Astrolux MF05 review

Astrolux MF05 specifications
| Brand / Model | Astrolux MF05 |
|---|---|
| Category | Mega Thrower |
| LED | Luminus SBT90.2 |
| Max. output | 7500 lumens |
| Max. beam intensity | 2,500,000 cd |
| Battery config. | 4-8*18650 |
| Modes | 6 |
| Blinkies | 3 |
| Reflector | Smooth |
| Waterproof | IPX7 |
| Review date | August 2020 |
Introduction:
Astrolux is one of those brands that started with small flashlights and grew to one of the manufacturers pushing the boundaries. The Astrolux MF05 is an example of that, featuring the most oversized flashlight in the normal LED flashlight world, reaching over 3 kilometers / 1.8 miles.
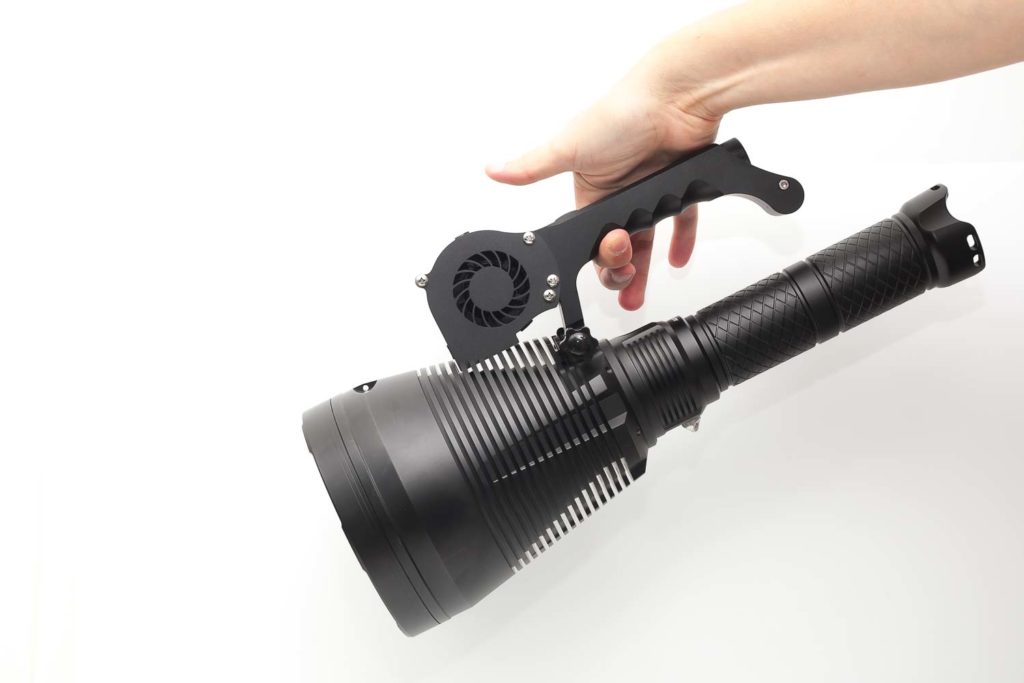
It’s not only reaching very, very far, but it is also H U G E and H E A V Y. The length is 42.6cm, and it weighs 3.4 kg (without batteries).
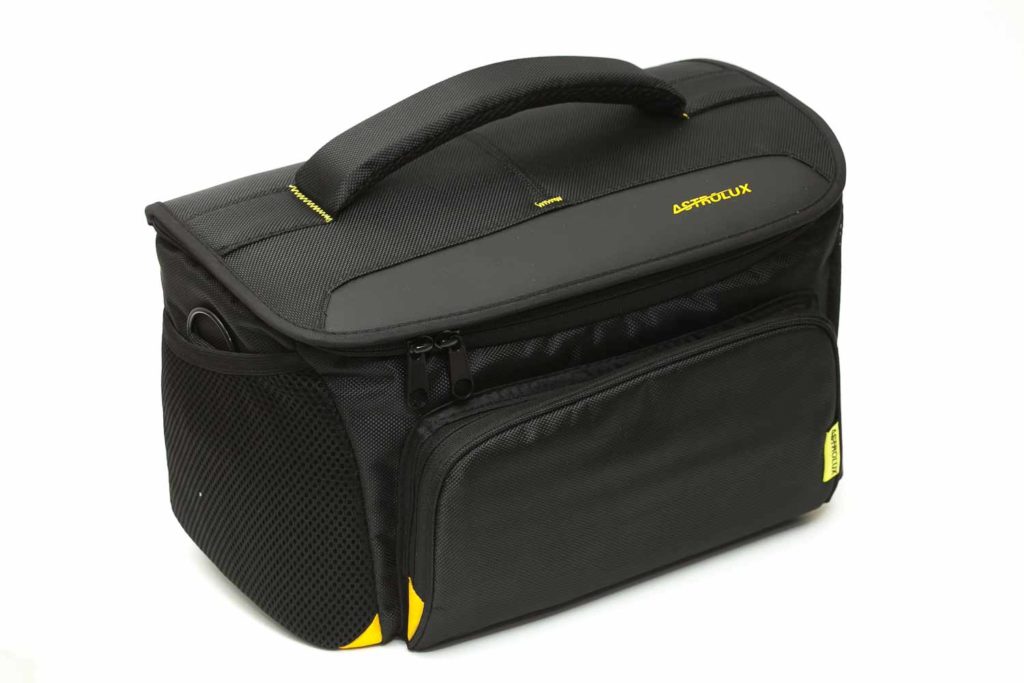
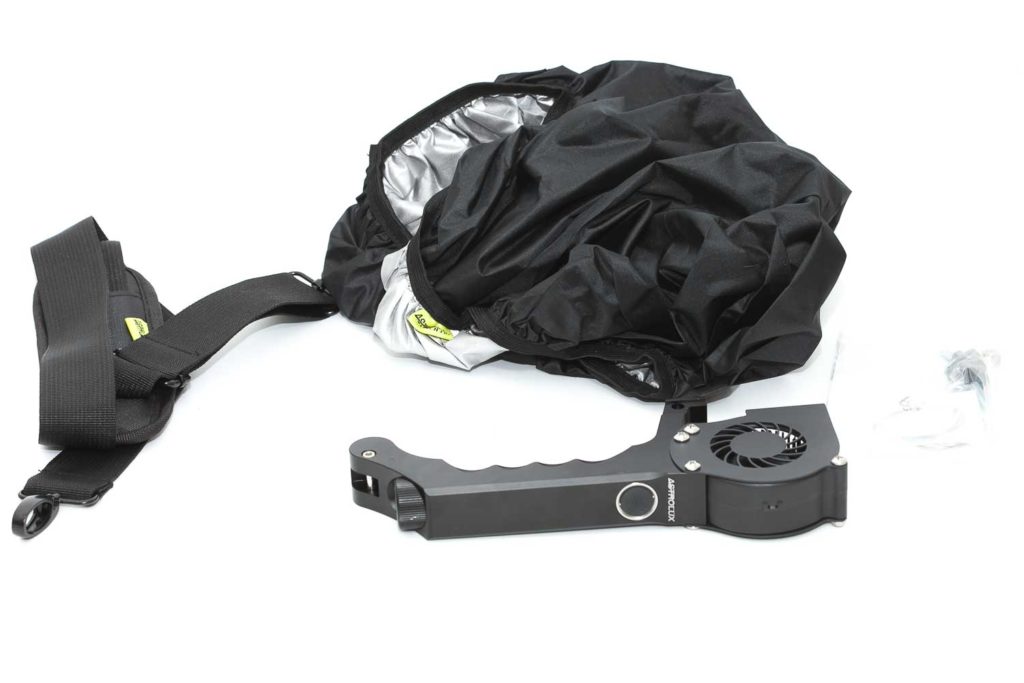
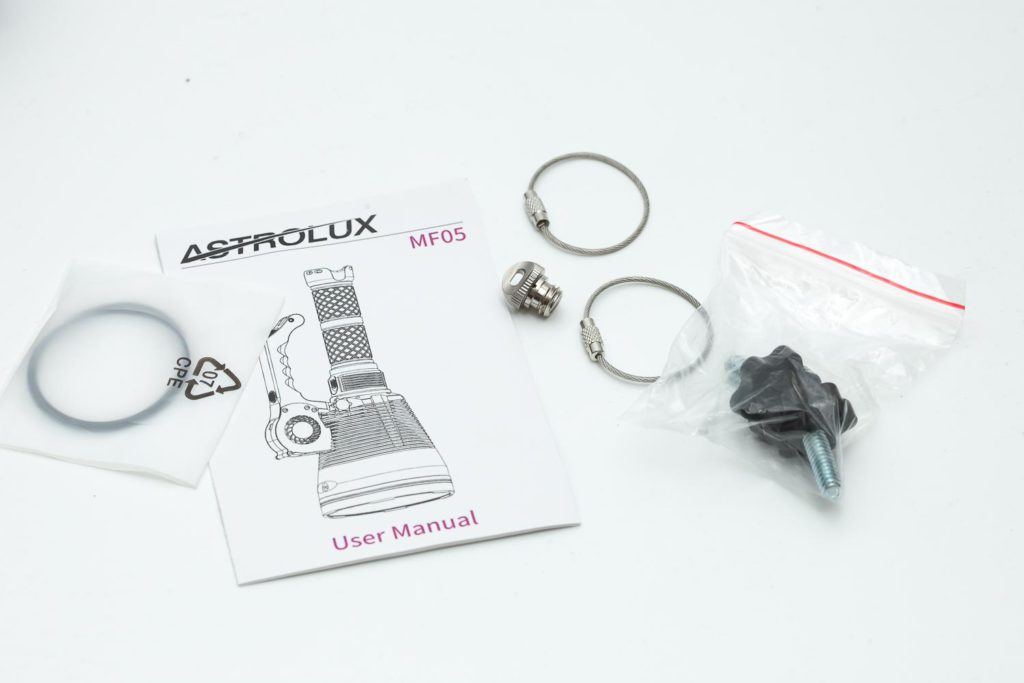
What you’ll get:
Package quality.
- The flashlight: Astrolux MF05
- Tripod mount screw
- Back strap
- Fan handle (needs a 21700 battery)
- 2 Handle screws
- 2 Shoulder strap steel ring
- 2 Spare O-rings
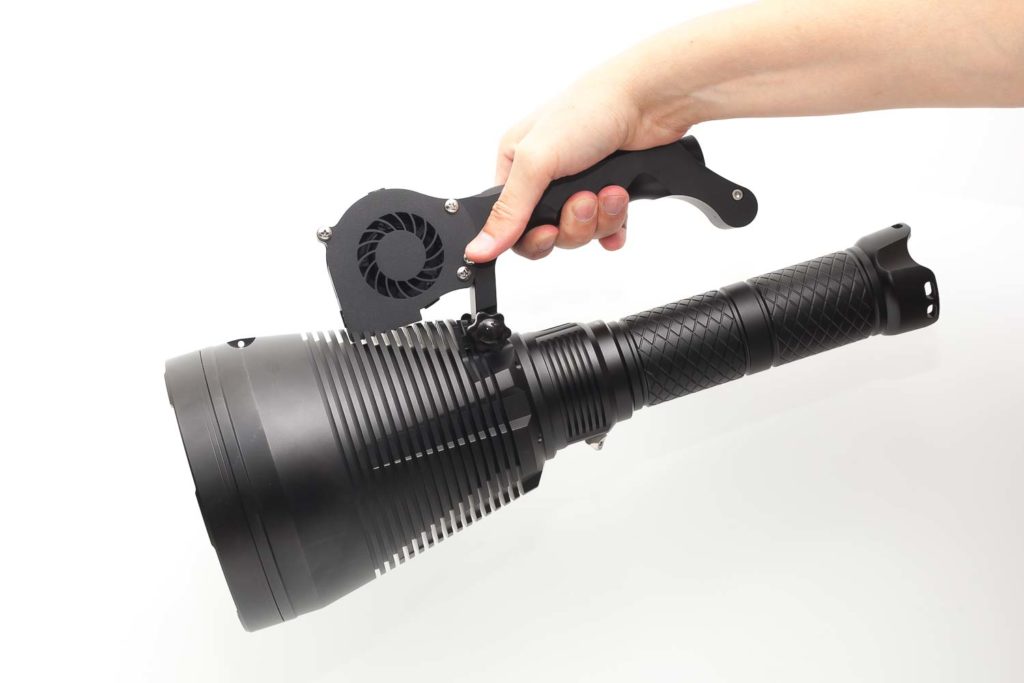
Handling of the light
The size of this flashlight is just insane. I never had anything like this before. The Lumintop BLF GT90 (which is one of the biggest LED flashlights available, doesn’t even come close. Carrying this thing around for longer than a few minutes makes you feel like Superman. Well, only if you use the carry strap. Holding it in your hand longer than a few minutes feels like exercising.
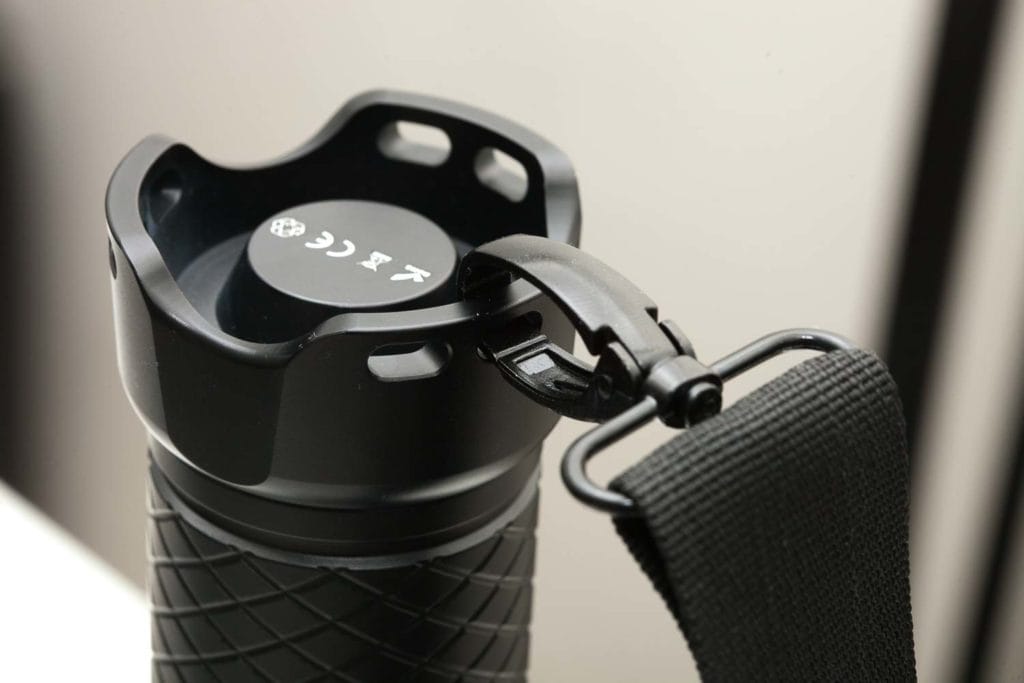
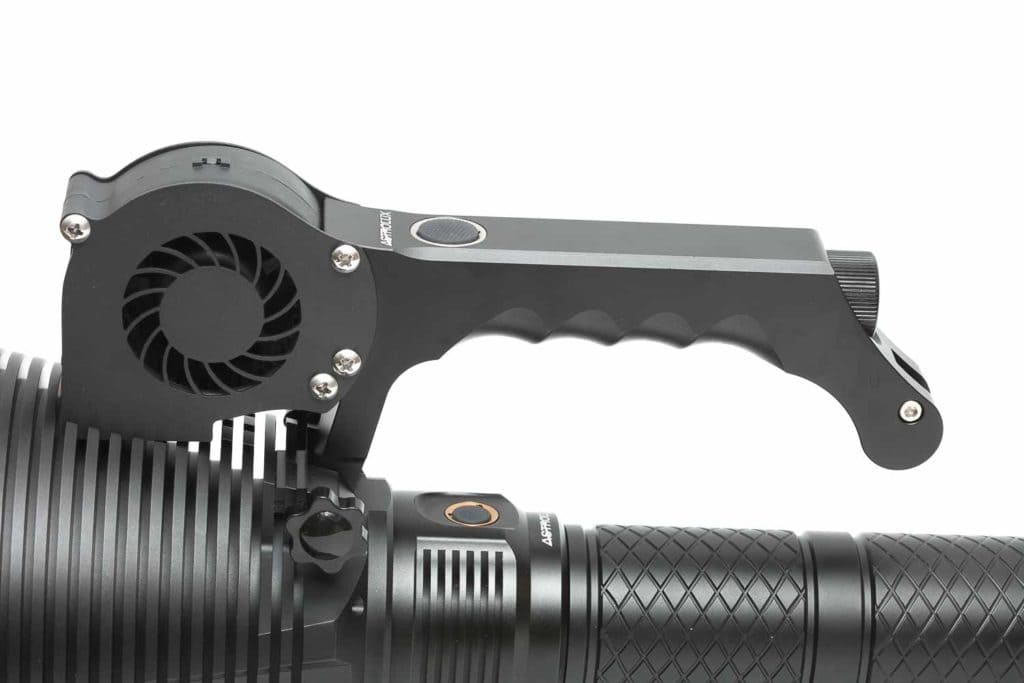
With the light, you’ll get a carry handle with a built-in fan. Since the handle’s diameter is much less than the body diameter, it makes a difference when carrying it around. You need to use less energy, although the weight is still there.
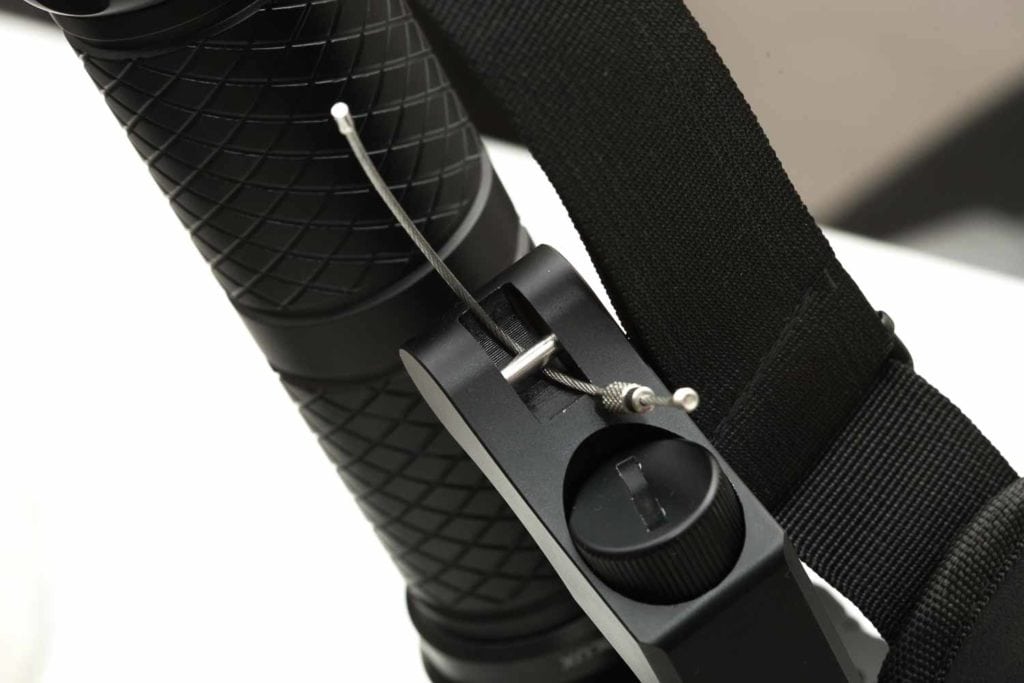
I noticed that the weight is mostly at the front of the light. The head is huge and heavy. So, when you carry it around, you’ll notice this front-heaviness. This means that you not only need to use energy to hold it because of the weight, but you also need to tilt it slightly so the light can be used horizontally. With all this in mind, the included shoulder strap is very handy. Weight comes off your hands, you need to use less energy, and you can carry it around for much longer.
The tail end of the light is wide enough to tail-stand the light, but I would not recommend that. If that thing falls, you will likely hurt a toe or two. This is not your average EDC flashlight, lol.
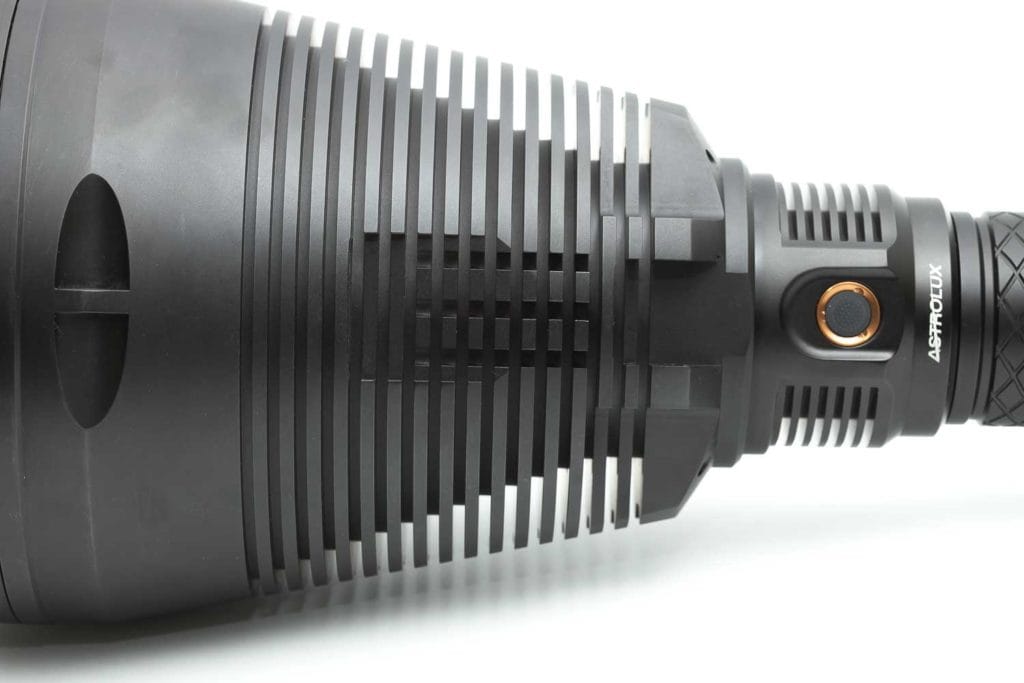
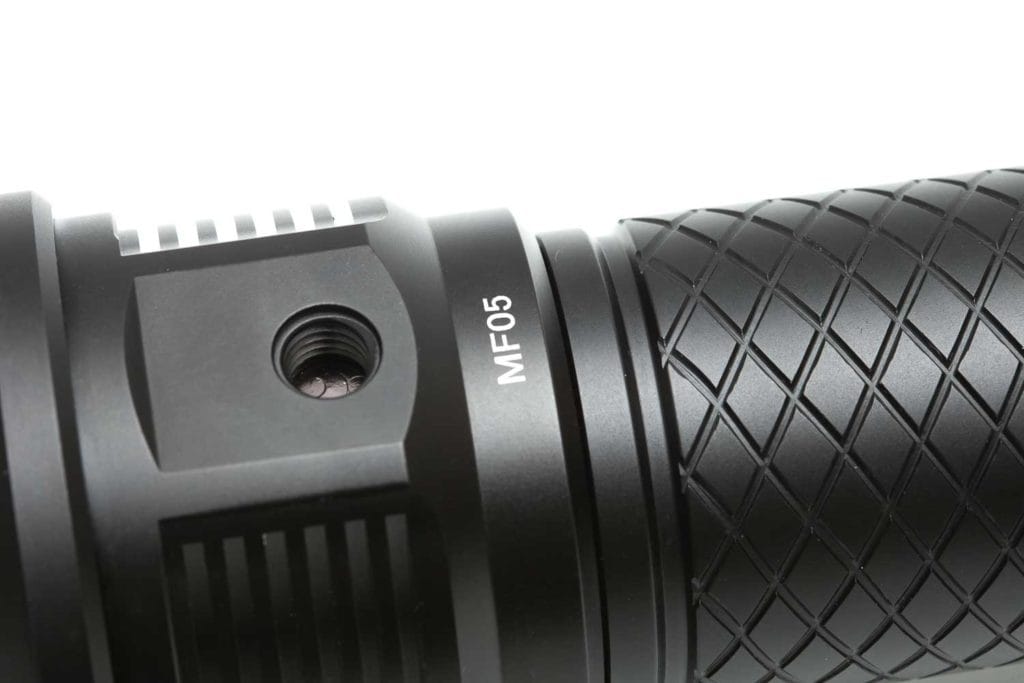
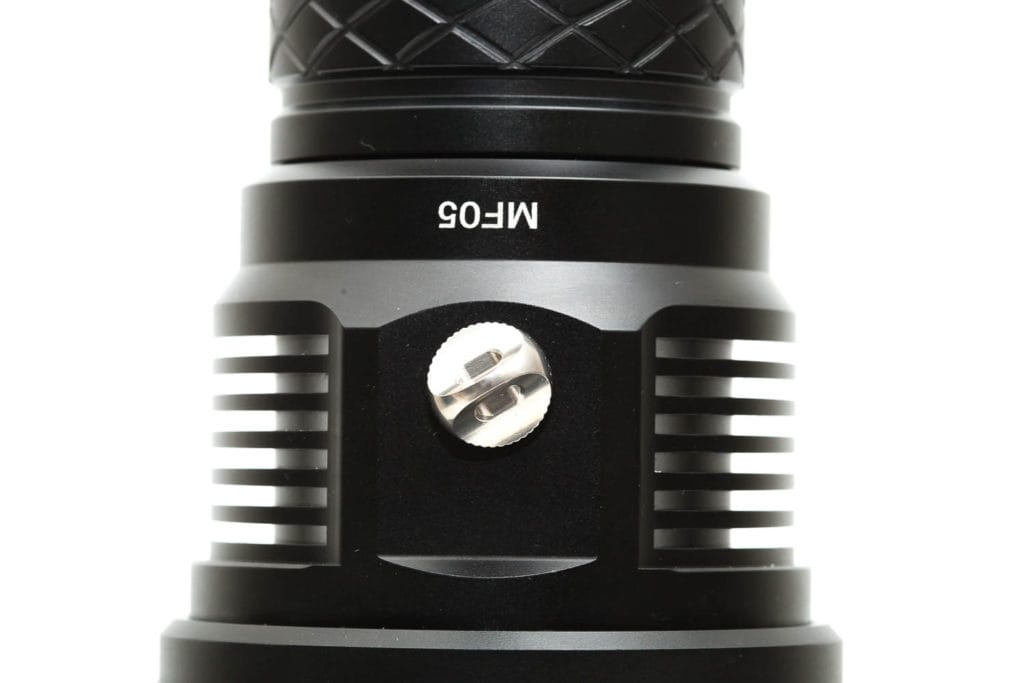
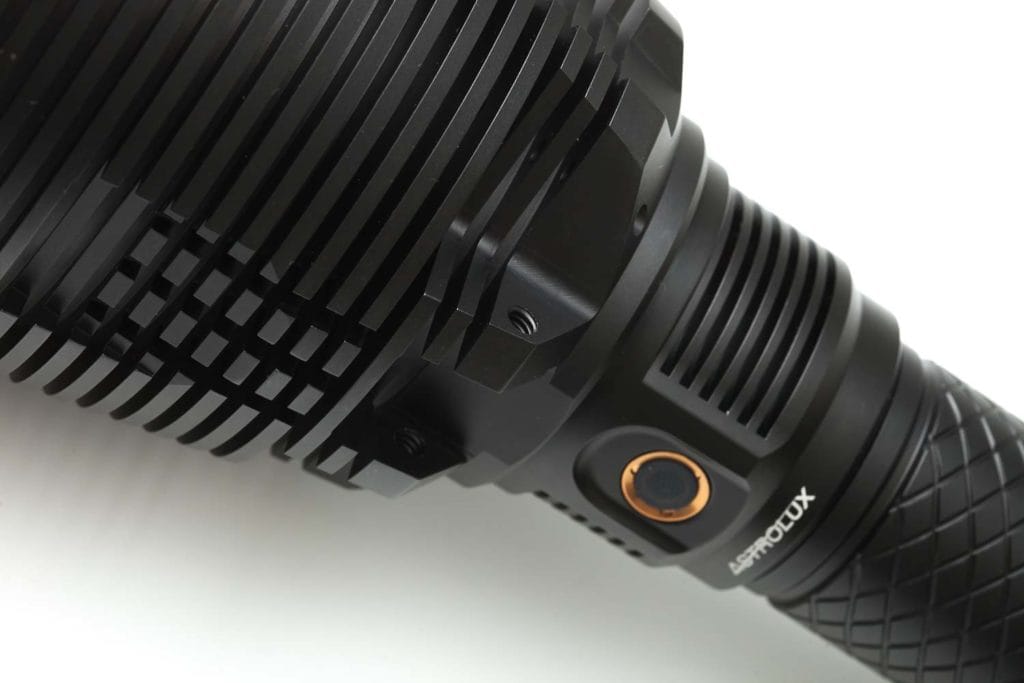
The MF05 uses only 1 switch, which is located relatively conveniently but has no indicator LED switched on when the light is off. Other flashlights usually have an indicator LED turned on while the flashlight is turned off, making it easy to find the switch in the dark. The switch has a light indicator, but it is used for other reasons. 1 is to measure the battery voltage.
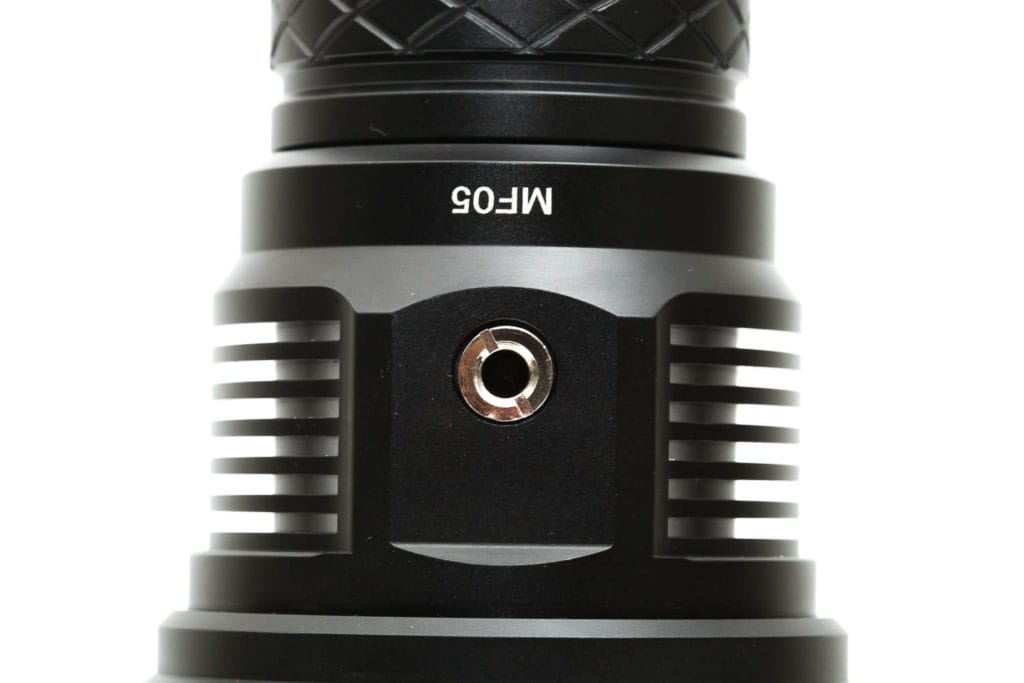
On the other side of the switch is a large Tripod mount. It is larger than most normal tripods you can buy online. However, it includes a tripod adapter ring to use with regular-sized tripods. It also includes a tiny screw-in type hook, which is also found on the smaller Astrolux MF04. When this is inserted, you can find the switch easier in total darkness.
The switch is located right underneath the handle when the handle is attached. It would have been cool to operate the light from the handle, maybe next time.
Oh, and before I forget, a protection film on the front glass is really hard to see. So please make sure you remove the film before measuring it or trying to achieve maximum reach. During my testing, the film resulted in roughly 300 kcd less throw.
Warning about the FAN.
Please learn from my mistake! The manual doesn’t mention the handle, and it doesn’t exactly tell how to insert the battery or operate it.
Unfortunately, I had to figure this out the hard way… not really. But you need to press the switch 3 times, quickly. 1 and 2 clicks do nothing.
Also, you better use some circular (plastic) tool to tighten the tailcap of the battery compartment of the handle. It needs to be tightened more than my fingers can. So, it’s best to use a tool to tighten that tailcap. The LED indicator behind the switch will blink to show that you tightened it well.

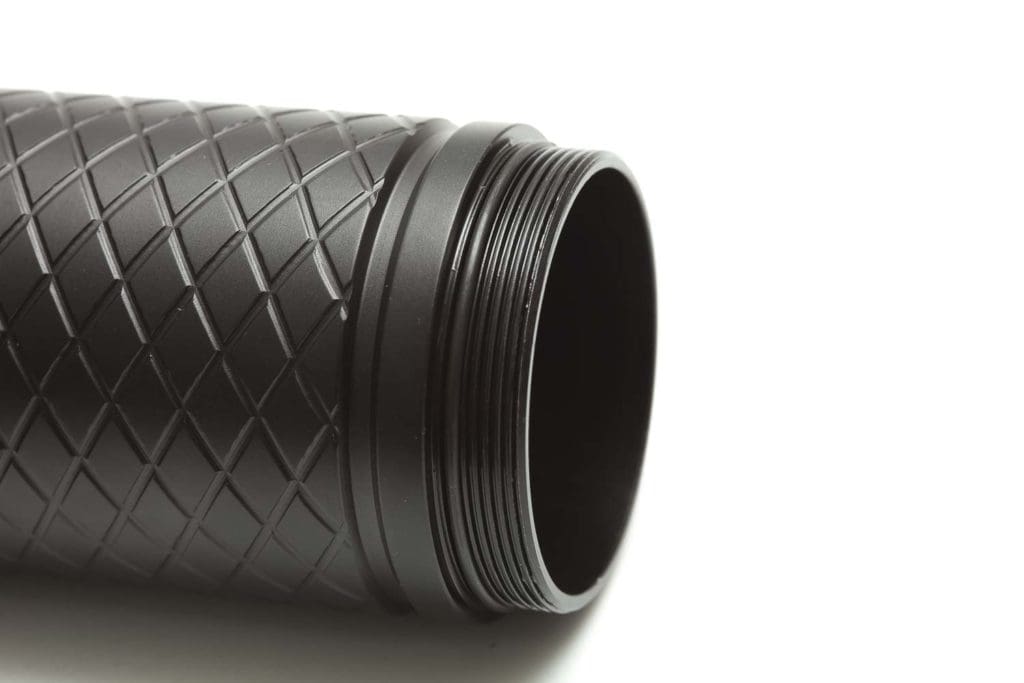
Build Quality, knurling, threads, and anodization
Astrolux flashlights are built pretty well. The Astrolux MF05 is no exception to this. I currently own about 5-7 Astrolux flashlights, and they are all built well, to be honest.
The MF05 is made of aluminum and weighs roughly 3.4kg (7.5 pounds) without the batteries and handle. It is best not to drop it onto concrete, as it will be severely damaged.
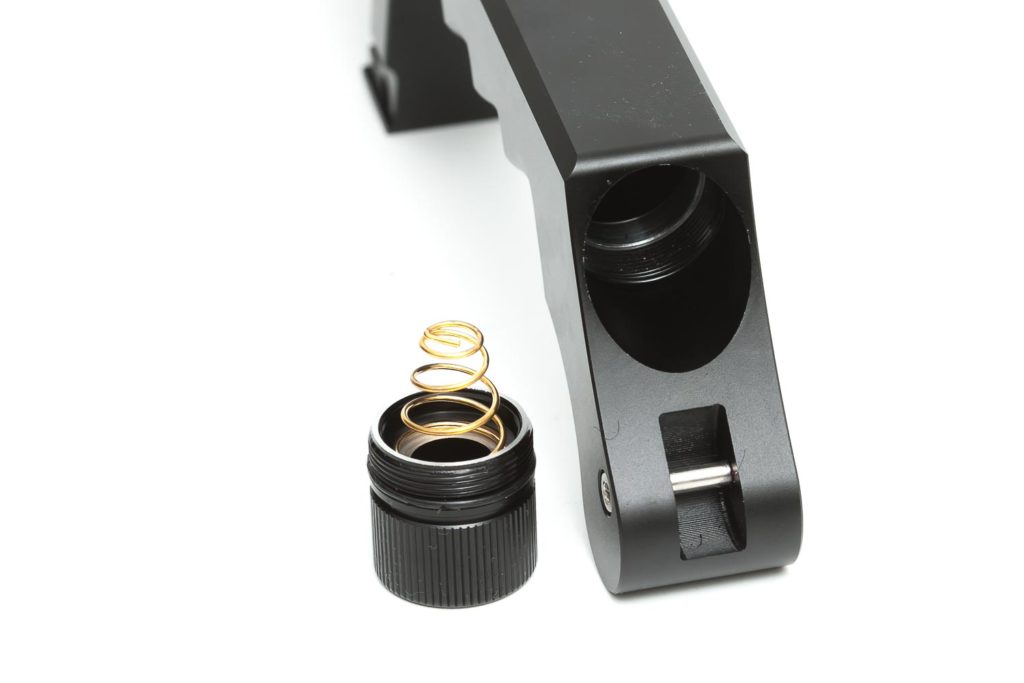
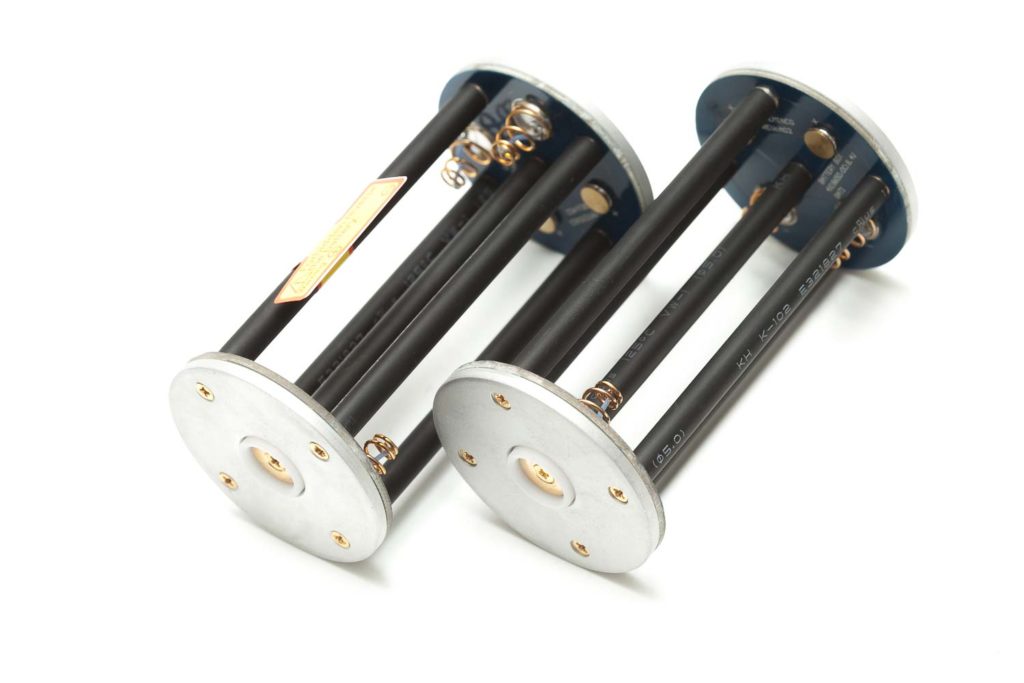
The other problem I found with the light is the battery carriers. There are 2 of them, and they use single springs. I would have preferred a single 8*18650 battery carrier. The more parts, the more change things get damaged or lost. They bypassed them all with some wire to compensate for the possible power loss through these springs. How this will hold up for long-term use is unclear.
Like all other flashlights, the tripod is surrounded by a flat surface, not large enough for my Manfrotto Hexagonal release plate. If yours has a smaller release plate, this may not be a problem though. But with a weight of nearly 4 kg, you need a sturdy tripod anyway.
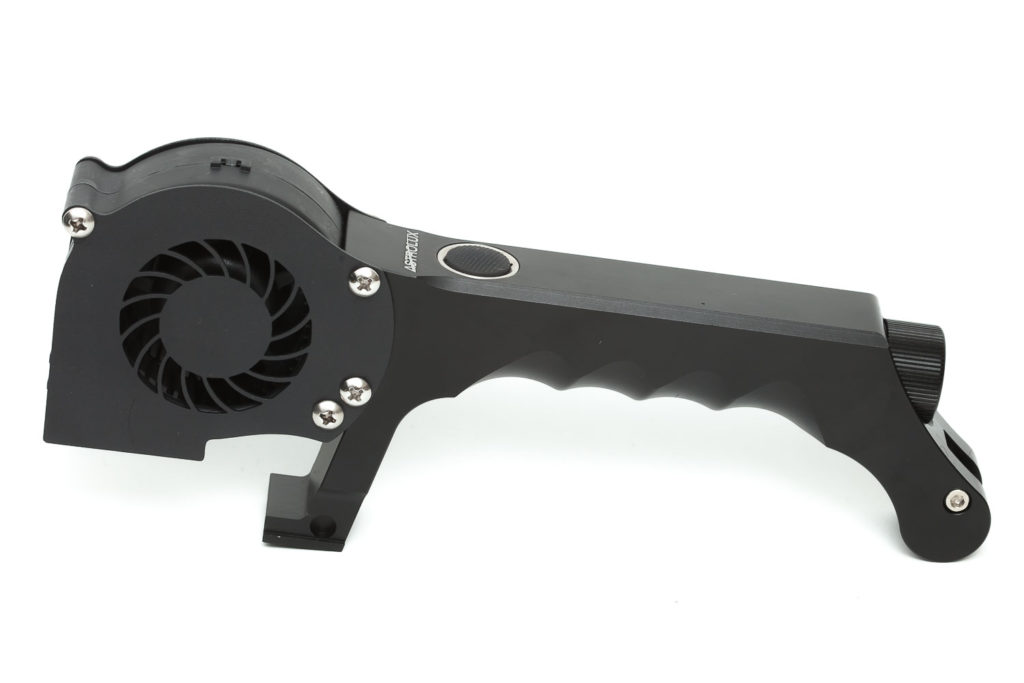
Finally, a word about the handle. The handle itself also weighs roughly 1 pound. The fan is covered with a plastic cover, not aluminum. I don’t honestly know how this would hold up during rain. I would not be using it during the rain though.
You have to slide in the handle before you can keep it in place with the screws. When inserting a 21700 battery, you need to use a circular tool, like a plastic coin, to tighten the tailcap for that handle. If you use a metal tool, the anodization will damage.
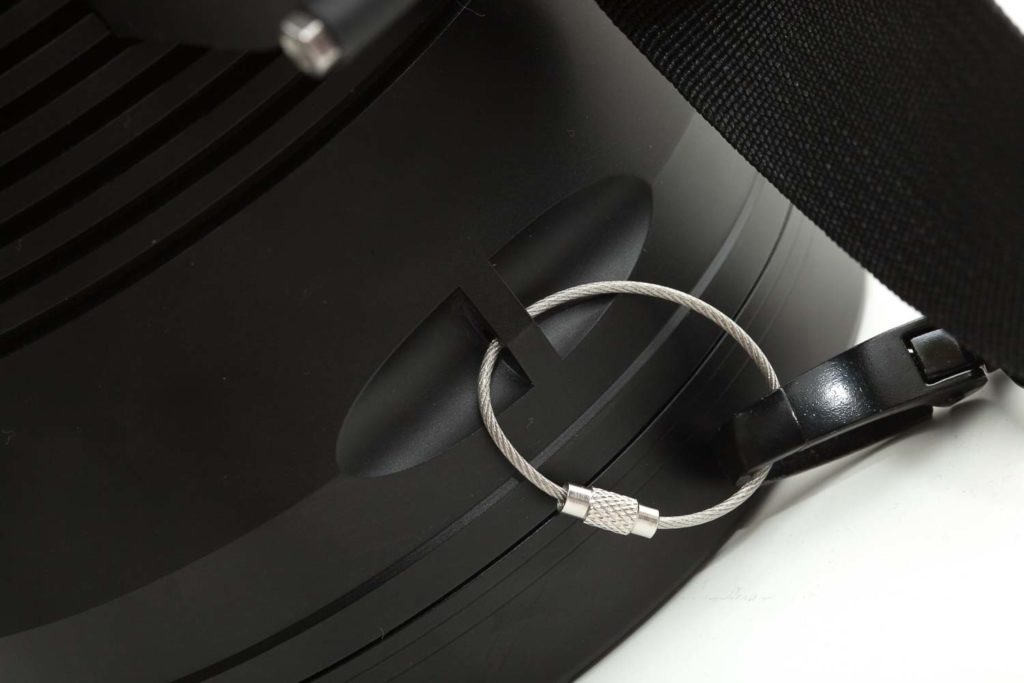
They included steel rings to attach the carry strap, which I think is a stupid idea. They should have designed it so you can attach the strap directly to the light. This is possible near the tail cap but not near the head.
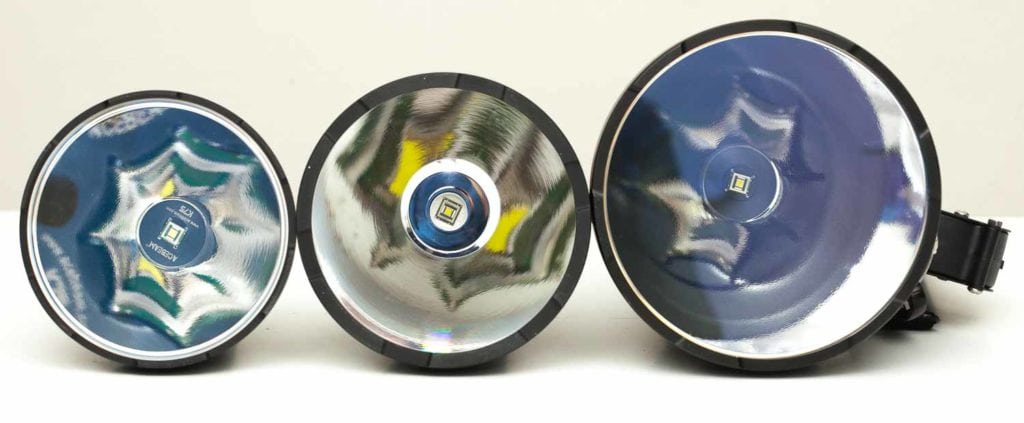
LEDs, Lens, Bezel, and Reflector
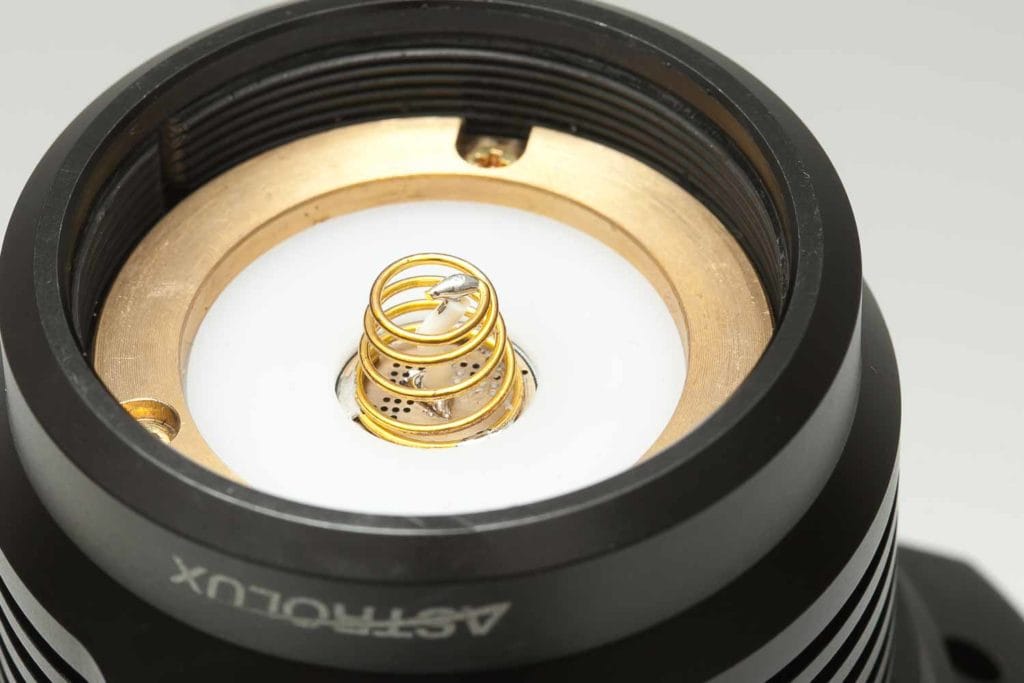
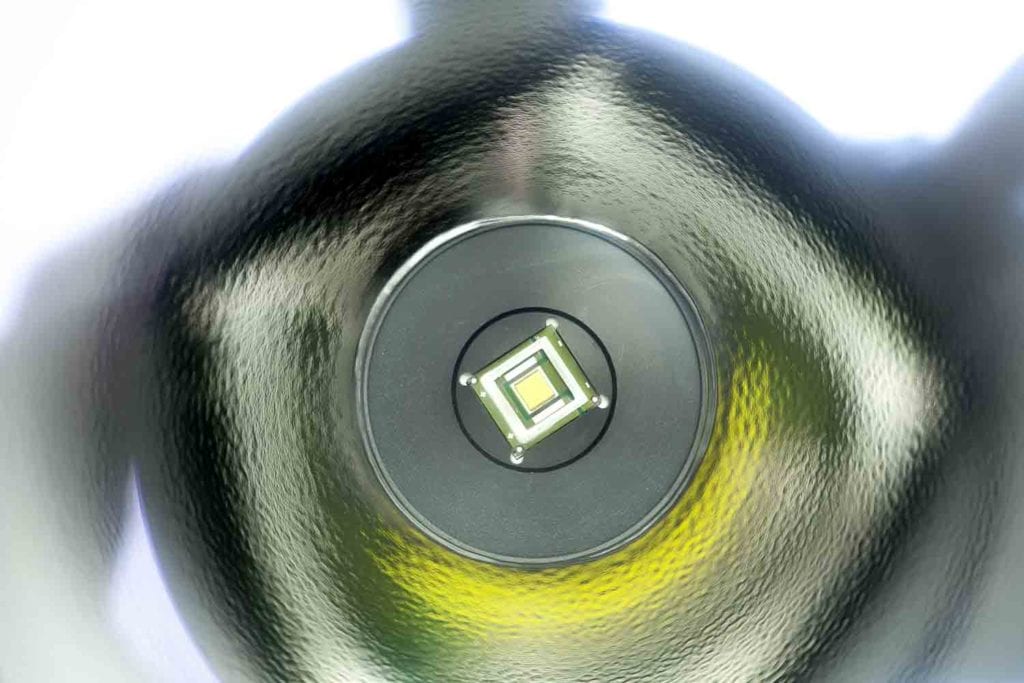
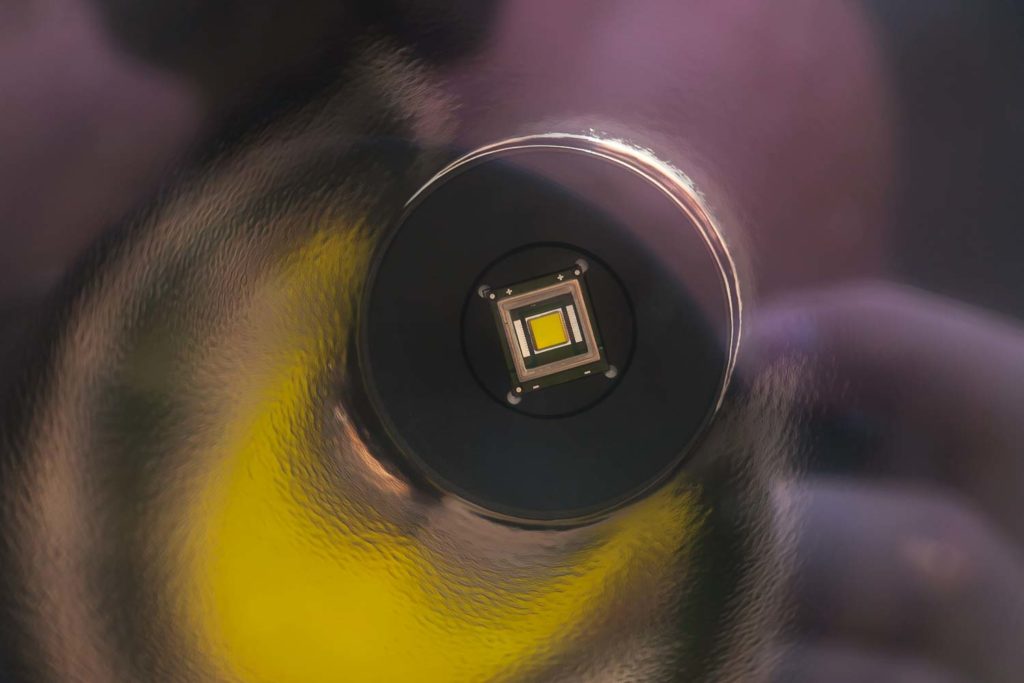
They used the Luminus SBT90.2 LED to achieve the longest beam and the brightest single LED. This is currently the most powerful throw LED available that doesn’t look like a pencil beam. It only needs 3V, contrary to the Cree XHP70.2, for example, which needs 6V or 12V.
The LED is centered with a black centering ring deep inside a smooth reflector. A thick piece of glass protects the reflector, also called a lens.. lol.. The lens has an Anti-Reflective coating, so it can have the most light going through. If you’re not sure whether a flashlight lens has AR coating, look into the lens and try to reflect a light source into the lens. If you can see the light source in the reflection of the lens, the lens should turn purplish.
A stainless steel bezel would have looked gorgeous though, but they didn’t include one. Even at this weight, an SS bezel would probably not be enough to withstand a 1-meter drop on concrete. But you know, we can always dream about it.
Dimensions:
- Length: 426 mm / 16.77 ”
- Head diameter: 160 mm / 6.299”
- Diameter reflector: 145 mm / 5.7″
- Body diameter: 53 mm / 2.08”
Weight:
- With batteries: 3423 g (3.4kg) / 120.74 oz
- Handle itself with battery: 548.5 grams / 19.35 oz
- With batteries and carry handle: 3989 grams / 140.71 oz
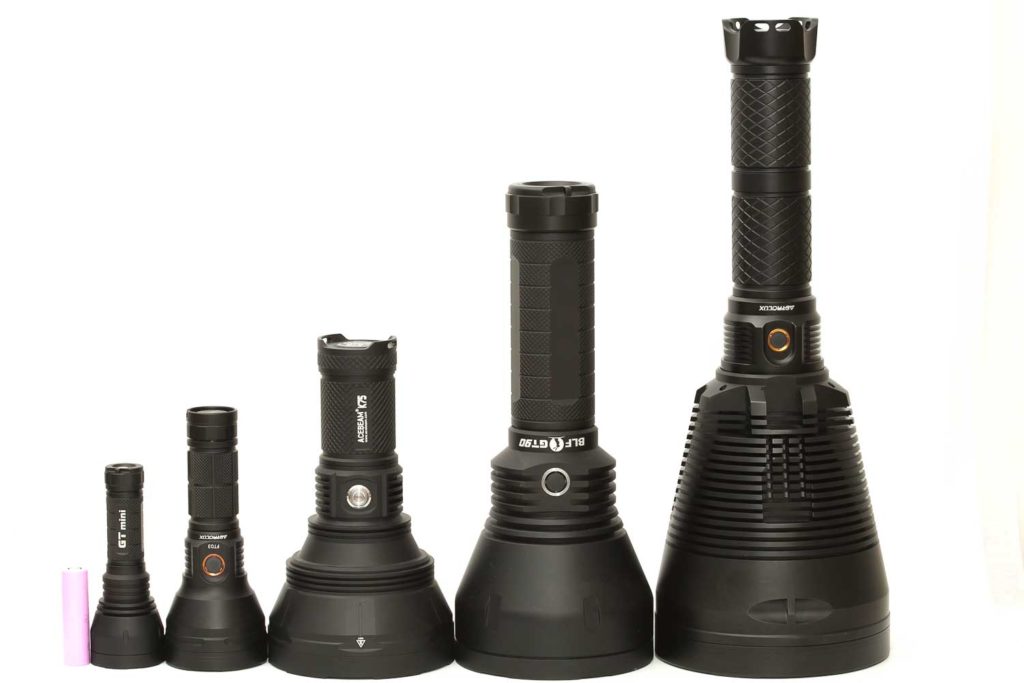
Size comparison of mega throwers
The size compared to other far throw flashlights.
Image 1: from left to right: 18650 battery, Lumintop GT Mini, Astrolux FT03, Acebeam K75, Lumintop BLF GT90, Astrolux MF05
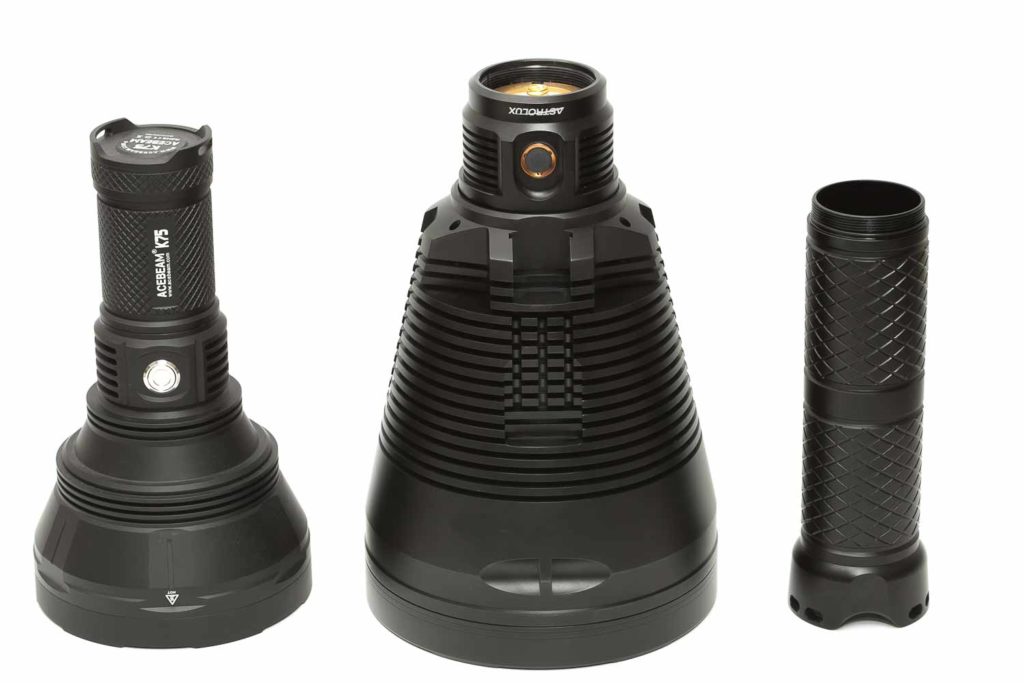
Image 2: Acebeam K75 vs Astrolux MF05
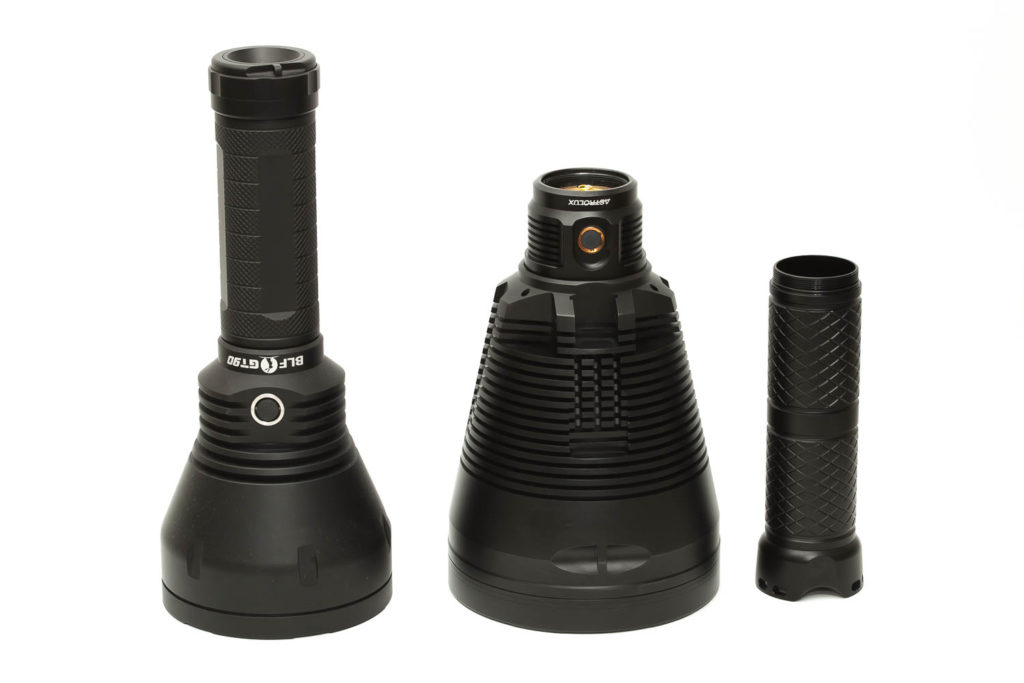
Image 3: Lumintop BLF GT90 vs Astrolux MF05
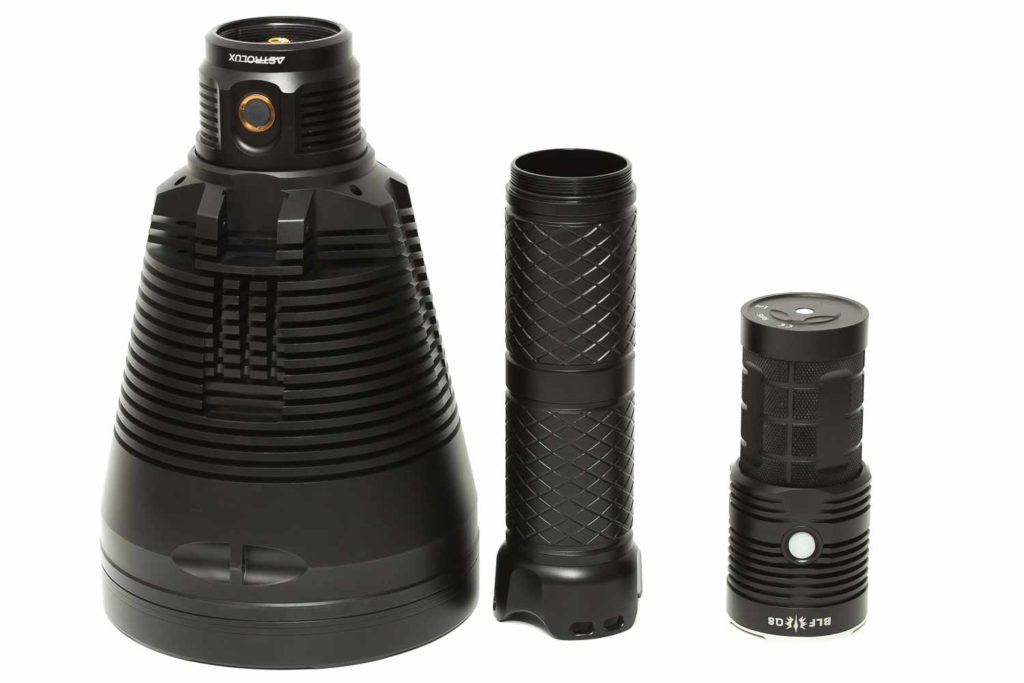
Image 4: Astrolux MF05 vs the famous BLF Q8 (not a thrower, just for size comparison)
Image 5: Acebeam K75, Lumintop BLF GT90, Astrolux MF05
Driver & User Interface:
The Astrolux MF05 uses 2 user interfaces, namely for the flashlight and the fan.
Fan
Before we dive into the flashlight’s UI, I want to make this clear to everyone before you skip the FAN explanation—it’s important!
You can only activate the fan with 3 clicks. I know—not very smart. It looks to me that they used a driver similar to the driver in the MF05, probably to keep things consistent.
- Single-click: nothing
- Double-click: nothing
- Triple-click: ON
- Four clicks: battery check
- Five clicks: lock-out mode
- Six clicks: eternal lockout mode
When you do 6 clicks, you can’t return to normal mode unless you unscrew the tailcap and put it back on again. It is like the Momentary On feature on the MF05.
I already mentioned that it looks like they used the same driver for the fan. And a little embarrassing for Astrolux, is the following. A triple-click on the flashlight is Blinky modes. And guess what? A double click when the fan is on changes the fan’s modes. And no, there is no Slow, Faster Fastest, but an SOS type of fan… this is pretty lame. I hope to show this in the video review!
Available modes:
- Moon, Low, Mid1, Mid2, High, Turbo (Moon and Turbo are not in the normal mode group)
- 4 strobe modes: Fast strobe, Slow strobe, SOS, Beacon.
From OFF:
- Press and hold: moon mode
- Single-click: Low
- Double click: Turbo
- Triple-click: Strobe (double click to go through the 4 different blinky modes)
- Four clicks: battery voltage check
- Five clicks: lock-out (repeat to deactivate)
- Six clicks: Momentary On
From ON:
- Press and hold: Turn of
- Single-click: Run through the menu from Low to high
- Double click: Turbo
- Triple-click: Strobe
- Four clicks: nothing
- Five clicks: lock-out
- Six+ clicks: nothing
Shortcuts:
- To Turbo: double click from On and Off
- To Moon: press and hold from Off
- To Strobe: triple click from On and Off
Mode memory:
- No, it doesn’t have mode memory.
Blinky modes menu:
- There are 4
- Enter the blinky mode group by a triple-click from On or Off.
- Double click to walk through the 4 different blinky modes: Fast strobe, Slow strobe, SOS, Beacon
- Single-click to go back to last used mode, or back to Off.. depending on whether the light was On or Off when activating the blinky modes.
Low battery warning flashlight:
- There is no low-battery warning. The light will reduce output close to low battery power. But it doesn’t give a warning or something
Low battery warning Fan:
- The backlight LED indicator on the Fan will start blinking when the battery runs low.
- When the indicator starts blinking you have about 1 hour of battery left.
- After about 30 minutes it starts blinking every 3 seconds
- The LED indicator starts flashing quickly about 5 minutes before the battery is empty.
- The battery is 2.6V when the Fan turns off.
- The fan has enough battery for Turbo mode, to be used throughout the runtime, it doesn’t have enough juice to use in high mode throughout. You don’t need this, because the effect of the cooling is minimal.
Lock-out mode:
- 5 clicks from On or Off
PWM:
- Not visible by eye. I don’t care if a camera or an oscilloscope can measure it. Flashlights are used by humans, not by oscilloscopes
Batteries and charging:
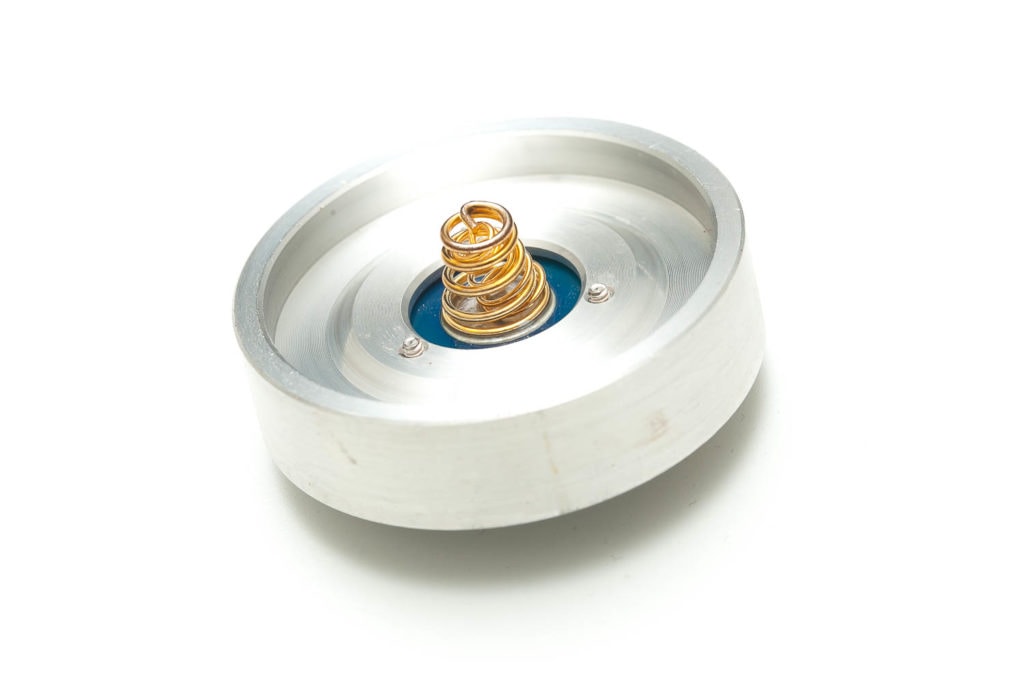
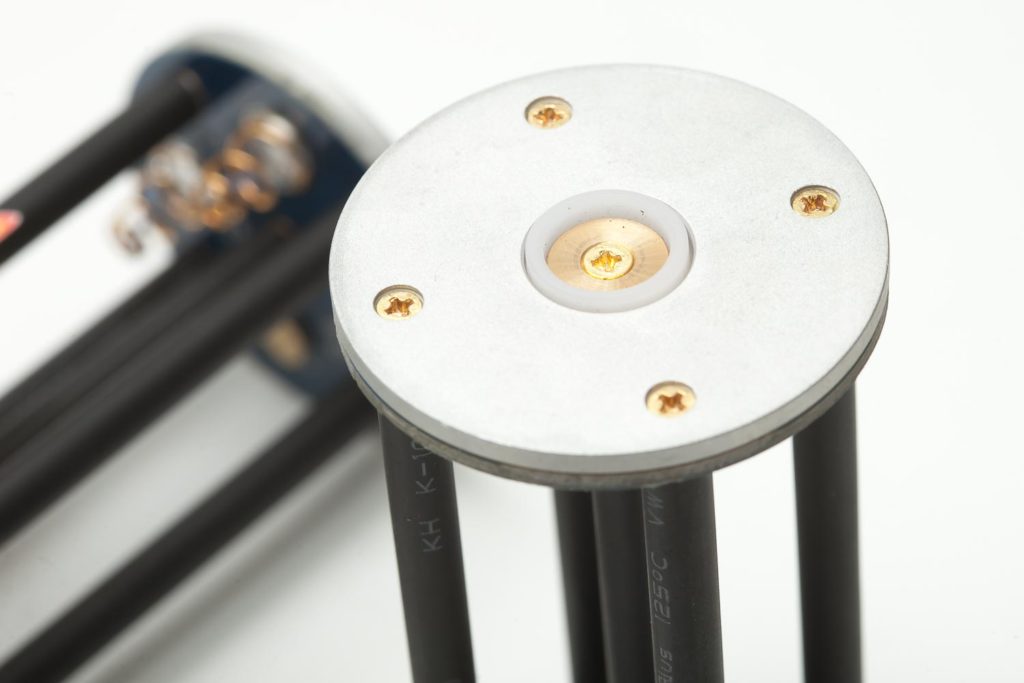
There are 2 battery holders for 4 batteries each. A circular piece of aluminum with springs on both sides connects the 2 battery holders. You can use the flashlight with either 4 or 8 batteries.
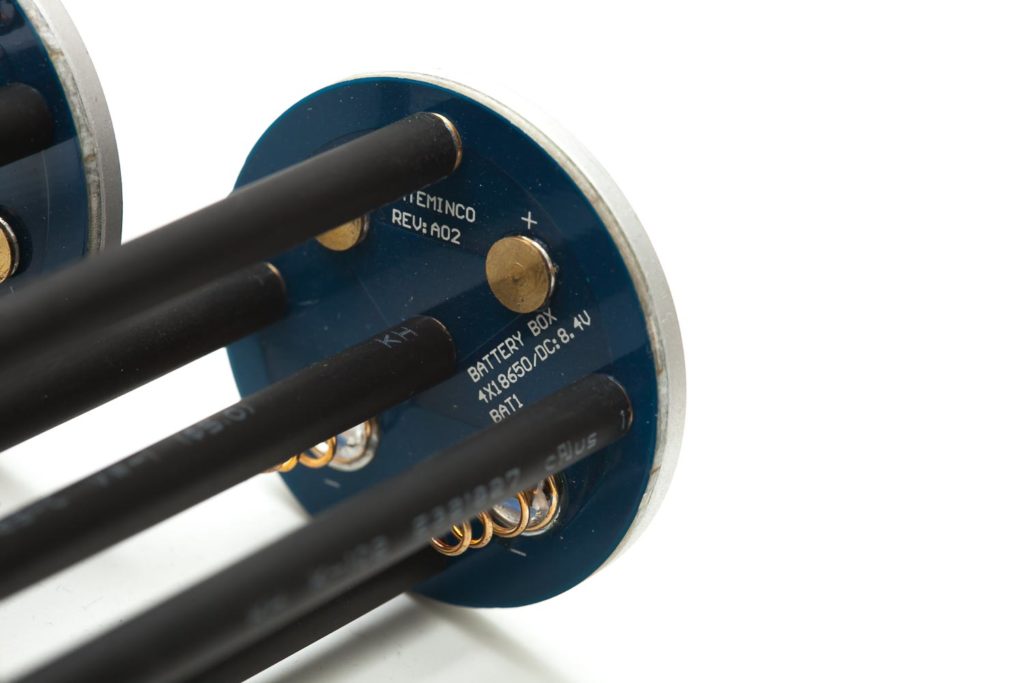
There is no reverse polarity protection on the battery carriers, which are organized as 2P2S. When the batteries are fully charged, the voltage for a battery carrier is 8.4V. Adding the second battery carrier, the Voltage remains 8.4V since the battery carriers are connected in parallel. But because there is no reverse polarity protection, you better make sure you insert the batteries the correct way.
The positive side towards the little nipples, and the negative side touching the springs. The carriers use a single spring for each battery and a bypass wire to decrease resistance. The same bypass is used on the driver spring. Why they haven’t opted for 1 long battery holder, I do not understand.
They chose a single spring instead of double springs because they used protected and unprotected batteries. Protected 18650 batteries fit in the carriers as well. Even the longest Nitecore 18650 I have will fit.
Fan
The fan, however, uses a single 21700 battery. It doesn’t indicate how to insert the battery, but the positive terminal needs to go in first, and the tailcap is screwed on top of the negative terminal. The fan pulls 1.5 Amps, which is a lot, in my opinion. This means that it runs for 2.5 hours, which is enough for the full runtime in Turbo but not in High.
This doesn’t really matter since the fan’s effect is minimal when not used in Turbo. See all the runtime graphs in the performance section below.
Performance:
Lumen measurements:
All output numbers are relative to my homemade Integrating Sphere. It is set up with an Extech SDL400 Lux Meter for measurements, including a Kenko PRO1D ND-16 filter. The base measurement is done with a Convoy S2+ that has been tested at 255 lumens.
All of my readings were taken from fully charged 8*Samsung INR18650 30Q (the pink ones), which have a capacity of 3000mAh each.
| Mode | Specs | At turn on | At 30 seconds |
|---|---|---|---|
| Moon | 2.1 | – | 1.88 lm |
| Low | 92 | – | 155 lm |
| Mid1 | 641 | – | 614 lm |
| Mid2 | 1650 | – | 1831 lm |
| High | 3600 | – | 3375 lm |
| Turbo | 7500 | 5450 lm | 5094 lm |
Please take these numbers with a grain of salt. The head diameter is too large to fit my integrating sphere. It should, however, be a good indicator in terms of %, but maybe not as a precise reading. As you see, the output drops about 10% in the first 30 seconds.
The specifications claim an output of 7500 lumens, but I can neither confirm nor disprove it with my current setup. But still, I think 7500 lumens is a little over the top.
Runtime:
The runtime test was done with the 50cm integrating sphere, including the Kenko Pro1D ND-16 filter and Extech SDL400 data logging Lux Meter. The batteries used are again the Samsung INR18650 30Q, which I try to use in all my measurements unless the flashlight comes with batteries.
Turbo mode:
I tested Turbo mode with and without using the fan.

As you can see, the fan certainly affects the performance but maybe not quite as you may have expected. Nevertheless, using the fan in Turbo mode is certainly recommended, if the ambient temperature is not cold. For most of the first 50 minutes, the fan produces a higher output. But when it finally drops, it probably used so much juice that when uncooled, the output is still higher. Due to the heat, the driver probably cut back on amperage, so it could hold the output just a bit longer.
With cooling, Turbo mode works for 1 hour and 37 minutes when it drops to 140 lumens. This is the end of the runtime, although the batteries aren’t fully discharged yet. The 140 lumen output is continuous for another 1.5 hours.
For another hour or so, you can see a horizontal line of the non-cooled version, which is roughly equal to Moon mode. This doesn’t happen at every output. Mid1 turns off completely at the end of the runtime. It could probably produce enough amperage to keep the light running at that output.
High mode;
I also tested the High mode with and without cooling. See the results in the following graph.
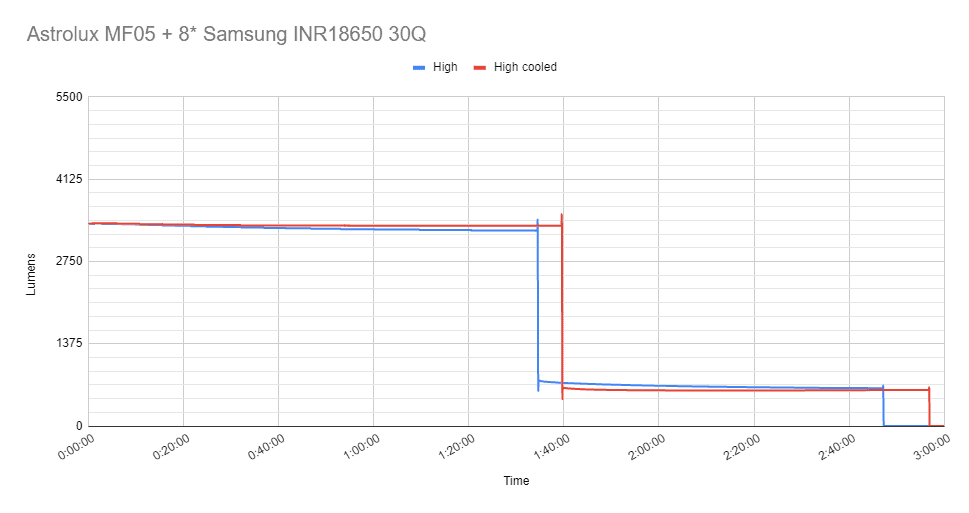
In high mode, you don’t see a huge difference between the cooled and non-cooled runtime. But you see that it maintains 5 minutes longer in the highest output before it drops.
After 2.5 hours, the fan stopped working because the 4000mAh 21700 battery only lasted that long. But the total runtime is just short of 3 hours when cooled, and 2 hours 47 minutes non-cooled.
Turbo, High, Mid2, Mid1.
I didn’t measure LOW, nor MOON.
Here are the runtime graphs, non-cooled.
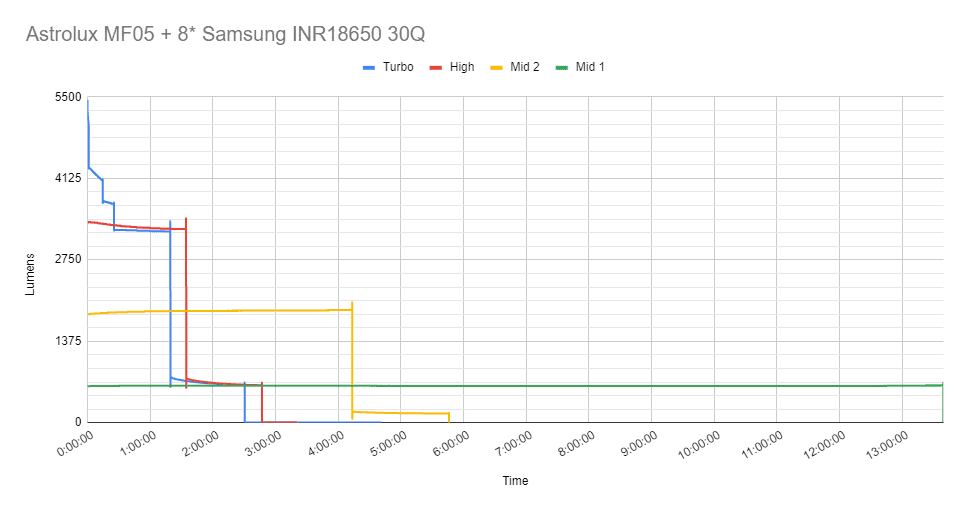
Mid2 drops after 4 hours and 13 minutes but runs for another 1.5 hours at roughly 150 lumens till it turns off at 5 hours and 46 minutes.
Mid1 drops after 13 hours and 40 minutes and shuts off completely. The battery voltage is 2.5V
Throw measurement:
Measurements were taken with a professional Hagner E4-X Lux Meter. My first round of readings was done with the protection film still on the lens. I only noticed the protection film 2 days after my measurements, so I was curious how much it would differ. Here are the new numbers, measured at 20 meters.
- Moon: 1,600 cd = 80 meters / 88 yards of throw / 0.05 miles
- Low: 96,000 cd = 620 meters / 678 yards of throw / 0.39 miles
- Mid1: 350,800 cd = 1185 meters / 1296 yards of throw / 0.74 miles
- Mid2: 1,052,000 cd = 2051 meters / 2243 yards of throw / 1.27 miles
- High: 1,932,000 cd = 2780 meters / 3040 yards of throw / 1.73 miles
- Turbo: 2,844,000 cd = 3373 meters / 3669 yards of throw / 2.1 miles
With the protection film still attached, I measured 2.52 Mcd / 2,844,000 cd, so the protection film cut 300 kcd. High mode was 1.72 Mcd, which is 200 kcd less.
The specifications mention a beam intensity of 2.5 Mcd / 2,500,000 cd, and a beam distance of up to 3162 meters. My measurements show that my copy throws farther than expected. Maybe they forgot to remove the protection film as well. lol.
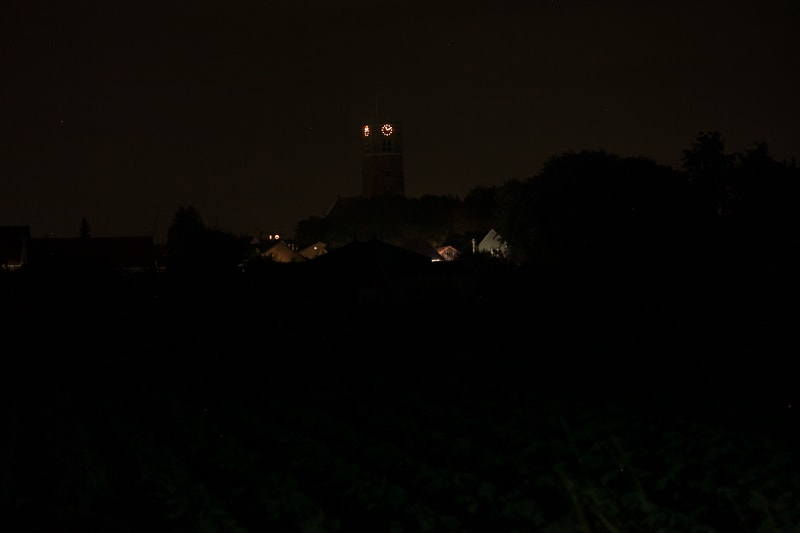
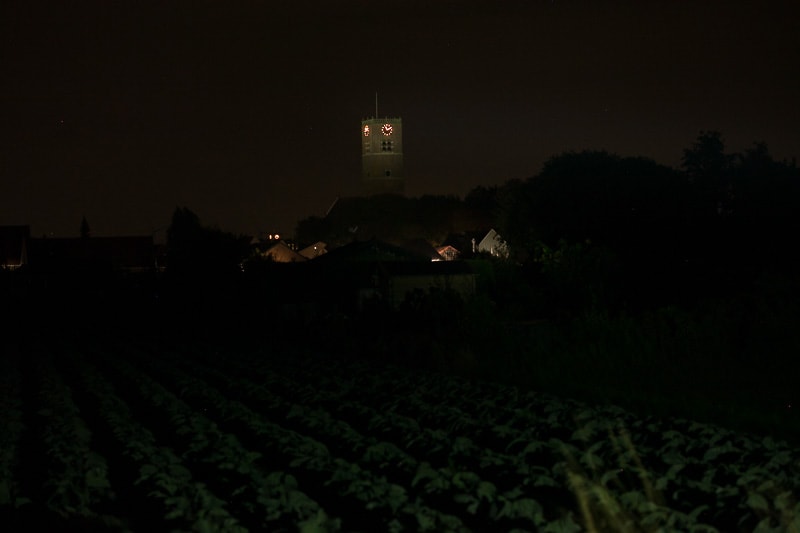
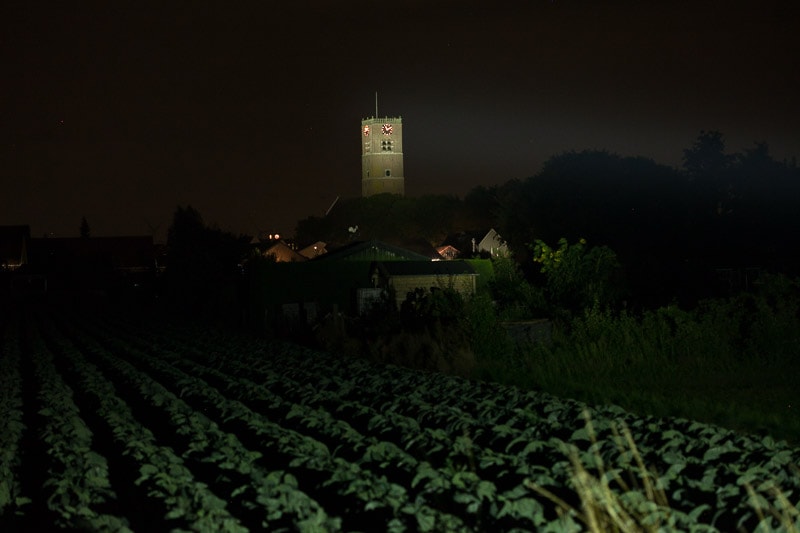
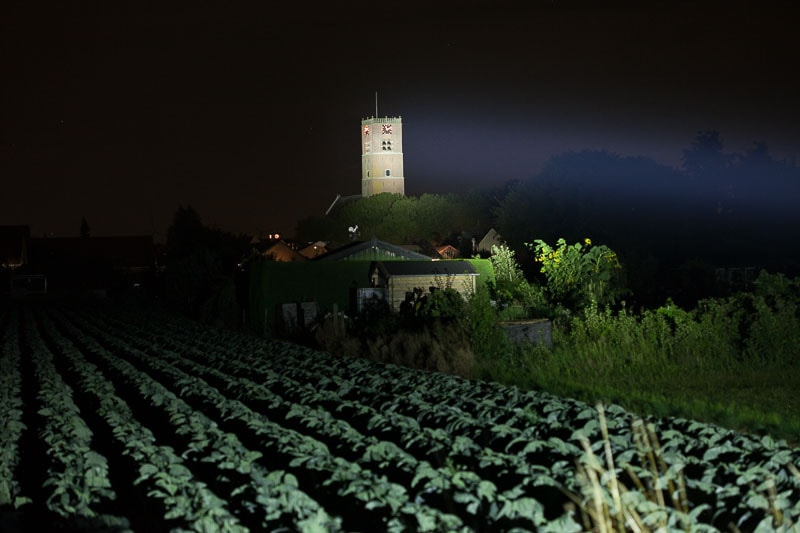
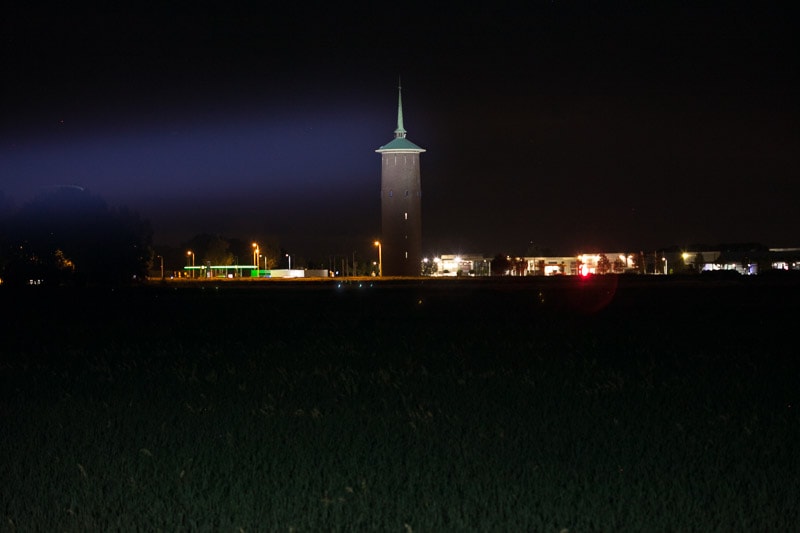
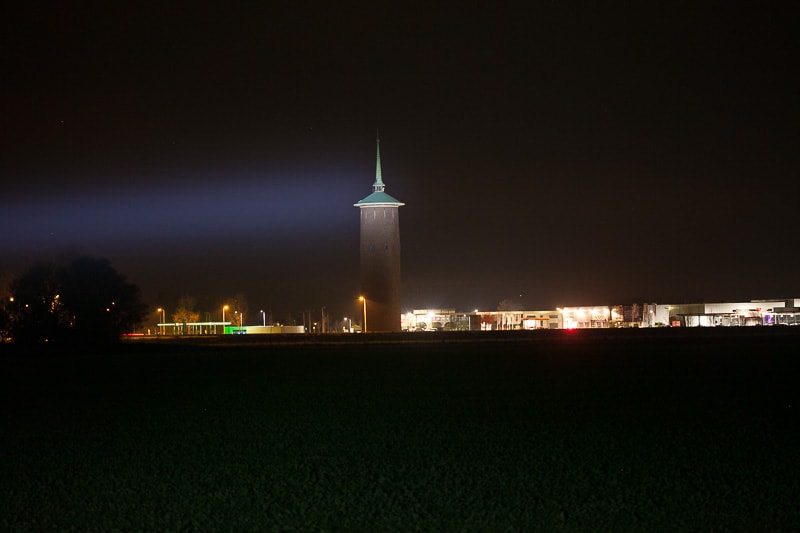
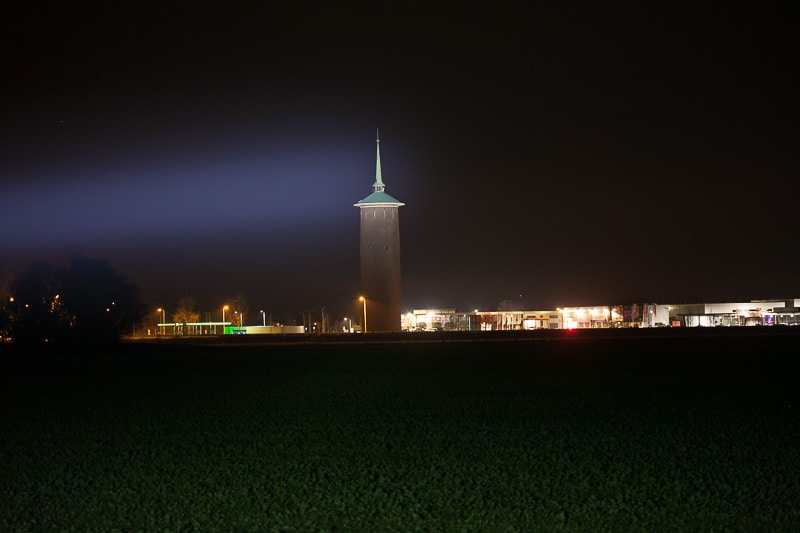
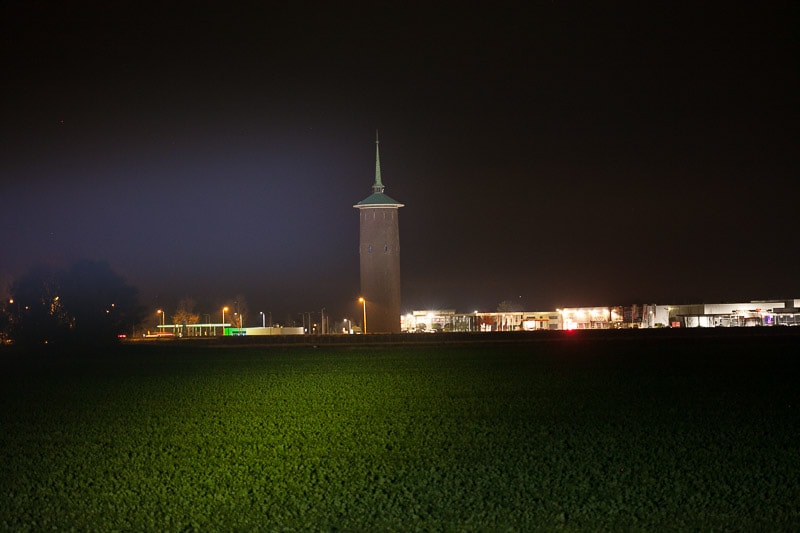
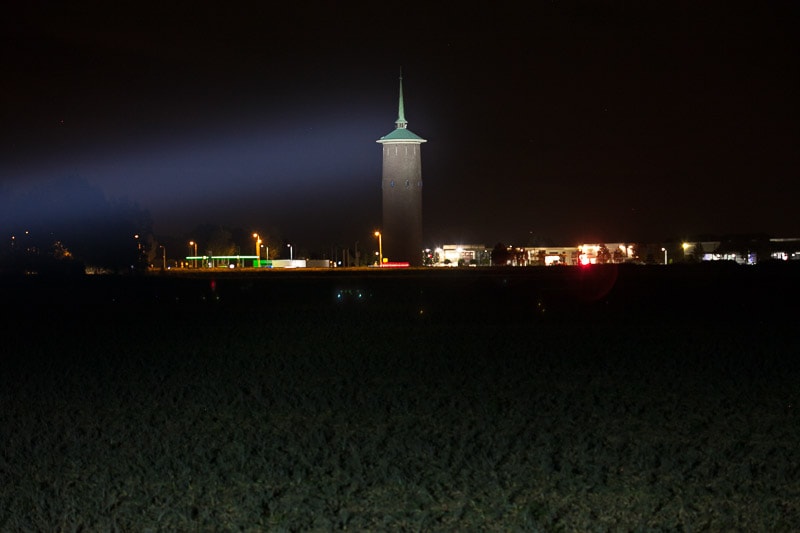
Beamshots
For the following beamshots, I used a Canon EOS 5D Mk2 and a 100mm lens. manual settings: ISO1600, 1/2 sec , F4, 5000K
The first tower is 450 meters / 492 yards away; the second tower is about 650 meters / 710 yards away.

Watch a short video review here: https://youtu.be/klqKOvbGkeE
Disclaimer: This flashlight was bought with my own money. I have not been paid to review, nor have I been holding back on problems or defects.
Final verdict
Pros:
- Extremely far-reaching flashlight
- 3km / 2 miles of reach
- Many accessories included
- Simple UI
- No PWM
- Including fan to maintain high output in Turbo mode
Cons
- Heavy
- 2 separate battery carriers instead of 1
- The user interface of the fan
- Attachment points for the carry strap need some attention

Rating: 4 stars ★★★★
It’s not very difficult to give the Astrolux MF05 a high star rating. But there are still a few things they could improve. The fan helps maintain the highest output in Turbo mode, but its battery life is rather short. But, when you actually go out and use it, you totally forget about all these issues. Especially the ones with the battery carriers. You even forget that you aren’t dreaming. This thing is ridiculous. Look at all the beamshots and measurements to convince you this is the farthest-throwing LED flashlight in the world.
Buy your Astrolux MF05 here
Check out the price at banggood!