Emisar D18 review
Table of contents
Introduction:
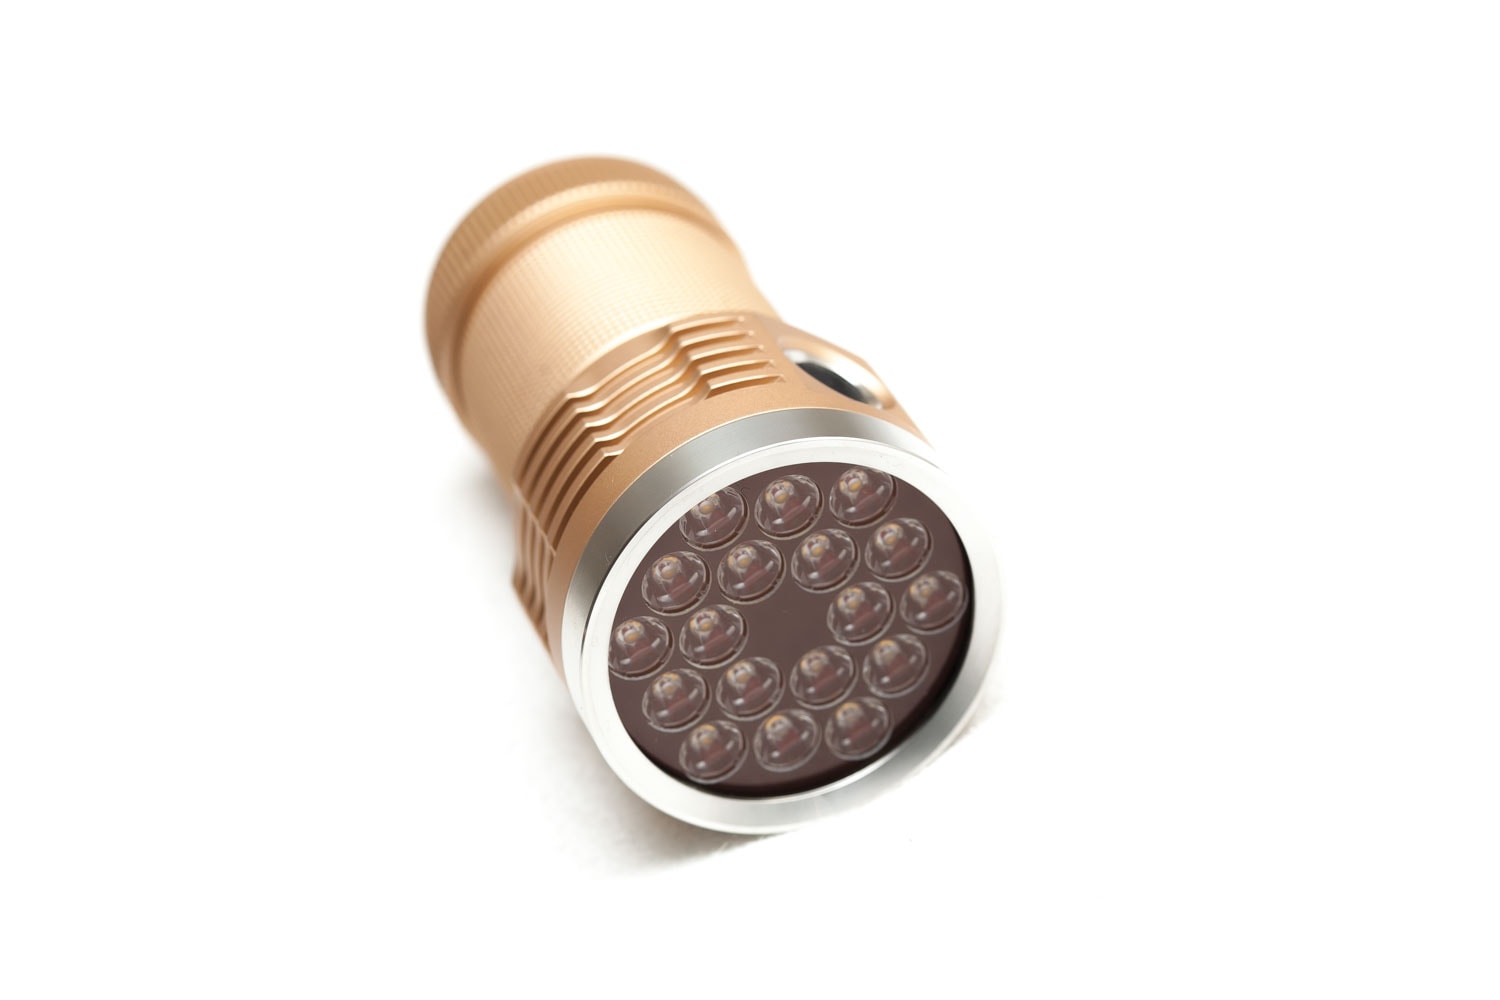
The Emisar D18 is available with several different kinds of LED configurations. The one I got is the 4000K SST20 CRI95 and is supposed to be 10,000 Lumens. Hence, the light’s MFG specification list shows 10,000 Lumens, while the heading of the page shows 14,000 Lumens. This is what the light is shown for: MAX Lumens. Since I wanted to try Hi CRI SST20 LEDs, mine is supposed to be 10,000 lumens instead of 14,000. So that you understand.
Hank at Intl-outdoor is a true flashoholic. Big brands don’t offer a wide variety of LED choices and tints. Besides that, it uses firmware that was written by a flashoholic, so the distance between the manufacturer and user is very very close! Not many brands have such a close relationship!
What you’ll get:
- Plain carton box
- Emisar D18
- Spare O-rings
- Carry strap
- Pouch
Specifications
| Brand / Model | Emisar D18 |
|---|---|
| LED | SST20 4000K |
| Lumens | 10,000 lm |
| Beam intensity | 45,000 cd |
| Battery config. | 3*18650 |
| Material | Aluminum |
| Modes | Raming by default |
| Blinkies | Many |
| Reflector | TIR |
| Waterproof | IPX67 |
| Review date | April 2019 |
Handling of the light and knurling
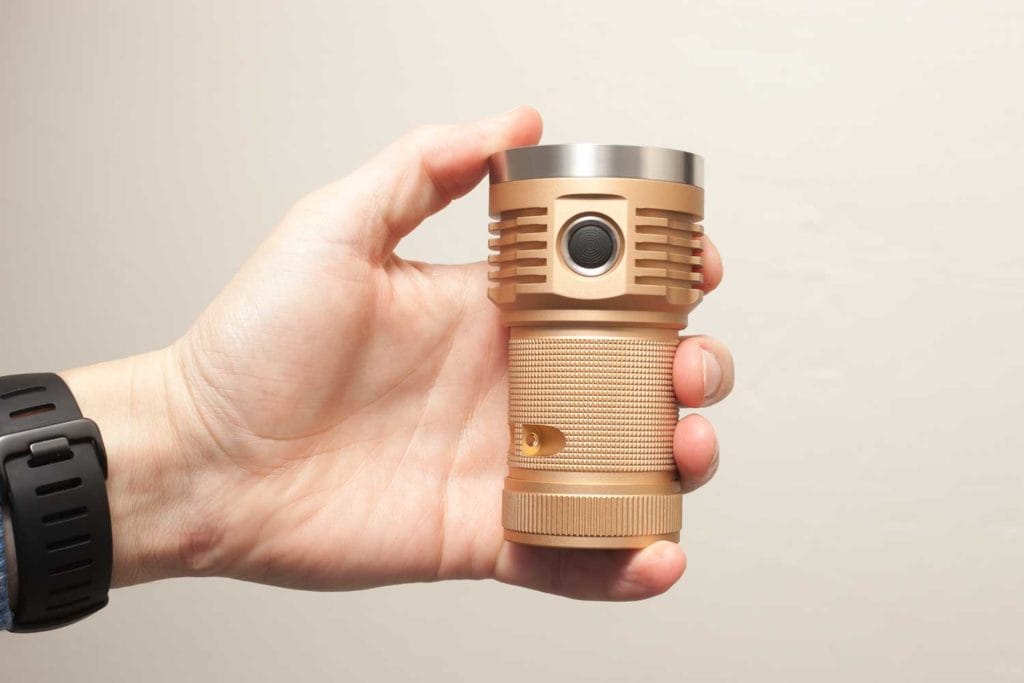
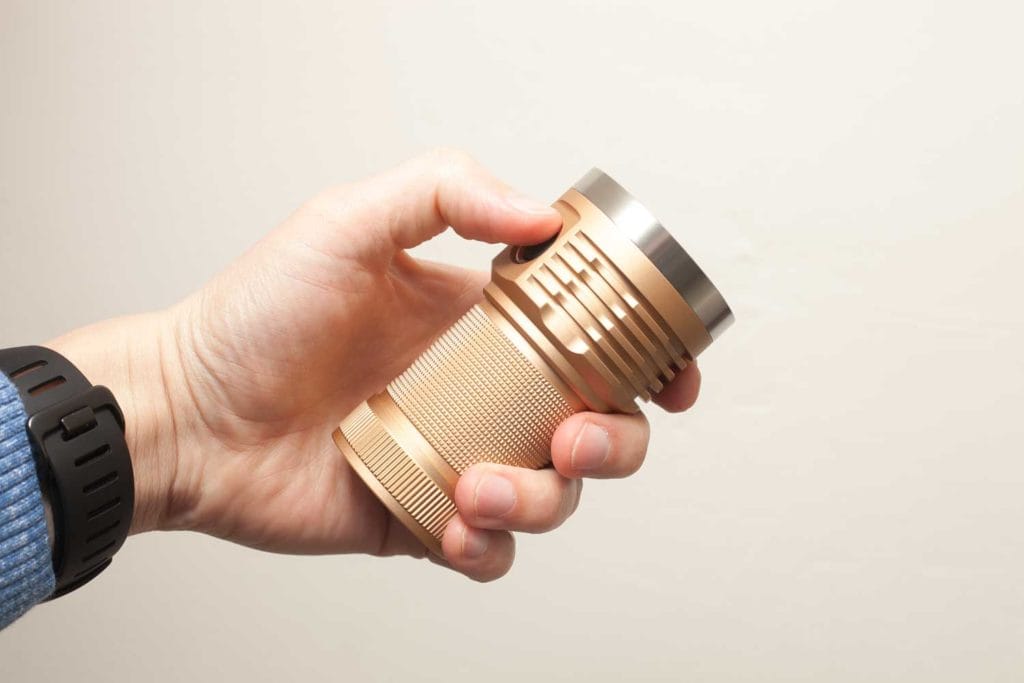
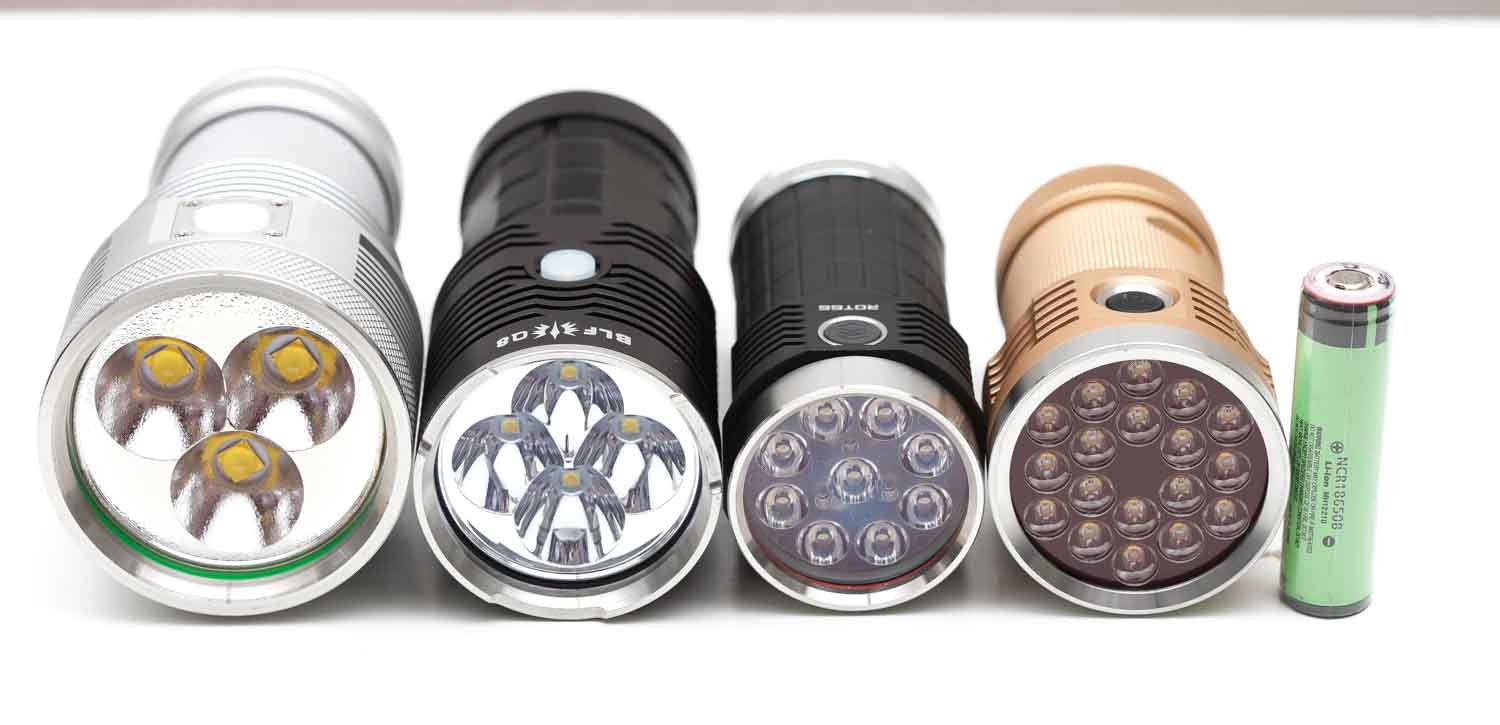
It’s a shock. I didn’t expect the D18 to be soo small. If you own the BLF Q8, you’ll notice that this is a lot smaller… and brighter. If you have large pockets I wouldn’t be surprised that the D18 would fit. The switch is a little recessed so it is less likely to be activated accidentally. But it’s still possible to do so, and that has been 1 major problem with the Emisar D1’s and D4’s. It would help if you did a physical lockout by unscrewing the body from the head or do an electronic lockout by clicking the switch 4 times from Off.
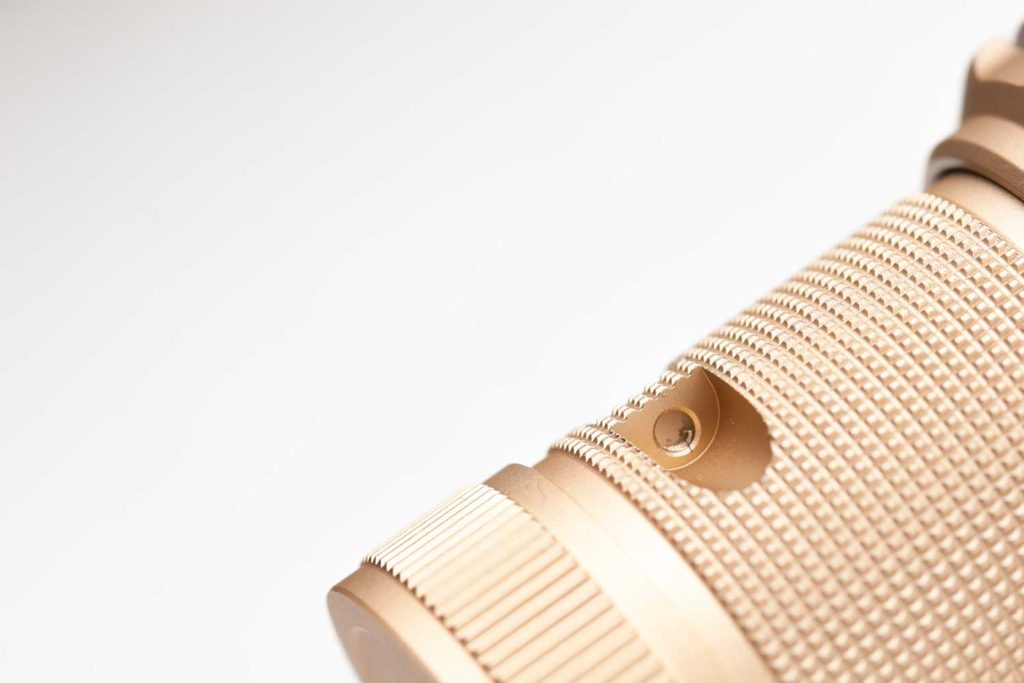
Fortunately, the D18 has quite a bit of rough knurling on the body, so it won’t easily slip out of your hands, and the carry strap can help here as well. It’s a very interesting, powerful flashlight.
Tail-stand?
- Totally cool, zero problems.


Build Quality
For $100 you’ll get a beautiful little flashlight! I’ve tried to find something noteworthy, and I only noticed some machine marks in the lanyard attachment hole. Besides that, there is nothing bad to say about it.
Anodization
Anodization is done well; there is nothing to complain about here, either. I love my gold/sand-colored version a lot. Since 95% of professional flashlights are black, I sometimes choose a different color on purpose. Some manufacturers even have their own “color”—think about Zebralight.
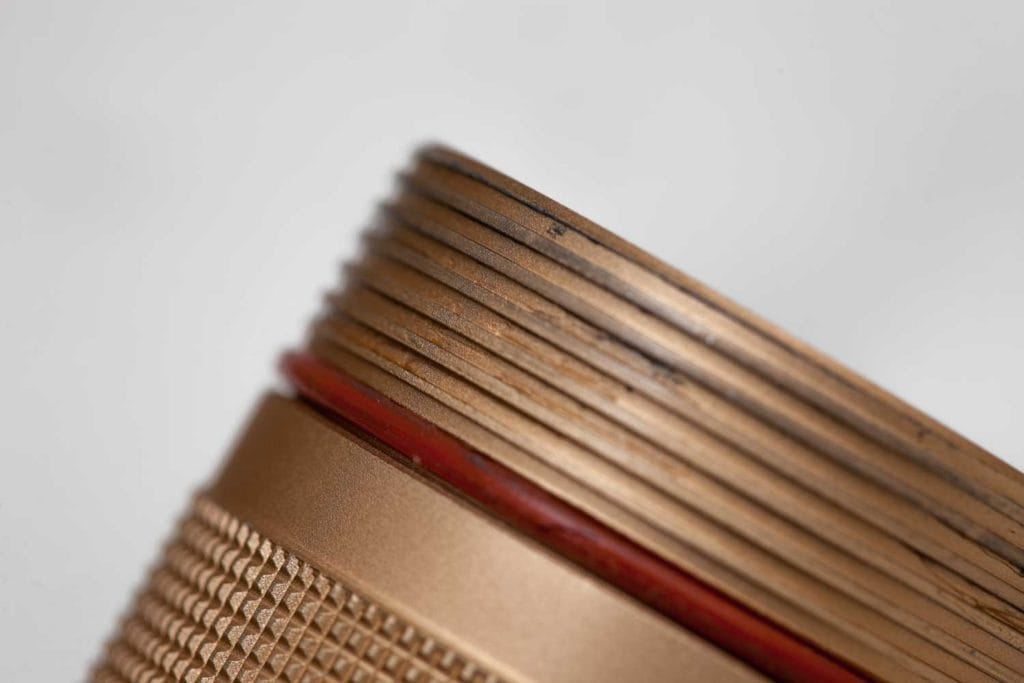
Threads and O-rings
Both threads and o-rings came lubed. I couldn’t find any damage to the threads. The body screws into the head and uses an O-ring to keep water from entering the body. I don’t want to test this, because I’m not 100% sure it can withstand water..claiming IP67.
You’ll get an extra pair of O-rings in case you need to replace the current O-rings.
LEDs, Lens, Bezel and Reflector
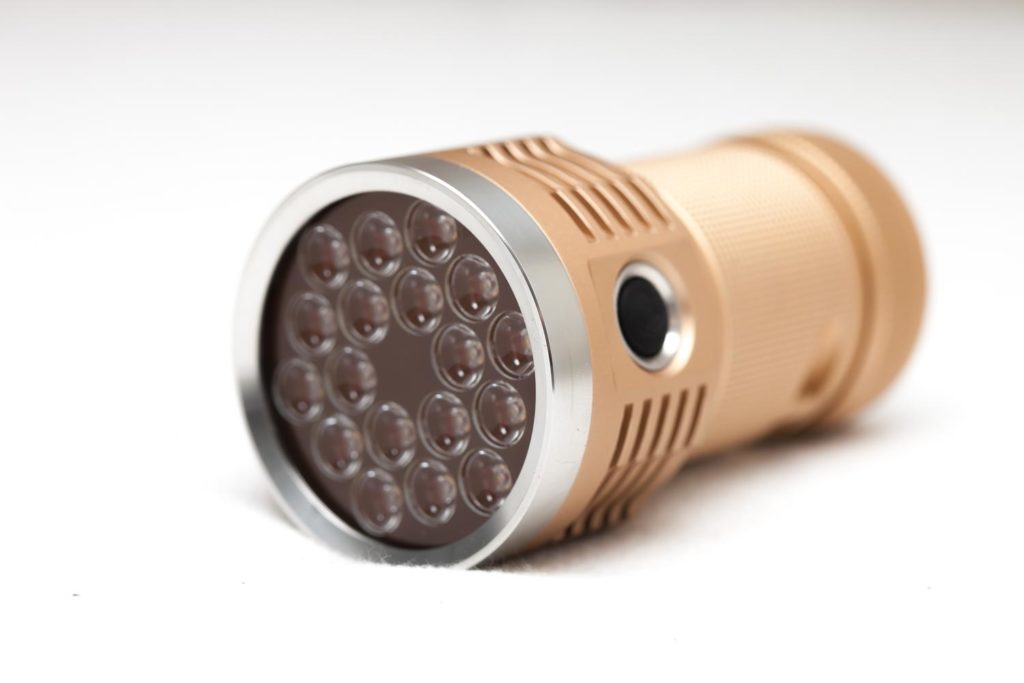
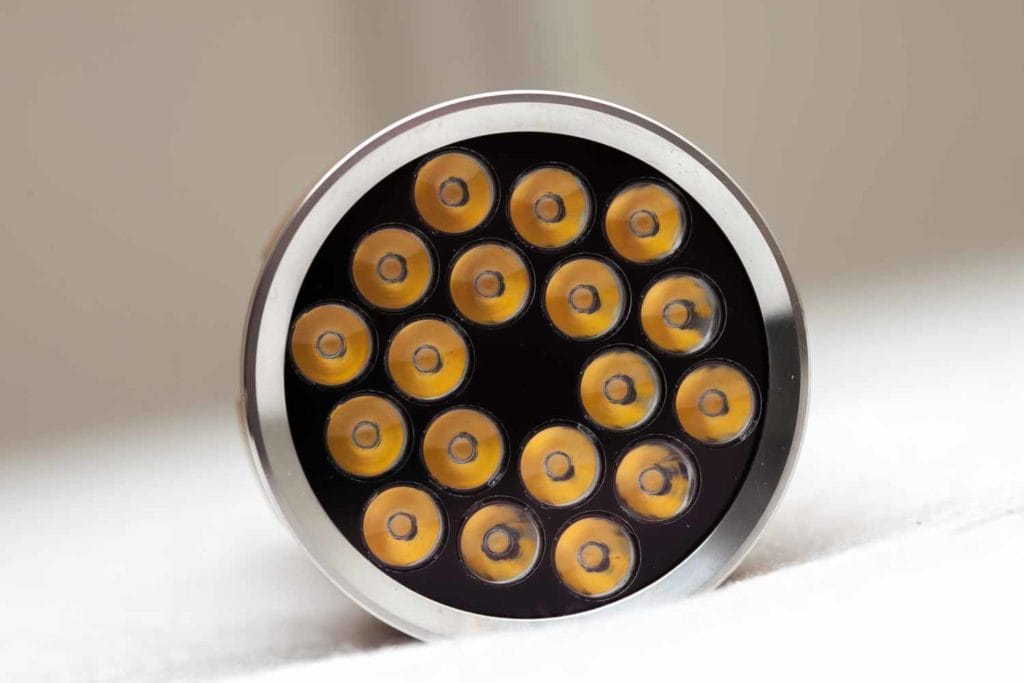
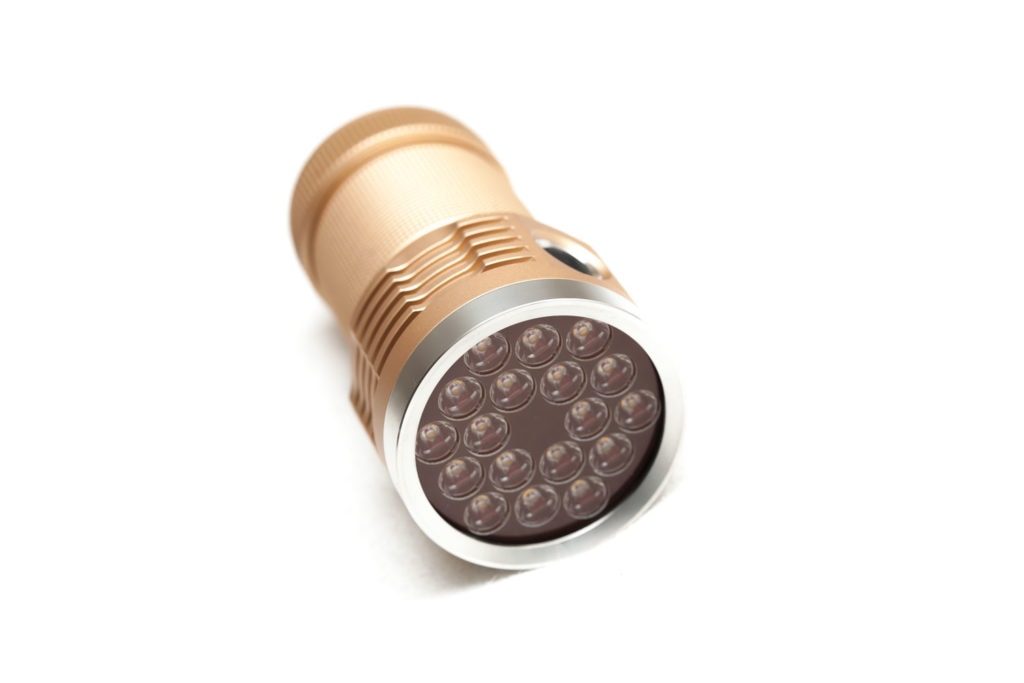
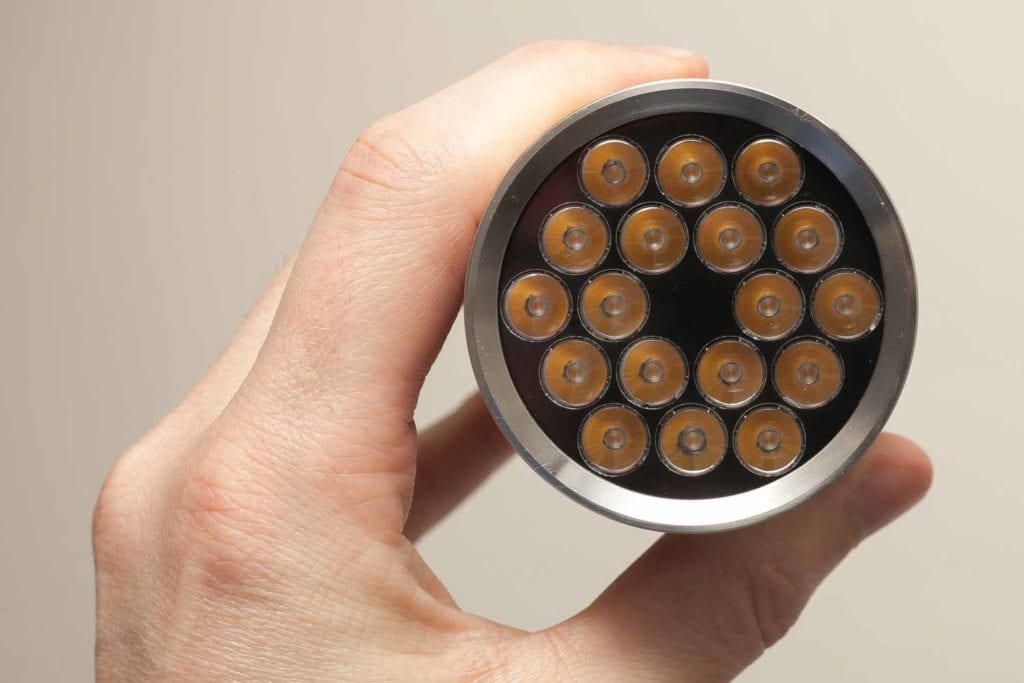
I chose the Luminous SST20 4000K version because that is my favorite spot, somewhere between 4000K and 5000 K. Besides the temperature, I chose this because of its High CRI (Color Rendering Index). The LEDs sit on a copper MCPCB below TIR optics in an exciting layout.
The bezel is silver, and I assume its made of stainless steel—no reflectors for this one.
Dimensions:
Flashlight manufacturers mainly show dimensions in millimeters.
- Length : 103mm / 4.0″
- Head diameter: 58 mm / 2.28″
- Width body : 46 mm / 1.8″
Weight:
- Weight: 343 gr / 11.4 oz.
- Weight Head: 192 grams / 6.8 oz
- Weight Body incl battery: 150 grams / 5.31 oz
From left to right: Haikelite MT03, BLF Q8, Fireflies ROT 66, Emisar D18, protected 18650 battery


User Interface:
See the image below:
Click for a larger image.
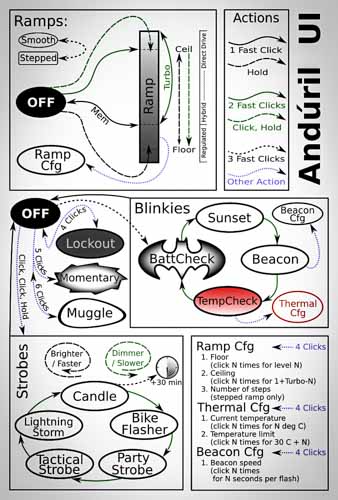
The Emisar D18 uses a firmware called Anduril. A Budgetlightforum member named Toykeeper wrote the code for the firmware.
By default, the Emisar D18 uses a smooth ramping mode. When the light ramps up, you’ll notice a strange flicker about halfway.
Check out the full Anduril UI manual here
From OFF:
- Single-click: ON
- Double click: High (Top of ramp)
- 3 clicks: Access the blinky/utility modes.
Enter Special/Fun modes from OFF:
- 2 clicks + hold: Strobe modes
- 4 clicks: Lock Out mode
- 5 clicks: Momentary on
- 6 clicks: Muggle mode
From ON:
- Single-click: Off
- Double click: Turbo
- 3 clicks: change ramping mode.. Instead of a smooth increase, it has 6 little steps between Lowest and Max.
- 4 clicks: change to ramping configuration mode
- Press and hold: brightness ramps up.. release and press and hold again to ramp down.
Special and FUN modes:
Read the full manual on how to access and customize these modes. Also, see the firmware picture.
- Blinky Utility mode:
- Battery check
- Sunset Mode
- Beacon mode
- Temperature check
- Strobe / Mood modes:
- Candle
- Bike flasher
- Party strobe
- Tactical Strobe
- Lightning mode
- Lockout mode (can’t use the light)
- Momentary mode (signaling/morse coding)
- Muggle mode: (safer for children)
- Configuration mode
- Ramp config mode
Protection Features
The D18 has a low-voltage-protection (LVP) and thermal regulation.
LVP makes the light step down to a lower level when the battery is low, and if the light is already at the lowest level, it shuts itself off. This activates at 2.8V. LVP adjustments happen suddenly, in large steps.
Thermal regulation attempts to keep the light from overheating, and otherwise adjusts output to stay as close as possible to the user-configured temperature limit. Thermal adjustments happen gradually, in steps so small they are difficult for humans to perceive.
Batteries and charging:
Instead of using 4*18650 lithium-ion batteries, the Emisar D18 runs off 3 batteries. I recommend using 1 set of batteries per light you own! When you buy a set of 4 batteries, do not continuously switch between a light powered by 3 batteries and 4 batteries. One of the batteries will get less use, and the set will be “out of sync.” This could potentially be dangerous when you run the light down until the batteries are empty.
1 or more of the batteries will be discharged deeper than the other and therefore more prone to internal damage. If you do this too often, the battery’s quality will decline even more rapidly every time you discharge it too far! Be cautious not to run your lights (powered by lithium-ion batteries) down till it’s dead.
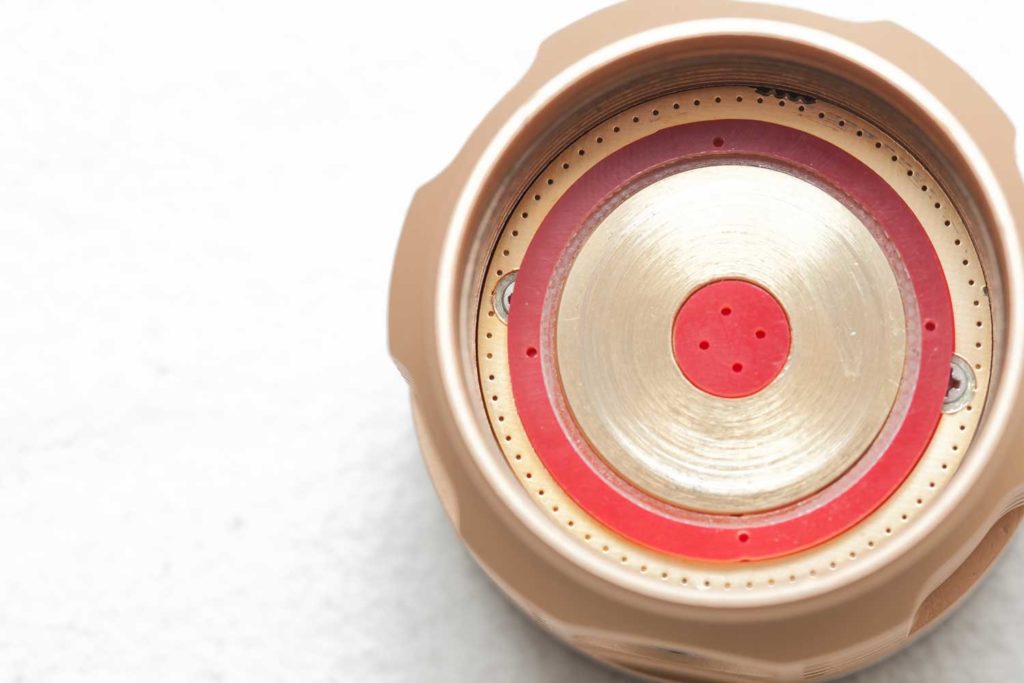
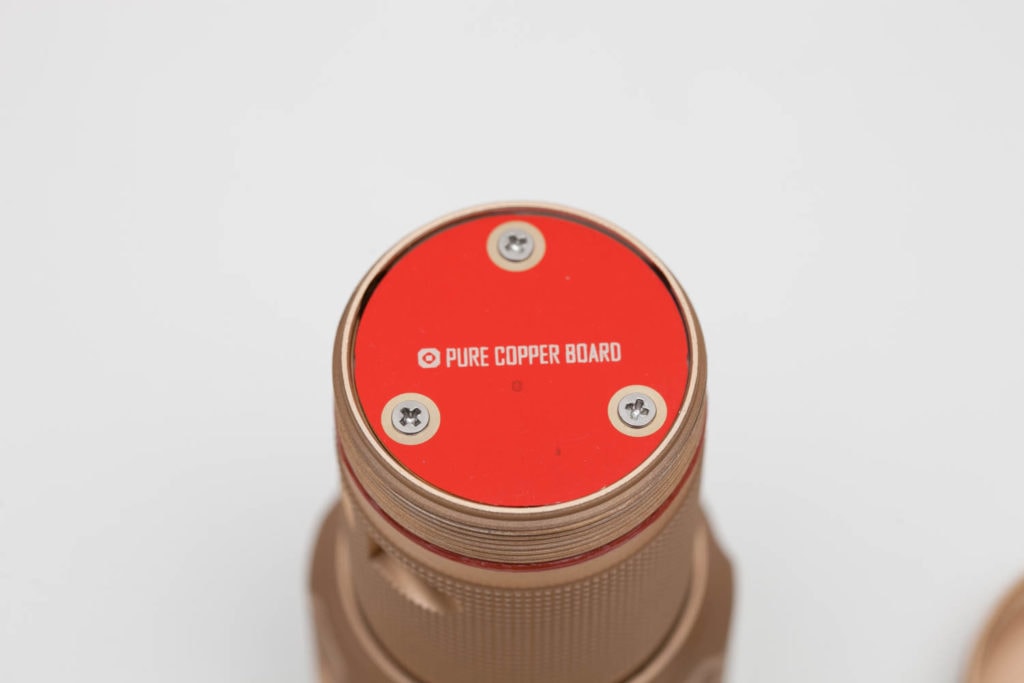
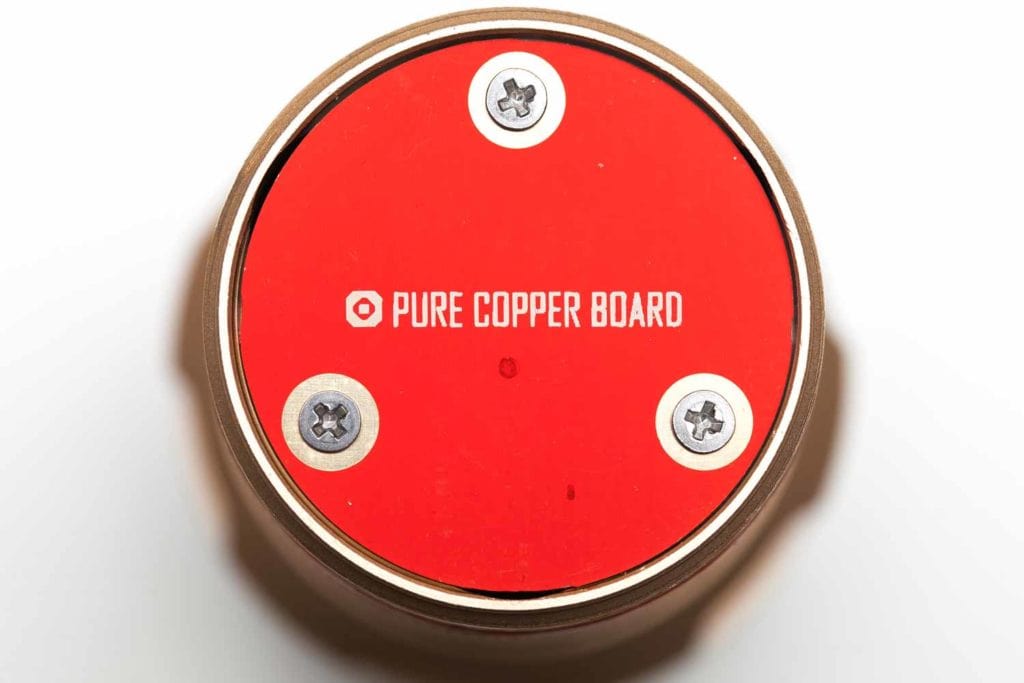
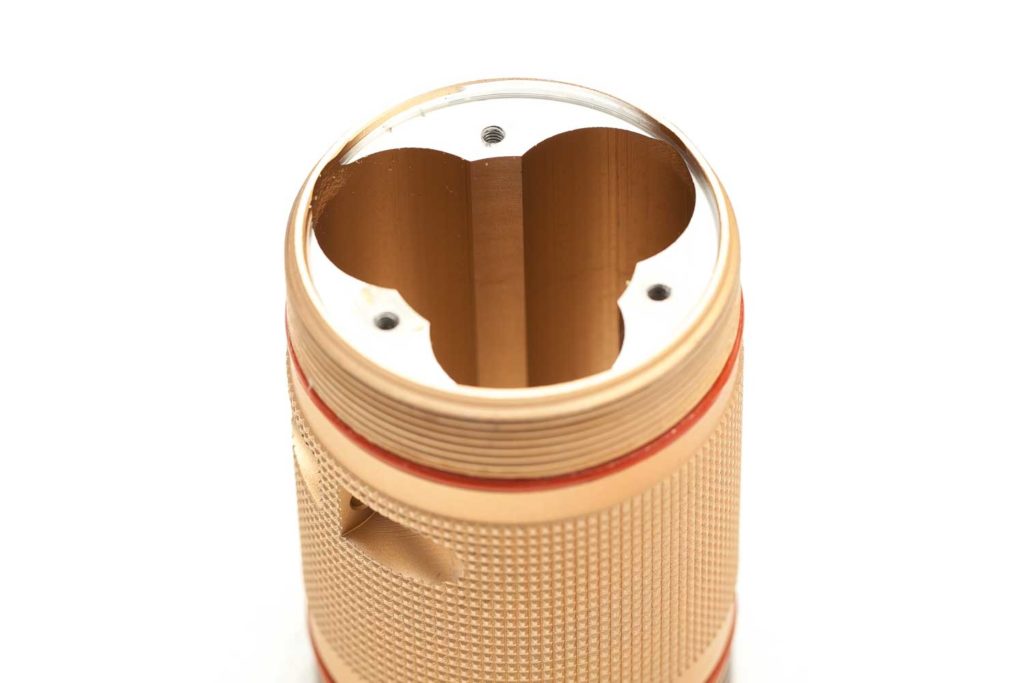
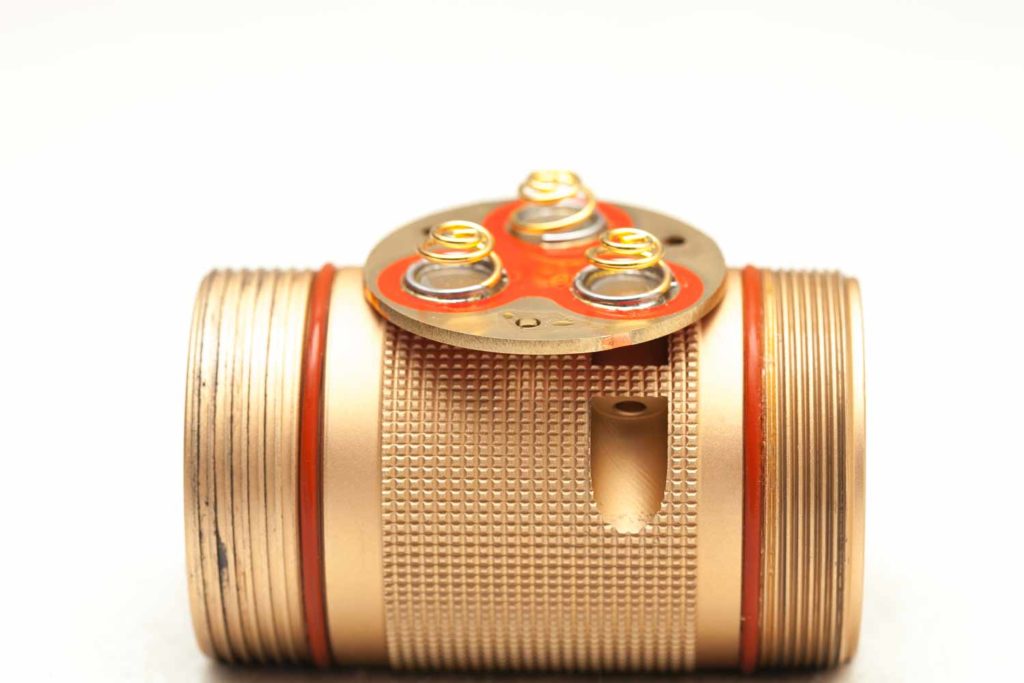
The D18 accepts button-top Non-Protected batteries only! The driver contact board (for the batteries) has physical protection built into it. This is one way of reverse polarity protection! See the pictures.
If you don’t have button-top batteries, there are a few ways to get them. Some are ideas from BLF members.
- Not recommended: I unscrewed the copper contact board from the tail cap, inserted my Samsung 30Q Flat top Batteries with magnets attached to the positive contact, and screwed the driver board down. This is not easy since the springs are pretty stiff.. And it’s extremely annoying to do. Especially if you realize you didn’t charge the batteries yet. LOL.. guess who found that out.
- Remove the red ring by force…..
- Add some solder blobs to your flat top batteries so they will make contact
- Solder copper discs unto the positive contact point of a flat top battery
Performance:
My integrated Sphere only measures up to about 4000 Lumens without using any filters. For this test, I used a Neutral Density filter from my Canon DSLR and compared the numbers of my test without the filter. They looked quite similar—maybe 1-2% difference—until I got up to 4,000 Lumens, when the test without a filter just stopped.
Since the numbers with filter and without the filter looked similar (after calculation), I measured all modes (not the smooth (stepless) ramping mode, but the stepped ramping mode (triple-click from ON).
Lumen measurements with 4000K SST20 CRI95 (In secondary ramping mode (3 clicks) NOT default ramping mode!)
- 11.9 Lumens
- 38.8 Lumens
- 109 Lumens
- 198 Lumens
- 412 Lumens
- 779 Lumens
- 1437 Lumens
- Turbo 7457 Lumens
Turbo in default ramping mode and “other ramping mode” are the same. So I measured about 7500 Lumens. Which is 2500 lower than claimed. I will check other reviews and see what numbers they get.
This time, I measured a peak output of 8378 Lumens with 3* Sony VTC5A batteries and even 9000 lumens with 3* Samsung 30Q batteries. The output and runtime are too dependable on the battery quality and the thermal calibration.
Amps:
I took off the negative contact board towards the tail and measured Amps with only 1 Samsung 30Q battery and got 5.5 Amps. Measured with solid copper wires on a Fluke 77III.
Runtime:
I redid the runtime test. This time it was done in my homemade integrating sphere which has a much more reliable measurement. Measured with an Extech SDL400 Lux Meter and Kenko PRO1D 16ND filter because the meter would go crazy otherwise. (error).
This runtime was done in April 2020 and replaces the one done in 2019.
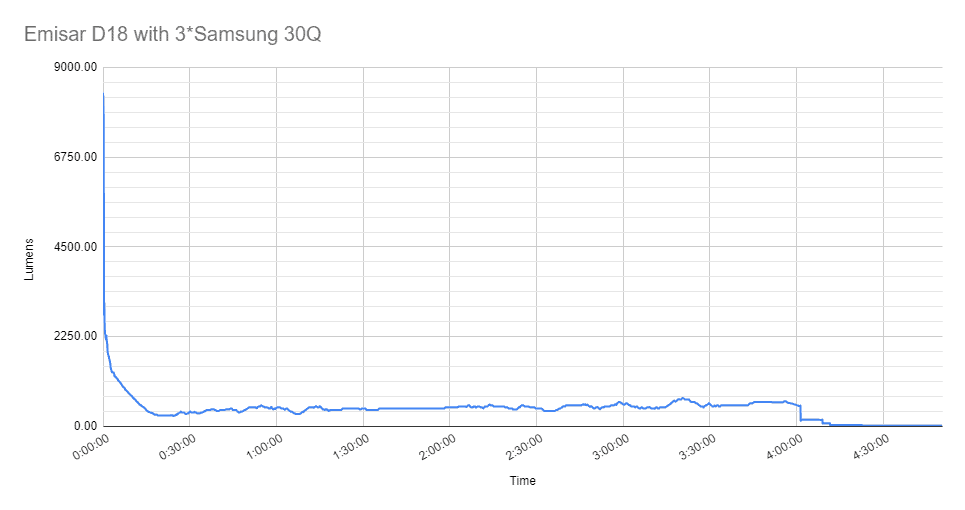
The runtime really depends on the batteries you use. The following picture shows the first 20 minutes.
When I switched the D18 off, it was still producing about 5 lumens. It would probably continue doing that for a bit longer before it would shut off completely.

High power flashlight comparison
Here is the list with most of the high-power flashlights we reviewed in this category (Category: high-power soupcan sized flashlights).
| Flashlight | Max. Output | after 30sec |
|---|---|---|
| Acebeam X50 | 35,507 | 30,383 |
| Acebeam X75 | 64,295 | 73,716 |
| Acebeam X80-GT2 | 31,890 | 27,143 |
| Astrolux EC06 | 18,111 | 8,352 |
| Fenix LR50R | 11,698 | 10,849 |
| Imalent MR90 | 52,326 | 32,128 |
| Imalent MS08 | 25,745 | 19,615 |
| Imalent MS12 Mini | 68,773 | 46,750 |
| Imalent MS12 Mini C | 71,967 | 55,873 |
| Imalent RS50 | 20,302 | 16,939 |
| Imalent SR16 | 53,657 | 43,115 |
| Lumintop GT3 | 16,267 | 15,168 |
| Manker MK38 (SFT) | 16,013 | 13,129 |
| Olight Marauder 2 | 14,251 | 13,964 |
| Thrunite TN50 | 18,200 | 17,360 |
(Interactive line graphs below)
Hover your mouse over the lines in the graph to see more details, or select a flashlight in the graph.
Using a mobile phone? Hold your phone horizontally!
Another comparison, focusing on the first 10 minutes after activation
And here’s another comparison, but zoomed in. The first 60 minutes after activation.
Low Voltage Warning
There isn’t really a low voltage warning, the list will just turn off. After I took the batteries out, they were at 2.85 Volts.
Throw:
- Max throw measured at 10 meters: 53000 cd
- Throw measured with SkyTronic LX-101 lux meter
Beamshots
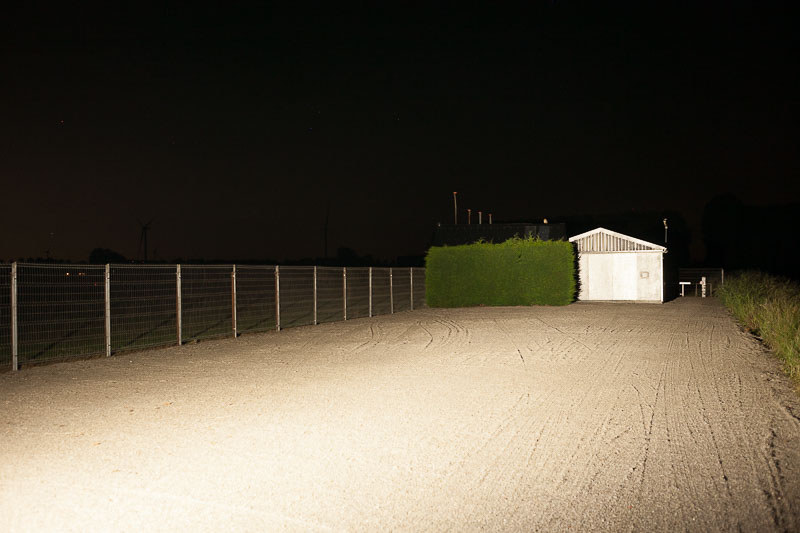
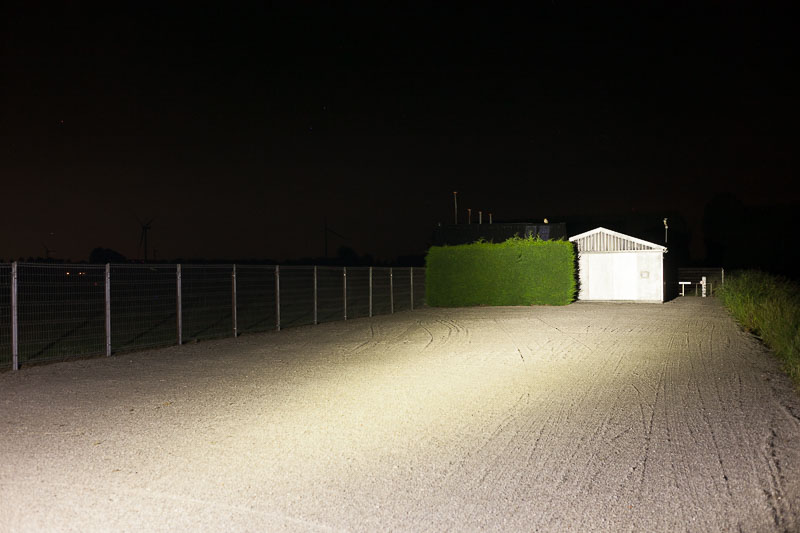
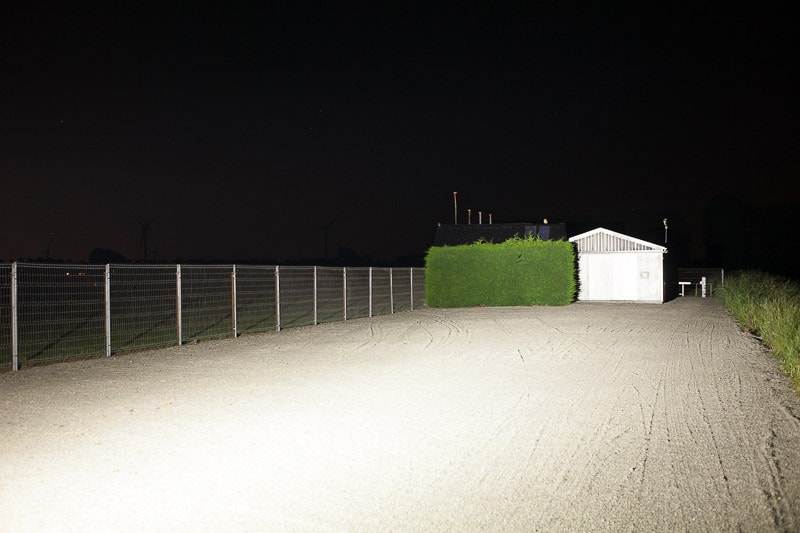
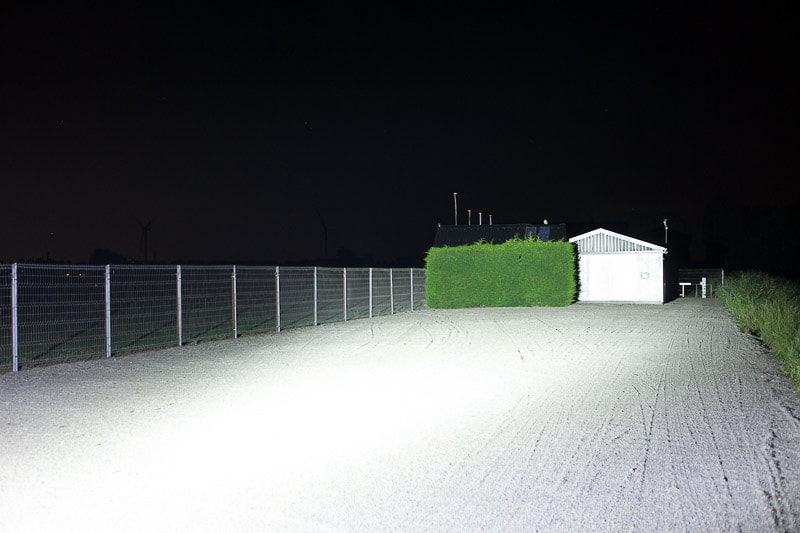
Camera settings: 50mm, ISO 1600, F4, 1/40 shutter speed, 5000K
Emisar D18, BLF Q8, Fireflies ROT66 gen2, Fenix LR35R
Overall conclusion
Pros:
- Very bright
- Good value at $99
- Choice of LED + TInt
- Easy default UI: ramp up ramp down.. simple
Cons
- So many features that you almost feel like you are left out if you don’t utilize them.
- Accepts only high button top batteries. Protected batteries won’t fit.
Overall Rating: excellent
Imagine a flashlight for all circumstances—this one might be it. You can use it for your road bike, camping, or other outdoor activities. It is very bright, measuring 7500 Lumens with High CRI.