1lumen selects and reviews products personally. We may earn affiliate commissions through our links, which help support our testing.
Lumintop FW1AA review
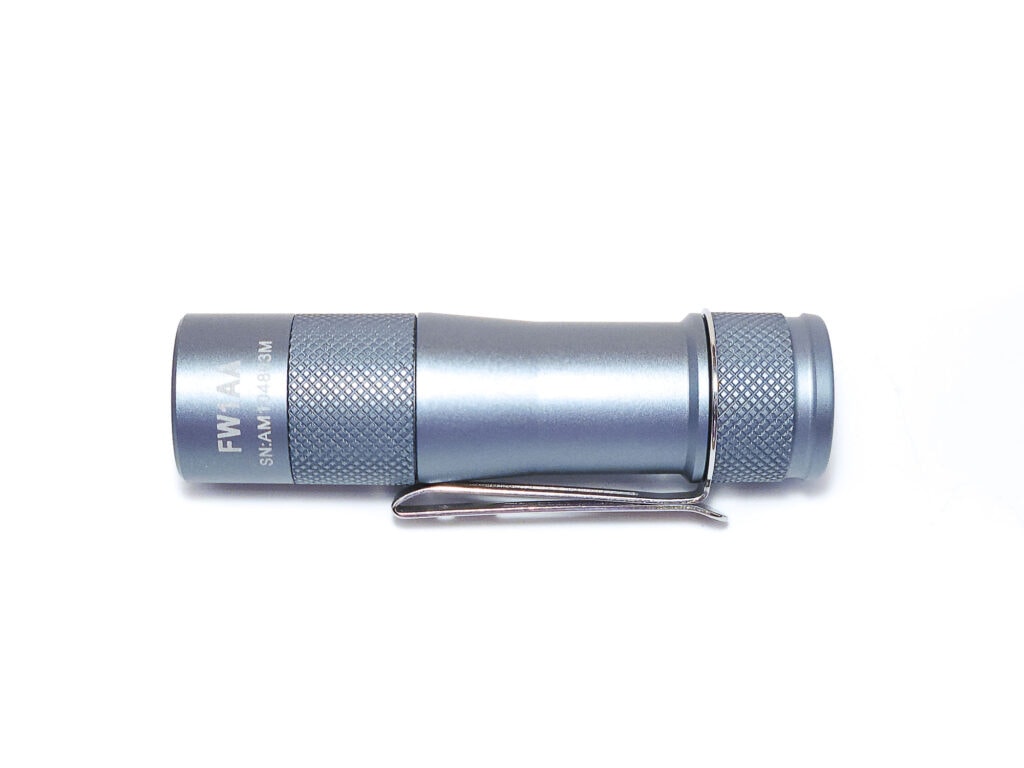
Lumintop FW1AA specifications
| Brand & Model | Lumintop FW1AA |
|---|---|
| LED | Osram CSLMN1.TG (as tested), Nichia 219c, Luminus SST-20 |
| Lumens | 700 Lumens |
| Beam intensity | 27,000 cd |
| Battery config. | 1*14500 |
| Onboard charging | N/A |
| Modes | Anduril 2: 7 default steps; smooth ramping |
| Blinkies | Anduril 2: Candle, bike, tactical strobe, party strobe, lightning, beacon, SOS |
| Reflector | Smooth reflector |
| Waterproof | IPX8 |
| Review publication date | September 2022 |
Introduction:
Here comes another Lumintop light hotly anticipated by the flashlight enthusiast community: The FW1AA. First announced in the summer of 2021, Lumintop brought the smooth reflector, single emitter setup of the Lumintop FW1A to the 14500 form factor of the Lumintop FWAA, creating a tiny, powerful thrower and wrapping it in Anduril 2. Let’s see if it lives up to the hype.
Package quality.
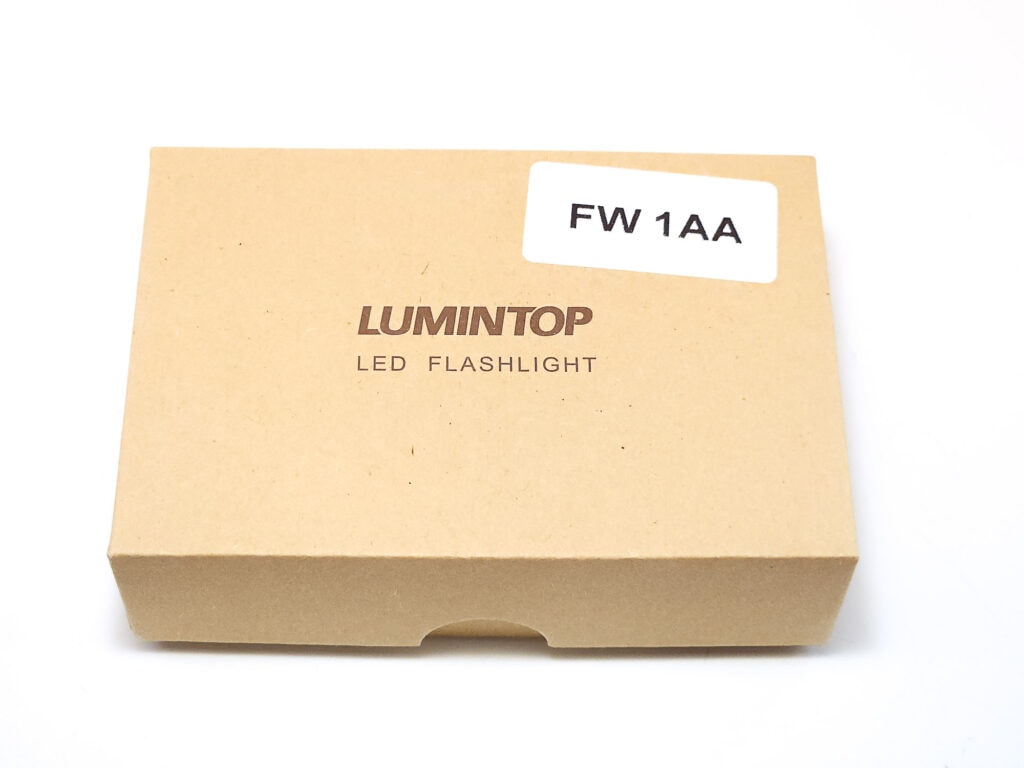
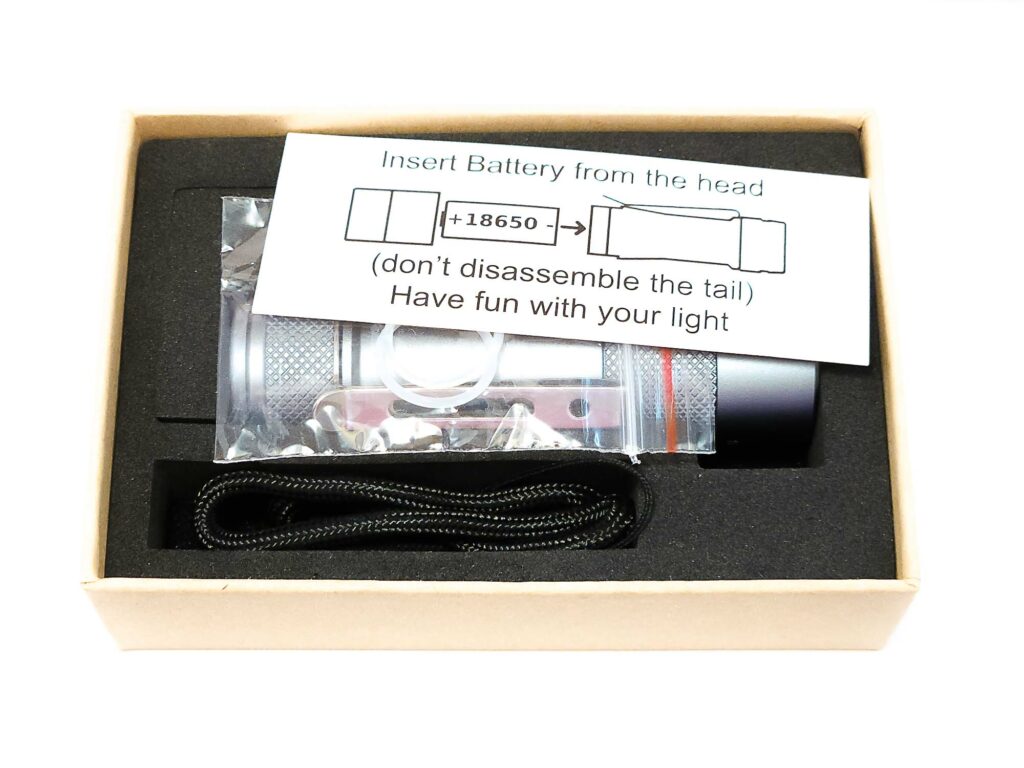
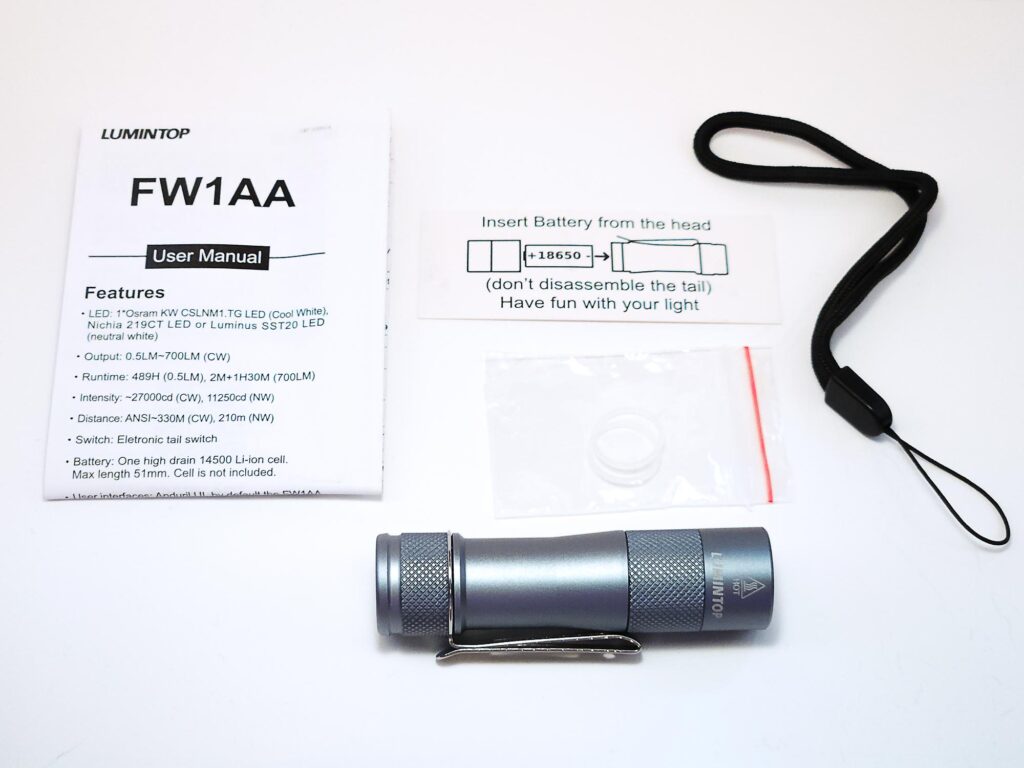
The FW1AA comes in one of Lumintop’s standard plain cardboard boxes with the name on a sticker on top. The back of the box has Lumintop’s contact information. Inside, you’ll find the light nestled within a foam cutout with the accessories stacked on top of it. Since this light runs Anduril 2, the manual is rather large, and ended up wedged into the top of the box. Lumintop also included a card instructing you to unscrew the head in order to insert or remove the battery instead of removing the tail cap. It appears to be the same as the one used for the larger FW-series lights as the battery is labeled “18650”, though this is a 14500 light.
The total contents of the box include:
- Lumintop FW1AA, with clip attached
- Two spare o-rings in a plastic zip top bag
- Lanyard
- Manual
- Reminder card to not disassemble the tail cap
Flashlight in use
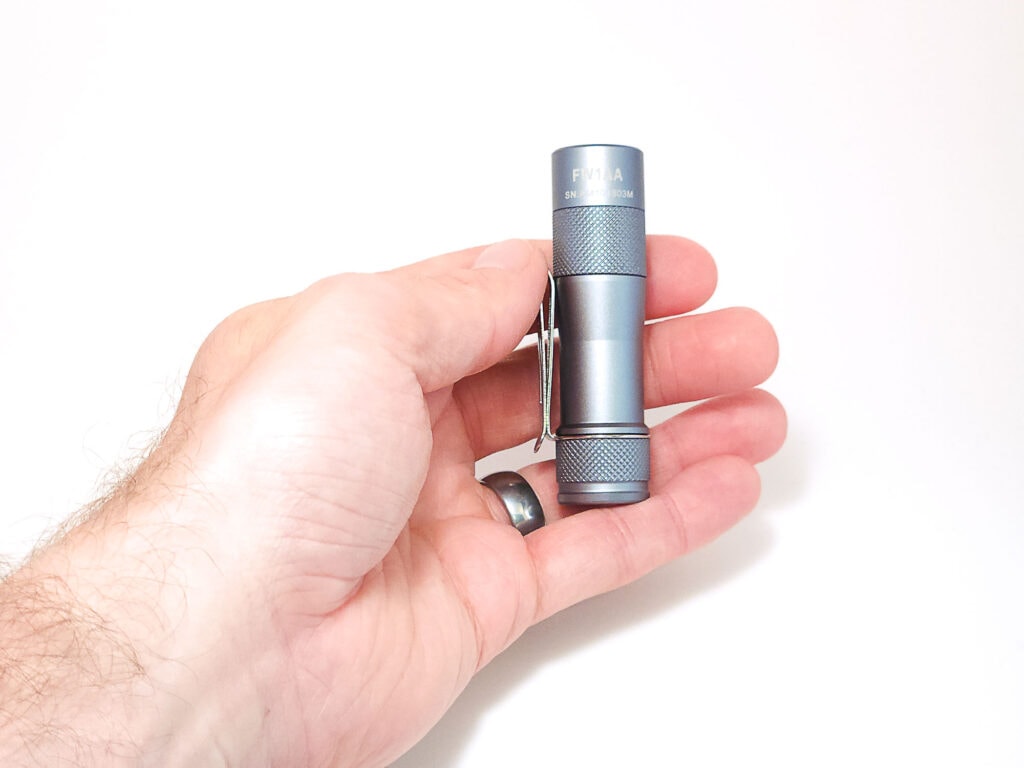
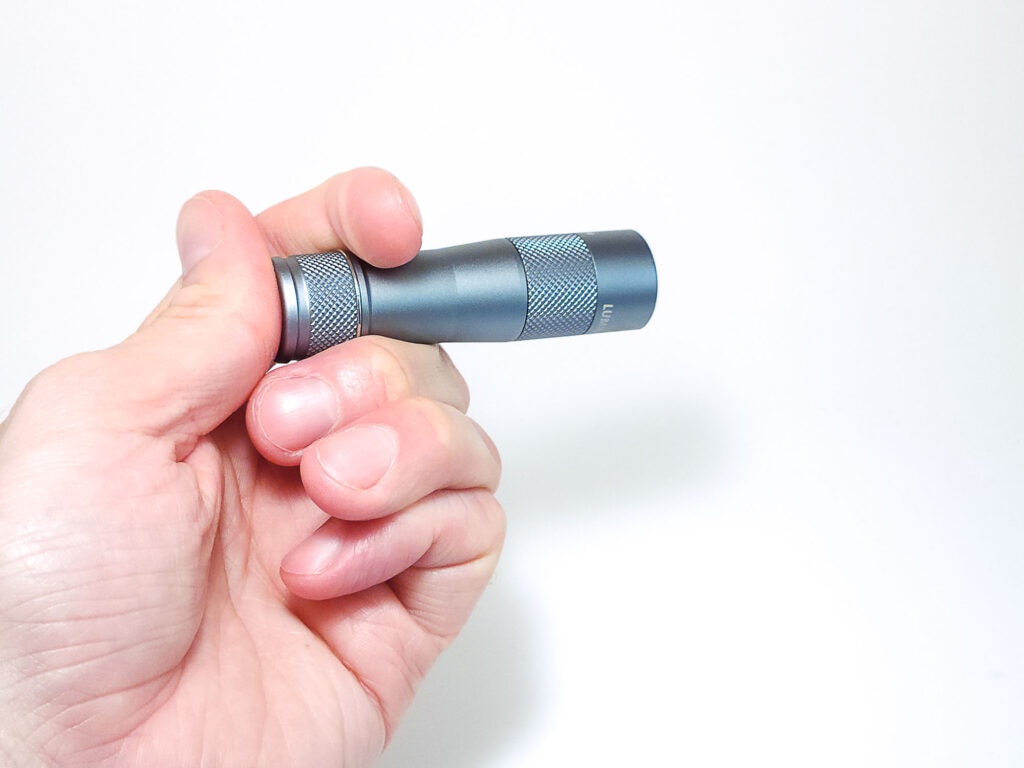
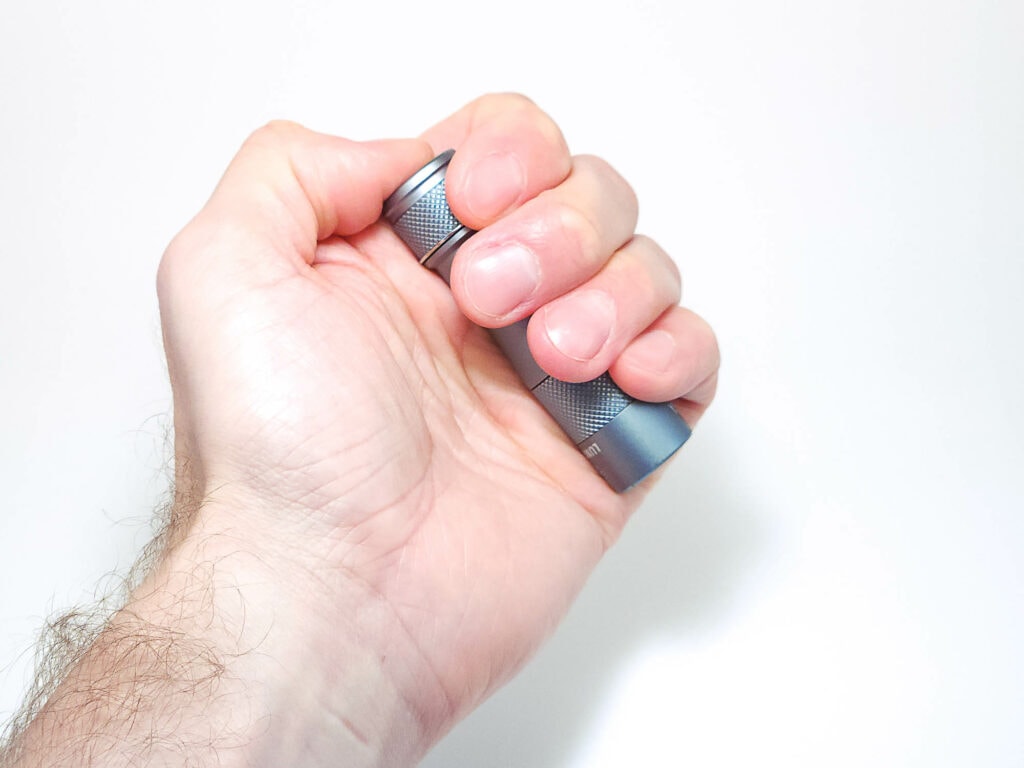
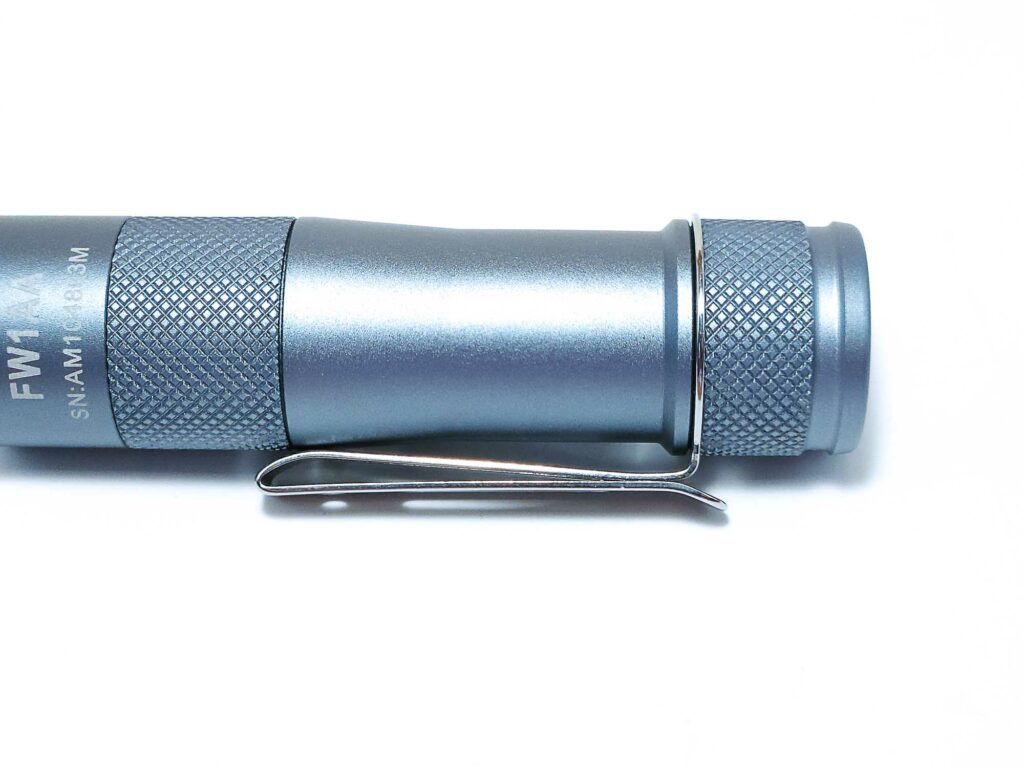
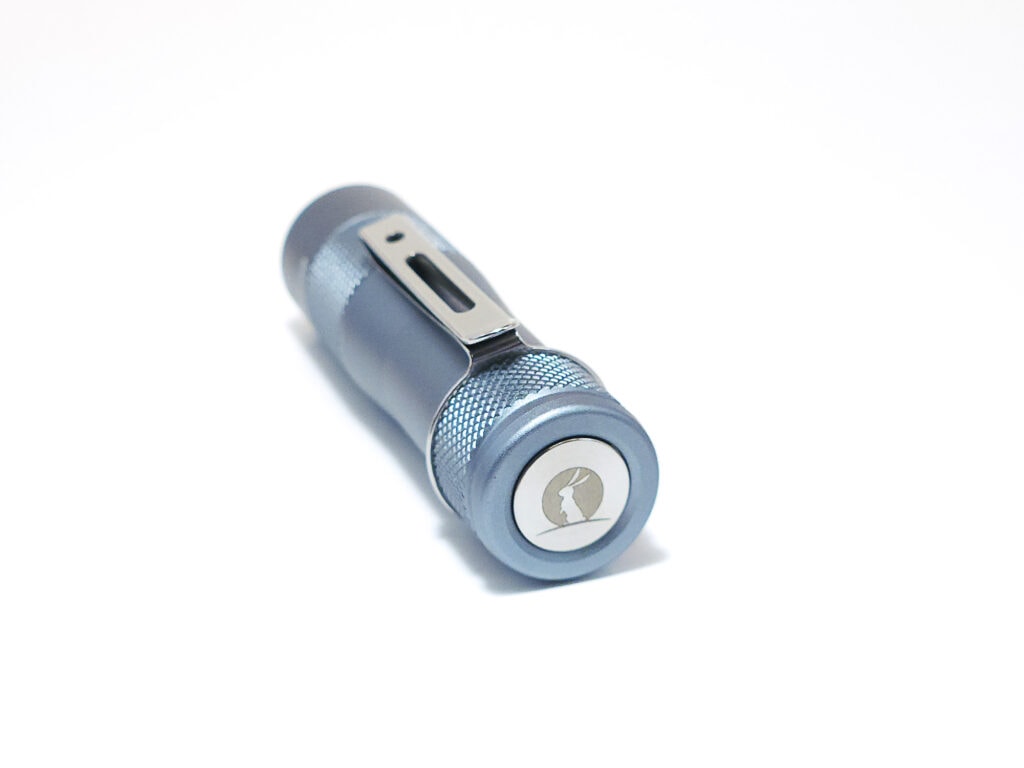
The FW1AA has that bowling pin design where the body tapers from the head to the tail, which is the same size as the head. This makes the cigar grip very easy to use, and in fact with a tail switch light of this size, my preferred grip. It’s a little small for the overhand grip, traditionally the other main grip style for tail switch lights, but still doable. You can also use the standard flashlight hold, but like with all tail switch lights, you’ll have to adjust your grip to change modes.
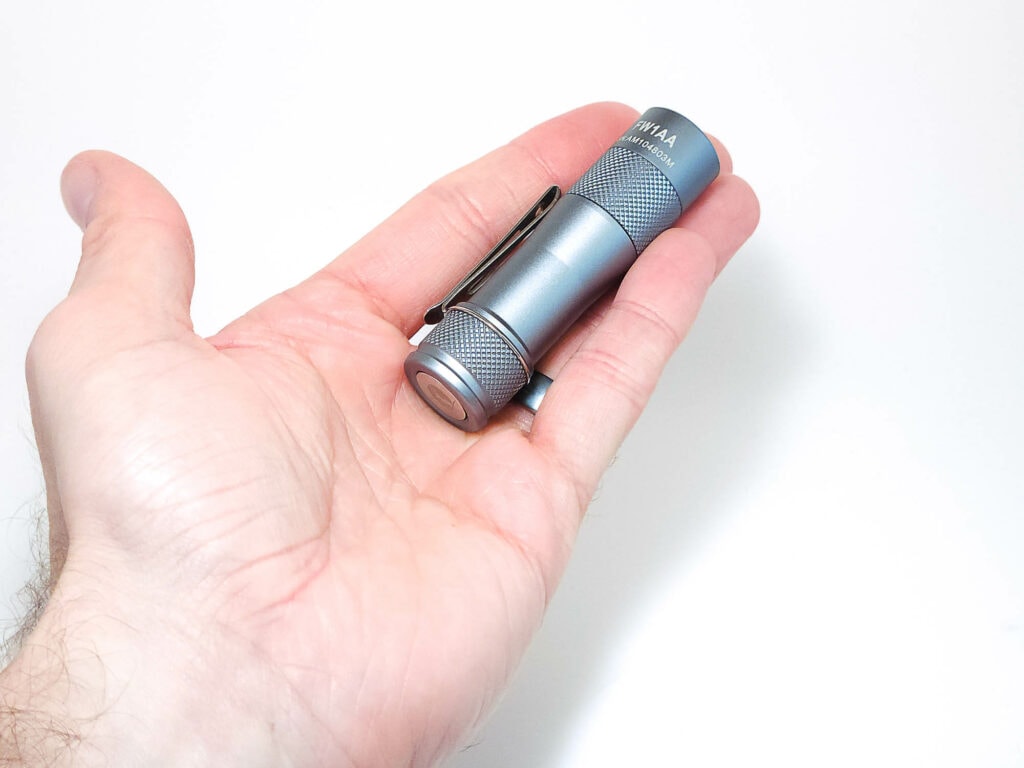
The included captured, bi-directional clip slips over your pocket well and there is enough room to slide it all the way on, even over jeans thanks to the taper of the body tube. In this position, the tail cap sticks out, but given the overall size of the light, it’s not much. Clipping the FW1AA into something in the other direction is a little more challenging because the loop on this end in the clip is not as large. It can still be done; it’ll just be a tight fit. Having the clip attached will prevent the light from rolling. The clip is also really the only place to attach the lanyard. There are several cutouts along the clip, though I find this awkward due to them being in the middle of the light.
The head and tail both have crosshatch knurling that gets the job done. Mostly this is used when unscrewing the head, but be careful not to unscrew the tail by accident.
The tail and electronic switch are flat, allowing it to tail stand and since the button is recessed, it will not be depressed while doing so
I found that the 14500 size leant itself to easily clipping onto my pocket and pulling out when necessary. Most of the time I use the cigar grip as it allows me to remove the light, activate it with the tail switch, and eventually replace it in my pocket one handed. Likewise, the lightweight makes it easy to flick about, where larger and longer lights can be unbalanced in this grip.
Being as small as it is, the Lumintop FW1AA makes a good pocket light if you don’t mind the small hotspot. It’s easy to carry around, though, with a 14500, it doesn’t have the largest capacity.
Build Quality, and Warranty
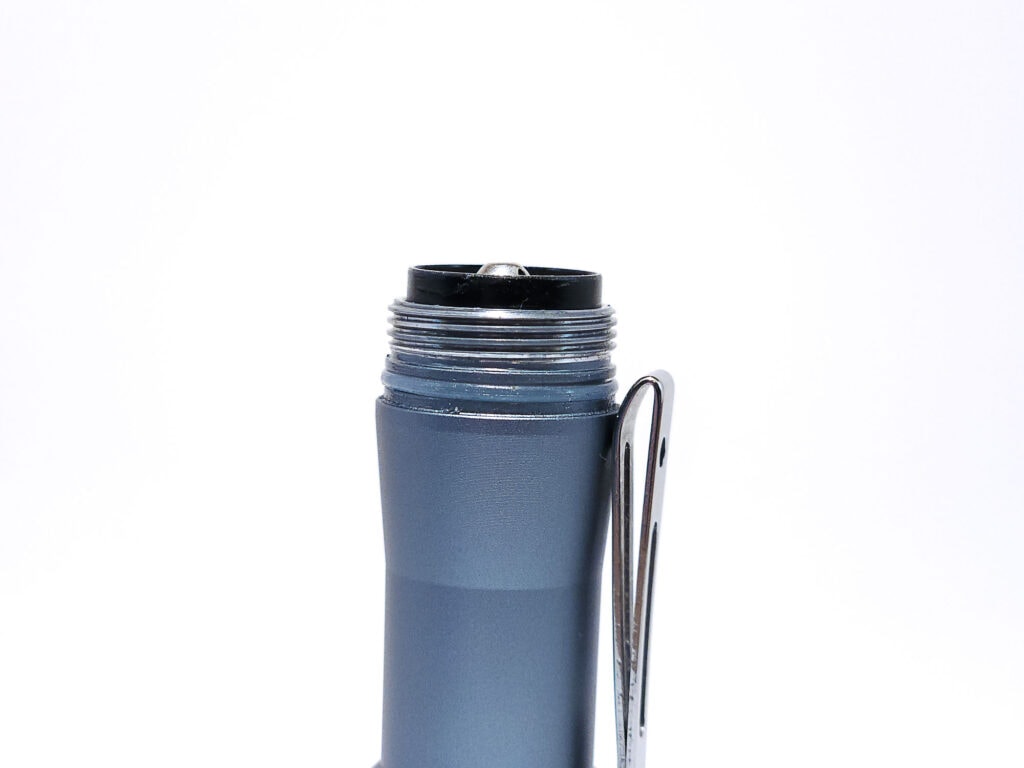
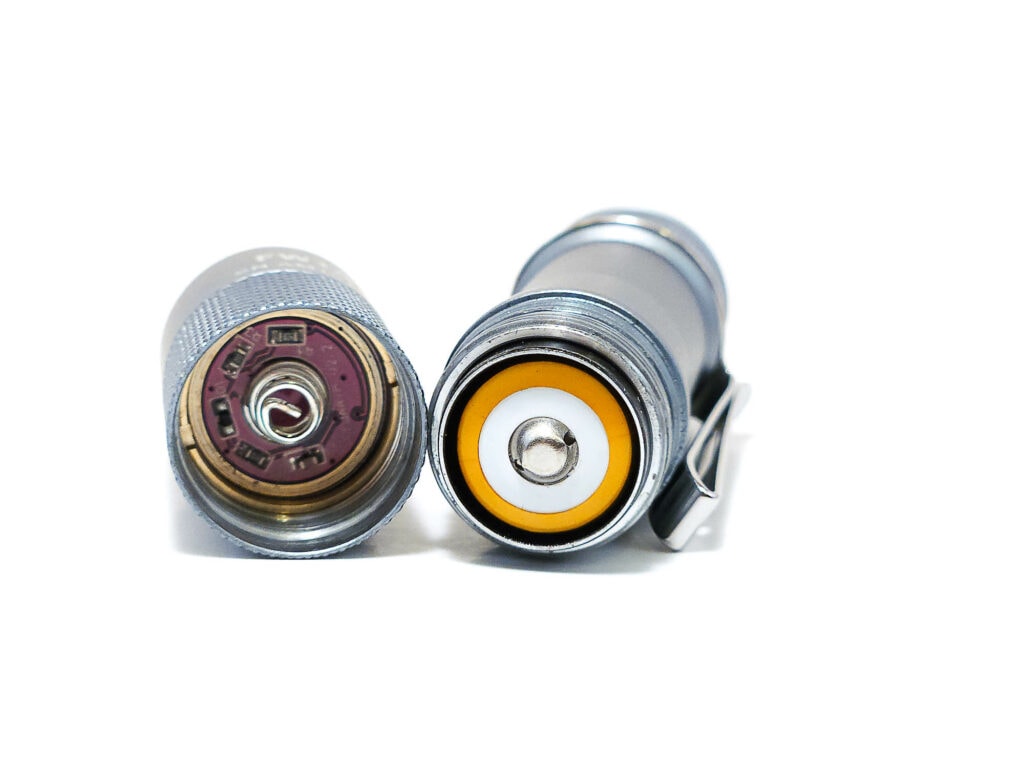
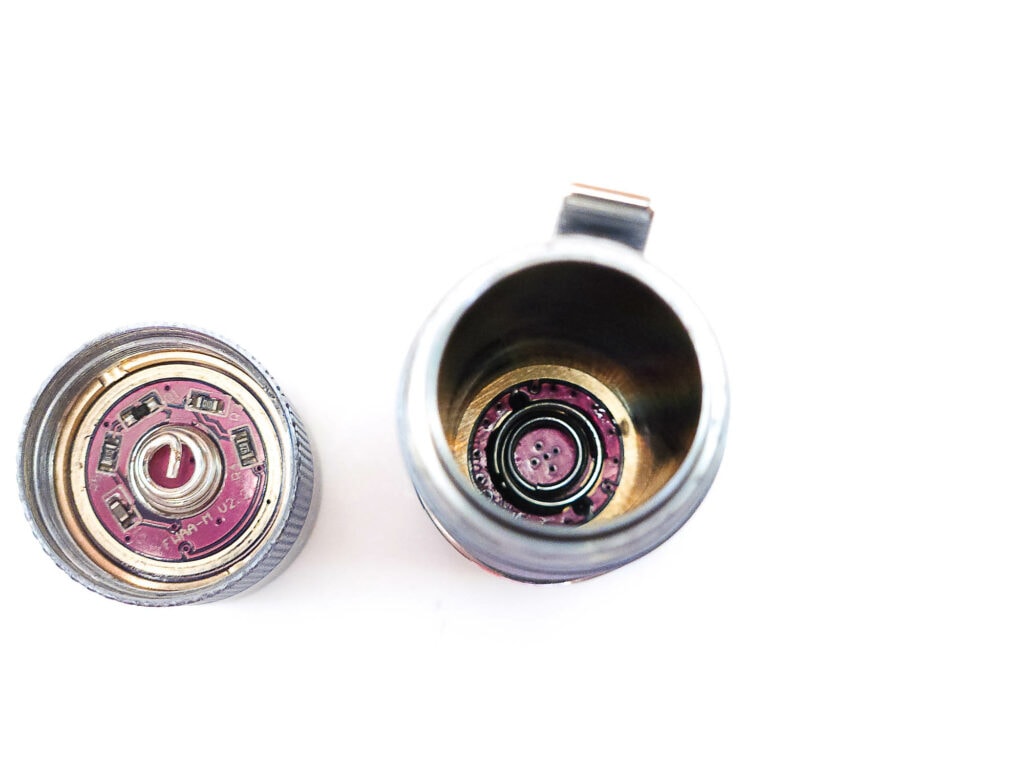
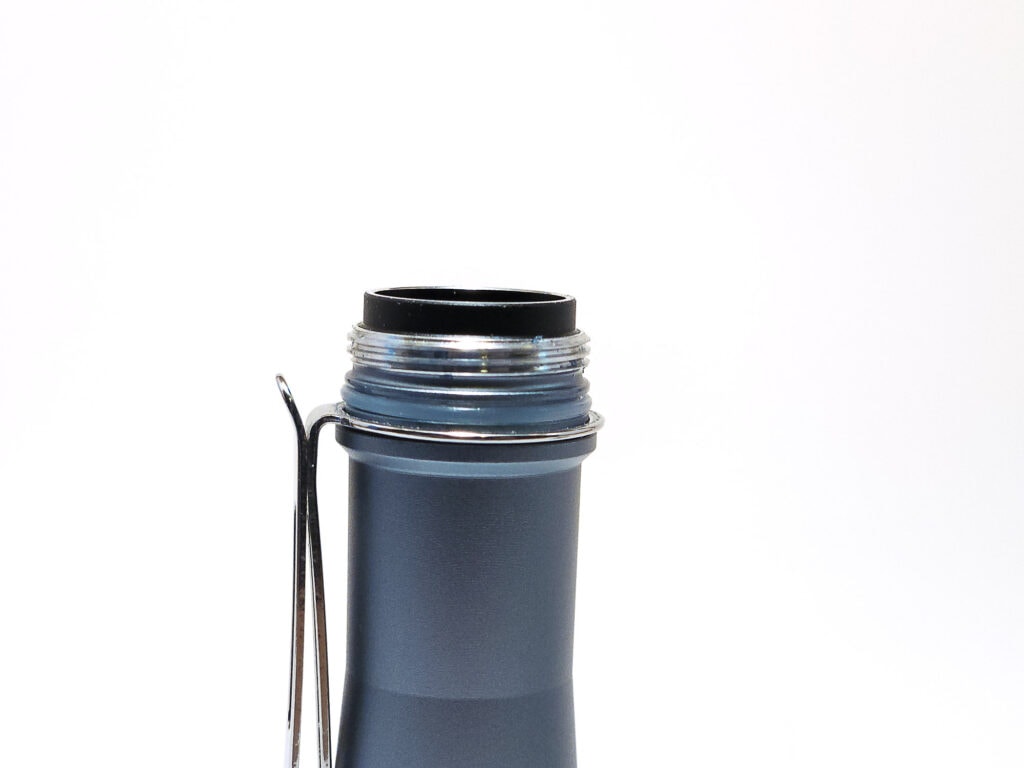
For the initial launch of the FW1AA, Lumintop produced it in aluminum, though many of their other lights eventually saw production in a variety of premium metals, including the FWAA. So, it’s a safe bet that the FW1AA will at some point, too. The anodization on this aluminum light is Lumintop’s signature blue-gray in a satin finish. The body threads are not anodized so mechanical lockout is not possible. This design uses an inner sleeve to carry the signal from the tail to the head, and that connects even before you begin threading the head on, which defeats mechanical lockout anyway. These threads are a little rougher than on other lights, and tightening the head feels fairly grating, especially first getting it started. The FW series has historically had problems with the switch in the tail cap coming apart (which is why it’s recommended to insert or remove the battery through the head as indicated on the card included in the box), but in the few times I’ve removed it for testing or pictures, I have not experienced that.
There are two accessories included with the FW1AA: A clip and a lanyard. There’s little to say about the lanyard; it’s just a standard lanyard. The clip is captured and bi-directional, and made from steel. It is not deep carry, but it does the job.
Lumintop’s standard warranty applies to the FW1AA. It includes free replacement for lights with manufacturing defects within 30 days of purchase, and free repairs for manufacturing-related issues, that is, not ordinary wear and tear, within 5 years of purchase, shipping excluded for both. You can read the full text on the site.
LED, Lens, Bezel, Beam, and Reflector
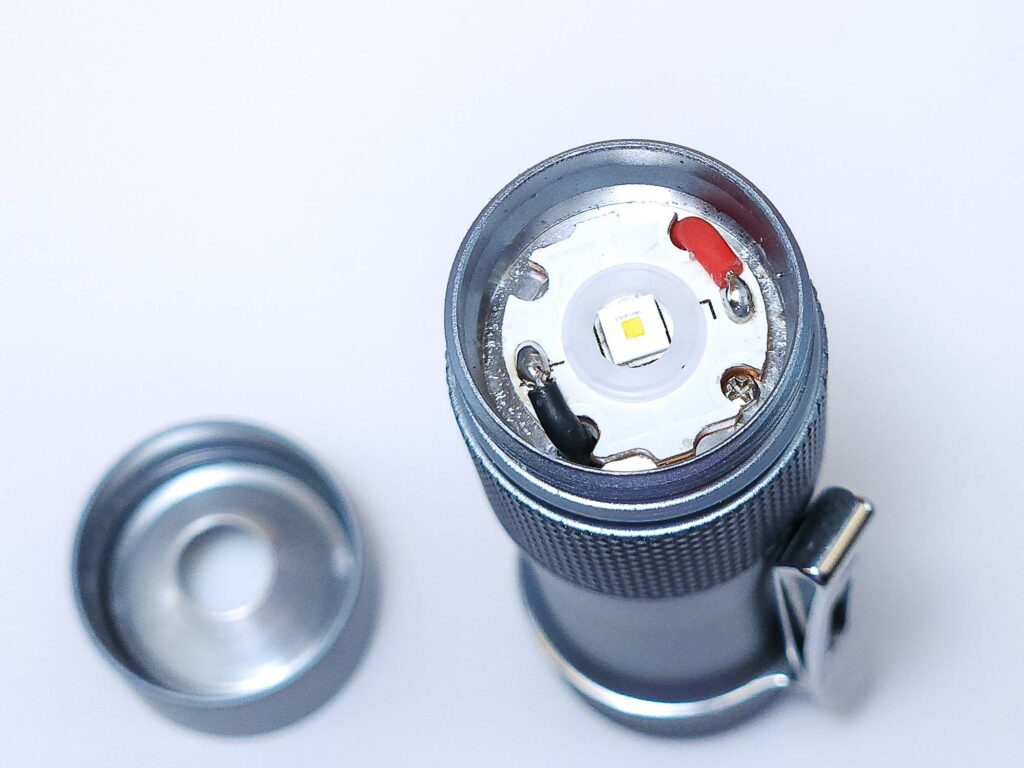
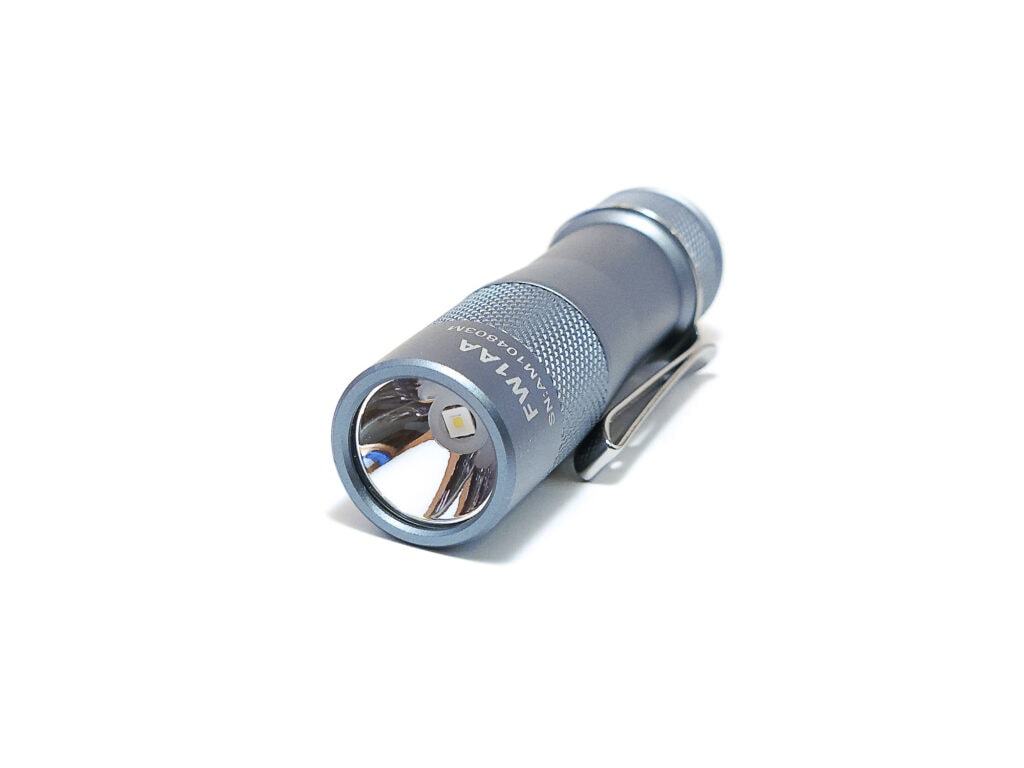
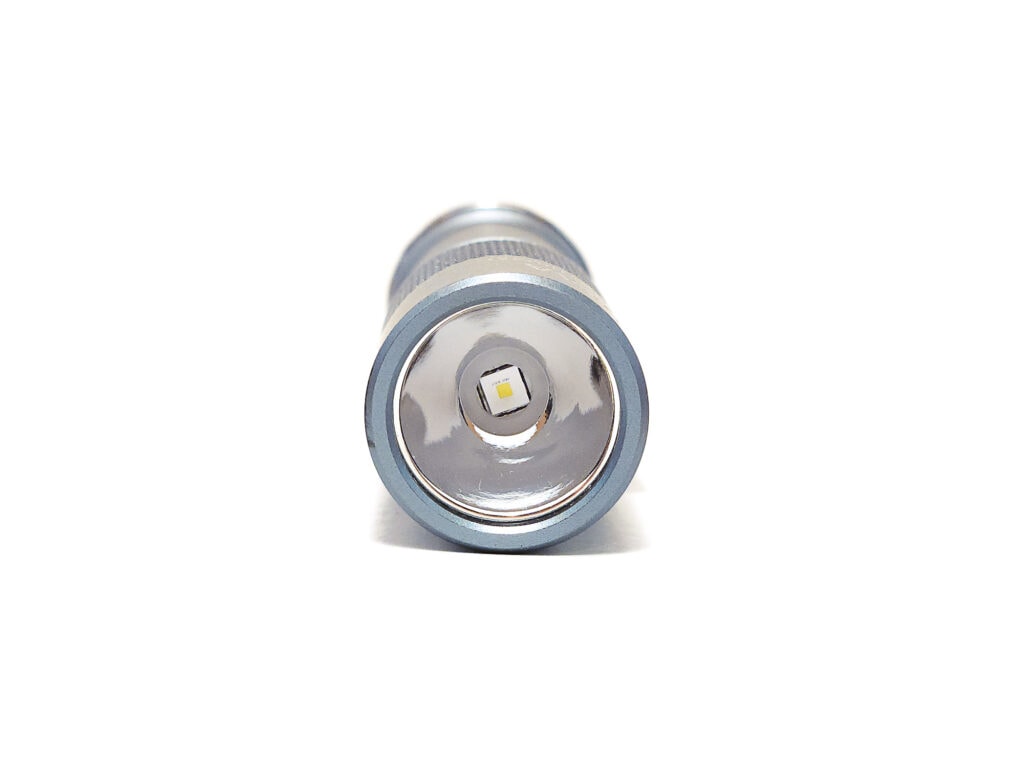
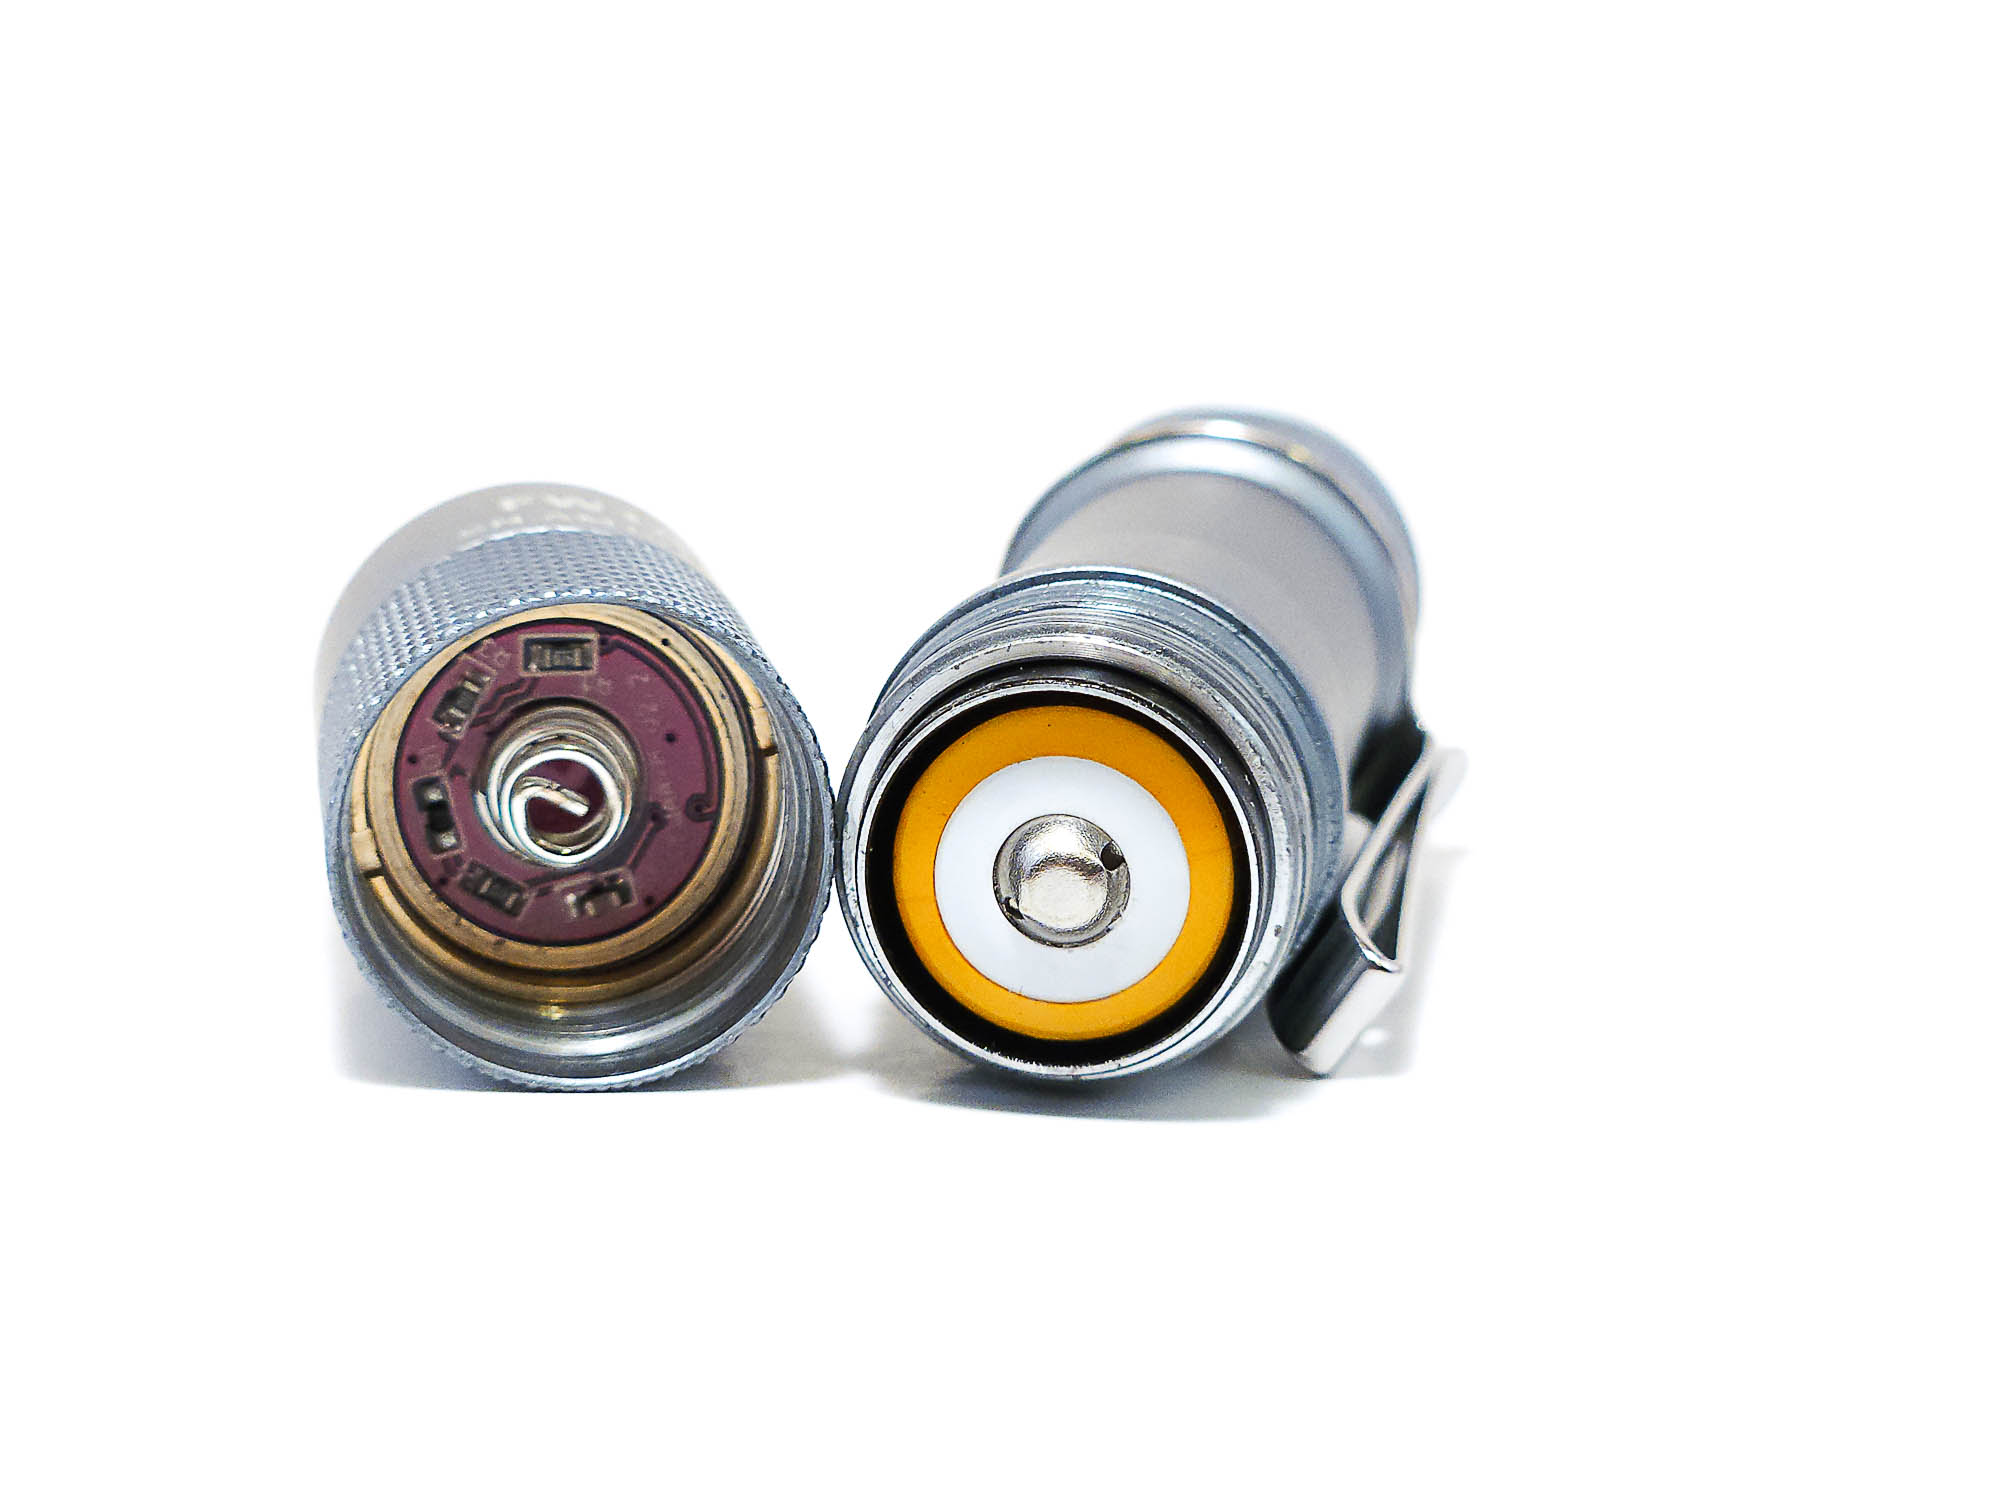
This test unit came with the Osram CSLNM1.TG emitter in 6500K, which is the option that will throw the farthest, especially paired with the smooth reflector which is used in the FW1AA. Interestingly, if you unscrew the aluminum bezel, the emitter and MCPCB are very easily accessible, making emitter swaps possible. The smooth reflector does have a tendency to reveal even the slightest misalignment in centering the emitter. Even with a centering ring, it’s possible to see that the hotspot is slightly uneven at short distances on an even surface at low power. This doesn’t affect the beam in regular use, though. Similarly, the smooth reflector causes artifacts in the hotspot due to the square, domeless emitter but again, only when you’re looking for them and not so much during actual use.
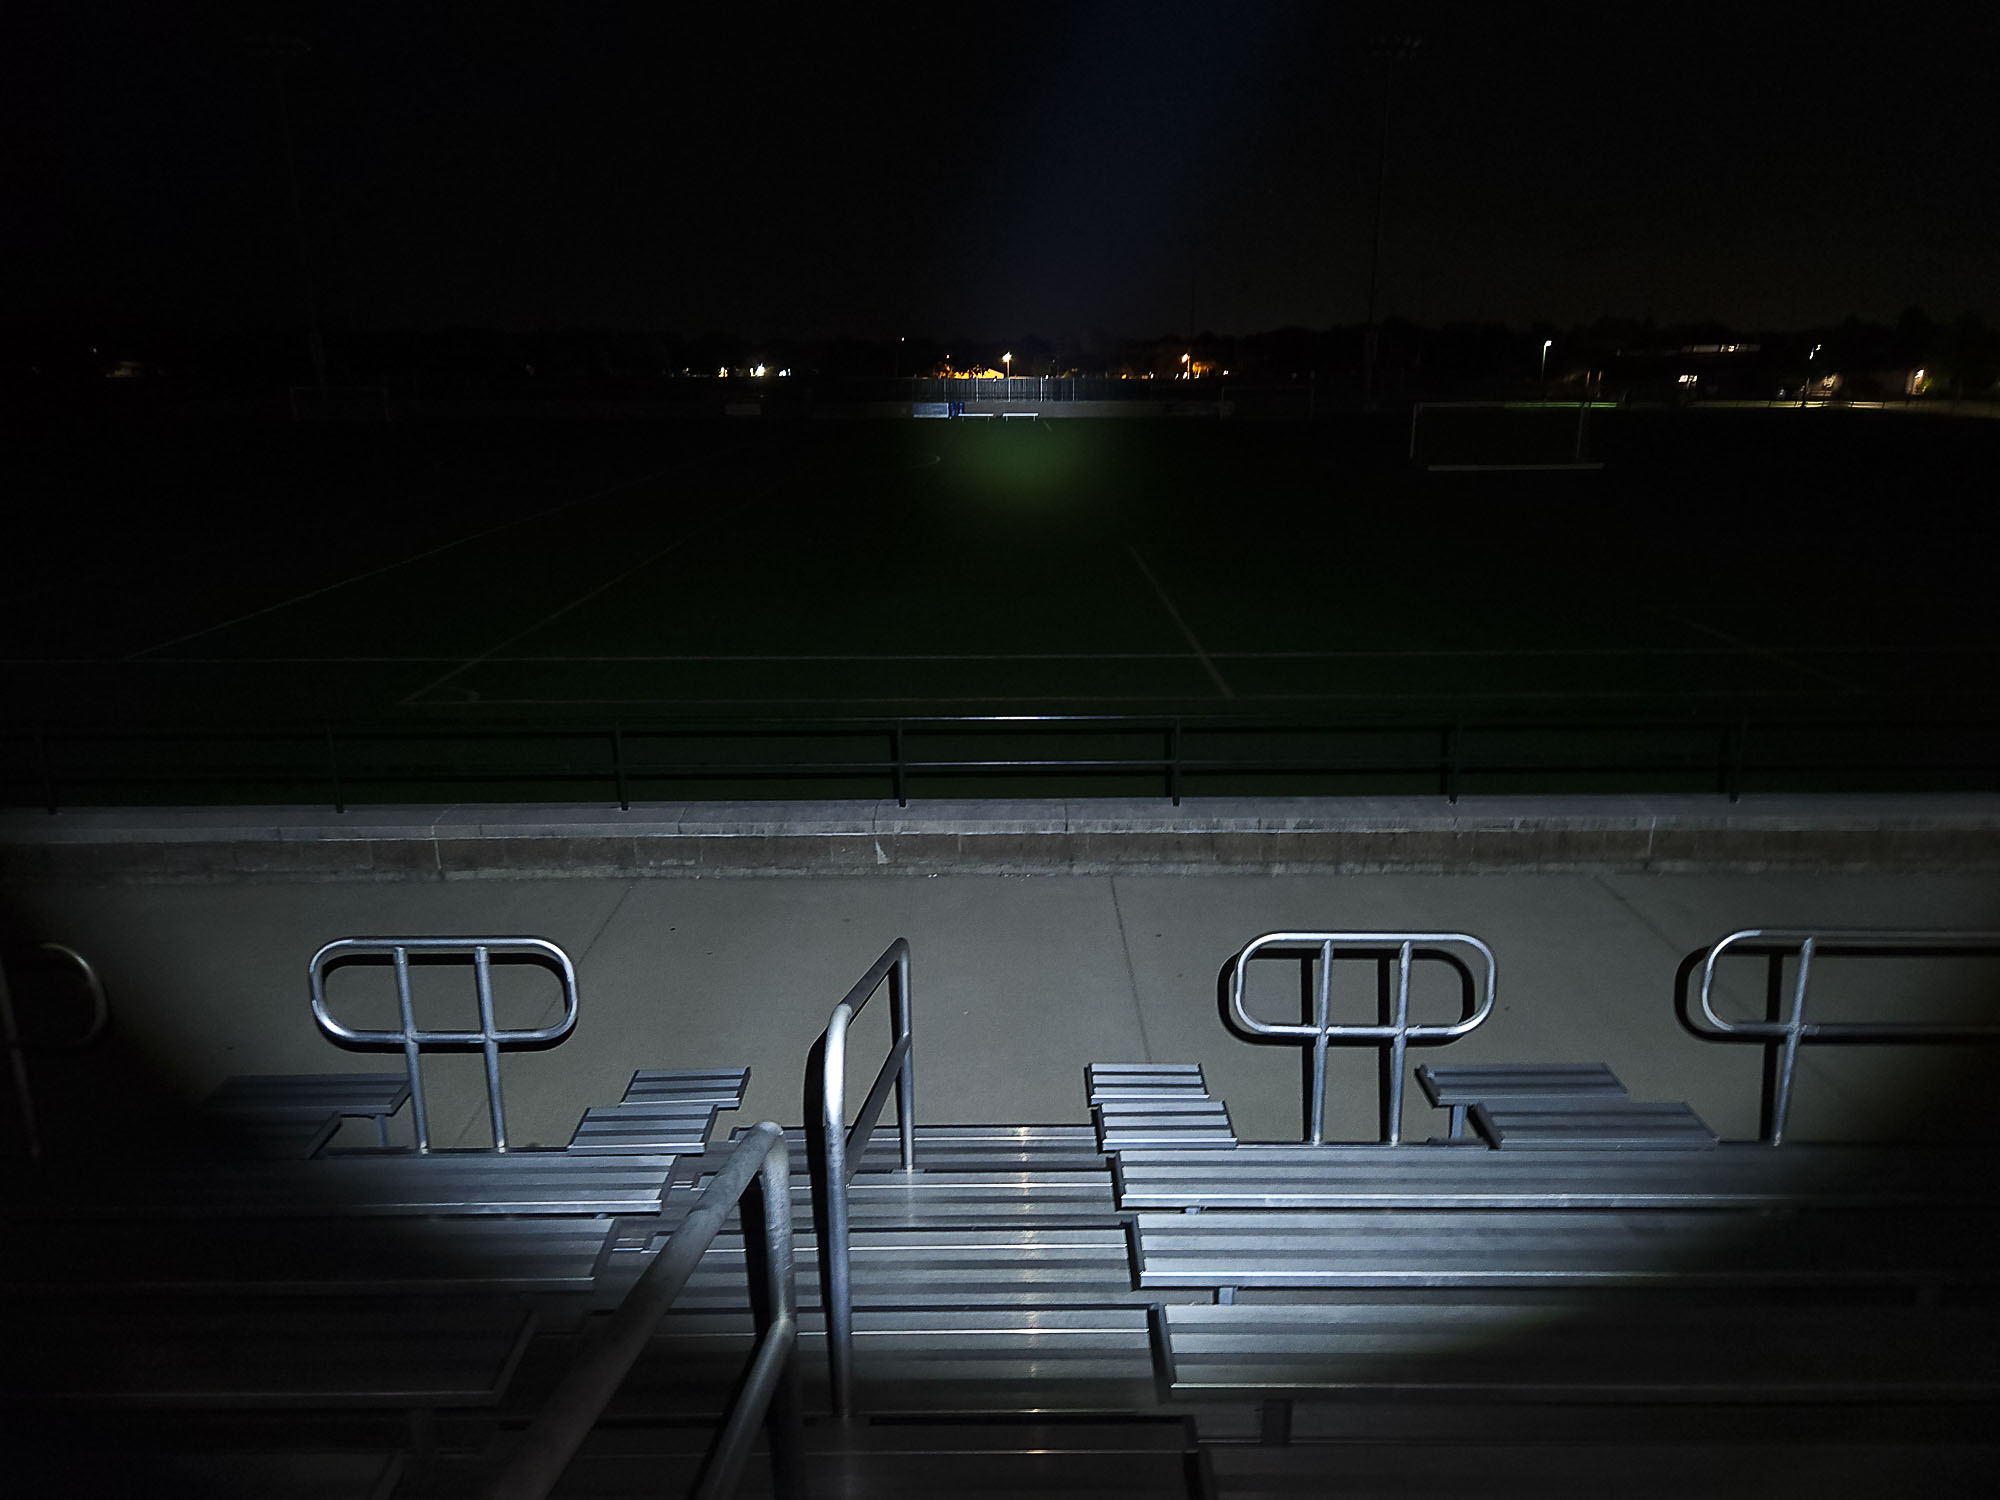
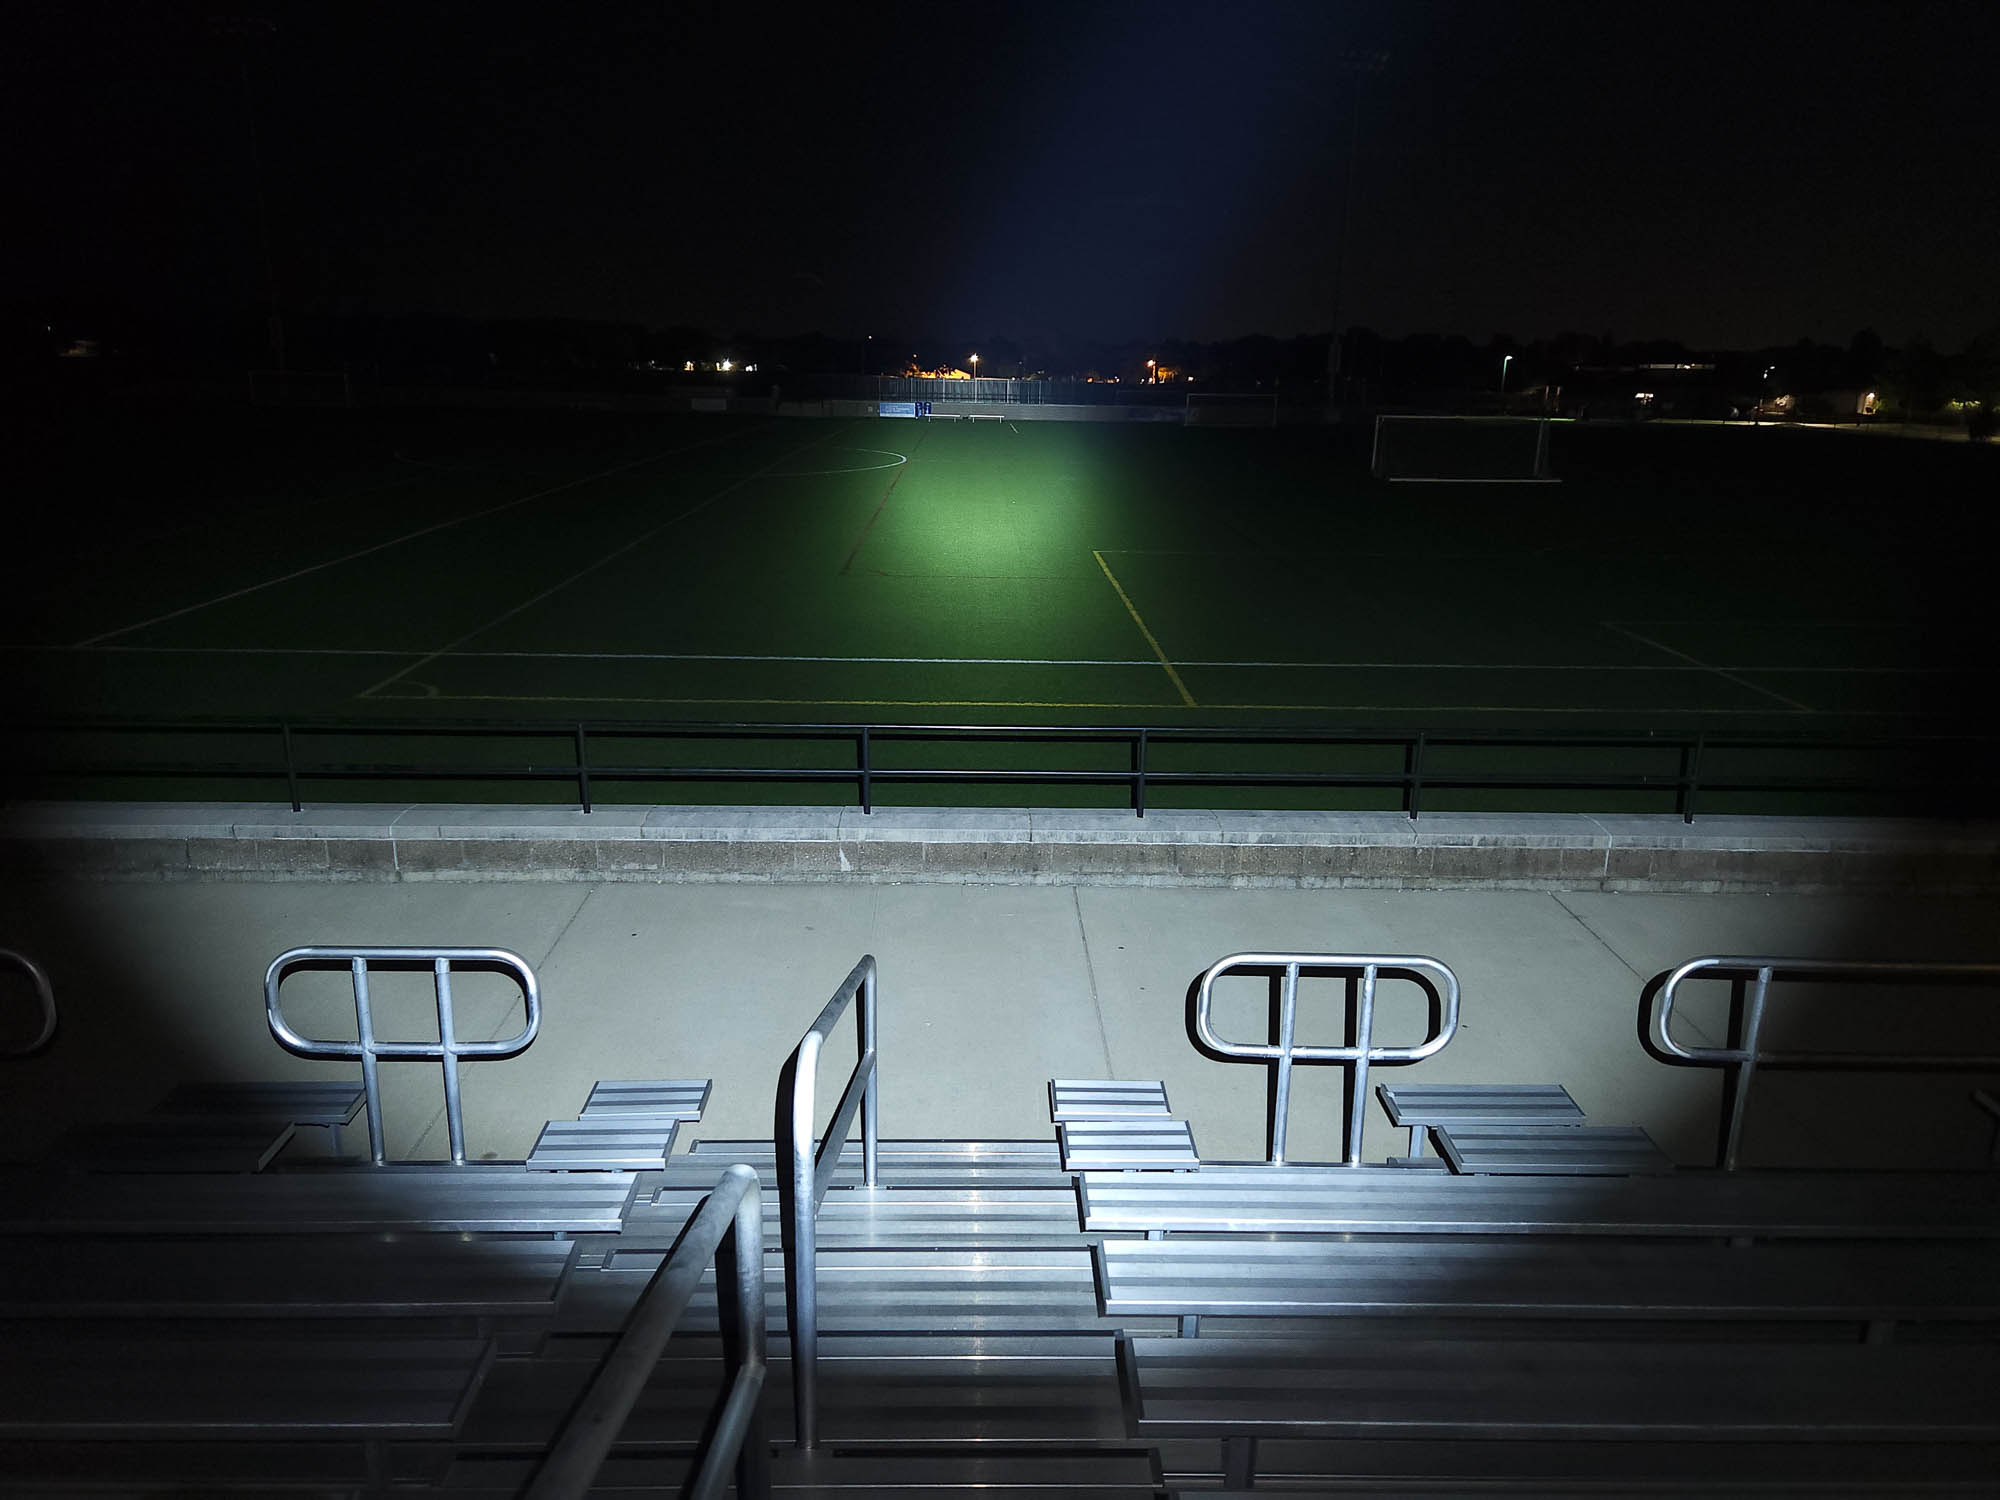
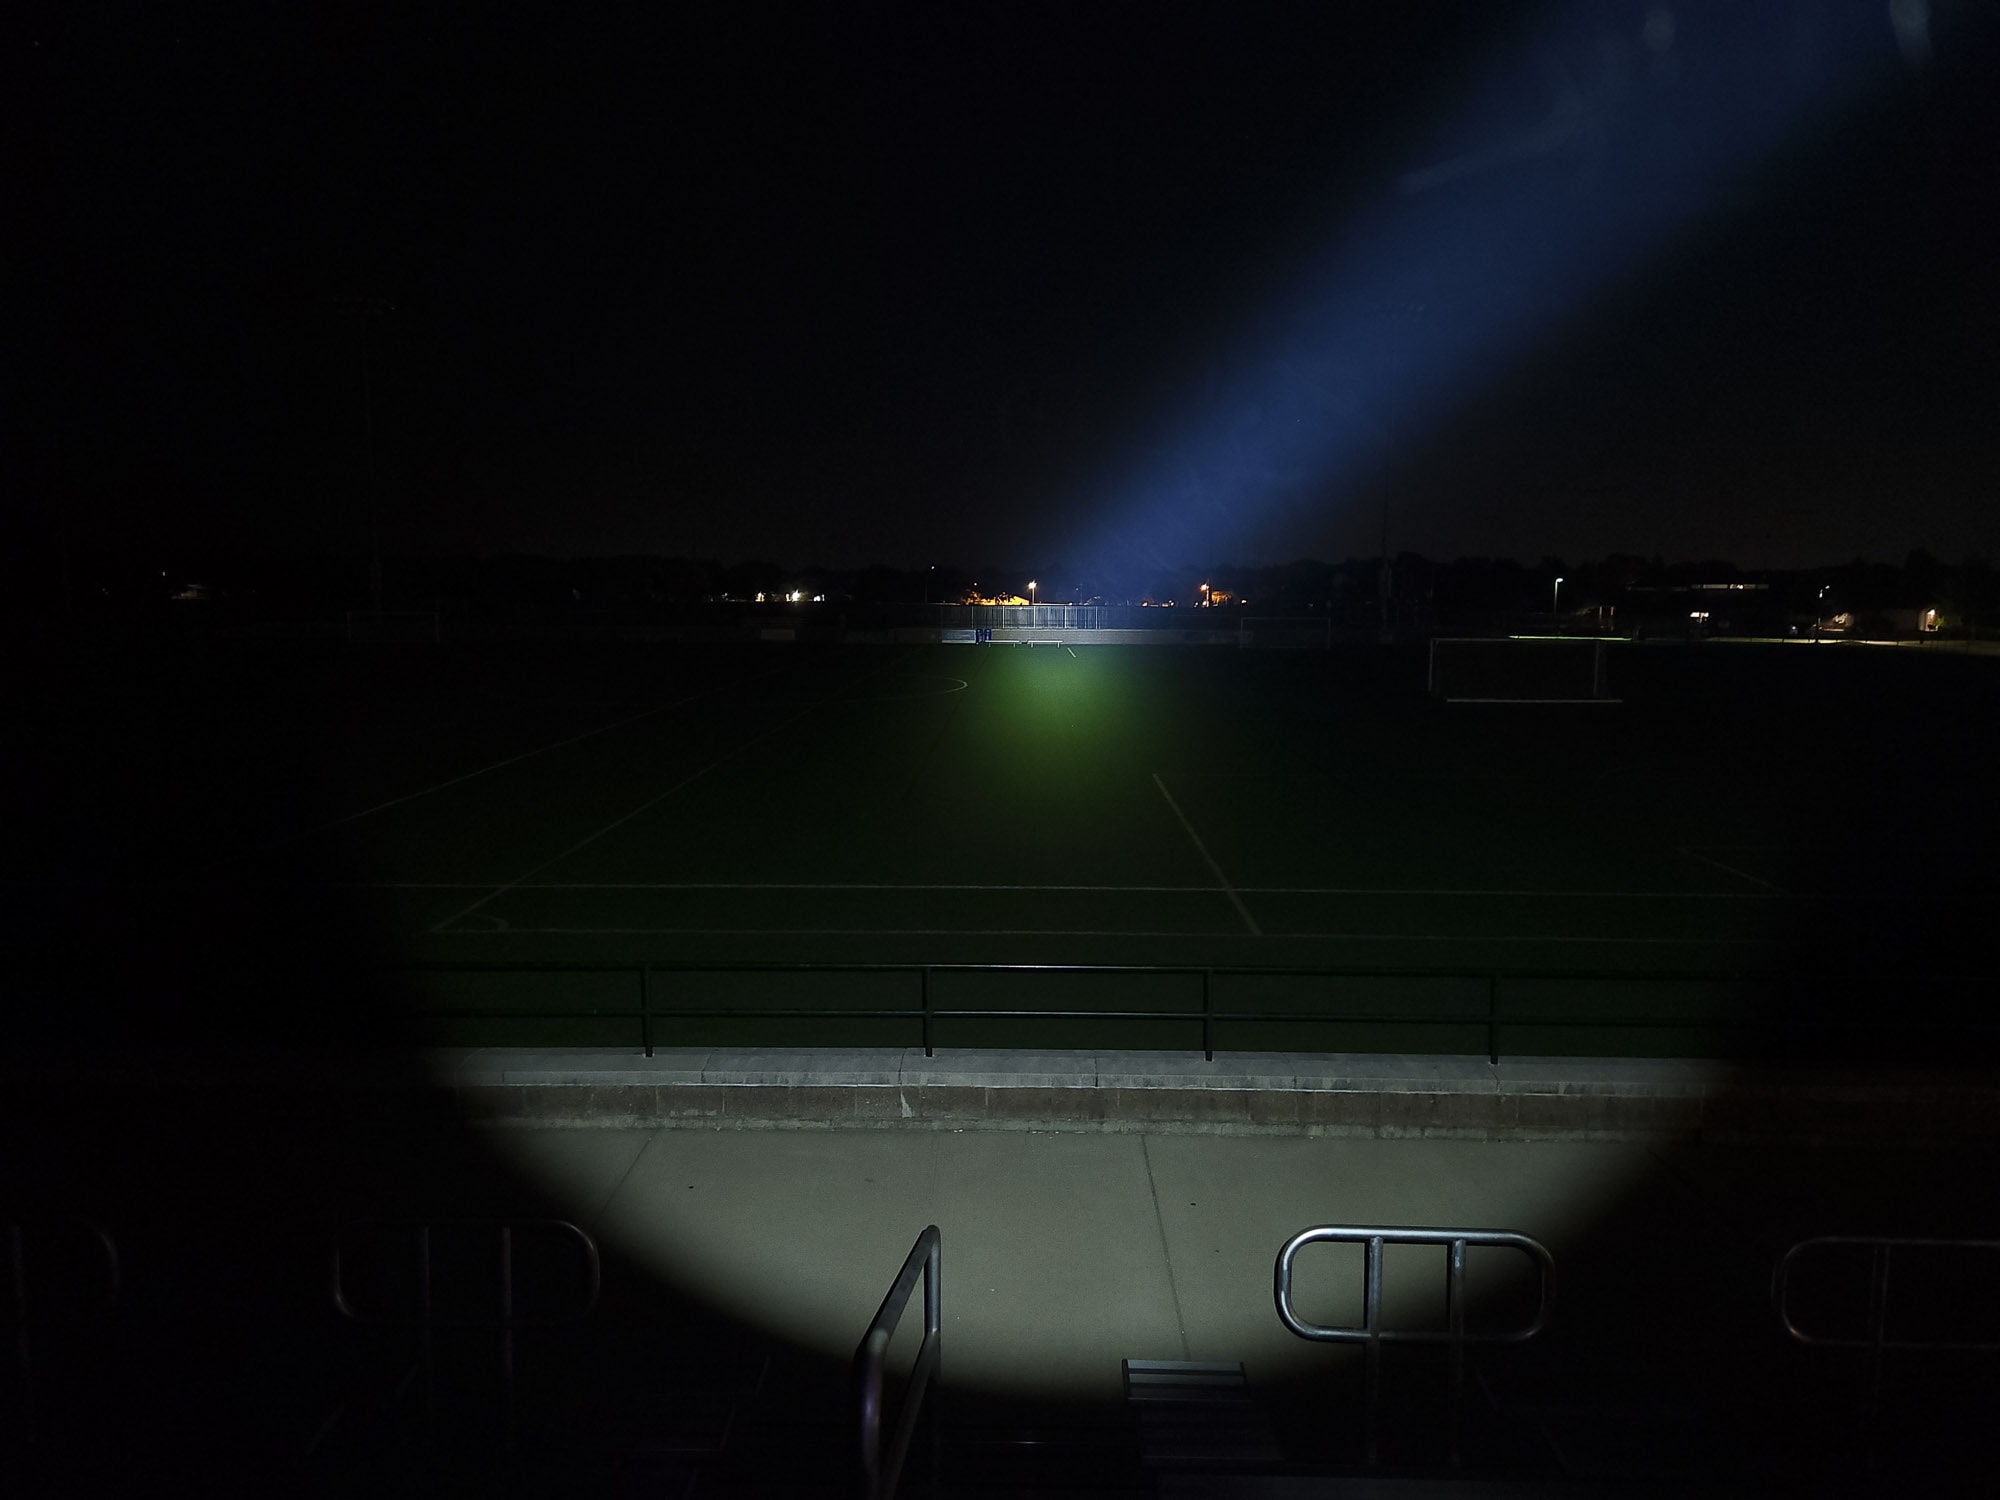
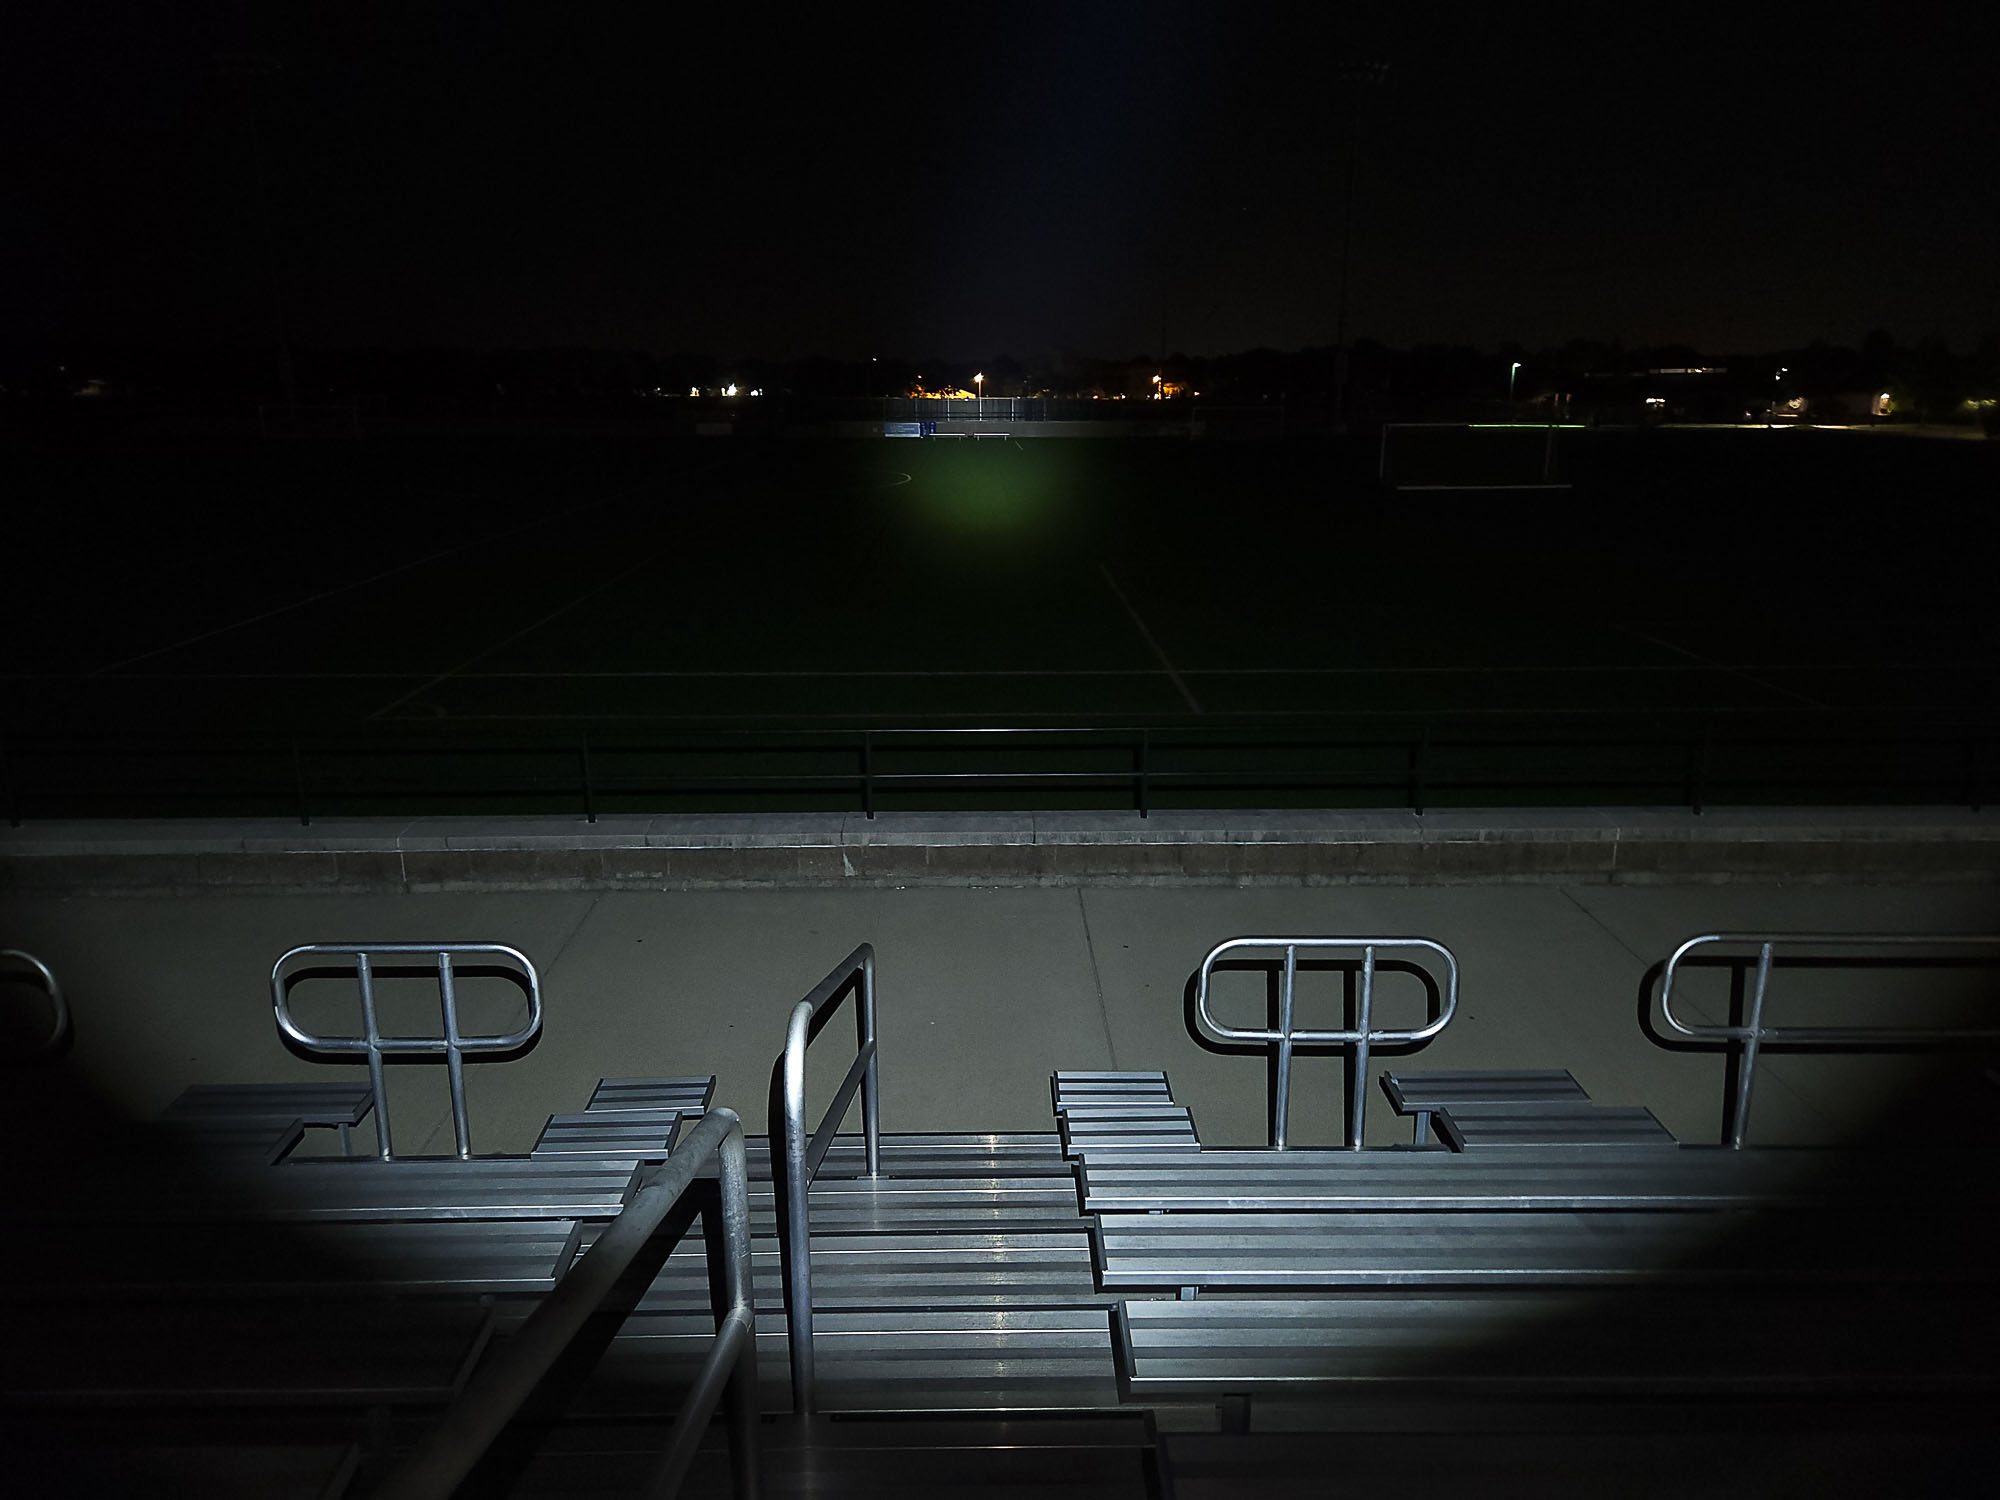
One thing to note is that the hotspot on this light is tiny. You will definitely see that in the beamshots. There is some usable spill, but that obviously doesn’t travel as far as the hotspot. It’s important to make sure you take a look at that and decide if that’s for you if you’re considering this light. This is really a function of the FW1AA being a small light with a small reflector. The edge of the hotspot can also be noticeably yellow, no matter the level of output.
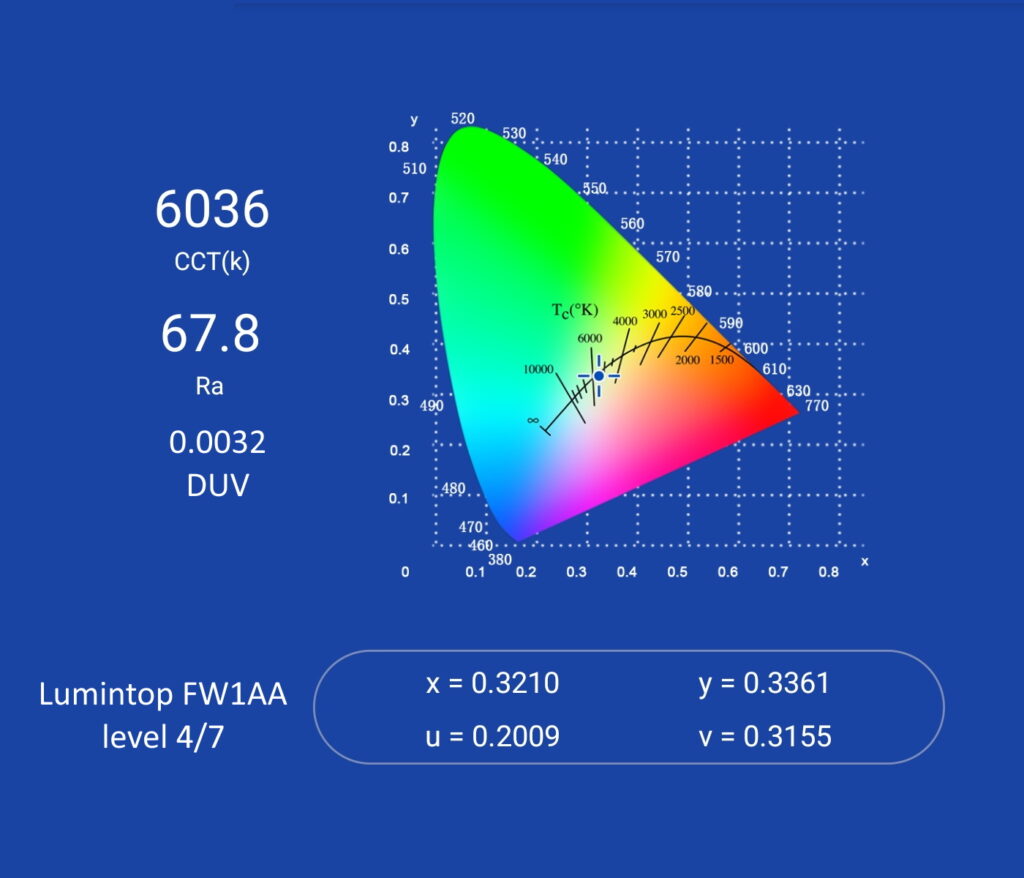
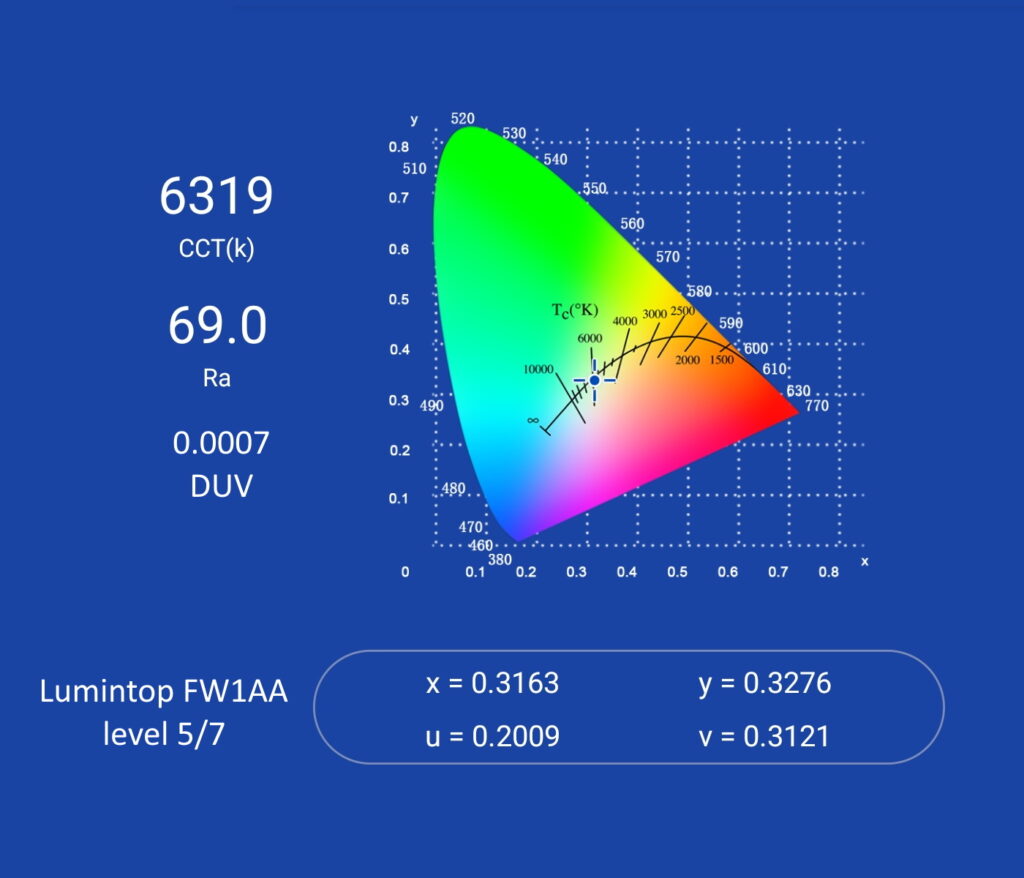
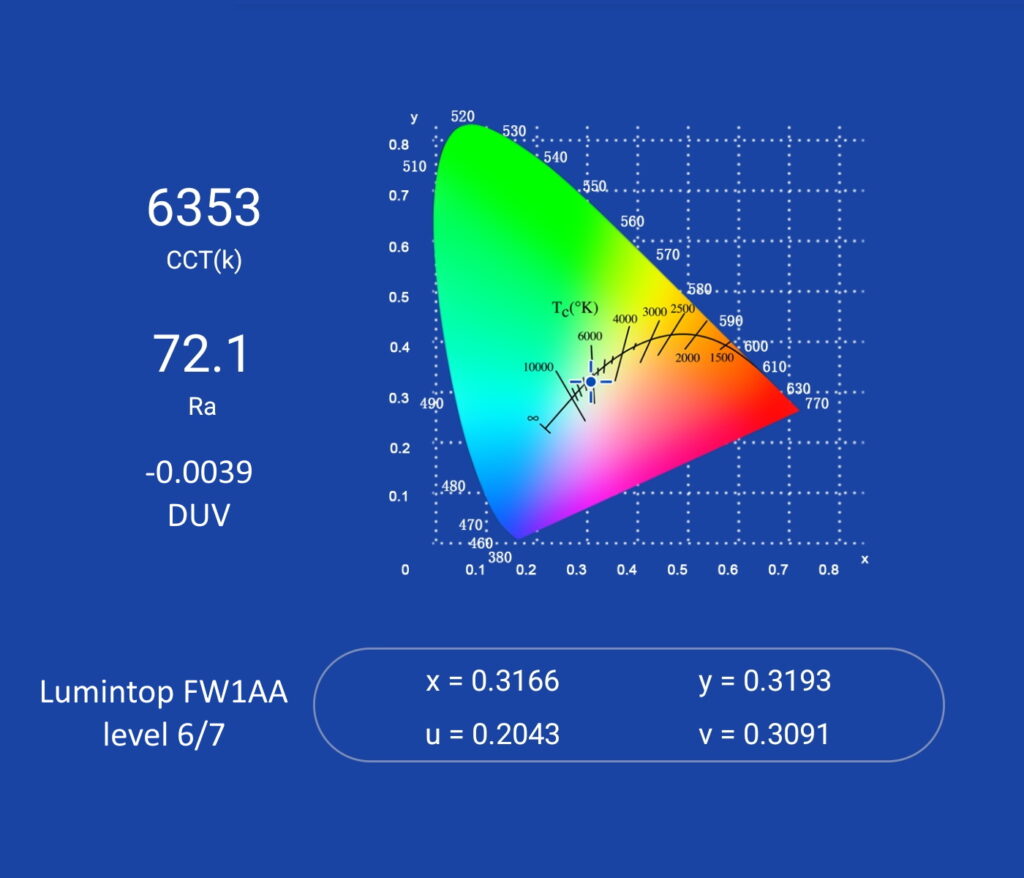
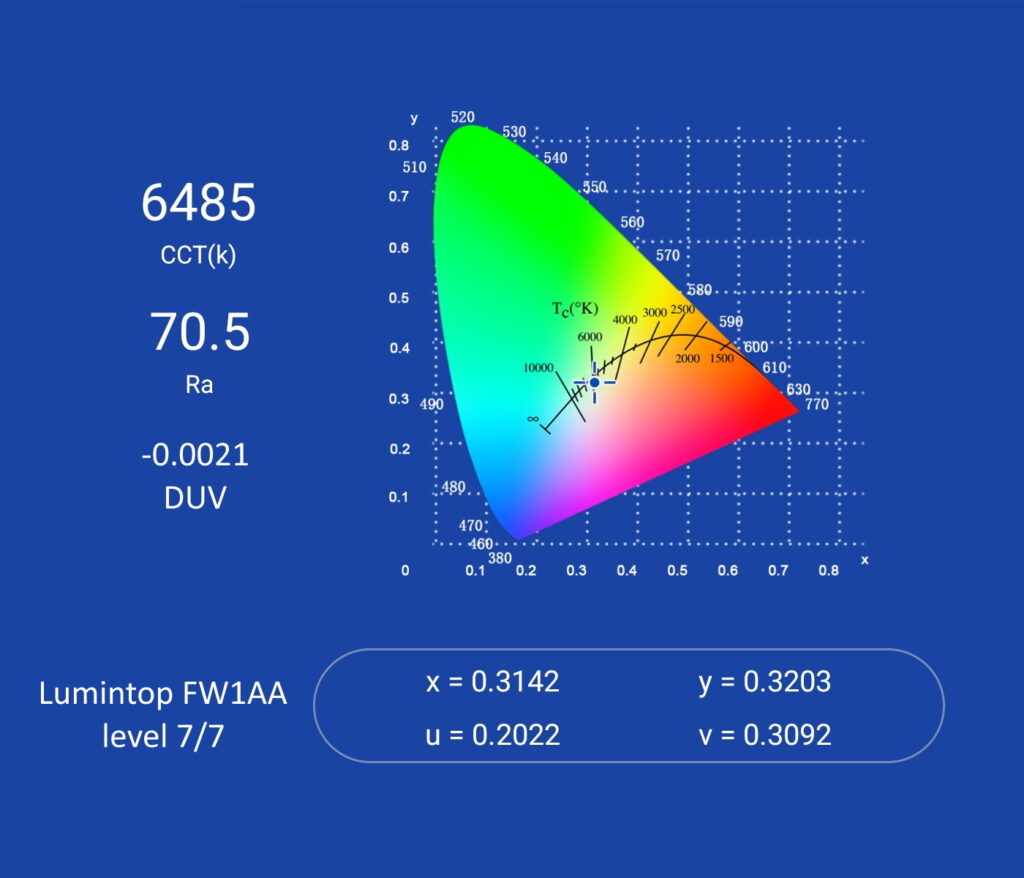
Any light with Anduril uses pulse width modulation to control the brightness. On the FW1AA, it’s very fast and unnoticeable to the naked eye, though it can be seen through a camera on the lower modes. Level 4, which is the first mode where the driver is using FET, looks to be the worst.
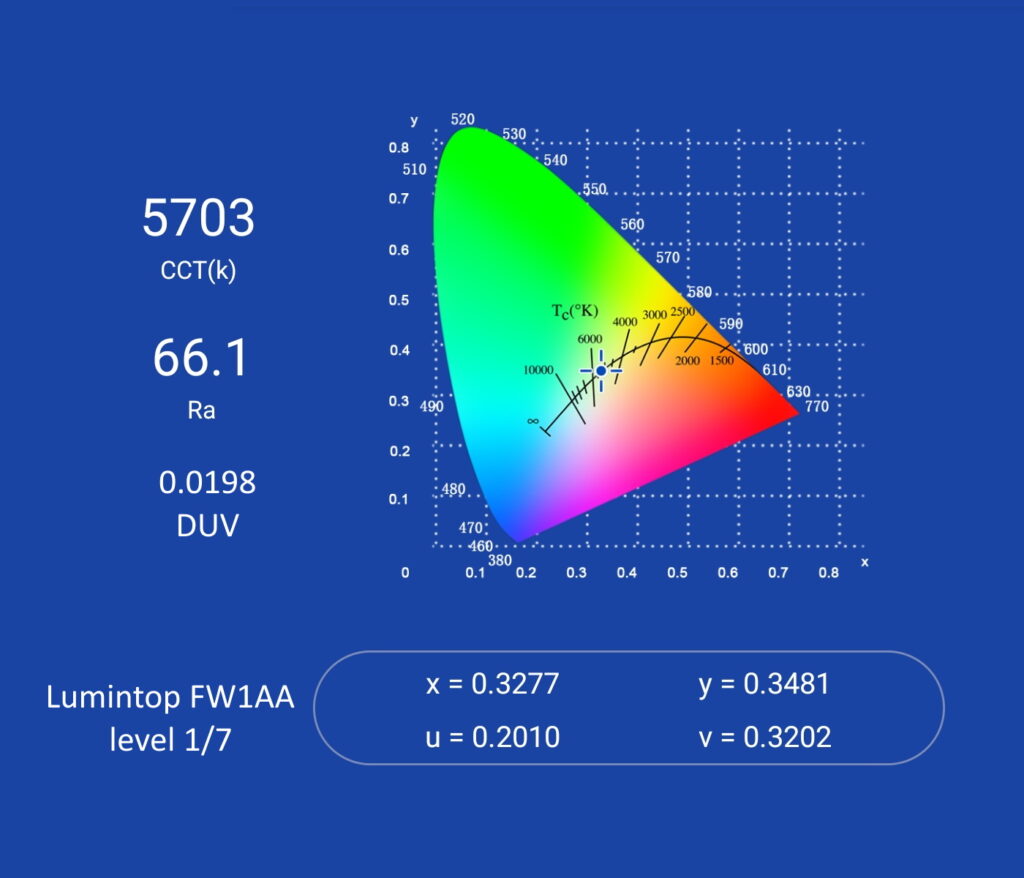
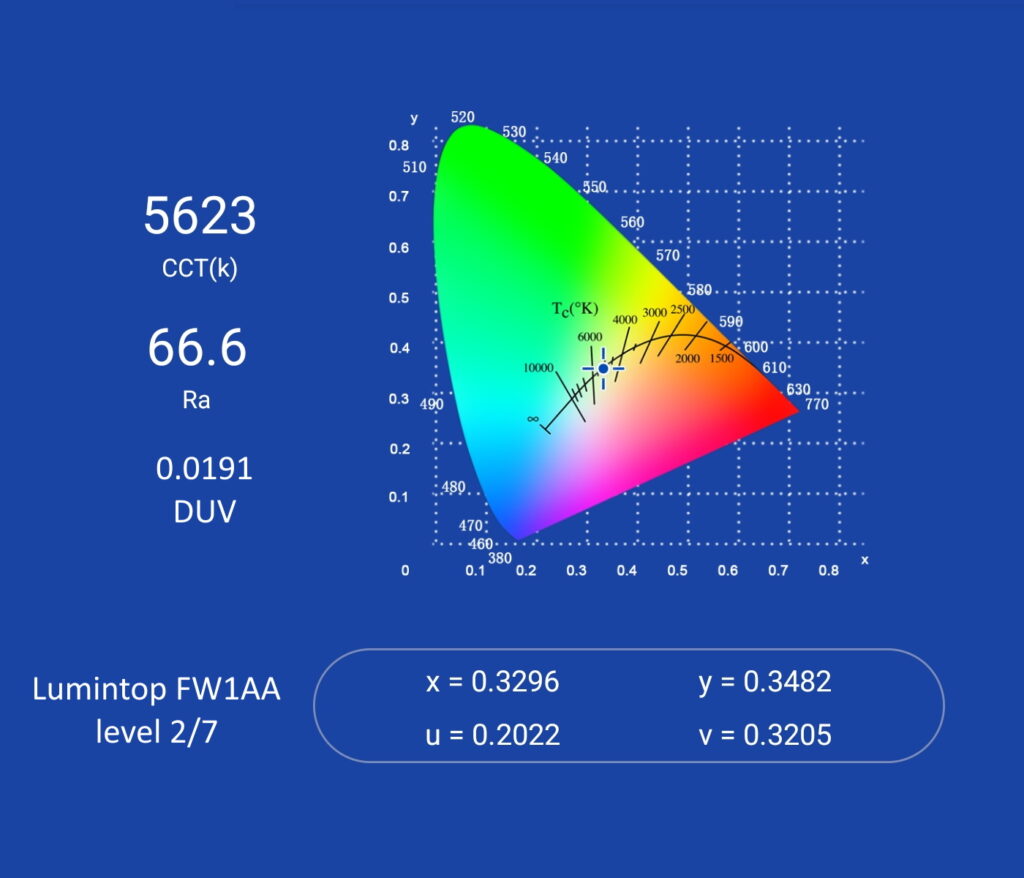
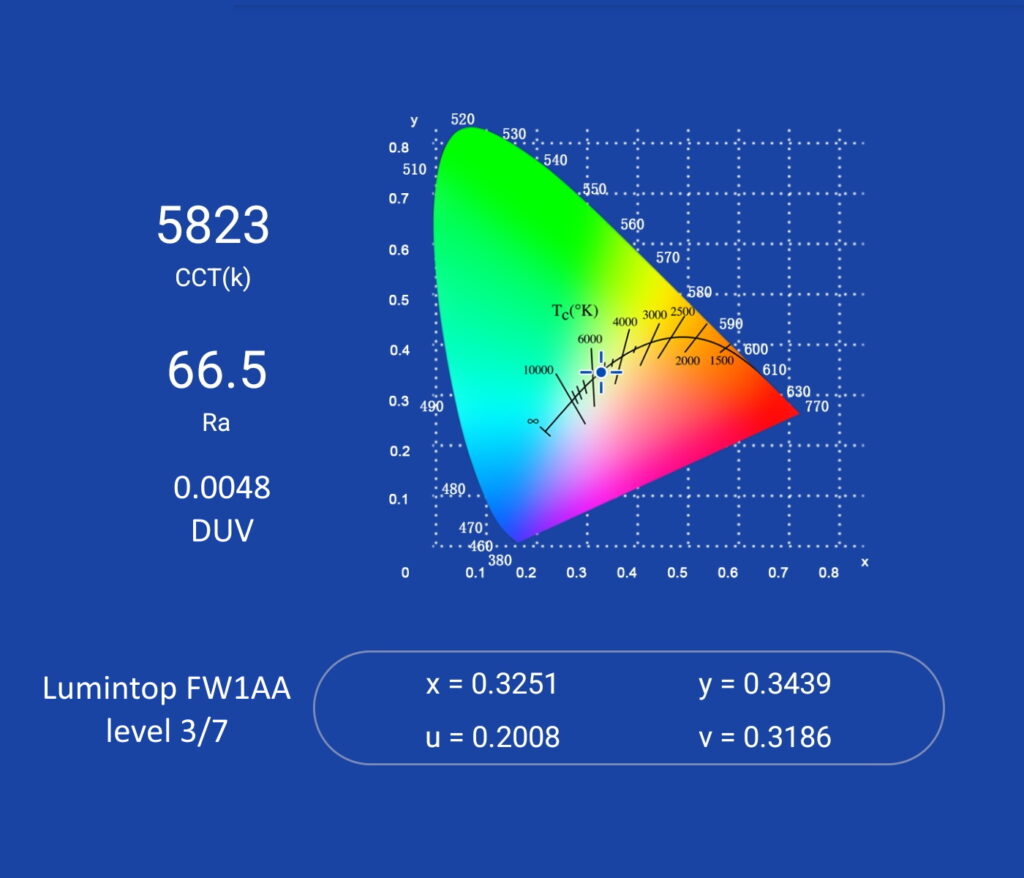
Dimensions and size comparison
Dimensions:
| Dimension | Millimeters | Inches |
|---|---|---|
| Length | 77.1 | 3.03 |
| Head diameter | 20.4 | 0.80 |
| Body diameter | 18.2 | 0.71 |
Weight:
| Weight | Grams | Oz. |
|---|---|---|
| Without battery: | 33 | 1.1 |
| With battery | 53 | 1.9 |
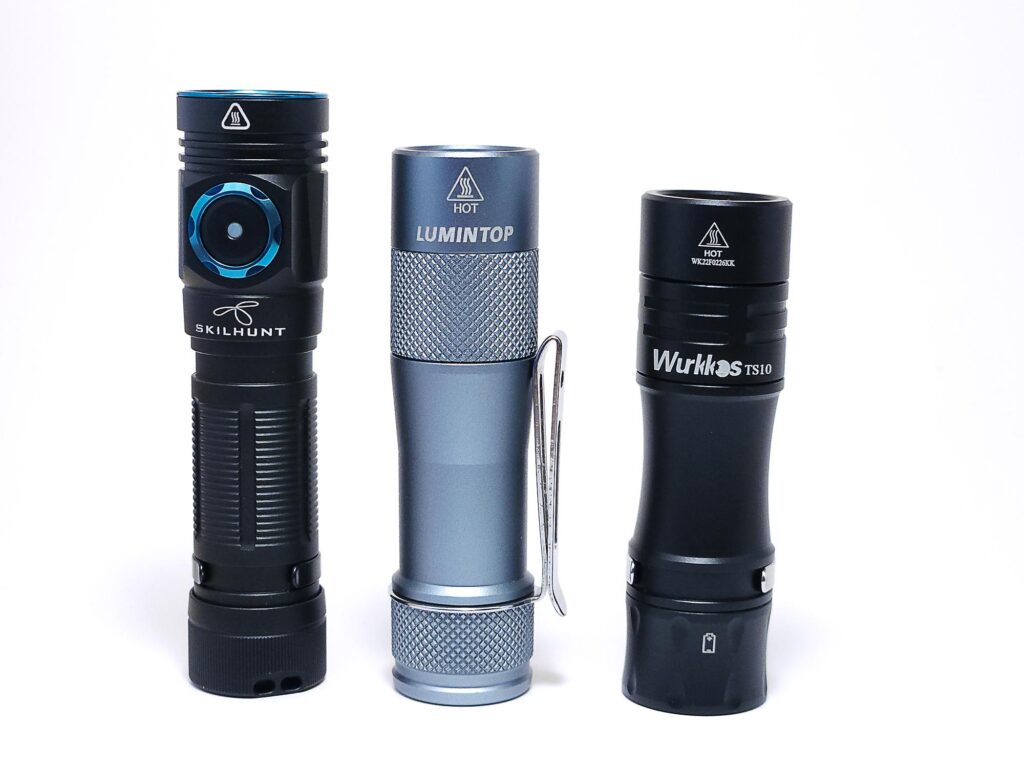
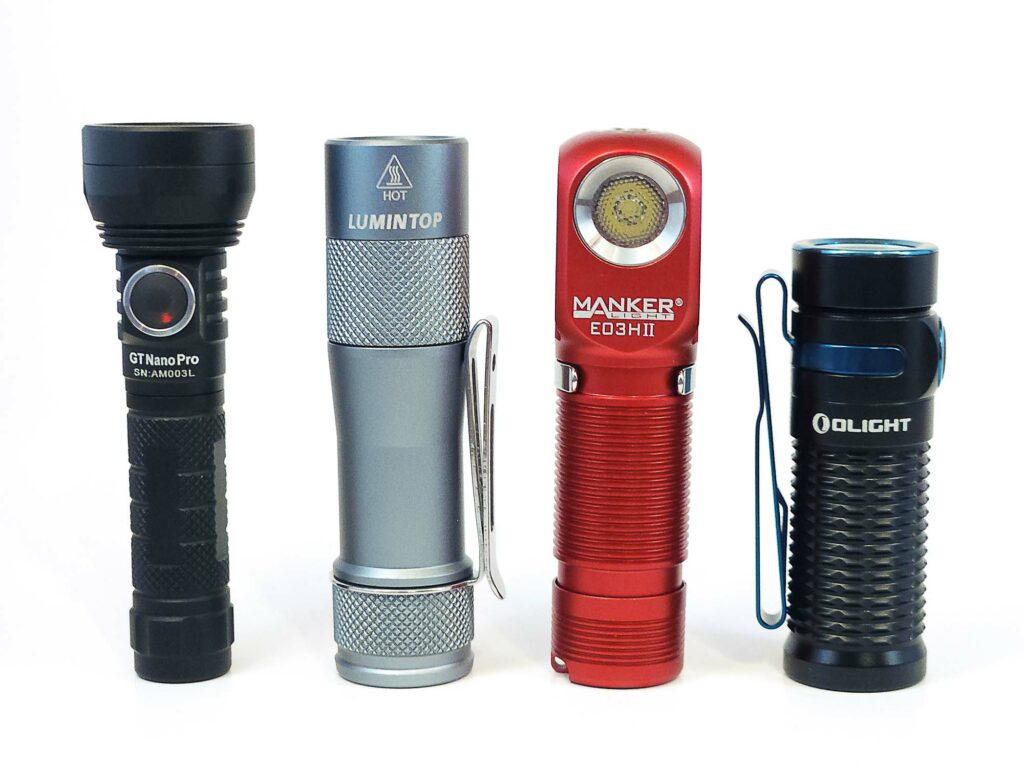
Flashlight size comparison with its competition
Group 1: Skilhunt M150 v2, Lumintop FW1AA, Wurkkos TS10
Group 2: Lumintop GT Nano Pro, Lumintop FW1AA, Manker E03H II, Olight Baton 3
The FW1AA stacks up (or down, depending on your point of view) against the competition in terms of size. Especially if you’re used to the 18650-sized FW series, the FW1AA will feel miniscule in your hand.
Driver & User Interface:
The FW1AA uses Anduril2 for its UI. The driver in this light is the same 1+FET as the FWAA, meaning it has one 7135 chip to power the low modes and one FET chip to power the high modes. In the case of the FW1AA, levels 1-3 use the 7135, and 4 and above use the FET. Like many Anduril lights, there is a slight blink when crossing the threshold between 7135 and FET while using smooth ramping, in either direction.
Anduril 2 User Interface
This Anduril 2 diagram and explanation below may not be 100% the same to the Lumintop FW1AA.
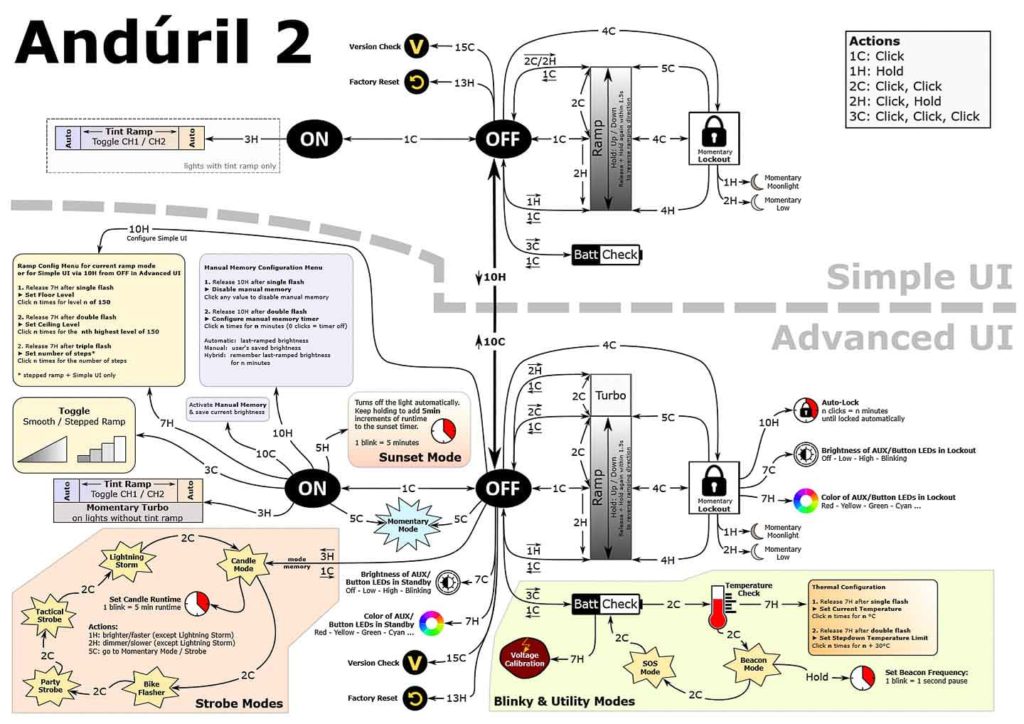
Here is another Anduril 2 image.
And by default, it uses the Simple UI… and here is the UI diagram:
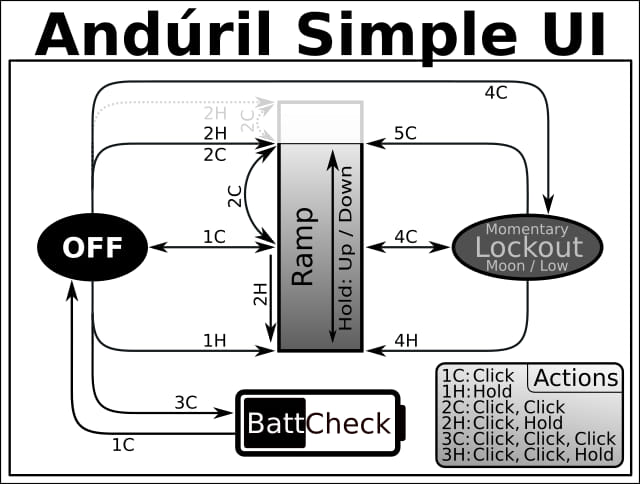
Anduril2 has two UI’s available: Simple and Advanced. The light came with the Simple UI enabled, and I think it’s kind of a misnomer because it’s still a little complicated for a first-time user. However, those familiar with the original will pick it up pretty quickly. Simple UI is missing some of the familiar features present in the original, namely the special blinky modes, temp check, and thermal configuration (those are present in the Advanced UI), and there’s no “muggle” mode either. You still get access to smooth ramping (stepped is, you guessed it, only available in Advanced UI), lockout, momentary high, battery check, and some useful lock/unlock modes.
The Advanced UI is appropriately named because it’s, well, advanced and there’s a plethora of options and configurations available. There’s probably way more features than the average user would ever dip into, but it’s nice to know you can tweak things like the voltage sensor calibration for batt check, AUX LED settings, and even configure the auto-lock. I found this to be a pretty useful feature that enables the light to automatically turn off after a certain amount of time if the light is accidentally activated.
Modes: Simple and Advanced UI both have many standard and blinky modes available, but the main modes are stepped and smooth ramping, but stepped ramping is only available in Advanced UI, and smooth is enabled in both Simple and Advanced.
Switch to Advanced UI from Simple: 10 clicks, but hold on the 10th click
From OFF:
- Press and hold: Turns on in either smooth or stepped ramp (depending on which mode is enabled)
- Single click: Turn on in last mode (step or ramp state-again depends on which mode)
- Double click: Ramp ceiling/turbo
- Triple click: Battery check (in Simple and Advanced UI)
- Triple click and hold: Special strobe modes-remembers last used (in Advanced UI)
- Quad click: Lockout mode. In lockout mode you have different options available:
- 1 click: momentary moon (bottom of ramp)
- 2 clicks: momentary (higher floor)
- 4 clicks: turns on in ramp mode
- 4 clicks with a hold: on in ramp mode, lowest/floor
- 5 clicks with a hold: on in ramp mode, highest/ceiling
- 10 clicks with a hold: configure the lock timeout threshold (in Advanced UI only). This is a new feature for Anduril2, it allows you to set a timeout to the lock, where the light will lock after a pre-set elapsed time.
From ON:
- Press and hold: Ramp up (depending on the mode)
- Single click: Turn off
- Double click: Ramp ceiling/turbo
- Double click and hold: Ramp down
- Triple click: Toggle between smooth and stepped ramping (in Advanced UI only)
- Quad click: Lockout mode (see above for the lockout options)
Mode memory:
- Yes, memorizes last on state setting either smooth or stepped ramping, but does not remember blinkies
Low voltage warning:
- Yes, when in operation, the light steps down brightness gradually until turning off when the cell is around 2.96 volts.
Strobe/blinkies
- Yes, many! The blinkies are accessible from off with 3H (click click click-hold) in ADVANCED UI only. You switch between strobe modes with 2 clicks:
- Candle mode
- Bike flasher
- Party strobe
- Tactical strobe
- Lightning storm
Lock-out mode:
- Yes. In Simple or Advanced UI, lockout is accessed by 4 clicks from on or off. 4 clicks to unlock. The lockout enables momentary operation in the moon mode, however, 2H (click click-hold) enables low mode. There are other lockout modes available (see the diagram).
Temp check and thermal calibration mode
- In the first version, you could do both the ambient temperature sensor calibration and thermal ceiling at the same time, but in Anduril2, it’s a little different. When in temp check, click 7 times and hold on the 7th to enter the thermal configuration. To configure the ambient temp, wait for the first flash and then set the ambient, but once you’ve done that, you need to go back to the temp check and click 7 times, hold on the 7th, this time, don’t let off the button. Wait for the 2nd blink, and then you can set the thermal ceiling.
PWM
- There’s PWM visible via camera, but when pointing the light at a fan and ramping up and down, there’s not a noticeable change in “blade speed” as you might get with some other lights, so it’s not hugely visible to the eye.
Batteries & Charging
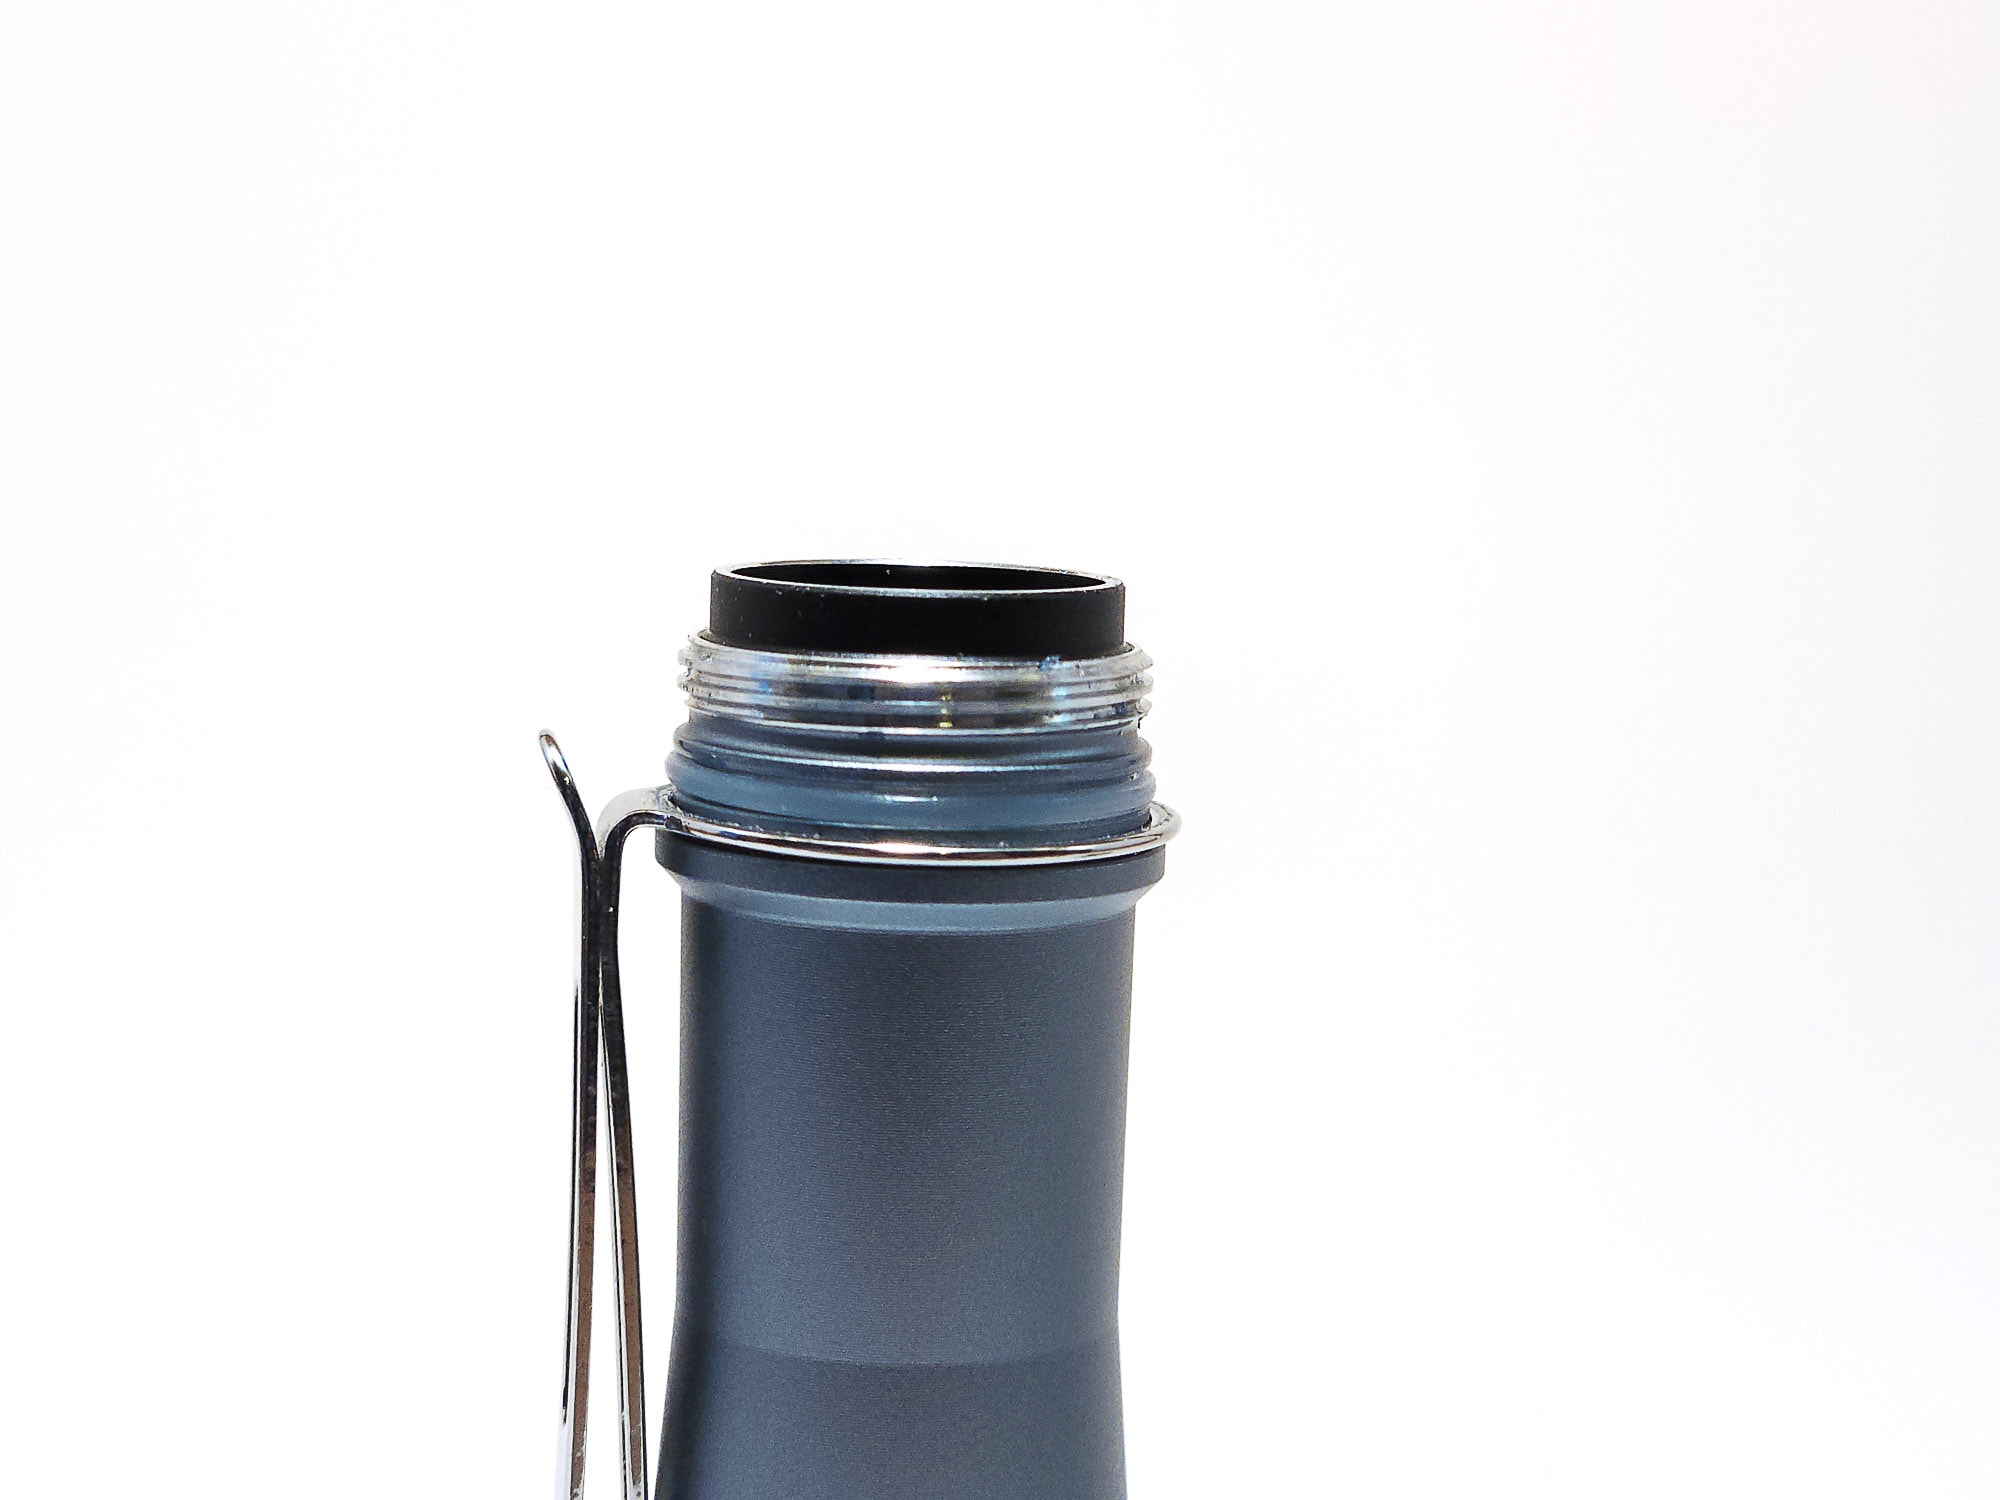
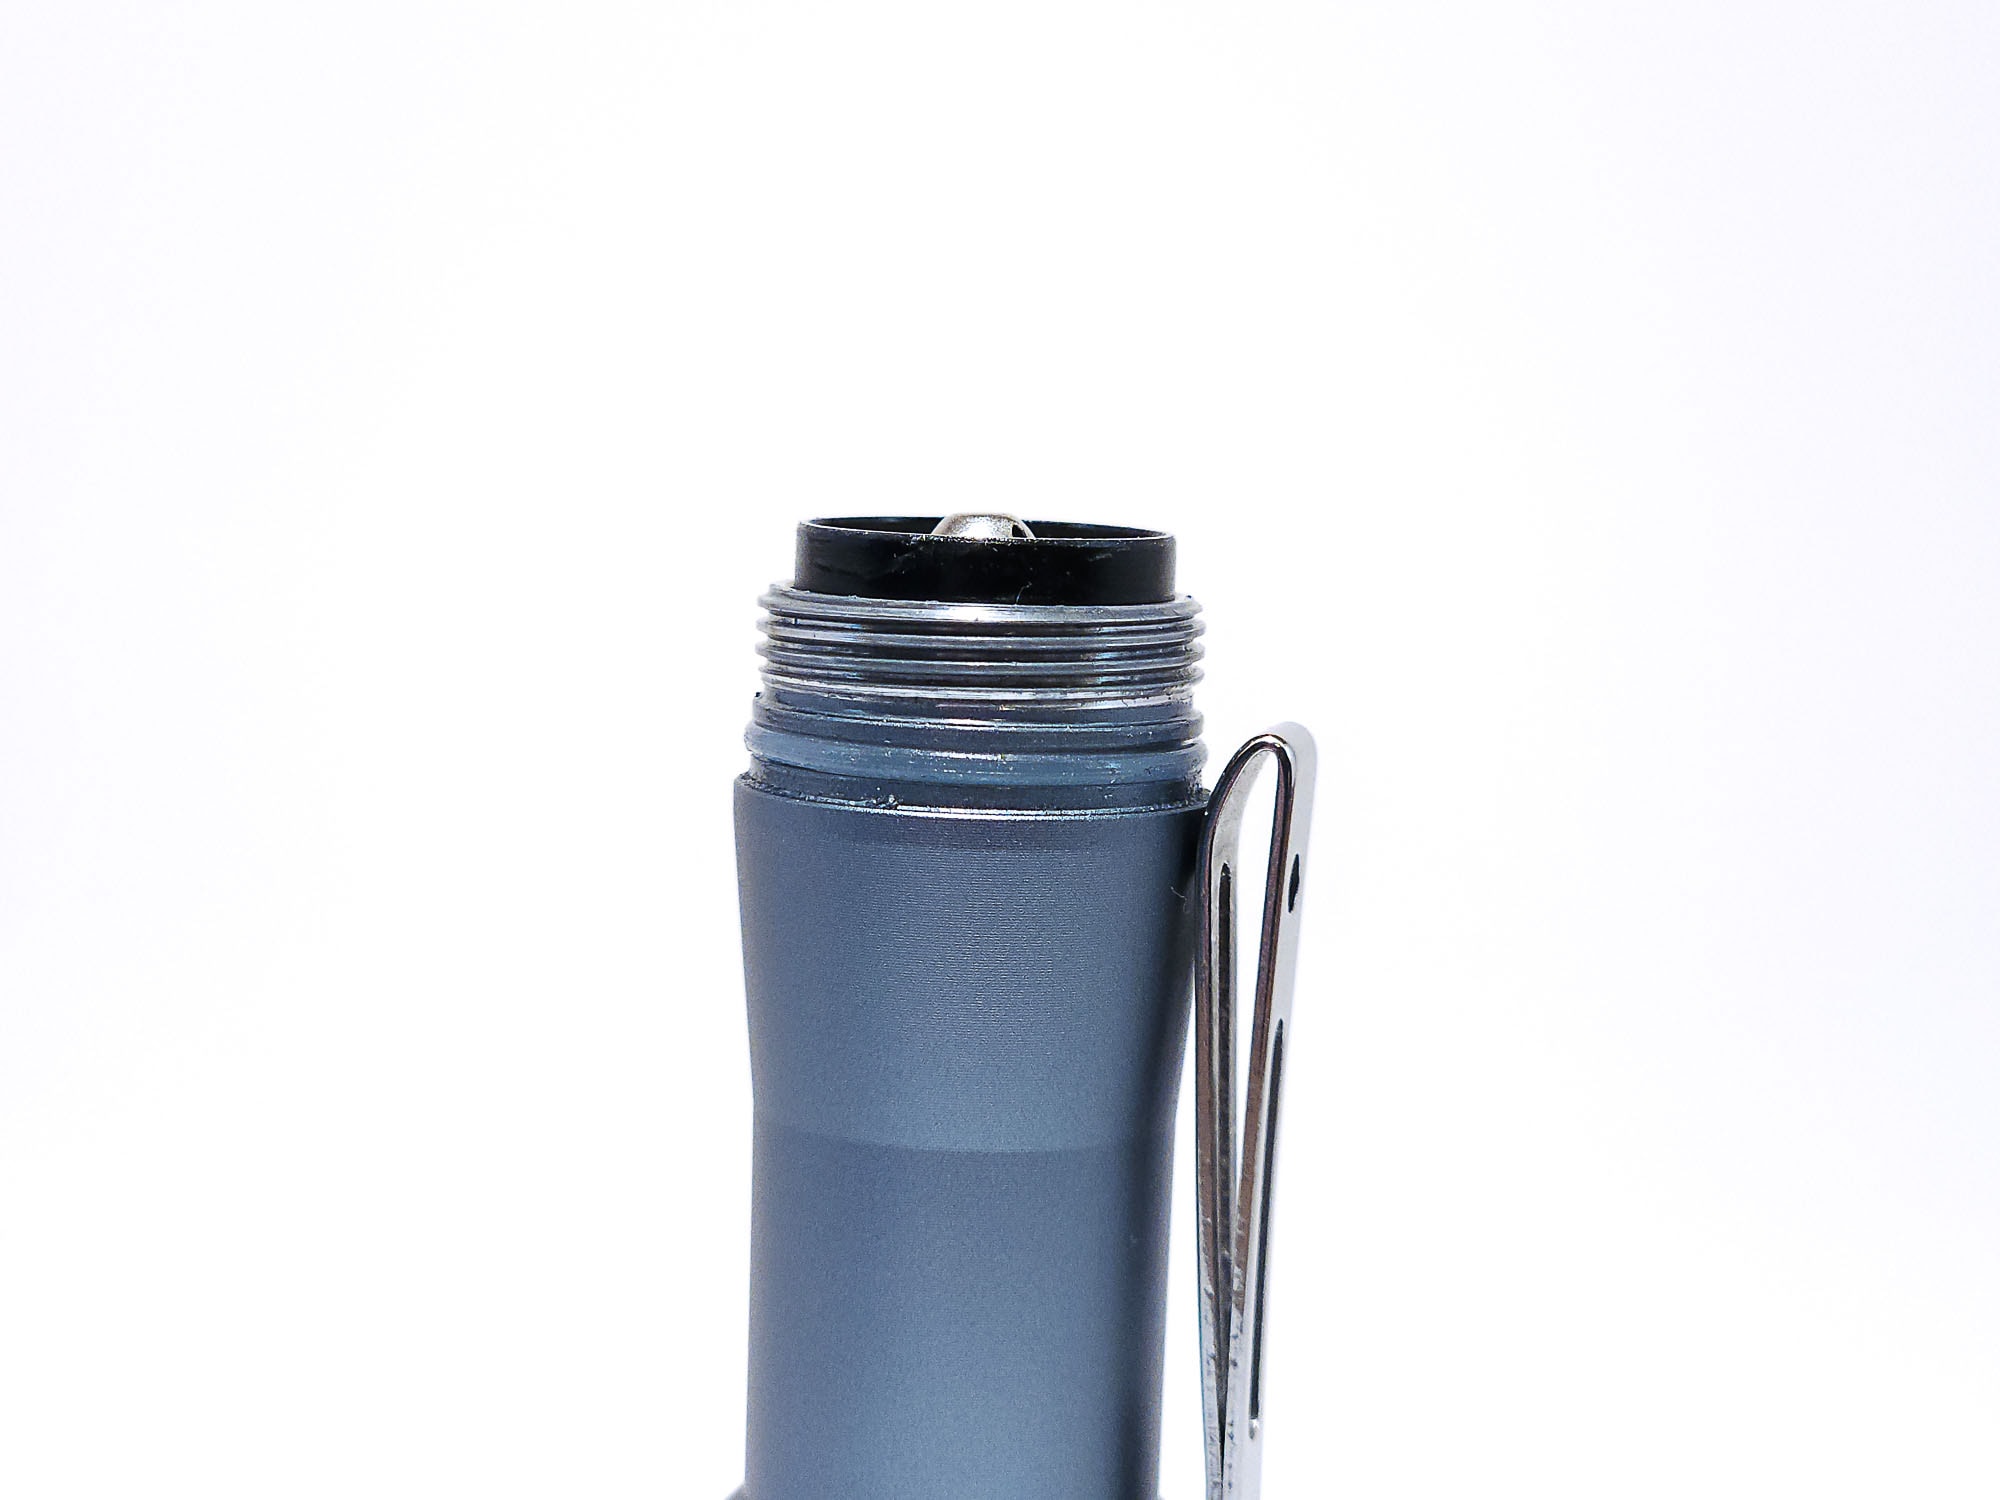
My test FW1AA did not come with a battery, though you can include one as an add-on when you buy the light from Lumintop. For my testing, I used a Vapcell button top ICR 1000mAh 3A 14500 battery (gold wrapper). There are springs in both the head and tail, so as long as your batteries stay within the stated 51mm maximum length that Lumintop states, they will fit. The battery I used is 53mm, however, and while I have not seen any adverse effects from that, there have been reports of longer batteries such as this causing the springs to compress or bend over time. There is no onboard charging.
Low voltage protection on the driver kicked in at 2.96V.
Performance test
To obtain these numbers, I used a very rudimentary integrated shoebox and ceilingbounce on my Samsung Galaxy S10. Ceilingbounce has been calibrated to match the specs of the Baton 3 as provided by Olight and corroborated with other reviewers.
Since the FW1AA uses Anduril 2, I measured the light using the default steppings. The only output measurements Lumintop gives (on lumintop.com) are
- Moonlight: 0.5 lumens
- Low: 5 lumens
- High: 500 lumens
- Turbo: 700 lumens
I have labeled which steps appear to be referenced by those numbers. In my test, for about 10 seconds, turbo/7 actually exceeded specs, while high/6 lasted 20 seconds above spec.
Lumen measurements
| Mode | specs | turn on | 30 sec | 10min |
|---|---|---|---|---|
| 1 | 5 (“low”) | 4 lm | 4 lm | 4 lm |
| 2 | – | 26 lm | 26 lm | 26 lm |
| 3 | – | 69 lm | 70 lm | 69 lm |
| 4 | – | 162 lm | 161 lm | 155 lm |
| 5 | – | 329 lm | 314 lm | 131 lm |
| 6 | 500 (“high”) | 518 lm | 362 lm | 159 lm |
| 7 | 700 (“turbo”) | 685 lm | 331 lm lm | 155 lm |
(Edit: Nov 2022: lumen table updated after applying new correction factor)
Unfortunately, due to the electronic switch being on the tailcap, I was unable to take amperage measurements, though Lumintop states an unprotected, high-drain battery is required.
Battery Life: Runtime graphs
Like with output specs, Lumintop.com states:
- Moonlight: 489h
- Low: 185h
- High: 5min + 1h 8min
- Turbo: 2min + 1h 30min

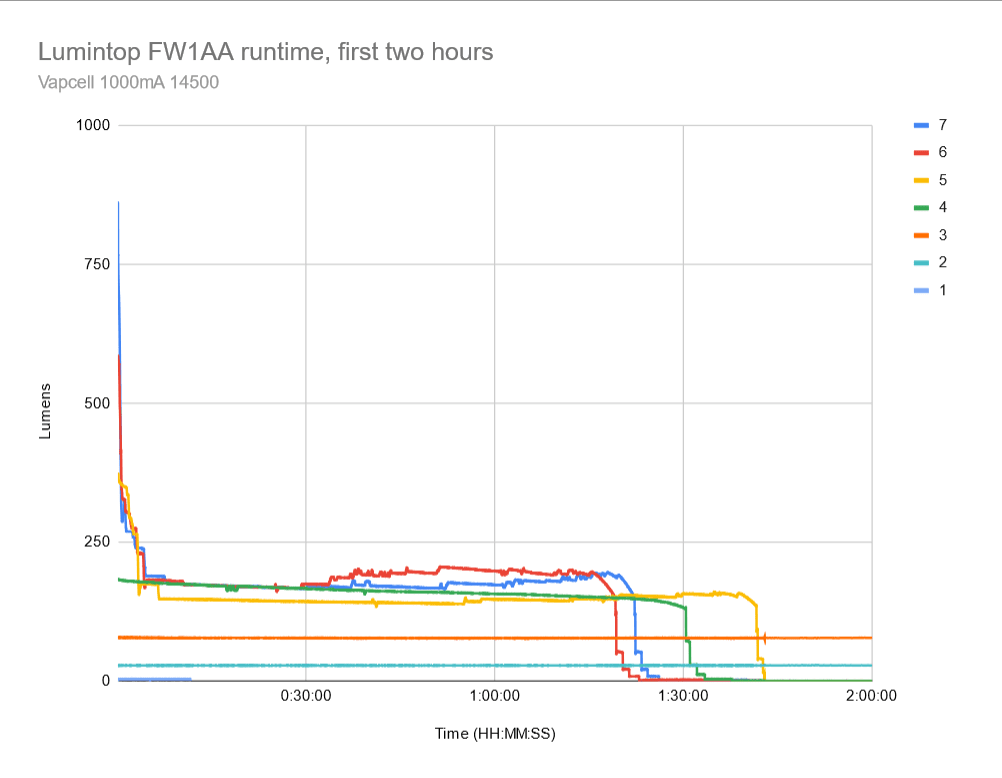
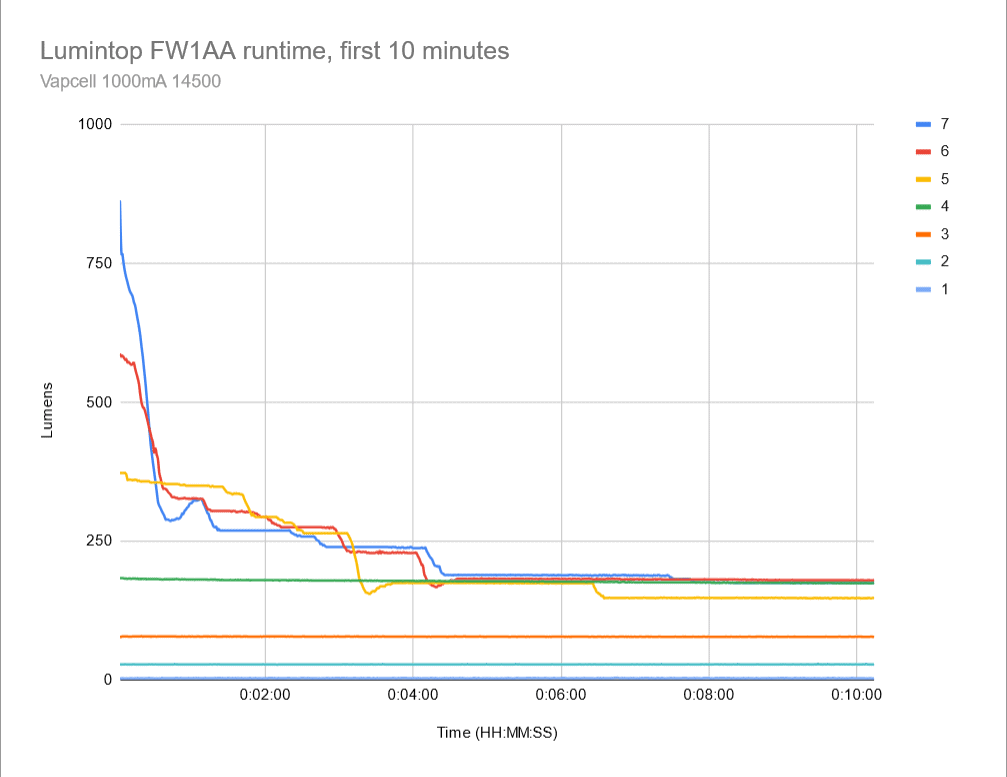
The measured runtime numbers look good, though they’re definitely subject to battery capacity. I would assume the stated specs were measured with Lumintop’s own branded 14500, which is only 800mAh. “Turbo” and “high” step down is claimed at 2 minutes and 5 minutes respectively, though it looks like it only lasts around 30-45 seconds before it has stepped all the way down to a lower level. We are talking about a lot of heat here and very little mass to absorb it.
Level 3 looks to be the highest of the default steppings which is still regulated, coming in at a solid 78 lumens for 3 hours and 44 minutes before stepping down. The higher levels seem to converge around 175 lumens after stepping down for around an hour and a half of runtime.
| Mode | Specified runtime | Measured runtime (ANSI) | Time till shut off |
|---|---|---|---|
| 1 | 185h (“low”) | – | – |
| 2 | – | 11h 09min | 11h 23min |
| 3 | – | 3h 44min | 4h 55min |
| 4 | – | 1h 32min | 3h 10min |
| 5 | – | 1h 43min | 2h 13min |
| 6 | 5min + 1h 8min (“high”) | 1h 19min | 2h 11min |
| 7 | 2min + 1h 30min (“turbo”) | 1h 22min | 2h 21min |
ANSI FL1 standards: The runtime is measured until the light drops to 10% of its initial output (30 seconds after turning on). This does not mean that the flashlight is not usable anymore. The last column shows how long the light actually works till it shuts off. If there is a + symbol, it means that the test was stopped at that particular point, but the light was actually still running. This happens on certain occasions, with certain drivers, firmware, or batteries.
Peak beam intensity and beam distance measurements
The numbers for candela were obtained with a UNI-T UT383S luxmeter at 5 and 15 meters, then averaged.
As soon as you turn it on, the FW1AA can sure throw a tiny hotspot. Even after the step down, it should still be able to throw around 150 meters.
| Mode | Specs | Candela measured | Meters | Yards |
|---|---|---|---|---|
| 1 | – | 150 cd | 25 | 27.3 |
| 2 | – | 800 cd | 57 | 62.3 |
| 3 | – | 2675 cd | 103 | 112.6 |
| 4 | – | 6925 cd | 166 | 181.5 |
| 5 | – | 12,175 cd | 221 | 241.7 |
| 6 | – | 15,463 cd | 249 | 272.3 |
| 7 | 27,000 cd | 12,125 cd | 220 | 240.6 |
| 7 (turn on) | – | 30,825 cd | 351 | 383.9 |
Extra info: Peak beam distance according to ANSI FL1 standards: The calculated value of distance in meters at which the flashlight produces a light intensity of 0.25 lux. (0.25 lux is about the brightness of a full moon shining on an object).
Beamshots
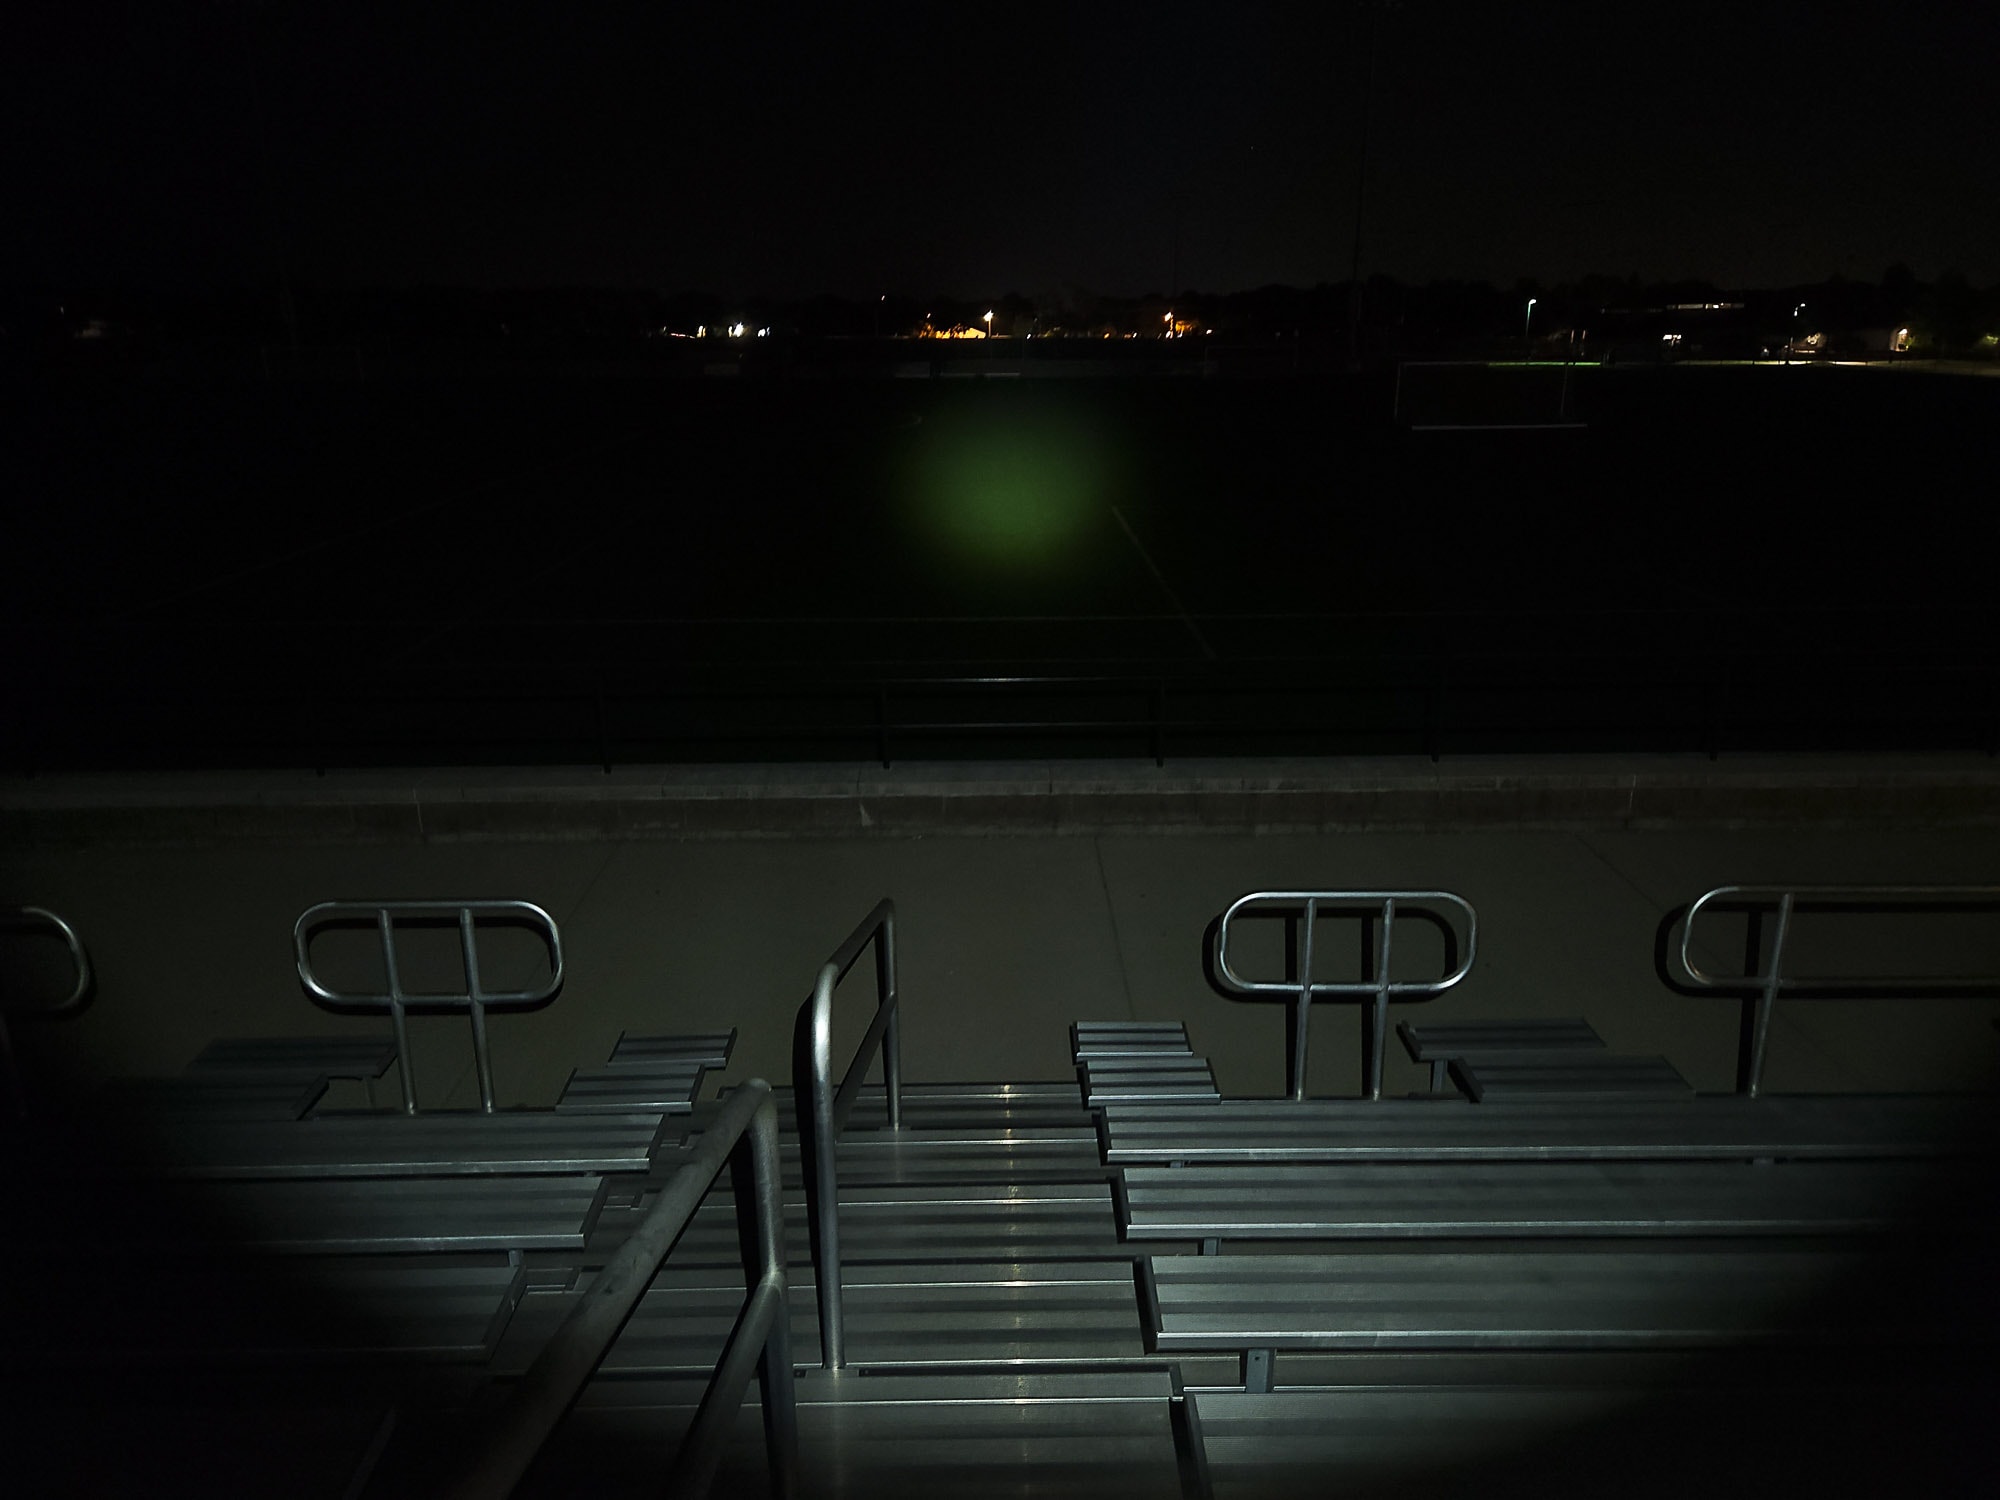
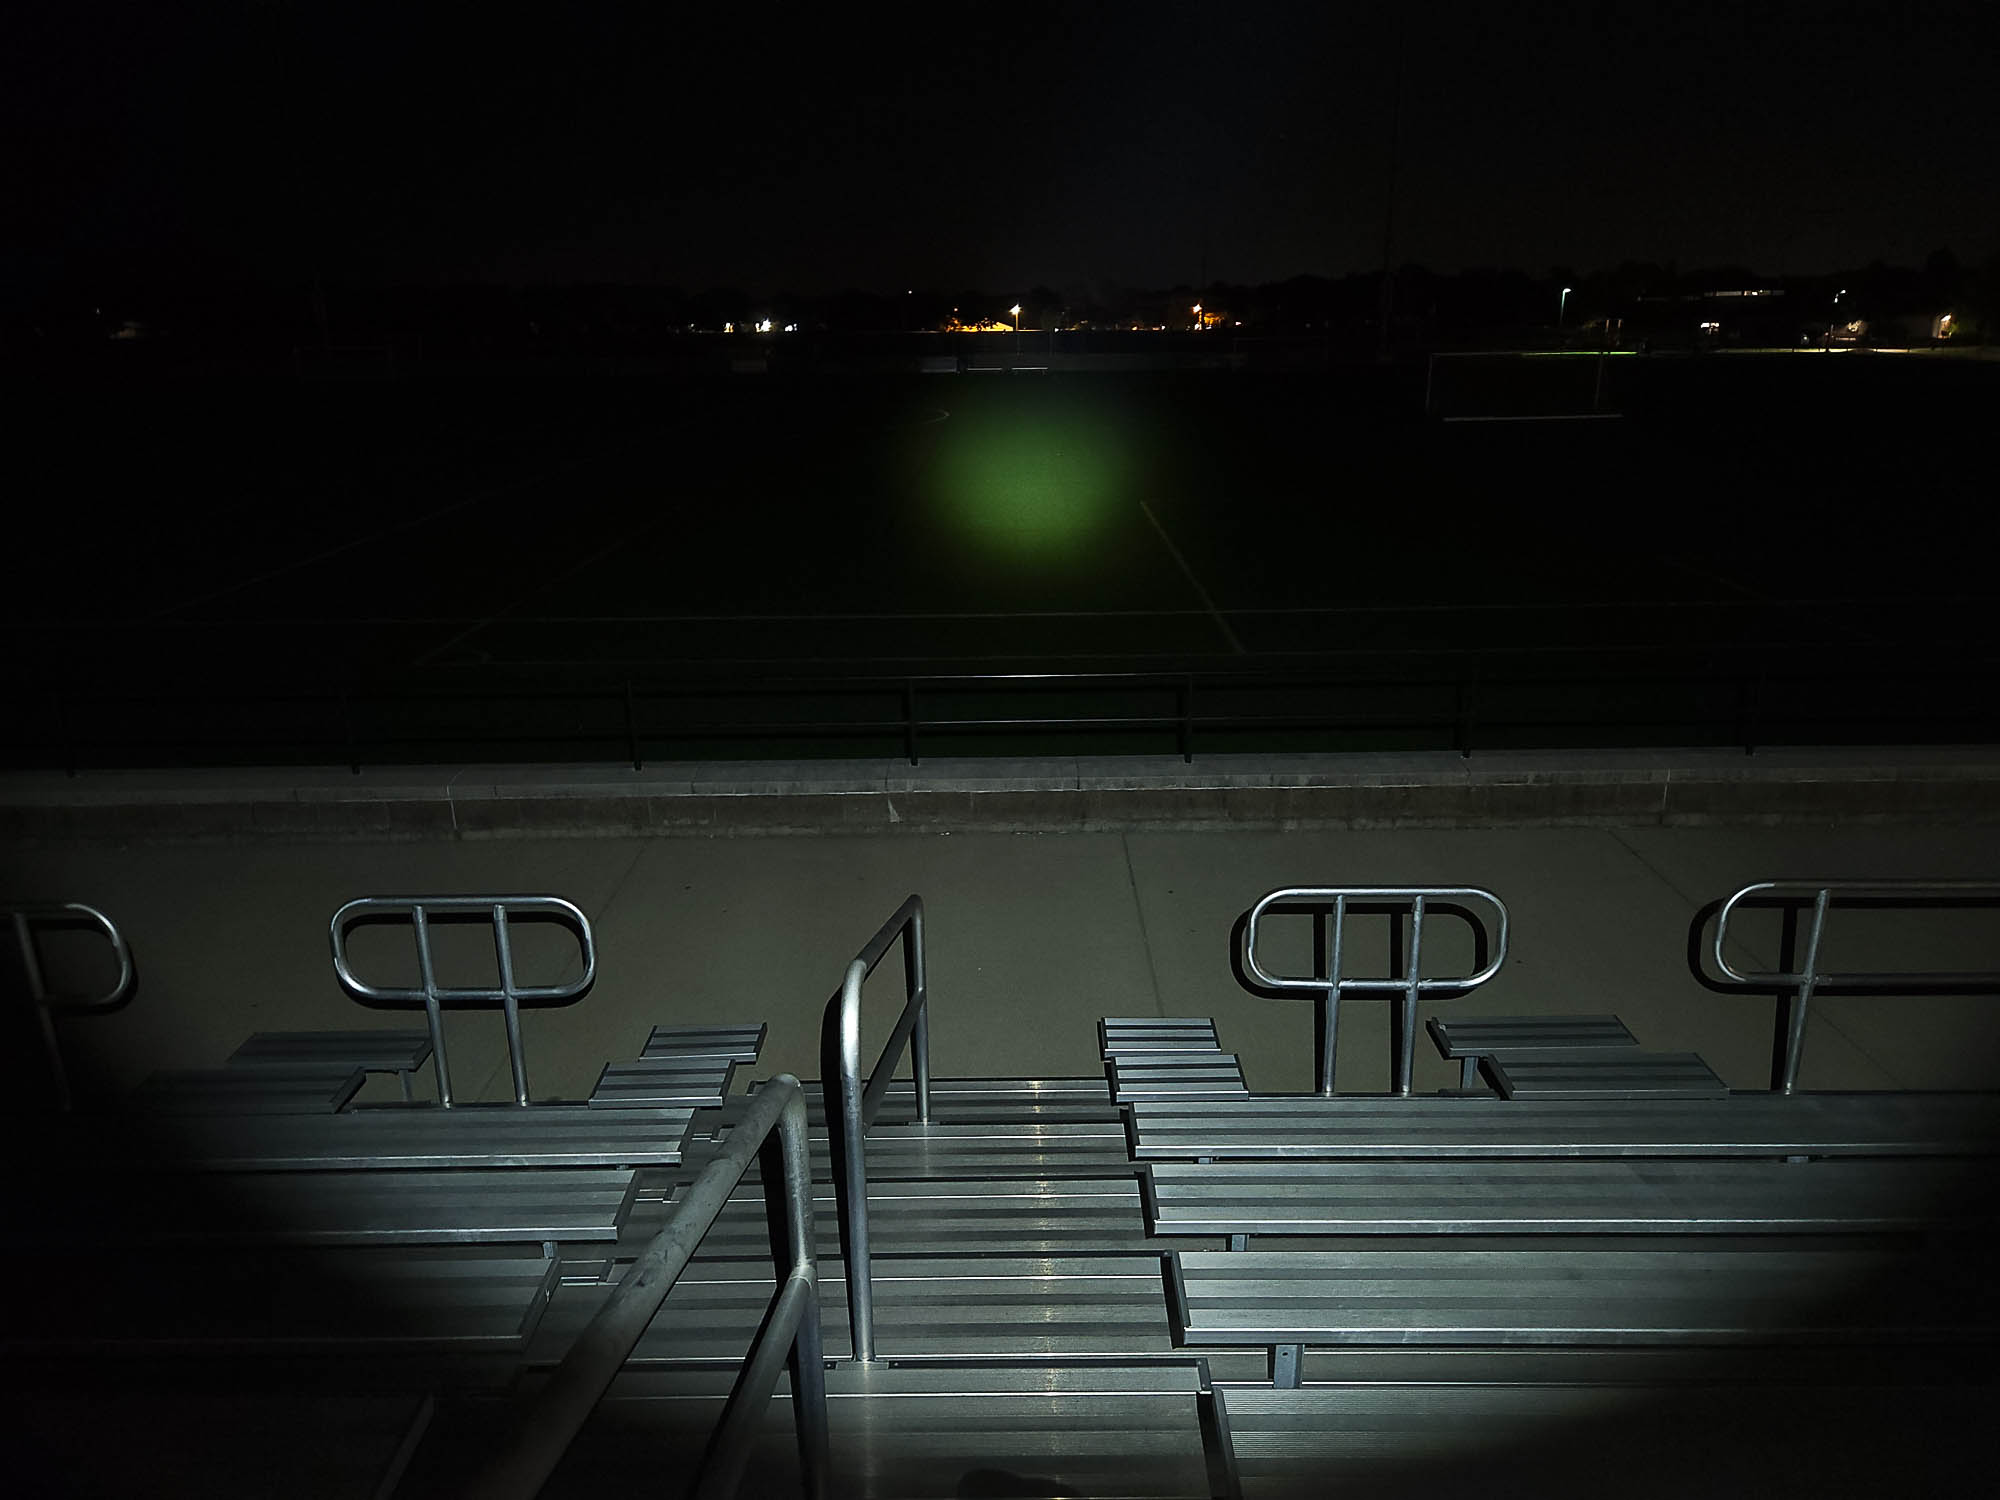
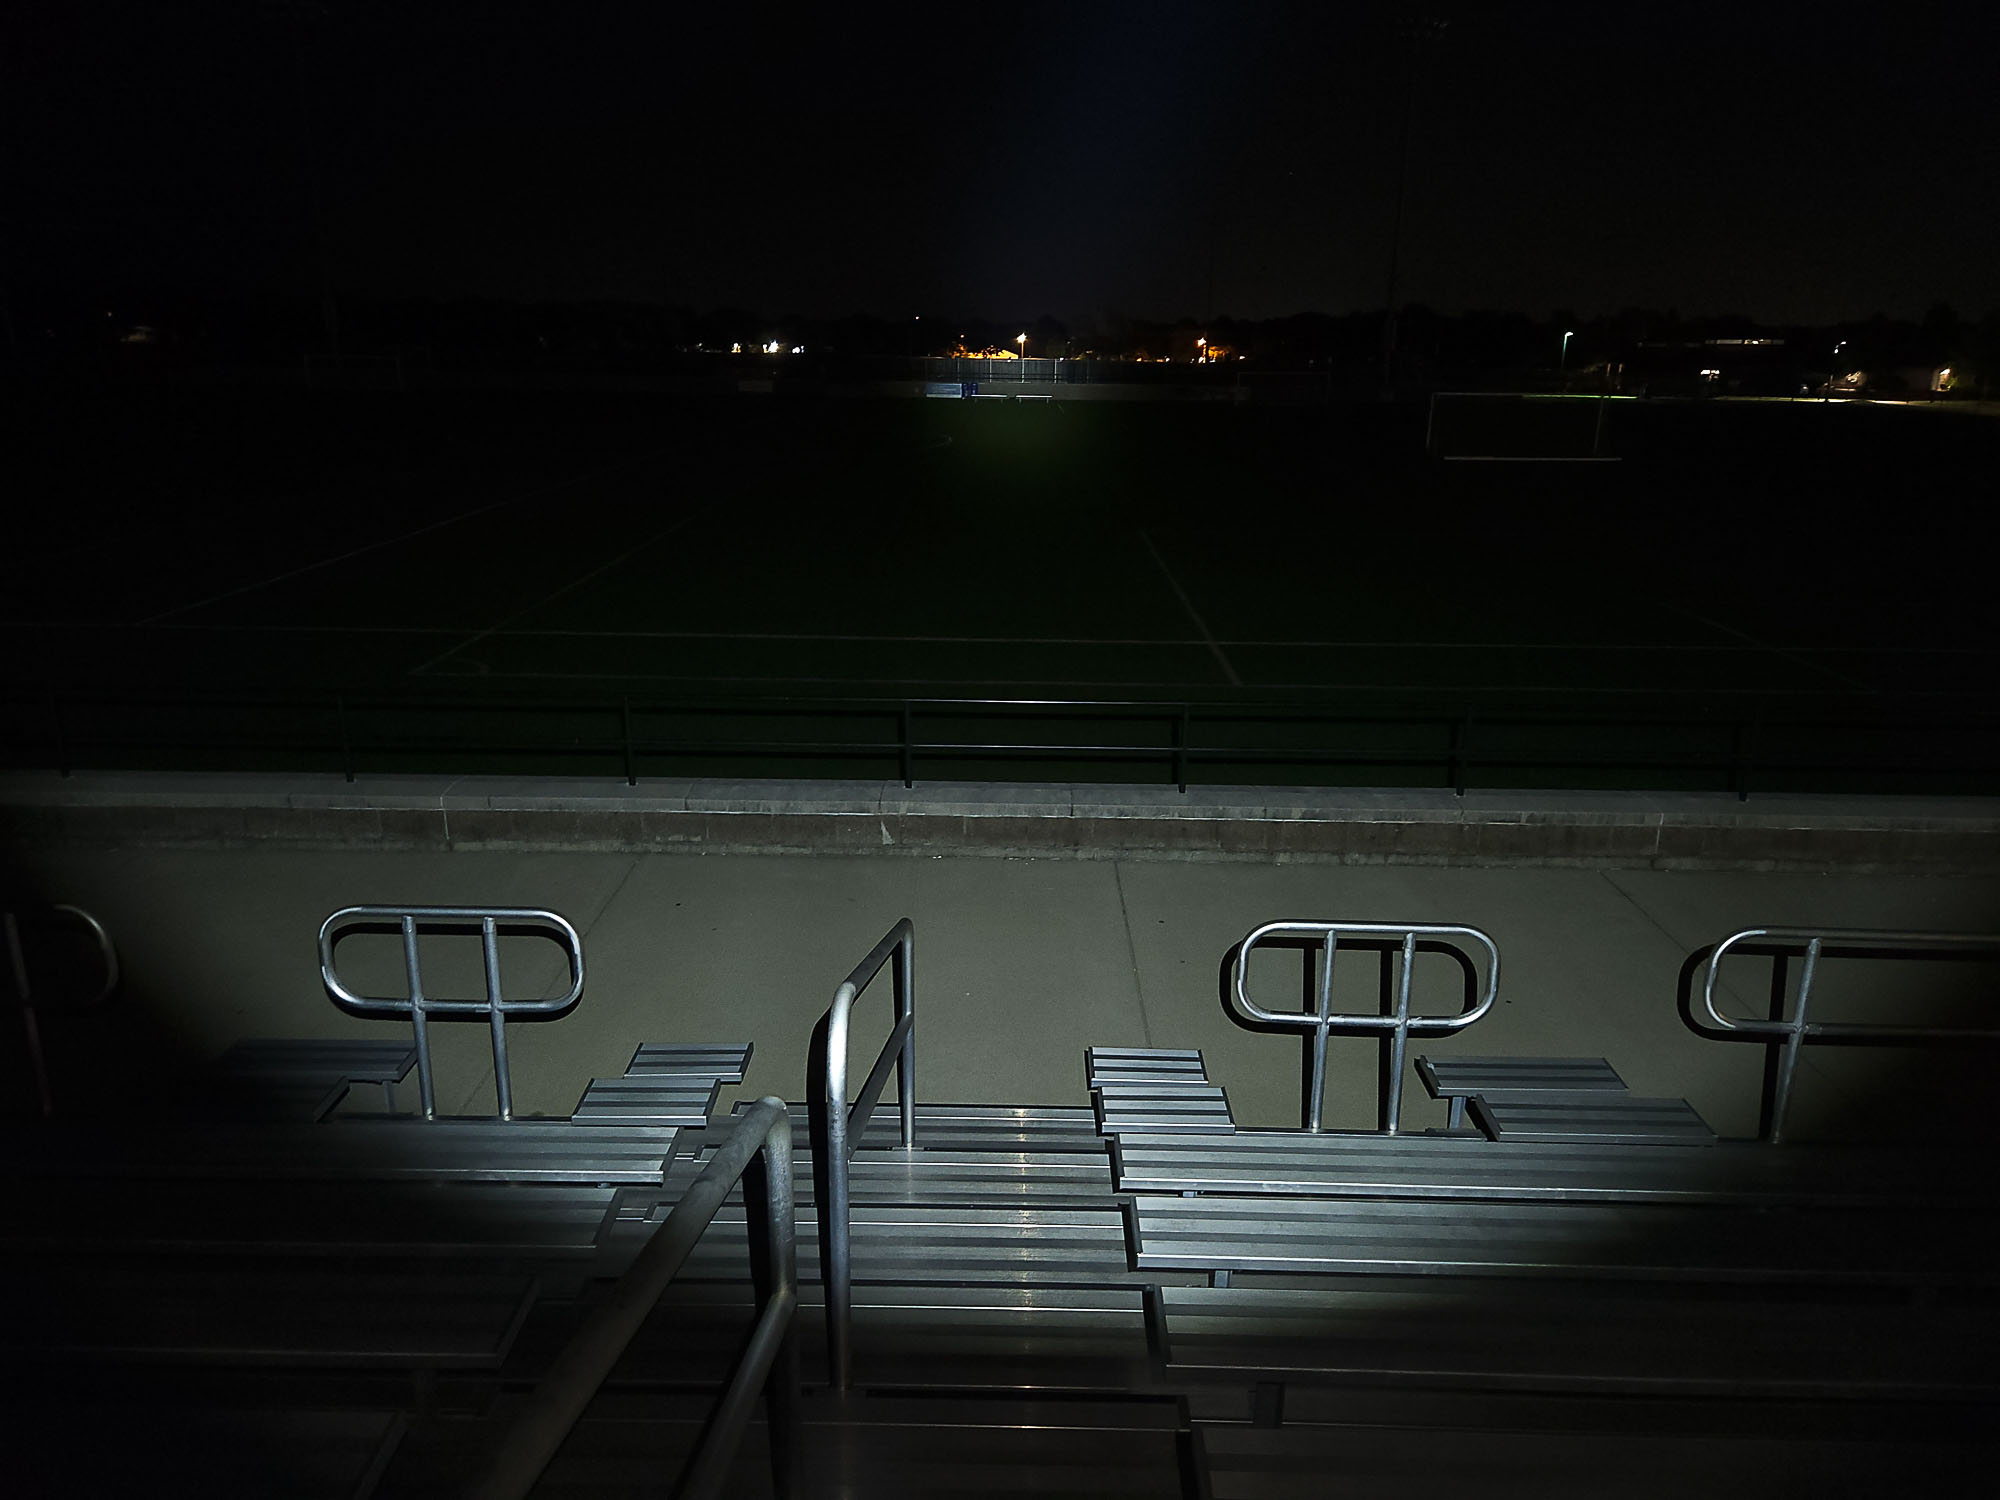
These were taken with a Samsung Galaxy S22+ using pro mode and the following settings:
- WB 5000K
- ISO 200
- Speed 0.5
Beamshots compared to the following flashlights:
- Lumintop GT Nano
- ThruNite TN12 Pro
You can see how small the hotspot is on the FW1AA. The GT Nano, another small light, actually has a similarly sized hotspot, but it’s more intense. Compare that to the hotspot on the ThruNite TN12 Pro, which is a full size 18650 light.
Disclaimer: This flashlight was sent to me for review at no cost by Nealsgadgets. I have not been paid to review, nor have I been holding back on problems or defects.
Final Verdict
Pros
- Tiny light!
- Exceeds output specifications, ever so briefly, for both lumens and throw
- Anduril makes it highly customizable
Cons
- Tiny hotspot
- Artifacts; yellow ring around the off-center hotspot
- Low mass means low heat tolerance
- Anduril alienates some users
Explanation on star ratings:
1: Avoid: a match would be a better choice – 2: Poor: significant defect or issues; almost unusable – 3: Average: some defects or issues; but still usable 4: Good: recommended (minor issues) – 5: Great: highly recommended

5 stars: ★★★★★
The FW1AA is one cool light. Imagine the power of the FW series, but the light has been shrunk down to almost the size of the battery in the original FWs; that’s the FW1AA. It’s easy to carry and use, though since it uses Anduril for its UI, it’s more of an enthusiast light. Of course it has the same issues with heat as any small, high powered light does; while it actually exceeded output specs in my tests, it immediately begins a drastic step down due to the heat. The hotspot might also be a point of contention as it’s fairly small and shows imperfections easily, but again, this is a small light.
I give the Lumintop FW1AA five stars as a tiny enthusiast pocket light.
Lumintop FW1AA discount code
Use one of our unique discount codes for 15-25% off: 1lumenNew or 1lumen711
1lumen selects and reviews products personally. We may earn affiliate commissions through our links, which help support our testing.