1lumen selects and reviews products personally. We may earn affiliate commissions through our links, which help support our testing.
Nitecore HC68 review

Nitecore HC68 specifications
| Brand/model | Nitecore HC68 |
|---|---|
| Category | Best headlamp |
| LED | 2x SST40 + 2x red emitters |
| Max. Lumens | 2,000 lm |
| Max. Beam intensity / distance | 10,300 cd |
| Battery config. | 1*18650 or 2*CR123A |
| Onboard charging | USB-C |
| Modes | 6 |
| Blinkies | Red flashing / White beacon / White SOS |
| Reflector | Custom twin TIR |
| Waterproof | IP68 |
| Review date | June 2022 |
Introduction:
Today I’m looking at the Nitecore HC68, one of the newest headlamps from Nitecore. Like a lot of other headlamps in their stable, the HC68 has multiple sets of emitters, but this time with a bit of a twist – being able to ramp from a flood mode to a “spot” mode. There’s also some aux emitters to give a bit of extra utility, too.
I’m somewhat of a headlamp tragic; my most-used lights are probably my Zebralight H600fc and H32, so I’m interested to see if this is worthy of adding to the rotation – or at least to leave out where I’m likely to grab it.
Package quality.
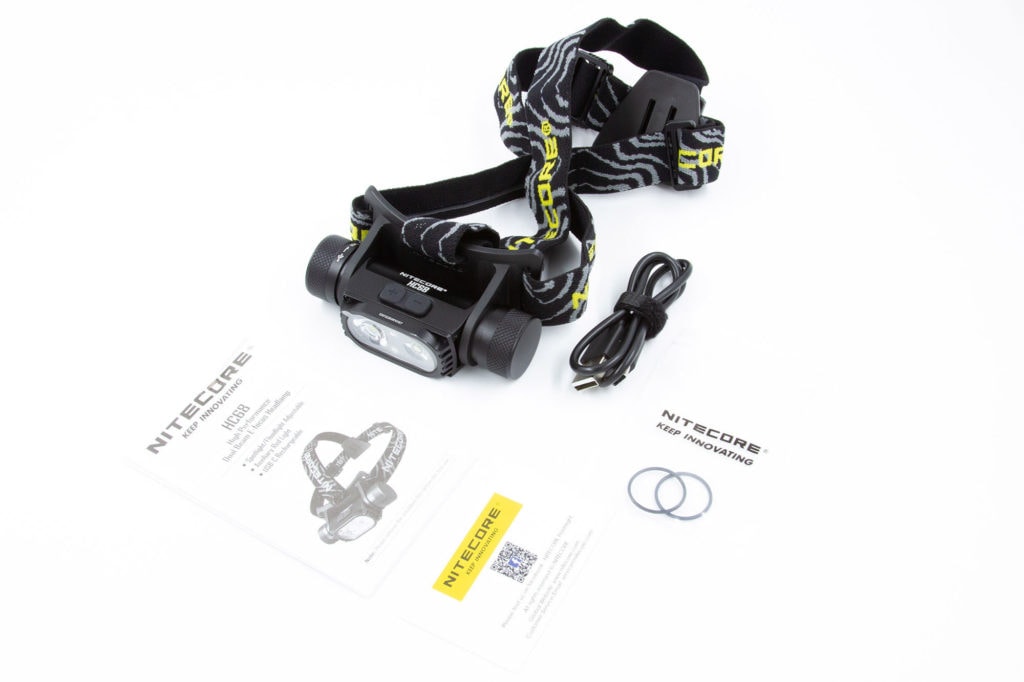
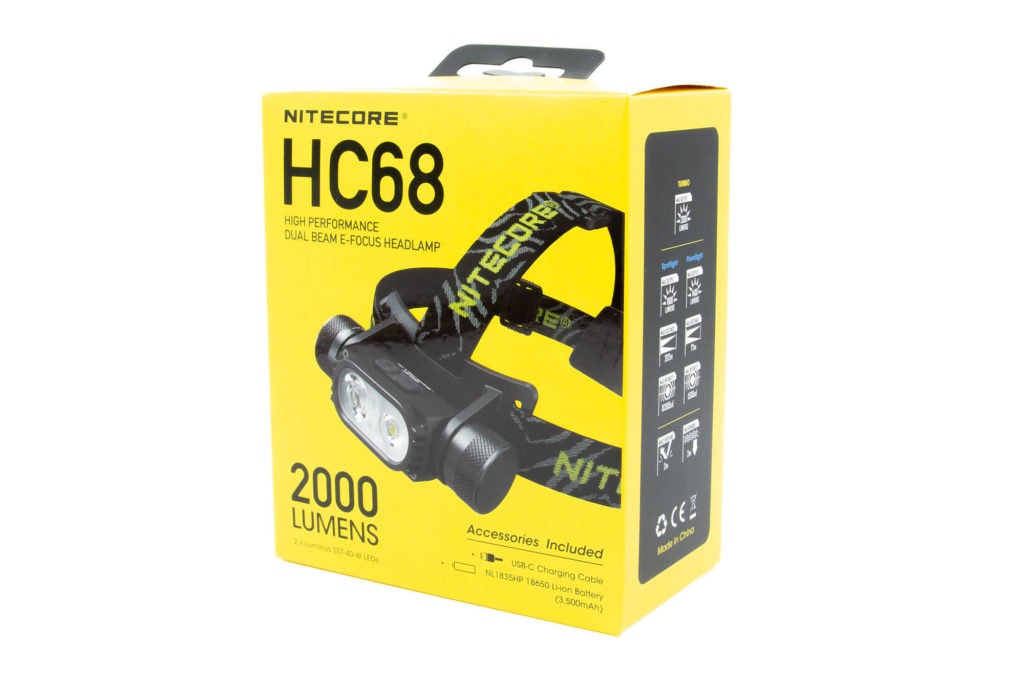
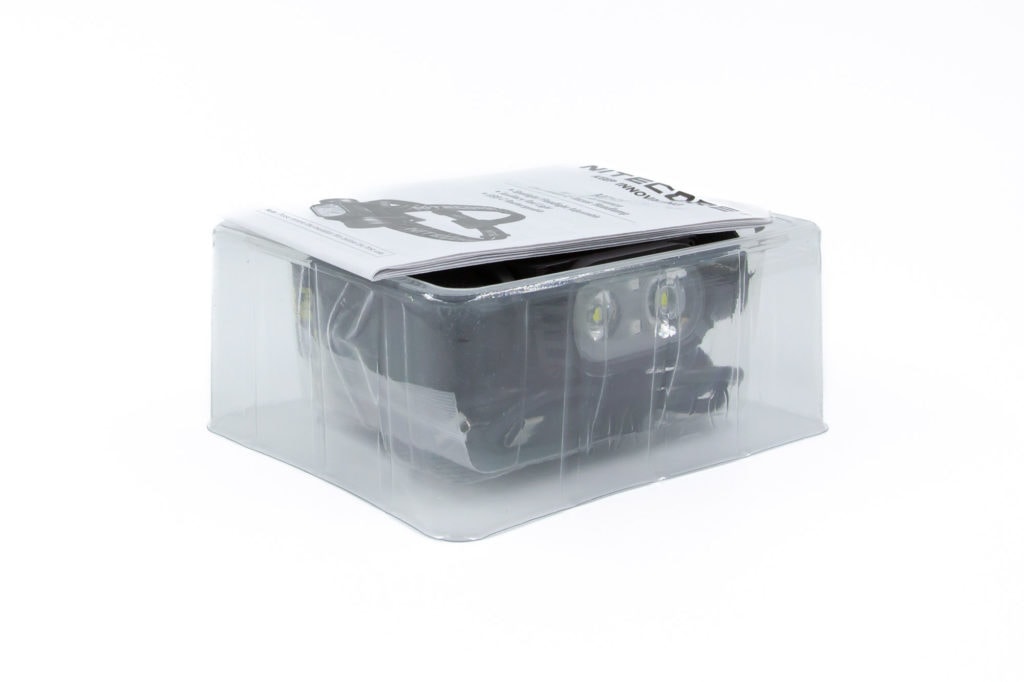
As always with Nitecore, the packaging for the HC68 is absolutely sublime. Inside the attractive retail packaging, I find a tray with the following inside:
- The HC68 itself
- Inside, the NL1835HP cell
- Headband
- USB-A to USB-C cable
- 2 spare o-rings in a bag
- Manual and warranty guide
Everything to get you up and running with this headlamp is included – just remove the isolator on the battery before charging, and away you go.

Flashlight in use
There’s three switches on the HC68 – one on the side (power), and two on top for adjusting the brightness/spot/flood/cycling through aux modes. The power button feels quite solid beneath the cover, but the two on top have a little bit of a “mushy” feel. There’s still solid feedback from the buttons though, so it’s more in comparison to the power button’s feel.
You can rotate the light in the band to face up or down, with a 180 degree field of rotation – plenty of uses for that.
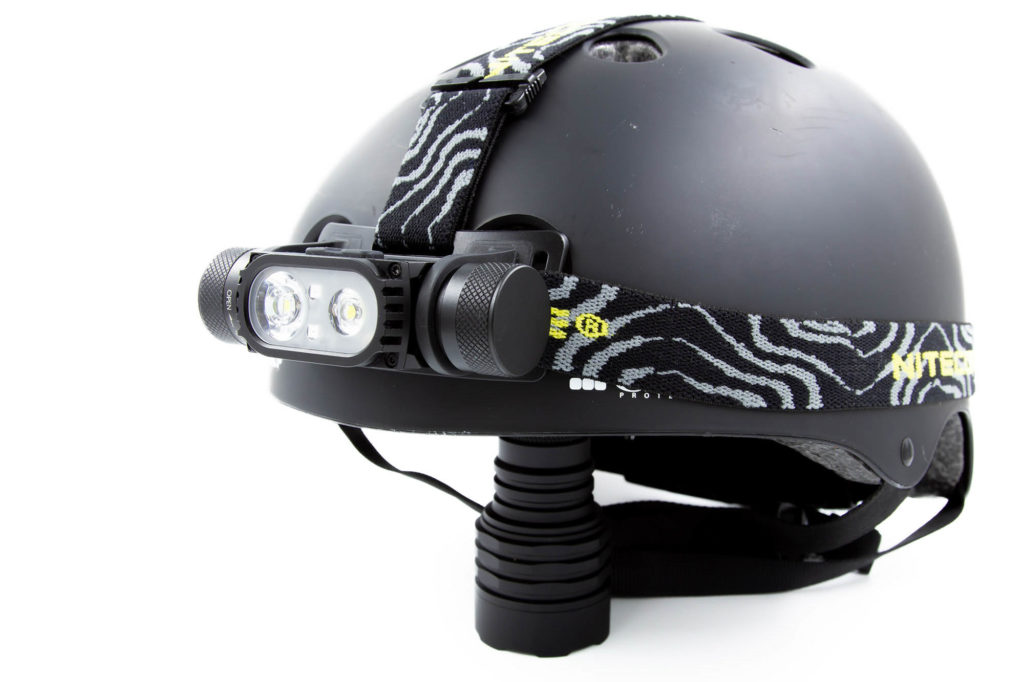
The headband has a silicone “line” on the inside that goes around halfway the length of the band, to keep it anchored to your forehead (or whatever else you’ve got it attached to, for example, a helmet). It’s a small touch, but one that’s appreciated to ensure it stays in place. It’s also touted as a sweat-diverting strip, so I guess that’s another use for it.
There are two supports on the headlamp band – the front piece to hold the headlamp, and a rear piece to center on the back of your head for stability.
The curved piece at the front is fairly hard so as to keep the headlamp in place, but the band itself weaves through that piece, so there’s minimal contact with your head from that. The piece at the back appears to be made of a rubber that is fairly comfortable. I didn’t notice any discomfort or pain from wearing it for an extended period of time.
Removing the light itself from the headband was a little tough to do at first, but with repeated removals and reattachments, it’s easier to do – the loops holding the light in are tougher than I first anticipated, so they can take a bit of stretching without being damaged.
Once the light is out, you could stand it on one end due to the flat base of the battery cover, but there’s really not much point. This really is designed to be used on a head due to the beam profile.
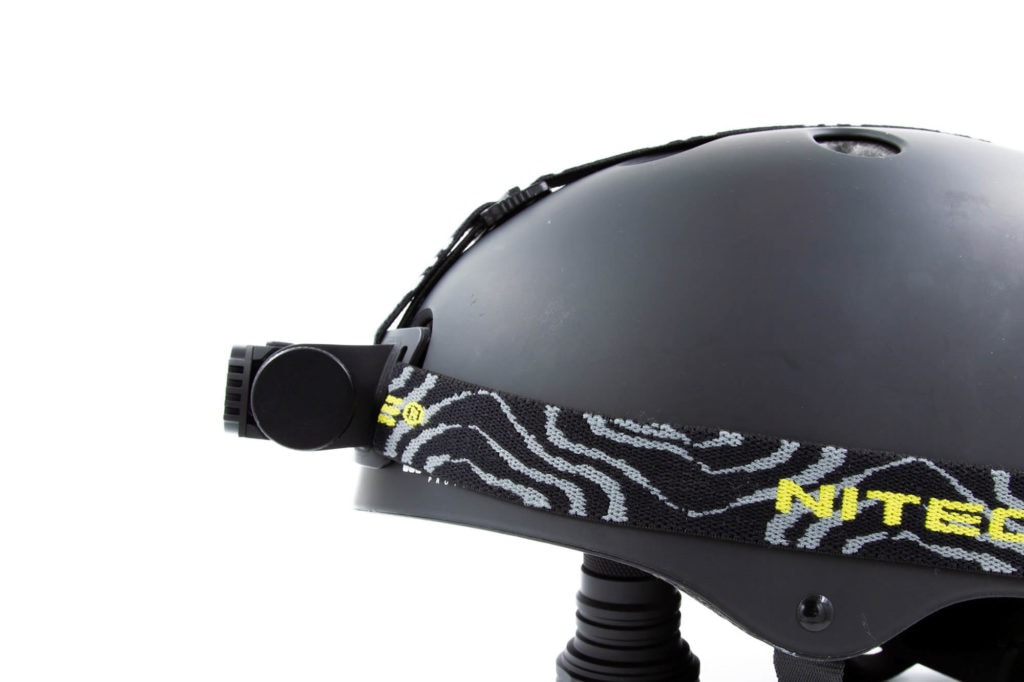
Build Quality, and Warranty
I’ve said it a lot of times before, but it bears repeating – I’ve yet to use a Nitecore light that I haven’t been impressed with the build quality of. There’s not a thing out of place, not a mark that I can see, the only vaguely sharp edge is around the small grooves on either side of the lens (more “grabby” than sharp), and it just feels solid all around.
The anodisation is the usual satin black, and threads are sufficiently lubricated to make them move smoothly with no grinding feeling. The only gripe is that the o-rings are perhaps a few nanometers too big, as they definitely want to grab onto the caps, so you’ll need to put in a little more effort to unscrew them than you might expect.
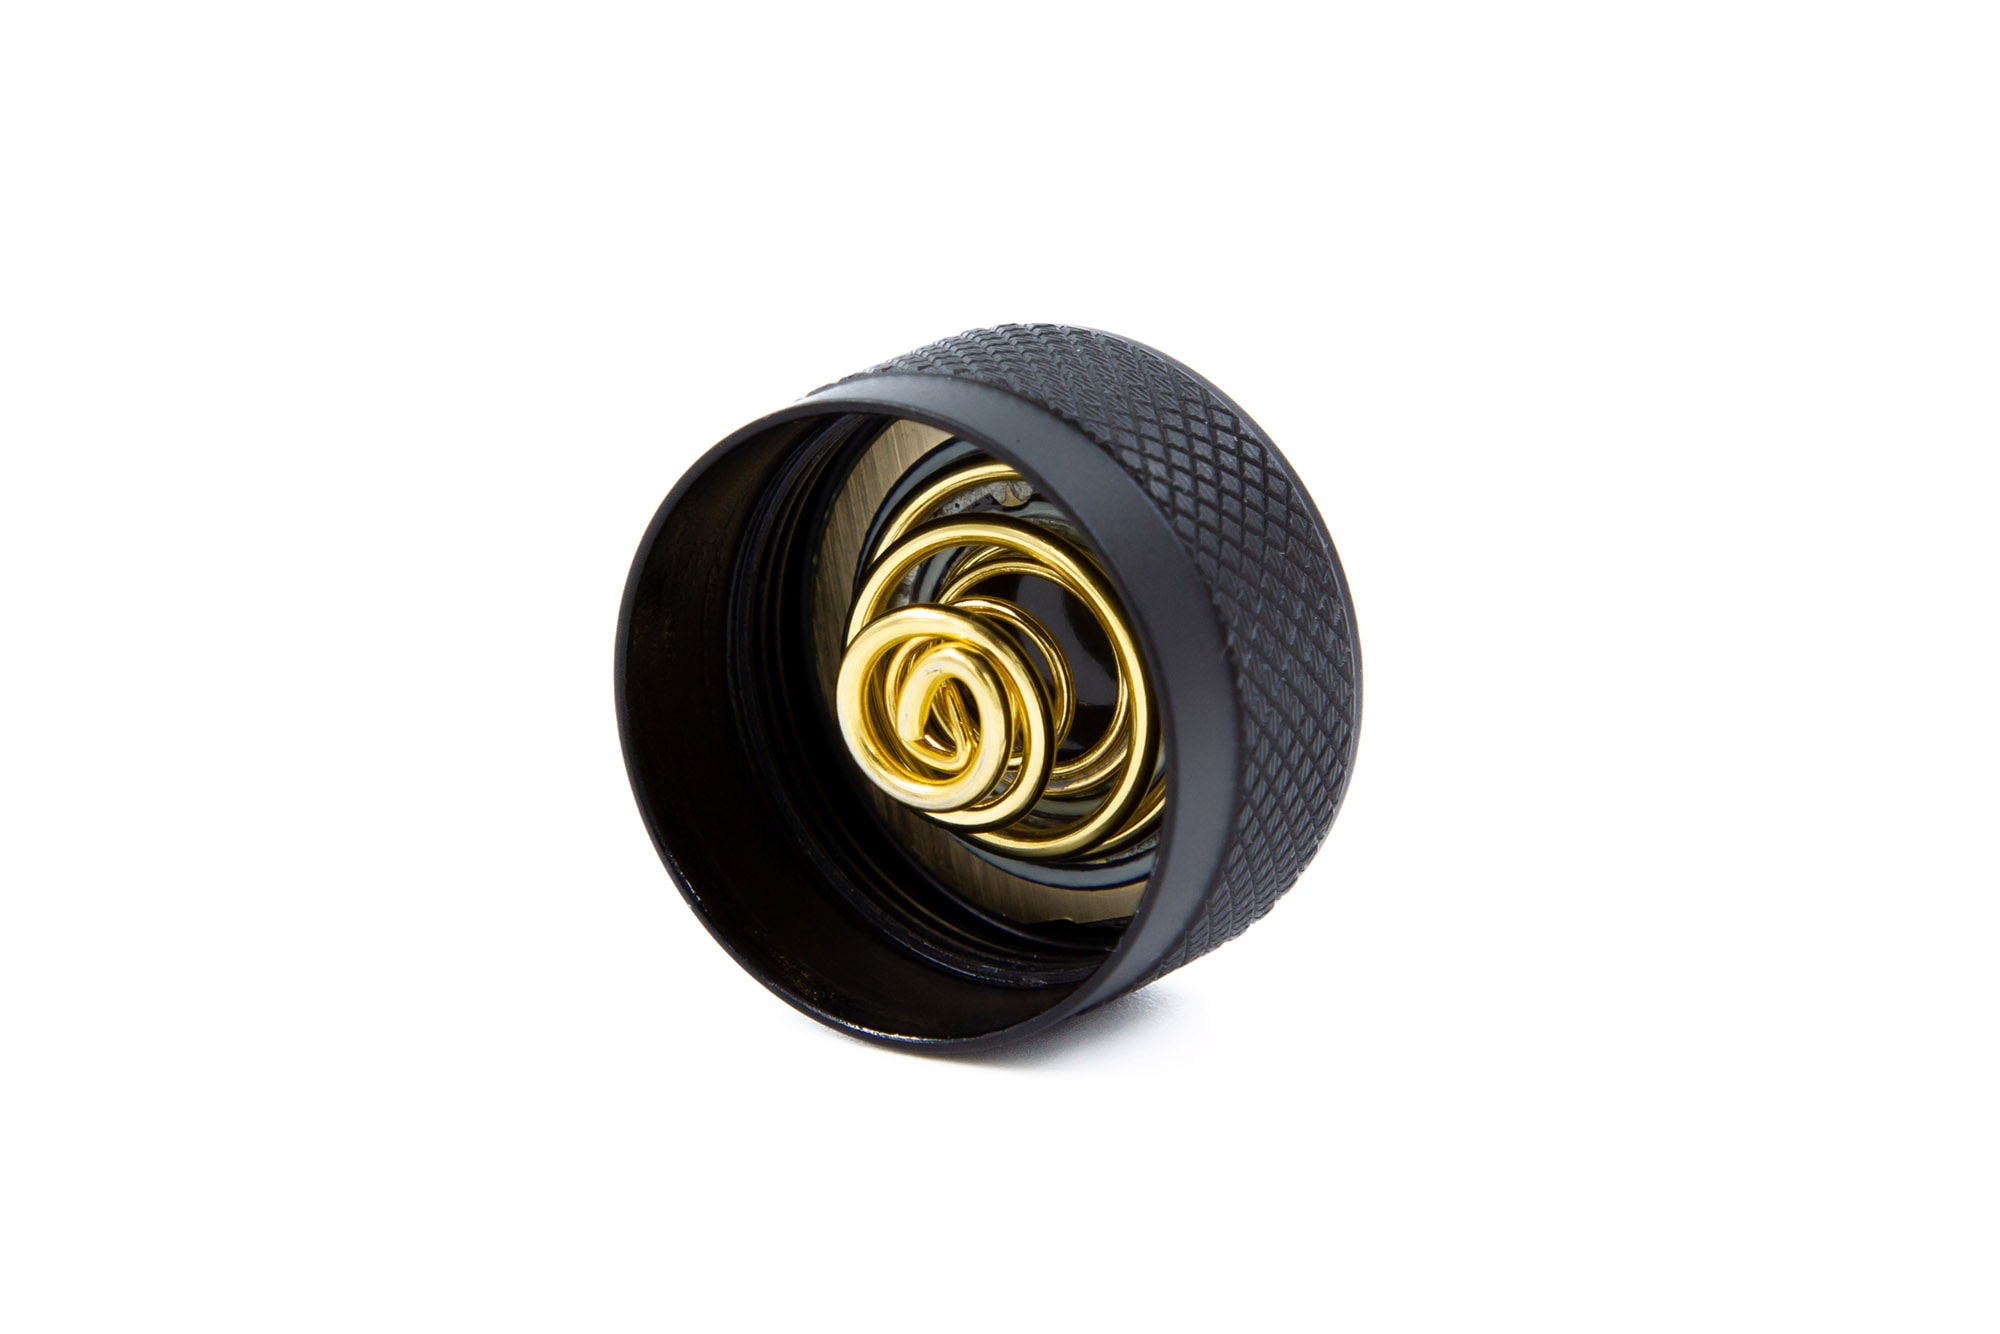
The spring on the battery tailcap is actually a double-spring system, which is quite nice; good for lowering resistance and helping stabilise output.
Nitecore’s warranty covers DOA or defective products within 15 days direct to the dealer, and then covers repairs for 2 years, due to the inbuilt battery (lights without inbuilt batteries come with 5 years warranty).
After this, Nitecore will cover labour costs and maintenance for repairs, with the cost of components being charged.
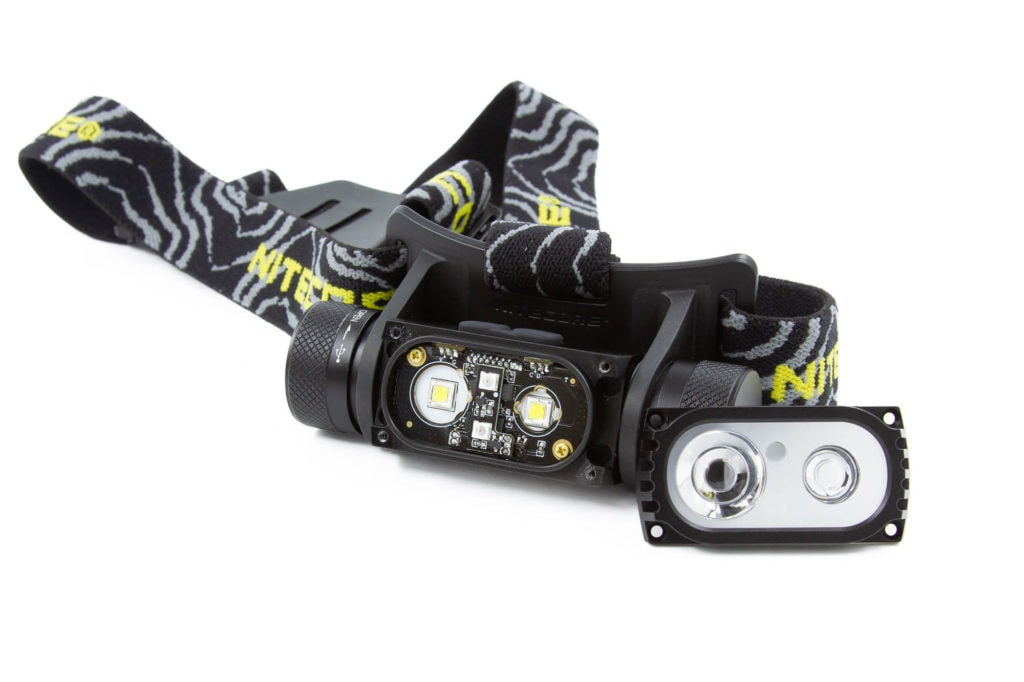
But if you decide that you’re the kind of person that voids warranties (ie. me), then there’s great news for you tinkerers – you can open the front of this light with a star bit, and get right at the emitters and boards if you want to change the SST40 for something else compatible (3V 5050).
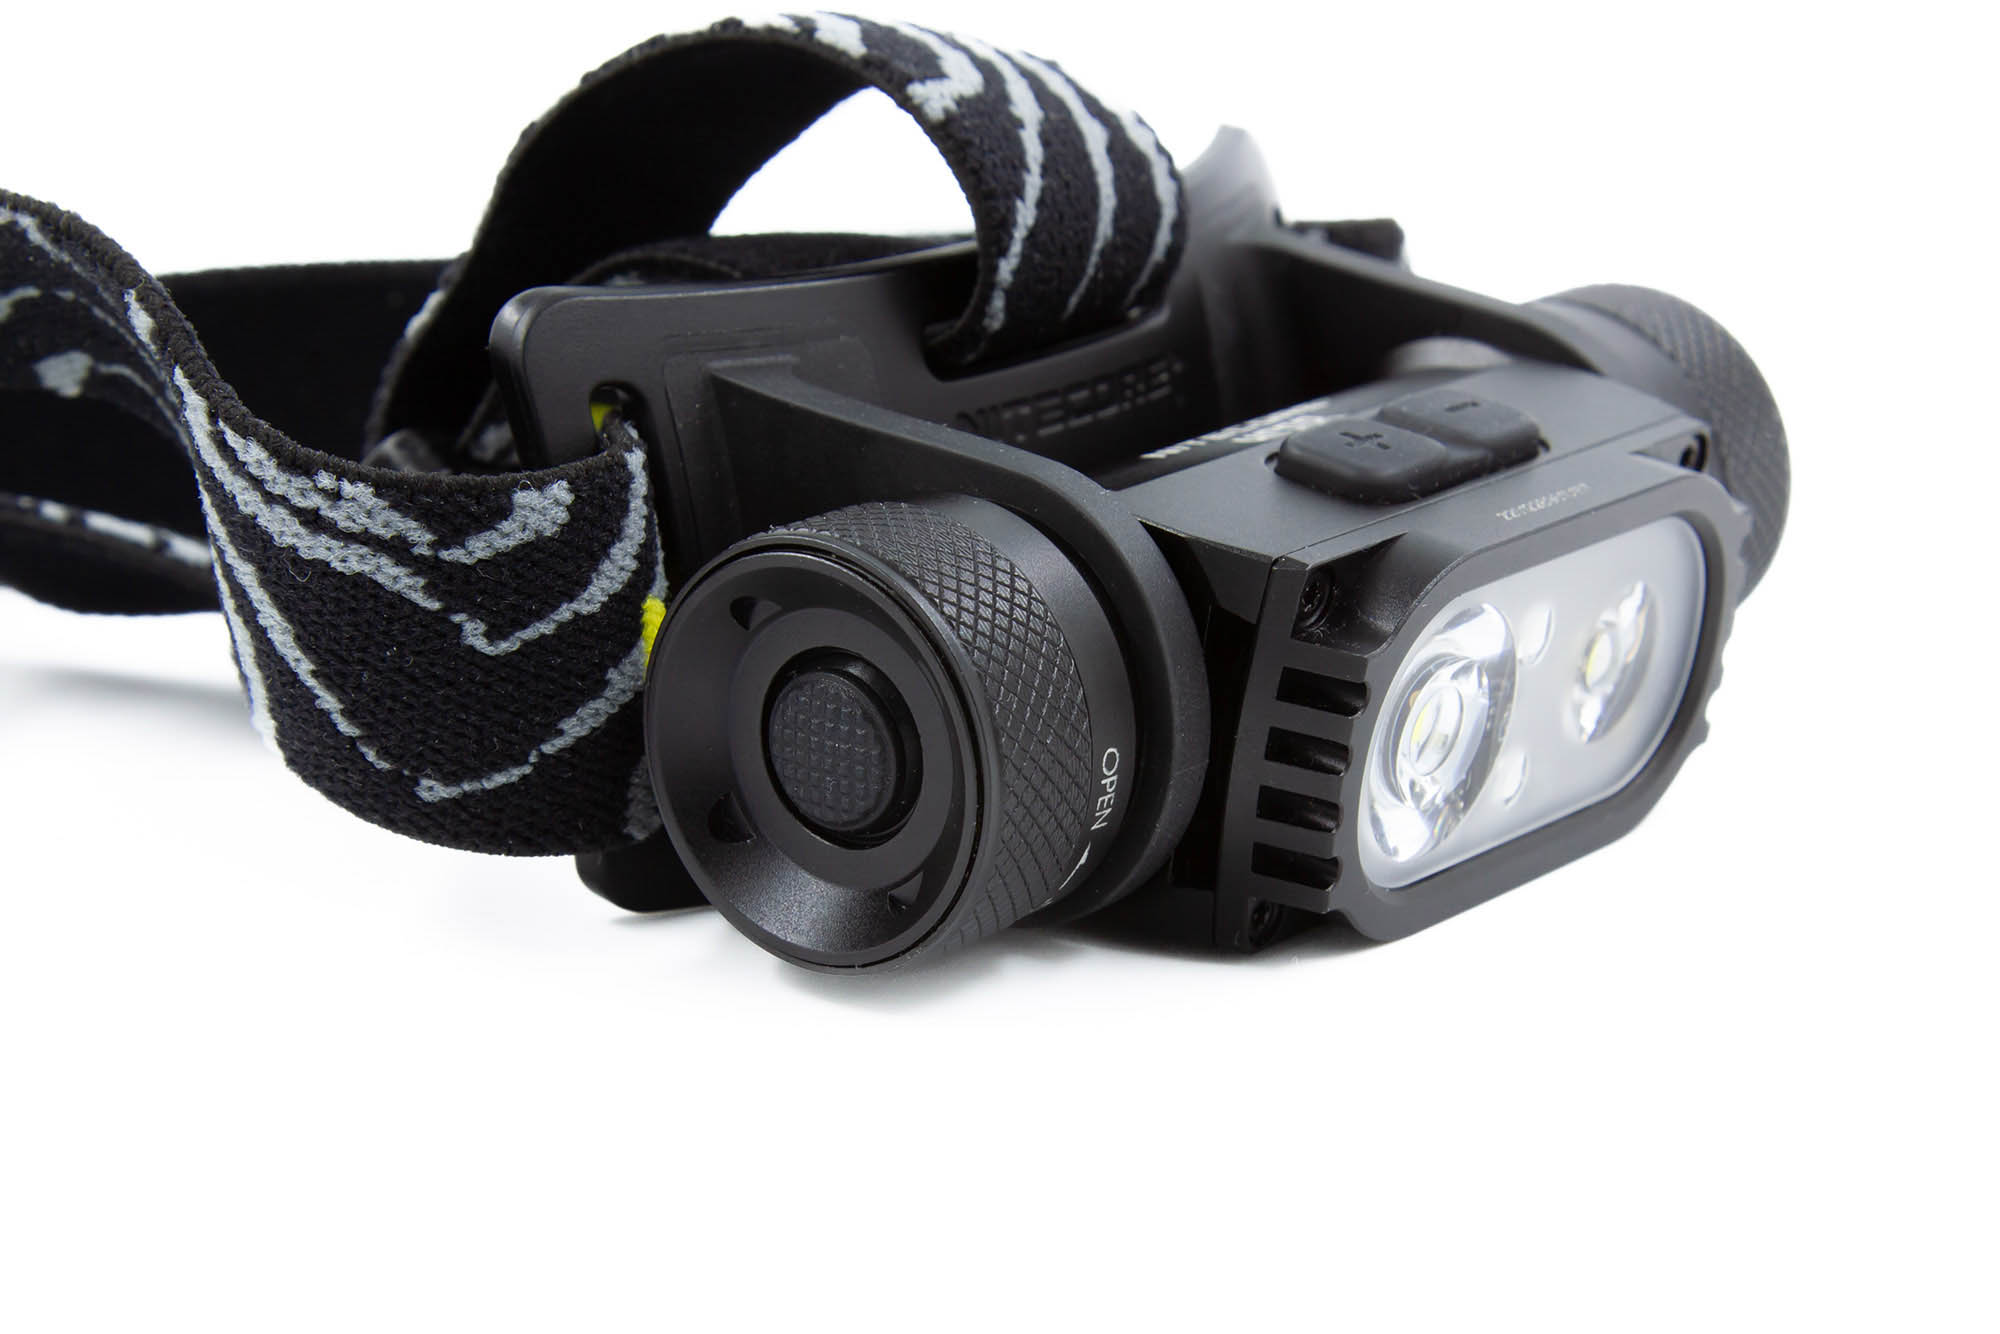

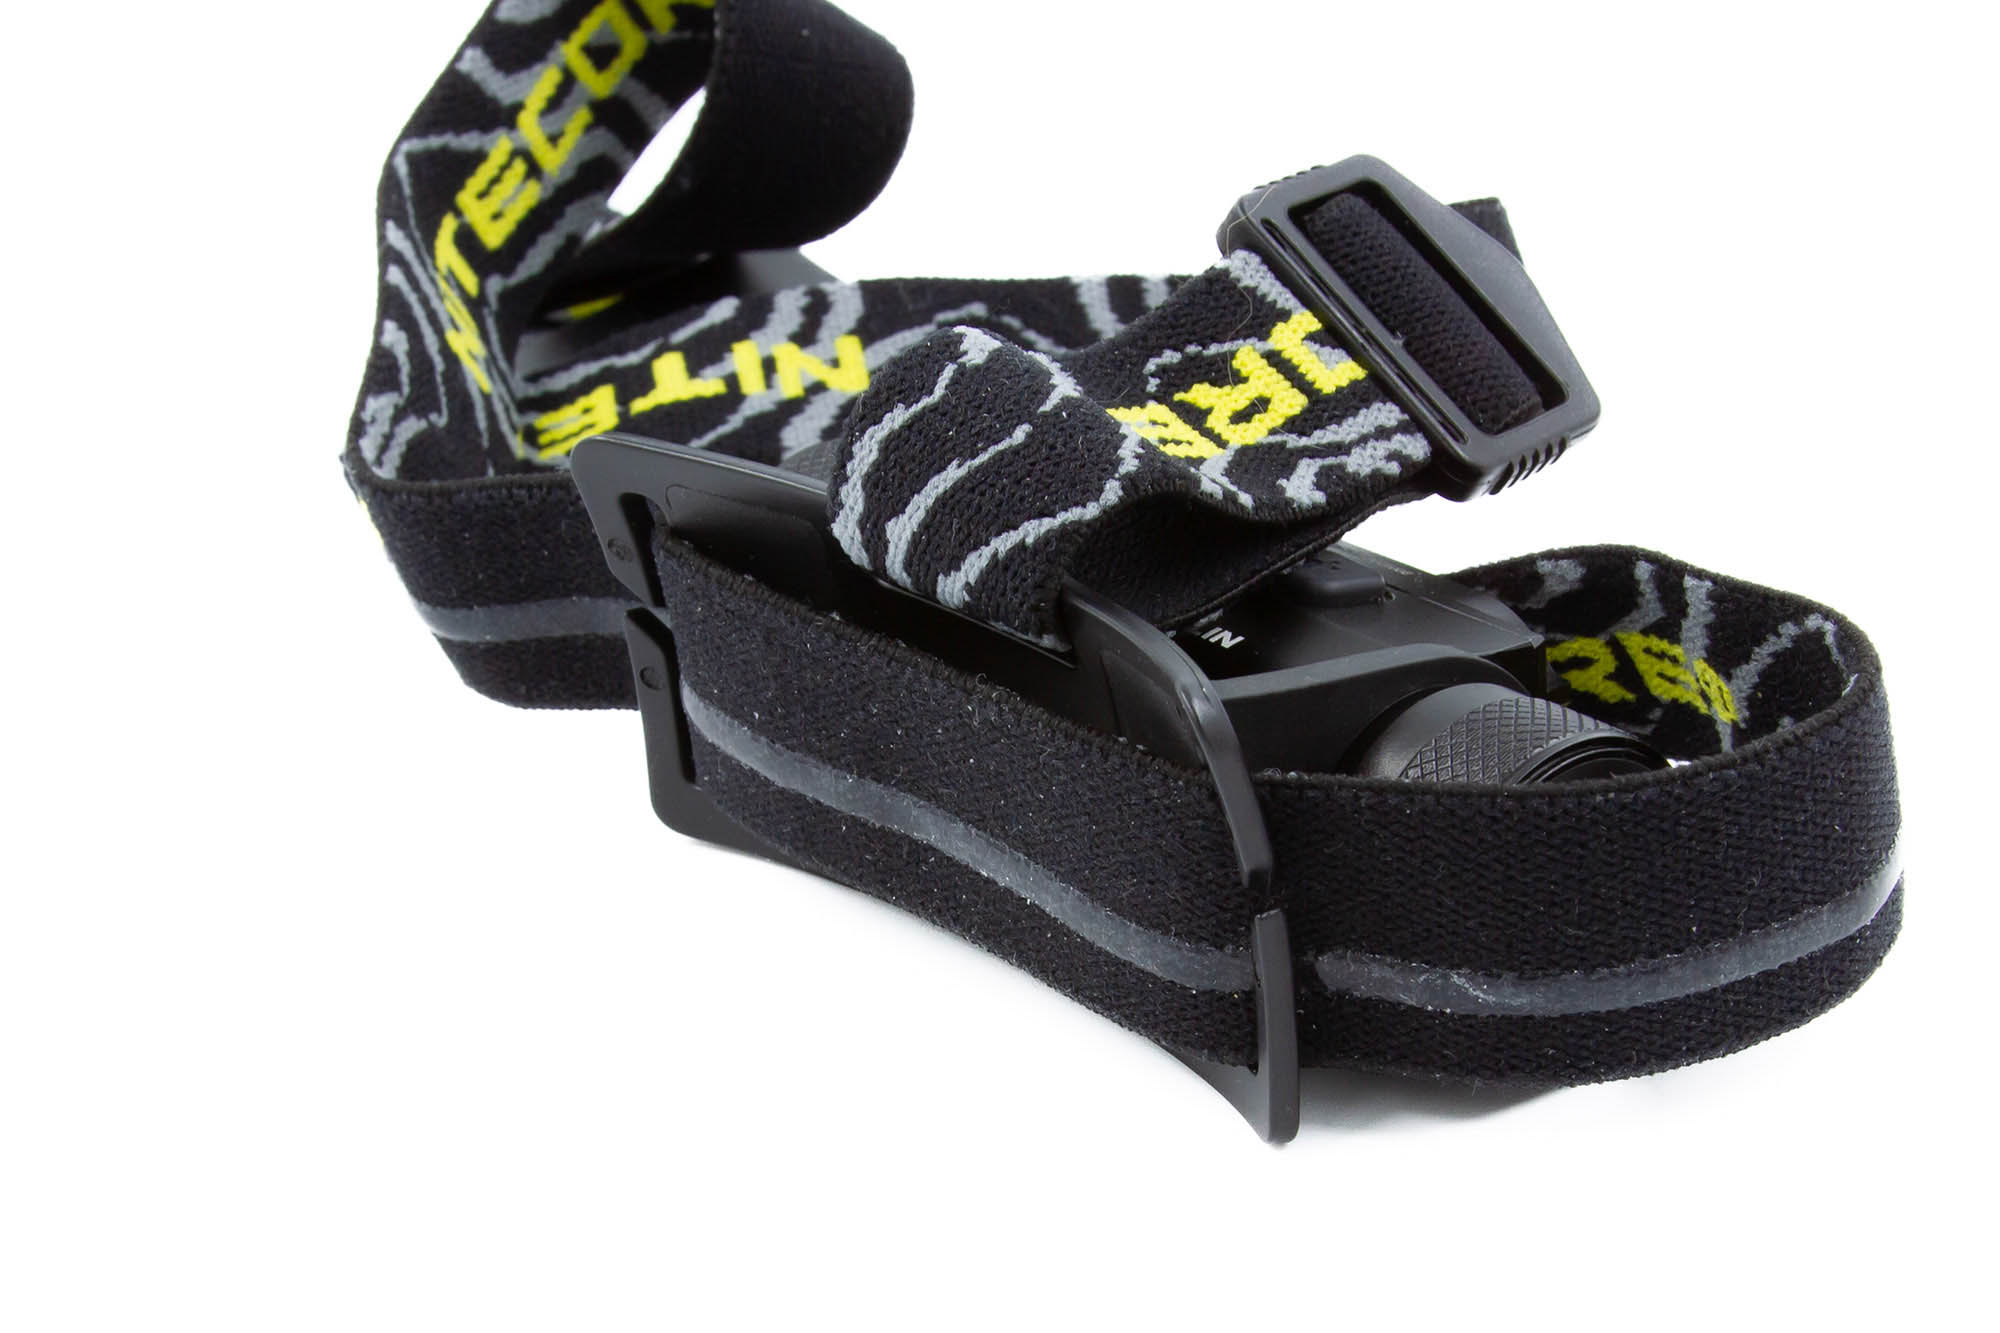

LED, Lens, Bezel, Beam, and Reflector
The Nitecore HC68 uses two Luminus SST40 emitters of an unspecified colour temperature nestled behind a custom TIR (more on that later), but as these emitters only come in 5000K and 6500K, and Nitecore has a propensity for using 6500K, it’s a fairly good assumption that this is the case on this light – although I’ll be checking that with my spectrophotometer.
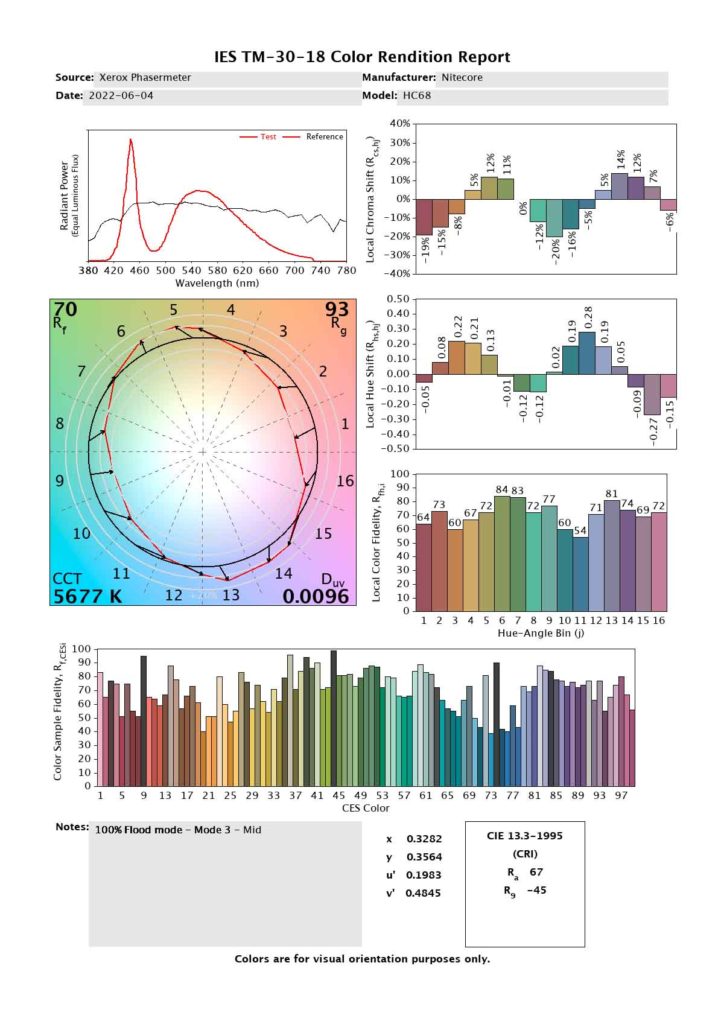
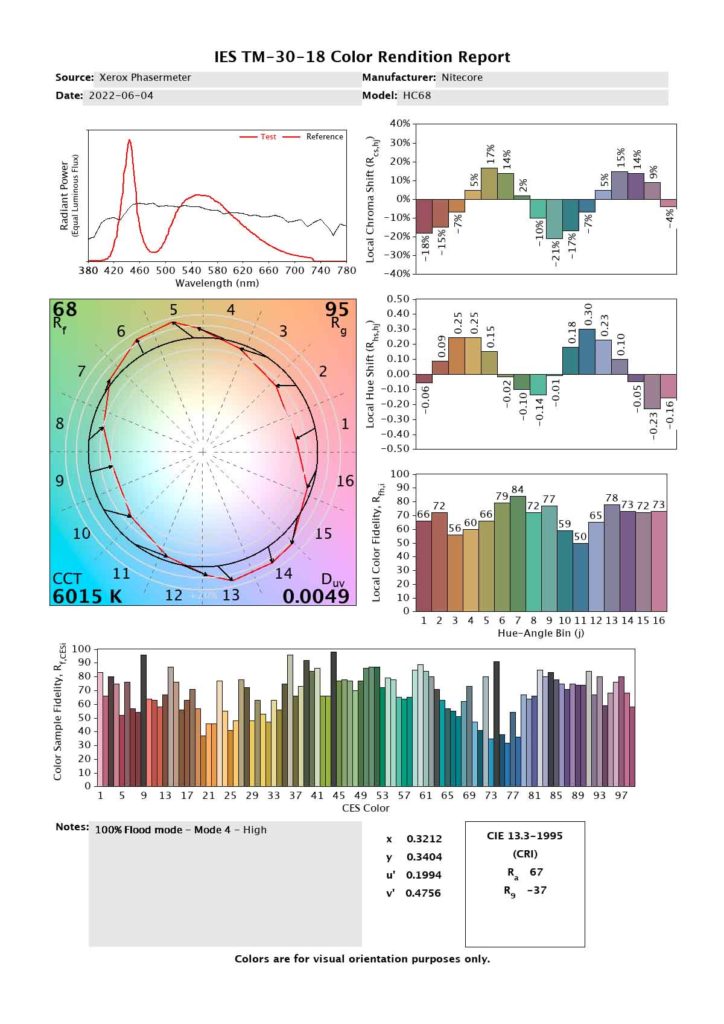
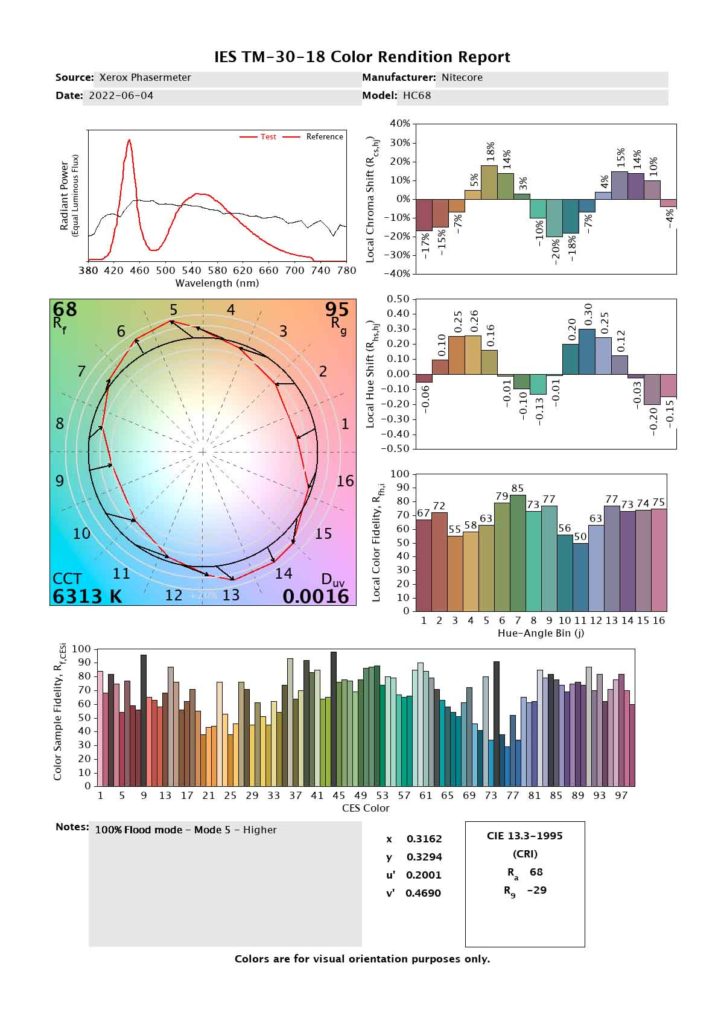
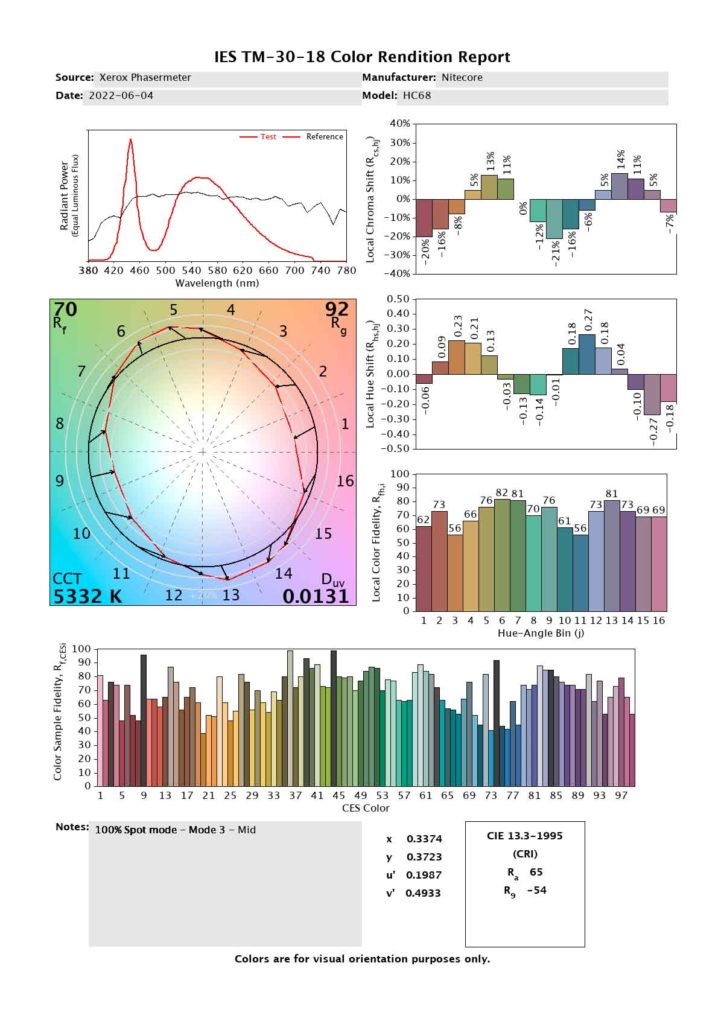
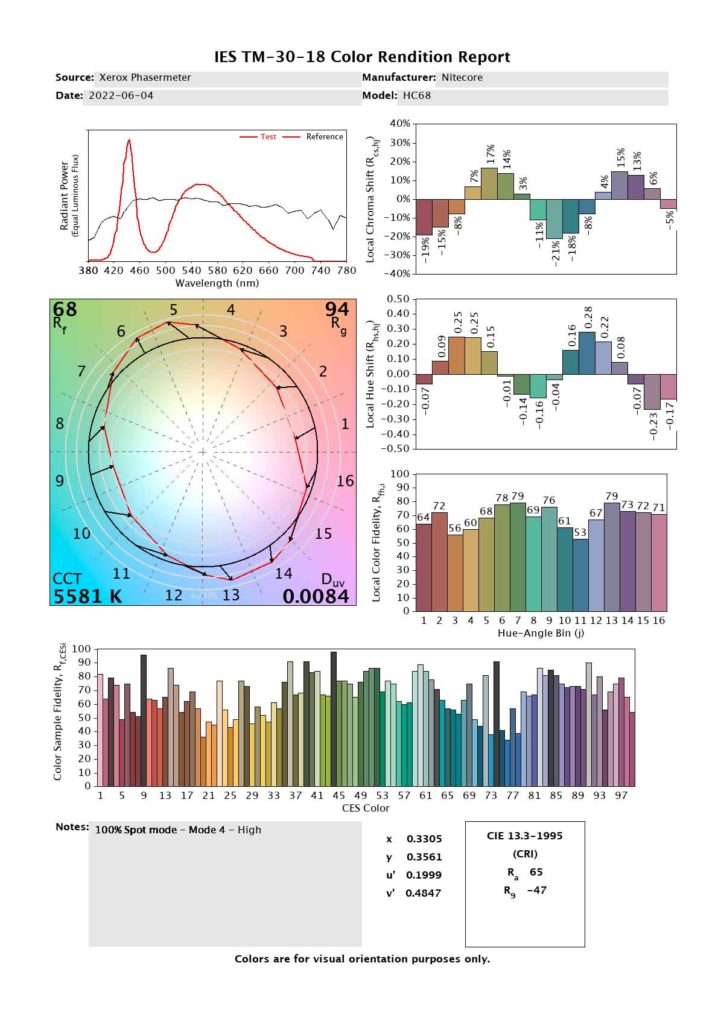
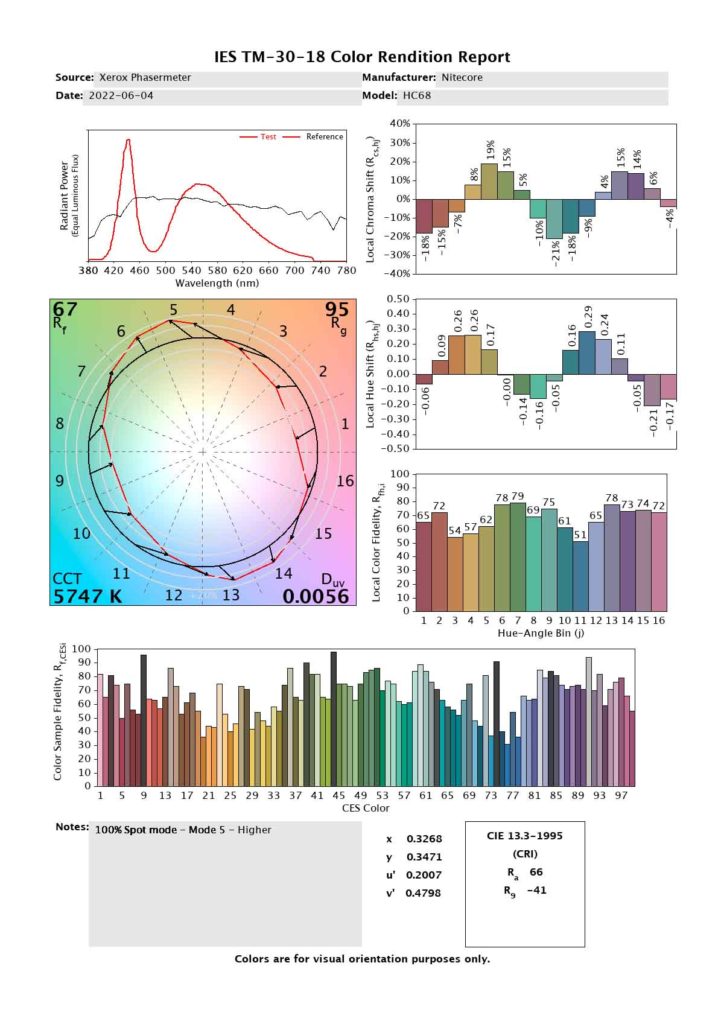
Interestingly enough, the Spot mode seems to have a warmer colour temperature (albeit not by much) – this could be due to the TIR reflecting light differently. It could also be due to different binned emitters being used, but I don’t think this is likely when Nitecore runs their ship as tightly as they do. CRI is <70 as expected, and all on the green side of the BBL.
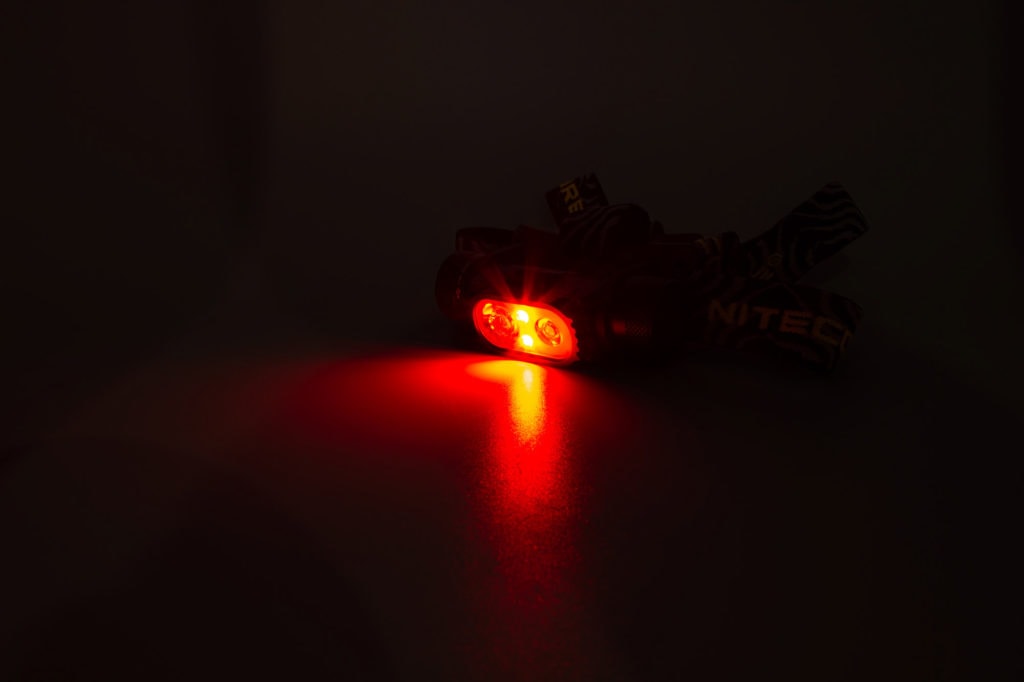
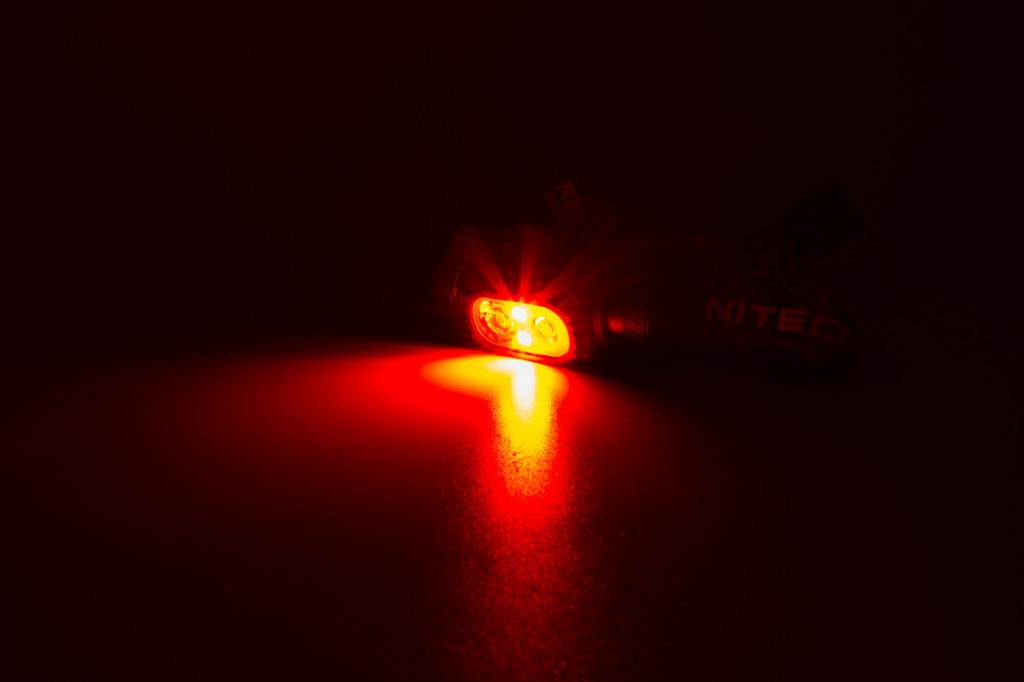
There’s also two red auxiliary emitters in between these two SST40s for the red modes. These are photo red at 630nm.
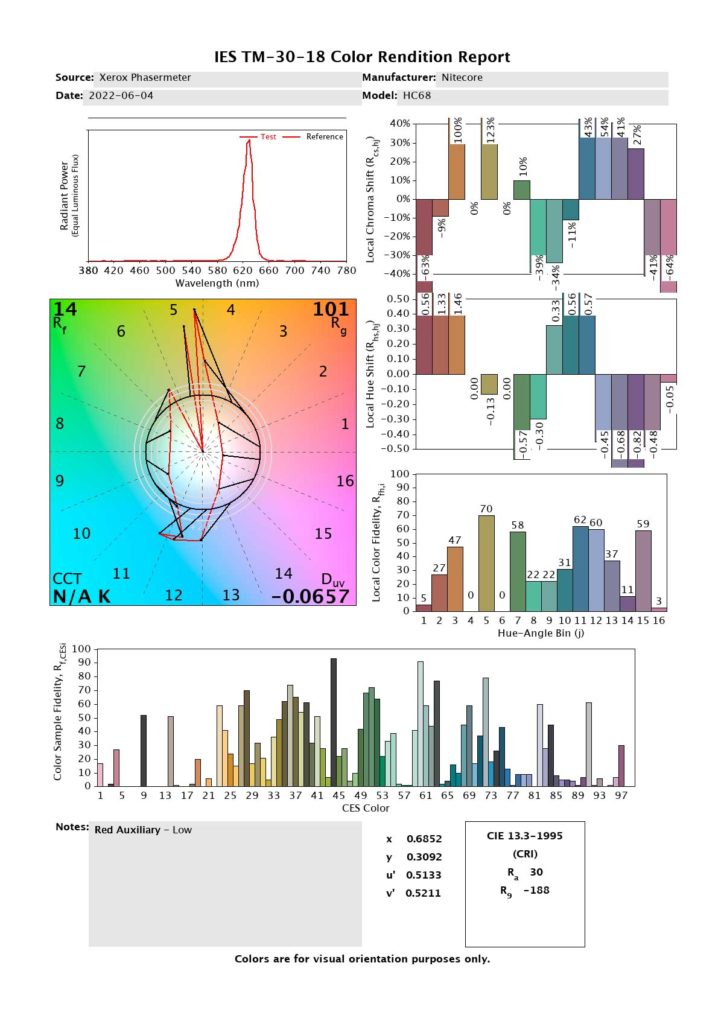
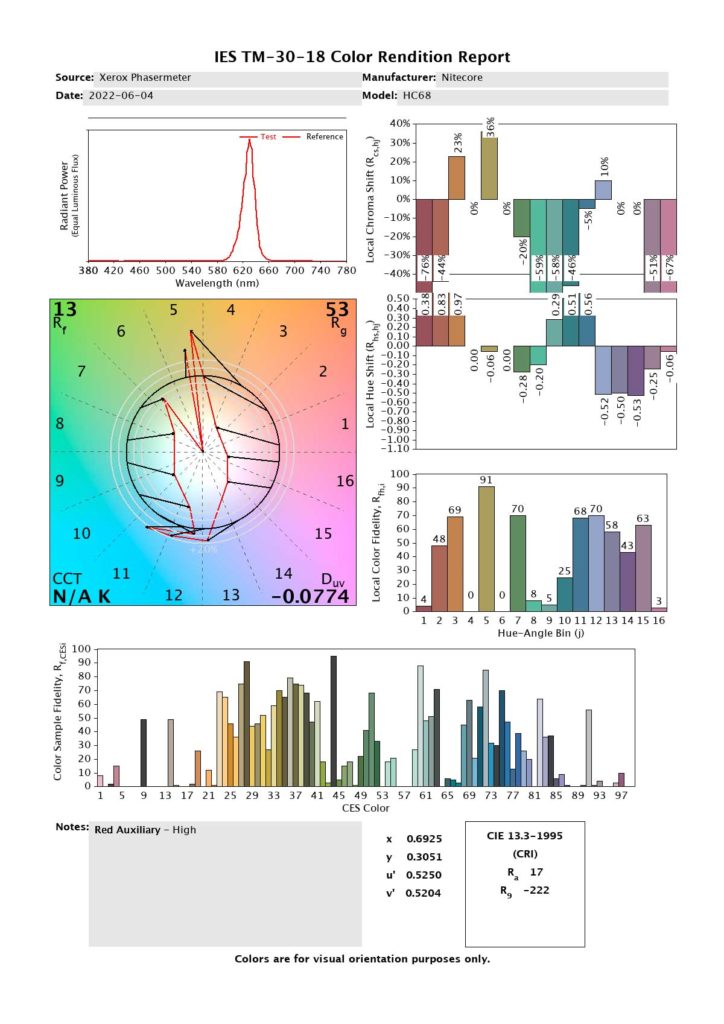
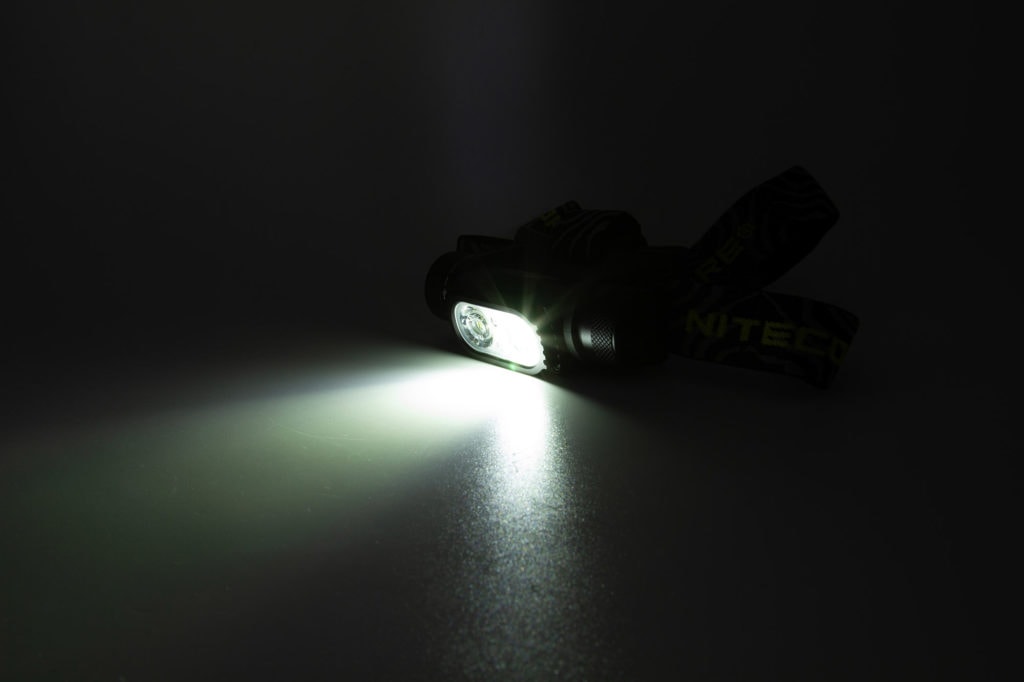
As mentioned above, all of these sit behind a custom TIR with one SST40 being pure flood, and a more narrowly focused TIR for the “spot” mode. There are clear cutouts for the red emitters, so they’re pure flood, but that’s the right thing for these aux emitters. There doesn’t appear to be glass over the top of the lens, for those of you who like that kind of thing.
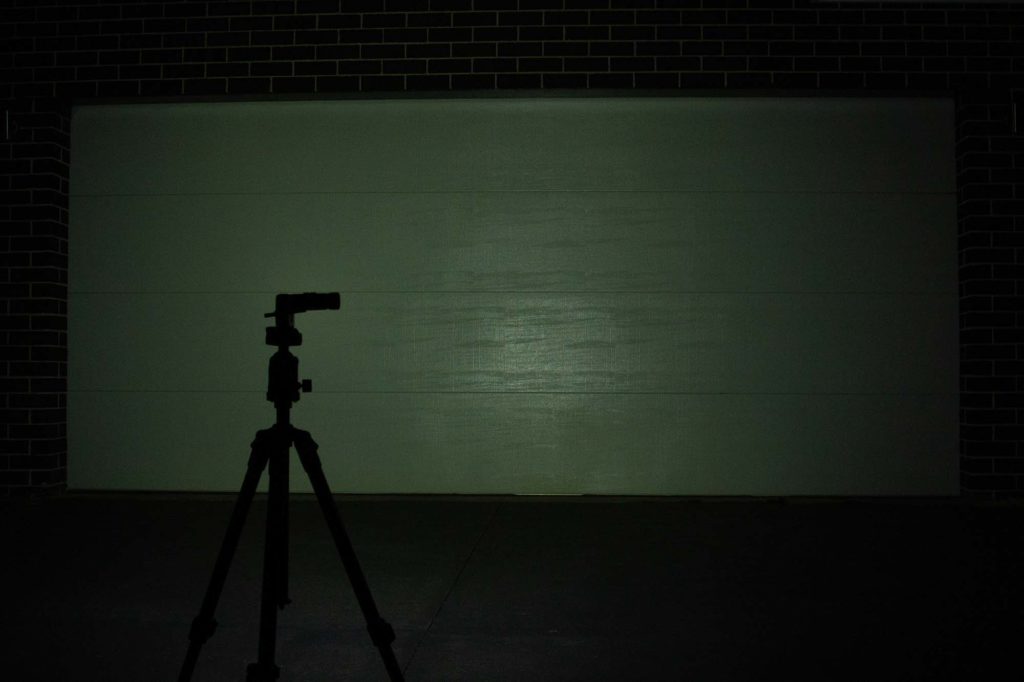
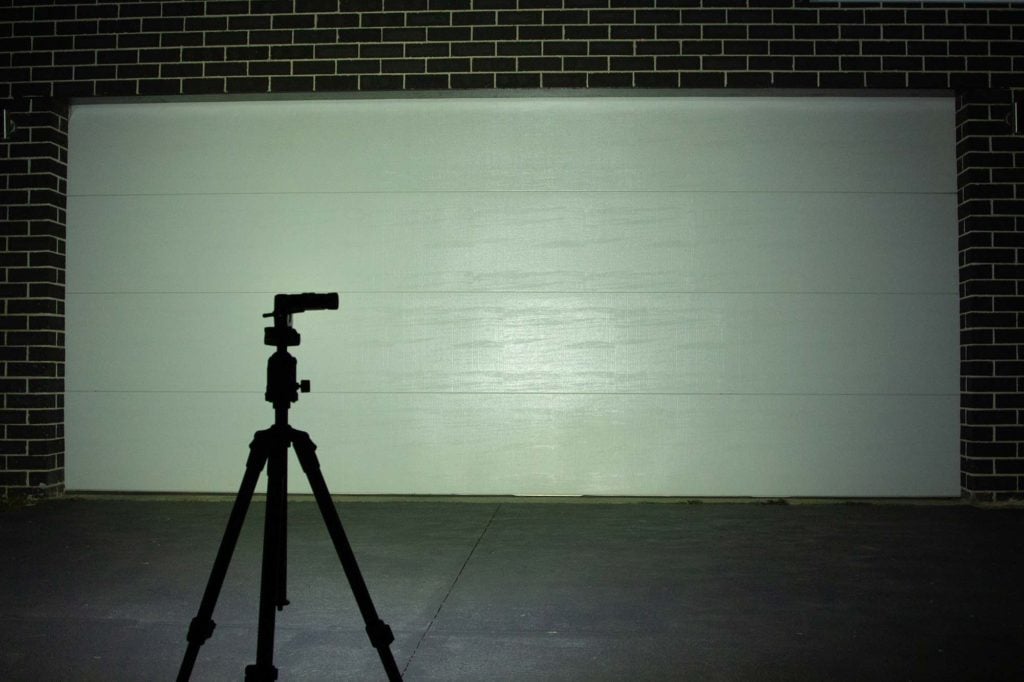
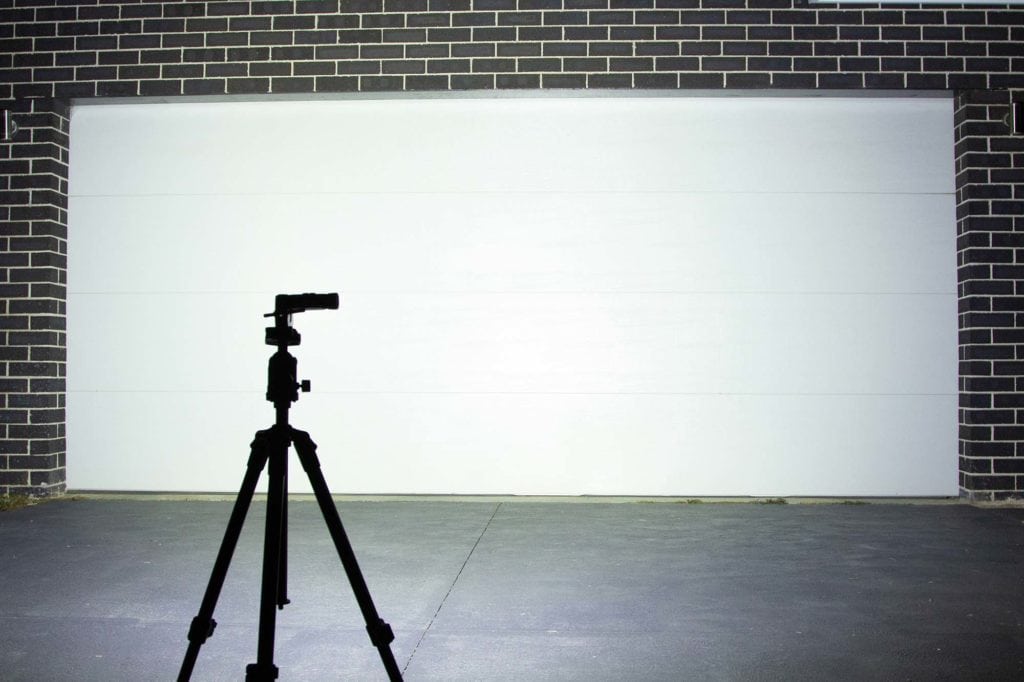
The spot mode still has a lot of spill, so it’s a good all-round beam. The flood beam has no real defined hotspot, so it’s definitely a more up-close-and-personal mode.
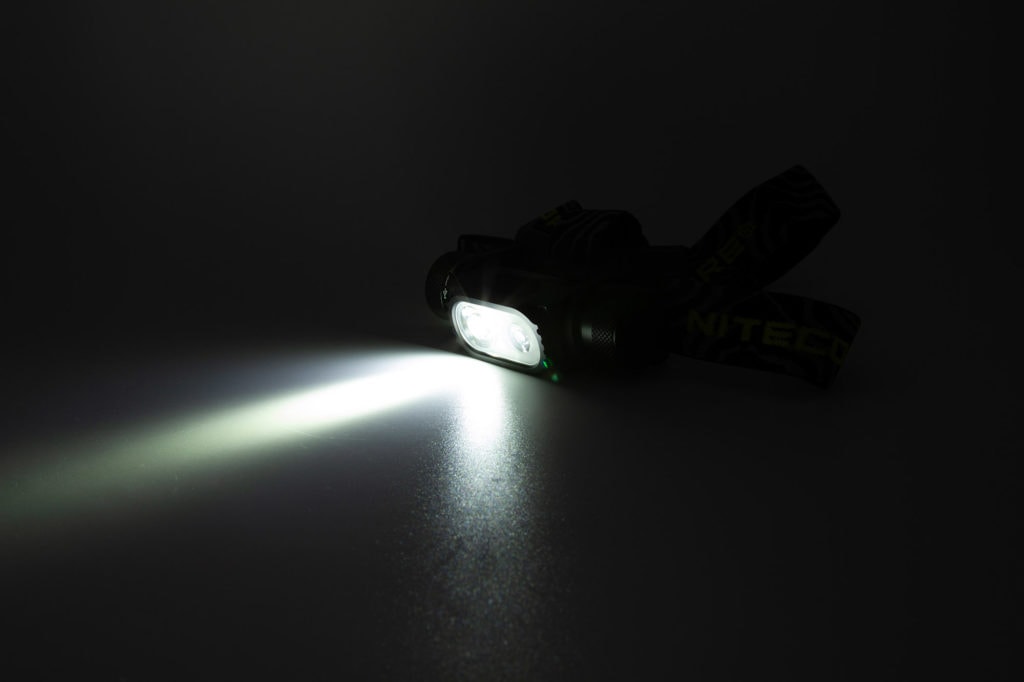
Dimensions and size comparison
Length:
- Length: 91.5 mm / 3.6 inches
- Front to back: 34.75 mm / 1.37 inches
- Height: 26.5 mm / 1.04 inches
Weight:
- With headband, without cell: 118.5 grams / 4.18 oz.
- With cell: 168.4 grams / 5.94 oz.
Flashlight size comparison with its competition
Note that I don’t have anything that directly compares with this – most of my headlamps are right-angle, and the only other “T” shaped headlamp I have is the Acebeam H40, even though that’s an AA/14500 light.
- Nitecore HC68 and Acebeam H40
- Nitecore HC68, Zebralight H600fc, and Wurkkos HD15
- Nitecore HC68 and Emisar DW4
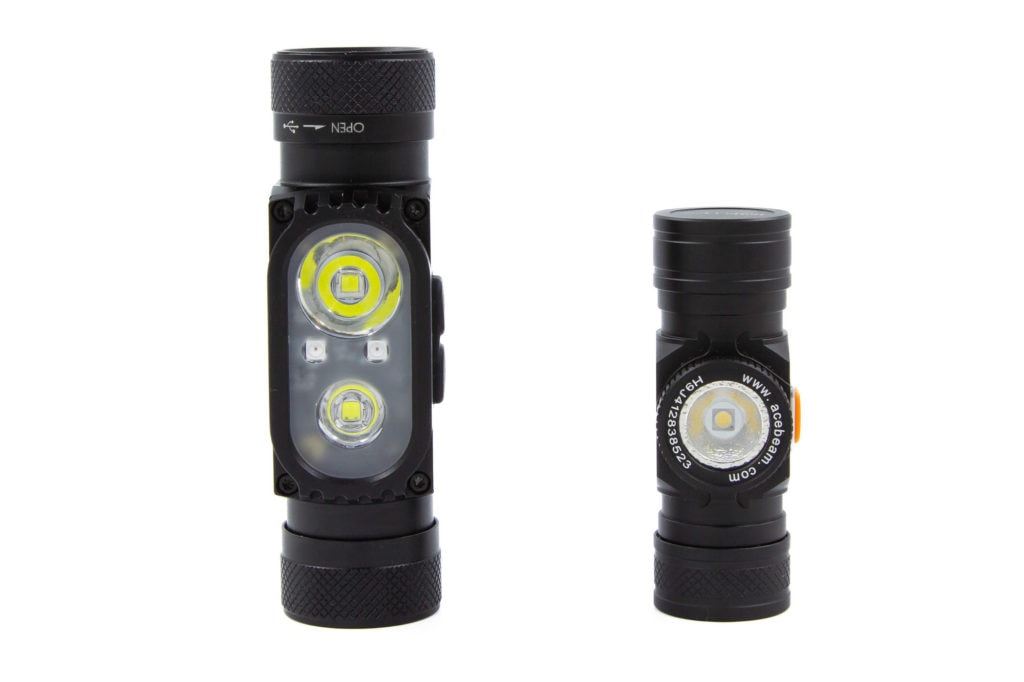
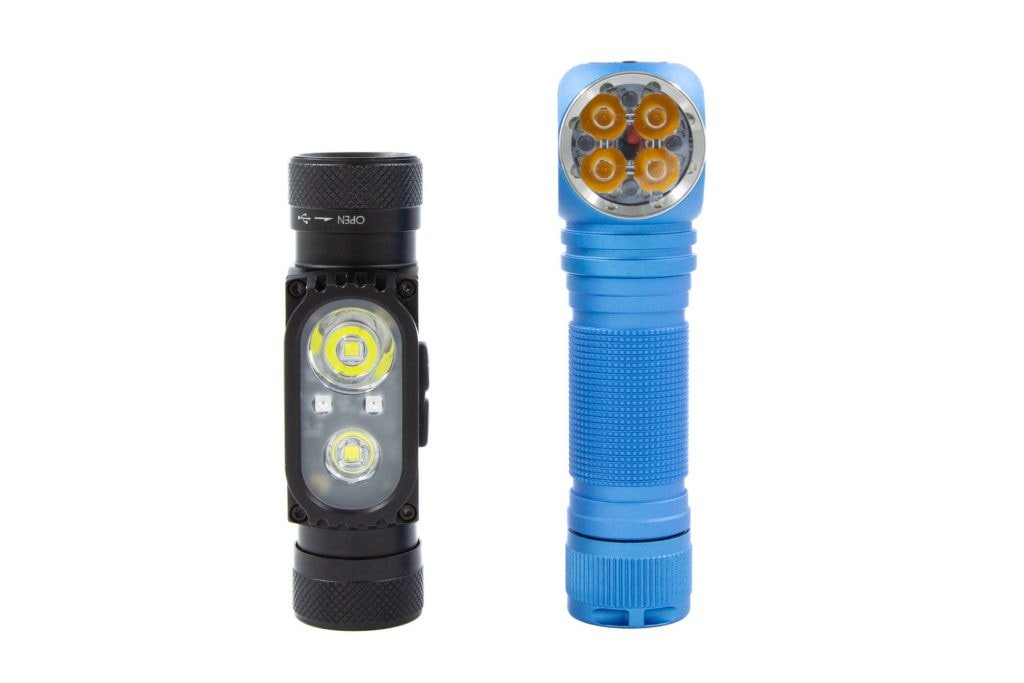
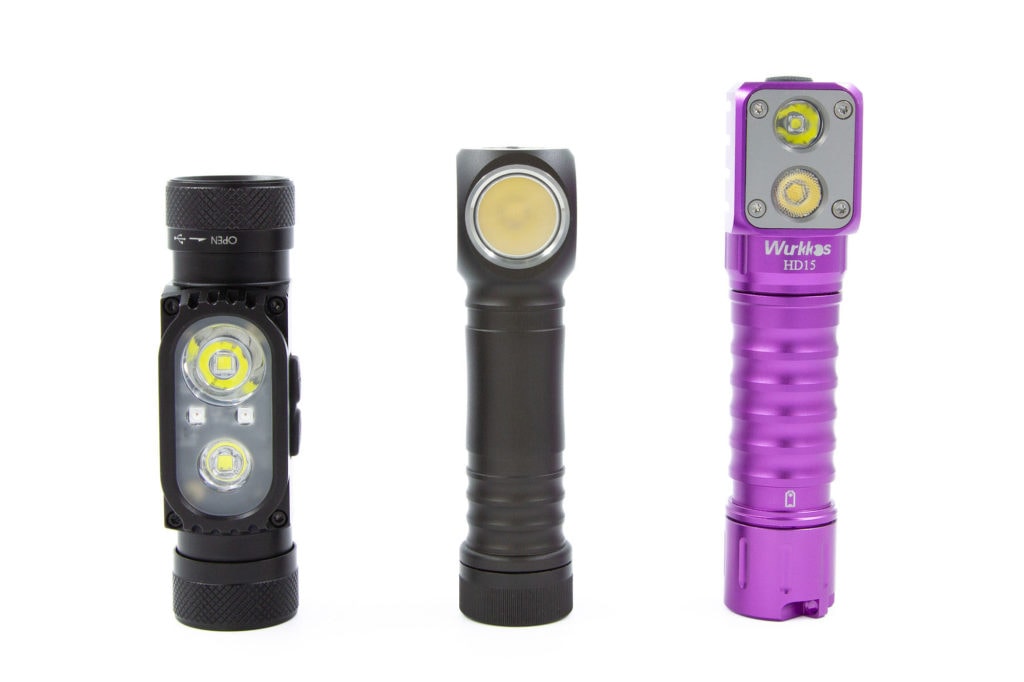
Driver & User Interface:
Due to the dual-channel nature of this light, there’s some interesting things here.
There’s effectively three buttons to think about here; Power, “Plus”, and “Minus”. There’s also a few shortcuts to some modes, which I’ll go over below. The UI seems far more complicated in writing than it is in use, though – after a short time with the light, it’s very intuitive.
Available modes:
- Normal modes: Ultra-low, Low, Mid, High, Higher, Turbo
- Aux modes: Red Low, Red High, Red Flashing, Beacon, SOS
Power button:
From OFF:
- Press and Hold: Turbo mode (60 seconds)
- Single click: Turn on (memory mode)
- Double click: Enter “auxiliary” mode (red+beacon+SOS)
From ON:
- Press and Hold: Turbo mode (60 seconds)
- 1 click: Off
Plus and Minus buttons:
From OFF:
- Press and Hold: to be used for shortcuts for Ultra-Low and Higher
- Single click: Show power indicator behind plus and minus buttons (three flashes is above 50%, two is below 50%, one is below 10%)
From ON (white modes):
- Plus:
- Press and Hold: Increase spotlight output and decrease flood output
- Single click: Increase brightness
- Minus
- Press and Hold: Increase flood output and decrease spotlight output
- Single click: Decrease brightness
From ON (red+aux modes):
- Power button: Off
- Plus:
- Single click: Cycle upwards (red low -> red high -> red flashing -> beacon -> SOS)
- Minus
- Single click: Cycle downwards (SOS -> beacon -> red flashing -> red high -> red low)
Mode memory:
- The HC68 will return to the last used selection (brightness and spot/flood).
Shortcuts:
- To Ultra-Low: Hold down the “minus” button, and press the power button.
- To Higher: Hold down the “plus” button, and press the power button.
Low voltage warning:
- The HC68 itself doesn’t have any voltage warnings – on bench power, I was able to wind the power down to 2.3V and the emitter was still very slightly lit, with no flashes of either the emitter or the indicator lights behind the top buttons. Any LVP would be as a result of the protected cell.
Strobe/blinkies
- Red flashing, Beacon, and SOS modes are available by using the Aux modes (double press power button from off), then cycling upwards (Plus button).
Lock-out mode:
- The only way to lock the HC68 out appears to be to loosen the battery cap slightly for a physical lockout.
A very solid note to make here – on all modes but one, you can blend the spot and flood emitters. The exception is Ultralow, which is a binary flood/spot choice when adjusting with the top buttons.
Batteries & Charging
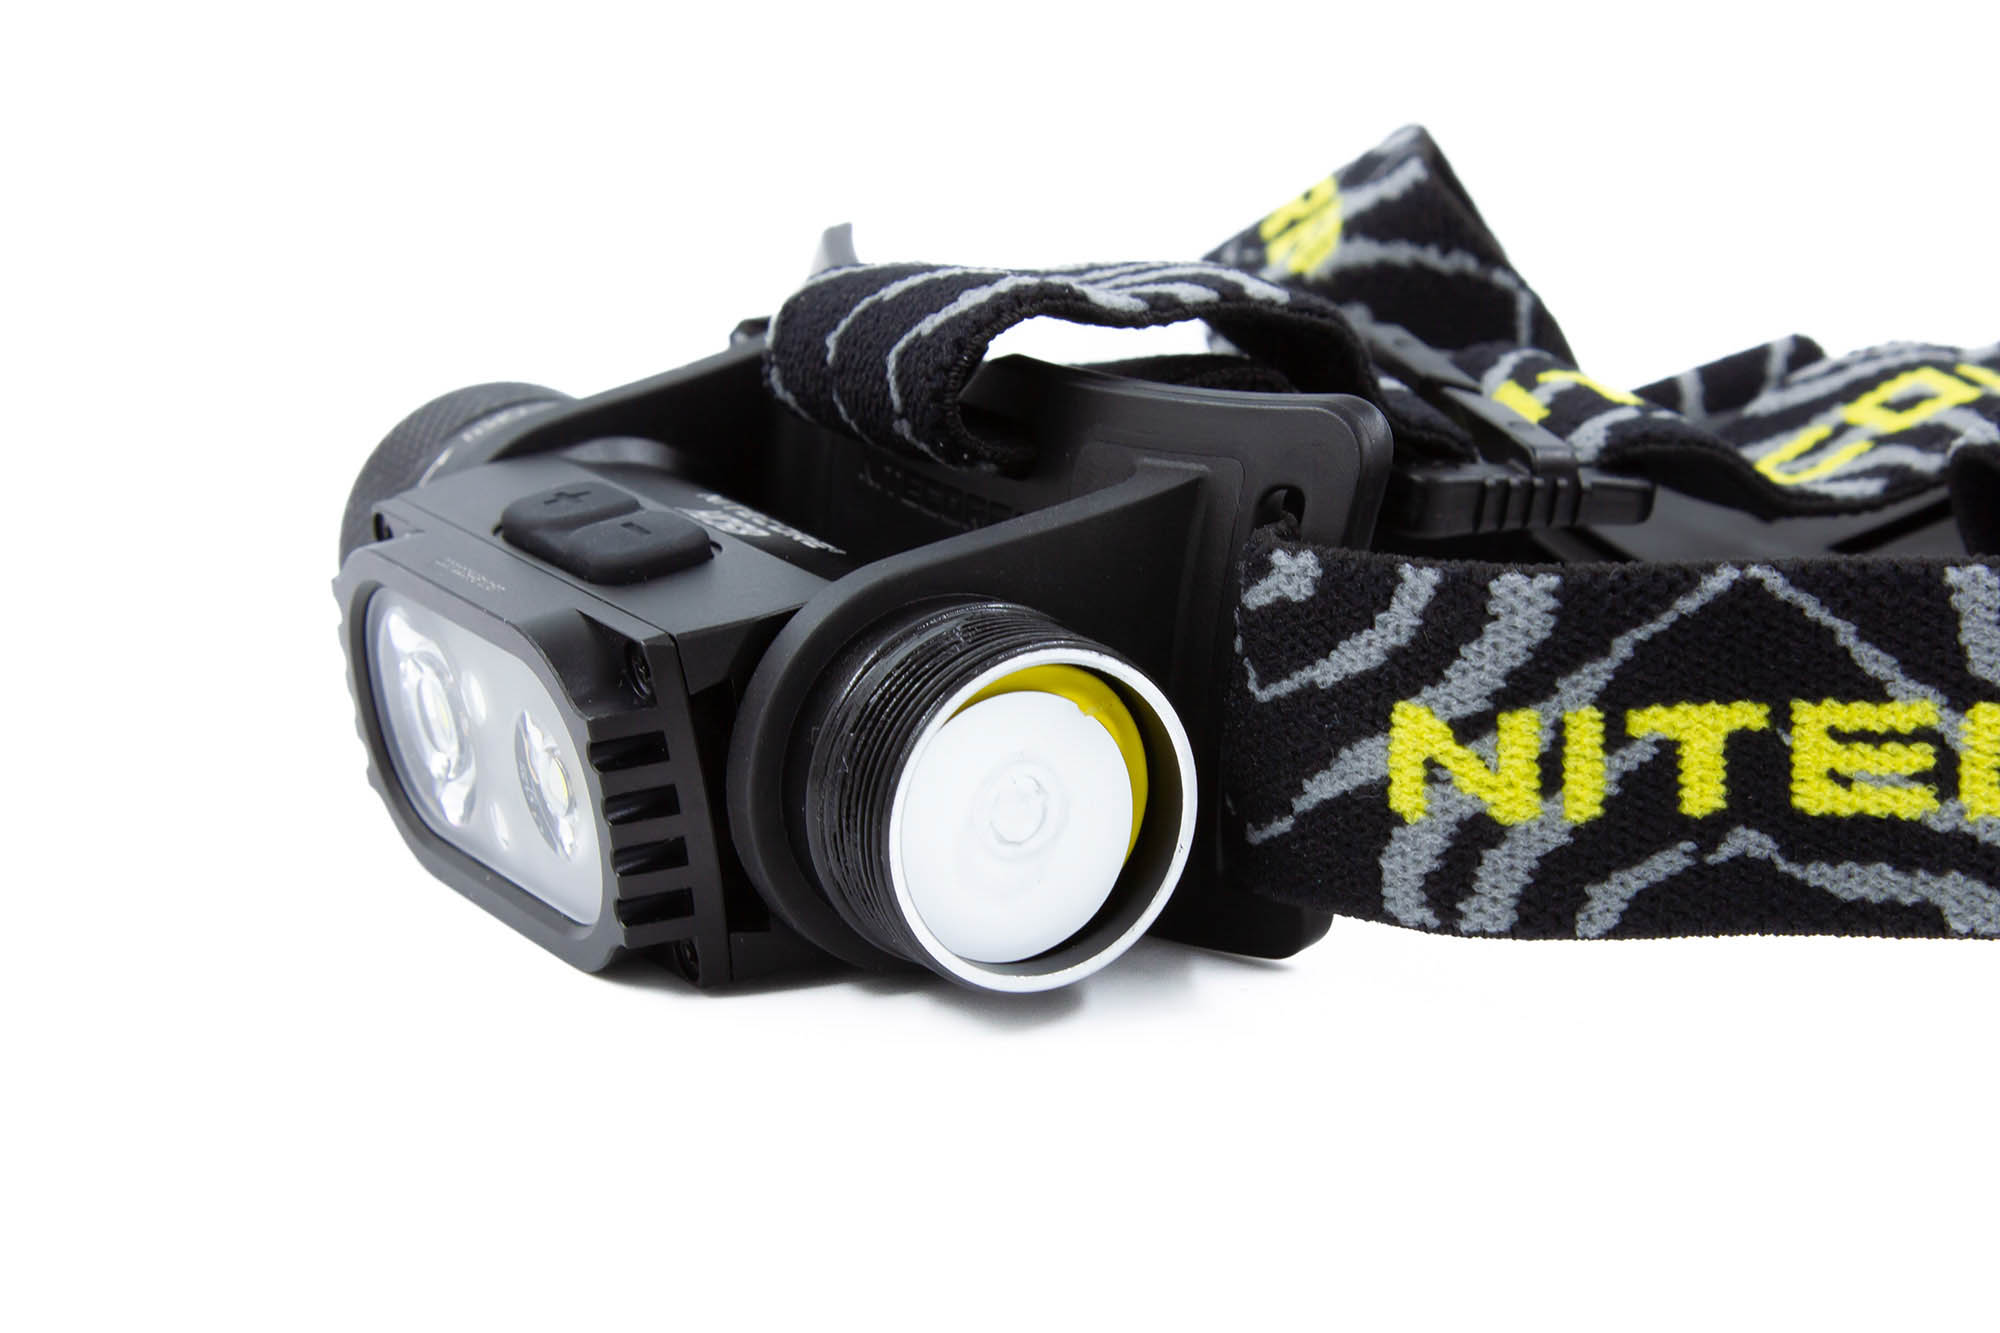
The HC68 has built-in charging that is concealed behind the threads at the power button end. A note on this though – it requires 9 full turns to unscrew the cap to its limits, and the first few times you do this, it may be quite tough. This loosens up over time, however.
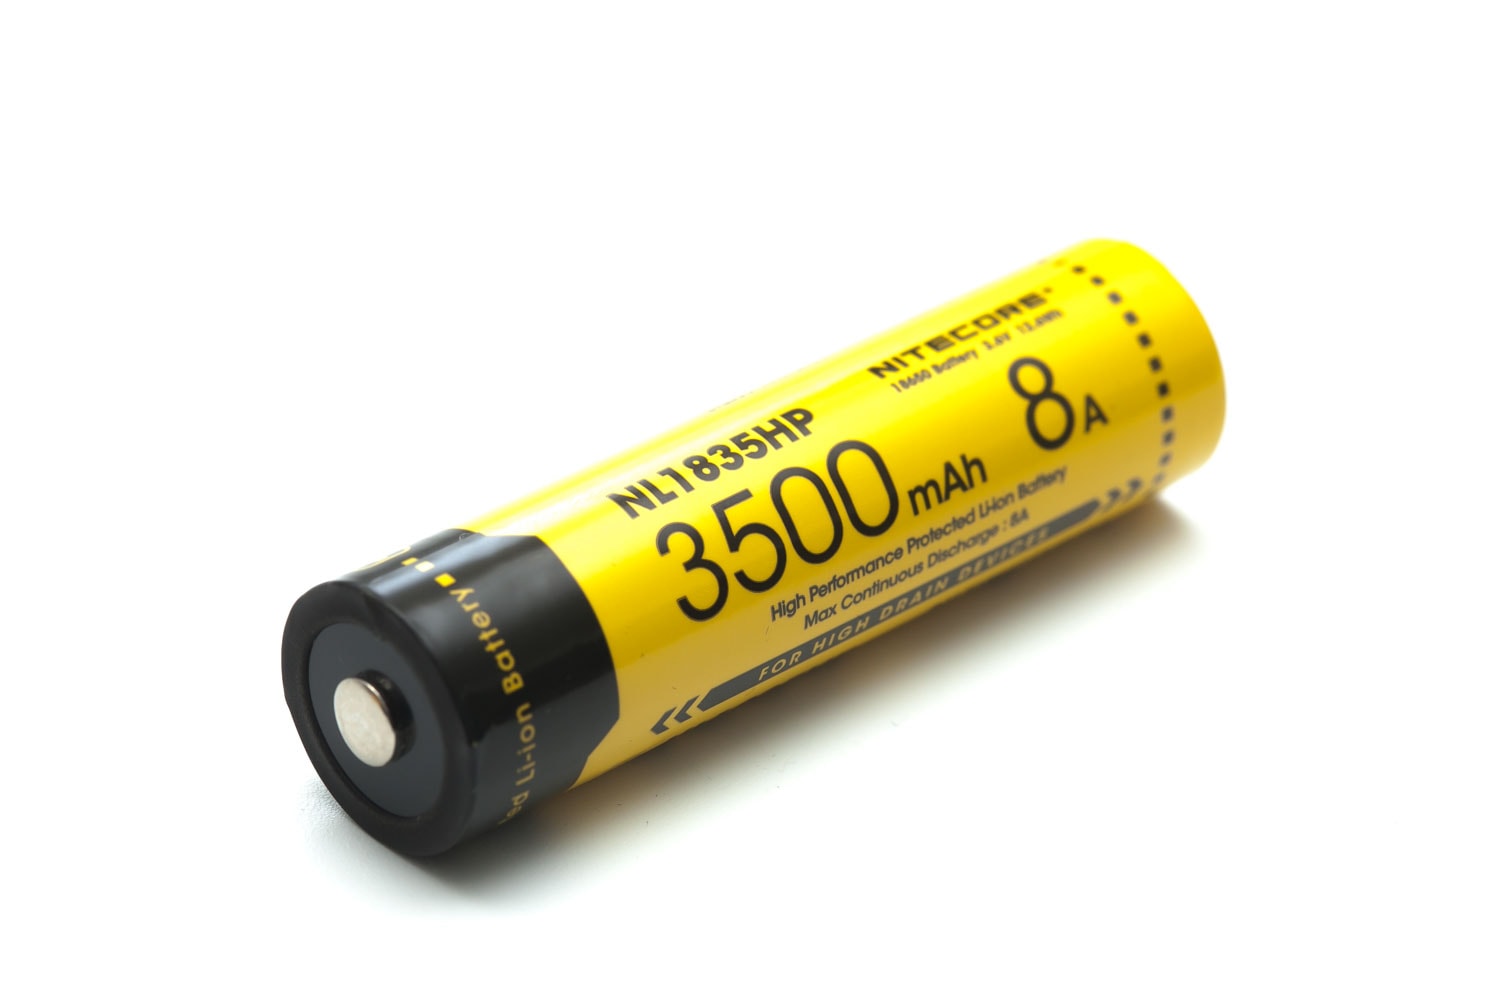
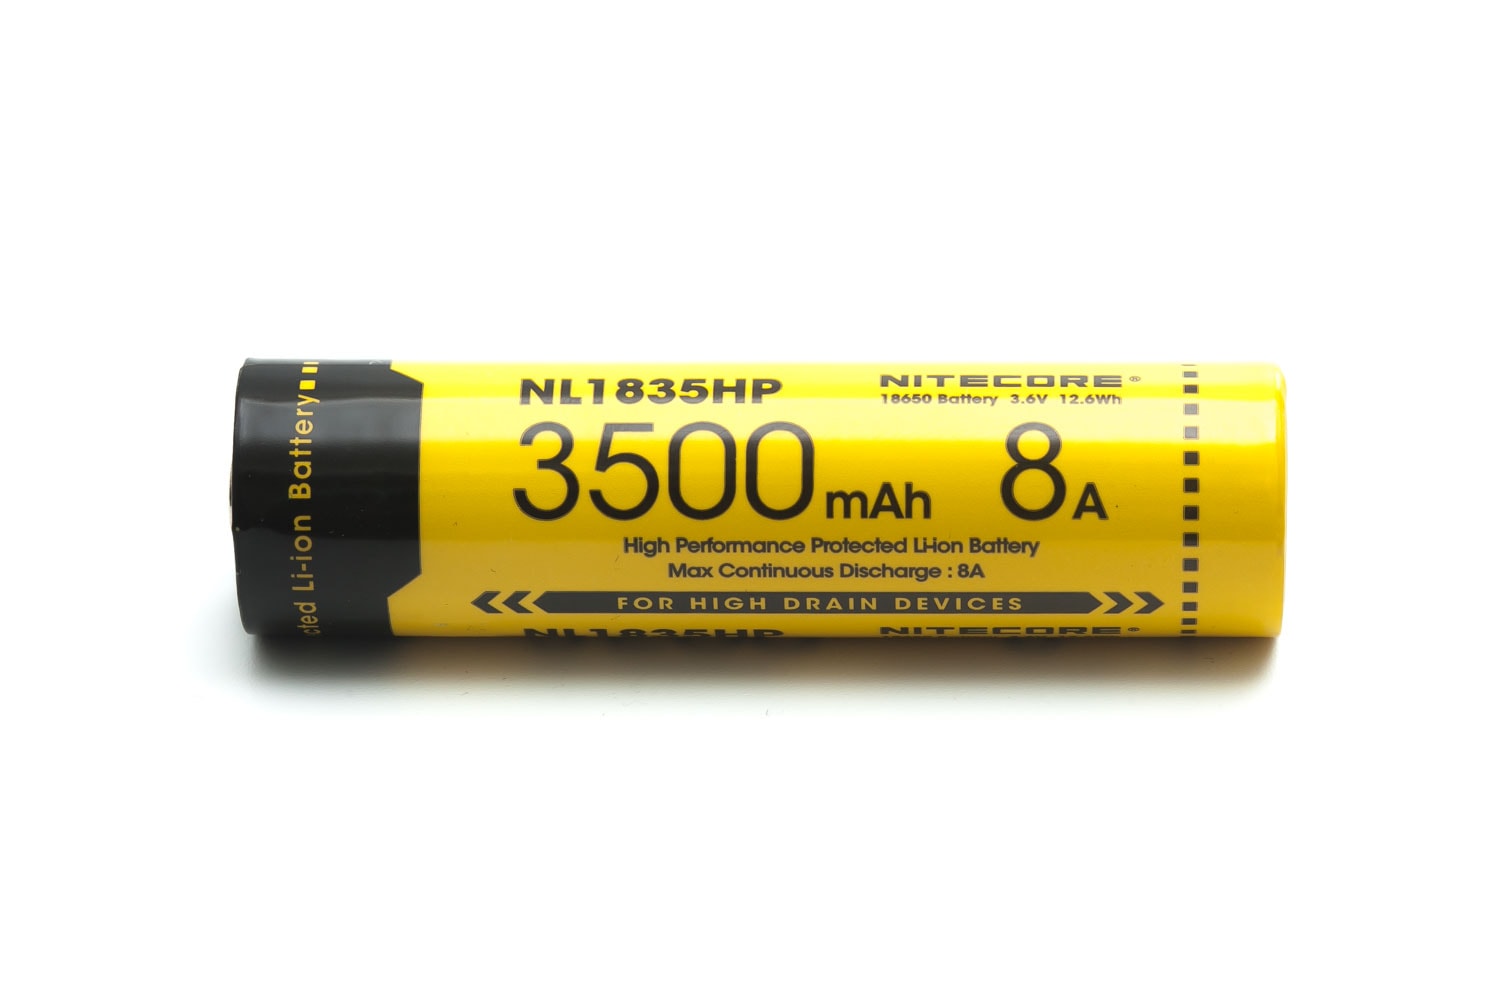
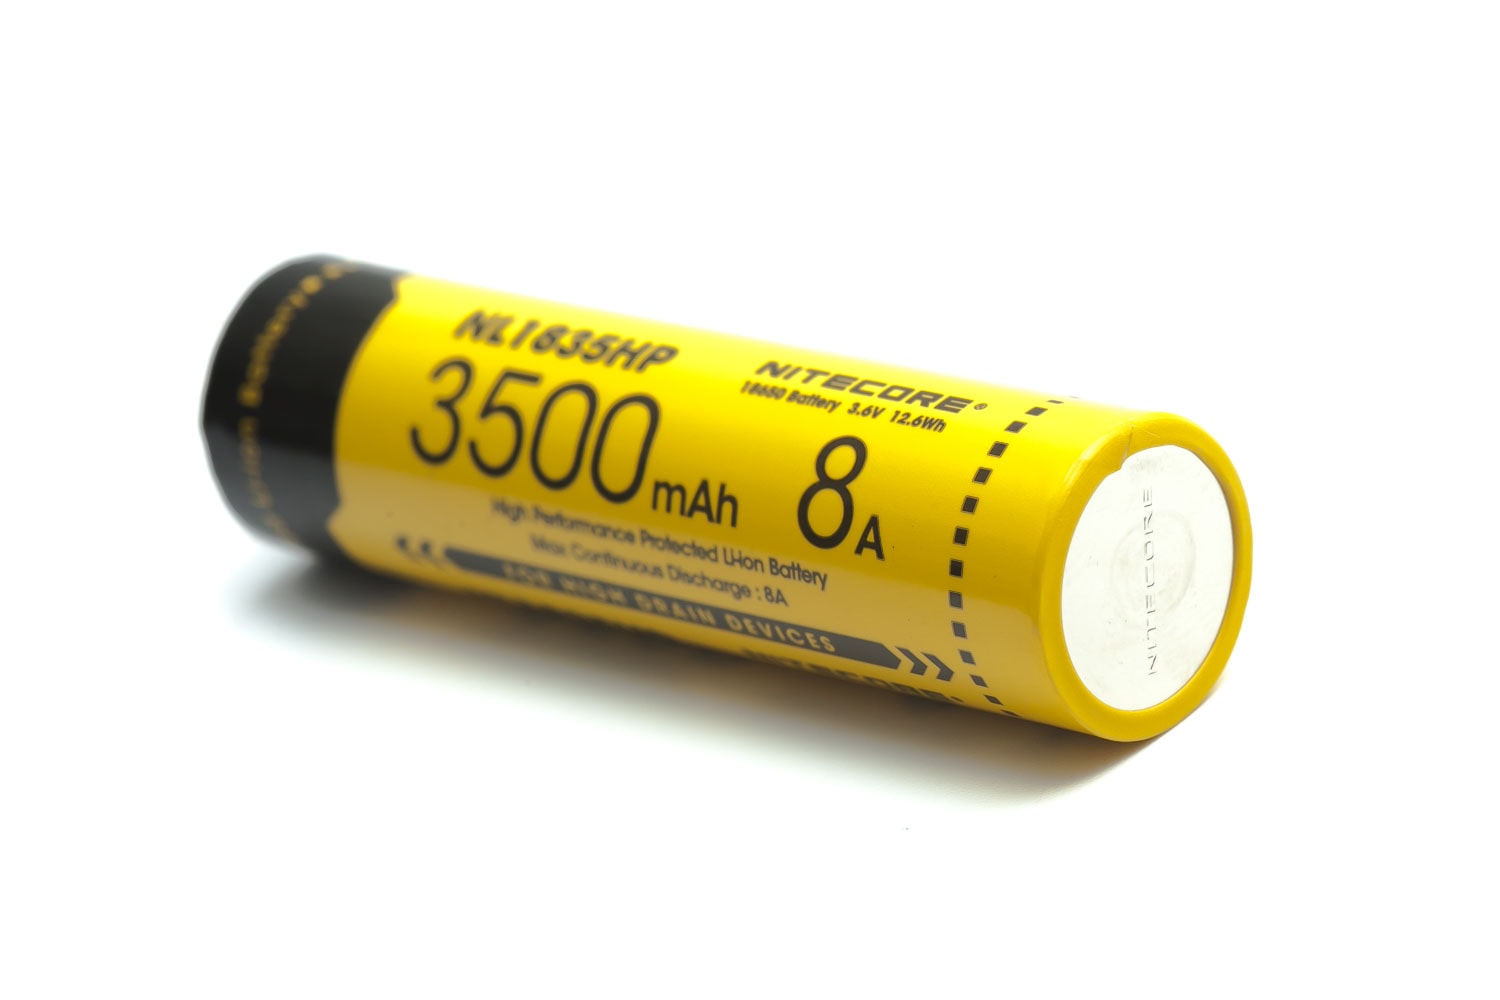
The included cell is the NL1835HP, which I’ve previously discovered is usually an LG MJ1 or a Sanyo GA cell with a protection circuit grafted to it – these are both very good cells, and have a capacity of 3500mAh. The protection circuit will limit the output to 8A even in case of an overrun, while the cells are capable of 10A. Still – they’re a great cell to use.
If you want to use unprotected cells, that’s doable – I tested this light with a Sony VTC6 and it worked fine. Keep in mind though, the light itself doesn’t have LVP, so you could very well kill a cell by doing so.
You can also use 2x CR123 cells in this light… but I don’t recommend it unless that’s all you have available. Make sure you don’t try to charge these cells in this light!!
I tested charging in the following methods: USB-A to USB-C was tested in an Apple 12W charger with the included cable, USB-C to USB-C was tested in an Apple 20W USB-C charger with a low resistance USB-C to C cable, and I tested charging the cell directly in my Vapcell S4+ set to Auto. There’s very similar results with both Apple adapters, so there’s no benefit in charging USB-A or USB-C.
Note that these are initial/maximum figures – as the battery gets closer to full, the charge rate will slow down.
- USB-A to C: 5.1V @ 2.08A – 10.6W
- USB-C to C: 5.18V @ 2.04A – 10.57W
- Vapcell S4+: 2A

Performance test
For my readings, I use the following:
Lux Meter: For lumen readings and runtimes, an Adafruit TSL2591 connected to a Raspberry Pi running Ubuntu, using RuTiTe by bmengineer in a custom sphere. A UNI-T UT383S is used for candela readings.
DMM: UNI-T UT139C and UNI-T UT210E – 16AWG wire is used directly into the 139C via some banana plugs, and 8AWG wire in a loop for the UNI-T. The DMM I use depends on how high the expected current will be – I use the 139C for <10A, and the 210E for >10A.
Lumen measurements (for each mode)
For the lumen measurements, I won’t be doing the 10-minute measurements on Ultralow and Low – it stands to reason that they’re going to be the same as turn-on, or perhaps only a fraction lower than that. There’s enough modes here to make testing a very lengthy process as it is.
| Mode | Amps at start | Specs | turn on | 30 sec | 10 min |
| Spot – Ultralow | 6.7mA | 1 lm | 1 | 1 | x |
| Spot – Low | 103mA | 50 lm | 44 | 44 | x |
| Spot – Mid | 0.48A | 250 lm | 219 | 219 | 212 |
| Spot – High | 2.34A | 950 lm | 898 | 849 | 541 |
| Spot – Higher | 5.8A | 1800 lm | 1595 | 1429 | 427 |
| Flood – Ultralow | 6.7mA | 1 lm | 1 | 1 | x |
| Flood – Low | 103mA | 45 lm | 38 | 38 | x |
| Flood – Mid | 0.48A | 220 lm | 189 | 186 | 180 |
| Flood – High | 2.34 | 850 lm | 706 | 674 | 342 |
| Flood – Higher | 5.8A | 1400 lm | 1257 | 1144 | 341 |
| Turbo | 6.3A | 2000 lm | 1831 | 1660 | 391 |
An interesting note – the same power is being delivered for both flood and spot emitters, and is changed smoothly – almost no change in current was detected when ramping between flood and spot.
Some of the readings are lower than per the specification sheet, but after taking into account the fact that I’m using amateur equipment, these aren’t noticeable differences – or at the most, only slightly perceptible.
I also tried making a graph of this, but… let’s just say it’s not too pretty, so I’ll let the numbers do the talking.
Parasitic drain:
- 17µA – although measuring was quite tricky, despite it being easy to connect probes to.
Runtime graph
There’s a huge amount of modes that can be tested here – five brightnesses in two different modes (spot and flood), with an infinite number of options between, as spot and flood mix. To keep it simple, I’ve just done runtimes on the two highest modes (“Highest” and “High”) in both 100% spot and 100% flood, as well as the first 10 minutes of the Turbo mode, which lights up both emitters.
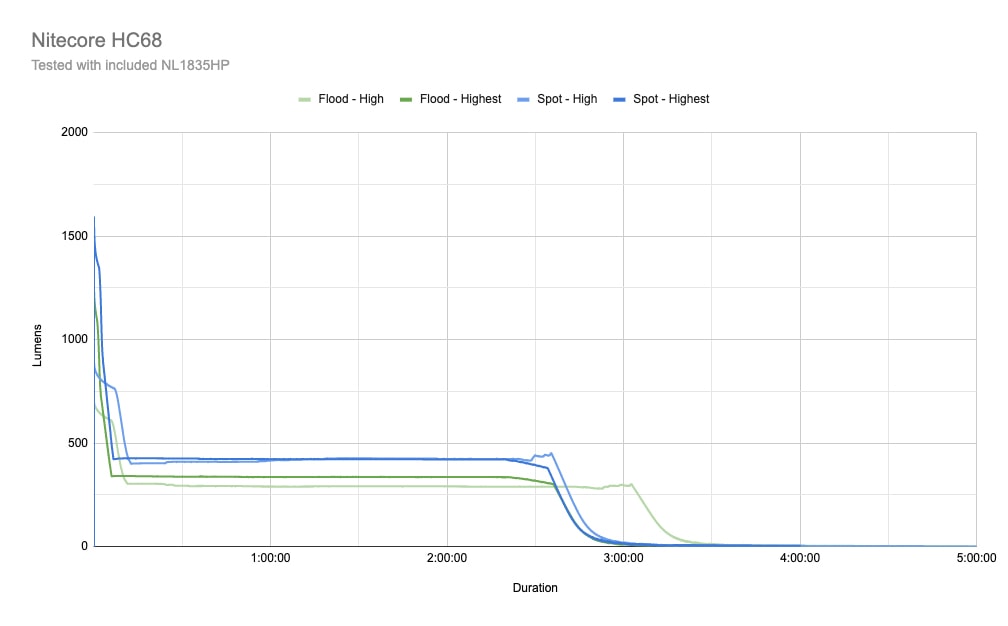
All of the modes tested run out to 2.5 hours at least before ramping down to almost nothing – I let them run for a while longer and then stopped the runs. High on both 100% flood and 100% spot are rated at 2.5 hours, so I’m quite impressed with the accuracy on that for 100% spot, and even happier that it ran for longer on flood.
“Higher” is rated at 30 mins, but with a caveat of thermal regulation disabled. I don’t think that’s something that I can do, so it ramps down and goes along, but still runs for around 2.5 hours.
As I’ve mentioned in other reviews, my sphere doesn’t seem to play nicely with very floody lights, but the curves between spot and flood look mostly the same – but this time it seems to be fairly accurate, which is nice.
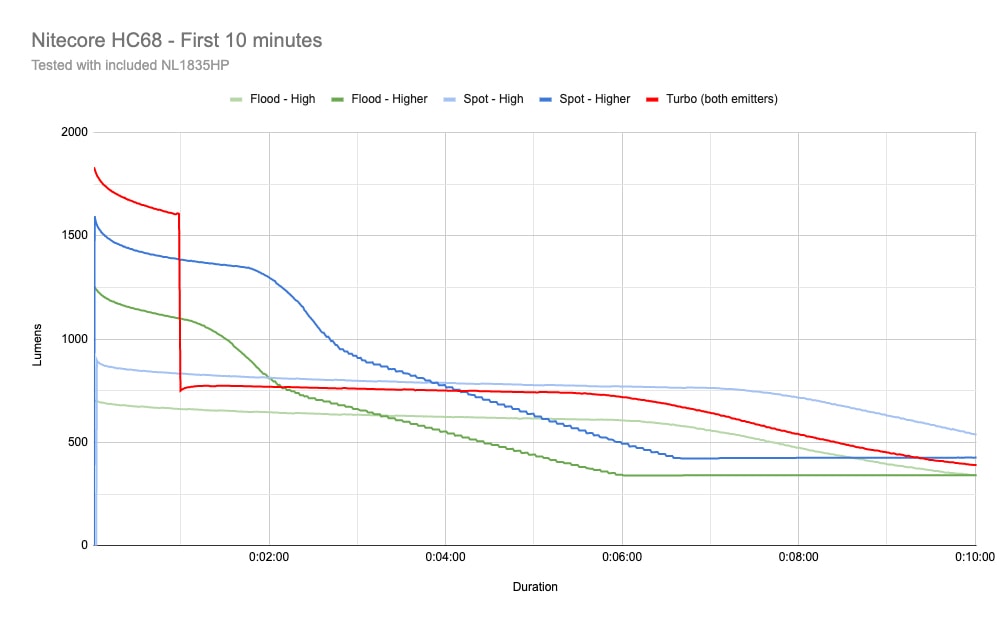
As per Nitecore’s note in the manual, Turbo lasts for 60 seconds or thereabouts, and then drops hard. It then pulls fairly level with 100% spot on High, although slightly lower due to the excess heat from Turbo.
Throw numbers:
I’ll be doing all readings at 5m – even the highest mode is only rated at 200m throw, so that’s sufficient here.
I also don’t see much point in doing throw measurements at the lower levels, so I’ll be doing it on Mid, High, and Higher on both 100% flood and 100% spot, as well as Turbo.
All readings will be taken at 30 seconds, to simulate real-world use after an initial drop from power-on. I’ll also do an instant reading of Turbo.
| Mode | Specs | Candela measured | Meters | Yards |
| Spot – Mid | 1,420 cd | 1,575 cd | 79.37 m | 86.8 y |
| Spot – High | 5,400 cd | 6,100 cd | 156.20 m | 170.82 y |
| Spot – Higher | 10,300 cd | 10,950 cd | 209.28 m | 228.87 y |
| Flood – Mid | 210 cd | 225 cd | 30 m | 32.81 y |
| Flood – High | 820 cd | 950 cd | 61.64 m | 67.41 y |
| Flood – Higher | 1500 cd | 1650 cd | 81.24 m | 88.85 y |
| Turbo | 8,600 cd | 8,025 cd | 185.47 m | 202.83 y |
| Turbo (instant) | 8,600 cd | 8,500 cd | 184.39 m | 201.65 y |
All modes tested were above their rated specs, except for Turbo – but we’re talking a matter of 100 candela, or just over 1m difference between 8500 and 8600 cd.
All output I FL1 standards: The calculated value of distance in meters at which the flashlight produce a light intensity of 0.25 lux. (0.25 lux is about the brightness of a full moon shining on an object).
Beamshots
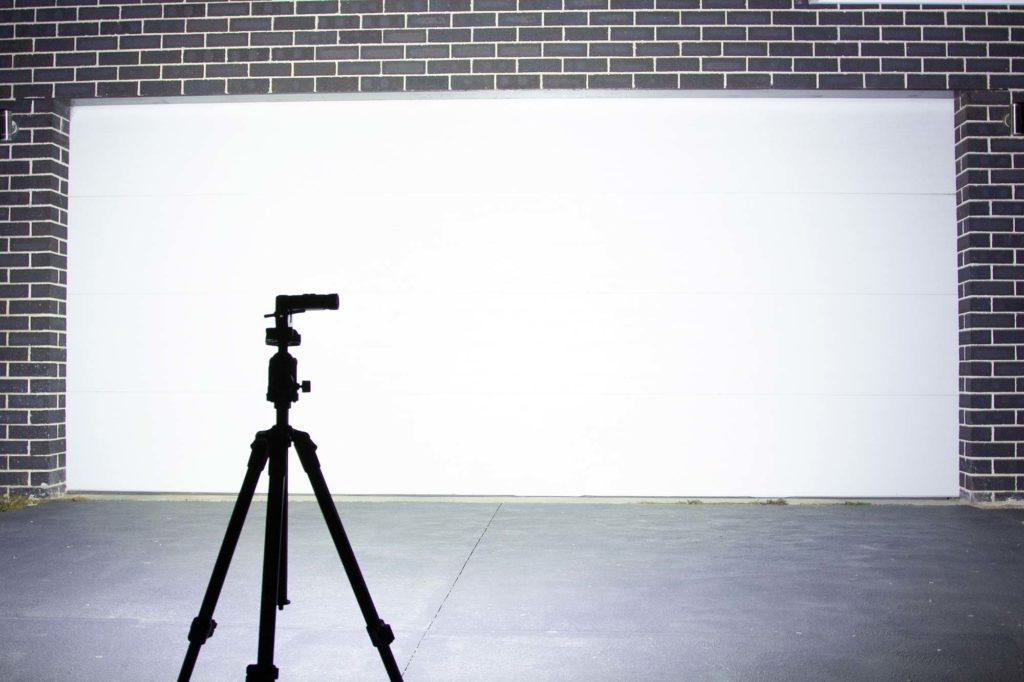
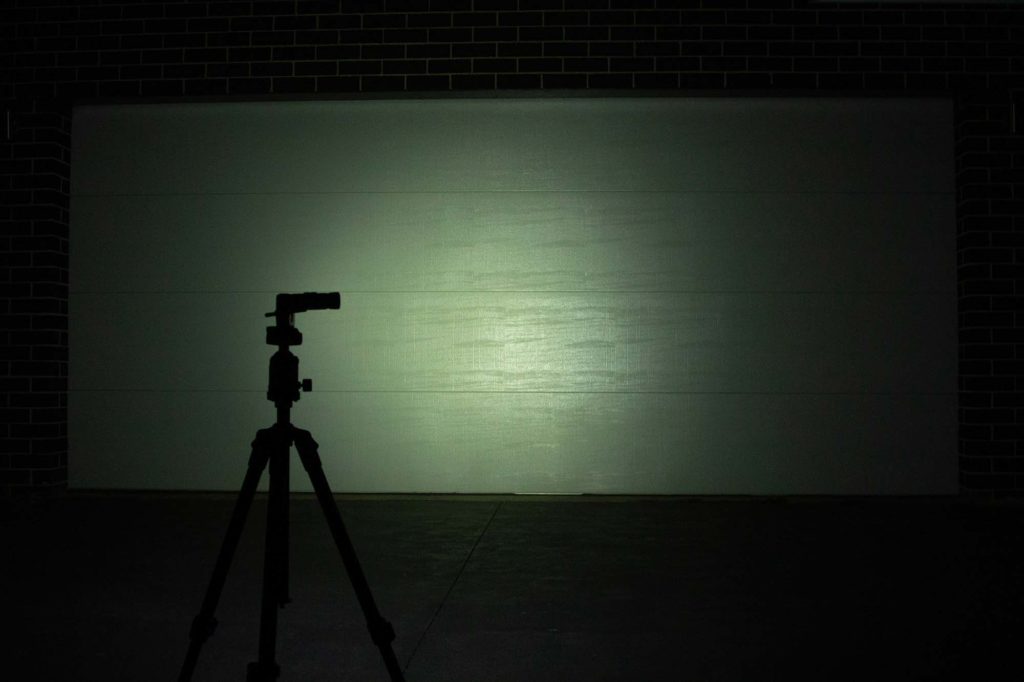
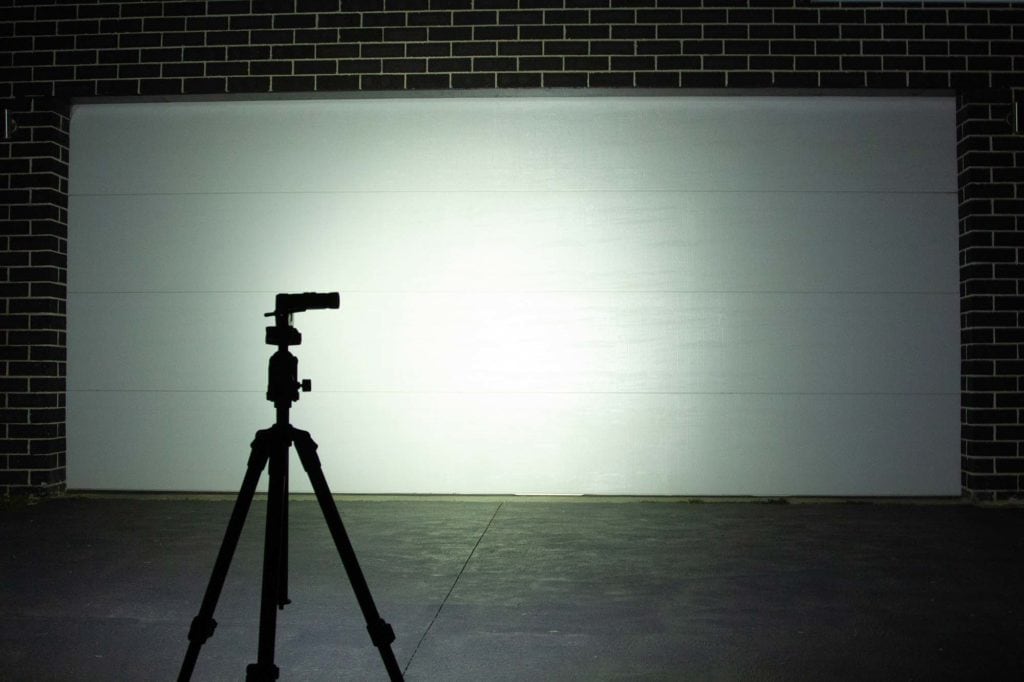
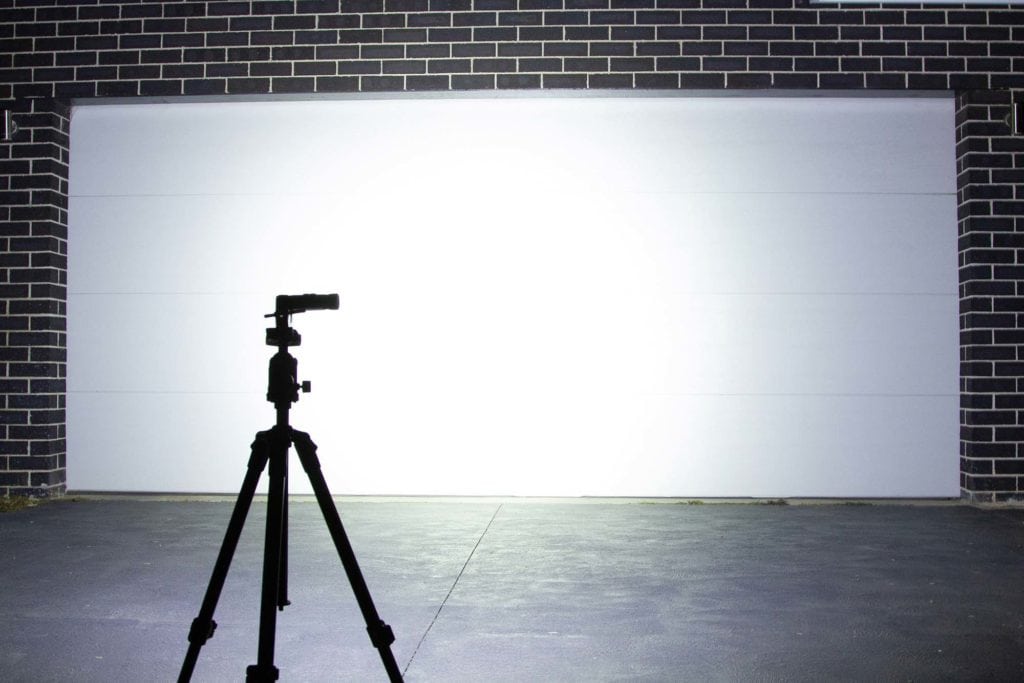
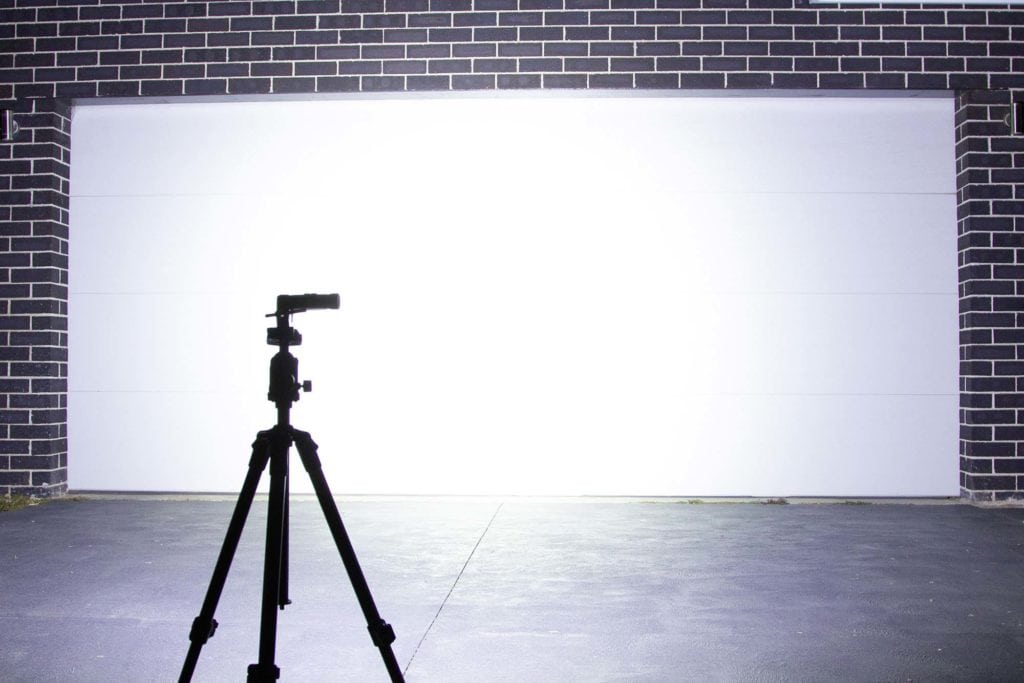
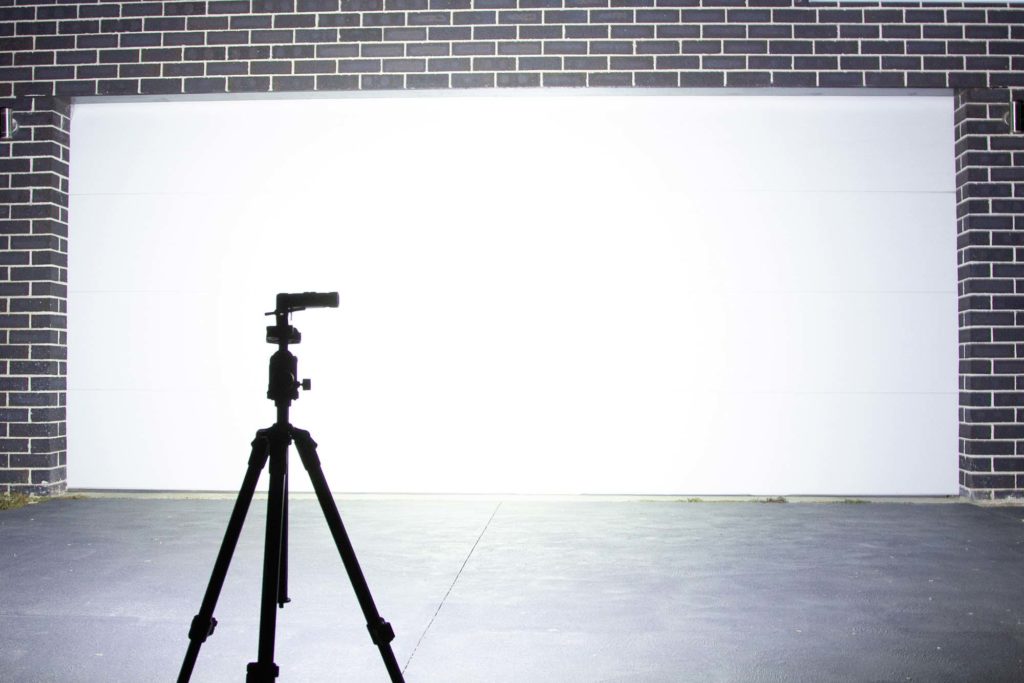
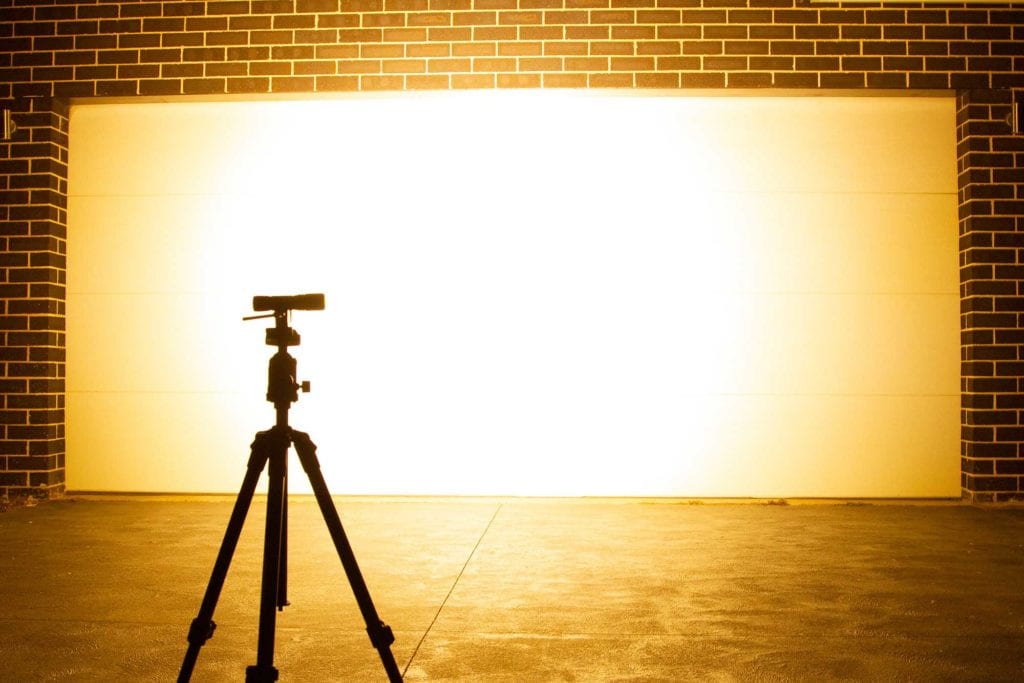
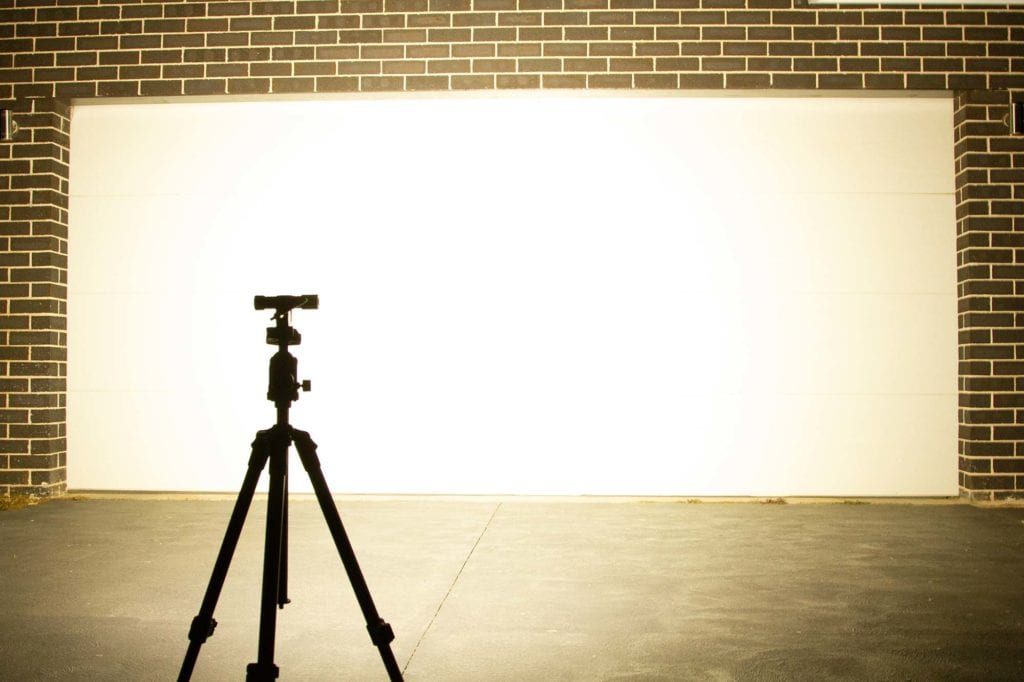
All shots taken with the light 5m from the garage door, at 0.3 sec, f6.3, ISO 1600.

Disclaimer: This flashlight was sent to me for review at no cost by Nitecore. I have not been paid to review, nor have I been holding back on problems or defects.
Final Verdict
Pros
- Flood/Spot concept is well executed
- Good output level
- The headband is comfortable!
- Onboard charging is nice and quick
Cons
- Cool white (personal preference, as always)
- Very long charge-port cover thread
- At $180AUD in my local stores, quite expensive ($99 USD)
Explanation on star ratings:
1: Avoid: my phone flashlight would be a better choice – 2: Poor: significant defect or issues; almost unusable – 3: Average: some defects or issues; but still usable 4: Good: recommended (minor issues) – 5: Great: highly recommended

4.5 stars: ★★★★⋆
I like that Nitecore is trying some new things with this light. The idea of ramping between spot and flood is a great idea, and works quite well. It’s comfortable to wear, and will most likely find its way into the set of headlamps I leave lying around the place after I do a few small modifications, as per the next paragraph.
Unfortunately (for me), it’s still a cool white – I think this light would be better served with something more neutral or even warm white, but as always, this is a personal preference. The Cree XML2 8A1 (2700K, 90CRI) is an amazing emitter that would pop right in, but I know this will be far too warm for most.
The spot mode still has a little too much flood, but that’s due to the physical constraints of a short TIR, so for what it is, it performs above expectations.
I give the HC68 4.5 stars – if you’re not fussed by cool white, then this is an amazing headlamp that has great versatility for a range of situations.
Nitecore HC68 discount code
Get 15% off by using discount code 15OFF on orders above $75. Below $75, use our unique coupon code 1Lumen to get 10% off.
1lumen selects and reviews products personally. We may earn affiliate commissions through our links, which help support our testing.