1lumen selects and reviews products personally. We may earn affiliate commissions through our links, which help support our testing.
Convoy S2+ review
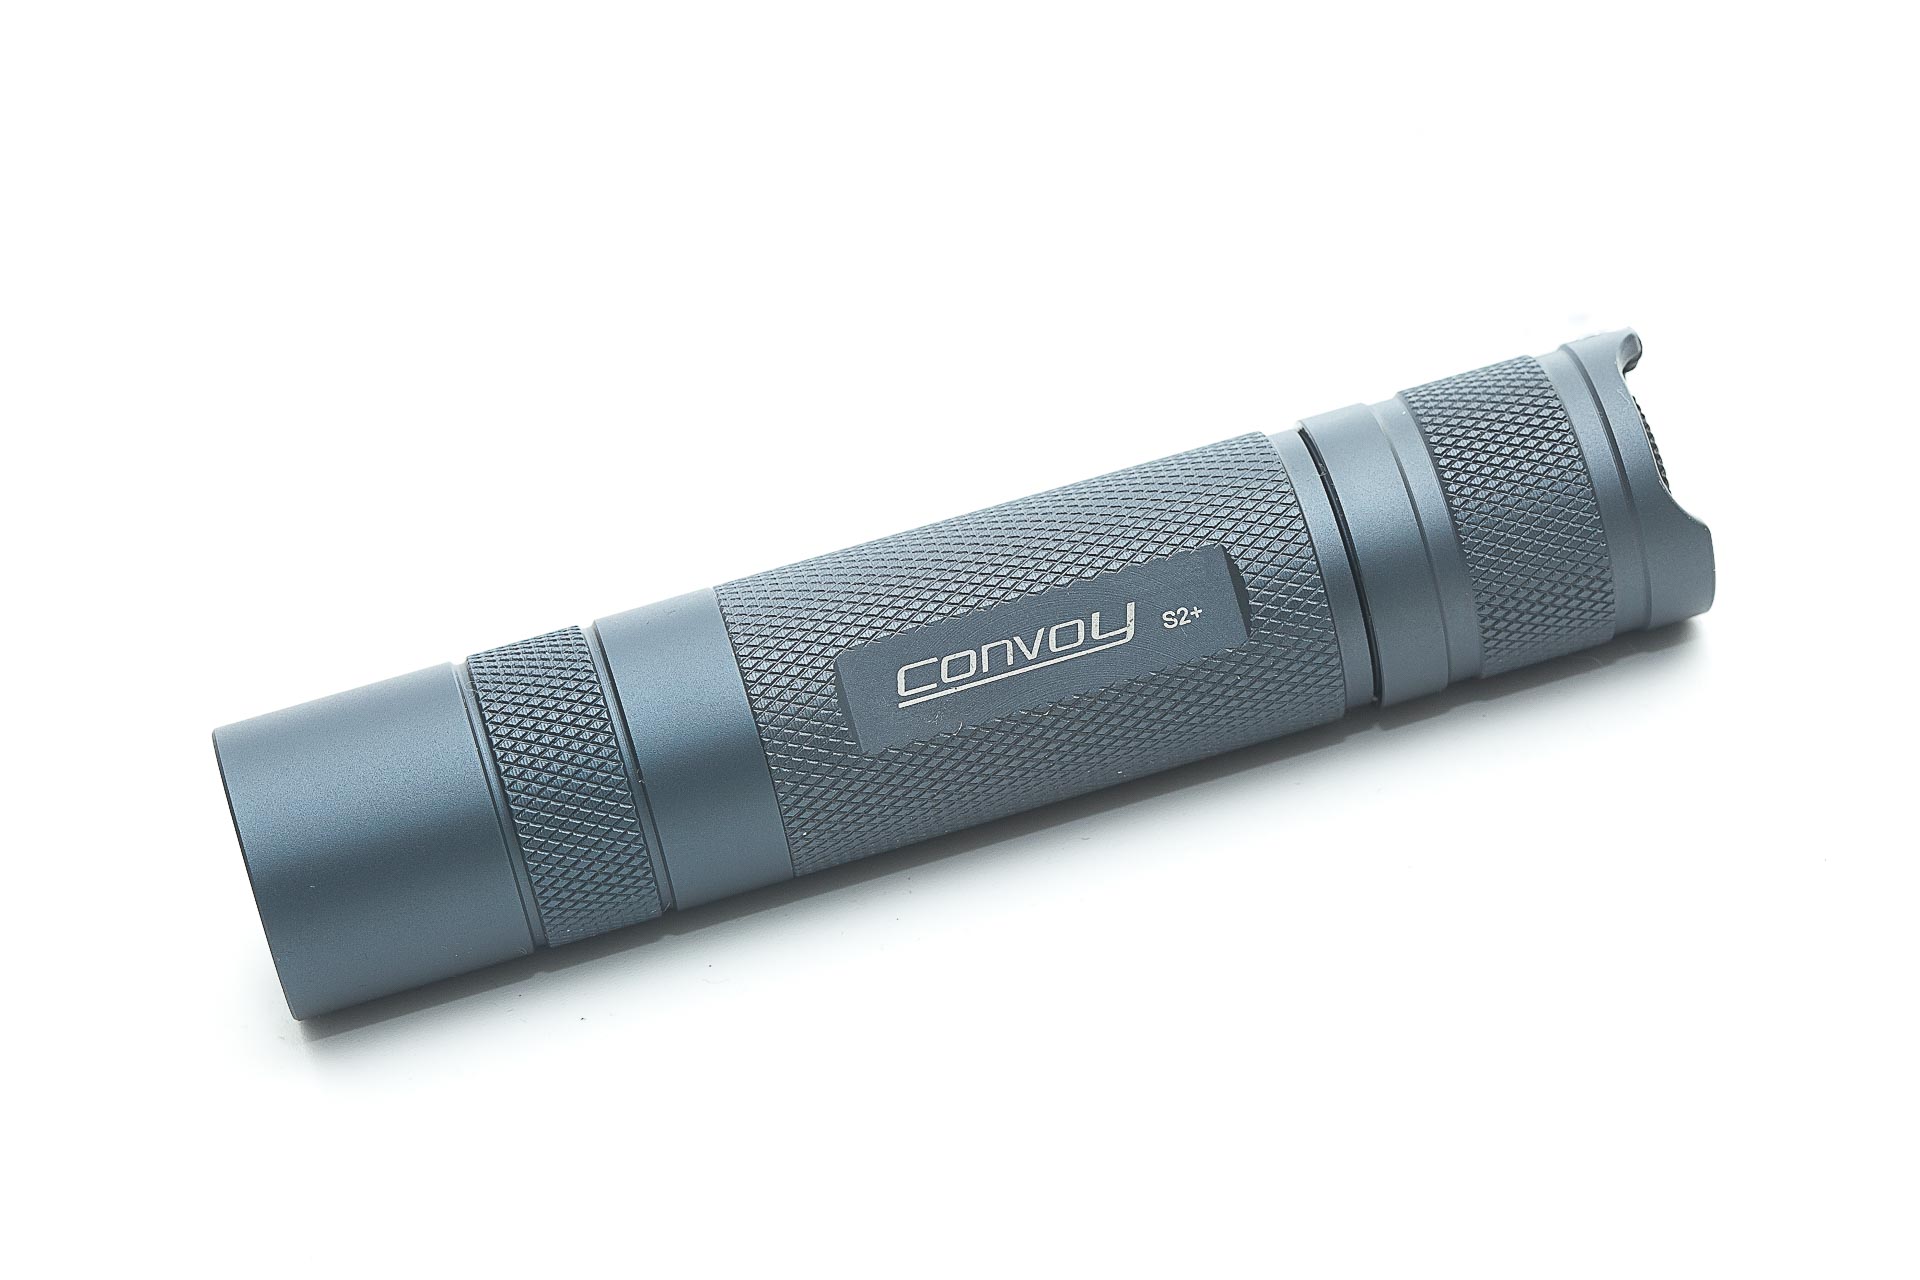
Convoy S2+ specifications
| Brand/model | Convoy S2+ |
|---|---|
| LED | Luminus SST20 (Ra95 4000K) |
| Max. Lumens | ? lm |
| Max. Beam intensity / distance | ? cd |
| Battery config. | 1*18650 |
| Onboard charging | N/A |
| Modes | 5 |
| Blinkies | strobe, biking, sos, battery check |
| Reflector | Smooth |
| Waterproof | IPX8 |
| Review date | March 2022 |
Introduction:
What flashlight would you suggest to someone that has never had a ‘real’ flashlight?
Convoy S2+
Why?
Because it’s probably one of the ‘best bang for your buck’ lights on the planet. So if you’re on the fence for a cheap eBay flashlight, stop! This is probably the best budget flashlight on the market that only flashaholics know about.
The Convoy S2+ is a general-purpose light that is great for many use cases. Camping? yup. Around the house light? yup. EDC flashlight? yup. It can be had with so many options, that it’s nearly impossible to mention them all. But if you want to get an S2+, definitely take a look at this version with the Luminus SST20 LED, which is 4000K (neutral white) and has a CRI rating of 95.
Let’s dive into this.
Package quality.
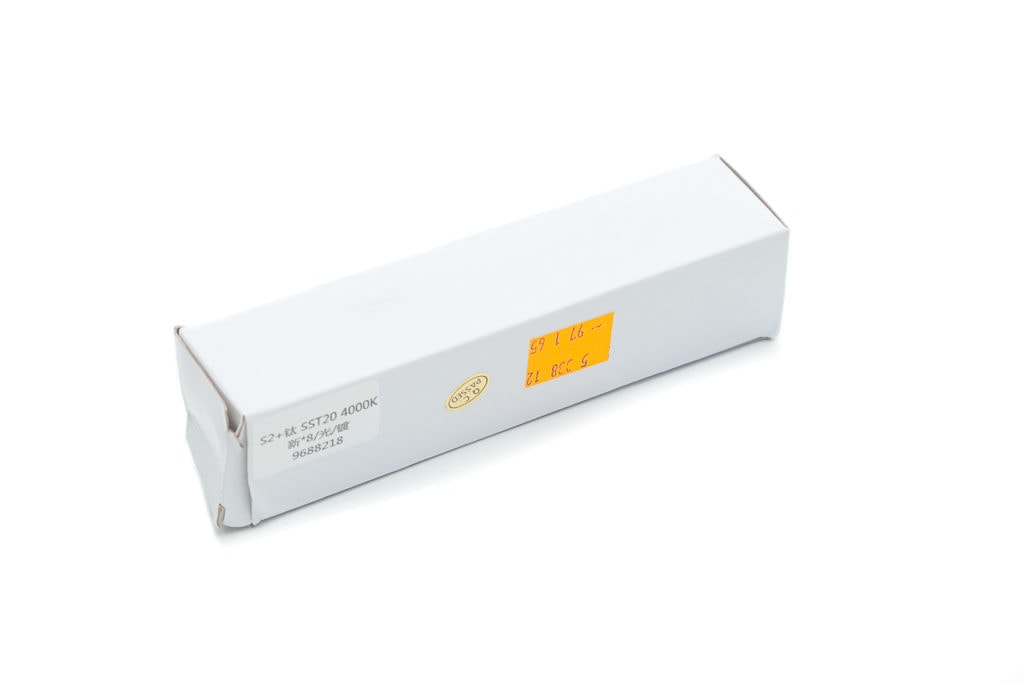
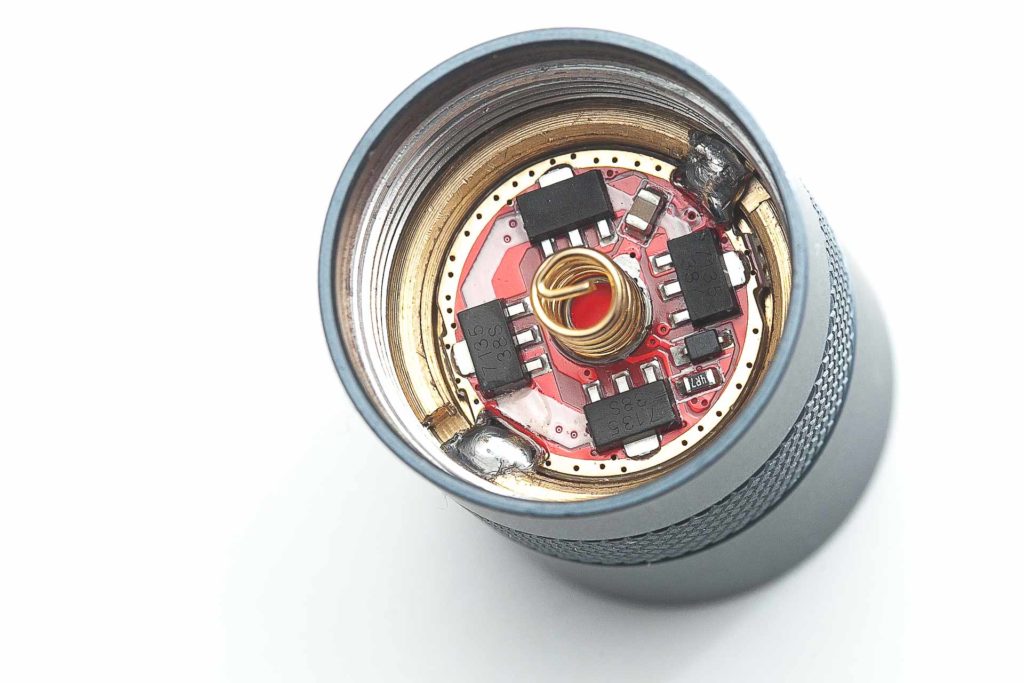
The price this S2+ goes for, is about $15, and with that, you get lots of value for the money. But don’t expect to get any fancy packaging and accessories. It arrived in a plain white carton box, including a lanyard. There’s a sticker on it, so you can check you received the correct version. But without tools, it’s still kind of hard to know, unless you can recognize the different parts that go with it. The one I ordered uses 8*7135 chips, and it has grey anodization. I have enough black flashlights, so I choose this one. This is what I received inside the box:
- The flashlight: Convoy S2+
- Lanyard
I totally understand that Convoy doesn’t include any other accessories, but a simple UI description would have been nice. Fortunately enough, there are plenty of sources that can help you out on the internet, in case you don’t know how to make this work. I’ll include an explanation of the UI later in this review.
This particular light was 1 of the 14 Convoy S2+ lights I bought, for comparing different LEDs. I wanted to see which LED or which color temperature I personally prefer. Since there is so much talk and arguing about CRI, CCT, and DUV, I just want to test many LEDs to see what I personally prefer and if what people say, is actually true or not, or if we should take it with a grain of salt. The longer I’m into this hobby, the more I

Flashlight in use
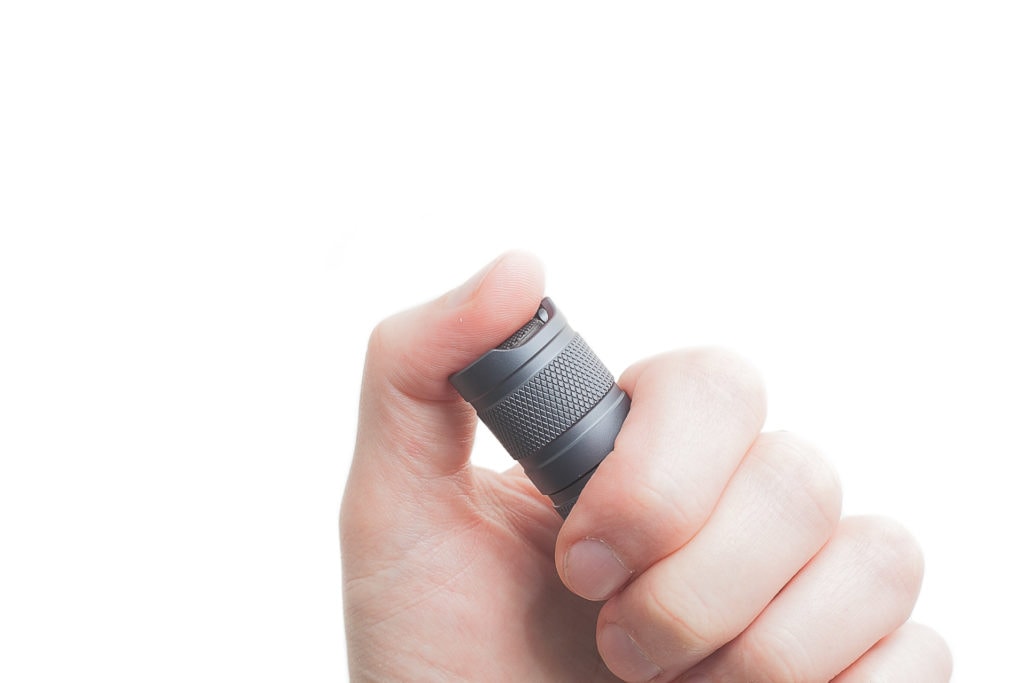
This light has only 1 switch located at the tailcap. It uses a reverse-click mechanical switch to operate the light.
A reverse-clicky switch works as follows: fully press the switch till you hear a click, to turn the light on. When the light is on, you can half-press the switch to change modes. (You shouldn’t hear a click when changing modes)
There’s another type of switch, which is referred to as a ‘forward clicky switch’ (this can be bought separately if you prefer this), and works as follows: when the light is turned off, you half-press the switch to run through the different modes. Once you find the output mode you want to use, fully press it till you hear a click.
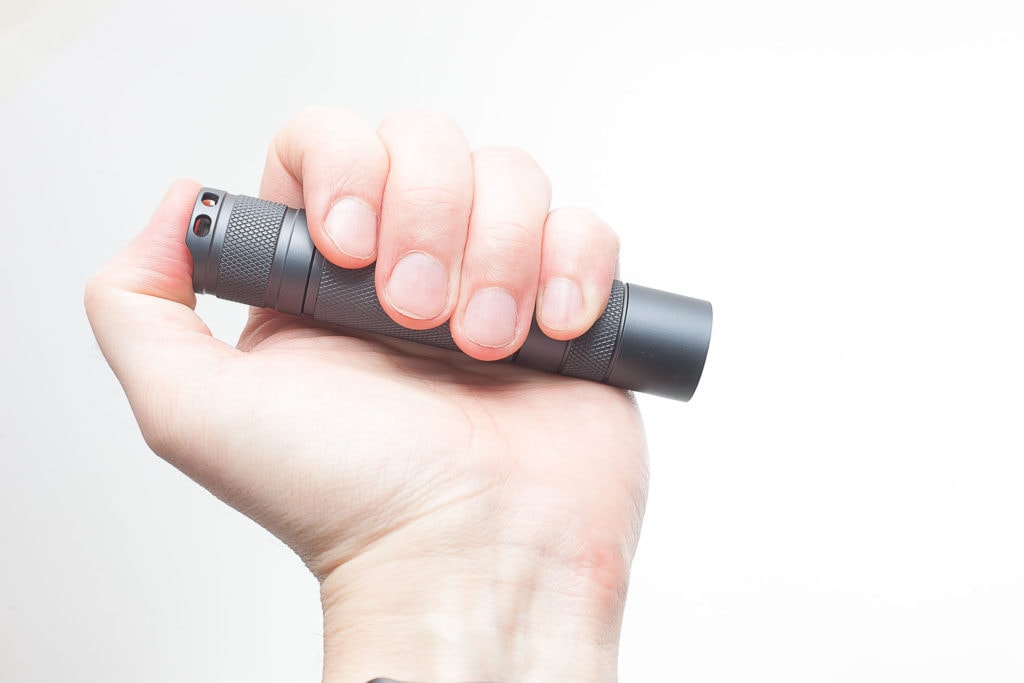
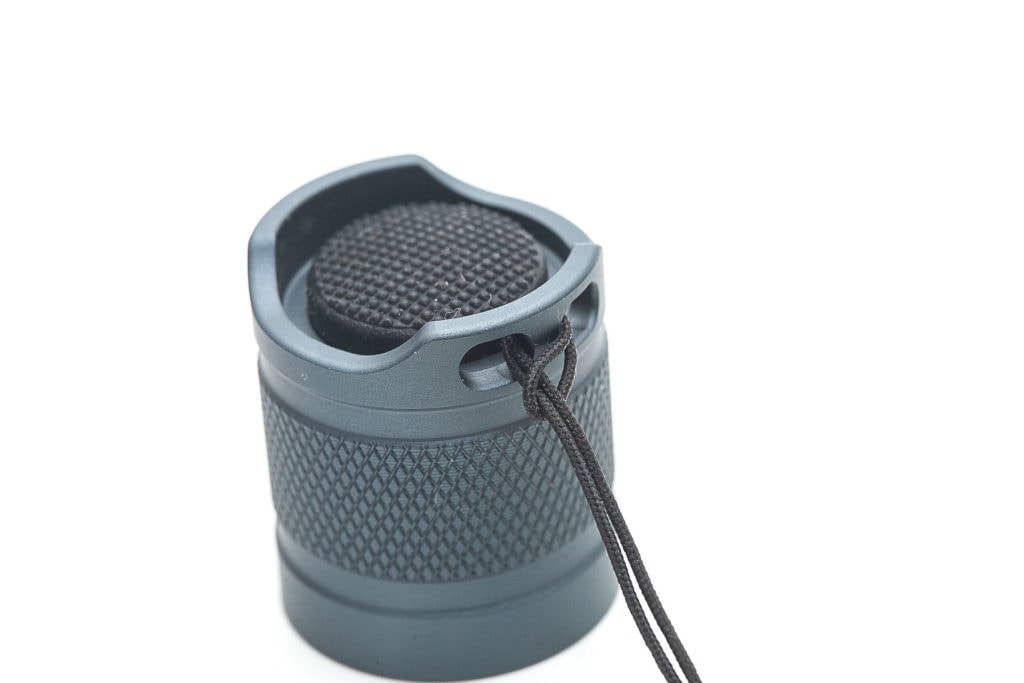
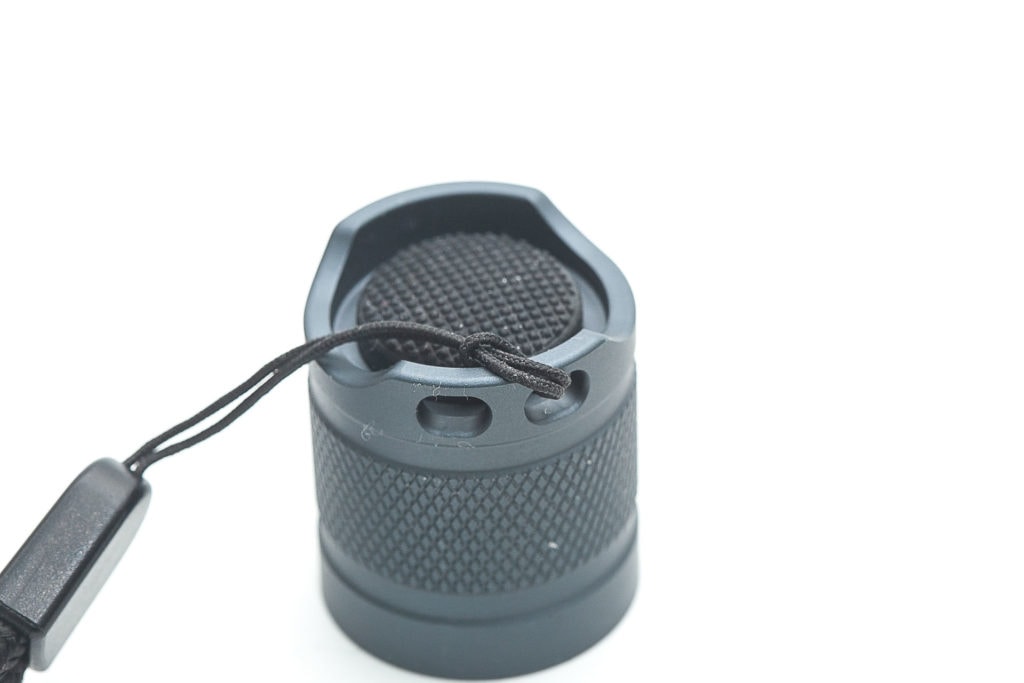
The tailcap has 2 cutouts that help you put your thumb on the switch, and operate the flashlight while holding it in an over-hand position. There are 2 lanyard holes that you can use to attach a lanyard. It’s recommended inserting the lanyard through both holes, instead of just 1, because of tailstanding. Of course, you can loop it through 1 hole, but the light won’t stand very stable on a flat surface.
Talking about the lanyard, if you don’t like using one, it’s very easy to remove. It’s strong enough for most use cases.
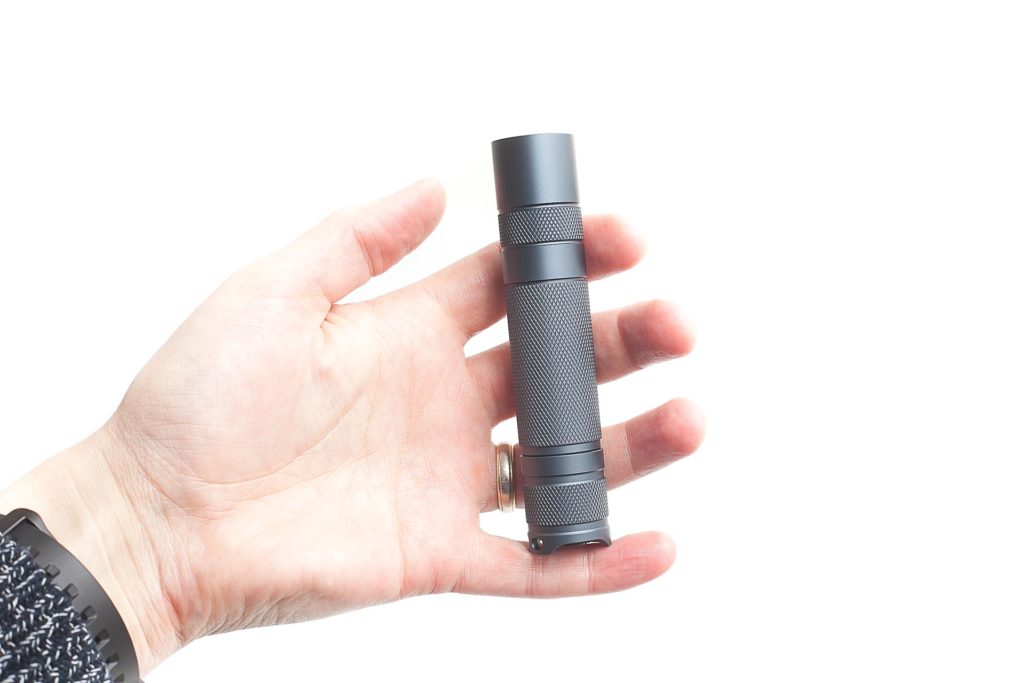
All 3 parts of the flashlight have a traditional type of knurling, that helps to use the light, but also to unscrew it. It provides enough grip.
Build Quality, and Warranty
Yes, it’s a very cheap flashlight, but no, it’s no bad quality at all.
All parts can be unscrewed and are easily accessible, which makes it one of the nicest flashlights to start modding on. If you’re not used to doing any modifications to flashlights, and you’re interested in learning, or practicing your skills, get the Convoy S2+. There is no glue used on any of the parts.
The tailcap switch is easily accessible, and the pill (plus driver and LED board) can be unscrewed from the head easily as well. This will give you access to the LED, which you can easily replace with another LED (and mcpcb) without too much trouble. The MCPCB (LED board) is 16mm in diameter.
And the great thing about this all is that you can find replacement parts very easily. They are available at convoy’s store at Aliexpress, and if you don’t see them in their shop, just send them an email.
Warranty?
I don’t think there is an official warranty for Convoy products. But if you have any trouble, reach out to the owner, Simon, is very willing to help you out. Link to his store: https://convoy.aliexpress.com/store/330416
Just for clarification: the store closes during certain periods in the year, this usually includes Chinese New year. So if you see a message that says: Store on vacation, he will be back soon.
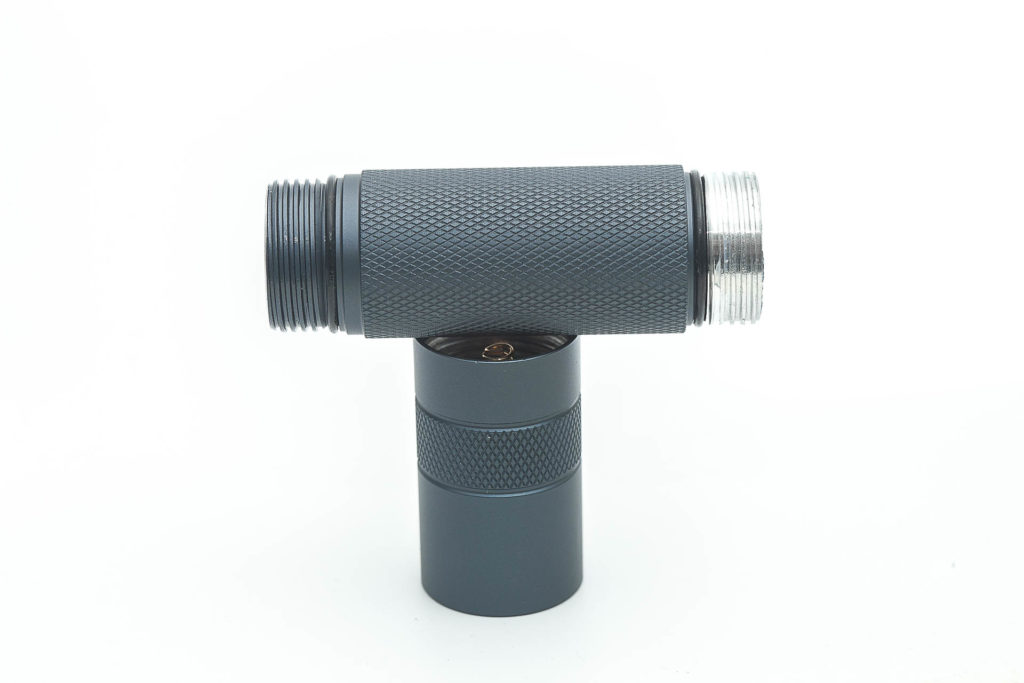
LED, Lens, Bezel, Beam, and Reflector
Depending on where you order your Convoy flashlights, the official Convoy store at Aliexpress gives you the most options in terms of LEDs, etc.
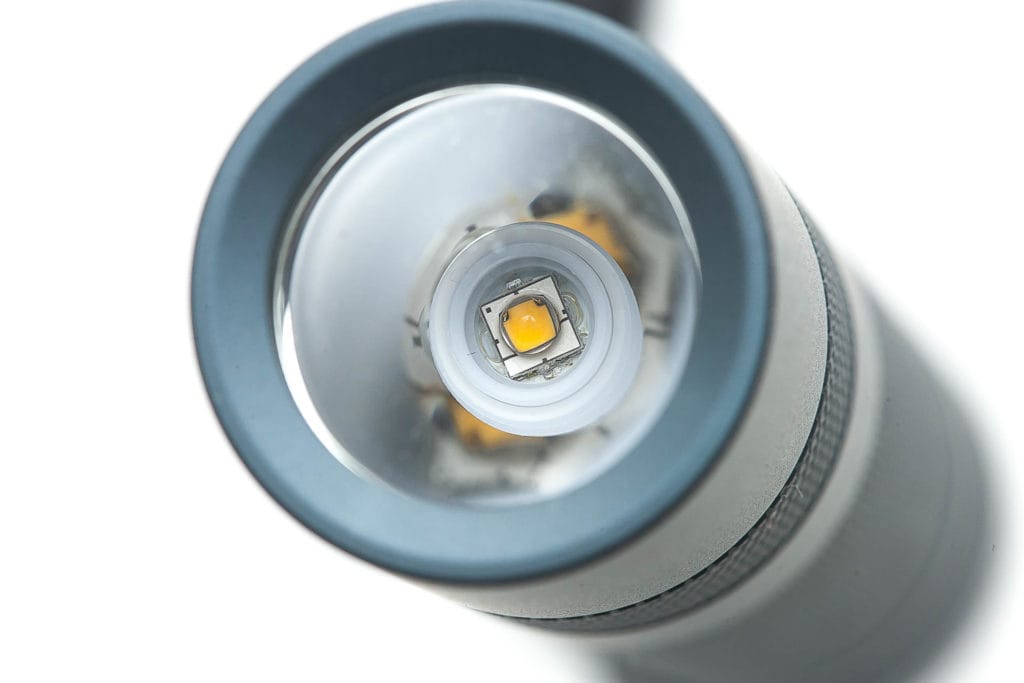
The one I’m reviewing uses a Luminus SST20 with a CCT (color temperature) of 4000K. This is a neutral white beam, that many people like. So if you’re not sure what to get, get one of these!
Besides choosing the LED, you also get the option to choose how many amc7135 chips are mounted on the driver board. The more chips the higher the output. Originally, each 7135 cheap would pull 350mAh, but although the name stayed the same, each chip actually produces 380mAh. So, a quick overview of what they would pull:
I added 2 columns, just in case they really pull 350mAh
- 1*7135= 380mA
- 3*7135= 1,140 mA
- 4*7135= 1,520 mA
- 6*7135= 2,280 mA
- 8*7135= 3,040 mA
- 1*7135= 350mA
- 3*7135= 1,050 mA
- 4*7135= 1,400 mA
- 6*7135= 2,100 mA
- 8*7135= 2,800 mA
Although the more chips you have, the higher output you will get, the difference is not very large. If you want to get the brightest, make sure you select the highest number. In most stores that’s 8. But some of the Convoy flashlights are sold with 3 or 4 chips.
The reflector I received are smooth and are protected by a glass lens with Anti-Reflective coating. And like some people have pointed out, any Anti Reflective coating has a tiny influence on the DUV of 0.0010. If you don’t know what that means, just skip this, because it’s not very significant. I replaced mine with a clear non-AR glass.
Since each type of LED is quite unique, the beam pattern is influenced a lot by the reflector and the spacer used. Fortunately, the Luminus SST20 LED doesn’t show any ugly artifacts with the smooth reflector. But if you’re getting a Nichia 219, you’ll notice a strange spot in the middle of the beam. You can get rid of this with an orange peel (OP) reflector, that will smoothen the beam a lot. If that’s not enough, get some DC Fix, which will make the beam very smooth, even if you have a CREE LED with lots of tint shift.
This particular LED was tested with the Opple Light Master II with the following results:
- CCT: 3922K
- Ra (CRI): 94.4
- DUV: -0.0001
Keep in mind that I replaced the AR coated lens with a clear lens. This influences the DUV reading. Out of the 13 convoys I bought, this particular light had the best readings, so I kept it in normal condition. The other 12 I replaced with other LEDs for comparing.
Dimensions and size comparison
| Part | Dimension (mm) | Dimension (inches) |
|---|---|---|
| S2+ Length | 117.5mm | 4.63″ |
| S2+ Diameter head | 24mm | 0.947″ |
| S2+ Reflector diameter | 20.6mm | – |
| S2+ Reflector height: | 11.6mm | – |
| S2+ Reflector opening | 7mm | – |
| S2+ LED gasket outside | 9mm | – |
| S2+ Gasket thickness | 1.7mm | – |
Weight:
- Empty: 75.3 g / 2.66 oz
- With battery: 121.1 g / 4.27 oz
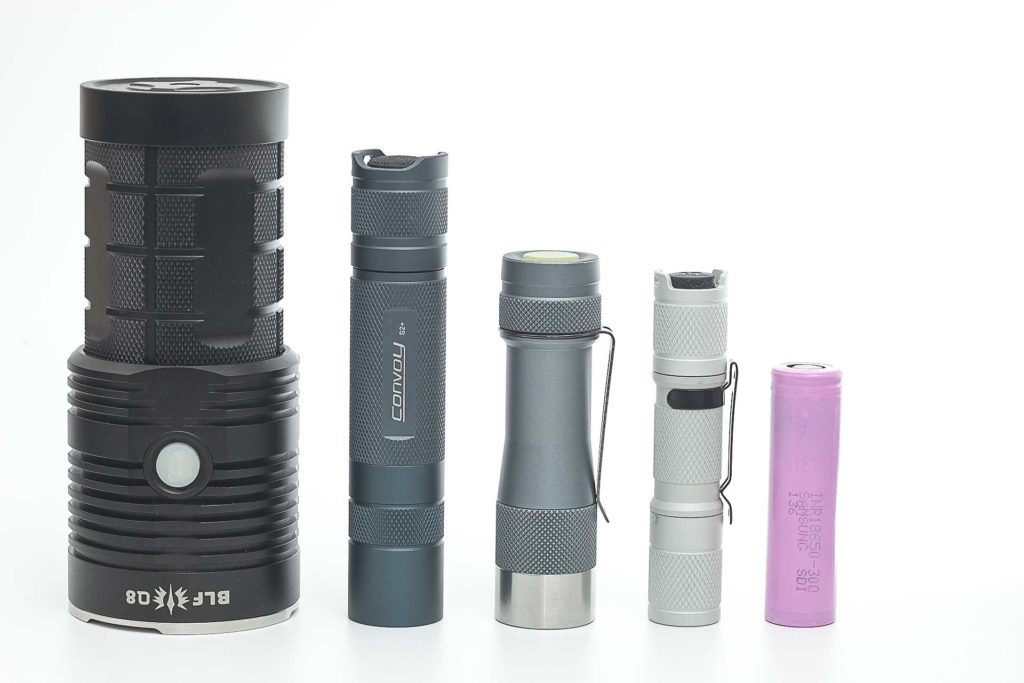
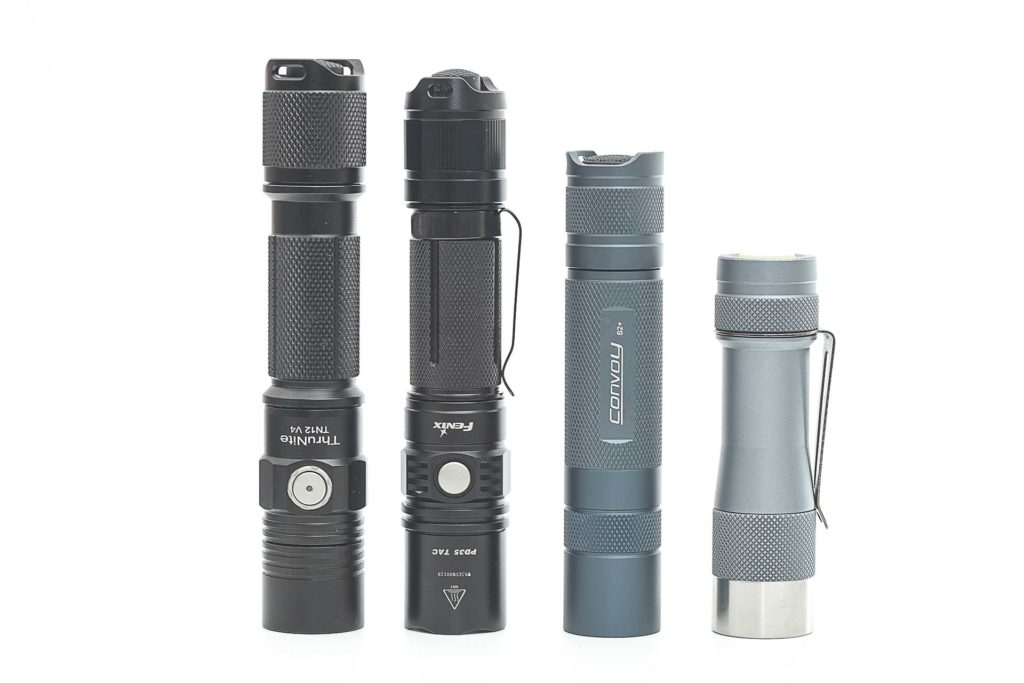
Flashlight size comparison
Image 1, compared to some of the most popular flashlights: from left to right: BLF Q8, Convoy S2+, Lumintop FW3A, Lumintop Tool AA, and a Samsung 18650 30Q battery.
Image 2: compared to a couple of popular and tactical flashlights: Left to right: Thrunite TN12 v4, Fenix PD35 Tac, Convoy S2+, Lumintop FW3A.
Convoy S2+ User Interface (Biscotti):
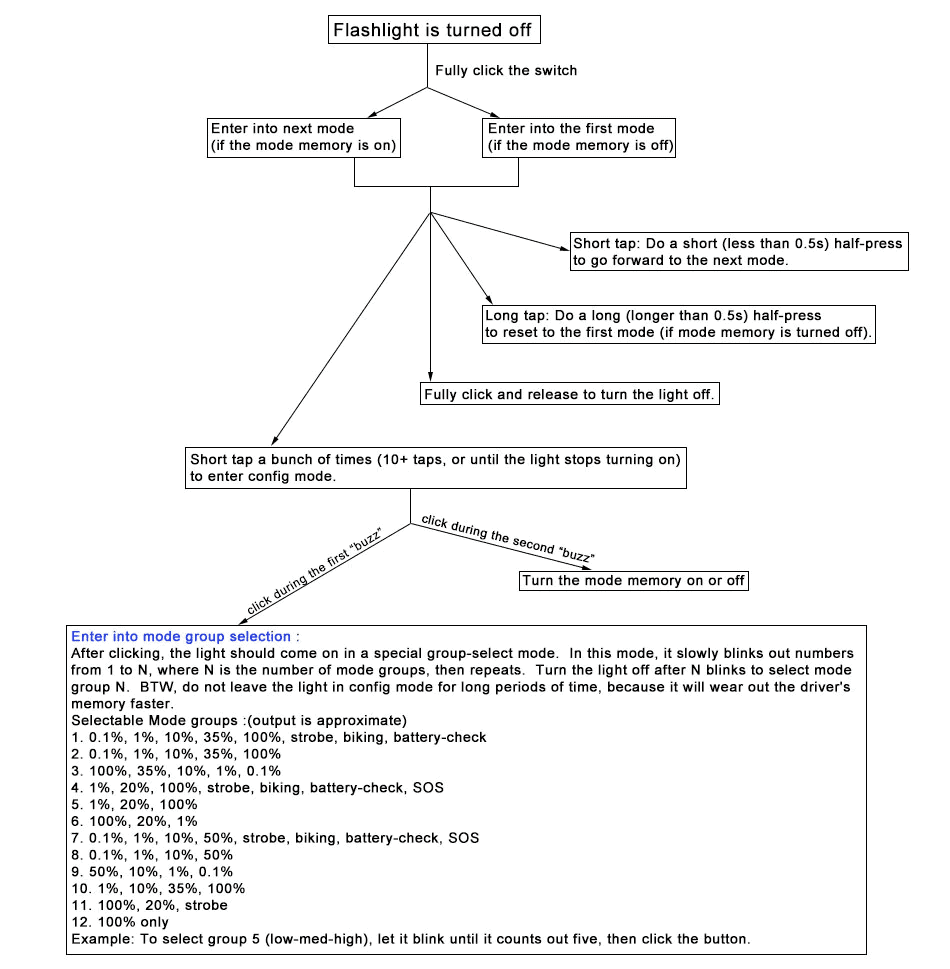
The Convoy S2+ comes with the Biscotti UI.
Here is the Biscotti firmware cheat sheet:
Convoy S2+ programming: how to enter and customize
Problems with programming your Convoy S2+? Here are the steps, including some tips.
First, you need to enter the programming menu. Turn the light on, and start tapping the switch (not clicking) for about 20+ times. (you’re basically changing modes, until the light just stays dark). When you don’t see any light, you entered the programming mode.
Now release the switch, and you’ll see 1 blink, followed by quick flashing.. It will then do 2 blinks… and quick flashing.
Those are the 2 options you have. The first blink is to select your desired mode menu, while the second is to turn the mode memory on/off.
Activate/deactivate mode memory on Convoy S2+:
First I’ll explain the second option (with the 2 blinks) for selecting the mode memory. When you see the 2 blinks + flashing, you can fully click the switch to turn the mode memory on/off. It won’t let you know what you selected, so you basically have to test it yourself to see which option is currently selected.
You can do this by turning the light on, changing modes… and then turning it off.. When you turn it back on, you’ll either notice that the light is back in the same mode you used last time (Mode memory), or if the light it in the first mode (by default this is the lowest output mode).
Note: When testing mode memory, you shouldn’t select Moon mode. Because if you have mode memory turned off, it will always turn on in the lowest output. You have to use a different mode for testing.
If it’s not what you wanted, you have to go back, tap the switch again for 20+ times to enter programming mode, and wait for the 2nd blink, and again turn the light off. This time you have selected the other mode memory setting.
Change Mode Group in Biscotti firmware:
Ok, now we will change to another mode group.
First, you need to enter programming mode, by tapping the flashlight about 20+ times till there is no light coming from the flashlight. You let the switch go, and wait till you see the first blink + flashing. Now you have 2 options:
- You tap the switch to enter Mode Group Selection directly, and the light will show a number of blinks.
- You click the switch, so the light will turn off, so you have a bit more time to concentrate. If you turn the light back on, you enter Mode Group Selection.
In the Mode Group Selection, you will see a number of blinks. Of course, starting with only 1 blink. (This is the default option).
When you wait about 3 seconds, the light will blink 2 times. After another 3 seconds, it will blink 3 times.. this continues till you see all 12 blinks.
If you’d like to activate Mode group 5, with only 3 modes. You simply turn the light off after the 5 blinks.
Available modes default:
- 0.1%, 1%, 10%, 35%, 100%, strobe, biking, battery check.
- You may call them: Moon mode, Low, Medium Low, Medium, High?
- But many more options.
From OFF:
- Half-press: nothing
- Single-click: turns on
From ON:
- Half-press: Cycle through the menu from Moon mode to High
- Single-click: off
- 20+ taps (short presses): programming mode
Mode memory:
- Yes
Blinky modes menu:
- Yes, by default. But you can turn select another mode group to get ride of them.
Low battery warning:
- Yes, the light will start blinking when the battery runs low
Lock-out mode:
- No, since it has a mechanical switch. If you want to decrease the likelyhood to accidentally activating the light, you simply unscrew the tailcap by a half turn.
PWM:
- It probably does, but not visible by eye.
Firmware / UI Conclusion:
Changing mode groups isn’t the easiest thing to understand. But once you read our short explanation, you should be able to understand how it works.
Batteries & Charging
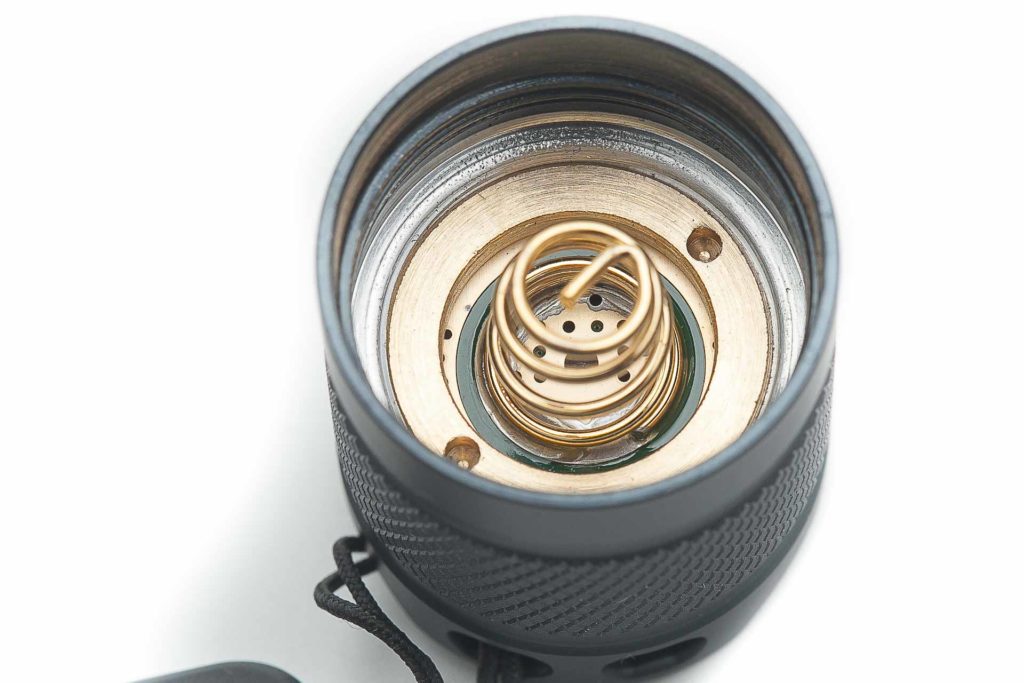
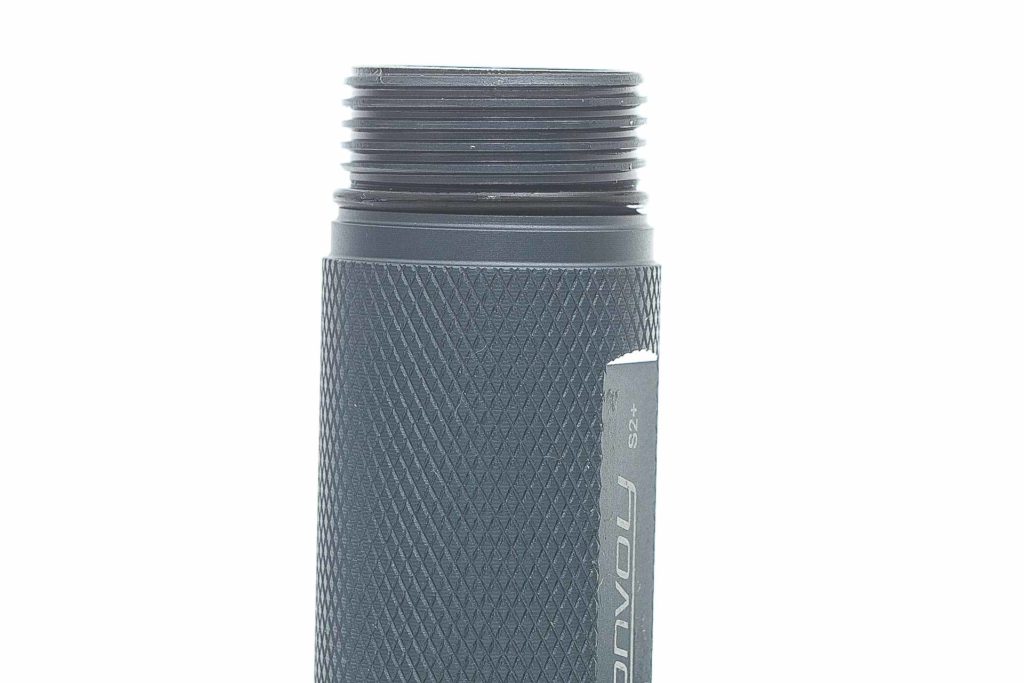
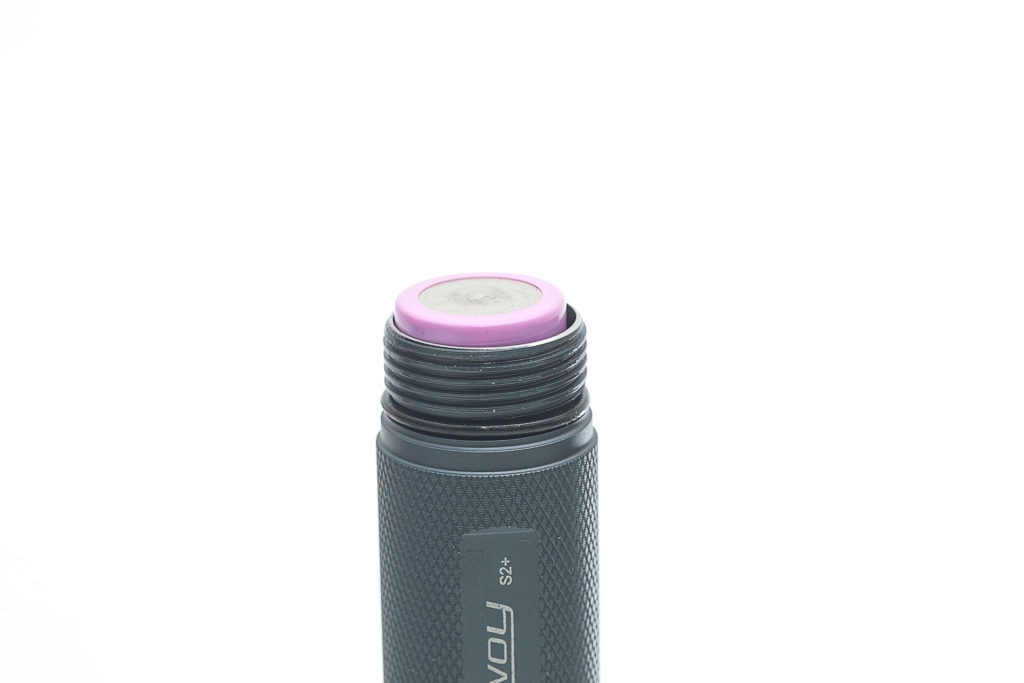
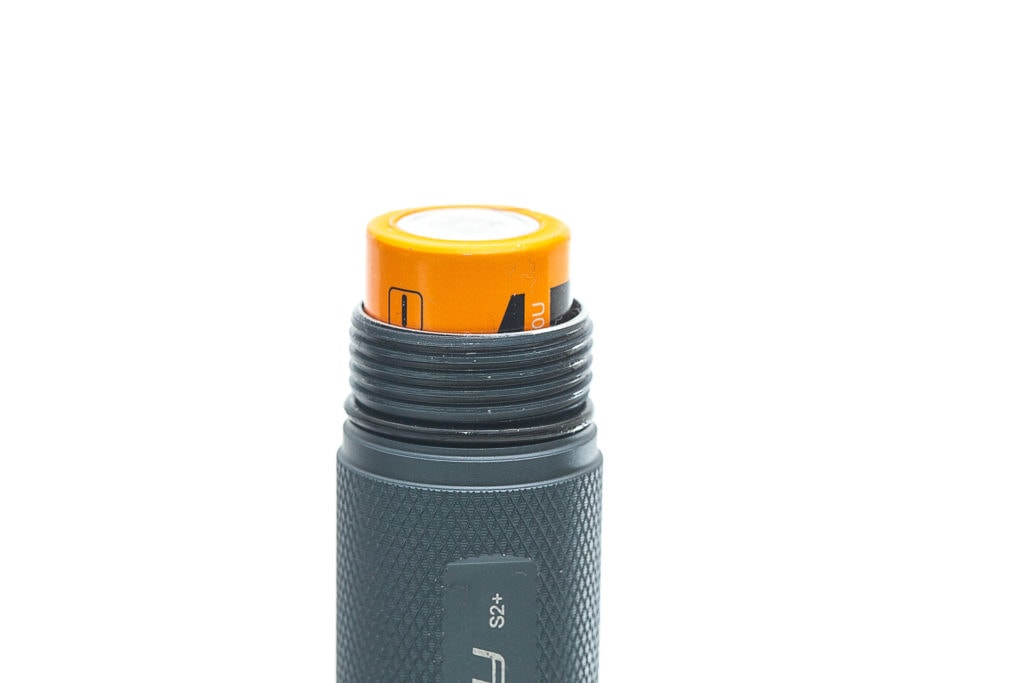
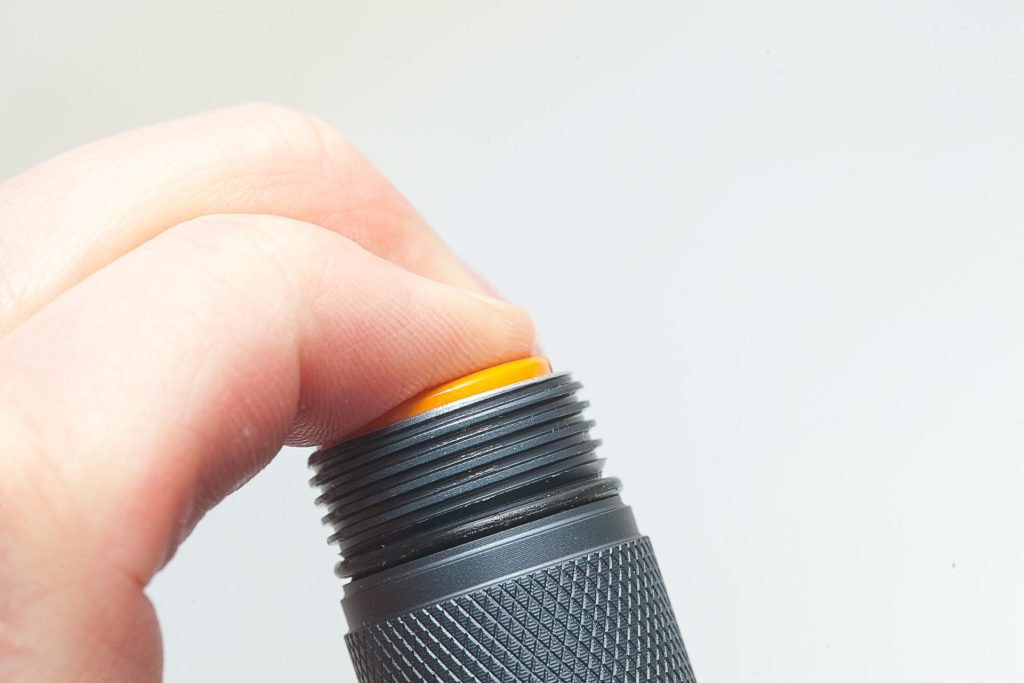
You should be able to use all kinds of 18650 batteries, except for maybe the longest ones with USB ports+protection boards. Even though they may fit and work, they probably stress the driver board/spring a bit too much. I’d recommend using flat tops, or button tops that aren’t too long.
I tried a long Fenix 18650 battery with protection and USB port, and it worked, but not always. I had to unscrew the head a bit to make it work sometimes. So that’s not very reliable, and therefore not recommended. See the second and third image.
There’s no onboard charging, so you need a separate 18650 charger for charging.
Performance test
Lumen measurements:
All output numbers are relative to my homemade Integrating Sphere. It is set up with an Extech SDL400 Lux Meter for measurements including a Kenko PRO1D ND-16 filter. The base measurement is done with a Convoy S2+ that has been tested at 255 lumens.
For Amp readings, I use a Fluke 77III DMM. For higher amps, I now use a Fluke 325 True RMS clamp meter. For microamps, I use a cheap DMM with an easy-to-use micro amp setting.
All of my readings were taken from a fully-charged Samsung 30Q .
| Mode | turn on | 30 seconds | 10 minutes |
|---|---|---|---|
| 1 | 1.31 | 1.31 | – |
| 2 | 24 | 24 | – |
| 3 | 71 | 71 | 71 |
| 4 | 195 | 193 | 189 |
| 5 | 543 | 519 | 258 |
Keep in mind that all my measurements are for my specific copy only. The one you get might be different and have different measurements. Also, these numbers are for my 8*7135 + Luminus SST20 configuration, with a Samsung 30Q battery.
Parasitic drain:
- None
Runtime:
The runtime test was done with the 50cm integrating sphere, including the Kenko Pro1D ND-16 filter and Extech SDL400 data logging Lux Meter.
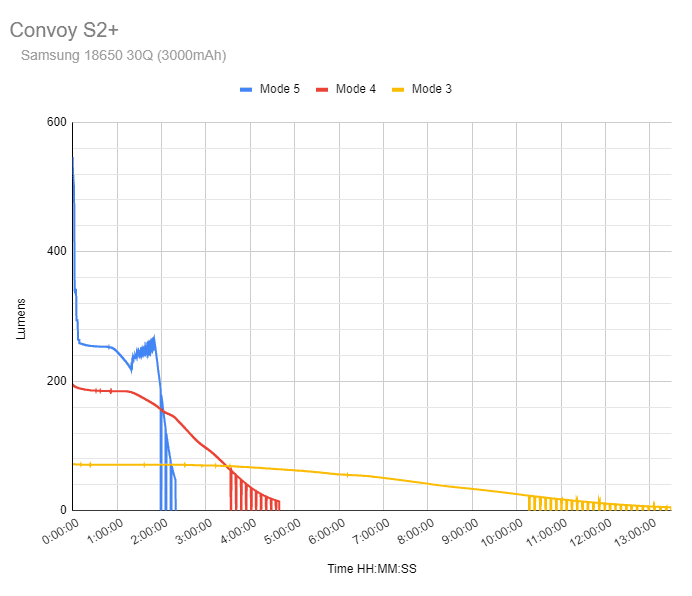
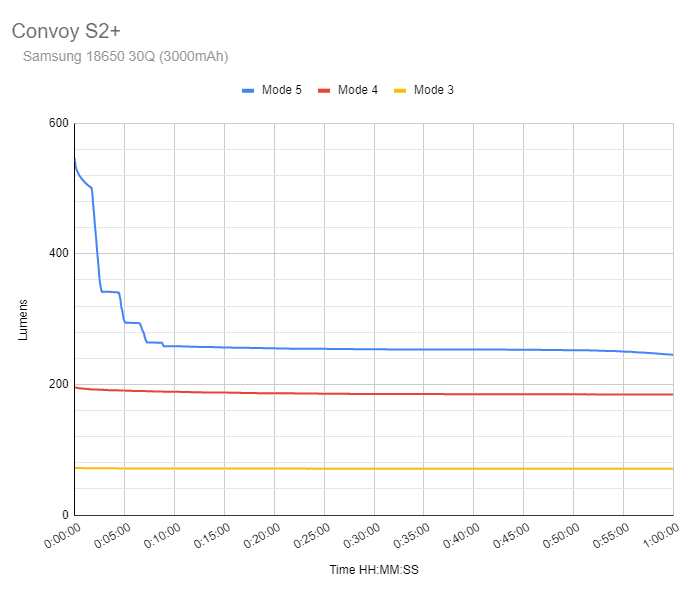
Mode 5: starts off at around 545 lumens, and slowly drops. After 10 minutes it’s down to 258 lumens. After 1h20min it’s down to the lowest output at 225 lumens, but then increases till it’s at 260 lumens at 1h50min. From then onward it just keeps dropping. After 2 hours the light will start blinking as a low voltage warning. It will turn off just shy of 2h19min. 10% of the initial output would be 2h18 min. Voltage was down to 2.8V
Mode 4: starts at around 195 lumens. After 10 minutes it’s 185 lumens. After 1h20min the output starts decreasing. At 3h40min the light starts blinking to warn you of low battery. Finally, at 4h39min the light turns off. The last measured output was 14 lumens. 10% from the initial output is at 4h25min. Voltage was down to 2.8V
Mode 3: Starts at around 71 lumens. After 10 minutes it’s still 71 minutes. Between 3 and 4 hours, the light starts to reduce output bit by bit. At around 10h20min the LVP activates and starts blinking. At this point, it’s still 23 lumens. At 13h23min the light shuts off. The last measured output was 3 lumens, which means it’s blinking for 3 hours.. so you will be warned long before the battery runs out of juice. Voltage was down to 2.8V
Mode 2, and 1 would take too long to measure. Probably 50+ hours for mode 2, and a few days for mode 1.
Throw Measurement
Measurements were taken indoors at 5 meters with a professional Hagner E4-X Lux Meter. Measured 30 seconds after turn on.
| Mode | Candela | Meters | Yards |
|---|---|---|---|
| Mode 1 | 25 | 10 | 11 |
| Mode 2 | 475 | 44 | 48 |
| Mode 3 | 1400 | 75 | 82 |
| Mode 4 | 3,900 | 125 | 137 |
| Mode 5 | 10,825 cd | 208 | 228 |
10,000cd is not bad at all.
Beamshots
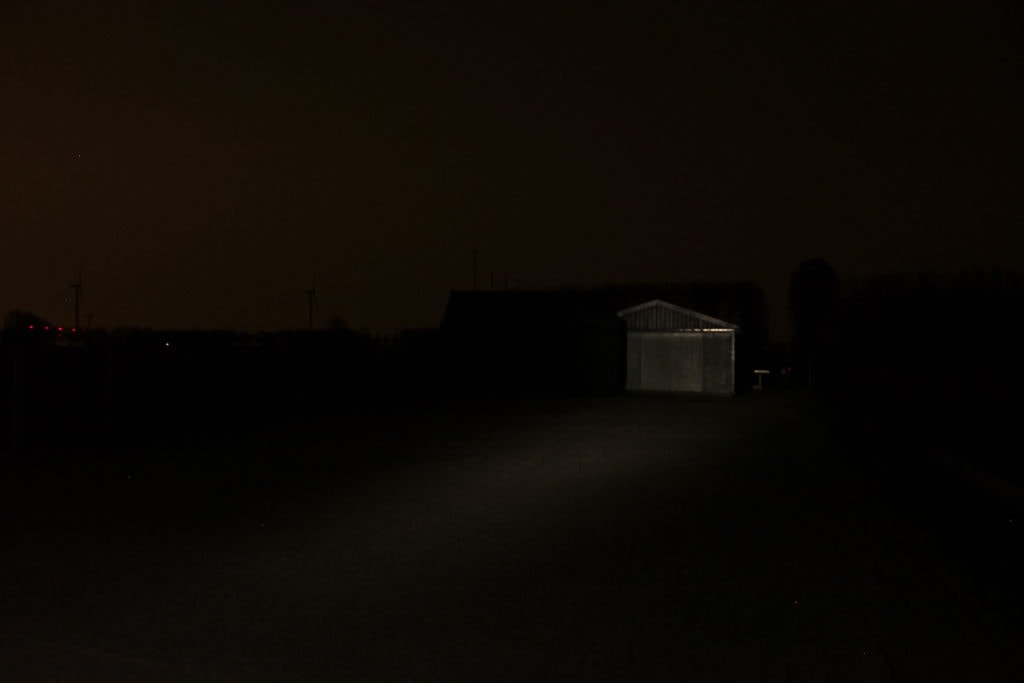
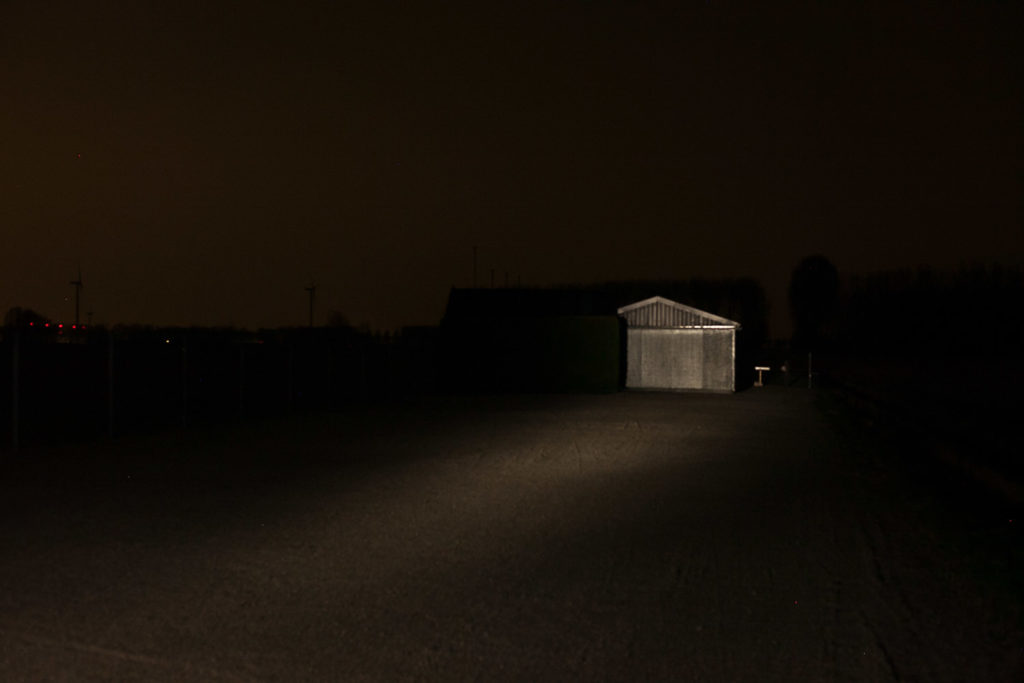
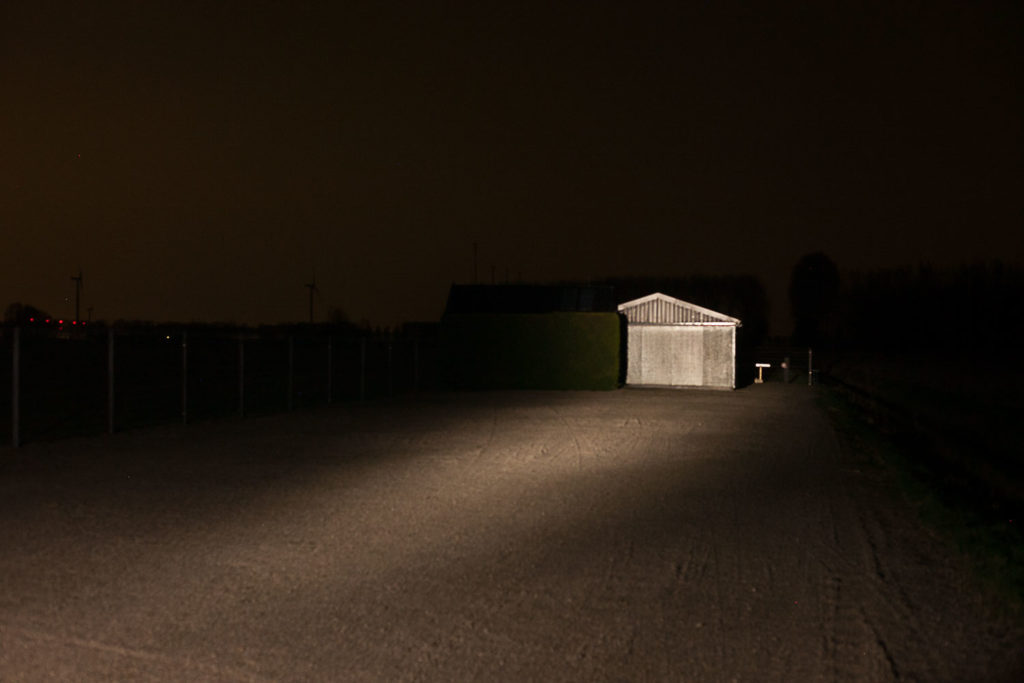
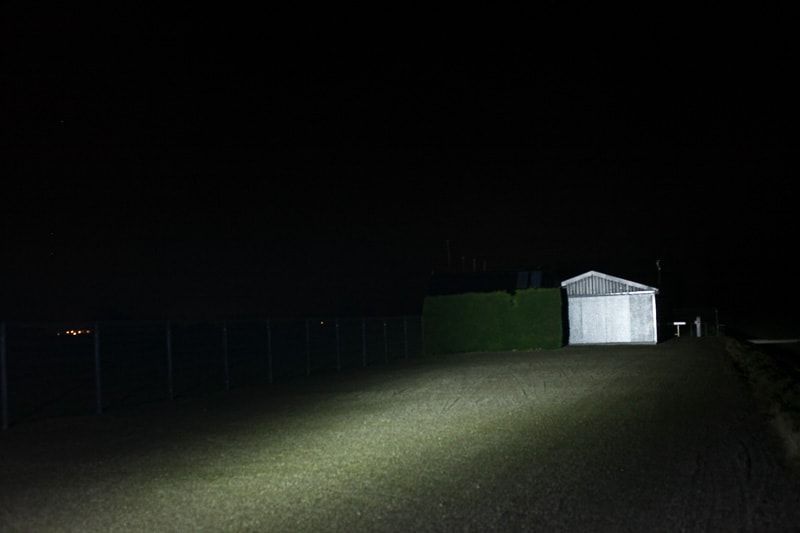
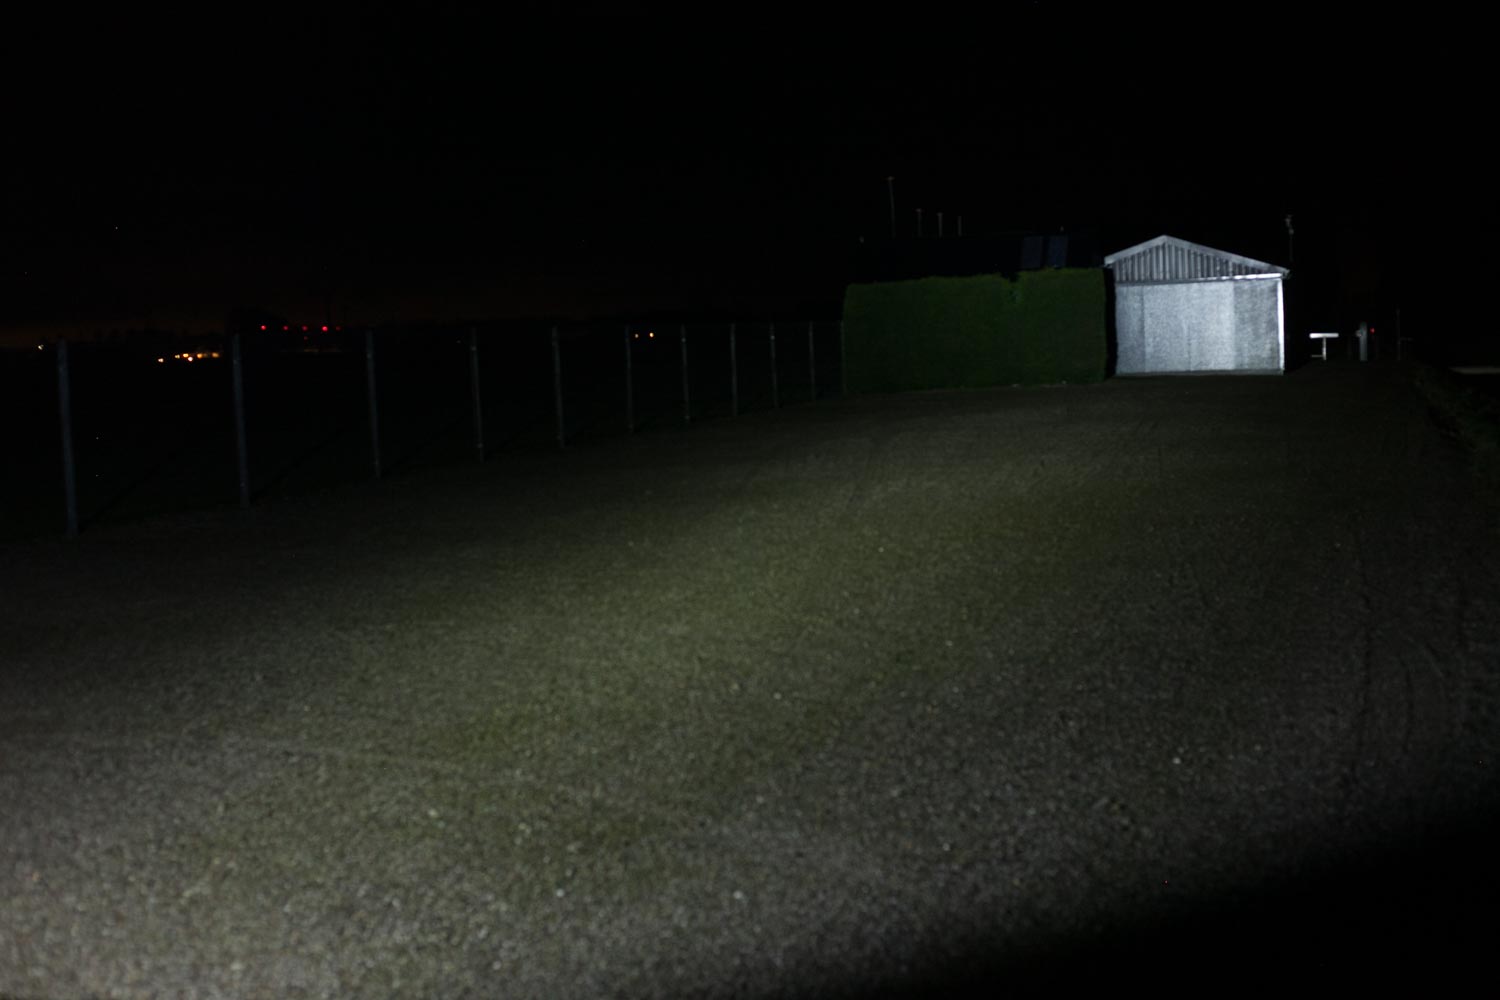
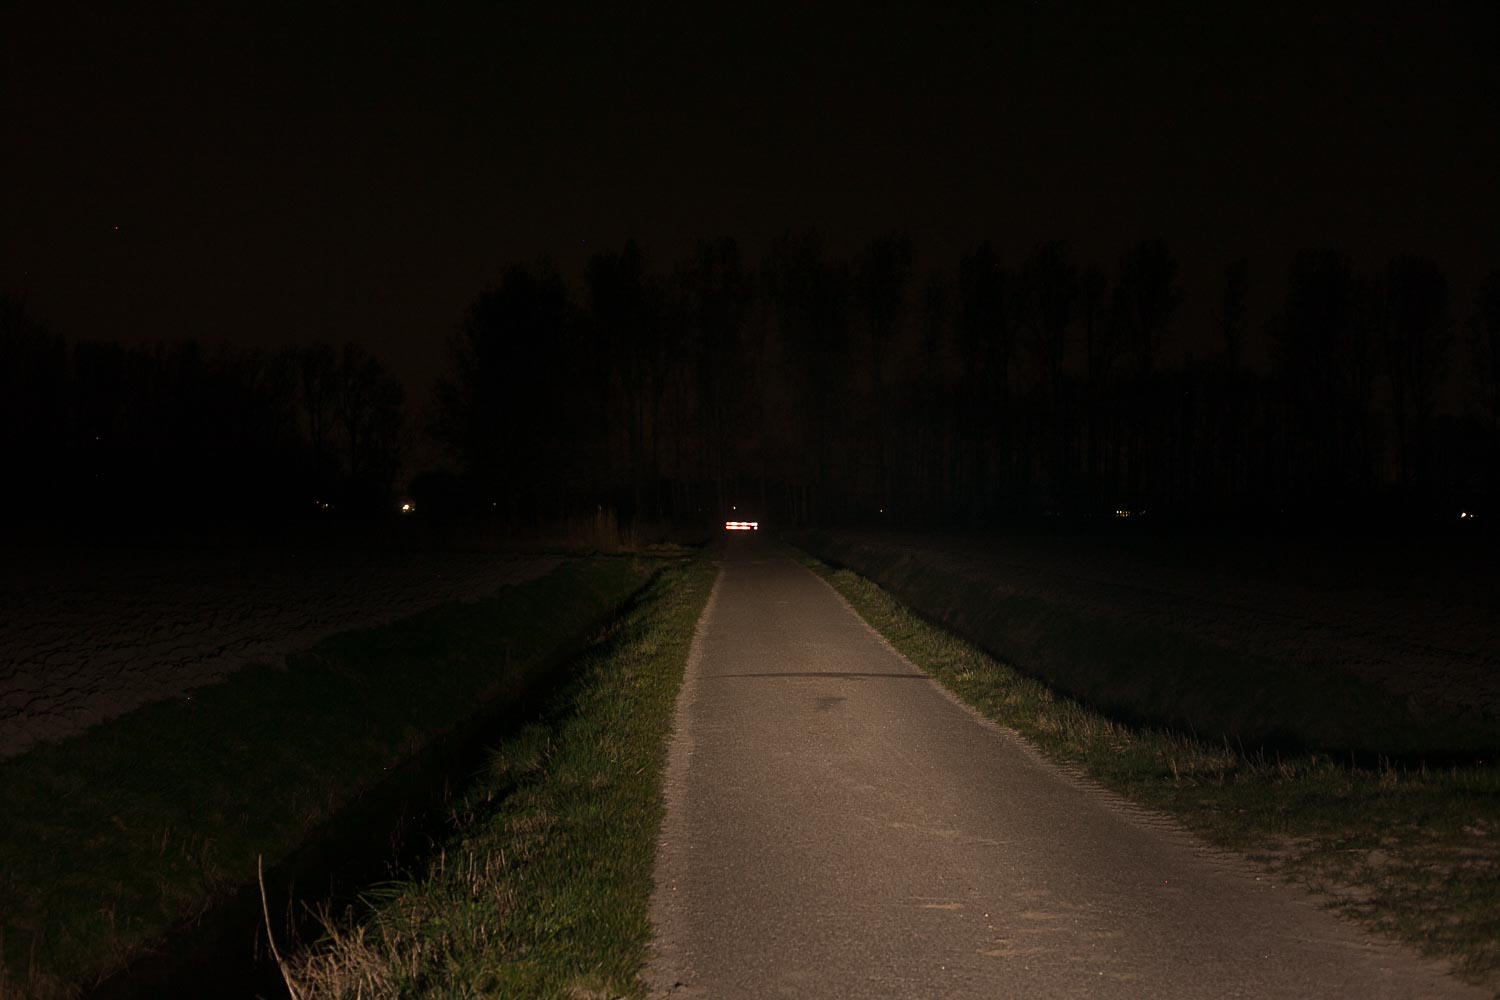
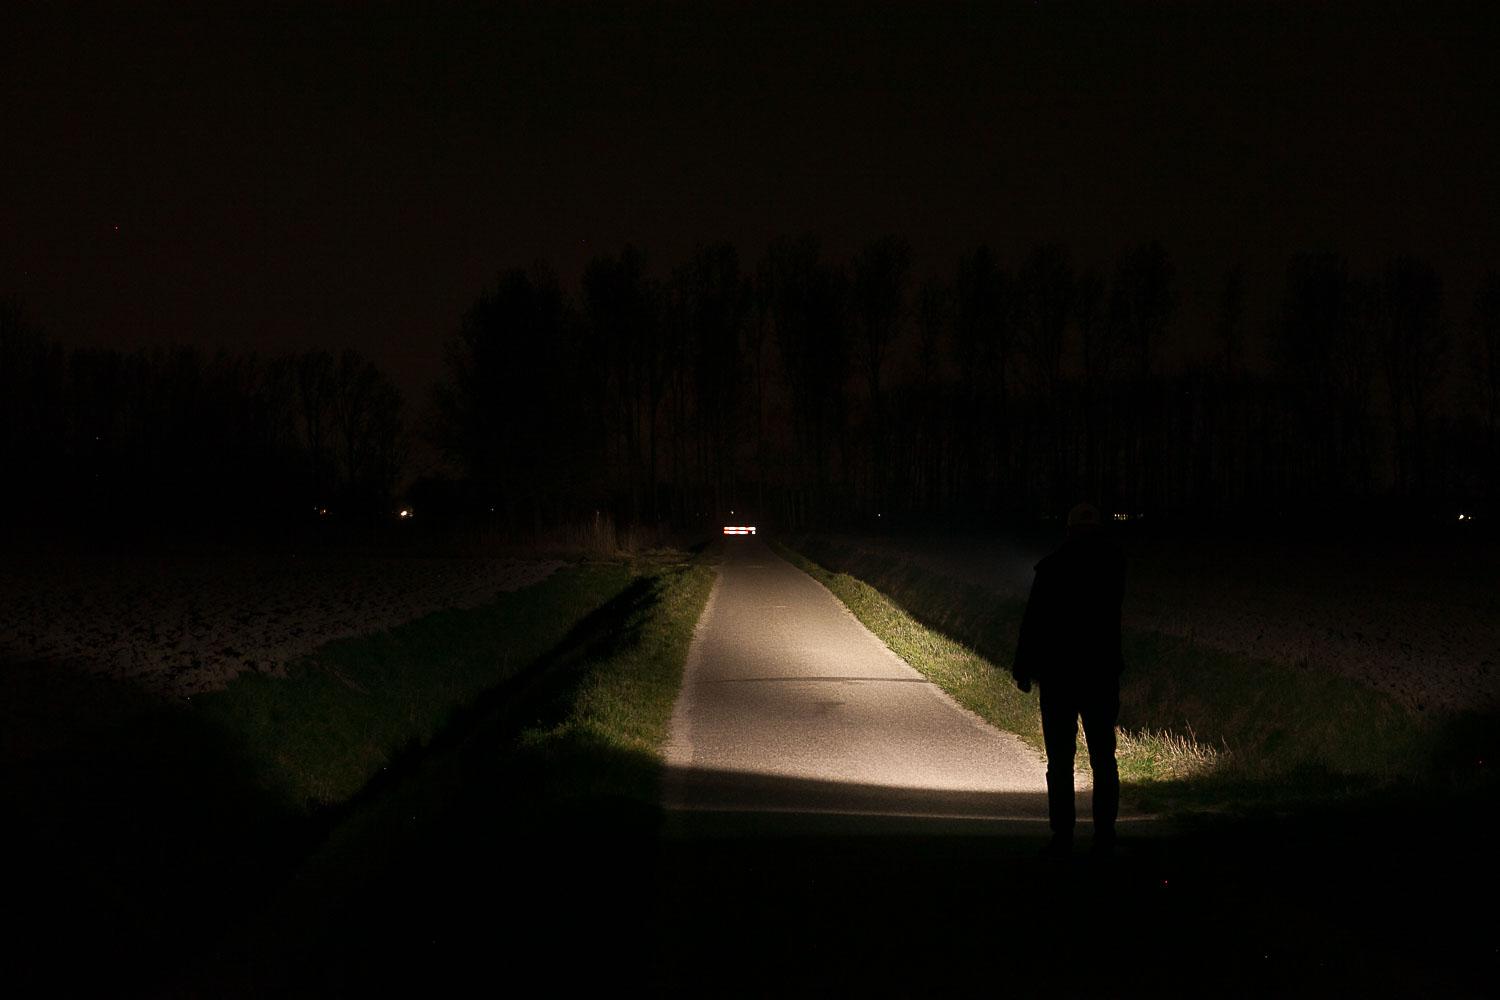
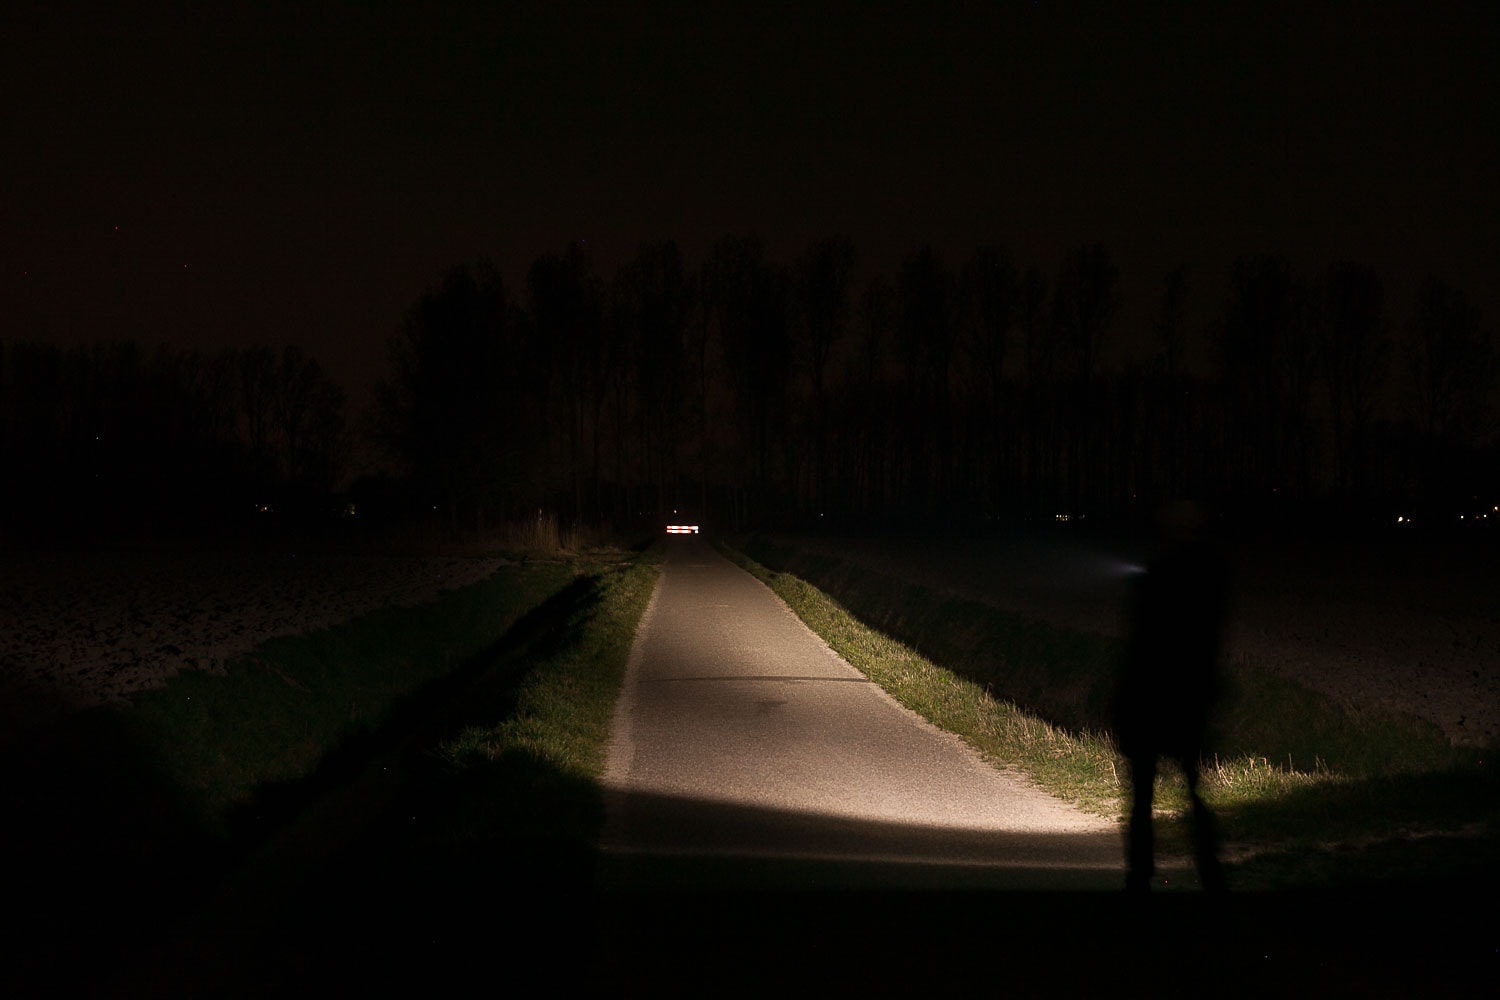
For the following beamshots, I used a Canon EOS 5D Mk2 and a 50mm lens. manual settings: ISO1600, 1/4sec , F4, 5000K
The shed is about 65 meters / 71 yards away. The reflective fence in the next group of pictures is about 200 meters away.
Pictures were taken at turn on, so if you want to know how the flashlight performs after turn on, scroll back up and check out the runtime charts. Those give you a better picture of what to expect.

Disclaimer: I bought this flashlight with my own money. Nobody paid me to review this flashlight, nor have I been holding back on problems or defects.
Final Verdict
Pros
- Best bang for your buck flashlights
- All parts are replaceable, and no glue is used
- Many LED options available
- Many body color options available
- Many parts and accessories available
- Easy to modify
Cons
- No manual or pocket clip included
- Default UI includes 3 blinky modes. You need to select another Mode Menu for a better UI
- Sometimes a very high pitch noise can be heard
- Low output compared to competitors in this day and age
Explanation on star ratings:
1: Avoid: my phone flashlight would be a better choice – 2: Poor: significant defect or issues; almost unusable – 3: Average: some defects or issues; but still usable 4: Good: recommended (minor issues) – 5: Great: highly recommended

4.5 stars: ★★★★⋆
Yes, this is not a newly released flashlight, but since I am using 14 of them for comparing CRI, CCT, etc, why not write a review?
The Convoy S2+ is a great flashlight for anybody stepping into the world of flashlights. It’s probably one of the best affordable flashlights, with great build quality, and lots of different options when it comes to body color, LED, and accessories. The only downside is the relatively low output, compared to most other 18650 flashlights that are built these days.
This light is highly recommended, even for flashlight enthusiasts.
Convoy S2+ For Sale
You can get it at many stores. But every store has different LED options.
1lumen selects and reviews products personally. We may earn affiliate commissions through our links, which help support our testing.