1lumen selects and reviews products personally. We may earn affiliate commissions through our links, which help support our testing.
Olight Odin Mini review
Table of contents
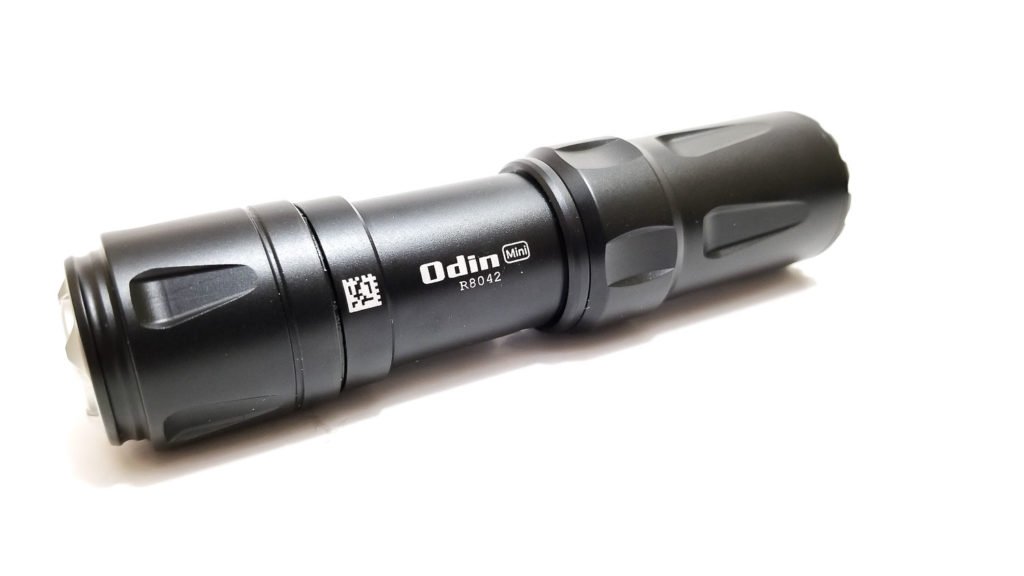
Specifications
| Brand/model | Olight Odin Mini |
|---|---|
| LED | unknown |
| Lumens | 1250 lm |
| Beam intensity | 14,400 cd |
| Battery config. | 18500 (proprietary) |
| Material | Aluminum |
| Modes | 2 |
| Blinkies | N/A |
| Reflector | TIR optic |
| Waterproof | IPX8 |
| Review date | November 2020 |
INTRODUCTION:
Olight is a brand that needs no introduction as their reputation for functional, high performance, and quality have earned a strong following amongst enthusiasts and professionals alike. When I was asked to review an Olight I was ecstatic since I’ve read all about them and poured over other’s reviews, but never owned one. What has Olight whipped up this time? Enter the Odin Mini, the smaller version of the fullsize Odin WML (weapon mounted light) that Gabriel reviewed earlier. The Odin is purpose-built for one mission: to be mounted on a firearm (usually a long gun), and to put light on a target when needed. I absolutely love how they name their tactical lights, and this one is about as appropriate as it gets: Odin is a deity in Norse mythology renowned as both a cunning warrior and battlefield protector. As a flashlight enthusiast, I’m super-excited to be trying this out. It’s an Olight, so I’m expecting it to be good.
Package quality.
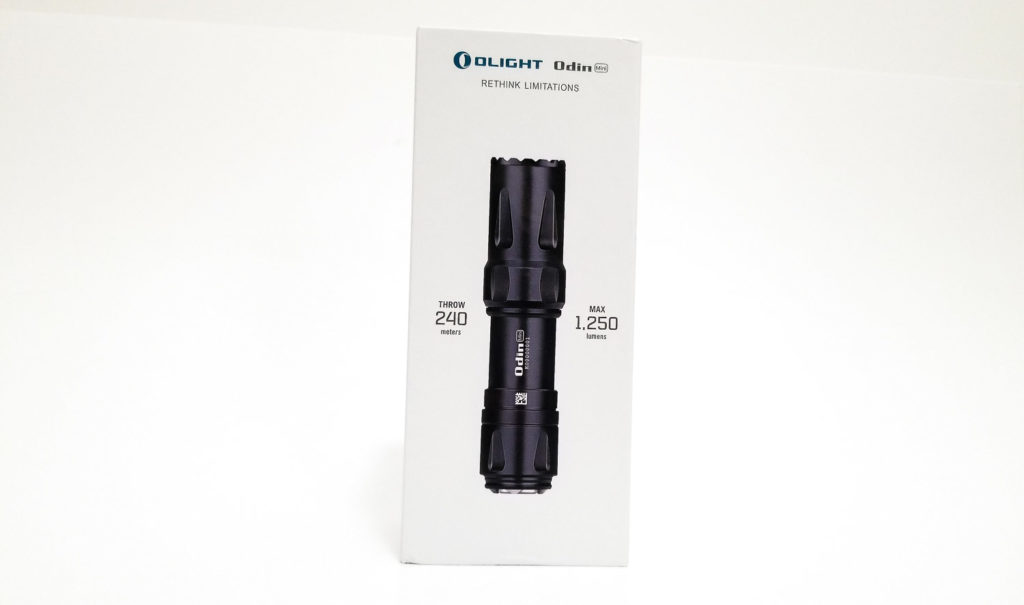
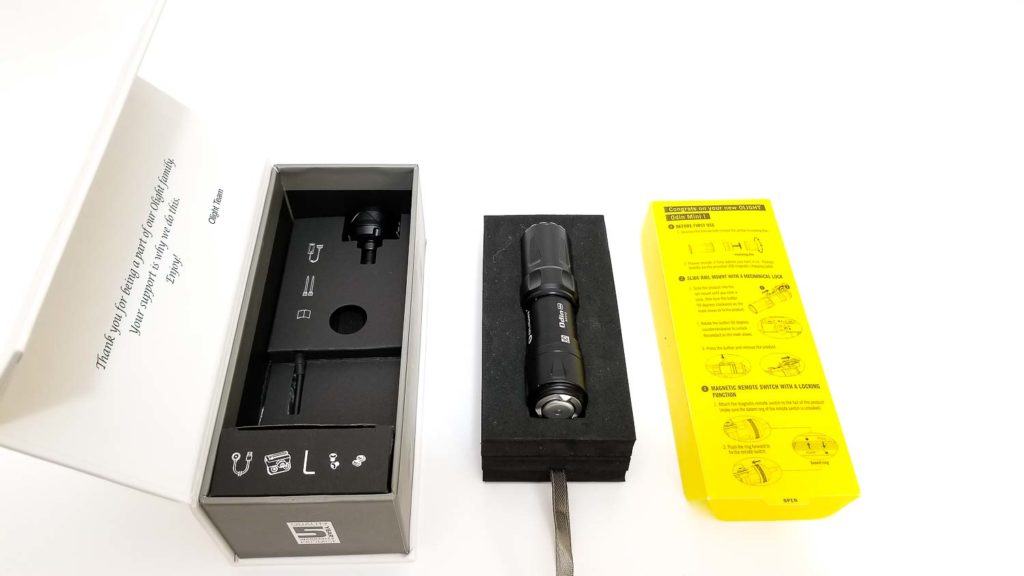
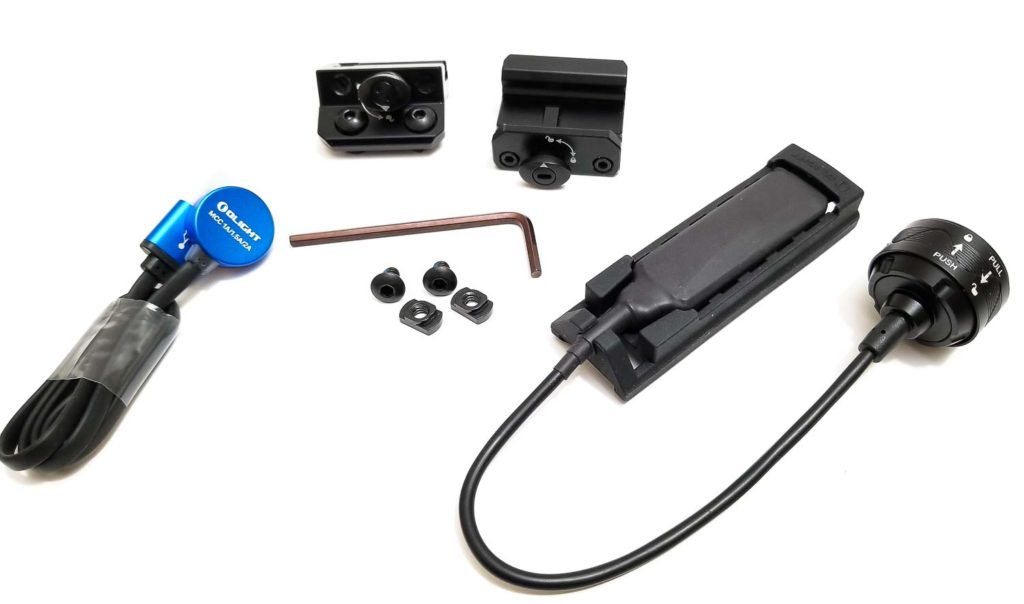
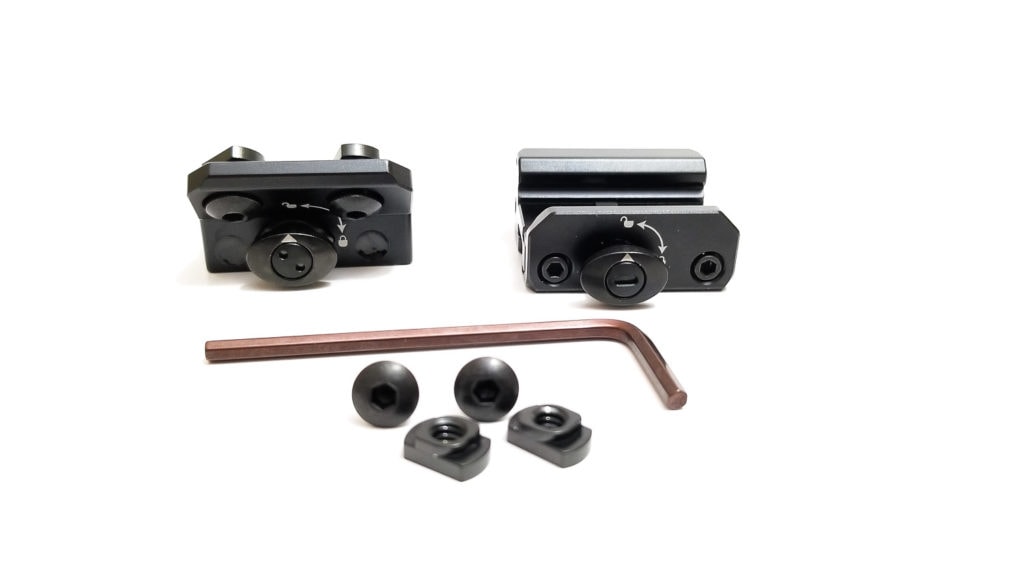
Olight’s packaging is legendary. The box seems pretty basic on the outside, with just a picture of the light on the front of the box, specifications and other information on the back, and a small blurb about the warranty on the ends. I noticed the picture on the front is an actual size image of the light. To get into the box, lift up the magnetic closure and the lid folds open. Inside there’s a message thanking/welcoming you to the Olight family and a plastic cover with operation instructions for the remote switch and charging procedure. Under that cover, you find the Odin Mini itself, held in microcell foam with a small box containing the charging cable, a 3mm hex key, some cap head hex bolts, and two M-Lok retaining nuts. Under the foam is another divider for the remote switch, a rail mount for the switch pad, a two-position M-Lok rail mount, and some small zip ties. I can attest to the efficiency of the packaging since it’s a lot to cram into a small area. Olight also threw in a second (but sold separately) mount for M1913 Picatinny rails. Nice!
- Olight Odin
- MCC3 USB magnetic charging cable
- ROD-7 Remote pressure pad switch with rail mount
- Rail mount with M-Lok nuts attached
- Picatinny 2-position rail mount (normally sold separately)
- 3mm hex key
- Multilingual manual
- 2 hex cap head screws and 2 M-Lok retaining nuts
- Olight proprietary ORB-185C20 18500rechargable lithium ion battery
Olight cut no corners with the accessories included with the Odin Mini. They are top-notch, some of the best I’ve seen included with a flashlight. They even warranty the accessories! The packaging, presentation, and quality reminds me of the packaging of a really high-end cell phone I bought once.
Handling of the light
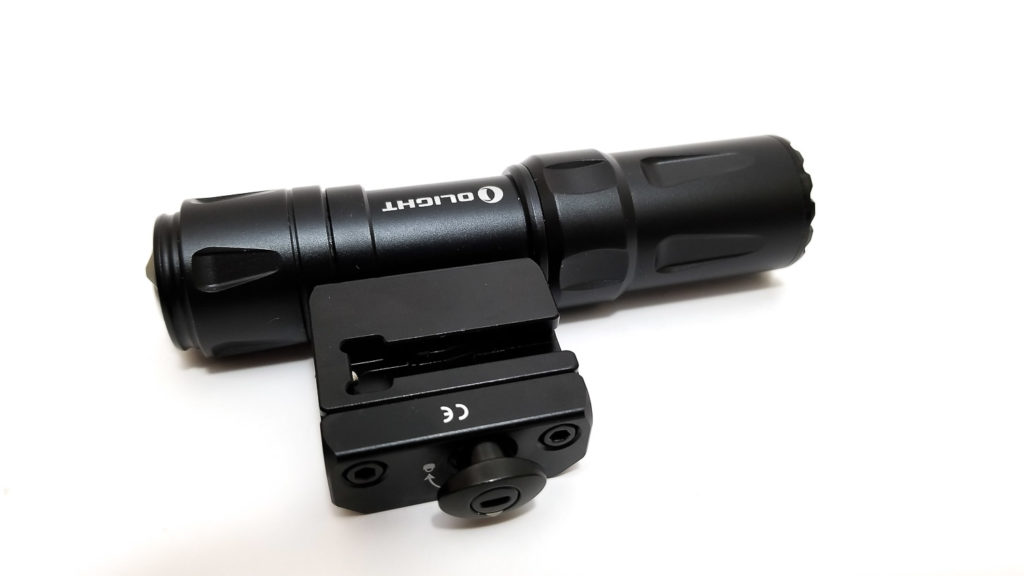
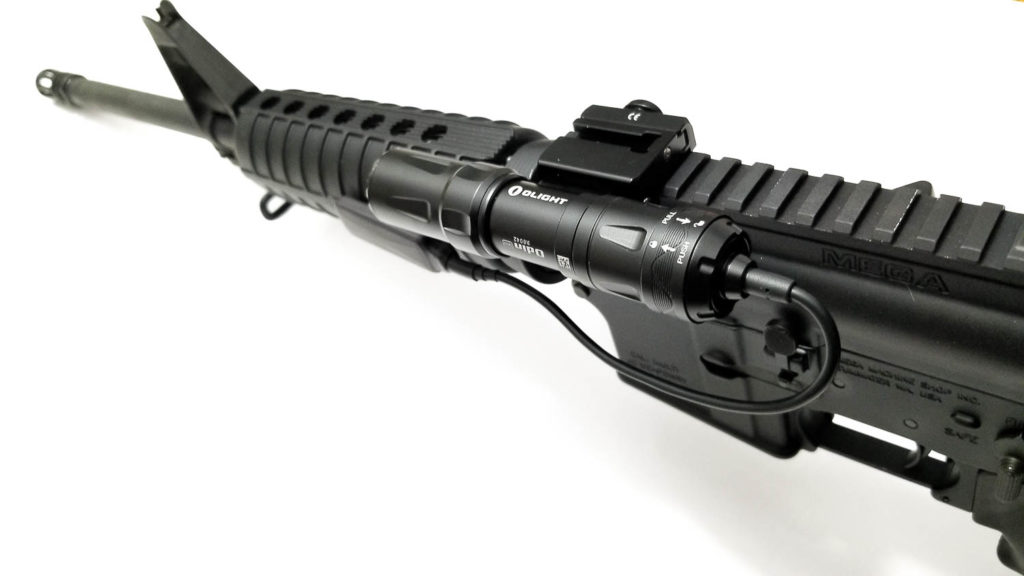
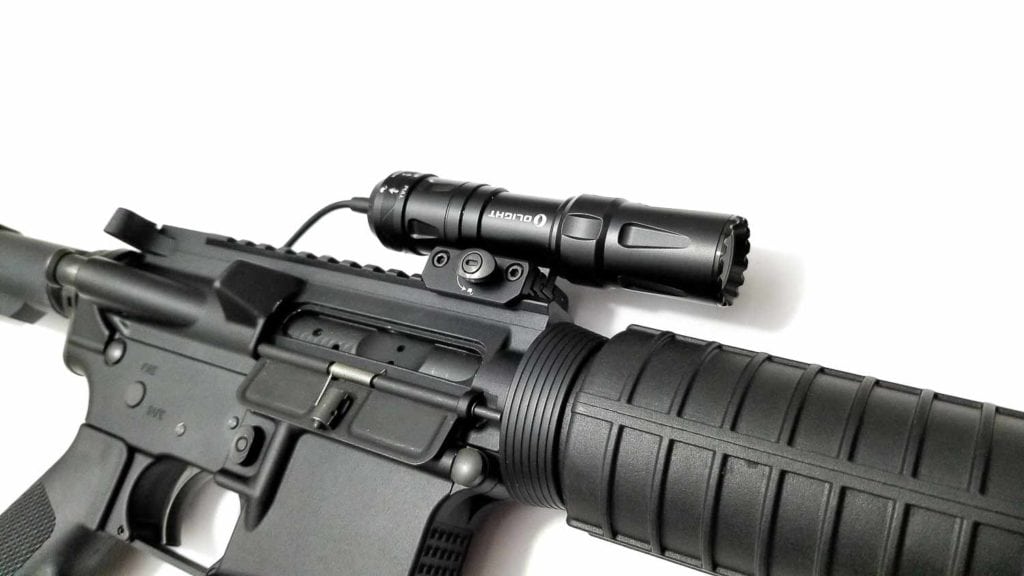
The Odin is a WML (weapon-mounted light) meant to be mounted on a firearm, and includes mounts for M-Lok accessory rails, but Olight sells a two position M1913 Picatinny rail mount as well (the review light came with it). The light has a mounting point attached to the battery tube that interfaces with the rail mounts. It’s drilled and tapped for the included M-Lok mounting nuts, so you can forgo the mount and attach the Odin Mini directly to a M-Lok rail.
Mounting and unmounting is easy: Slide the light into the mount and it locks into place. Rotate up the locking button and it’s locked in solid with no wobbling or deflection. To remove, rotate the lock button to the unlocked position, push the button, and slide the light forward out of the mount. It was a bit stiff at first, but it got easier over time as the parts wore together.
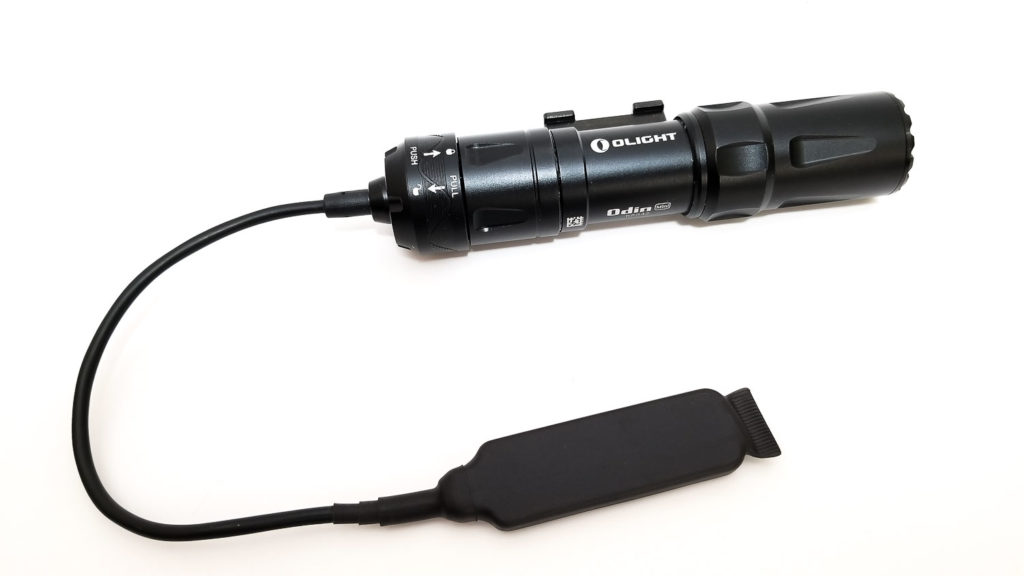
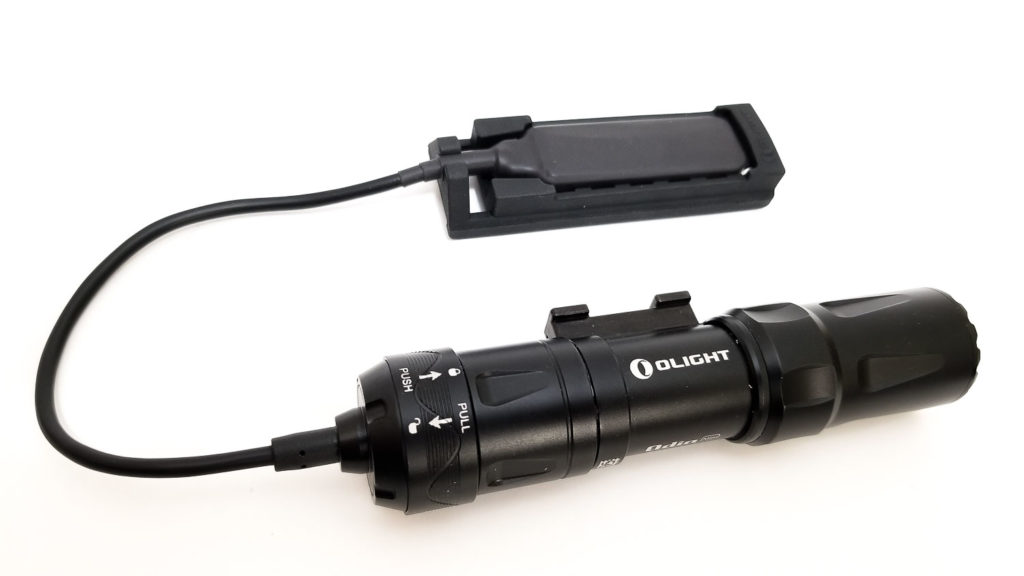
The kit includes Olight’s ROD-7 magnetic remote switch as well. No need to remove the tailcap, it just attaches magnetically and has a detent locking mechanism to keep it from falling off. It is very strong. The pressure pad comes preinstalled in a semi-flexible plastic mount that can go on a Picatinny rail, or you can remove the pressure pad and stick it to a handguard, grip, or receiver with double-sided tape. The kit includes zip ties for securing the Picatinny mount as well.
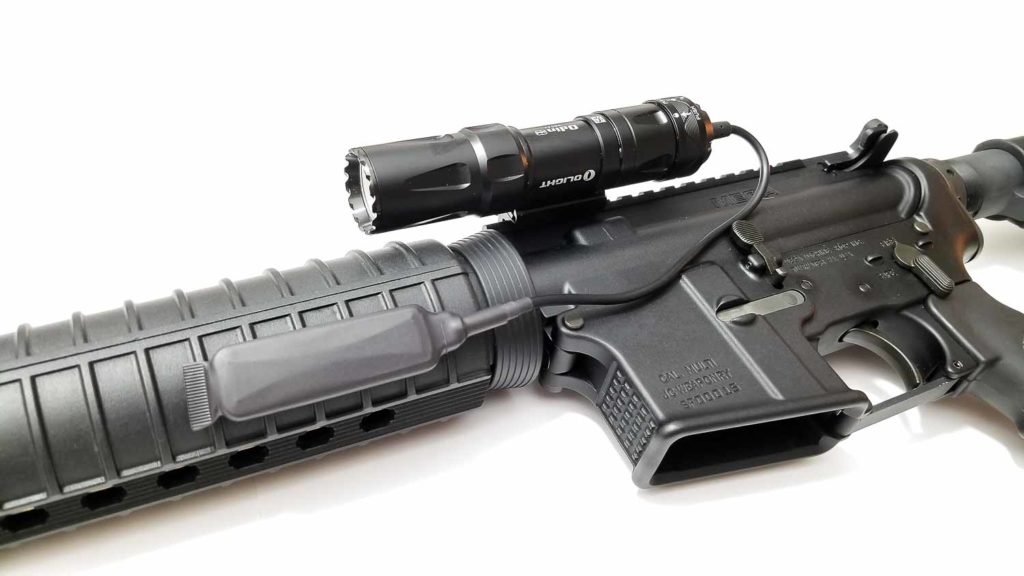
I mounted the Odin Mini to my AR-15’s flat top receiver with the Picatinny rail mount and attached the pressure switch to the handguard with stick tape. A tip: If you get the optional Picatinny mount, you need a 2.5 mm hex key to loosen the rail clamp for installation. I tried the 12 o’clock and 9 o’clock positions on the mount and found it very handy.
Not only does it look slick as heck with the blackout treatment, but it works fantastic. The switch operation is about as easy as it gets: Push to turn on, push to turn off. You have momentary and continuous operation depending on how you press the pad. Press and hold for momentary, and press and release quickly for continuous. With the remote switch, there’s only a single mode: High. This may be good or bad. Good in that you can blind a target and disorient them, or bad that your night vision is affected.
Even though the Odin Mini is designed as a WML, you can use it as a handheld flashlight. It feels good in the hand, and the size and heft makes it easy to handle. It’s the same width as a 18650 light, just shorter. The mount also gives some purchase for a cigar type grip and manipulating the rear switch. The finish is a little slippery in bare hands, but not too bad.
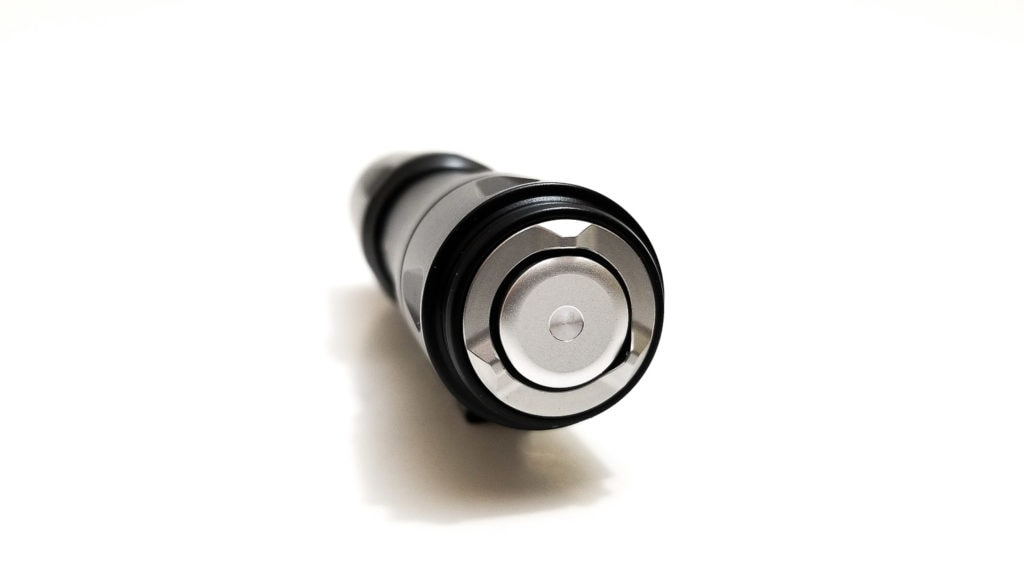
The stainless steel switch has a magnet embedded for the charging and remote switch, but it can also stick to things. Don’t stick it to a vertical surface though because the magnet won’t hold it up. It’s fine tail standing though. The forward switch feels amazing; a bit stiff, but is awesome for an e-switch. Operation is the same with the pressure pad: momentary on and continuous.
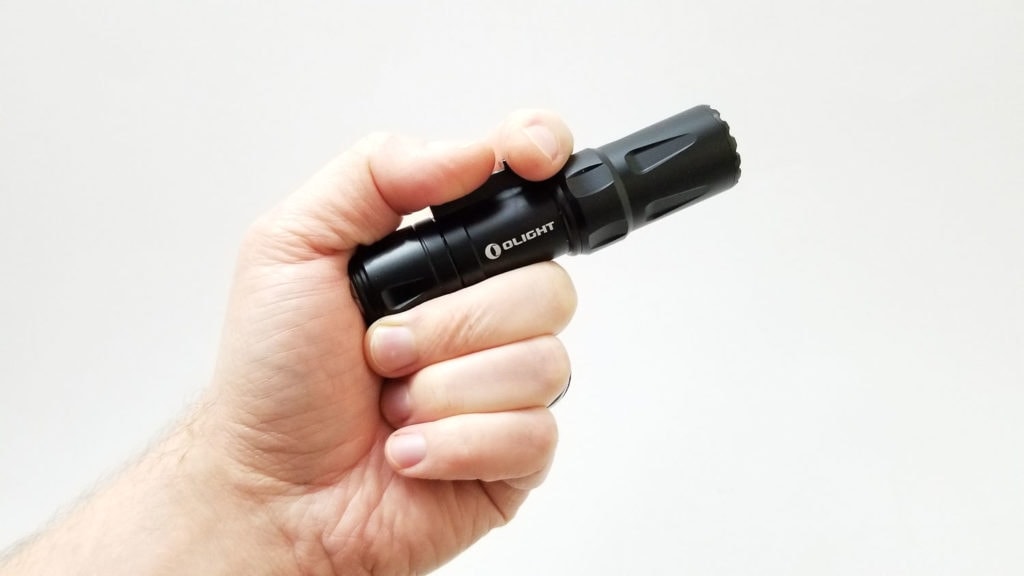
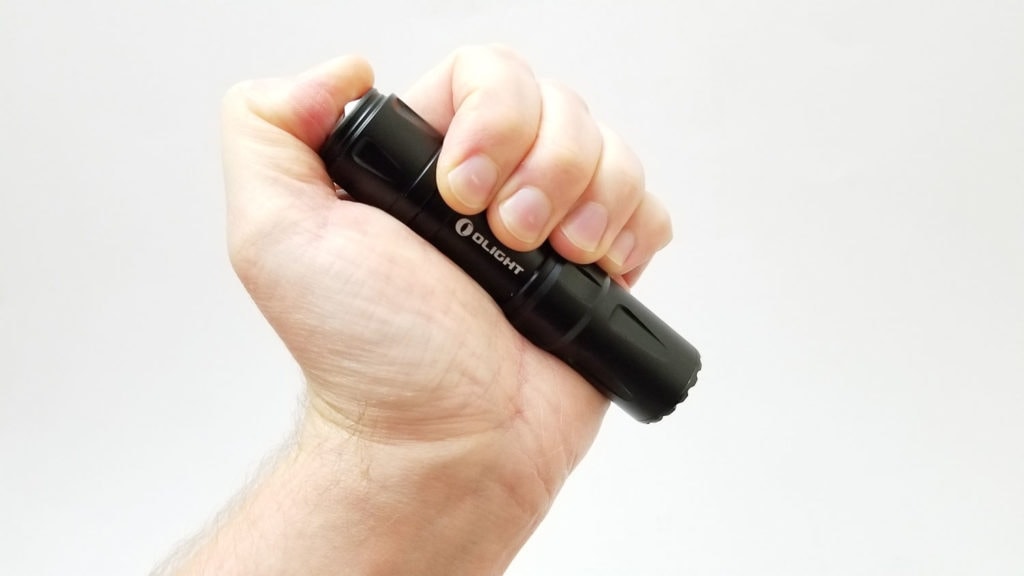
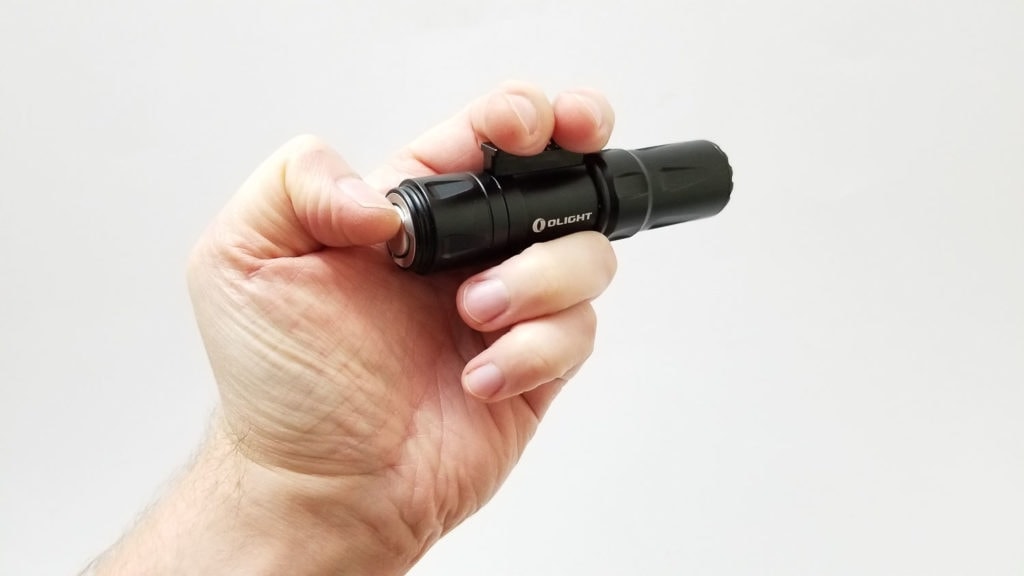
Build Quality, Knurling, Threads, and anodization
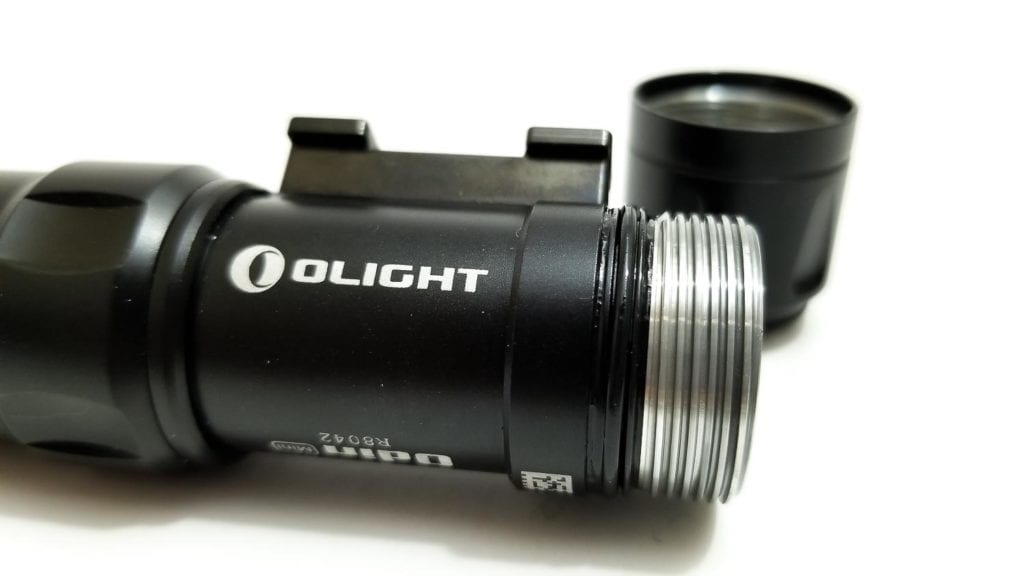
Quality is something Olight takes seriously and it sure shows. Olight backs their products with a 5 year warranty, which is awesome. Equally awesome is the overall build quality. I can’t find anything to nit-pick with the Odin Mini. The light is made from aerospace grade aluminum, finished with type III HA. As mentioned previously, the finish is great, more of a semi-gloss than matte, but not slippery. All the parts fit together great with no gaps. The machining is perfect with no blemishes or tool marks. The finish is also durable too and didn’t wear off much after continuous mounting and unmounting.
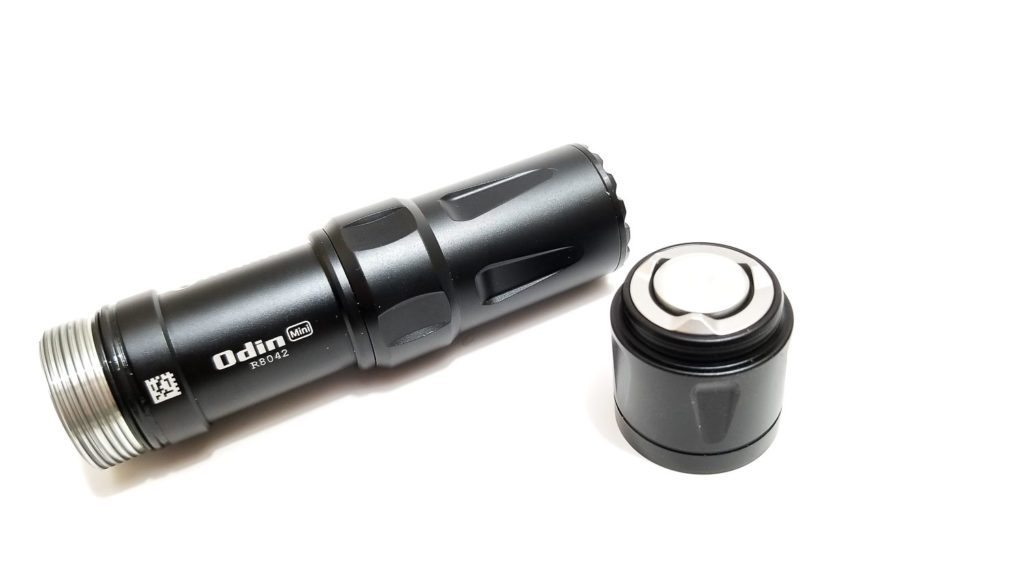
The threads are not anodized (due to the switch design and battery design), but are square cut, smooth, and really beefy. There’s a single good-sized o-ring for sealing the tailcap, and the threads and o-ring were well lubed and screwed together buttery smooth. Olight rates it with IPX8, so immersion is no issue.
There’s no knurling anywhere on the Odin Mini, and I think that’s fine since it’s primarily mounted in one place and not hand held. However, there are grooves machined in the body near the head and tailcap for gripping if you need to go handheld with it.

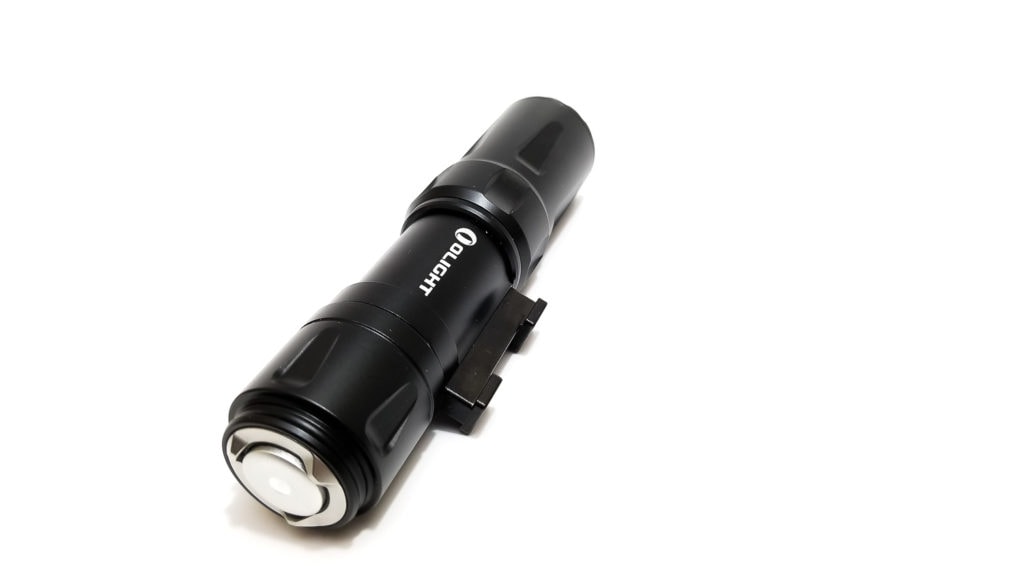
LED, LENS, BEZEL, AND REFLECTOR
Everyone who has ever owned an Olight knows they don’t delve into the particulars of the LED, and the trend continues for the Odin Mini. The LED is described as high performance neutral white and that’s it. This is fine for most people who don’t care about LED brand, binning, CCT, or CRI values, but as an enthusiast, it would be nice to know. Looking through the optic at the outer part of the Mini’s LED die, it looks similar to the one in the full-size Odin, but who knows.
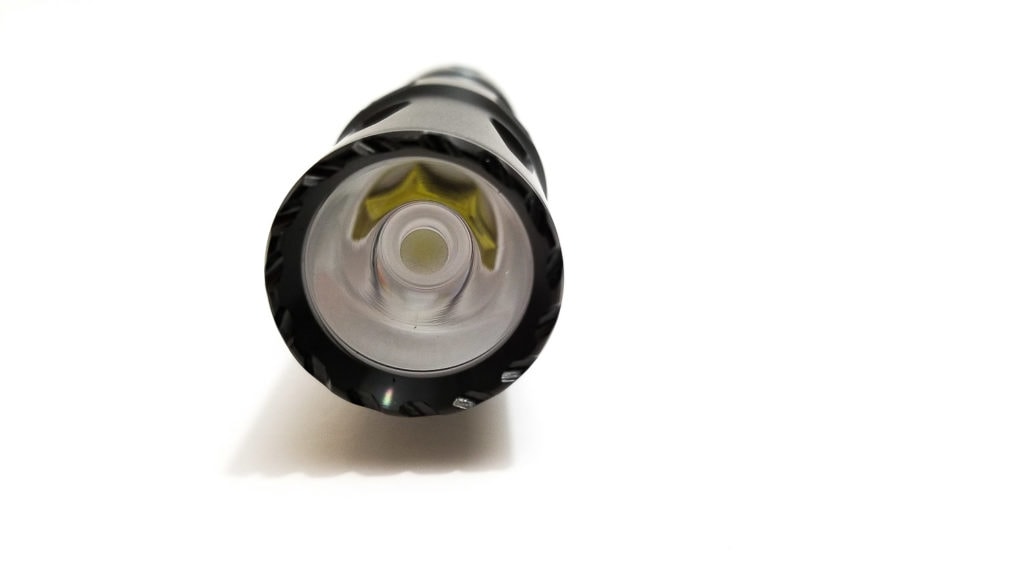
The blackened bezel is beautiful (I couldn’t unscrew it) and has a really neat spiral design. I wouldn’t call it a strike bezel (small crenulations), but would protect the lens if dropped.
The Odin Mini uses a PMMA plastic TIR (total internal reflection) optic instead of a reflector. There’s no lens protecting it, but it’s pretty thick plastic and isn’t likely to break. The center is frosted to smooth the beam out.
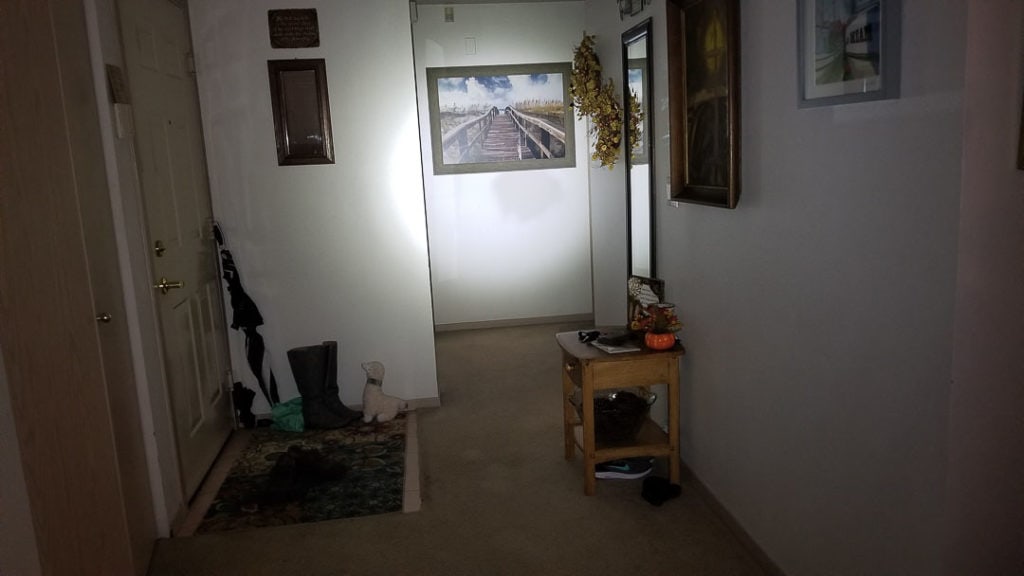
The beam is awesome and perfect for the intended purpose. It’s almost a mix between a reflector and the optical lens of an inspection light. The difference between spill and the large, extremely uniform and artifact-free hotspot is almost indistinguishable, which is good for side illumination. The Odin Mini puts a lot of light on target for being so small. I was really impressed with how well the insides of my house were lit up.

Dimensions
- Height: 11.5 cm / 4.55 inches
- Head diameter: 2.9 cm / 1.14 inches
- Body diameter: 2.5 cm / 1.01 inches
Weight:
- With cells: 176 grams / 6.2 ounces
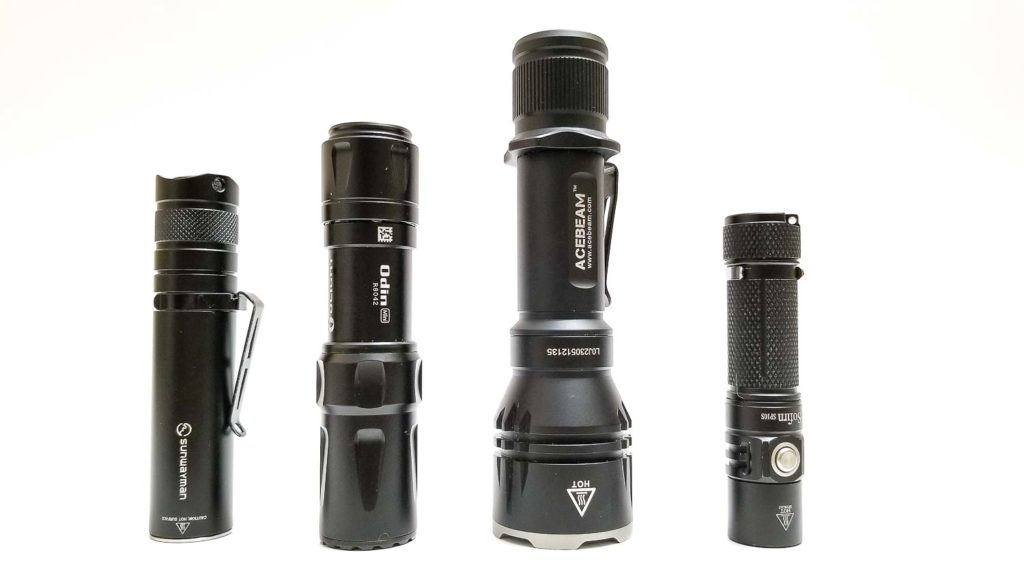
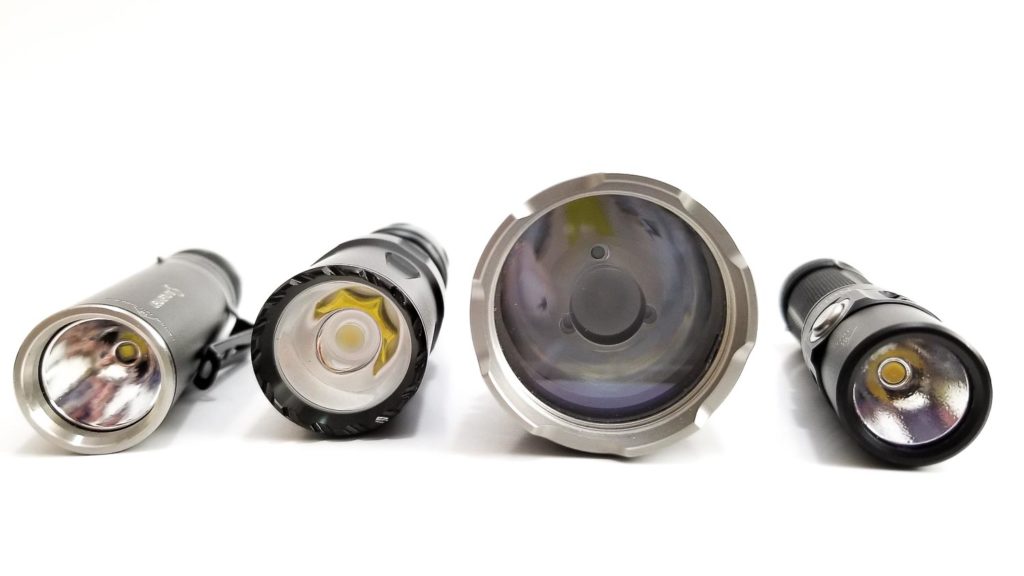
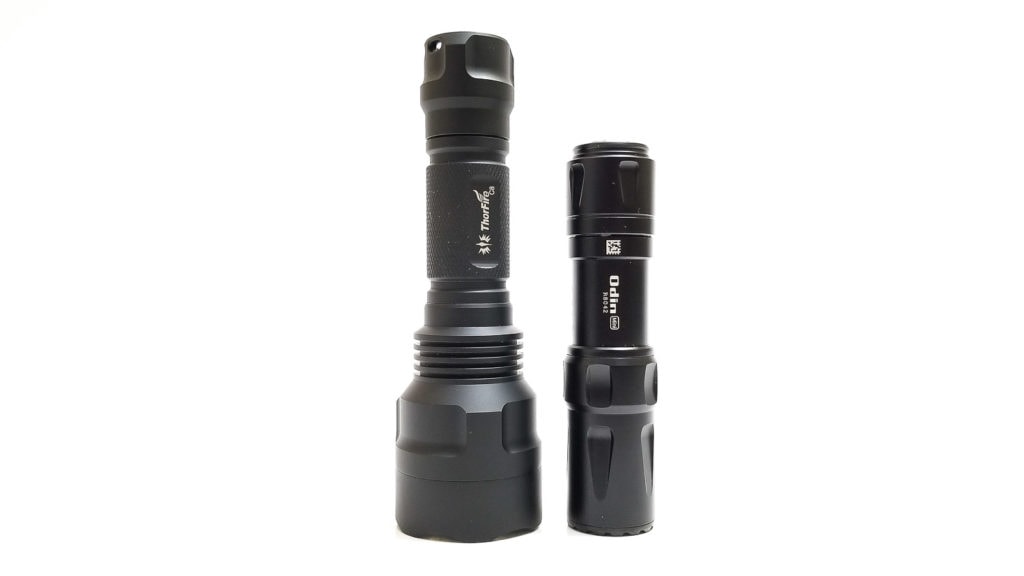
Size comparison
Left to right: Sunwayman R10A, Olight Odin Mini, Acebeam L17, Sofirn SP10S.
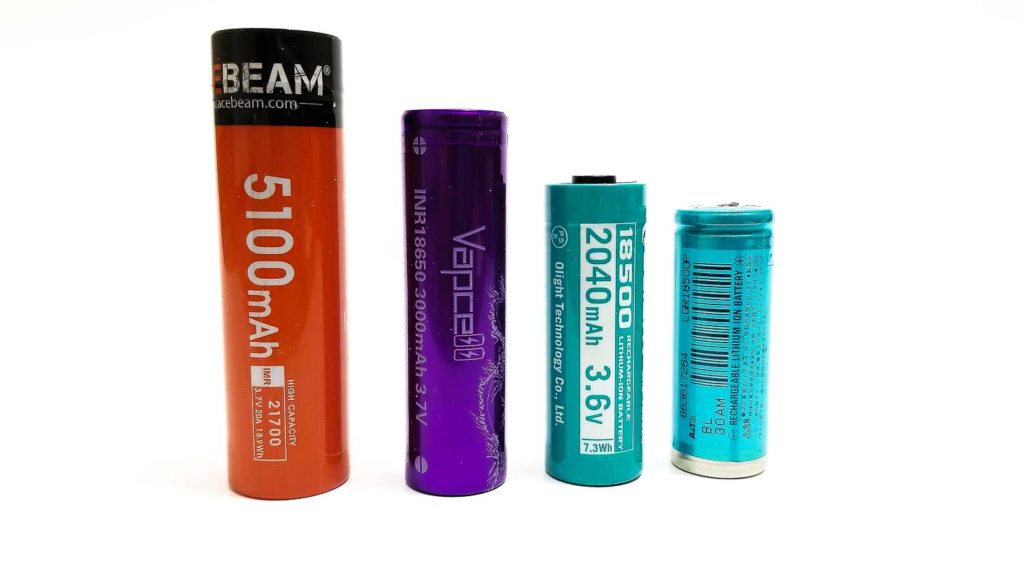
Battery comparison: 21700, 18650, Olight 18500, standard 18500.
Driver & User Interface:
I had a bit of an epiphany with the Odin Mini’s UI. I was expecting at least six modes with blinkies, but when I ran through the modes, I only got two: Low and high (Level 2 and Level 1, respectively). No turbo, no blinkies, no moonlight. There’s no mode memory, and no lockout, which is just fine for this light. More on that later.
The light starts on Level 2 or Level 1, selected by how you press the switch. Press and hold lightly for momentary on in Level 2, or press and release quickly for continuous. Press it hard (it will click) for momentary Level 1, and press and release for continuous. It’s the same for the pressure pad switch, but it’s only Level 1, no Level 2.
Olight has one of the most unique LVP notifications of any flashlight. They use haptic feedback, aka. vibration, to alert you to the battery condition! This is a new one for me, and it works great. Like a vibrating cell phone.
Modes:
From OFF:
- Press and Hold: Turns on in Level 2 or Level 1, momentary on.
- Single click:Turns on in Level 2 or Level 1, constant on.
From ON:
- Press and Hold: Momentary Level 2 or Level 1.
- Single click: Turns off or switches to Level 1.
Mode memory:
- None
Low voltage warning:
- Vibration warning. Light vibrates once every 5 minutes for battery <20%, vibrates once every minute for <10%, vibrates once every 10 seconds if <5%.
Strobe/blinkies
- No strobe or blinkies
Lock-out mode:
- None
PWM
- Nope!
Additional info: There is no lockout on this light and unscrewing the tailcap doesn’t work (it will fall off by the time it won’t turn on anymore). Olight nailed the UI. In my opinion, complicated UI’s have no place on WML’s or pure tactical lights. It should turn on when you press the switch. Period. Mode memory can be bad since it might be too dim or too bright, and accidentally locking the light or forgetting to unlock it can be really bad for obvious reasons. When operating under stress or when the adrenaline is pumping, you don’t care about ramping, mode groups, special strobes, or blinkies anyway.
Batteries & Charging
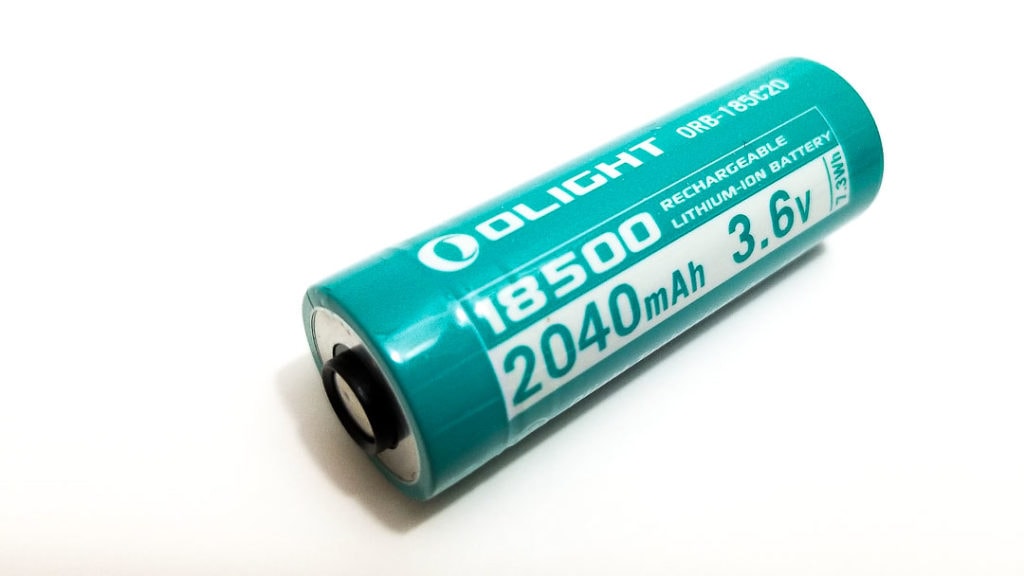
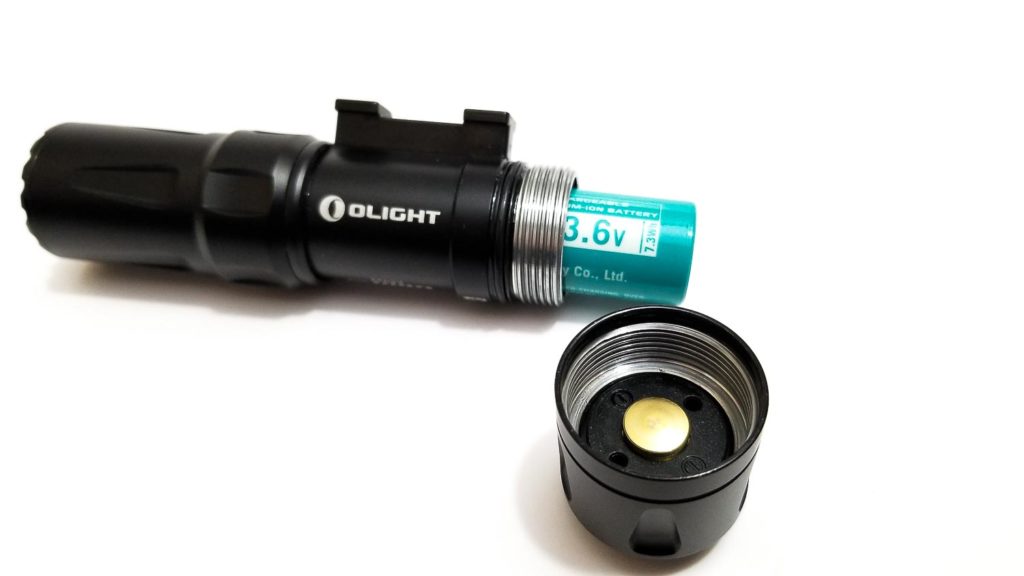
The Odin Mini came with Olight’s ORB-185C20 protected 2040 mAh lithium-ion battery preinstalled. Not an 18350 or 16430, this is an 18500 size cell which is typically found in-camera battery packs. Like other Olights, this is a proprietary cell, meaning you can’t use non-Olight cells in the Odin Mini, and the Olight cell cannot be used in other flashlights. You may be able to charge it in your normal charger, but Olight doesn’t recommend it, and it may not work with all chargers.
Normally I’m exceedingly annoyed by this, but I understand Olight’s reasons for it. One is to protect the light. The other is to ensure that the light performs to specifications. If a different battery is used, it might damage the light or cause inconsistent performance. The average buyer probably doesn’t care if they can use a different battery anyways, and honestly, I feel okay about it since Olight’s batteries are great quality and they have a 1-year warranty.
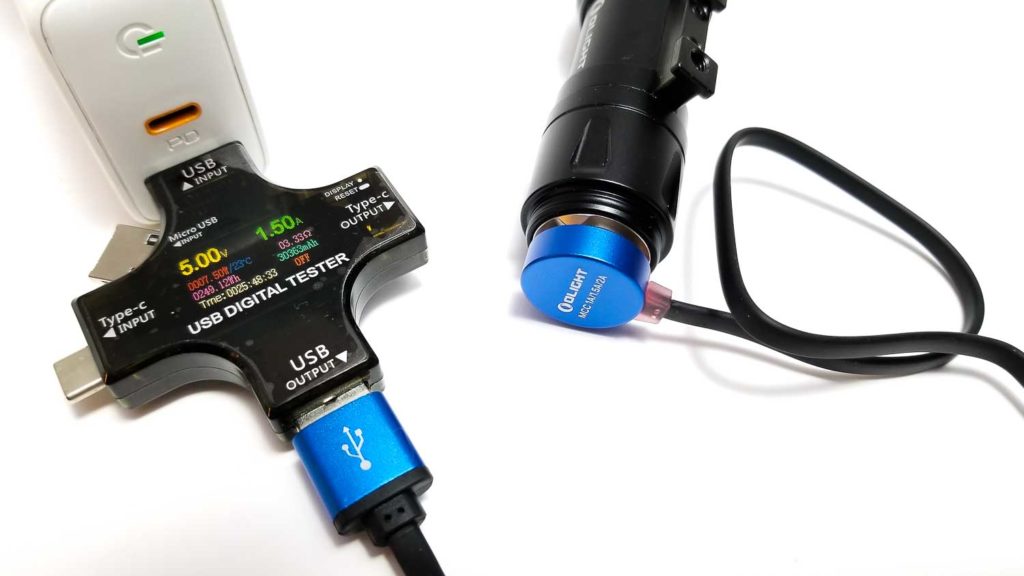
For charging, you get Olight’s proprietary MCC3 magnetic charging system. It’s a USB A connector on one end, and a round disk with an embedded magnet that attaches directly to the tail switch on the other. Magnetic charging is great on one hand since there’s no connector to wear out or break, no ingress point for moisture, and no charging port cover to mess with. On the other hand, if you lose the cable you’re out of luck since other magnetic charging cables are not compatible.
Charging is very user friendly. Just plug the USB A end of the MCC3 cable into a USB charging port (laptop, computer, power bank, power adapter), and the other end attaches to the tail switch magnetically. The LED indicator on the cable turns red when charging and changes to green when finished. The charge speed is specified at 1.5 amps max (on a 2.4 amp wall adapter) and on my 2.4 amp wall adapter my USB tester showed exactly 1.5A! This means the battery should be fully charged in about an hour and a half.
Performance
Olight is considered one of the ‘honest’ flashlight manufacturers since their lights consistently perform very close to advertised output, so that’s what I’m expecting.
Amp measurement
Unfortunately, I couldn’t measure the current since the optimum current path to the driver is sealed inside the head.
Runtime graph
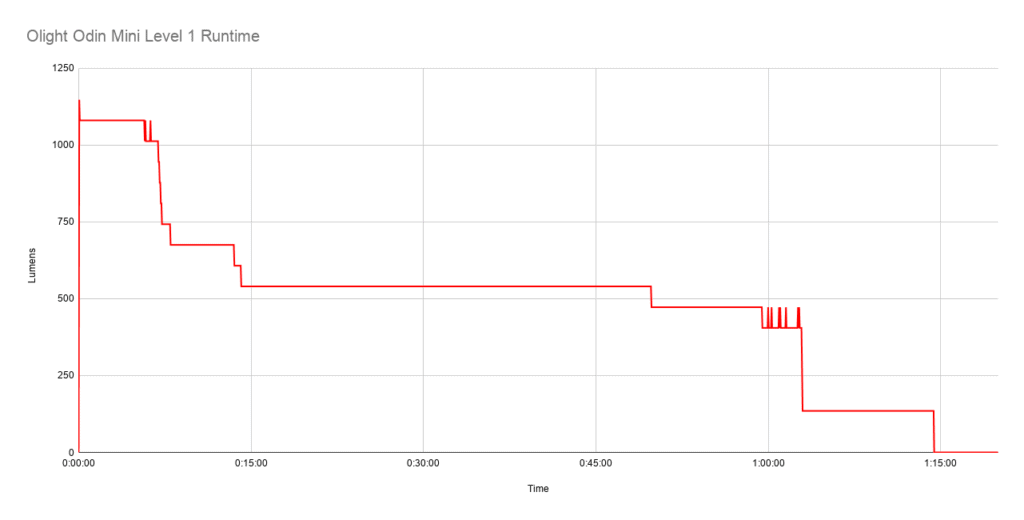
I did the runtime test in my 30 cm integrating sphere using the Digi-Sense 20250-00 luxmeter for both modes with a fully-charged battery for each test run. On level 1 (high), the light did get pretty warm, around 54 C throughout the test, which isn’t bad. Olight specifies the high mode runtime around 1 hr. 10 min. I got 1 hr. 14 minutes. How’s that for consistency? The output is really steady throughout the whole test, steadily stepping-down the output until the light turned off at the 1 hr. 14 minute mark. The light would not turn on after the test, which tells me the battery’s protection circuit works fine. What about the haptic LVP? It works! The light started vibrating (actually startled me a bit) around 55 minutes and kept vibrating occasionally as intended. As the battery depleted, the vibrations get closer and closer together until LVP kicked in and the light shut off.
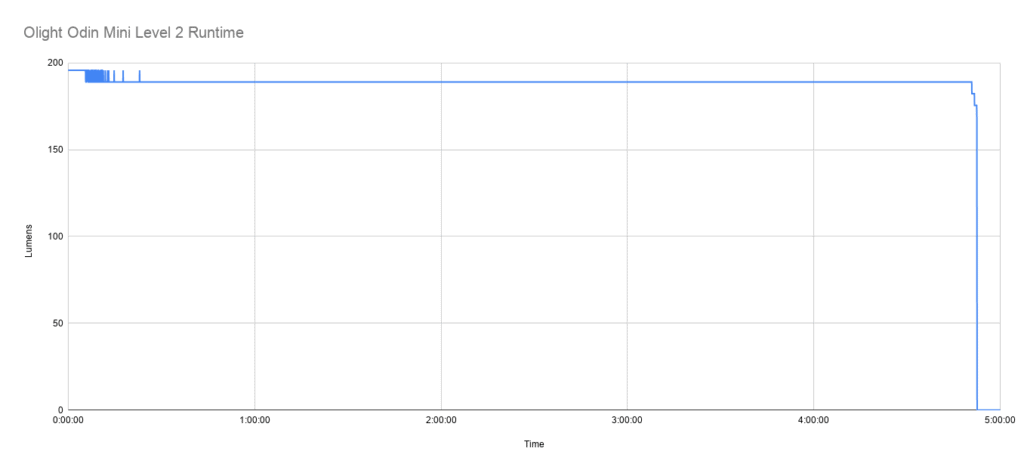
For the level 2 test (low), the light maintained a consistent output for over 4 and a half hours before stepping down slightly to around 180 Lumens, then completely turning off at the 4 hr. 53 minute mark. Olight specifies 5 hours for the level 2 runtime, so again, consistent performance. The haptic feedback worked great. Again, the light wouldn’t turn on after the runtime test.
Takeaways? It’s not until you do a runtime test that you realize the benefit of using the light with the included battery, since you know how long it will run!
Lumen measurements (for each mode)
Lumen measurements were taken using my homemade 30 cm integrating sphere calibrated with lights of known output using the Digi-Sense 20250-00 data logging luxmeter. All readings were taken from the fully-charged battery at 30 seconds. My numbers are on the left, and Olight’s advertised figures are in the far right. No surprises here. Olight’s advertised numbers are very close to mine.
- Low: 195.7 Lumens (Olight 200 Lumens)
- High: 1147.5 Lumens (1161 at turn on) (Olight 1250 Lumens)
Throw numbers:
Throw measurements taken with the Digi-Sense 20250-00 data logging luxmeter at 5 meters and measured at 30 seconds. Olight’s advertised numbers on the right. No surprises here. My numbers are within 7% which is great. The throw is more than enough for the intended purpose.
- Low: 2280 cd= 95.49 meters (Olight 97 meters)
- High: 12,575 cd= 224.27 meters (Olight 240 meters)
Beamshots
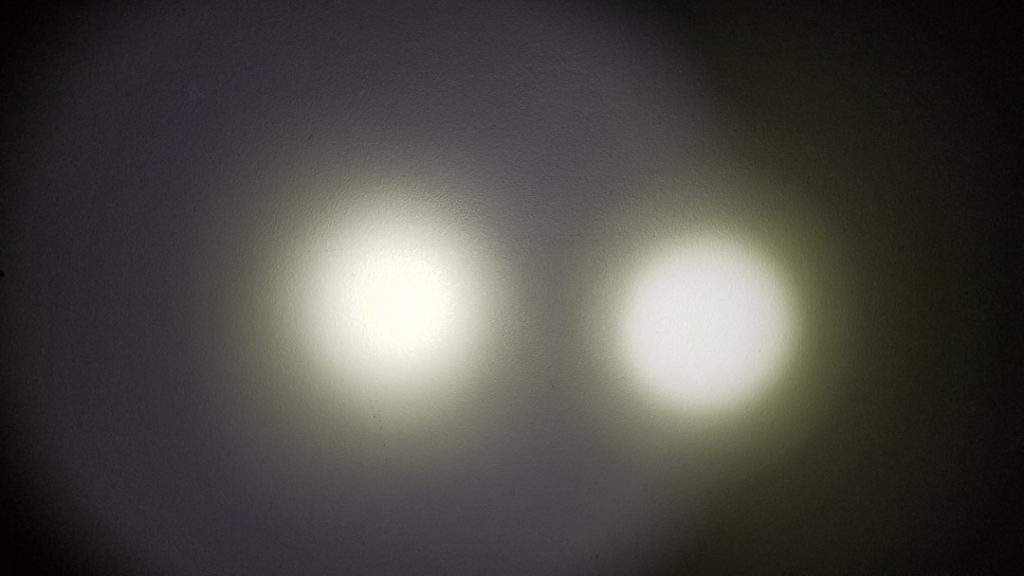
The beam color is definitely warmer than the 4000K XP-L Thorfire and about the same as the 5000K SP10S (just not high CRI that I could tell). It’s less floody than the Sofirn as well and just a more ‘precise’ beam pattern.
- White wall beamshot 1 meter from wall. Left to right: Sofirn SP10S LH351D 5000k 90 cri, Thorfire TG06 XP-L 4000K, Olight Odin Mini unknown warm white LED
- Compared to Solarstorm SC01 XML2 neutral white (on left) Olight Odin Mini (on right)
- Sofirn SP10S vs. Odin Mini



Disclaimer: This flashlight was sent to me for review at no cost, by Olight. I have not been paid to review, nor have I been holding back on problems or defects.
OVERALL CONCLUSION
Pros
- Amazing packaging with quality accessories
- Well-designed
- Great performance
- Compact
- Mounts many accessory rail systems
- Excellent beam quality
- 5 year warranty
Cons
- No low mode with remote switch
- Proprietary battery and charging

5 stars: ★★★★★
Olight develops, designs, and builds flashlights with a single vision: To put an Olight in as many peoples’ hands as possible (because no one wants to be left in the dark, right?). From the moment I opened the box, there was no question that Olight is all about the details in the design, quality, performance, and even packaging. The Odin Mini was designed to be a compact, no-nonsense, high-performance weapon light and they definitely nailed it. It can mount to just about any accessory rail system, and it’s a turn-key setup out of the box for M-Lok systems. On top of that, it’s super easy to use with a perfectly-suited UI. The output and the runtime consistency is about as good as it gets for a light of this caliber. This is a quality item with a great warranty, and it looks awesome on my rifle. It’s really hard to find anything wrong with the Odin Mini, but I would like to be able to use low mode with the remote switch, and although no fault of the light whatsoever, I’m still not a fan of proprietary batteries and charging. However, in this case, I can make an exception. 5 stars all the way and another awesome product from Olight.
Olight Odin Mini discount code
Use our exclusive 1lumen discount code to get an extra 10% off anything you order at Olightstore.com (USA). Coupon code: 1lumen
1lumen selects and reviews products personally. We may earn affiliate commissions through our links, which help support our testing.