1lumen selects and reviews products personally. We may earn affiliate commissions through our links, which help support our testing.
Olight Warrior X3 Review
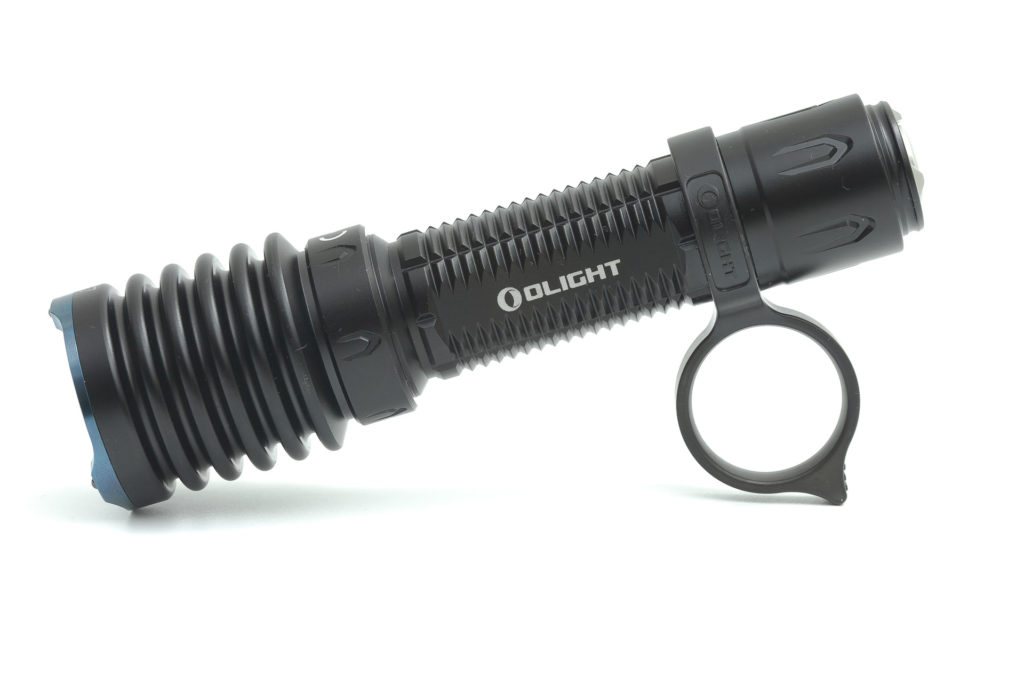
Olight Warrior X-3 specifications
| Brand/model | Olight Warrior X3 |
|---|---|
| Category | Best tactical flashlights |
| LED | N/A (Luminus SFT70) |
| Max. Lumens | 2,500 lm |
| Max. Beam intensity | 78,000 cd (560m) |
| Battery config. | 1*21700 (proprietary) |
| Onboard charging | Proprietary USB |
| Modes | 2 |
| Blinkies | N/A |
| Reflector | Smooth |
| Waterproof | IPX8 |
| Review date | February 2022 |
Introduction:
Try to imagine you are in a situation where you need light, immediately.
Would you be happy, if you had to unlock the light before using it? Probably not. You’d want a flashlight that produces light when you push that switch!
That’s the importance of a tactical flashlight. Immediate light, without any strange hidden modes or locking features. So let’s see what the 3rd version of the Olight Warrior X has to offer.
If you’re interested in seeing how the previous version performed, head over to our Olight Warrior X PRO review. The X 3 is supposed to be a bit brighter (2,500 vs 2250), but throw a little less far (560m vs 600m).
Package quality.
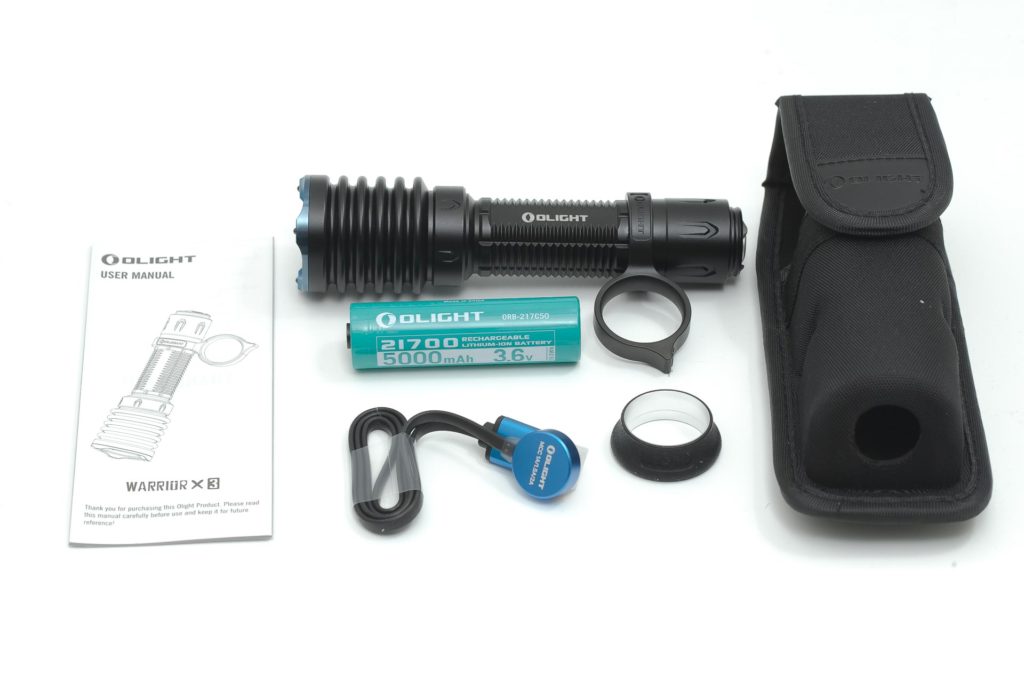
If you care about high-quality packaging, you’ll surely love the Warrior X’s one. It feels nice, strong and high quality. Olight’s packaging is legendary. A picture of the light on the front of the box, specifications and other information on the back. To get into the box, lift up the magnetic closure and the lid folds open. Inside there’s a message thanking/welcoming you to the Olight family, and this is what’s inside:
- The flashlight: Olight Warrior X 3
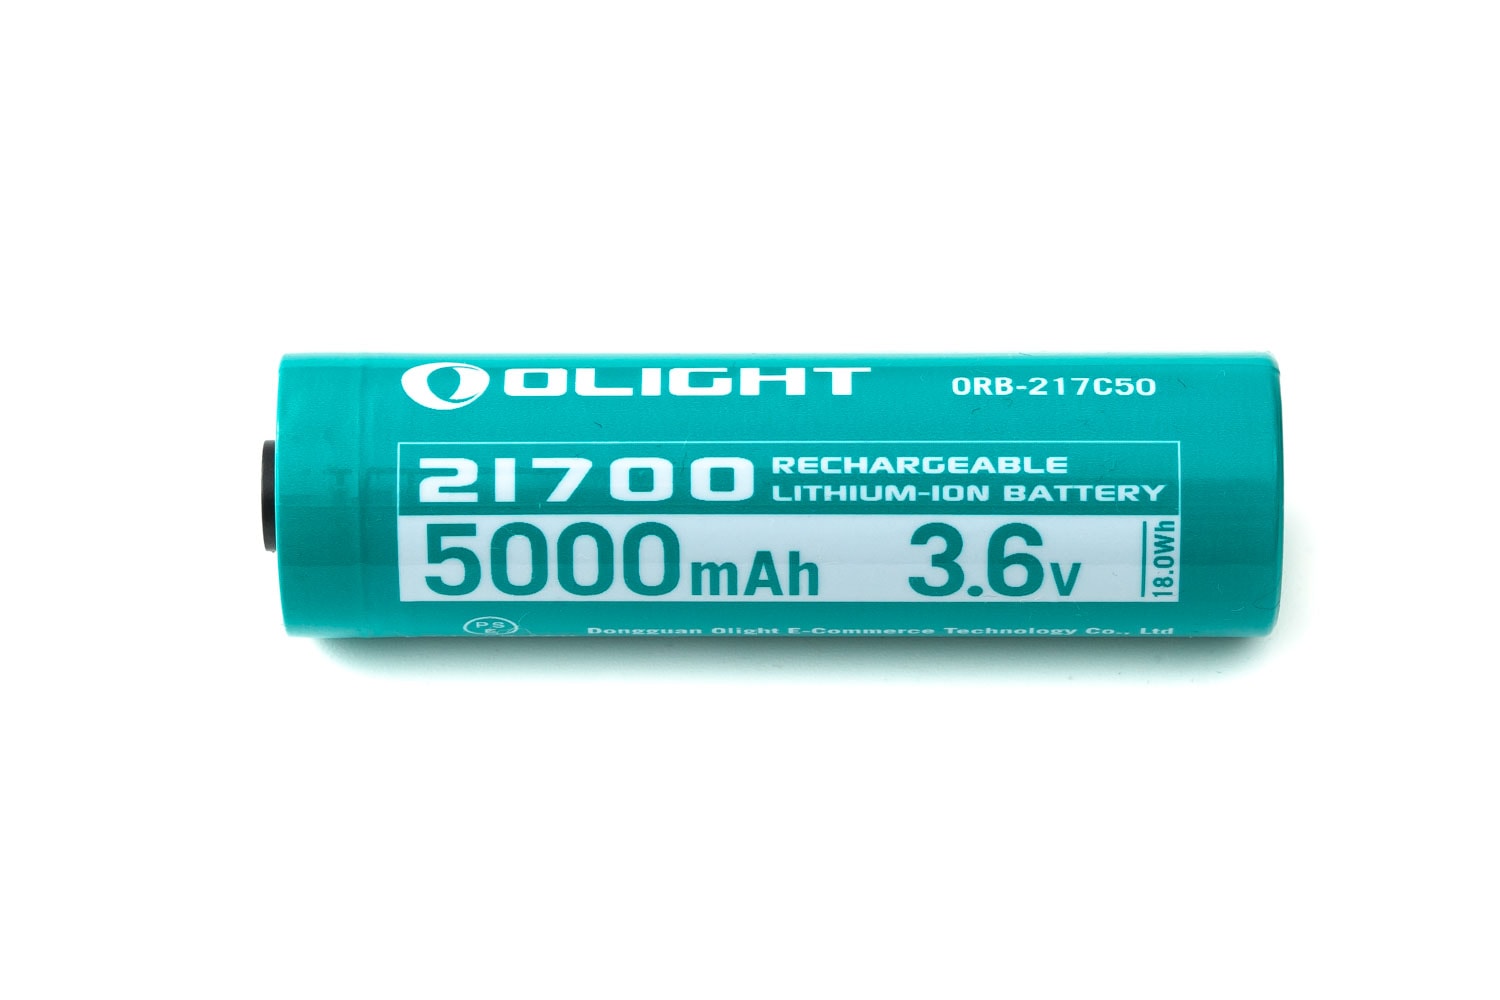
- Olight 21700 type battery with 5000mAh (proprietary)
- Silicone Tactical grip ring
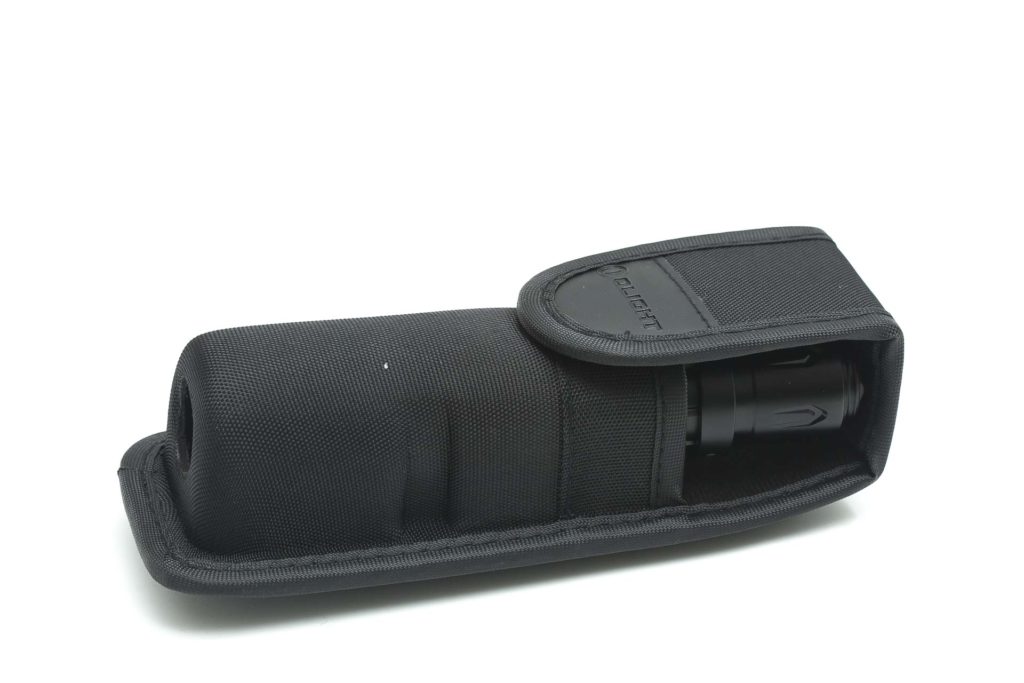
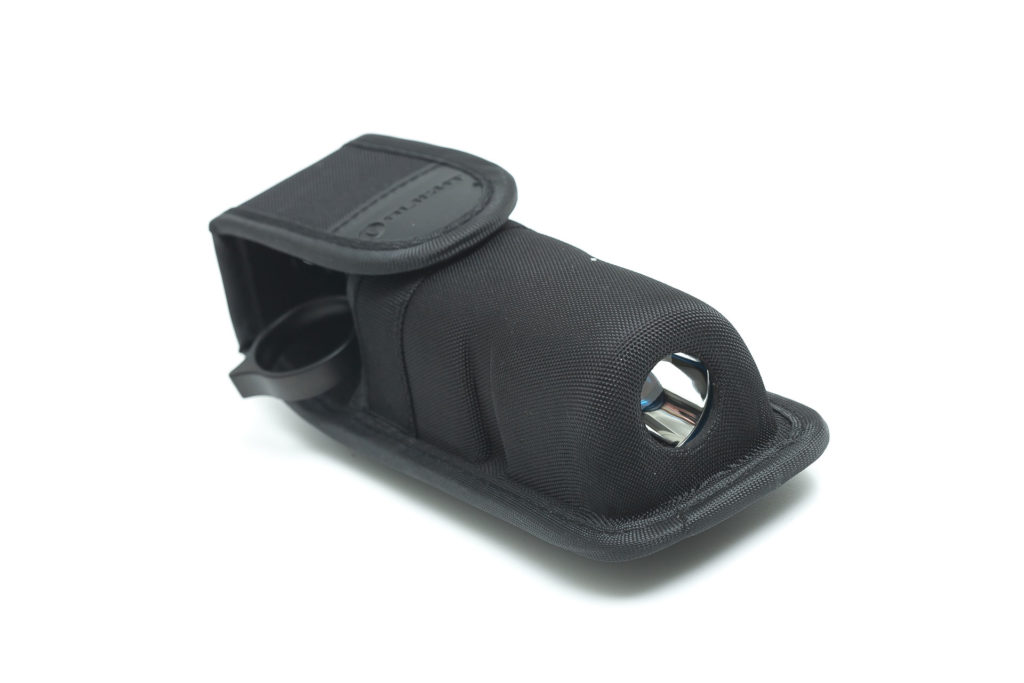
- Holster
- USB charging cable
- Olight warrior ring
- Manual
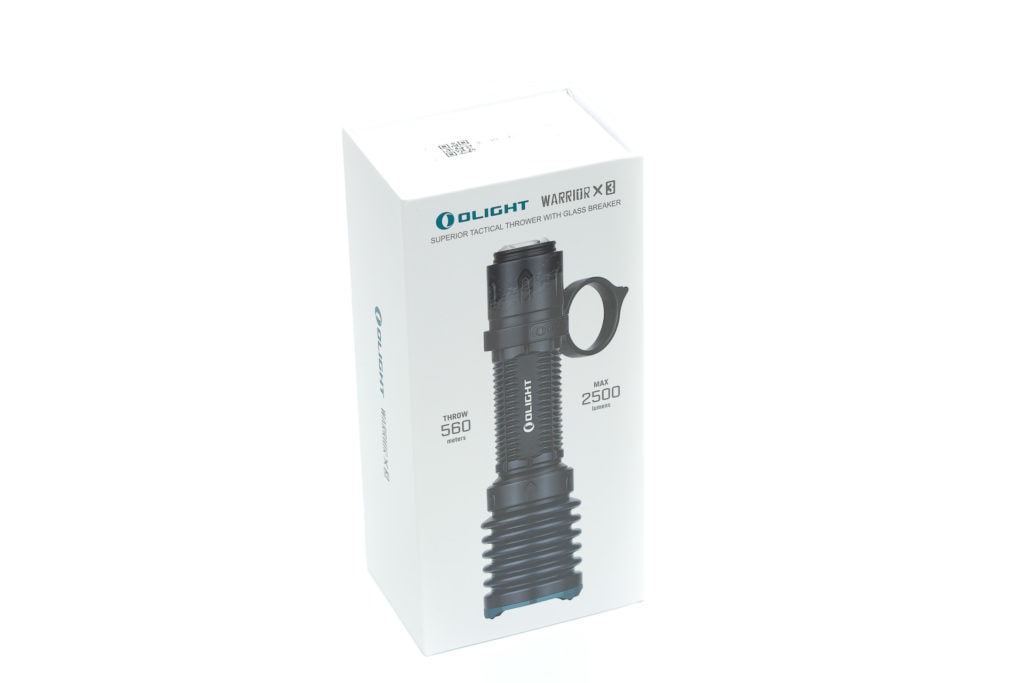
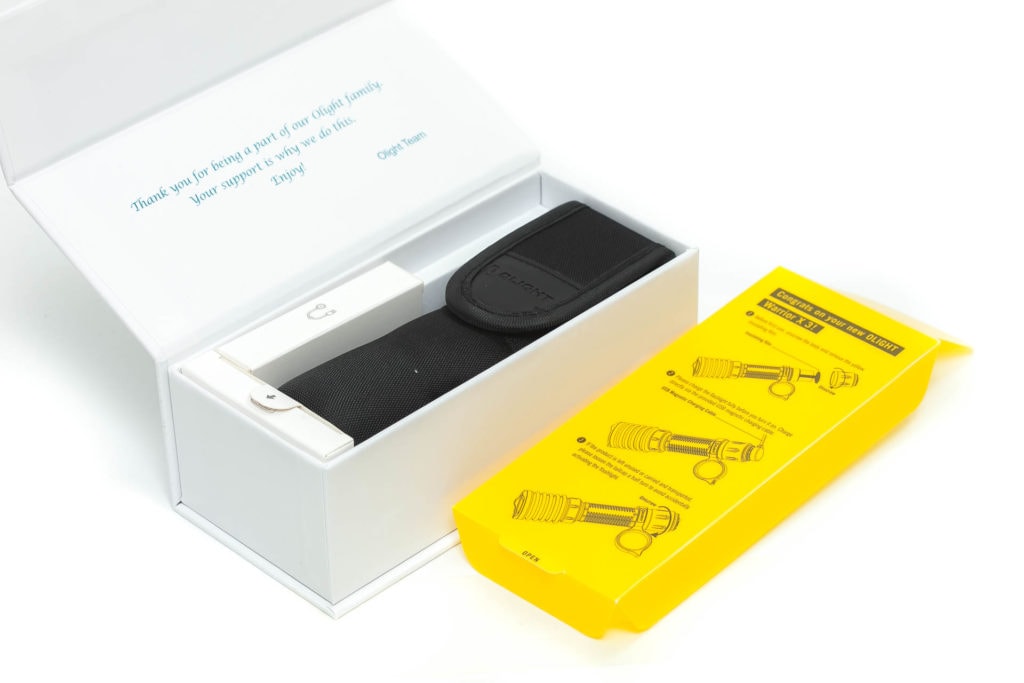
Flashlight in use
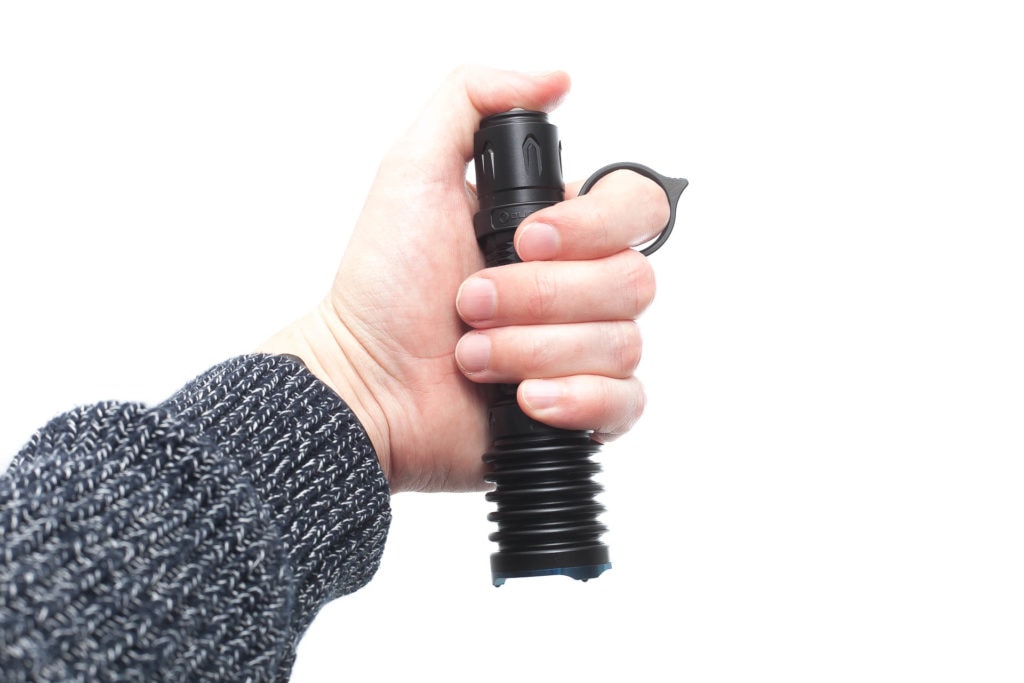
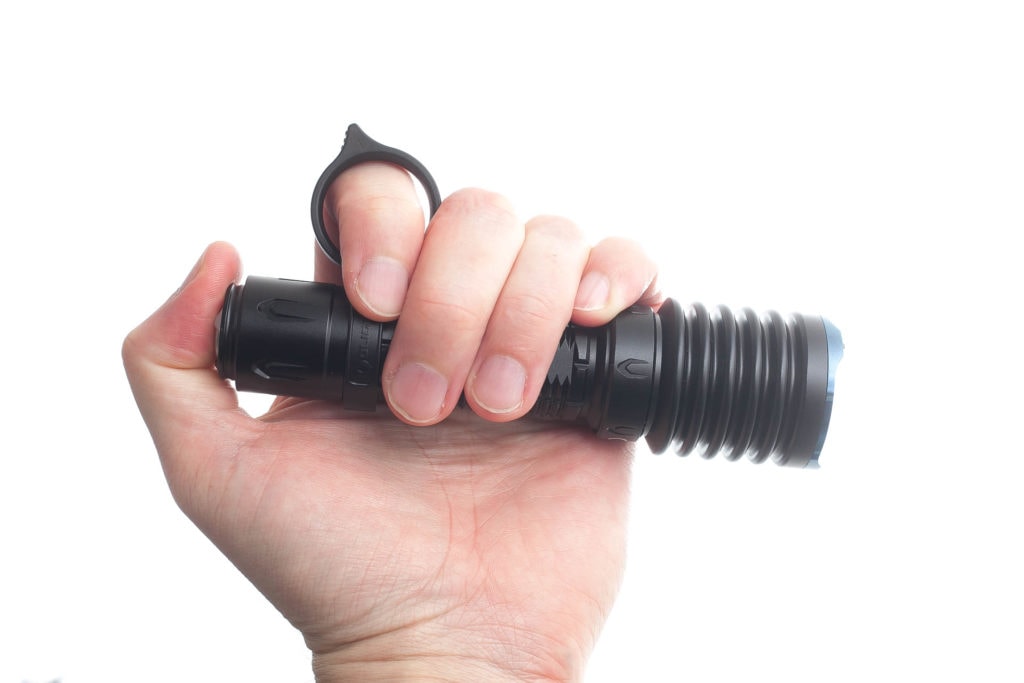
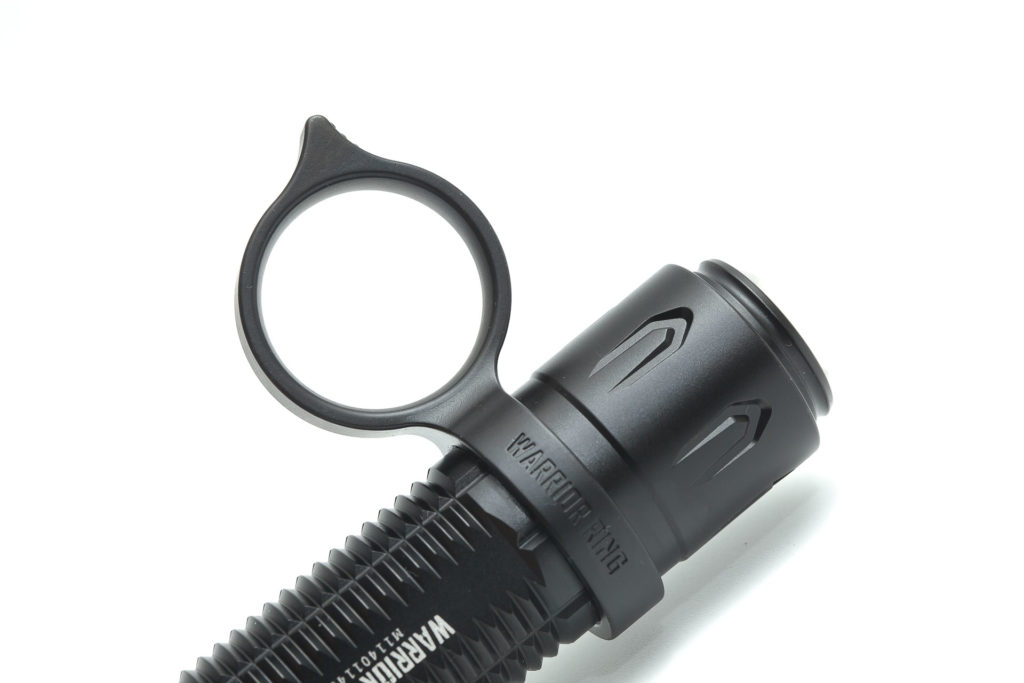
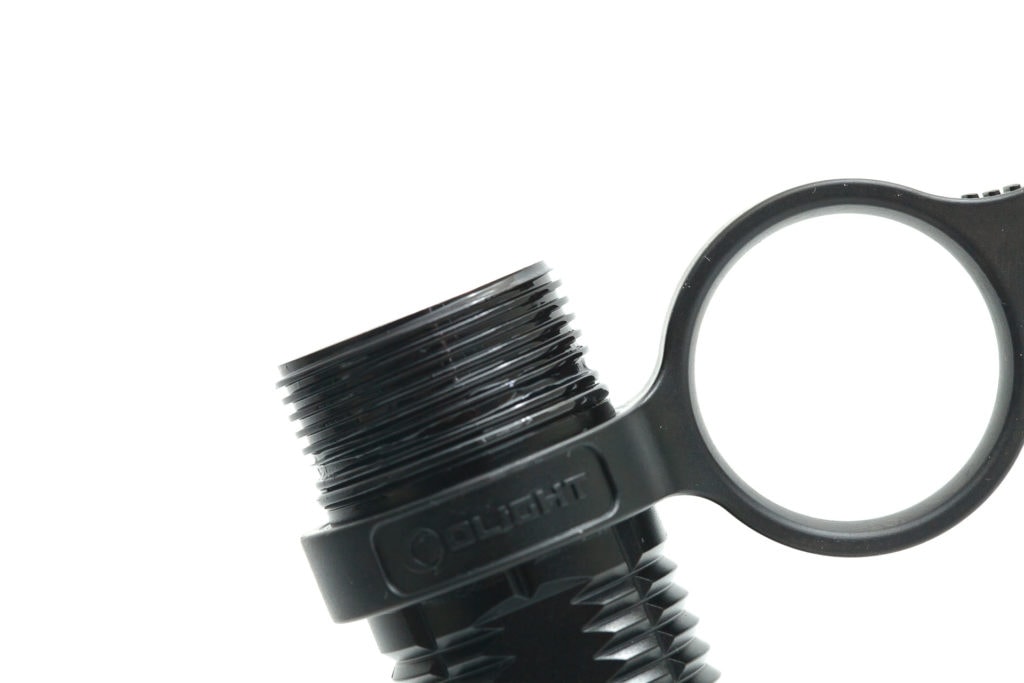
Before picking up the flashlight I already noticed the interesting Warrior ring. It’s located just below the tailcap and is meant to put 1 finger through. It’s held in place by the tailcap, and 2 o-rings underneath it to stop it from spinning freely. You can move the ring around the body.
To me, the best finger to put through the hole is the index finger. That way, you can use your thumb to manipulate the switch on the rear end.
There’s a pointy part on the ring that you can probably use for breaking glass, although I don’t recommend doing that while your finger is in the ring. You better use the bezel for that, with the zirconium beads.
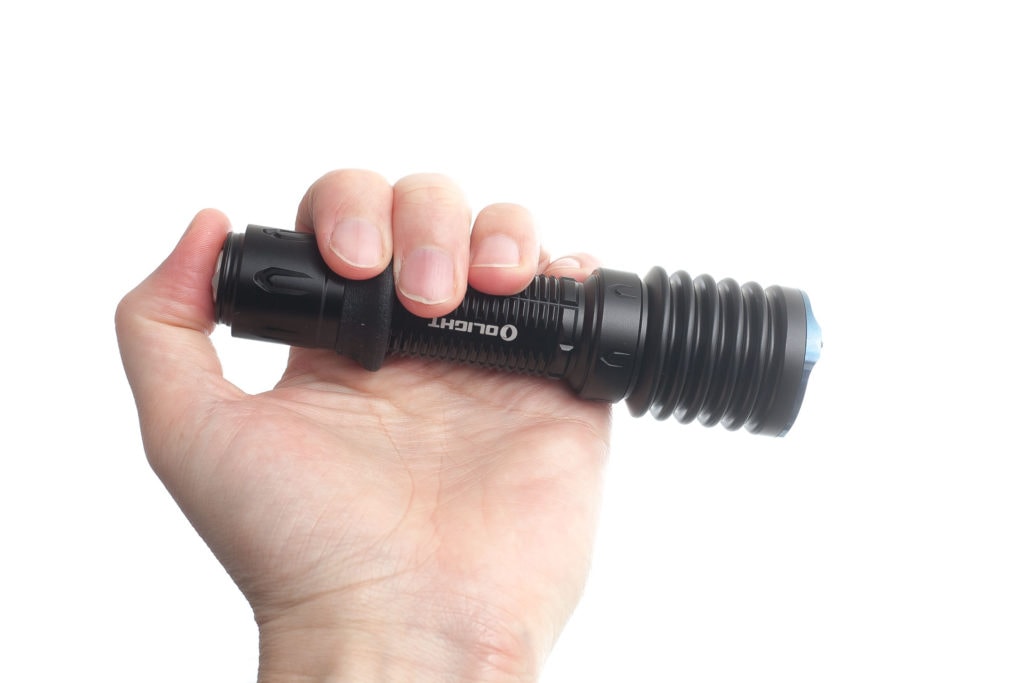
If you don’t like using that ring, you can replace it with a tactical grip ring Olight they also included.
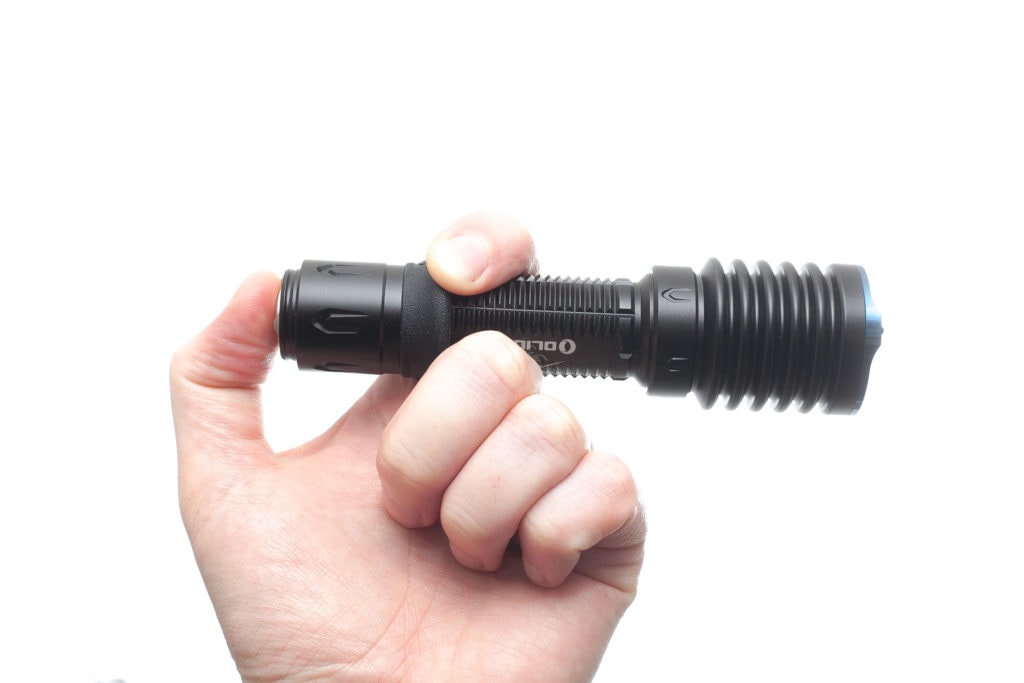
The switch operation is about as easy as it gets: Push to turn on, push to turn off. You have momentary and continuous operations depending on how far you press the switch. Press and hold for momentary, and press and release quickly for continuous.
A full click will turn the light in High, and a half-press for low.
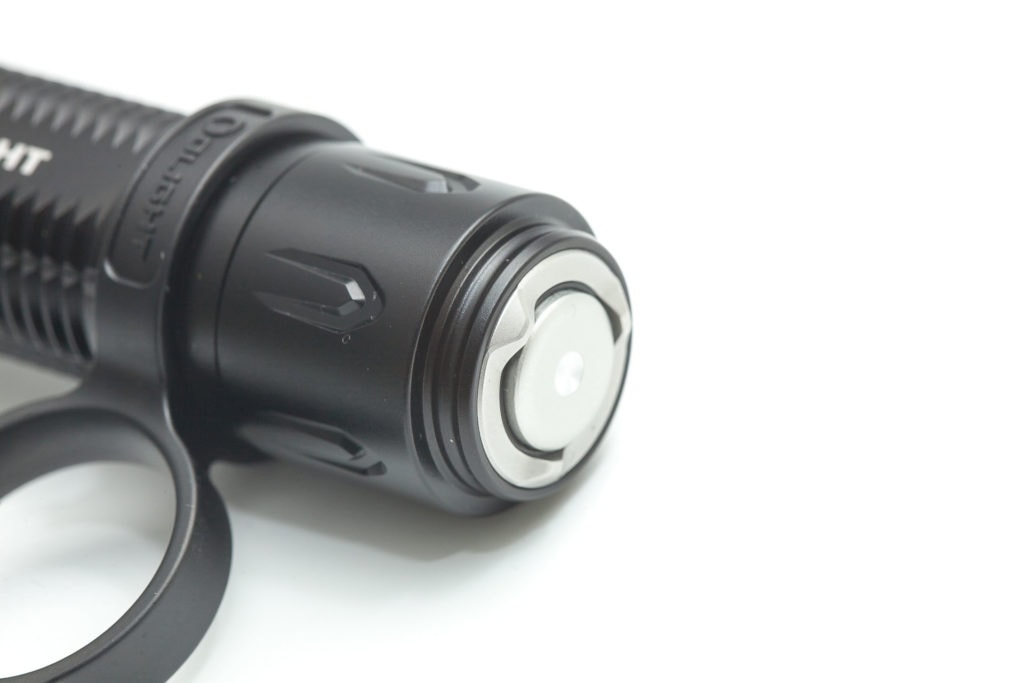
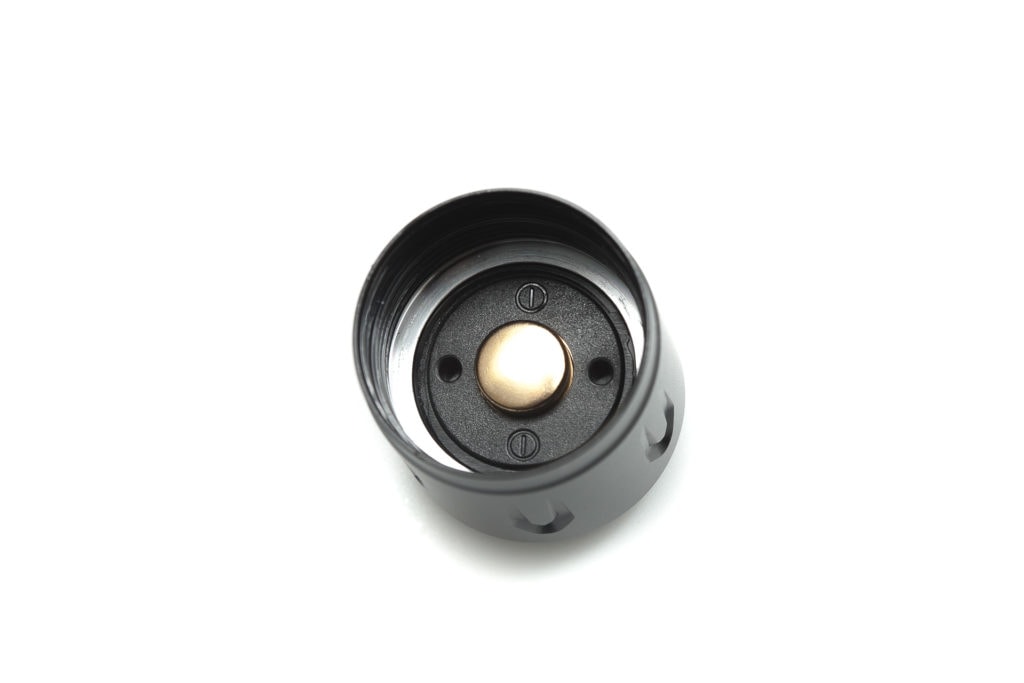
The switch also includes a magnet, for attaching the MCC charging cable. You can also attach the light to something metal, but you can’t attach the light pointing horizontally. You can definitely hang it down from metal.
Build Quality, and Warranty
Quality is something Olight takes seriously and it sure shows. Olight backs their products with a 5-year warranty, which is awesome. Equally awesome is the overall build quality. I can’t find anything to complain about.
The finish of the light is great, more of a semi-gloss than matte, but not slippery. All the parts fit together great with no gaps and lots of lubrication. The machining is perfect with no blemishes or tool marks.
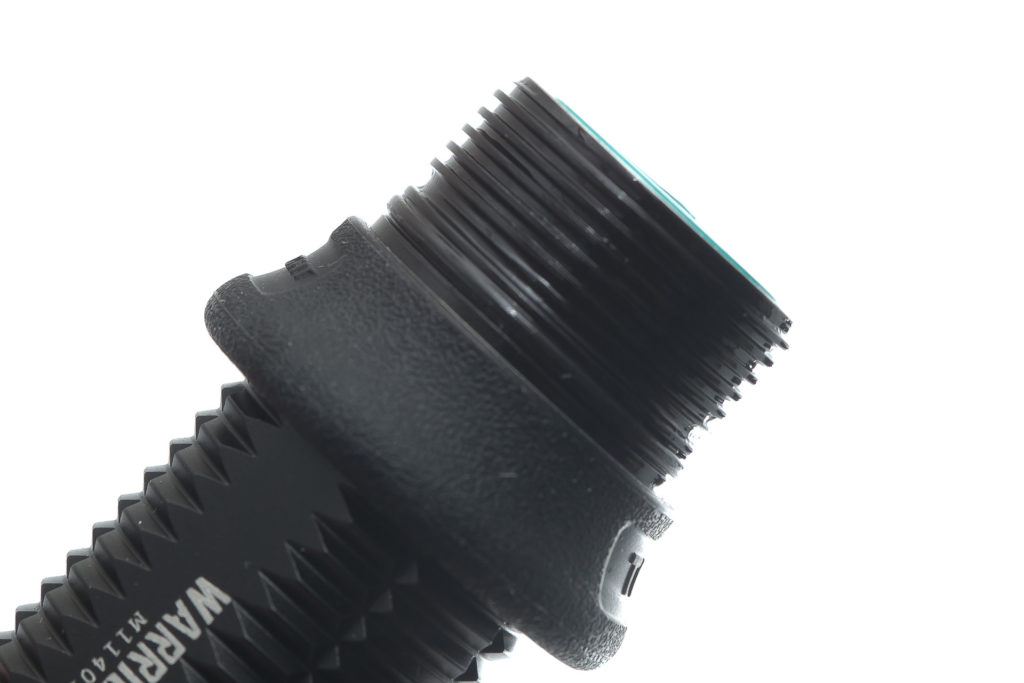
The tailcap is the only part you can unscrew, and is also the way to remove either the Warrior ring or tactical grip ring. I don’t recommend using none of the ring accessories, because there are 2 lubed o-rings placed just below the tailcap.
LED, Lens, Bezel, Beam, and Reflector
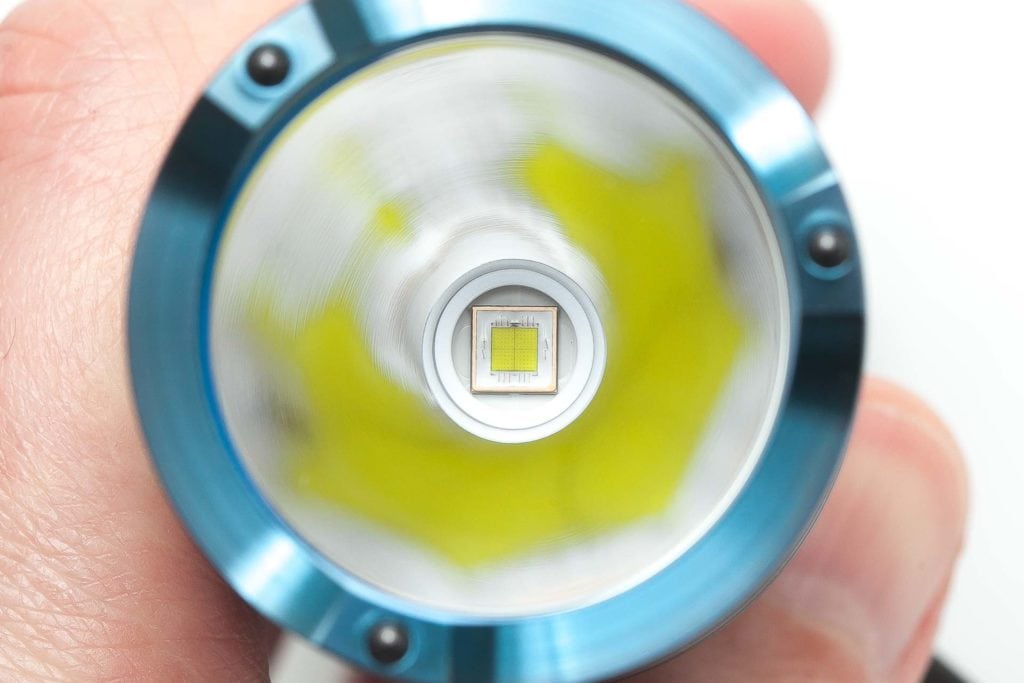
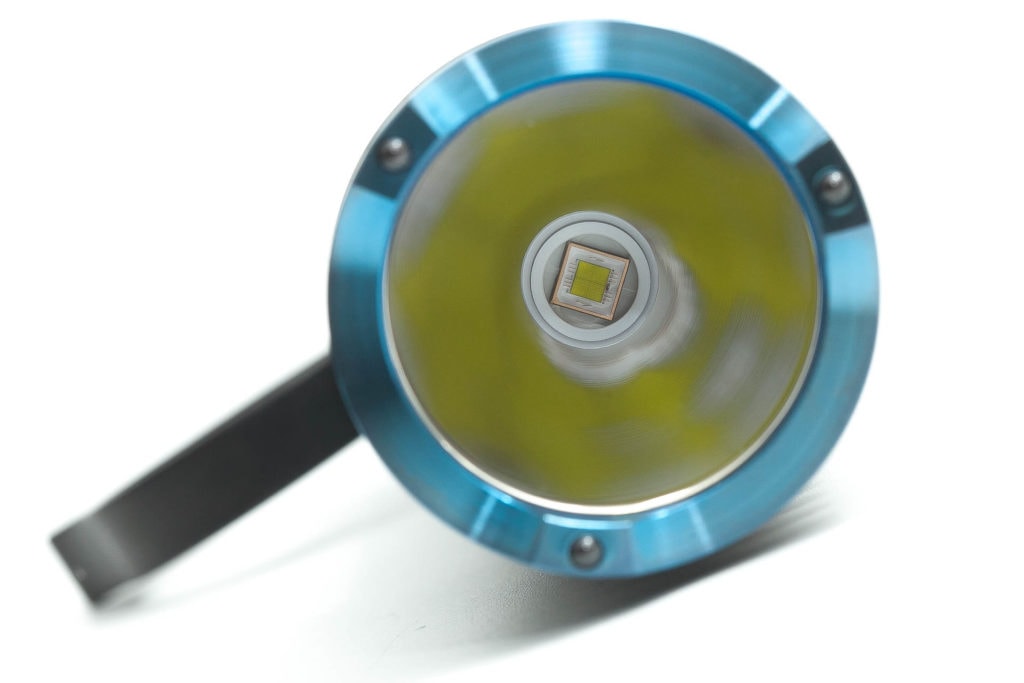
Olight doesn’t specify their LEDs. But if you know what type of LEDs are currently around, you’ll be able to identify it. And since I reviewed flashlights recently with the exact same LED, I can tell for sure it’s a Luminus LED. And to be precise it’s a Luminus SFT70.
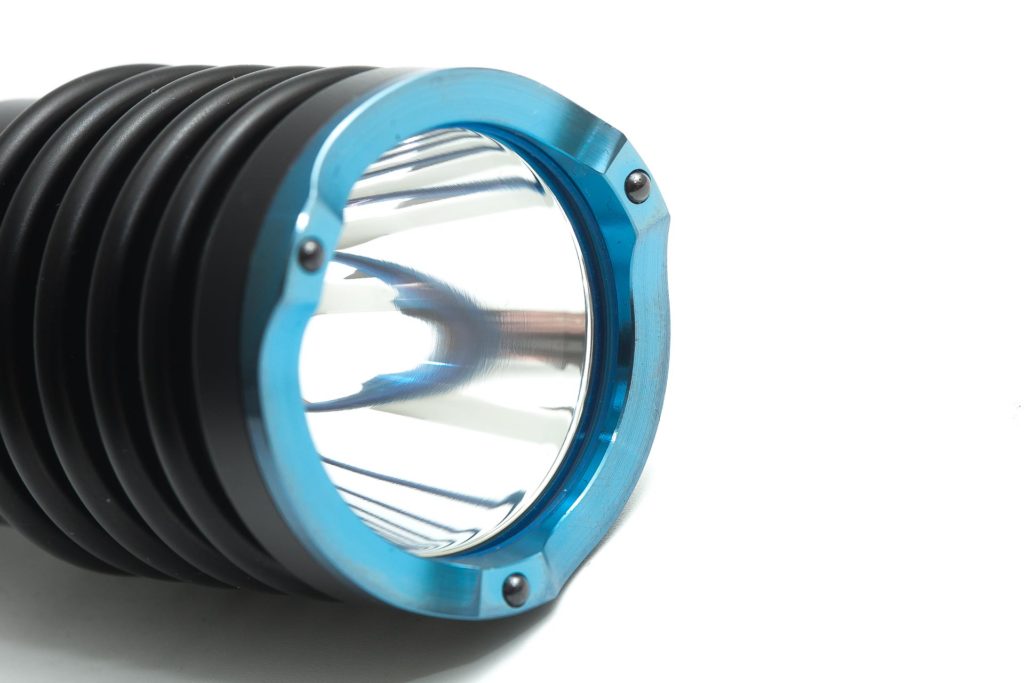
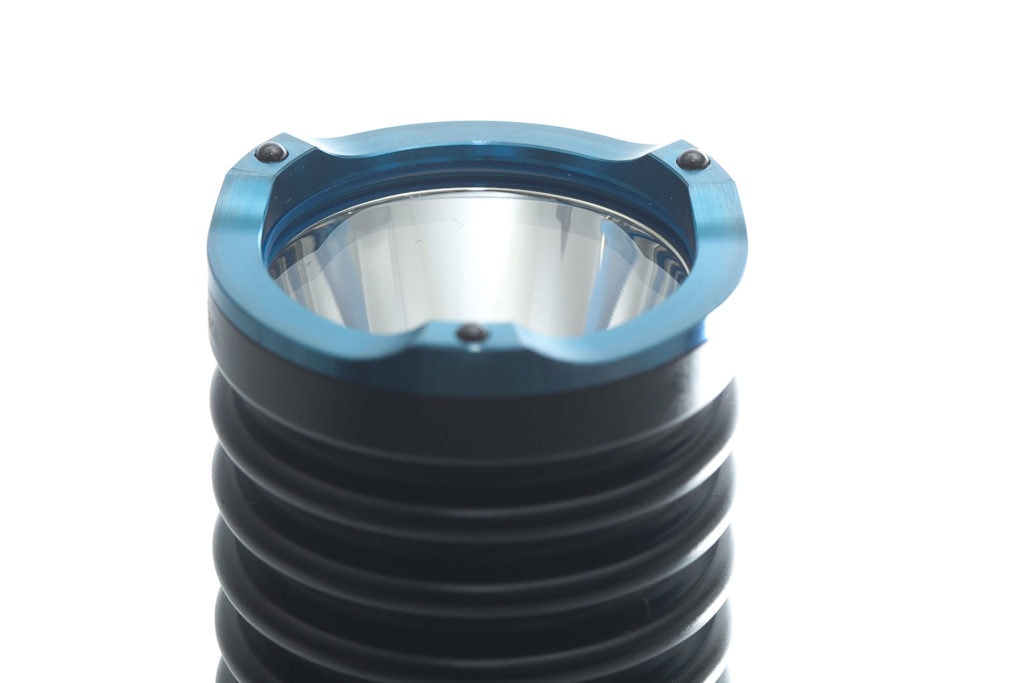
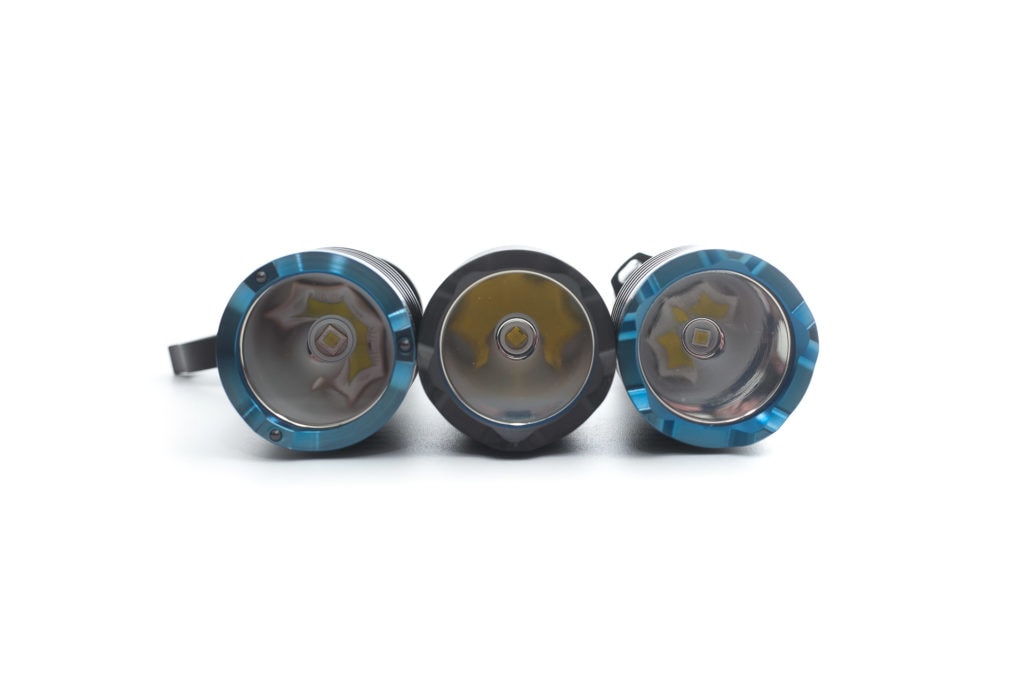
The bezel is the typical Olight blue and crenulated, with 3 zirconium beads for breaking glass. And no, uou can’t unscrew the bezel. Olight glues on all of their lights (Loctite) so you can’t take them apart without force or a great amount of heat.
For flashlight enthusiasts, this might be a con. But it’s probably for your own good. Don’t try to fix something that isn’t broken. If the light breaks with normal use, Olight is likely going to repair it for you, or even provide you with a new copy. If you try to open it up, you void their warranty.
The lens is kept in place by a glow-in-the-dark o-ring. It’s glowing a bit weak though.
The reflector is smooth and is supposed to push the maximum beam intensity up to 78,000 cd, and I’m sure to test that!
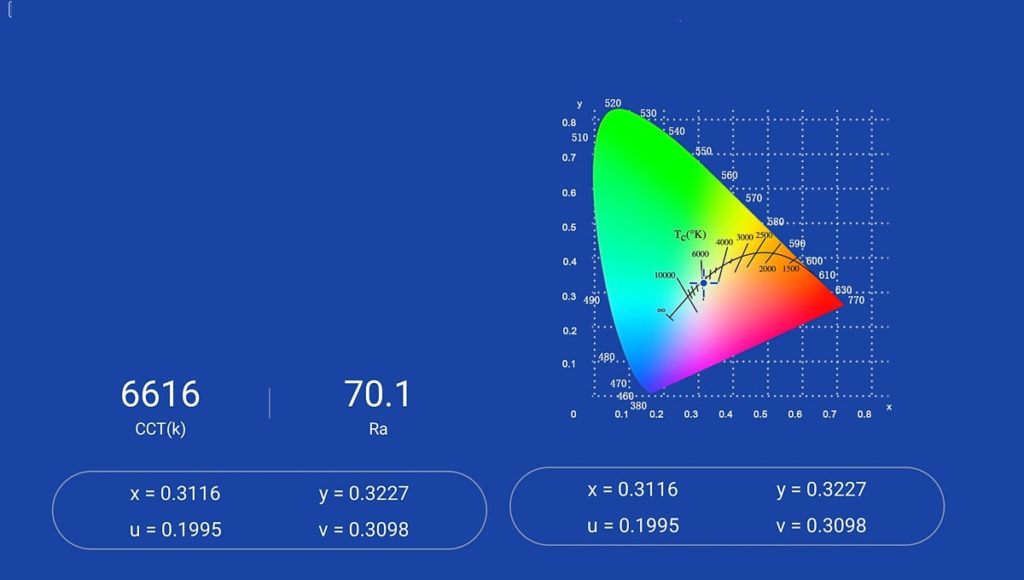
- CCT: 6616
- Ra (CRI): 70.1
- DUV: 0.0005
Dimensions and size comparison
- Length: 149.5 mm / 5.88 ”
- Head diameter: 39 mm / 1.537 ”
- Tailcap diameter: 28.3 mm / 1.11 ”
Weight:
- Empty: 184.8 g / 6.52 oz
- With battery and warrior ring: 257.5 g / 9.08 oz
Tactical flashlights comparison
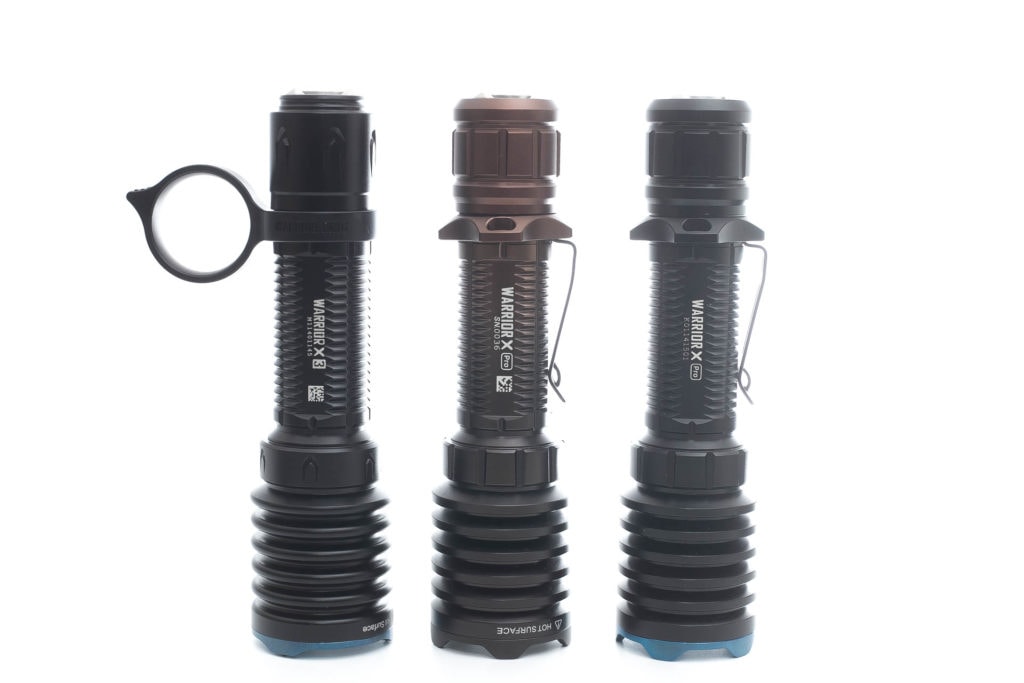
Group 1: Left to right: Tactical flashlights: Olight Warrior X3, Olight Warrior X PRO limited edition, Olight Warrior X PRO
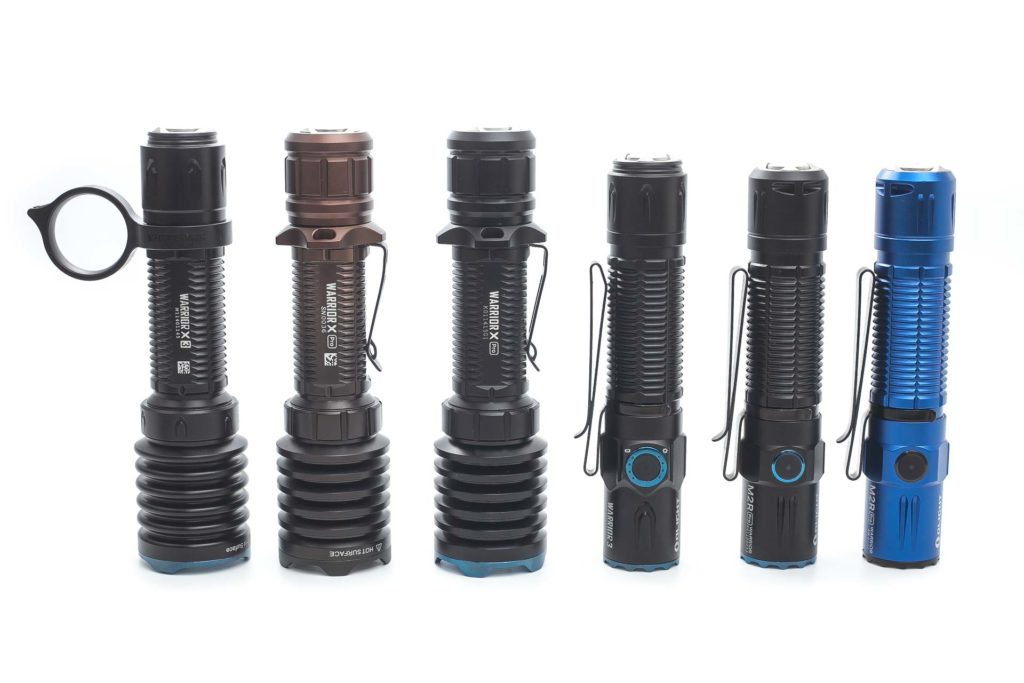
Group 2: Left to right: Olight Warrior X3, Olight Warrior X PRO limited edition, Olight Warrior X PRO, Olight Warrior M2R PRO, Olight Warrior M2R Pro, Olight Warrior M2R PRO limited edition.
Driver & User Interface:
The Olight Warrior X 3 uses a simple but rather unique user interface.
There are 2 modes, High and Low. Low is actually not really low, but 300 lumens.
Modes:
- Low, High
From OFF:
- Short half-press: Low
- Short full-press/single-click: High
- Half-press and hold: Low (temporarily.. release switch to turn off)
- Full-press and hold: Turbo (temporarily, release switch to switch off)
From ON:
- Half-press: Off
- Single-click: Off
Blinky modes menu:
- None
Low battery warning:
- Built-in vibration system.
- Battery <30% = vibrate every 5 minutes
- Battery <10% = vibrate every minute
- Battery <5% = vibrate every 10 seconds
Lock-out mode:
- No
PWM:
- Not visible by eye, so that is what counts.
Batteries & Charging
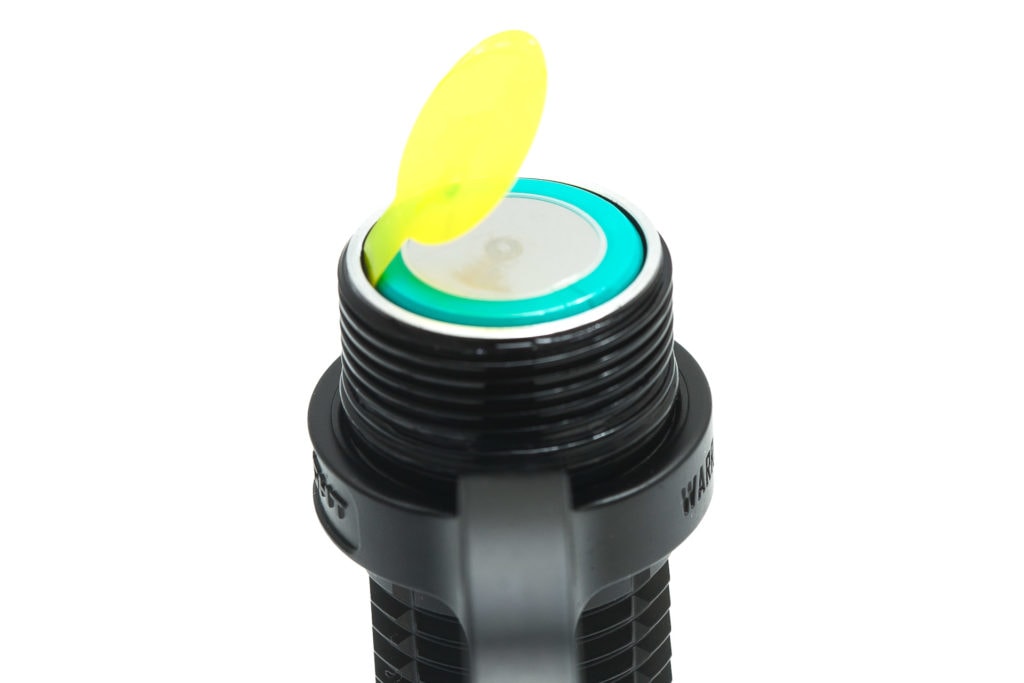
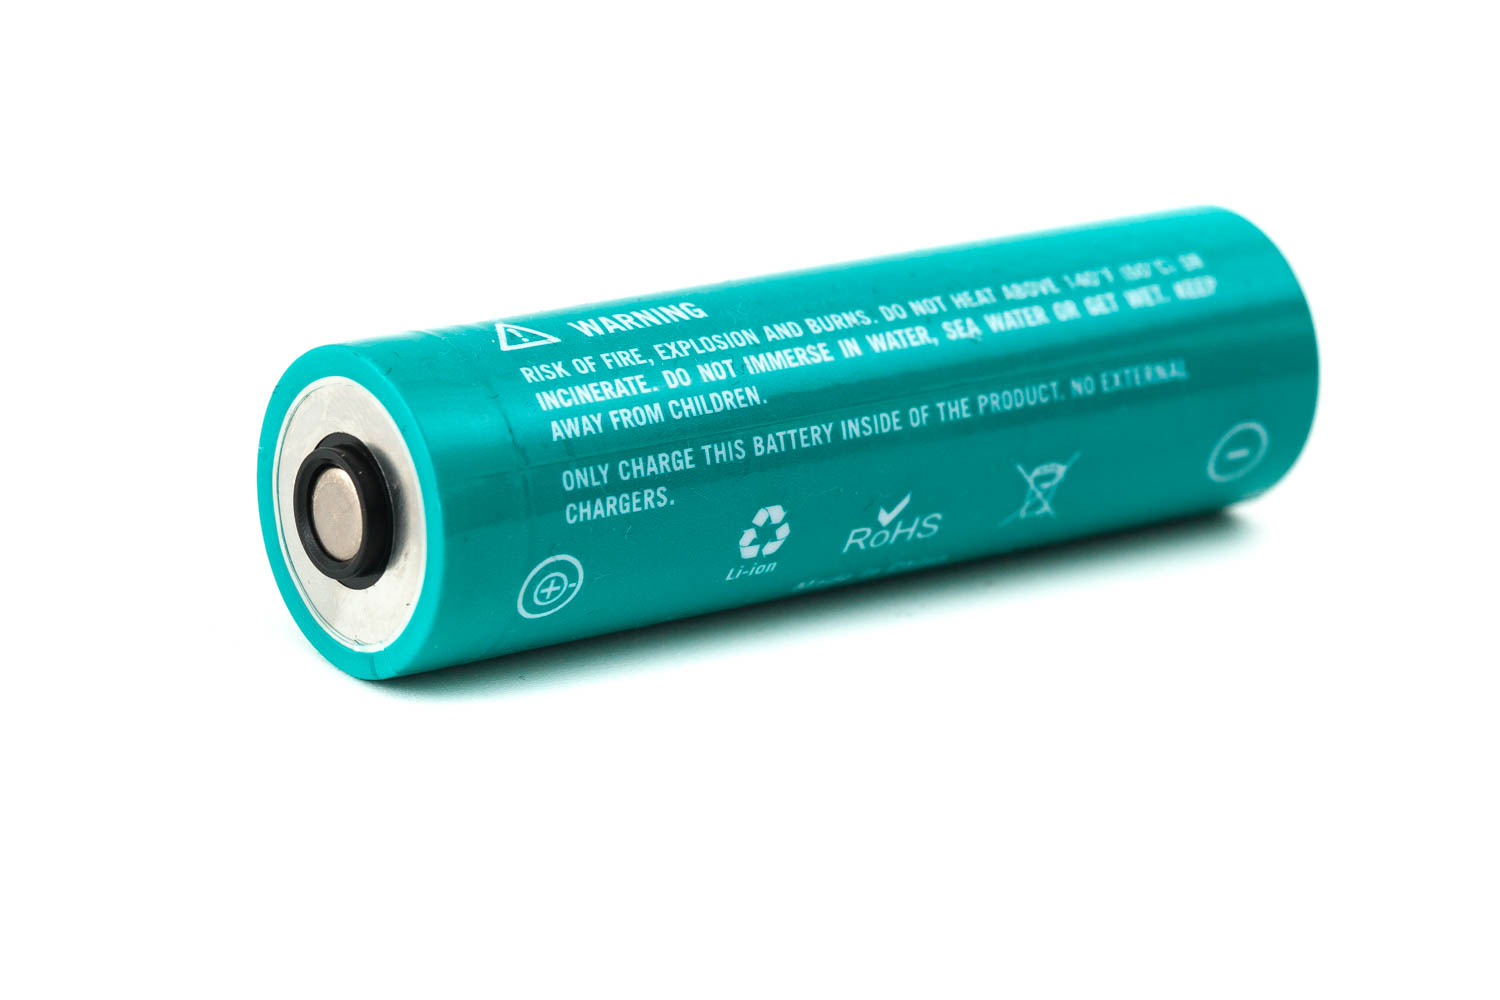
Olight uses a proprietary 21700 battery and charge system. That means you can’t use another battery in this flashlight. However, you can still charge the Olight battery in a normal charger as long as it can make contact with the shrouded positive terminal in the middle.
The battery included is an Olight ORB-217C50 Lithium-Ion 21700 type battery with a capacity of 5000mAh. That is a lot more juice than a regular 18650 battery can provide. The maximum capacity for 18650 batteries is currently still around 3500-3600mAh. So the 21700’s 5000mAh is a significant increase in capacity.
For charging, you get Olight’s proprietary MCC3 magnetic charging system. It’s a USB A connector on one end, and a round disk with an embedded magnet that attaches directly to the tail switch on the other. Magnetic charging is great on one hand since there’s no connector to wear out or break, no ingress point for moisture, and no charging port cover to mess with. On the other hand, if you lose the cable you’re out of luck since other magnetic charging cables are not compatible. Unless of course, you have a normal charger with protruding terminals. I added a solder blob to 1 of my chargers on the positive terminal, so it makes contact with the positive terminal of the Olight battery, and thus charges it.
This is just a workaround, and it may be dangerous to do so, so be warned!
Also, charging inside the flashlight stops at around 4.16V. This means that the battery isn’t 100% fully charged yet. And the charge indicator LED turns green long before it’s 4.16V.. it probably turns green at around 4.10V. This will extend the battery’s life.
When the battery runs low, the flashlight warns you with a Low Voltage vibrator. Yes, it starts vibrating when the battery is lower than 20%, so you have no excuse by saying: I didn’t SEE the low voltage indicator….

Performance
Lumen measurements:
All output numbers are relative to my homemade Integrating Sphere. It is set up with an Extech SDL400 Lux Meter for measurements including a Kenko PRO1D ND-16 filter. The base measurement is done with a Convoy S2+ that has been tested at 255 lumens.
For Amp readings, I use a Fluke 77III DMM. For higher amps I now use a Fluke 325 True RMS clamp meter. For microamps, I use a cheap DMM with an easy-to-use micro amp setting.
All of my readings were taken from a fully-charged Olight battery. I charged it in a normal charger, so it charged to 100% instead of the 95% from the built-in charger.
| Mode | Specs | start | 30 sec | 10 min |
|---|---|---|---|---|
| low | 300 lm | 300 lm | 300 lm | 298 lm |
| high | 2500 lm | 2641 lm | 2545 lm | 1120 lm |
Olight is usually on the conservative side with their lumen specifications. And my numbers are pretty close to theirs.
Runtime:
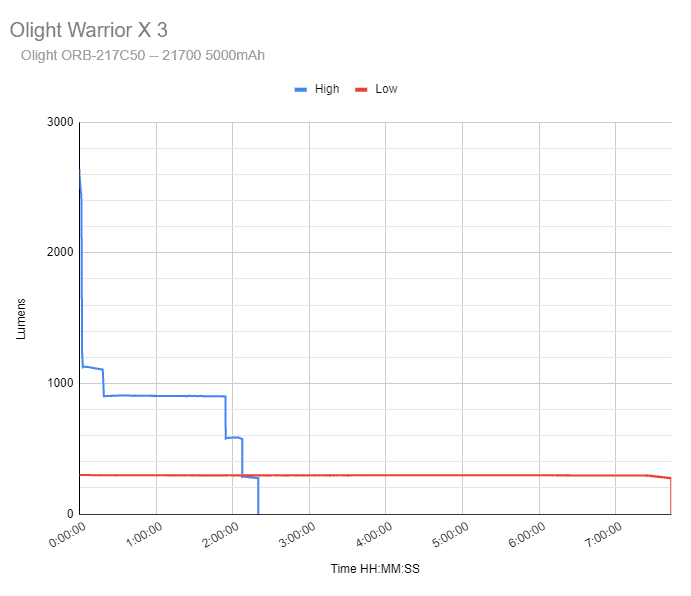
The runtime test was done with the 50cm integrating sphere, including the Kenko Pro1D ND-16 filter and Extech SDL400 data logging Lux Meter.
And zoomed in on first 10 minutes:
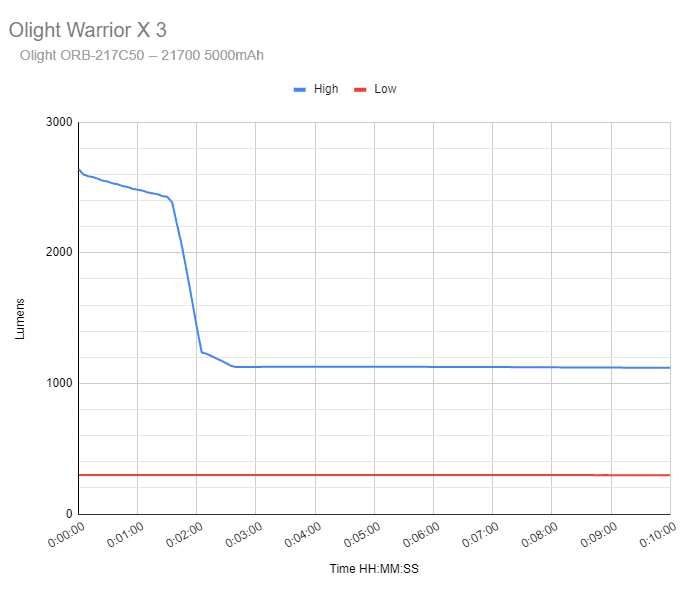
High starts at around 2500 lumens. The first real drop happens after around 1minute and 40 seconds. After 2 short drops it’s down to 1125 lumens. The next drop happens at 18minutes when it drops to 900 lumens.
At 1h54min it drops from 900 to 585 lumens. Then at 2h7min it drops again, from 575 to just below 300 lumens. At 2h20min it turns off, and the last measured output was 274 lumens.
Low starts at 300 lumens. At 7h27min it starts to slowly drop to 7h43min, when it abruptly turns off. You’ve got plenty of warning from the built-in low-voltage warning vibrator before that happens.
Throw Measurement
Measurements were taken both indoors at 5 meters with a professional Hagner E4-X Lux Meter.
| Mode | Specs | Cd measured | Throw in Meters | Throw in Yards |
|---|---|---|---|---|
| high | 78,000 cd | 83,250 cd | 577 | 631 |
| low | – | 9,750 | 197 | 216 |
Also, my numbers are just a tad higher than their advertised throw numbers.
Beamshots
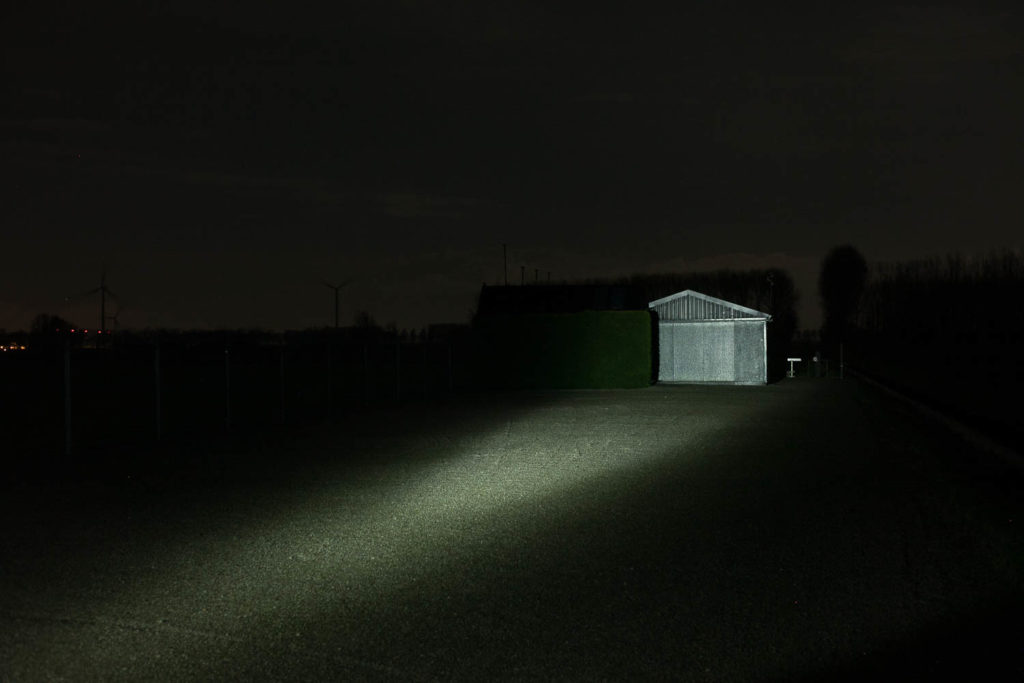
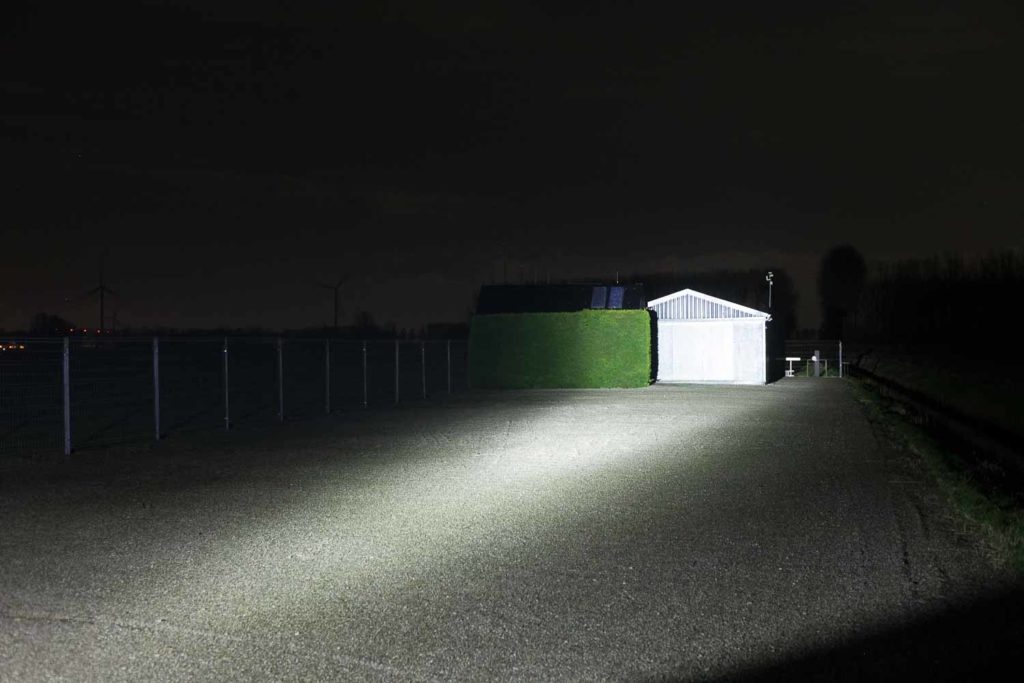
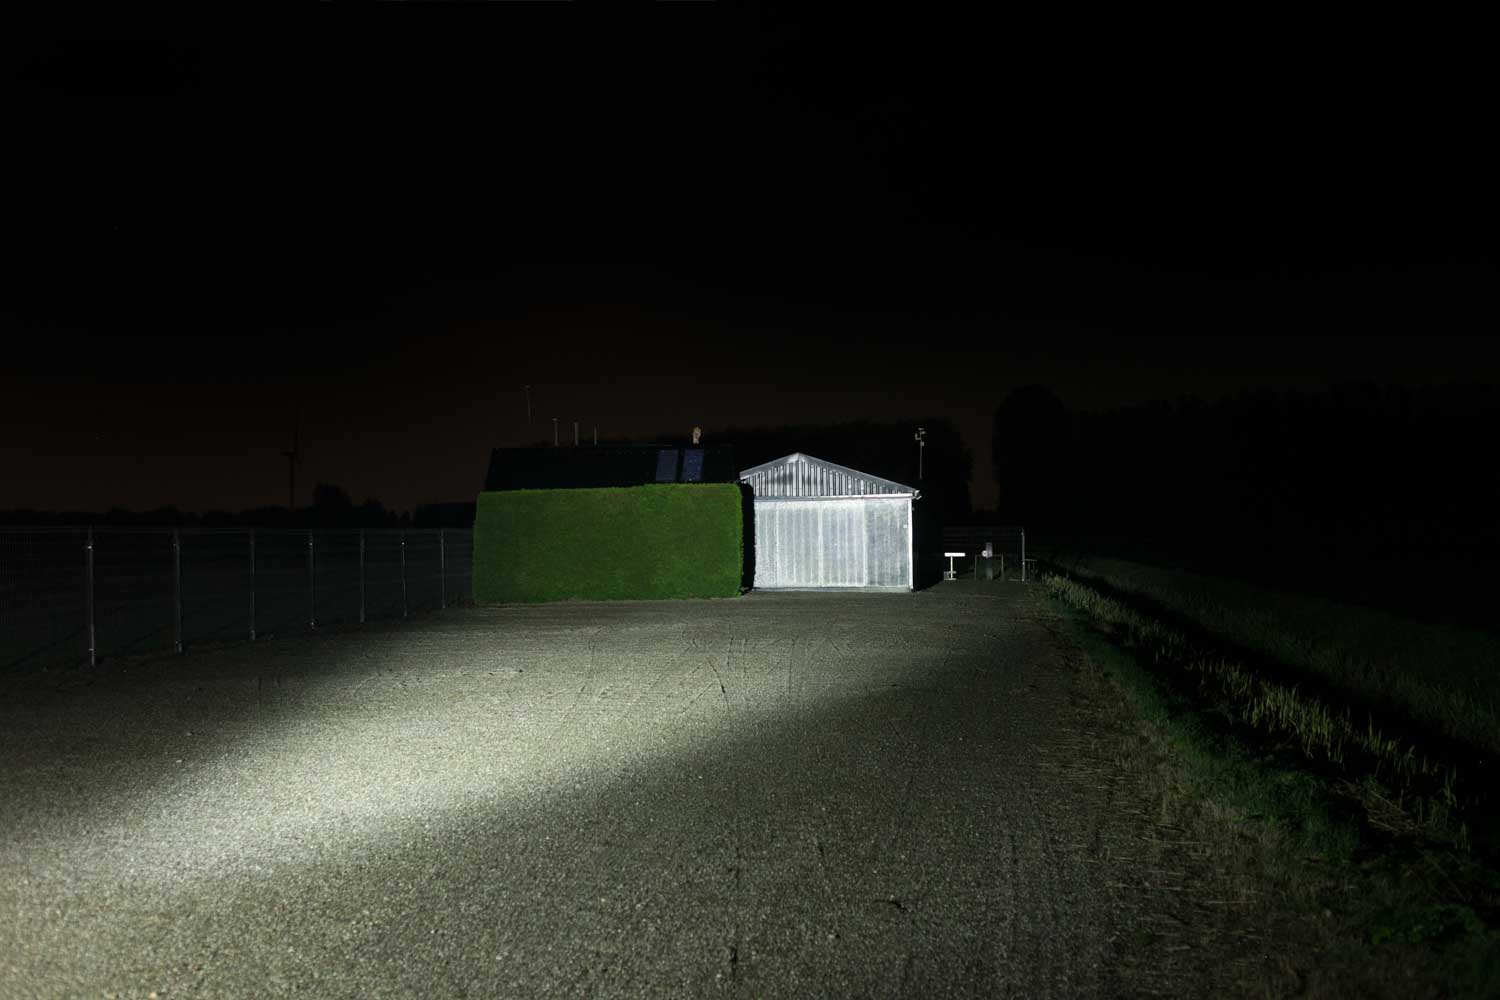
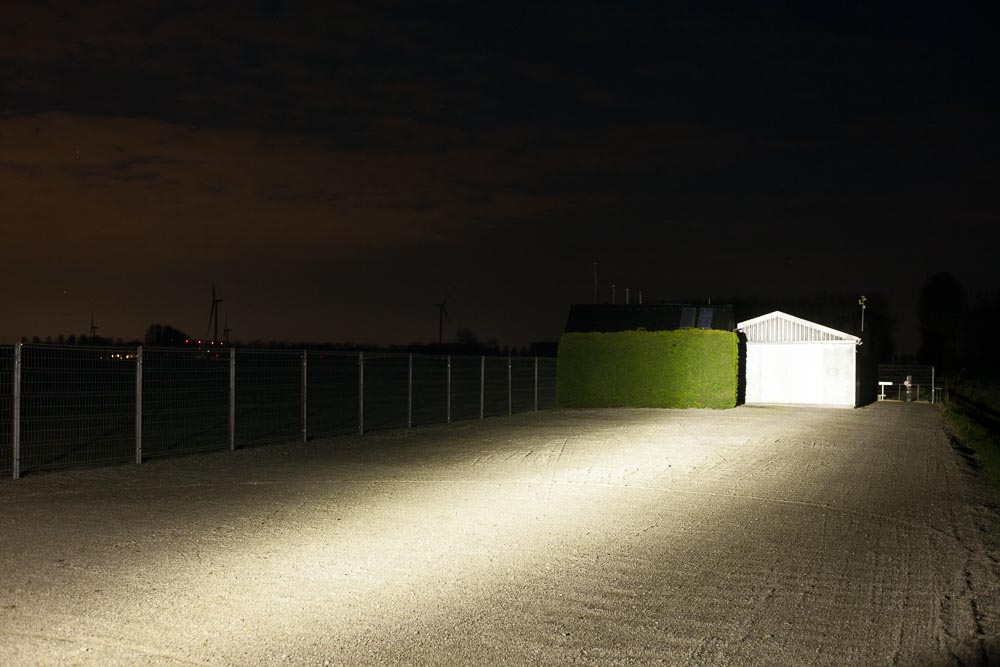
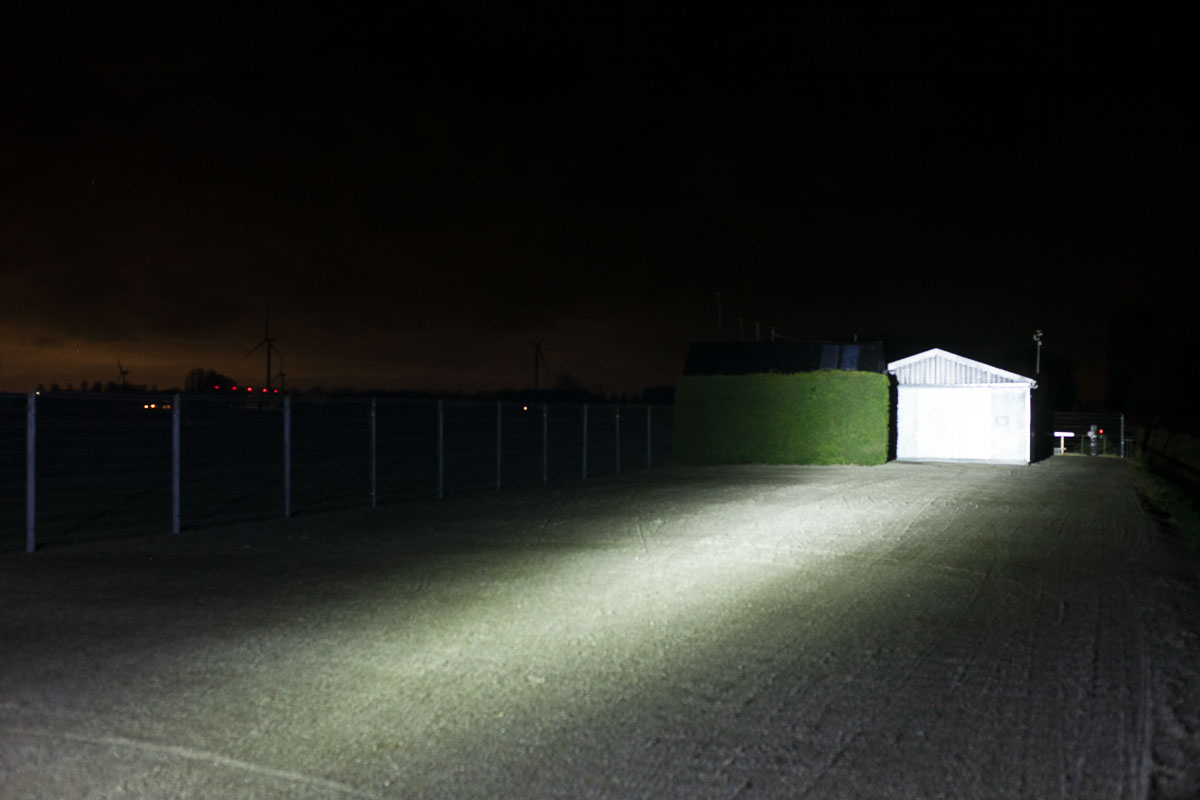
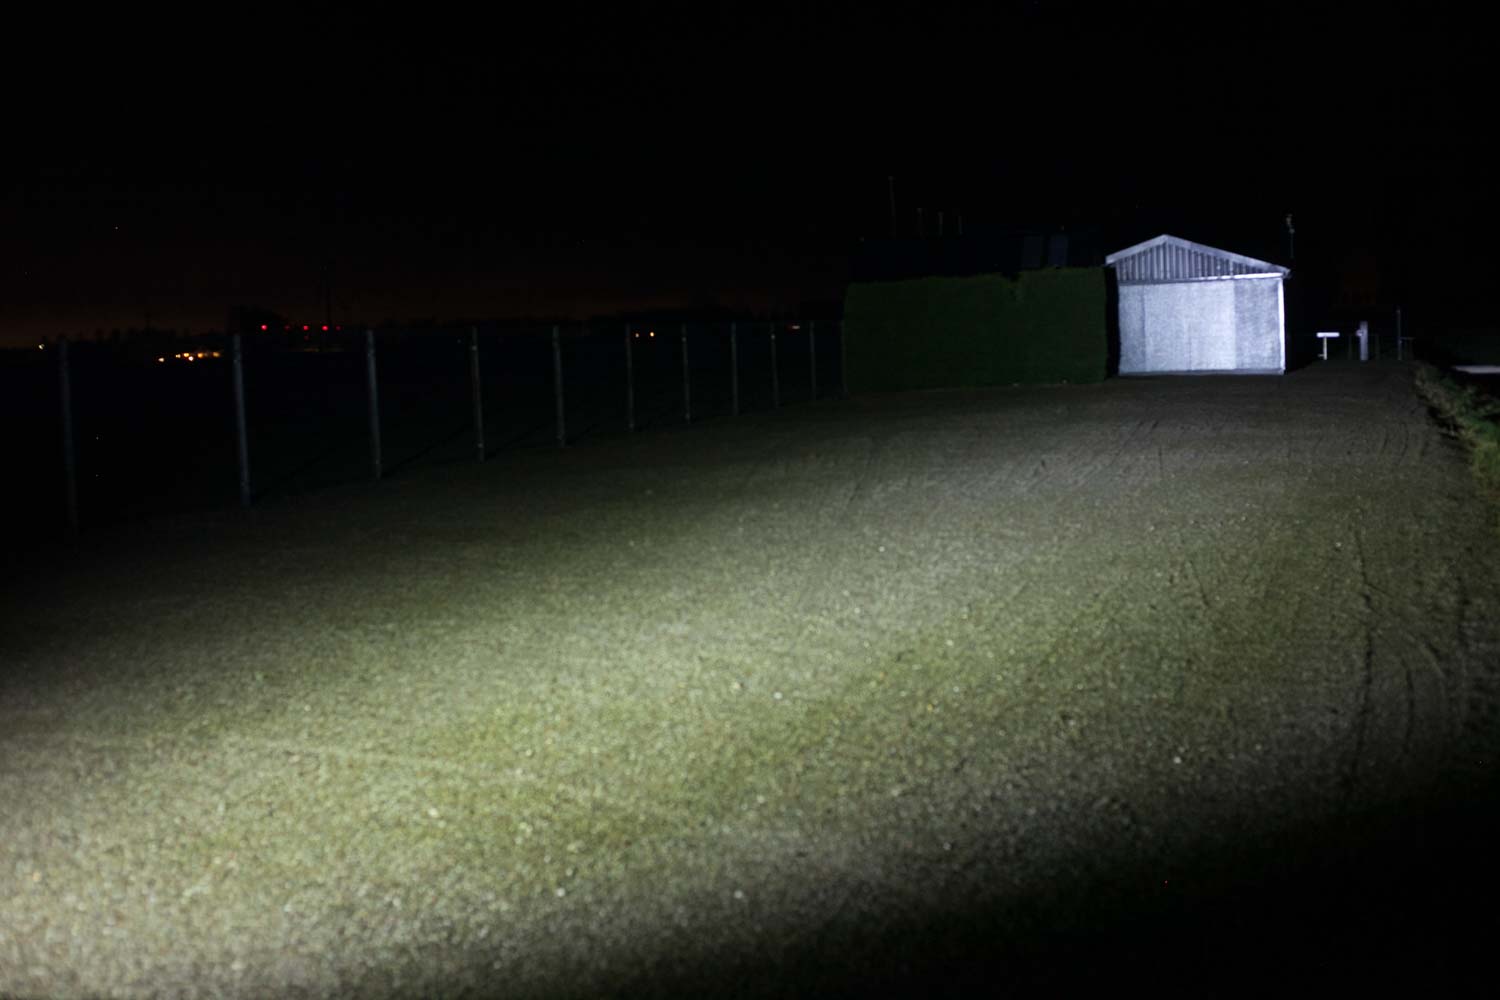
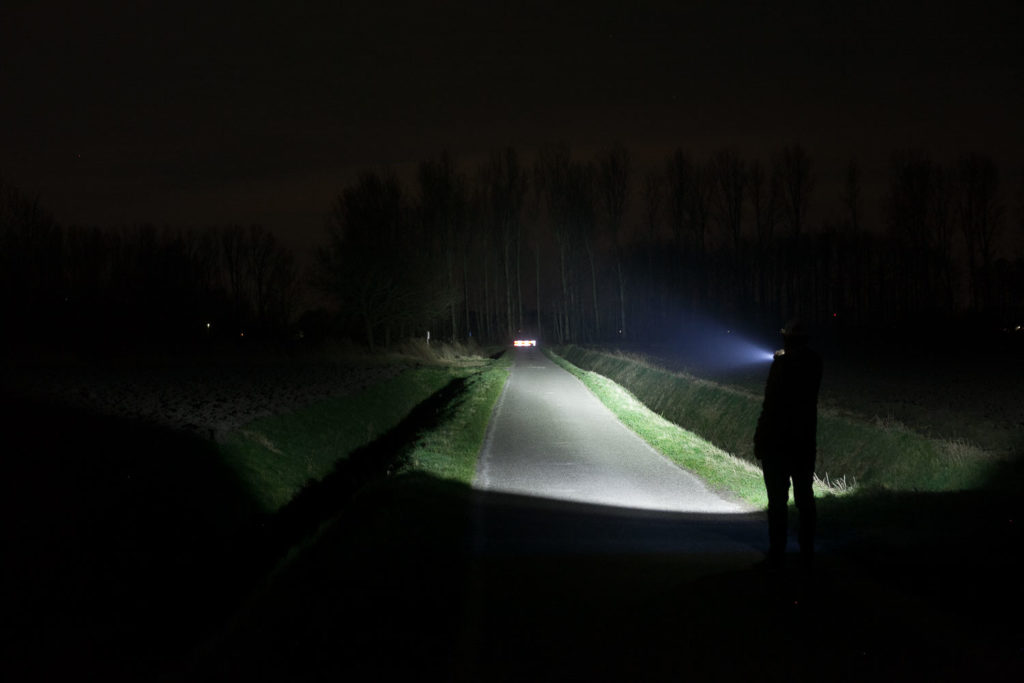
For the following beamshots I used a Canon EOS 5D Mk2 and a 50mm lens. manual settings: ISO1600, 1/4sec , F4, 5000K
The shed is about 65 meters / 71 yards away, and the fence and trees about 200 meters.




Disclaimer: This flashlight was sent to me for review at no cost by Olight. I have not been paid to review, nor have I been holding back on problems or defects.
Final Verdict
Pros
- High quality as usual
- Using a unique and new LED
- No PWM
- Performs really well
Cons
- When not using the Warrior ring or Tactical ring, there will be lubricated o-rings exposed that will make your hands dirty
Explanation on star ratings:
1: Avoid: my phone flashlight would be a better choice – 2: Poor: significant defect or issues; almost unusable – 3: Average: some defects or issues; but still usable 4: Good: recommended (minor issues) – 5: Great: highly recommended

5 stars: ★★★★★
It’s really hard to find any flaws in Olight flashlights when it comes to performance, user interfaces, and the like. For flashlight enthusiasts, the proprietary battery and charging is probably still a dealbreaker, but for the rest of us, the Olight Warrior X 3 is another home run.
Olight Warrior X 3 discount code
Use our exclusive 1lumen discount code to get an extra 10% off anything you order at Olightstore.com (USA). Coupon code: 1lumen
1lumen selects and reviews products personally. We may earn affiliate commissions through our links, which help support our testing.