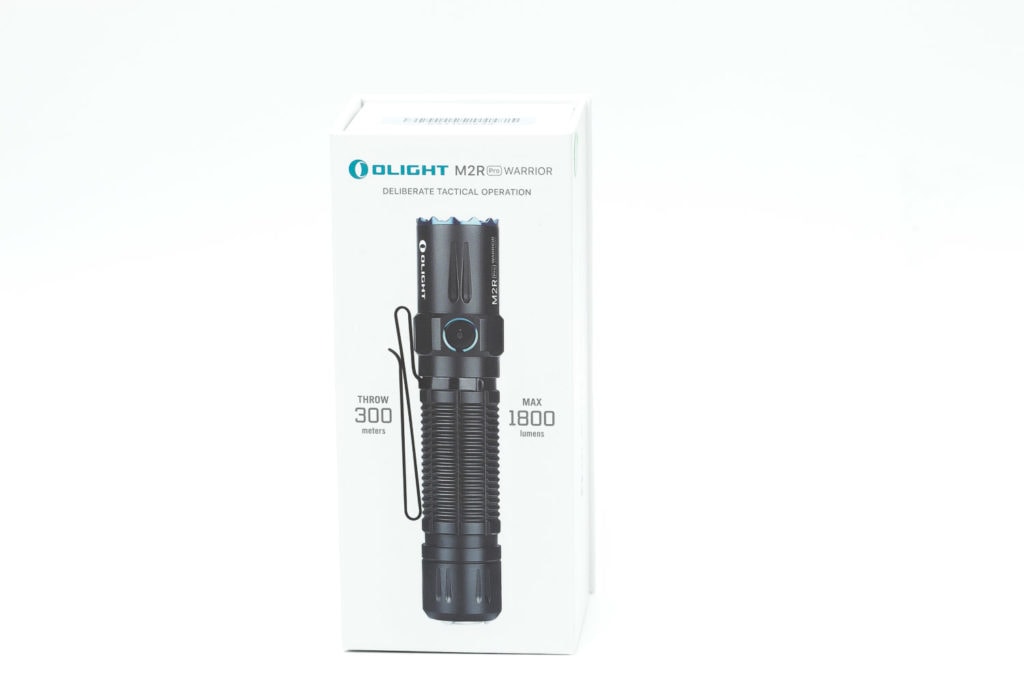
Olight M2R Pro Warrior review

Olight M2R PRO Warrior Specifications
| Brand / Model | Olight M2R Pro Warrior |
|---|---|
| LED | CREE XHP35 Hi |
| Lumens | 1800 lm |
| Beam intensity | 22,400 cd |
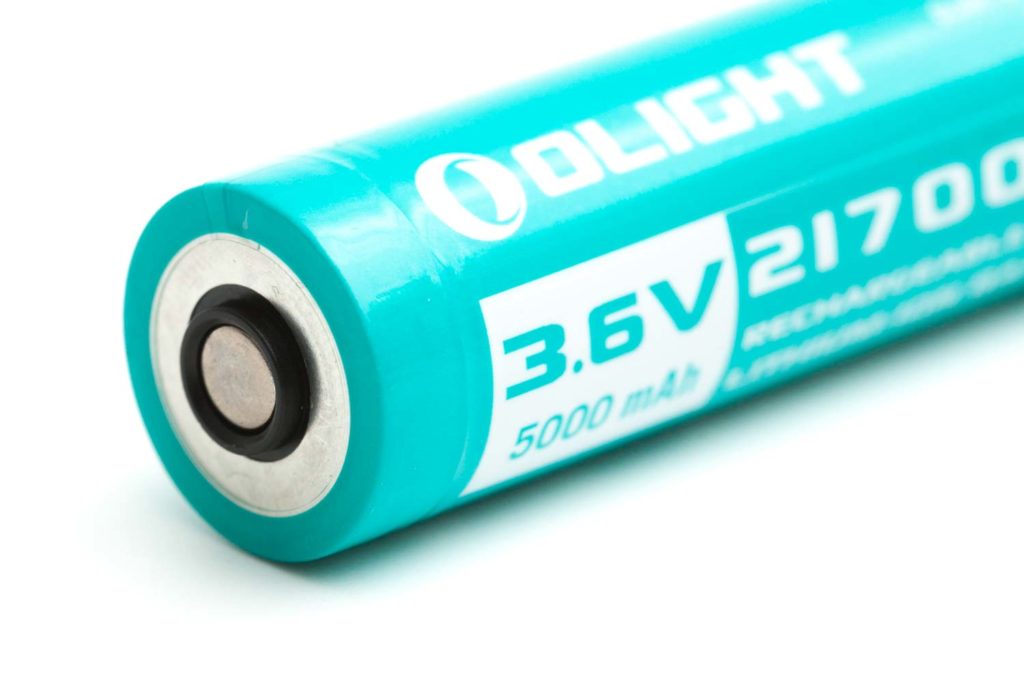
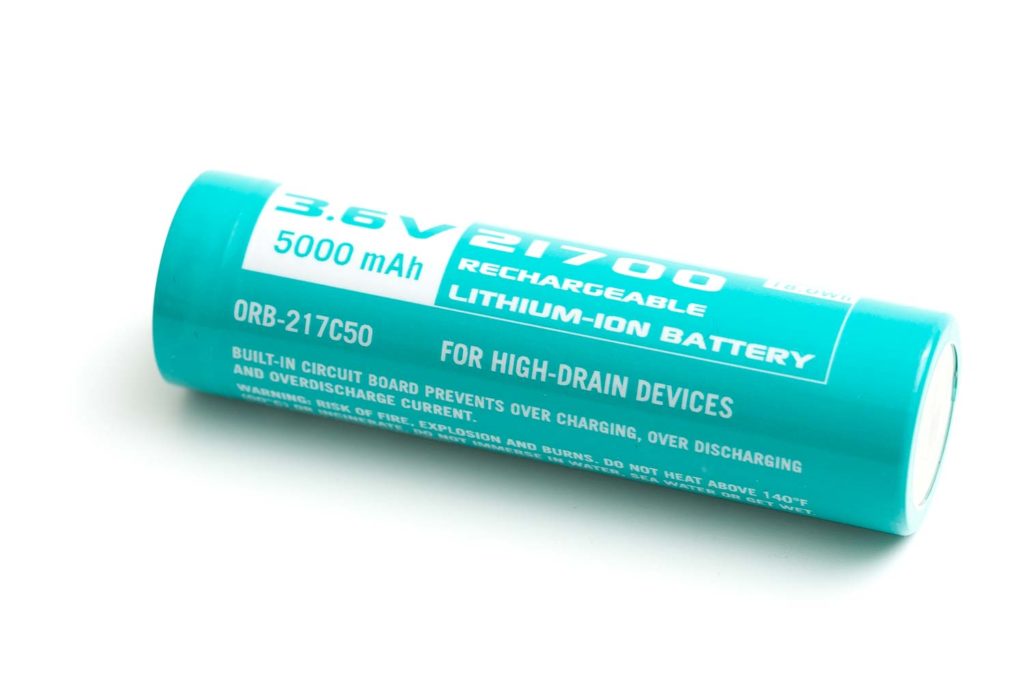
| Battery config. | 1*21700 |
| Material | Aluminum |
| Modes | 6 |
| Blinkies | 1 |
| Reflector | TIR |
| Waterproof | IPX8 |
| Review date | May 2020 |
Introduction:
Note: This flashlight is not for sale anymore. Olight upgraded this model with the Olight Warrior 3S. But we also reviewed the special edition Olight Warrior 3S Titanium, and the Olight Warrior 3S Copper.
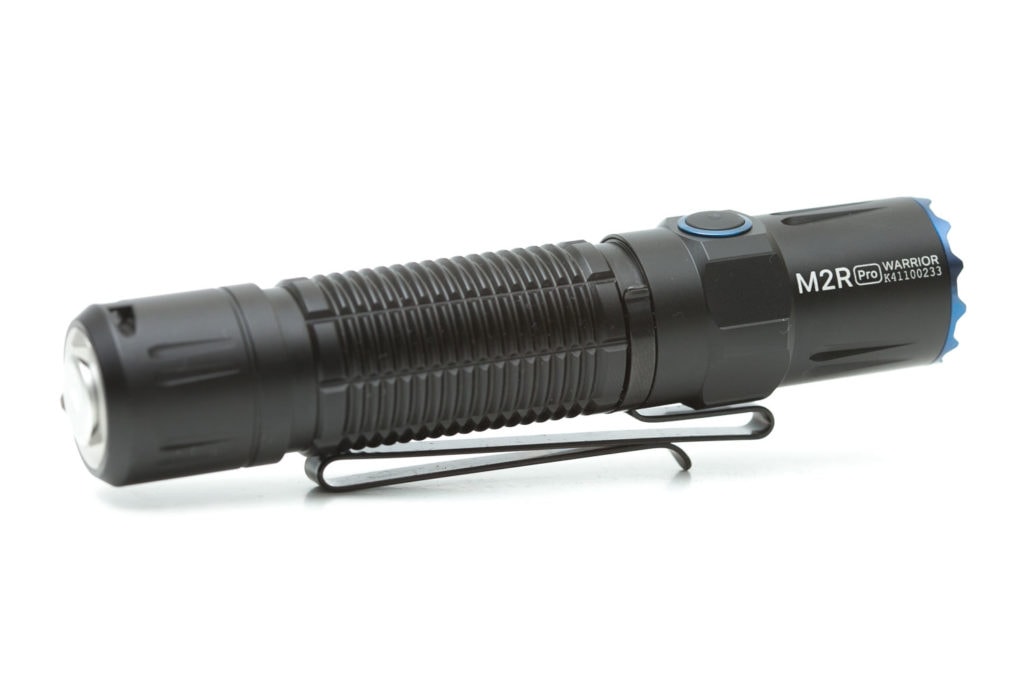
The Olight M2R Warrior Pro is the successor of the M2R Warrior, an 18650 battery-type flashlight. The Warrior PRO is a 21700 flashlight with increased output and battery life. After reviewing the Olight Warrior X PRO earlier, I think the M2R PRO should also be an excellent light. We’ll find out what this Olight has to offer. As good as the X PRO? Let’s test it.
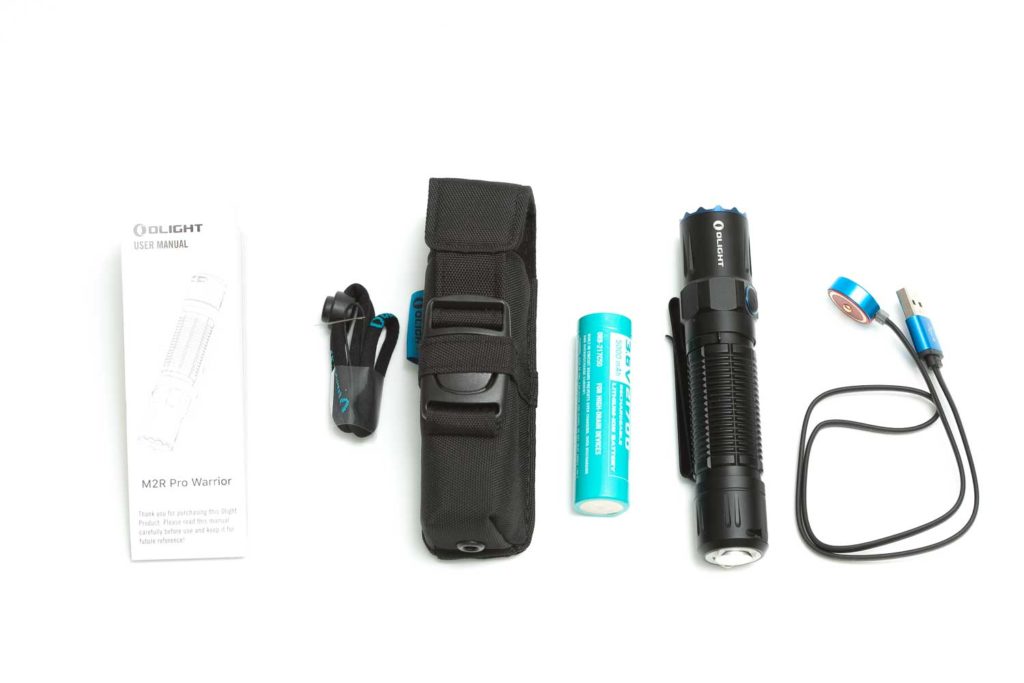
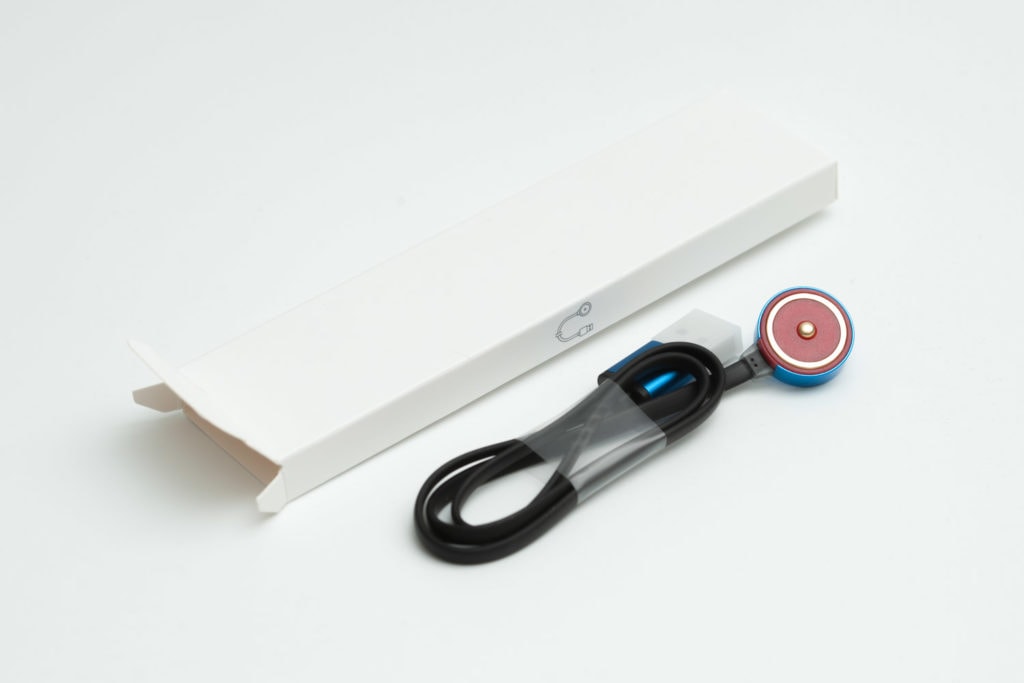
What you’ll get:
The package is just top-notch. Not many manufacturers design their packages as much as Olight. Every detail has been thought through. It’s very impressive.
- The Olight M2R Warrior PRO
- Olight 21700 battery
- MCC3 magnetic charge cord
- Lanyard
- Holster
- Manual

Handling of the light
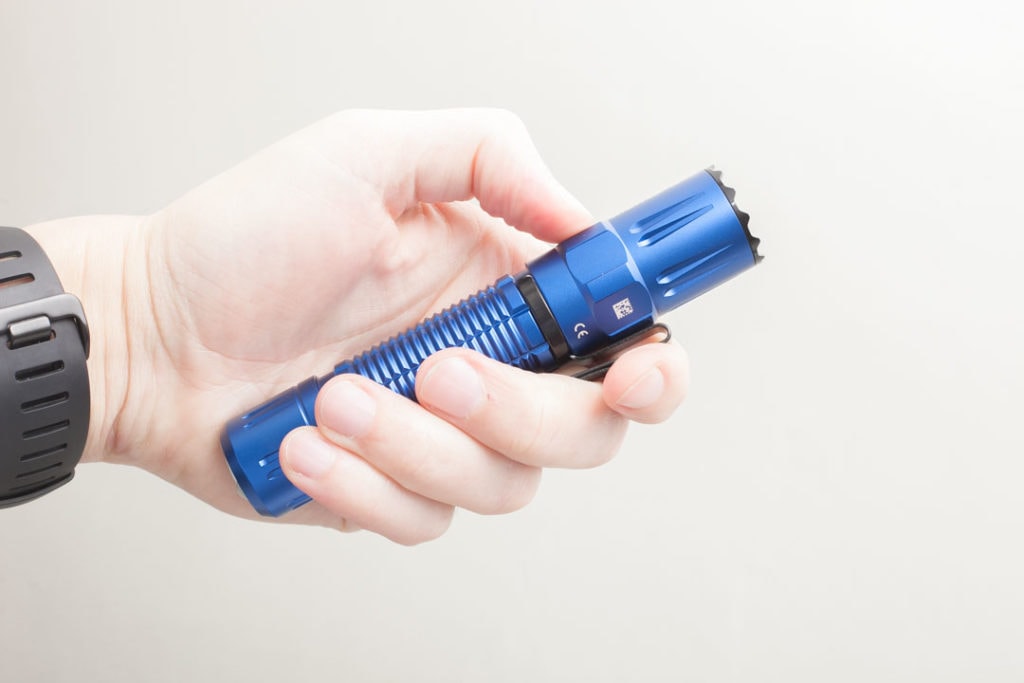
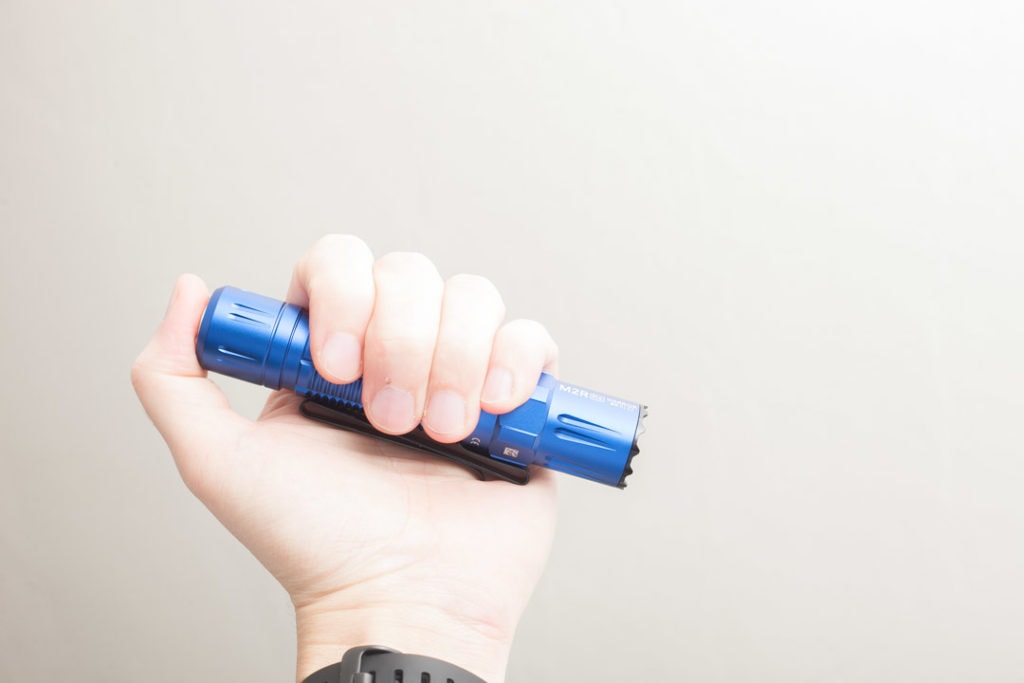
After using the Olight Warrior X PRO a bit, I thought this would be the same, but I was wrong. The Warrior X PRO has only 1 switch, at the tailcap. The M2R PRO has 2 switches, and both can be used at all times.
With other flashlights, you usually use the tailcap for power and side switch for modes, but this isn’t the case with the M2R PRO Warrior. (a long name by the way). You could hold it with your thumb on the side switch as well as on the rear switch. In both positions, can you power the light on and off? I like that. That is quite unique. But the downside is usually a parasitic drain. I wonder if I can measure that with this light. It also works differently from regular flashlights. You can read the rest in the Driver/firmware section.
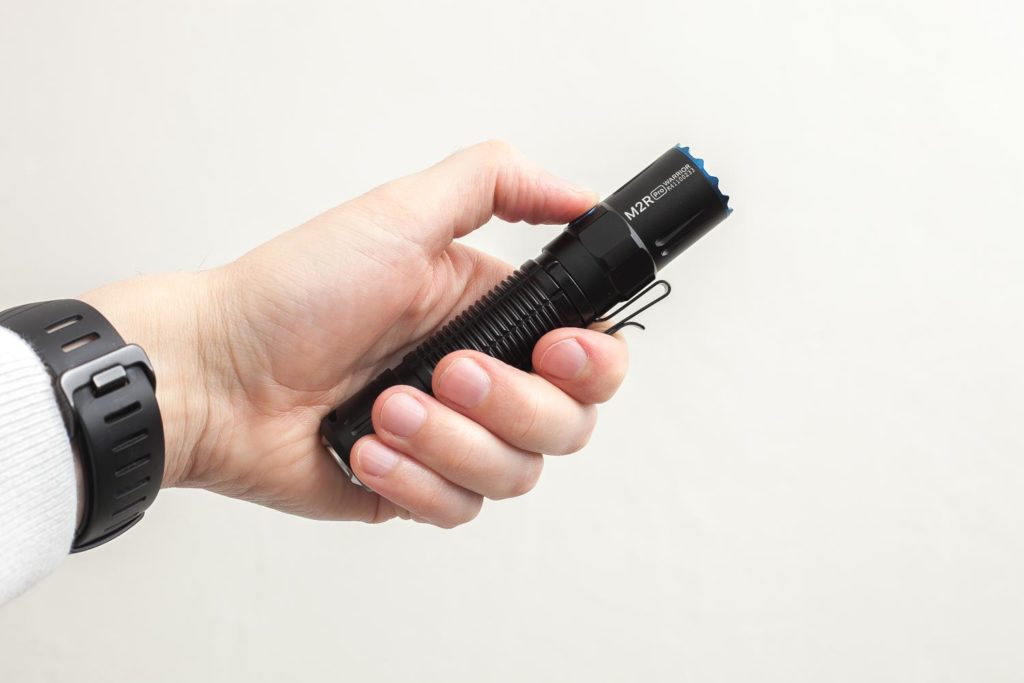
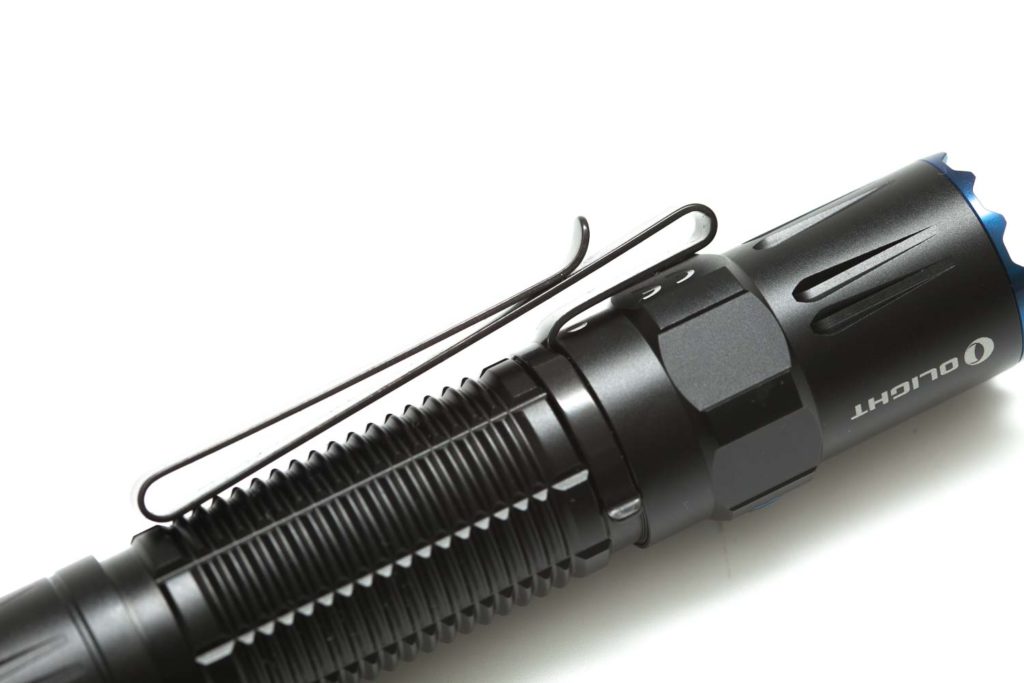
It has a 2-way pocket clip, so you can either carry it downwards or upwards, in your pocket, and outside your pocket. If you rather prefer a holster or lanyard, they got you covered there as well. With all the knurling (reading) it doesn’t feel very slippery, nor does it feel very rough.
The attack bezel is sharp and dangerous. It can easily damage your pants, pockets, jeans, or jacket, however you carry it. With this type of bezel, the holster almost becomes a necessity.
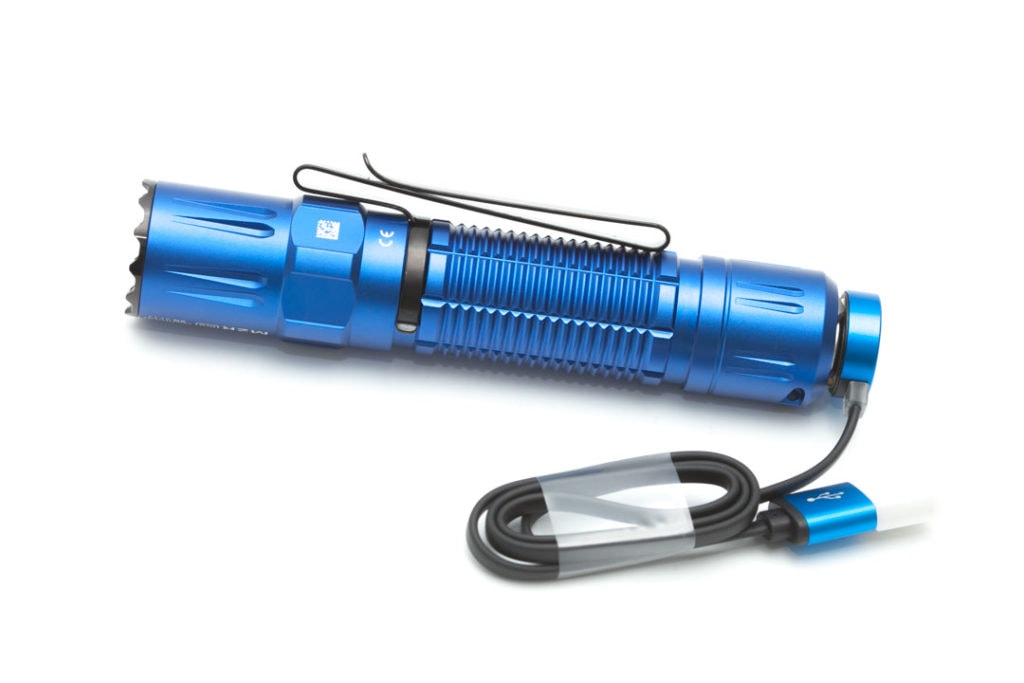
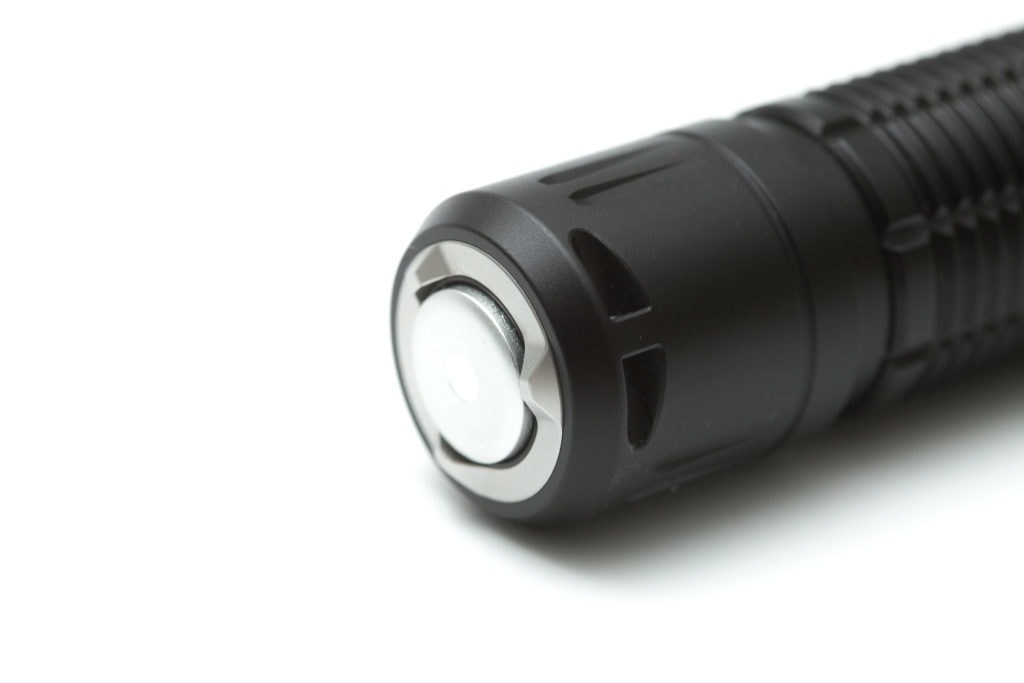
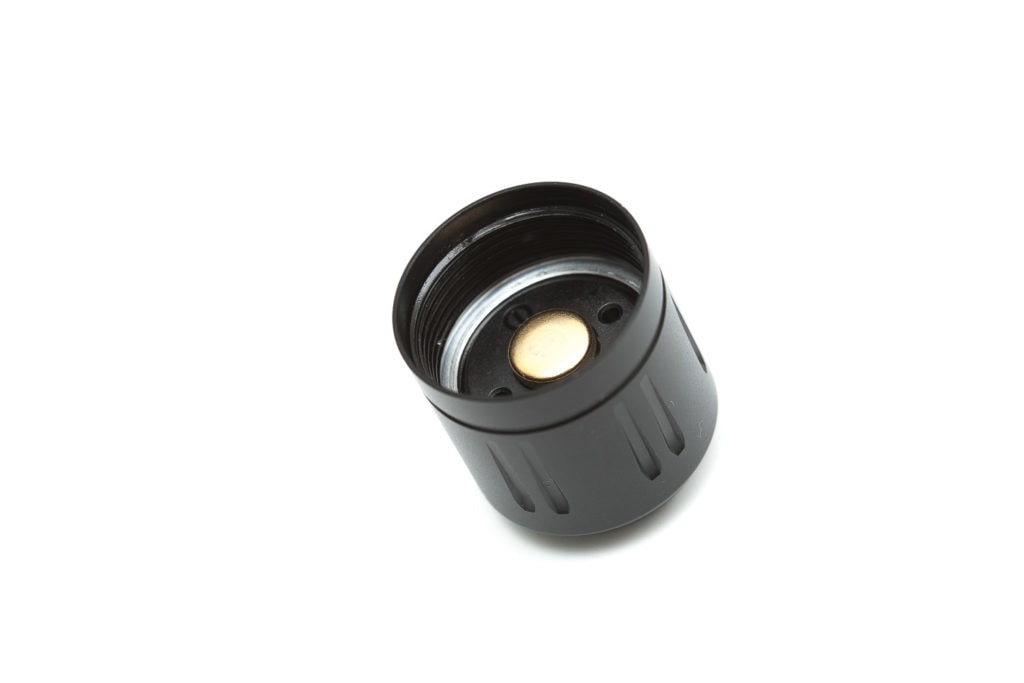
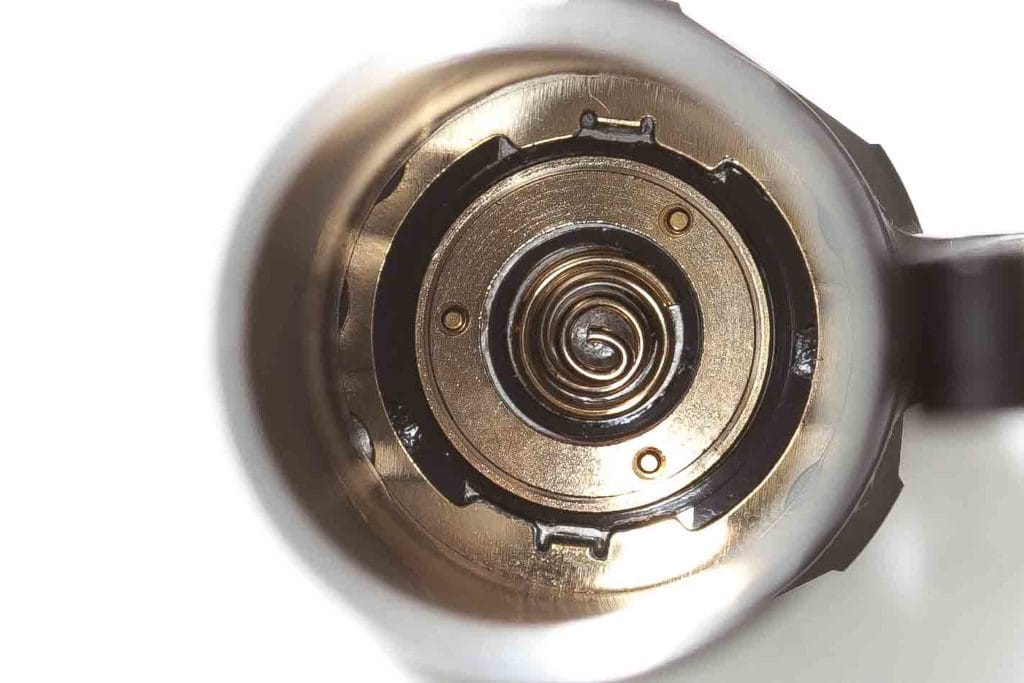
Inside the tail switch is a little magnet. This magnet attracts the magnet inside the MCC charging cable, so they don’t separate easily.
Tail standing: yes, but a little unstable.
Build Quality, knurling, threads, and anodization
All Olight flashlights I owned so far are made of top-quality materials. The Warrior X PRO I reviewed earlier, as well as the M2R PRO, are nothing but quality. In the intro section of the review, I talked a bit about the packaging, and this is probably where Olight separates from the rest. The whole package is designed specifically for each light, to fit everything very tightly. Few manufacturers go that far into details.
The anodization is done pretty well all across the light. The finish is a little shiny, which I don’t like so much. I liked the shiny finish on the Warrior X PRO, but not so much on the M2R PRO. That is probably just my first impression and personal opinion.
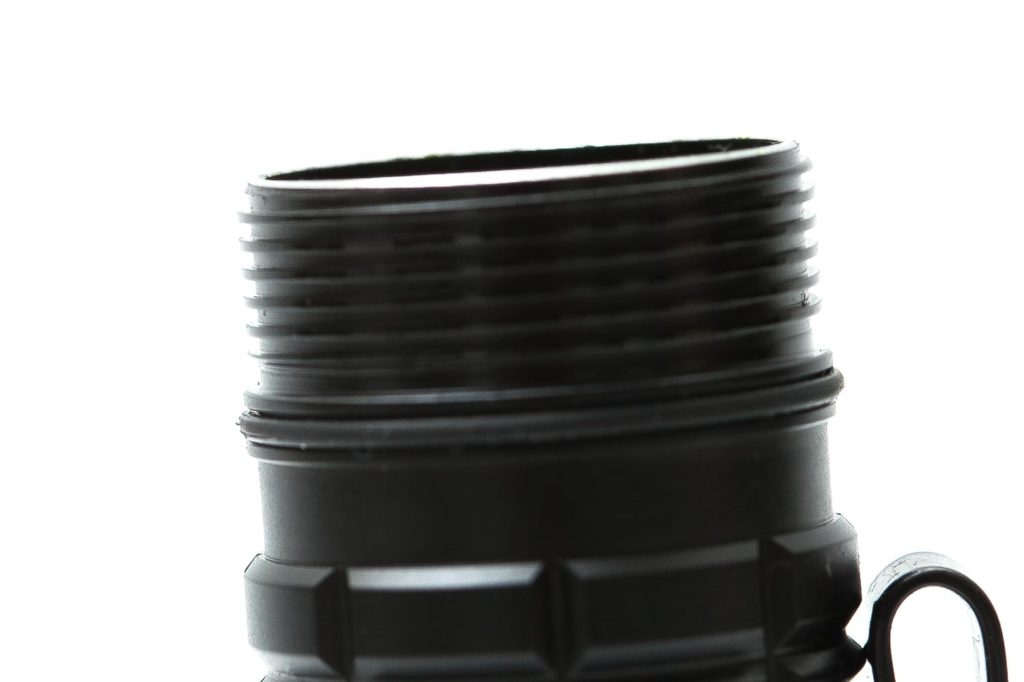
The threads and O-ring are lubed. There was no spare O-ring inside the package. Of course, there was no extra switch boot either since this is not your regular tail switch.
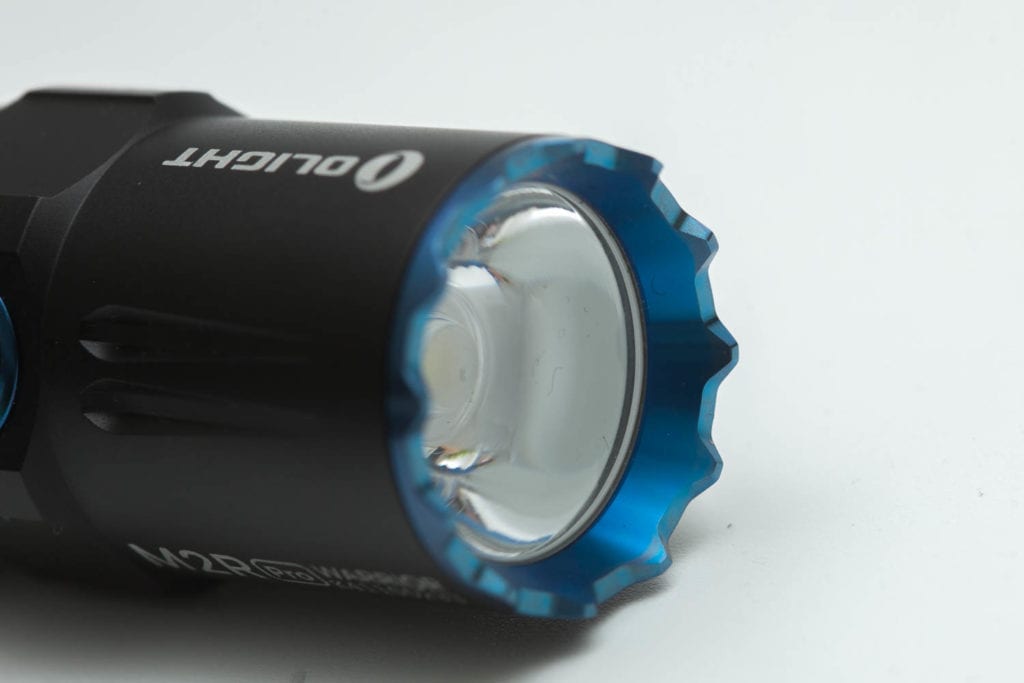
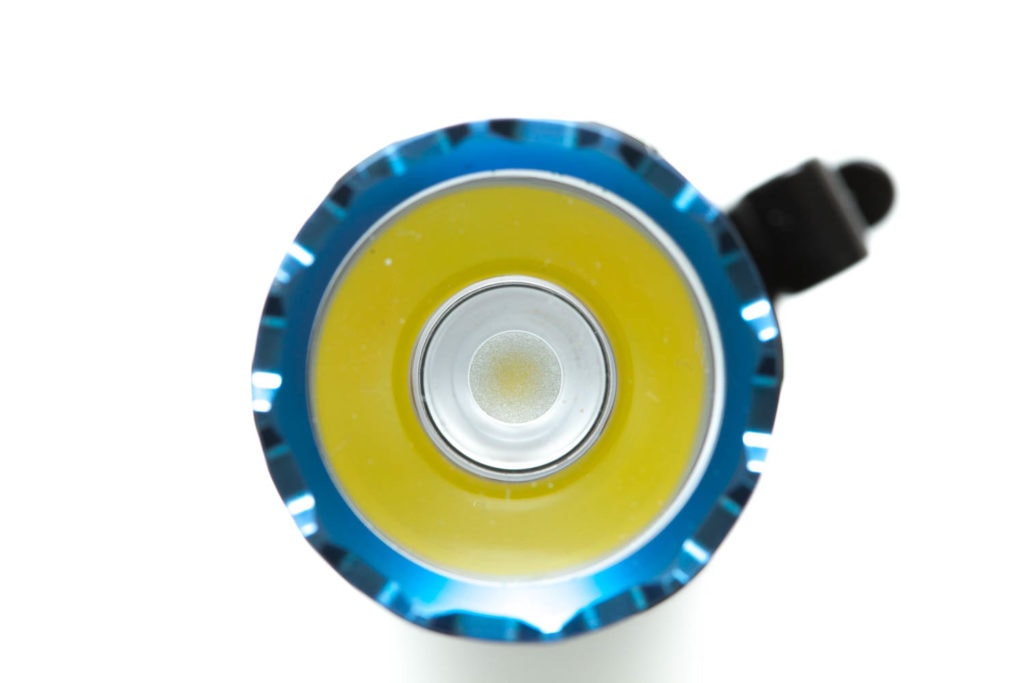
LEDs, Lens, Bezel, and Reflector
The bezel drew my attention since it’s very pointy, or a strike bezel/attack bezel in flashlight terms. Not only can you easily break a window with it, but you could also use it for self-protection. Don’t ask me how.
Again, Olight added some color to the flashlight by adding a blue bezel. The ring around the side-switch uses the same color as well. Since the M2R PRO Warrior is using TIR optics it’s hard to say what type of LED is used. After inquiring at Olight, they told me it is using a CREE XHP35 HI (NW) LED. That sounds very promising.
The beam has a well-defined hotspot with a relatively sharp transition into the spill. Since the hotspot is relatively tight, the TIR must be a narrow spot.
Dimensions:
- Length: 136 mm ( 5.38 “)
- Head diameter: 26.8 mm ( 1.05 “)
- Body diameter: 25 mm ( 0.98 “)
Weight:
- With 21700 battery: 179 g ( 6.31 oz)
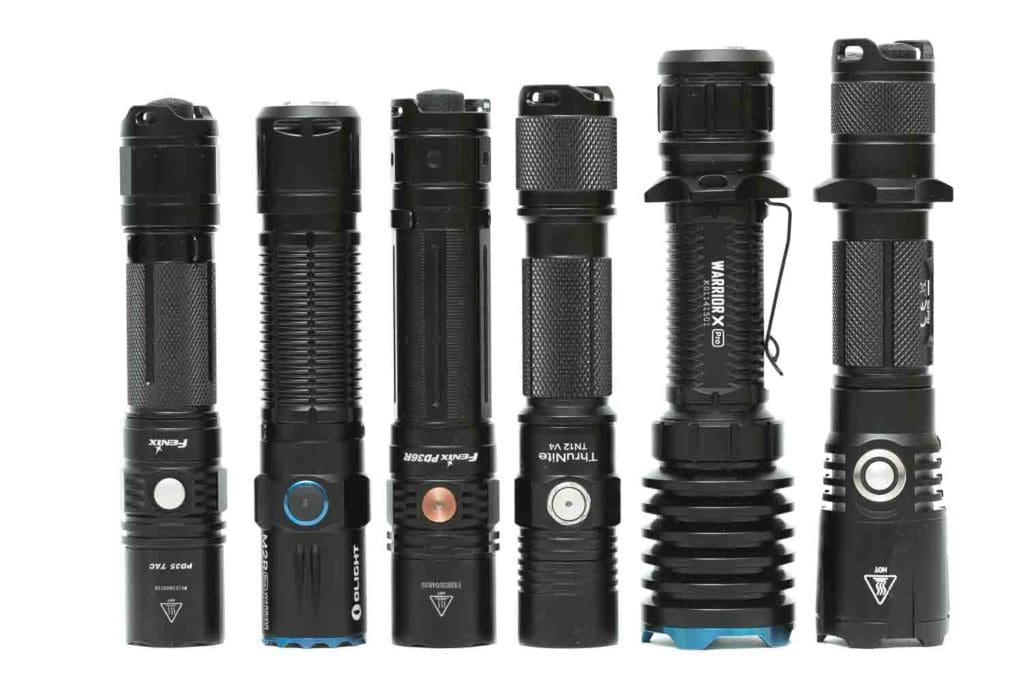
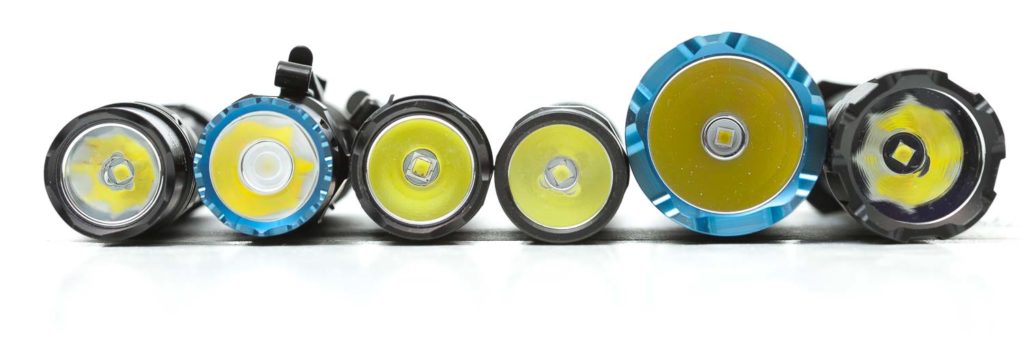
Size compared to other Tactical Flashlights
Tactical flashlights we reviewed, from left to right: Fenix PD35 Tac (18650), Olight M2R PRO (21700), Fenix PD36R (21700), Thrunite TN12 V4 (18650), Olight Warrior X PRO (21700), Nitecore MH25GTS (18650)
Driver & User Interface:
The M2R PRO Warrior has a different kind of UI than other brands. You can activate the light using the tailcap and the side switch, but the tailcap has a different function from the side switch.
It also has 2 menu configurations. This is mainly for the tailcap switch. The default configuration is half press for Medium and Full press (click) for Turbo. In mode configuration 2 you have half-press for Turbo and full-press for Strobe.
Modes:
- Moon, Low, Medium, Med 2, High, Turbo
- Moon, Turbo and strobe str not part of the mode cycle
From OFF Tailcap:
- Half-press: Medium output
- Full-click: Turbo
- Double click: N/A
- Triple-click: N/A
- Press and hold: if you half-press the switch for more than 0.5 sec it will be momentary on. (release is off)
- Press and hold: if you fully press the switch for more than .5sec, it will be momentary on (release is off). .. you can’t do signaling or morse coding.
From OFF: Side-Switch:
- Single-click: Last used mode (exclusive Moon, Turbo or Strobe)
- Double click: Turbo
- Triple-click: Strobe
From ON: Side switch:
- Single-click: Off
- Double click: Turbo
- Triple-click: Strobe
- Press and hold: Cycle through modes
- Yes, it does have mode memory, but you have shortcuts to Moon, Med and Turbo!
Blinky modes menu:
- Yes, triple-click on side switch. Both from on and off position.
Low battery warning:
- There is a little light behind the side switch that indicates the battery level.
- Green = 75-100%
- Orange= 30-70%
- Red= Lower than 30%
- Blinking red= lower than 10%
Lock-out mode:
- Yes. You can enter the lockout setting by pressing and holding the side switch from OFF. It will first go to Moon and then turn into lockout mode.
- You can also do a mechanical lockout by untwisting the tailcap.
PWM:
- Yes, visible in moon mode! But at high Hz. So not noticeable by eye unless you swing the light really hard. In some circumstances the PWM could be annoying, depending on how sensitive you are.
Firmware / UI Conclusion:
- The firmware is easy to understand and with the shortcuts to Moon Med and High makes this a nice firmware. And if you like Strobe you even have a shortcut to strobe as well.
Batteries and charging:
Olight uses a proprietary charge system and battery, which has a few pros and cons. I understand why Olight does this, but it makes it a little less practical for me personally and probably many flashoholics who have multiple lights, chargers, and batteries.
First of all, Olight does this to guarantee its performance and safety. Enough people are using questionable chargers or batteries. This can lead to underperformance of the flashlight, but even in worse cases damage the flashlight or even the person in question. So, I can totally understand that they include a proprietary battery and charger. This is the way how they can guarantee what they claim is achievable. And from my testing Olight specs are usually on the conservative side. When Olight claims a max output of 1800 lumens, you can trust that this is true.
On the other hand, I like having spare batteries with me and charging multiple batteries outside the flashlight. This helps me to use the flashlight while charging the battery, if necessary. You’d have to have a second Olight to charge the battery while using the other flashlight.
Because of its design, I can’t measure the parasitic drain. But you can unscrew the tailcap for a mechanical lockout, which would improve its battery life.
The included Olight MCC3 charge cable is supposed to pull 2A. My USB charger could only reach to about 1.7A, but that is still not bad for a charging speed. It charged the battery in about 4.5 hours. Right after I finished the runtime tests, the battery was not measurable. And the charge speed is reduced because of the low voltage. Towards the end of the charge, the charge current is reduced again. Just if you’re wondering why it didn’t charge faster.
When you charge the battery, the MCC3 cable turns red, and green when it finishes.
The M2R PRO draws about 4.7mA when the light is not in use. This is actually too high, IMHO. With a 5000mAh battery, it would take about 1064 hours to discharge the battery completely, which is 44 days. So make sure you always unscrew the tailcap!
Performance:
Lumen measurements:
All output numbers are relative to my homemade Integrating Sphere. I set the Integrating Sphere up with an Extech SDL400 Lux Meter and a Kenko PRO 1D ND16 camera filter in front of the Lux sensor for measurements. I do the base measurements with a Convoy S2+ that is tested at 137 lumens.
Unfortunately, due to the battery and driver design, I can’t do Amp measurements.
Since I’m using a ND filter, low output numbers are harder to measure. The differences between Tailcap (2 modes) and normal modes is probably the time when I measured it. The heat builds up fast and output drops quickly.
Tested with Olight 21700 battery
| Mode | Specified | I measured |
|---|---|---|
| Moon | 1 | 1 lm |
| Low | 15 | 13 lm |
| Med | 60 | 59 lm |
| Med2 | 250 | 251 lm |
| High | 750 | 784 lm |
| Turbo | 1800 | 1947 lm |
| Med | 250 | 246 lm |
| Turbo | 1800 | 1931 lm |
Below are the numbers I tested with the limited edition. They were slightly higher, but not by a lot. Olight M2R PRO Warrior limited edition
| Mode | Specified | Measured @ 30sec | at turn on |
|---|---|---|---|
| Moon | 1 | – | – |
| Low | 15 | 15 | 15 |
| Med1 | 60 | 63 | 63 |
| Med2 | 250 | 259 | 259 |
| High | 750 | 793 | 796 |
| Turbo | 1800 | 1985 lm | 2088 lm |
Runtime:
The runtime test was done with the integrating sphere, including the Kenko Pro1D ND-16 filter and Extech SDL400 data logging Lux Meter.
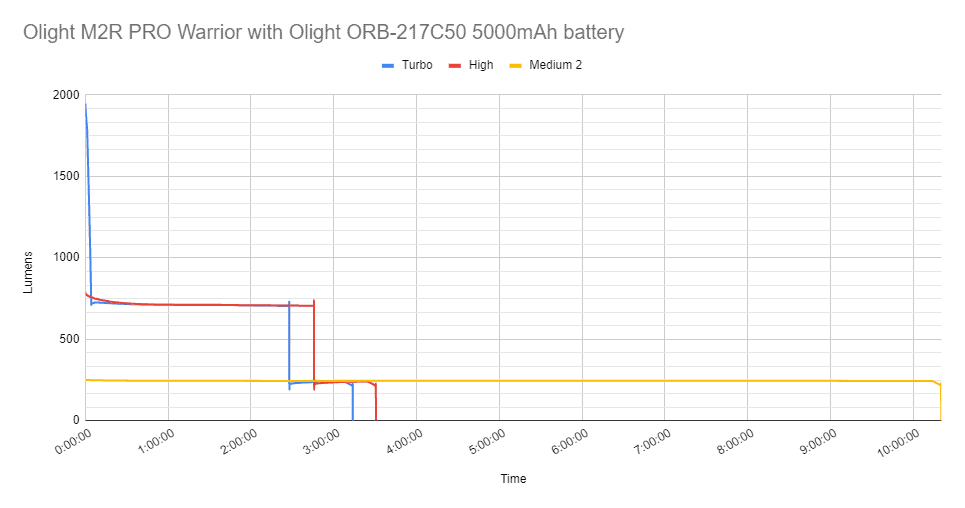
This is measured for Turbo, High and Medium 2.
Medium would have taken a bit too long for my liking and my spreadsheet.
- Turbo: Second output drop just before 2 hours 30 minutes to +/- 245 lumens. Complete runtime in Turbo setting: 3 hours 13 minutes.
- High: First real output drop just 2 hours 47 minutes. Complete runtime in High mode: 3 hours 30 minutes
- Medium 2: pretty stable output of roughly 250 lumens for 10 hours and 20 minutes
The light abruptly shuts off at the end of its battery life. Maybe because of the battery protection? The battery read 0V when checking.
The following graph shows the first 5 minutes of the runtime test.
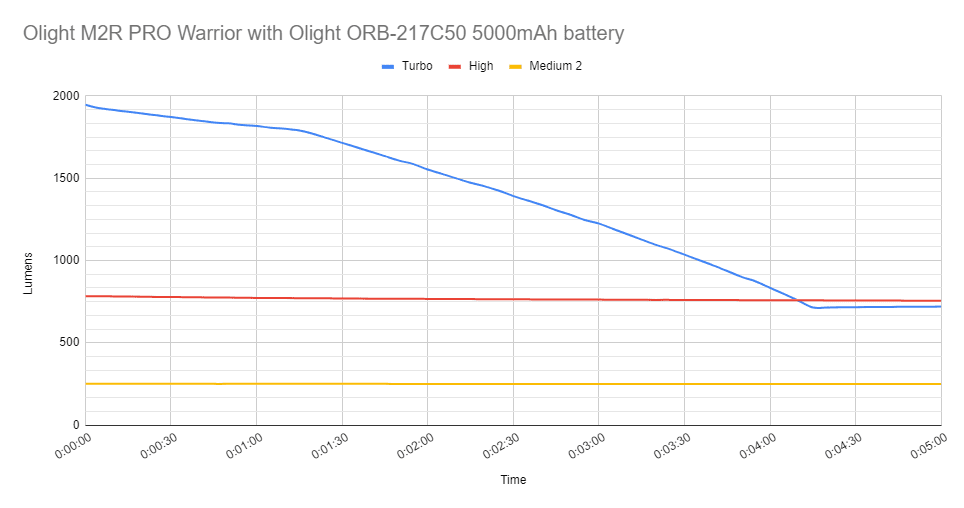
From the runtime graph we can see that Turbo gradually drops to about 750 lumens in less than 4.5 minutes.
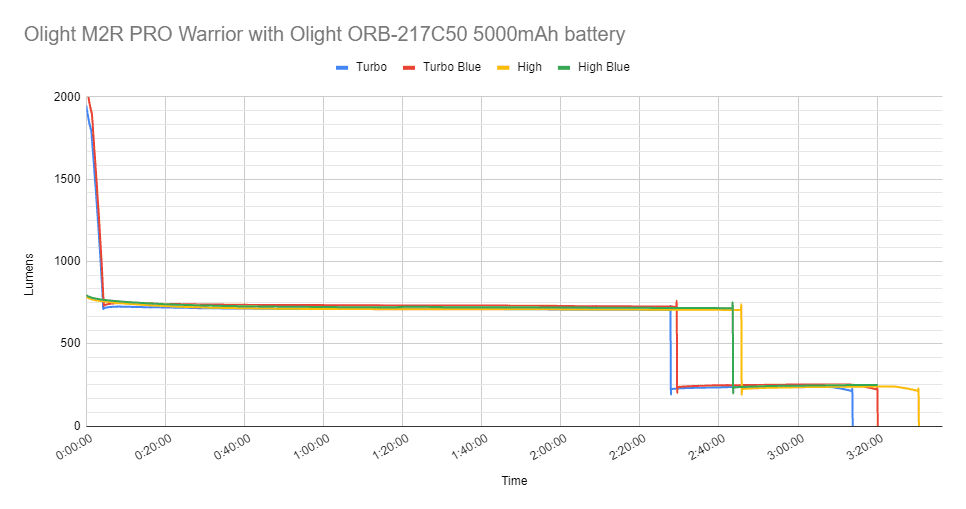
Olight M2R PRO black vs Limited Edition Blue
I also ran 2 tests, and they look pretty similar. No real differences here:
Throw measurement:
Measurements were taken both indoors and outdoors with a professional Hagner E4-X Lux Meter. I took measurements at both 5m for indoors and 10m for outdoors.
Using the high mode only, I get:
- Indoors (5m): 29500 cd = 344 meters / 376 yards
- Outdoors (10m):
| Mode | Intensity (cd) | Meters | miles | feet |
|---|---|---|---|---|
| Turbo | 28,000 cd | 335 | 0.21 | 1098 |
| High | 6600 | 162 | 0.10 | 533 |
| M2 | 3500 | 118 | 0.07 | 388 |
| M1 | 800 | 57 | 0.04 | 186 |
| L | 230 | 30 | 0.02 | 100 |
Moon is impossible to measure at 10 meters distance.
I tested the Olight M2R PRO Warrior Limited Edition as well, but at 5 meters.
| Mode | Candelas measured | Meters | Yards |
|---|---|---|---|
| Med2 | 3,000 cd | 110 | 120 |
| High | 8,500 cd | 184 | 202 |
| Turbo | 23,750 cd | 308 | 337 |
It’s interesting to see that the output on the Blue Limited Edition is actually higher, but with fess throw capabilities.
I must say that measuring at 5 meters and the Lux setting can make a difference. I would still recommend doing it at 10 meters, but I had almost no time to finish this, and it was raining outside.
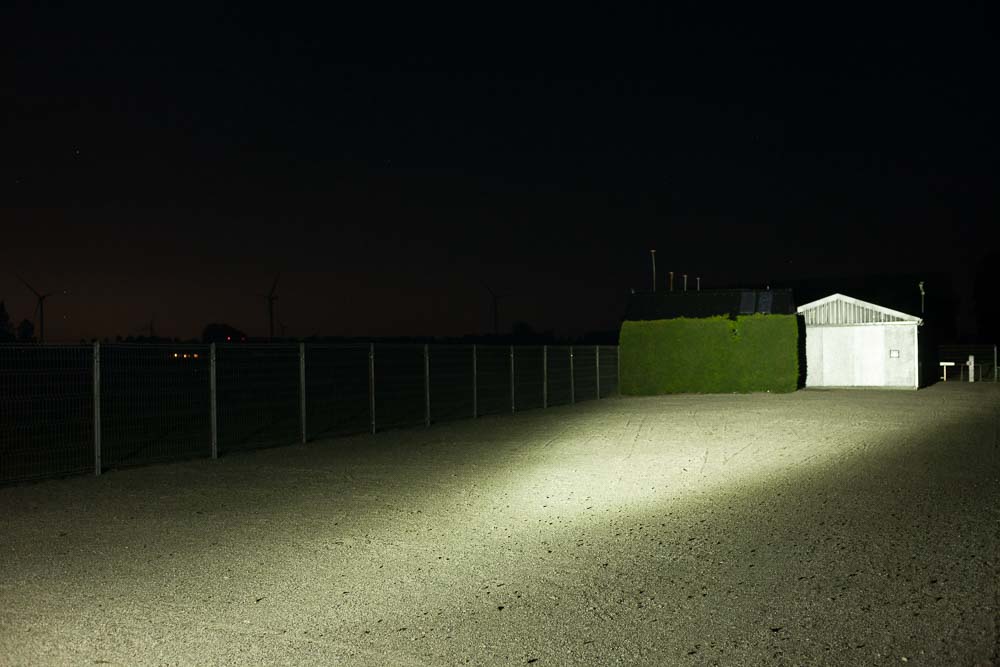
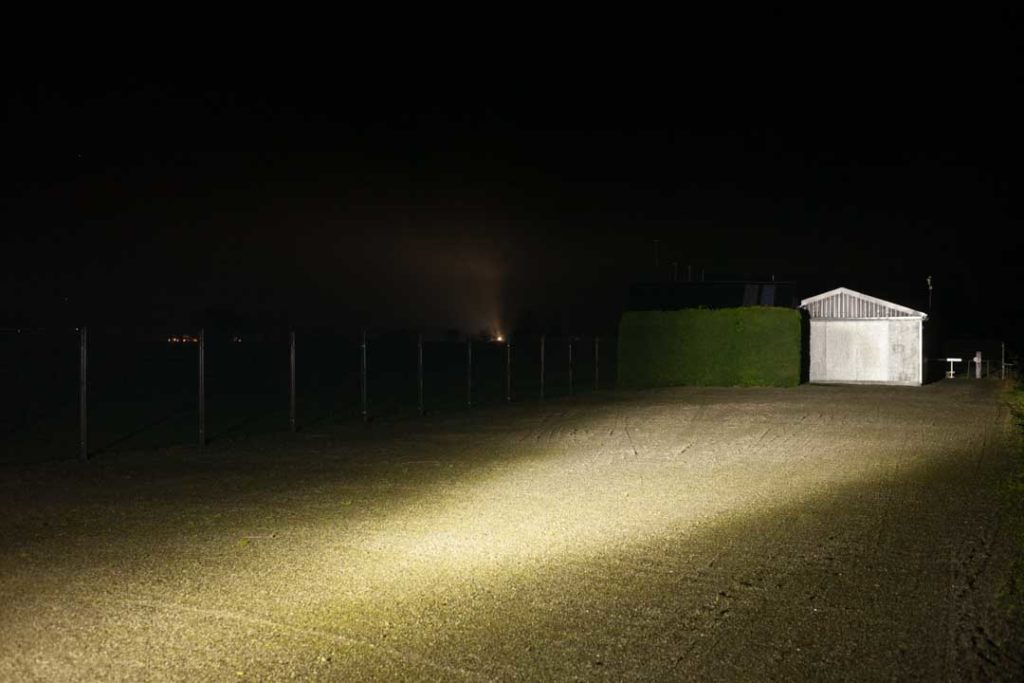
Beamshots
The first set of beamshots is from Moon to Turbo. I set the camera settings manually to show the difference, but unfortunately, this would either result in overexposure or underexposure. So the lowest settings are barely noticeable. In person you would easily see it.
From left to right:
Lumintop FW3A, Olight Warrior X PRO, Olight M2R PRO warrior, Olight M2R Pro Warrior Ltd Edition
The beam of the new ltd edition M2R PRO Warrior looks a bit more neutral white, compared to the original M2R PRO Warrior.
Disclaimer: This flashlight was sent to me for review at no cost, by Olight. I have not been paid to review, nor have I been holding back on problems or defects.
Overall conclusion
Pros:
- High-quality flashlight and accessories
- Shortcuts to Moon, Med and Turbo
- TIR lens for smooth beam with defined hotspot
- Great runtime
- 5 year warranty
Cons
- PWM in Moon mode
- Needs a proprietary charger and battery
- Possible high parasitic drain
- The bezel is really sharp and easily damages your pants…or intruder..(con?)

Rating: 4 stars ★★★★
Olight delivers high-quality products, and the M2R PRO is definitely one of them. Great output and great runtime. There are a few cons, like PWM in moon mode, proprietary charger and battery, and the sharp bezel. I personally carry my lights in my pockets and this doesn’t work for me. It’s too sharp. The UI is not my favorite but I know many people like it. I personally like clicks for mode changing and not press and hold, unless it’s a ramping UI. I would personally give it 4 stars. If you don’t care about these points, there is nothing else really wrong with it. Superb quality.
Olight M2R PRO Warrior for sale
Important note: This model is being recalled because some people forget to lock it out properly. They may not be available soon.
https://www.cpsc.gov/Recalls/2022/Olight-Ecommerce-Technology-Recalls-Flashlights-Due-to-Burn-Hazard
Olight upgraded it to the Olight Warrior 3S. But we also reviewed the special edition Olight Warrior 3S Titanium, and the Olight Warrior 3S Copper.
1lumen selects and reviews products personally. We may earn affiliate commissions through our links, which help support our testing.