1lumen selects and reviews products personally. We may earn affiliate commissions through our links, which help support our testing.
Olight Warrior 3s review
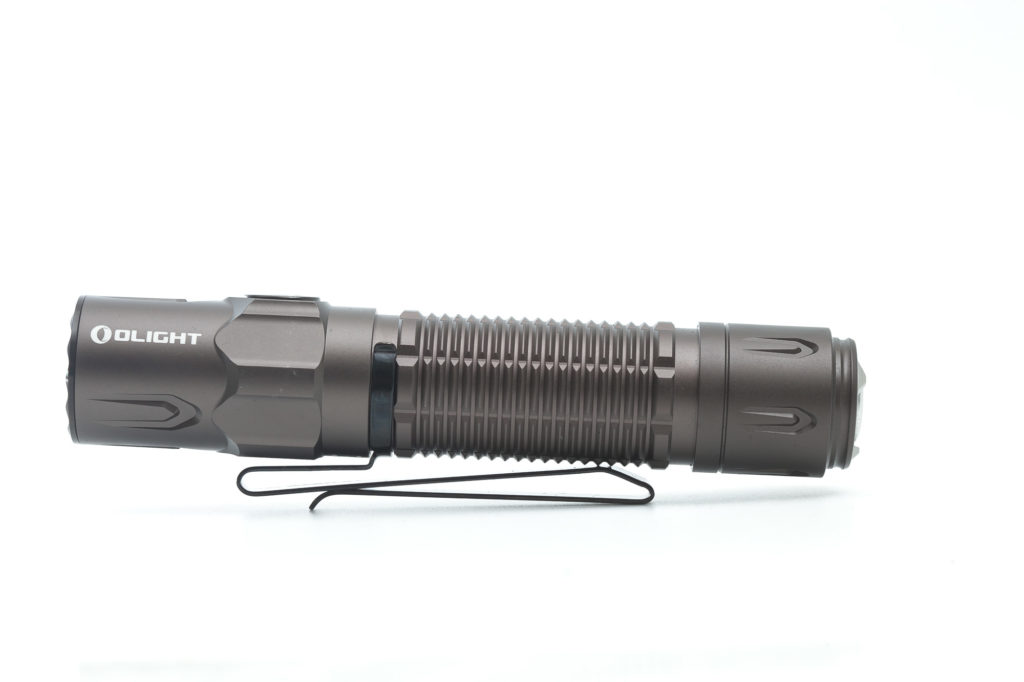
Olight Warrior 3 S specifications
| Brand/model | Olight Warrior 3S |
|---|---|
| Category | Tactical flashlight |
| LED | N/A (probably Luminus SFT70) |
| Max. Lumens | 2,300 lm |
| Max. Beam intensity / distance | 23,000 cd |
| Battery config. | 1*21700 (proprietary) |
| Onboard charging | Magnetic USB charging (proprietary) |
| Modes | 5 |
| Blinkies | N/A |
| Reflector | TIR optic |
| Waterproof | IPX8 |
| Review date | April 2022 |
Introduction:
If you’re into flashlights, you know Olight. The company’s current lineup includes many types of flashlights, including some very popular tactical flashlights. The one we are reviewing here is the Olight Warrior 3S, the latest edition in the Olight Warrior series. There’s been several iterations of this particular model, but Olight has upgraded it with the Warrior 3S.
The 3S has some features, that weren’t present in the previous models.
Let’s quickly dive in, and see what they are, and of course, if it performs well according to specs.
Package quality.
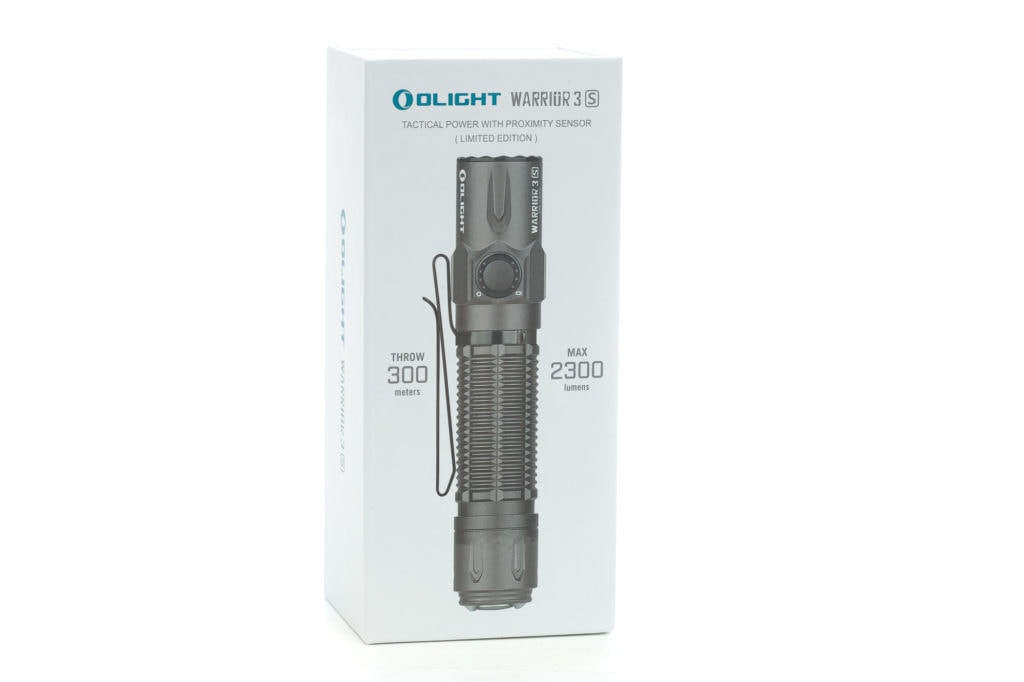
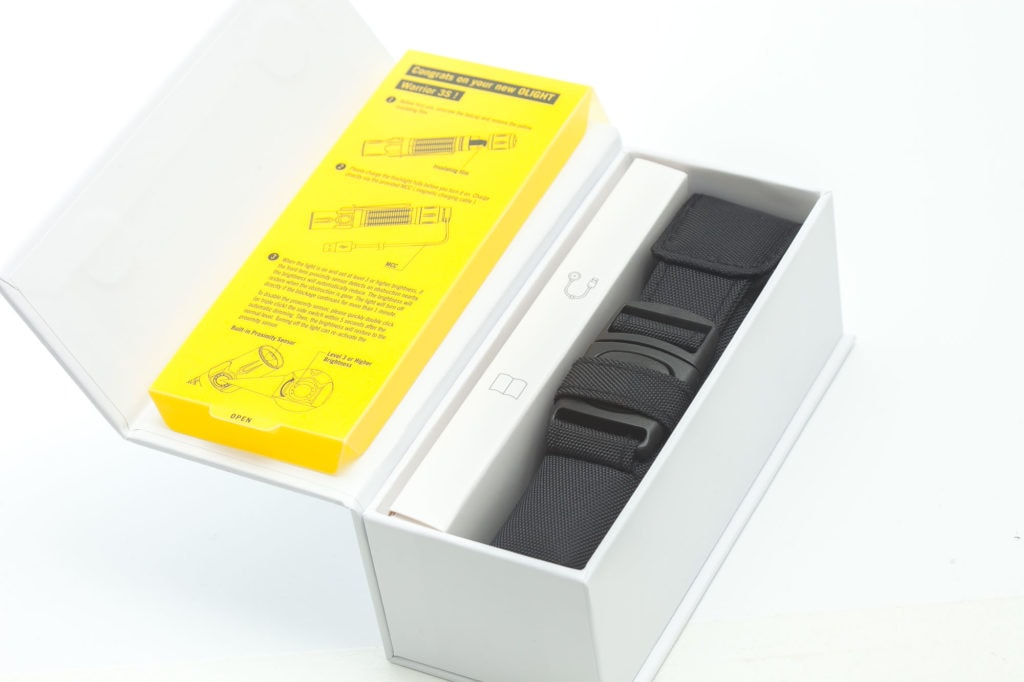
Sorry to sound repetitive, but if you’re not used to high-quality flashlight packaging you will really enjoy Olight. They have some of the nicest packagings in the industry, with great attention to detail. Most people don’t care much about the packaging, but if you’re into high-end products, you’ll notice more and more attention to packaging, and Olight does a tremendous job.
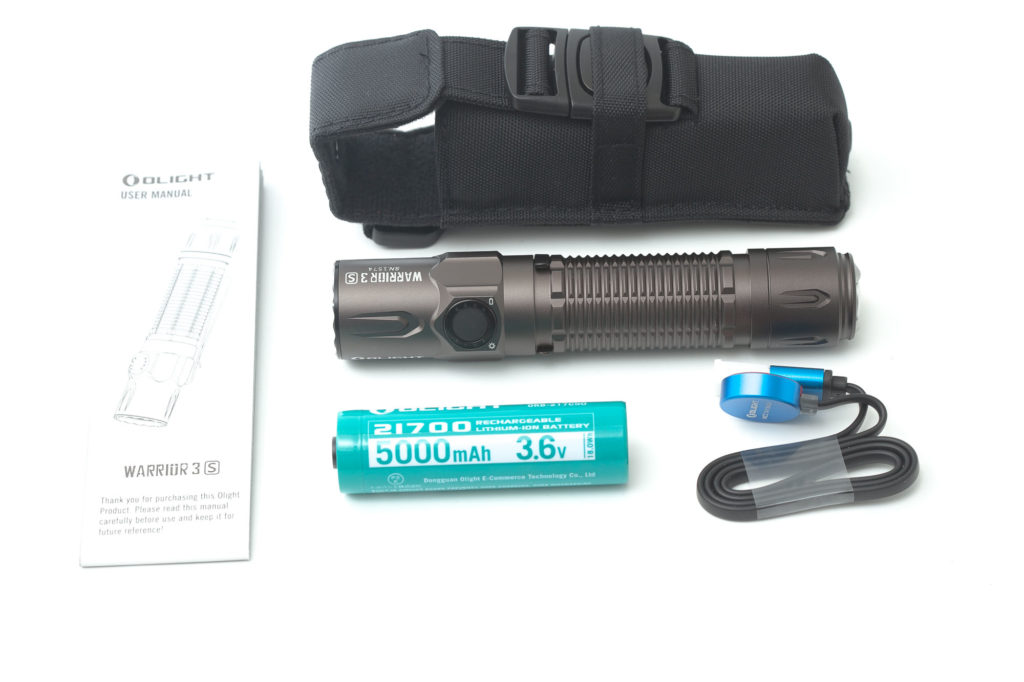
Okay, so what’s inside:
- The flashlight: Olight Warrior 3S
- Olight ORB-217C50 lithium-ion battery (proprietary)
- Pocket clip (installed)
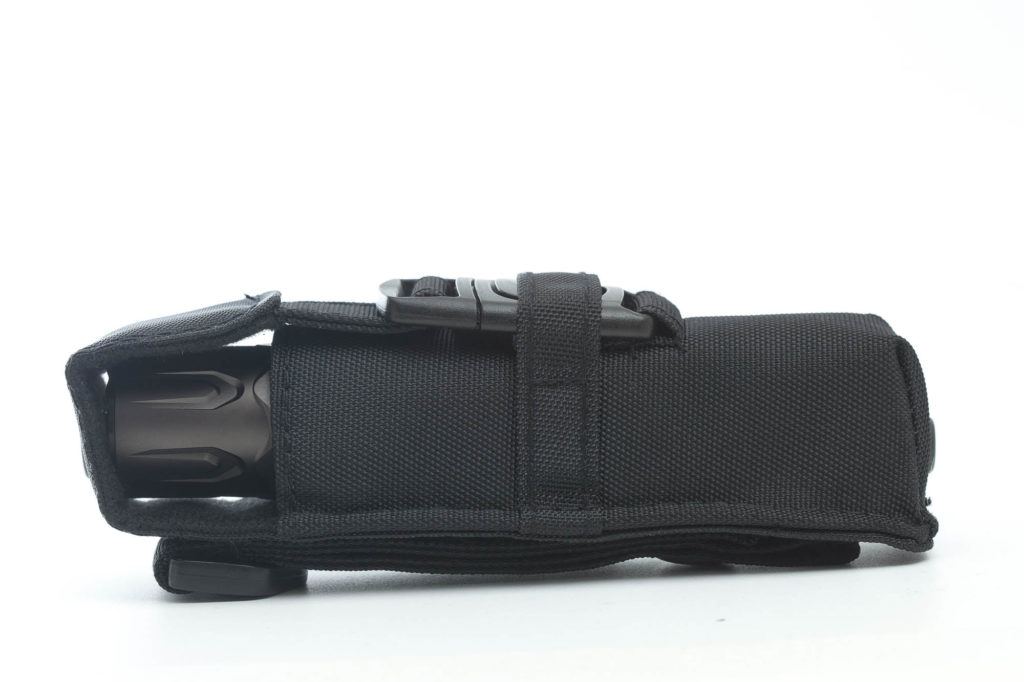
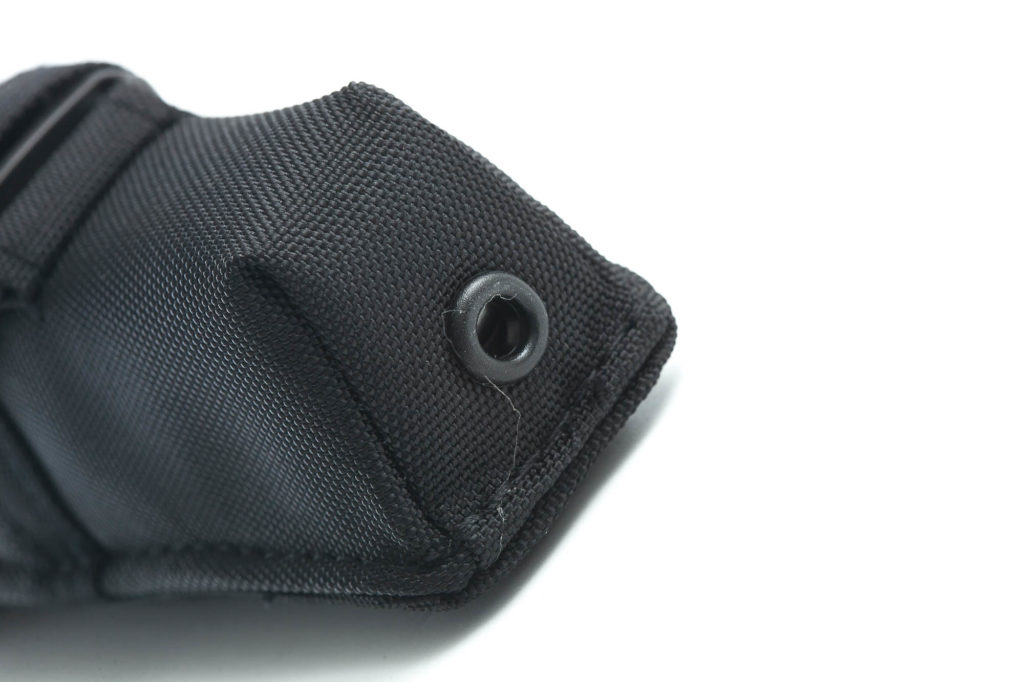
- Holster
- Magnetic USB charging cable (Olight MCC3)
- Manual
- Warranty card
It’s RTR (ready-to-run) and has everything needed to open the box, charge the battery with the Magnetic USB charging cable, and get on with it. The accessories are nice and of high quality. The battery was installed with a plastic isolator in the tail to break the connection.
Flashlight in use
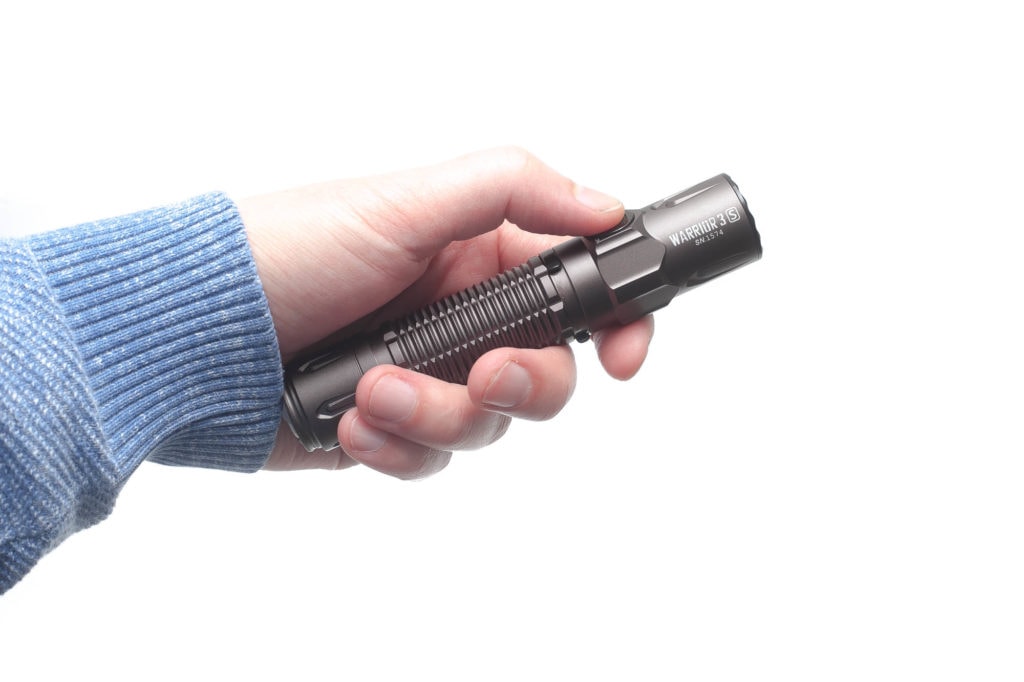
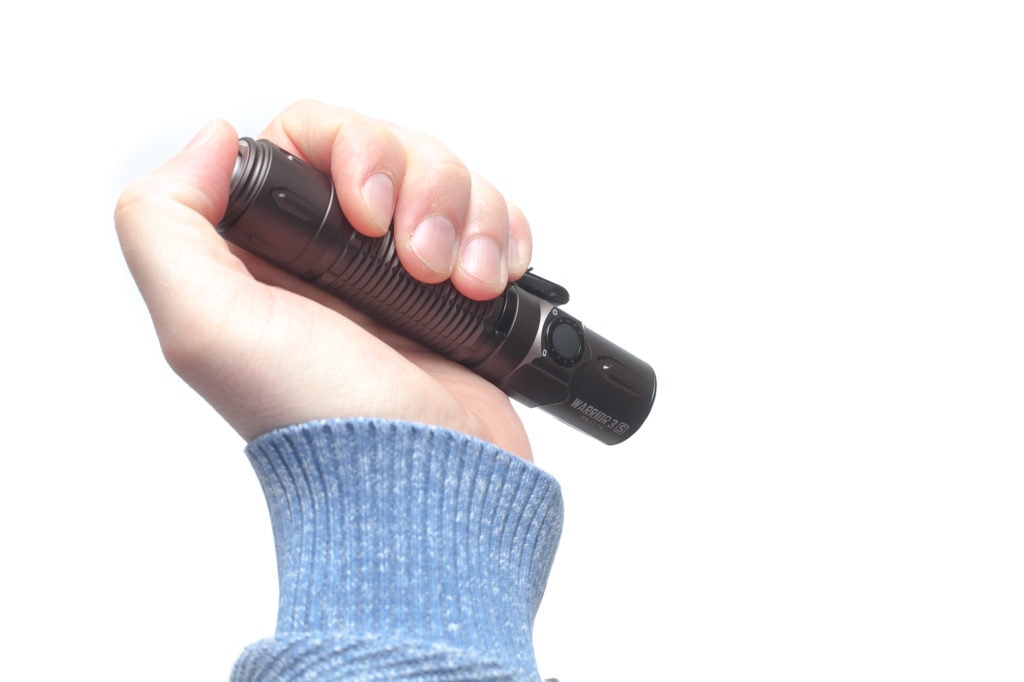
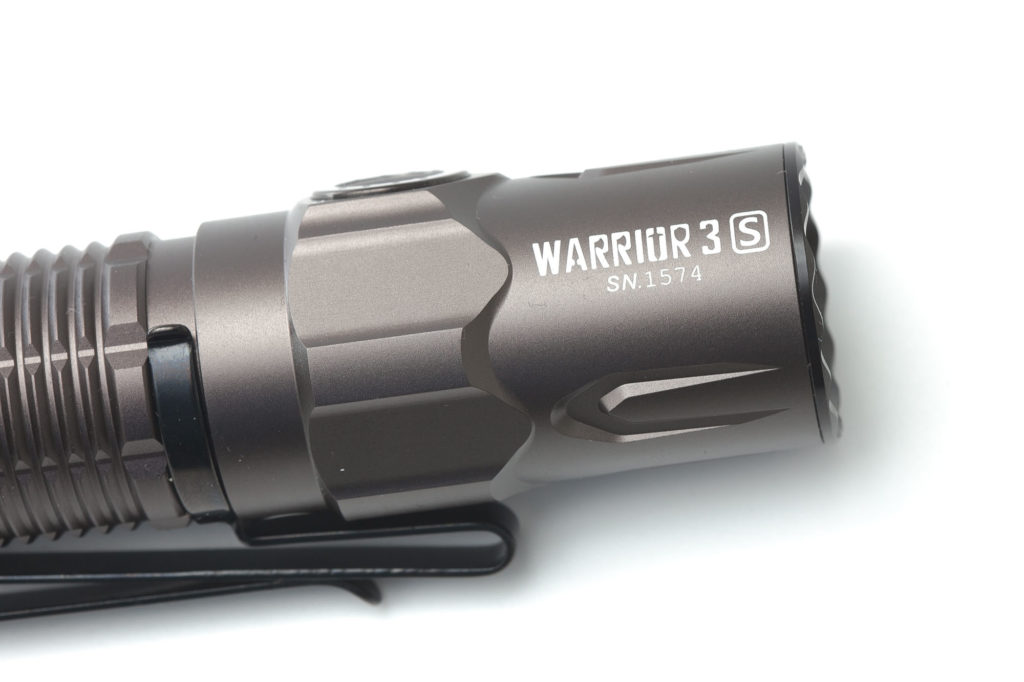
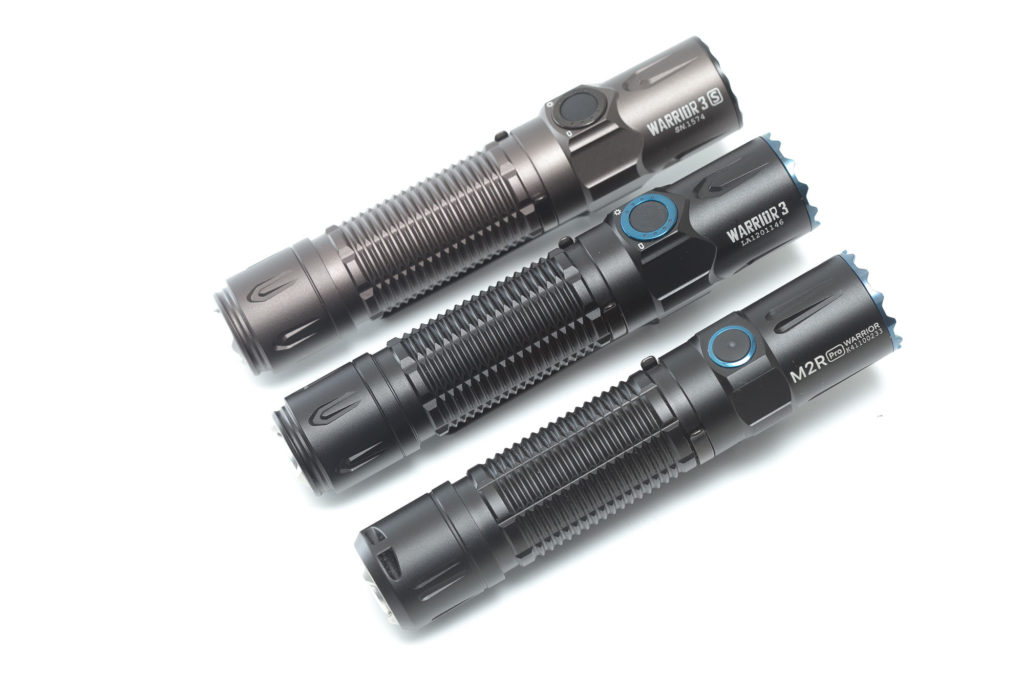
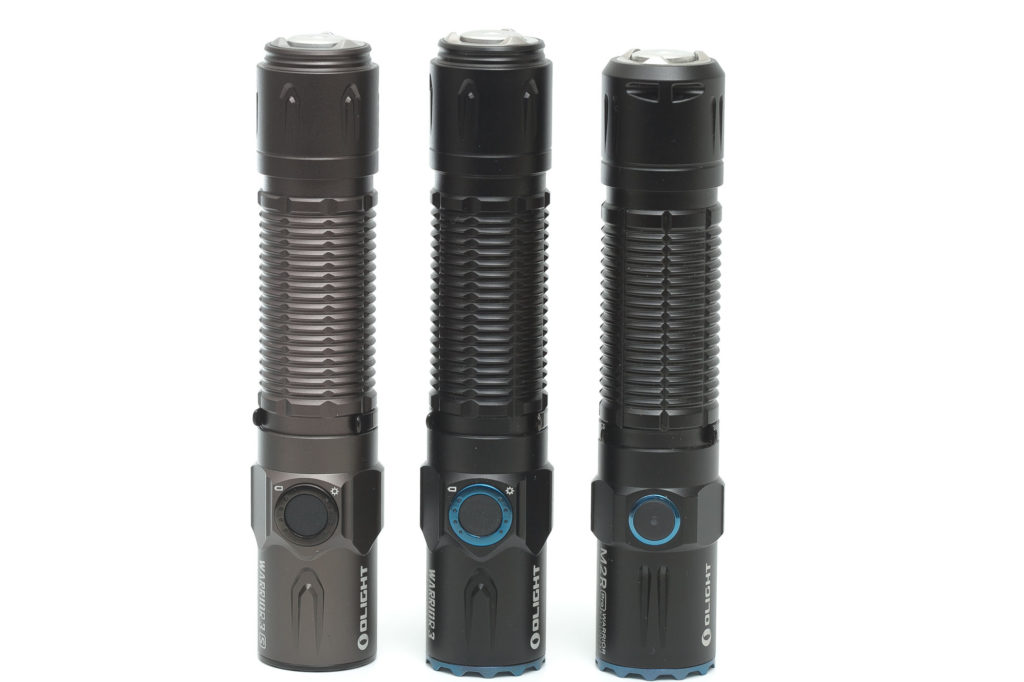
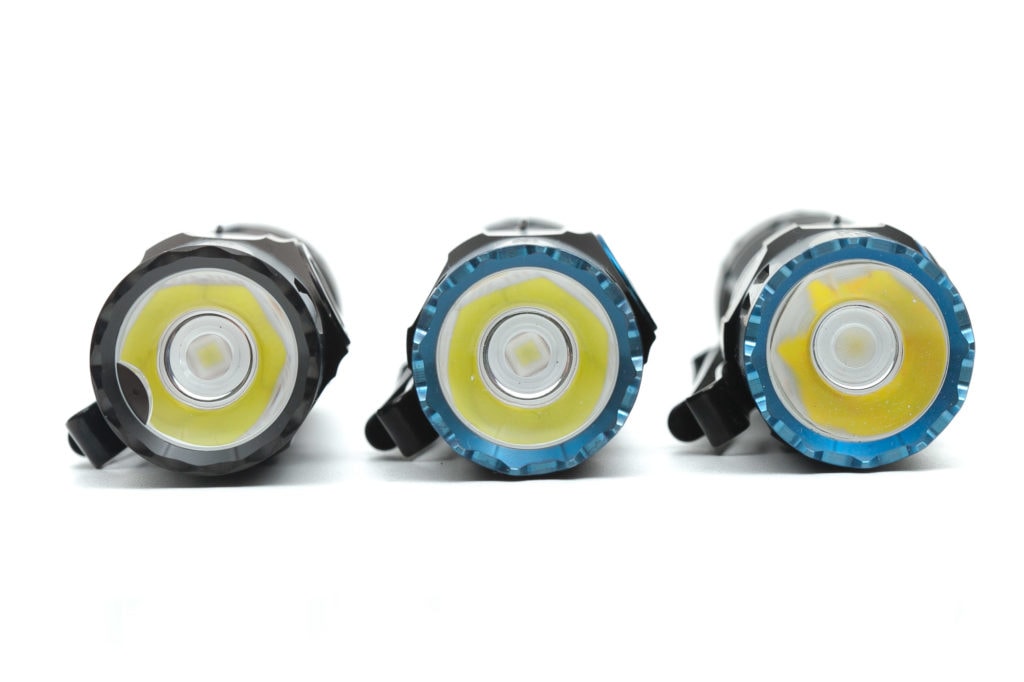
From a distance, the differences between the Warrior 3, and the Warrior 3S are not easy to find. The first thing you probably notice is the different bezel. The aggressive bezel on the Warrior 3 has been replaced by a non-aggressive, smoother bezel. So, finally, you can carry it in your pocket.
I have no idea how anybody could carry the M2R or Warrior 3 in their pocket without ripping it. The bezels on both predecessors are too sharp for pocket carry IMHO, and the lights don’t come with a holster just for fun. Those were real tactical flashlights, while the new 3S is more of a hybrid between tactical and EDC with the new bezel.
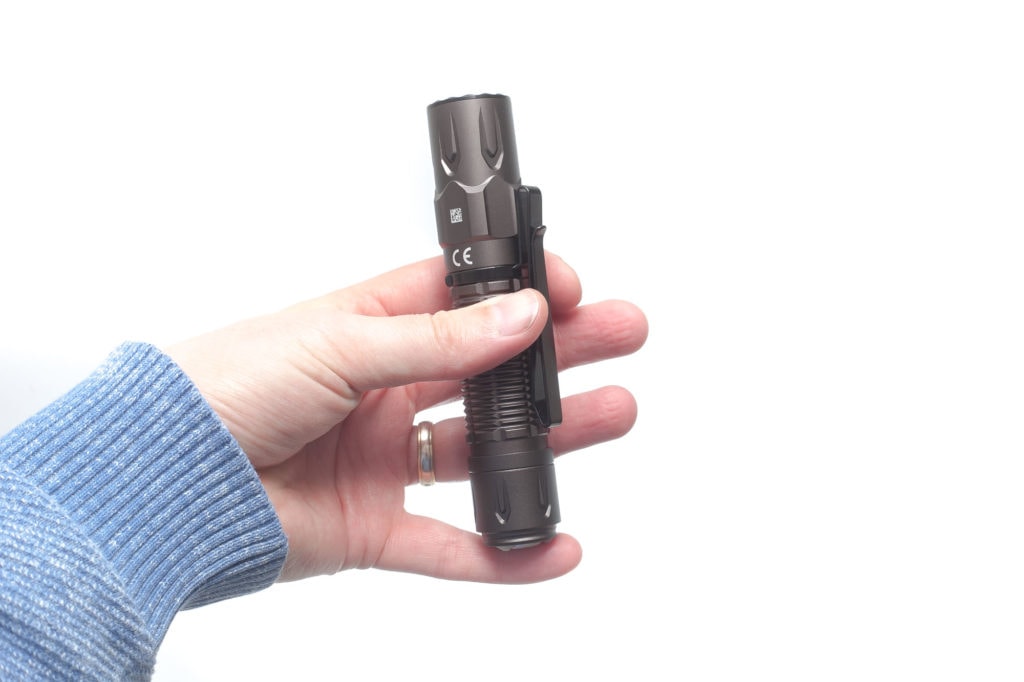
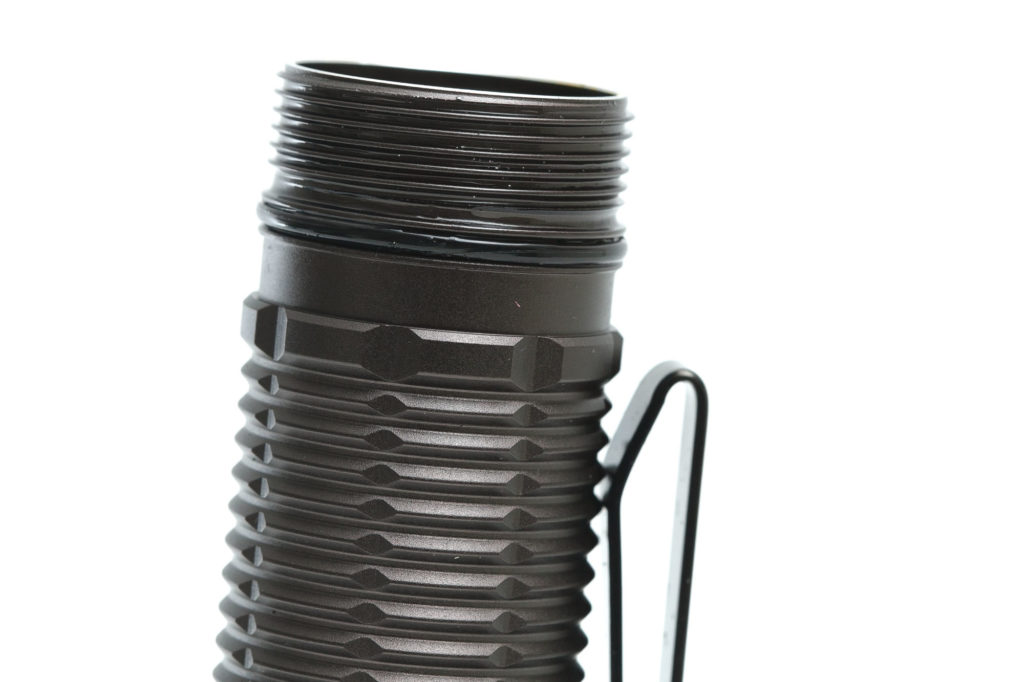
The 2-way pocket clip stayed the same, so you can still use it to carry downward or upward… whatever you like. By default, the clip is attached in the circumferential groove, specifically made for the clip towards the head. But there’s also a groove towards the rear, so you have 2 options to attach + 2 options to carry.
Anyway, the main upgrade to the Warrior 3 is related to the model name 3S. The letter S refers to the new built-in proximity SENSOR, that adds safety, by reducing the output when it detects anything close to the sensor (eg clothes, hand, pocket).
The same type of sensor is built into the Olight Warrior Mini 2, Olight Marauder 2, and probably a few more.
If you accidentally turn the light on in your pocket (or holster), the light will reduce output, and turn off after 60 seconds. BTW this only relates to the higher modes (from mode 3 (medium) upwards).
The 3S still uses the dual-switch setup, which can be used independently, and interchangeably. You can turn the light on with 1 switch, and turn it off with the other etc. This is quite a unique feature Olight created.
Having 2 switches also helps with the 2 particular use cases (EDC and Tactical) because you can use the side switch for power, and mode changing keeping the light in a normal underhand position. And the rear switch can be used for an overhand position like you would use it during tactical use. The rear switch is a 2-stage switch with a few features, which I will explain later in the UI section.
Build Quality, and Warranty
If you’re into flashlights, and own flashlights from many brands (including Olight) you know that they build high quality lights. The build quality of the Warrior 3 is always top-notch, just like we are used to from Olight.
All edges are smooth and chamfered, including the bezel this time. So there are sharp edges or anything. The anodization on my copy is a beautiful gunmetal grey covering most parts of the flashlight, excluding the tail switch, and bezel.
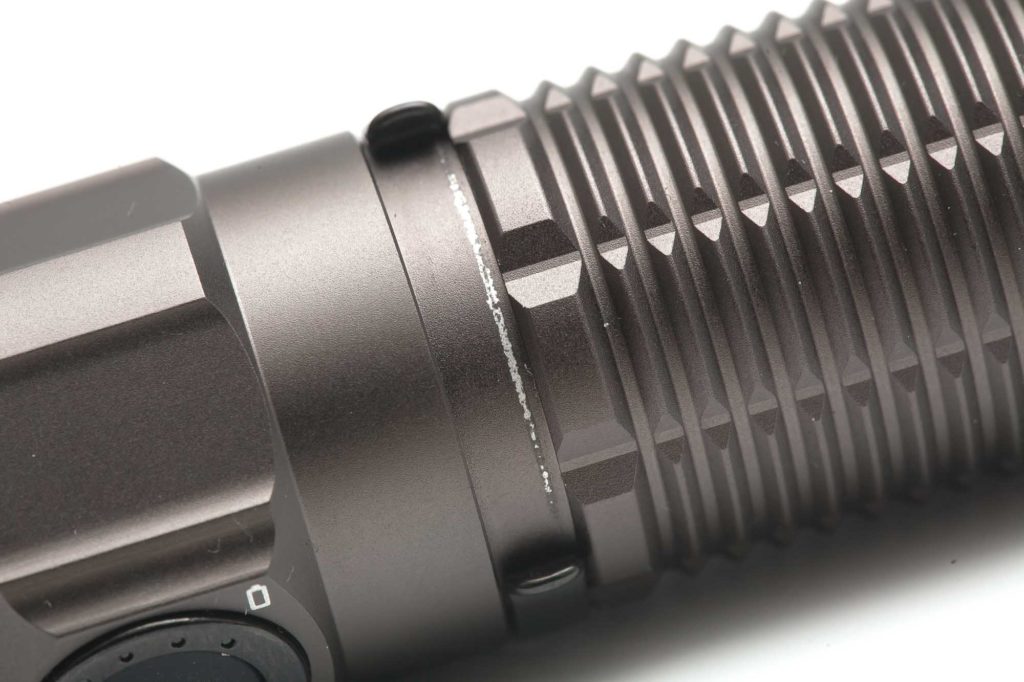
(BTW there are 2 things I noticed. 1. the tailcap looks like a slightly different shade of grey, but I only noticed that while editing my pictures. 2. After playing with the pocket clip, I noticed severe damage on the coating.. the anodization just came off when I used my nail to scrape the damaged part)
The bezel has a black coating, just like the pocket clip, while the tail switch is grey.
If you like black coatings, the Warrior 3S is currently also available in black. I’m pretty sure soon we’ll see some special editions coming with more colors or maybe even different materials.
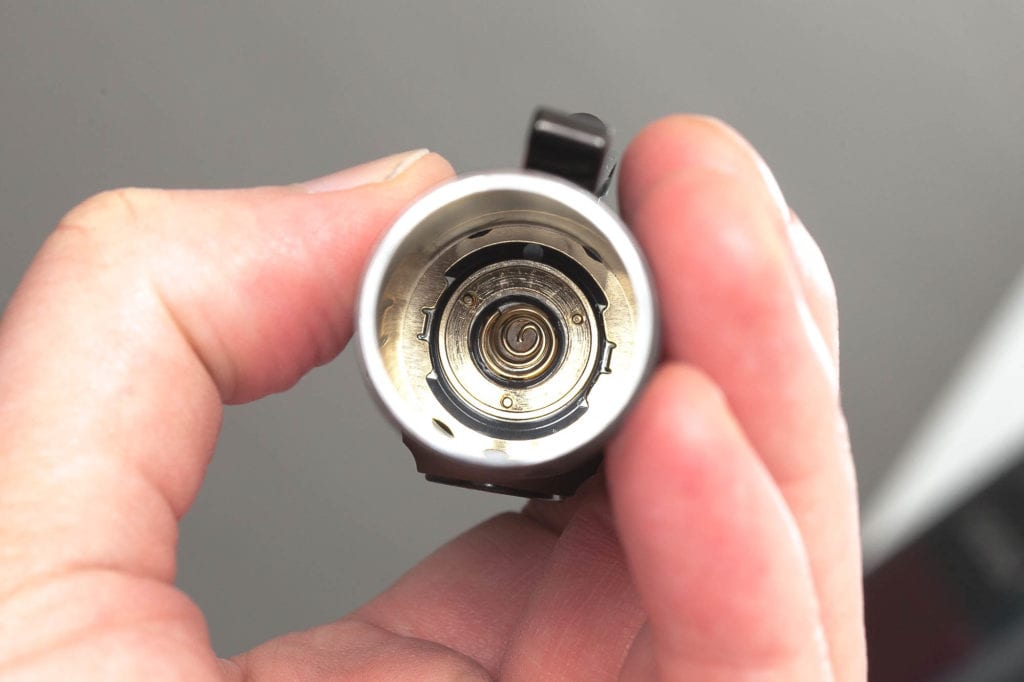
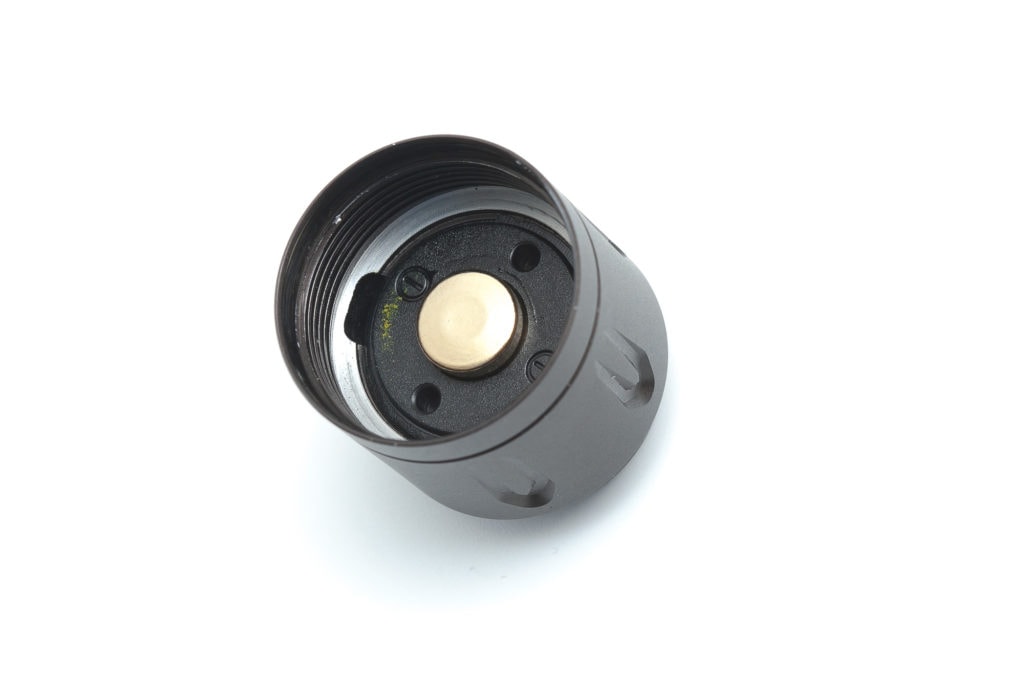
The tail cap is the only thing you can remove by hand. The rest of the Warrior 3S is glued to keep curious people out.
For waterproofness, Olight includes 1 o-ring near the tailcap, close to the threads. The threads are anodized and well lubricated.
Olight warranty:
If your Olight product has any defect as the result of the materials or workmanship we want to make it right! Within 30 days of purchase: Return the product to the retailer you purchased it from and they will replace or repair it. Period. Within 5 years of purchase: Return the product to Olight and we will repair or replace it as long as the light is not working because of factory defects. This does not include obvious user wear or extreme damage. After 5 years of purchase: Return the product to Olight and we will repair or replace it. We will assess the fees involved and will let you know once we receive it.
LED, Lens, Bezel, Beam, and Reflector
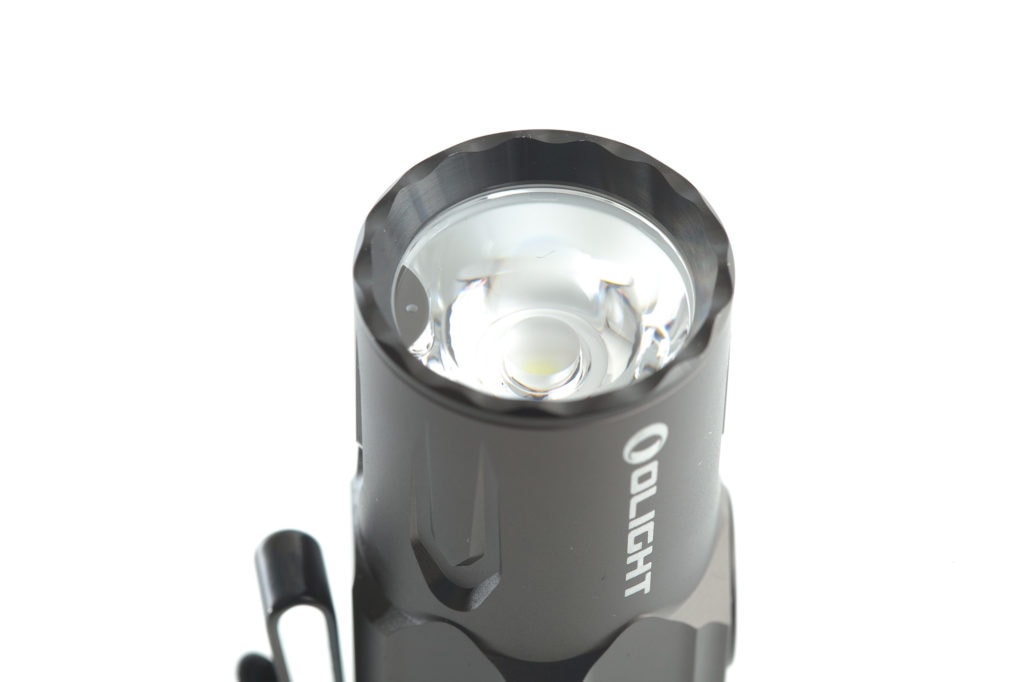
It’s no secret that Olight doesn’t include the type of LED in its descriptions/specifications. But sometimes you just have to look at the LED to know what type is used.
Unfortunately, that’s not possible with the Warrior 3S, because the TIR optic doesn’t let you. The TIR optic looks almost like a smooth reflector on the outer ring but is translucent in the center. The translucent part makes it hard to guess what type of LED is used, because that’s the part covering the LED.
The only thing I can see is something that looks like a golden edge around the emitter, like you see with the Luminus SFT70. And I wouldn’t be surprised if they used this LED, because the Olight Javelot Pro 2 uses the same.
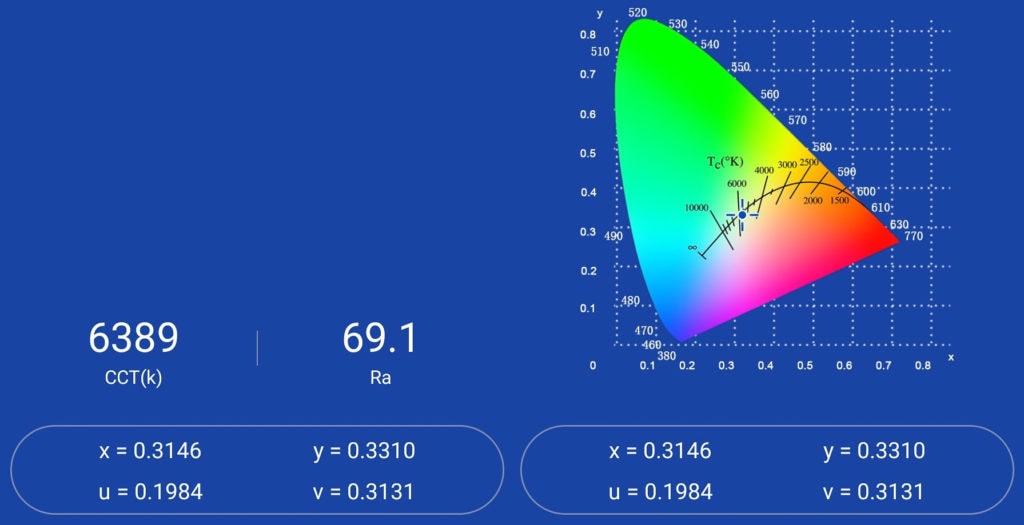
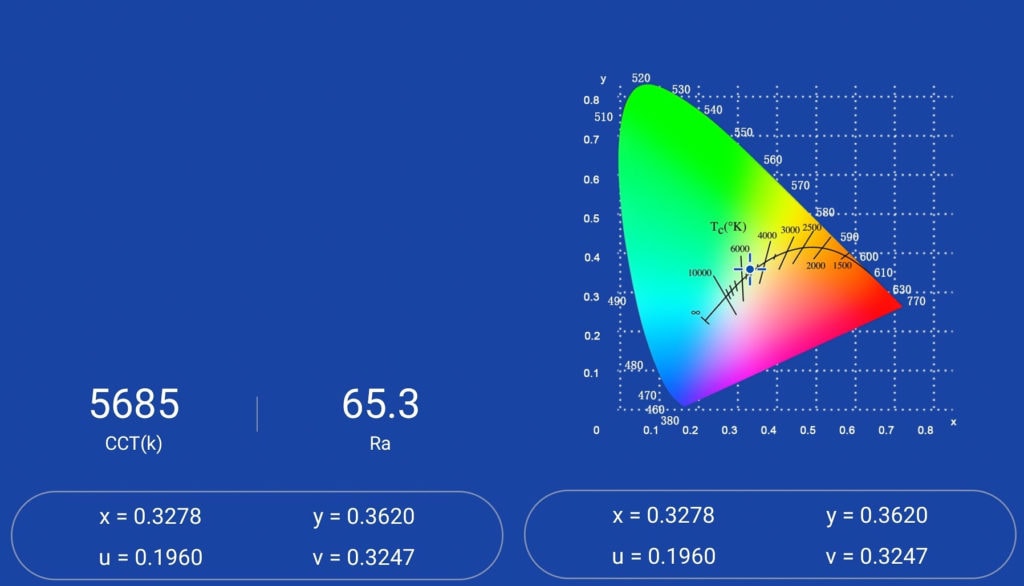
And in order to learn more about the LED’s characteristics, I use the Opple Light Master 3.
For testing, I point the center of the beam directly onto the sensor of the Opple, while trying to get a relatively stable reading. The distance between the sensor and the flashlight is about 80-90cm.
Below you can see the 2 images with CCT and CRI for Low mode and Turbo mode.
Low mode:
- CCT: 5685K
- Ra (CRI): 65.3
- DUV: 0.0124
Turbo mode:
- CCT: 6389K
- Ra (CRI): 69.1
- DUV: 0.0033
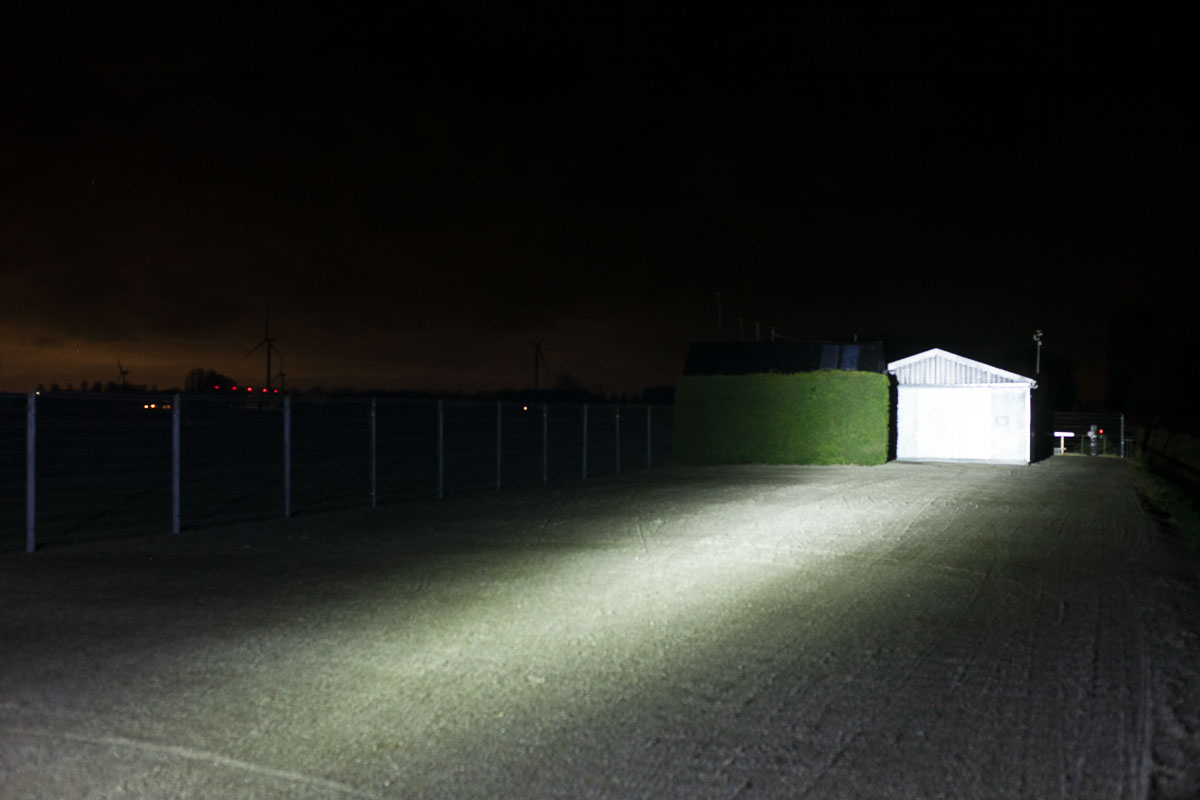
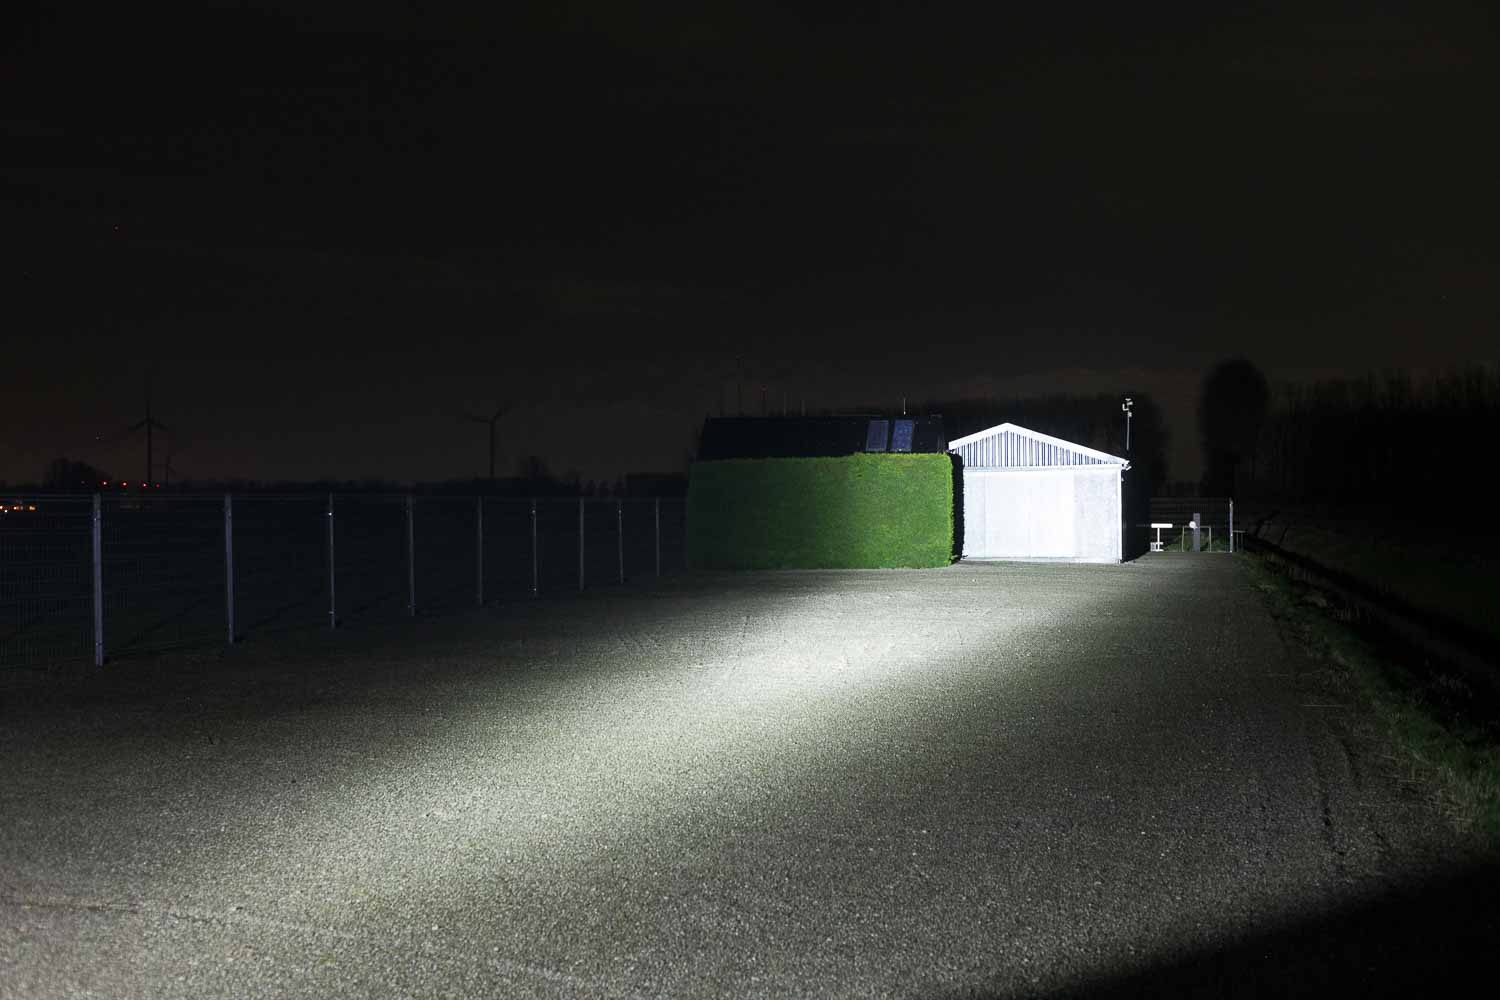
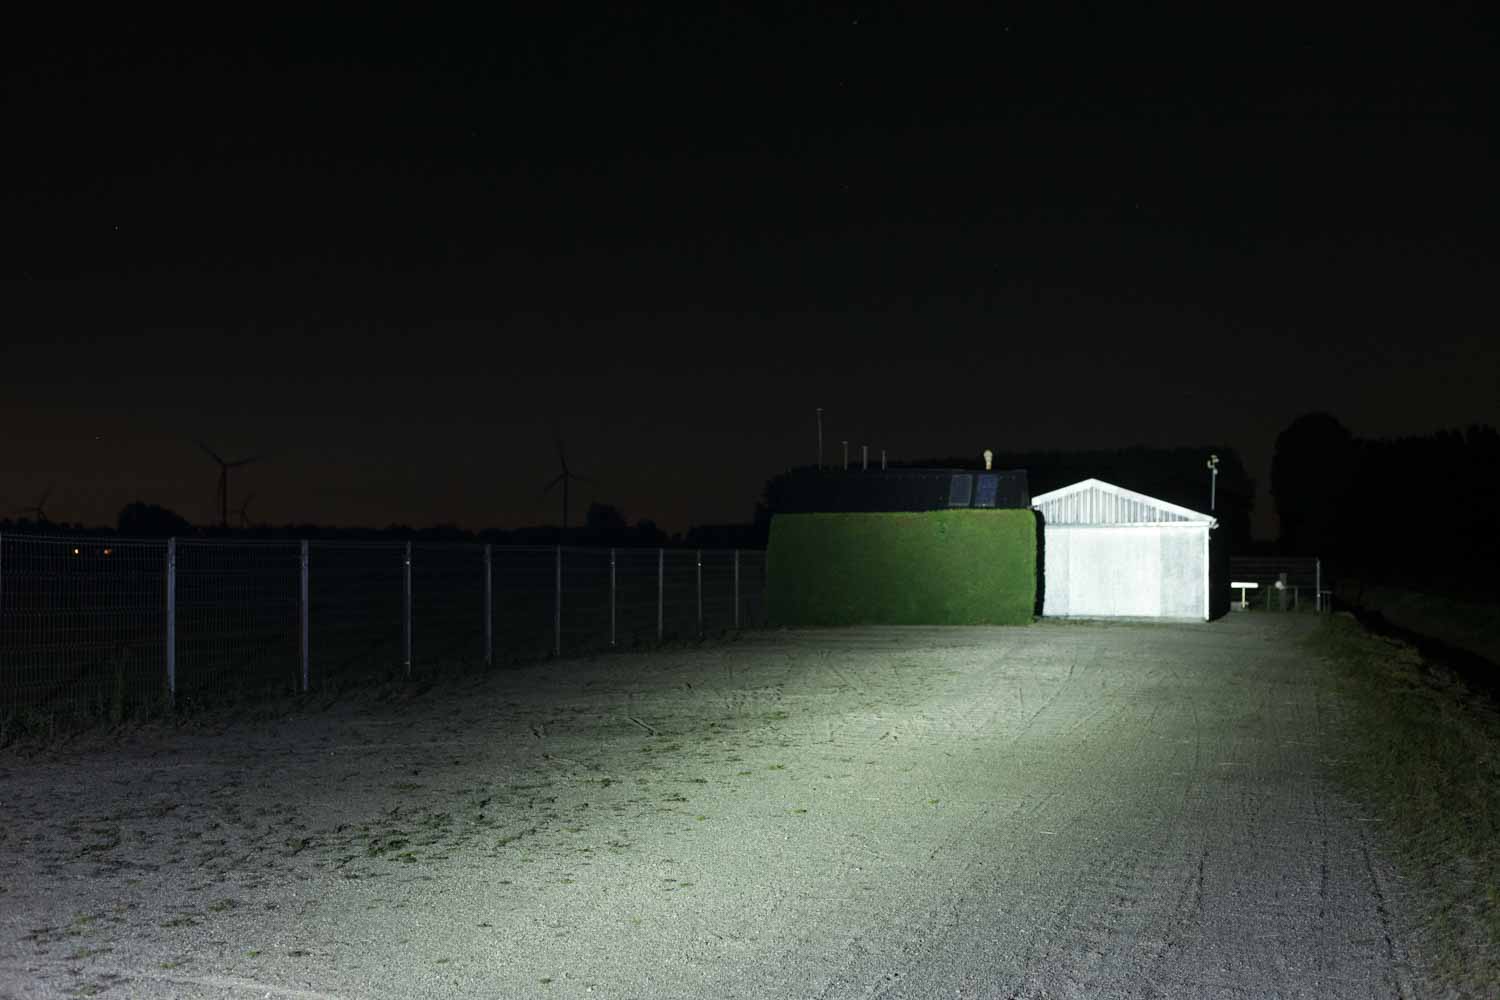
The beam has a very defined and round hotspot with a weak spill due to the way the TIR optic works. The rounded center of the beam is visible even at a longer distance.
For more pictures look at the comparison pictures below.
Dimensions and size comparison
- Length: 138.8 mm / 5.46 ”
- Head diameter: 26.73 mm / 1.05 ”
- Tailcap diameter: 27 mm / 1.066 ”
Weight:
- Empty: 103 g / 3.63 oz
- With battery: 175.8 g / 6.2 oz
Olight Warrior 3S comparison
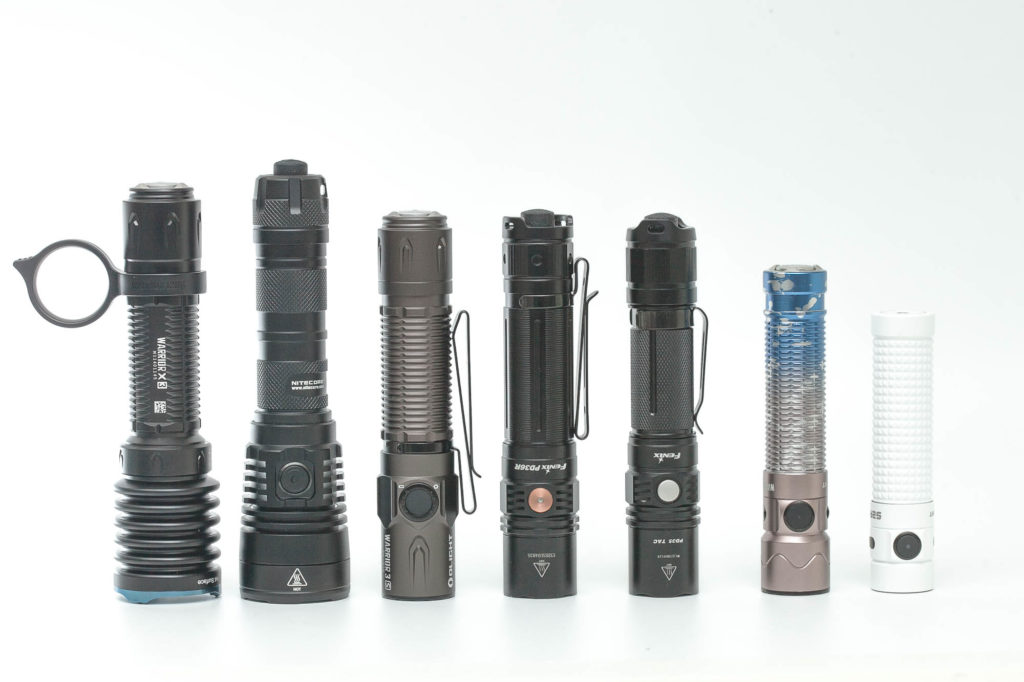
Size compared to other Tactical flashlights, from left to right: Olight Warrior X3, Nitecore MH25 v2, Olight Warrior 3S, Fenix PD36R, Fenix PD35 Tac, Olight Warrior Mini2, Olight Baton S2R
The other group is a comparison between the Olight Warrior 3S, Warrior 3, and Warrior M2R PRO
Driver & User Interface:
The Olight Warrior 3S uses the same UI as the Warrior 3. You can use the tail switch and side switch to activate the light, while the side switch can toggle between 5 modes and the rear switch only 2. Both switches work differently.
The tail switch has 2 menu configurations, besides being a unique 2-stage switch. The default configuration is half-press (first stage) for Medium and Full press (second stage) for Turbo. In mode configuration 2, you have half-press for Turbo and full-press for Strobe.
In mode configuration 1 (default) you also have the ability to use the light momentarily by holding the switch depressed for more than a second.
Modes:
- Moon, Low, Medium, High, Turbo
- Turbo and strobe are not part of the main mode cycle
From OFF: Tailcap:
- Half click: constant on, medium mode
- Half-press (stage 1) (longer than ~1 sec): momentary-on, medium mode
- Full click: constant on, Turbo mode
- Full press (stage 2) (longer than ~1 sec): momentary-on, Turbo mode
- Triple-click: N/A
From OFF: Side-Switch:
- Single-click: Last used mode (excluding Turbo or Strobe)
- Press and hold: Moon mode
- Double click: Turbo
- Triple-click: Strobe
From ON: Side switch:
- Single-click: Off
- Double click: Turbo
- Triple-click: Strobe
- Press and hold: Cycle through modes Low Medium, and High repeatedly
Olight Warrior 3S mode configuration switching
How to switch to Mode Configuration 2?
To switch between the two configuration modes, press and hold the tail switch and click the side switch. Release the switches to activate the configuration mode. Repeat to revert back.
Mode memory:
- Yes, it does have mode memory, but you also have shortcuts to Moon, Med and Turbo!
- Turbo is not memorized.
- High is memorized for 1 minute. After 1 minute the light will turn on in Medium mode.
Blinky modes menu:
- Yes, triple-click on side switch. Both from on and off position.
- Or in Configuration 2, the tail switch can activate Strobe momentarily if fully pressed
Low battery warning:
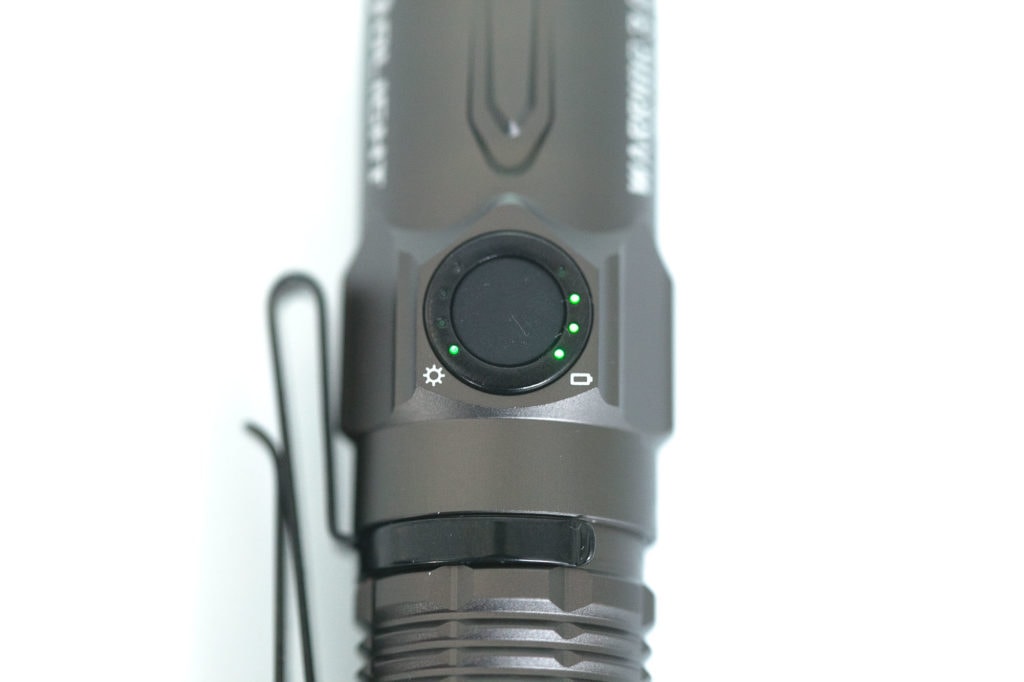
- There are battery level indicator LEDs on the right side of the switch
- 4 LEDs = 75-100%
- 3 LEDs = 50-75%
- 2 LEDs = 25-50%
- 1 LED = 10-25%
Lock-out mode:
- Yes. You can enter the lockout setting by a press-and-hold of the side switch from OFF. It first goes to Moon and then turns into lock-out mode.
- You can also do a mechanical lockout by unscrewing the tailcap, but the tailcap will almost fall off
- When the electronic lock-out mode is activated, and you press a switch, a red indicator LED will light up.
- If tailcap is unscrewed just a little, the rear switch will not work!
PWM:
- Yes, visible in moon mode! But at high Hz. So not noticeable to the eye unless you swing the light strongly.
Proximity sensor
- The proximity sensor can be deactivated temporarily. When the light starts dimming in High or Turbo mode, you can do a double click to temporarily deactivate the proximity sensor. After you turn the light off, the sensor is automatically turned on again.
Firmware / UI Conclusion:
The firmware is easy to understand and has shortcuts to Moon, and Turbo, making this a great firmware. And, if you like Strobe, you even have a shortcut for that as well.
Batteries & Charging
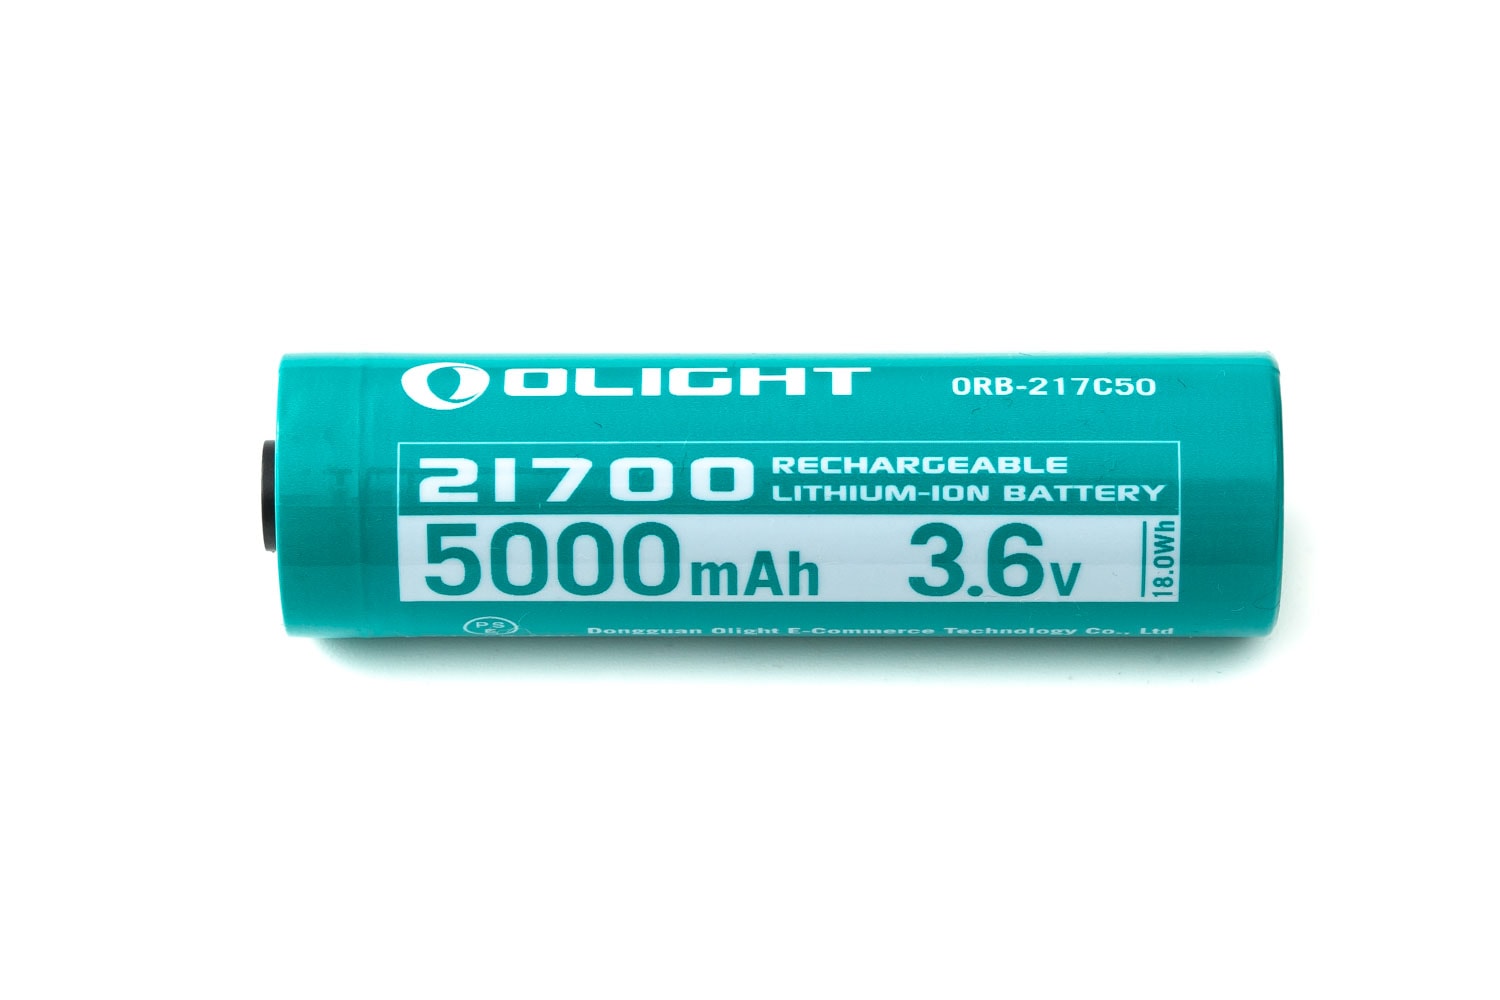
The included 21700 battery is labeled as Olight ORB-217C50. This is a lithium-Ion battery with a 5000mAh capacity. That’s a lot more capacity than any 18650 battery, but only slightly larger.
Olight includes an MCC3 magnetic charging cable, and it doesn’t accept any older MCC cables. They use a proprietary charging system to guarantee the best possible performance and safety. Charging with the cable takes about 3 hours, and although a green light indicates the end of charging, the battery is not 100% full yet. When the light turns green, the battery is about 95% charged and continues charging till it reaches full capacity.
If you use a USB meter, and you see a very low charge current, you have to wait a bit before it starts increasing the current. It will charge at about 1.8A. I know some other Olight charging cables (with 1A) are working right away.
On a side note: warning: for educational purposes only:
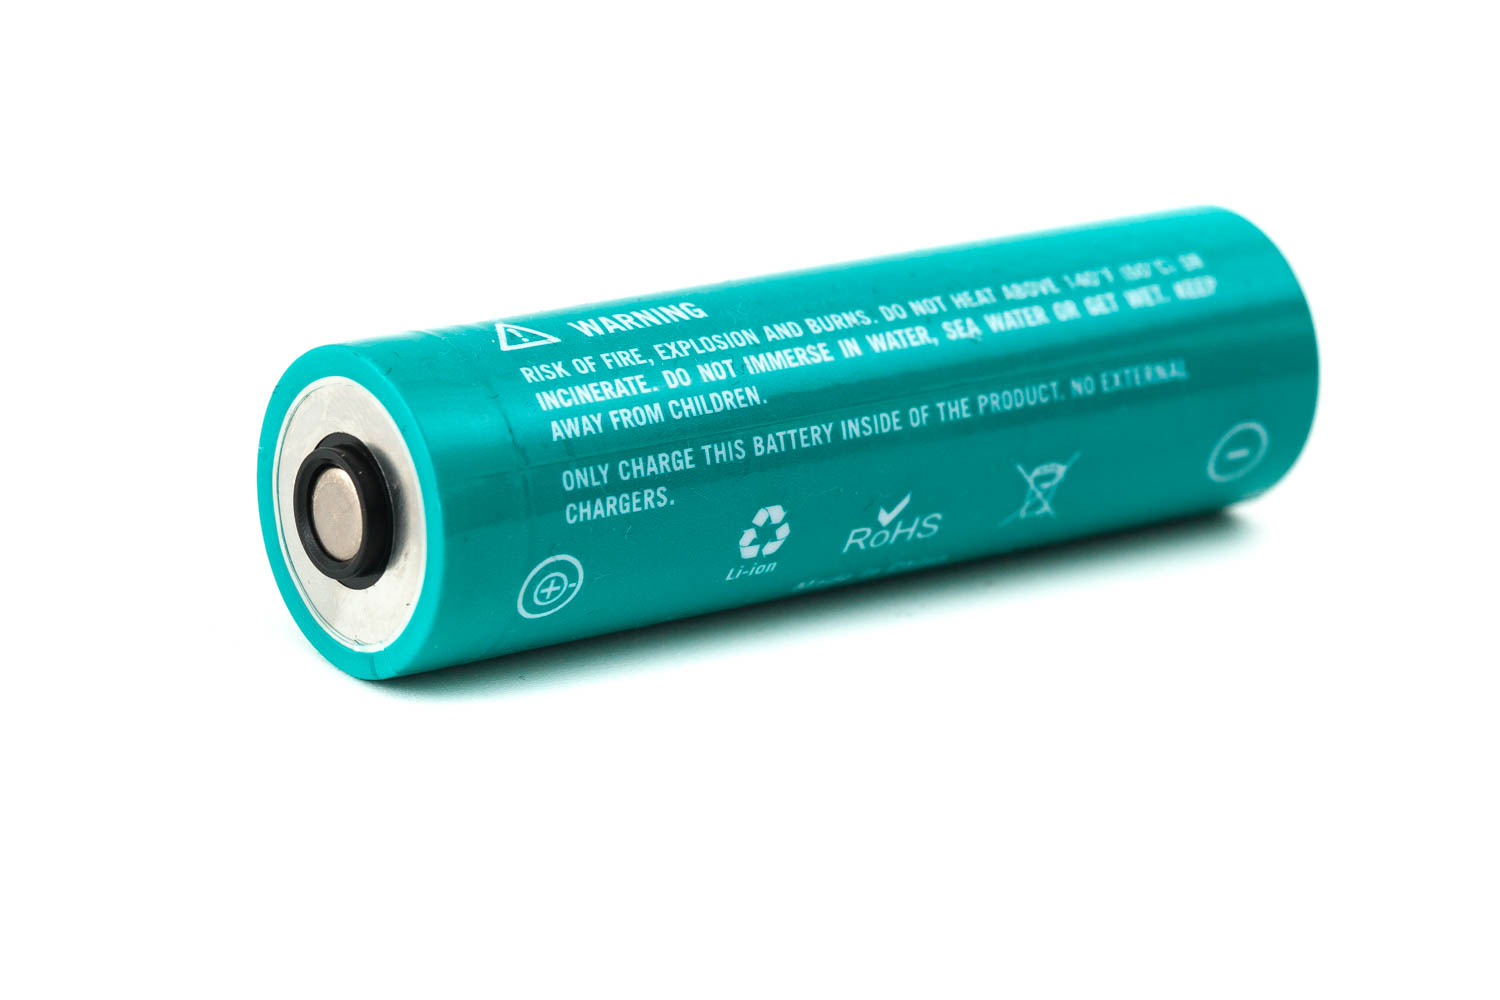
Olight uses a proprietary battery and charging system, and some people say you can’t use these proprietary batteries in other flashlights, but that’s not really true. As long as the driver spring makes contact with the positive terminal, you can use these batteries in other flashlights. However, this is not recommended, because of the possibility to get a short circuit. Just be careful that you don’t get a short by touching the negative terminal by adding a plastic/paper washer on top of the negative ring.
I do not advise doing this, but just want to make clear that these aren’t some sort of magic batteries.
Also, you can still charge these batteries in a normal conventional lithium charger (as long as it can make contact with the positive terminal). If it doesn’t just add a solder blob to the positive terminal on the charger.

Performance test
Lumen measurements:
All output numbers are relative to my homemade Integrating Sphere. It is set up with an Extech SDL400 Lux Meter for measurements including a Kenko PRO1D ND-16 filter. The base measurement is done with a Convoy S2+ that has been tested at 255 lumens.
All of my readings were taken from a fully-charged Olight 21700 battery.
The measurements were done manually at turn on and 30 seconds. The 10 minute measurements were taken from the runtime graph.
| Mode | Specs | turn on | 30 sec | 10 min |
|---|---|---|---|---|
| Moon | 1 | 0.99 lm | 0.99 lm | – |
| Low | 15 | 19 lm | 19 lm | – |
| Med | 200 | 217 lm | 217 lm | 215 lm |
| High | 800 | 846 lm | 838 lm | 798 lm |
| Turbo | 2300 lumens | 2568 lm | 2358 lm | 776 lm |
Note: there was 1 thing with the Warrior 3 that was brought to our attention. It was the inability of returning back to Turbo when the battery charge was showing 3 levels of battery (lights on side of the switch). The Warrior 3 wouldn’t return to Turbo mode, but turn to High mode instead.
I tested this with the Warrior 3S, and discharged so the light would show 3 battery levels, and the Warrior 3S could return to Turbo mode! But, it won’t run Turbo right after it dropped down… this is likely temperature controlled. So you need to let it cool down a bit before you can hit Turbo again.
For a light not returning to Turbo when the battery is discharged for a certain amount, isn’t a fluke. It’s likely just a safety feature, like it or not. Returning back to Turbo from whatever SOC (state of charge) isn’t really good for the battery and for the light if done too often. The light would heat up and damage either the LED, driver, or both.
I tested a bit more, and even the Warrior 3 does return back to Turbo when the battery is around 3.75V. So it’s likely more of a temperature-controlled safety feature.
Parasitic drain:
Can’t measure properly
Runtime:
The runtime test was done with the 50cm integrating sphere, including the Kenko Pro1D ND-16 filter and Extech SDL400 data logging Lux Meter.
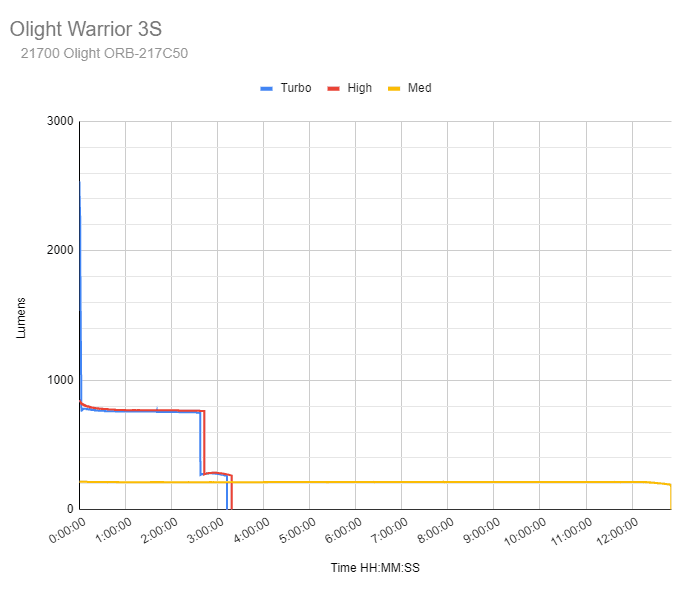
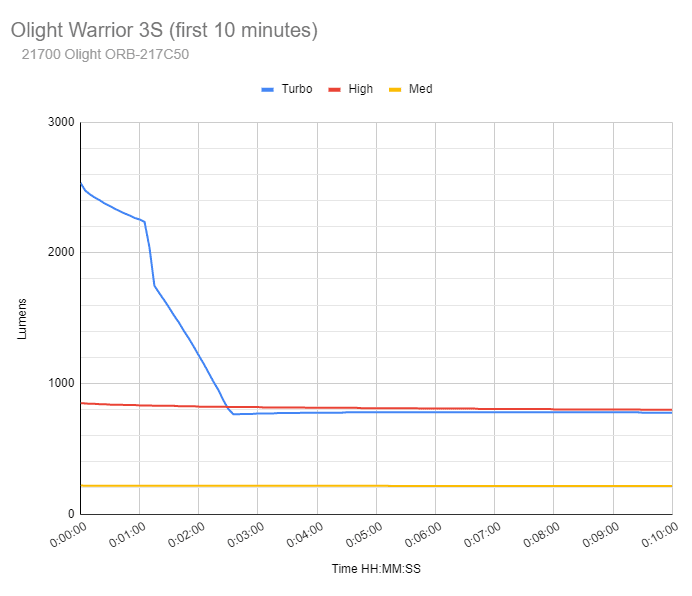
Turbo start at over 2500 lumens and drops within 3 minutes down to about 760 lumens. At 2h37min there is the next drop from 749 to 272. At 3h12min the light turns off. The last measured output was 260 lumens. (Battery is about 2.9V)
High starts at almost 850 lumens. The output reduces slightly but this is not visible by eye, and sustains an output of almost 770 lumens. At 2h42min, the output drops to about 275 lumens. At 3h18min the light turns off.
Medium mode is very stable output of about 210-215 lumens for 12hour and 51minutes, when the light turns off. Specs say 13h
I haven’t tested Low and Moon, because they would run fo 130 hours and 55 days respectively.
Olight Warrior 3S vs Warrior 3 vs Warrior M2R PRO
Since I own all 3, I used all the measurements and put them in a comparison graph. And this is the what it looks like:
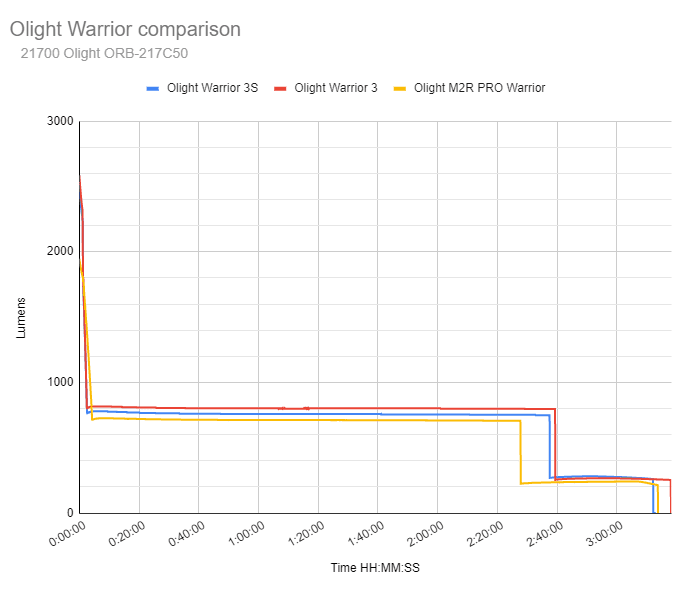
They all perform very close, except for the initial output of the M2R PRO which is considerably lower. But during the runtime, you would be hard-pressed to see any difference in person.
Throw Measurement
Measurements were taken indoors at 5 meters with a Hagner E4-X lux meter. The measurements were taken manually 30 seconds after turn-on.
| Mode | Specs | Candela | Meters | Yards |
|---|---|---|---|---|
| Moon | – | – | – | – |
| Low | 25m | 200 | 28 | 30.93 |
| Med | 90m | 2400 | 98 | 107 |
| High | 180m | 9400 | 194 | 212 |
| Turbo | 300m | 26,400 cd | 325 m | 355 yd |
Specs only show the distance, and no candela. So you have to compare the column Specs with the column Meters. Yards are rounded numbers. As you can see, Olight was pretty conservative with their specifications, as usual.
Beamshots
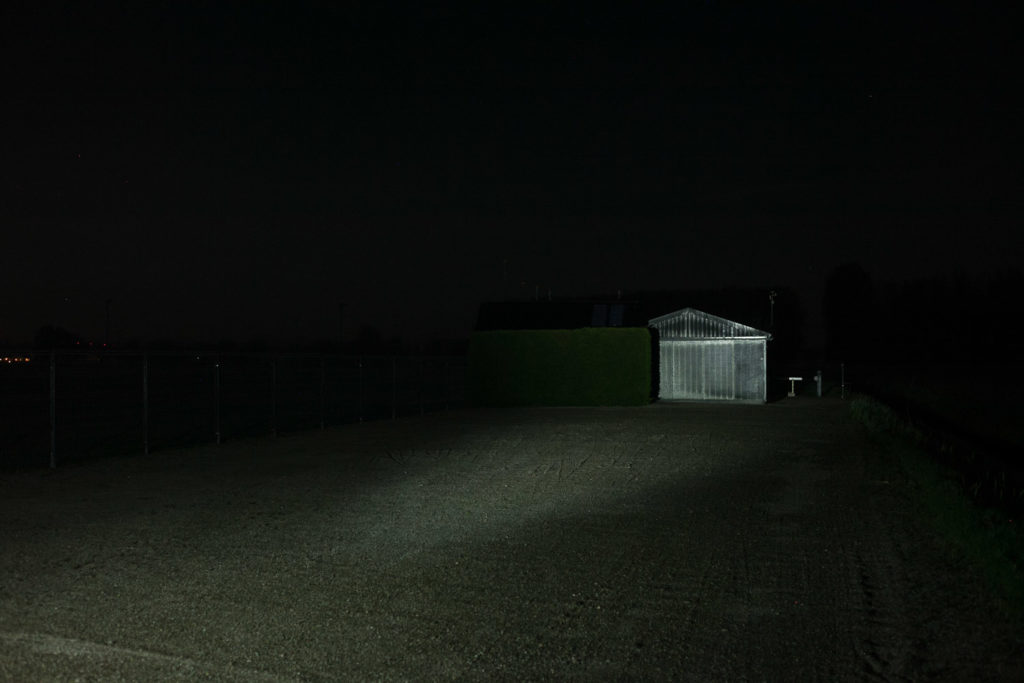
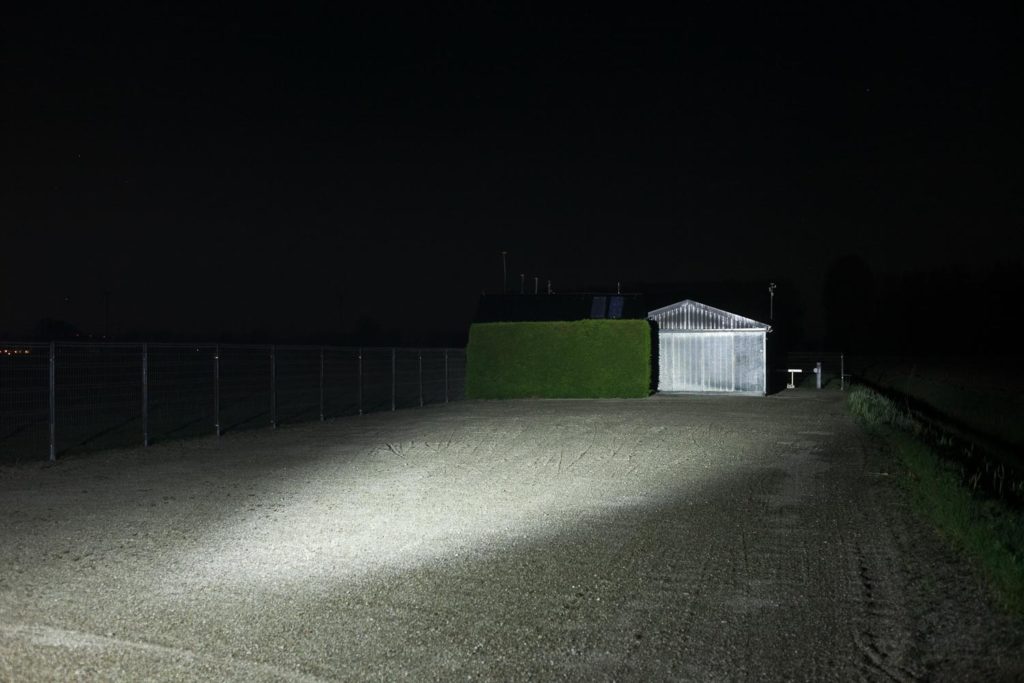
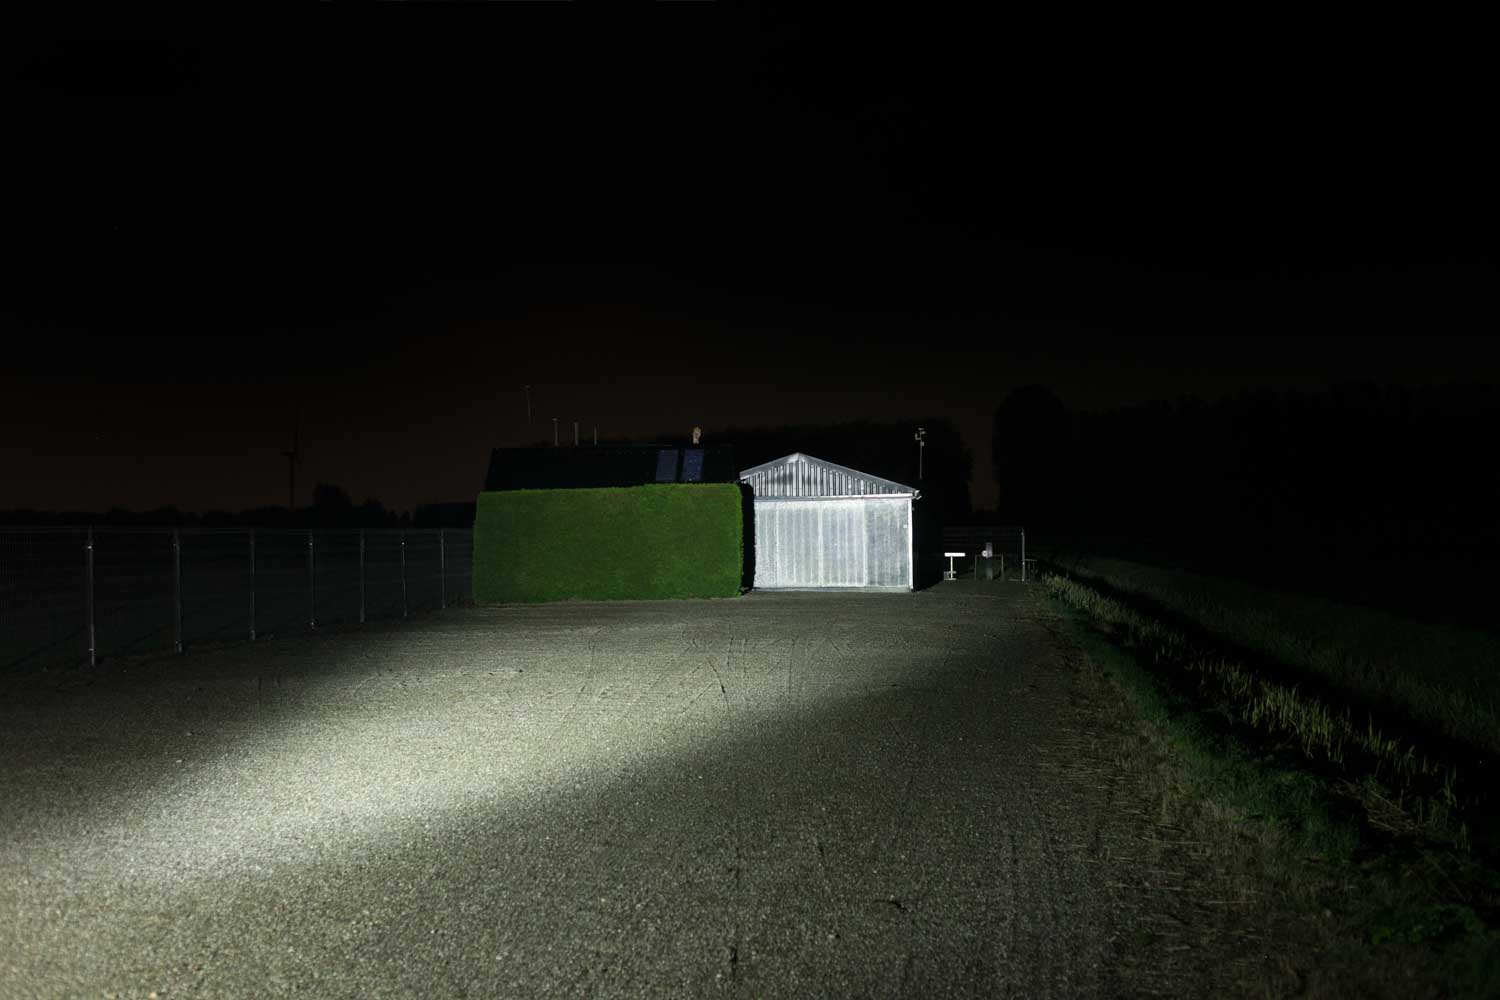
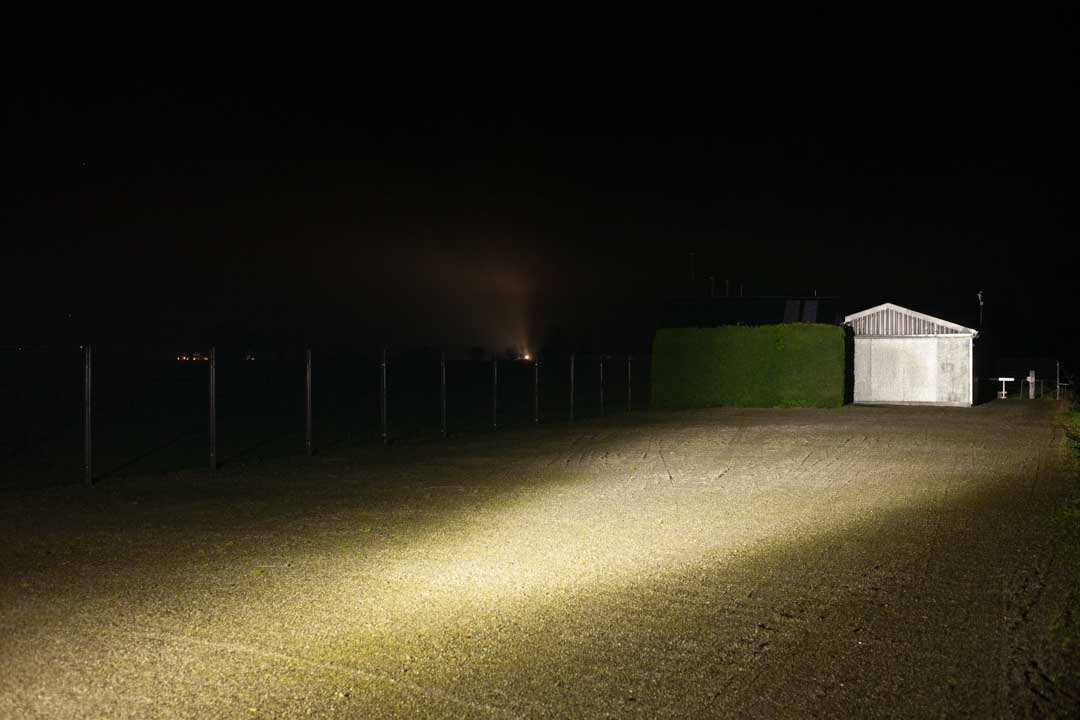
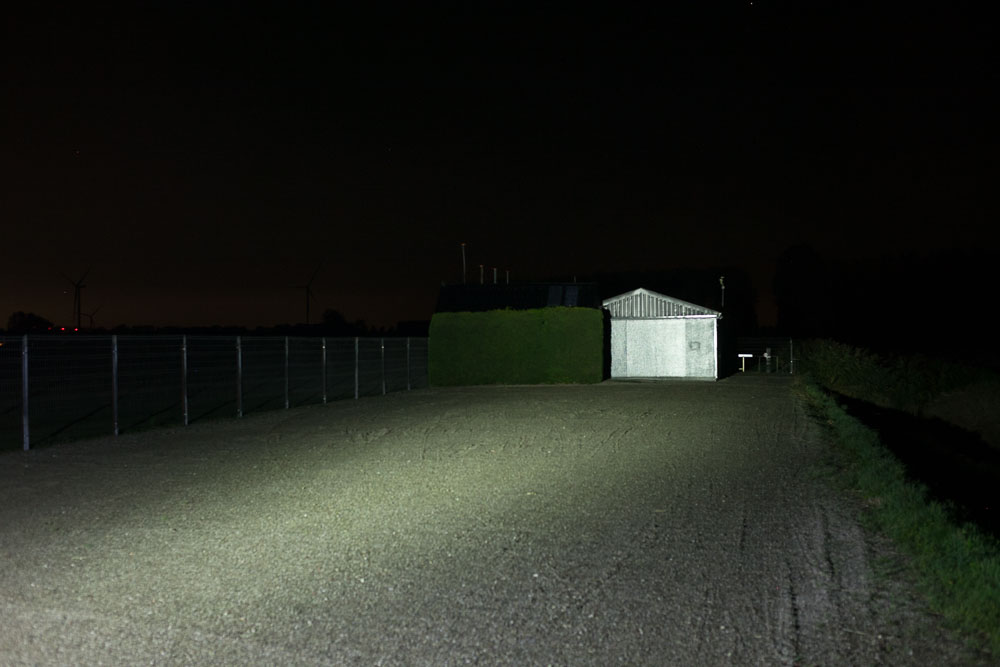
For the following beamshots I used a Canon EOS 5D Mk2 and a 50mm lens. manual settings: ISO1600, 1/4sec , F4, 5000K
The shed is about 65 meters / 71 yards away, while the reflective fence is at about 200 meters.
And some comparison with other popular and Tactical flashlights

Disclaimer: This flashlight was sent to me for review at no cost by Olight. I have not been paid to review, nor have I been holding back on problems or defects.
Final Verdict
Pros
- High quality
- Plenty bright
- Well regulated driver
- Bezel is smoothened for pocket carry
- Proximity sensor for extra safety (and the ability to temporarily turn it off)
- No visible PWM
- Real moon mode
Cons
- Proprietary battery & charging (just like almost all Olight flashlights)
- Anodization is pretty weak on this gunmetal grey copy, and I saw damage when moving the pocket clip a couple of times
- No other LED choices
Explanation on star ratings:
1: Avoid: my phone flashlight would be a better choice – 2: Poor: significant defect or issues; almost unusable – 3: Average: some defects or issues; but still usable 4: Good: recommended (minor issues) – 5: Great: highly recommended

4 stars: ★★★★
Having a proprietary charge solution isn’t for everyone, but it does add another layer of safety. The built-in proximity sensor is another safety feature that will reduce the risk of burning your pockets/bags. Like all other Olights, the build quality is great and the metal grey anodization looks really good. However, the anodization on my copy (maybe because it’s gunmetal grey?) is pretty weak. Mine has visible damage from moving the pocket clip around several times. No problem if you use it on the job, but it won’t stay beautiful for long while using.
The output is high and regulated, and the runtimes are great. Having 2 switches than can work independently is nice, because it allows you 2 types of interfaces for 2 different use cases. That makes it a nice hybrid (tactical and EDC). Oh, and the moon mode will run for many days, in case of emergencies.
Olight Warrior 3S discount code
Use our exclusive 1lumen discount code to get an extra 10% off anything you order at Olightstore.com (USA). Coupon code: 1lumen
1lumen selects and reviews products personally. We may earn affiliate commissions through our links, which help support our testing.
