1lumen selects and reviews products personally. We may earn affiliate commissions through our links, which help support our testing.
Acebeam P15 review
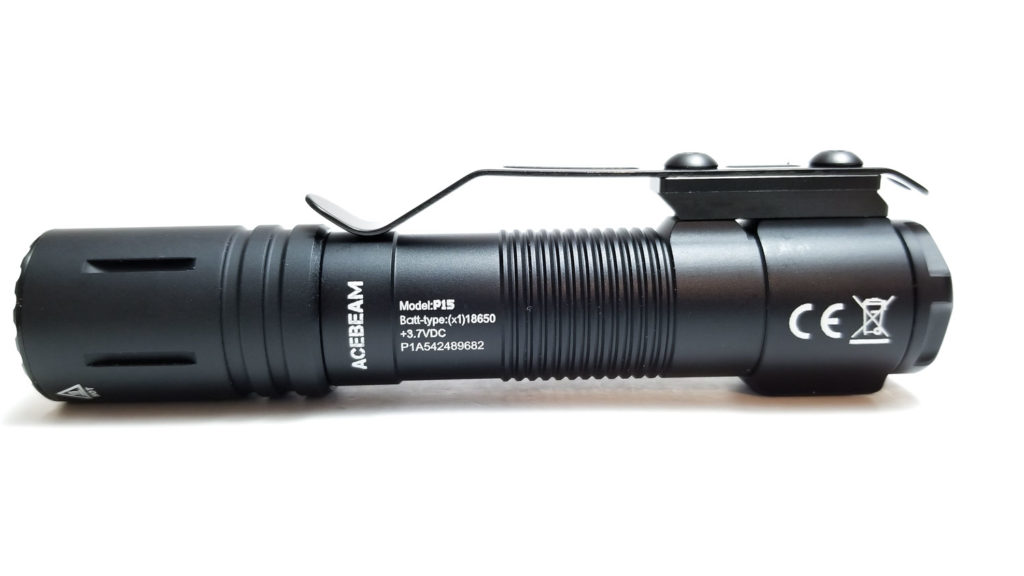
Acebeam P15 Defender specifications
| Brand/model | Acebeam P15 Defender |
|---|---|
| LED | Luminus SFT40-W |
| Lumens | 1,700 lm |
| Beam intensity | 27,225 cd |
| Battery config. | 18650 |
| Material | Aluminum |
| Modes | 5 |
| Blinkies | Strobe |
| Reflector | Smooth |
| Waterproof | IP68 |
| Review date | November 2021 |
Introduction:
Obviously, Acebeam needs no introduction as they are a premier flashlight manufacturer for consumers and professionals. Seriously, you can’t talk about flashlights and not mention Acebeam, right? They make everything from LEP uber throwers, EDC, and even keychain fodder. If you need to light stuff up a little or a lot, Acebeam has you covered. When word hit the pavement that Acebeam was developing a tactical WML (weapon mounted light) system, it made sense because, well, they don’t have one! If you wanted something like that, you bought an Olight Odin, Streamlight ProTac, or if money isn’t an issue (or someone else pays for it), a SureFire, or something from Cloud Defensive or Modlite. Many armed forces and law enforcement agencies have been fielding Streamlight and SureFire products for decades, and they pretty much own the market. You could say the brand-new P15 Defender has some big shoes to fill. With all the years of know-how, development, testing, and resources within the professional-use nexus, Acebeam has the right stuff, but can the newbie Defender throw a wrench in SureFire’s fan? Let’s see
Package quality.
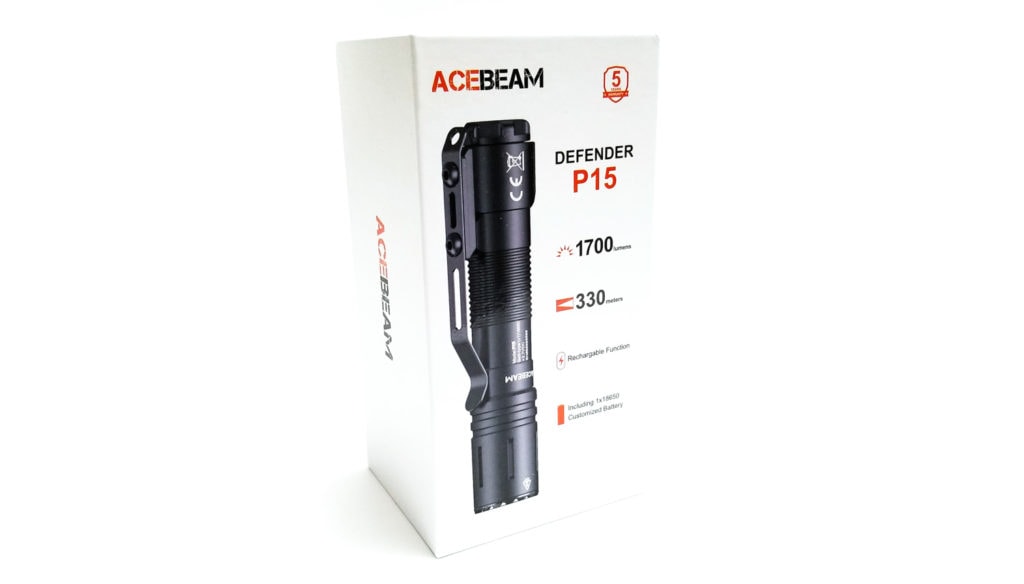
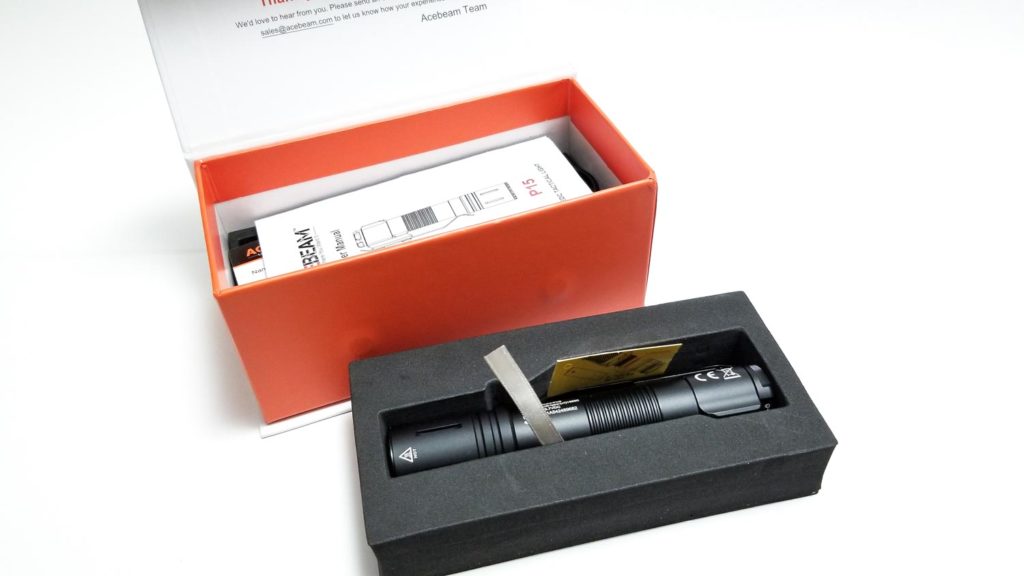
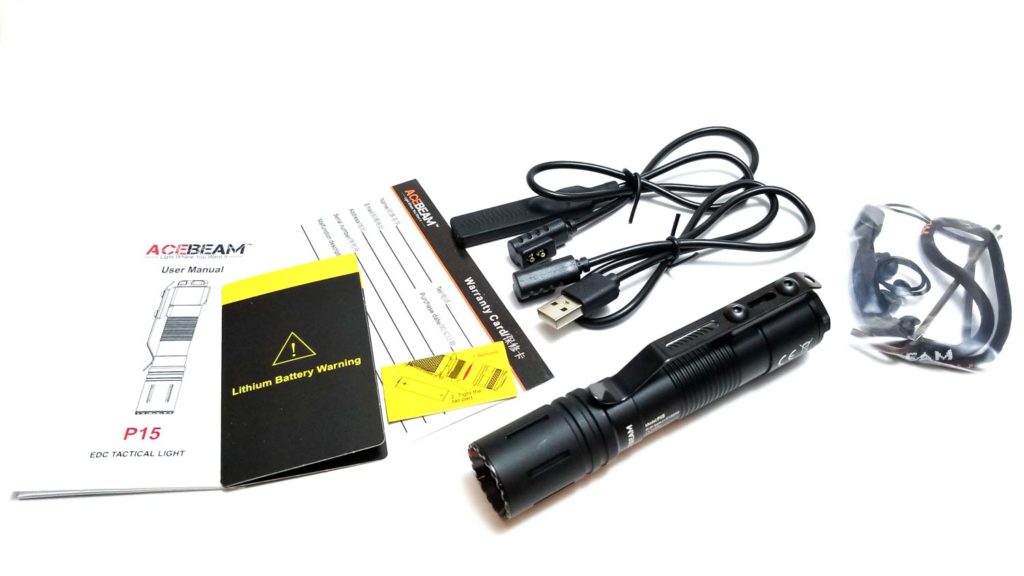
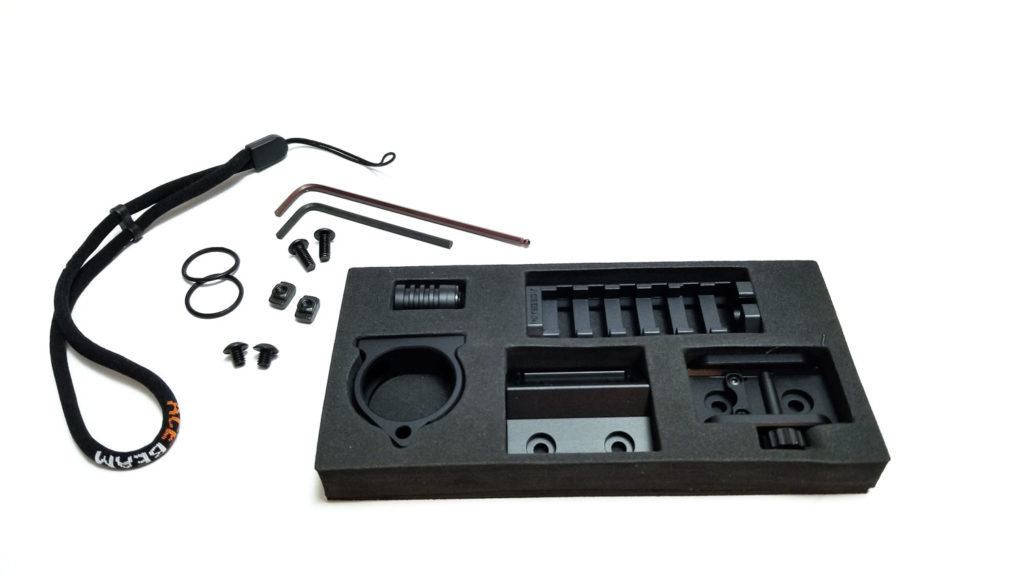
It’s been said that imitation is the sincerest form of flattery, and Acebeam must think highly of Olight because they have incorporated elements of Olight’s packaging scheme. That’s not a bad thing, since Olight has some of the nicest packaging around. The box is utilitarian, with a near-life size image of the P15 on the front in glossy relief, with some feature blurbs all over. The box opens with a flip-open lid held on with a magnetic clasp (al-la Olight), and you’re greeted by a nice message on the inside of the flap. The P15 sits on top of a cut-to-fit microcell foam tray. Under the tray, you find more accessories in a foam tray, and under those, still more accessories (depending on how your P15 is optioned). Mine came with the Tactical Kit, so it has all the bells and whistles, plus optional add-ons. Here’s what my sample included:
- Acebeam P15 Defender flashlight
- Acebeam ARC18650H-310A battery (loaded in the light)
- Pocket clip (attached)
- USB charging cable
- Remote switch
- User manual
- 2 spare o-rings
- Warranty card
- Lithium ion battery safety card
- Promotional material with QR code
- Lanyard
- Dual-position M-LOK rail mount
- 2 Allen wrenches (long and short)
- 2 M-LOK T-nuts
- 2 M-LOK screws
- Tactical ring
- Picatinny rail mount for the remote switch
- Quick Function Switch (optional)
- Picatinny rail mount (optional)
The P15 EDC Kit comes with everything you need to get going (light, battery, charging cable, Allen wrench, o-rings, lanyard), but if you want to go all-out tactical with WML capabilities, go for the Tactical Kit. However, if you’re still fielding a long gun with a Picatinny accessory rail system, you’ll need to purchase the Picatinny rail mount separately since the Tactical Kit doesn’t include it. The battery was preinstalled with a plastic isolator to keep it from dumping during storage, and when I pulled it, the battery read 3.76 volts, a good storage voltage. The lens also had a pull-off protector on it, so be sure to remove it before use. Overall, no complaints with the accessories. All high-quality items here.
Flashlight in use
This next bit will be a bit long-winded since the P15 features a smorgasbord of mounting and retention options, so bear with me.
The Acebeam P15 is designed as a sort of a dual-role light. The body is sized to accept an 18650 cell, and it seems the right size for most hands. There’s a row of raised ridges in the middle of the tube to add some grip surfaces. The head has milled slots to aid with grip for removal, since this is where the battery is loaded. The balance is okay, but most of the weight is at the rear due to the raised mount for the clip and weapon mounts. It didn’t muddy the handling too much, and it contributed to a nice solid feel in the hand while remaining pretty maneuverable.
As a handheld light, the P15 does fine and the pocket clip adds versatility since it can be clipped to a pocket, MOLLE gear, or backpack, and serves as a mounting point for the lanyard. Unfortunately, the pocket-carry manners weren’t so good. The clip just doesn’t sit close enough to the tube and doesn’t have much surface area to grip thinner clothing. The tall rear mount for the clip and accessories caused a taller profile than the other tactical/duty lights I have. Electronic lockout is mandatory since it kept coming on in my pocket as well, and I didn’t care for the unlocking process (takes too long). I did not enjoy EDC’ing the P15 as much as I did sticking it on my long gun. If you were clipping to thicker mediums like webgear, MOLLE, or a belt, it would be fine though.
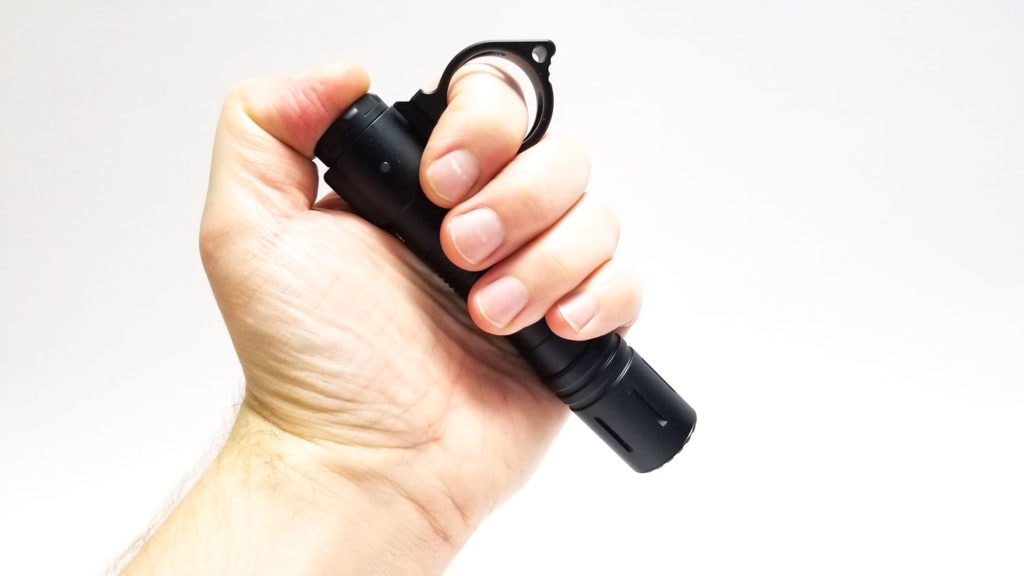
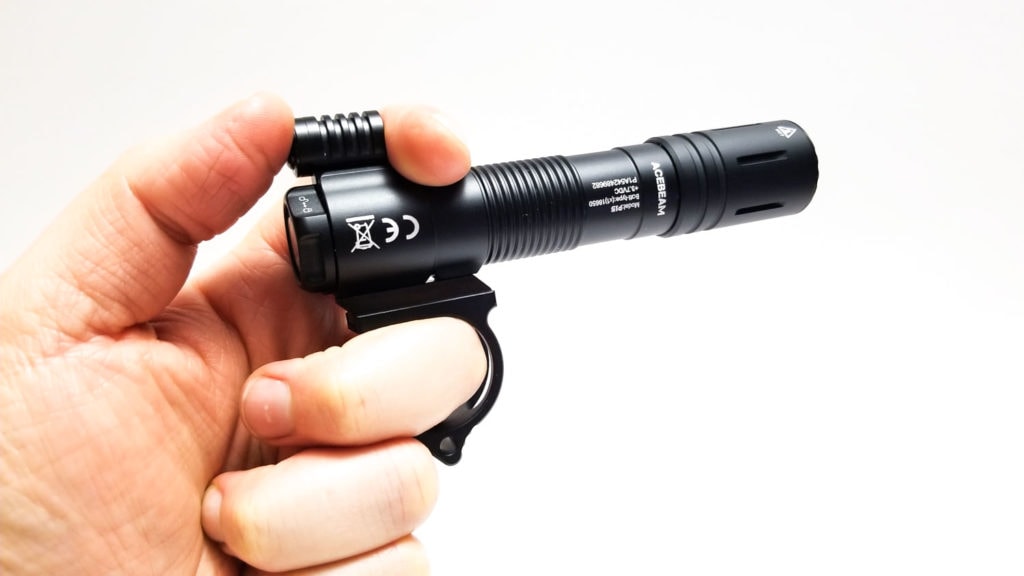
The tactical ring has a tip on the finger ring that I assume is for breaking glass or “defensive purposes” if called upon. There’s also a hole in it that you can thread a lanyard through as well. A tactical ring’s main function is so you can do other tasks (like reloading a handgun, racking the slide, or clearing a malfunction) without losing grip on the flashlight. I tried this for myself, and it helps, but takes practice to master.
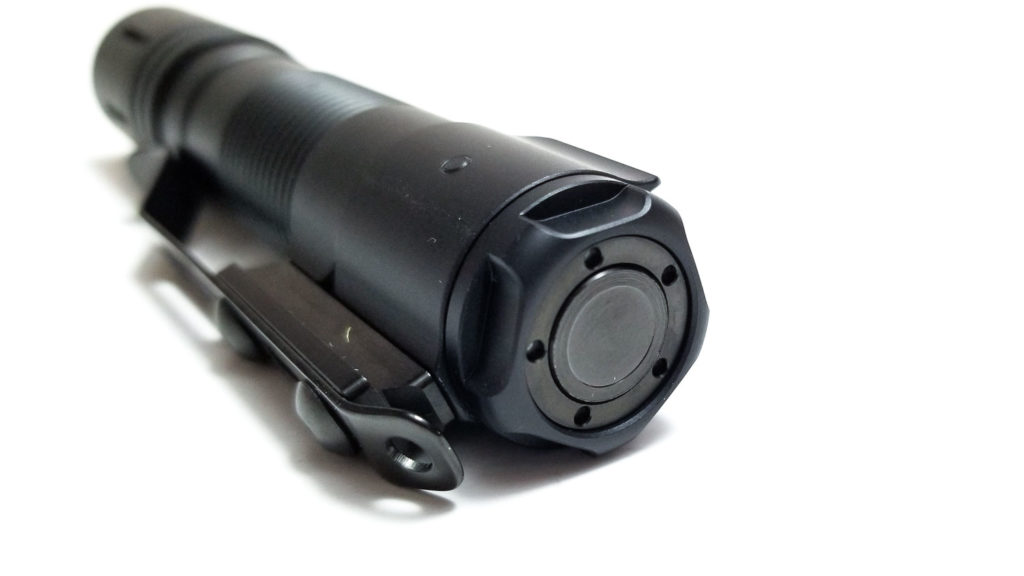
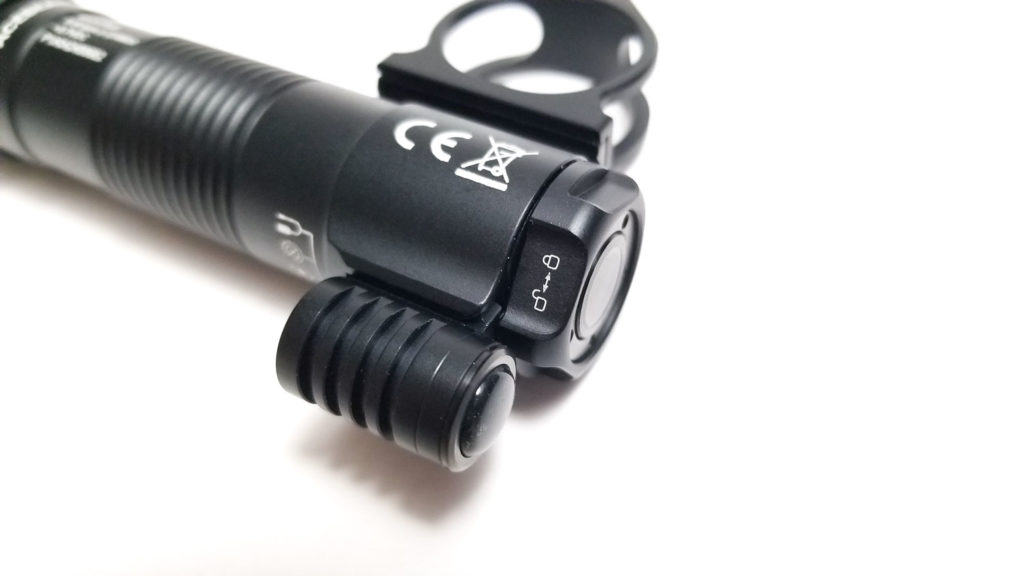
The P15 features a single rear-mounted electronic switch. It’s made entirely of aluminum with a smooth surface (non-illuminated). Although the switch button is nearly flush, it was situated in the rear in a way that finding it by feel wasn’t an issue. The switch action is exceptional, with nice solid clicks and good feedback when wearing gloves. Unlike some e-switches of this type, it didn’t matter if it was pressed in the center or on the periphery. I always got solid activation and it was easy to reach with my thumb in an overhand position or when used with the tactical grip ring. My sample came with Acebeam’s Quick Function switch. This is a detachable e-switch that enables instant Strobe or Turbo modes (with some configuring-more on this in the User Interface section). Honestly, I think it’s sort of a gimmicky feature since strobe is a part of the UI (triple-click of the tail switch), and to me, it’s one more thing to get lost or misplaced. Why not just add a second button for instant strobe like Fenix does on the TK16 V2? You can override the Quick Function switch with the rear switch if needed. I found it was useful to use with the tactical ring installed to help with a cigar grip. Tailstanding is not an issue.
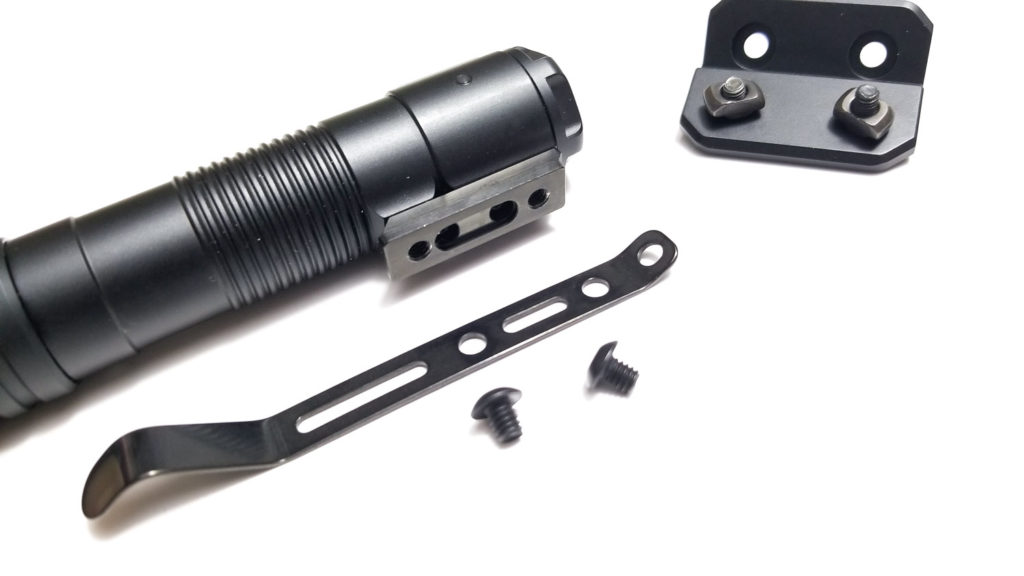
That raised section at the rear is the main attraction since it’s needed for the WML functionality. Along with the pocket clip and grip ring, the optional M-LOK or Picatinny mounts are affixed here. The clip and mounts are attached with 2 hex cap head screws, which can be removed using the included hex keys (my kit came with a long and short one). The mount is held on with two Torx fasteners and a Philips screw. Of course curiosity got the better of me, and I got the Torx screws out, but I nearly mangled the Phillips head screw in the process (probably Loctited).
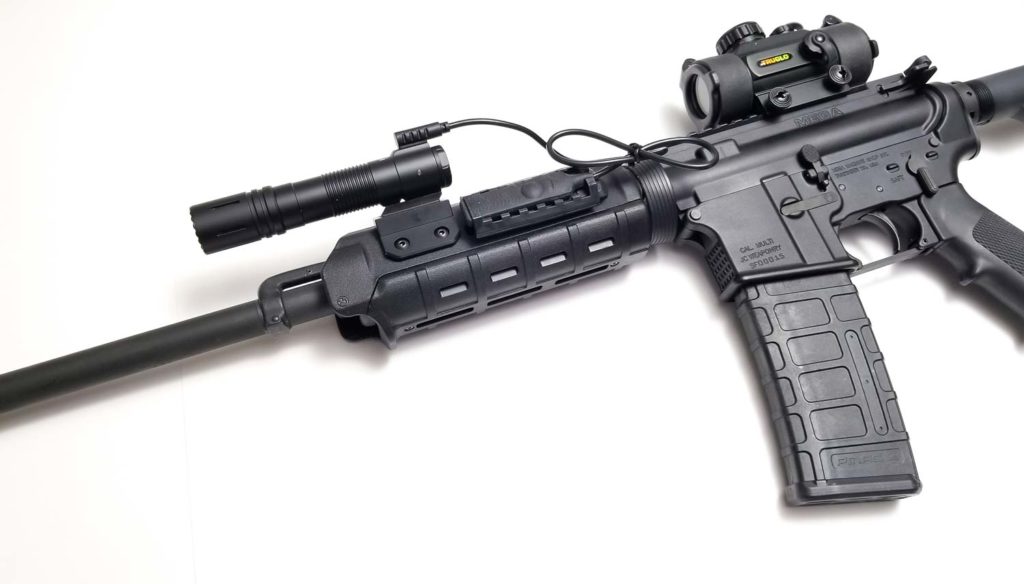
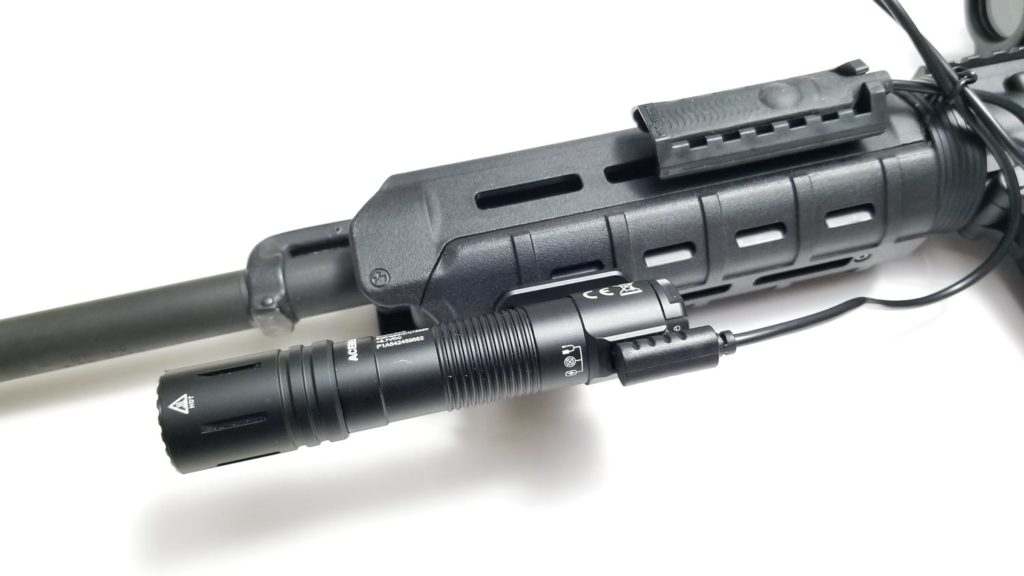
The P15 can be adapted to fit either the M-LOK or MIL-STD-M1913 Picatinny rail platforms (sorry KeyMod users). My sample came with the optional Tactical Kit which included a tool-less Picatinny rail mount and an offset M-LOK mount with 10 or 11 o’clock mounting positions. Mounting was really easy. I mounted the light to my AR15 using the Pic rail and the M-LOK mount to my Magpul MOE carbine-length handguard. I tried the 10 and 11 o’clock positions with the M-LOK mount, and the tool-less Pic rail mount was nice as well. I did have some issues with fitment and getting a solid connection on the MOE handguard though. Either the T-nuts were a little small, or the mount wasn’t sitting flush with the handguard, or both. I will say that I would have preferred some kind of quick-detach system rather than having to unscrew and re-mount the P15 each time I wanted to change positions (like from the M-LOK to Pic rail). Olight’s Odin has this and it’s very handy.
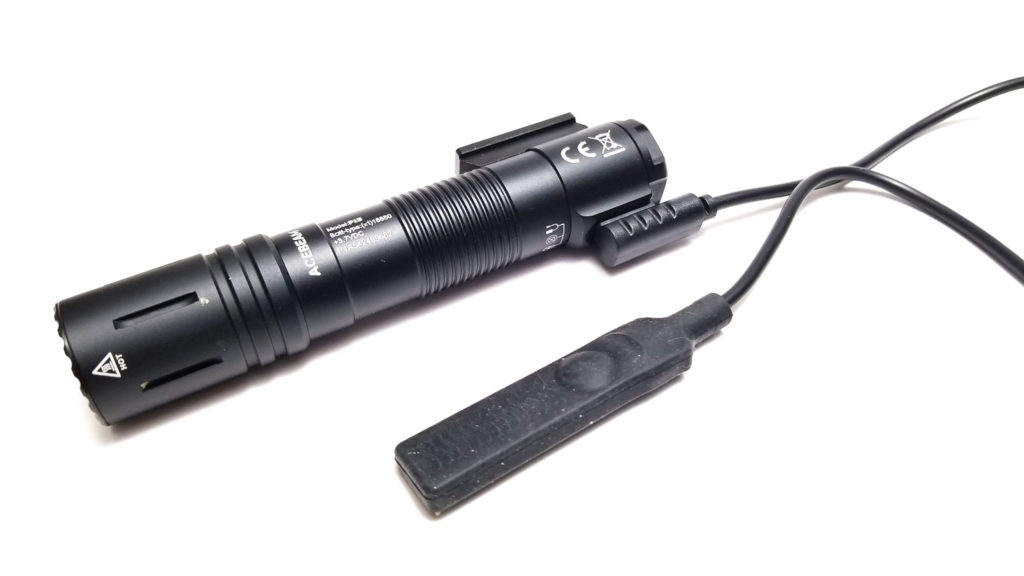
The remote switch pad can be mounted with zip ties, dual-sided tape, Velcro, or via the included flexible pic rail mount (Acebeam, some zip ties would also be a nice addition to the kit). I used both mounting options and they worked great. The remote switch has a very nice soft-touch rubber pad that’s very grippy and has tactile zones on it which are a nice touch for muscle memory. The tactile switches under the cover had great feel with solid clicks and would be easy to manipulate with gloves on. Like a proper tactical WML, the remote switch can activate momentary or continuous Turbo operation depending on how you press it. Similar to the Olight Odin’s switch, press and hold for momentary, or press and release quickly for continuous. The P15 adds momentary Strobe to the mix though, essentially the same functionality available with the Quick Function switch. This can be a nice feature, but like the Quick Function switch, accessing and switching between Turbo and Strobe is not seamless.
At about 12 inches, the remote switch cable is a bit long and unless you’re mounting the P15 to an old muzzleloading musket or maybe a Barret M82, you probably won’t need the extra length. I ended up using a twisty tie to stow the excess cordage. Unlike some other platforms that replace the rear switch with a remote switch, not so with the Defender, and since the rear switch is unencumbered, you can still use it with the remote switch or Quick Function switch attached. Redundancy in a tactical light is never a bad thing and this is great attention to detail on Acebeam’s part.
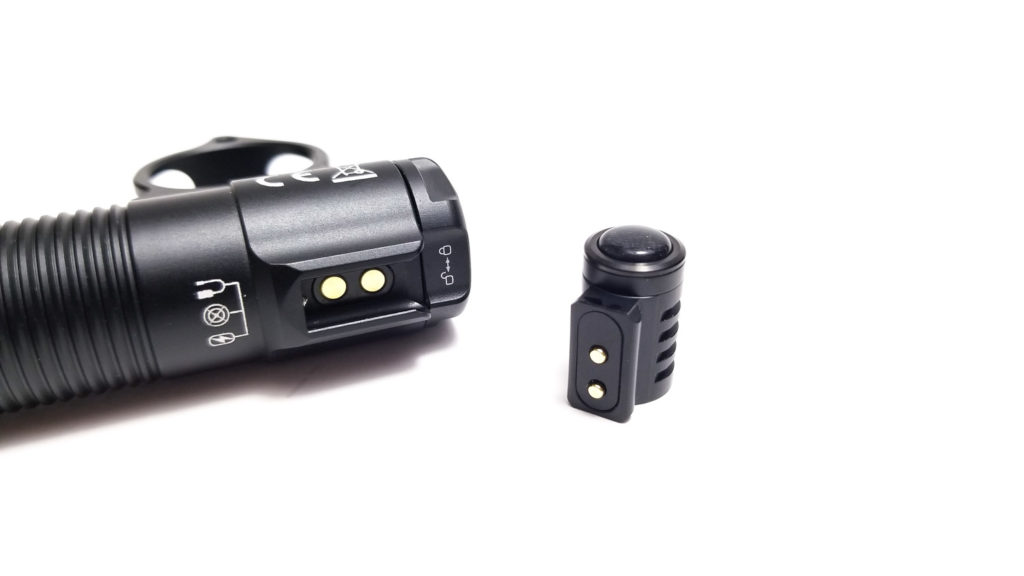
The charging, remote switch cables, and the Quick Function switch have a plug with two gold-plated pogo pins that interface with matching contact pads situated in a mounting slot at the rear of the body. The plugs slide in with a tactile click and are pretty secure as-is, but you can lock them in place by rotating a rear locking ring to the right. The locking ring has a detent that softly snaps into place to keep it from unlocking if jostled or bumped. This makes sense when mounted to a rifle to withstand the effects of recoil. I tugged on the cables vigorously and they didn’t budge, so I doubt they’d come off under normal use. I like the design since current Acebeam remote switches require removing the tailcap to install.



Build Quality, and Warranty
Acebeam’s attention to detail and quality are pretty much legendary and this is important since the P15 is sort of the low man on the totem pole in the WML-pecking order. Although it’s not really a budget light, I think it’s reasonably priced. It’s currently on sale for $114.90 in EDC guise (without weapon-mount accessories), and $139.90 (at the time of this writing) for the Tactical Kit, which includes the M-LOK mount, hardware, and remote switch. As of this writing, the Pic mount, Quick Function switch, and tactical ring are optional add-ons, and if you fully option the P15, you’re north of $160, which is on point. Olight’s Odin/Odin Mini comes in $130-$170, the Streamlight ProTac HL-series run $130 and up, and the SureFire M-series WMLs go for around $300. There are other brands, like those from Cloud Defensive and Modlite, but those are coming in around $350-$400 and up.
The light is made from 7075 aluminum alloy, not the typical 6061-T6. This is very good because if heat treated to T6 spec, 7075 aluminum tensile strength is double that of 6061, and shear strength is 1.5 times greater. It’s also much harder and tougher, so it can take more abuse. Nice. I couldn’t find any defects in the machining, fit, or finish. The Picatinny and M-LOK mounts are high quality, precisely machined parts with durable anodizing and should last a long time and take some abuse. The Quick Function switch housing is actually anodized aluminum as well, so it will be very durable. Aside from the switch boot, no plastic bits here!
This is a complicated light with the locking ring in the rear, remote switch/charging pad, and interesting current path (more on that later), but all the parts fit together perfectly…no large gaps or eccentricities. Every edge is blended and chamfered to perfection with no sharp edges, like a nice carry melt. For colors, it’s available in black, dark green, green, and desert tan finishes, and Acebeam is offering a white and light gray limited edition versions soon. My sample was the black version, and it’s done in a positively gorgeous MIL-A-8625 type III finish which adds grippiness without being an all-out chalkboard. This type of finish lends itself to good durability, and the silkscreening is perfectly done (all typical Acebeam stuff).
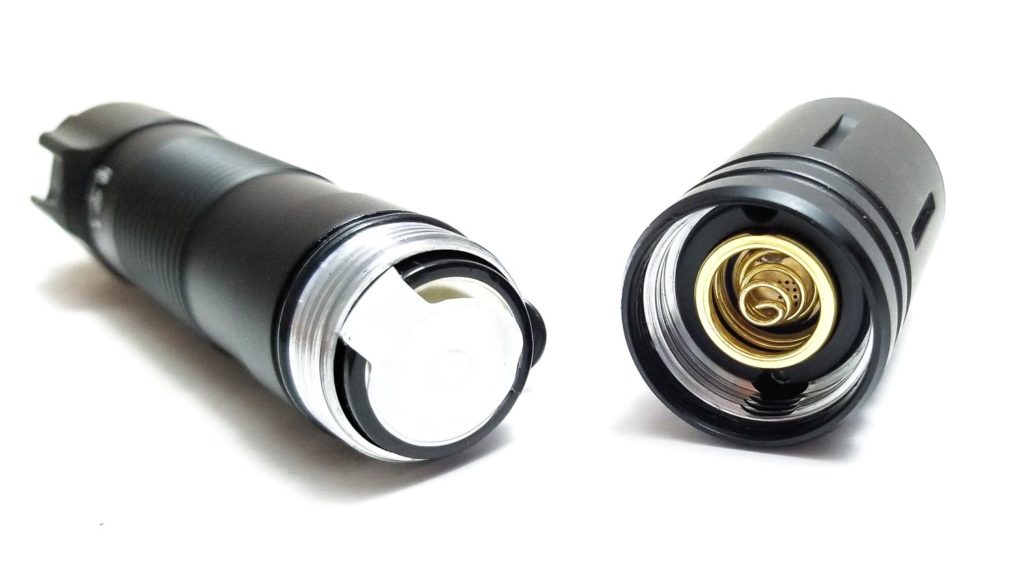
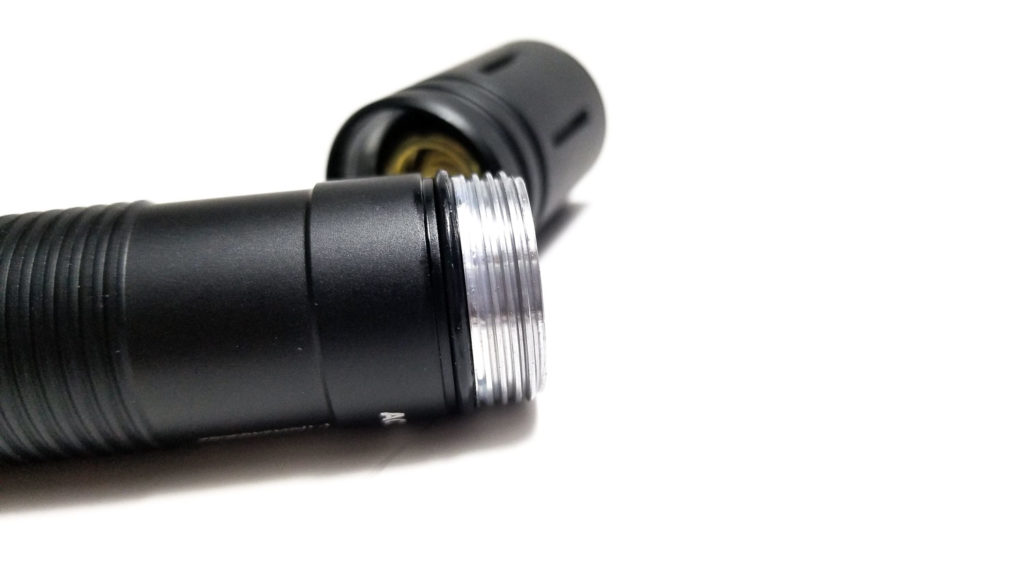
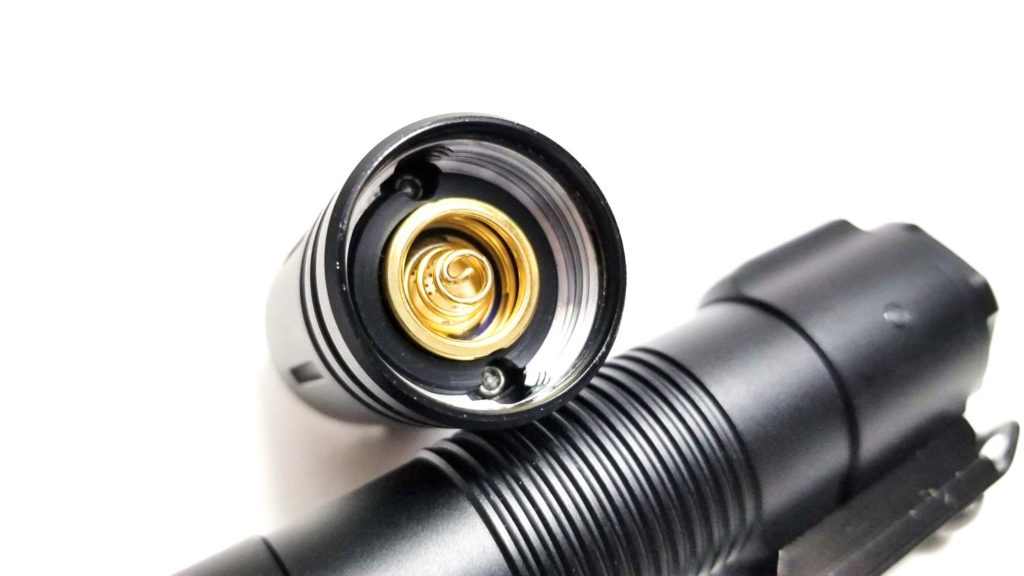
The only threads on the Acebeam P15 are up front. They are rectangular cut, unanodized, well-lubed, and buttery smooth. There’s a few springs at work here, and it’s an interesting arrangement meant to work with the equally interesting current path. Normally, a light with a dual switch relies on a signal tube (a second tube within the main battery tube), but Acebeam found a way around that and uses a system of springs and secondary contacts to direct the electron traffic. The head features a single, gold-plated spring within a spring-loaded gold-plated outer contact ring. The rear features a similar setup, with a central spring and outer ring. Dual springs on tactical (especially weapon-mounted) lights are important for durability and maintaining constant contact under recoil. This accentuates durability since it eliminates a potential failure point (although the insides of this light look complicated with potential failure points as well).
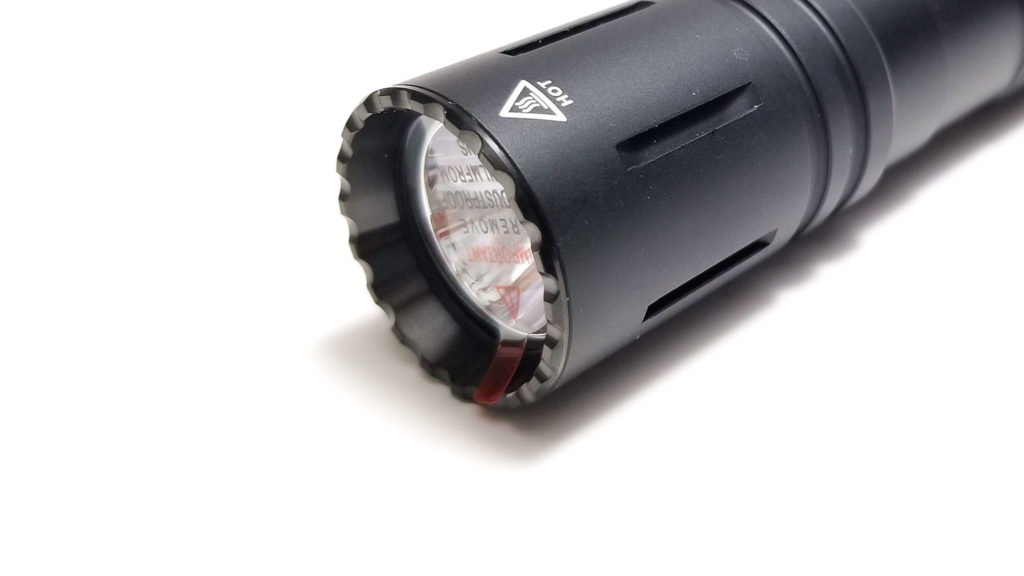
The design of the charging interface may mitigate the issues associated with onboard charging but would be prone to getting dirty and causing connection problems if not kept clean (per the manual, Acebeam does recommend cleaning the contacts periodically). Everything is sealed up tight. The only removable part is the head for changing batteries, and that joint is sealed with a decent o-ring. The bezel is glued on also, and this is good enough for P68, so no worries if you need to take down a perp who goes for a swim or stand post in a downpour.
The warranty is one of the best out there. From the Acebeam site: If the customer experiences any problems with an Acebeam product within 15 days of purchase, the dealer will replace that product. If an Acebeam flashlight fails during normal use within a period of five years (60 months) of purchase, the dealer will repair or replace the flashlight with the same or similar model. Acebeam flashlights enjoy a limited lifetime warranty – after 60 months the dealer will attempt to repair the flashlight for the cost of spare parts and shipping (i.e. no charge for labor).
LED, Lens, Bezel, and Reflector
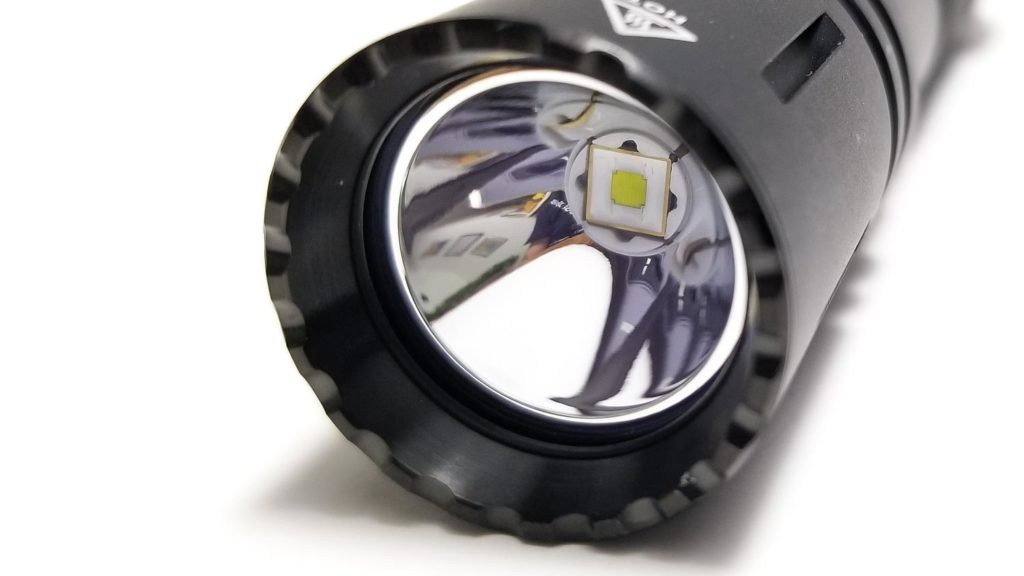
Acebeam chose the Luminus SFT40-W emitter for the P15, and as far as I know, it’s the first weapon light to come with it from the factory. The SFT40 has proven to be an excellent, versatile multi-role emitter in my other lights. It offers higher output than an XP-L HI, runs on 3 volts, and being a domeless emitter, has high cd/mm2 for excellent throw. It only comes in a single tint, 6500K, and this is totally fine for a tactical light since operators won’t care about CRI or BBL or warm and fuzzy tints.
The Opple Lightmaster recorded about 6000K and under 65 CRI on High, but kicking it up to Turbo shifts it north of 6000K, so the emitter is being driven pretty hard. The bezel is finely crenulated and looks to be made from blackened metal (stainless steel or aluminum-Acebeam doesn’t specify), and should protect the lens from drops. The LED is perfectly centered in a deep SMO reflector. It’s topped with an AR-coated mineral glass lens that Acebeam says is good for 99% light transmission. The beam is pretty clean and very versatile. There’s a nicely defined hotspot surrounded by dispersed bright spill. The beam rivals my Olight Odin (which has a TIR optic) and the beam profile seems great for clearing a dark room, EDC, or even as a duty light. Cranking up Turbo really ups the brightness. The throw is really good, and despite the small reflector it seems to throw farther than it does.
Dimensions and size comparison
- Length: 13.7 cm / 5.39 inches
- Head diameter: 2.54 cm / 0.98 inches
- Body diameter: 2.3 cm / 0.90 inches
Weight:
- Without battery: 96.7 grams / 3.41 oz.
- With included 18650 battery: 150.5 grams / 5.3 oz.
- With tactical ring: 152.2 grams / 5.29 oz.
- With M-LOK mount: 161.6 grams / 5.7 oz.
- With Pic mount: 166.3 grams / 5.86 oz.
Tactical Flashlight comparison
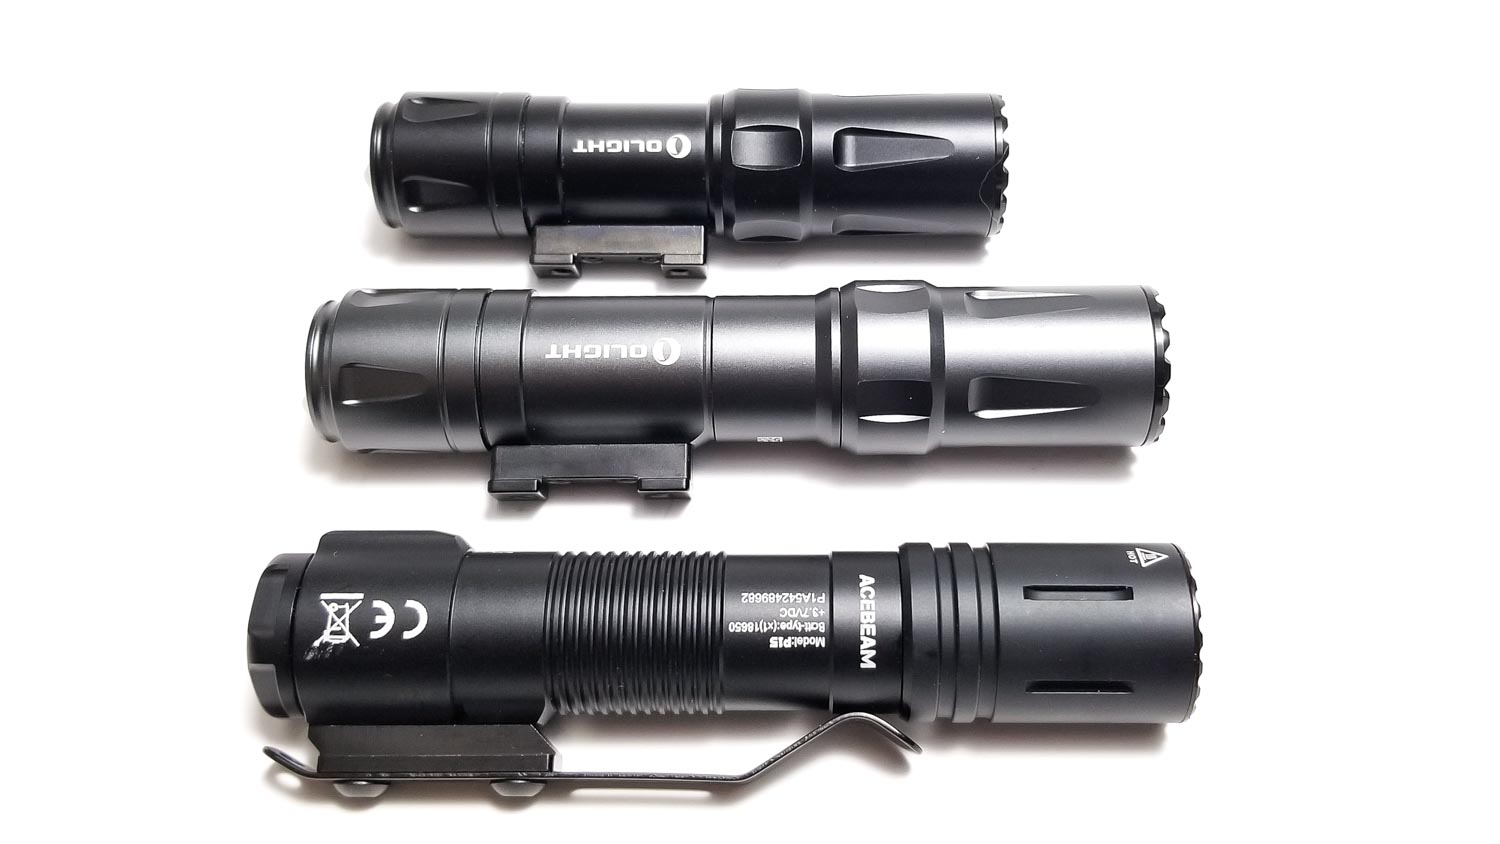
I compared the Acebeam P15 to some other tactical and tactical-use lights. The closest in size is the Olight Odin 21700-size WML, and it’s a bit heavier and longer than the P15.
Group 1 weapon lights top to bottom: Olight Odin Mini, Olight Odin, Acebeam P15 Defender.
Group 2 left to right: Thrunite Archer 2A V3, Thrunite BSS V4, Acebeam P15 Defender, Olight Odin, Fenix TK16 V2, Fenix PD36 Tac.
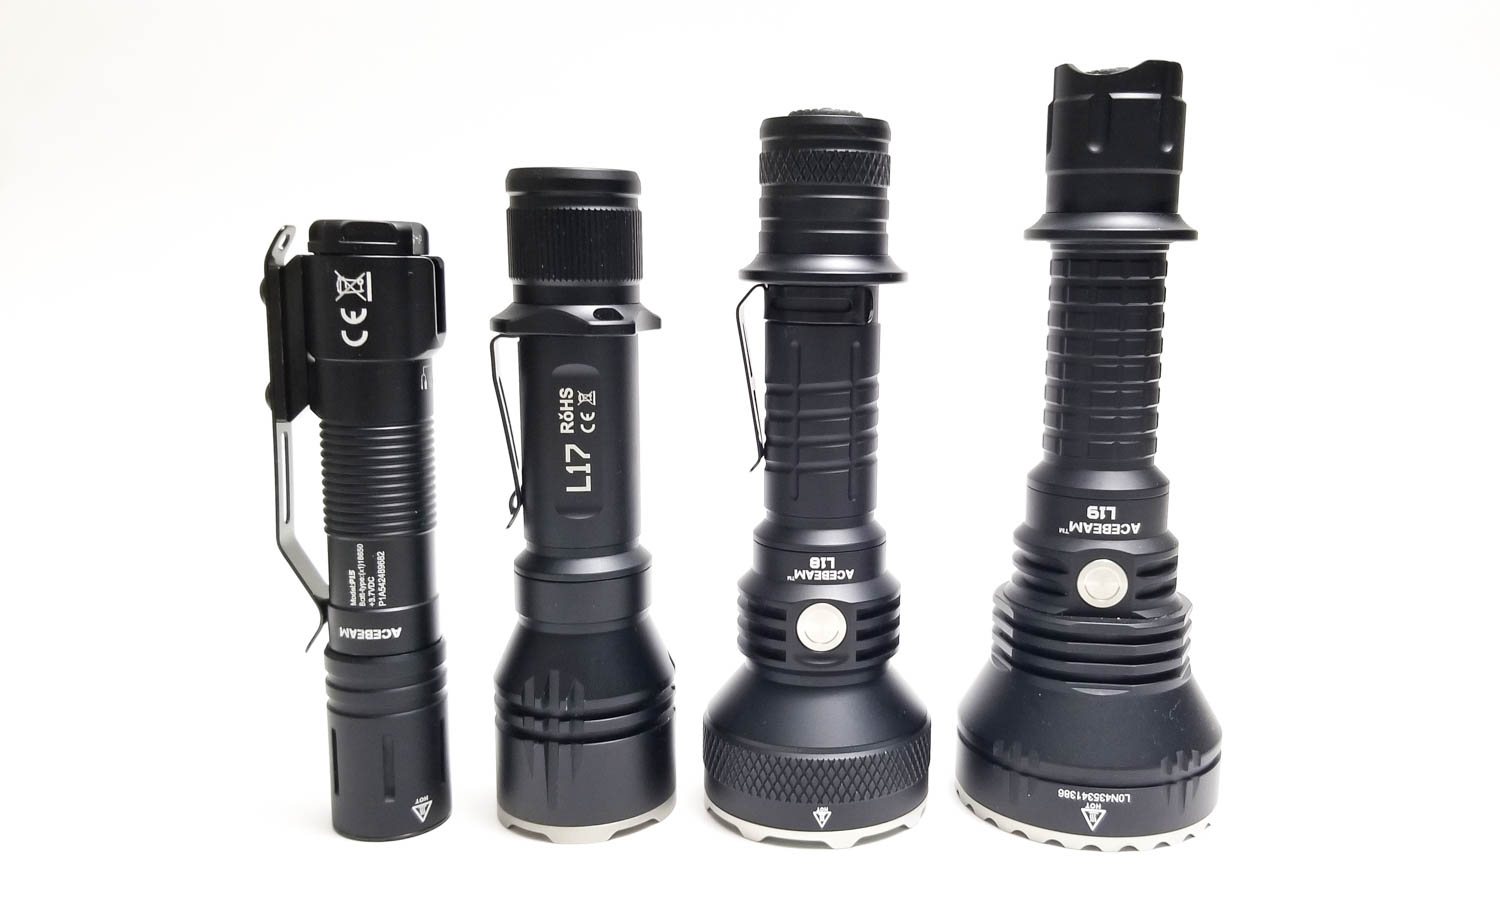
Group 3 left to right: Acebeam P15 Defender, Acebeam L17, Acebeam L18, Acebeam L19.
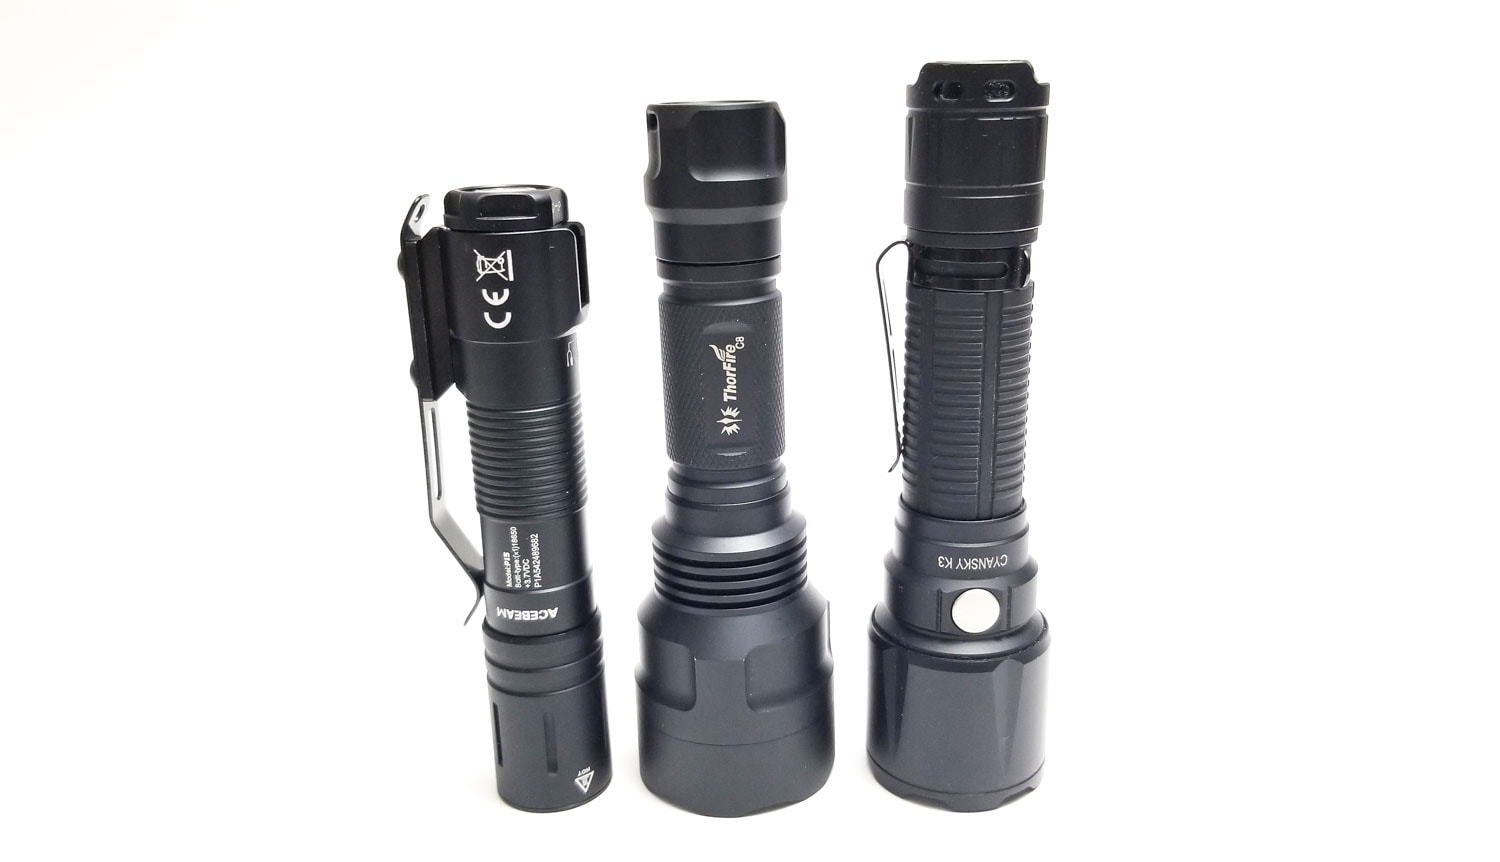
Group 4 left to right: Acebeam P15, Thorfire C8, Cyansky K3.
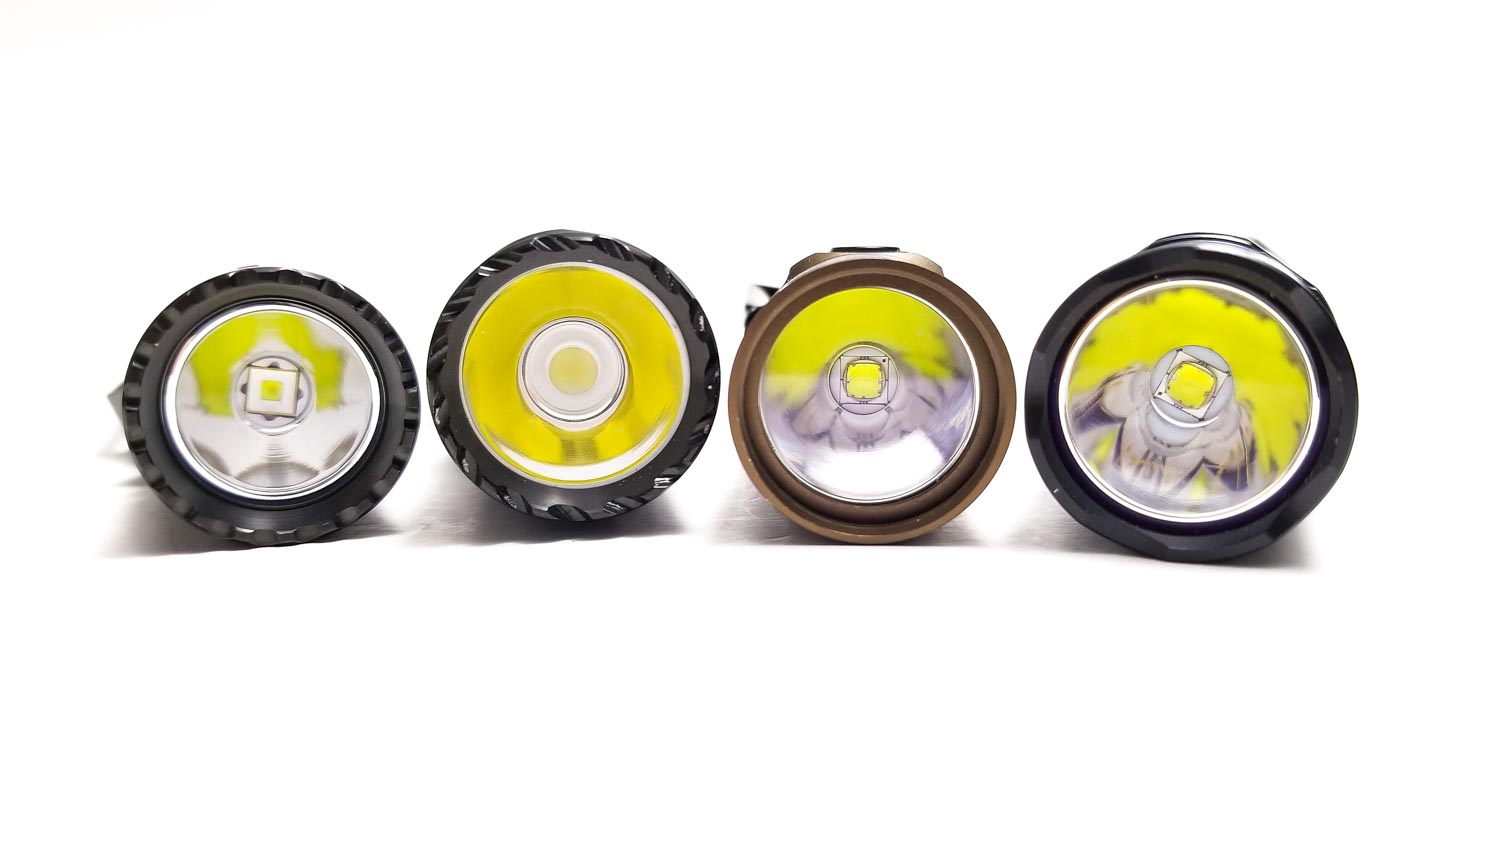
Front shots left to right: Acebeam P15, Olight Odin, Thrunite BSS V4, Fenix PD36 Tac.

Driver & User Interface:
I can’t crack it open and verify this, but Acebeam says the driver is a constant current unit (probably a buck driver). This makes sense because consistent, fully-regulated output is critical on a tactical or duty light.
The UI is very simple and intuitive, and mirrors mainstream tactical-use lights currently available. No Anduril, NarsilM, Biscotti, Bistro, or the like. It’s a straight-up one click on, one click off deal with press-and-hold to change modes. No messin with configurations, calibrations, menus, hidden deals, press n’ hold-to-whatever nonsense, just turn it on and go. Yep, even Gomer Pyles could figure out the P15.
Available modes: Ultra Low, Low, Mid, High, double-click for Turbo. Triple-click for strobe. Yep, easy. Adding the Quick Function switch and remote switch also unlocks some extra functionality, explained below.
From OFF:
- Single click rear switch: Turns on in last mode
- Double-click eswitch: Turbo
- Triple click: Strobe
- Press and hold: Activates Ultra Low mode
From ON:
- Single click rear switch: Turns off
- Press and hold: Cycles through modes: L-M-H-L
- Double click: Turbo
- Triple click: Strobe
Mode memory:
- Yes
Shortcuts:
- Double-clicking the e-switch in any mode activates Turbo, triple-click activates Strobe. Press and hold from off activates Ultra Low. To access or switch between instant Turbo and Strobe when using the remote and Quick Function switches: With the light off, press and hold the rear switch. The light will turn on in Ultra Low mode, keeping the switch pressed until it shuts off, wait for it to blink 3 times, turn off again, and then reactivate a couple seconds later in Strobe or Turbo (whichever one you’re attempting to activate). This takes about 13 seconds. Release the switch to turn off, and now the Quick Function or remote switch will activate momentary Turbo or Strobe mode. To switch back to Turbo from Strobe or vice versa, repeat the process.
Low voltage warning:
- Yes. Light steps down to a very low level until it hits Ultra Low brightness. After a while, the light will shut down.
Strobe/blinkies
- Single strobe. Frequency looks to be 2 Hz
Lock-out mode:
- Yes, electronic lockout achieved by pressing and holding the switch for 5 seconds. After 3 blinks, the light is locked. Repeat to unlock.
PWM
- Nada (not even visible with a camera)
Additional info on the UI:
This is a pretty conventional UI, and doesn’t really offer anything remarkably different from mainstream tactical-use light UI’s. The mode spacing is nicely done, but there’s a few things awry. Although instant Strobe and Turbo are technically available, it only works if the Quick Function or remote switch are installed, and it takes some configuring to access and switch between them, but that said, I still feel like it’s a worthwhile addition. Electronic lockout and mode memory are a little out of place here as well, and I would have liked to see these features axed in favor of manual lockout, but Acebeam designed this to be as EDC-friendly as possible, so I get it. There’s no visual LVP indicators either, no flashing, blips, boops, not even a blinking indicator light. Acebeam doesn’t mention anything about thermal regulation or timed step downs either. The mode switching when pressing and holding the switch is quick, about a one-second pause between modes. I did not like how long it took to unlock the light. Although 5 seconds doesn’t seem like much, when you really need light, you really need it and 5 seconds may as well be 5 minutes. I think manual lockout would be better, or something like 5 fast clicks to lock/unlock. Overall, the UI seems like a nice compromise between all-out WML and EDC/duty with some concessions made for each role.
Batteries & Charging
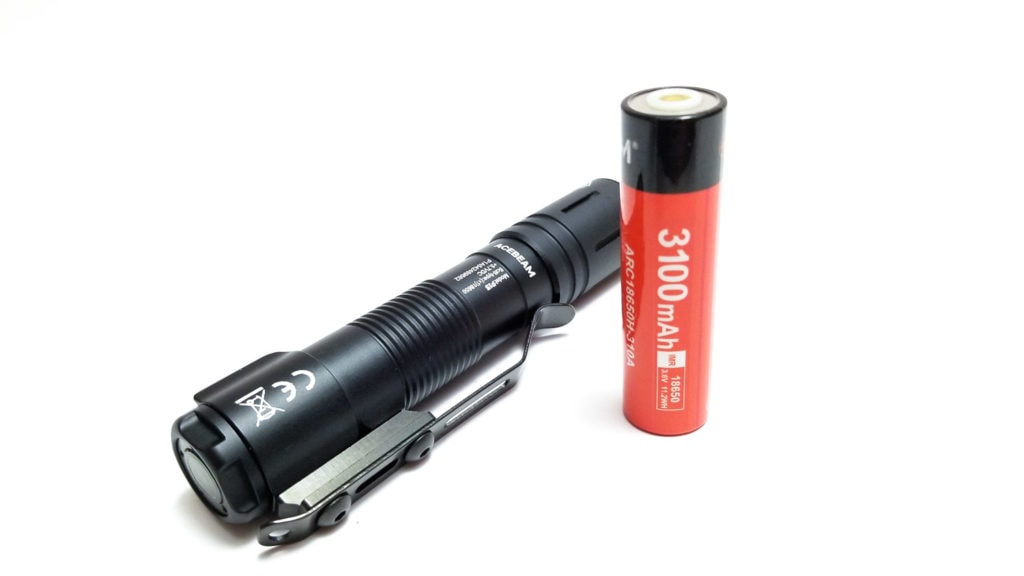
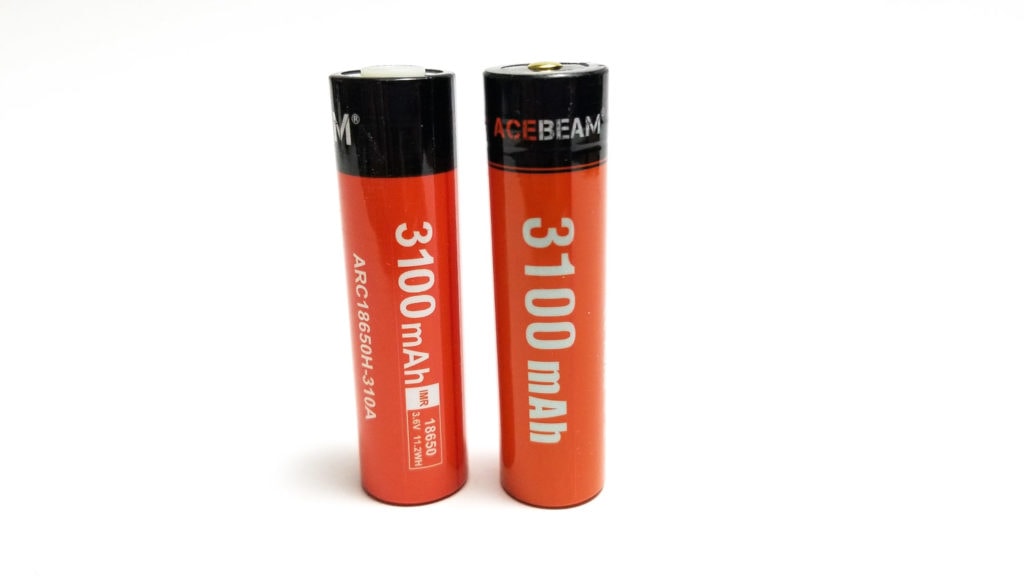
Here’s where the Acebeam P15 might catch some flack as a rechargeable flashlight. It uses a single 18650 for power, and comes with Acebeam’s ARC18650H-310A high drain 3100 mAh rechargeable battery. However, this “customized” battery incorporates the positive and negative contacts at the top of the cell. I’m definitely not a fan of proprietary batteries, but I get it. Manufacturers do this to ensure the light only works with an “approved” battery (that won’t damage the light or operator), and helps the light meet manufacturer output and runtime specs. It cannot be used in other lights, nor can you use standard 18650s in the P15. I didn’t try charging it in a regular charger and Acebeam doesn’t recommend it.
Right about now, some of you may be wondering, ”Nick, can I use CR123A cells in this?” Nope. You are stuck with the included cell, and this could be a deal-breaker because some agencies still predominantly use CR123A disposables (or require the option to use them) in the majority of their lights. For the record, most professional-grade WMLs offer CR123A primary compatibility, or as a backup to an 18650 or 18350.
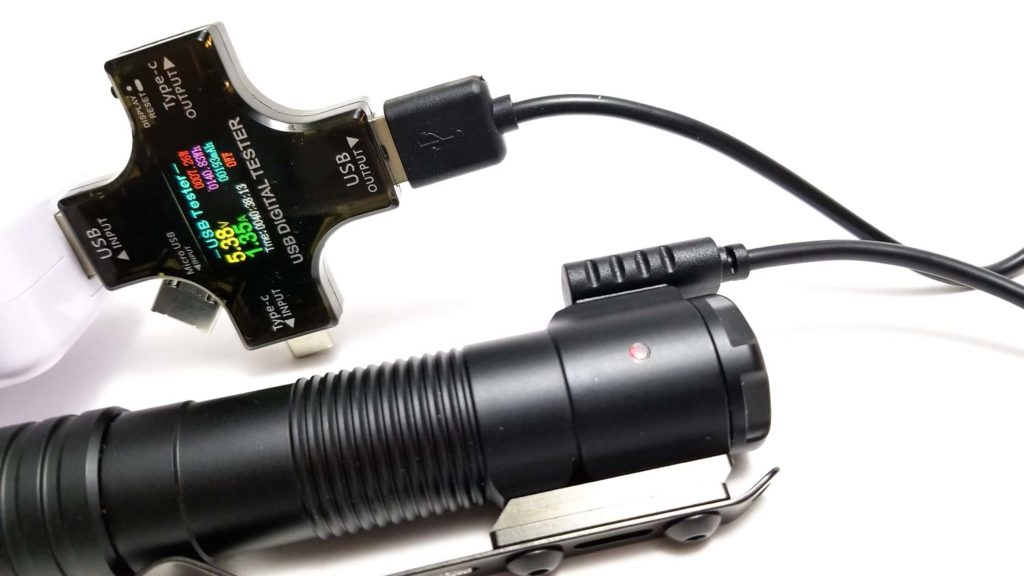
The Acebeam P15 incorporates onboard charging and utilizes an equally proprietary charging system. There’s a charge indicator light on the side of the light near the charging jack that shows charge state: Green for fully charged and red for charging. The proprietary charging cable consists of a USB A plug on one end and a plug with two gold-plated pogo pins on the other (same as the Quick Function switch and remote switch). These interface with the charging jack’s 2 contact pads. The cable slides in and clicks in place, and can be secured in with the lock ring. Acebeam says the charge current is set at 1.5 A and per the specs, should charge the cell in around 2.5 hours. I observed around 1.35 amps on my USB tester (about 7 watts) while charging the depleted battery. For my tests, the cell was charged to 4.22 volts (a bit high).
Performance
Lumen measurements (for each mode)
I measured Lumens using my 30 cm integrating sphere with a Digi-Sense 20250-00 data logging lux meter that’s been calibrated with several lights of known output. Tests were conducted using a fully charged ARC18650H-310A 18650 cell. No measurement for amps this time due to the inaccessible current path.
| Mode | Specs | start | 30 sec | 10min |
| Ultra-Low | 2 | N/A | N/A | – |
| Low | 45 | 41 | 40.8 | – |
| Medium | 200 | 202 | 201 | 201 |
| High | 600 | 553 | 552 | 536 |
| Turbo | 1700 lm | 1615 lm | 1350 lm | 525 lm |
I didn’t get a reading for the Ultra Low mode, so it’s definitely below 2 Lumens. We see that the measured figures are pretty close to the factory advertised.
Parasitic drain:
- N/A couldn’t measure.
Runtime graph
Runtime tests were conducted using the 30 cm integrating sphere with the Digi-Sense 20250-00 data logging lux meter calibrated using several lights of known output. I used the fully charged ARC18650H-310A battery for each test and tested Turbo, High, and Medium modes.
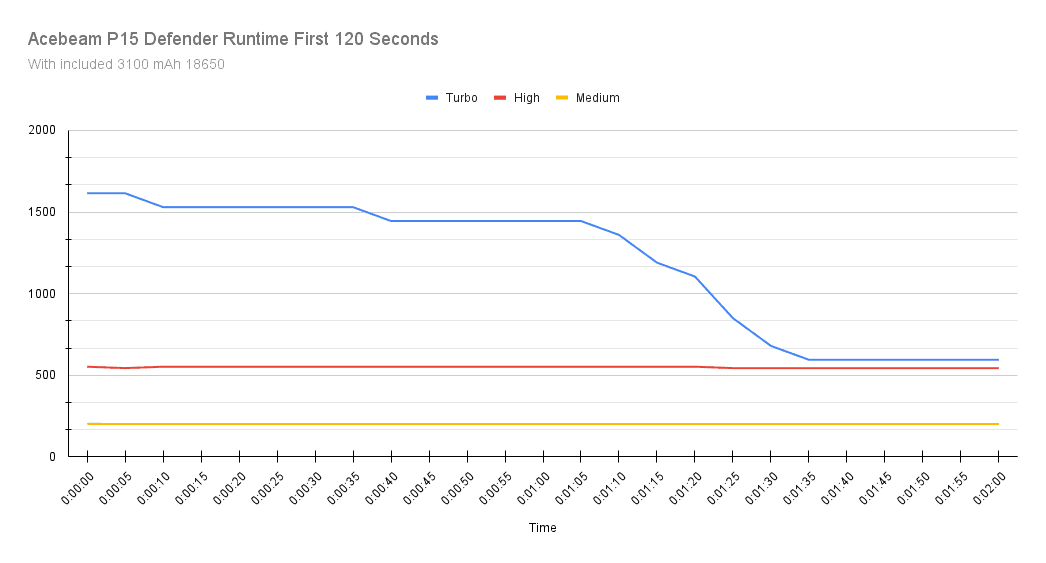

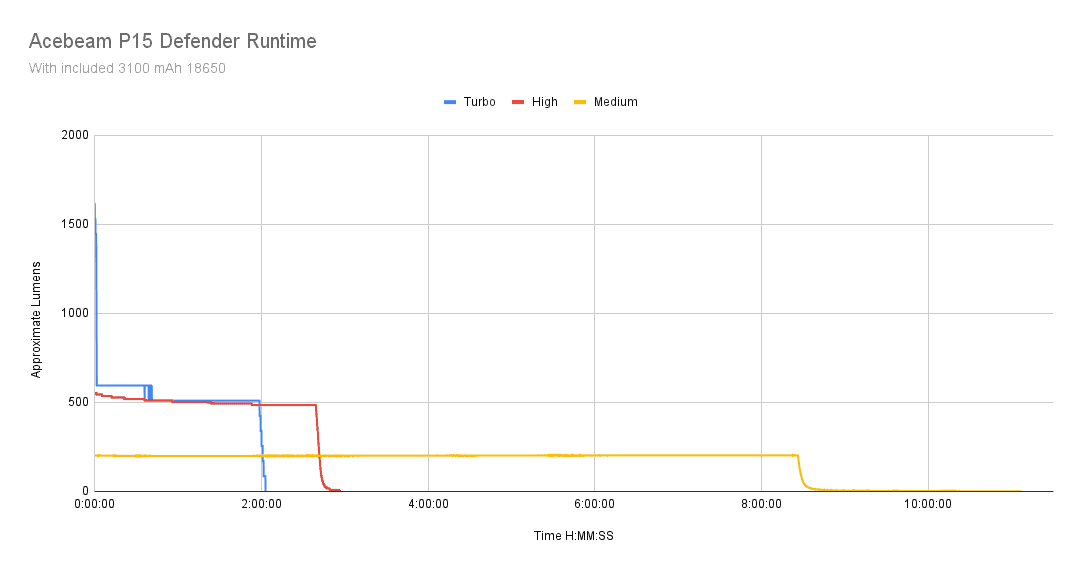
Turbo started at 1615 Lumens, and only held that for about 10 seconds before the output started dropping to 1530 Lumens, which it held for another 20 seconds. Just over 1 minute 30 seconds of high output (over 1300 Lumens) is not fantastic, but not bad either. The first big drop happened at 1 minute 15 seconds, and by 1 minute 30 seconds, the output was 595 Lumens. Heat? At 5 seconds (ambient 24 C) the head hit 32.7 C, by 20 seconds it’s 46.7 C, and by 60 seconds it’s 55.8 C. At 1 minute 30 seconds, the temp is down to 53 C, and the temperatures never went over 58 C (max measured at 1 hour). The output was stable at 595 Lumens for the next 38 minutes, when there was a slight drop to 510 Lumens, which it held for the next hour and 10 minutes. LVP didn’t pull the plug until the 2 hour, 1-minute mark, when it dropped the output to under 200 Lumens, then down to under 100 about 30 seconds later and then off the lux meter scale. The output was actually about 7 Lumens at the lowest level before I ended the test at 2 hours 3 minutes. Acebeam’s figure? 1 hour 45 minutes. The battery read 2.58 volts after the test, which is a bit low and a pretty deep discharge for a lithium-ion cell, but still within the safe limit.
High started at 552.5 Lumens and was rock-solid for nearly the entire runtime. The output doesn’t drop below 500 Lumens until 1 hour 24 minutes in. Temperatures were very reasonable but seemed a bit high for a low output. At 1 hour in, I measured 49 C at the head. The light held 485 Lumens for another hour and 25 minutes, then a slight step down to about 400 Lumens, then progressive drops down over the next 3 minutes down to under 100 Lumens. By 2 hours 44 minutes, LVP kicks it down to under 10 Lumens. The light shut off at 2 hours 56 minutes. Acebeam specified 2 hours 45 minutes for their runtime spec.
Medium was about what I expected, and in typical fully regulated fashion, the output was consistent and didn’t deviate much over the course of the 11 hour 56 minute (recorded) runtime. The test started at 202 Lumens, and it didn’t drop much until the 8 hour 26 minute mark when it dropped under 200 Lumens for the first time. From there, it was all downhill. The light became too dim to be useful as a working light at the 8 hour 41 minute mark when it dropped below 10 Lumens. From there, I let it run for another hour and 14 minutes until the output dropped below 5 Lumens and I ended the test at 11 hours 6 minutes. This is quite a bit longer than Acebeam’s time of 8 hours 30 minutes. Temperatures were never intrusive and never rose over 33 C.
This is excellent performance for a small tactical light, and about as good as it gets for professional users. The brightness is fully regulated thanks to the constant current driver, and the light never got too hot to handle with bare hands. If there was temperature regulation, it was completely unobtrusive and unnoticable, which is fantastic. LVP on this light exists, but it’s subtle, indicated by progressive decreases in brightness. Here’s where we see the difference between an enthusiast and professional-use flashlight. Acebeam could have incorporated a more aggressive ATR algorithm to keep the output higher longer, but that would shorten the useful amount of output and cause excessive heating (and drain the battery fast). On a weapon-mounted light, it’s less of an issue than with a handheld light, but remember, Acebeam incorporated handheld functionality as part of the Defender’s intended use.
Throw numbers:
Throw was measured at 5 meters indoors using the Uni-t UT383S lux meter. I used the fully charged ARC18650H-310A battery for the test. Readings were recorded at 30 seconds.
| Mode | Specs | Candela measured | Meters |
| Ultra Low | N/A too low | – | – |
| Low | 400 cd | 600 cd | 49 |
| Medium | 3600 cd | 3325 cd | 115 |
| High | 10,000 cd | 9650 cd | 196 |
| Turbo | 27,225 cd | 26,050 cd (28,175 cd at turn-on) | 323 (336 at turn-on) |
The throw is pretty good for a small reflector, and would easily reach 100 meters on Turbo. However, since close-quarters engagements happen at 20 meters or less, this is more than acceptable. If looking for more throw in a WML, you’ll be spending double what the P15 costs, or adapt a standard light to your long gun using a tube mount and remote switch (if available).
Beamshots
I tested the P15 against some tactical and semi-tactical “duty” lights: Fenix TK16 V2 (3100 Lumens SST70, 400+ meters throw), Fenix PD36 TAC (3000 Lumens SST70 300+meters throw), Olight Odin (2000 Lumens, 300 meters throw), Thrunite BSS V4 (2500 Lumens SST70 250 meters throw).
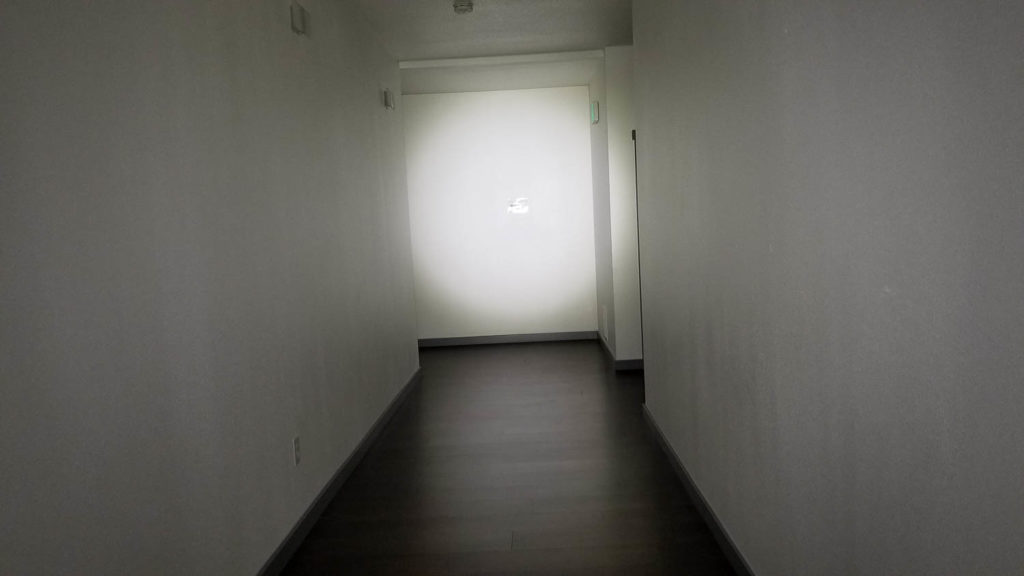
Indoor shots: The end of the first hallway is 7 meters away.
Outdoor shots: The fence is 95 meters away.
For some “functional” shots, I mounted the P15 to my AR15 rifle using the M-LOK mount. The remote switch was mounted to the handguard on the Pic rail to the rear. The handling was good, and although there was a slight shadow of the barrel, this was due to the short carbine-length handguard. The P15 easily lights up an entire room, and can put a lot of light in a small area with good throw and precision. I couldn’t tell much difference between the Odin and P15, other than the Odin gets brighter and has a warmer tint (closer to 5000K vs. 6500K).




Disclaimer: This flashlight was sent to me for review at no cost by Acebeam. I have not been paid to review, nor have I been holding back on problems or defects.
Final Verdict
Pros
- Lightweight
- Ultra consistent output
- 7075 aluminum construction
- Excellent quality, fit and finish
- Simple UI
- Very versatile with lots of mounting options
- Great beam with usable throw
Cons
- Instant access to Turbo and Strobe mode only available with remote and Quick Function switches installed
- Need to purchase Pic mount separately
- No CR123A battery compatibility
- No manual lockout
- Not the greatest for EDC pocket carry
Explanation on star ratings:
1: Avoid: my phone flashlight would be a better choice – 2: Poor: significant defect or issues, much better options available at the same price – 3: Average: some defects or issues – 4: Good: recommended (minor issues) – 5: Great: highly recommended

4 stars: ★★★★
Although weapon lights may occupy a small corner of the flashlight continuum, they are nevertheless an important part of the professional-use market, dominated by brands like SureFire, Streamlight, and the lesser-known brands like Modlite and Could Defensive Systems. Although it carries with it an impressive pedigree, Acebeam’s P15 Defender is a fresh-faced recruit joining a fraternity of grizzled veterans (literally-SureFire products are used by armed forces around the world).
Despite being a newcomer, the P15 Defender is a very versatile light that can (sort of) EDC or step into a WML role if called upon. It’s a lightweight flashlight with lots of mounting options. From a performance standpoint, it’s about as good as it gets with lots of usable brightness throughout the runtimes without intrusive ATR to keep from getting burning hot. It’s going to be reliable and durable to boot thanks to the monolithic tube design and tough 7075 aluminum construction. The UI is simple to use, and the innovative remote switch is a nice feature for plug and play functionality. The price is also reasonable considering the cheapest big name WMLs come in at $300+.
Although the P15 checks off a lot of boxes, it’s far from perfect. Pocket carry is wonky, and some features standard on other lights are missing, namely, CR123A compatibility, instant Strobe and Turbo (when not using the remote or Quick Function switches, and only if you do some configuring to access them), and lack of quick-change mounting options. I don’t like how the Pic rail mount isn’t included with the Tactical Kit either, since a lot of weapons systems still use the MIL-STD-M1913 in addition to M-LOK. Although you can’t use standard 18650s or CR123A cells, you can buy the ‘customized’ battery from Acebeam separately for $21.90 US if you want a spare on hand. As a first entry to the WML arena, if you can live with the quirks and compromises, I think the P15 Defender is an alluring alternative to more expensive options.
Buy your Acebeam P15 here:
Get a whopping 15% off your next order at Acebeam.com with the following discount coupon: AE15. Simply add the coupon code at your checkout.
1lumen selects and reviews products personally. We may earn affiliate commissions through our links, which help support our testing.