1lumen selects and reviews products personally. We may earn affiliate commissions through our links, which help support our testing.
Emisar D1K review
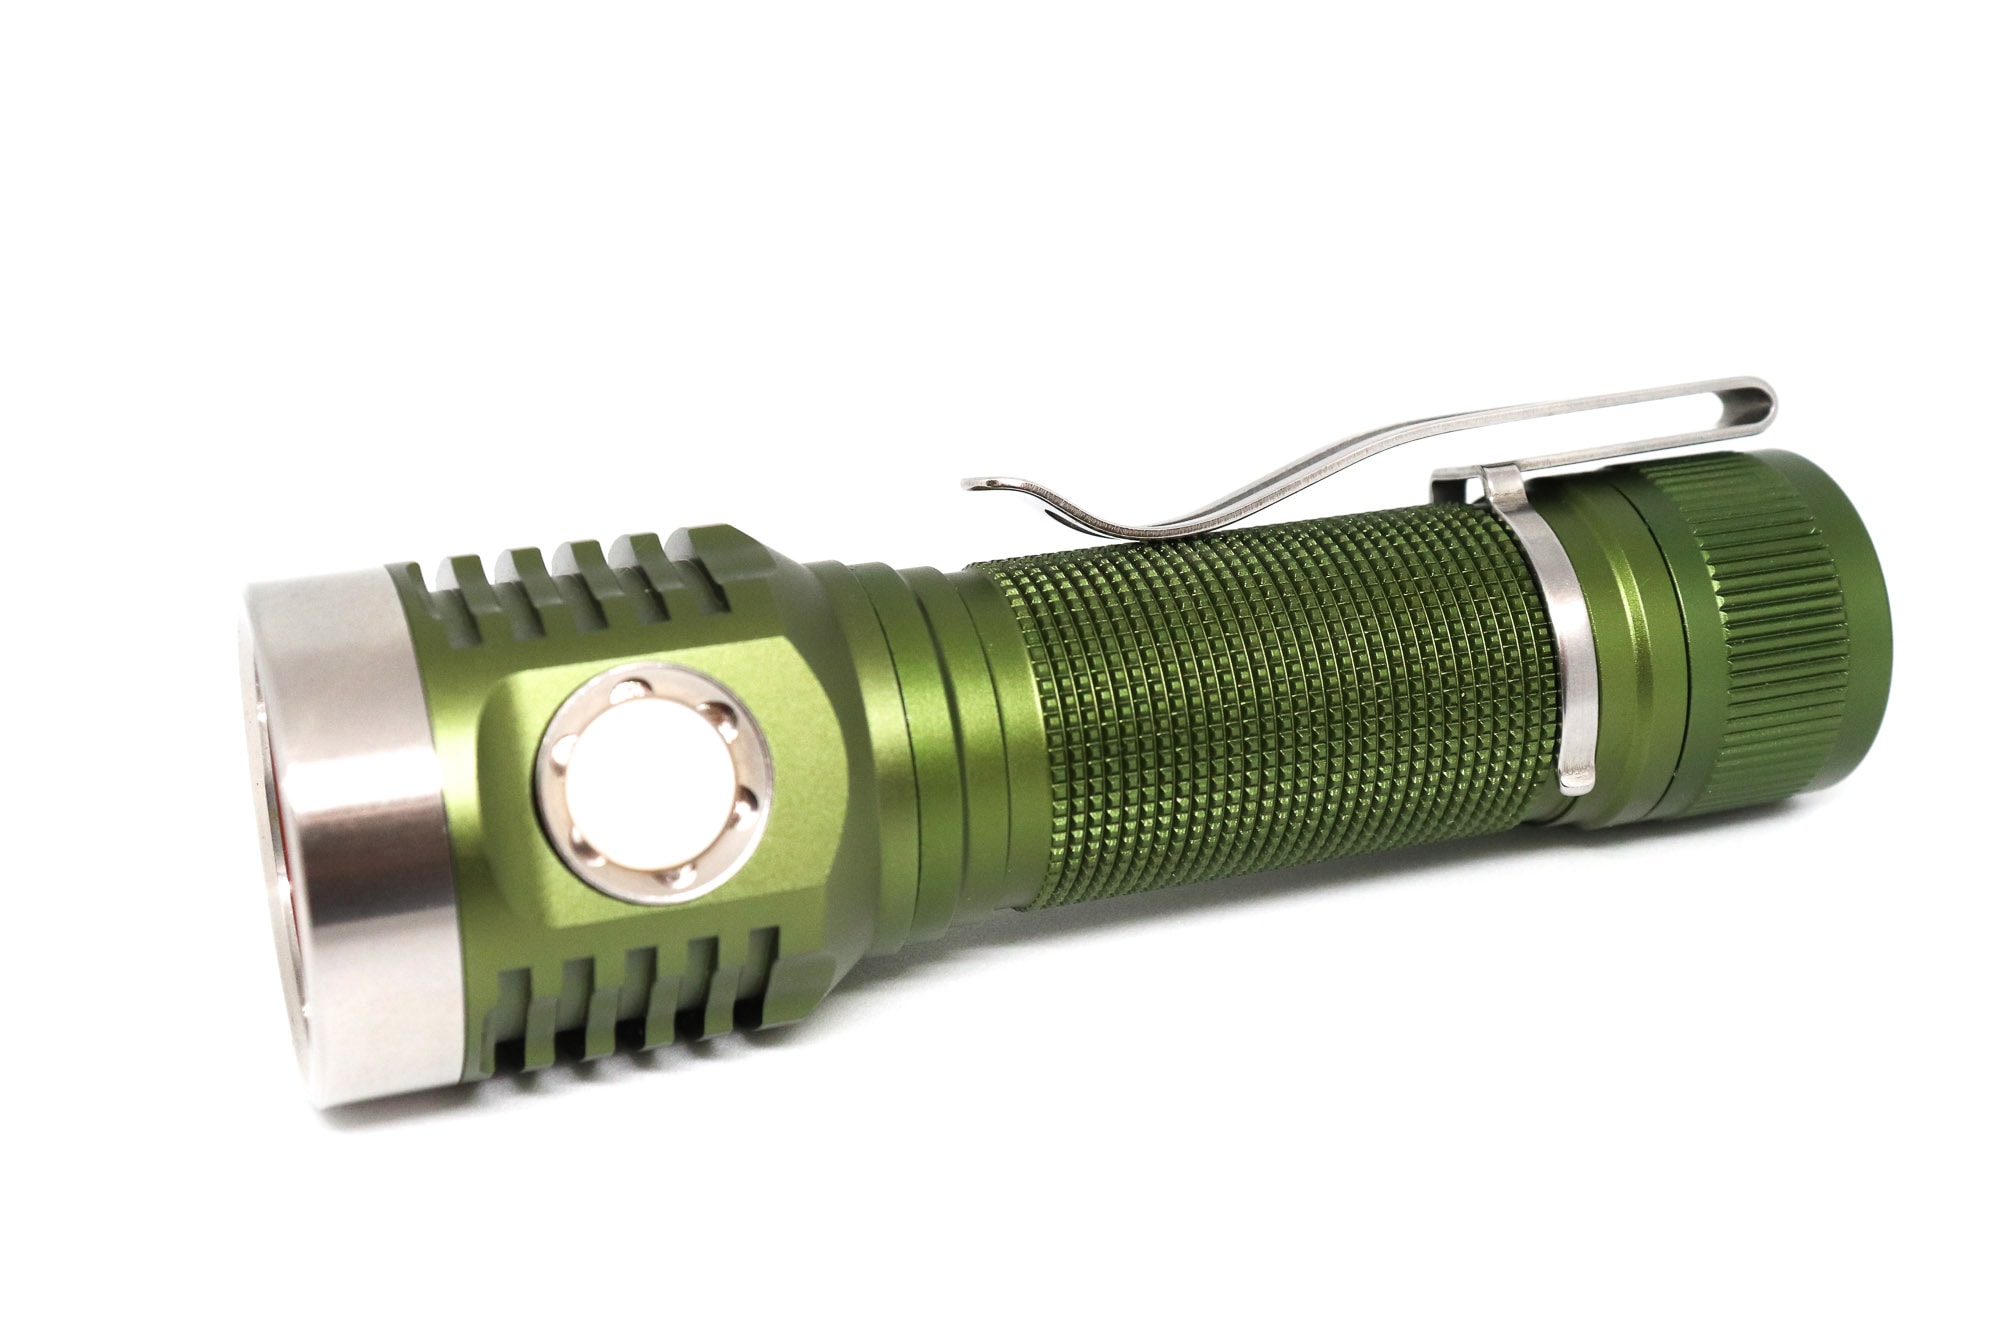
Emisar D1K specs
| Brand & Model | Emisar D1K |
|---|---|
| Flashlight category | EDC flashlight |
| LED | SST-20 4000k 95CRI |
| Max. output | N/A |
| Max. beam distance | N/A |
| Max. beam intensity | N/A |
| Battery config. | 21700 |
| Onboard charging | No |
| Main modes | Lots Moon to Turbo with ramping and lots of other modes |
| Blinkies | Yes |
| Waterproof | Not claimed |
| Review publication date | November 2023 |
Review intro:
You may not have heard of Emisar as a brand. Although if you are a regular in the flashlight community and forums you will likely be very familiar with them. Hank Wang sells his Emisar and sister Noctigon torches through his Intl-Outdoor store and is well known to the community for not only the quality of his lights, but that they are specifically aimed at the enthusiasts.
So let us run it through the entire review process and see if I need to eat humble pie or head off into the sunset, flashlight held high!
For those that are unfamiliar with the Emisar brand, Hank offers a huge variety of options when you order. None of these are gimmicky marketing tricks. All of the options make sense and allow an informed buyer to purchase a light to truly meet their needs. For example, you can not only pick the tint of LED you want, but there are no less (at the time of writing) 36 different LED options covering 14 distinctly different LED types. This may seem a little baffling to those not in the know, but the people that do know, this is an amazing thing to be presented with when buying.
You really can choose lumens, beam distance, tint, beam profile and several specialist options such as coloured or UV LEDs.
Along with the LED options you can also choose to include things like magnetic tailcap, pocket clip and different colours for the switch.
To give a little history, a while back Emisar launched the D1 which is an 18650 powered light. I actually own one of these, although in a completely different LED configuration. The D1K is a revision of the D1 but now supports 21700 batteries with a slightly larger battery tube.
I did have a goal in mind with this purchase. I wanted to create what for me would be the ideal EDC carry light. Which means it needs to be good at everything and usable for anything but also shouldn’t annoy me to use it.
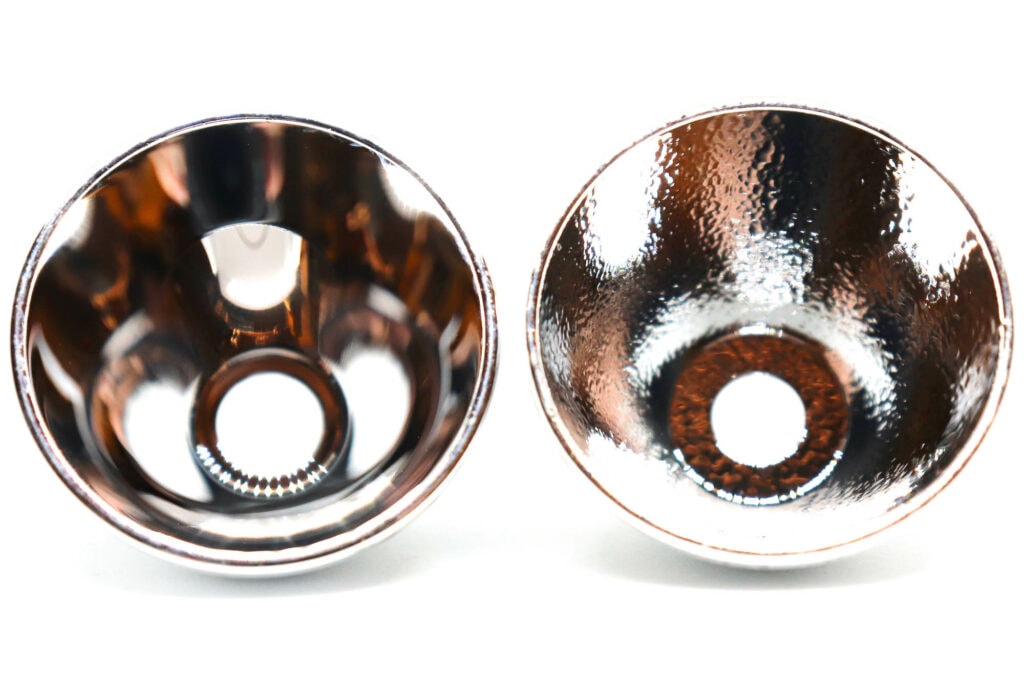
Hank is also hugely accommodating when you order from him (something I’ve done many many times over the years). So for this purchase I contacted Hank prior to ordering and went slightly off spec with my order, getting an additional Orange Peel (OP) reflector instead of the standard Smooth (SMO) reflector the light would normally come with when equipped with my choice of LED. It is hugely refreshing to be able to order the exact thing you want, rather than having to compromise. Still enough of my rambling, let’s get on with the review!
Package quality.
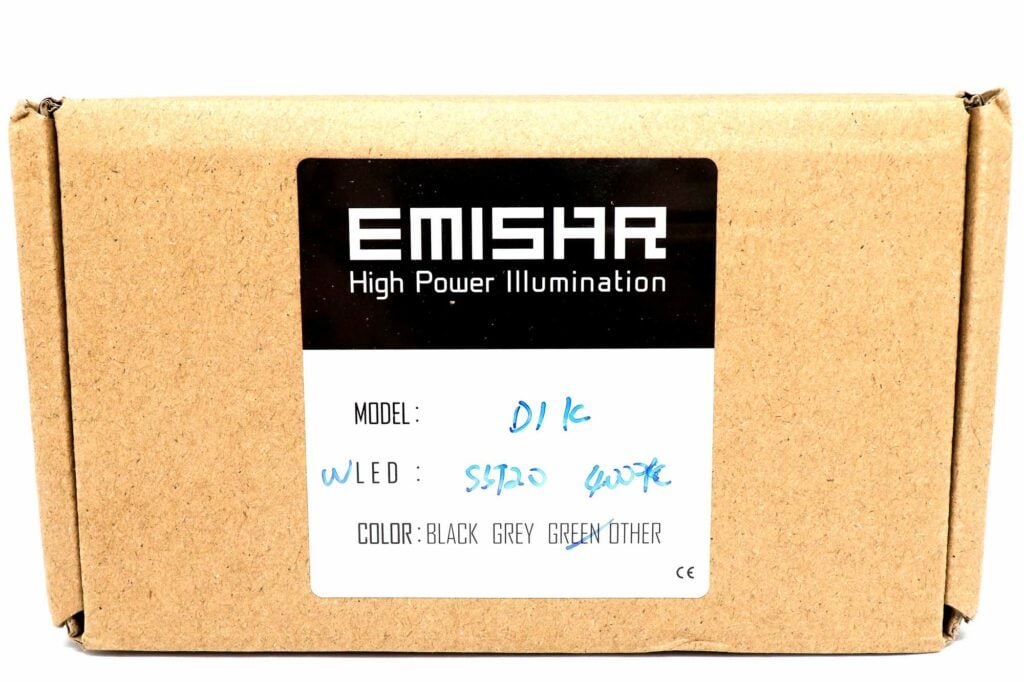
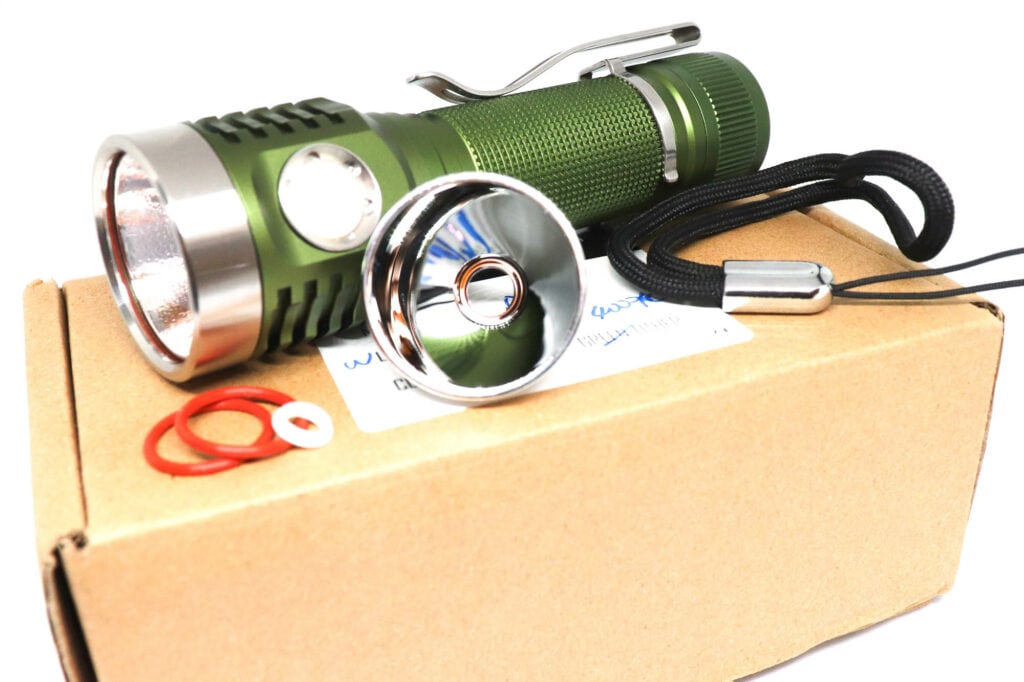
The D1K comes shipped in a nice thick brown cardboard box with a tailored foam insert. The box arrived in pristine condition with a large Emisar label and hand written details showing the specification I had ordered.
Inside the box you get the now fairly industry standard accessories of:
- 2 x spare O-rings
- Lanyard wrist strap
However, as I mentioned above. I asked Hank to include an extra OP reflector. Hank had kindly assembled the light with the OP reflector already fitted and in the box in a bag is the spare SMO reflector and the reflector specific centering ring.
I also ordered the pocket clip.
Flashlight in use, Build Quality, and Warranty
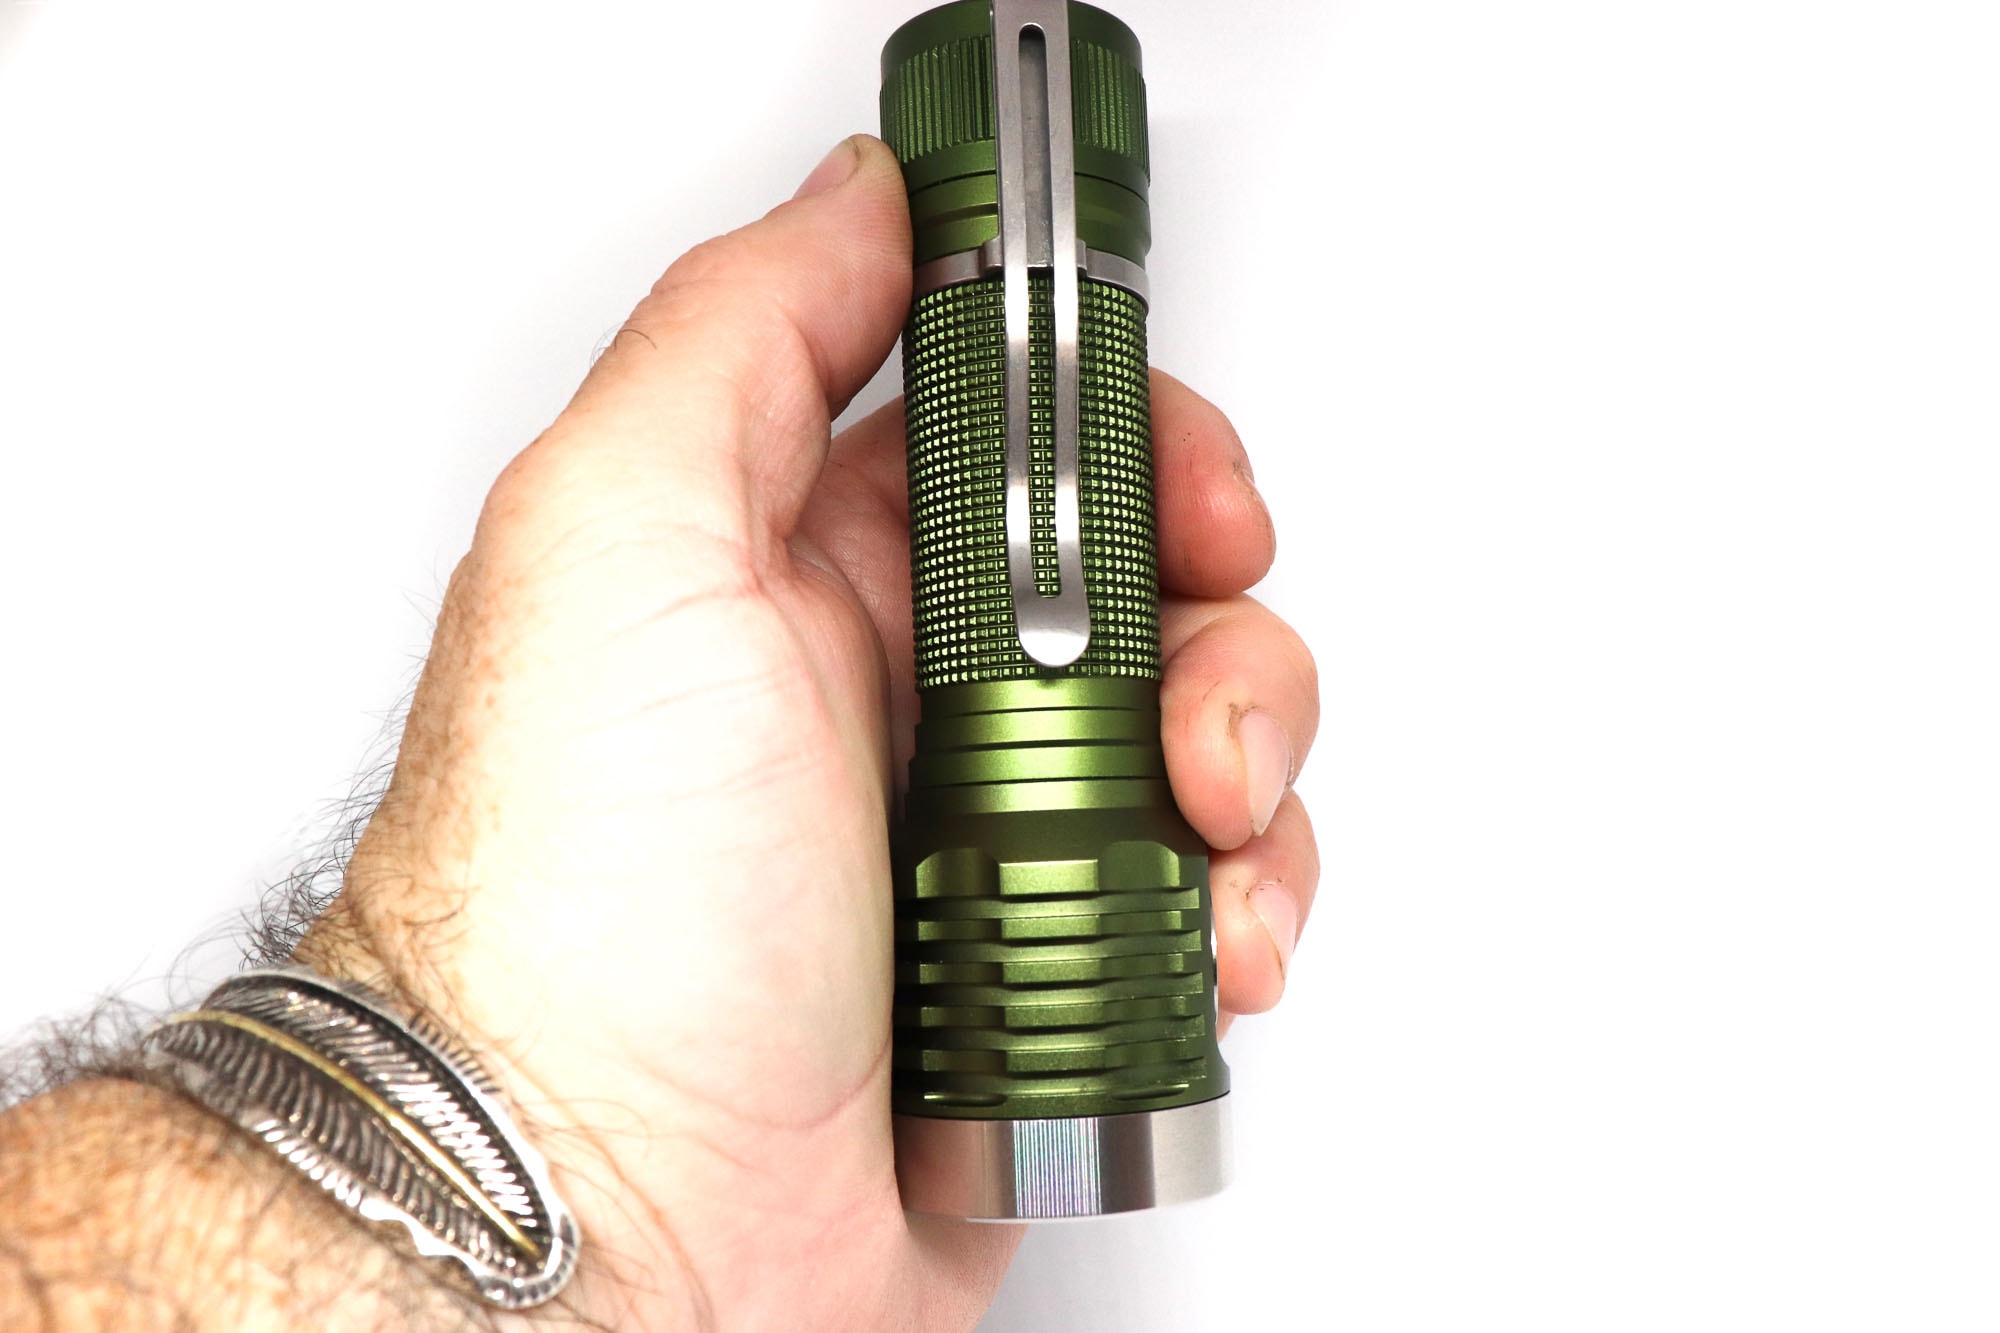
The Emisar D1K is marketed as a mini thrower light. It is compact and small and the relatively large reflector means it will be offering more throw than a simple tube light.
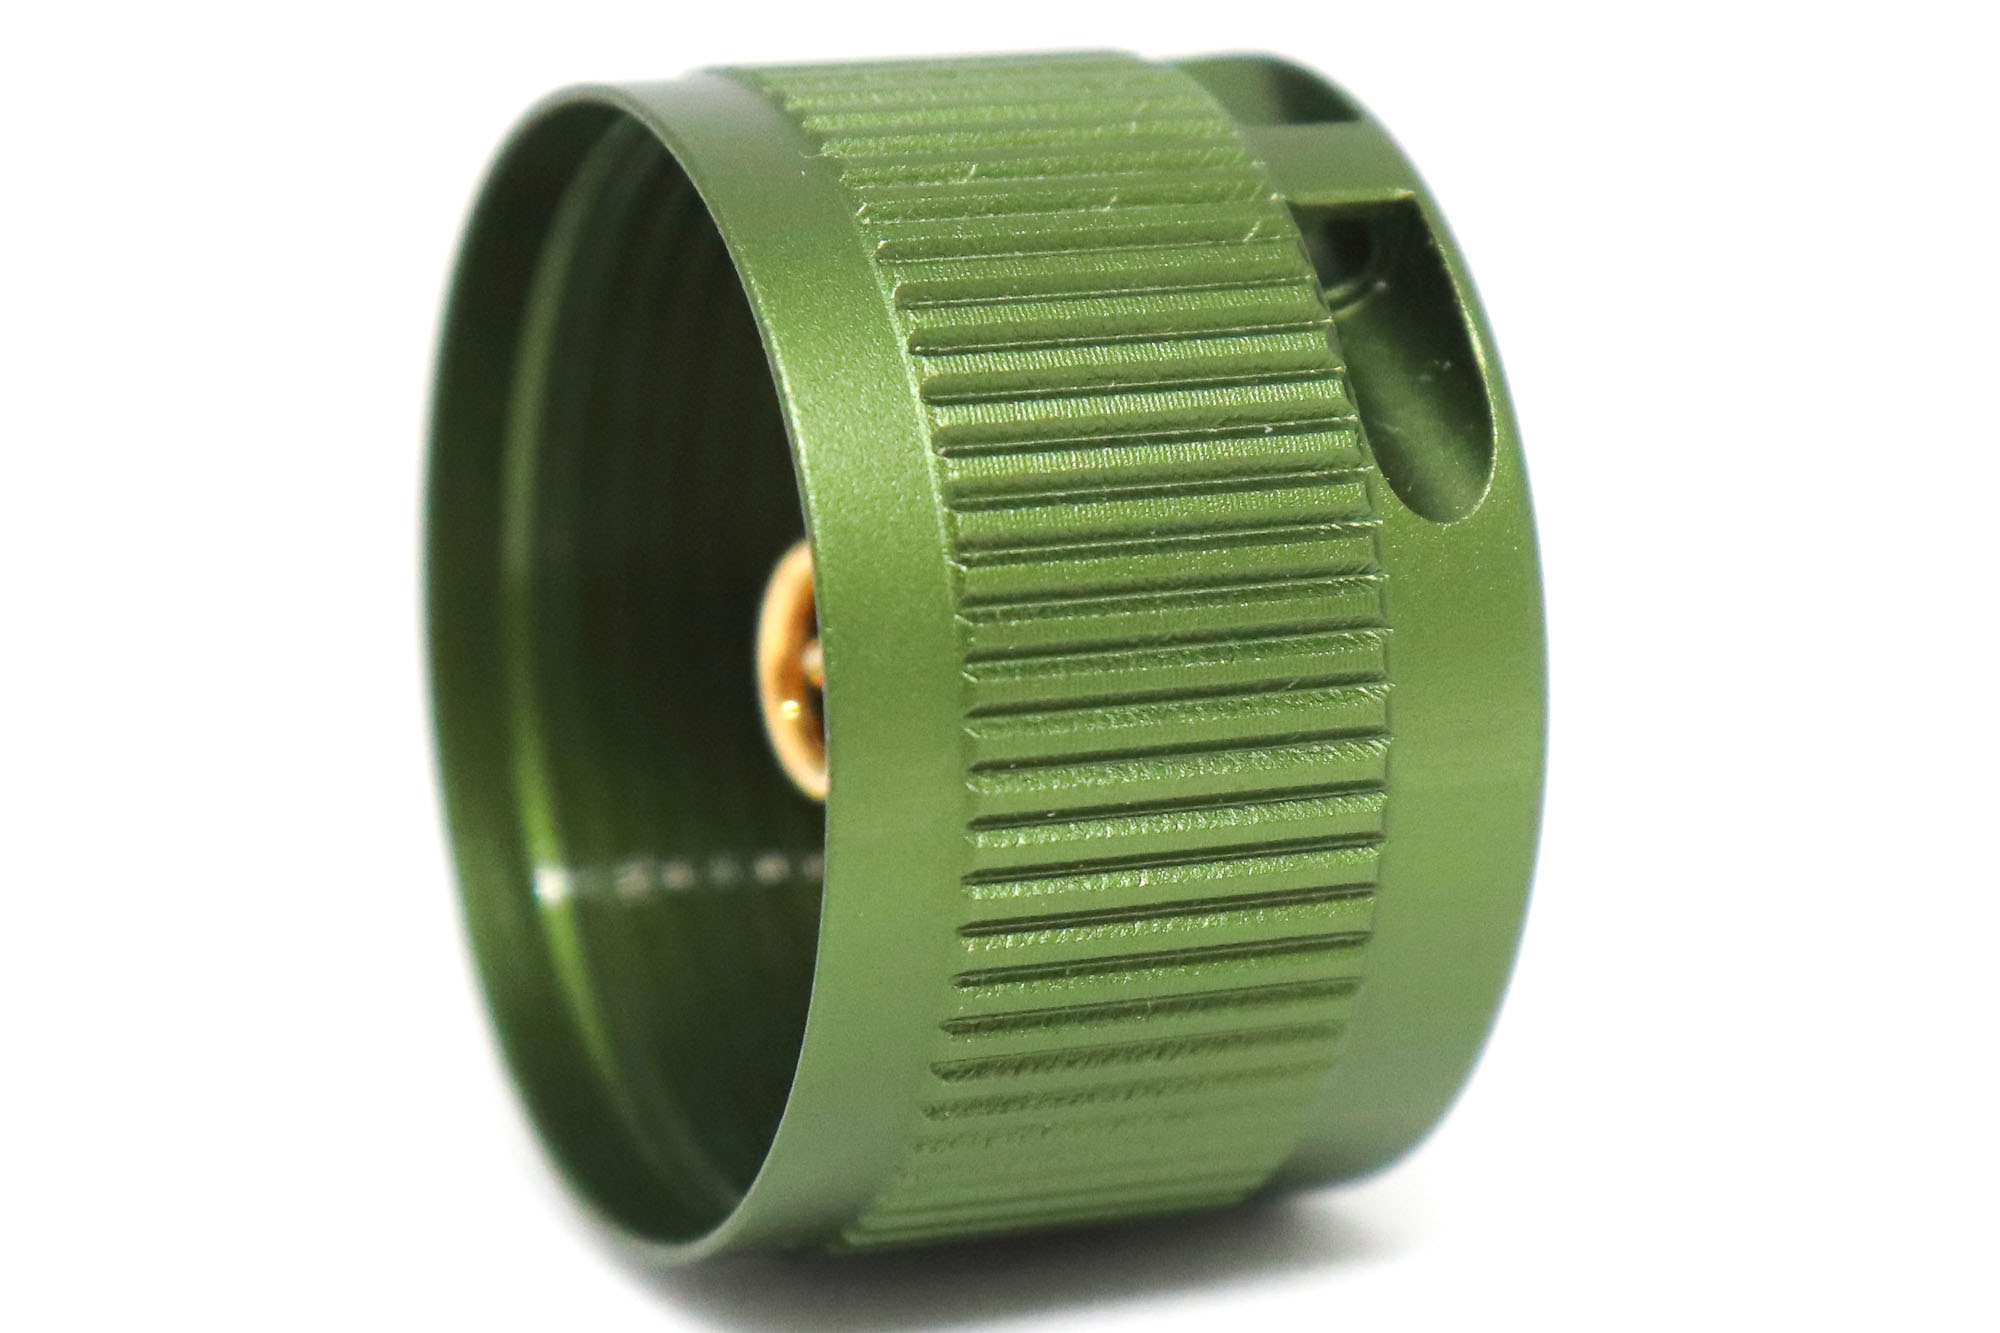
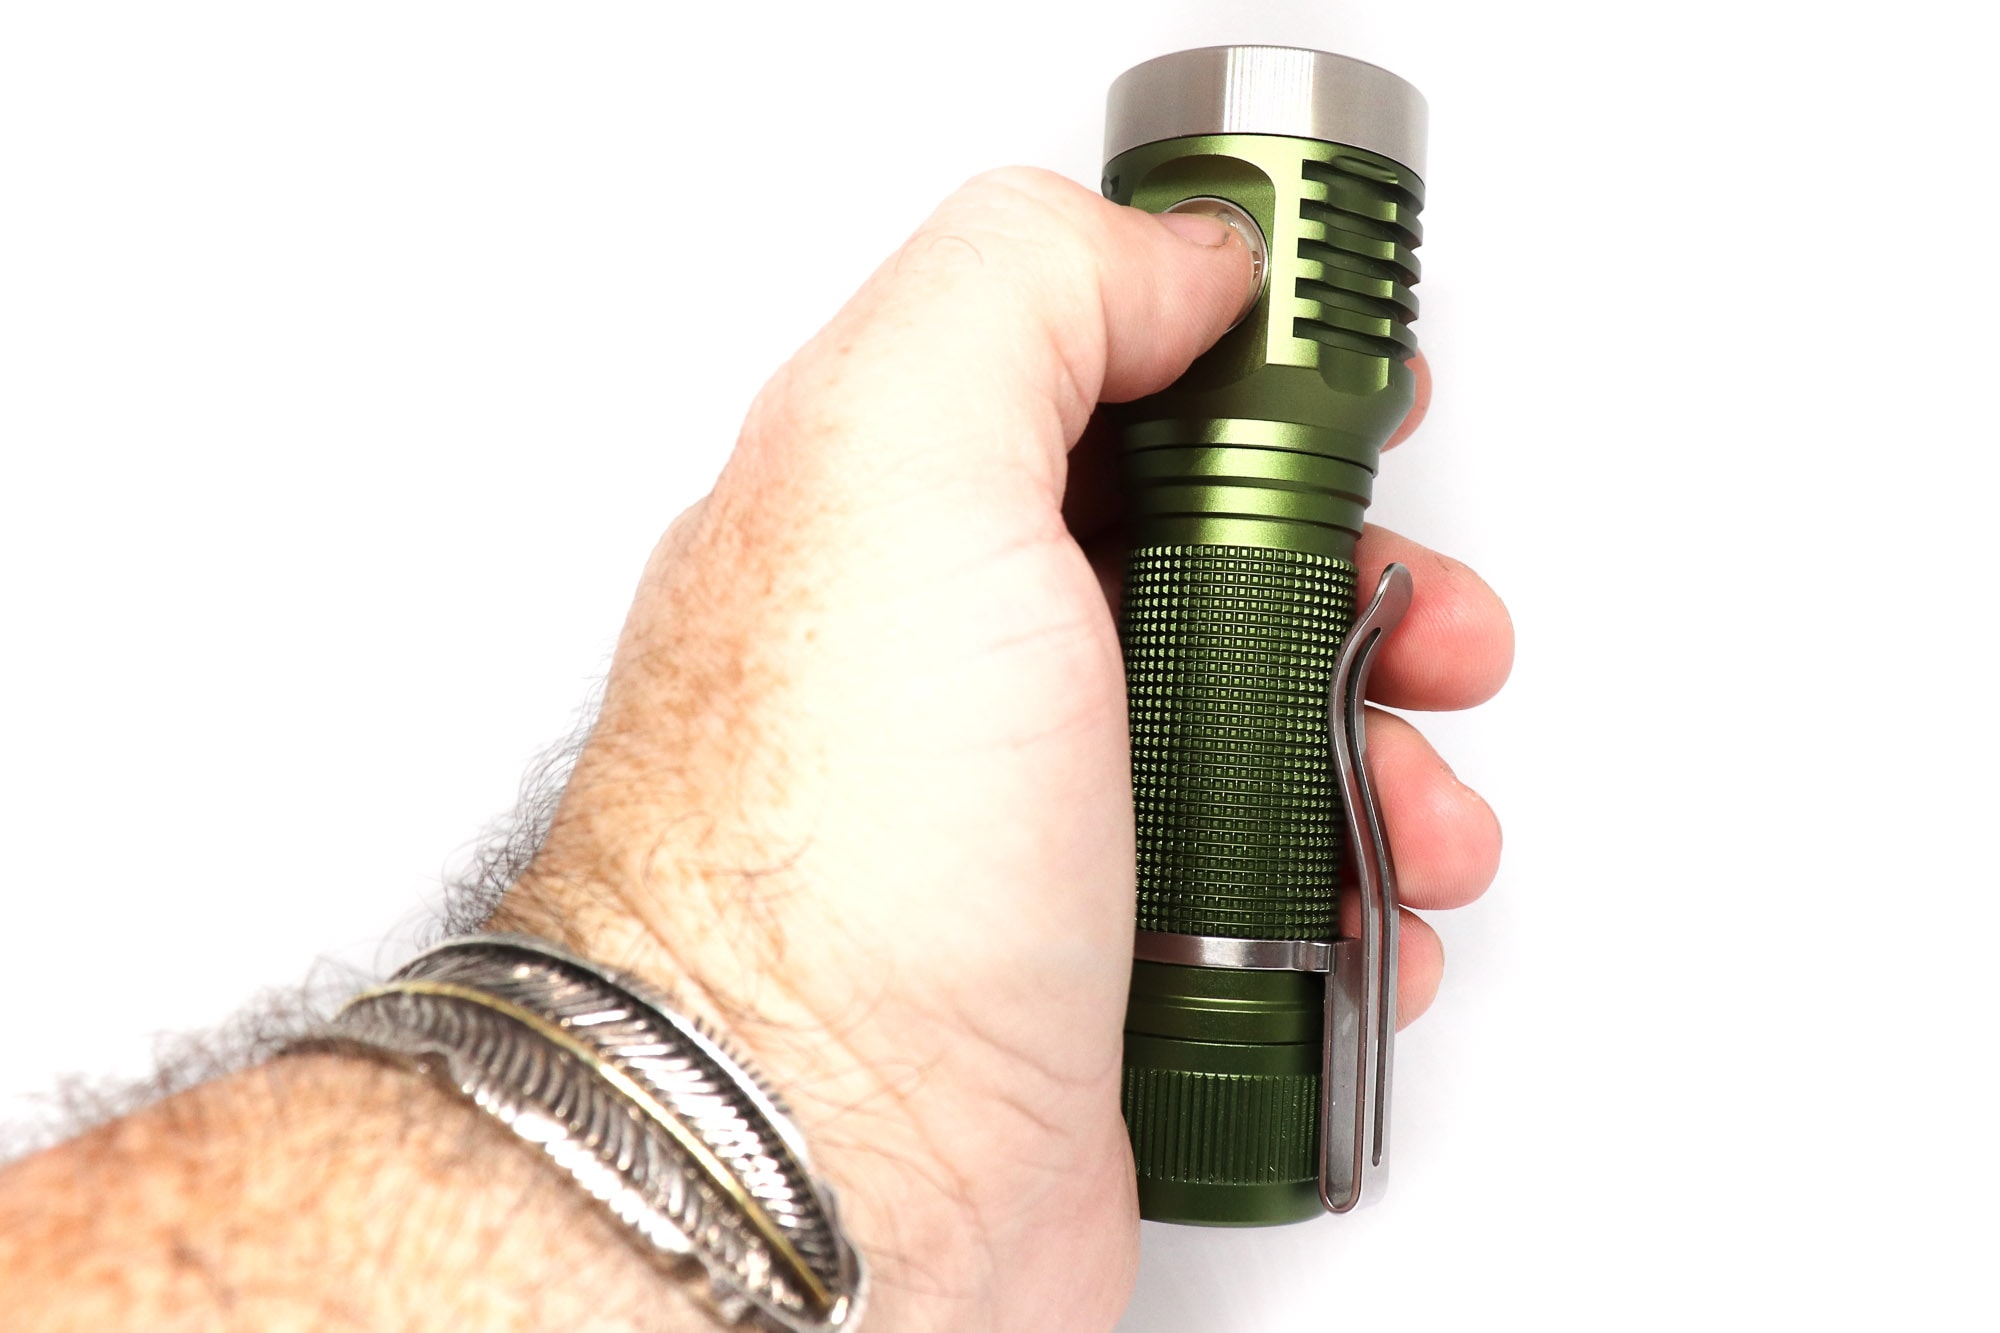
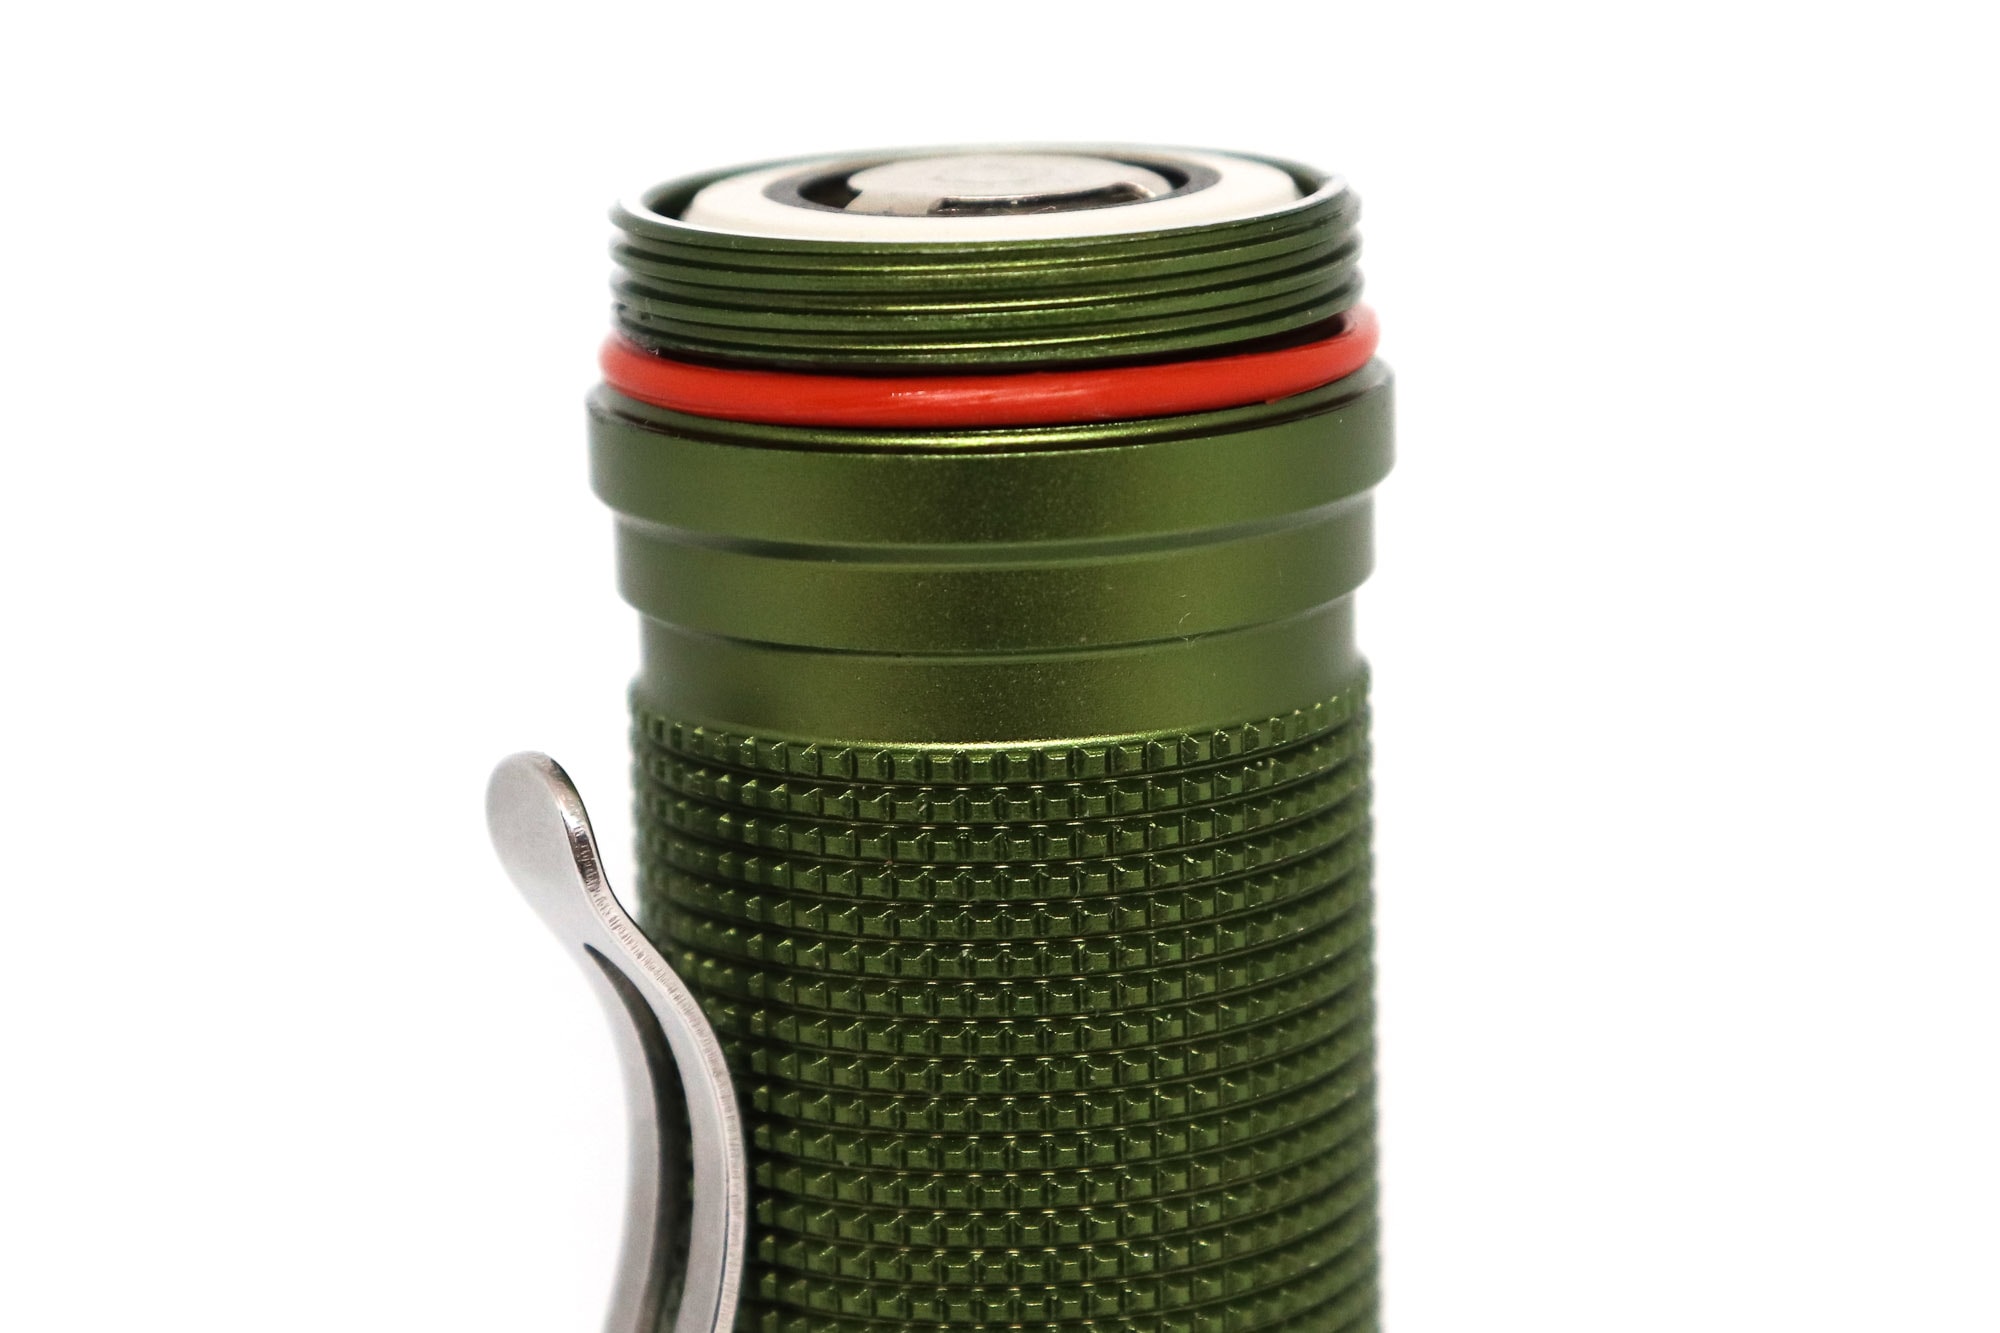
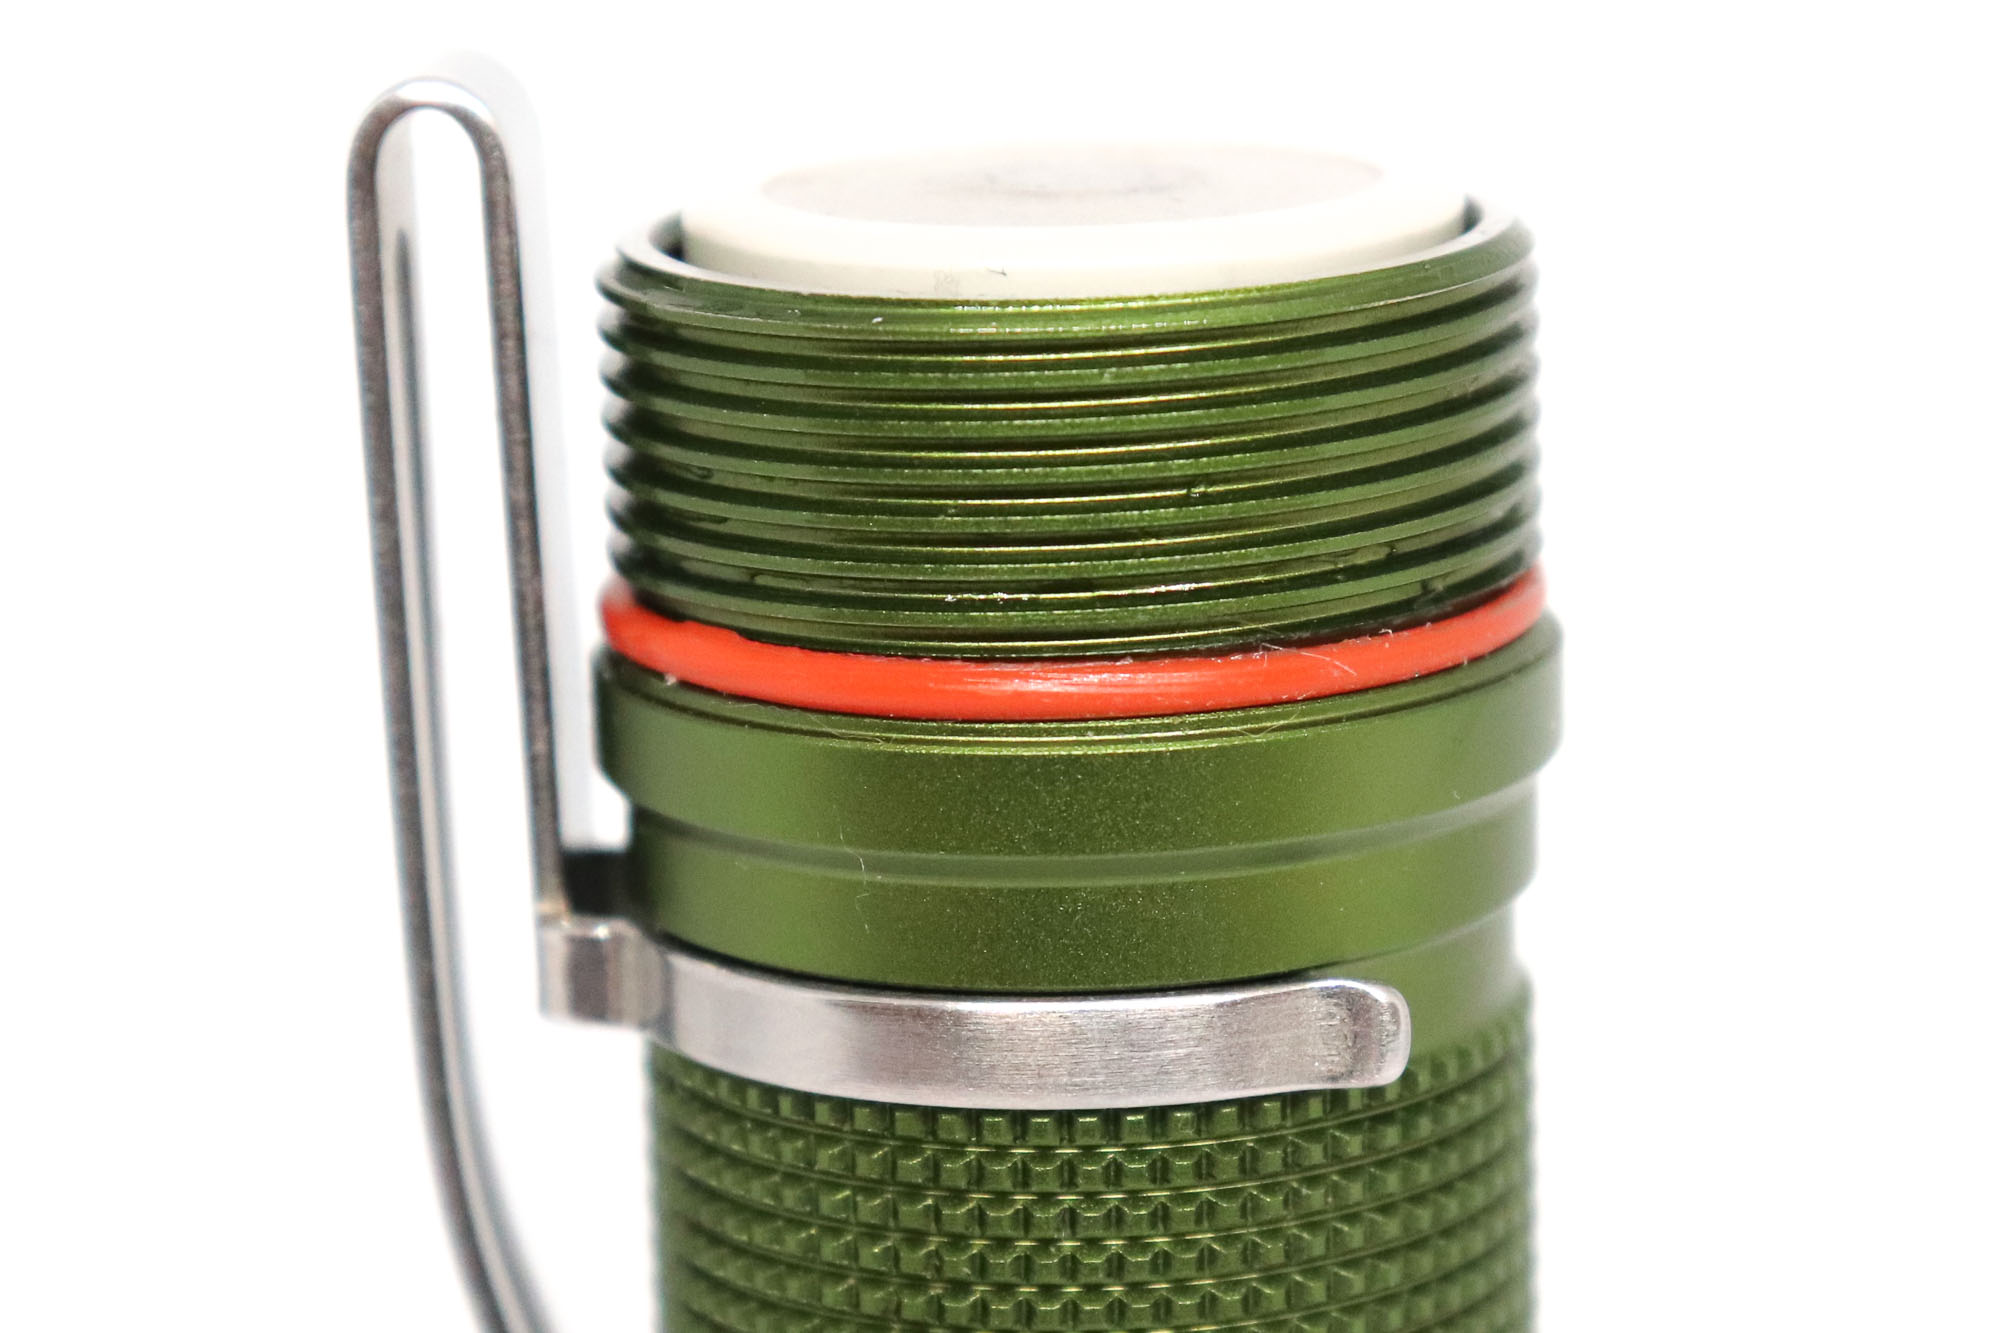
Build quality is great with a nice satin looking anodising finish and generally very good machining. The body has fine knurling which is nice to hold.
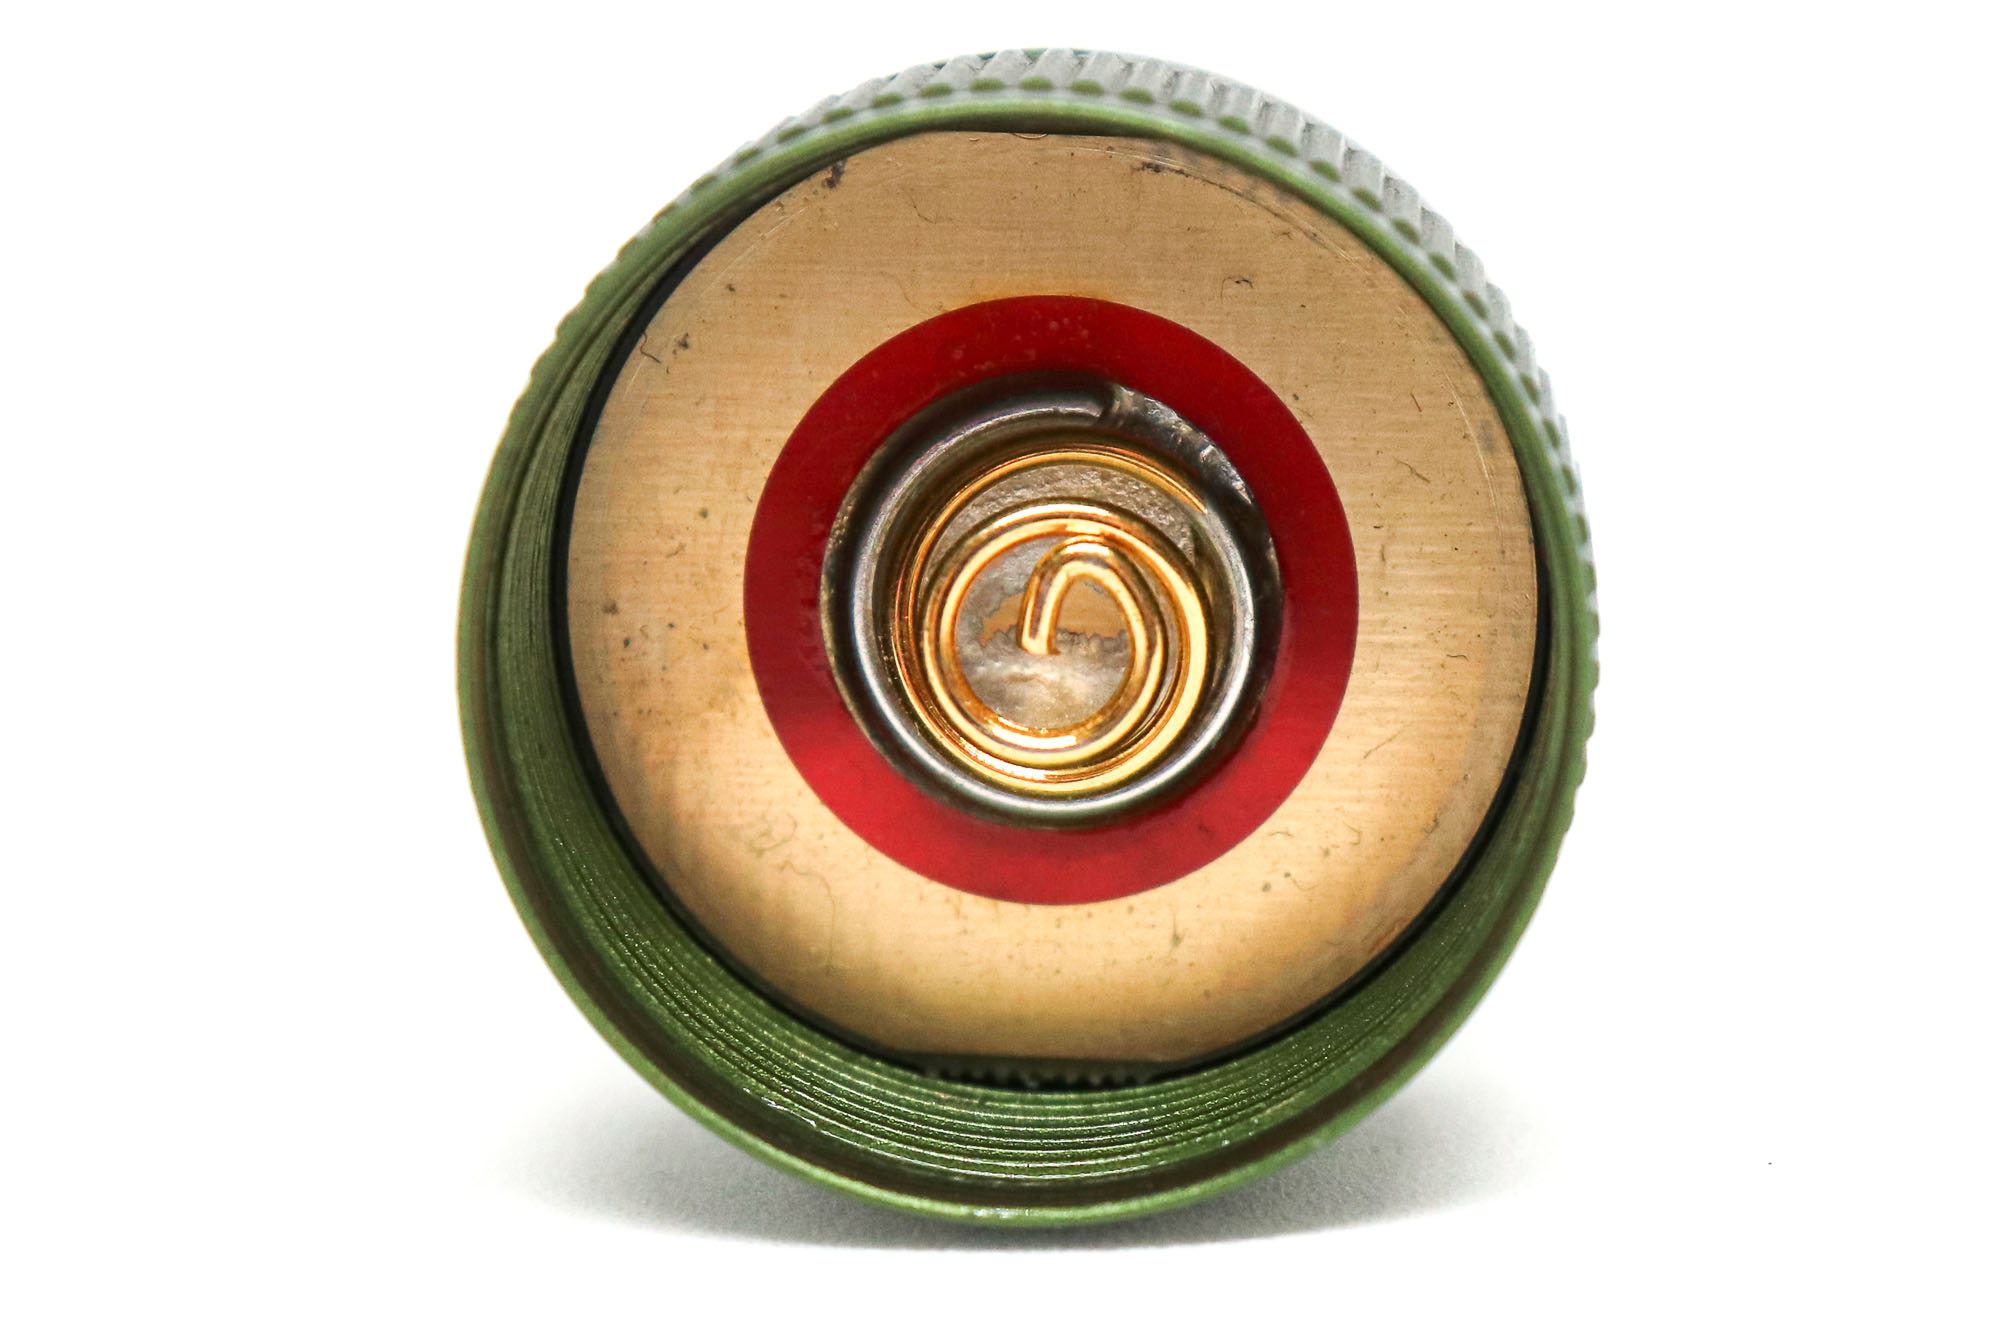
For this light I didn’t opt for the magnet in the tailcap, although my 18650 D1 does have this. Which can be very handy and it is a strong magnet. Do be warned though that you can end up collecting things like keys by mistake with it, it is a strong magnet!
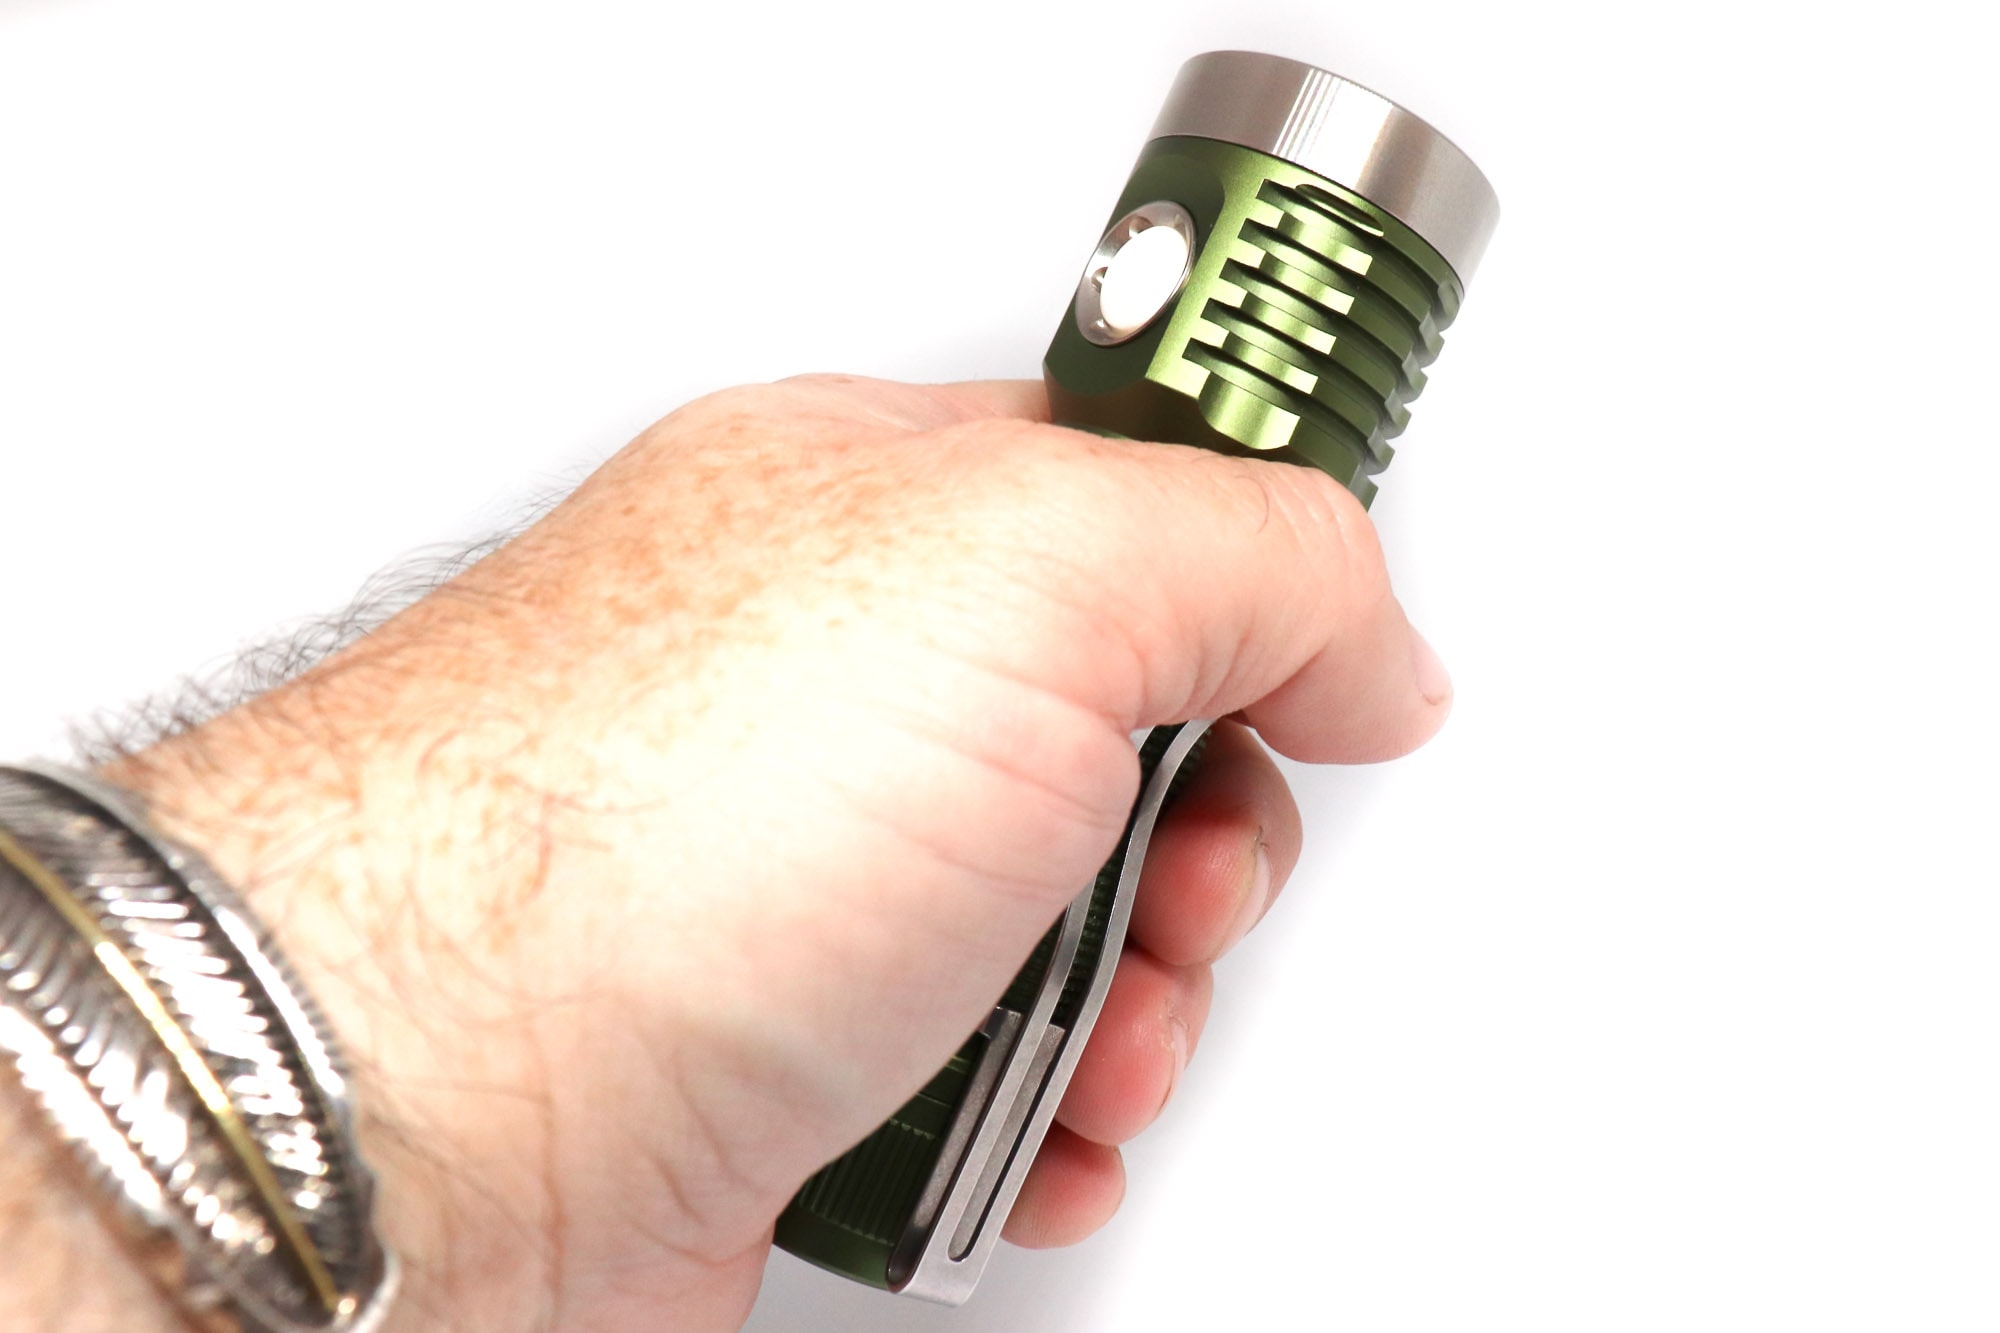
The pocket clip is a nice design and of deep carry specification, which again is a big tick in the box for an EDC light to my tastes. The only minor point I have is the pocket clip moves a little on the fine knurling occasionally. It isn’t really an issue, but just a little off. The clip on the 18650 D1 does not do this.
One of the key attributes I wanted to achieve with this light was a beam that would offer good throw, be usable up close, while offering a nice pleasant high CRI tint. To this end the D1K in this spec delivers and would be ideal for camping, dog walking, general use, EDC or as a home backup light. Other specifications with different LEDs can be tailored for more specific uses.
LED, Lens, Bezel, Beam, and Reflector
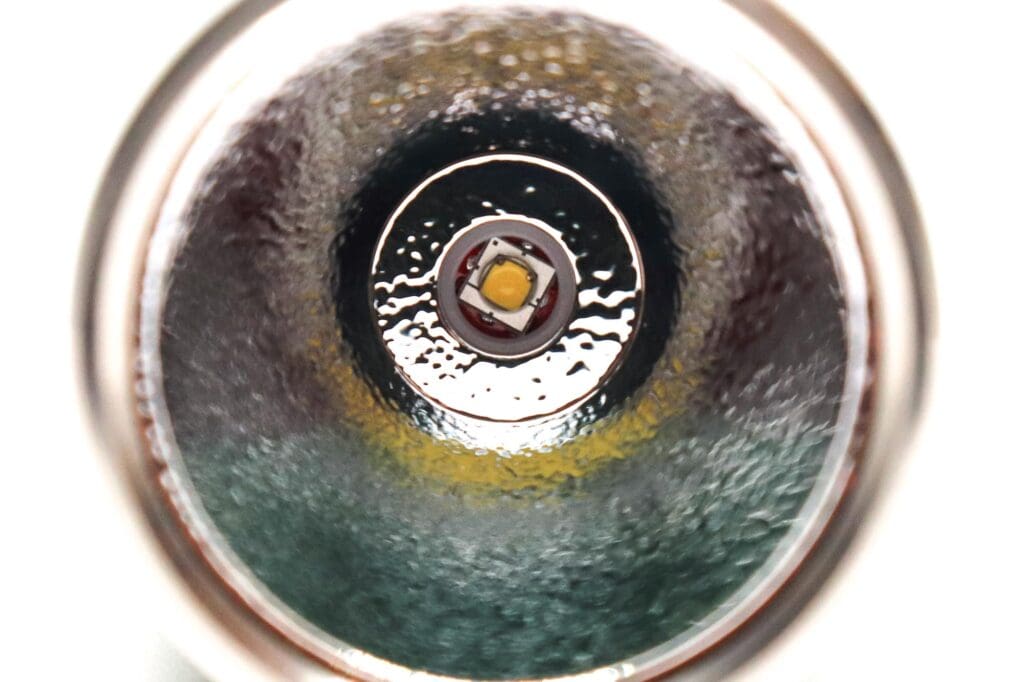
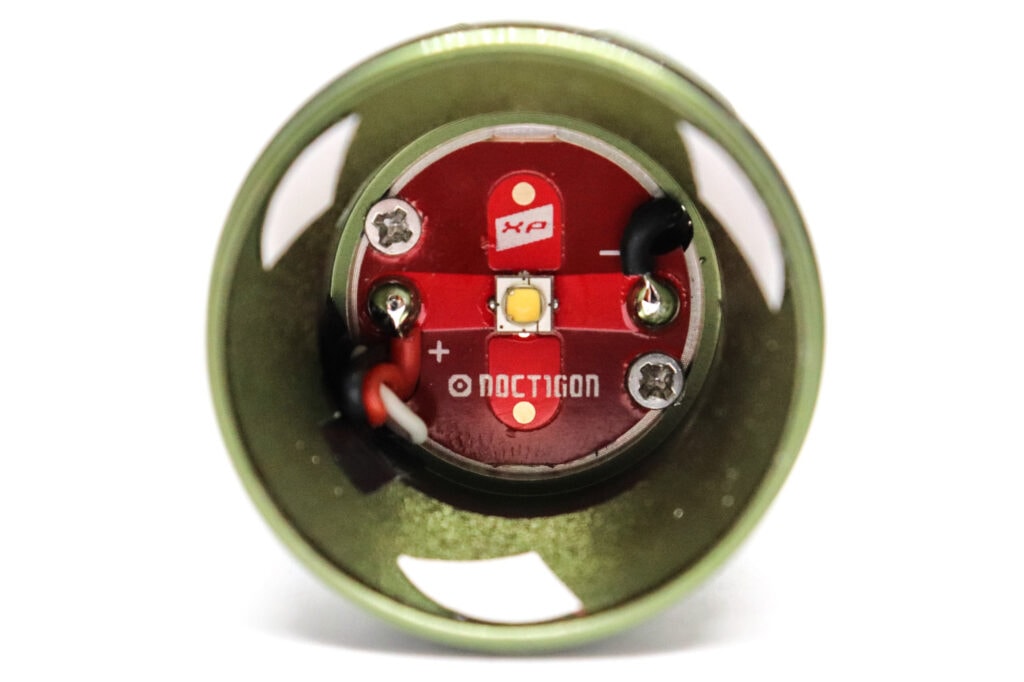
The beam really is the main thing with my custom spec of D1K. I truly love the tint of the SST-20 in 4000k 95CRI. I have this LED in a few other lights and it is my favorite LED in terms of colour, tint and rendition. More so than even the beloved Nichia 219 & 519 series of LEDs.
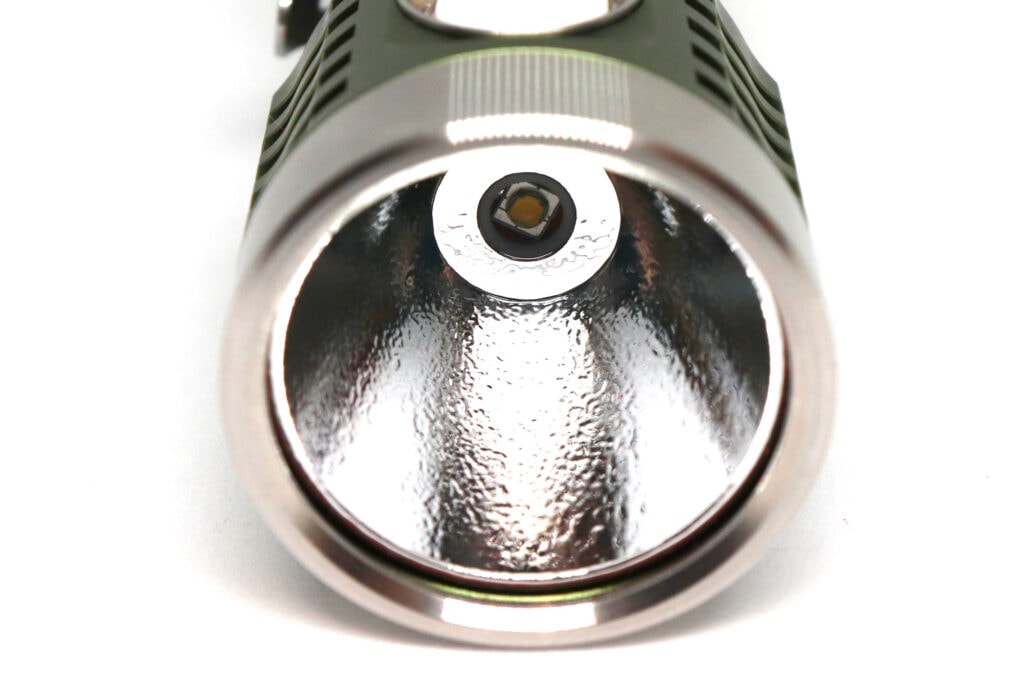
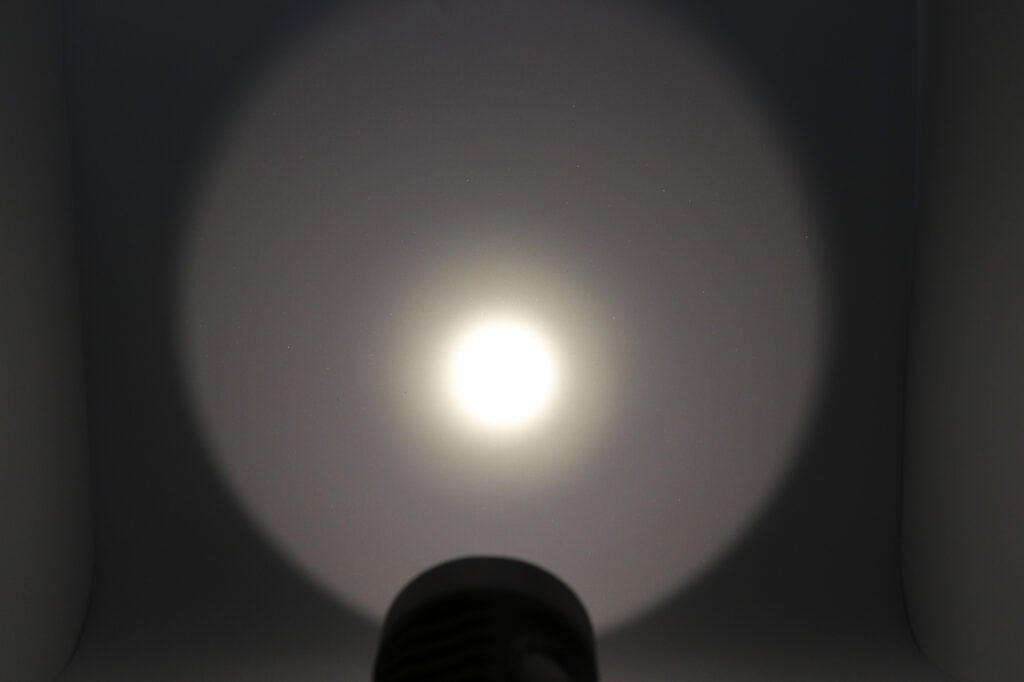
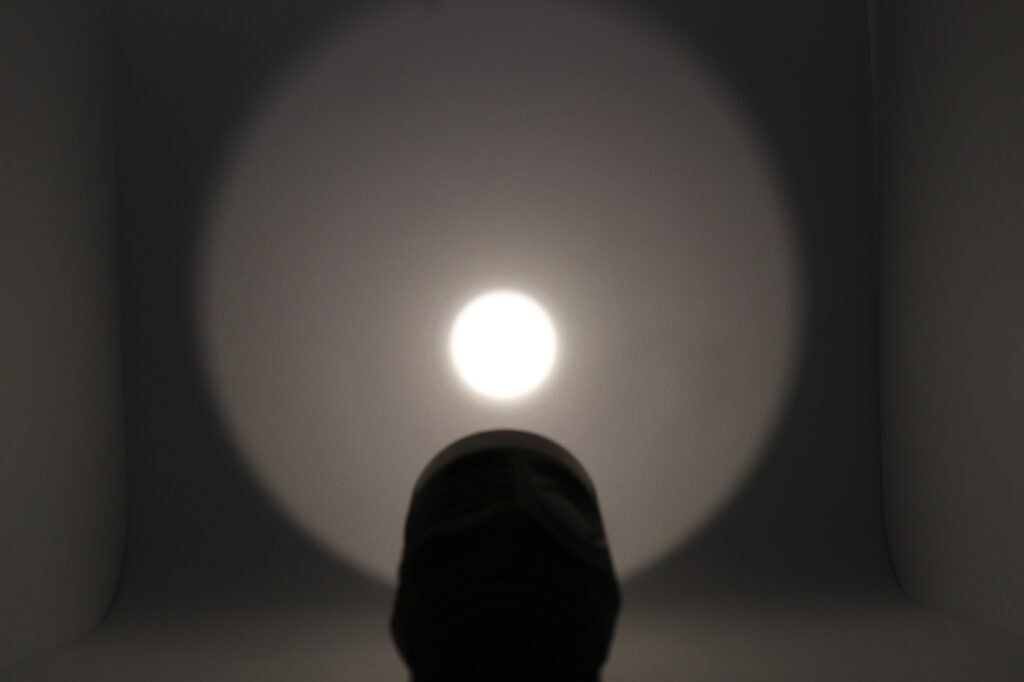
So the beam is wonderful on the D1K. As I specced it with an OP and SMO reflector I can tailor the beam profile too. The SMO reflector gives a lovely crisp hot spot with a good wide spill beam. In reality this is a really nice beam and does offer superior throw over the OP reflector. But the OP reflector just smooths out the hotspot a bit and creates a soft corona around it, while still offering a large highly usable spill beam.
Both setups are great, but I do prefer the OP reflect for general use which offers a softer beam indoors or when using low output modes close up. If I was primarily using it outside I’d probably go with the SMO reflector.
The SST-20 as a single LED will never offer any lumen output contests. If raw lumens are what you are after there are other options. But this combo offers relatively good throw, with enough lumens and a lovely looking beam in terms of tint, colour and CRI. I would happily forgo some lumens for a beam that is more usable and looks better.
The D1K has a nice stainless steel bezel that is easy to remove. Along with an AR coated glass lens.
Spectral measurements:
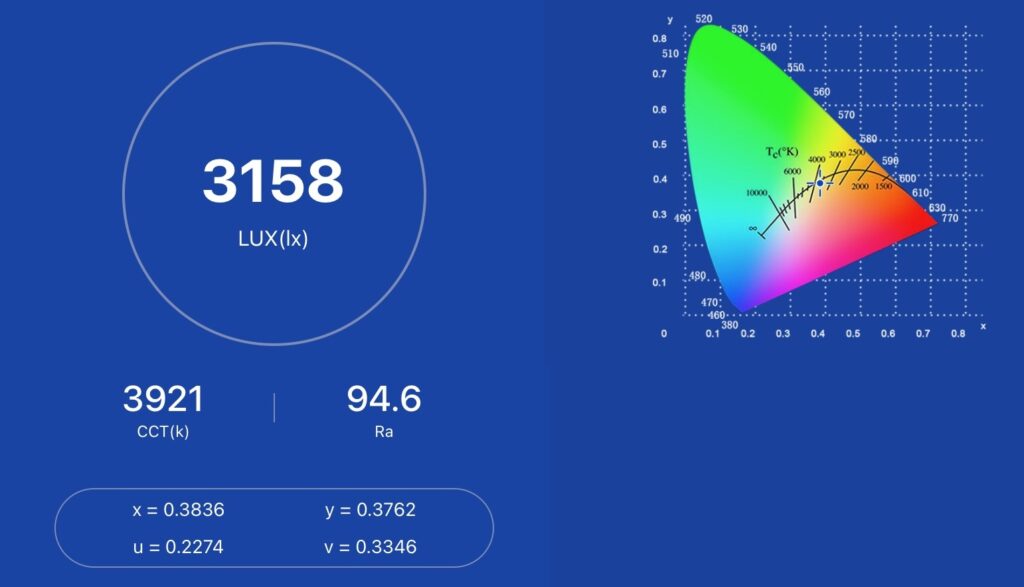
I used an Opple Light Master to measure the flashlight at 3 meters distance.
| Mode: | CCT: | CRI Ra: | duv |
|---|---|---|---|
| High | 3921 K | 94.6 | -0.0012 |
Dimensions and its competition
Dimensions:
| Emisar D1K | Millimeters | Inches |
|---|---|---|
| Length | 116mm | 4.6 in |
| Head diameter | 35mm | 1.4 in |
| Body diameter | 27mm | 1.06 in |
Dimensions are rounded to the nearest millimeter, and to the nearest tenth of an Inch.
Weight:
| Emisar D1K | Weight in grams | Weight in oz |
|---|---|---|
| With battery: | 158g | 5.57 oz |
| Without battery | 91g | 3.21 oz |
Weight is rounded to the nearest gram, and to the nearest tenth of an Oz.
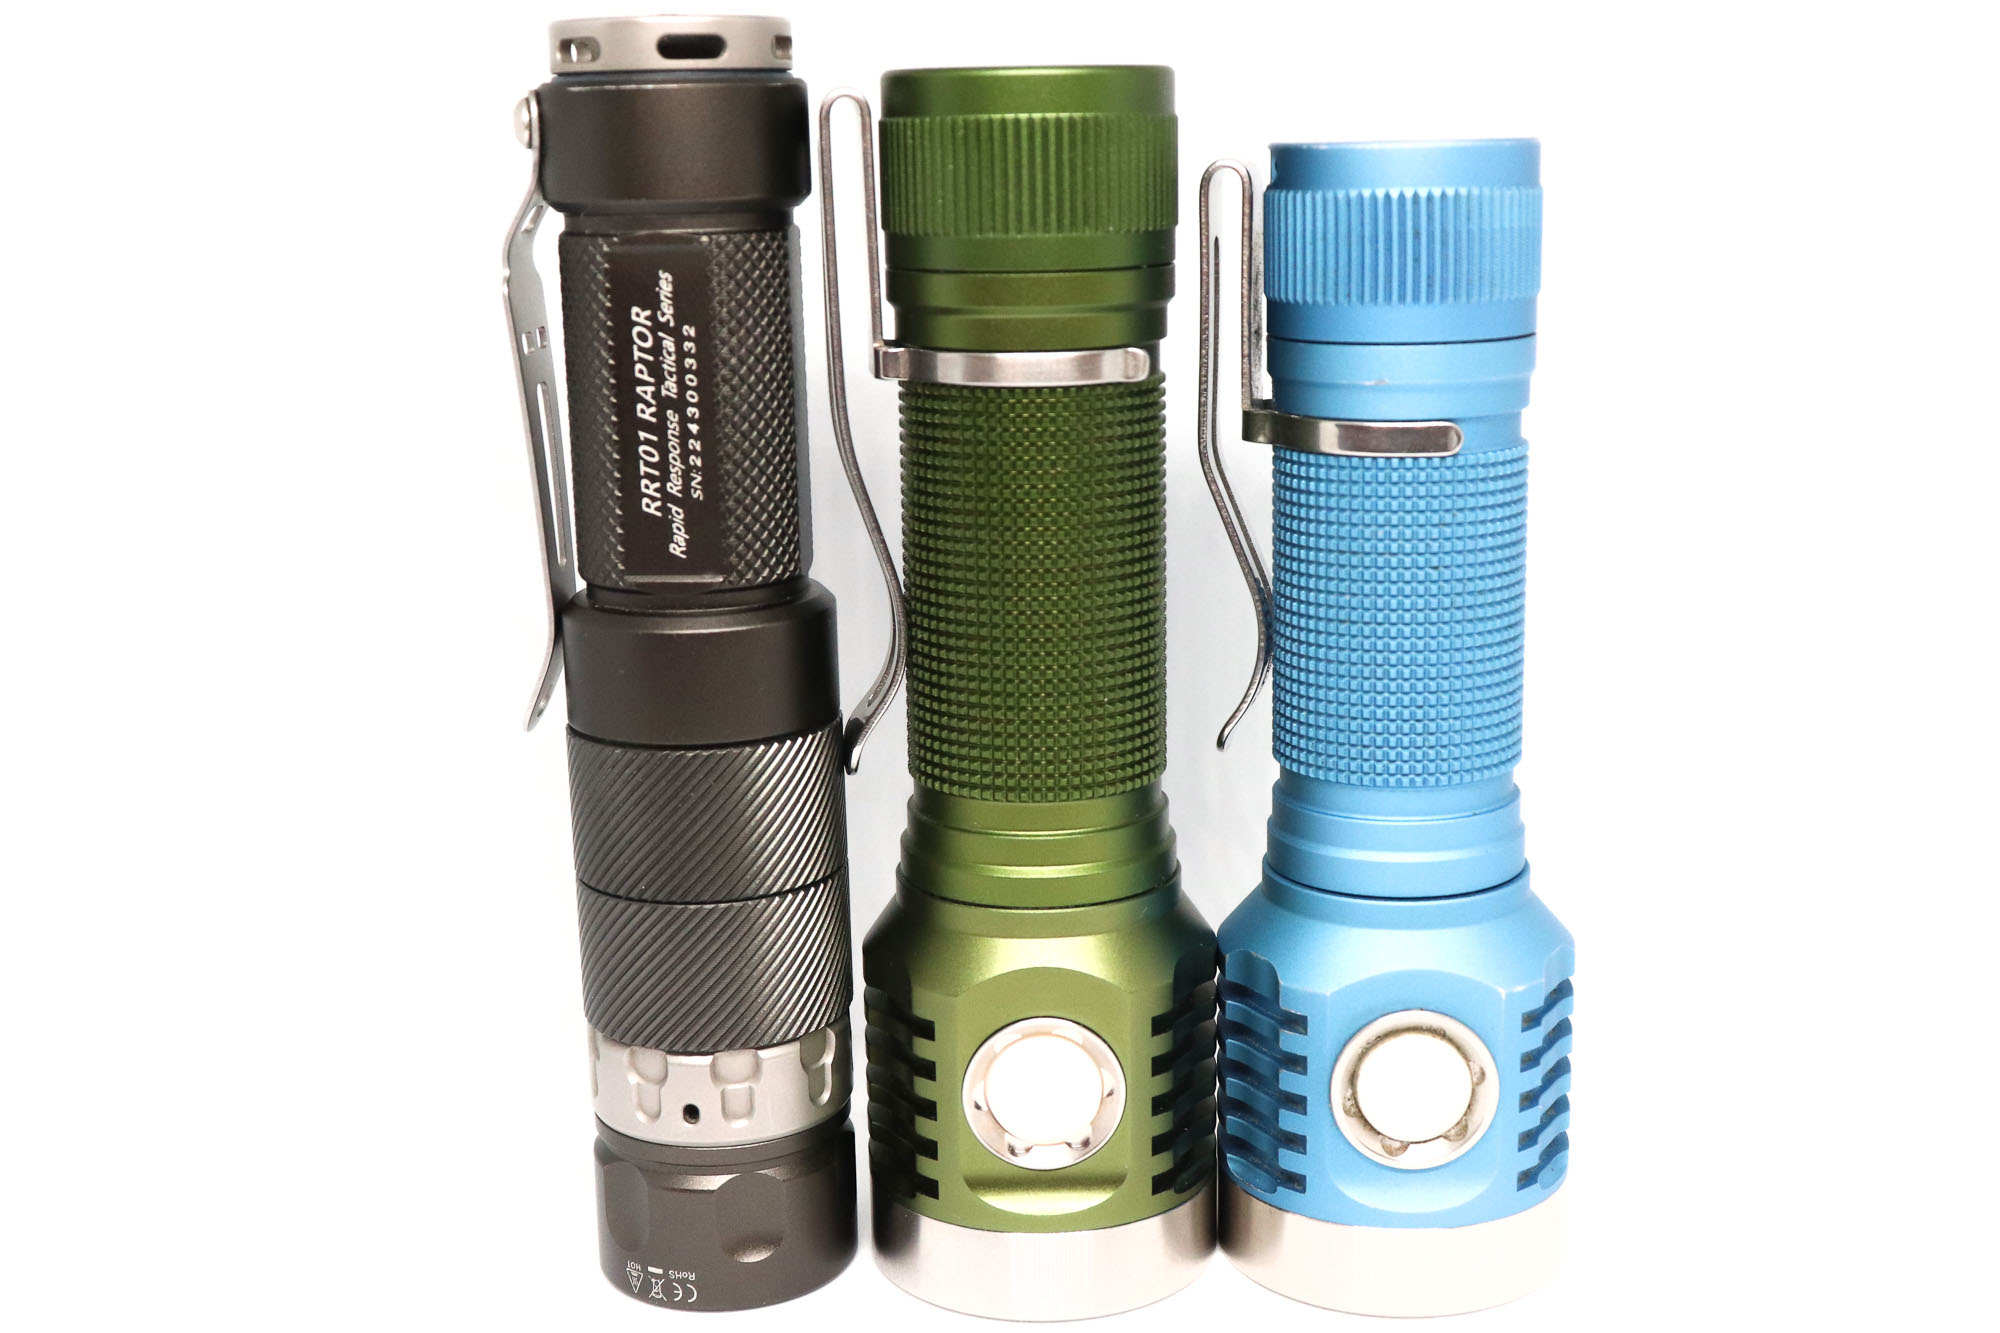
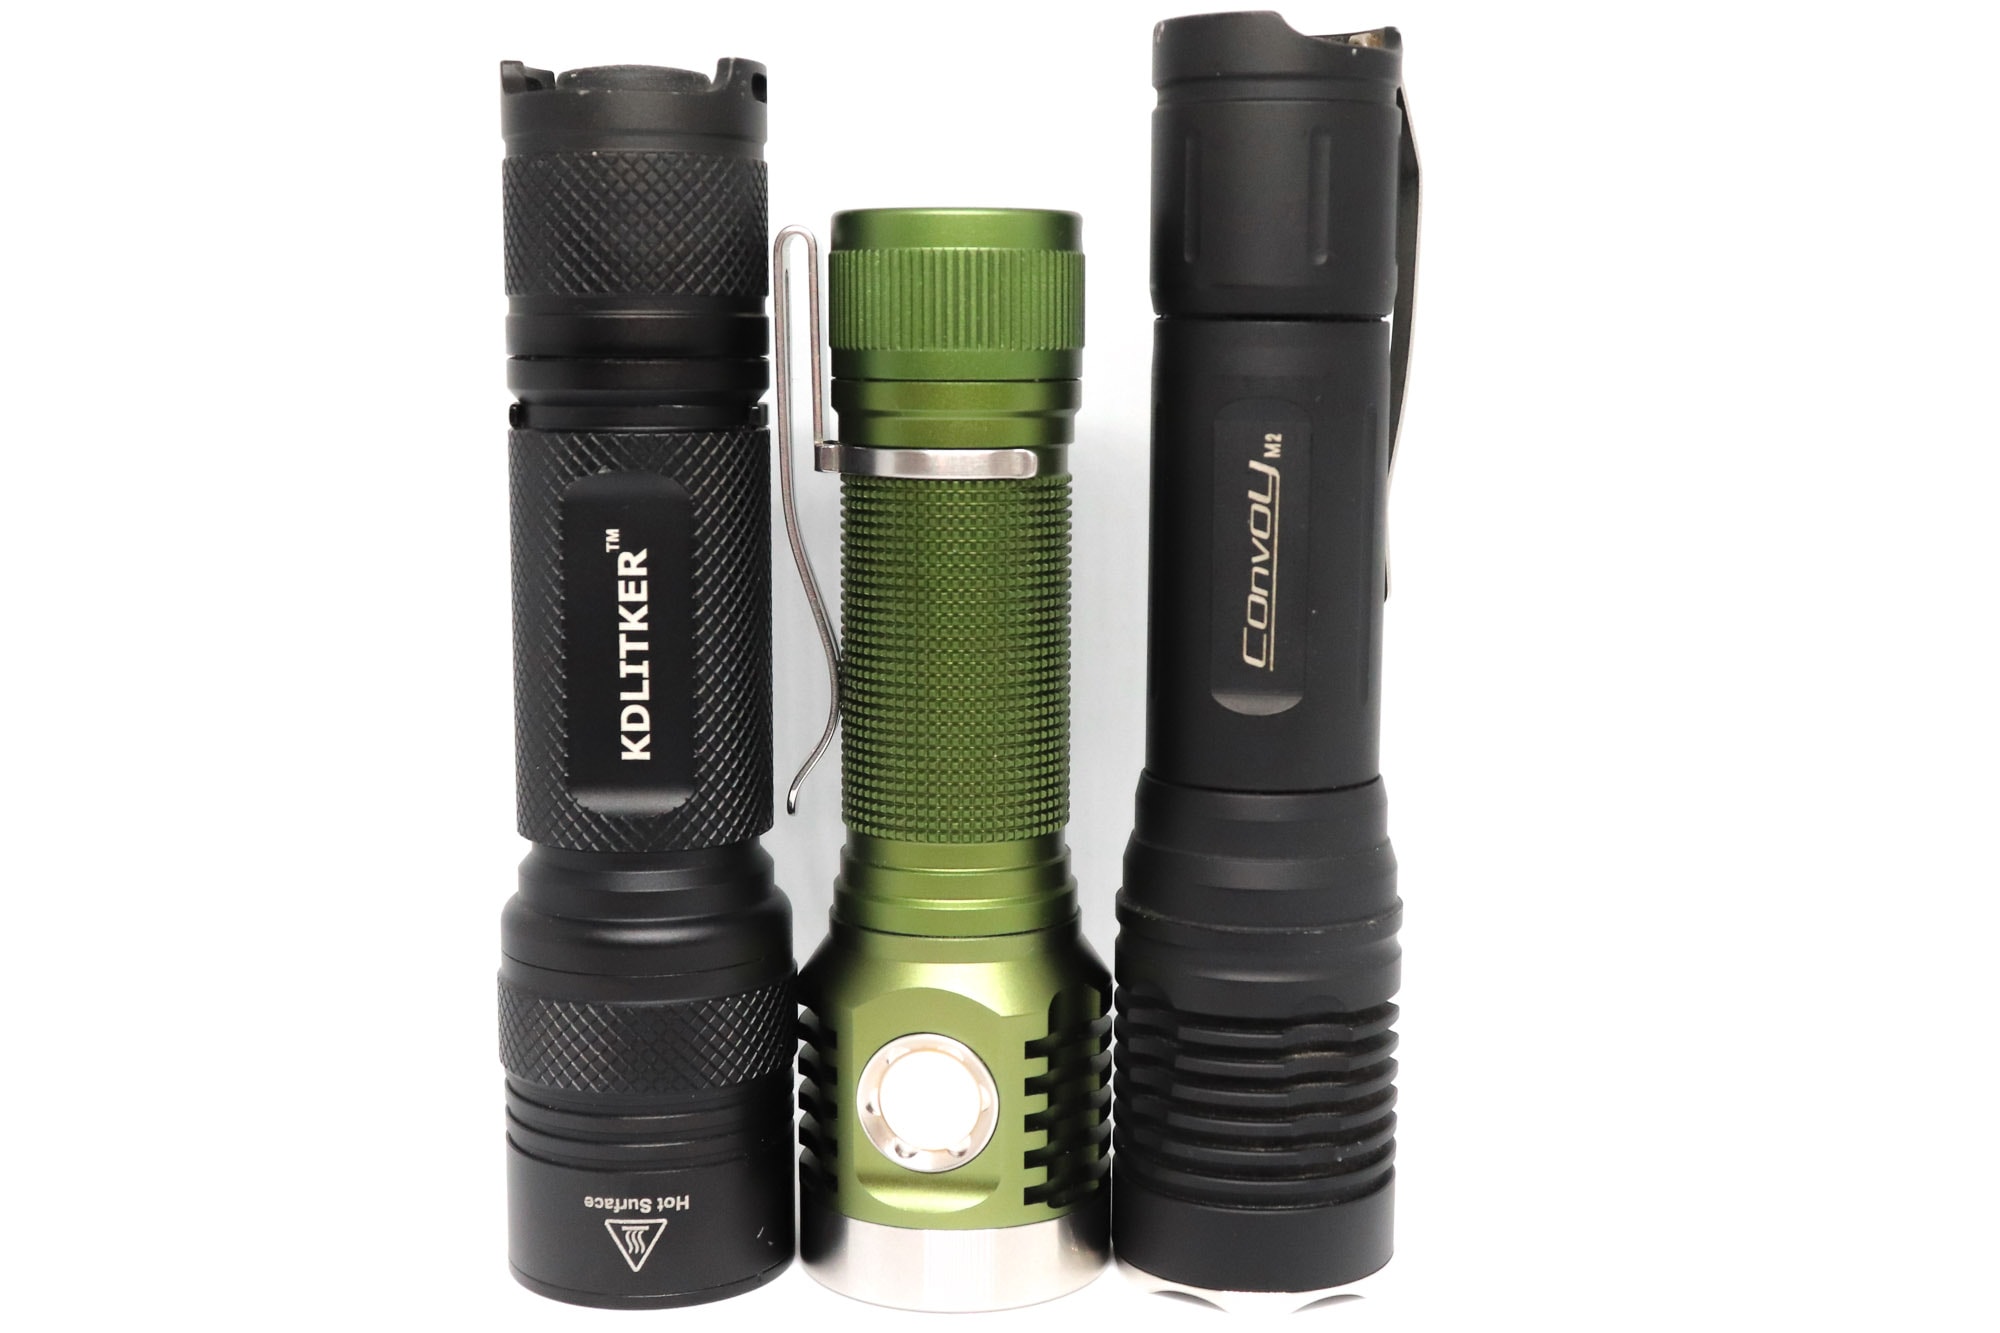
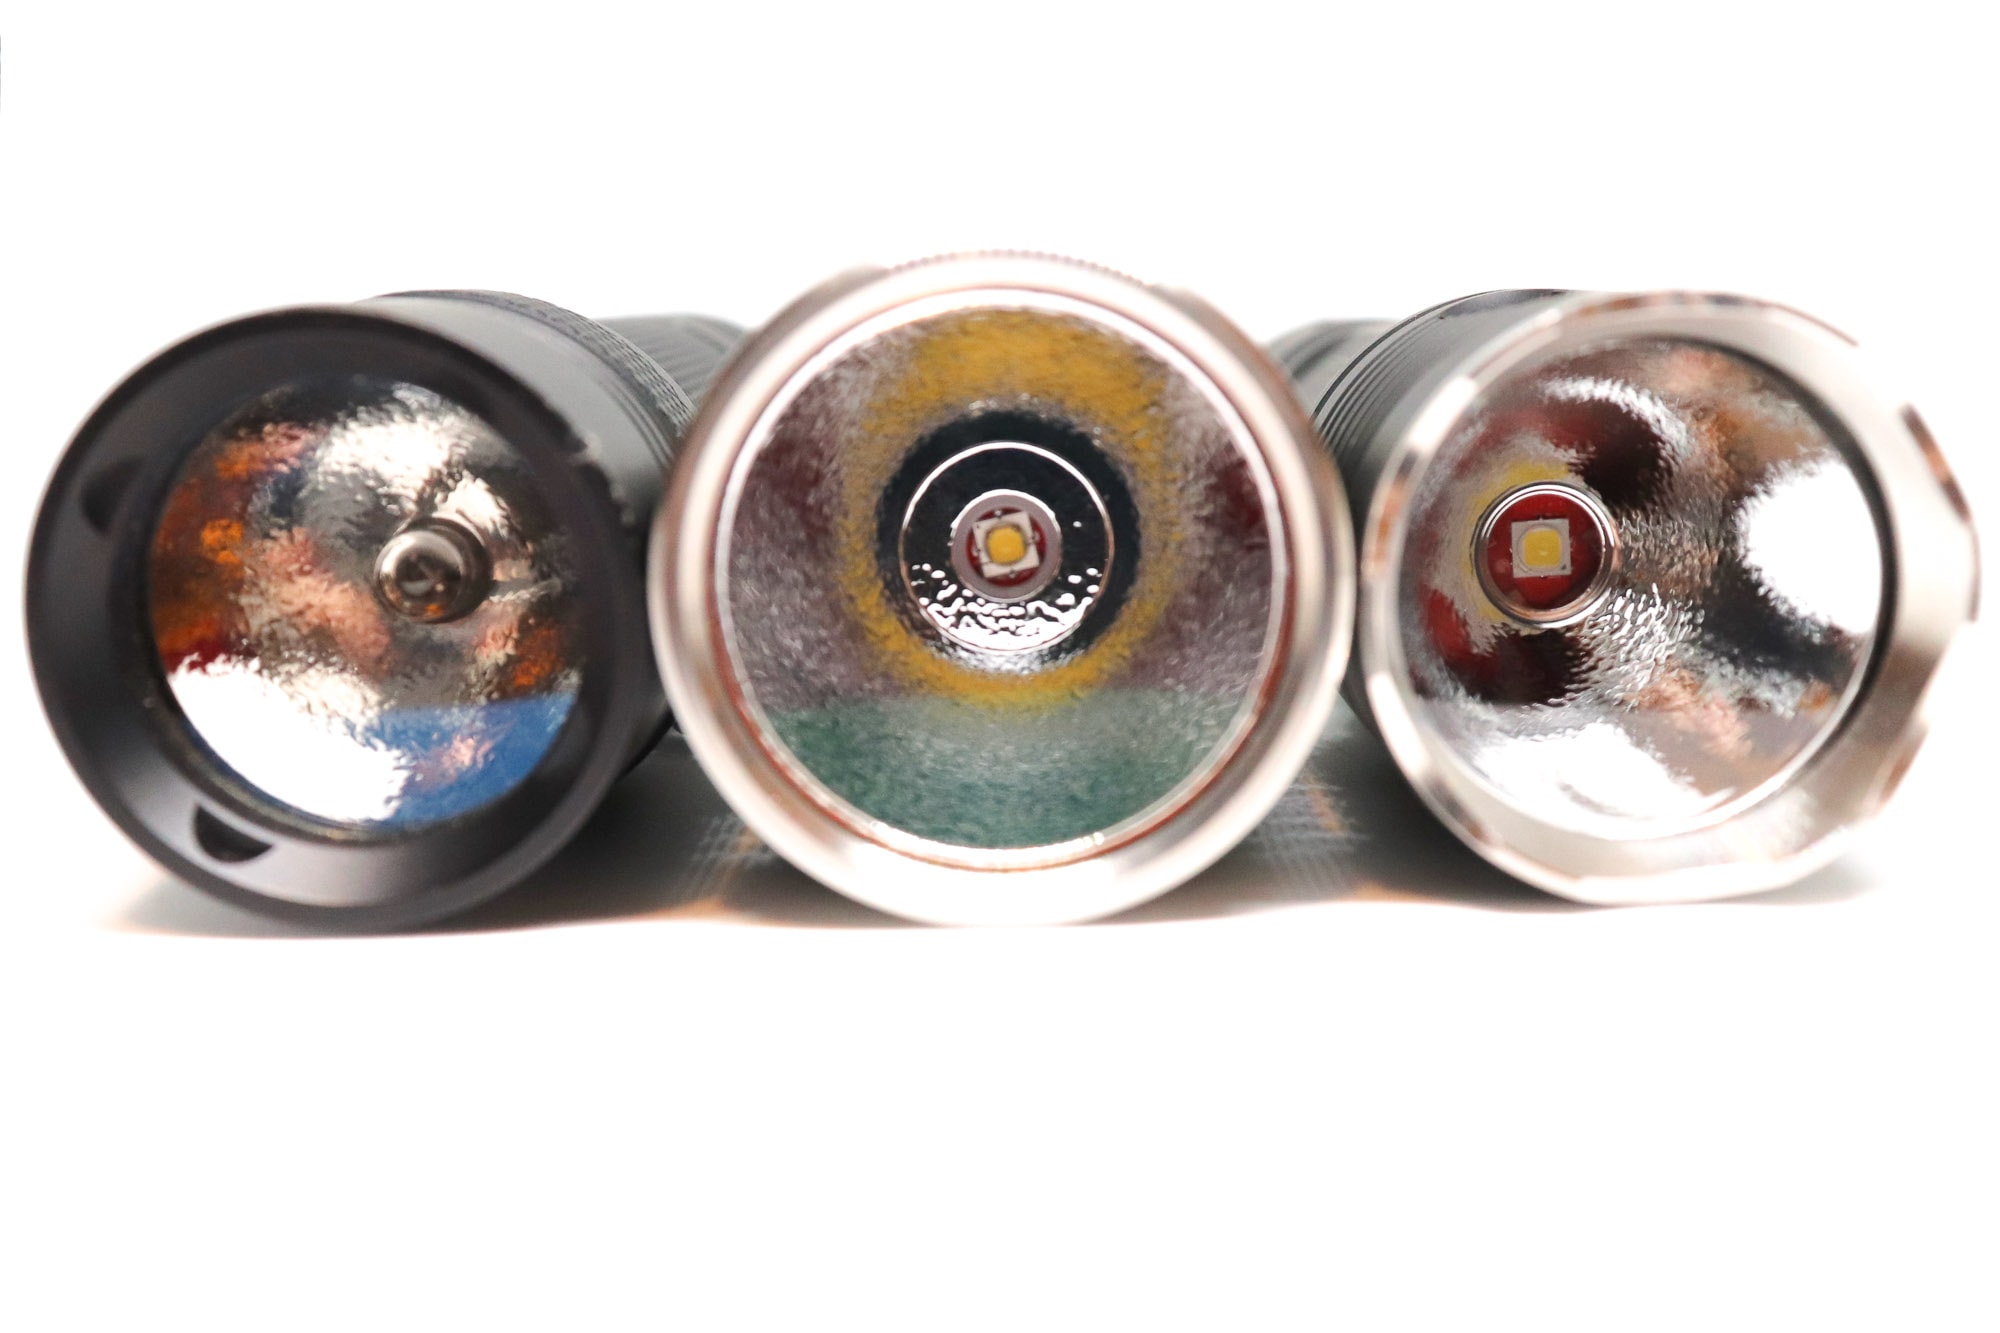
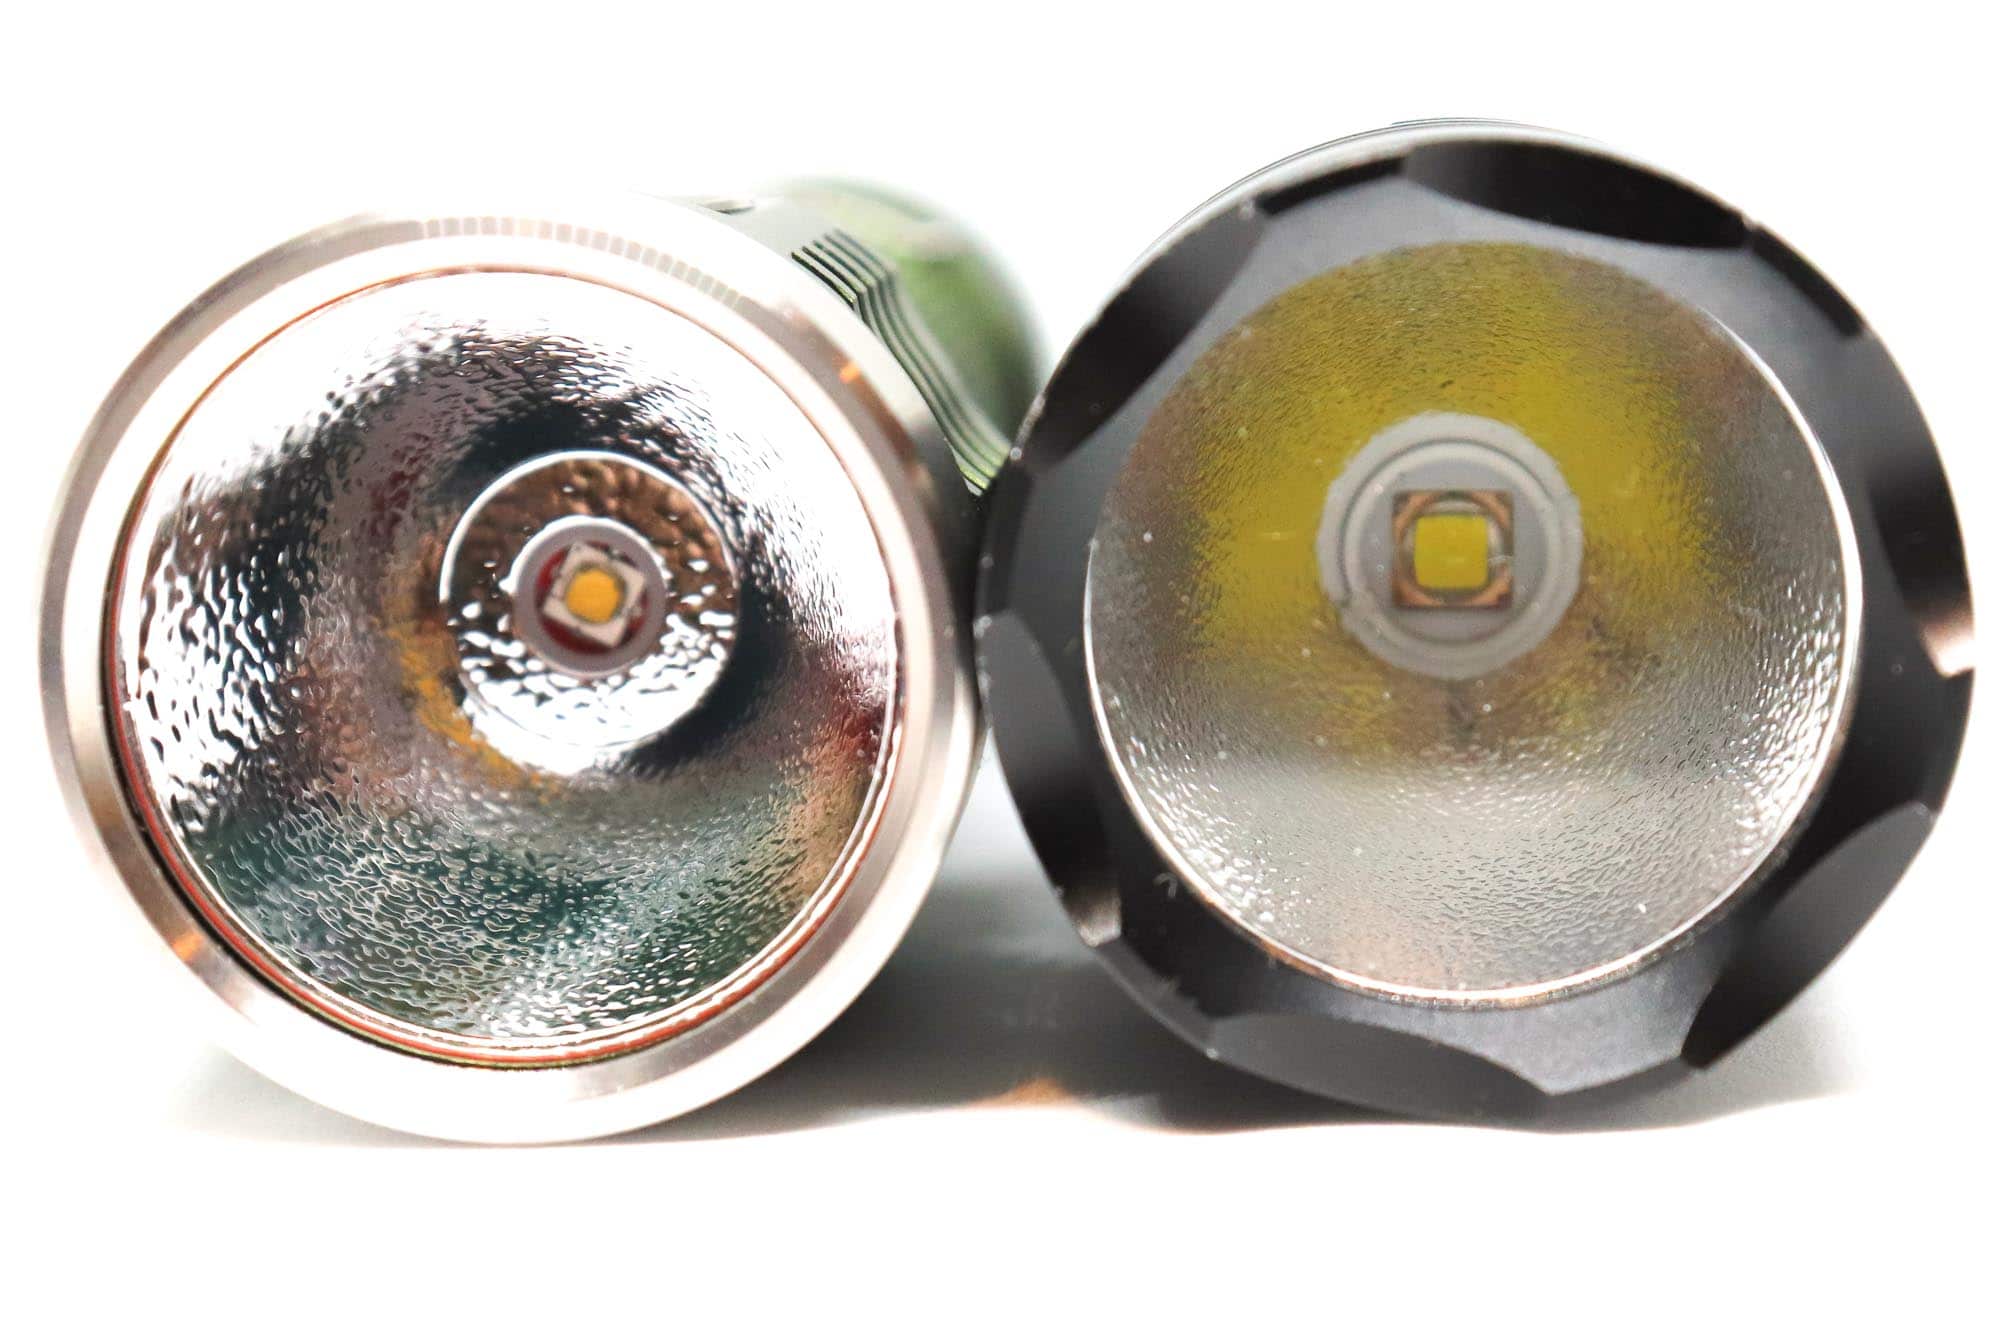
Flashlight size comparison with its competition:
Group 1: Jetbeam RRT01 Raptor, Emisar D1K, Emisar D1
Group 2: KDLitker E6 21700, Emisar D1K, Convoy M2
Group 3: Emisar D1K, Convoy M1


Emisar D1K UI: User Interface and Driver
The D1K comes equipped with the Anduril 2 UI for its user interface. This UI is highly configurable, but also has some very good features. To see all of the mode options the Anduril 2 UI offers, referring to UI diagram gives the best insight. But I’d like to highlight some key modes:
Anduril 2 User Interface
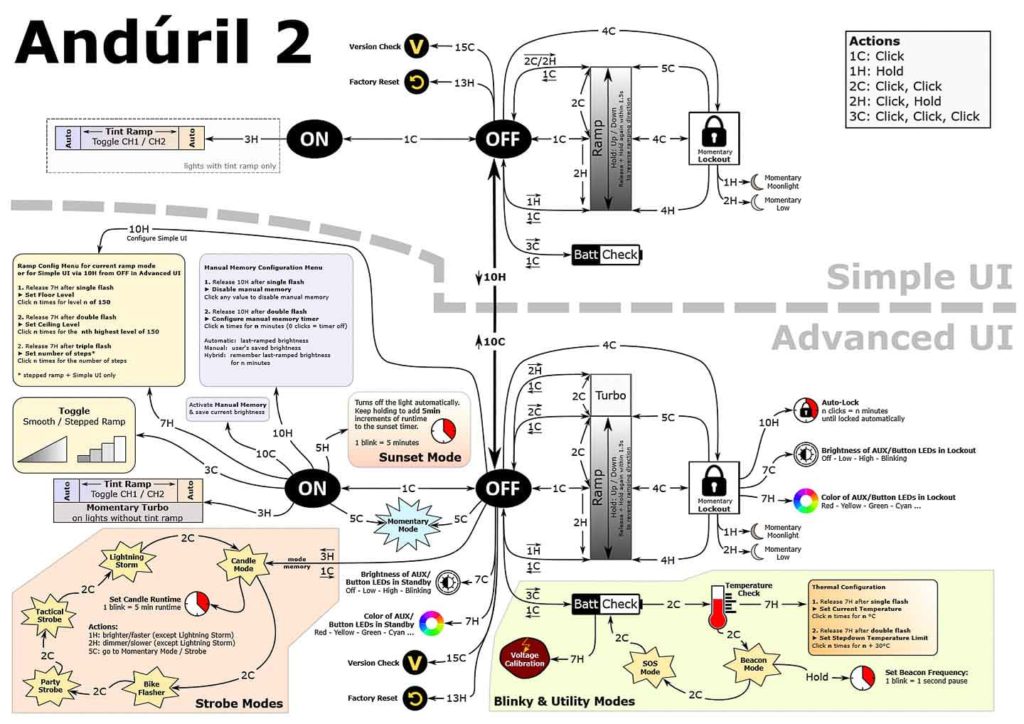
Here is another Anduril 2 image.
And by default, it uses the Simple UI… and here is the UI diagram:
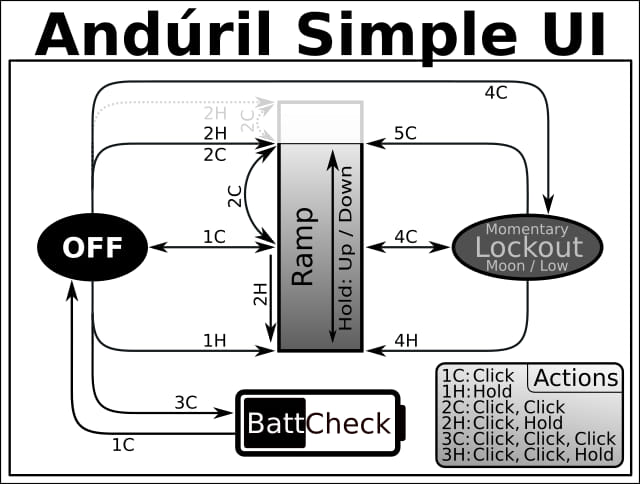
Anduril2 has two UI’s available: Simple and Advanced. The light came with the Simple UI enabled, and I think it’s kind of a misnomer because it’s still a little complicated for a first-time user. However, those familiar with the original will pick it up pretty quickly. Simple UI is missing some of the familiar features present in the original, namely the special blinky modes, temp check, and thermal configuration (those are present in the Advanced UI), and there’s no “muggle” mode either. You still get access to smooth ramping (stepped is, you guessed it, only available in Advanced UI), lockout, momentary high, battery check, and some useful lock/unlock modes.
The Advanced UI is appropriately named because it’s, well, advanced and there’s a plethora of options and configurations available. There’s probably way more features than the average user would ever dip into, but it’s nice to know you can tweak things like the voltage sensor calibration for batt check, AUX LED settings, and even configure the auto-lock. I found this to be a pretty useful feature that enables the light to automatically turn off after a certain amount of time if the light is accidentally activated.
Modes: Simple and Advanced UI both have many standard and blinky modes available, but the main modes are stepped and smooth ramping, but stepped ramping is only available in Advanced UI, and smooth is enabled in both Simple and Advanced.
Switch to Advanced UI from Simple: 10 clicks, but hold on the 10th click
From OFF:
- Press and hold: Turns on in either smooth or stepped ramp (depending on which mode is enabled)
- Single click: Turn on in last mode (step or ramp state-again depends on which mode)
- Double click: Ramp ceiling/turbo
- Triple click: Battery check (in Simple and Advanced UI)
- Triple click and hold: Special strobe modes-remembers last used (in Advanced UI)
- Quad click: Lockout mode. In lockout mode you have different options available:
- 1 click: momentary moon (bottom of ramp)
- 2 clicks: momentary (higher floor)
- 4 clicks: turns on in ramp mode
- 4 clicks with a hold: on in ramp mode, lowest/floor
- 5 clicks with a hold: on in ramp mode, highest/ceiling
- 10 clicks with a hold: configure the lock timeout threshold (in Advanced UI only). This is a new feature for Anduril2, it allows you to set a timeout to the lock, where the light will lock after a pre-set elapsed time.
From ON:
- Press and hold: Ramp up (depending on the mode)
- Single click: Turn off
- Double click: Ramp ceiling/turbo
- Double click and hold: Ramp down
- Triple click: Toggle between smooth and stepped ramping (in Advanced UI only)
- Quad click: Lockout mode (see above for the lockout options)
Mode memory:
- Yes, memorizes last on state setting either smooth or stepped ramping, but does not remember blinkies
Low voltage warning:
- Yes, when in operation, the light steps down brightness gradually until turning off when the cell is around 2.9 volts.
Strobe/blinkies
- Yes, many! The blinkies are accessible from off with 3H (click click click-hold) in ADVANCED UI only. You switch between strobe modes with 2 clicks:
- Candle mode
- Bike flasher
- Party strobe
- Tactical strobe
- Lightning storm
Lock-out mode:
- Yes. In Simple or Advanced UI, lockout is accessed by 4 clicks from on or off. 4 clicks to unlock. The lockout enables momentary operation in the moon mode, however, 2H (click click-hold) enables low mode. There are other lockout modes available (see the diagram).
Temp check and thermal calibration mode
- In the first version, you could do both the ambient temperature sensor calibration and thermal ceiling at the same time, but in Anduril2, it’s a little different. When in temp check, click 7 times and hold on the 7th to enter the thermal configuration. To configure the ambient temp, wait for the first flash and then set the ambient, but once you’ve done that, you need to go back to the temp check and click 7 times, hold on the 7th, this time, don’t let off the button. Wait for the 2nd blink, and then you can set the thermal ceiling.
Additional/summary info on the UI:
- While Anduril 2 can be slightly annoying at times due to how many features it has. Which really does require you to keep a copy of the interface guide to hand. It does some core things very well that are easy to use and remember.
- First off is the fact you can at the time of turning the light on, allow you to choose what output you need. Having instant access to either end of the output range is wonderful and I wish more light makers would take note of this. Even if they don’t include all the bells and whistles of Anduril 2 UI.
- Fast, but not too fast smooth ramping up and down the output range means that no matter what output mode you decide to start on. It is quick, intuitive and easy to get to your desired output mode or to increase or decrease the output.
- Simple electronic lockout which then gives you a low or moonlight momentary function.
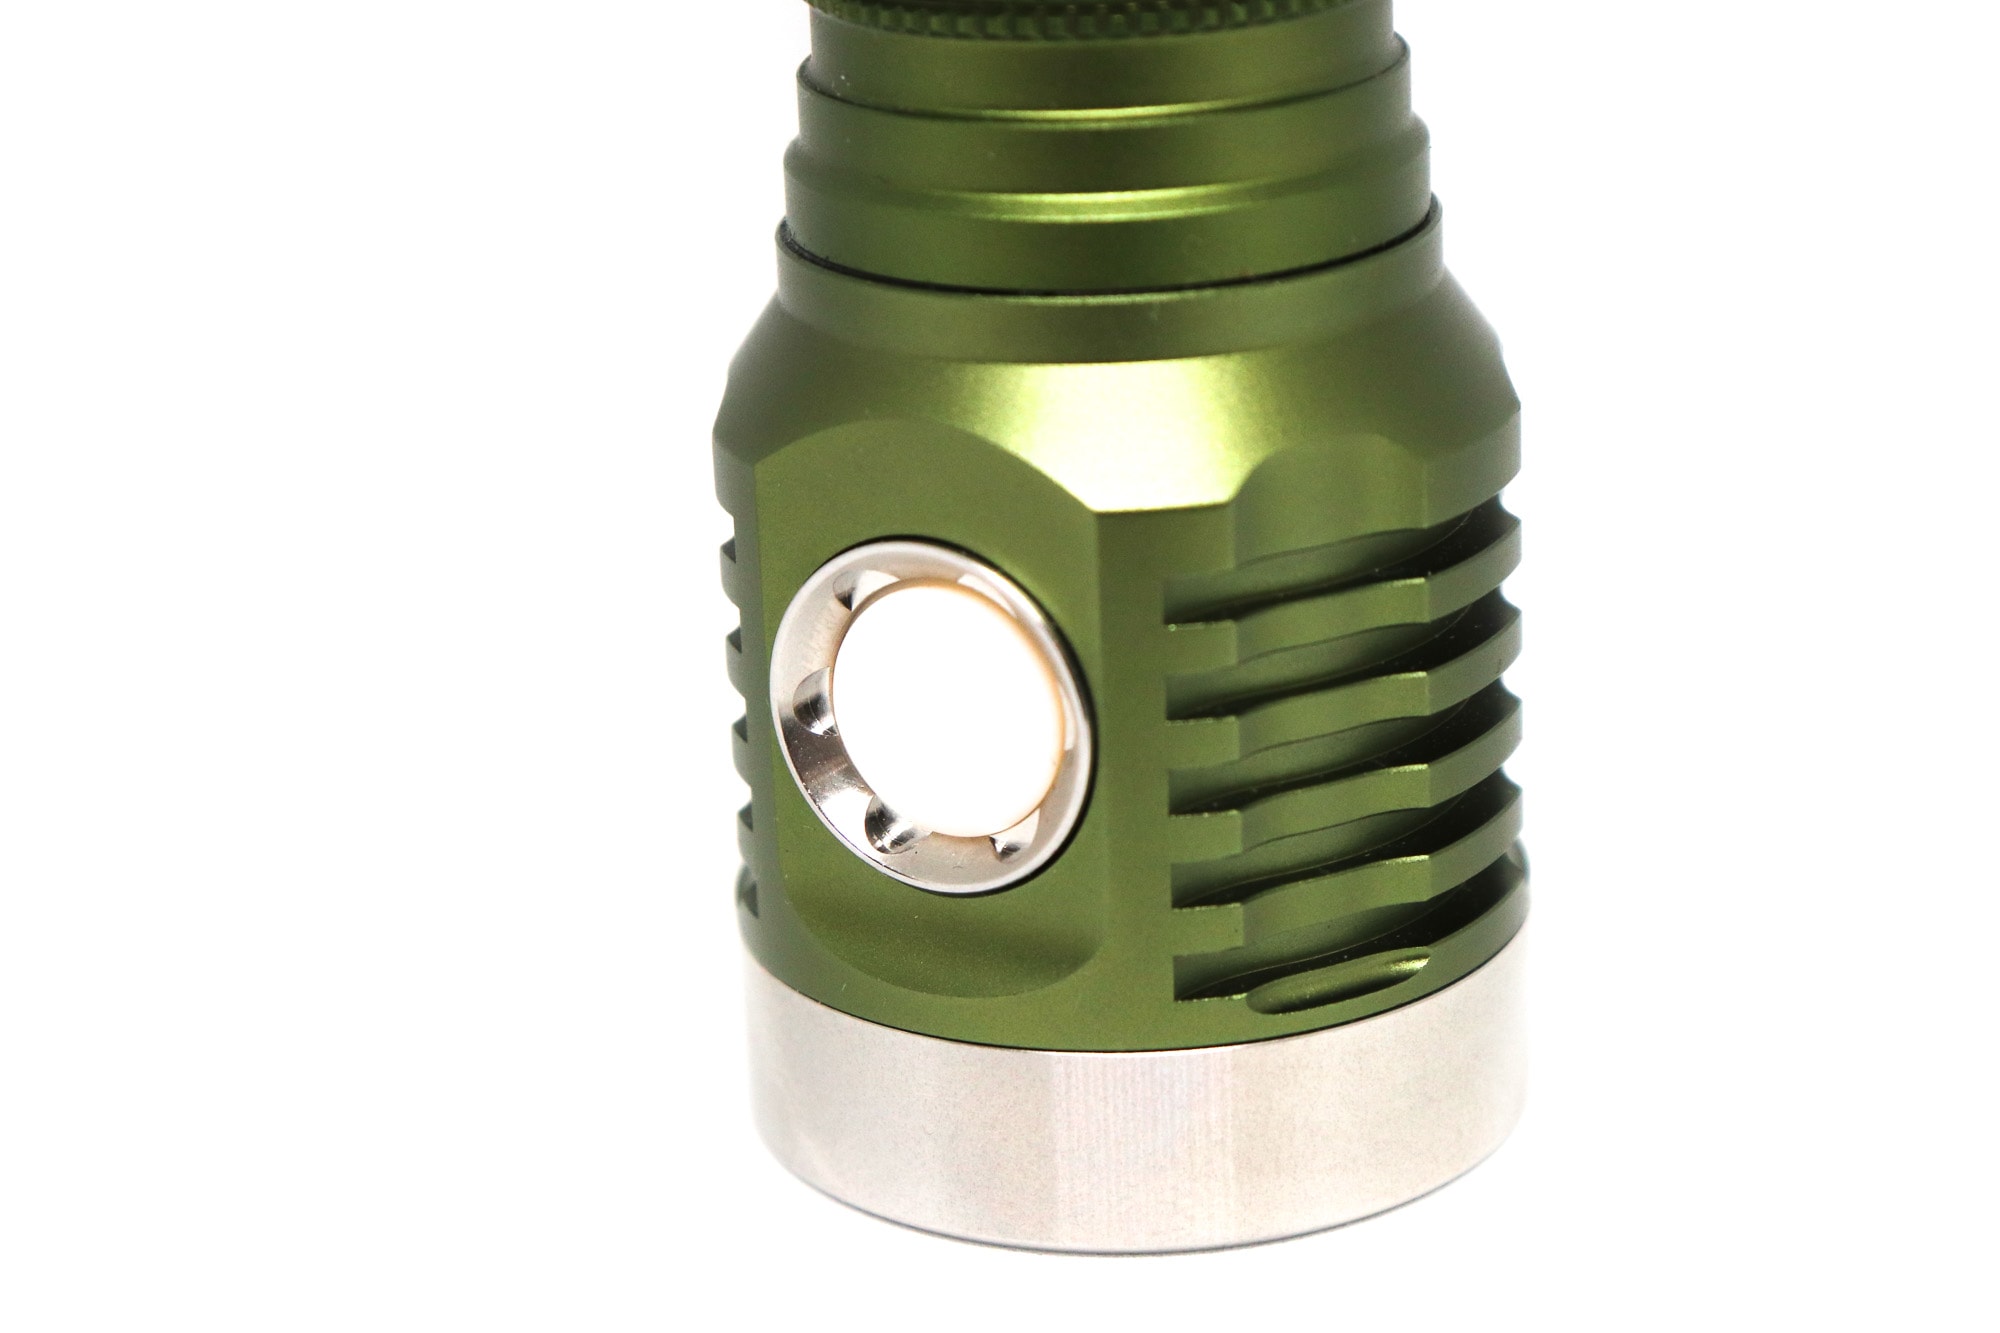
- Other points worthy of note is the switch. It is positive, nice to use and recessed. More importantly it has never accidentally activated in my pocket, which is a must for any side switch EDC light.
- Anduril 2 also allows the switch to illuminate, the colour of the light is an option when buying.
Emisar D1K Charging and batteries
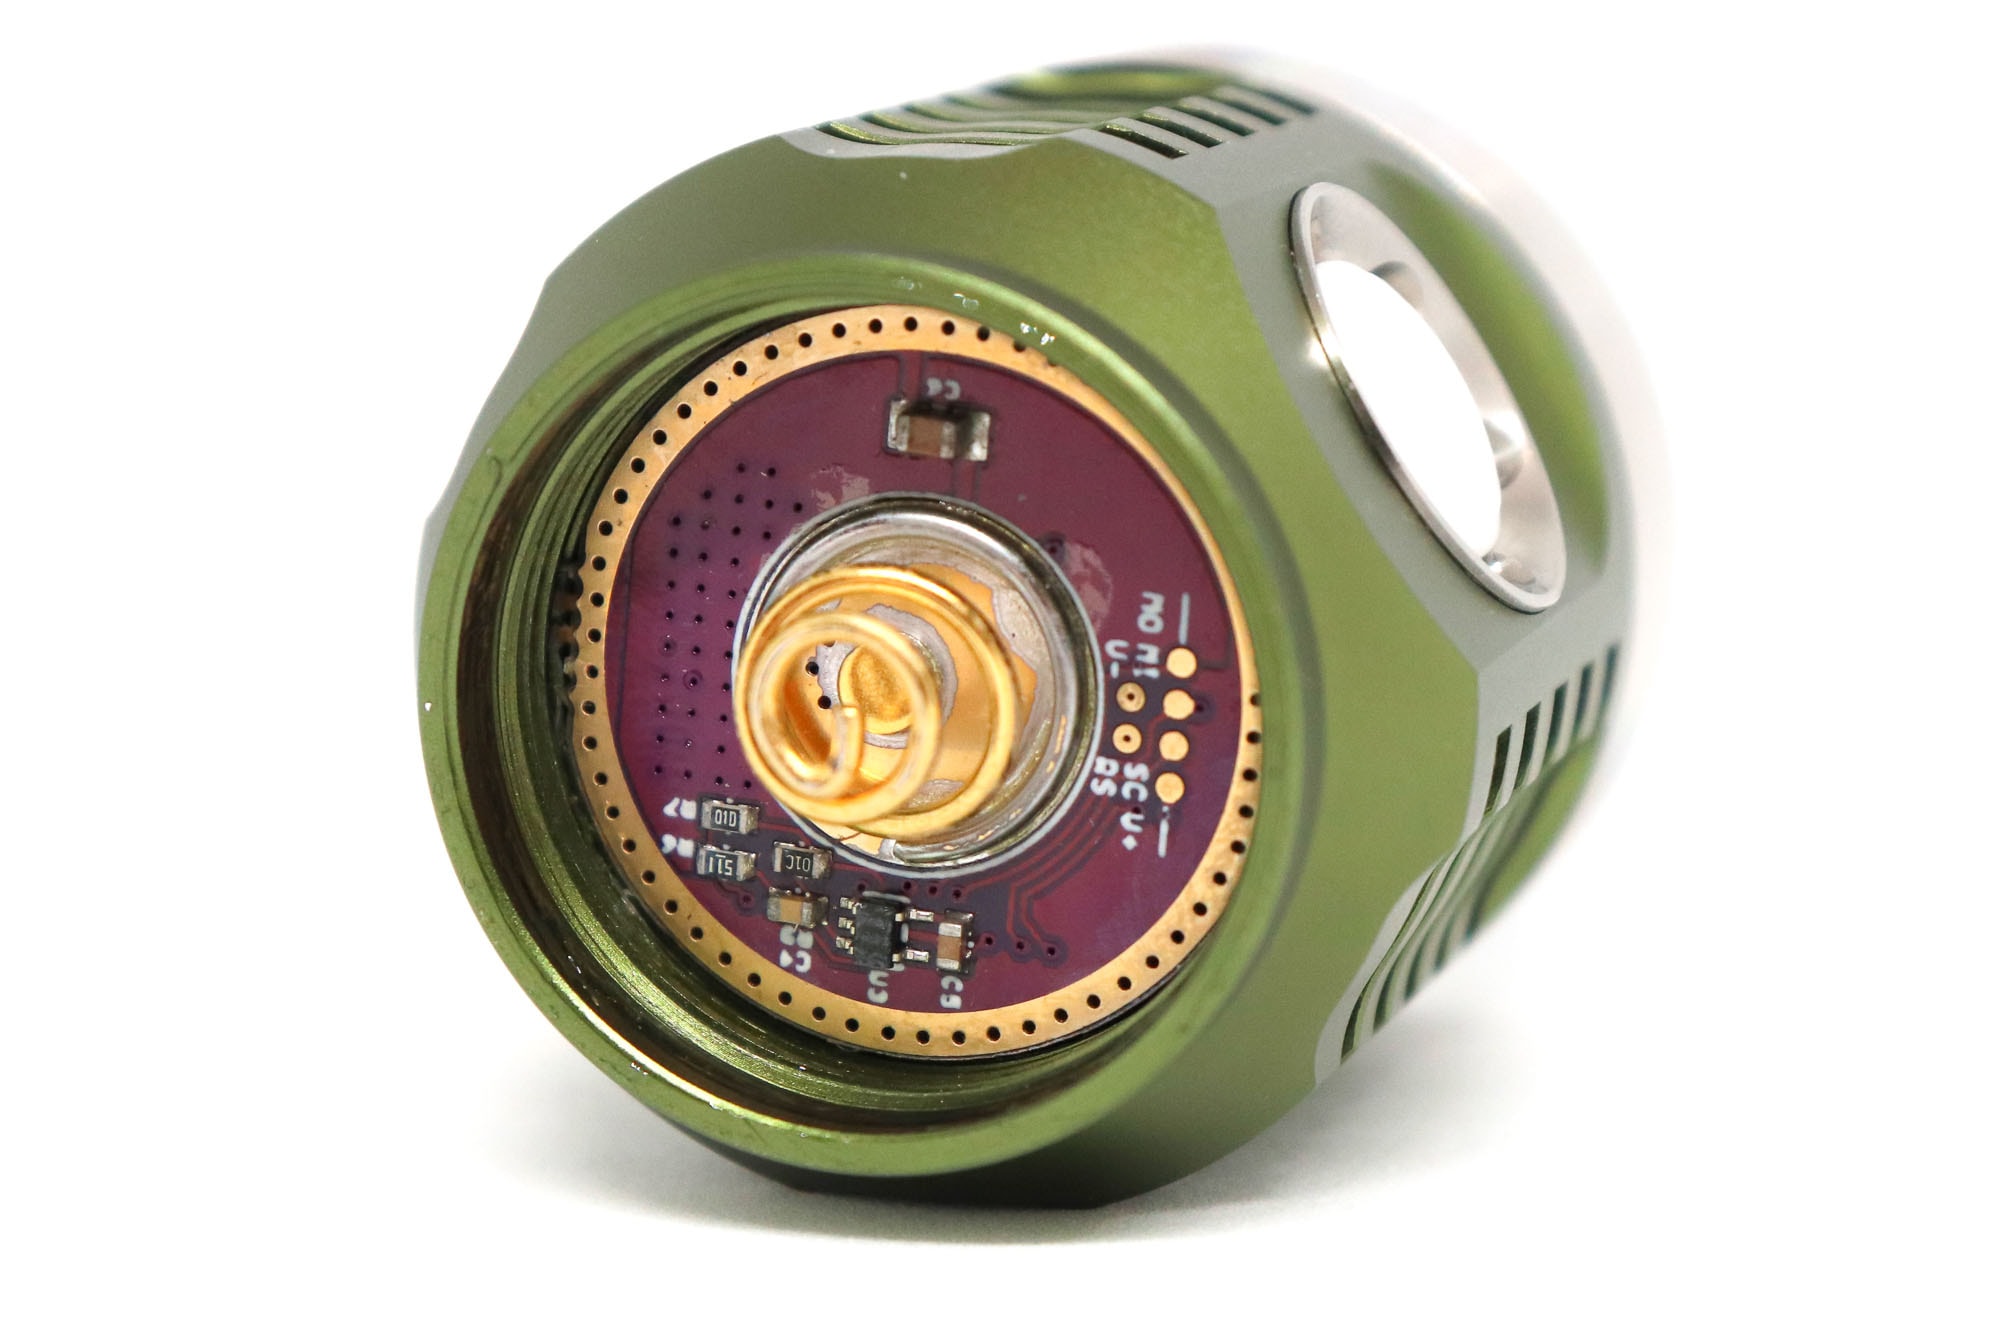
The D1K is not provided with a battery and has no onboard charging facility. You will need to supply your own battery. Any 21700 should be compatible with the light as there are springs on the driver board and tailcap alike.
Depending on your specific LED configuration a high performance INR chemistry battery is likely to perform best in terms of output and runtimes.
Performance test
Lumen measurements
How Lumens are Measured: Understanding ANSI FL1 Standards How Lumens are Measured: Understanding ANSI FL1 Standards: The ANSI FL1 standards specify that output in lumens should be measured 30 seconds after turning on, as this is the standardized time for measuring brightness according to the industry standard. This is why we focus on this part in our measurements. The ANSI FL1 standards require an ambient temperature of 22 ± 3°C. We record the ambient the ambient temperature to identify potential reasons for any observed discrepancies.To test the performance I use a homemade integrated sphere for lumen testing using a dedicated light meter. I also use the CeillingBounce Android app for measuring throw and runtimes. Both are calibrated using a 1Lumen supplied calibration light.
As the D1K is equipped with Anduril 2 UI, there are no preset modes apart from Low, High and Turbo. The outputs in between are infinitely variable by means of smooth ramping. I have there only measured performance at the top and bottom of the ramping mode for High & Low and for Turbo.
As I ordered the D1K with an OP and SMO reflectors I did test lumen output and throw with both reflectors. The impact on lumens was negligible, although the OP reflector did impact the throw numbers.
Emisar does not claim any specific beam intensity, output or runtime figures for this LED combo.
Testing was performed with a Samsung 40T 21700 and a Molicel INR 21700 battery. The Molicel seemed to offer the high lumen and throw numbers.
| Mode | Amps at start | Specs | turn on | 30 sec | 10 minutes |
|---|---|---|---|---|---|
| Moon | >0.01 A | not claimed | 1 lm | 1 lm | 1 lm |
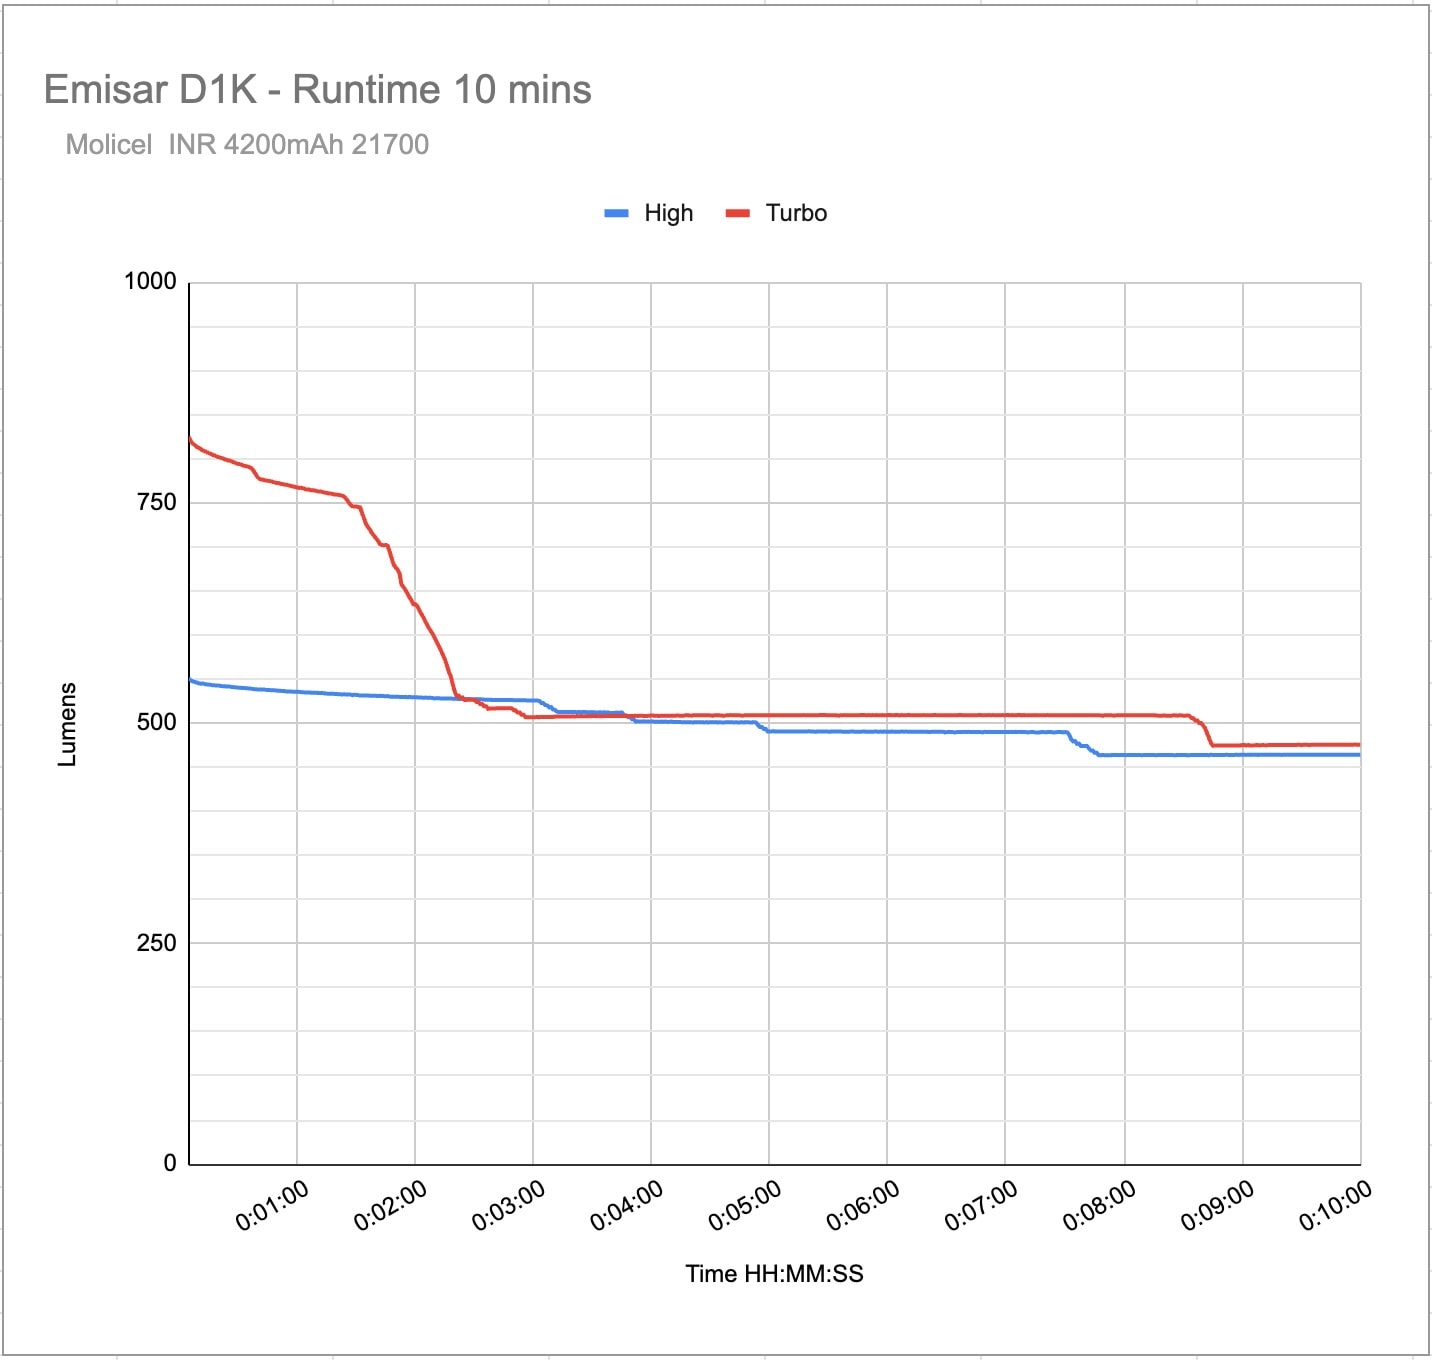
| High | 2.92 A | not claimed | 556 lm | 540 lm | 464 lm |
| Turbo | 5.23 A | not claimed | 793 lm | 750 lm | 476 lm |
Parasitic drain:
- Yes, but too low to get a reading.
Emisar D1K Battery Life: Runtime graphs
How Runtimes are Measured: Understanding ANSI FL1 Standards About ANSI FL1 runtime standards: The runtime is measured until the light drops to 10% of its initial output (30 seconds after turning on). This does not mean that the flashlight is not usable anymore. The last column shows how long the light actually works till it shuts off. If there is a + symbol, it means that the test was stopped at that particular point, but the light was actually still running. This happens on certain occasions, with certain drivers, firmware, or batteries.| Mode | Specified runtime | Measured runtime ANSI | Time till shut off |
|---|---|---|---|
| Moon | not claimed | not tested | not tested |
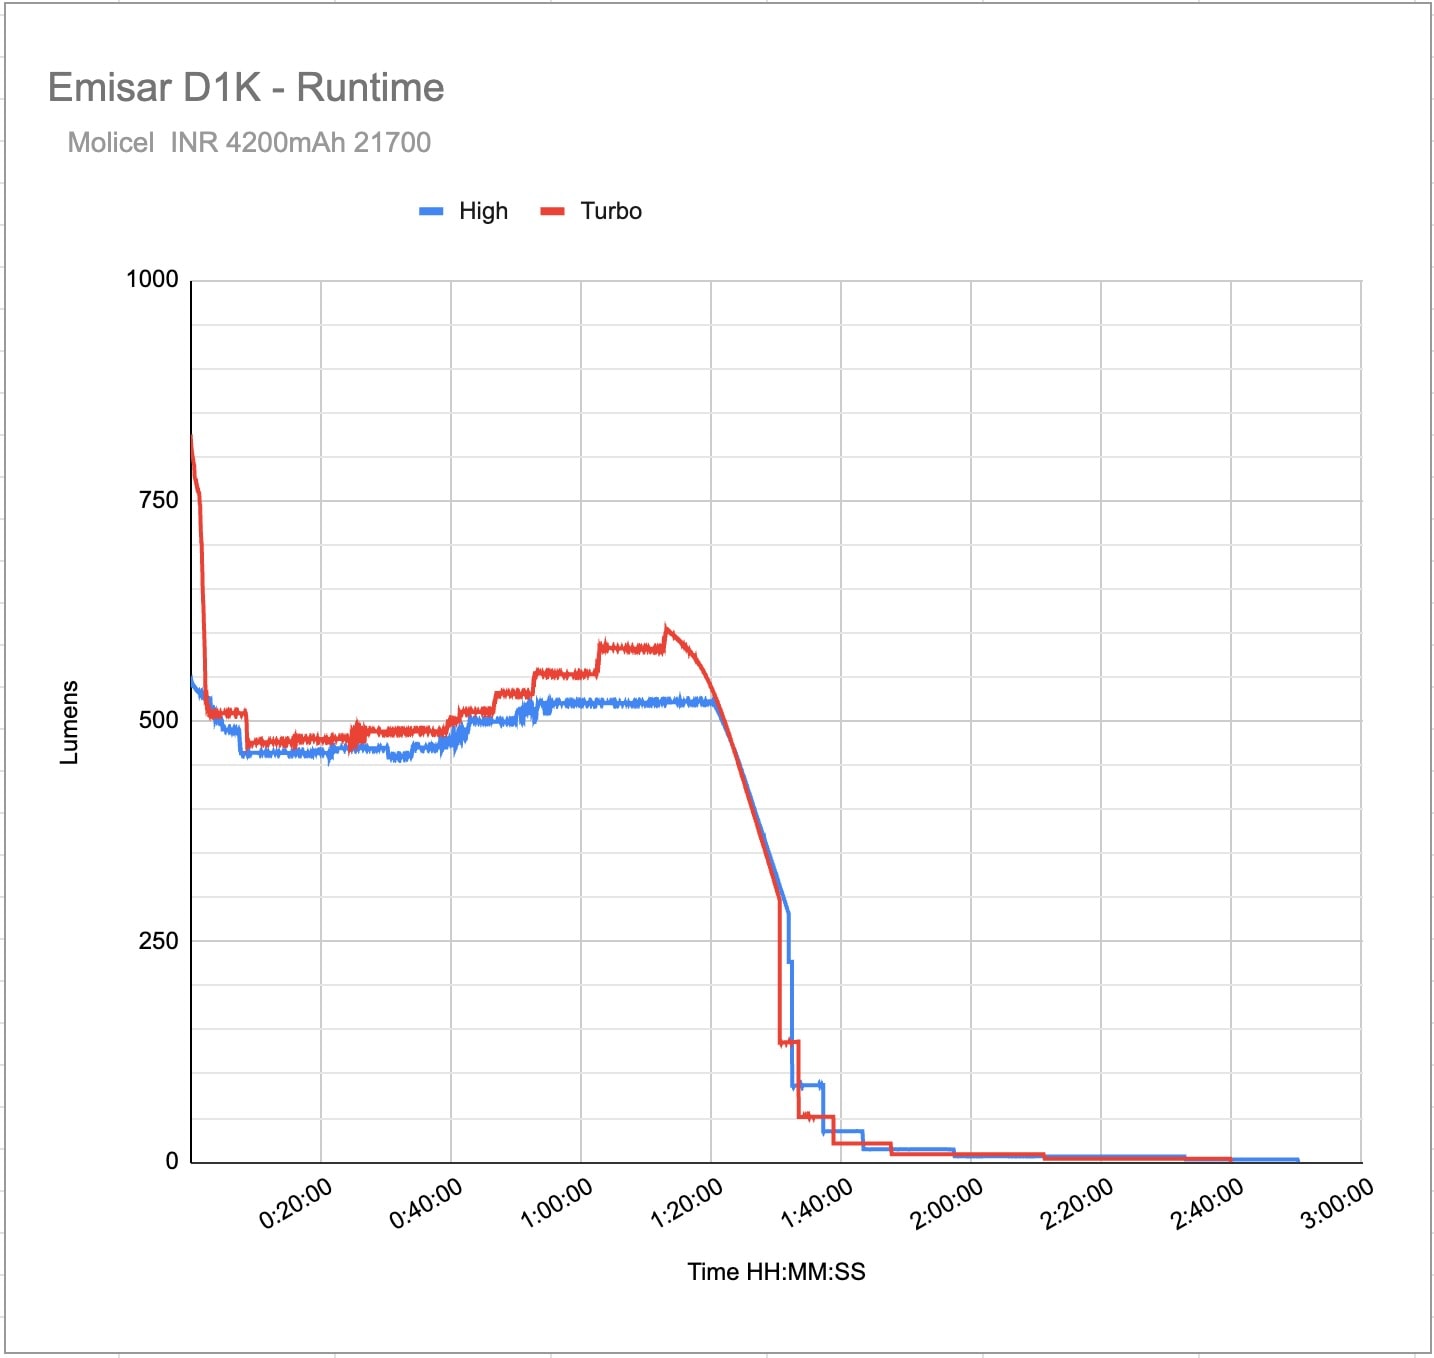
| High | not claimed | 1h 57min | 2h 50min |
| Turbo | not claimed | 1h 47min | 2h 39min |
Peak beam intensity and beam distance measurements
About Peak beam intensity: Understanding ANSI FL1 Standards About peak beam intensity The calculated value of distance in meters at which the flashlight produces a light intensity of 0.25 lux. (0.25 lux is about the brightness of a full moon shining on an object). This means that the intensity has decreased so much, it becomes difficult to see darker objects, or objects that don’t reflect light. The columns ‘Meters’ and ‘Yards’ use rounded numbers.| Mode | Specs | Candela measured | Meters | Yards |
|---|---|---|---|---|
| Moon (OP) | not claimed | 22 cd | 9m | 10 yd |
| High (OP) | not claimed | 13,345 cd | 231m | 253 yd |
| Turbo (OP) | not claimed | 19,122 cd | 277m | 303 yd |
| Turbo (SMO) | not claimed | 36,572 cd | 382m | 418 yd |
Beamshots
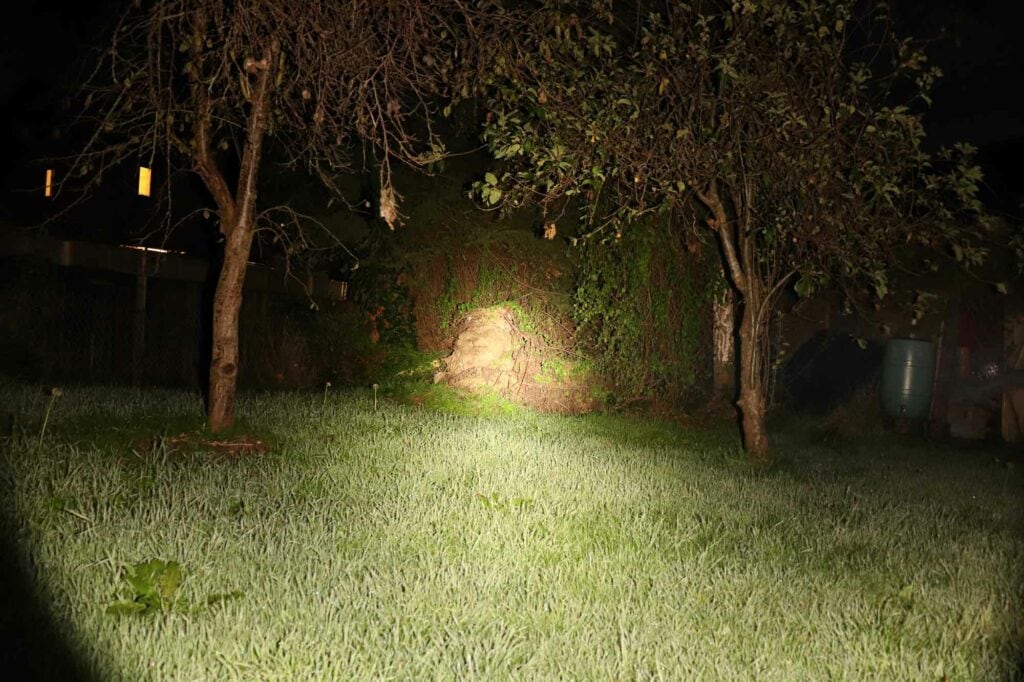
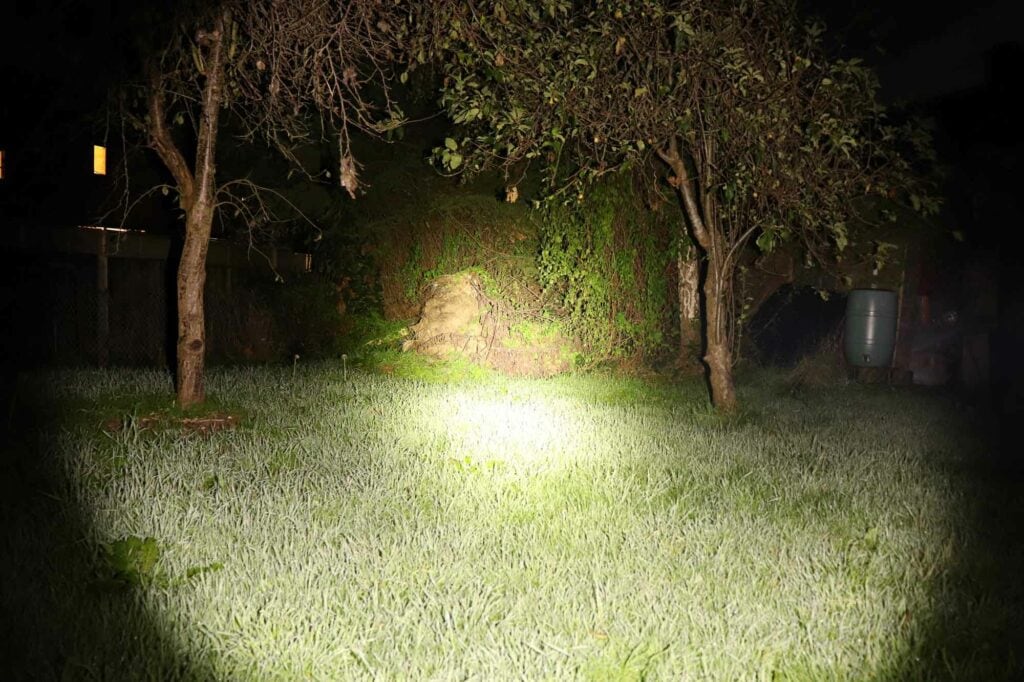
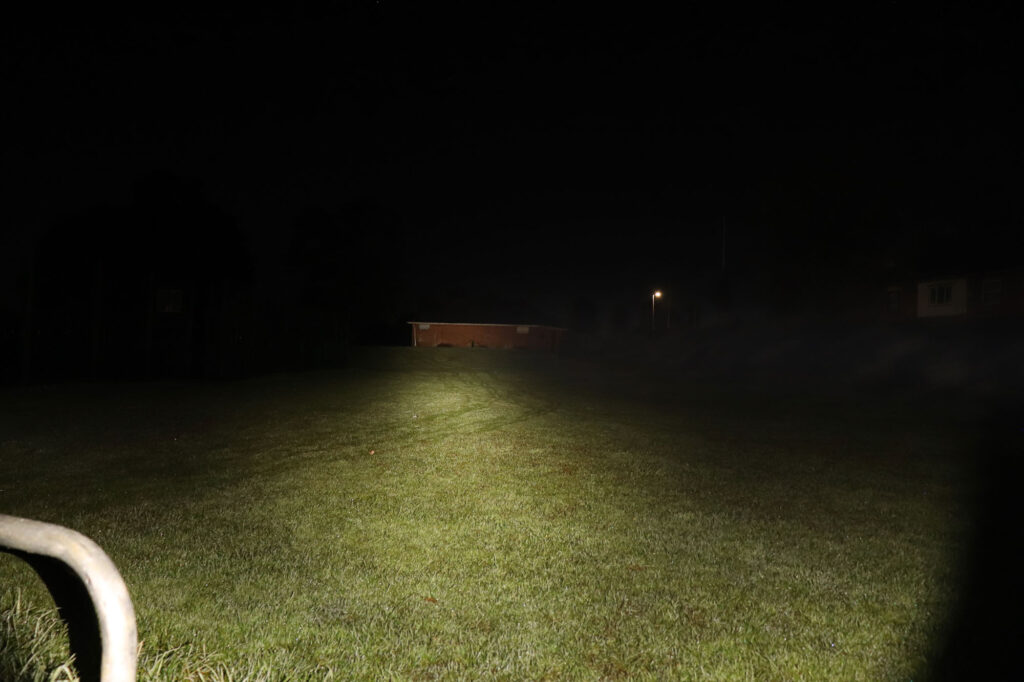
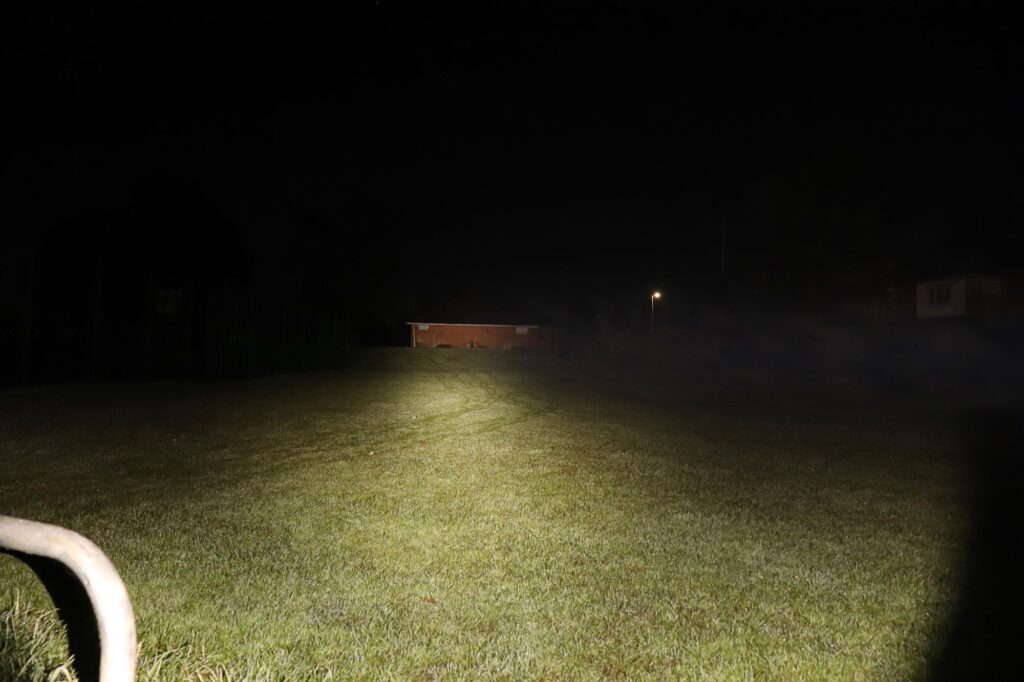
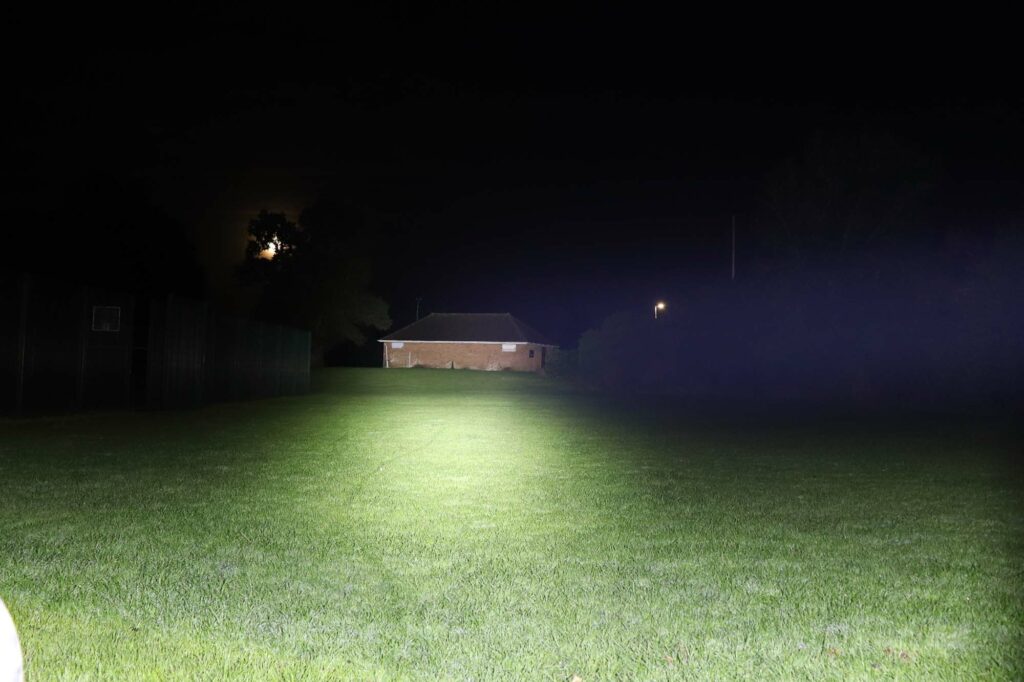
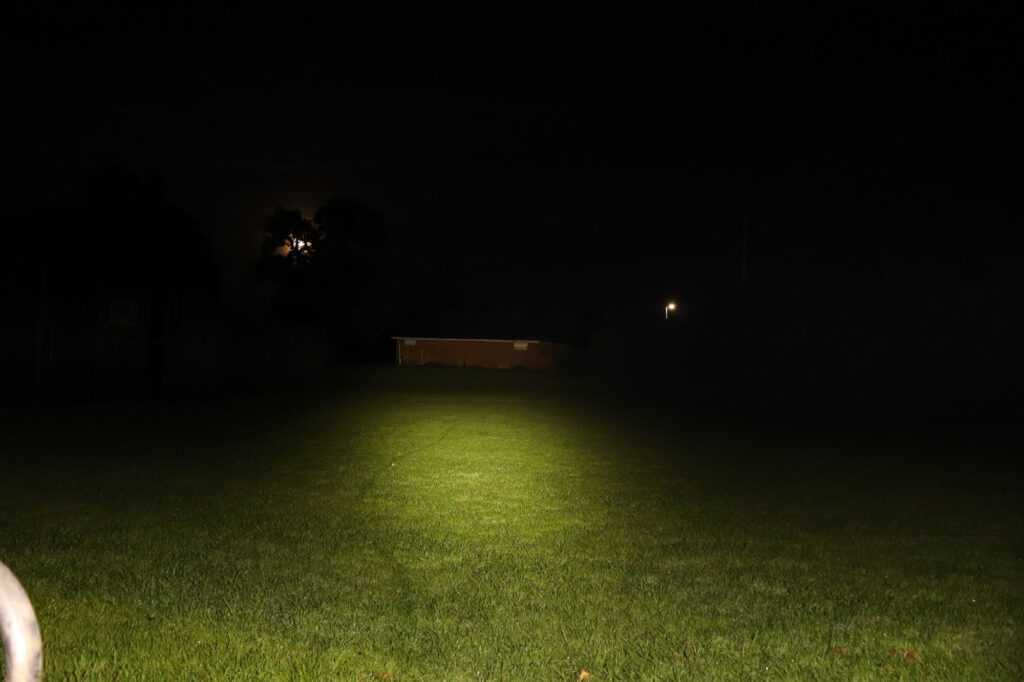
- Camera: Canon EOS 200D DSLR
- Lens: Canon 18-55mm EFS IS used at 18mm
- Shutter: ¼
- Aperture: F4.5
- ISO: 1600
- White Balance: 5200k
To take the photos the camera and torch are both mounted to a tripod using a timer on the shutter. Beam shots are taken at three different distances.
Distance: 100m to the building
Distance: 5m to the tree on the left and 11m to the compost heap
Beamshots of the following flashlights compared at 5-10m:
- Emisar D1K SST20
- Jetbeam RRT01 Raptor Nichia 519a
- Wurkkos TD02 SST-40
- Convoy M1 XM-L2
Beamshots of the following flashlights compared at 100m:
- Emisar D1K SST20
- Jetbeam RRT01 Raptor Nichia 519a
- Wurkkos TD02 SST-40
- Convoy M1 XM-L2
- Emisar D1 SBT-90.2
Please note that beamshots are mainly intended to showcase the beam pattern and beam quality, rather than overall performance. These images are typically taken directly after activation, and do not fully represent its overall performance. For accurate performance metrics, such as output, beam distance, and runtimes, you need to look at the performance section of this review.


Disclaimer: we bought this flashlight with our own money. Nobody paid us to review this flashlight, nor have we been holding back on problems or defects.
Final Verdict
Pros
- Beam
- Performance
- UI
- Customisable buying options
- Pocket clip
- Recessed button
Cons
- The 18650 D1 is slightly nicer in the hand
Explanation on star ratings:
1: Avoid: a match would be a better choice – 2: Poor: significant defect or issues; almost unusable – 3: Average: some defects or issues; but still usable 4: Good: recommended (minor issues) – 5: Great: highly recommended

5 stars: ★★★★★
While our star rating provides a reliable indicator, we encourage you to read the full review to make an informed decision based on your own needs and preferences.
Has the D1K lived up to expectations? 100% yes it has. I really love the beam and performance. It is usable as a bedside light, using under the bonnet of the car or across fields. All the while illuminating objects with a lovely beam. Making it a five star light for me. The only thing I’d say is, I prefer how the smaller 18650 D1 feels in the hand and the pocket. But only as a minor point. The D1K is still compact for a 21700 light and offers extended runtimes over an 18650 offering.
Buy your Emisar D1K here
Buy your Emisar D1K at the following store(s):
1lumen selects and reviews products personally. We may earn affiliate commissions through our links, which help support our testing.