1lumen selects and reviews products personally. We may earn affiliate commissions through our links, which help support our testing.
Magicshine Monteer 12000 review
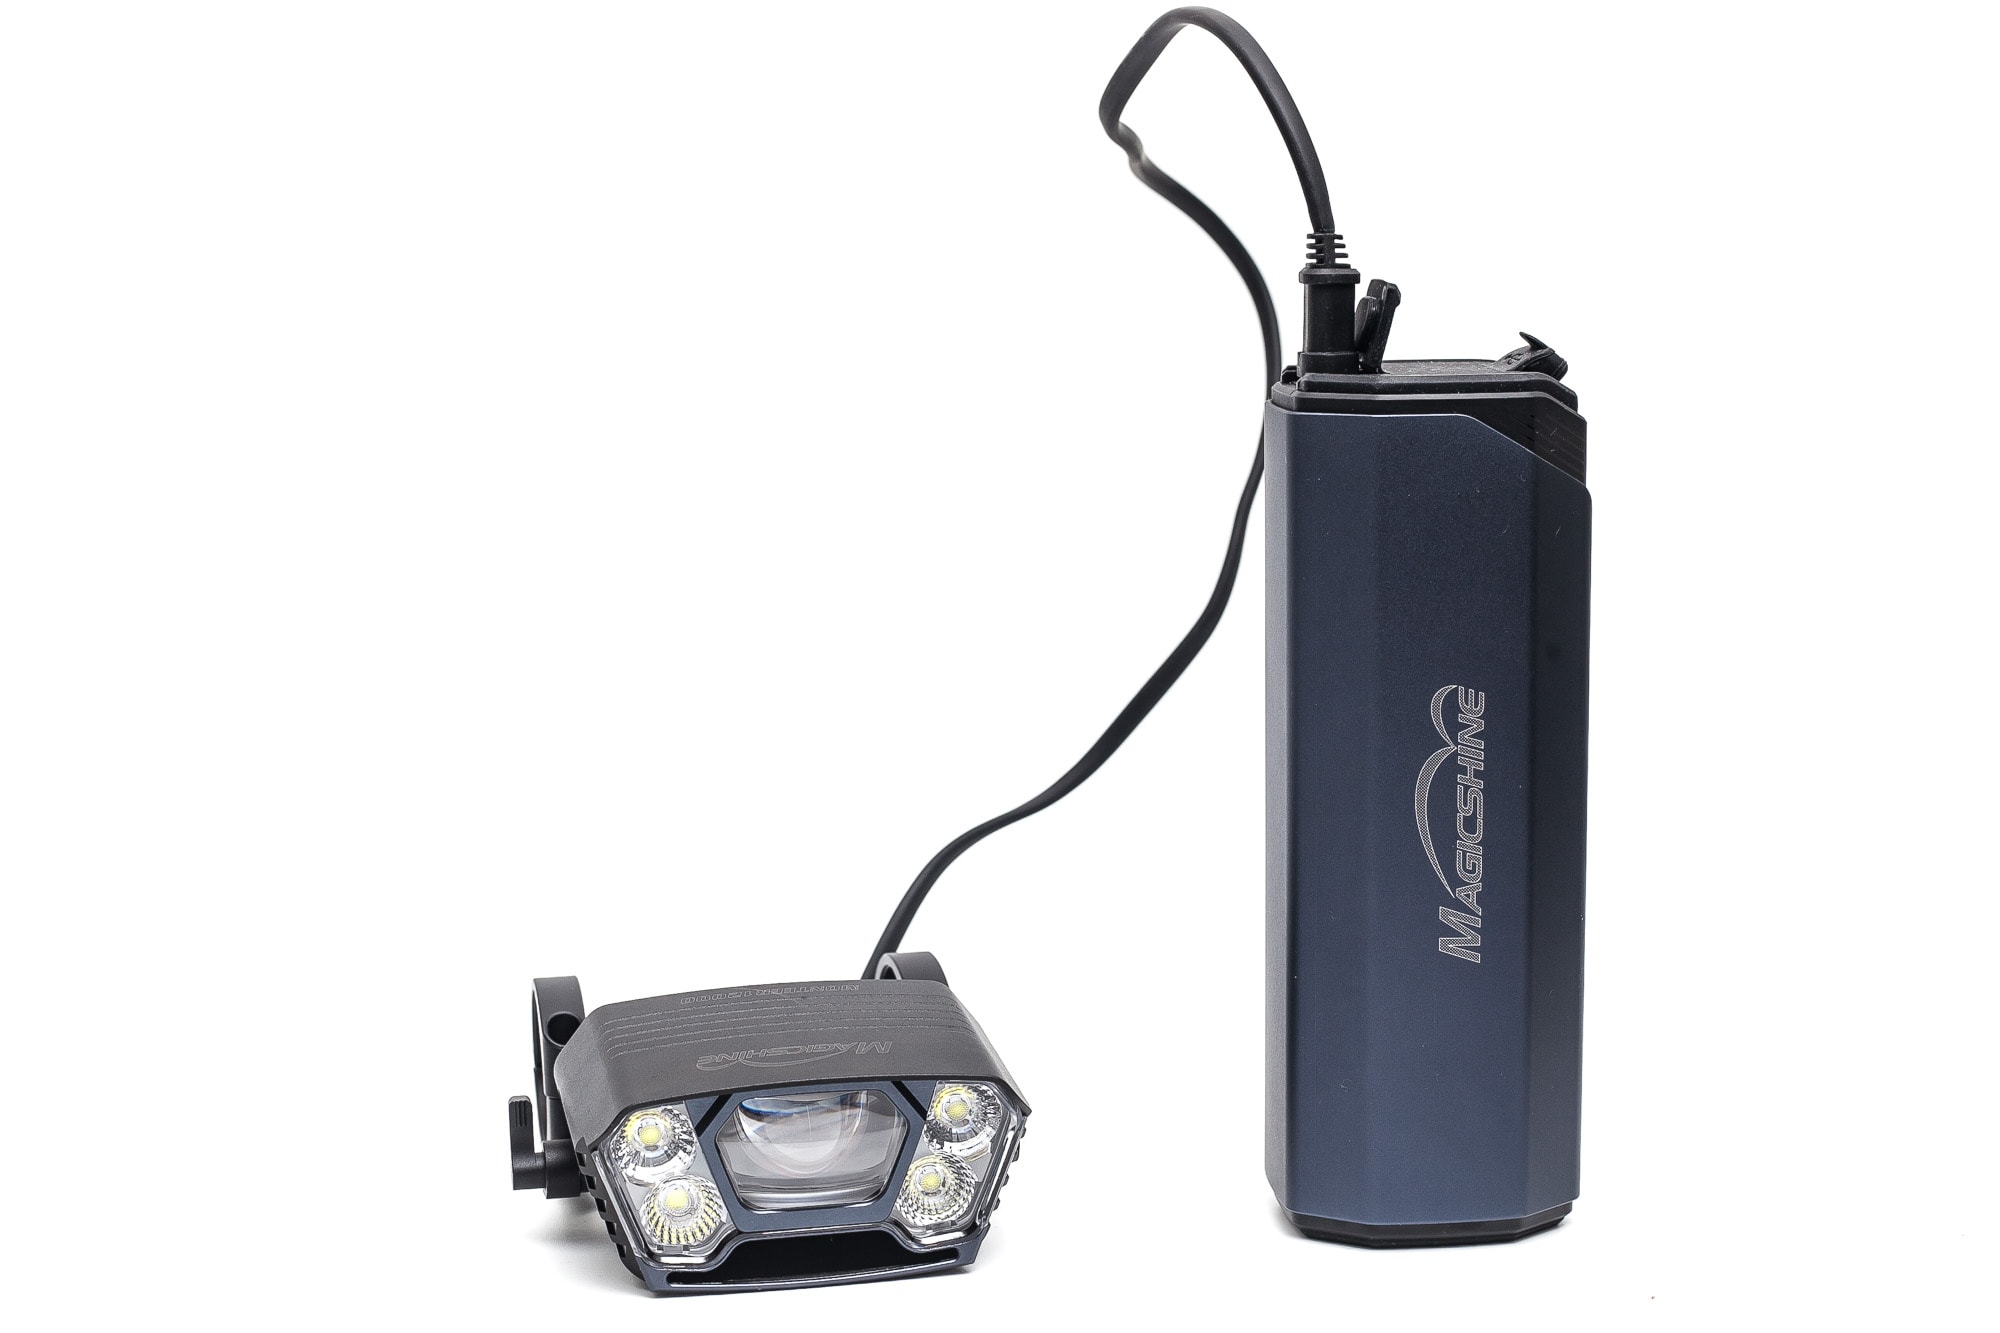
Magicshine Monteer 12000 specifications
| Brand/model | Magicshine Monteer 12000 |
|---|---|
| Flashlight category | High power bike light |
| LED | 1* Osram KW4 + 4* Luminus SST70 |
| Max. output | 12,000 Lumens |
| Max. beam distance | 360 meters |
| Max. beam intensity | 30,000 cd |
| Battery config. | Batterypack (14.4V / 10,000mAh) |
| Onboard charging | USB-C |
| Modes | 4+4 |
| Blinkies | day flash, night flash |
| Waterproof | IPX6 |
| Review date | November 2023 |
Review intro:
Oh boy.. this is one of the brightest bike lights on paper, and if you’d like, one of the brightest helmet lights on the planet.
But hey, aren’t we supposed to test flashlights? We don’t say no to camping lanterns, keychain lights, or bike lights! Especially since we have so many flashlights reviewed, why not add an enormous bike light to our list?
I’ll be testing everything the way I test a normal flashlight but with some improvising. I tested High modes with a fan to simulate windy conditions.
And the bike light I am talking about is no less than the Magicshine Monteer 12000, a 12,000-lumen bike light. If you have never heard of Magicshine, you probably haven’t been looking much at bike lights. They are up there with the best brands in that business.
Spoiler alert: the Magicshine Bluetooth App is pretty cool!
And for all the die-hard bike riders, I’m sorry if I don’t use your preferred jargon throughout this review.
Package quality.
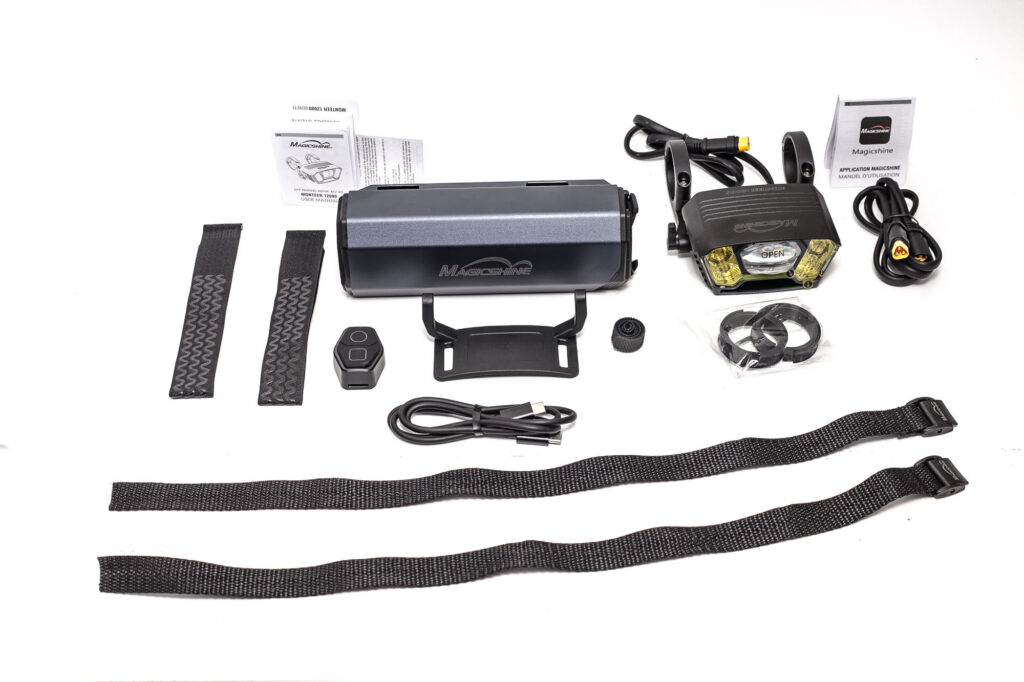
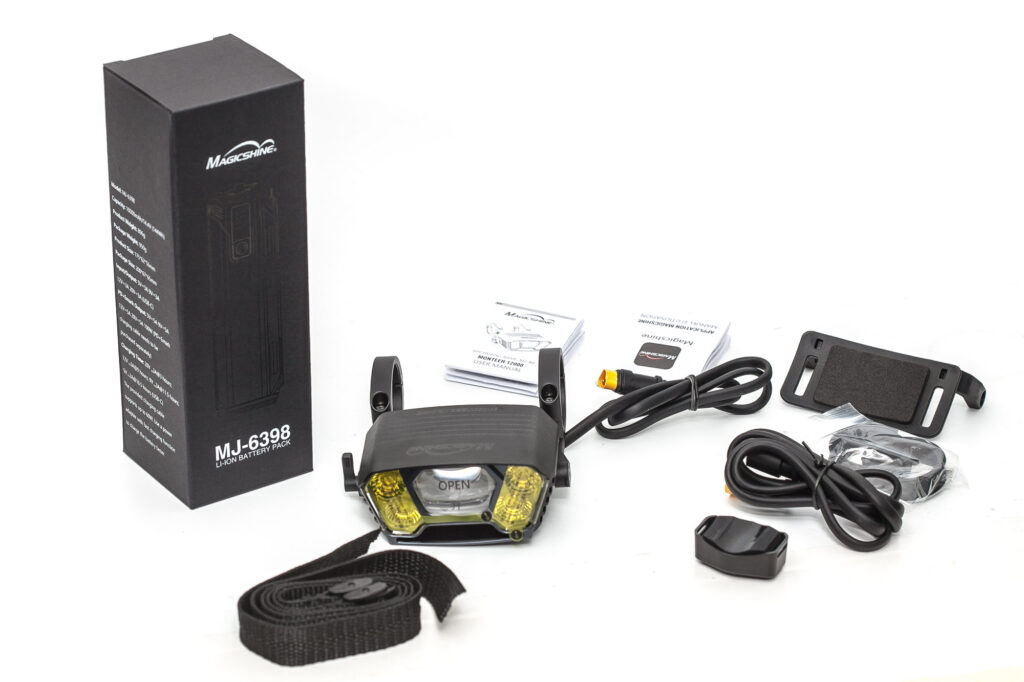
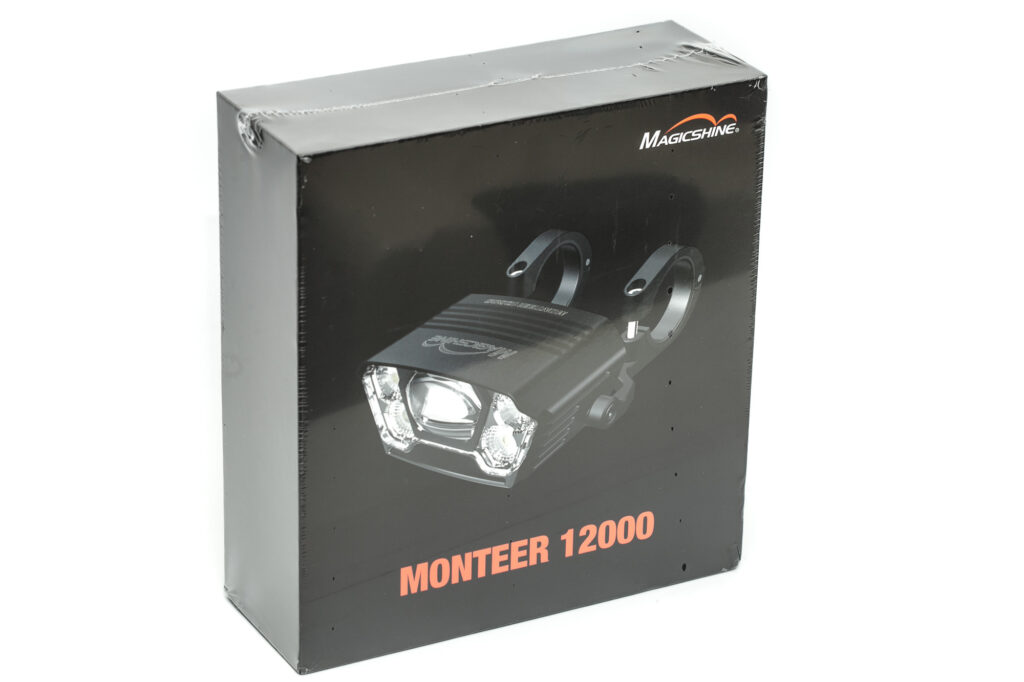
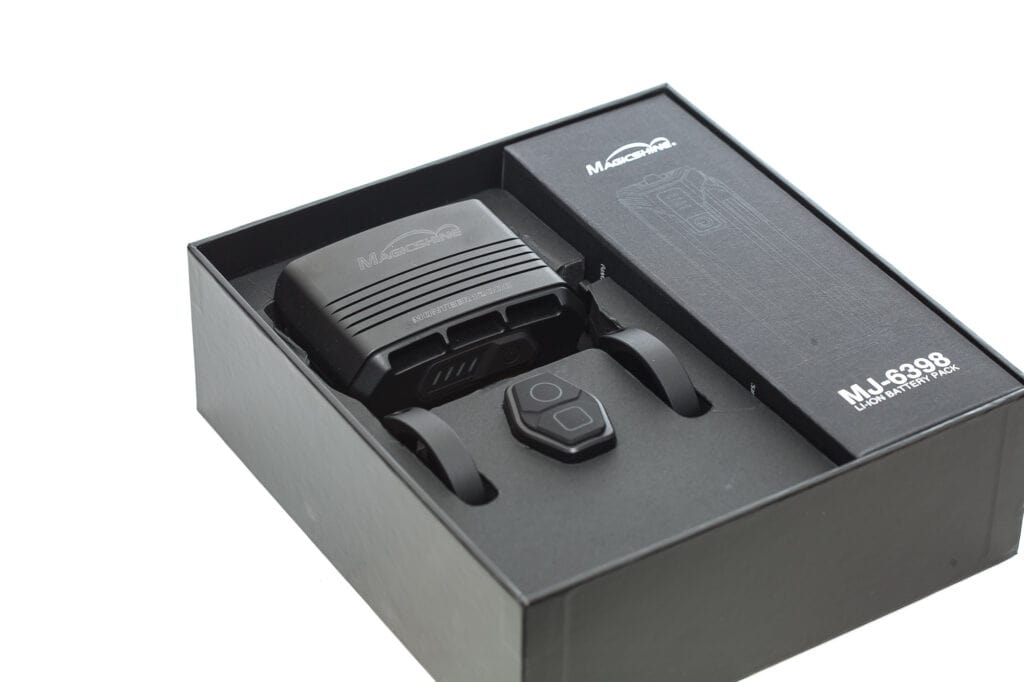
Expensive flashlights come in excellent packaging, and expensive bike lights do, too. They ship it in a lovely box with several accessories inside. Well, because most of these parts are necessary to use it. Here is what you get:
- Magicshine Monteer 12000 light
- Nylon shims for handlebar attachment
- Bluetooth remote control
- Large battery pack with 14.4V and 10,000mAh
- USB-C charging cable
- Extension cable for helmet use
- Helmet mount straps
- Battery pack straps
- Instruction manual
- App instruction manual
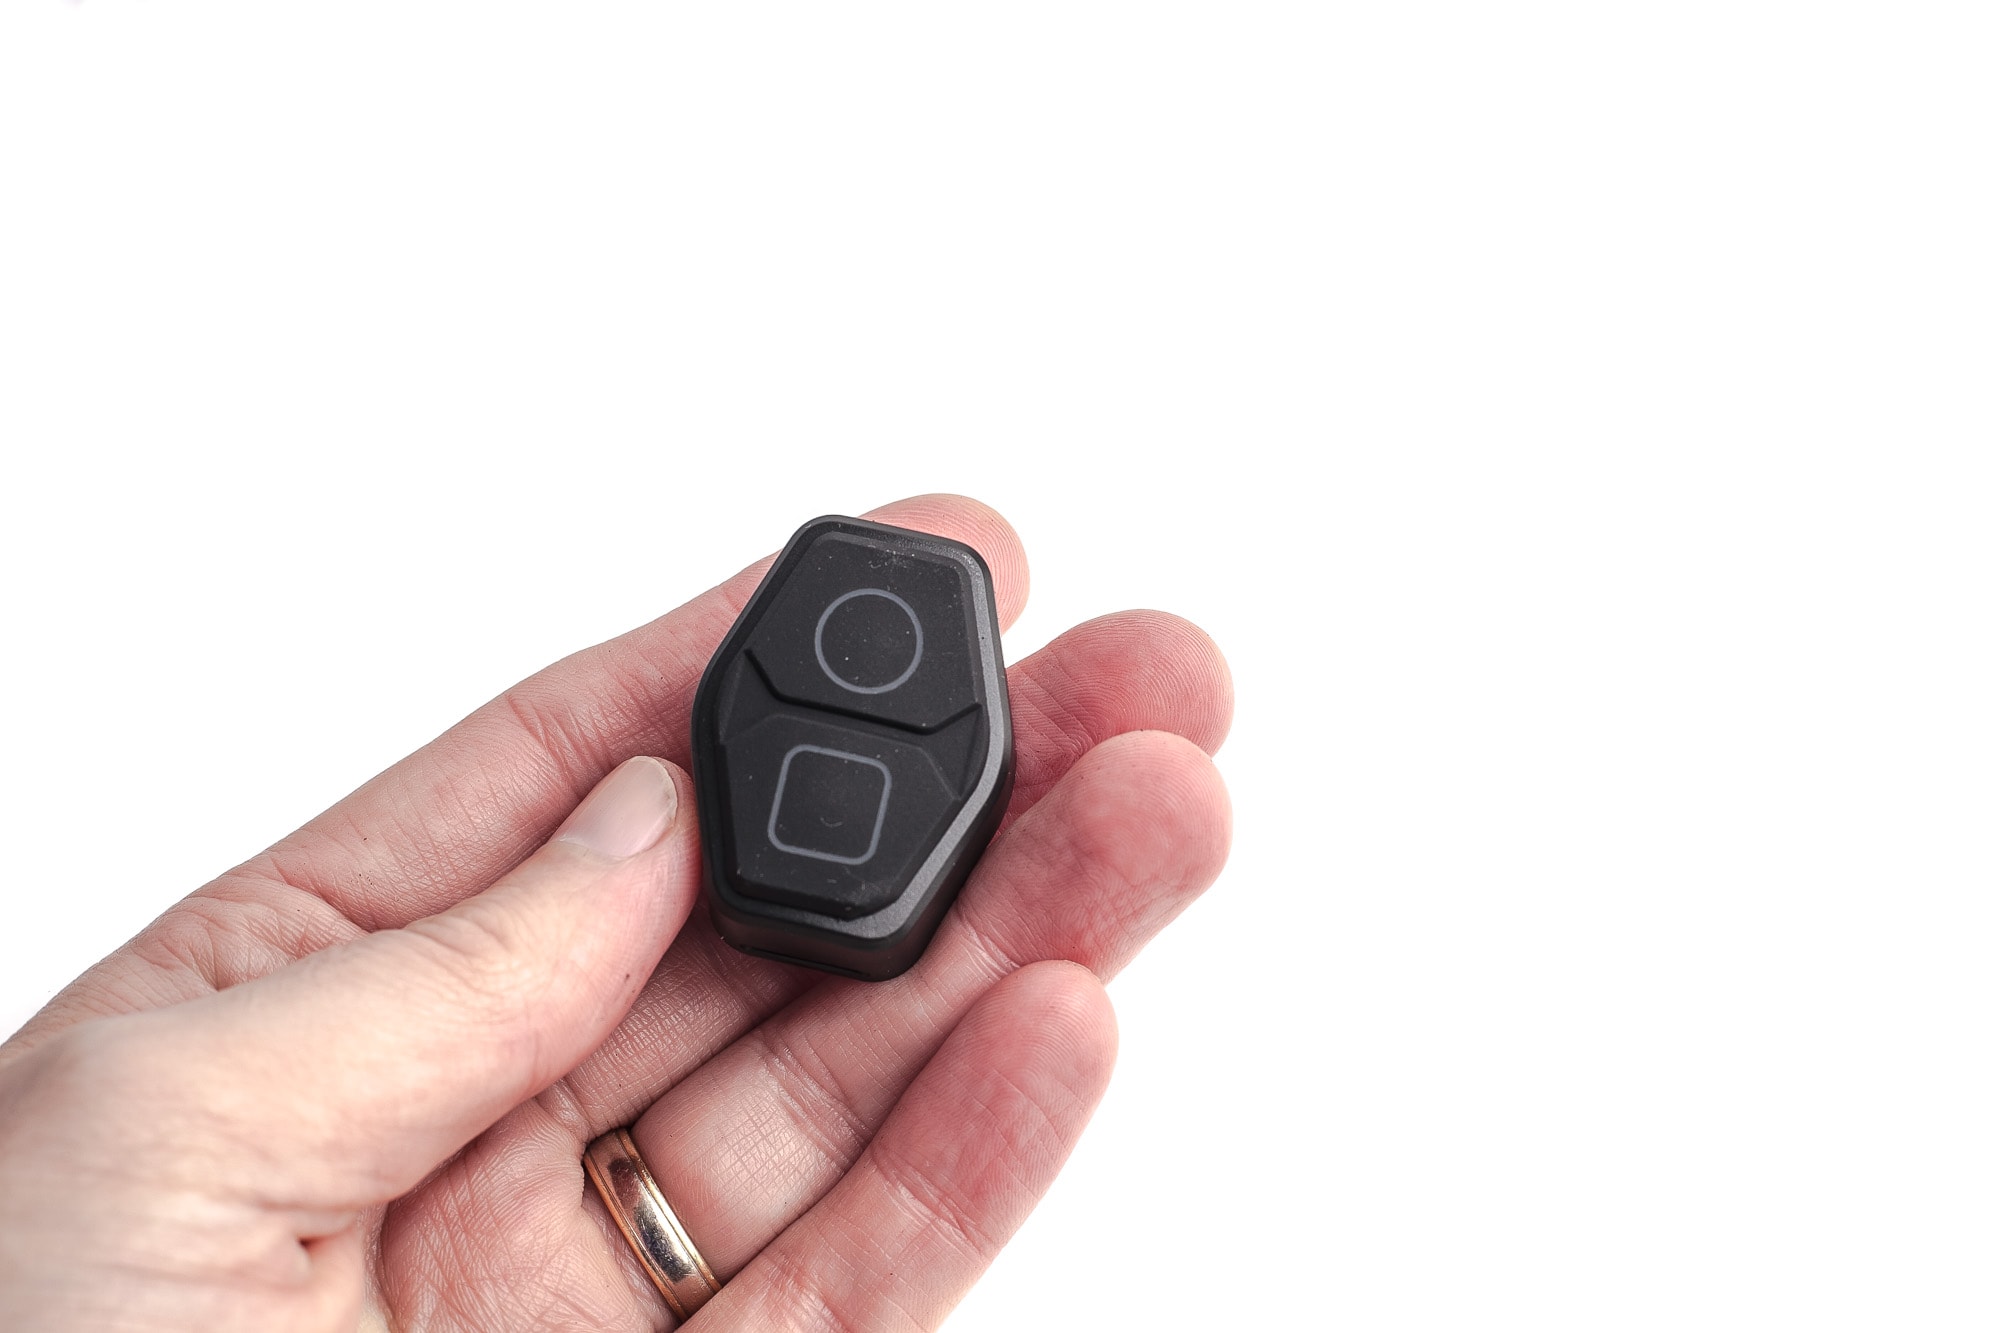
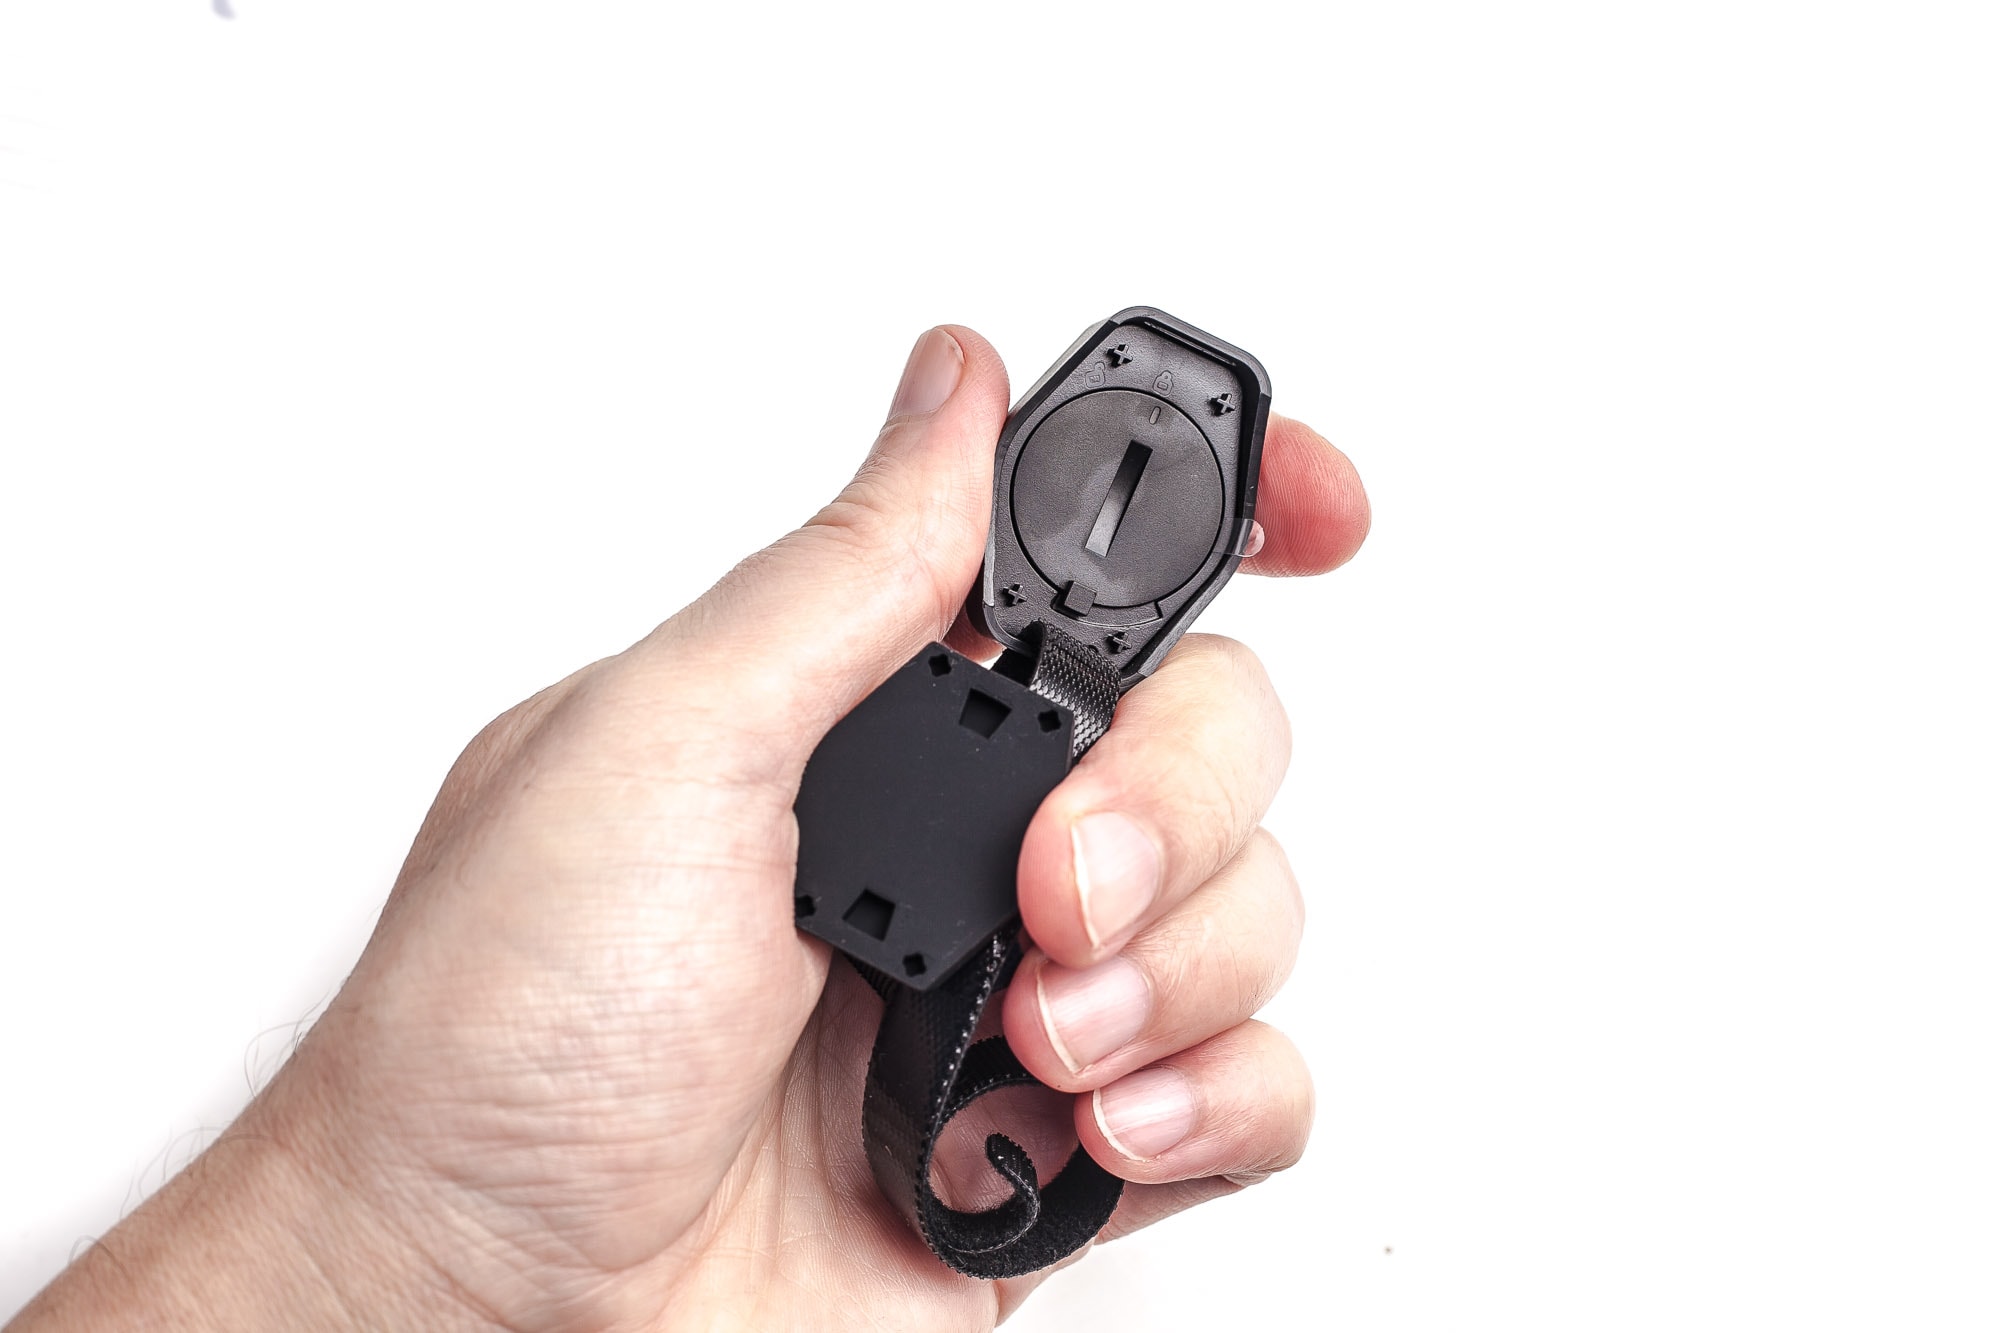
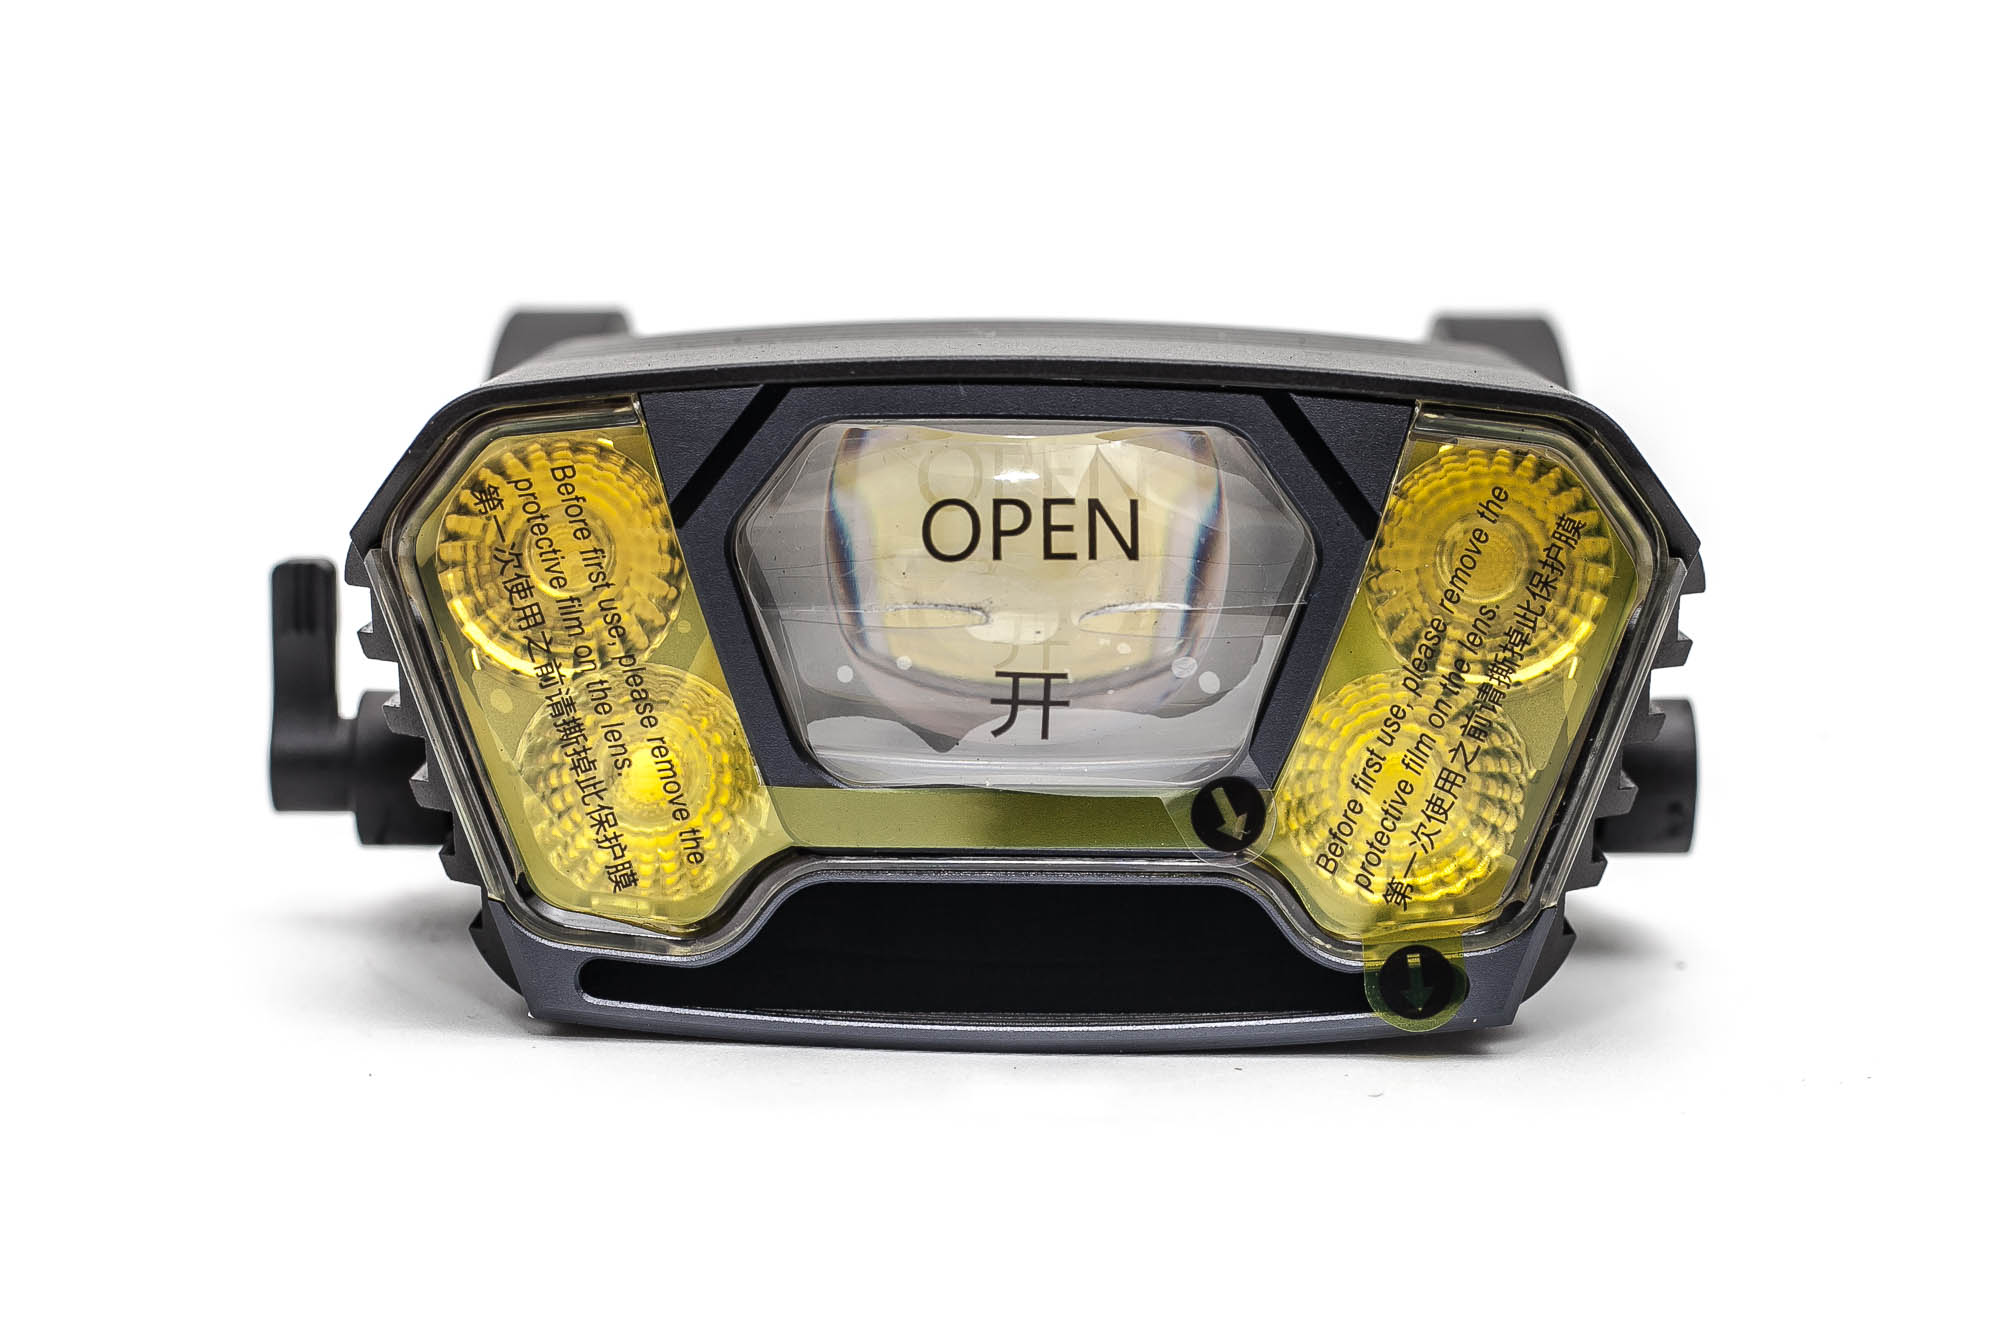
Before your first use, remove the sticker from the light, otherwise, they will surely melt when in the power modes. And while you are at it, remove the battery insulator from the remote switch
Flashlight in use, Build Quality, and Warranty
Oh boy.
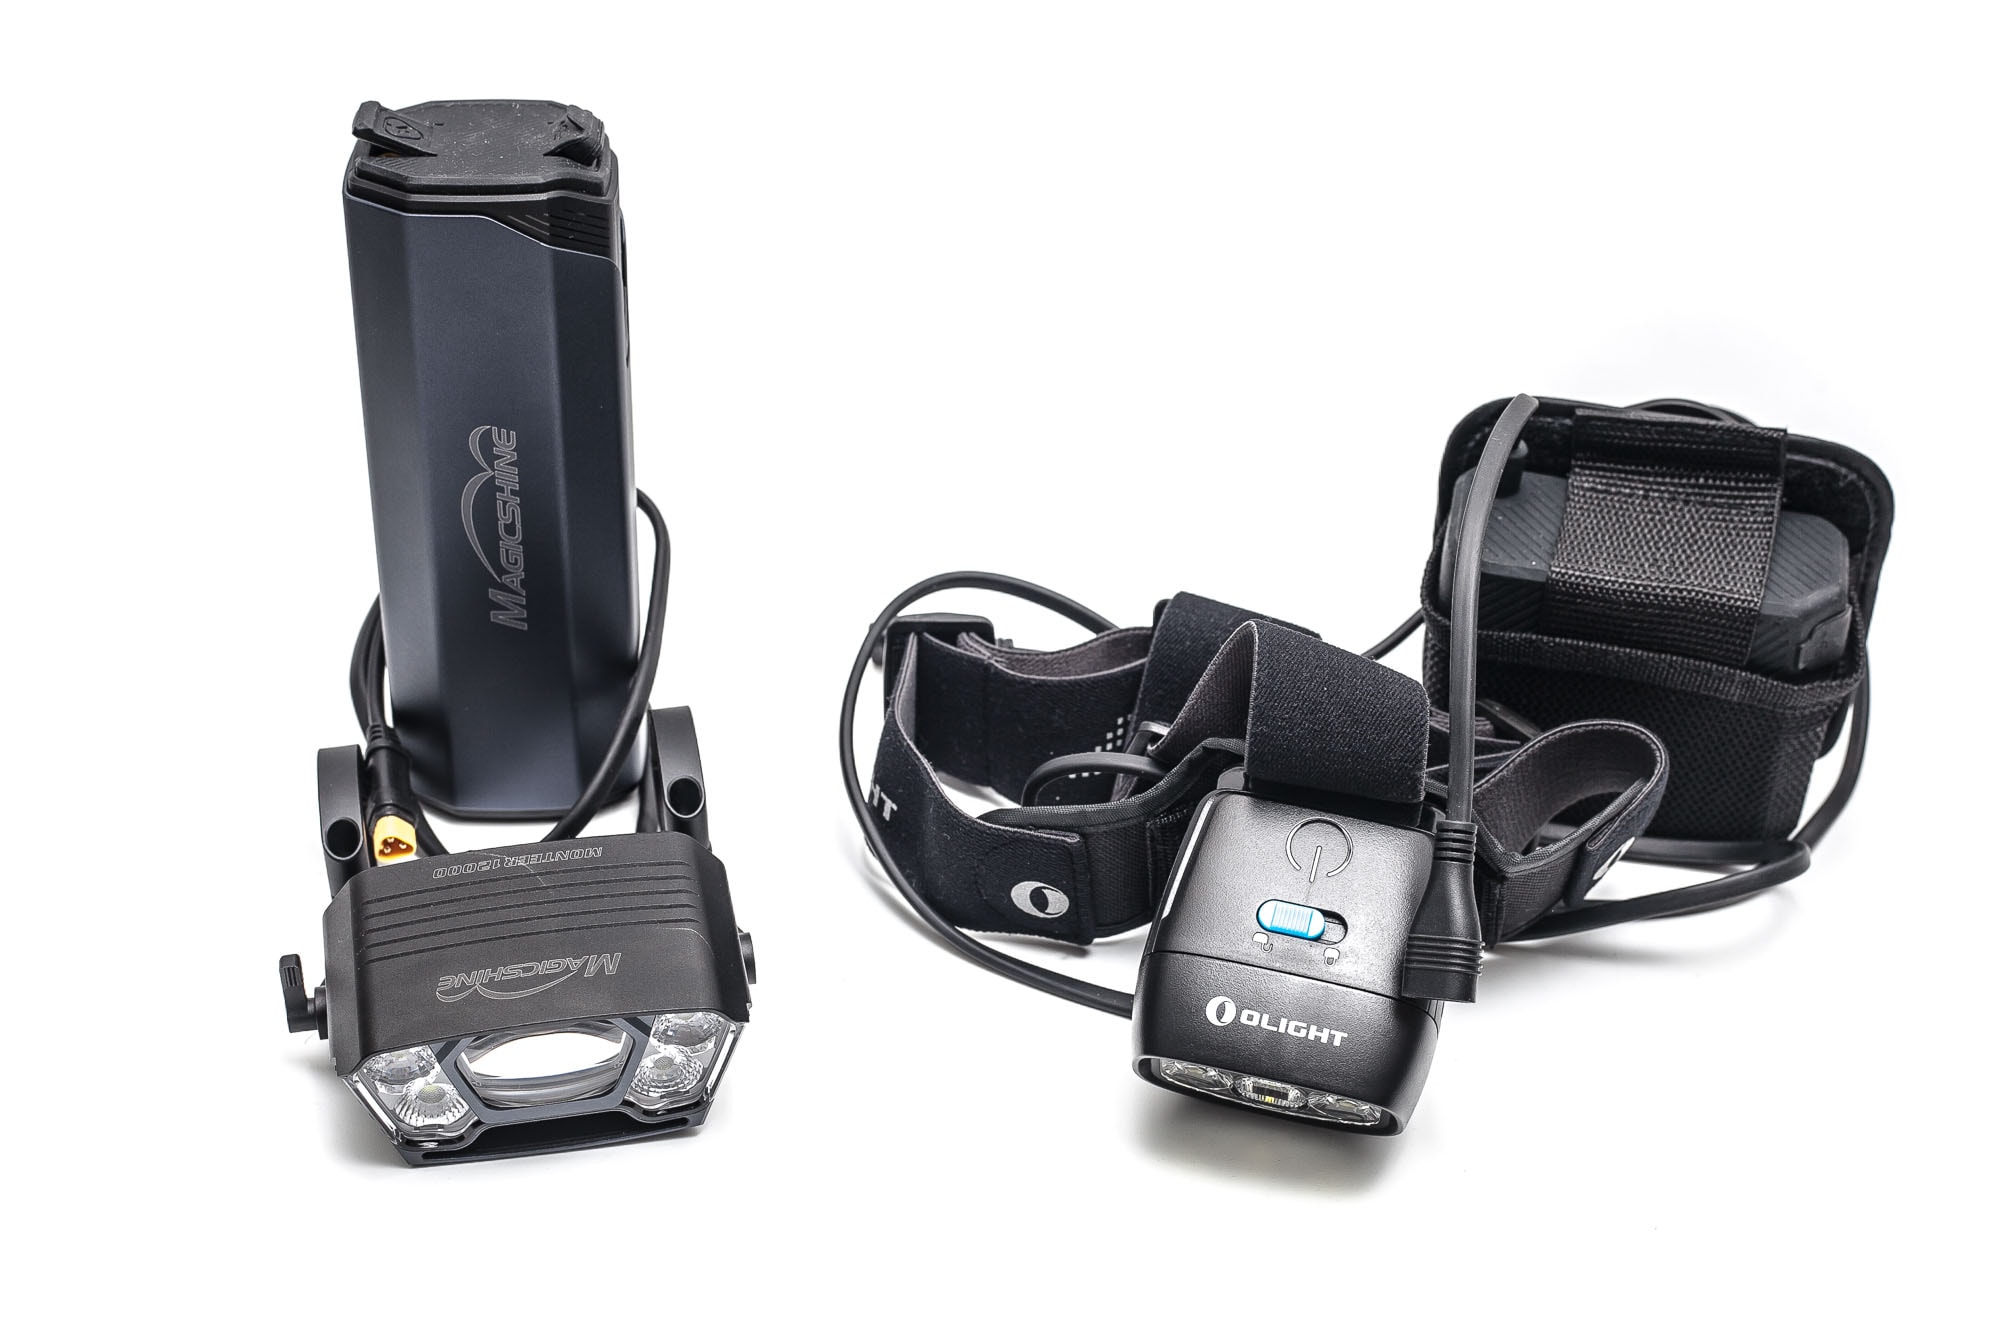
I have owned many flashlights and headlamps, and only a few were hybrid bike lights. But nothing (except for perhaps the Olight H67) has been this big, bold, and powerful.
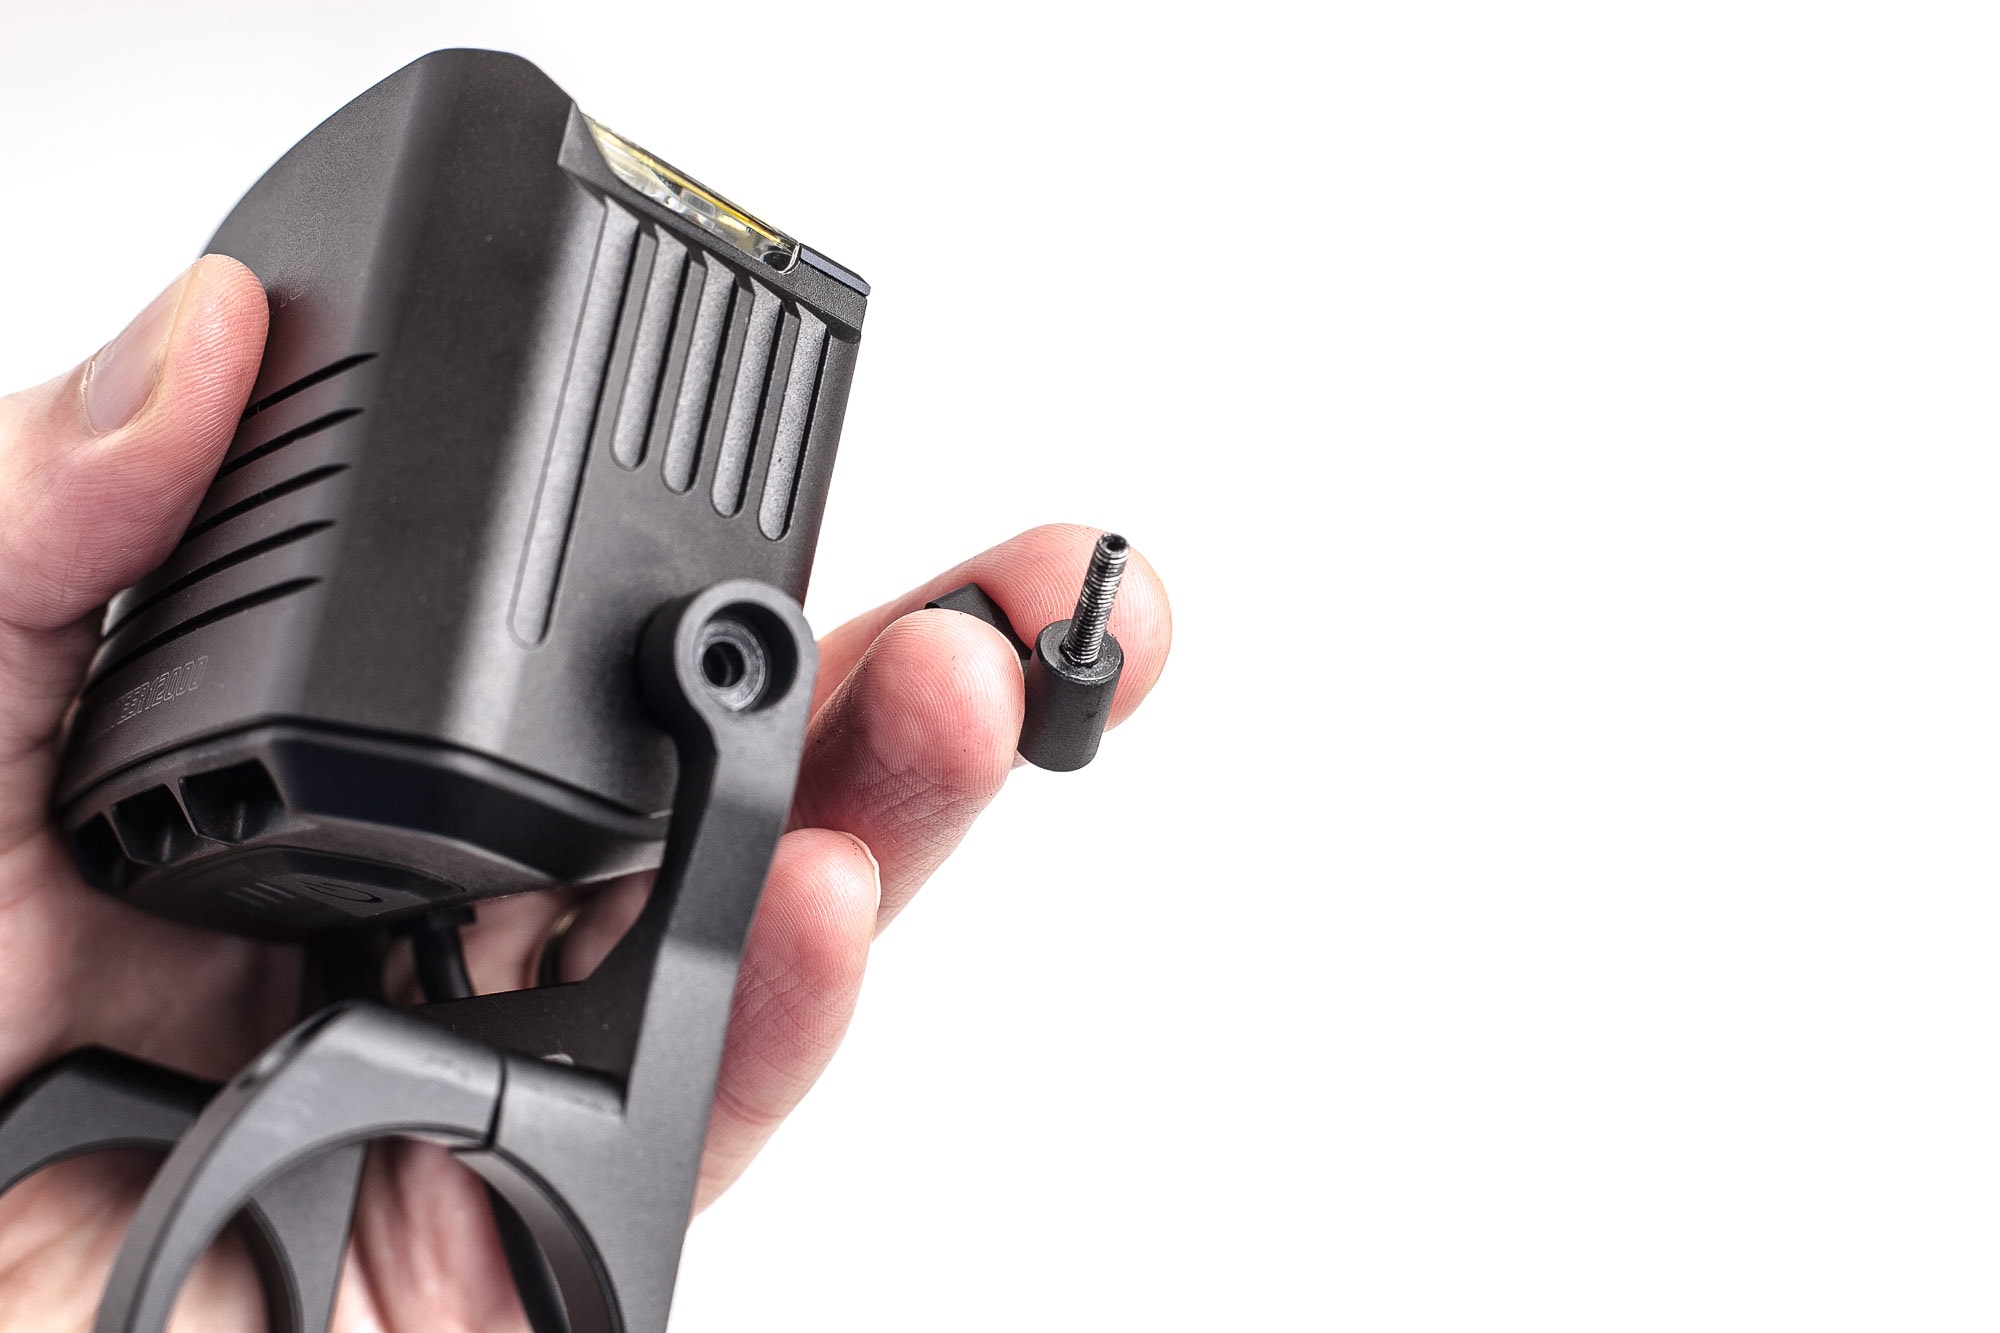
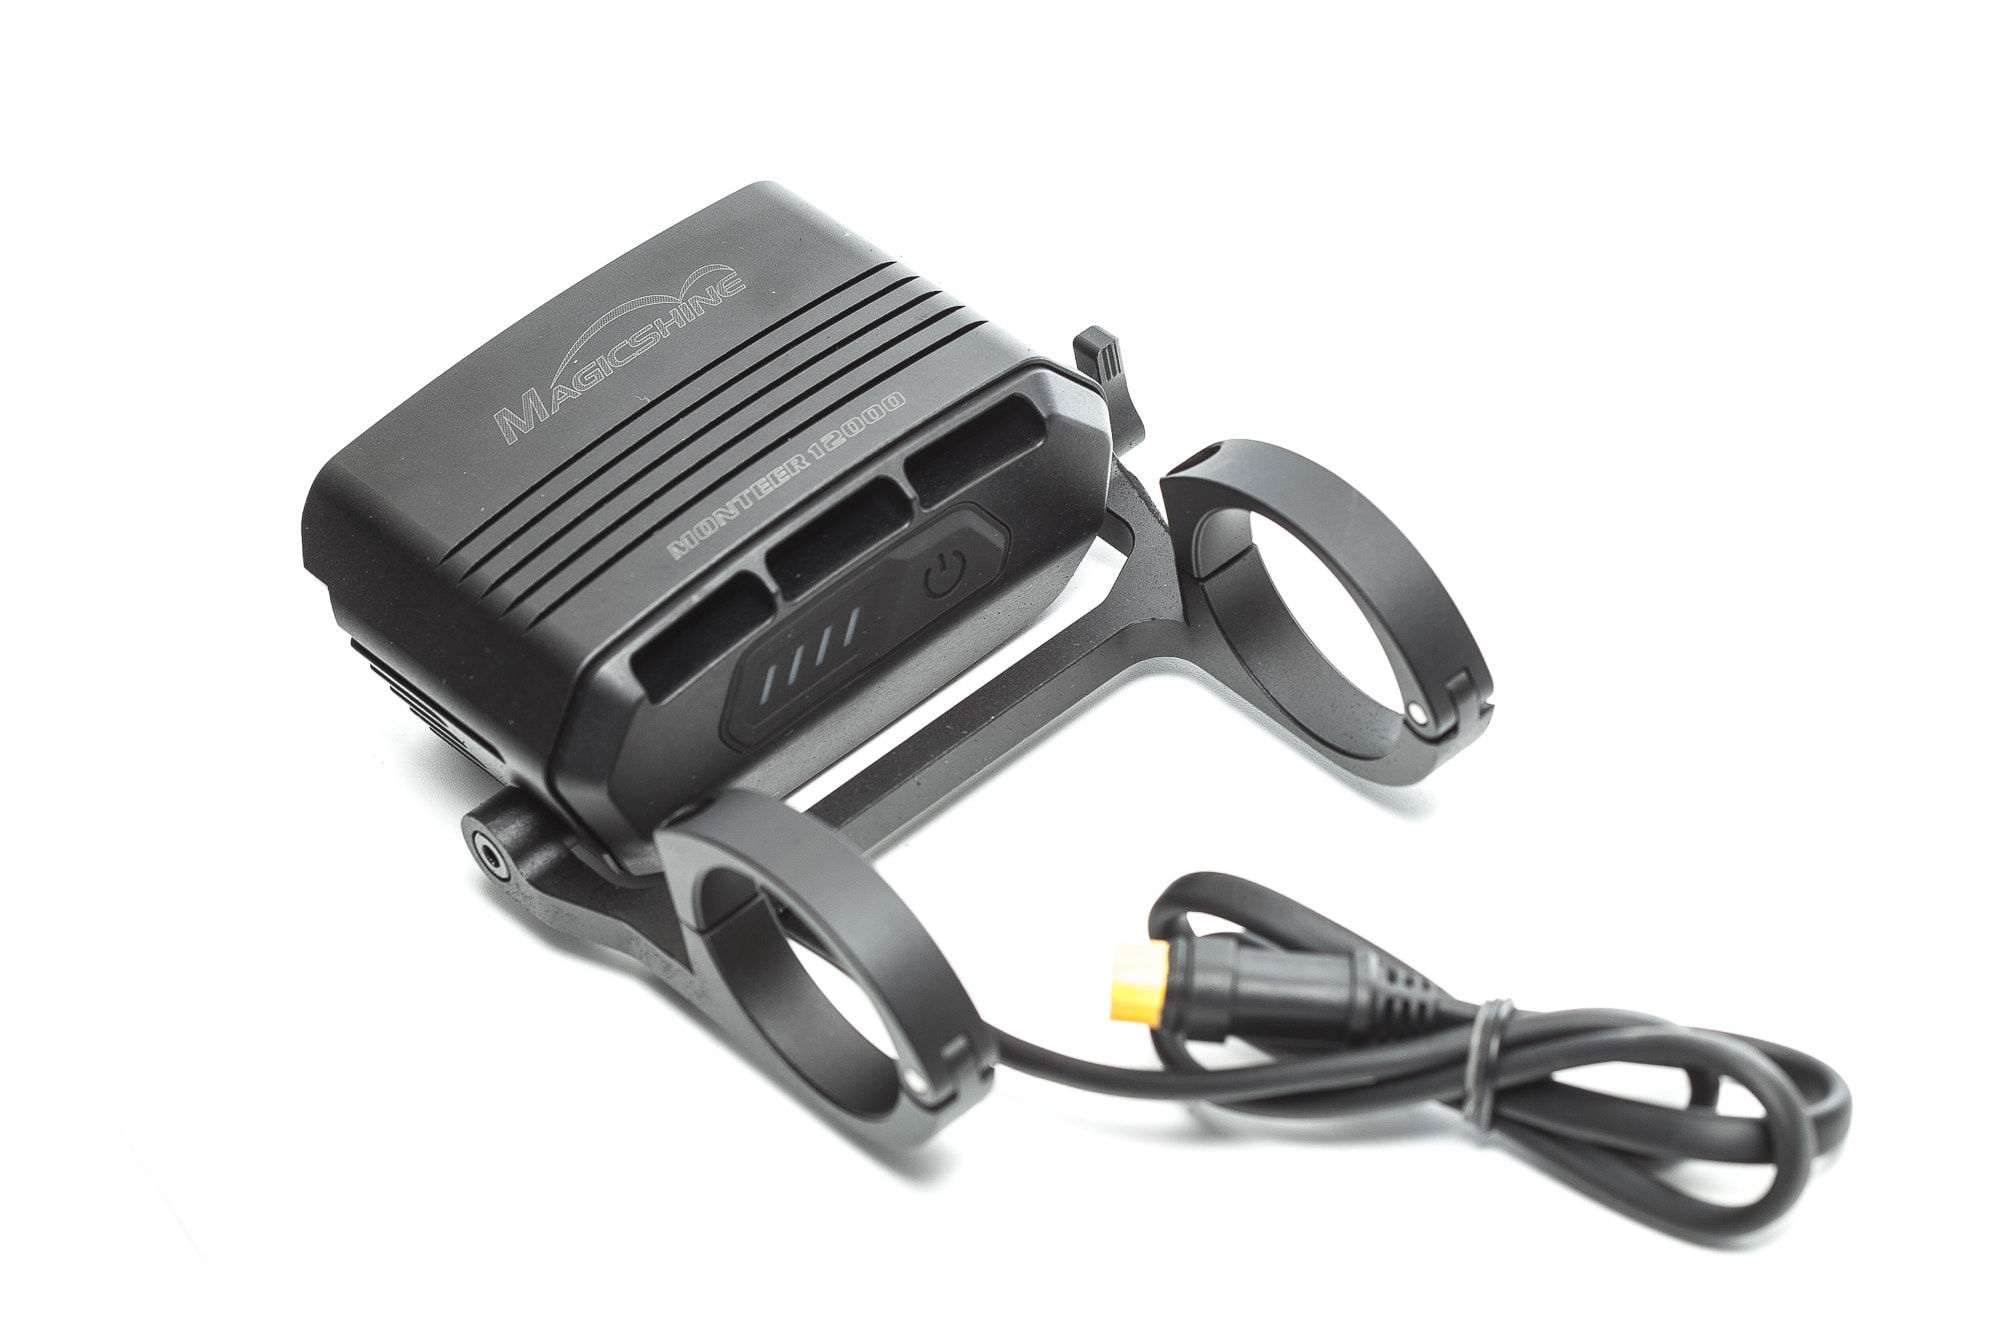
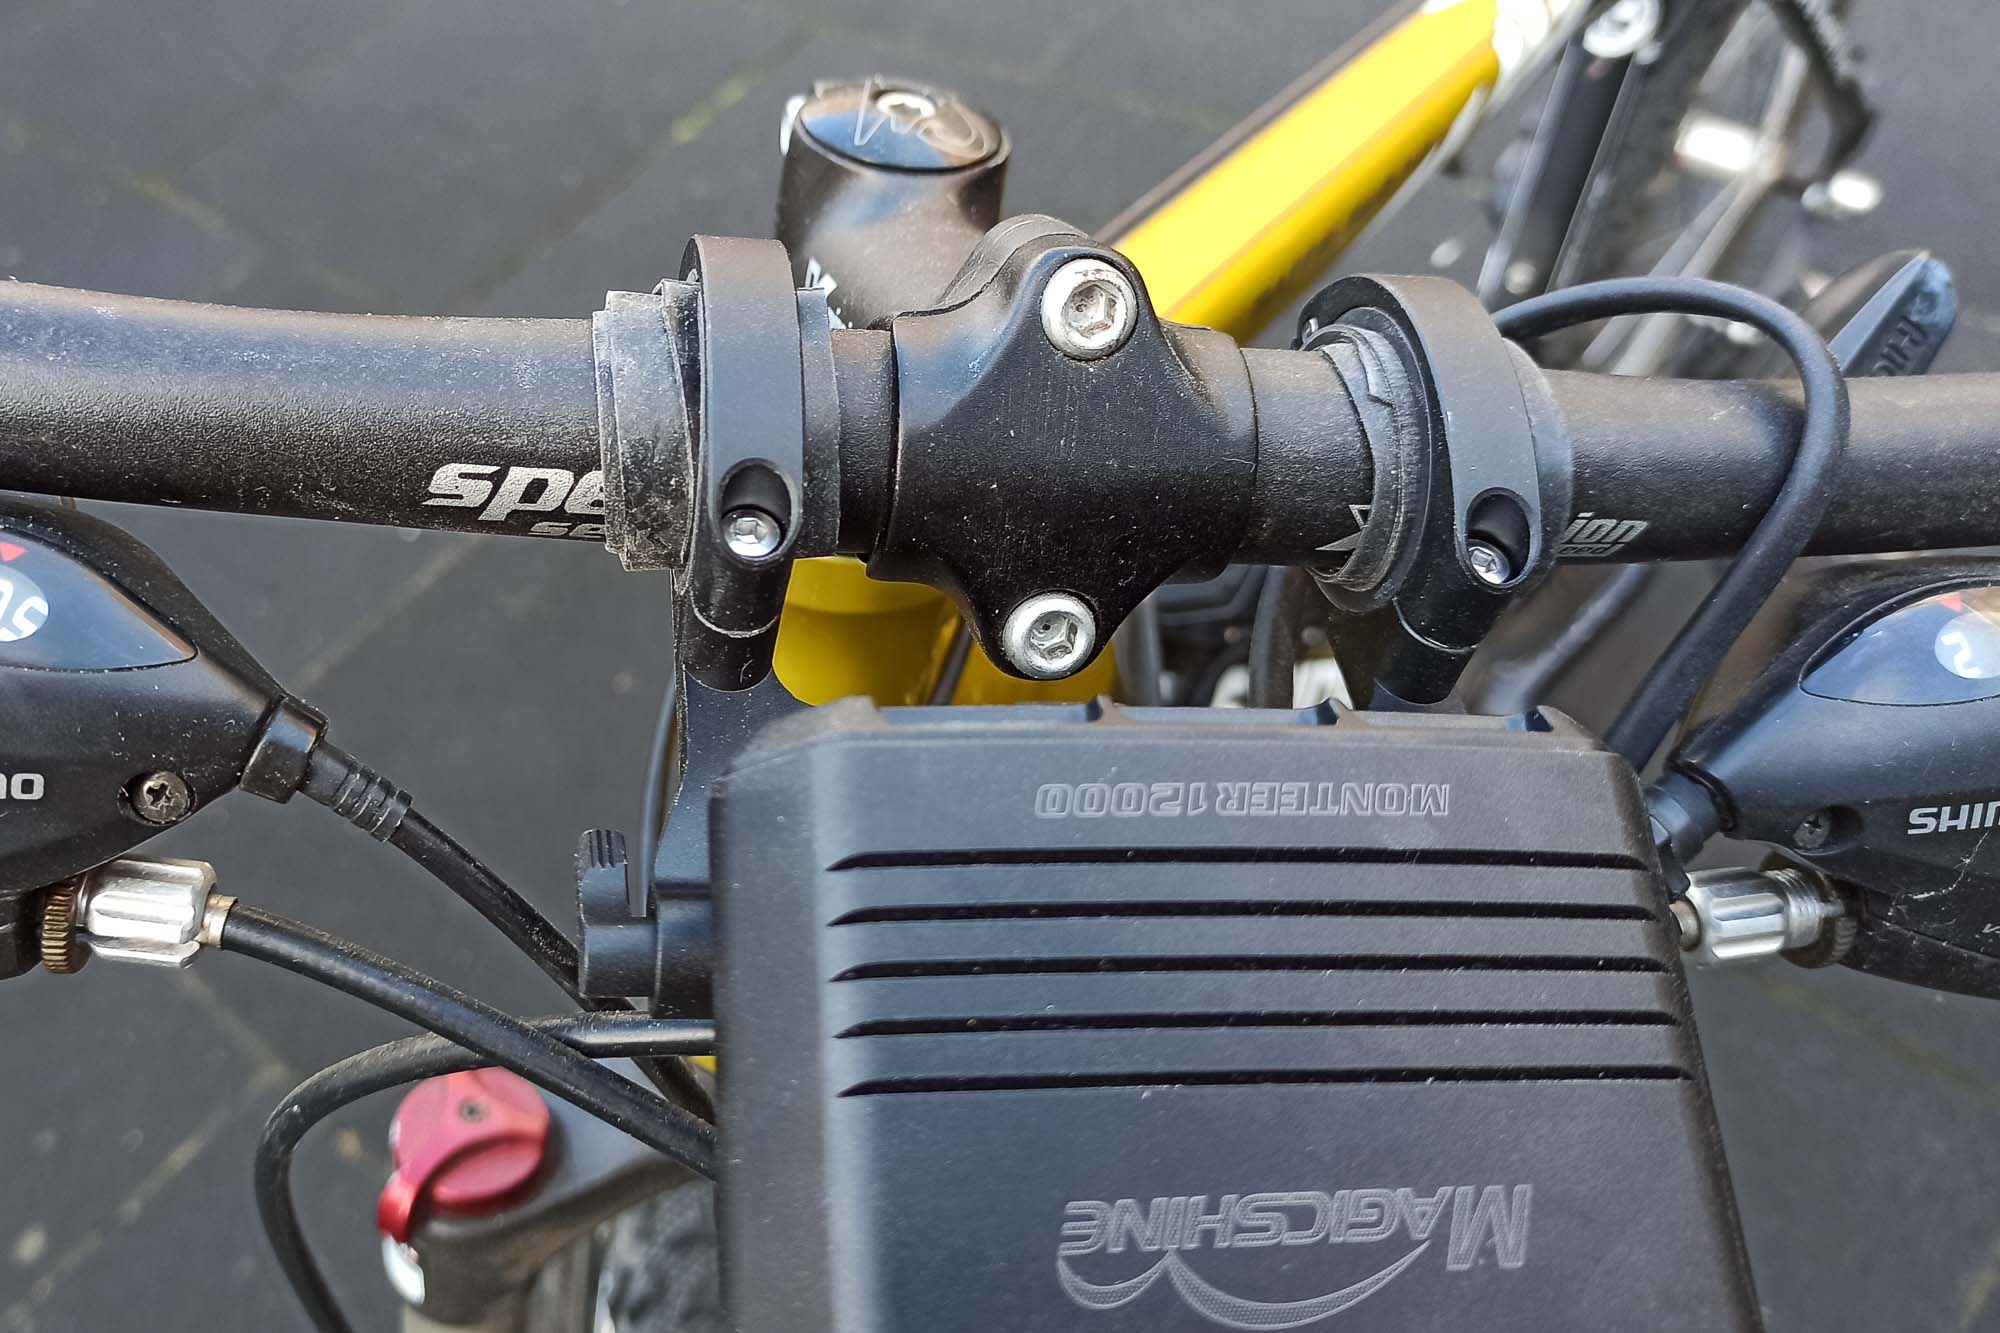
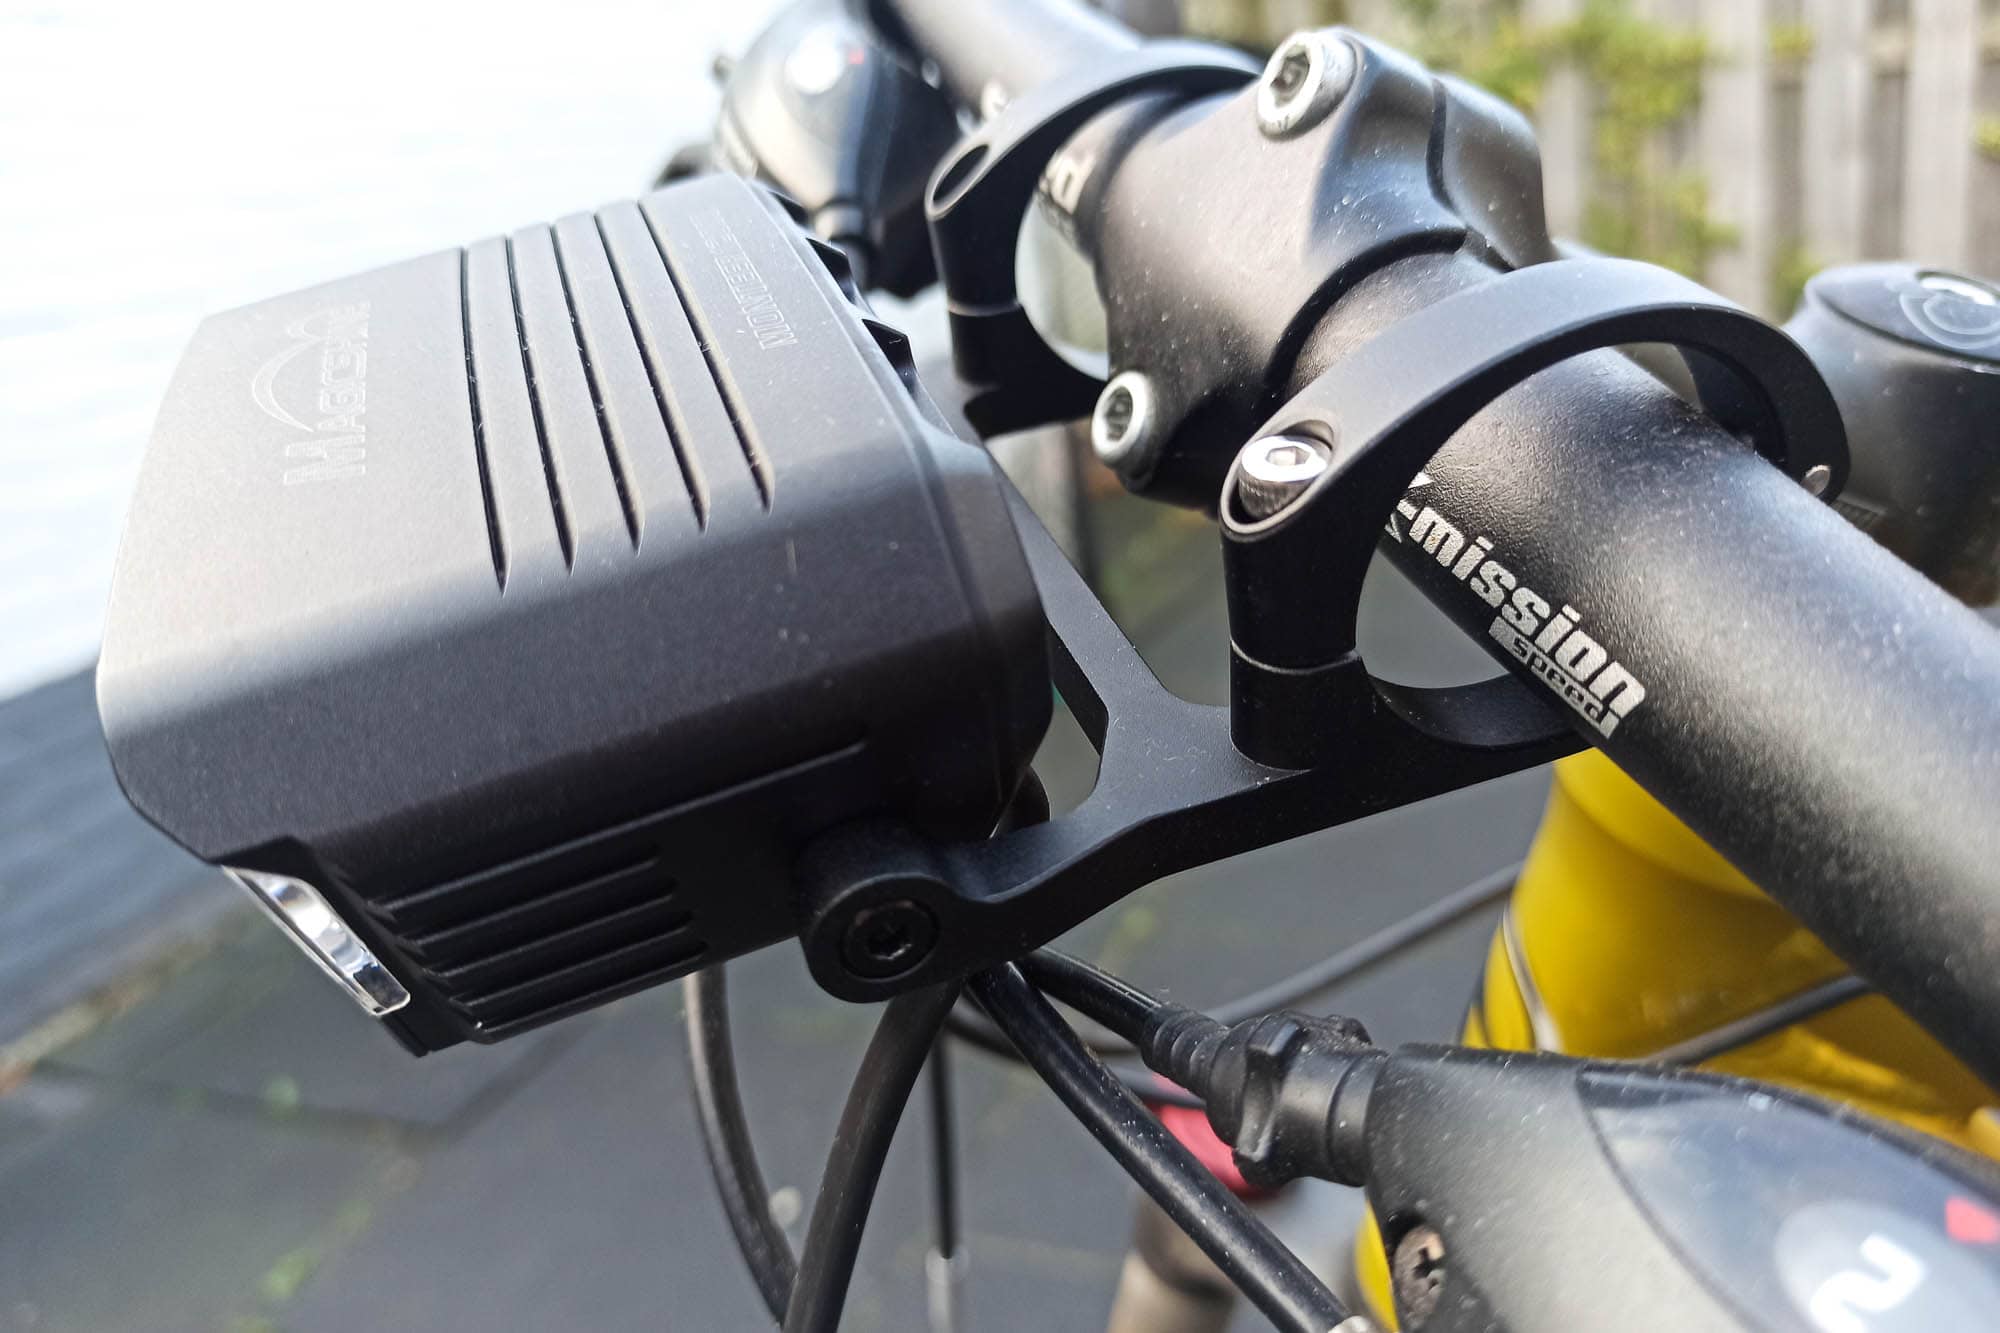
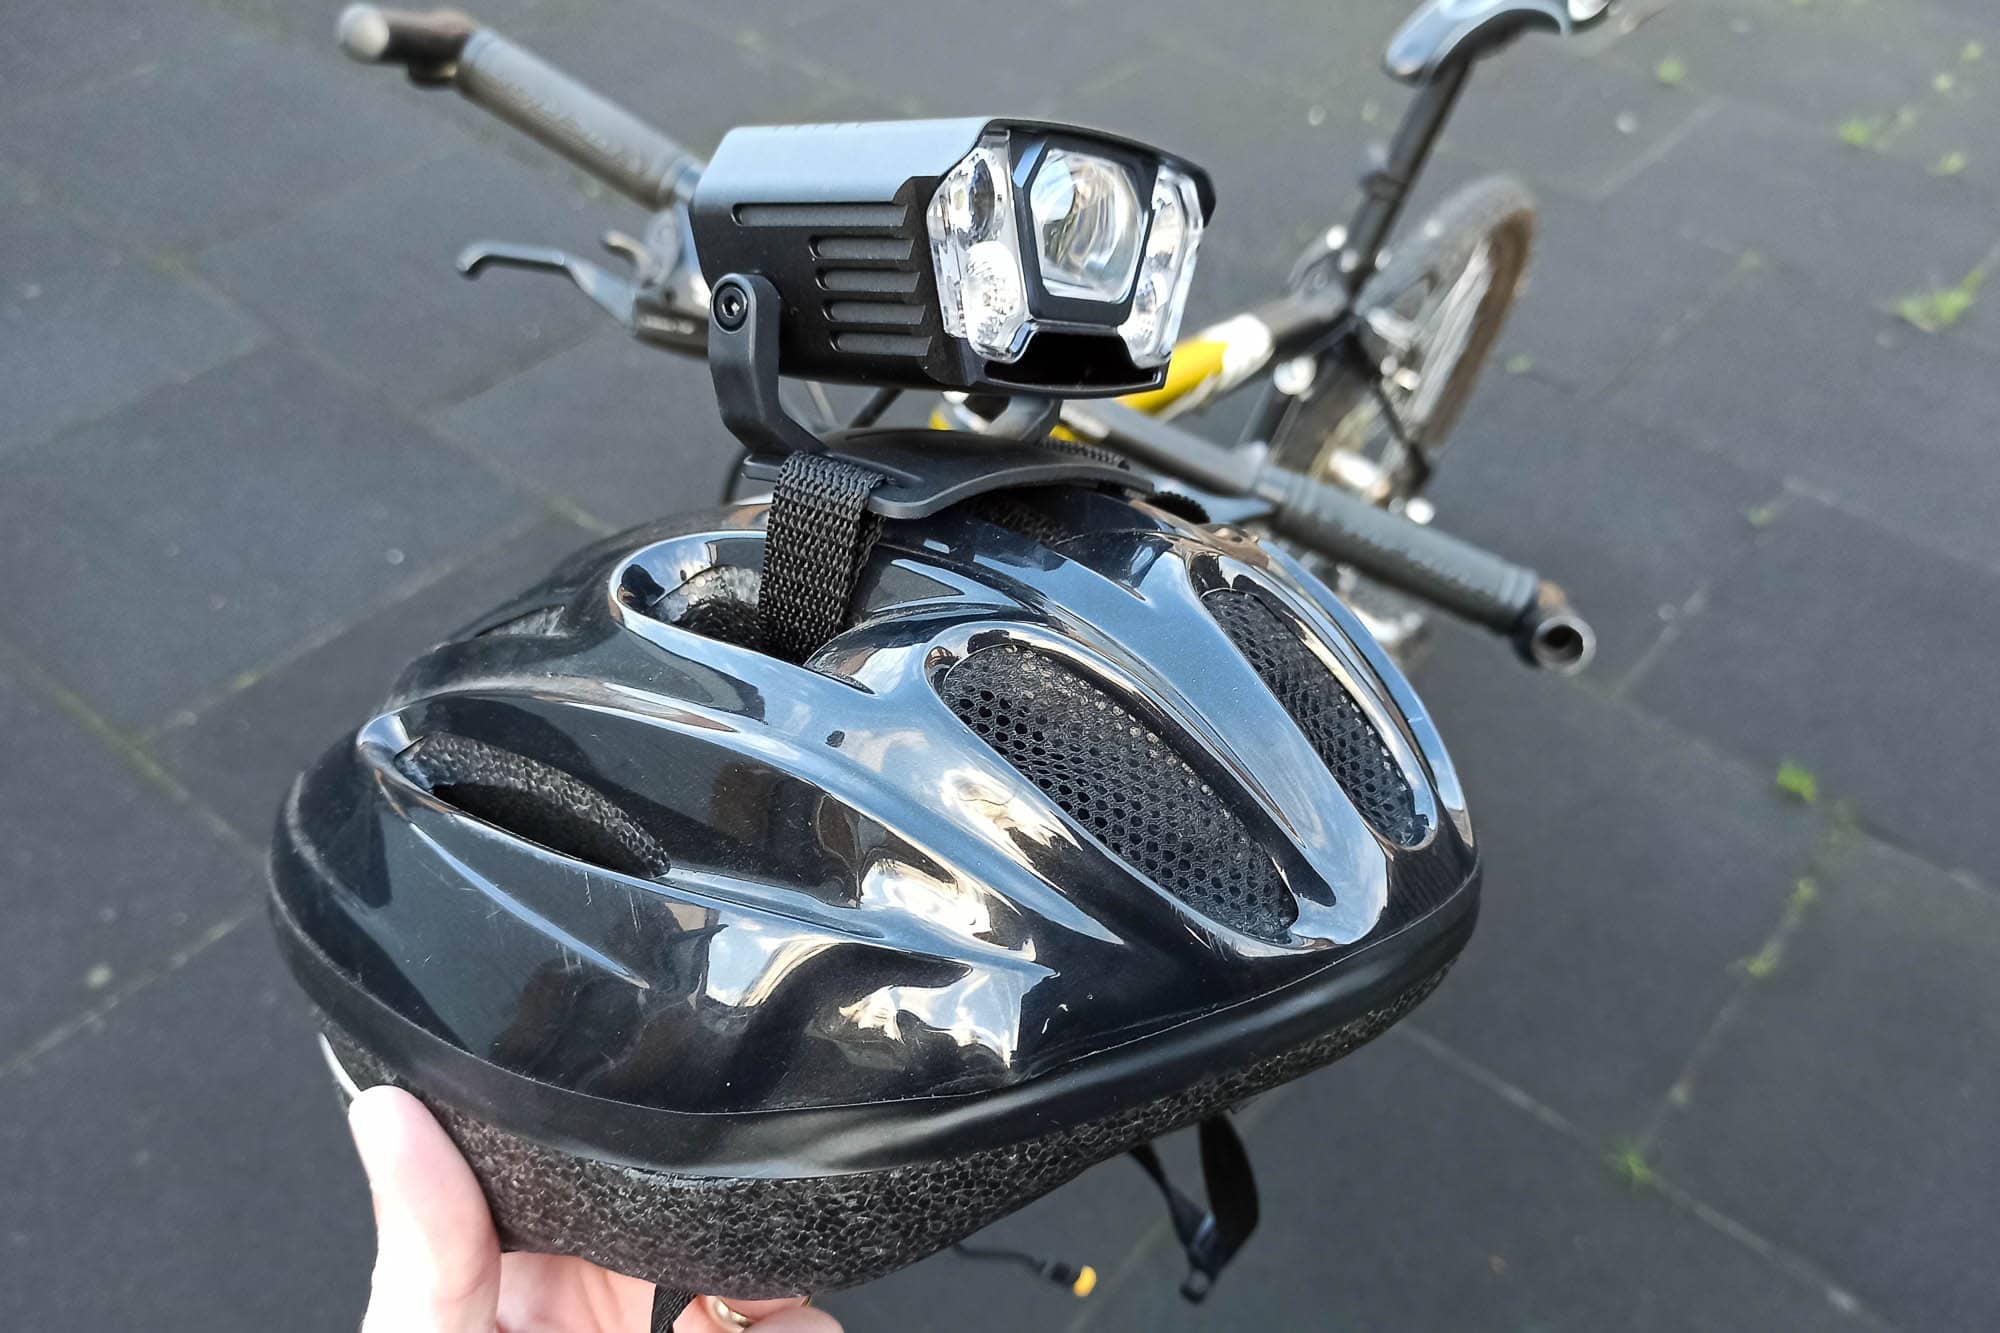
In terms of build quality, I can’t complain about anything. The lamp structure is great, with a removable bracket that attaches to the handlebar of your bike. They also include a plastic mount that is used to connect the light to your helmet. And it’s pretty straightforward, with the included helmet mounting straps.
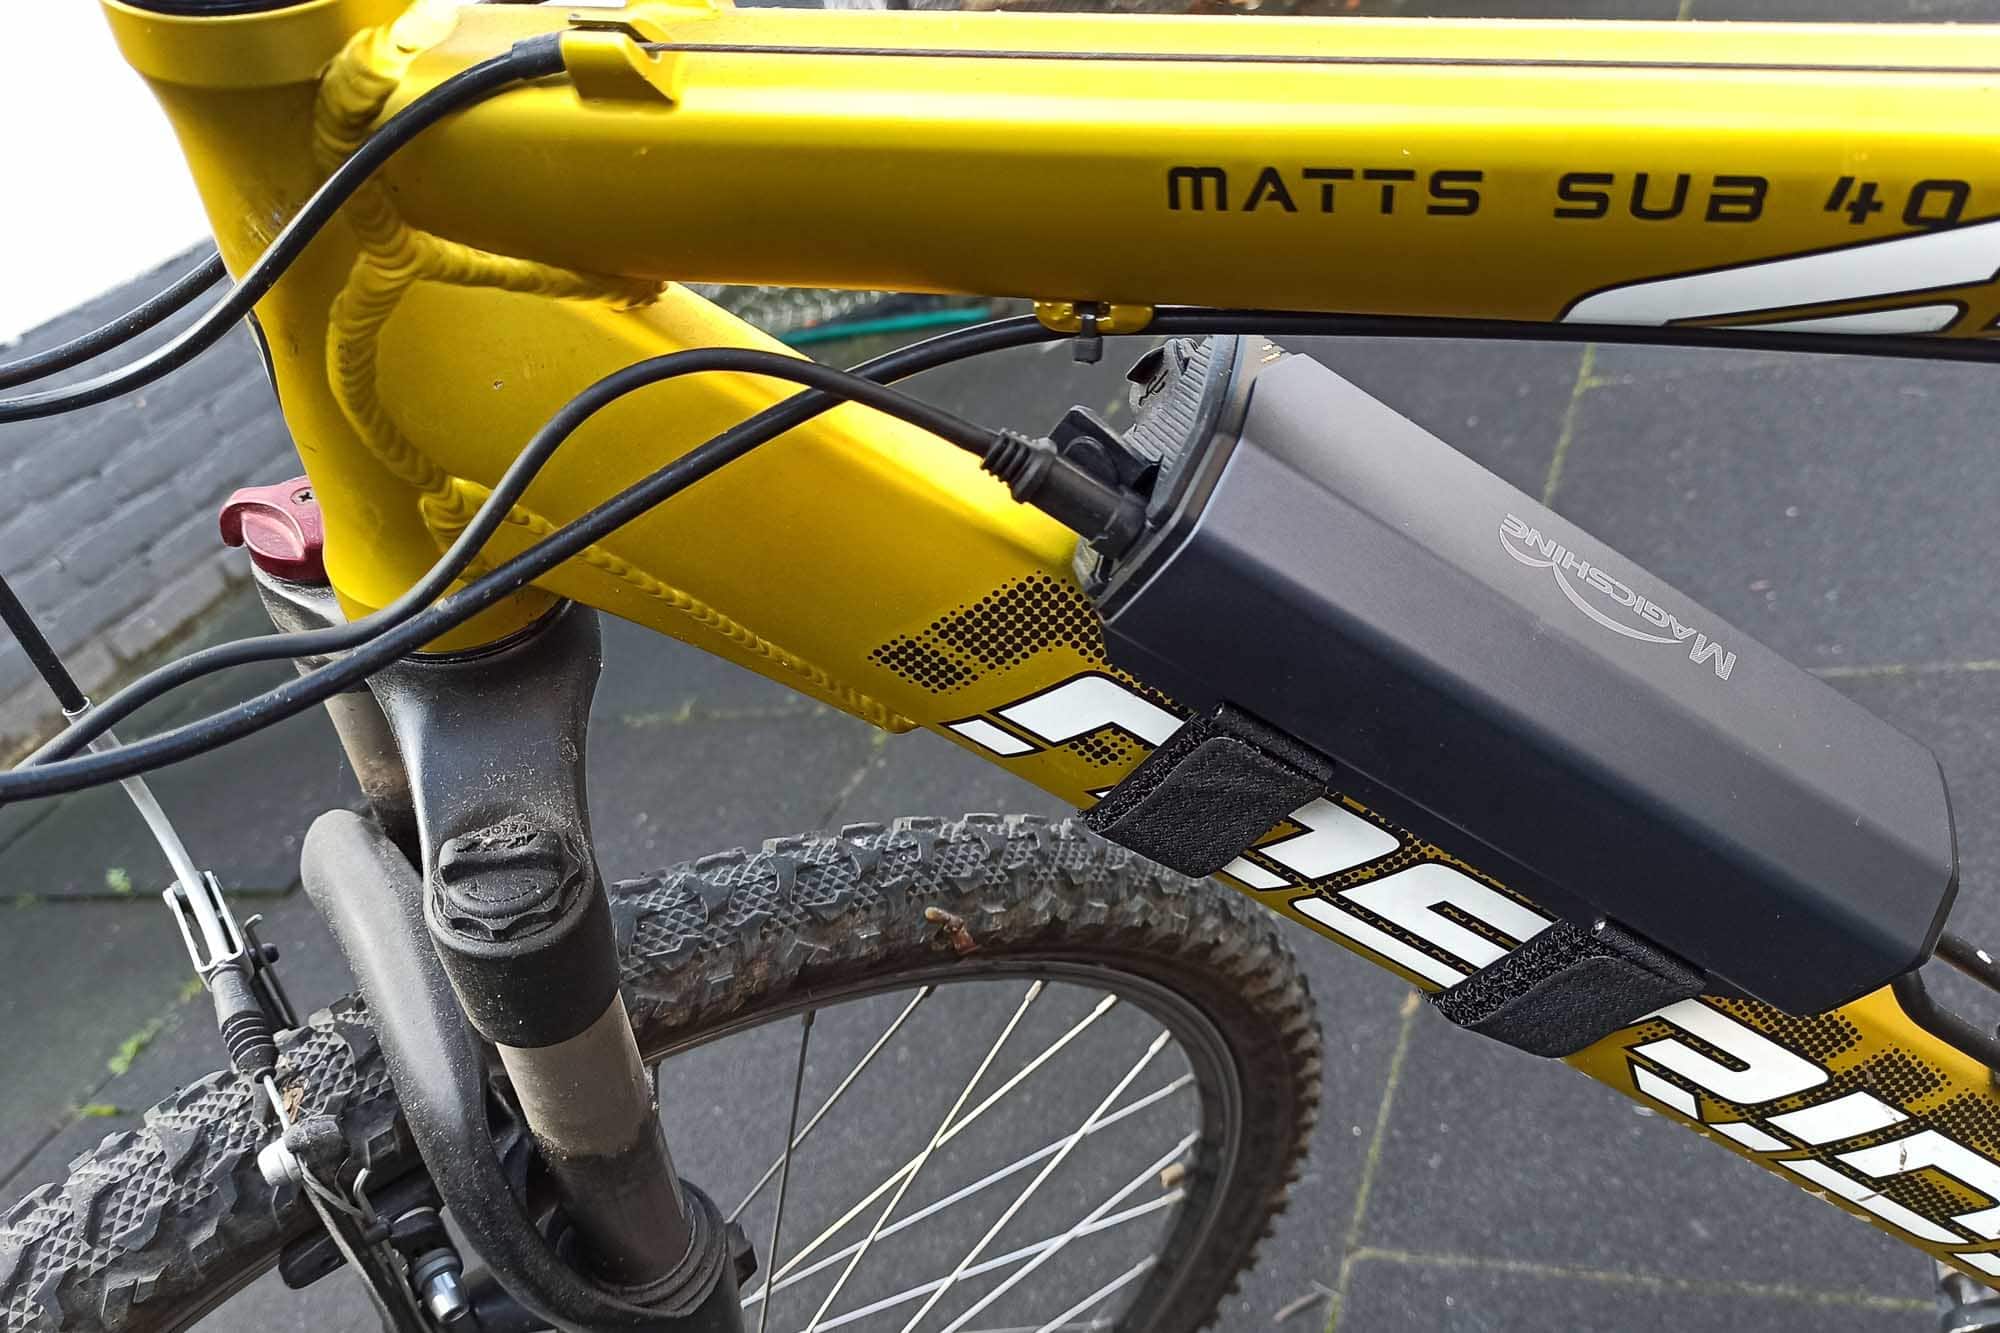
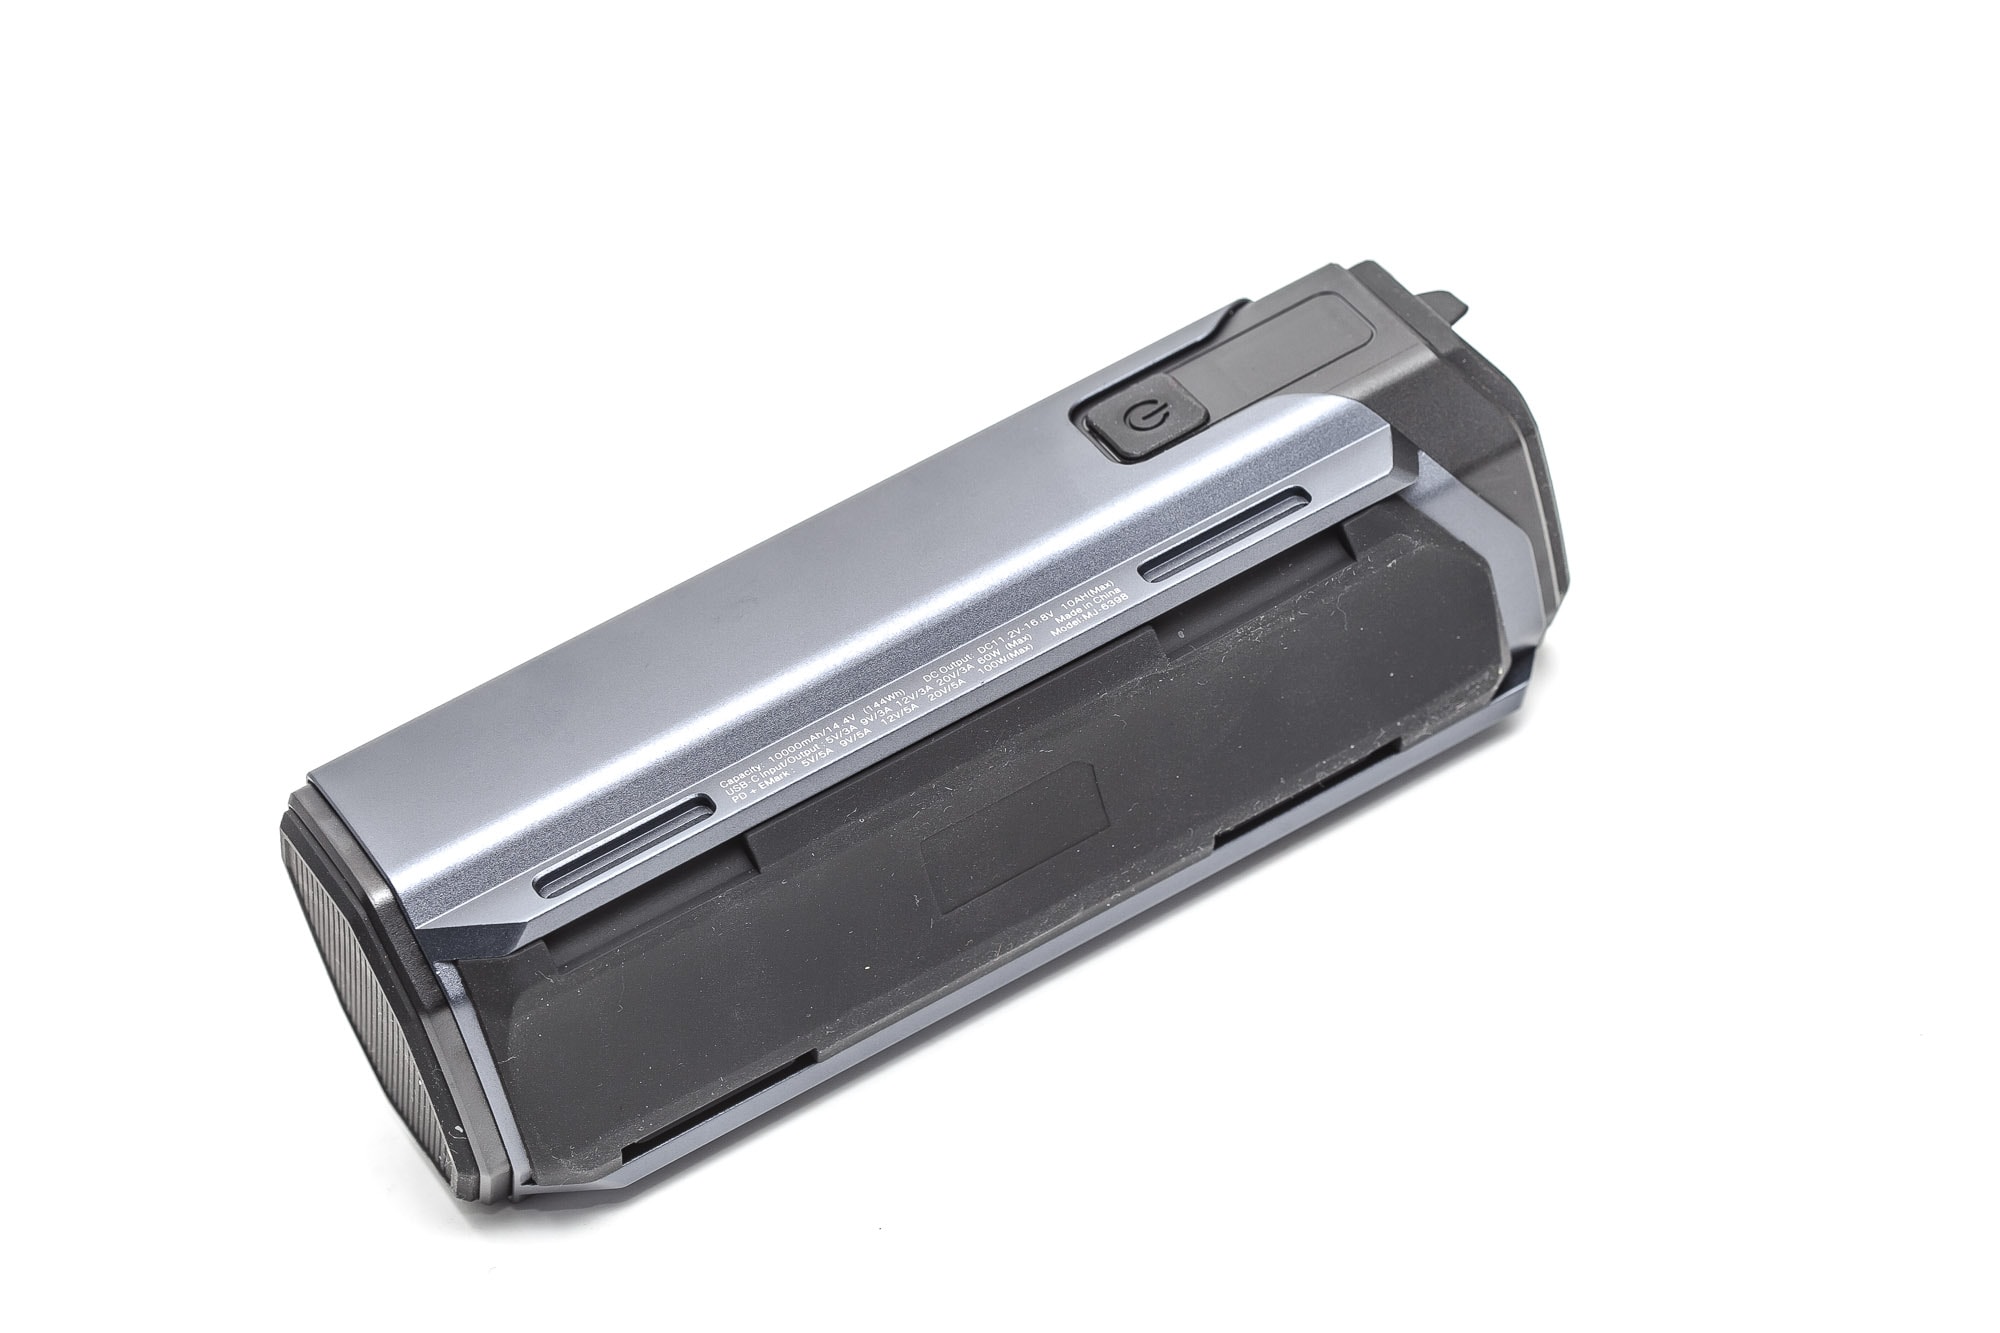
The battery pack is enormous and heavy.. kind of.. But it attaches to your bike, so you don’t feel any additional weight. Also, the attachment is very easy and straightforward.
The part of the battery pack that touches the bike’s frame is rubberized, so it will reduce the risk of any damage. Also, the battery mounting straps have some sort of silicone layers to keep the battery pack in place.
However, there is 1 thing worth mentioning. If you have a thin handlebar, like I do, the handlebar mount and the nylon shims can be too large. I had to add layers of rubber tape to make the mount fit on my bike.
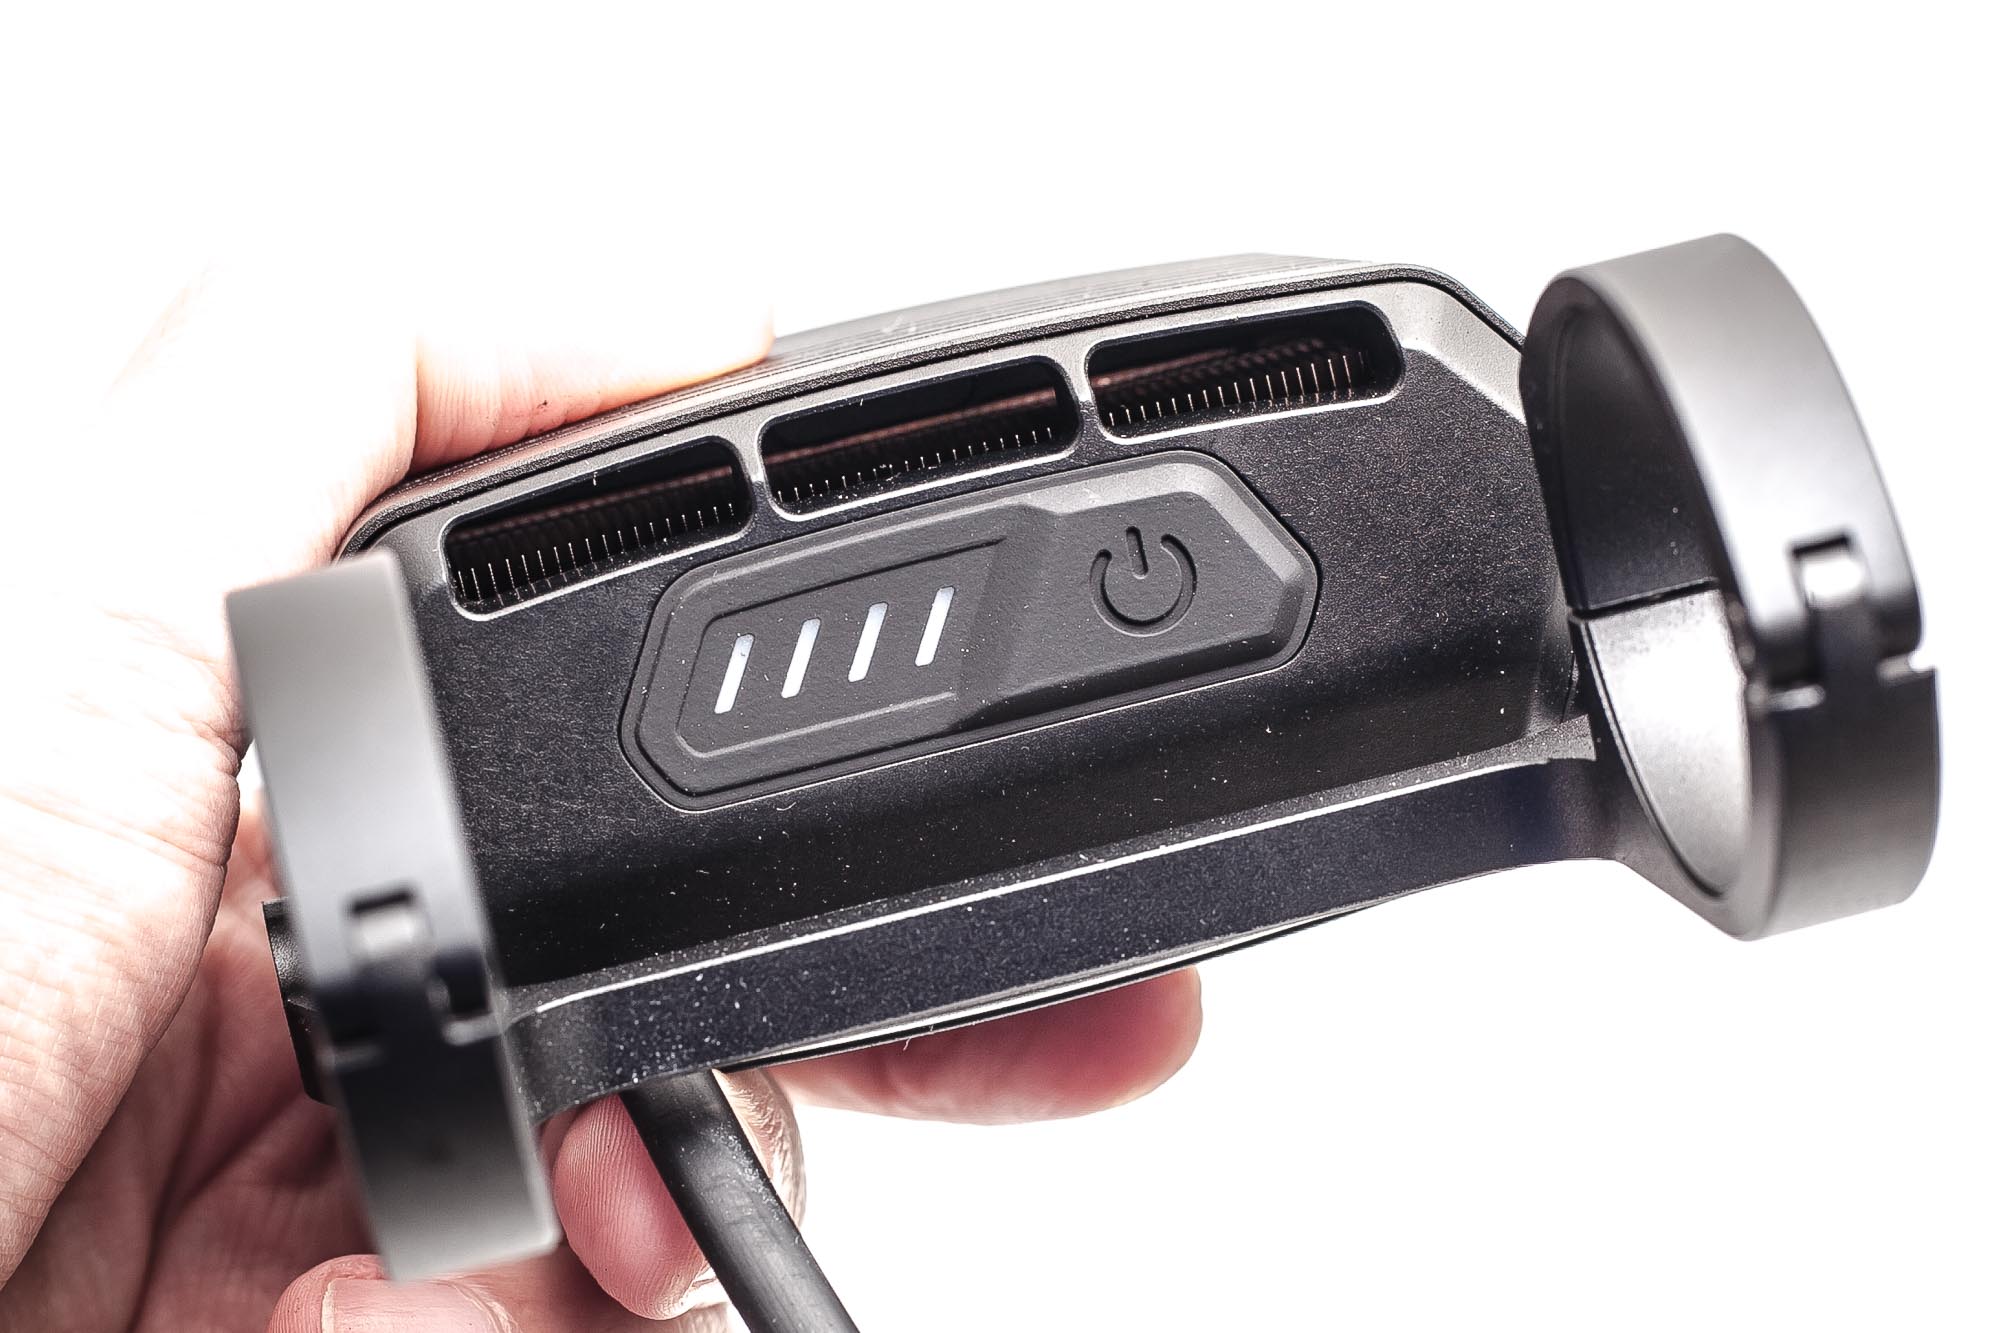
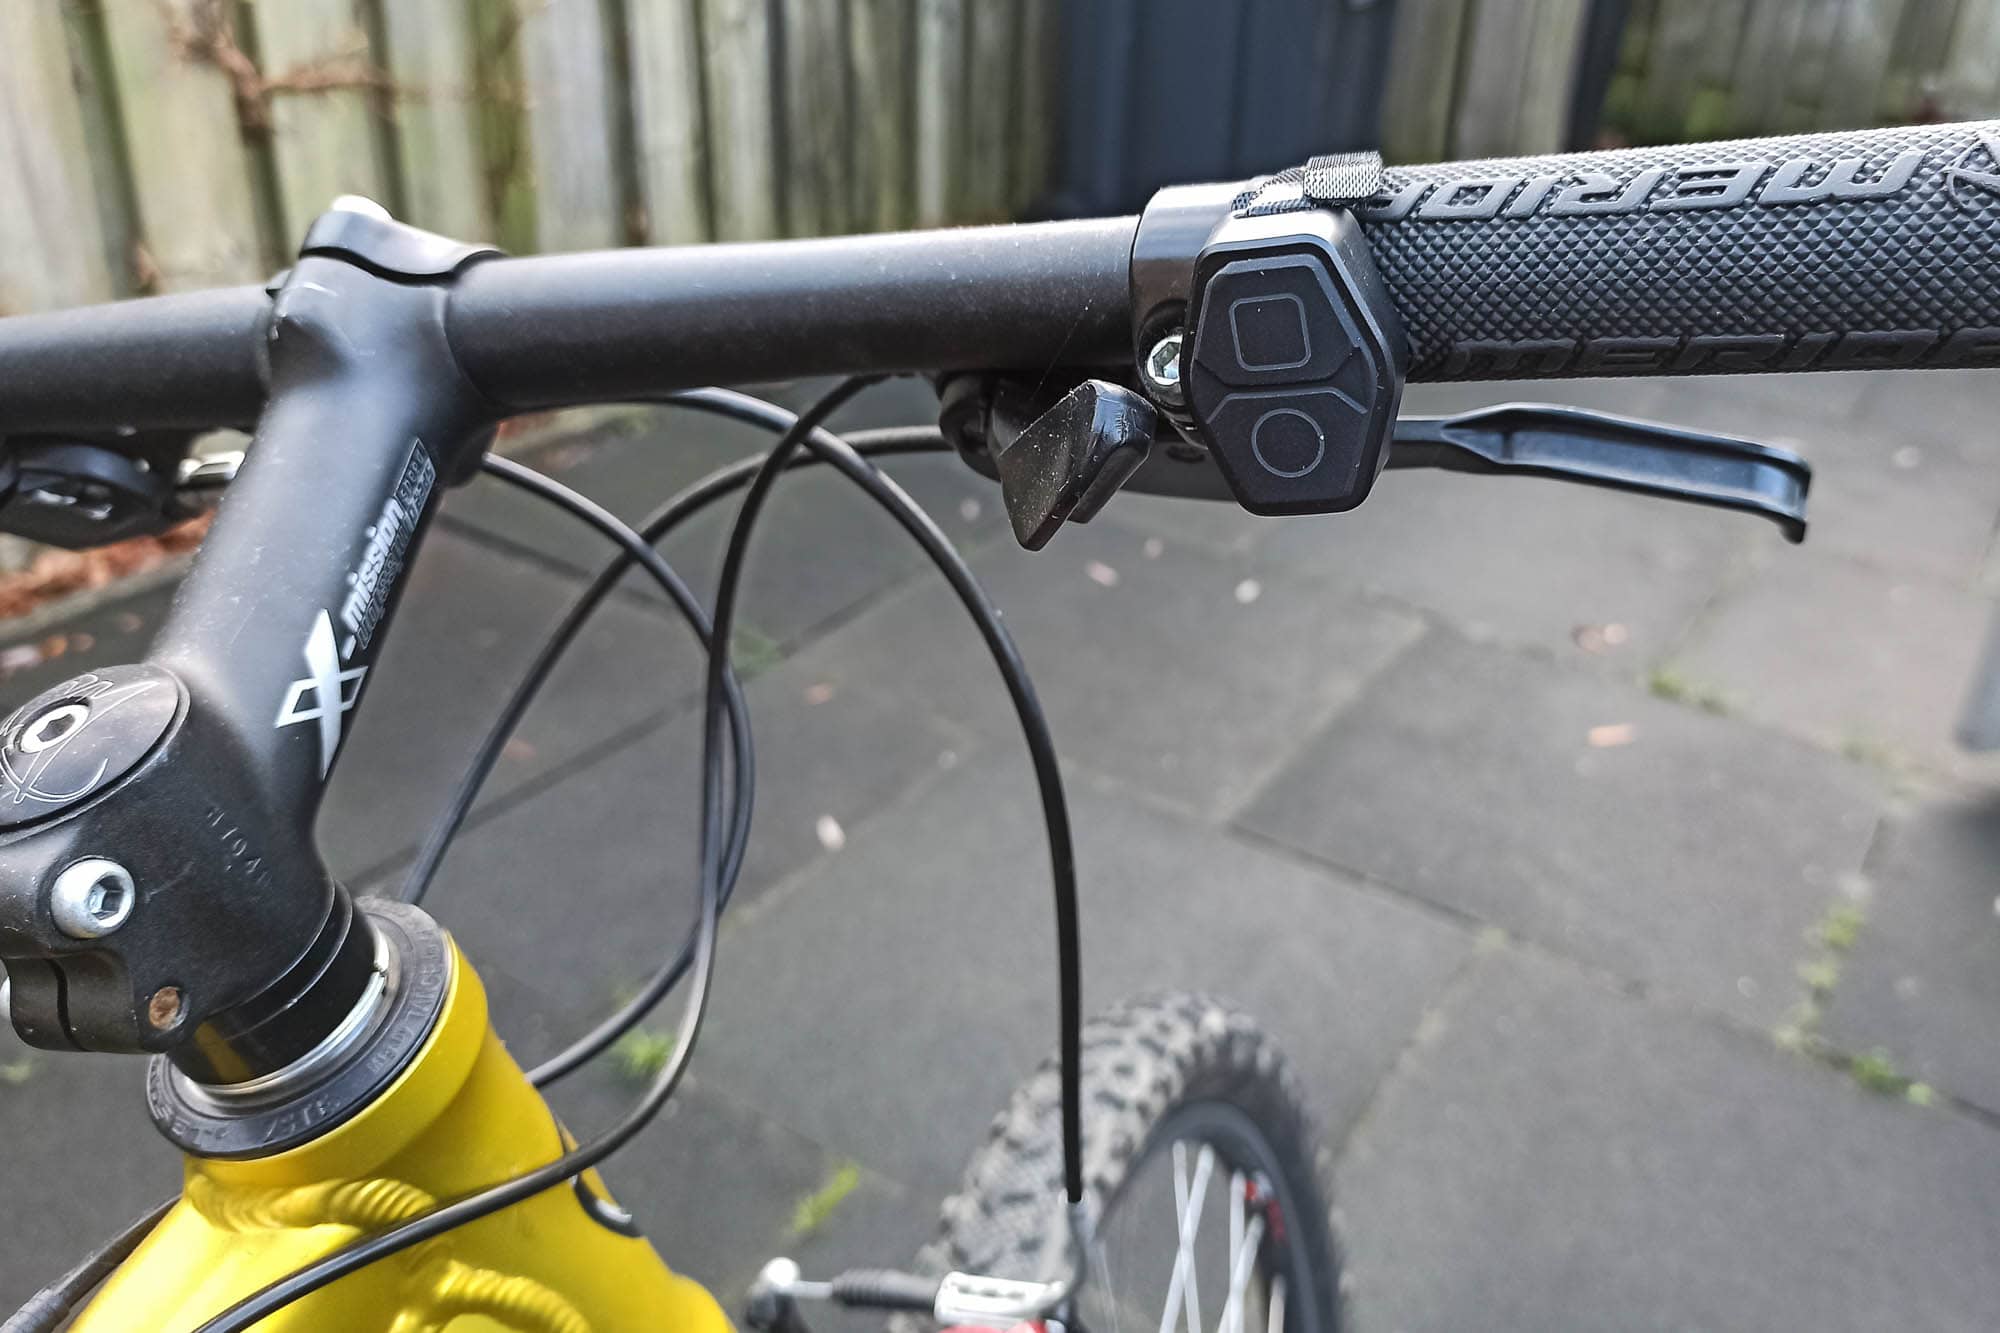
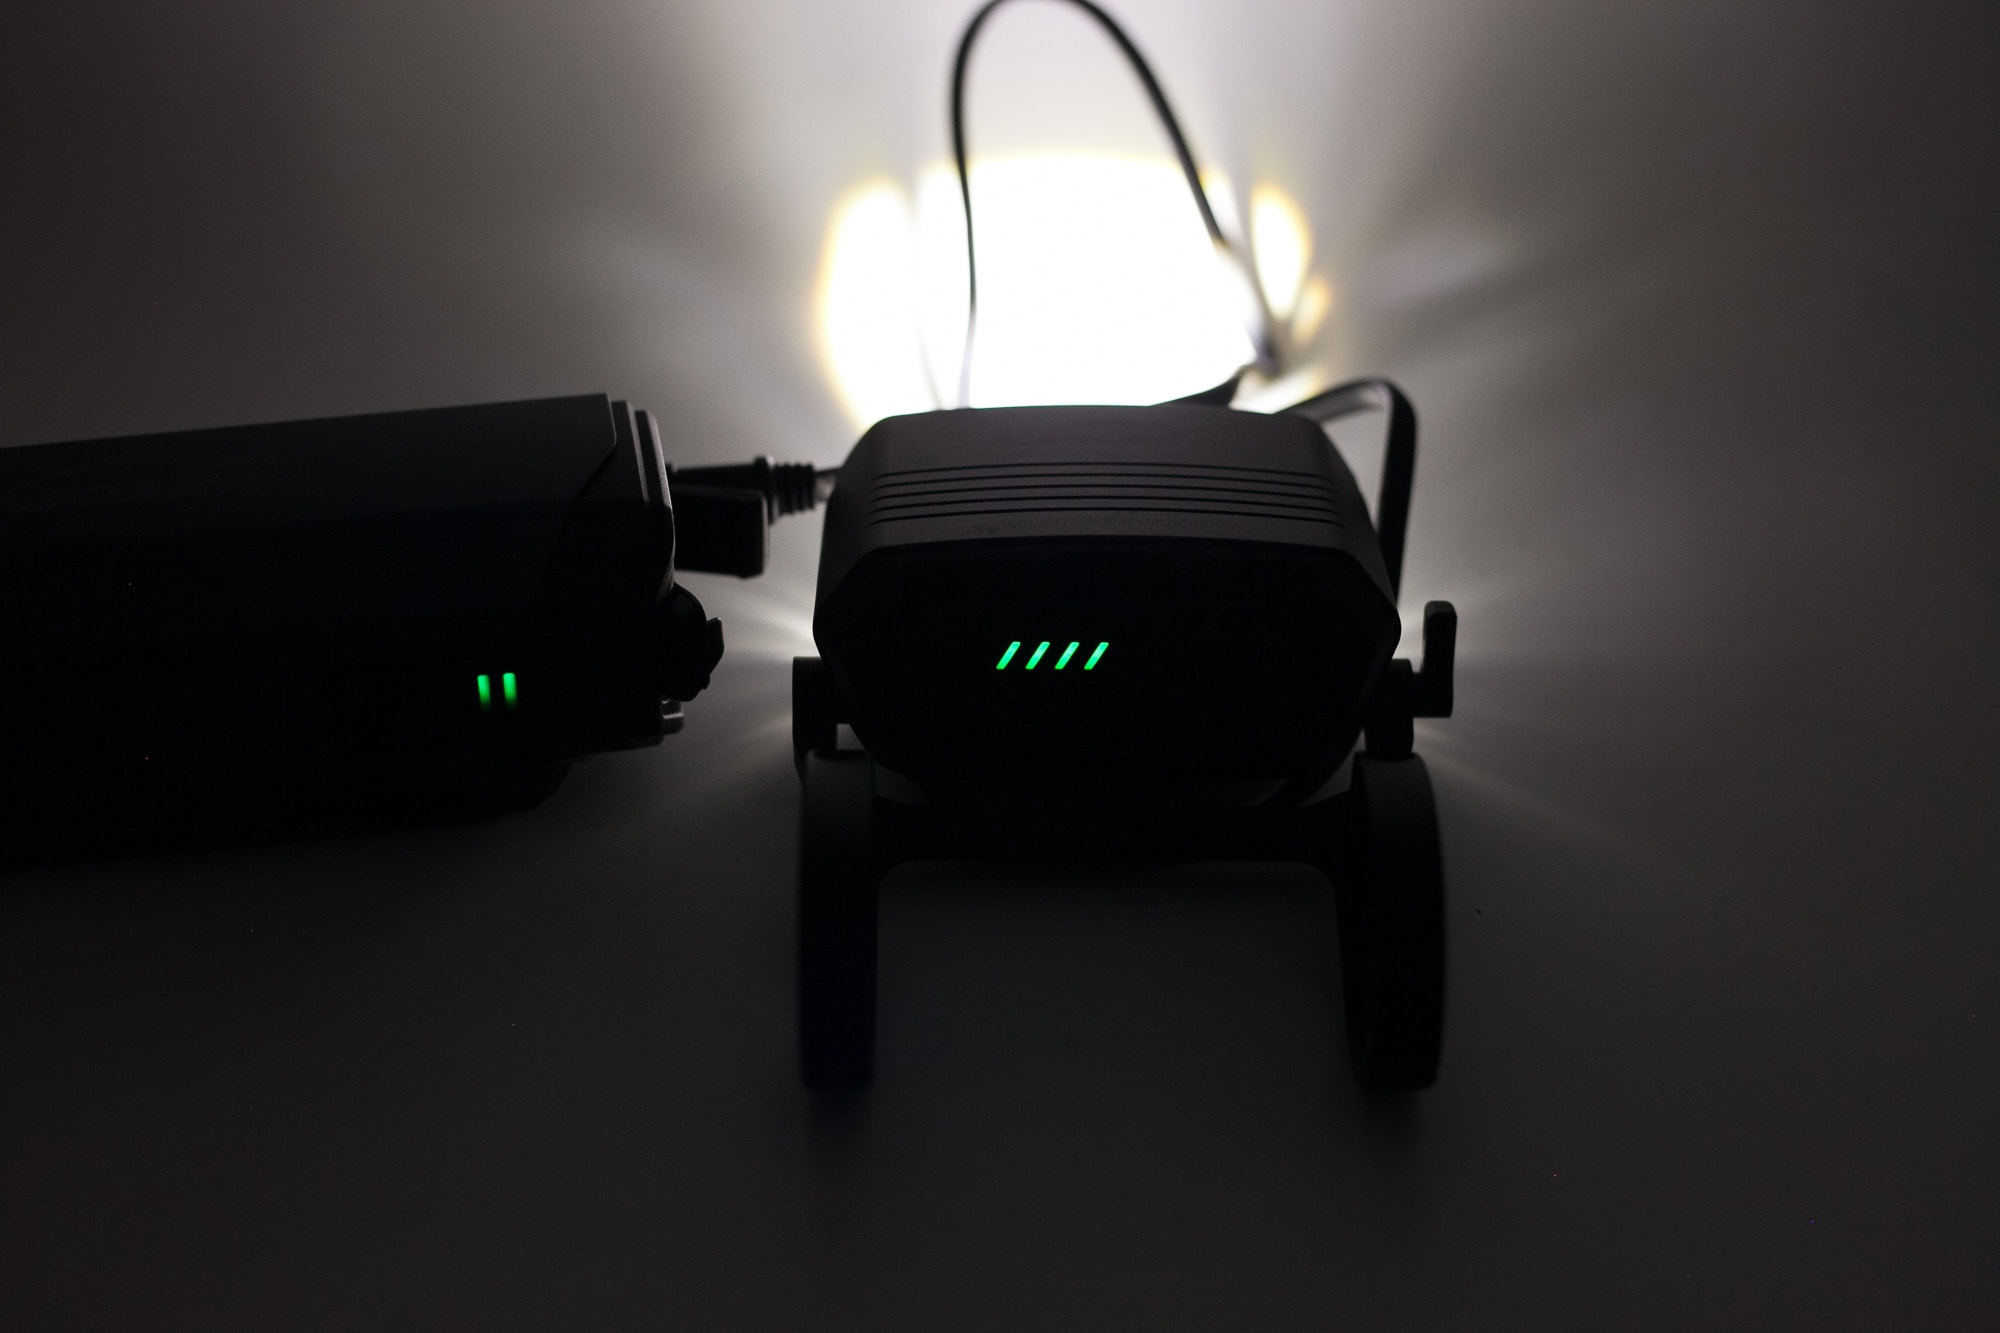
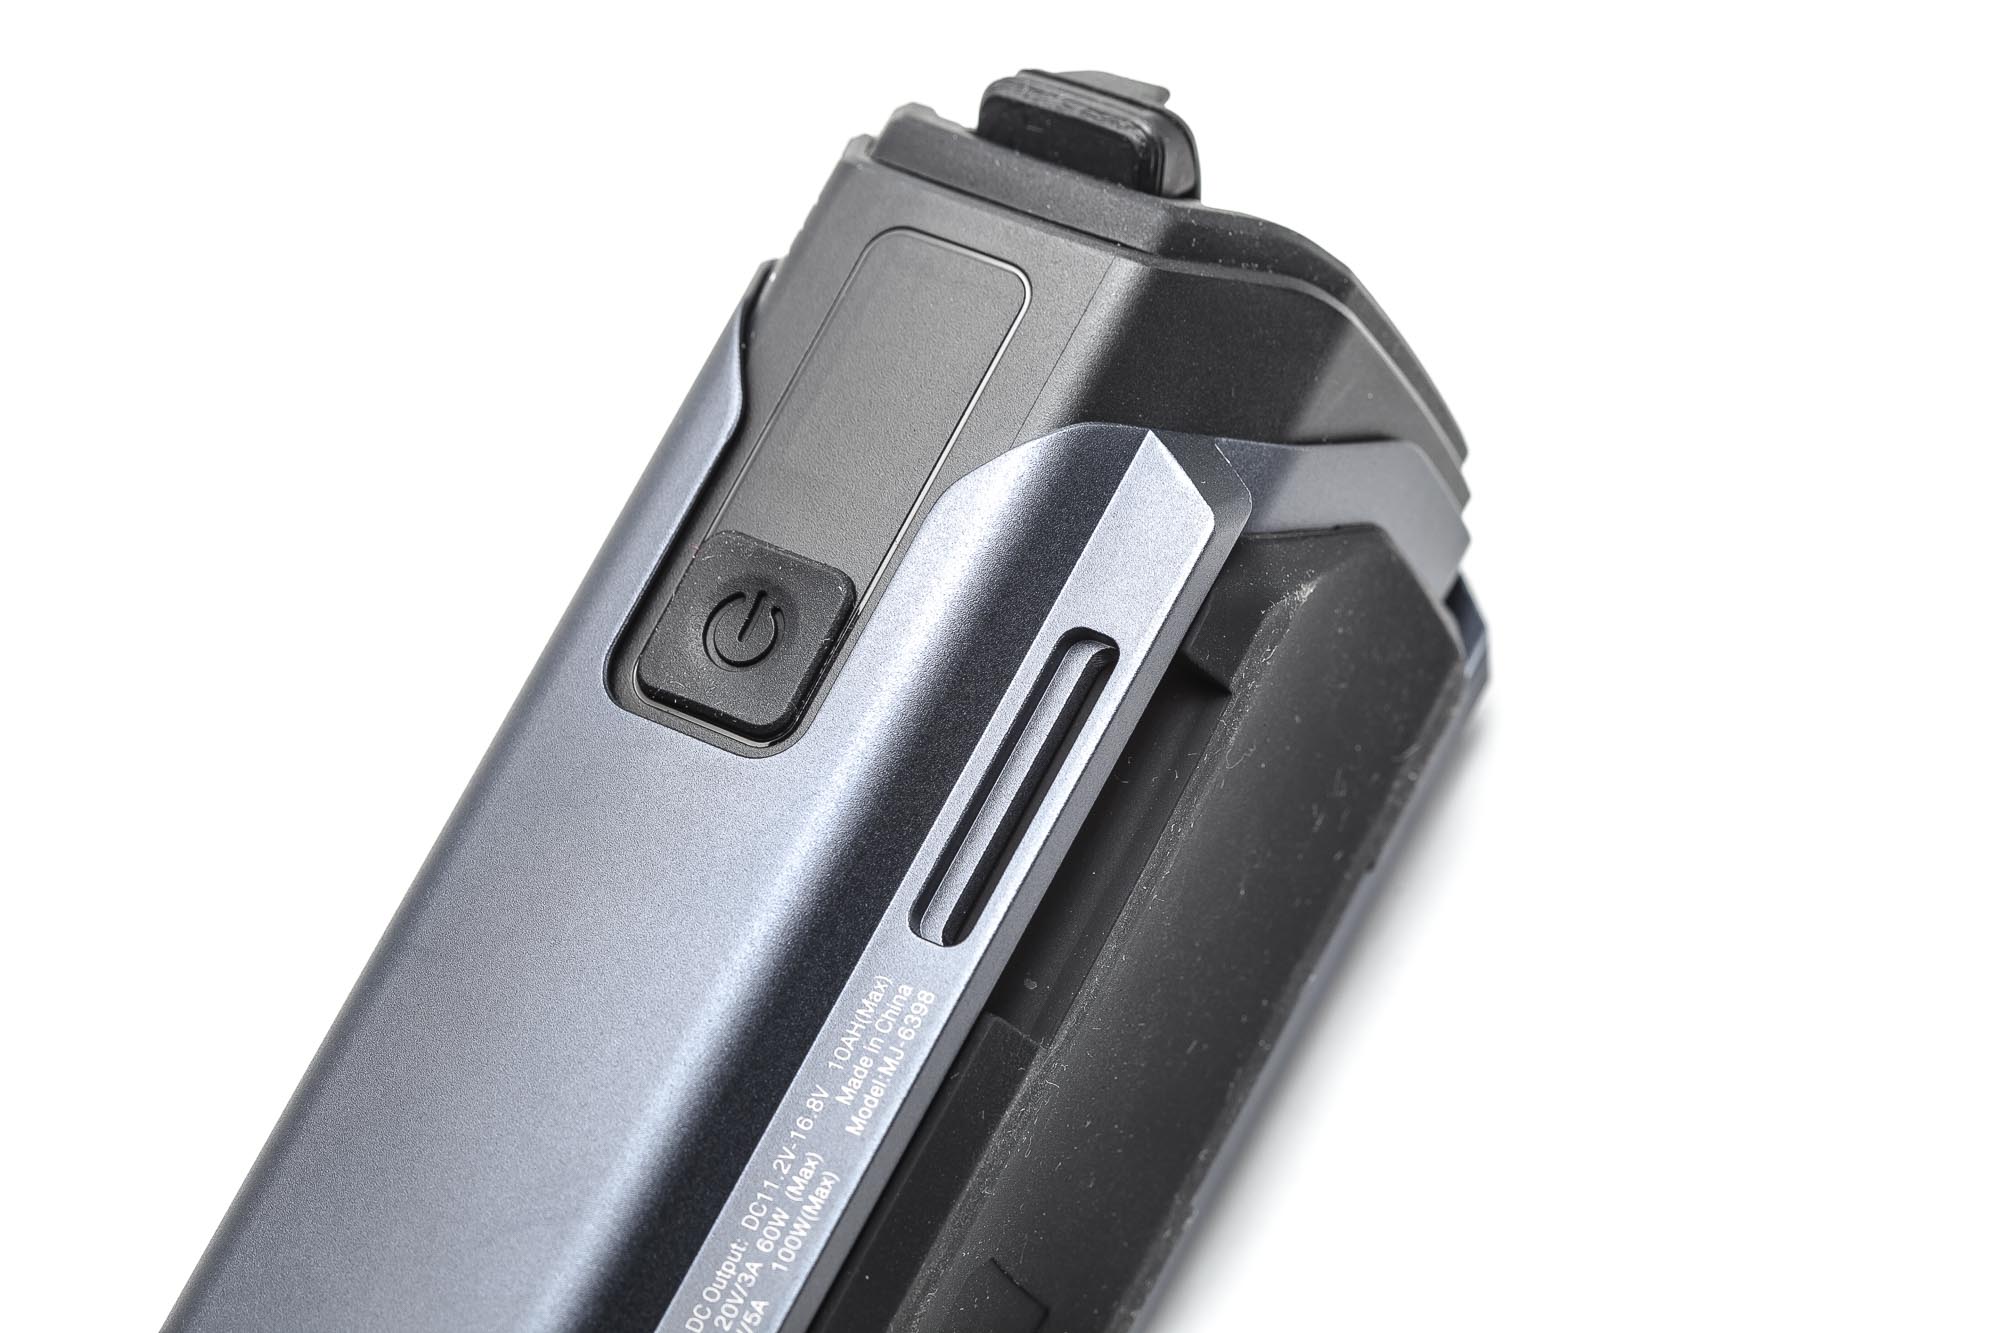
In terms of the actual use of the bike light, the head of the bike light has a switch and a battery level indicator. A long press will turn the light, while a single click shows the battery level. And the great thing is that these battery indicator lights are always visible while riding. That way, you can easily see when you run out of battery.
Magicshine also included a Bluetooth remote control with 2 buttons. They are shaped as a square and a circle. The round one is to change modes, and the square gives access to Power Turbo mode. (officially called Spotlight mode, High).
A double click will switch between normal bike mode and power level modes.
During my test, I noticed that the blinking red light (battery almost empty) will give you a few hours of runtime. For more details, refer to the Performance section of this review.
However, you can also attach the head to your helmet and use the extension cord to connect it to your battery pack. If you connect it to your helmet, I recommend adding the battery pack to the seat post (if not too greasy) or dirty.
The head is probably a bit too big and heavy to use on a GoPro mount, but if Magicshine added that, it could be used for even more applications. Just an idea!
Warranty:
Magicshine gives a two-year warranty, with an extended warranty of 6 months, after registering your bike light.
LED, Lens, Bezel, Beam, and Reflector
It’s the first time I heard of the Osram KW1 LED, which is a humongous LED sitting behind a TIR optic in the center. Around the Osram are 4 Luminus SST70 LEDs, producing the flood on the Monteer.
Of course, I tested the LEDs, but focused on the center of the beam, which is mostly the Osram LED.
The standard beam (called Floodlight by Magichine, confusingly) has almost a V-shaped beam, with the top 10-20% of the beam, being the brightest. Then, there is a visible difference in output below that line. You’d have to check the beamshots to understand.
The power mode beam (called Spotbeam by Magicshine) includes the Luminus LEDs, creating a much broader beam. In my opinion, this should have been called Floodlight. They should probably stick with other names to make it easier to understand.
I do have to say that the actual beam distance in Spotbeam is better, but it is also the highest output mode with a wider beam. So, perhaps they could have called it Standard modes and Power modes. Or something along those lines.
The output is thermally controlled, so the output will be higher when cycling. Just below the LEDs is a slight hold that lets air blow through, and near the rear end has cooling fins. That way, you don’t need active fans, but the wind flows from cycling.
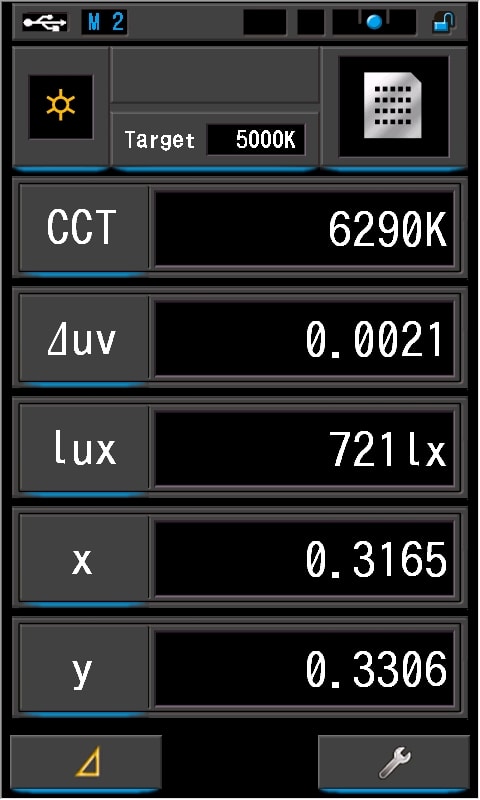
I used a Sekonic C800 spectrometer to measure the flashlight at a distance of 5 meters.
| Mode: | CCT: | CRI Ra: | duv |
|---|---|---|---|
| Highest mode | 6290K | 68.2 Ra | 0.0021 |
Remember that this light can burn things, and you could even light things on fire! I accidentally melted the headband of my Olight Perun Mini 2 because I was testing the light out on my desk.
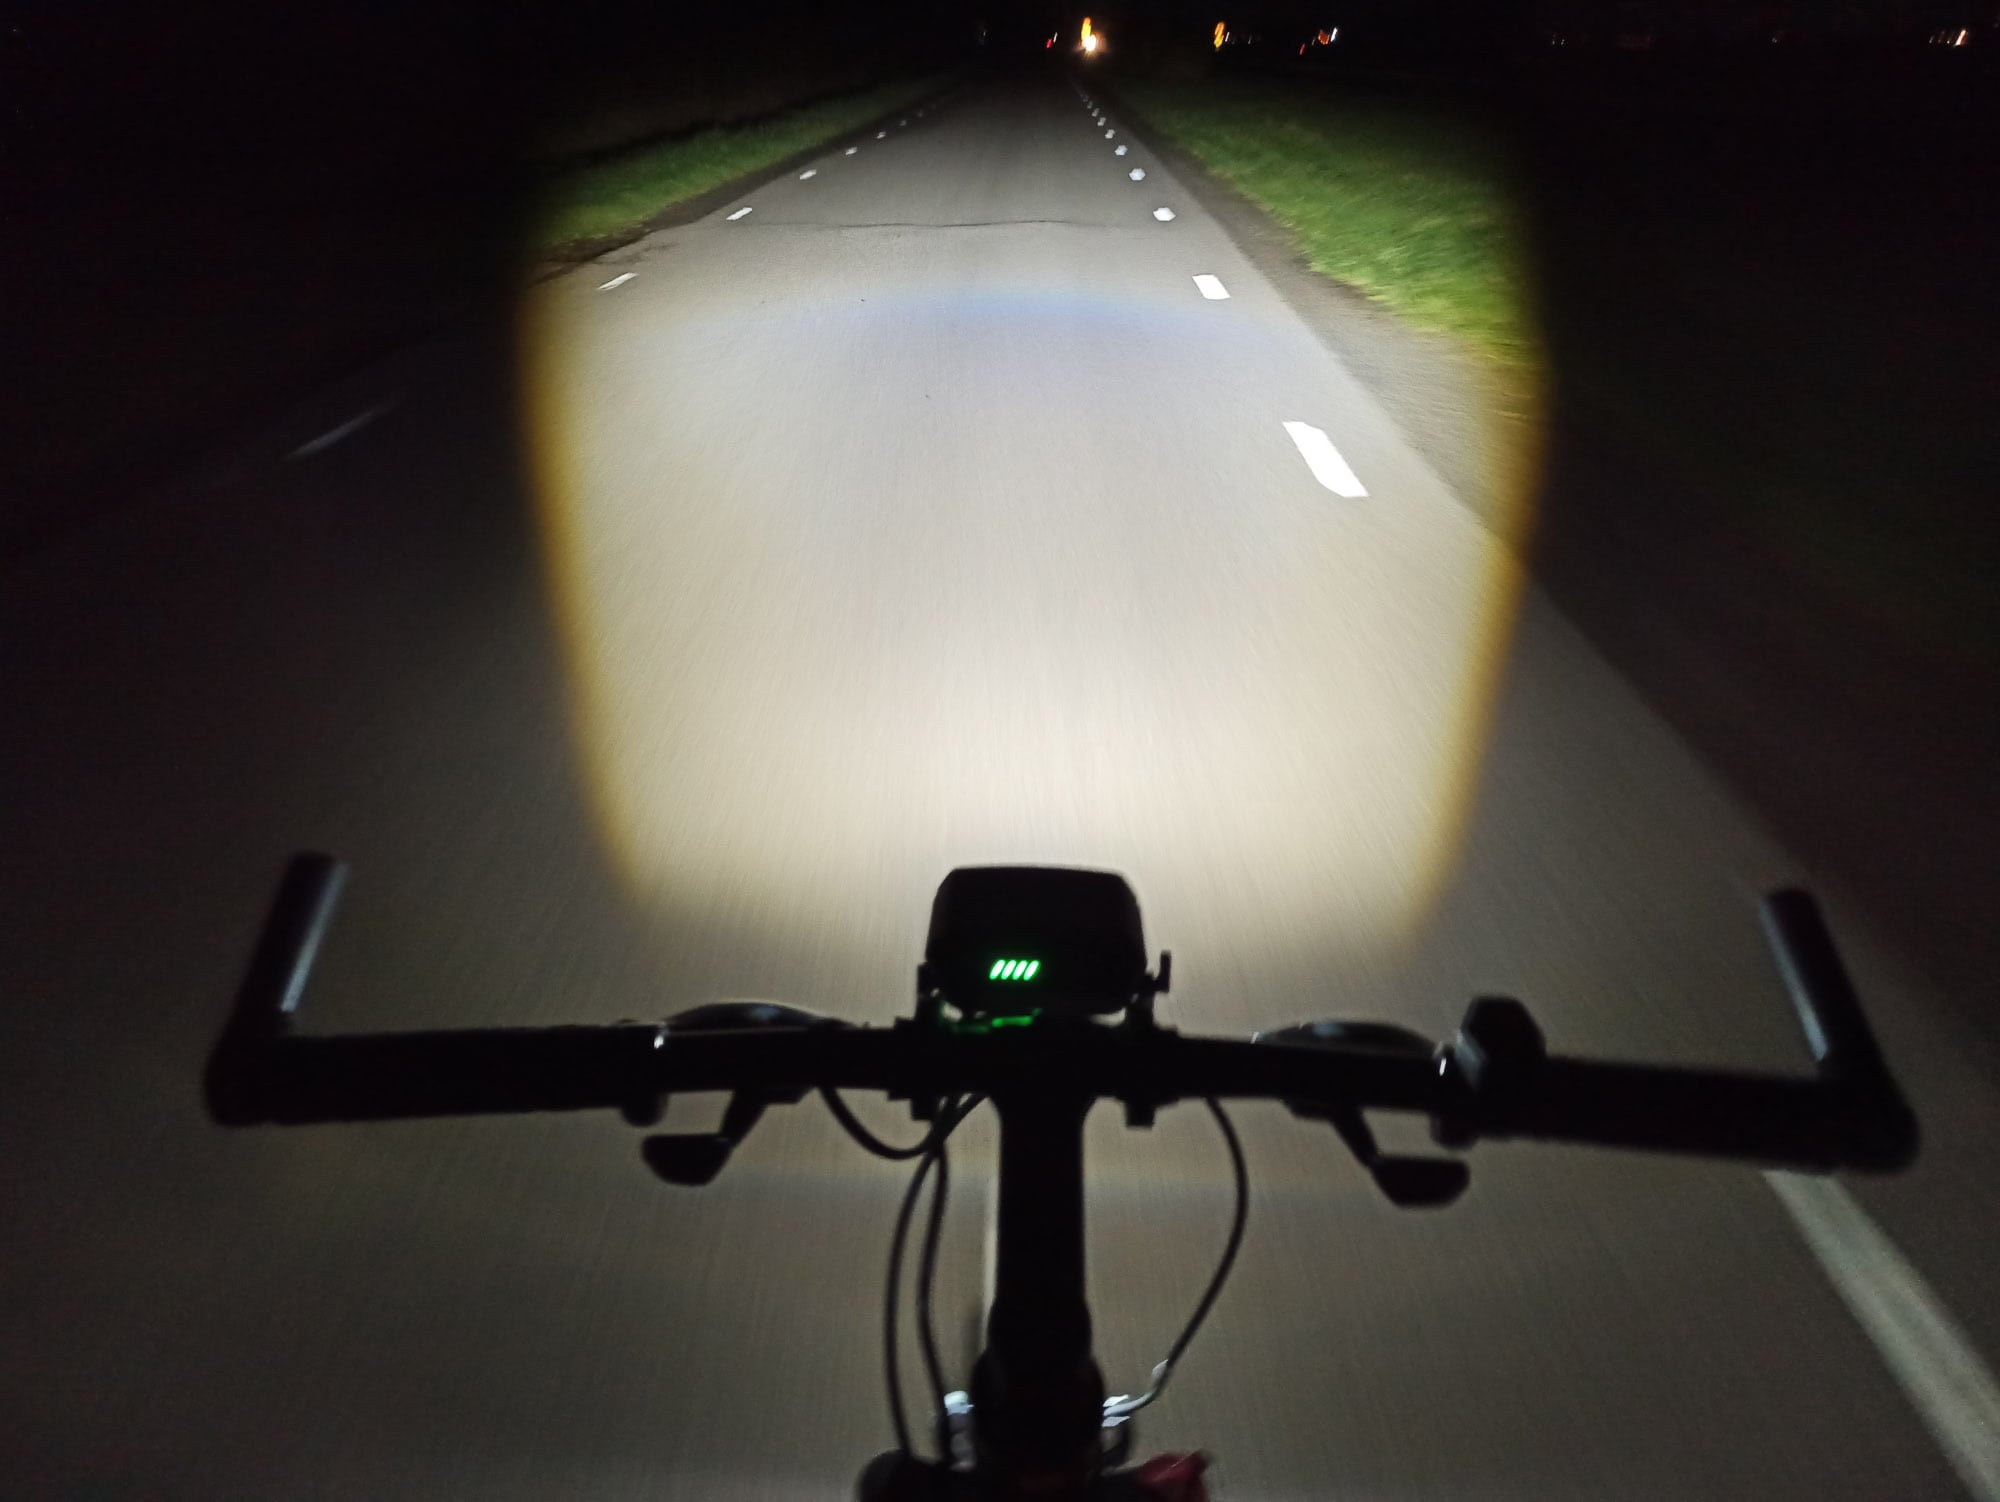
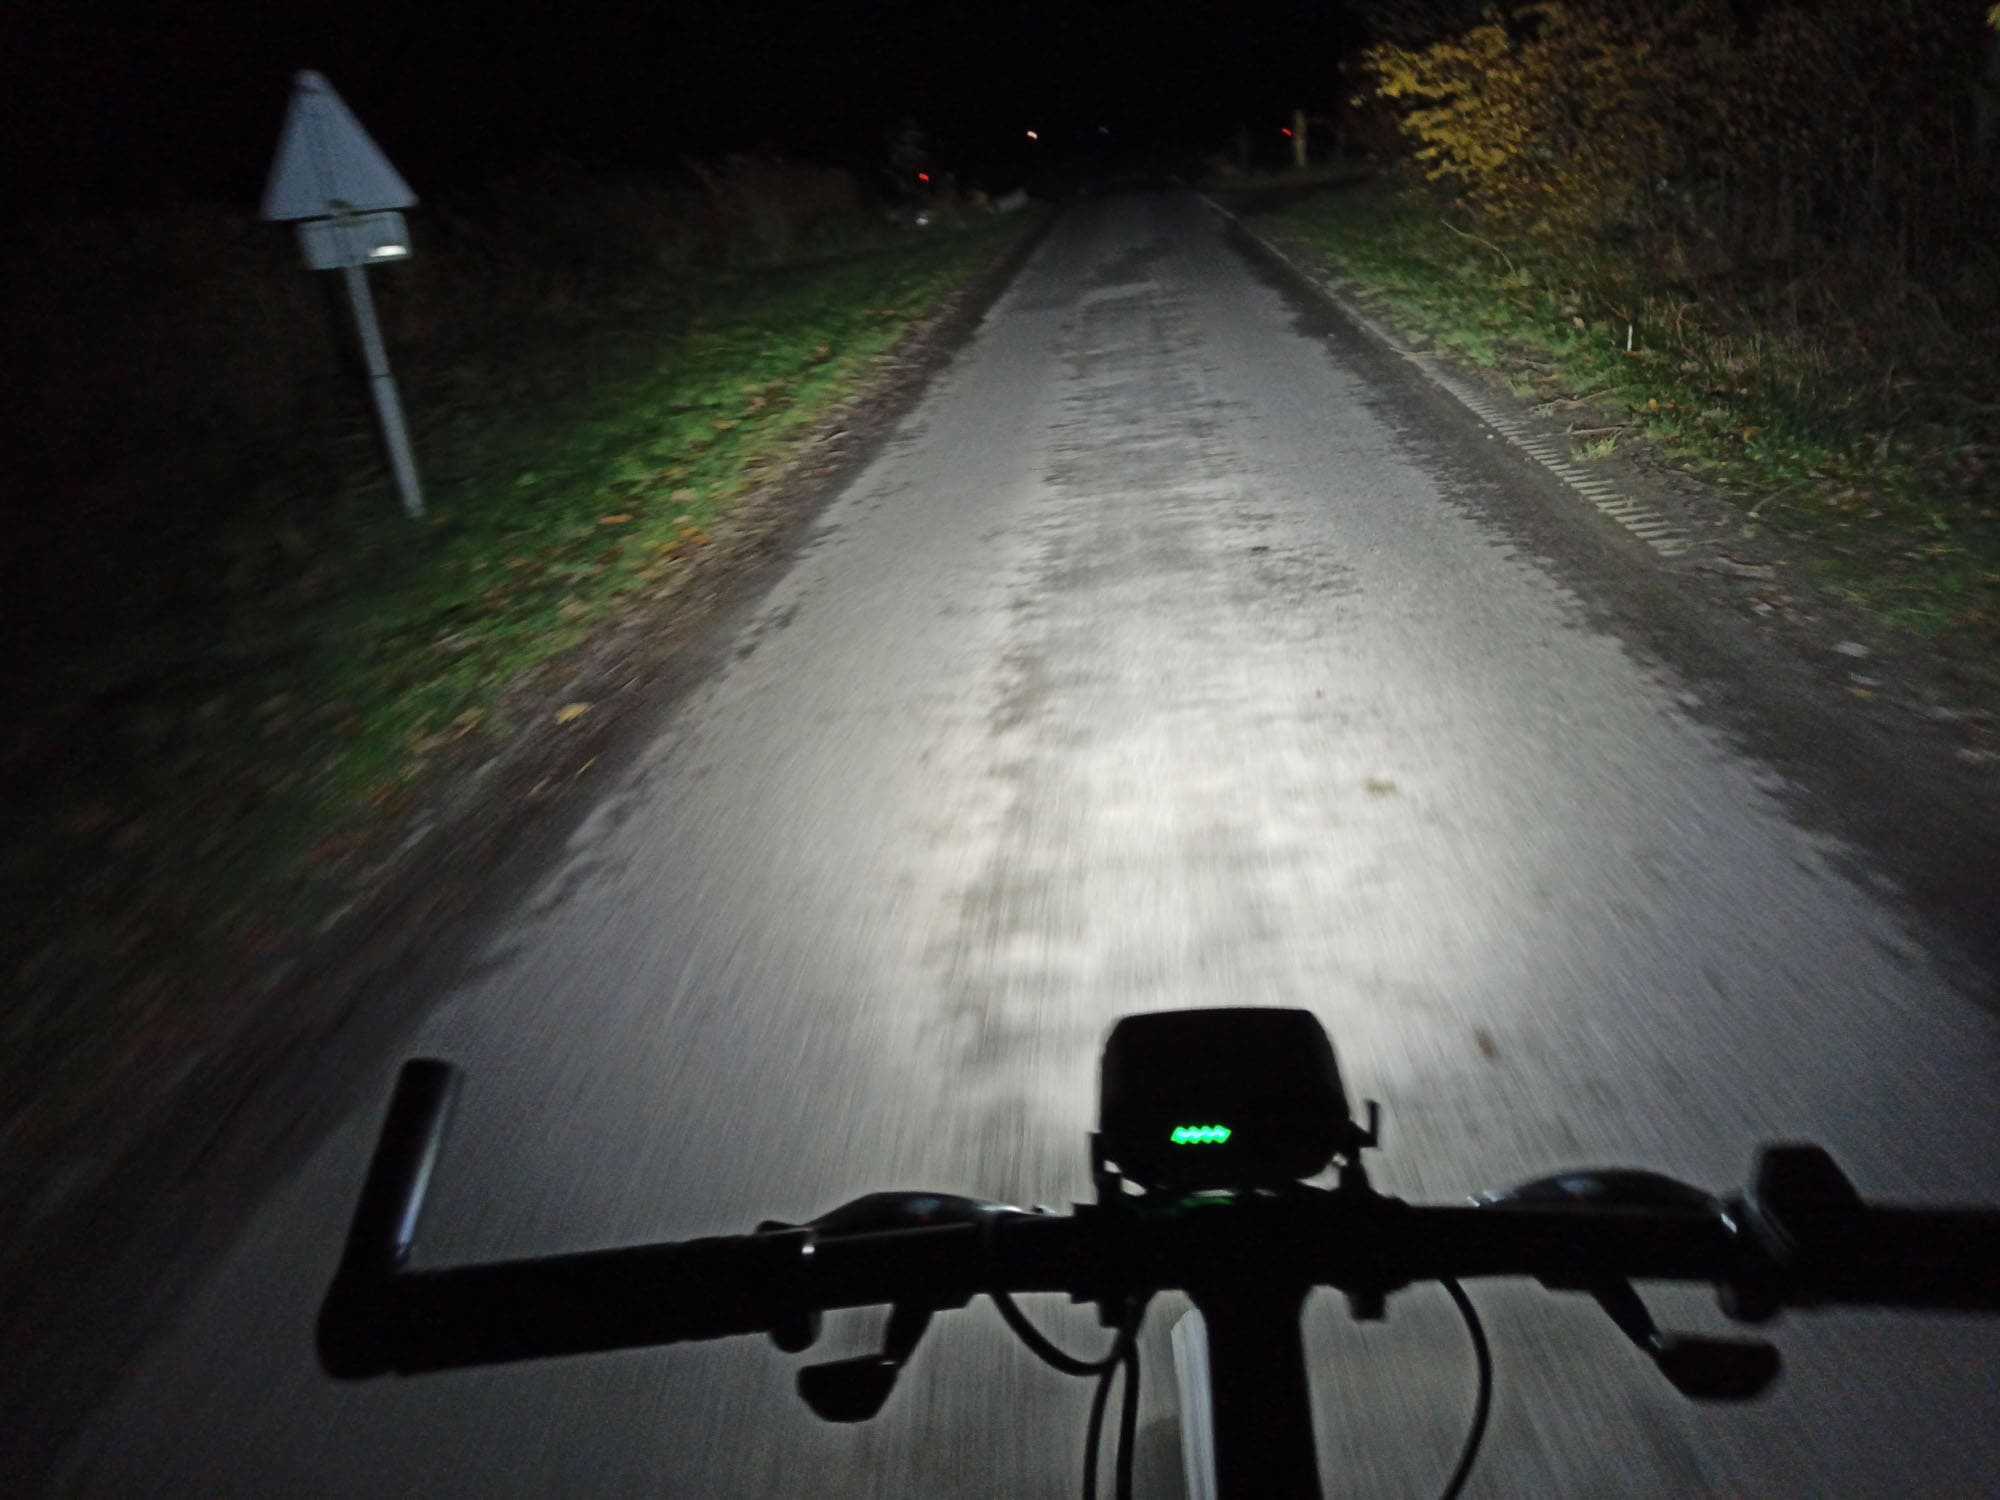
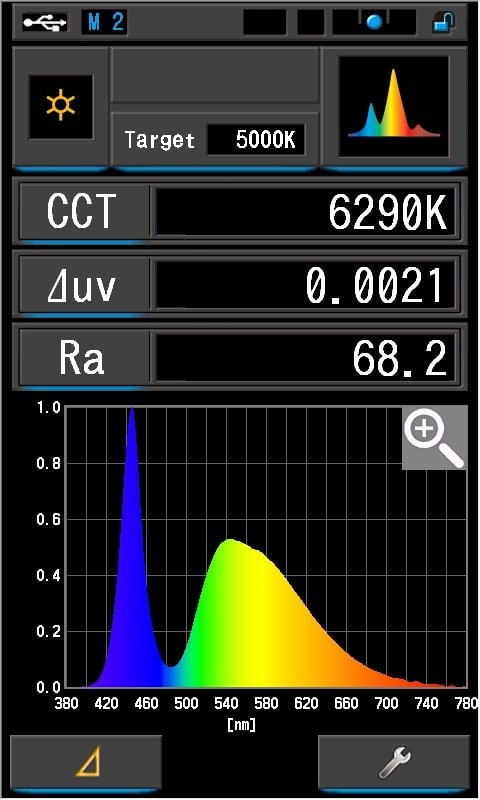
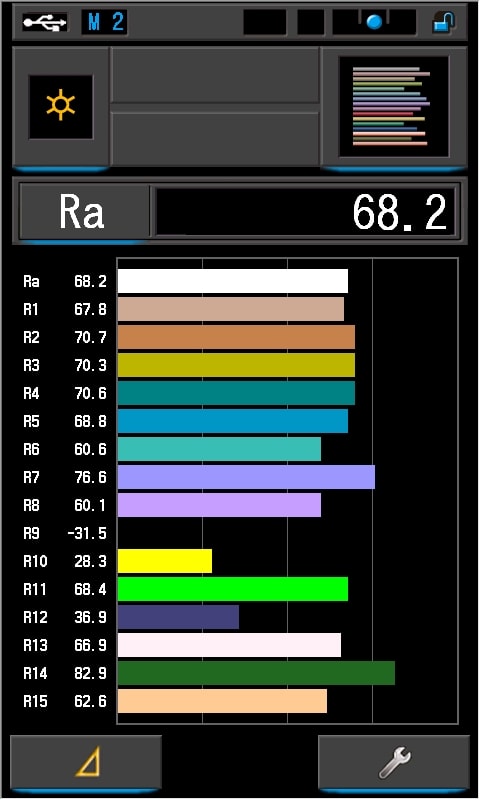
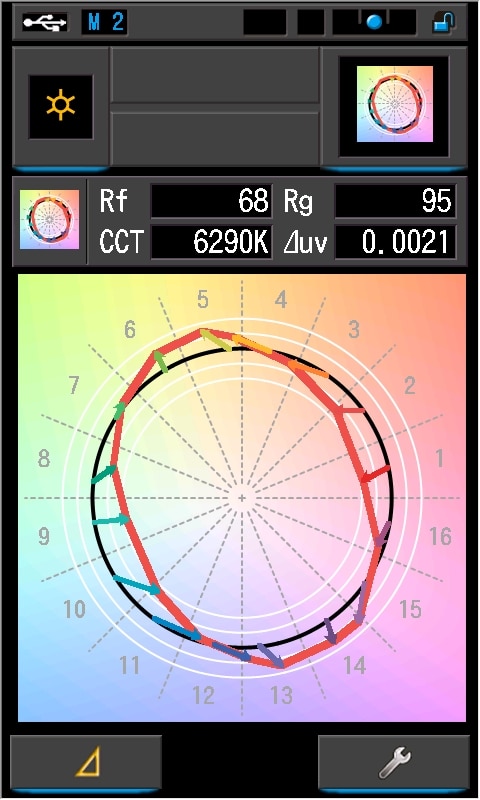
Here, you can see that Flood mode and Spot mode are a little different from what I would say.
The Standard beam picture shows a blueish line near about 20% of the top. That top part is the brightest, but it also shines the farthest. Magicshine probably did that on purpose to make the beam more natural. If the beam close by were as bright as farther away, your eyes would probably adjust and not see so far.
Dimensions and its competition
Dimensions:
| Magicshine Monteer 12000 | Millimeters | Inches |
|---|---|---|
| Width lamp head | 91 mm | 3.6 in |
| Head height | 46 mm | 1.8 in |
| Battery pack length | 175 mm | 6.9 in |
| Battery pack width | 63 * 55 mm | 2.5 * 2.2 in |
Dimensions are rounded to the nearest millimeter and to the nearest tenth of an Inch.
Weight:
| Magicshine Monteer 12000 | Weight in grams | Weight in oz. |
|---|---|---|
| Battery pack with 2 straps | 915 g | 32.3oz |
| Head with mount | 291 g | 10.3 oz |
Weight is rounded to the nearest gram and to the nearest tenth of an Oz.
Magicshine Monteer 12000 Flashlight comparison
Size compared to other lights
Group 1, from left to right: Magicshine Monteer 12000, Olight H67
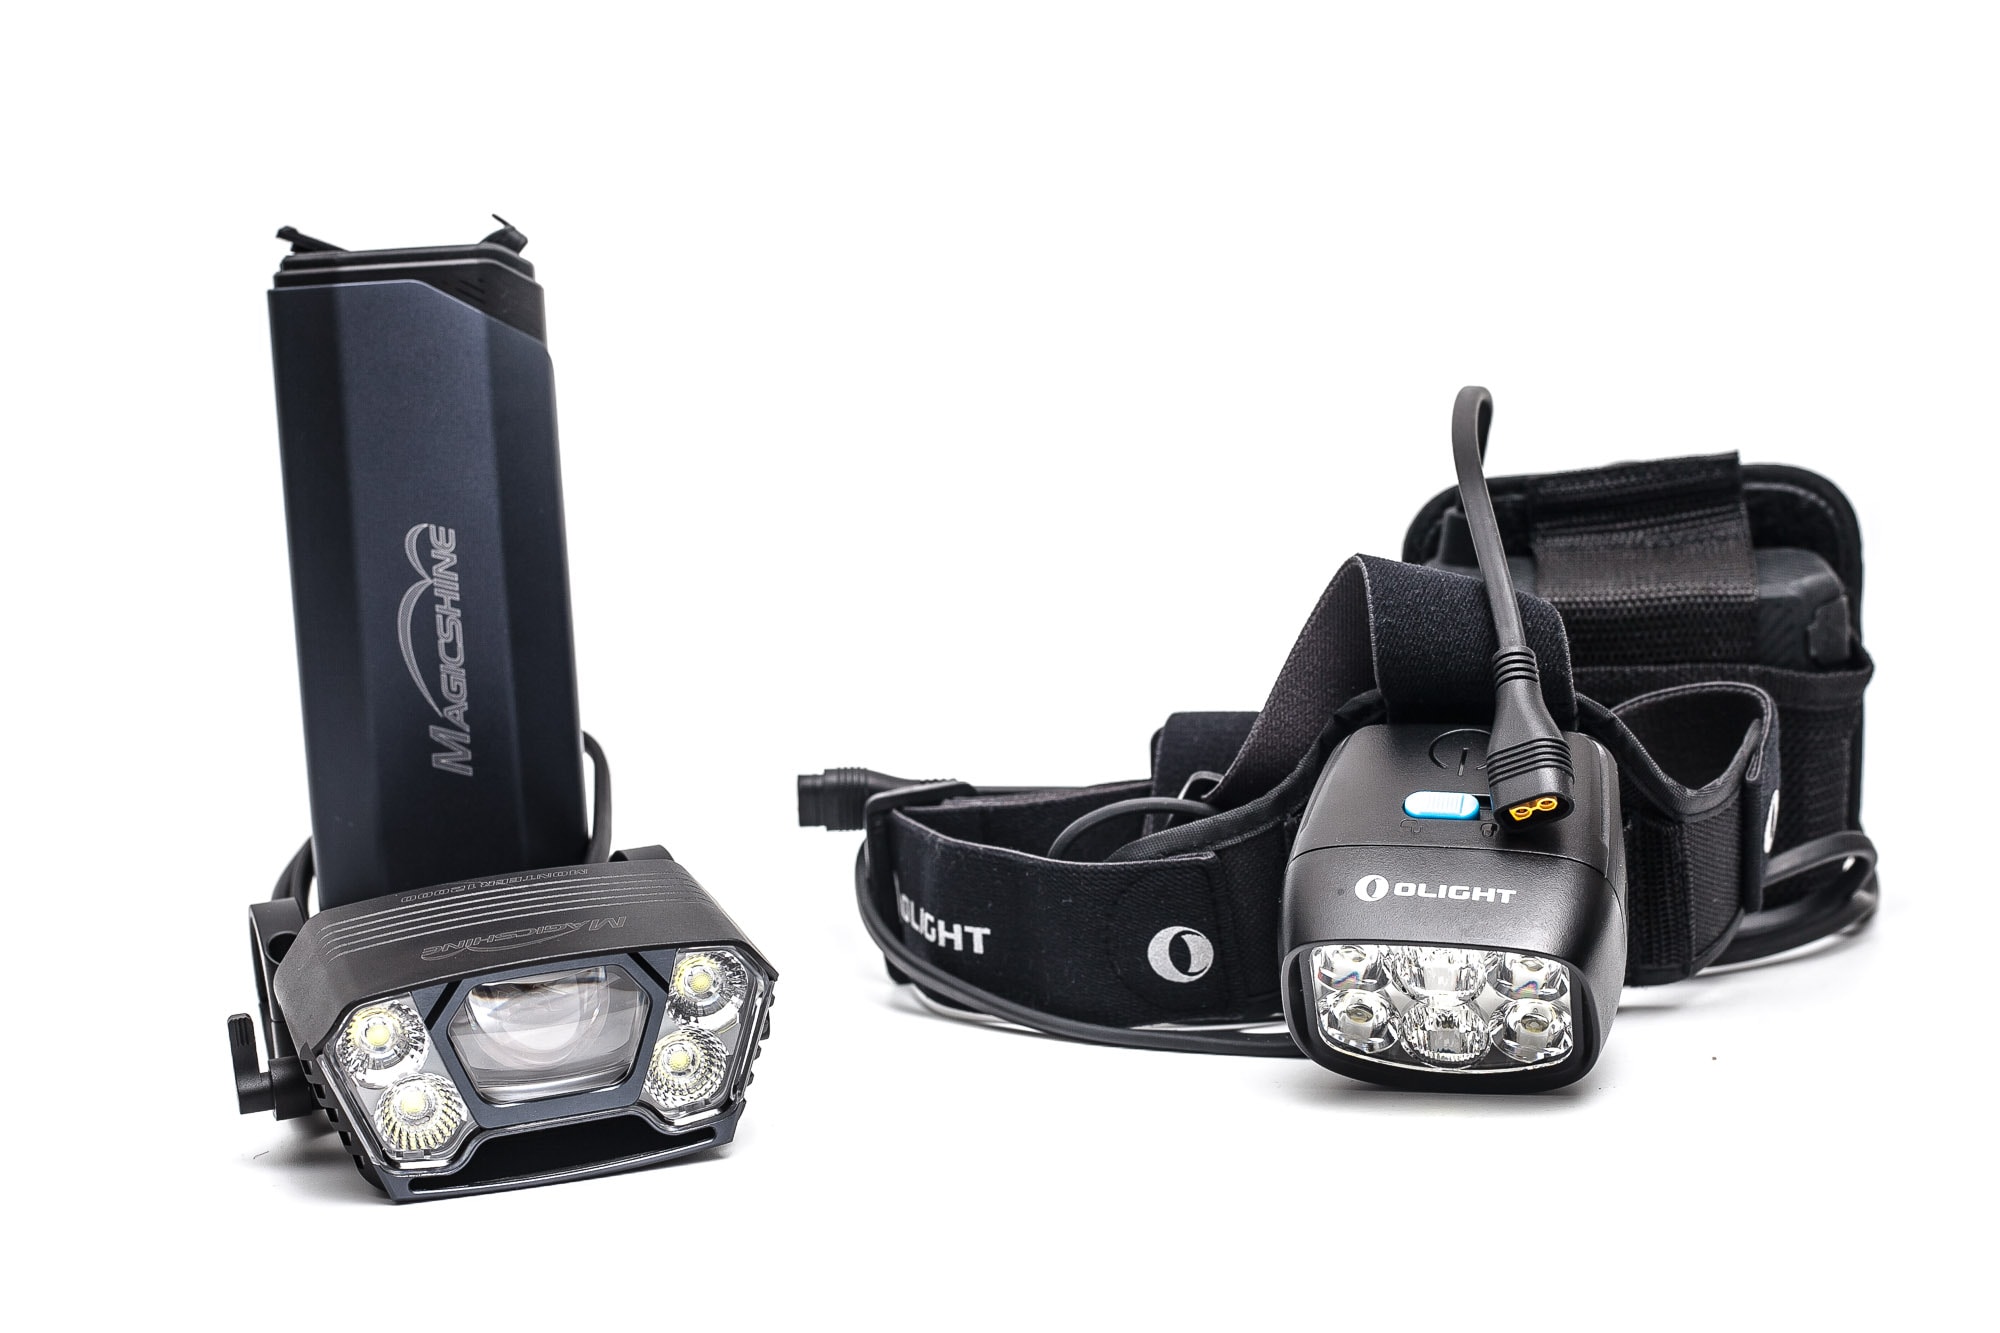
Magicshine Monteer 12000 UI : User interface and driver
By default, there are 2 menus, namely Spotlight and Floodlight. However, I would prefer to call them Standard modes, Power modes.. or something similar.
You can turn the light on and change modes by using the switch on the head or the Bluetooth remote switch.
The Android and IOS App allows you to make the UI you prefer.
The available main modes:
- Eco, Low, Medium, High (for both menus)
The available special modes (blinkies): Only accessible with remote control.
- Day flash (lamp is off, but blinks every second)
- Night flash (lamp is on and blinks every second)
How the UI works when the lamp is still turned OFF:
- Single-click head: shows battery level
- Double click head: shows battery level
- Press and hold head: turns on
How the UI works when the lamp is turned ON:
- Single-click: runs through the modes
- Double click: switch between the 2 menus
- Triple-click: nothing, just switch modes
- Press and hold: turns off
BLUETOOTH remote control when the lamp is turned OFF:
- Round switch, 1 click: nothing
- Round switch, 2+ clicks: nothing
- Round switch, long-press: turns on in last used mode
- Square switch, 1 click: nothing
- Square switch, 2+ clicks: nothing
- Square switch, long-press: turns on.. but in last used mode, not power mode.
- So both switches behave the same when the light is turned off
BLUETOOTH remote control when the lamp is turned ON:
- Round switch, 1 click: runs through modes from Eco to High, and repeats
- Round switch, 2 clicks: switches between Spot and Flood mode (or how I call them: standard modes and power modes)
- Round switch, long-press: turns off
- Square switch, 1 click: Power mode.. highest output (officially called: spotlight high)
- Square switch, 2 clicks: Flash mode (day flash, night flash)
- Square switch, long-press: turns on.. but in last used mode, not power mode.
- So both switches behave the same when the light is turned off
The Bluetooth connection is pretty cool. Because of this feature, you can turn your bike light on from a distance, but you can also come up with other use cases.. perhaps something in your garden or while camping. You name it!
Shortcuts within the UI:
- To highest output: Square button on Bluetooth remote control
- To Flash modes: double click the Square button on Bluetooth remote
Mode memory:
- Yes, including the flashes
Blinky modes:
- Day Flash and Night Flash. Accessible with a double click of the Square button on the remote control
Low battery warning:
- Battery level indicator has 4 levels
- 4 green bars: 76-100%
- 3 green bars: 51-75%
- 2 green bars: 26-50%
- 1 green bar: 11-25%
- red flashing: 1-10%
However, the bluetooth remote control can also tell the battery level, but a little less precise.
Green is 26-100%
Red is 11-25%
Flashing red is 1-10%
Lock-out mode:
- No, but you can just remove the battery pack
PWM:
- Not visible
Firmware / UI Conclusion:
- It’s pretty straightforward, mainly if you only focus on the head switch. The remote control works a bit differently because it has 2 switches.
Magicshine APP
This is where the real Magic Shines. Is this the app we have been waiting for?
All the explanation on the use of this App is listed in the App manual. First you need to download the Magicshine App from the appstore. You can also use the QR code from the manual.
After that, activate your Bluetooth and Location.
Note: You have to connect the battery pack with a USB power adapter. Mine couldn’t find the Monteer without this. After they are connected, you don’t need to connect it to a USB power source!
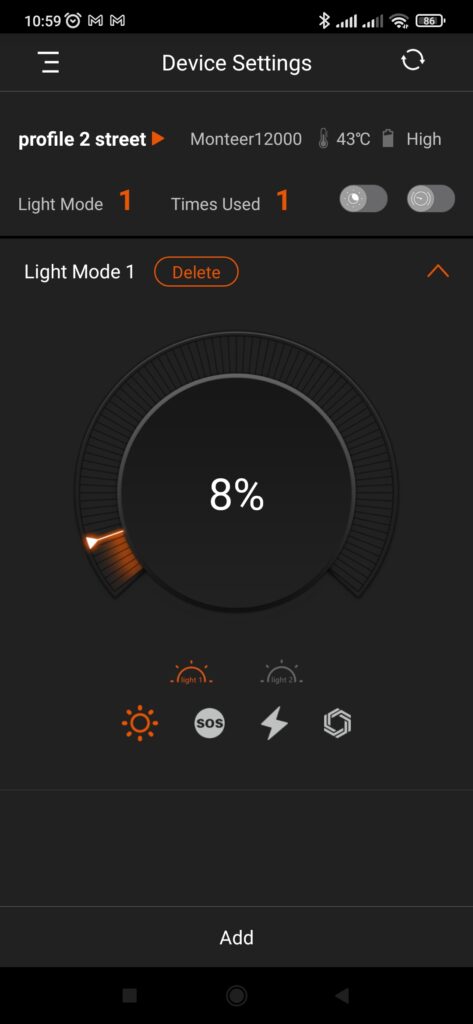
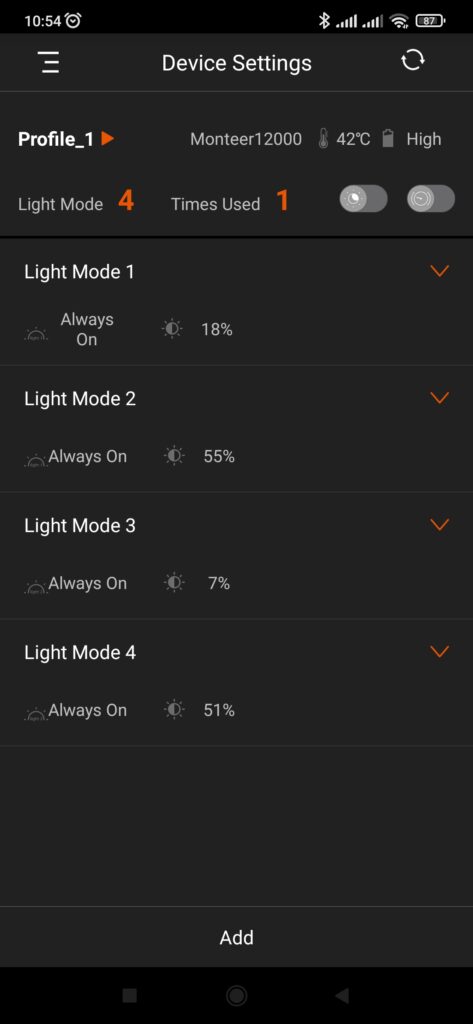
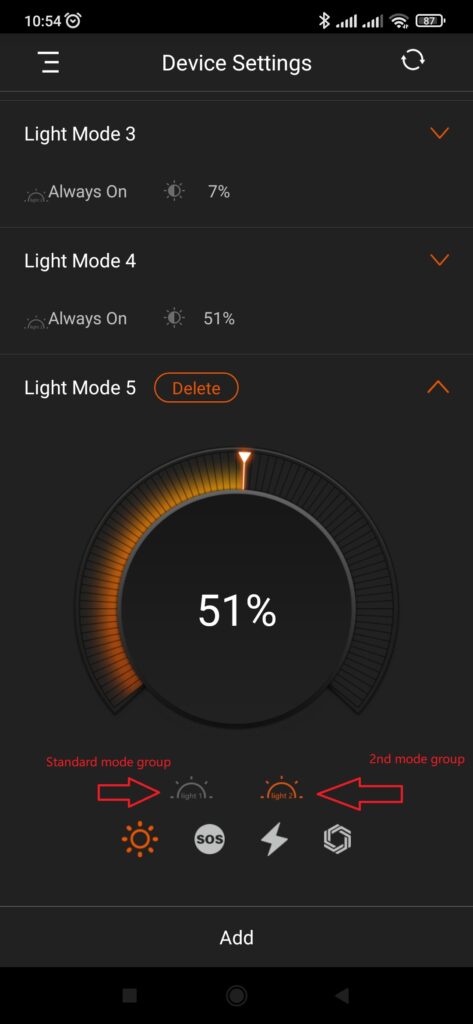
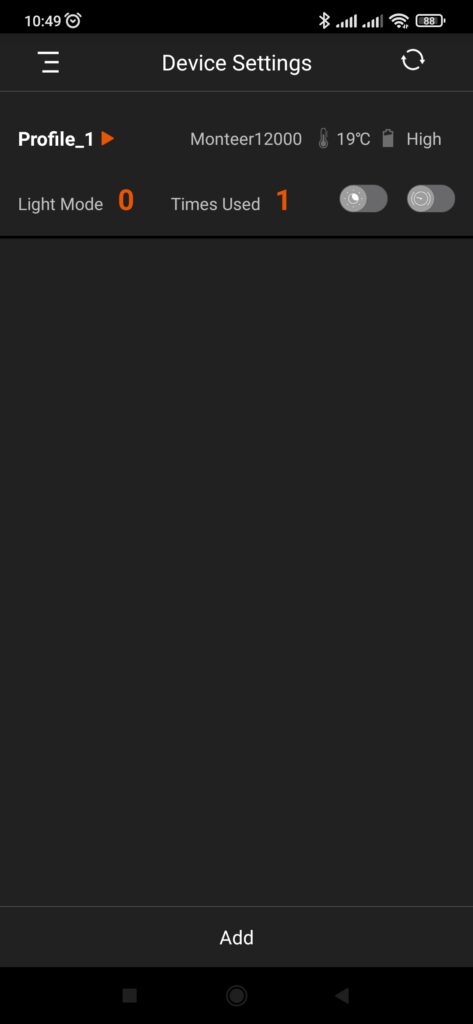
Inside the App you can setup your own preferred UI, and you can even make multiple profiles. The app also shows the ambient temperature, so there is a temperature sensor somewhere.
If you have multiple profiles, you need the App to switch between them. So you can have a specific profile for street riding, and one for off-road. Design to your liking.
Each profile can set modes for the Power and Standard modes (a double click will switch between these 2 mode groups).. You can even add a strobe as your second mode if you want to, but you can also just add like 10 modes in the order you want. Below are some screenshots.
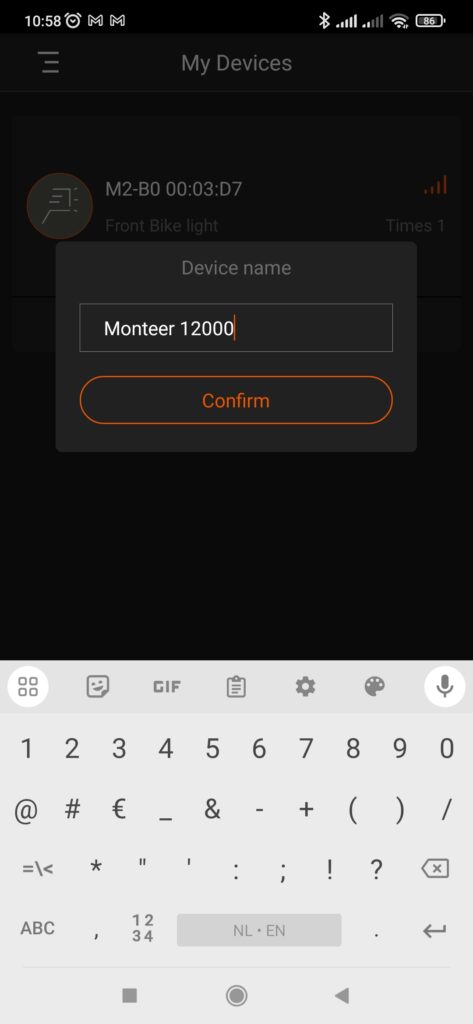
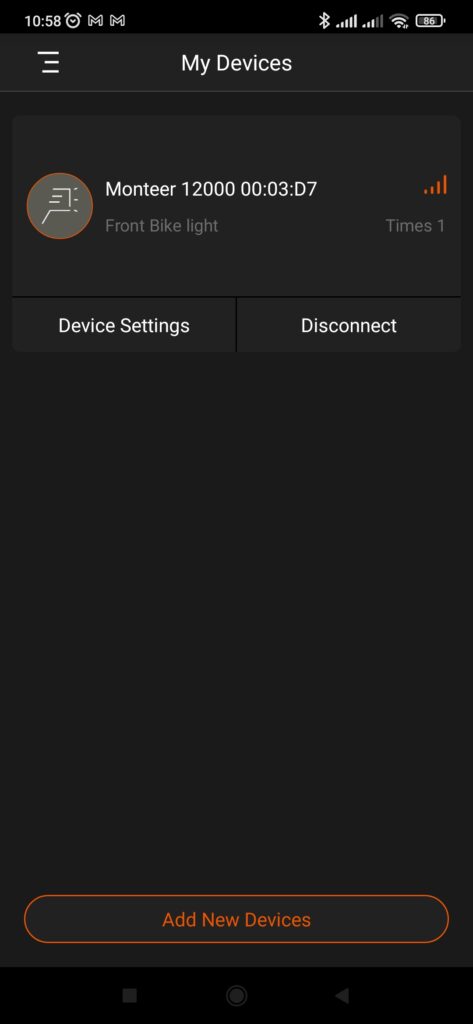
Each of these profiles can be named to your liking. And on top of that, if you have multiple Magicshine bike lights, you can rename the lamp in your app as well. If not, the default name looks like this: MD-B0-00:00:12.
I hope they will make this for flashlights as well.
Magicshine Monteer 12000 Charging and batteries
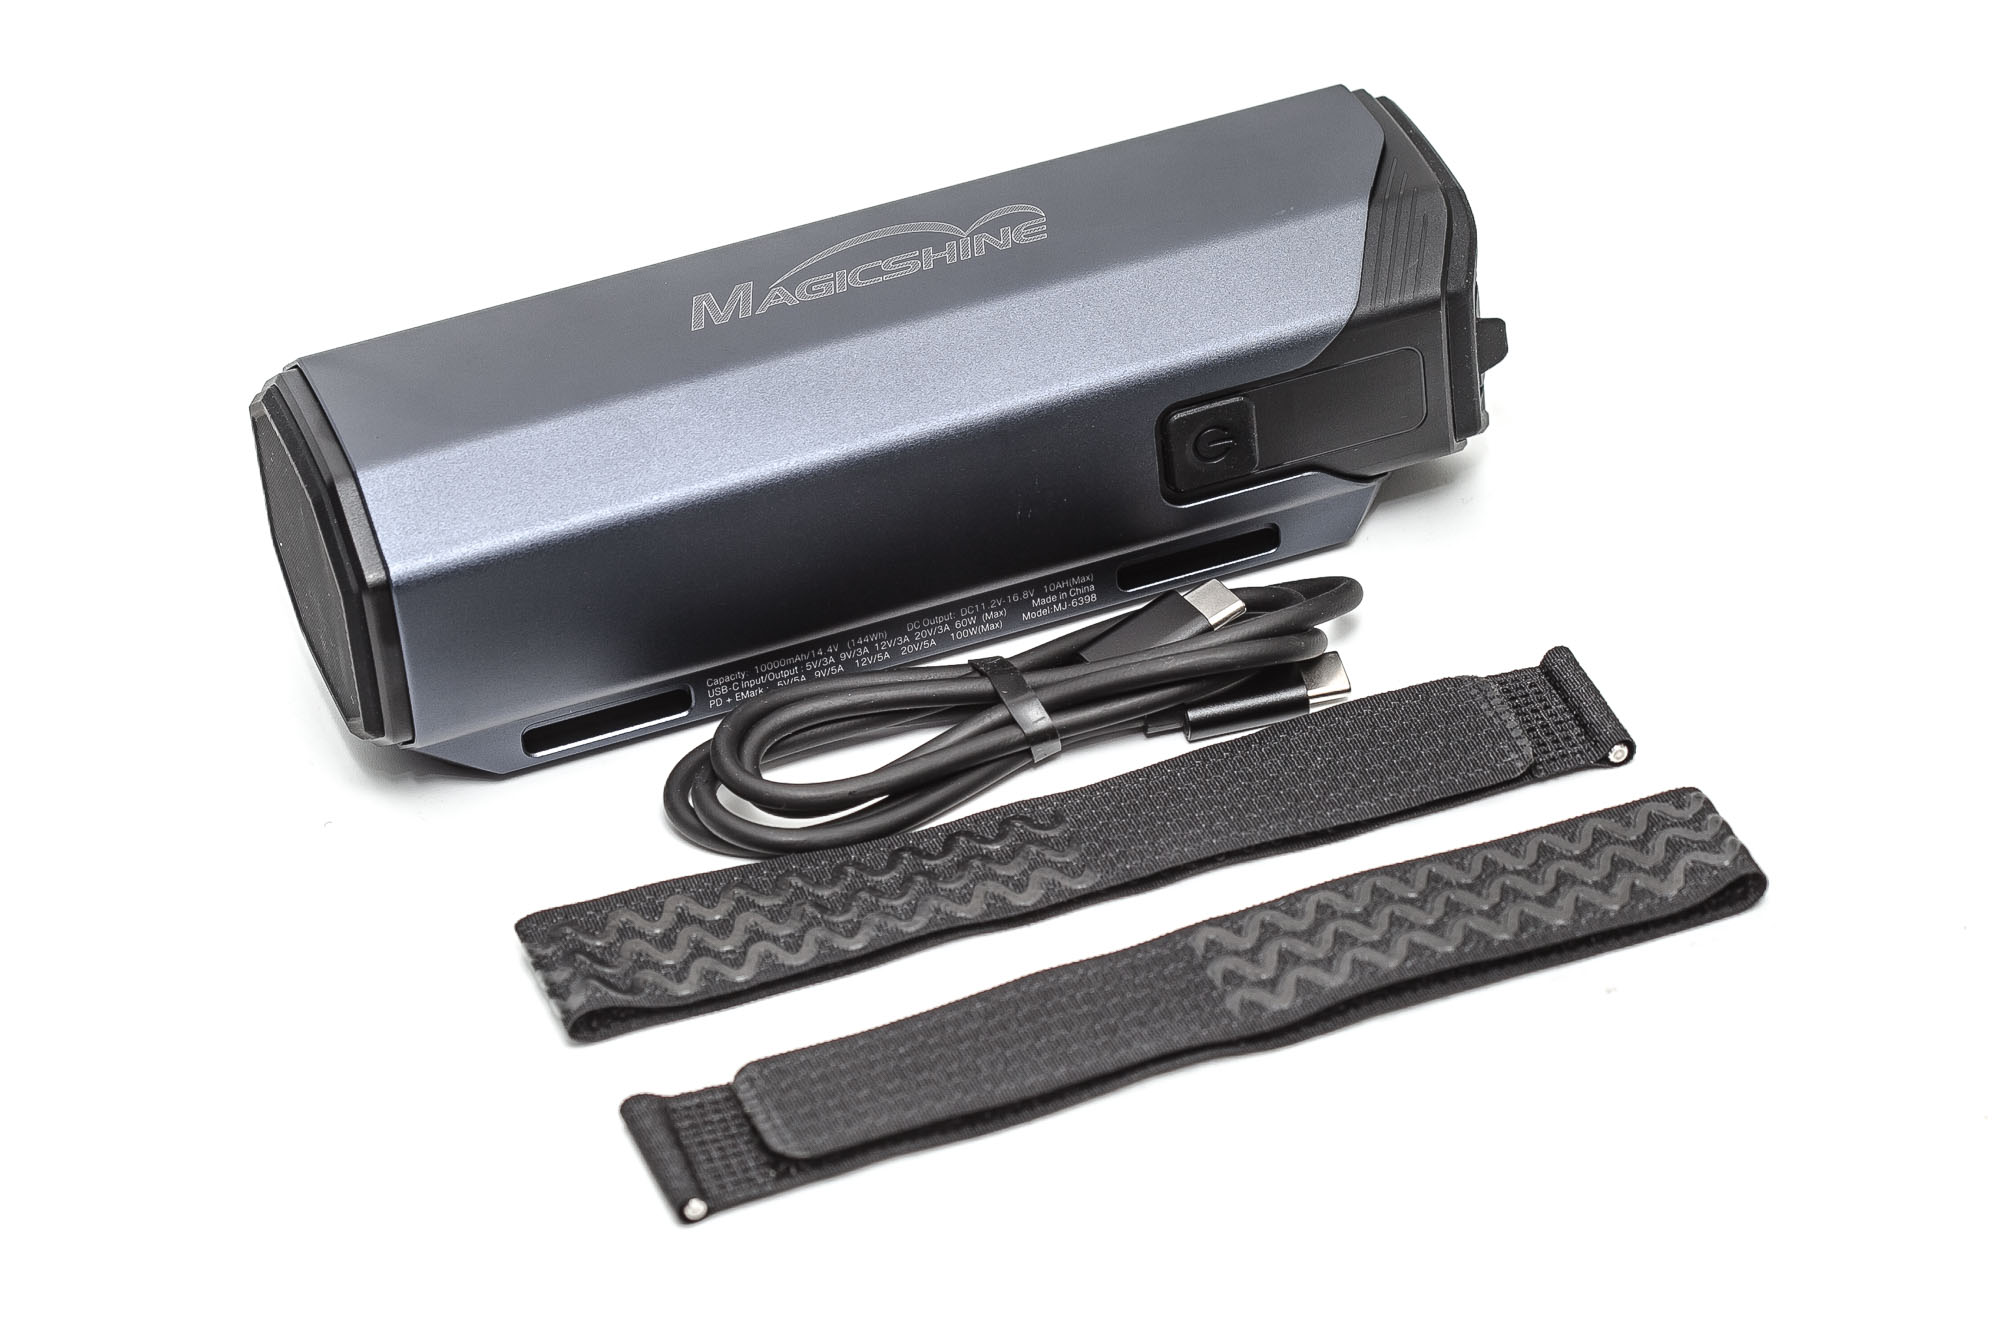
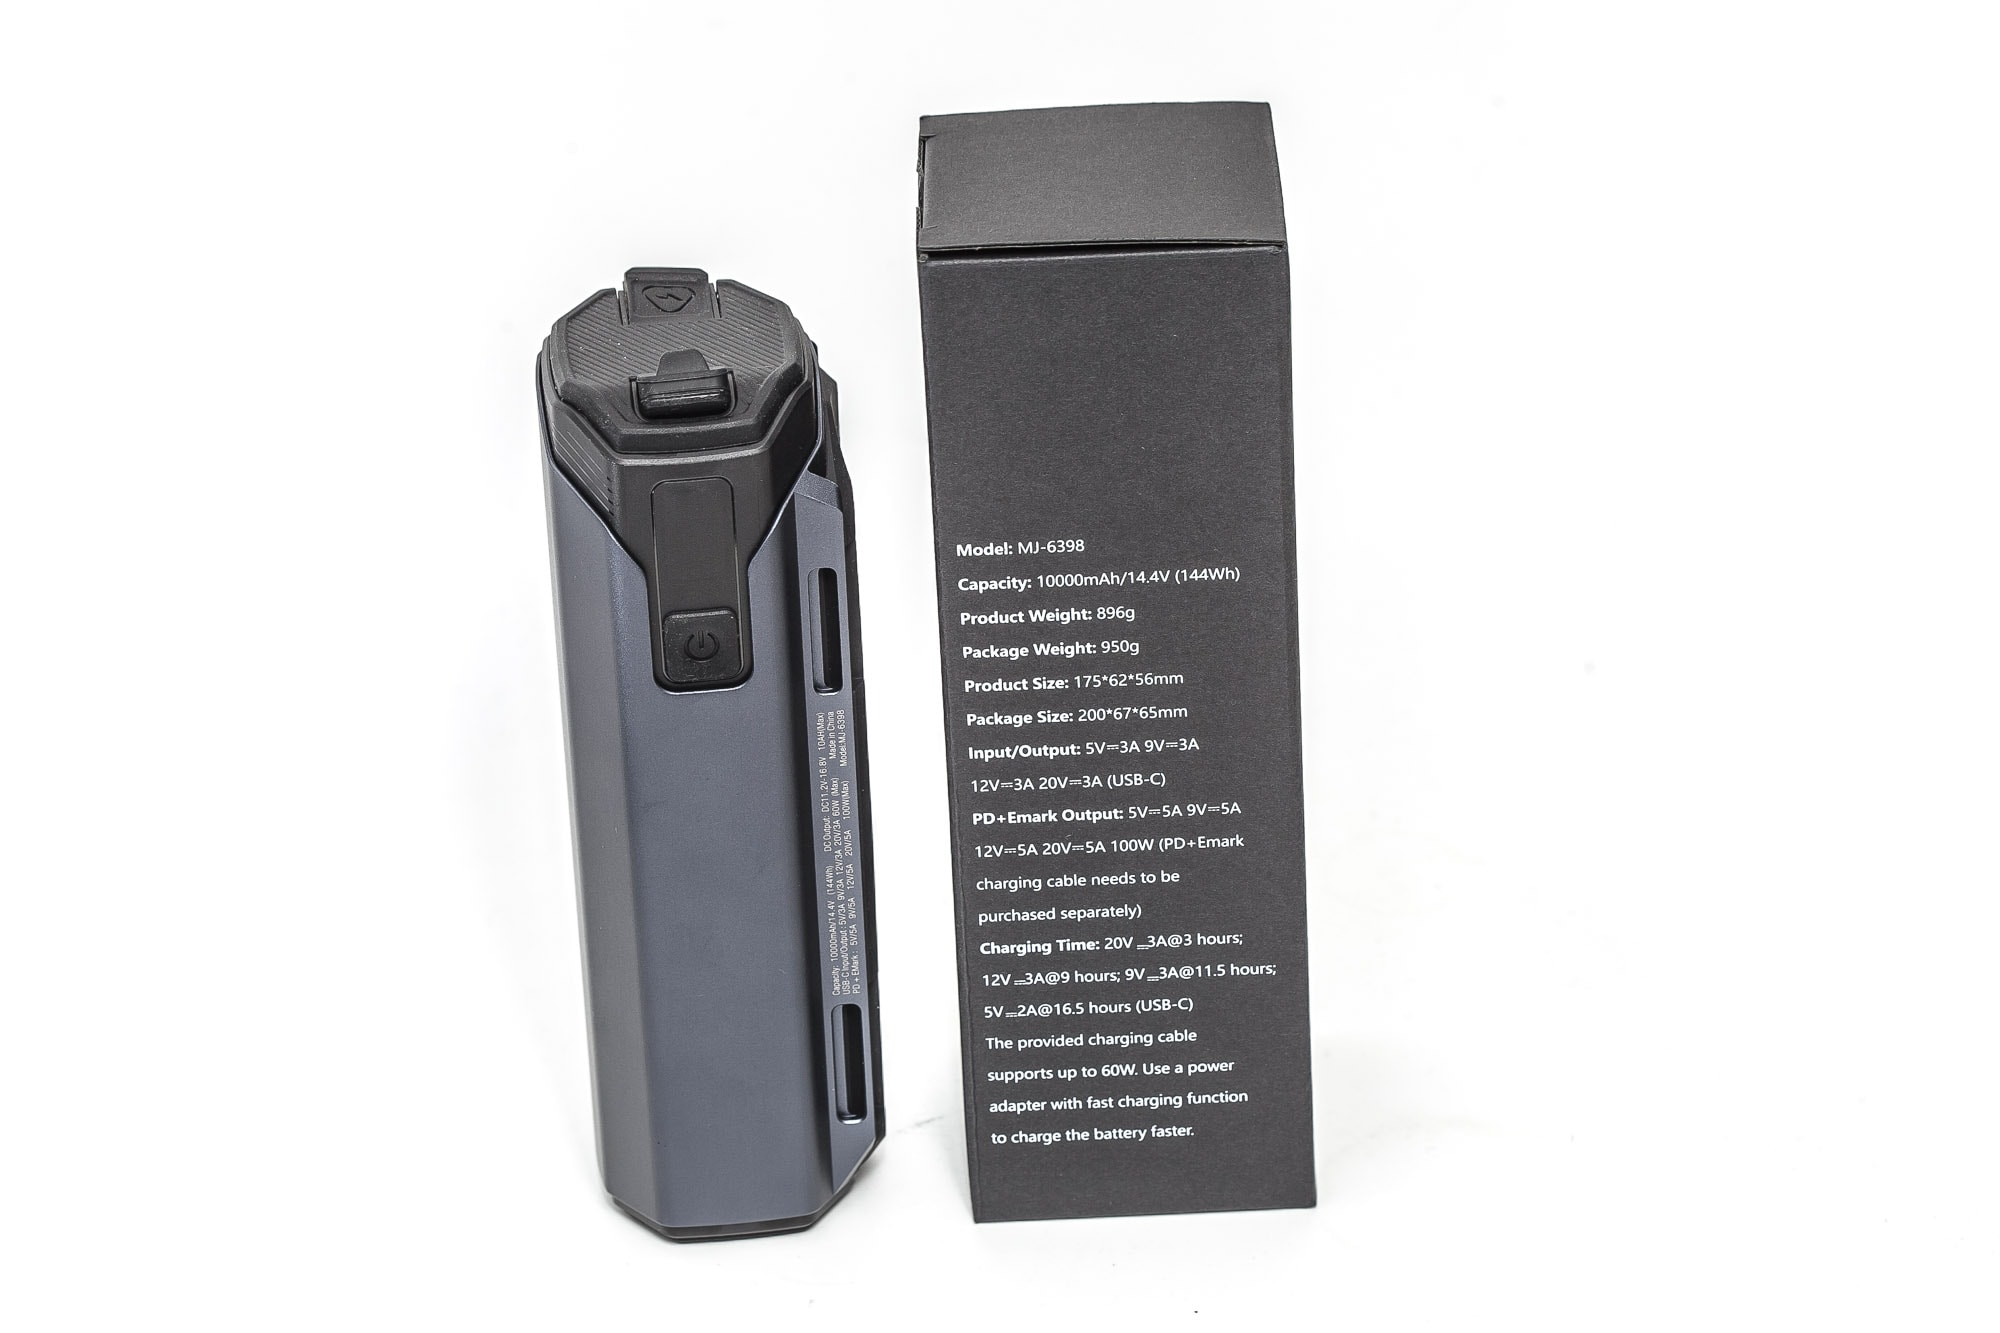
The battery pack weighs almost 1000 grams (1kg), so you must ensure it’s securely attached to your bike while riding.
You can use any USB-C cable for charging, but for fast charging, you need something like a 65W charging adapter. If you don’t, that’s okay, but the charge times will increase greatly.
Testing the runtimes took a very, very long time. So, charging the battery pack every time between the tests also took a while. See the charge times below in the table.
Please remember that the charge current reduces enormously towards the end of the charge. But the the battery pack keeps charging at like 100mA while the charging lights are still blinking.
I would highly recommend getting a USB tester so you know what charge you are currently charging. That way, you know whether the battery pack is almost done charging. Because it’s about 99% charged when the charge current is that low, and you don’t really need to wait for the full charge to finish!!! Especially important when in a hurry.
During charging, the 4 green battery level indicators will blink, starting from 1 bar and ending with 4 bars. When the 4 bars are solid green, the charge has fully finished. But like I said, you can stop charging when the current charge has dropped.
| Charge type | Voltage | Charge time |
|---|---|---|
| USB charger | 12V | 7h 51min |
| USB charger | 20V 1st test | 3h 11min |
| USB charger | 20v 2nd test | 3h 21min |
| USB charger | 20v 3rd test | 3h 21min |
| USB charger | 20v 4th test | 3h 33min |
Magicshine uses the following charge times: 20V 3hours, at 12v 9hours, at 9v 11.5hours, and at 5v 16.5 hours.
Remember that this is for a full charge, and the battery level indicators have turned solid green. But in reality, in the last 20 minutes or so, it’s charging at around 0.1A or lower.
At 20V charging, I measured about 55 watts.
Performance test
This is the gear I use for testing:
| Gear | Purpose | Link to buy |
|---|---|---|
| Hagner E4-X | Measuring beam intensity (throw) | Inquire at Hagner.se |
| 2* Extech SDL400 | Lumens and logging runtimes | Amazon.com, Amazon.co.uk, |
| Leica Disto D2 | Distance for throw measurements | Amazon.com, Amazon.co.uk, |
| Sekonic C-800 | Spectrometer for LED measurements | Amazon.com, Amazon.co.uk |
| Uni-T UTi260B | Thermal Image camera | Amazon.com, |
Lumen measurements:
How Lumens are Measured: Understanding ANSI FL1 Standards How Lumens are Measured: Understanding ANSI FL1 Standards: The ANSI FL1 standards specify that output in lumens should be measured 30 seconds after turning on, as this is the standardized time for measuring brightness according to the industry standard. This is why we focus on this part in our measurements. The ANSI FL1 standards require an ambient temperature of 22 ± 3°C. We record the ambient the ambient temperature to identify potential reasons for any observed discrepancies.The output measurements in this review are based on my homemade integrating spheres, each equipped with an Extech SDL400 Lux Meter. For consistency and accuracy, a calibration light (Convoy S2+ with 249lm and a Convoy S2+ with 261lm) is measured prior to each set of lumen measurements.
For high-output lights, one of the lux meters uses an ND camera filter to prevent the lux meter to max out. This is either the Kenko PRO1D ND16 for up to about 80,000 lumens or the Gobe ND32 for anything above.
All of my readings were taken from a fully charged battery pack
The measurements were taken manually at turn on and 30 seconds. The 10-minute numbers are taken from the runtime graph.
First: the standard modes (called the Floodlight modes by Magicshine). They were measured at an ambient temperature of 18.9 degrees. I didn’t test Low and Eco mode because they were supposed to run 35 and 85 hours respectively. And from doing the other tests, I learned that running could be much longer than that.
| Floodlight mode | Specified | At turn on | At 30 sec | At 10 min |
|---|---|---|---|---|
| Eco | 300 lm | 277 lm | 281 lm | – |
| Low | 800 lm | 724 lm | 728 lm | – |
| Med | 1500 lm | 1396 lm | 1390 lm | 1356 lm |
| High | 2500 lm | 2513 lm | 2233 lm | 1684 lm |
And here are the measurements for the Power modes (called the Spotlight modes by Magicshine)
10 minutes are from the runtime test WITHOUT wind (fan).
| Spotlight mode | Specified | At turn on | At 30 sec | At 10 min |
|---|---|---|---|---|
| Eco | 1000 lm | 1001 lm | 999 lm | 988 lm |
| Low | 3000 lm | 2,792 lm | 2,762 lm | 2649 lm |
| Med | 6000 lm | 5,304 lm | 5,221 lm | 2534 lm |
| High | 12,000 lm | 11,333 lm | 7,146 lm | 2721 lm |
I try to use rounded lumen numbers, except for maybe Low or Moonlight/Firefly modes.
Magicshine Monteer 12000 Battery life and runtime
How Runtimes are Measured: Understanding ANSI FL1 Standards About ANSI FL1 runtime standards: The runtime is measured until the light drops to 10% of its initial output (30 seconds after turning on). This does not mean that the flashlight is not usable anymore. The last column shows how long the light actually works till it shuts off. If there is a + symbol, it means that the test was stopped at that particular point, but the light was actually still running. This happens on certain occasions, with certain drivers, firmware, or batteries.Runtime tests were conducted in my 50cm home made integrating sphere, paired with the Extech SDL400 data logging Lux Meter.
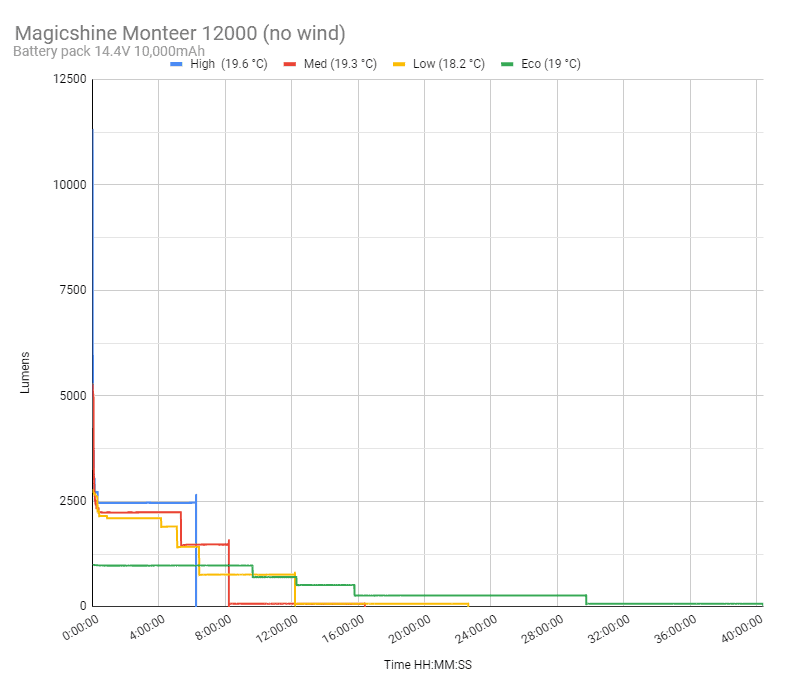
Because this is temperature-controlled, you will get a totally different runtime while cycling, so keep that in mind! The wind will cool down the head and sustain a higher brightness, resulting in shorter runtimes. These runtimes were without wind (fan)!
I set my integrating sphere on its side, placed the Monteer 12000 horizontally, and put a fan behind it at about 50 cm distance. Obviously, this is not the same as the wind from the front etc.. But at least it will give you a feeling. I only tested the 2 higher Power Modes with the fan.
| Mode | Specified | Measured runtime (ANSI FL1) | Time till shut off |
|---|---|---|---|
| Eco | 85h | – | – |
| Low | 35h | – | – |
| Med | 19h | 17h 41min | 27h 59min |
| High | 10h | 11h 23min | 21h 16min |
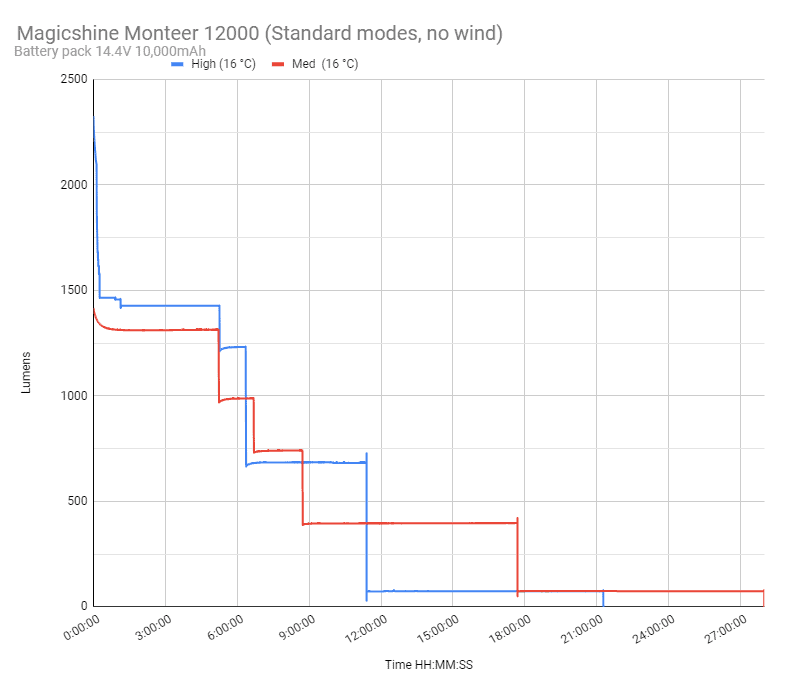
You see that the light doesn’t turn off directly with both higher modes. It continues running at about 75 lumens for 10 hours!
Power modes
| Mode | Specified | Measured runtime (ANSI FL1) | Time till shut off |
|---|---|---|---|
| Eco | 37h | 29h 44min | 40h 23min |
| Low | 11.5h | 12h 11min | 22h 38min |
| Med | 7h | 8h 12min | 16h 24min |
| Med with fan* | 7h | 5h 35min | 14h 38min |
| High | 2h 30min | 6h 14min | 6h 14min |
| High with fan* | 2h 30min | 2h 53min | 2h 53min |
You see that the light kept running for several hours after the output dropped to about 75 lumens, in Medium mode and below. High mode just abruptly turned off.
Runtimes with a fan are a bit more realistic because that’s closer to how they are used while riding a bike (because of wind flow).
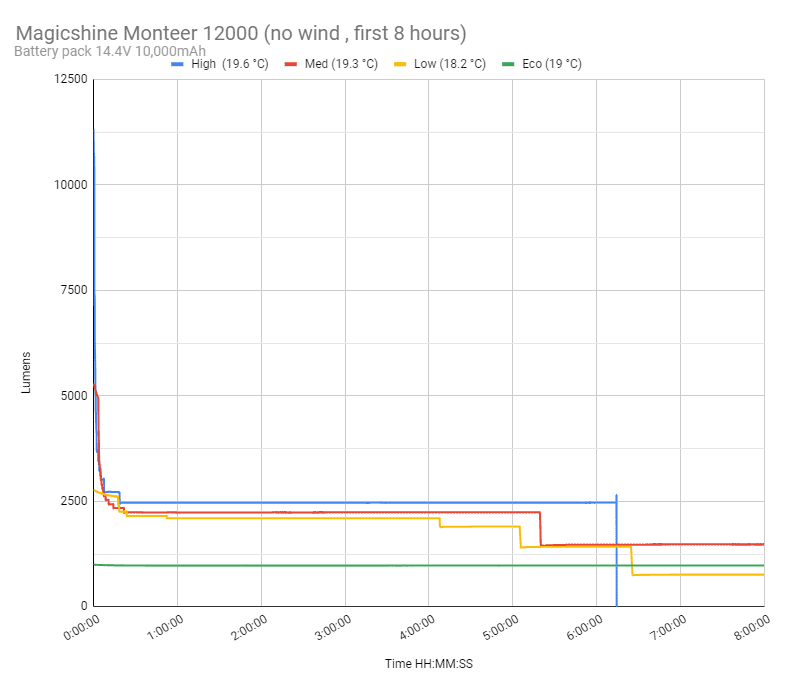
For fun, I used a portable dust blower and pointed it to the rear opening of the lamp, and you see that the output shoots right up, almost back to the original output. The dotted lines are with a fan pointing from the rear.
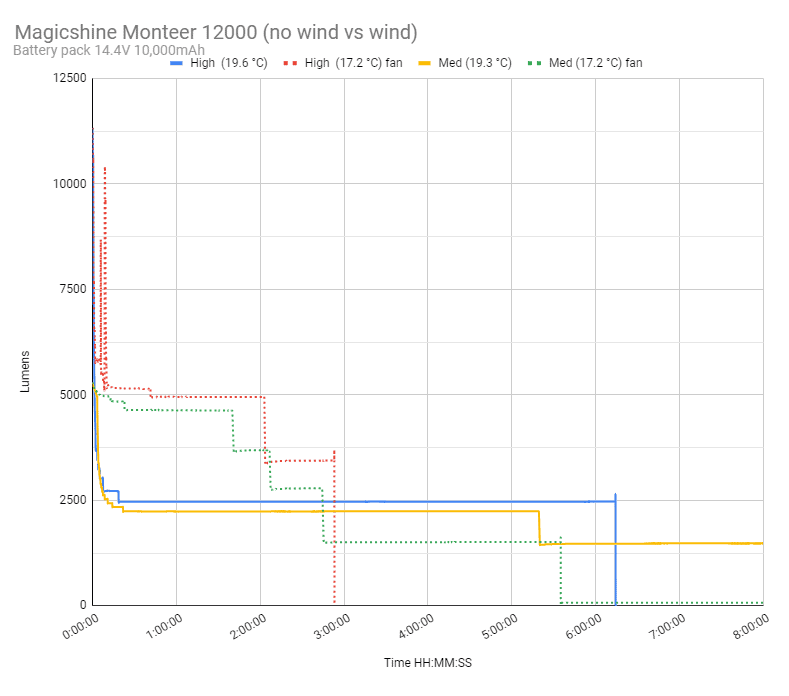
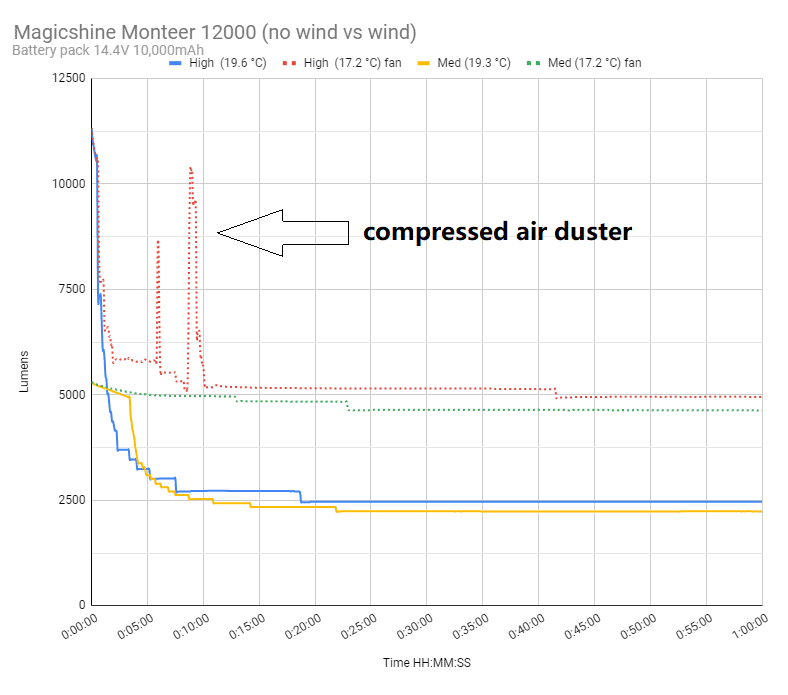
This means that the output is heavily controlled by the temperature. While riding your bike, you should have much higher outputs than what I measured during the runtime tests.
Magicshine Monteer 12000 Peak beam intensity and beam distance measurements
About Peak beam intensity: Understanding ANSI FL1 Standards About peak beam intensity The calculated value of distance in meters at which the flashlight produces a light intensity of 0.25 lux. (0.25 lux is about the brightness of a full moon shining on an object). This means that the intensity has decreased so much, it becomes difficult to see darker objects, or objects that don’t reflect light. The columns ‘Meters’ and ‘Yards’ use rounded numbers.Measurements were taken indoors with a Hagner E4-X Lux Meter. The measurements were taken 30 seconds after turn on. This time, I only measured the highest modes in Spotmode and Floodmode.
| Magicshine Monteer 12000 | Specified | I measured | meters | yards |
|---|---|---|---|---|
| Standard mode (highest) | 22,850 cd | 302 m | 331yd | |
| Power mode (highest) | 30,000 cd | 43,250 cd | 416 m | 455 yd |
Standard mode = mode group with lowest outputs (flood mode according to Magicshine)
Power mode = mode group with highest outputs (spot mode according to Magicshine)
Beamshots
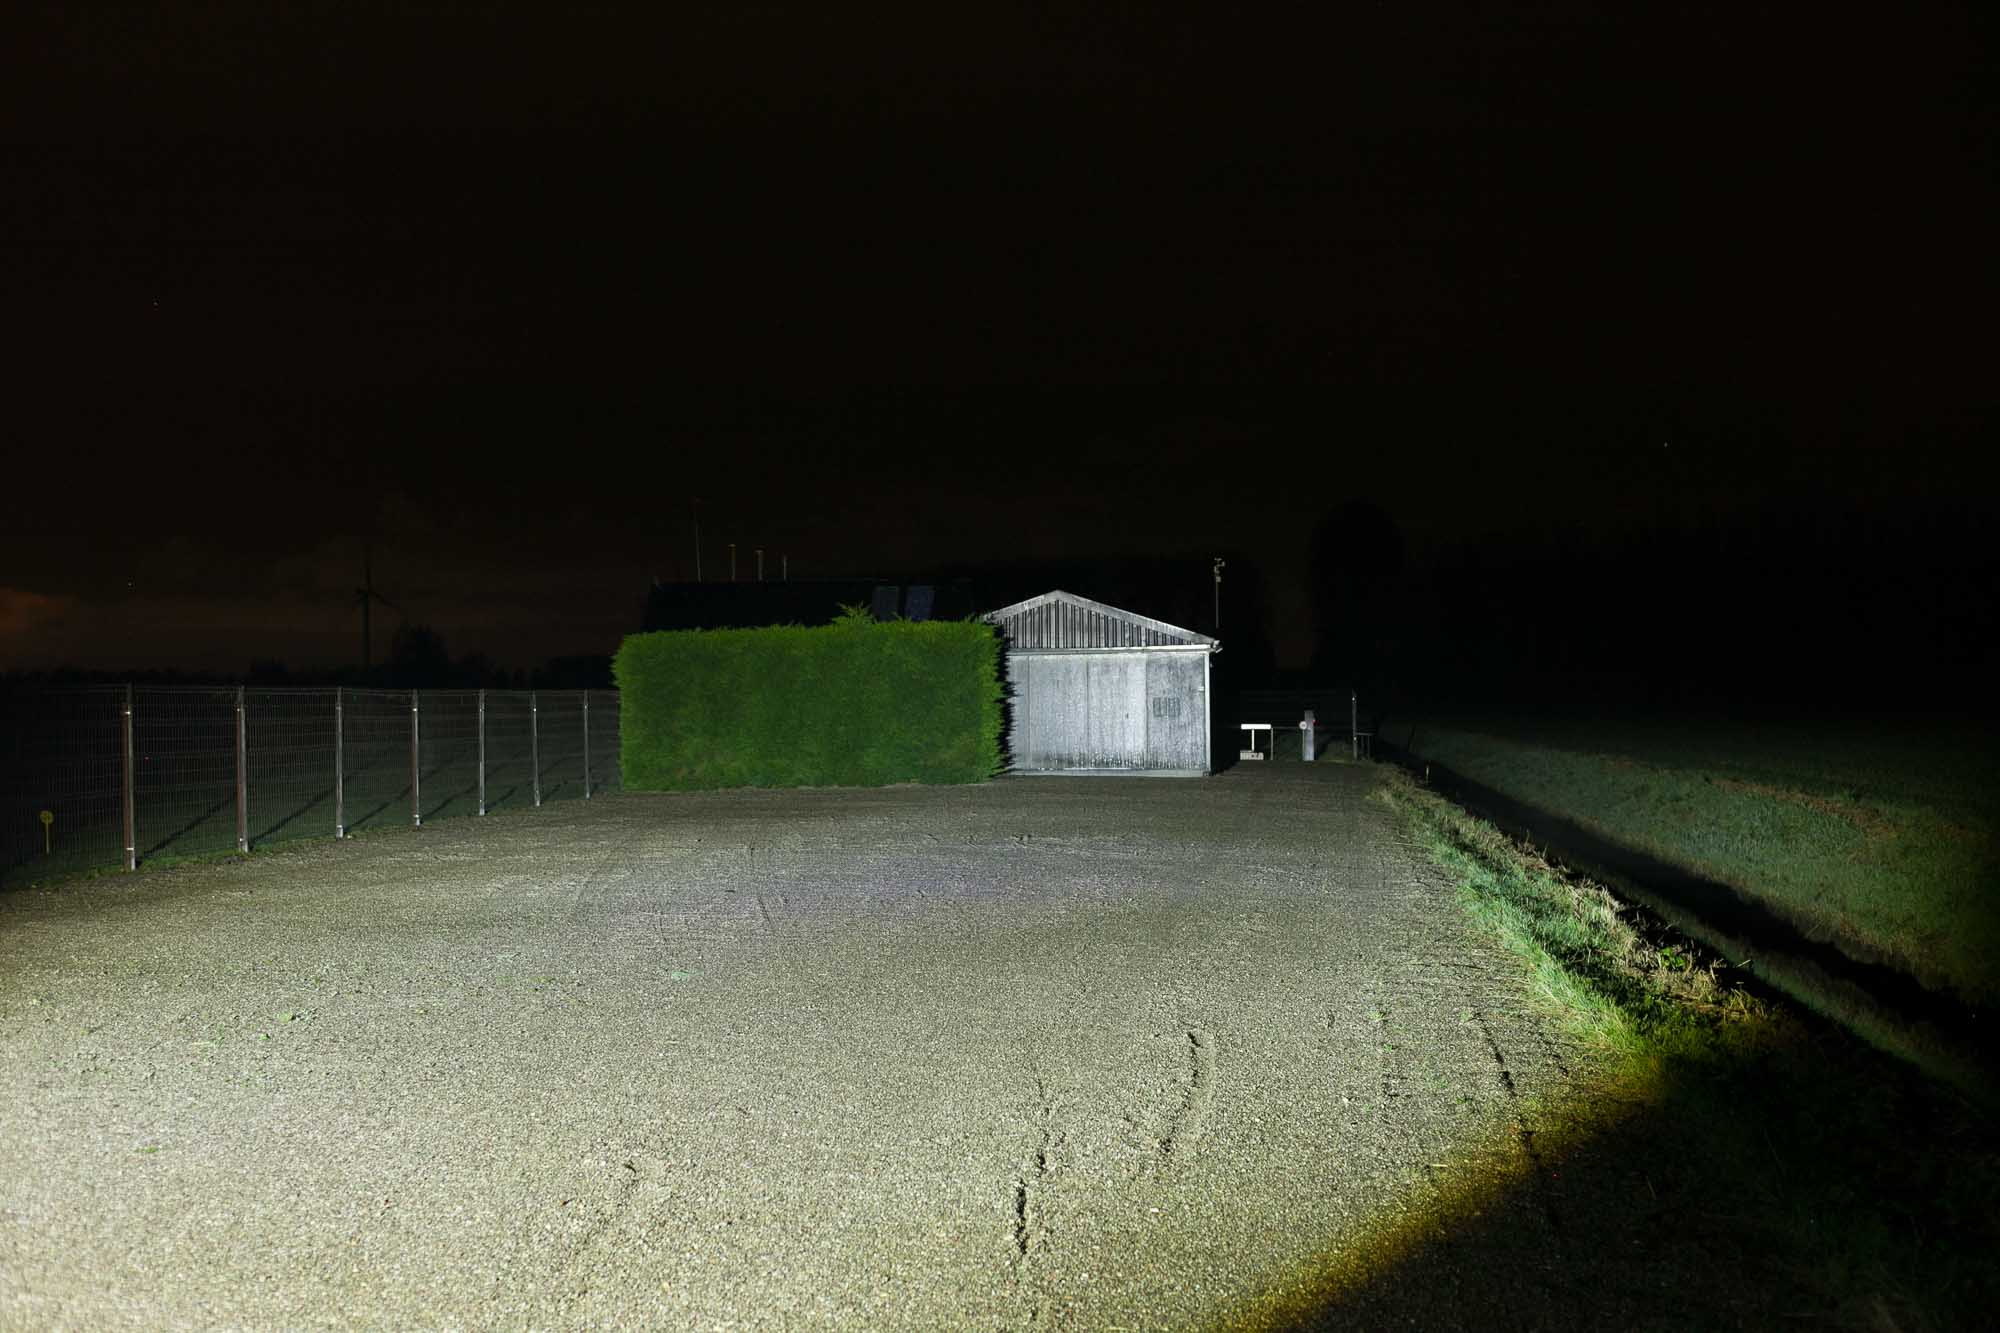
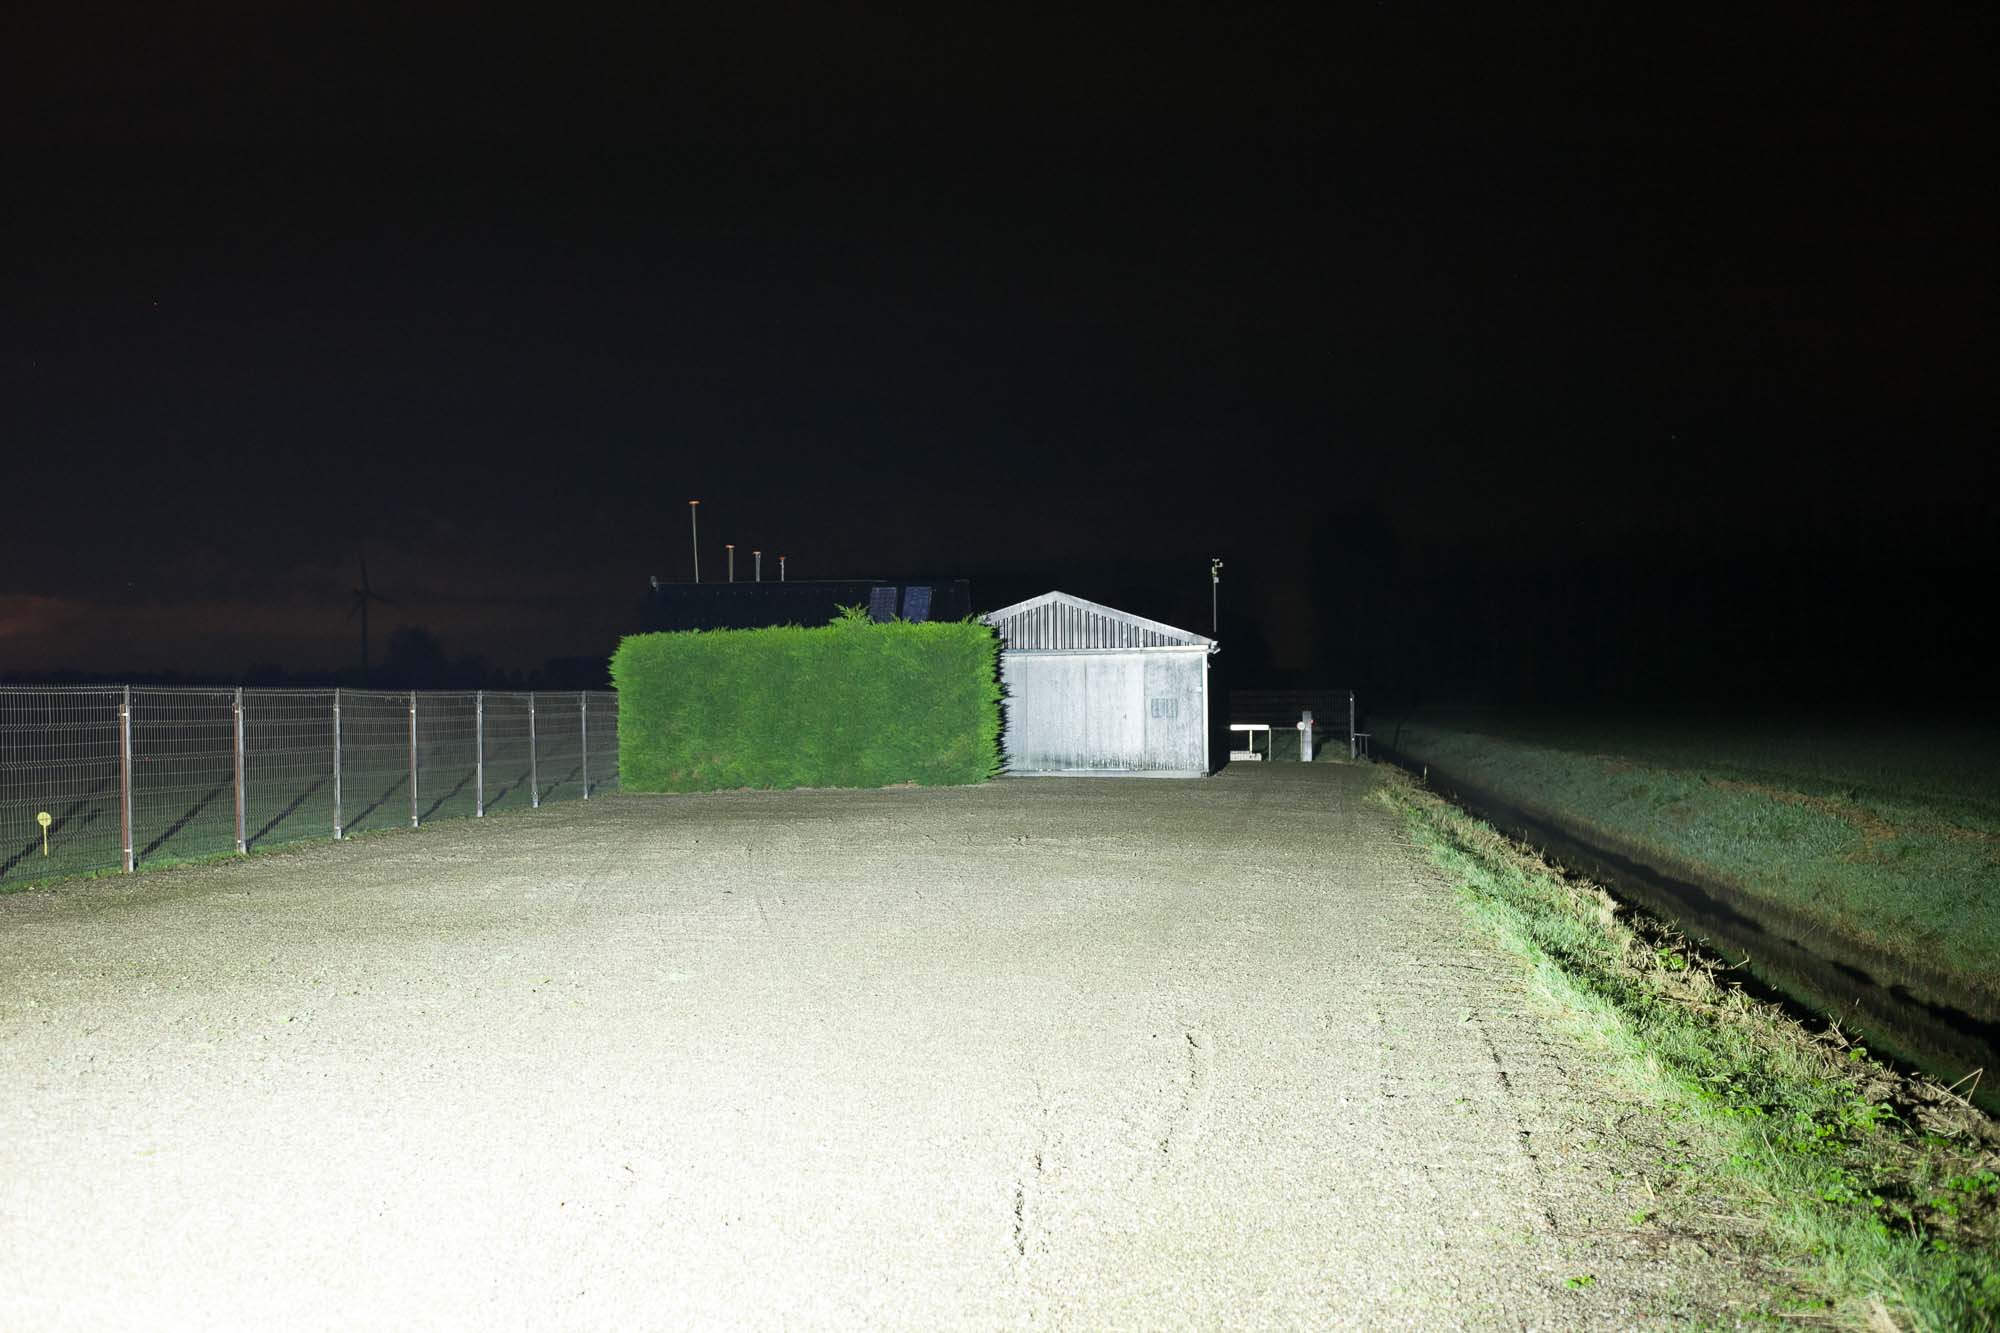
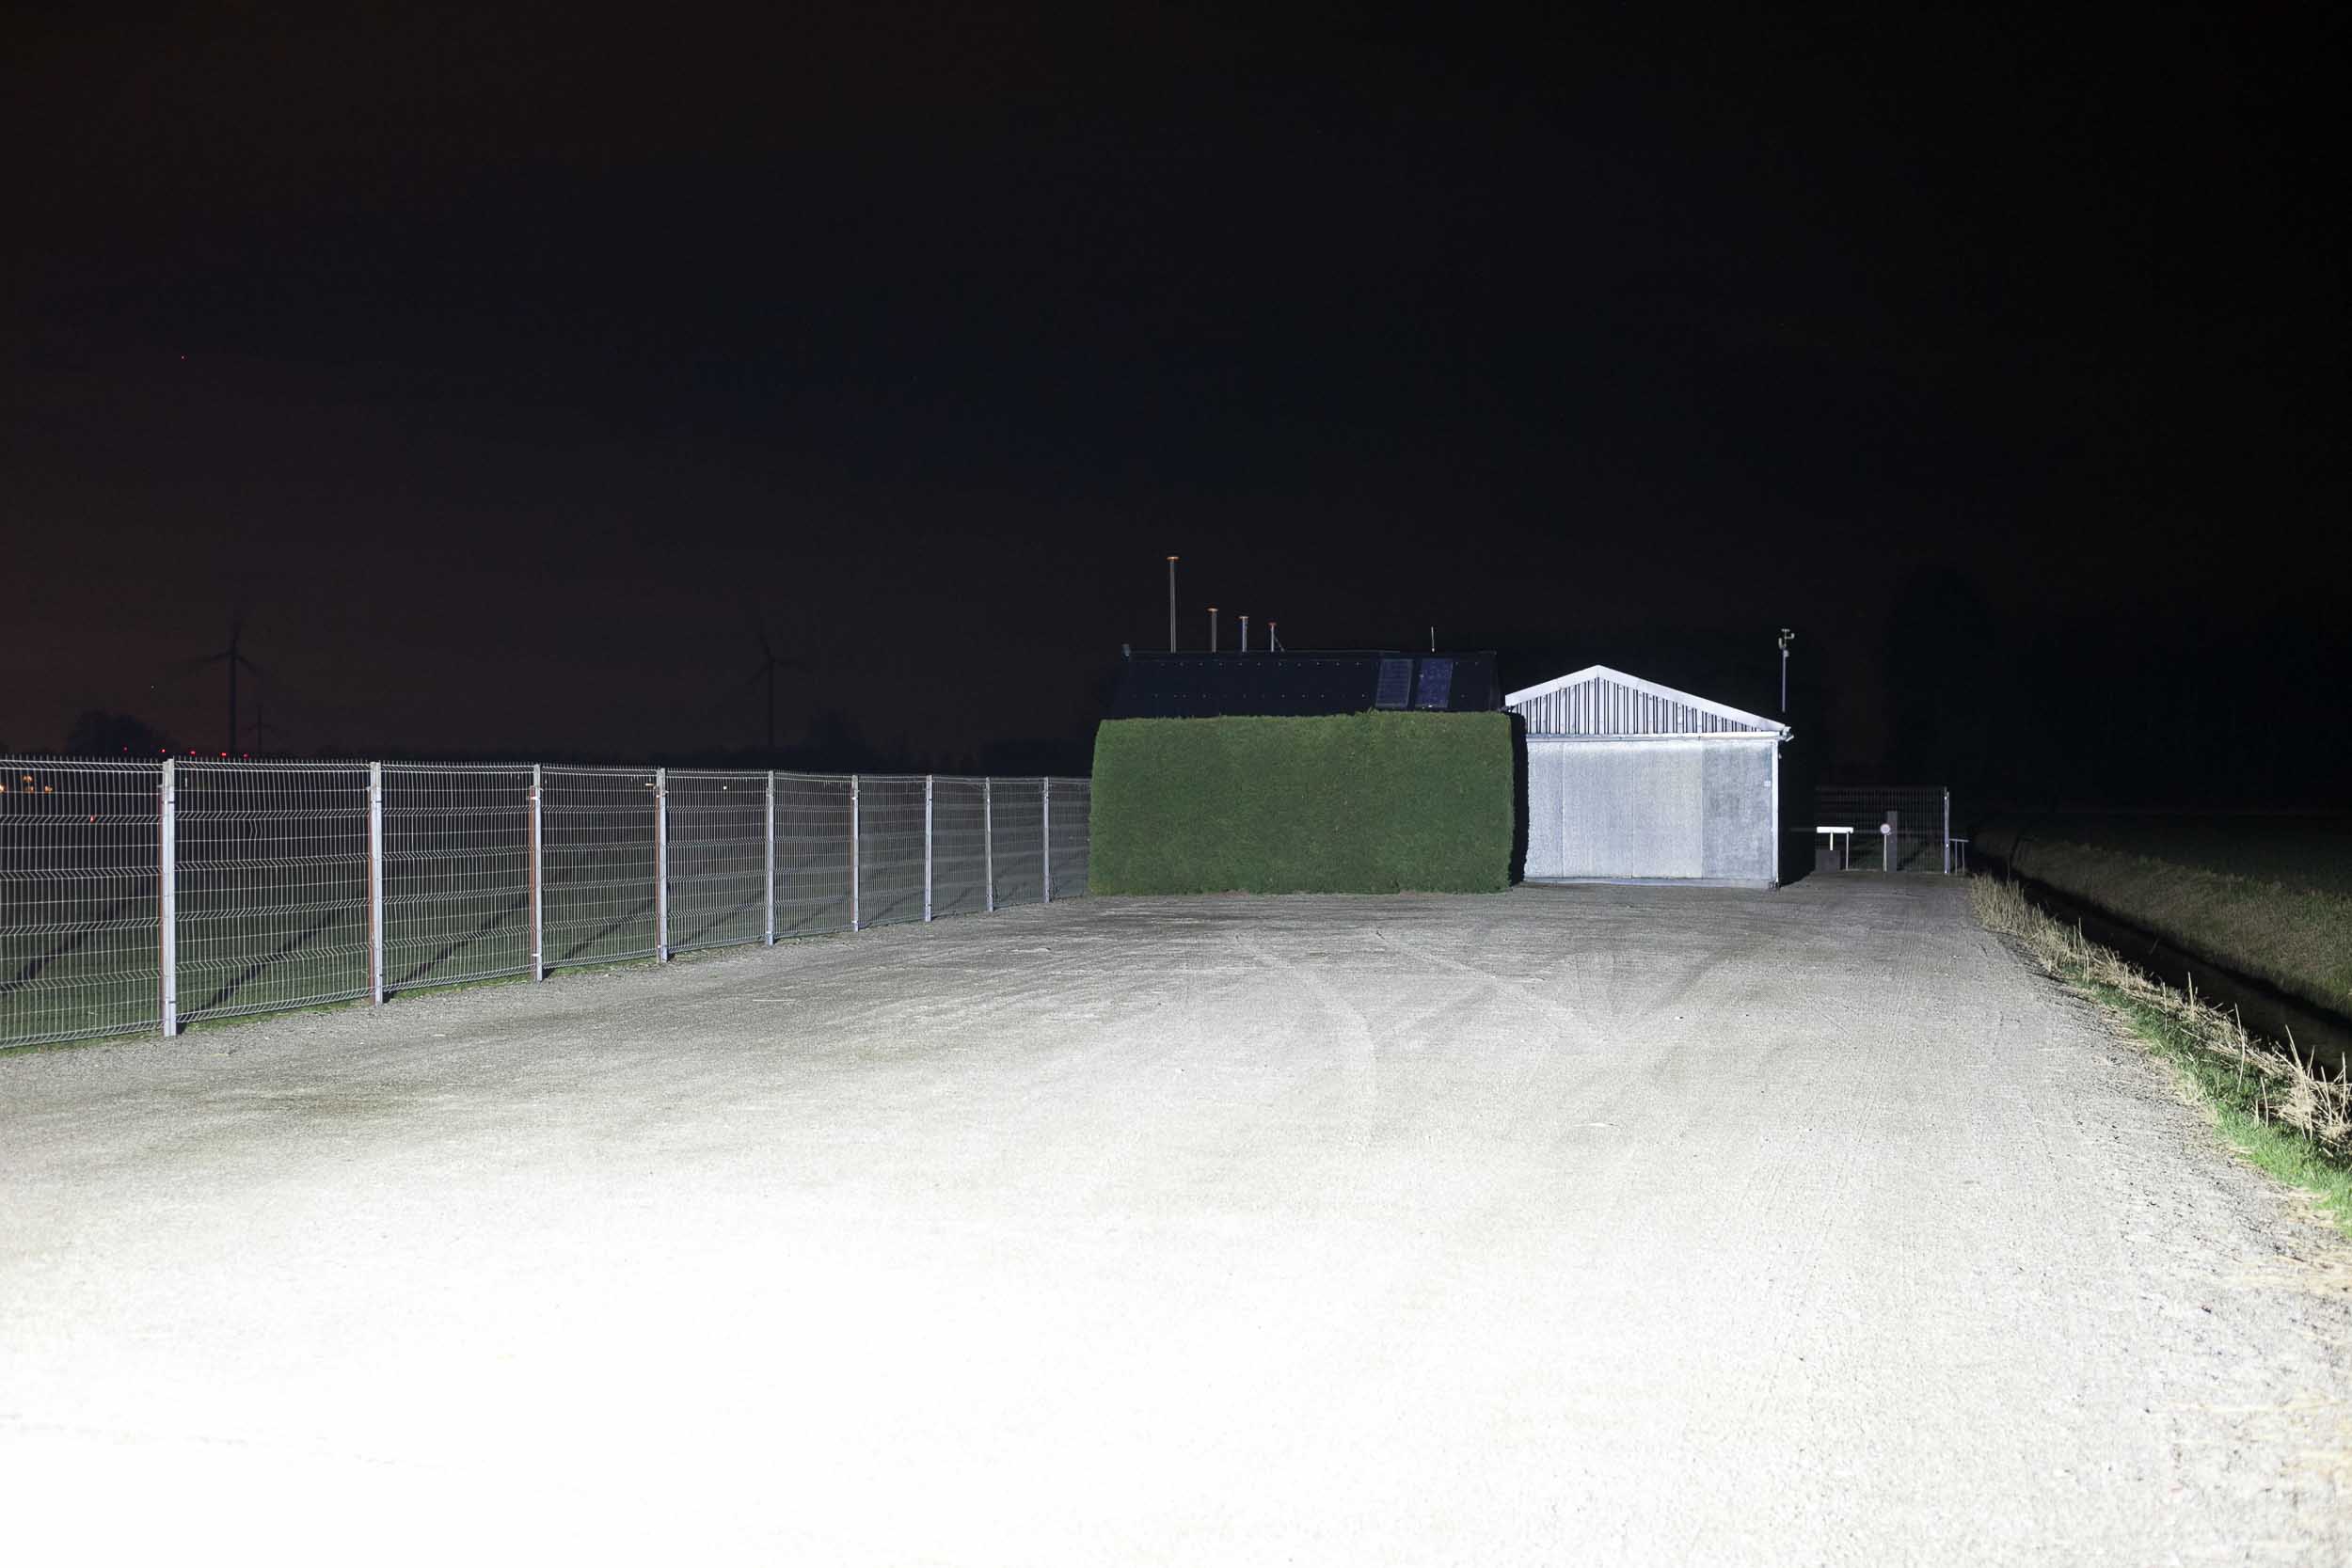
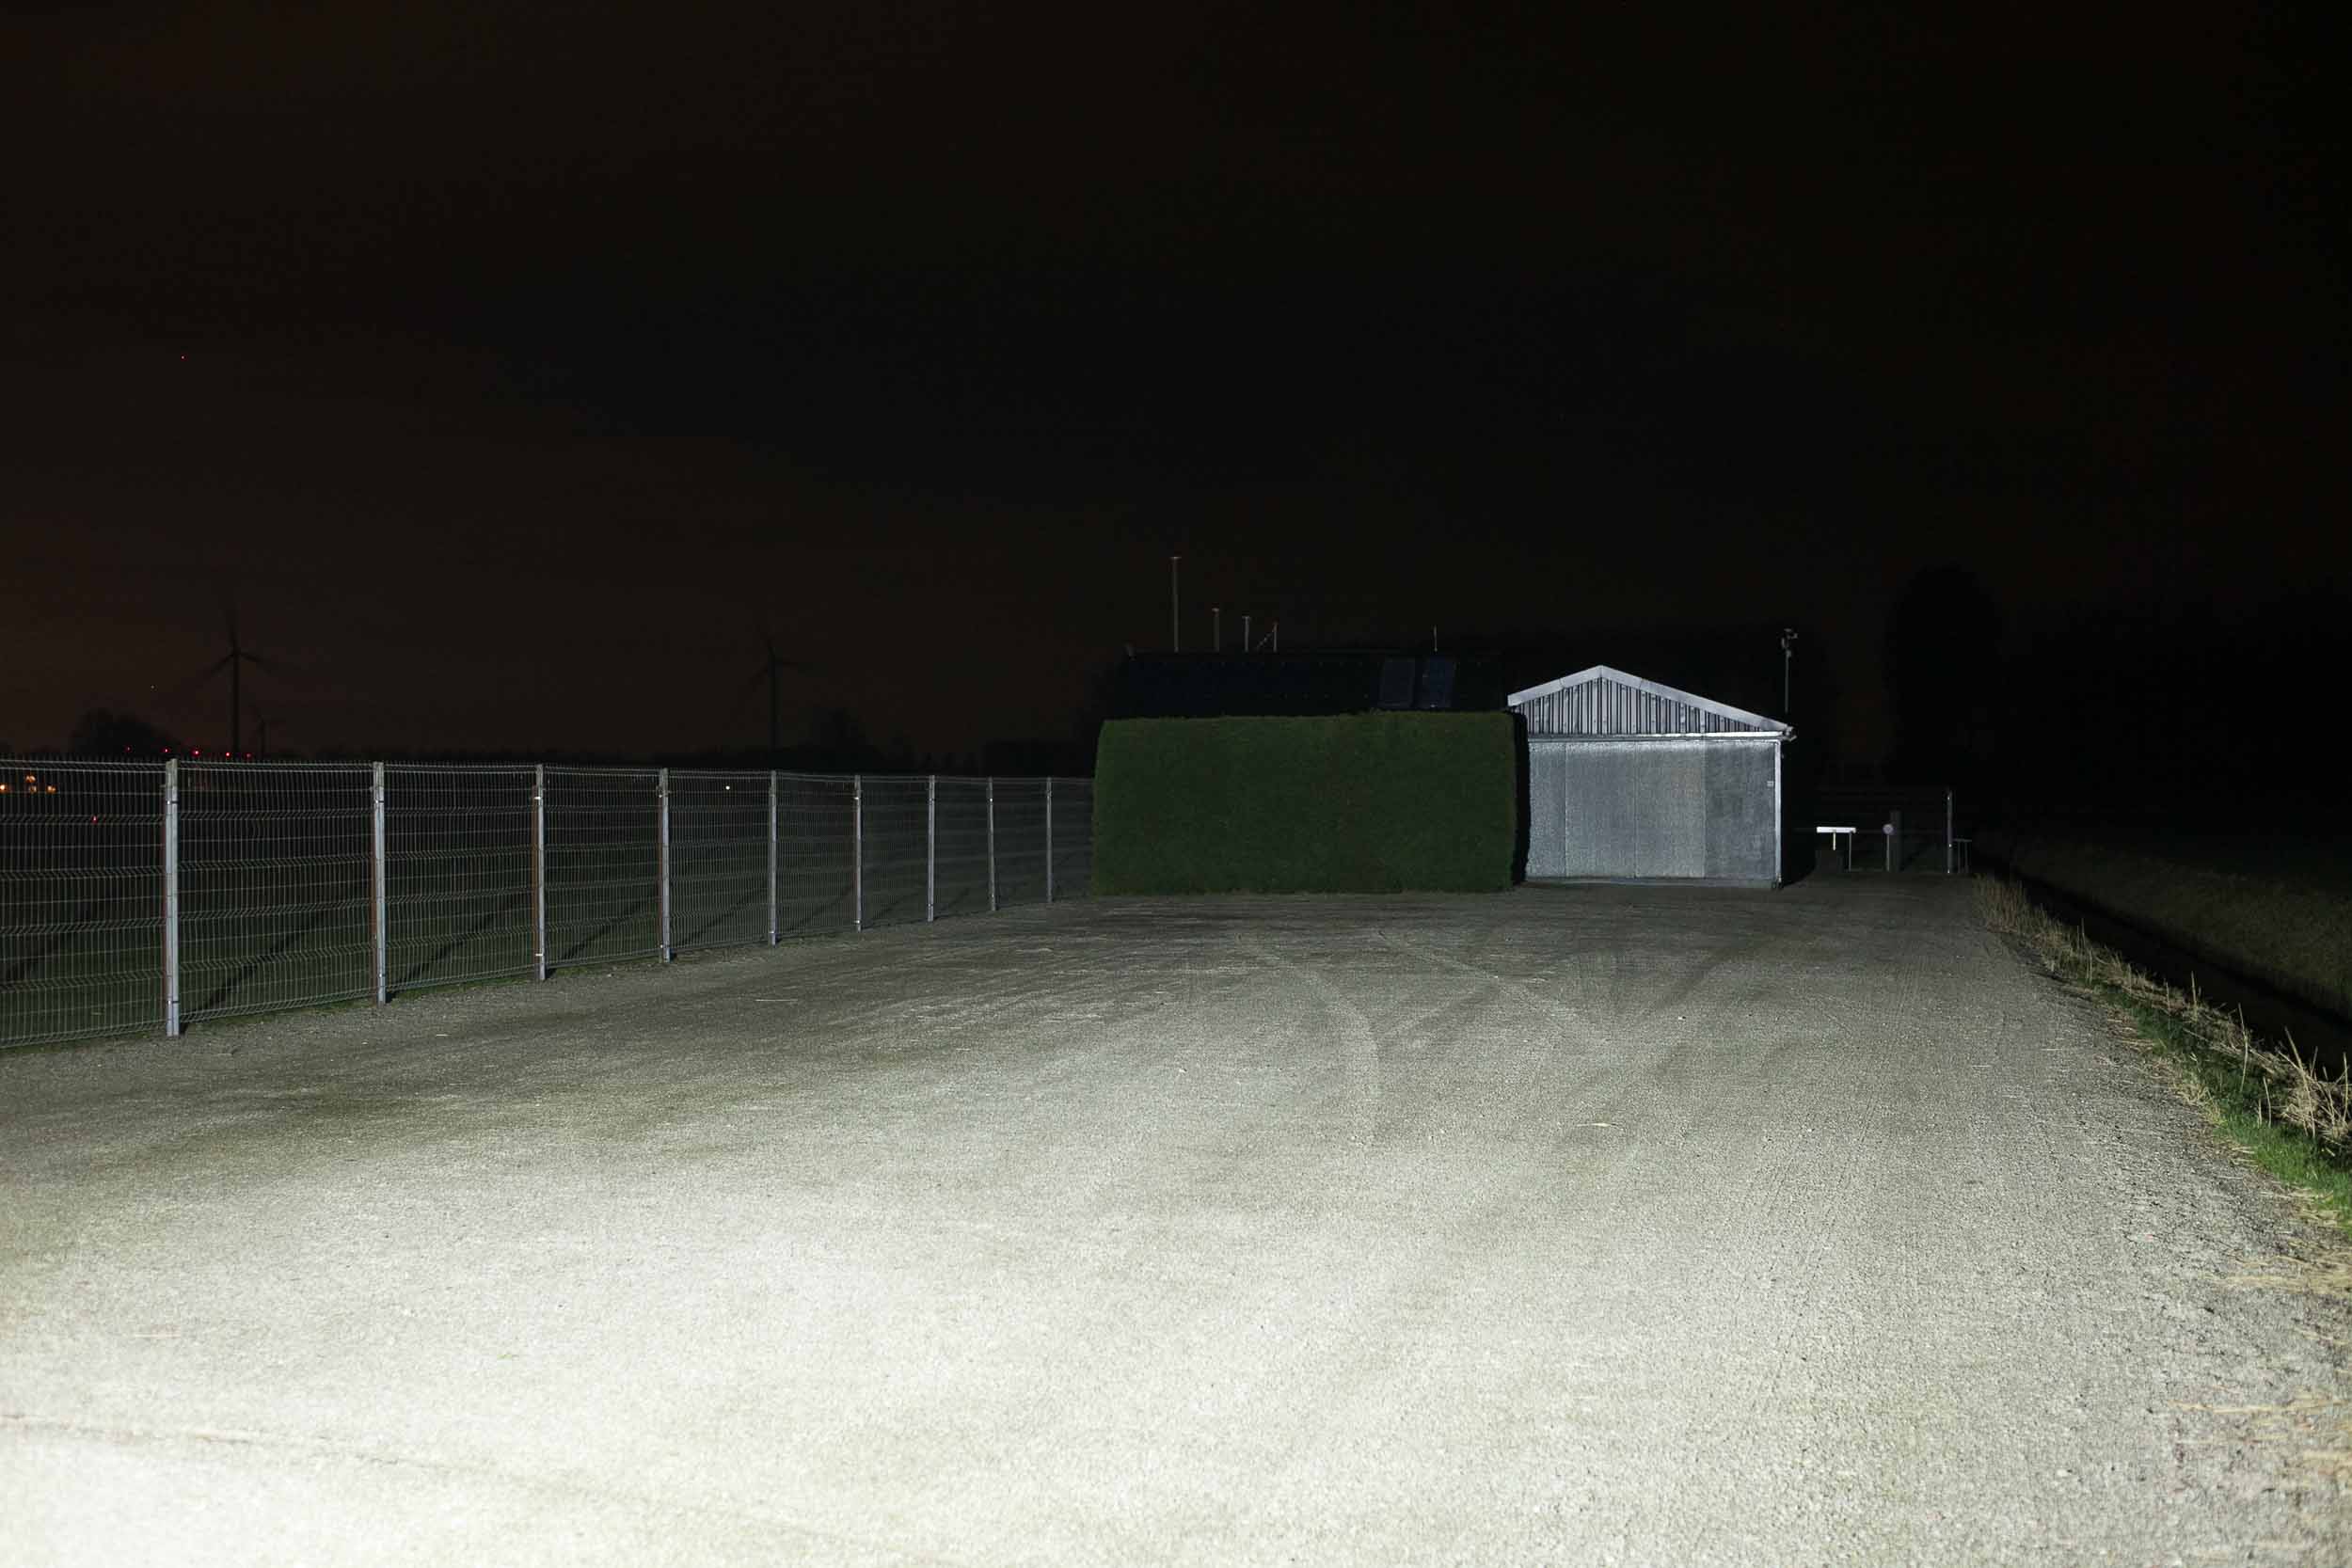
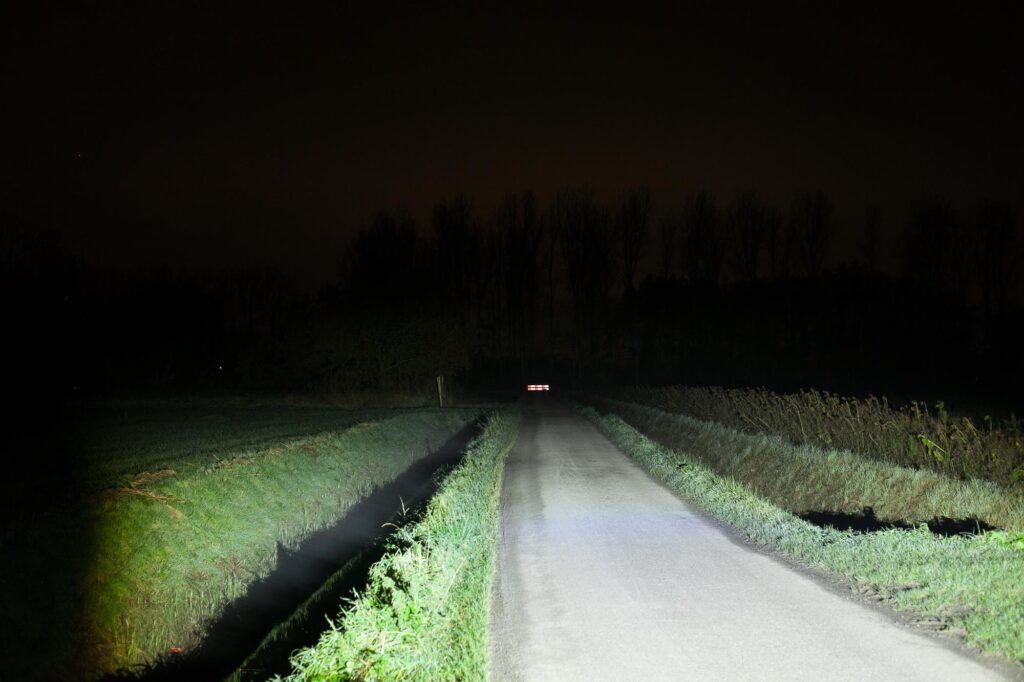
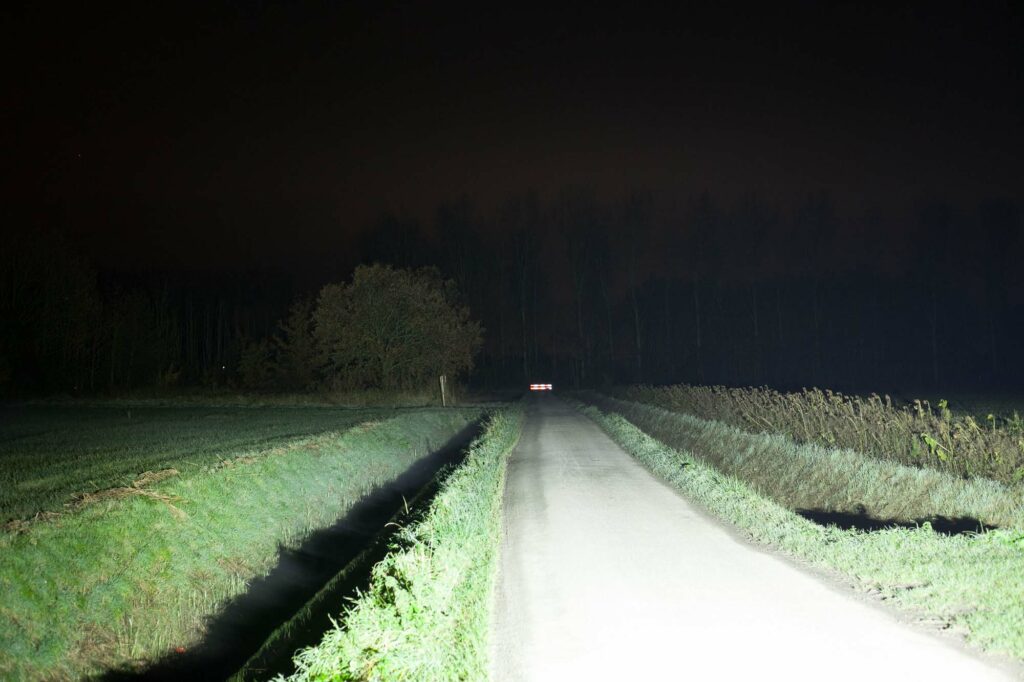
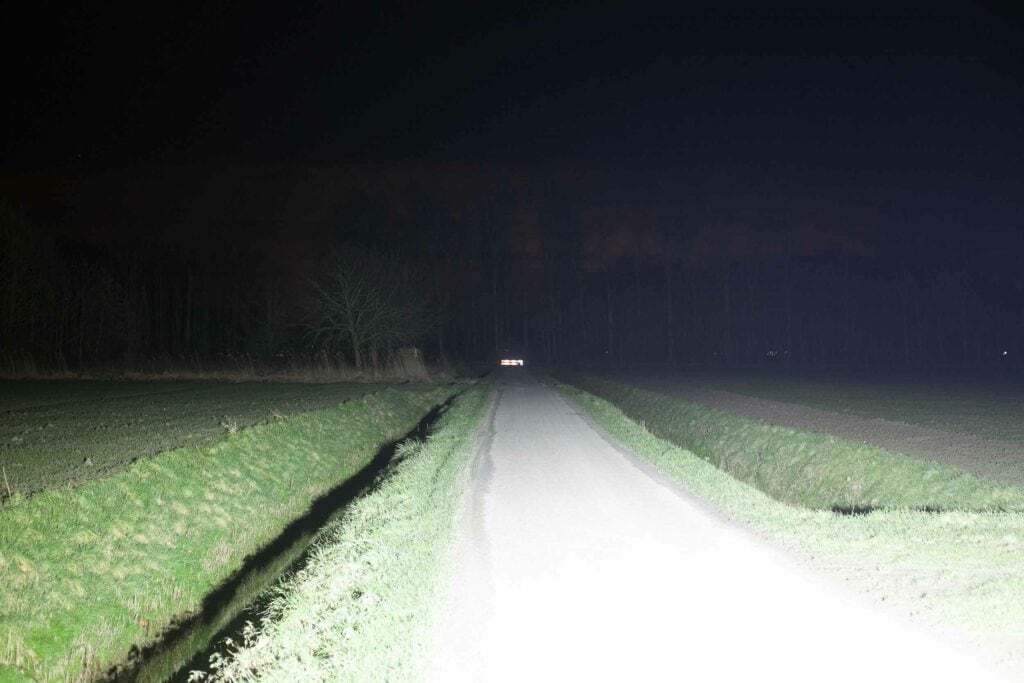
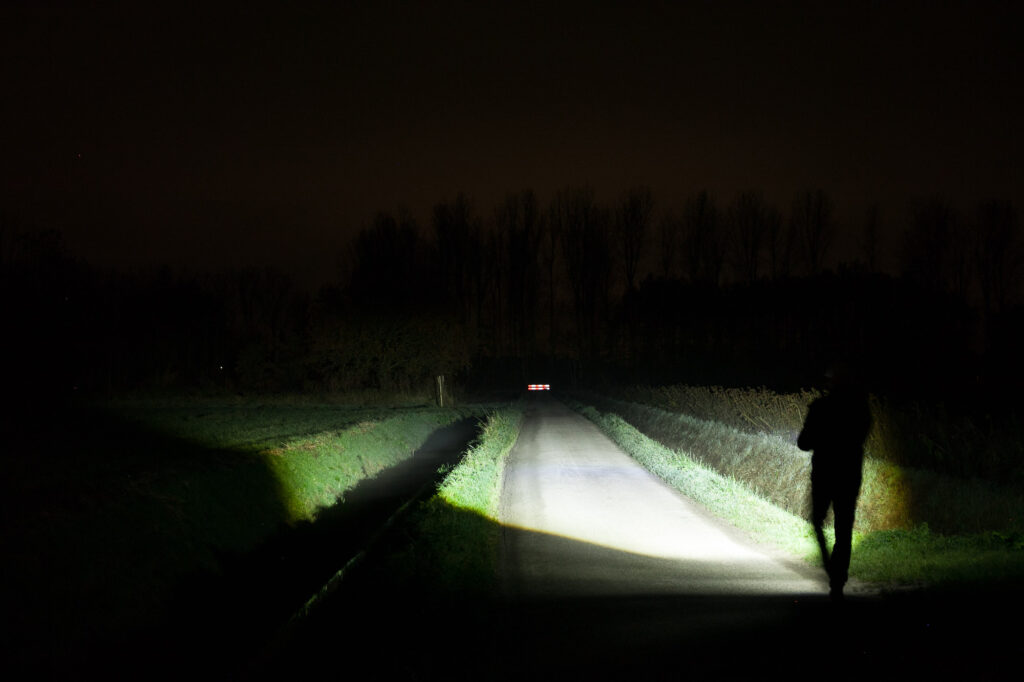
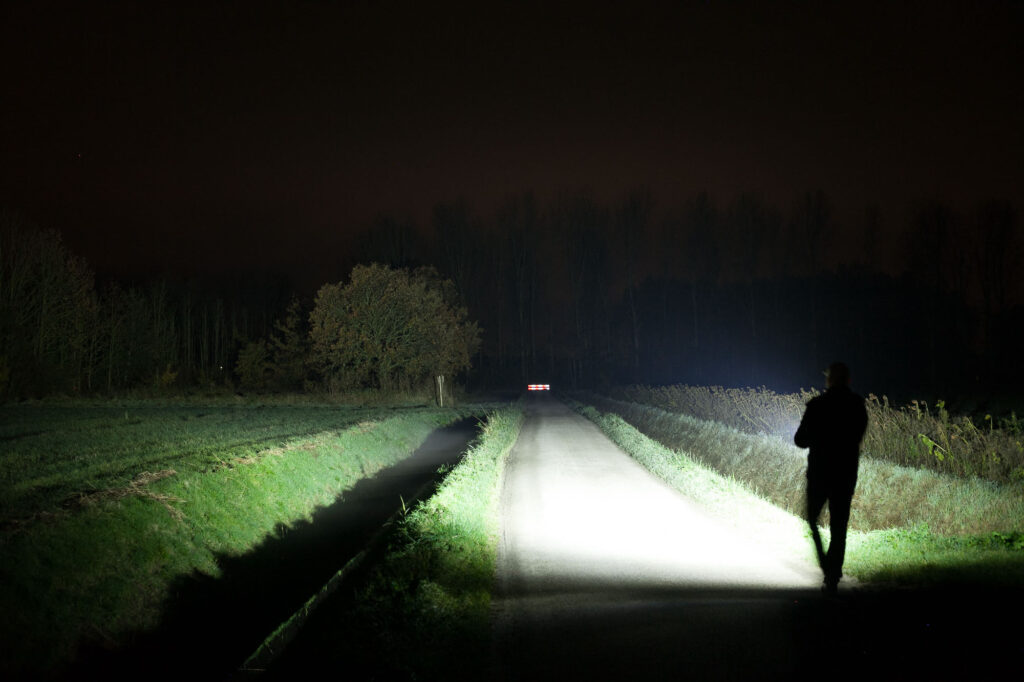
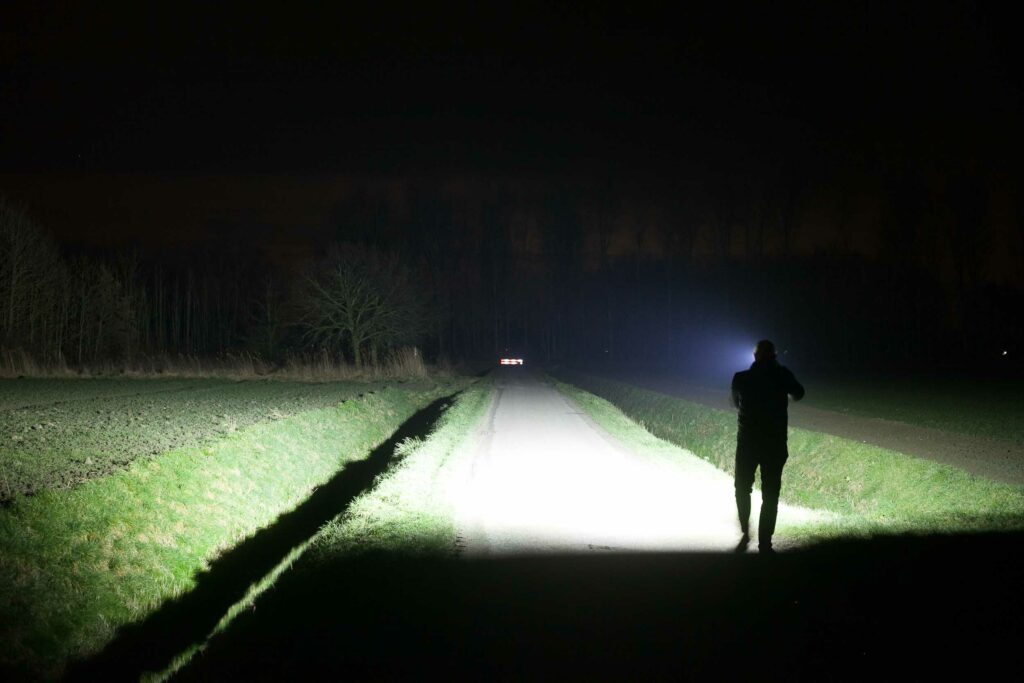
For the following beamshots, I used a Canon EOS 5D Mk2 with a 50mm lens. Manual settings: ISO1600, 1/4sec, F4, 5000K
The shed is about 65 meters / 71 yards away, and the reflective fence about 200 meters.
Explore and compare the beamshots from the following flashlights:
- Magicshine Monteer 12000
- Olight H67
And also some comparison pictures on the bike.
Please note that beamshots are mainly intended to showcase the beam pattern and beam quality, rather than overall performance. These images are typically taken directly after activation, and do not fully represent its overall performance. For accurate performance metrics, such as output, beam distance, and runtimes, you need to look at the performance section of this review.
Disclaimer: This flashlight was sent to us for review at no cost by Magicshine. We have not been paid to review, nor have we been holding back on problems or defects.
Final Verdict
Pros
- High quality
- Very bright
- Can be mounted on helmet as well (with extension cord)
- Thermal control, so wind cools the light to maintain a higher output
- Battery pack is huge and will last long
- Remote control for easy UI access
- Battery level indicator easily visible on the lamp
Cons
- Manual speaks about throw and flood, but they are basically Power mode, and normal mode
- No Gopro mount?
Explanation on star ratings:
1: Avoid: my phone flashlight would be a better choice – 2: Poor: significant defect or issues; almost unusable – 3: Average: some defects or issues; but still usable 4: Good: recommended (minor issues) – 5: Great: highly recommended
5 stars: ★★★★★
While our star rating provides a reliable indicator, we encourage you to read the full review to make an informed decision based on your own needs and preferences.
Please always have a second light or a backup light. I would also recommend getting a headlamp while cycling. A bike light can only point in the direction you are riding, but with a headlamp, you can see things on your side. So even with a powerful bike light like the Magicshine Monteer 12000, I’d recommend using a headlamp as well.
There are not many complaints I have about this bike light. And the only things I could come up with were the lack of a GoPro mount.. which some people like to have, and perhaps the naming of the 2 mode groups.
Other than that, this thing really impressed me. The App where you can set your own User Interface, as well as the Bluetooth remote switch.
I also really enjoyed the battery level indicators on the lamp, that you can see at all times. And even if you can’t (when it is on your helmet for example) you can use the battery level indicator on your remote switch.
The output really depends on how fast you drive, or better said, how much wind you have cooling down the head.
Keep in mind that I’m not a pro biker, so I did my best to give you as much information as possible, but you should read the whole review and make up your own mind.
But… the faster you ride, the brighter the light! … kind of
Buy your Magicshine Monteer 12000 here:
If you buy from Magicshine, get 15% off with our unique discount code: 1lumen15off (this code only works outside special sales like Black Friday, etc. Minimum order $50.
1lumen selects and reviews products personally. We may earn affiliate commissions through our links, which help support our testing.