1lumen selects and reviews products personally. We may earn affiliate commissions through our links, which help support our testing.
Mateminco FW3S review
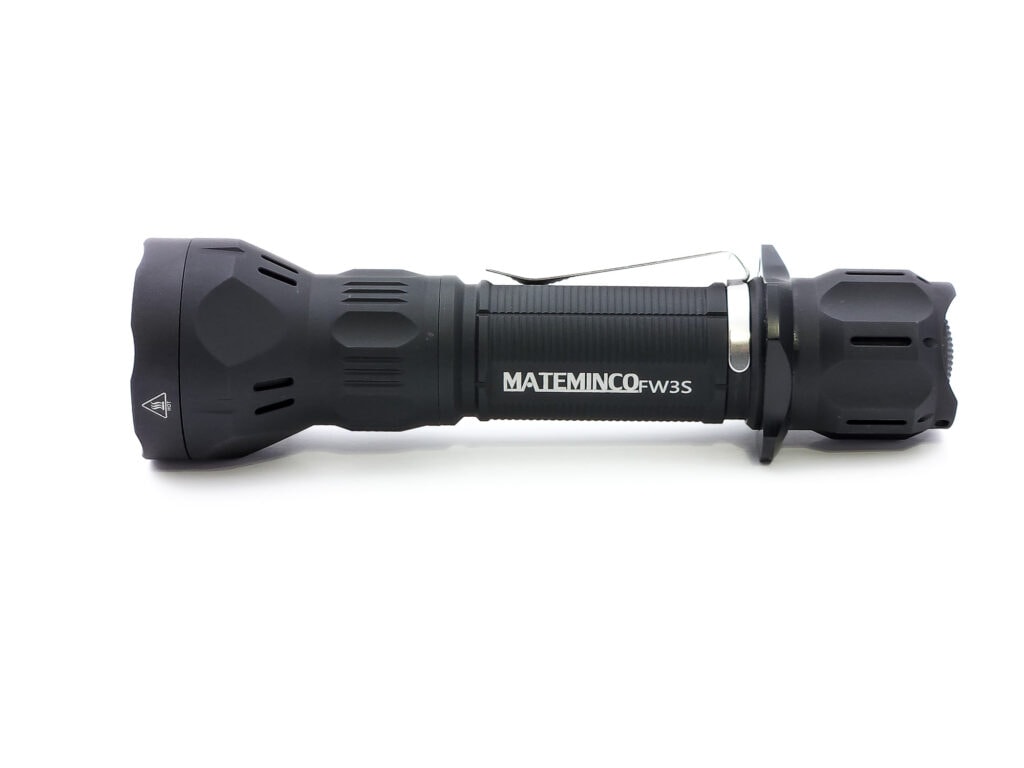
Mateminco FW3S specifications
| Brand & Model | Mateminco FW3S |
|---|---|
| Flashlight category | Long-range |
| LED | Throw: 1*SFT-40 6500K Flood: 9*Cree XB-D in one of the following tints/colors:6500K (as tested)5000KRedBlueGreenAmber |
| Max. output | 2650 lumens |
| Max. beam distance | 616 meters |
| Max. beam intensity | 95,000 cd |
| Battery config. | 1*21700 |
| Onboard charging | N/A |
| Modes | 7 |
| Blinkies | 1 |
| Waterproof | IPX6 |
| Review publication date | January 2023 |
Introduction:
Mateminco recently released a new type of light that’s a hybrid of an LEP surrounded by a ring of LEDs called the Mateminco FW3 (not to be confused with Lumintop’s FW3). They’ve now come out with a non-hybrid version in the FW3S which replaces the center LEP with a traditional LED (an SFT-40). It’s an interesting concept, so how does it work out? Let’s dive in.
Package quality.
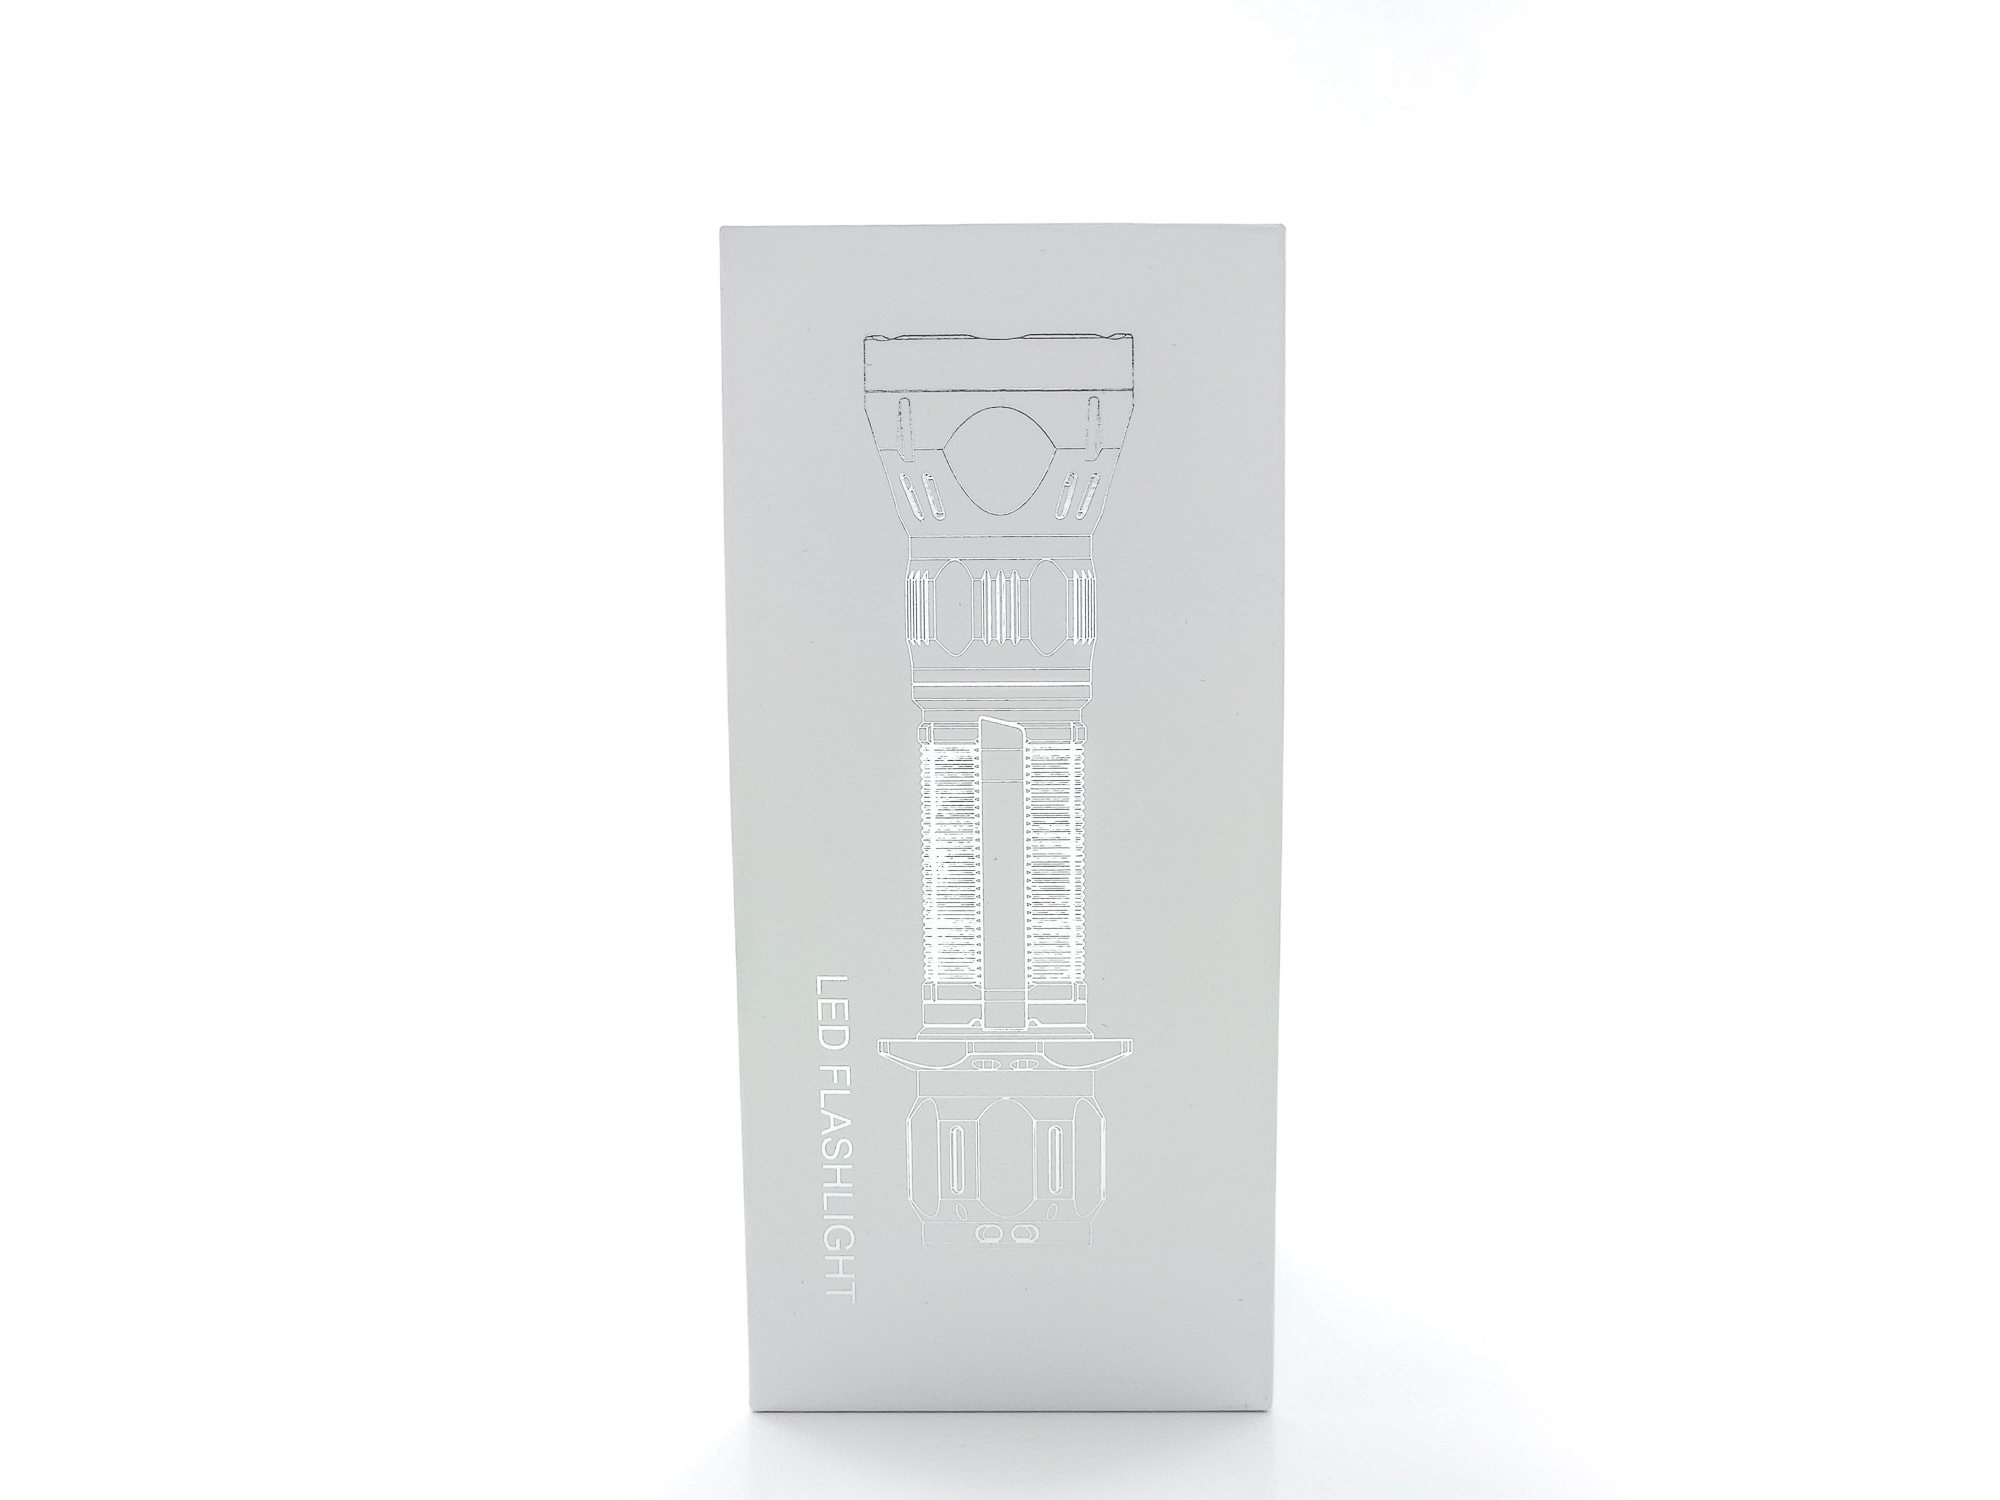
Mateminco’s FW3S comes in a pretty solid minimalist white box that features an image of the light on the front in silver line work, and the company’s contact information on the rear, while one side only has the name “Mateminco” on it, and the other gives some use cases for the light. The only real information about the light itself is on a sticker on the bottom, which shows what option for the LED ring is selected. When you remove the snug-fitting top of the box, there’s a thin sheet of foam on top, covering the light, which is cradled in a foam cutout, with accessories in another cutout below.
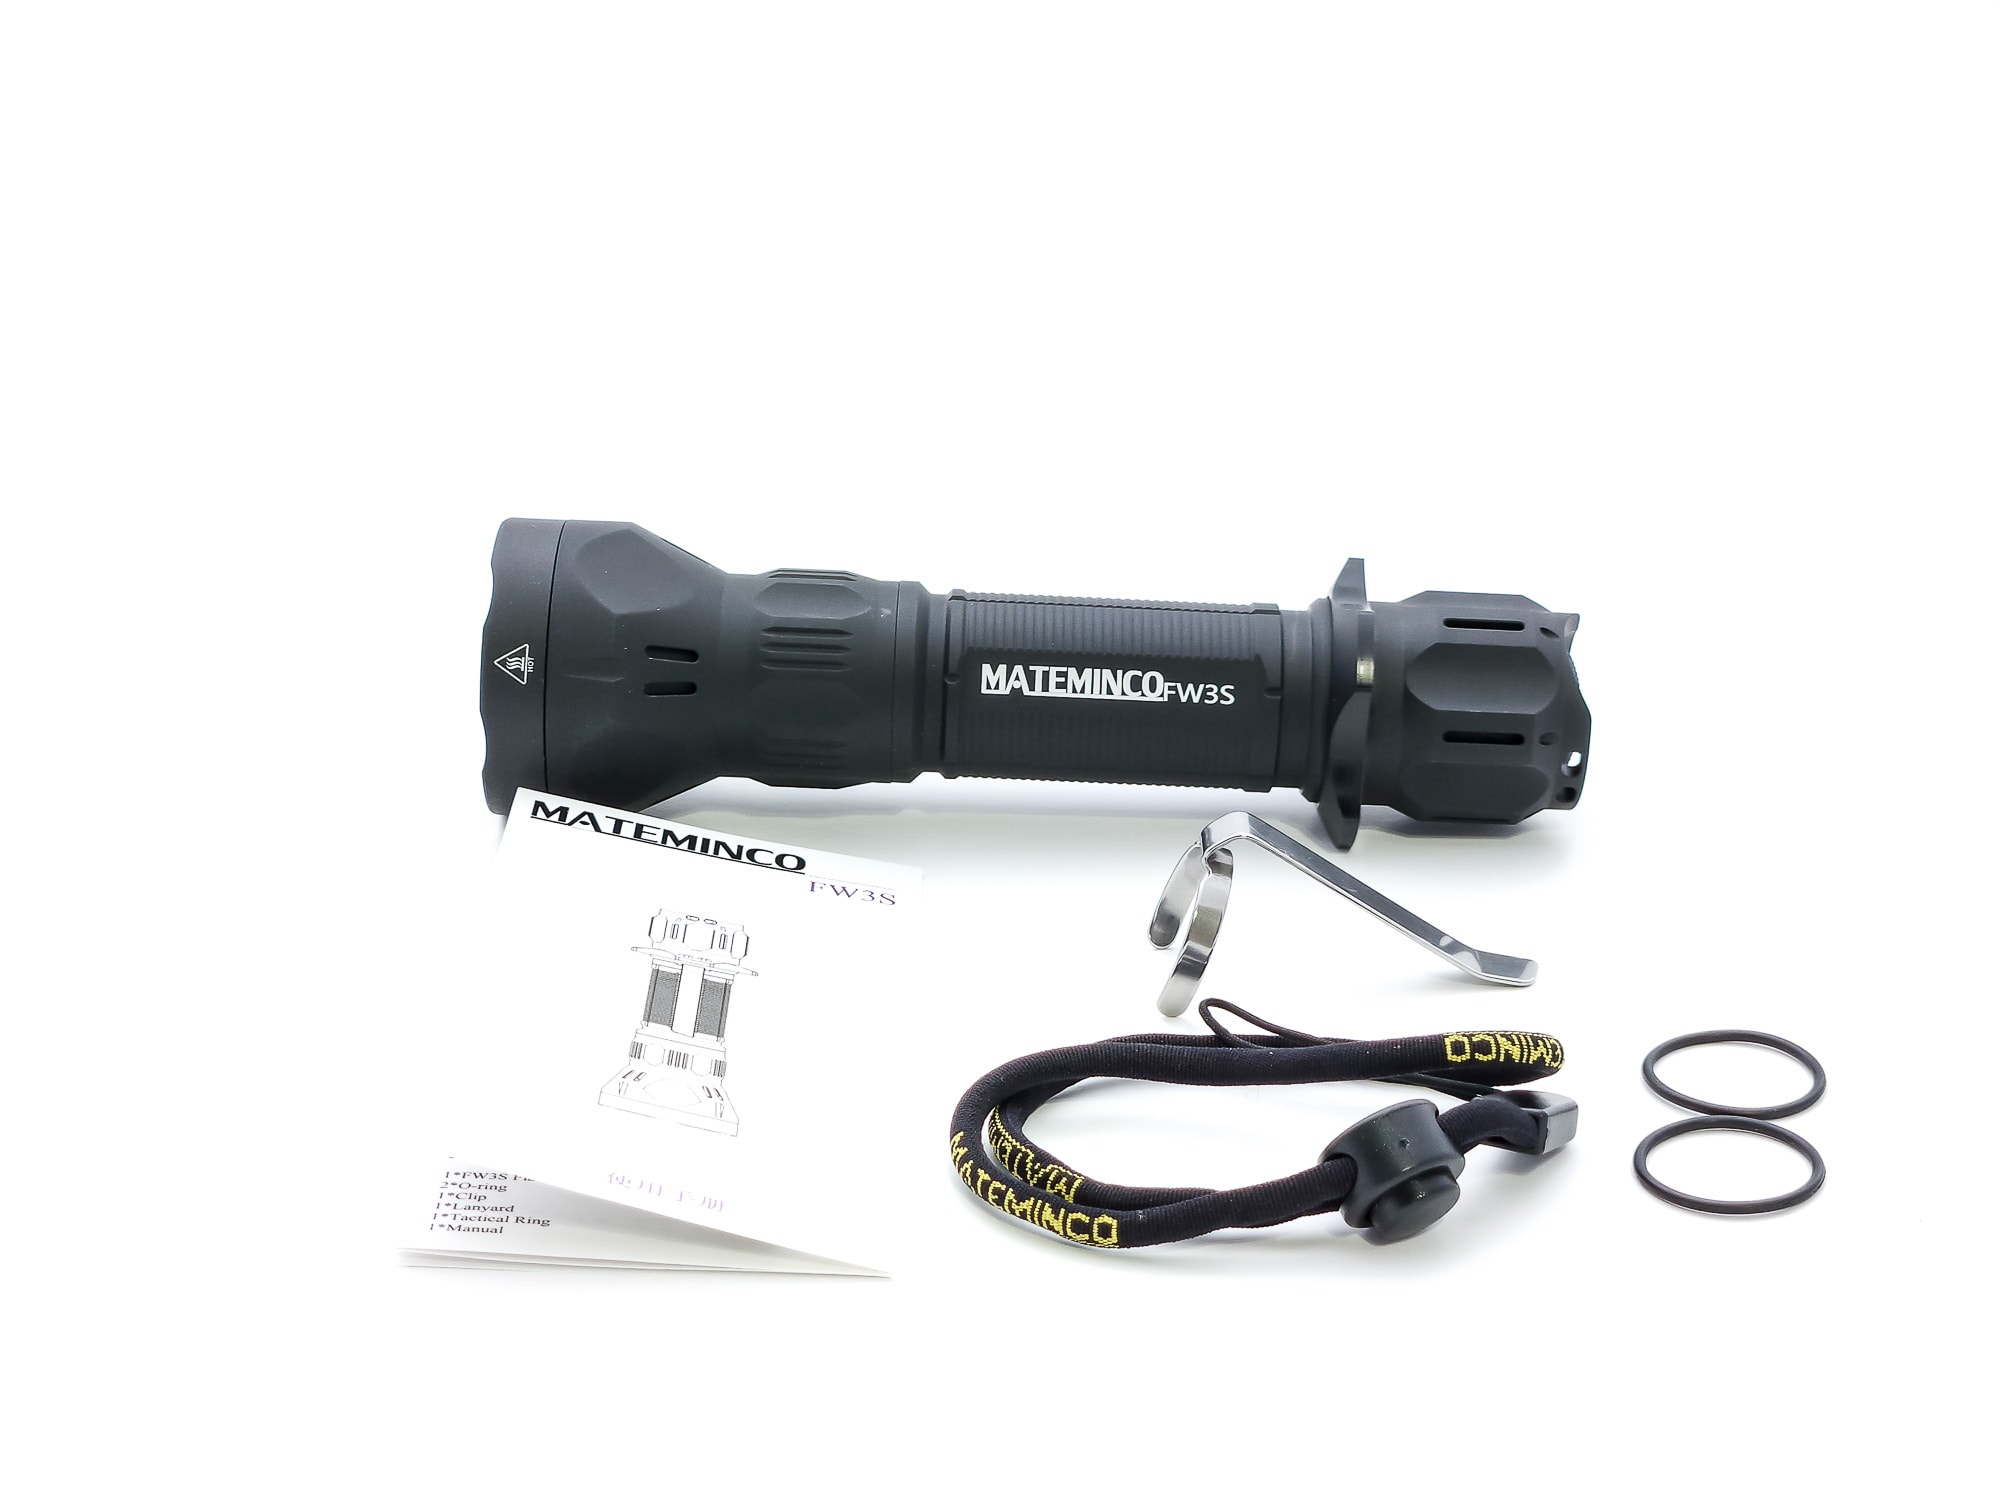
Inside the box you’ll find:
- Mateminco FW3S, with tactical ring installed
- Instruction manual
- A small, plastic bag containing:
- Lanyard
- Clip
- Two spare o-rings
Mine also came with a battery, a Lishen LR2170LA 21700, though this was included for testing and I don’t believe this is a bundled option when purchasing.

Flashlight in use
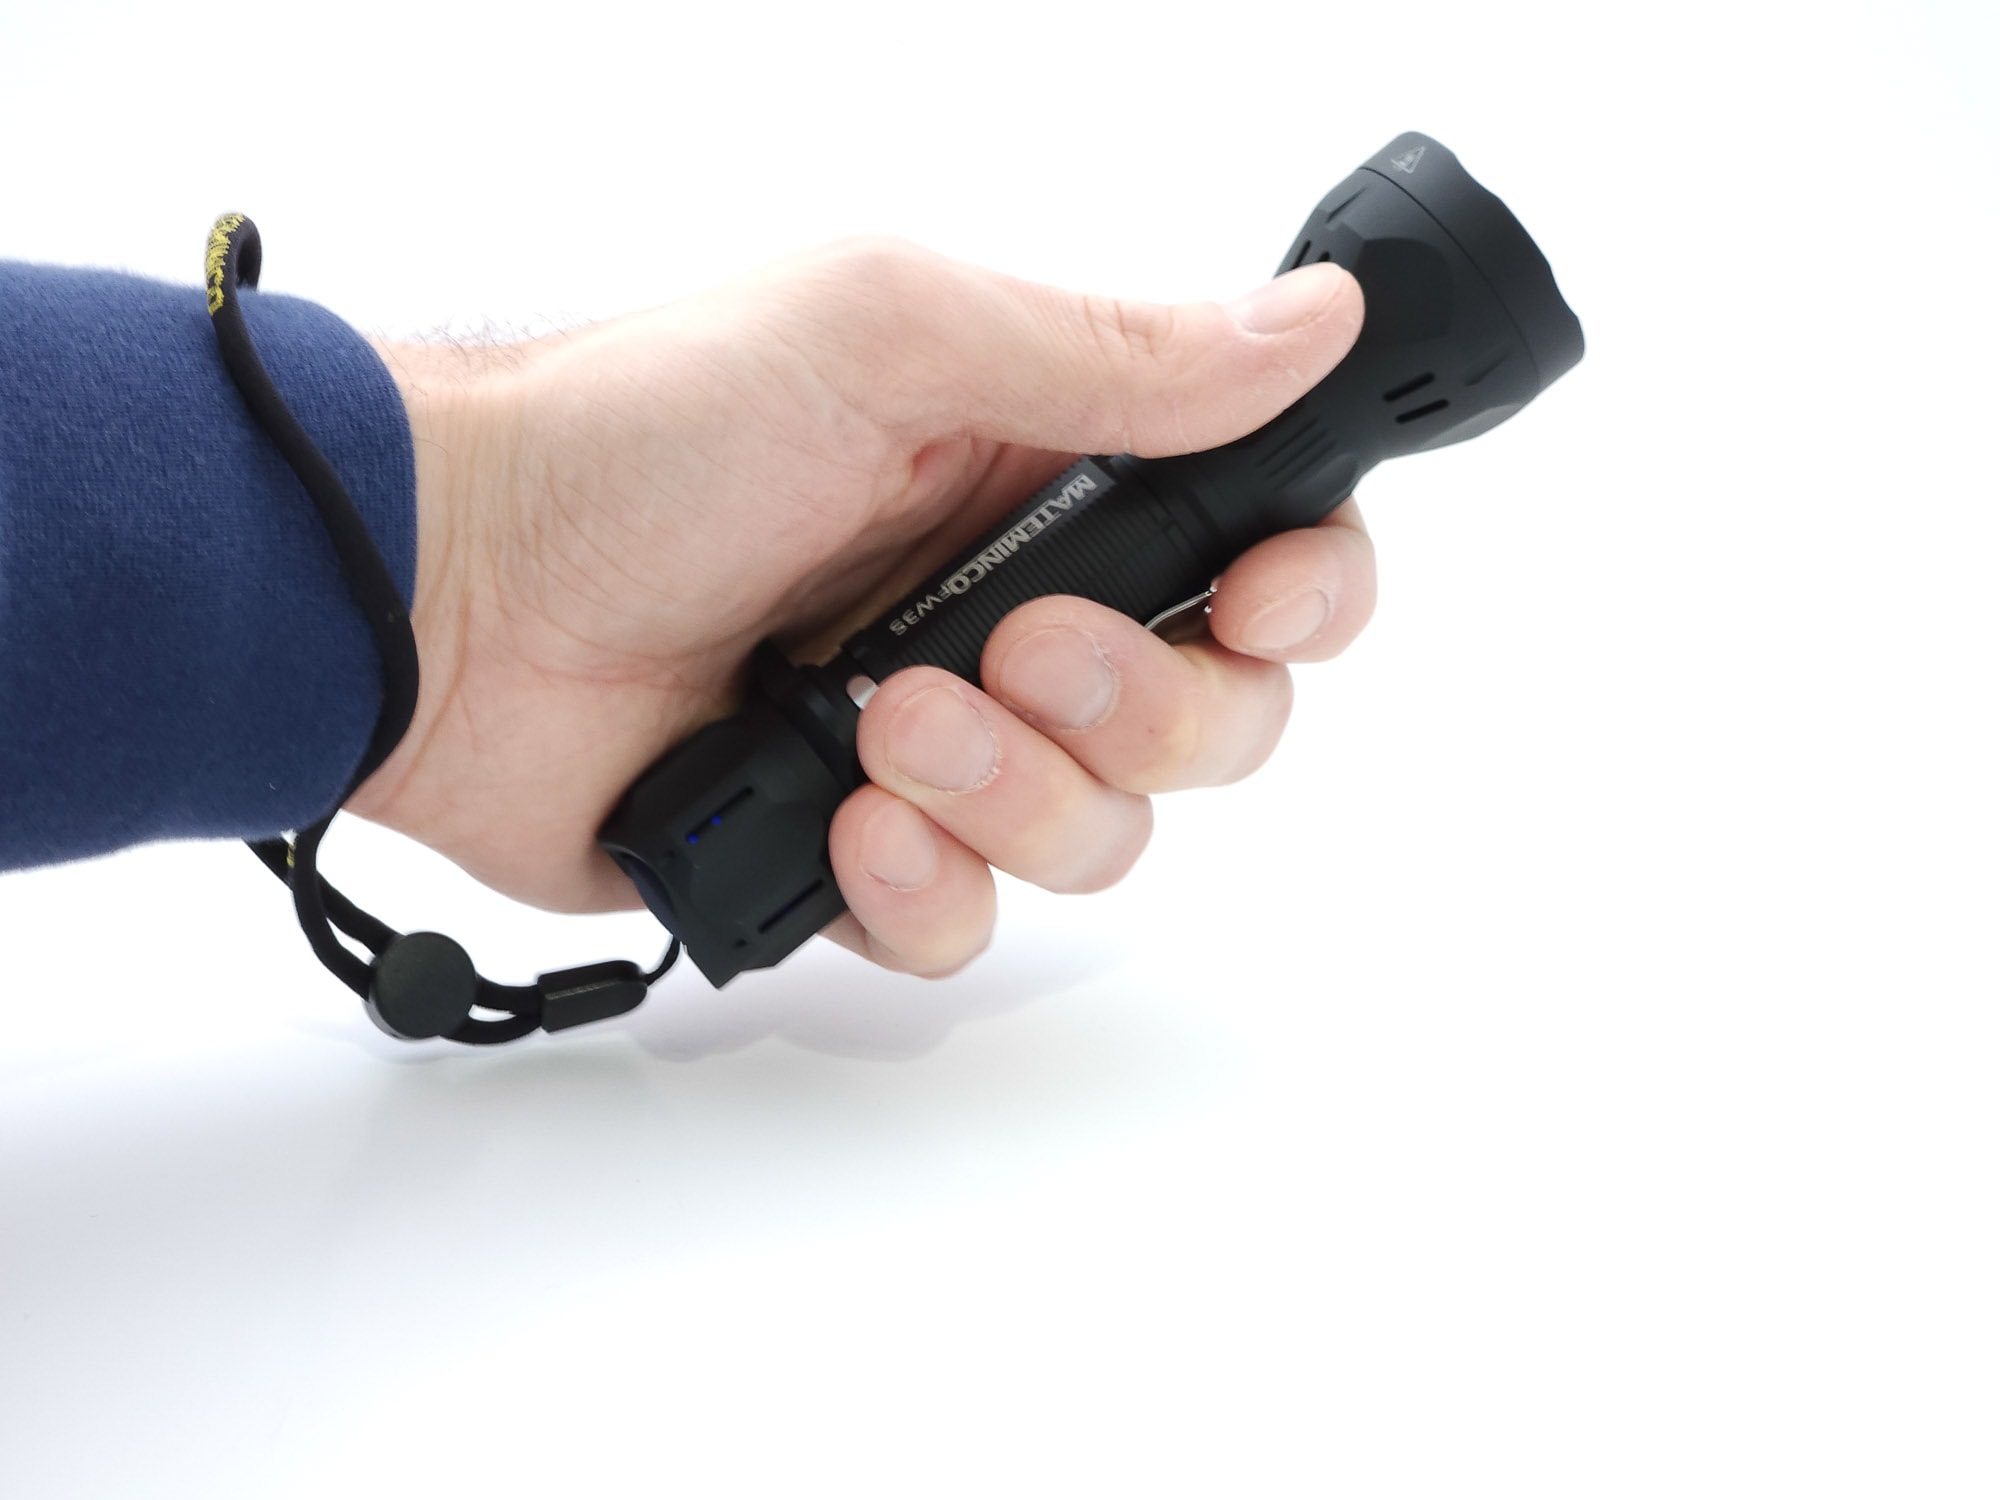
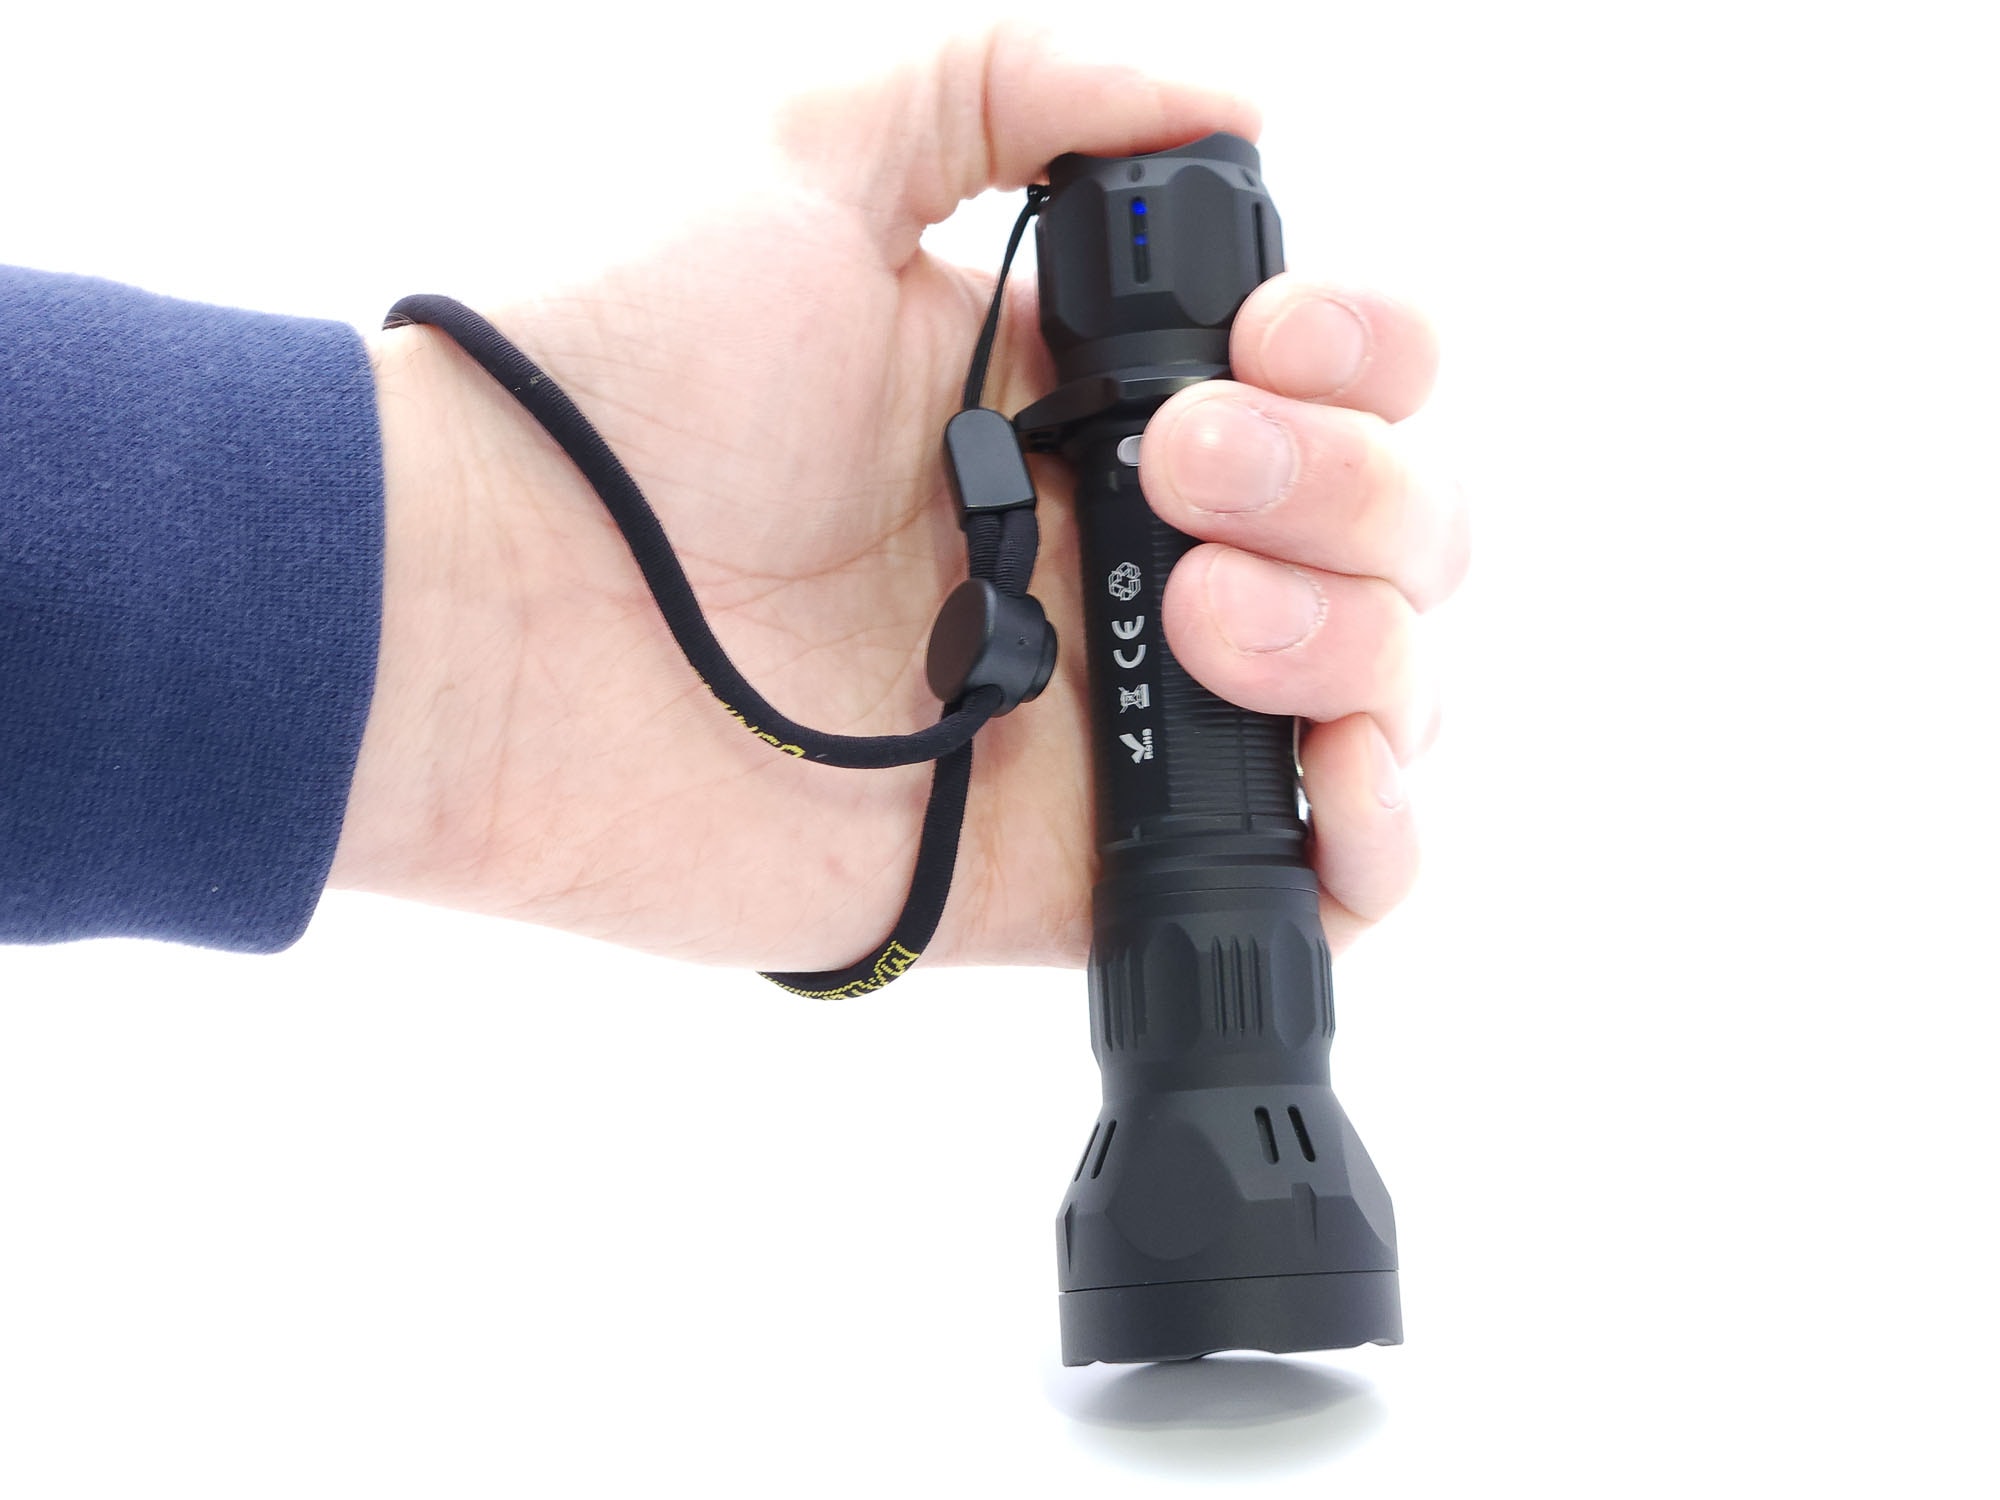
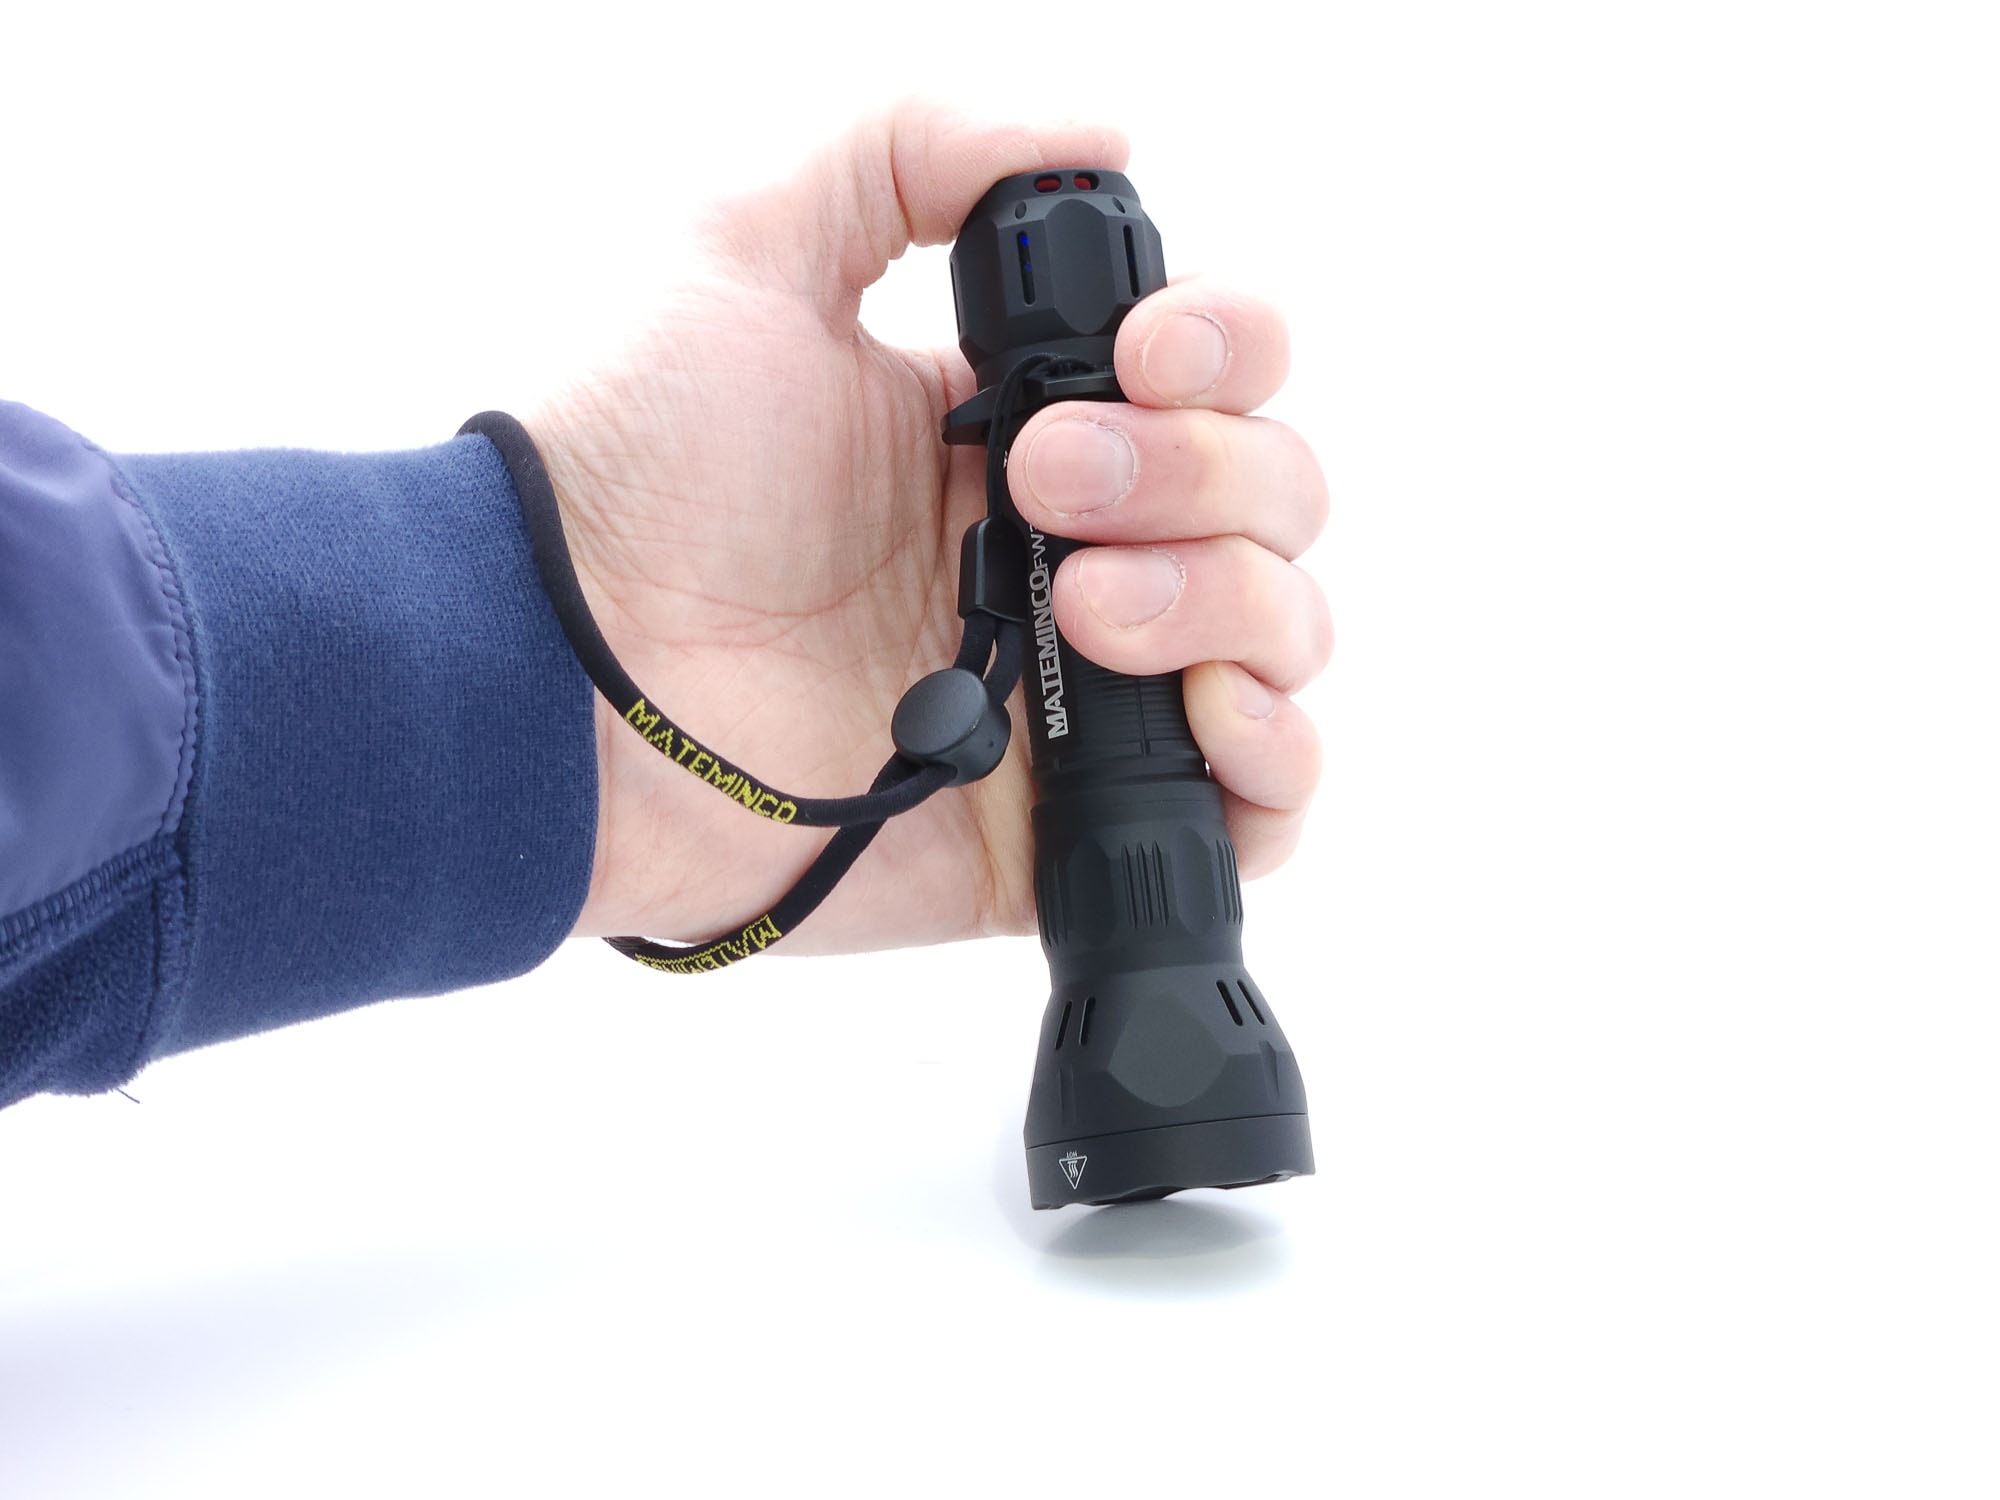
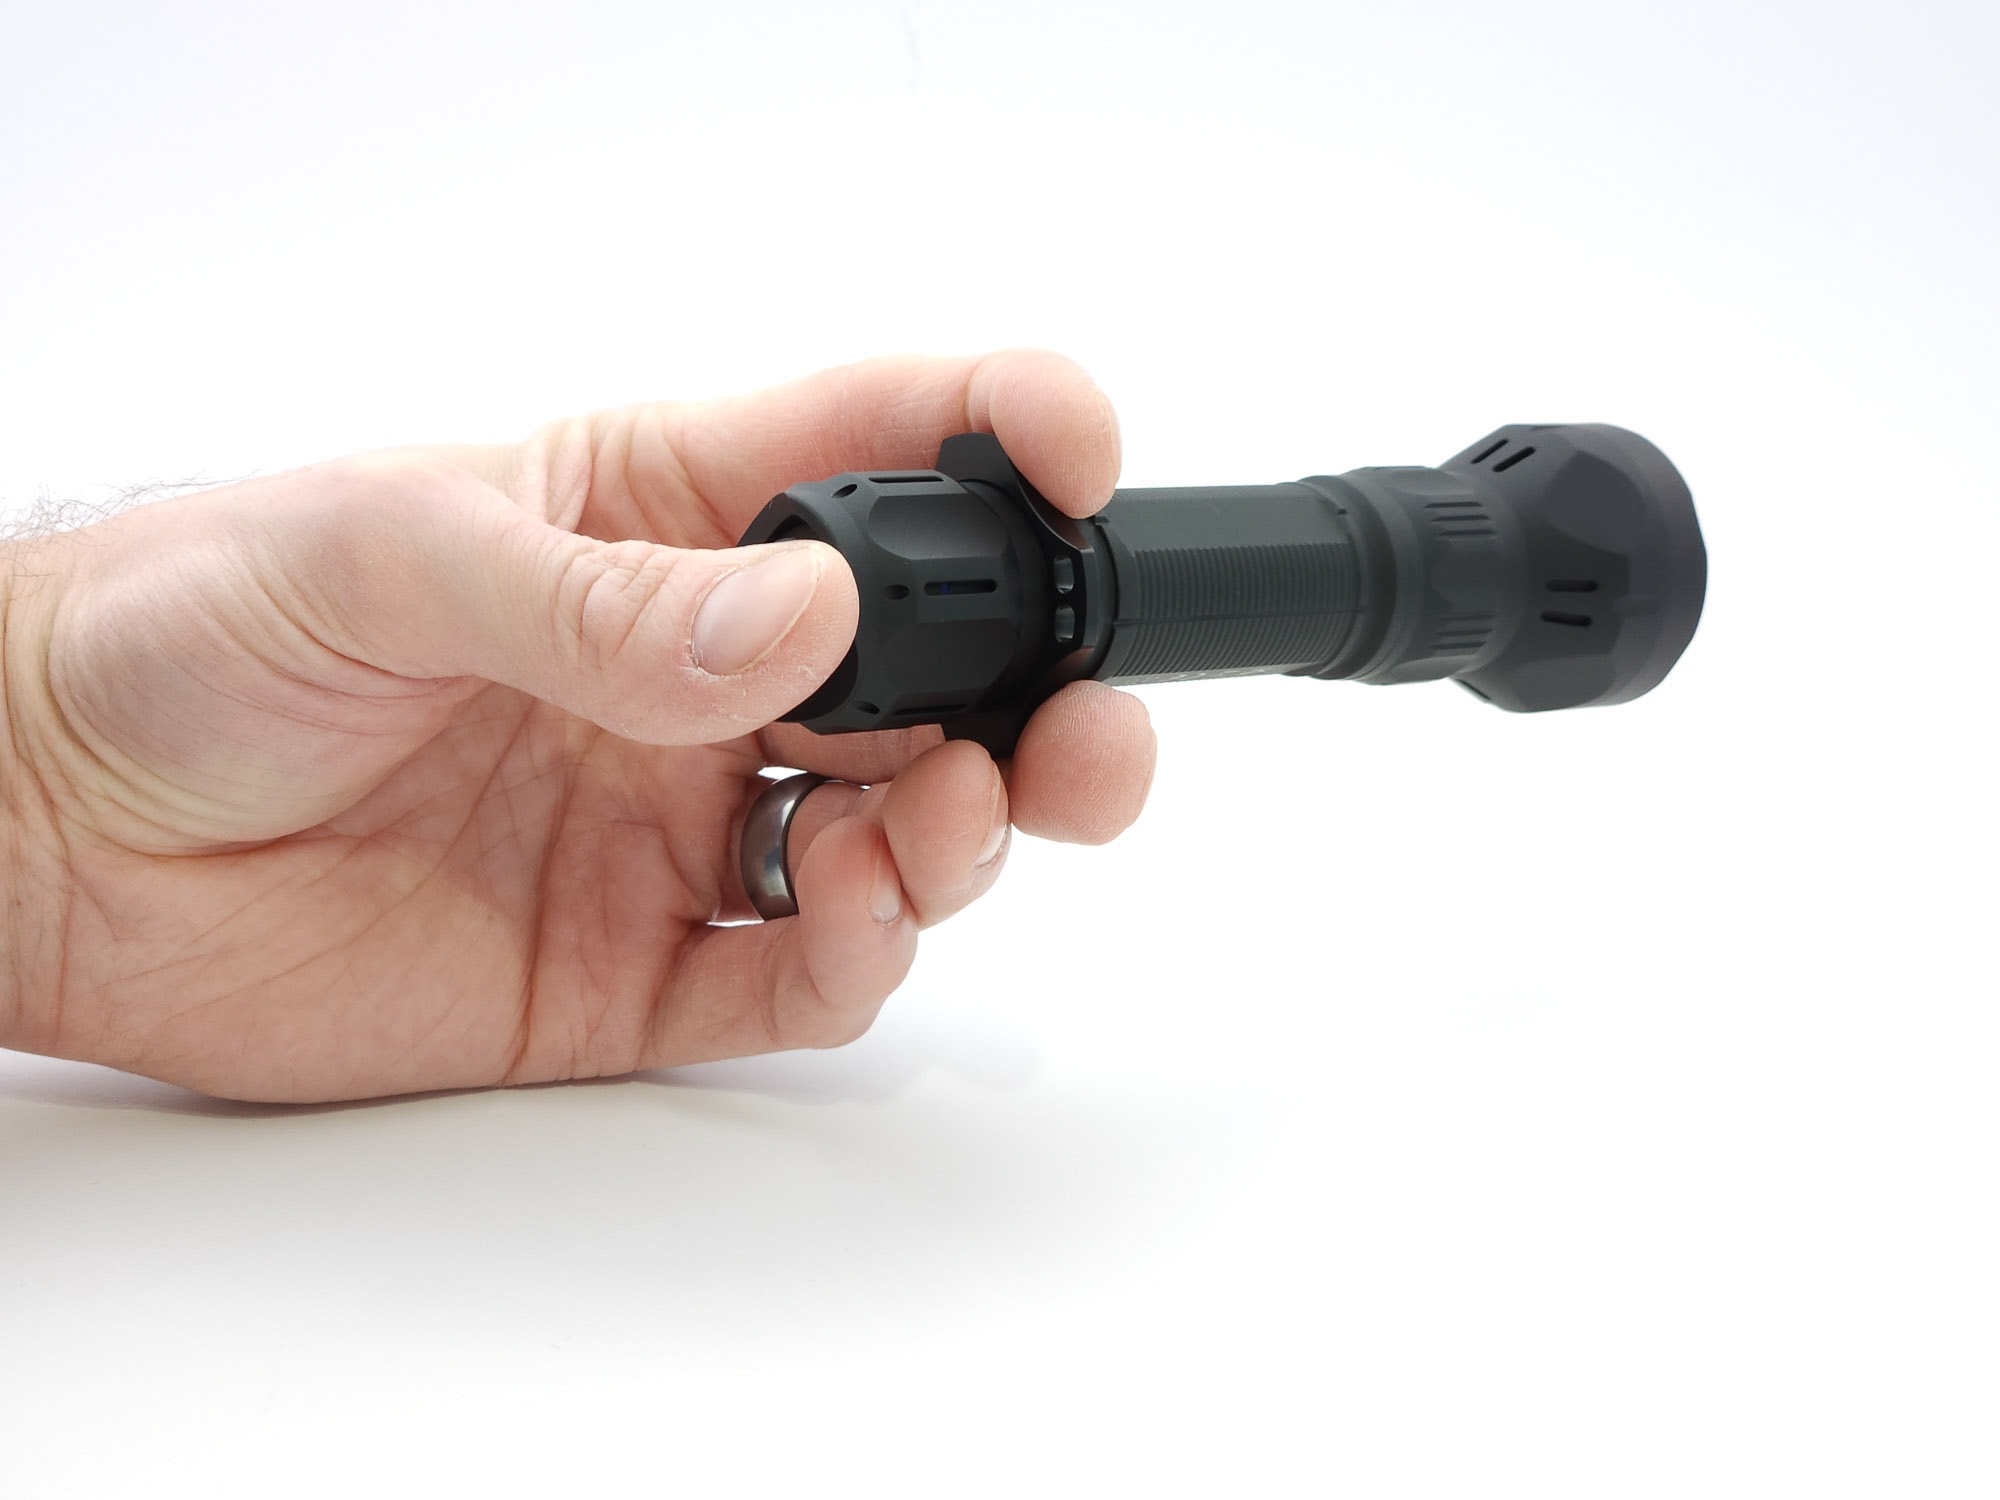
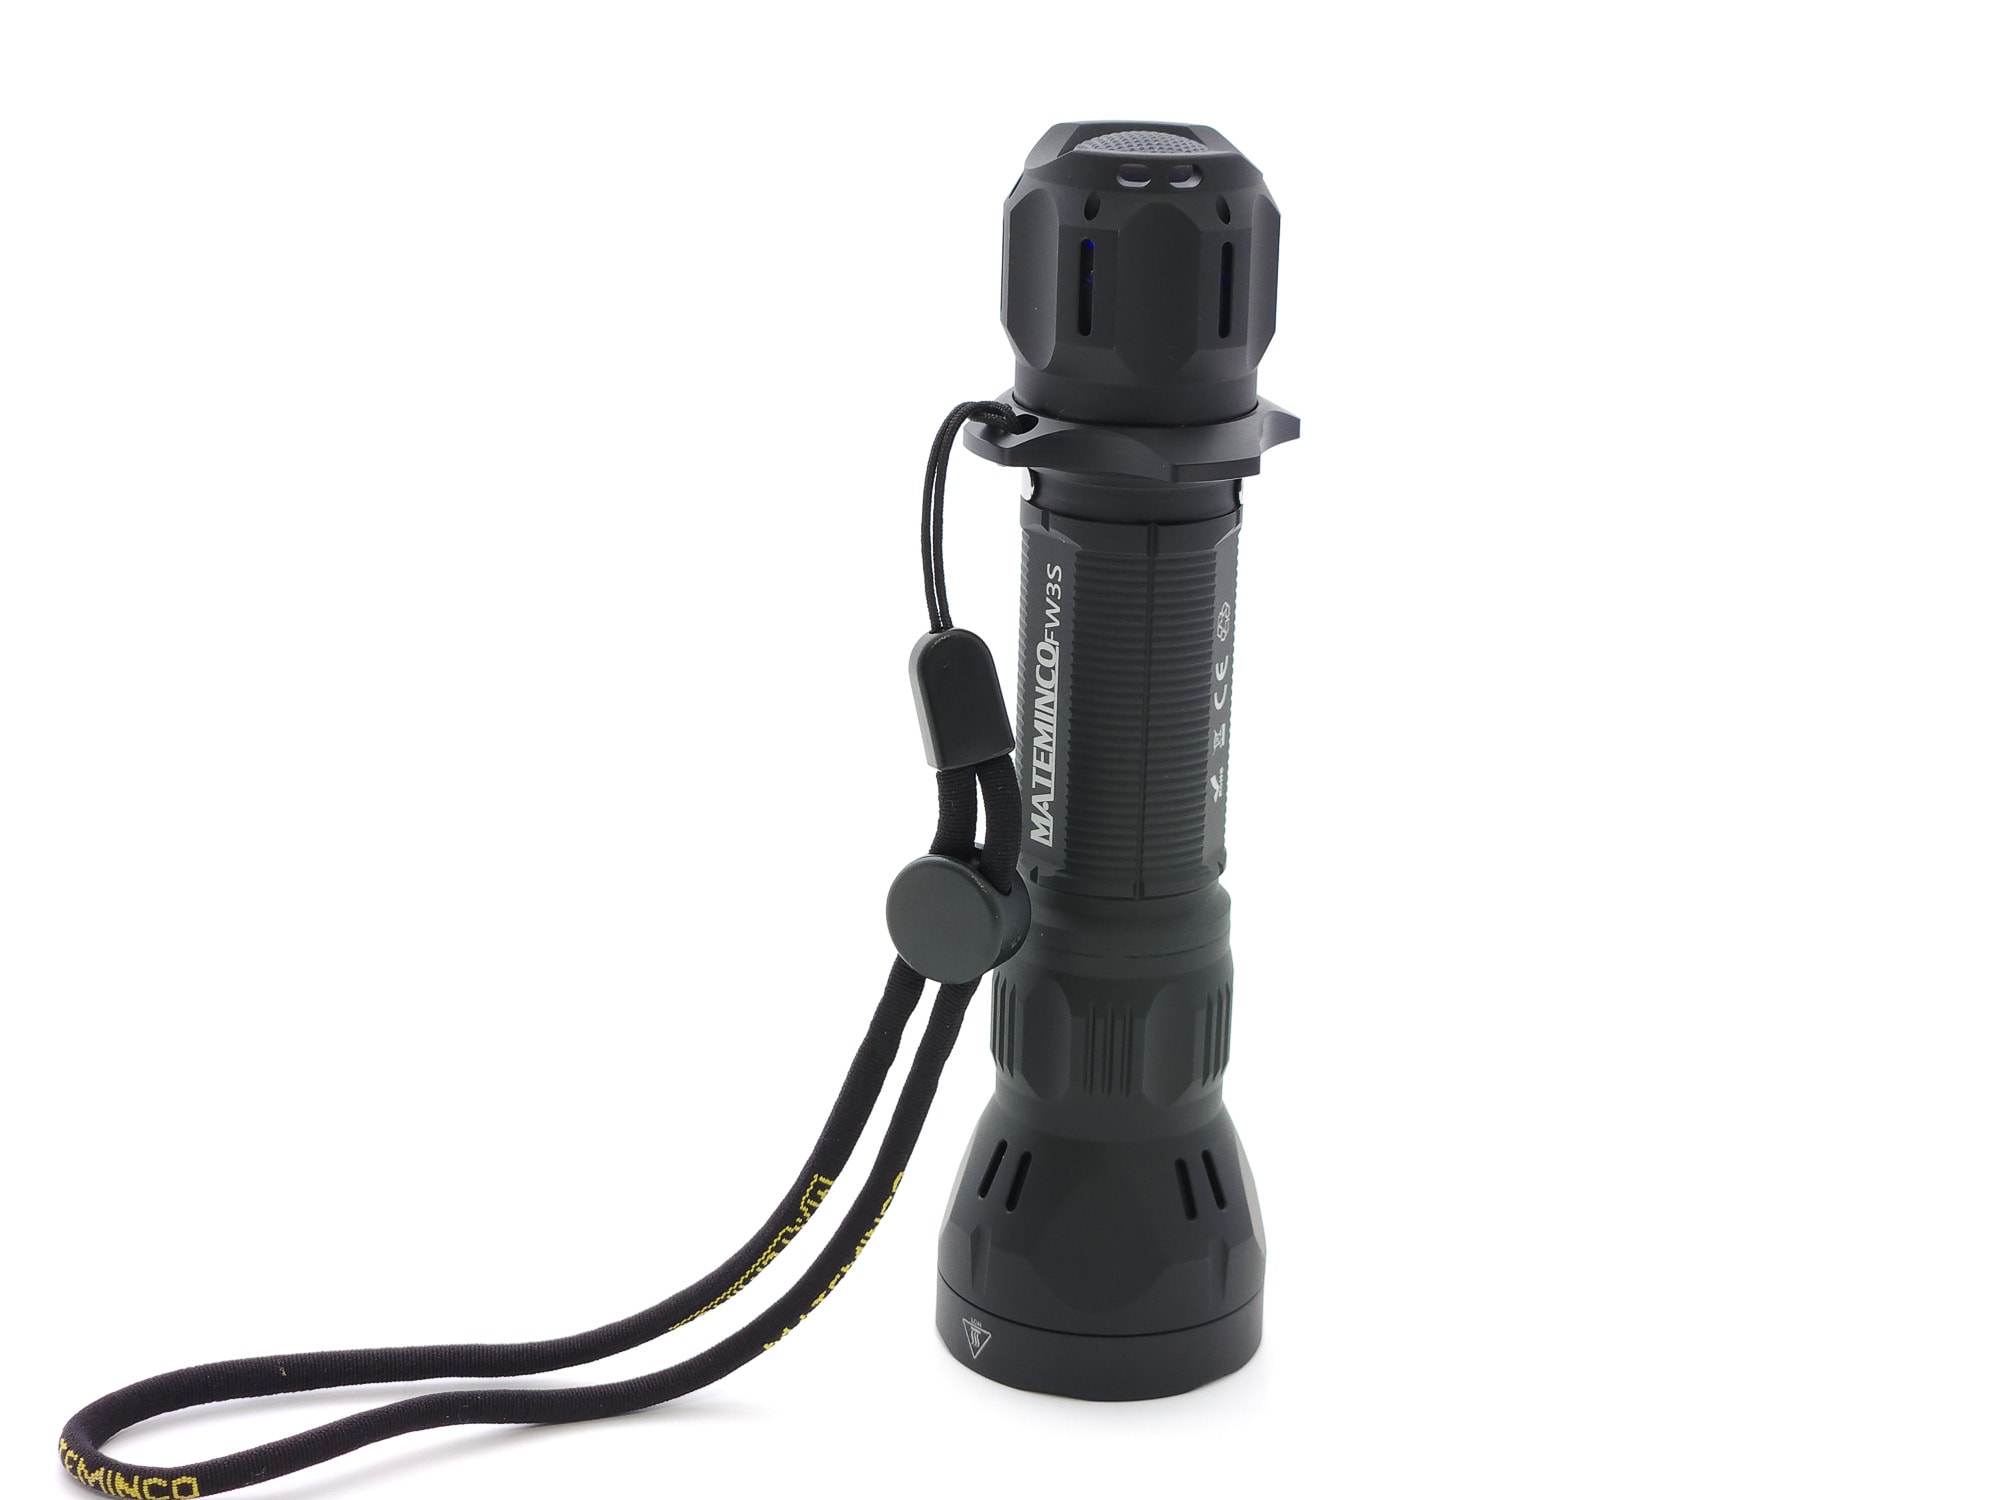
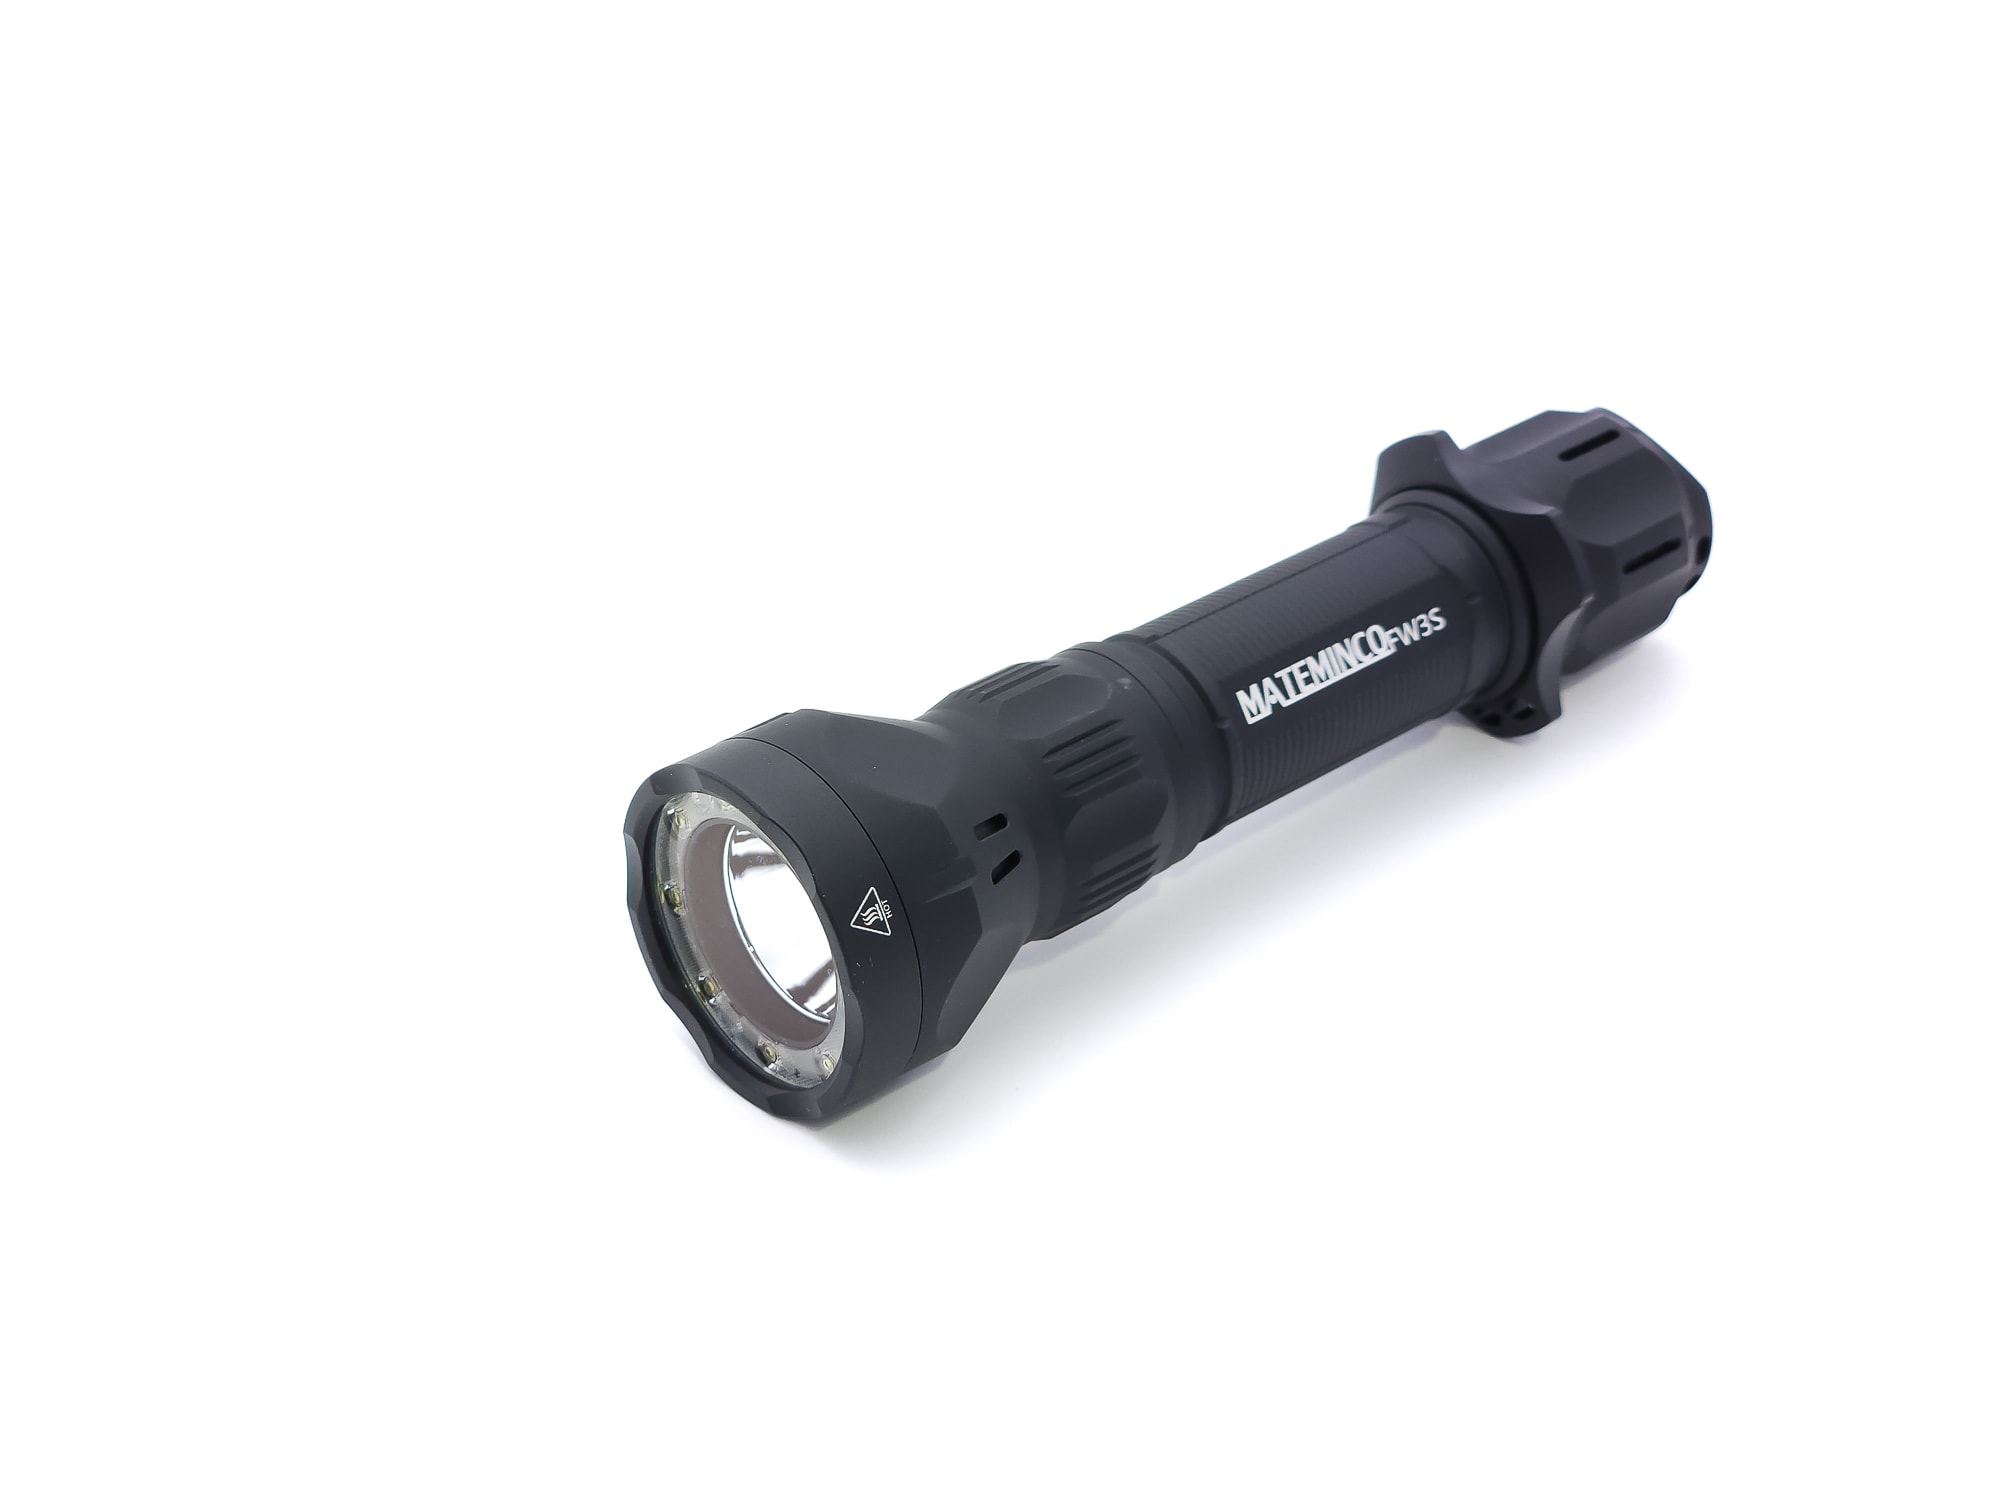
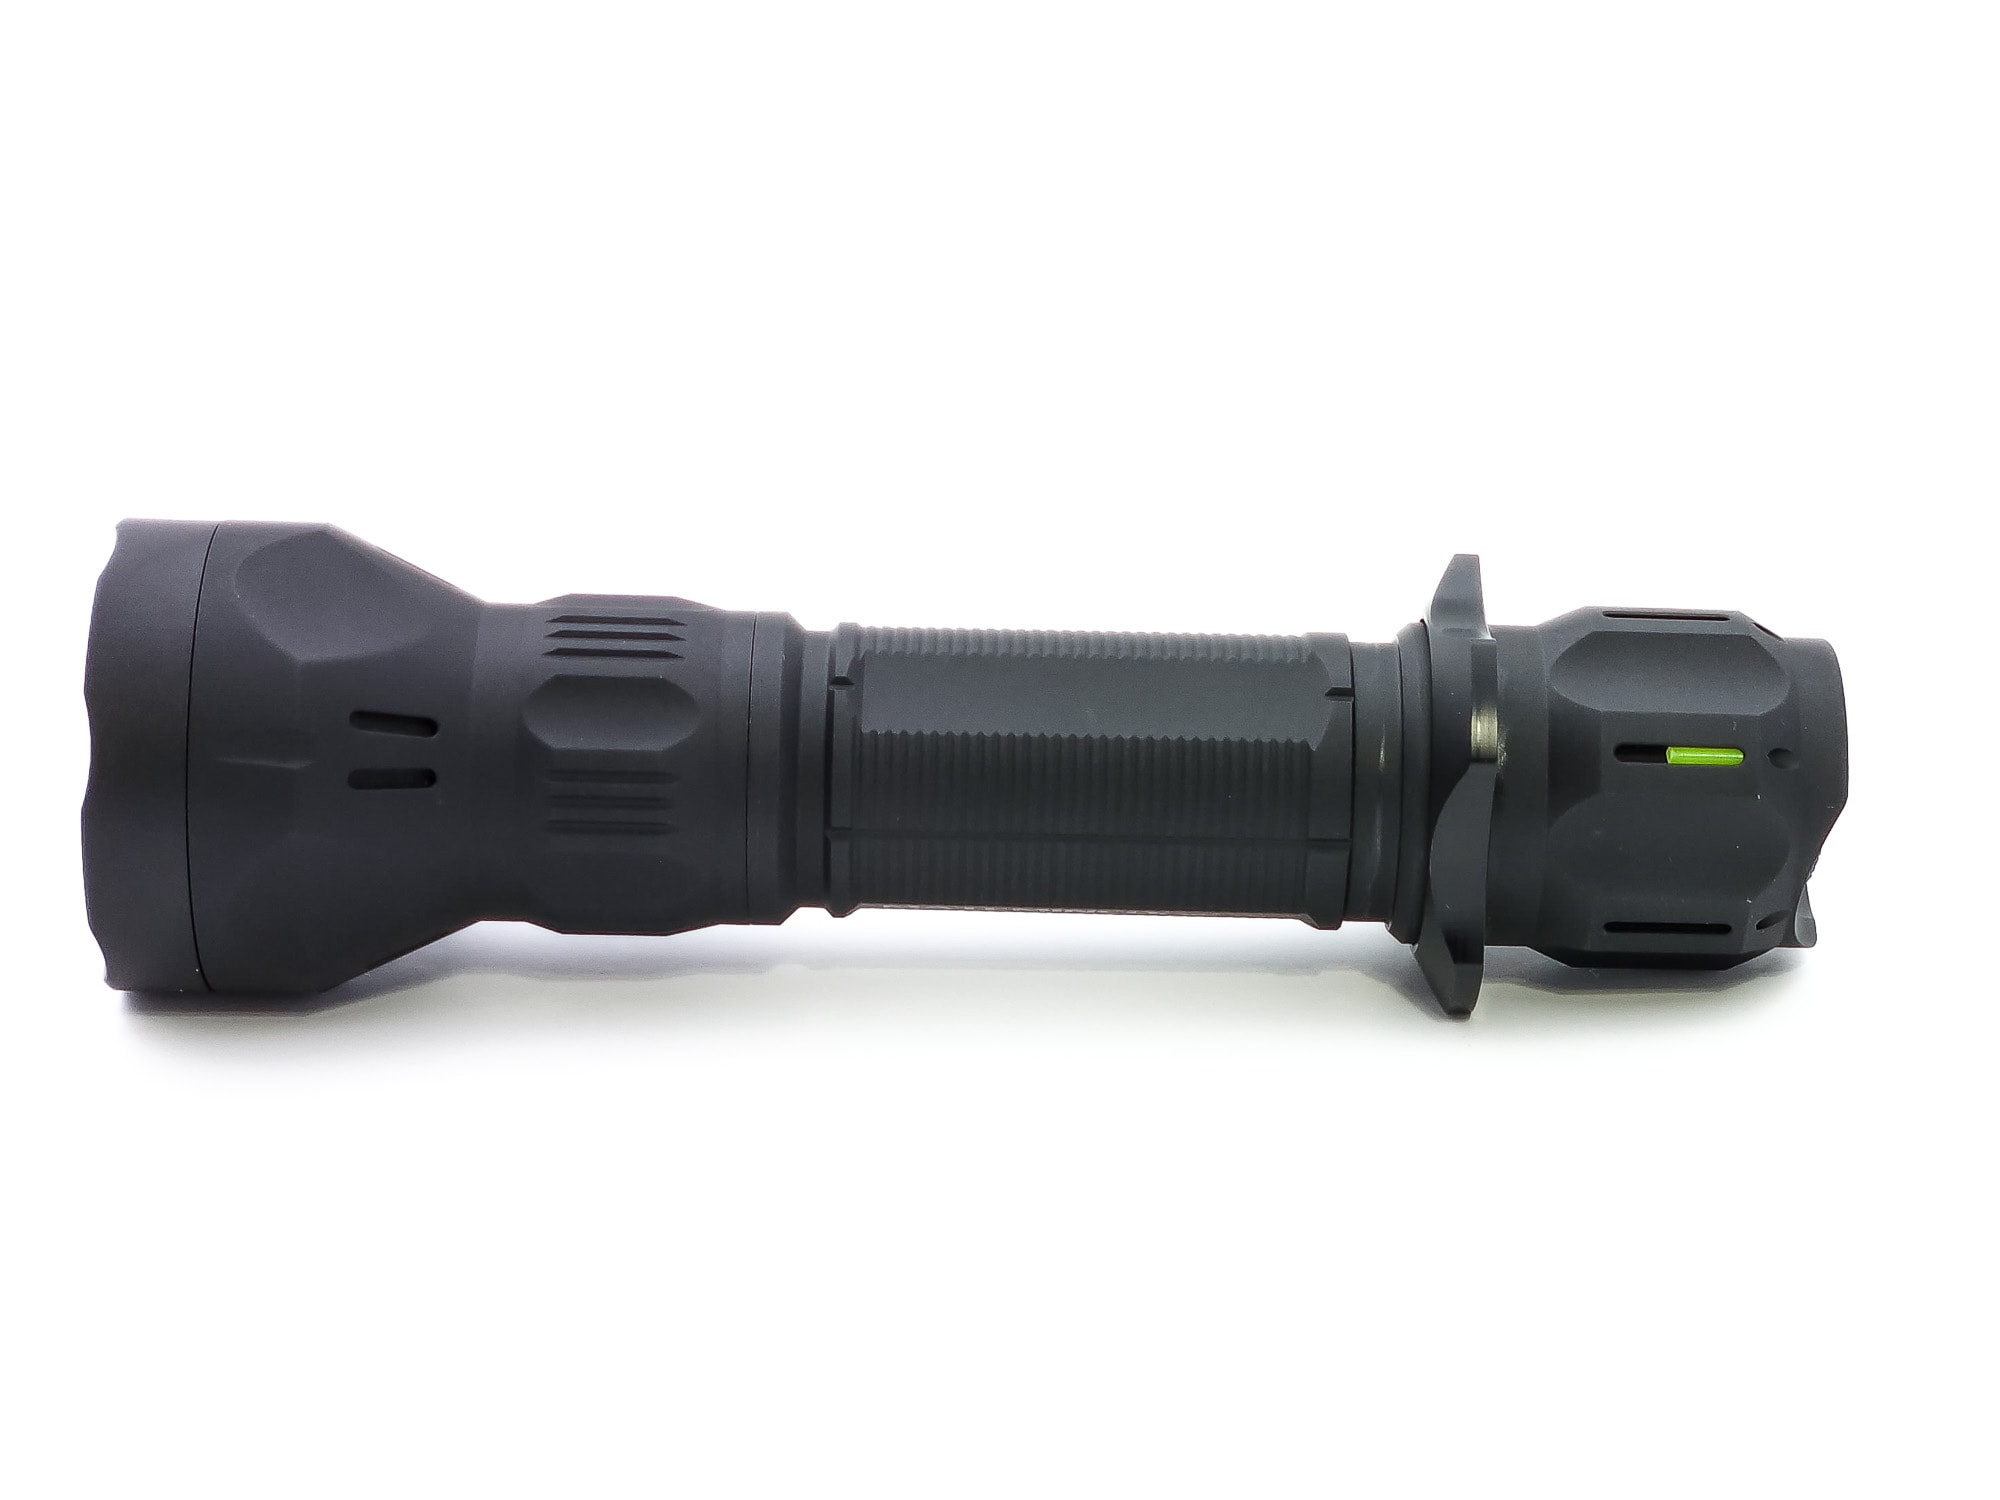
The Mateminco FW3S is a fairly big light, even for a 21700, coming in at 141mm; 13mm bigger than the Acebeam E70, even, and as such, it’s definitely not one for your pants pocket. A jacket pocket or a holster (not included) would suit it better. If I put my hand around it, the entire tail cap sticks out partially due to the size, but also because of the tactical ring around it. The tactical ring is also free spinning, made of plastic, removable, and makes the cigar grip easy and stable to use with your thumb on the forward clicky switch. The overhand grip keeps your thumb on the button and is a viable option, and the standard flashlight grip can be used, too, if that’s your preference, though as with all tail switch lights, you’ll have to change your grip or use two hands to change modes.
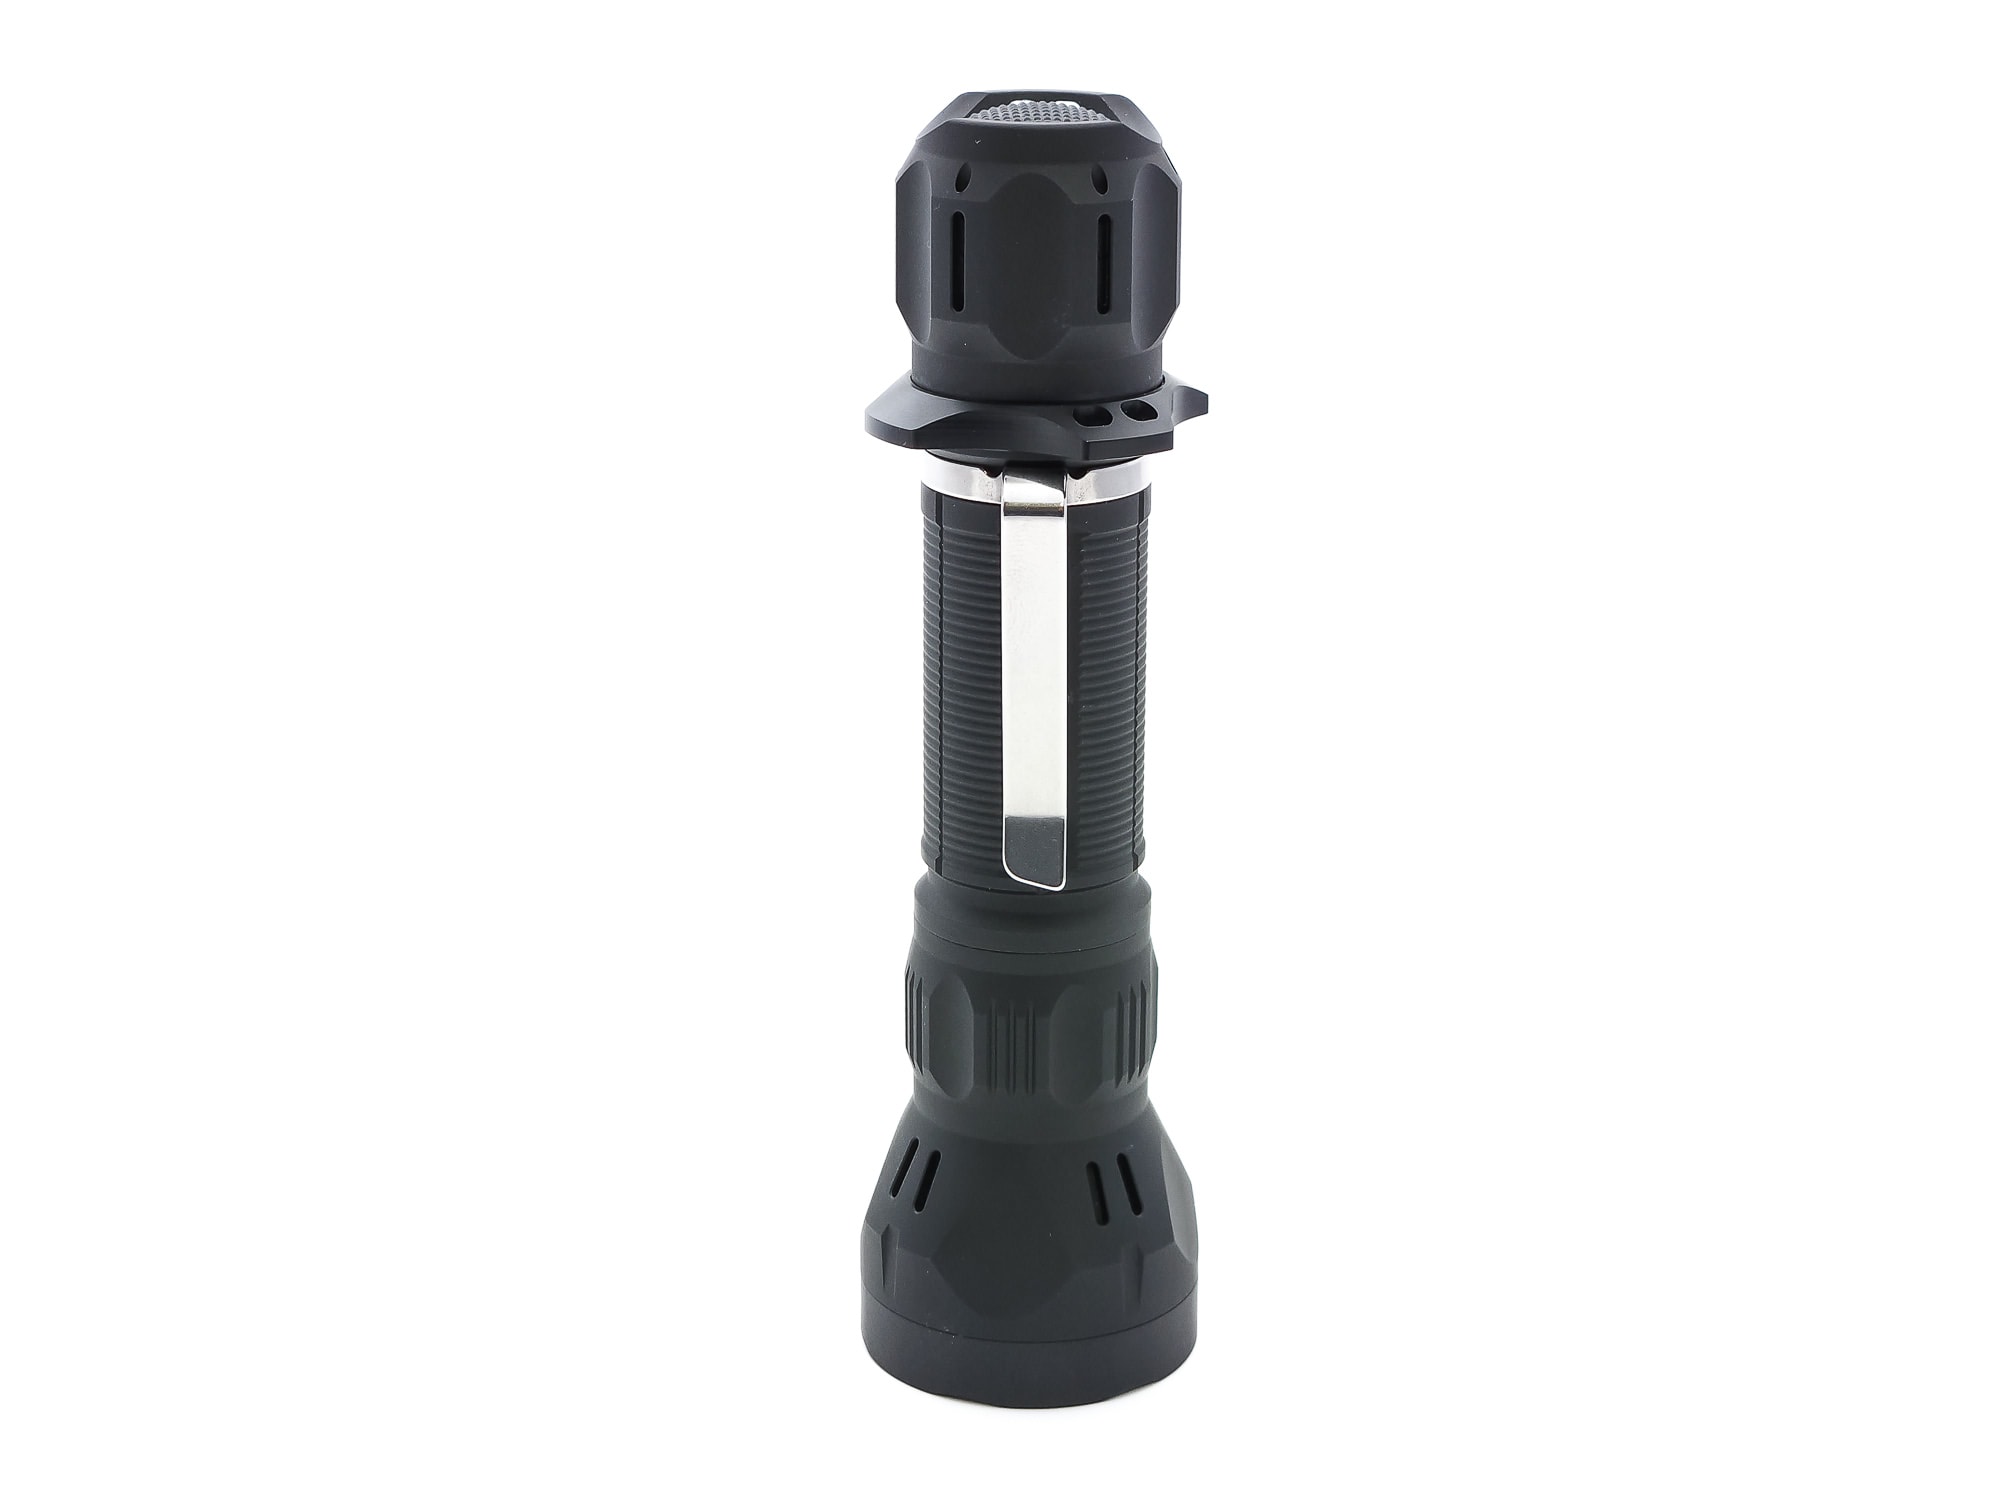
There are a lot of different patterns and textures on the body, head, and tail, and together they all help make the light easy to grip. If you’re using the standard grip, the larger head and tactical ring or tail will also help you keep a hold on it.
The tactical ring also plays a major role in keeping the light from rolling. If you remove it, the light can come to rest on one of the flat or recessed spots on the head or tail but because there are four on the head and six on the tail, they don’t line up and won’t necessarily stop the light if it’s already in motion. The tactical ring also features one of the two pairs of eyelets for the lanyard, the other being on the tail. Either one can be used with the included lanyard, though I felt like having on the tactical ring got in the way of my grip.
The other accessory it has is a clip, which can only go on the tail end of the body. It works well enough, though the entire tail cap, including the tactical ring, will be sticking out, and the size of the head makes it very bulky in your pocket. This is probably better used for clipping to the outside of a bag, though I feel like again, the size of the light might make it more likely to knock into things or get snagged.
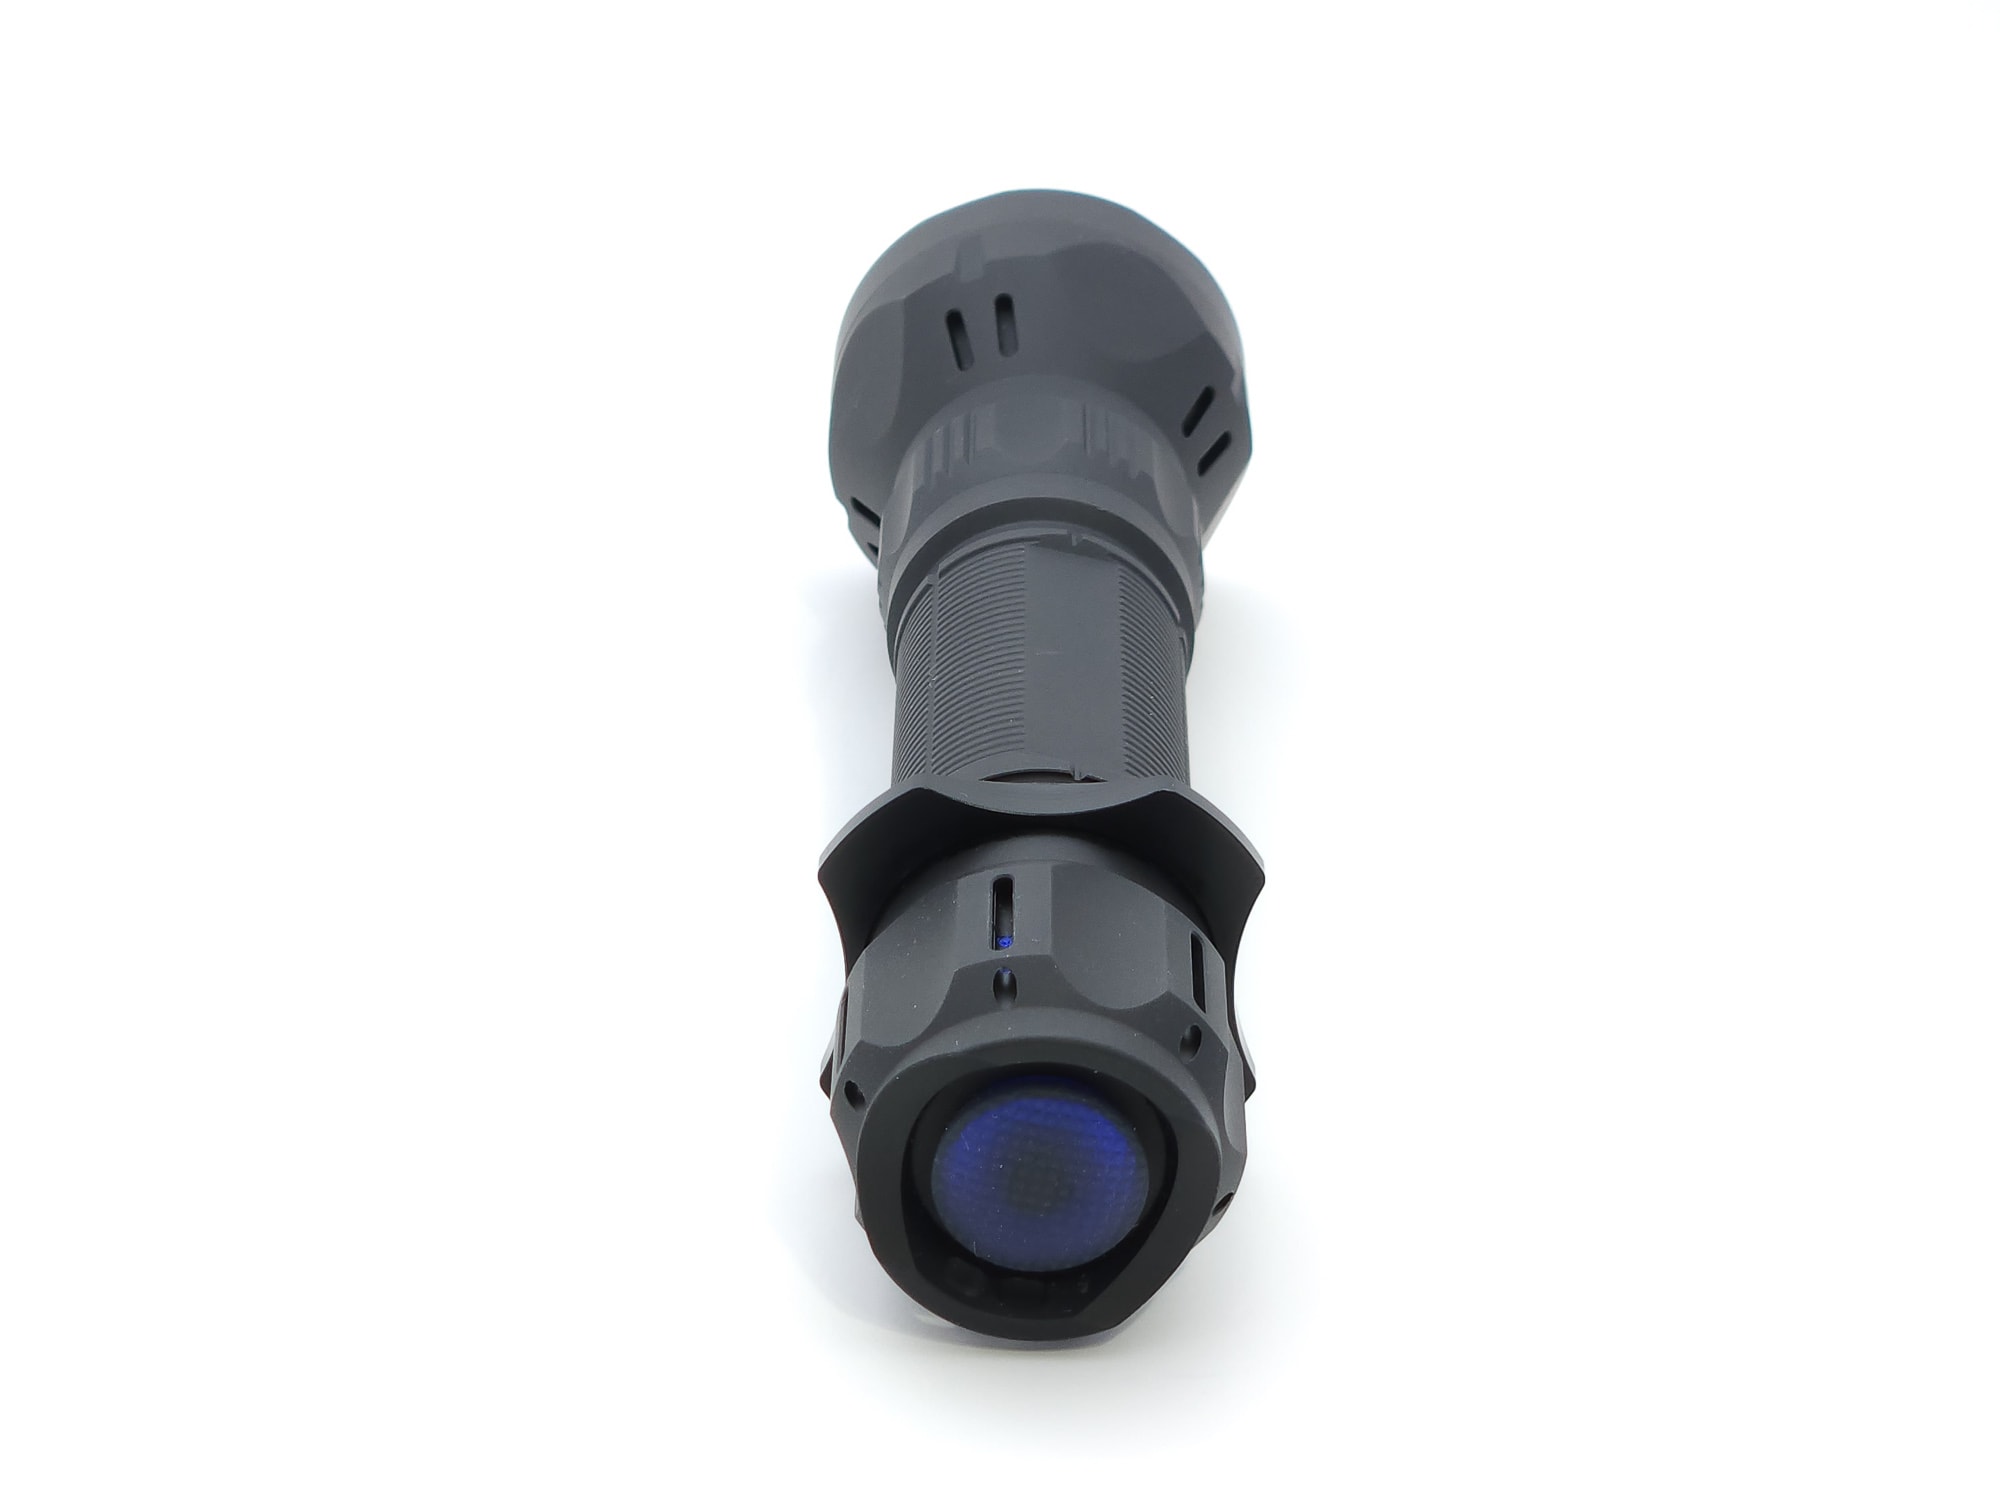
The forward clicky switch is recessed with a U-shaped cutout to allow easier access to the button. Normally, a light with this type of setup would be able to tail stand, and the Mateminco FW3S can, too, but the switch pushes the rubber boot just past the rear of the light, which makes it unstable.
The combination of flood and throw in one light is an interesting concept; on one hand, you would only have to carry one light instead of two (as if I’m not already carrying 5), but on the other hand, there are often sacrifices made when two things are combined into one. I had to find out, so I took this on a walk to test out its firepower the first night after it had arrived. My path took me to a wooded road via a suburban area, so I’d have the opportunity to test both flood and throw. While still in the subdivisions, I stuck primarily to using the flood modes and found the higher levels a bit too bright to shine at my feet, but with intermittent street lighting and vehicle headlights, not bright enough to illuminate as far as I expected. Once I got to the more remote area, I could see the difference. The flood modes were able to light up everything in front of me pretty well, but again, not very far out. The throw modes, however, really threw! And there was also plenty of usable spill, in a perfect circle around the hotspot.
The amount of light that came out was impressive, at least at first. I found myself having to go back into turbo repeatedly for two reasons: 1. Because cars were coming, and I’d turn the light off until they passed, and 2. Because the light stepped down quickly. Now, the Mateminco FW3S does not have mode memory, so when you press the button after it’s been off, it will always start in flood – low, then you half-press to advance modes through flood, then throw, then both.
I’m used to half-pressing on Convoys, on which you can zip through the modes, but on the Mateminco FW3S, the half-press time frame is longer, meaning that quickly half-pressing multiple times on this light registers as a double-click. Or triple-click, meaning that I ended up strobing myself about a dozen times on this section of the walk. I have since adjusted to the half-press timing, so I’m able to change modes or purposefully double-click to throw – high reliably. Keep that in mind when you first get it, so people nearby aren’t confused as to why you keep going into strobe mode on your walk.
Build Quality, and Warranty
The FW3S is put together pretty solidly. There are no defects in the black anodized aluminum, though it has a chalky feel to it and picks up marks easily. If my fingernail brushes up against the light, or I’m really twisting hard to unscrew the tail cap it will leave marks, but they’re easily wiped away. Most of the edges on the knurling and other designs are rounded, which makes the light smoother overall.
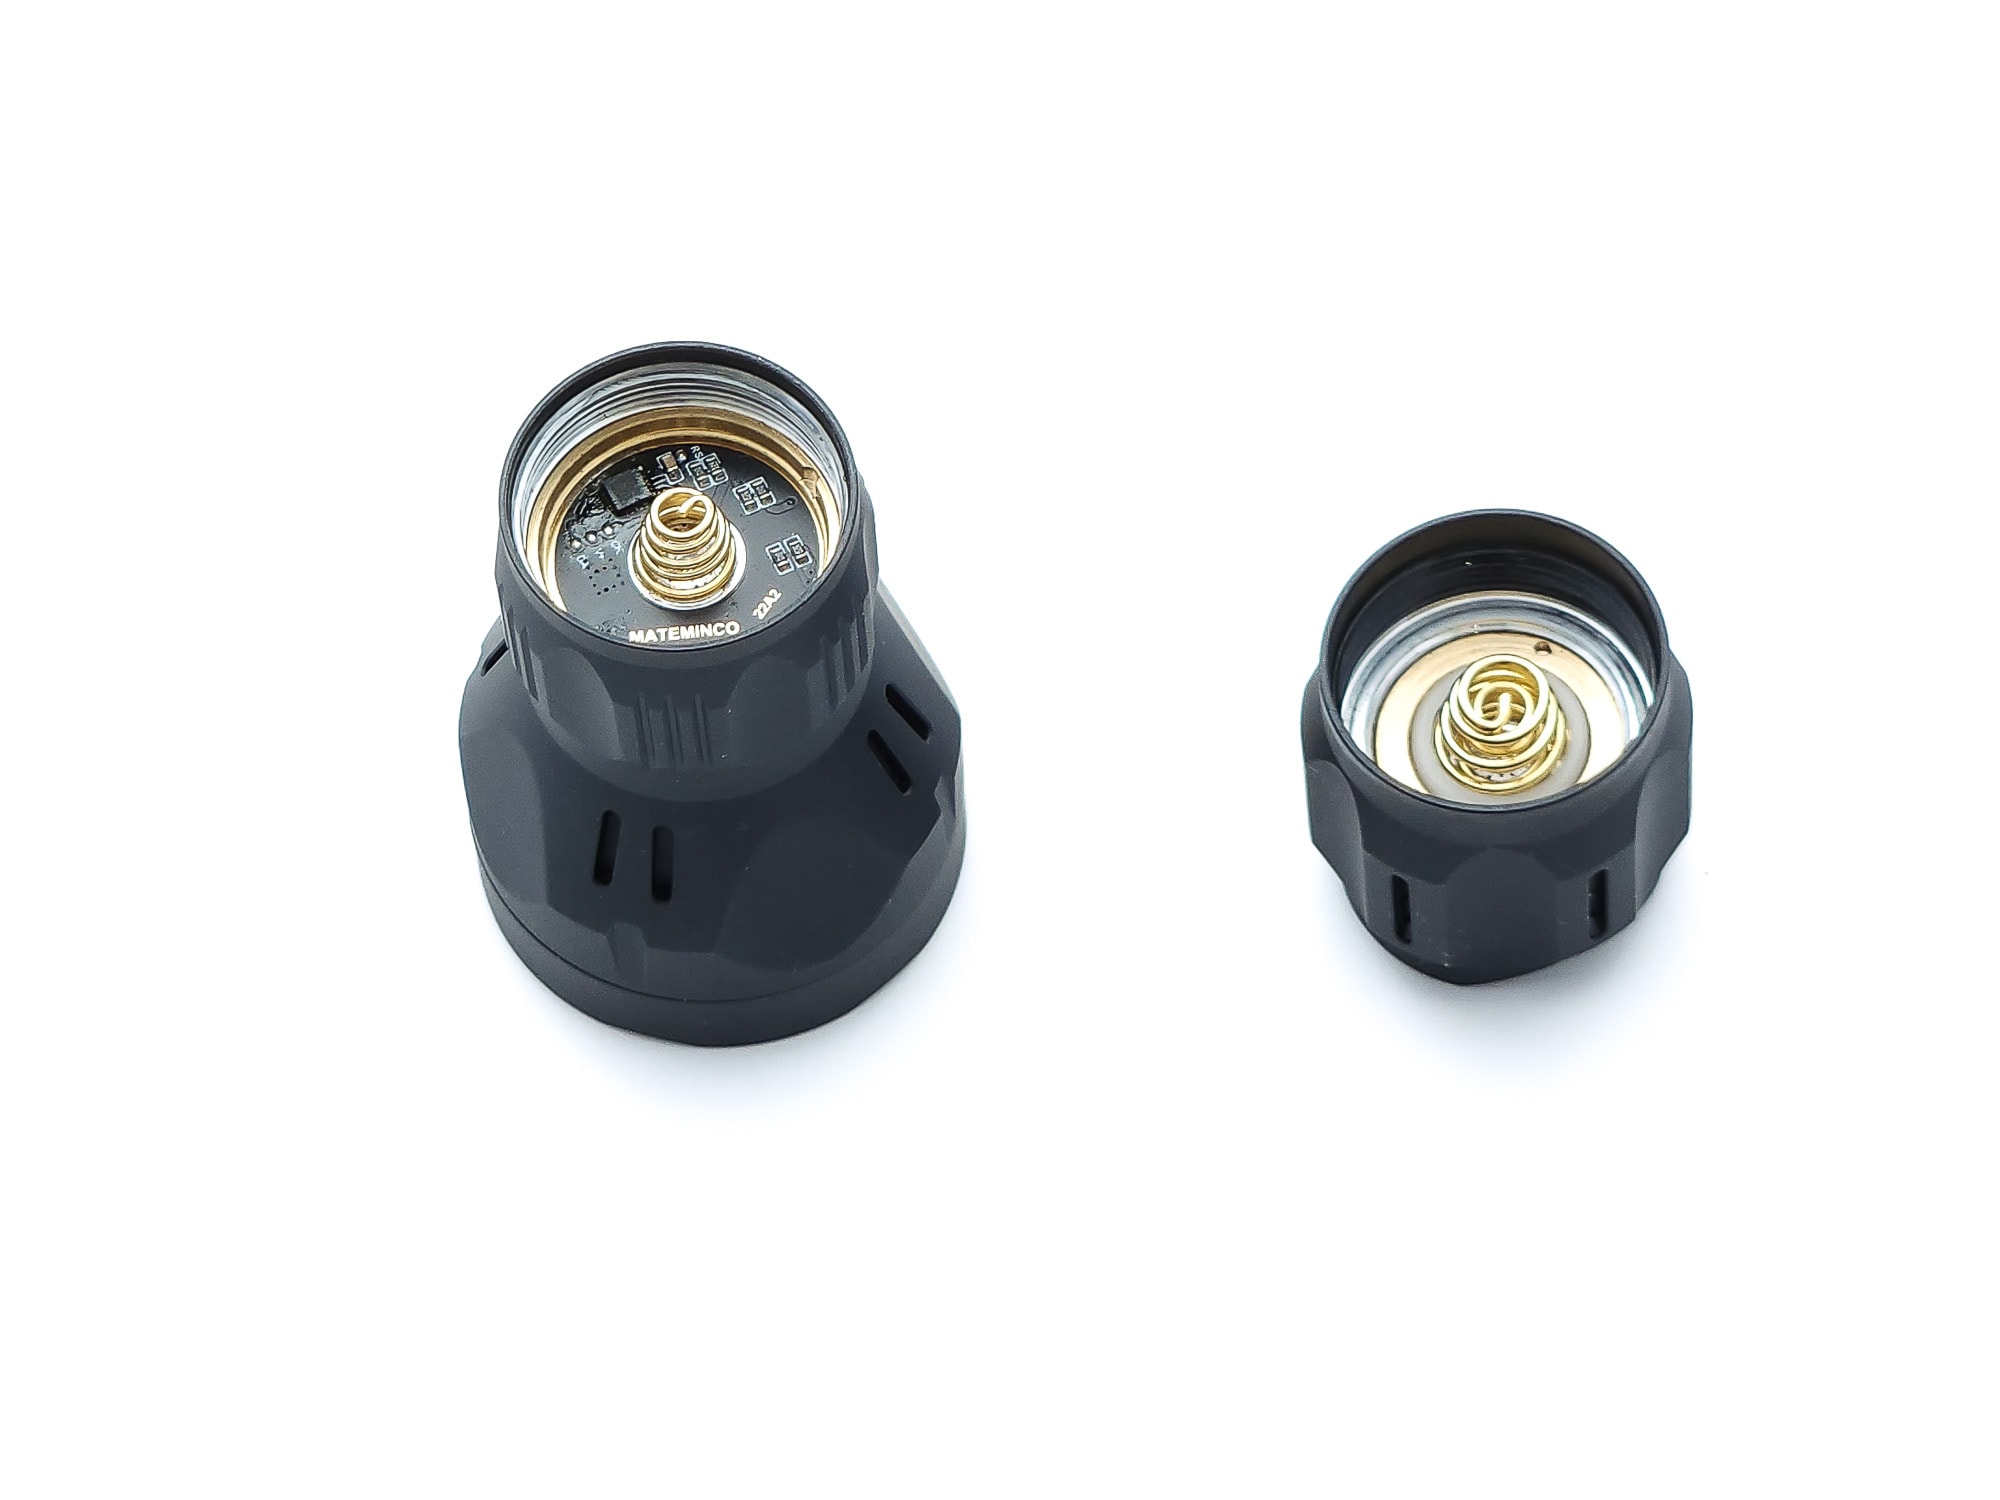
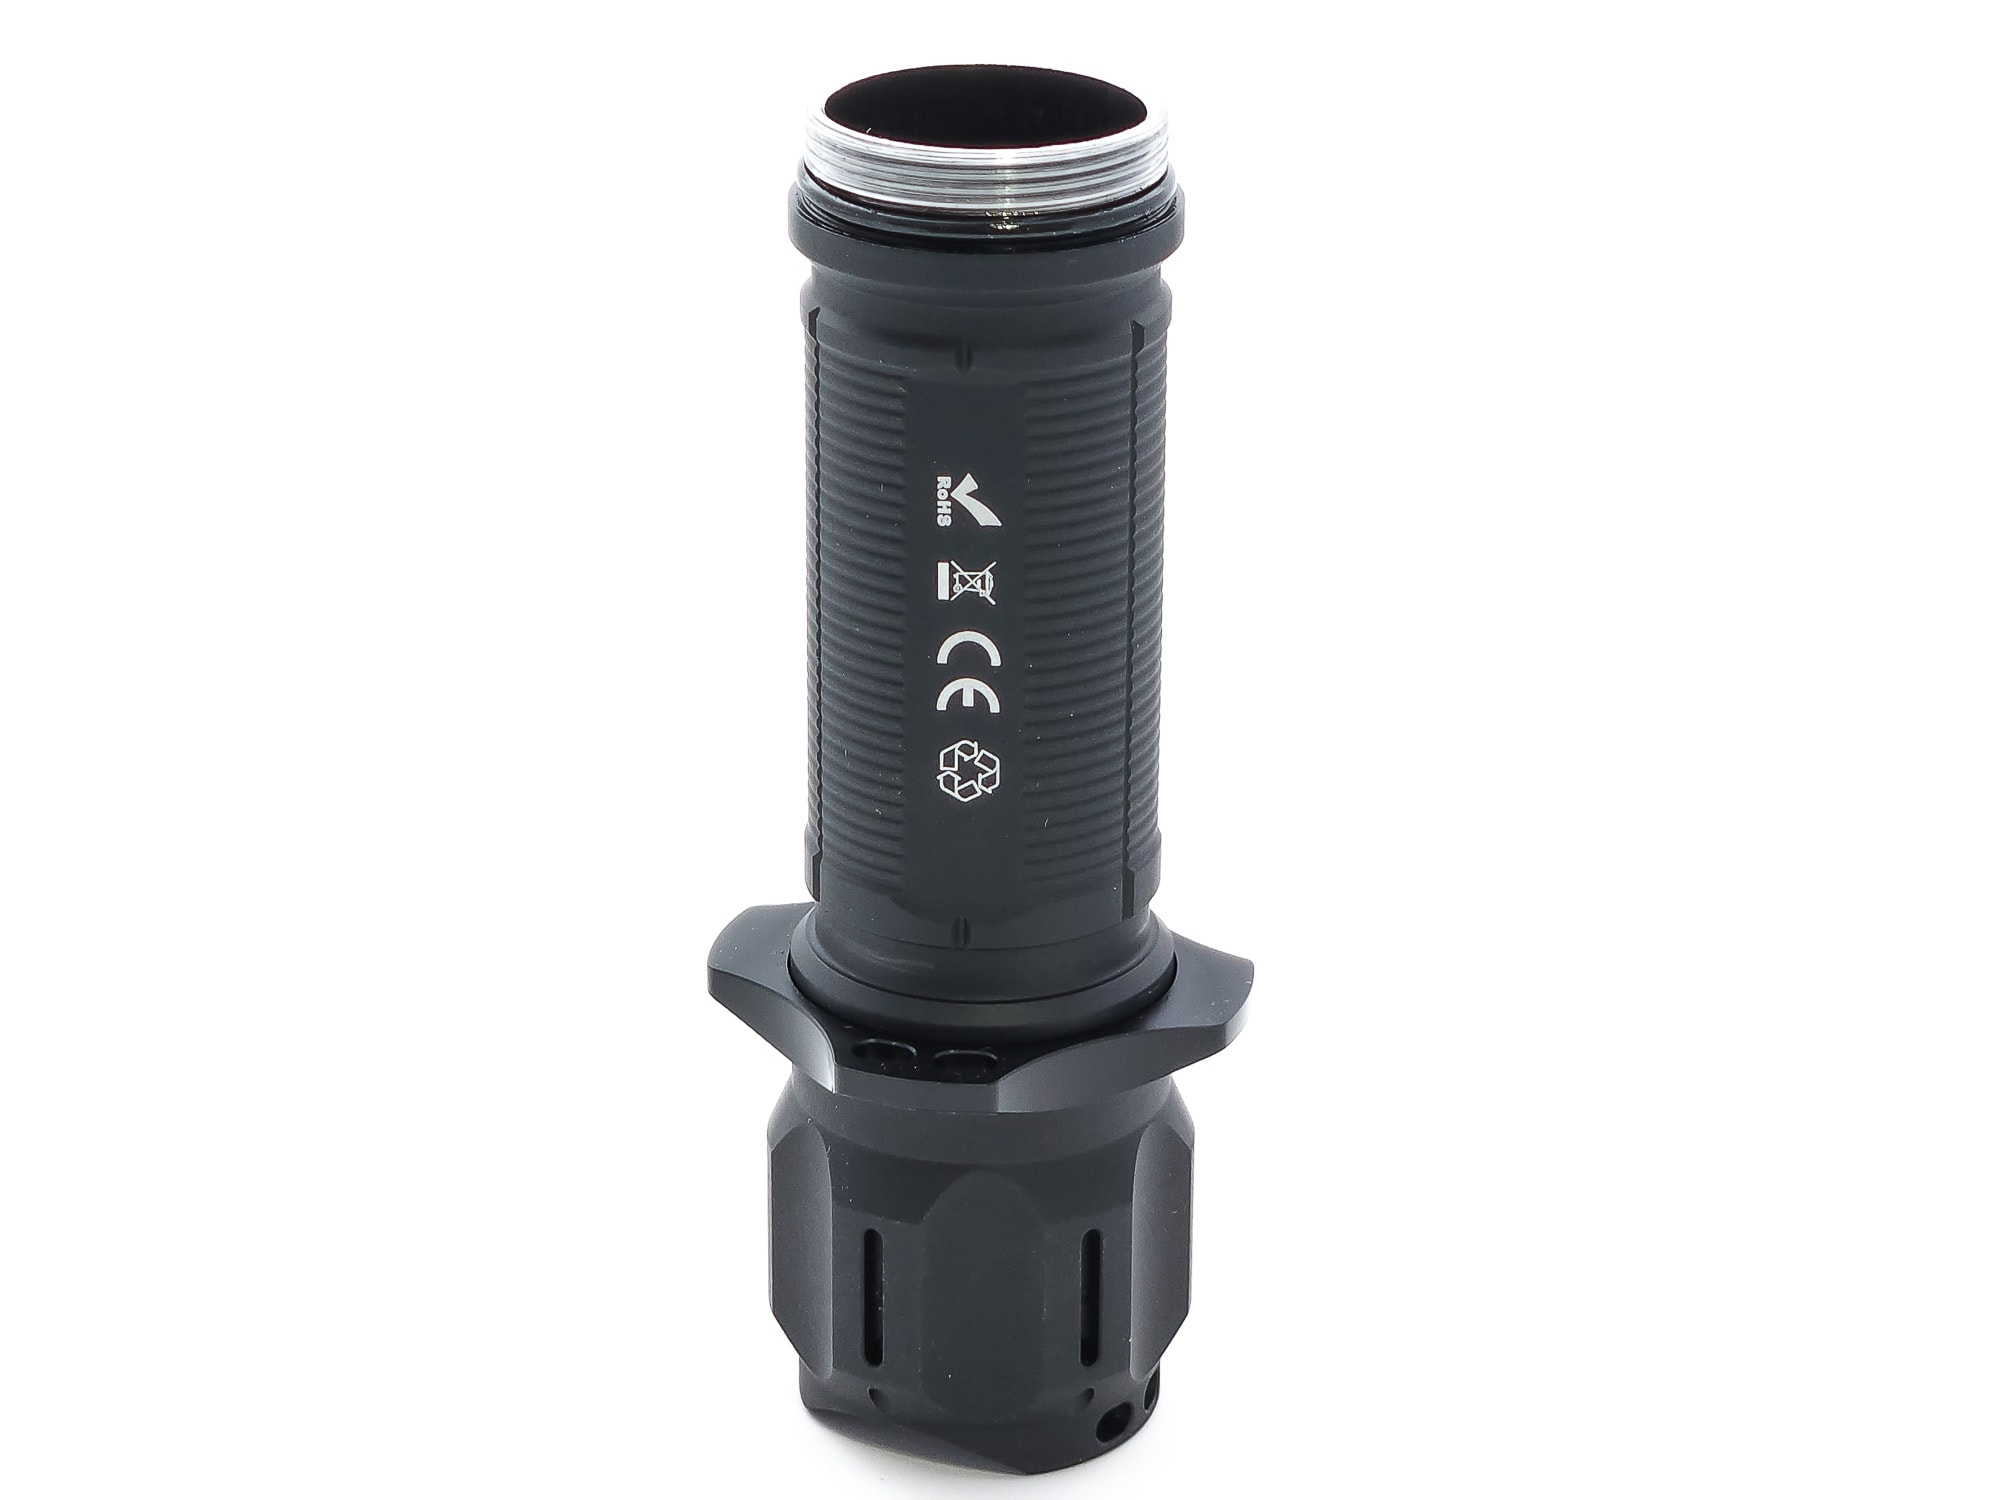
Both the head and tail are removable on the FW3S, but the tube is not reversible because the head threads, which are not anodized, are shorter than the tail threads, which are anodized, though both come well-lubed. The tail threads even have two o-rings, one of which is to keep the tactical ring from slipping off when you remove the tail cap. The body also has three flat spots among the knurling rings, one of which has the light’s branding, another has some regulatory symbols, and the third is blank.
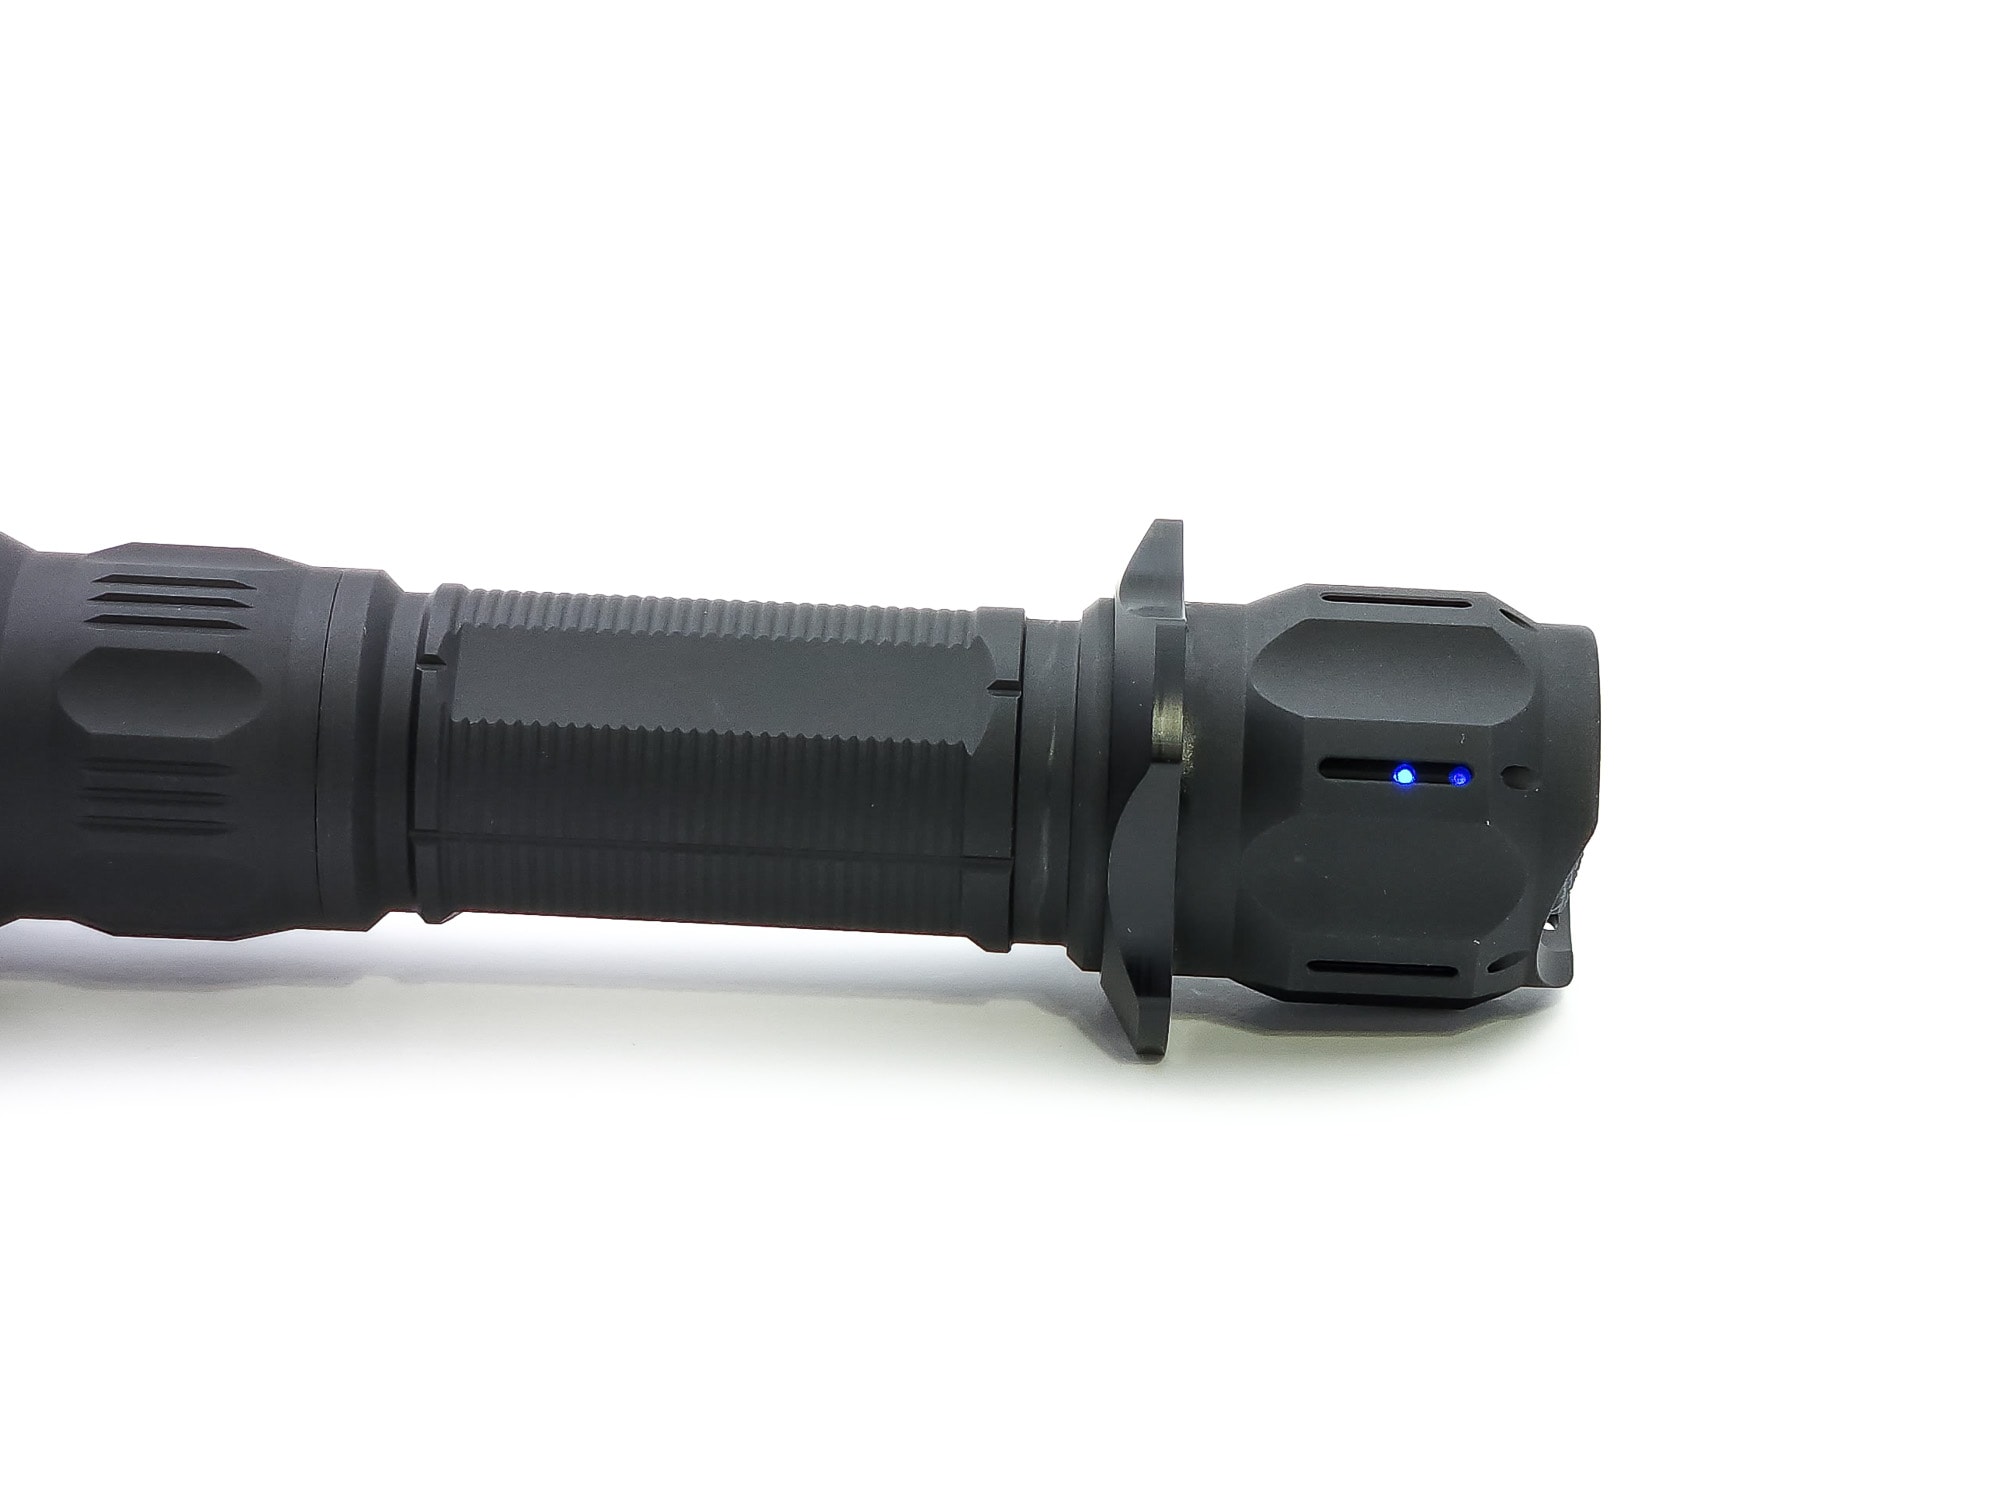
The tail cap is rather beefy, with large cutouts between raised sections providing grip for when you’re tightening and loosening the cap, which will be frequently. It’s a good thing that you can mechanically lock out the light as there’s no electronic lockout, but also because the tail has a blue light in it, which is otherwise always on. I say the tail and not the switch, because while the blue light does pass through the translucent rubber boot on the tail switch, there are also six slots for 1.5x13mm (which is not a standard size; I assume 2x12mm should work) tritium or glow tubes on the tail, each of which have two small holes in them to allow that blue light through and illuminate the glow tubes. I inserted a 1.5x6mm glow tube in to see what it would look like, and included a picture. When considering this, also note that the blue light must be off center, as it shines brighter through some of the holes than others. On the inside of the tail cap, you’ll find a retaining ring keeping everything together, including the double spring (a lighter-gauge spring under a heavier-gauge spring) for increased current.
On the other side of the light, the head has four pairs of two tritium slots, and if you like to decorate, this light could get very expensive very fast. There are also some similar parallel cuts in the smaller section of the head which kind of mimic the design of the tail and provide some extra grip when twisting the head. Since you can remove this, you can easily access the driver, which is also held in place by a retaining ring. The spring on the head side appears to be wound from wire whose gauge is in between those of the rear springs.
I was not able to find any warranty information on Mateminco’s AliExpress store, which is their primary outlet, or on resellers, so I messaged them on AliExpress, but never heard back. You can message them there, or use the contact information on the box and instruction manual if you have an issue, or the reseller you buy it from. Usually they honor manufacturers’ warranties.

LED, Lens, Bezel, Beam, and Reflector
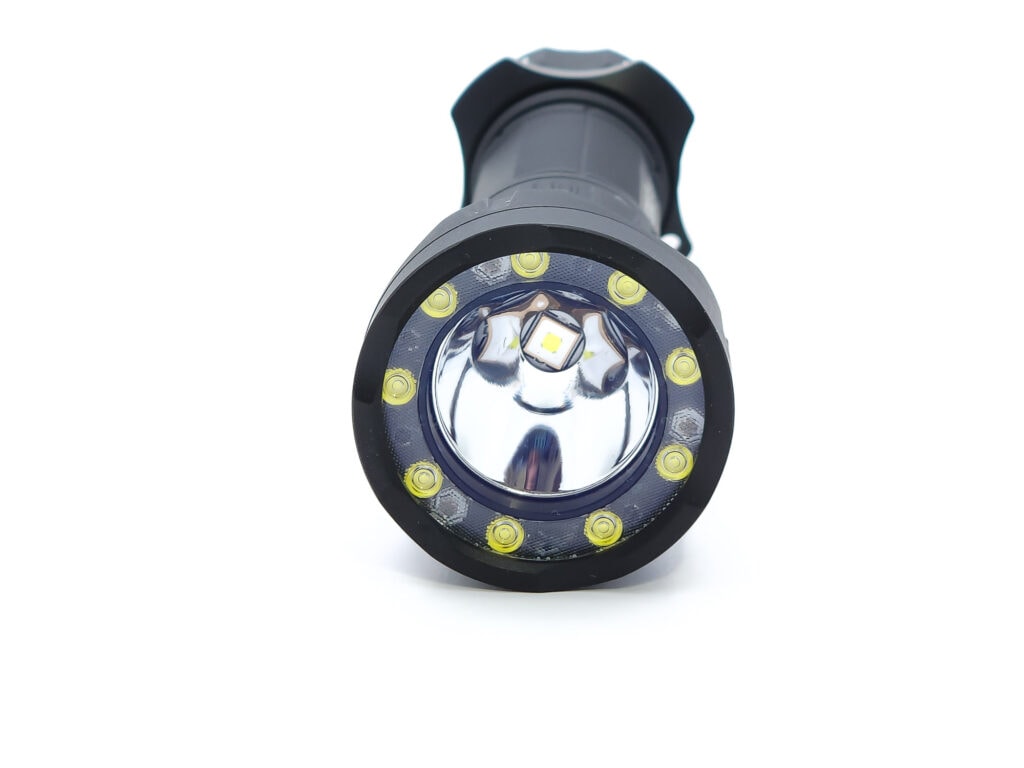
Mateminco executes the combination of flood and throw using a ring of Cree XP-G emitters surrounding a single Luminus SFT40 with a deep, smooth reflector.
The XP-Gs specifically can be had in 6500K or 5000K white light, or red, green, blue, or amber colored light. Mateminco uses 9 of them in a ring around the center emitter with a TIR lens covering all of them, though the lens doesn’t do much focusing of the light and the end result is an effect similar to a mule; no hotspot, just a flood of even light covering a wide swath. Due to the lack of focus, I do feel like the flood emitters get washed out easily. In total darkness, however, they light up a good area.
For throw, Mateminco put a 6500K Luminus SFT-40 at the center of a large, smooth reflector. This really focuses the light for maximum throw, and even on low, the SFT-40 out distances the flood ring on turbo. In these modes, you get a very bright hotspot andusable bright, circular spill
These are housed behind a bezel with low, flat crenulations. The bezel can be unscrewed, exposing the plastic TIR around the flood ring and the throw reflector, but I didn’t attempt to disassemble it further than that. All of this is covered by a glass lens with purple anti-reflective coating.
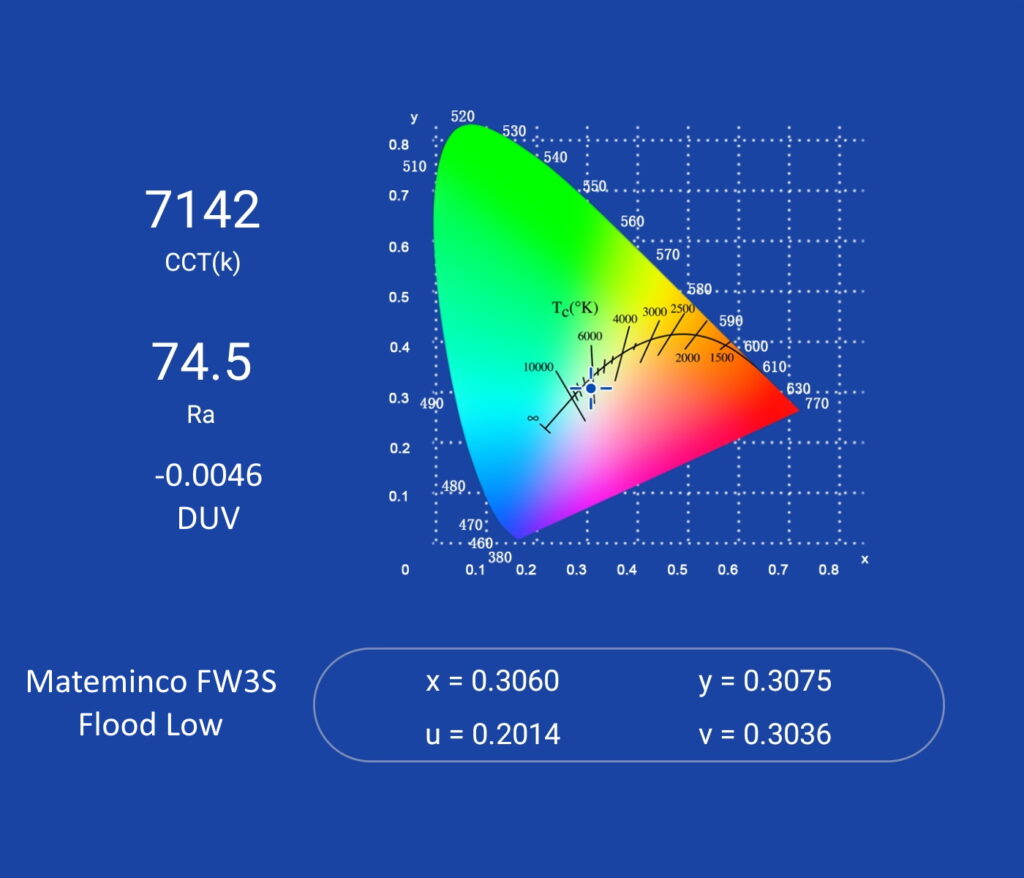
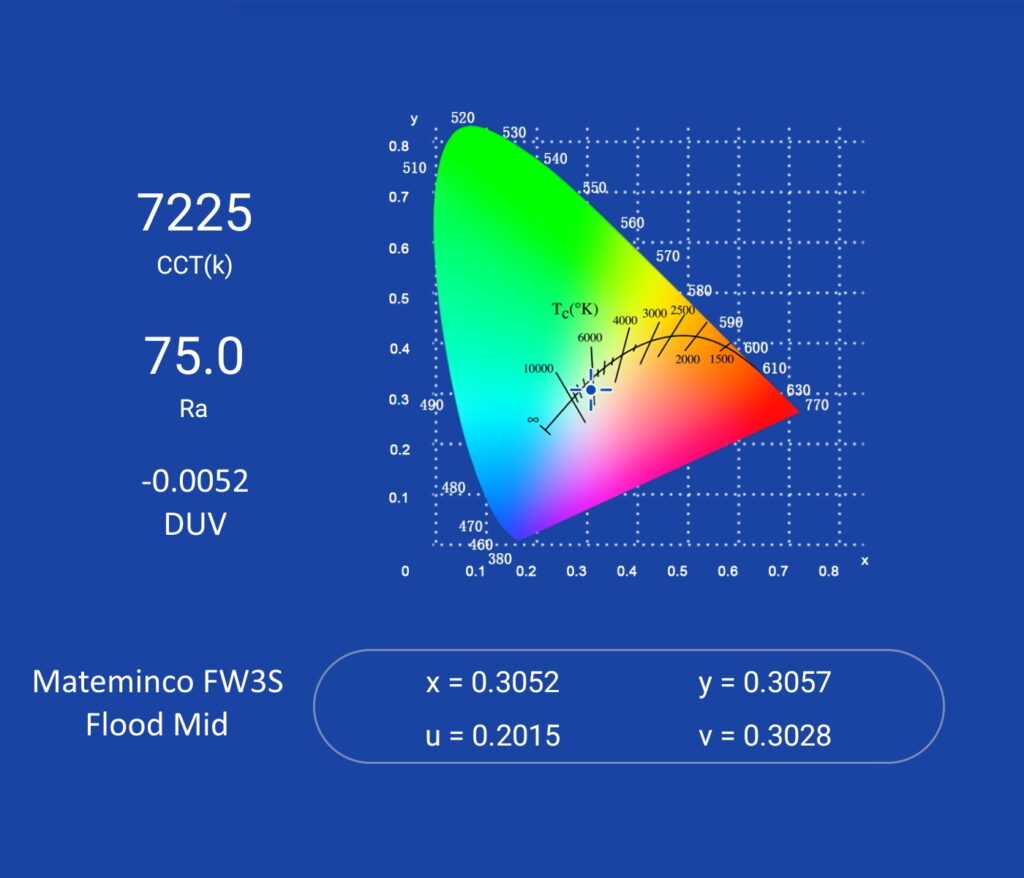
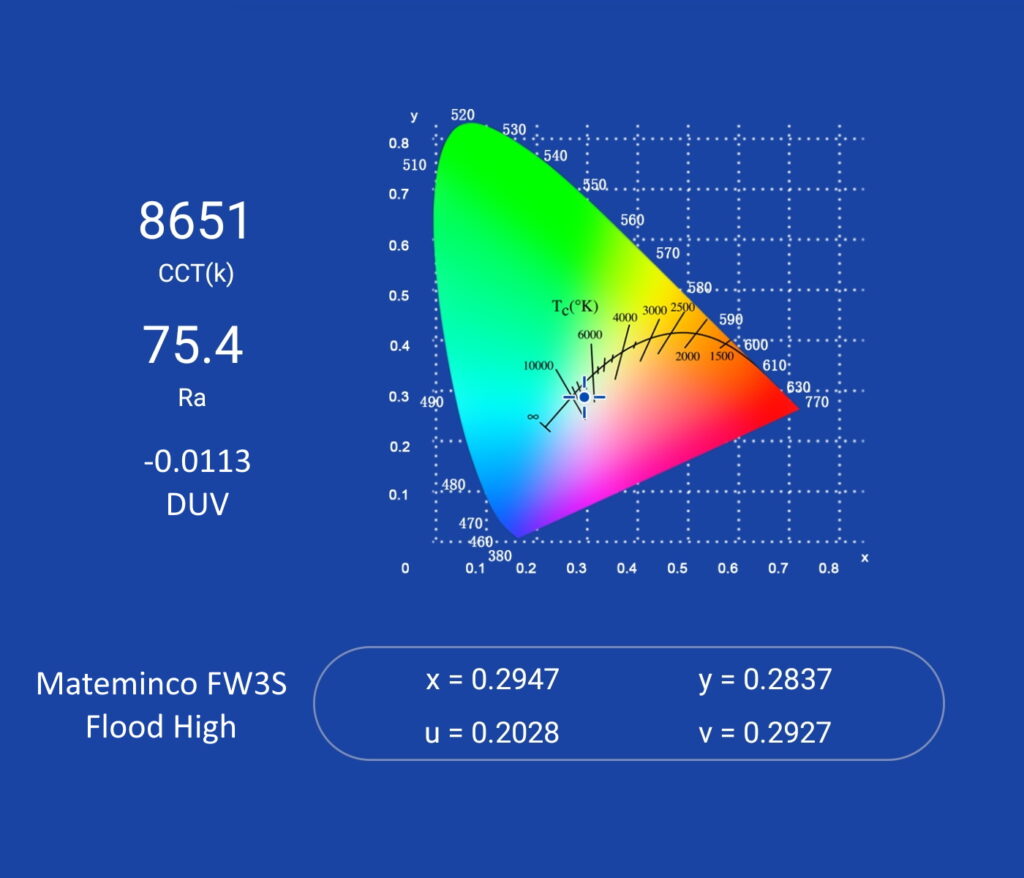
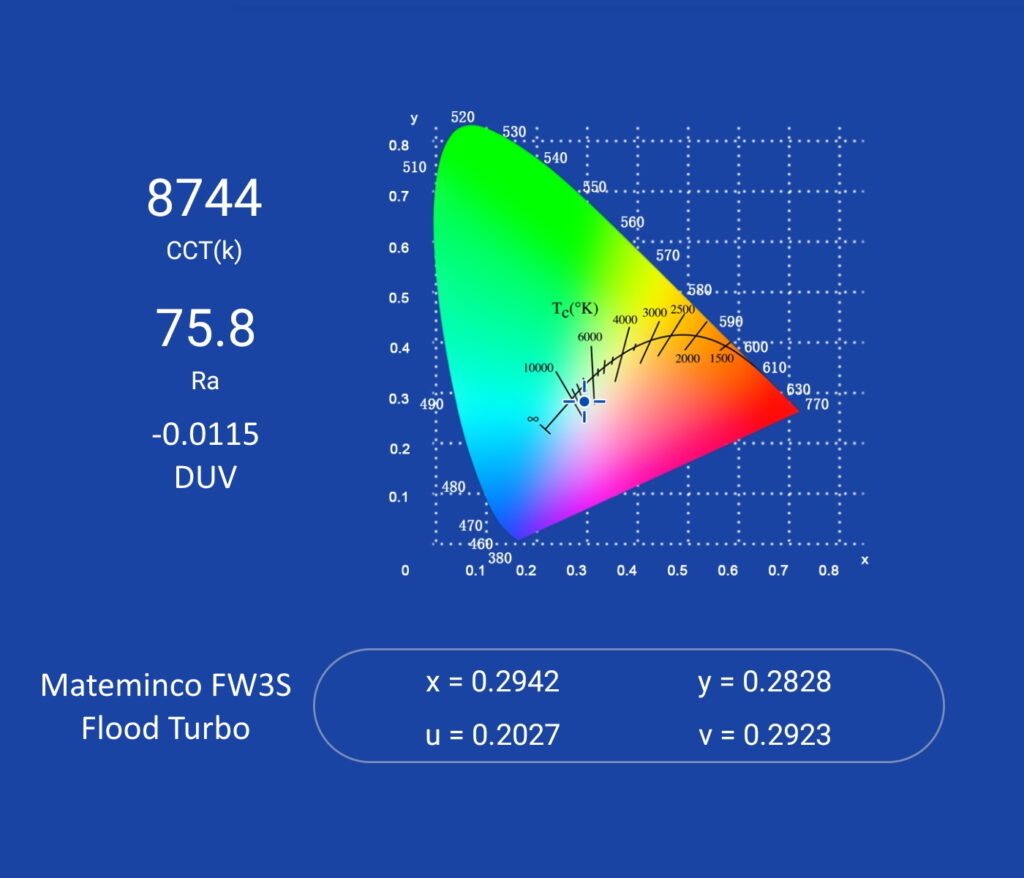
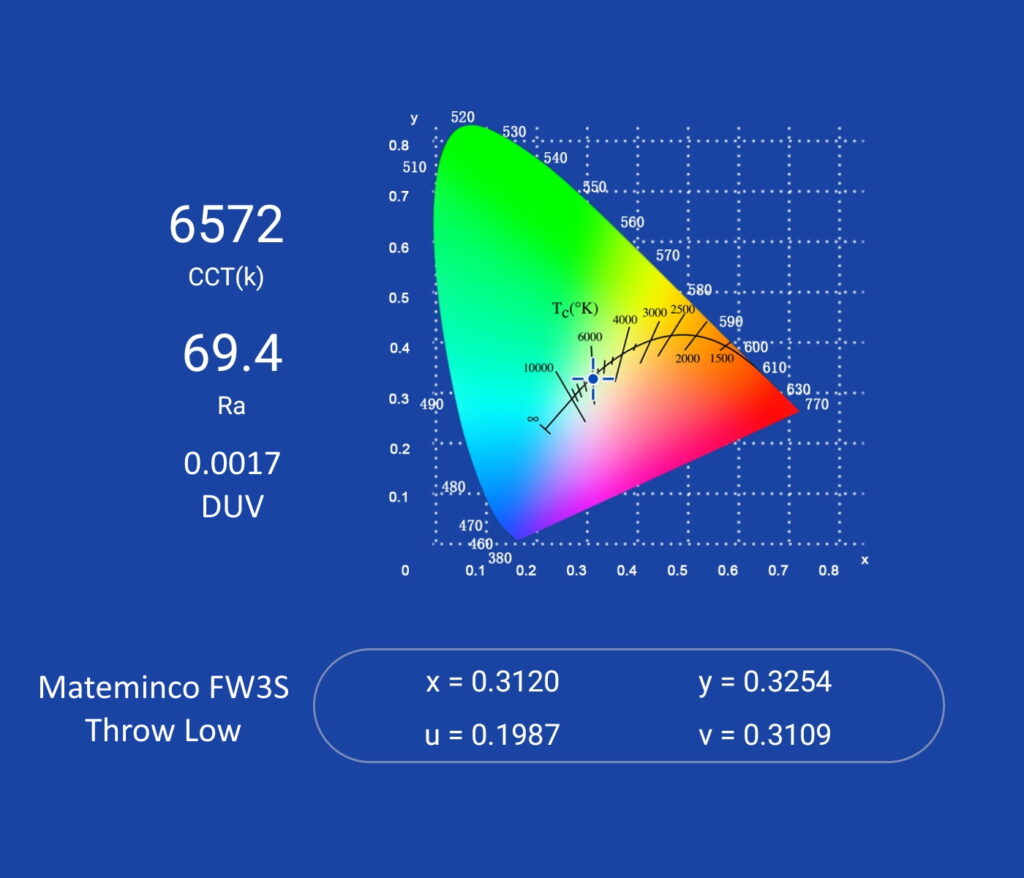
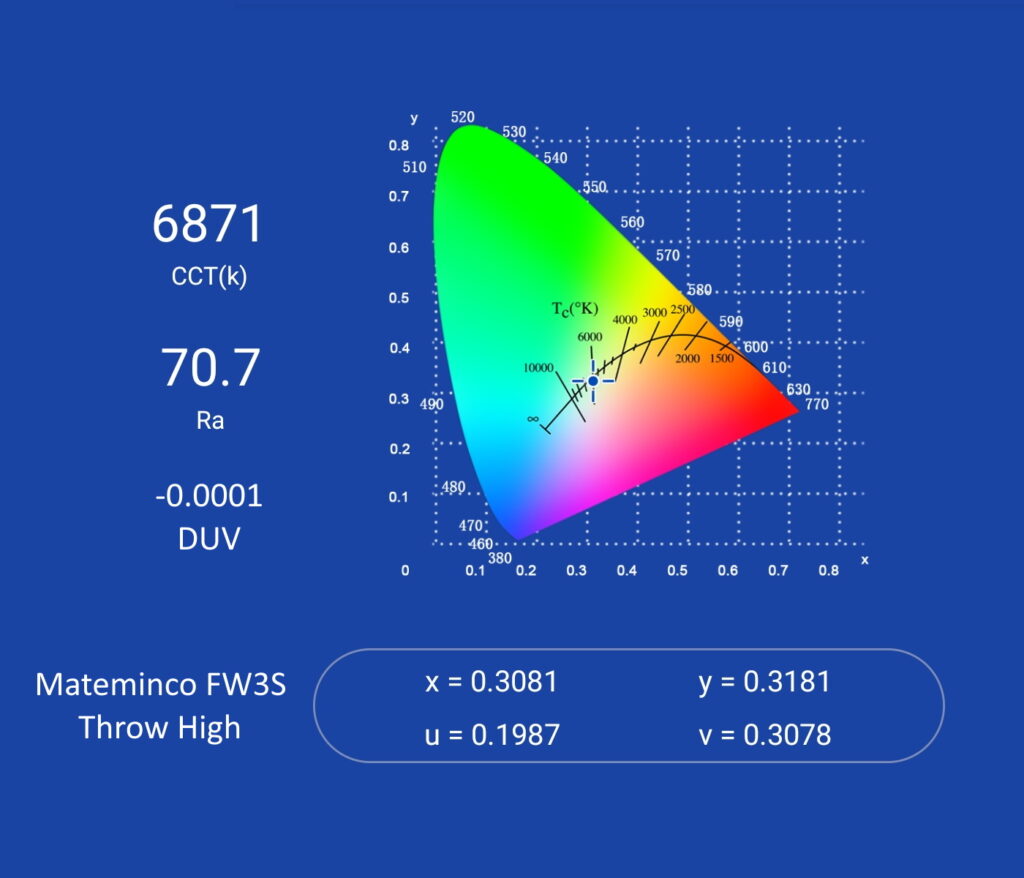
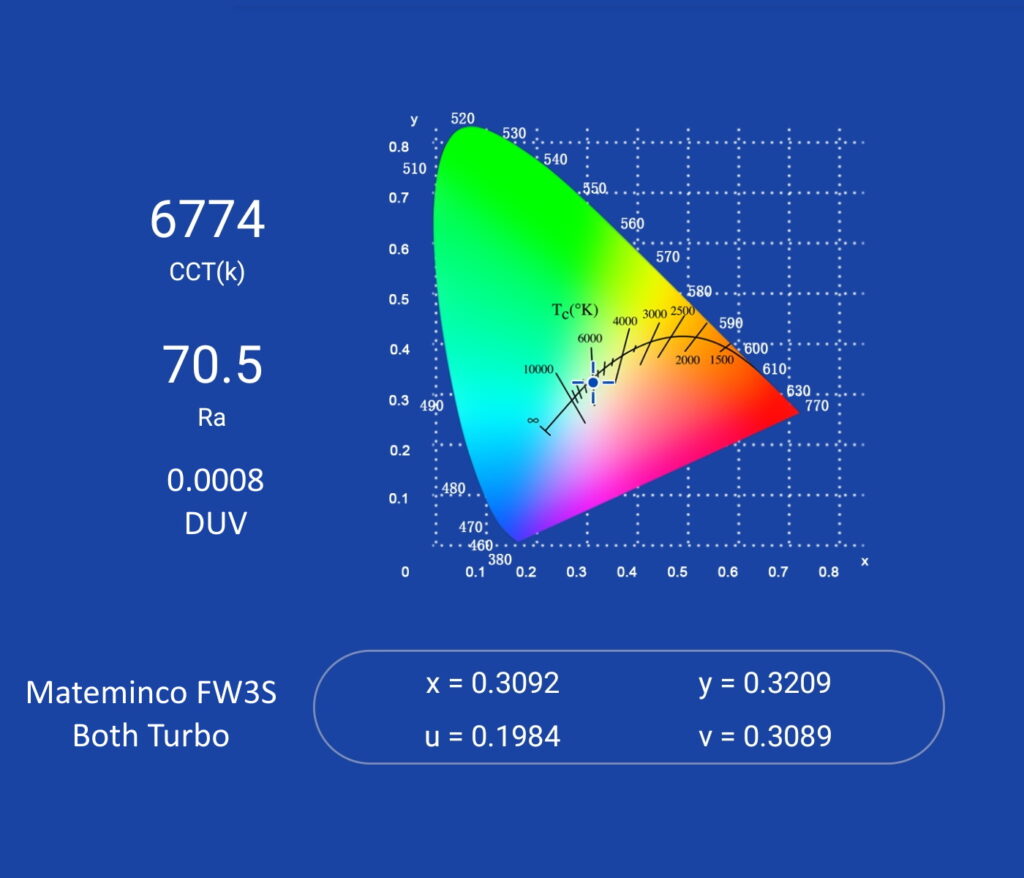
My Opple Light Master Pro shows that the XP-G emitters for flood are 75 CRI and range from 7000K to 8700K with negative DUV. Usually negative DUV is associated with a rosy tint, but with CCT this high, it means the light is closer to pure white. Those measurements were taken close to the hotspot, but towards the edges, the beam turns very yellow-green. The SFT-40 is closer to 70CRI and 6500K CCT, and is also very close to pure white. The throw beam is a lot more even, without tint shift on the edges.

Dimensions and size comparison
Dimensions:
| Mateminco FW3S | Millimeters | Inches |
|---|---|---|
| Length | 147 mm | 5.8 in |
| Head diameter | 41 mm | 1.6 in |
| Body diameter | 25 mm | 1.0 in |
Dimensions are rounded to the nearest millimeter, and to the nearest tenth of an Inch.
Weight:
| Mateminco FW3S | Weight in grams | Weight in oz |
|---|---|---|
| Without battery: | 130 g | 4.6 oz |
| With battery | 195 g | 6.9 oz |
Weight is rounded to the nearest gram, and to the nearest tenth of an Oz.
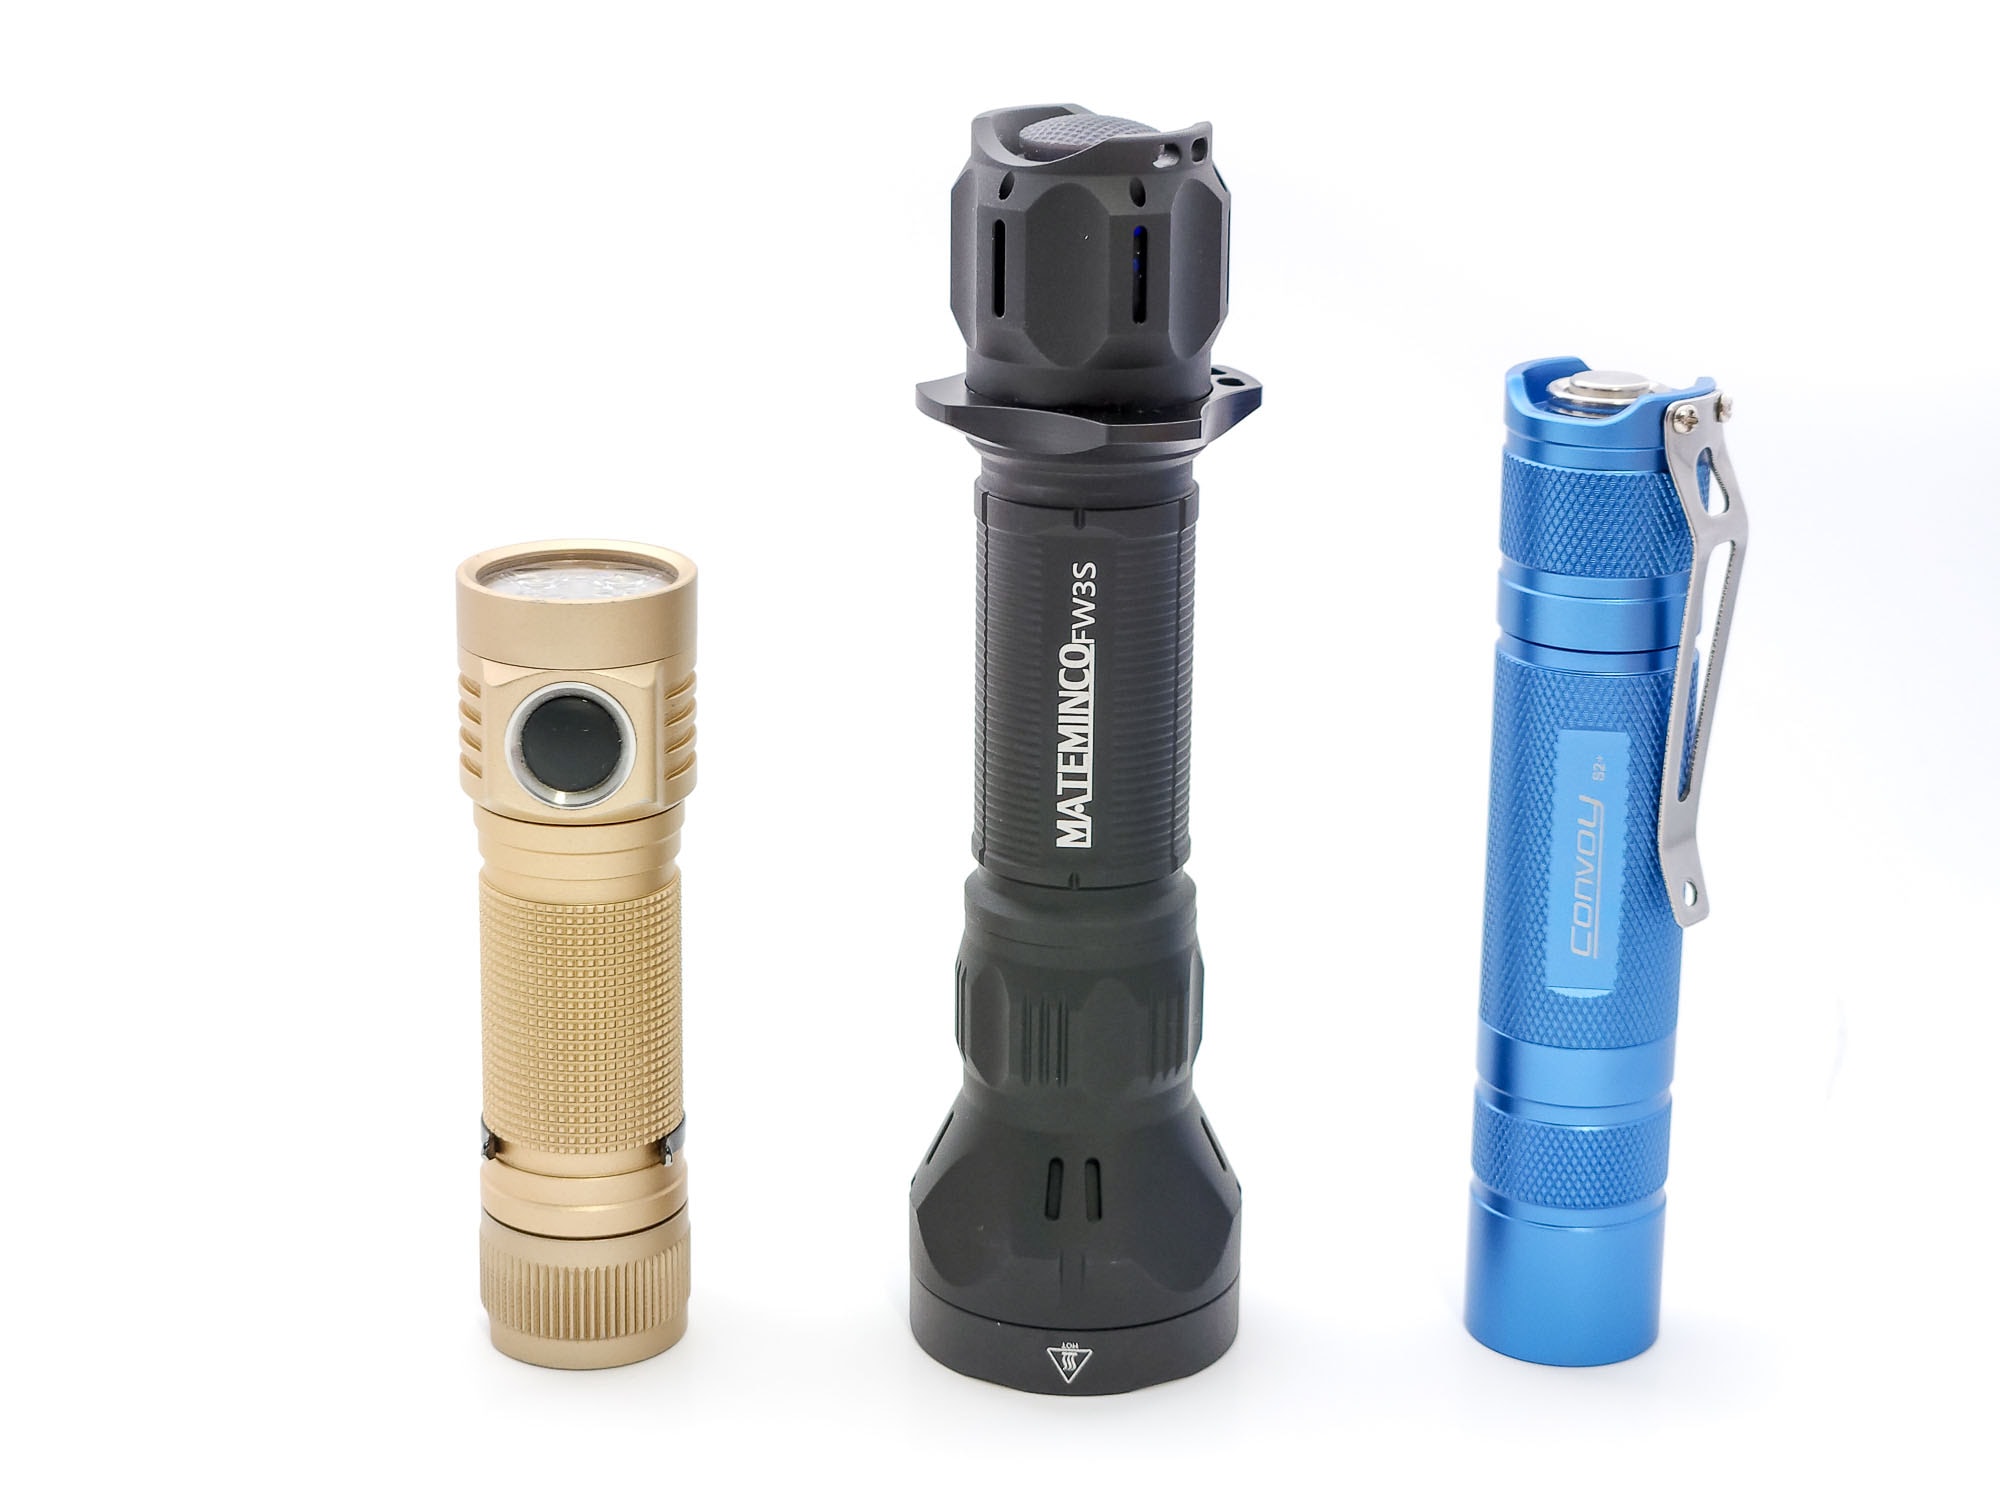
Flashlight size comparison with its competition:
Group 1: Acebeam E70, Mateminco FW3S, ThruNite TN12 Pro
Group 2: Emisar D4V2, Mateminco FW3S, Convoy S2+

Driver & User Interface:
The FW3s has a mechanical tail switch, so all the mode changing is done with half presses.
Available modes:
- Flood: Low, Mid, High, Turbo
- Throw: Low, High
- Both: Turbo
Available blinky modes:
- Strobe
From OFF:
- Half press: Momentary flood low
- Single click: Flood low
- Two fast half presses: Hold for momentary throw high, click for throw high
- Three fast half presses: Hold for momentary strobe, click for strobe
From ON:
- Half press: Advance mode
- 1 click: Off
- Two fast half presses: Hold for momentary throw high, click for throw high
- Three fast half presses: Hold for momentary strobe, click for strobe
Mode memory:
- None
Shortcuts:
- To throw high: Two fast half presses
- To strobe: Three fast half presses
Low voltage warning:
- There does not appear to be any low voltage warning beyond the output gradually falling and eventually the low voltage protection shutting the light off.
Strobe/blinkies
- Half press the switch three times for strobe. Keep holding the last press for momentary, or click it in all the way to engage it.
Lock-out mode:
- No electronic lock out mode
PWM
- PWM is not visible to the naked eye or phone camera
Additional/summary info on the UI:
- The timing of your half presses is important. I’m used to half pressing on Convoys, which don’t have shortcuts, where you can cycle modes as fast as you can half press the button. Half pressing that fast on the FW3S, however, will get you into throw high and then strobe, which I’ve done way too many times. There needs to be a slight delay between them, but less than half a second, or the light will consider itself off and reset to flood low.
Batteries & Charging
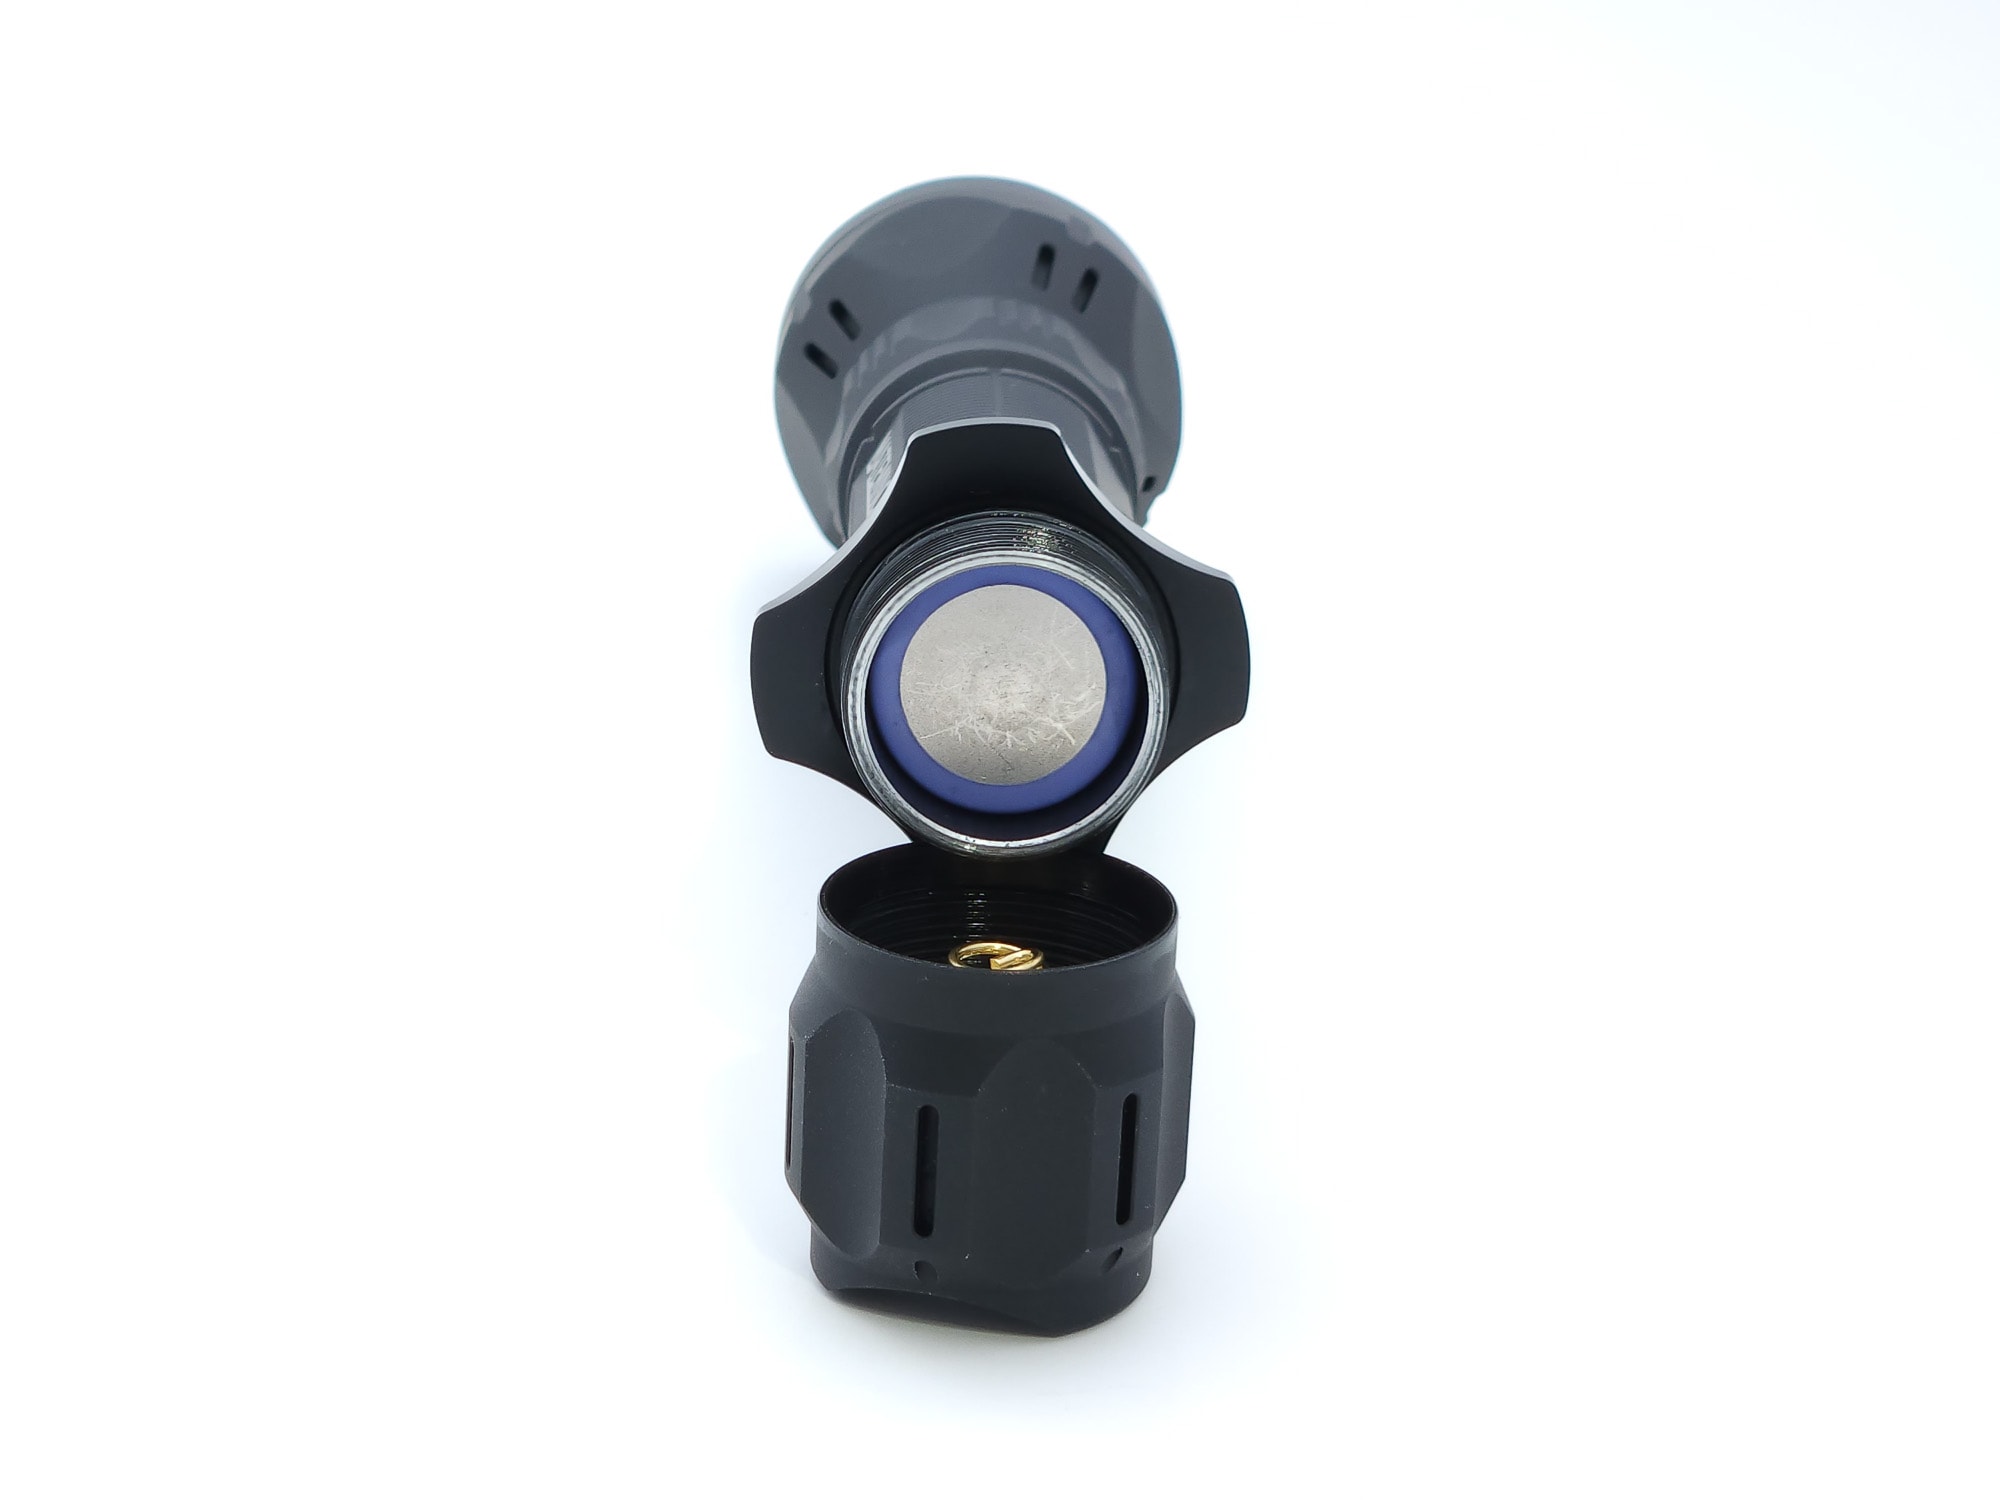
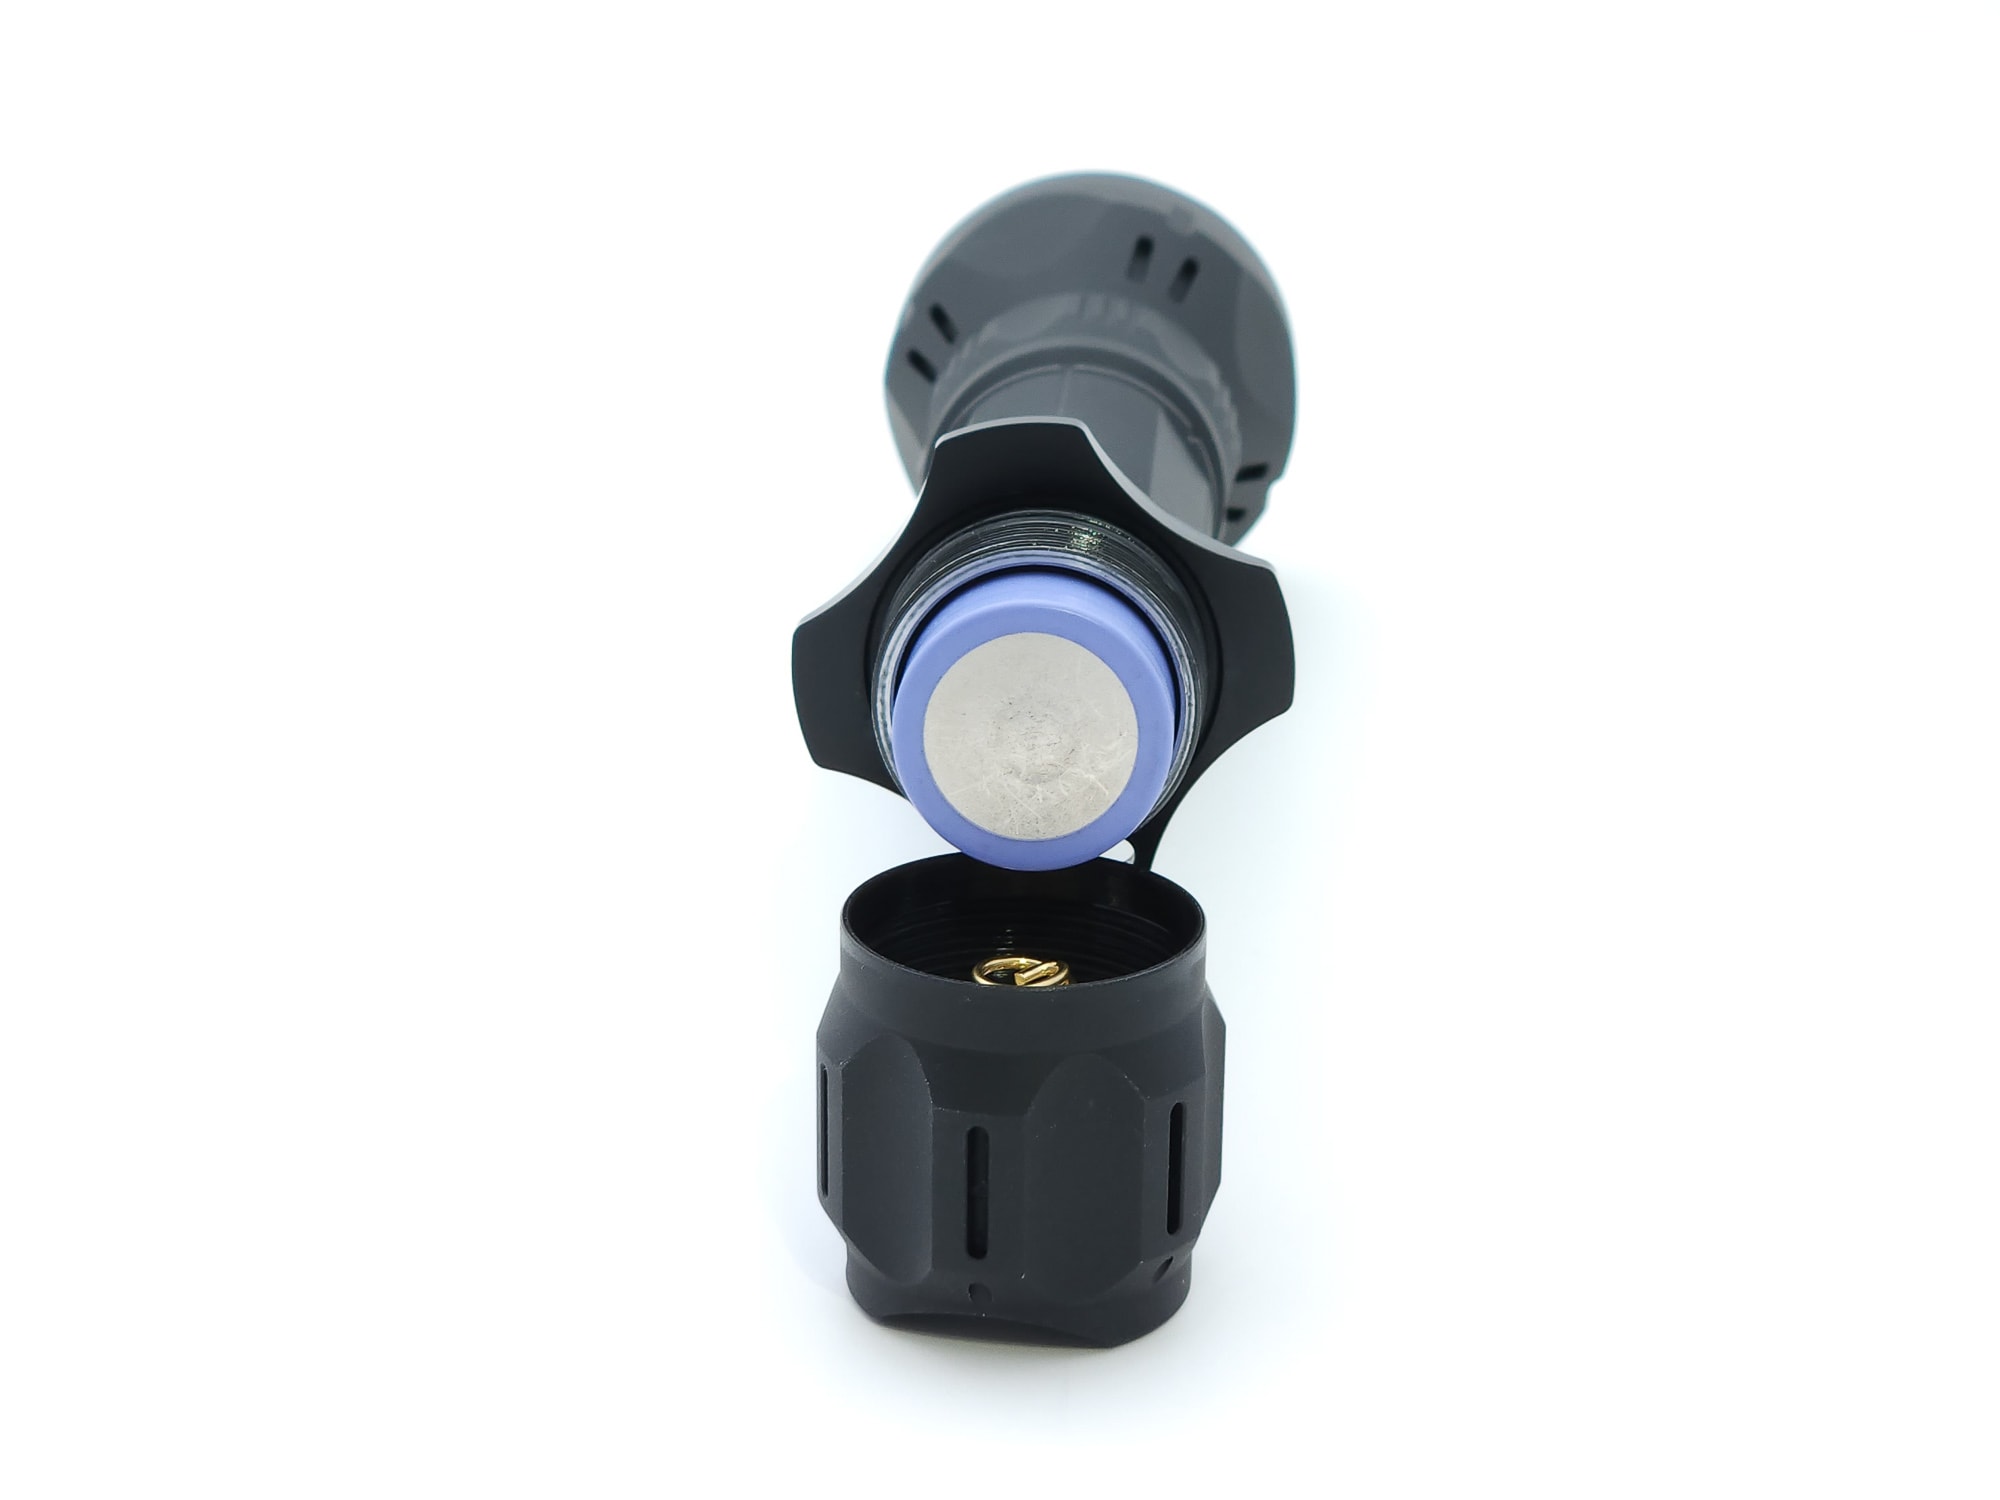
Flashlightbrand gives you the option to include a Lishen LR2170LA 4000mAh 21700 battery. Mateminco advises using a flat top, unprotected 21700 like the Lishen due to the need for high current, but this battery is barely long enough. Despite having springs at both ends of the tube, the light will change modes when knocked against your hand and rattles with light shaking. I even used a 21700 spacer from Convoy to extend the length of the battery and while it does not lose connection when hitting it, the springs still don’t hold it firmly enough to prevent rattling.
The FW3S does not include on-board charging, either.
Performance test
Lumen measurements (for each mode)
To obtain these numbers, I used a very rudimentary integrated shoebox and ceilingbounce on my Samsung Galaxy S10. Measurements have been calibrated using a standardized calibration light provided by 1Lumen.
I found that the flood ring outperforms specifications enough to carry the underperforming throw when using both on turbo, at least at turn on. That’s not to say the throwing SFT-40 is dim, it’s very bright, just not as much as Matemico states.
However, and this is a big “however”…
As you can see from the chart and the accompanying graphs, that’s only for turn-on. The ANSI measurements at 30 seconds have already dropped to well below that for most modes. The high mode for throw lasts the longest, giving you nearly 4 minutes above 1000 lumens.
During testing, the highest temperature I recorded was 67C/152F which is getting dangerously hot to hold. The thermal protection on this light will also prevent you from turning it on to higher modes while the temperature is elevated, so if you let it get that hot and turn it off, you’ll have to wait a few seconds for it to cool down enough to reach levels higher than low flood.
| Mode | Amps at start | Specified | turn on | 30 sec | 10 minutes |
|---|---|---|---|---|---|
| Flood Low | 0.03 | 5 | 6 lm | 6 lm | 6 lm |
| Mid | 0.36 | 75 | 94 lm | 94 lm | 93 lm |
| High | 2.45 | 700 | 821 lm | 821 lm | 726 lm |
| Turbo | 5.0 | 1450 | 1530 lm | 1001 lm | 365 lm |
| Throw Low | 0.43 | 175 | 131 lm | 130 lm | 127 lm |
| High | 5.30 | 2100 | 1816 lm | 1224 lm | 381 lm |
| Both Turbo | 7.0 | 2650 | 2668 lm | 1752 lm | 577 lm |
| Both Turbo at 3.6V | – | – | 1746 lm | 1206 lm | 395 lm |
Amps were measured with a Klein Tools MM300 digital multimeter to the best of my ability.
Parasitic drain:
I’m not able to measure it, but the light in the tailcap is always on while the battery is connected and therefore always pulling a small amount of current from the battery. If you’re not using this light frequently, you will need to lock it out by unscrewing the tail cap to avoid that drain.
Battery Life: Runtime graphs
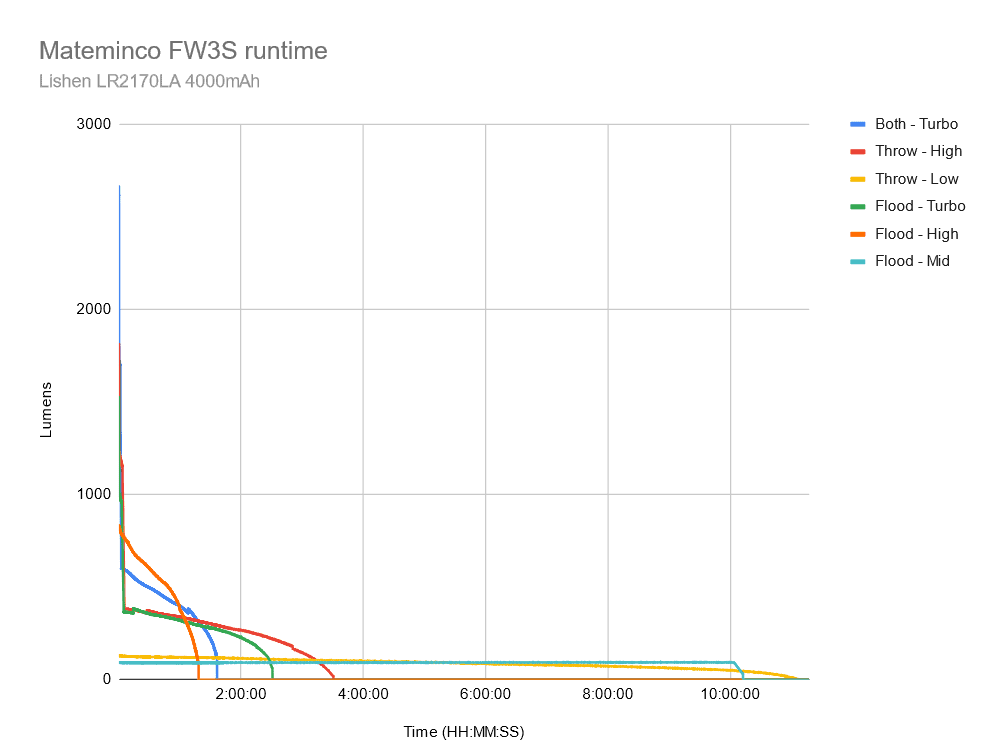

On lower modes, the FW3S exceeds the runtime standards, though higher modes simply don’t. Now, this was done with a 4000mAh battery and 21700s can go as high as 5000mAh, but they might not have as high of a current draw as necessary to reach the higher modes.
The instruction manual states that the FW3S uses a “Boosting Constant Current Driver,” but I believe there’s more to it than that. A constant current driver will usually produce a straight horizontal line graph with distinct step-downs, but as you can see in the graph, only flood mid has that kind of output. All of the other modes output droop with the lowering voltage from the battery that’s characteristic of FET or direct drivers. I could be wrong, as I haven’t done a teardown of the driver, but this is what it appears to be to me.
| Mode | Specified | Measured runtime ANSI | Time till shut off |
|---|---|---|---|
| Flood Low | 300h | – | – |
| Mid | 8h 30min | 10h 12min | 10h 12min |
| High | 3h 30min | 1h 17min | 1h 18min |
| Turbo | 2h 50min | 2h 31min | 2h 31min |
| Throw Low | 10h | 11h 00min | 11h 06min |
| High | 4h 30min | 3h 08min | 3h 31min |
| Both Turbo | 1h 30min | 1h 33min | 1h 36min |
About ANSI FL1: The runtime is measured until the light drops to 10% of its initial output (30 seconds after turning on). This does not mean that the flashlight is not usable anymore. The last column shows how long the light actually works till it shuts off. If there is a + symbol, it means that the test was stopped at that particular point, but the light was actually still running. This happens on certain occasions, with certain drivers, firmware, or batteries.
Peak beam intensity and beam distance measurements
The numbers for candela were obtained with a UNI-T UT383S luxmeter at 5 and 15 meters, then averaged.
I think that if the SFT-40 had enough juice to get to the claimed 2100 lumens, it would also meet the 95,000 candela spec, but it misses out by 15,000 cd at turn-on, but at the ANSI standard 30-second measurement, it’s down to just under 56,000 cd. That’s a big difference. It still certainly throws a long way, though, that’s for sure!
| Mode | Specified | Candela measured | Meters | Yards |
|---|---|---|---|---|
| Flood Low | – | – | – | – |
| Flood Mid | – | 162 cd | 25 m | 27 yd |
| Flood High | – | 1593 cd | 80 m | 87 yd |
| Flood Turbo | – | 2322 cd | 96 m | 105 yd |
| Throw Low | – | 5414 cd | 147 m | 161 yd |
| Throw High | – | 55,904 cd | 473 m | 517 yd |
| Both Turbo | 95,000 cd | 50,733 cd | 450 m | 492 yd |
| Flood Turbo @ on | – | 3456 cd | 118 m | 129 yd |
| Throw High @ on | – | 80,298 cd | 567 m | 620 yd |
| Both Turbo @ on | – | 64,598 cd | 508 m | 555 yd |
About peak beam distance: Peak beam distance according to ANSI FL1 standards: The calculated value of distance in meters at which the flashlight produces a light intensity of 0.25 lux. (0.25 lux is about the brightness of a full moon shining on an object). The columns ‘Meters’ and ‘Yards’ use rounded numbers.
Beamshots
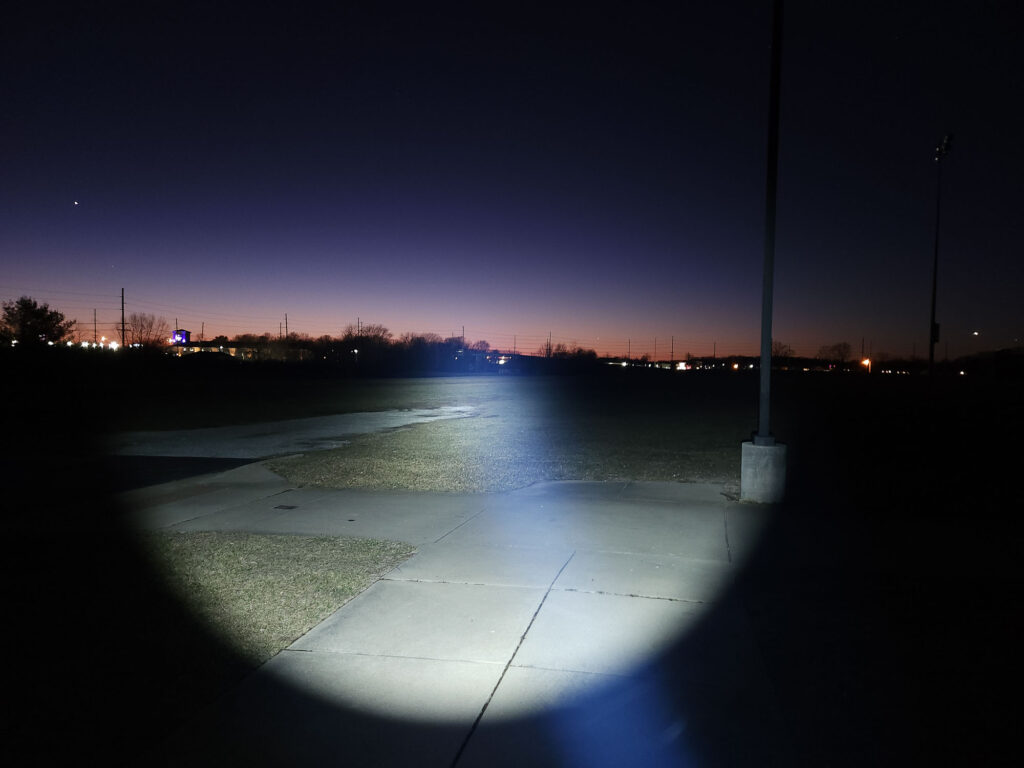
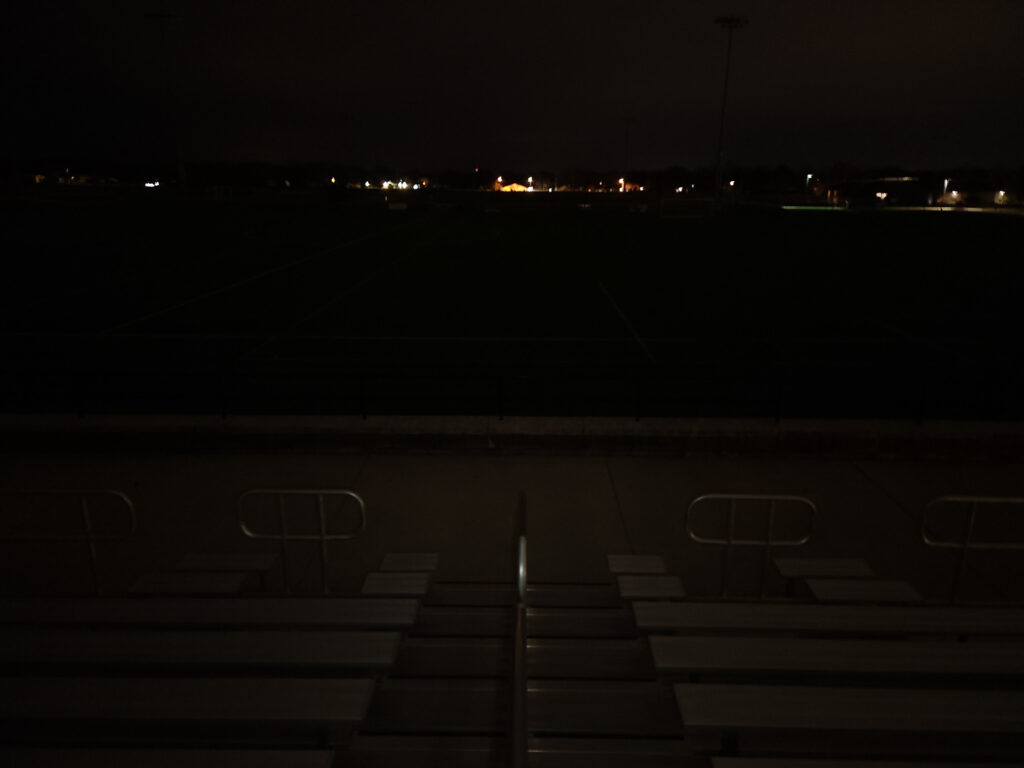
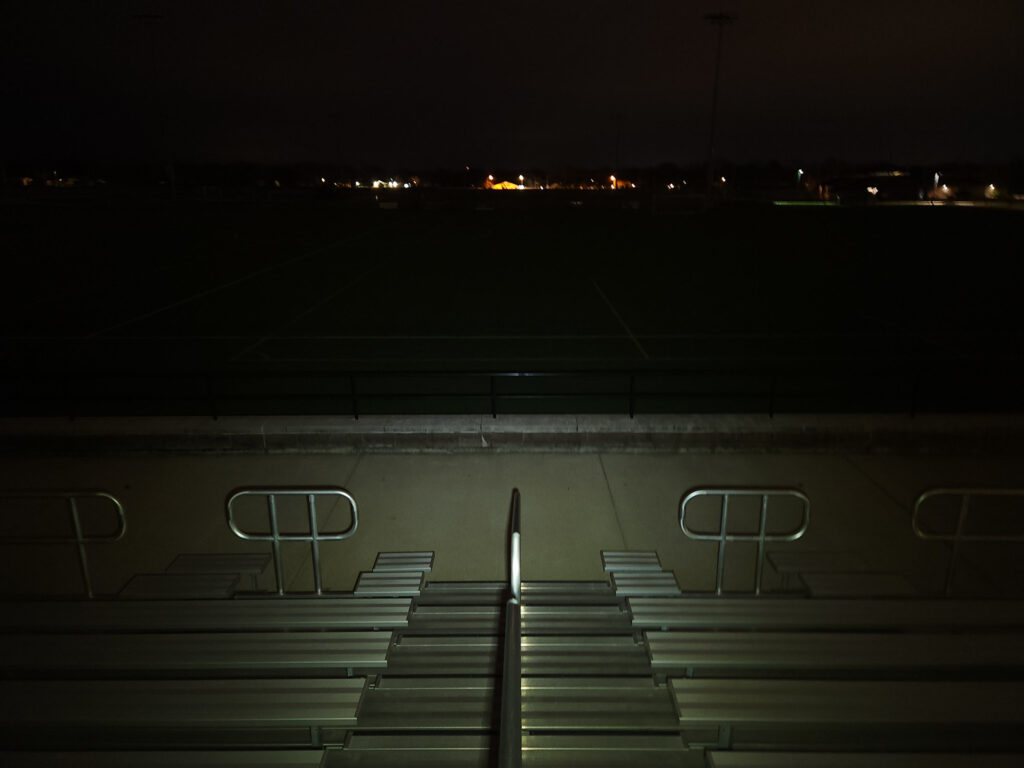
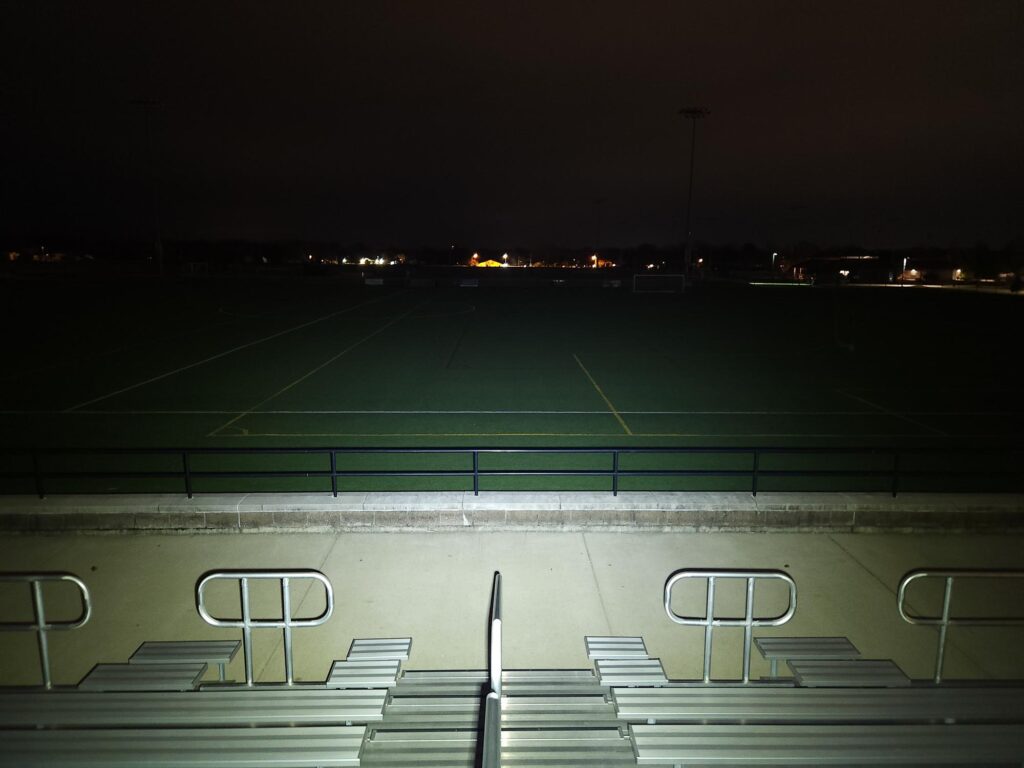
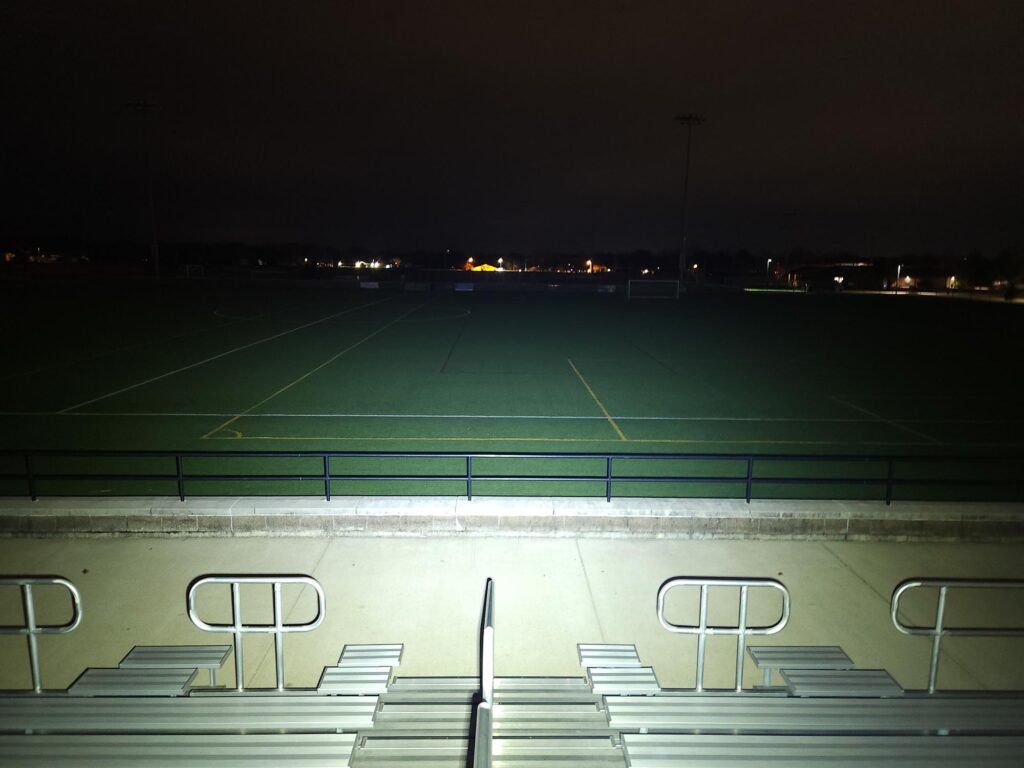
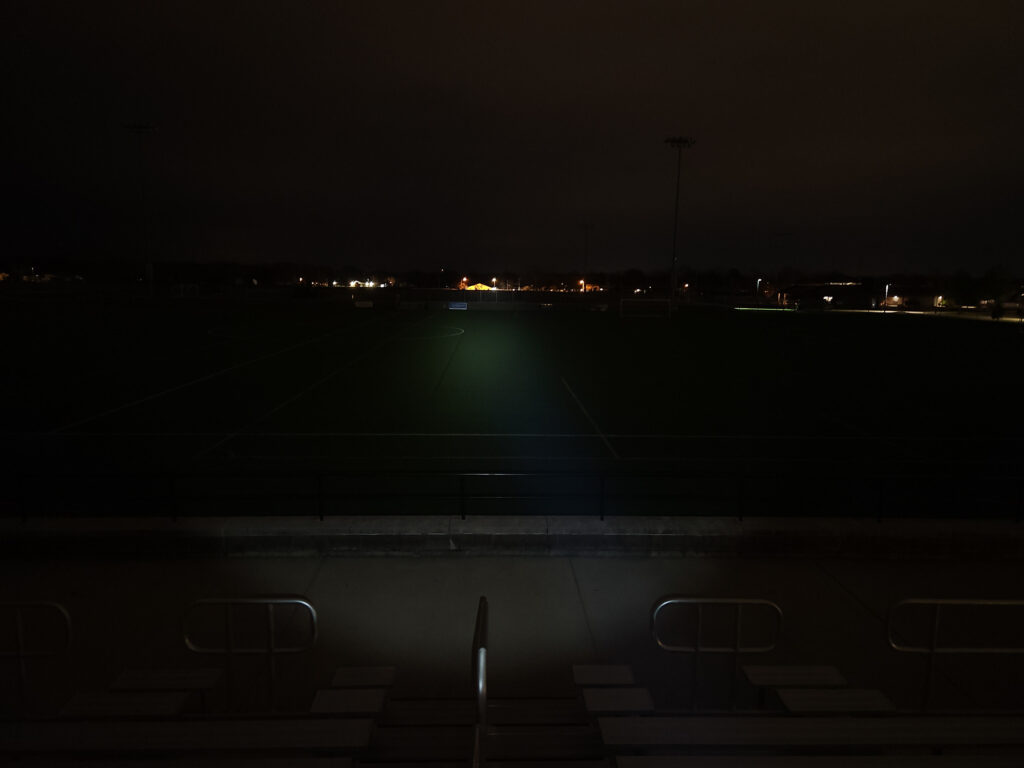
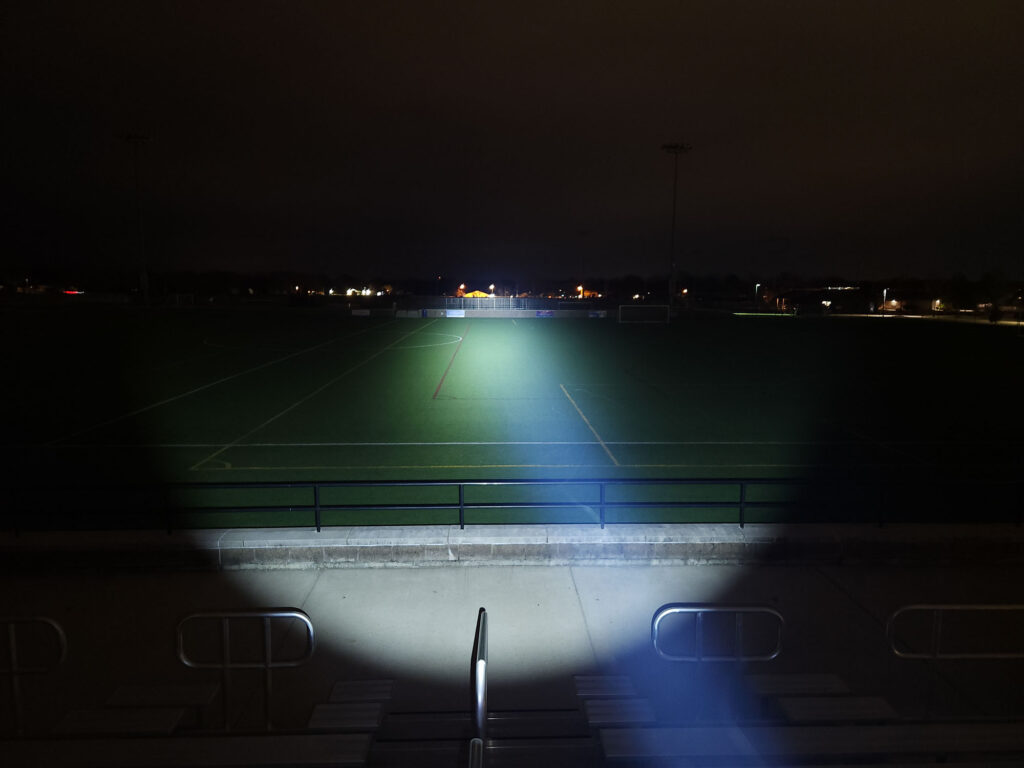
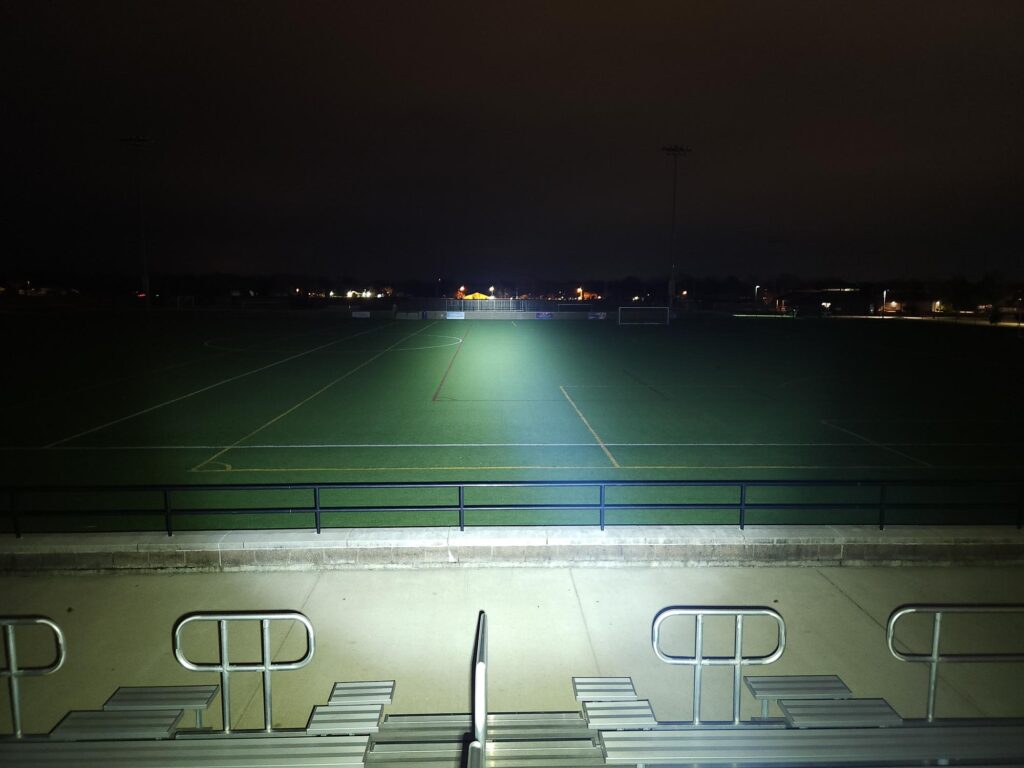
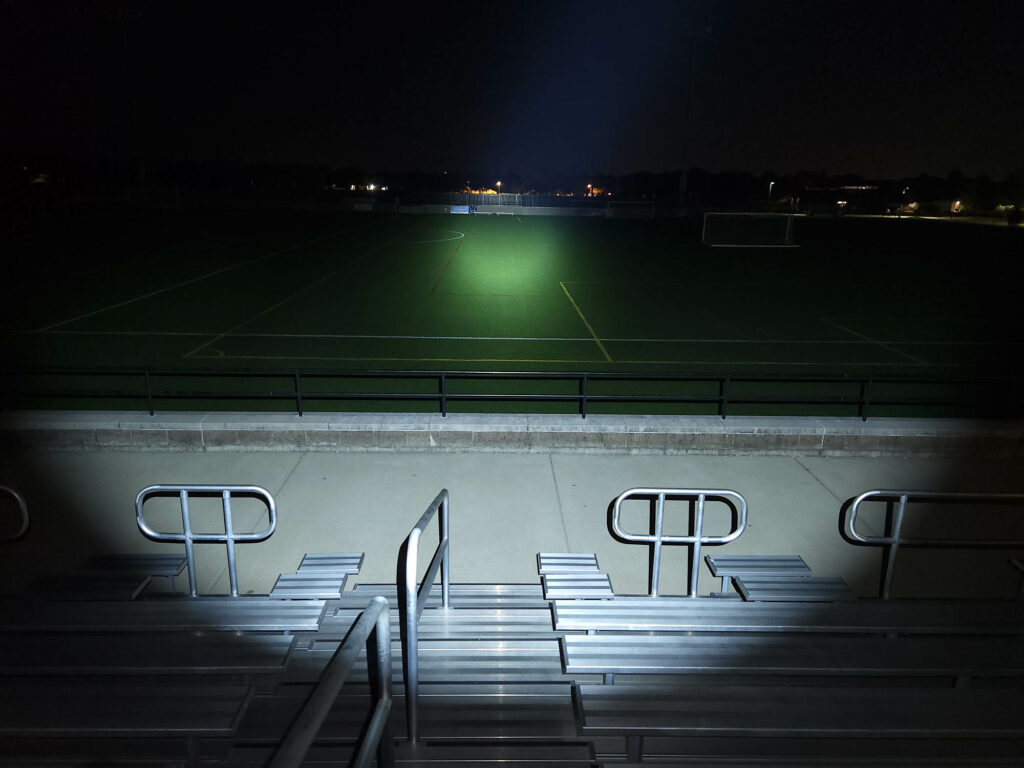
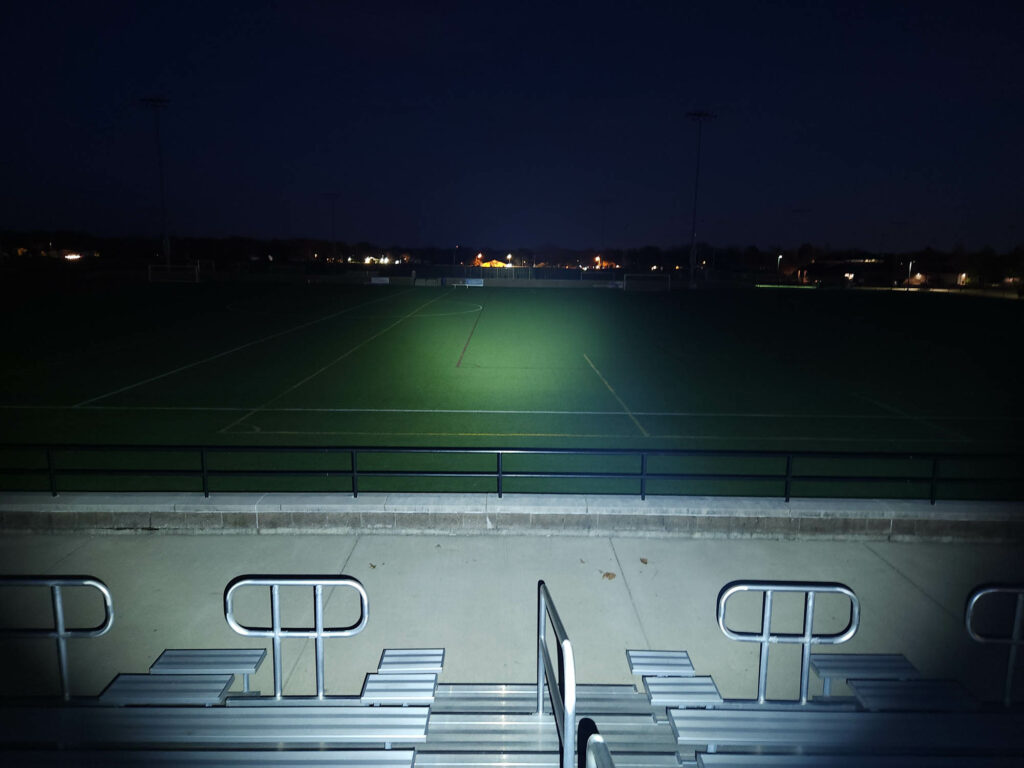
These were taken with a Samsung Galaxy S22+ using pro mode and the following settings:
- WB 5000K
- ISO 200
- Speed 0.5
Distance to the other end of the playing field is 100 meters.
Beamshots of the following flashlights compared:
- ThruNite TN12 Pro
- Sofirn SC31T Pro
Disclaimer: This flashlight was sent to me for review at no cost by Flashlightbrand. I have not been paid to review, nor have I been holding back on problems or defects.
Final Verdict
Pros
- Two for one with flood and throw
- Optional colored flood emitters, if you’re into that
Cons
- UI
- Timing on half-presses on UI takes getting used to
- Does not meet ANSI specs on high levels
- Doesn’t actually have a constant current driver
- Have to unscrew tail cap to turn off blue tail switch light
Explanation on star ratings:
1: Avoid: a match would be a better choice – 2: Poor: significant defect or issues; almost unusable – 3: Average: some defects or issues; but still usable 4: Good: recommended (minor issues) – 5: Great: highly recommended

3 stars: ★★★
Having two beam profiles in one light is a novel concept: It’s easy to switch between flood and throw, and there’s less to carry. But there’s more to a light than just that and I don’t believe the Mateminco FW3S really delivers. My disappointment stems mostly from the UI. Half-pressing to switch modes is common and accepted, but the FW3S’ UI is too simplistic, especially at the price point. If it even had mode memory, that would be an improvement! This setup would be better implemented with an electronic switch or even dual switches, if they wanted to keep the mechanical tail switch.
The specs are another issue. The FW3S gets close to what’s published at turn on, but you only have a few seconds of that before a steep drop off. Mateminco does say in their manual essentially that these specs are taken under ideal conditions and your mileage may vary, but that doesn’t make it right.
And thirdly, when I hear that a light has a constant current boost driver, I expect more uniform output than the sagging graphs the FW3S gave me.
So because of the UI and incorrect output and driver specs, I have to give the Mateminco FW3S 3 stars: It’s usable, but not recommended.
Mateminco FW3S for sale
Note: August 2023: WARNING: don’t buy from flashlightbrand.com!!!
We received questions whether flashlightbrand.com is still legit, because they either didn’t respond, or didn’t receive their orders. We tried to reach out multiple times, through multiple platforms, and they never replied to any of our messages. Warned: DO NOT BUY FROM FLASHLIGHTBRAND.com, because you will not receive your flashlight
1lumen selects and reviews products personally. We may earn affiliate commissions through our links, which help support our testing.