1lumen selects and reviews products personally. We may earn affiliate commissions through our links, which help support our testing.
Nebo SL100 Spotlight review: LEP flashlight
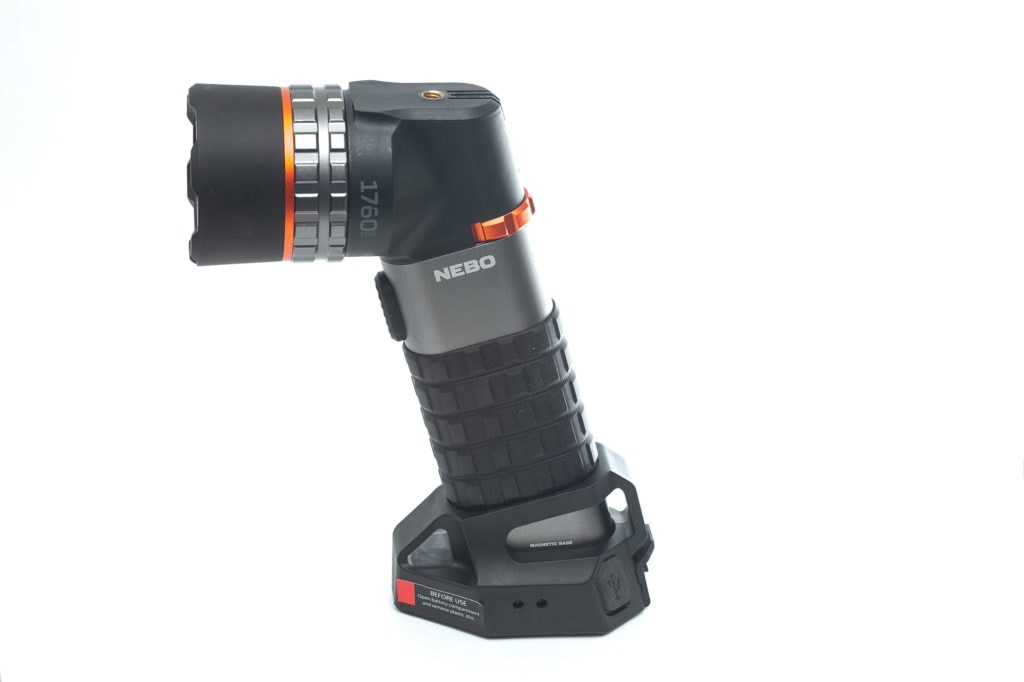
Nebo Luxtreme SL100 specifications
| Brand/model | Nebo Luxtreme SL100 spotlight |
|---|---|
| LED | COB + LEP + red |
| Max. Lumens | 500 + 280 +30 |
| Max. Beam intensity / distance | LEP: 1600m 640kcd / COB: 42m |
| Battery config. | 2*21700 proprietary battery pack |
| Onboard charging | USB-C |
| Modes | 4 |
| Blinkies | N/A |
| Reflector | Optics |
| Waterproof | IP67 |
| Review date | April 2022 |
Introduction:
Whether it be exploring caves or SAR (search and rescue) in mountainous areas, there’s 1 thing they have in common. They require proper and sturdy flashlights.
Nebo likely had these types of activities in mind when designing the Luxtreme SL flashlights. The one we’re reviewing here is the Nebo Luxtreme SL100 Spotlight, the farthest-reaching in its lineup. It’s using an LEP light source, instead of the most popular LED. LEP can throw much farther than LED with the same flashlight dimensions.
But the SL100 isn’t merely a spotlight, it also has the ability to switch to the built-in COB light. This will give you an enormous wide beam, right in front of you. Just perfect for close-up work and activities. Therefore it won’t be fair to call it just a spotlight. It’s more than that, and I hope this review will be a great source for you to decide whether this is the tool you are after.
Package quality.
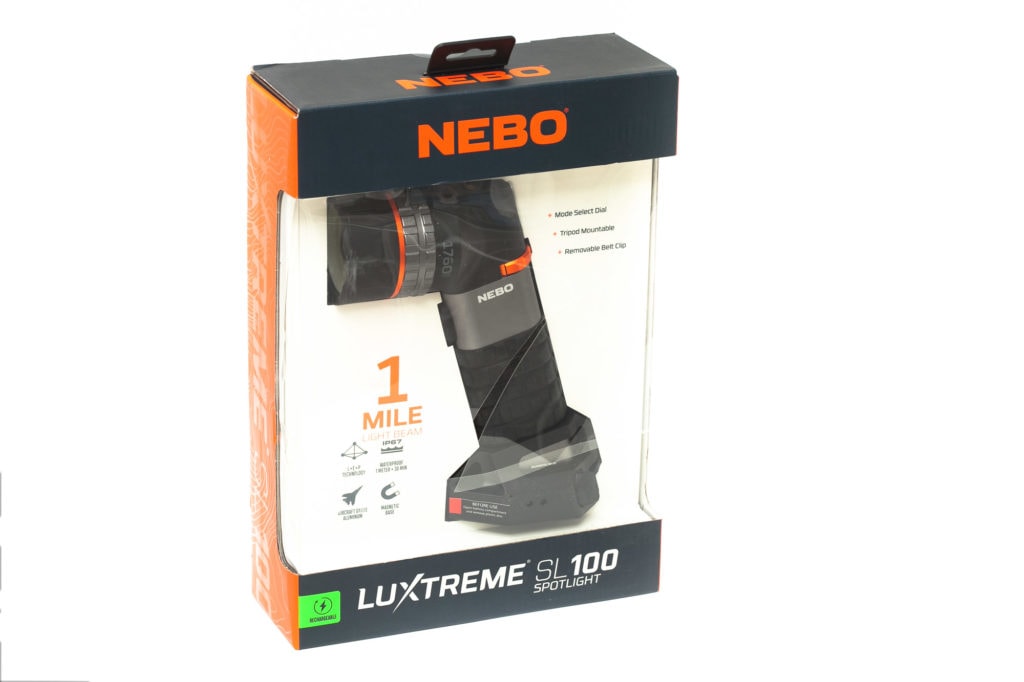
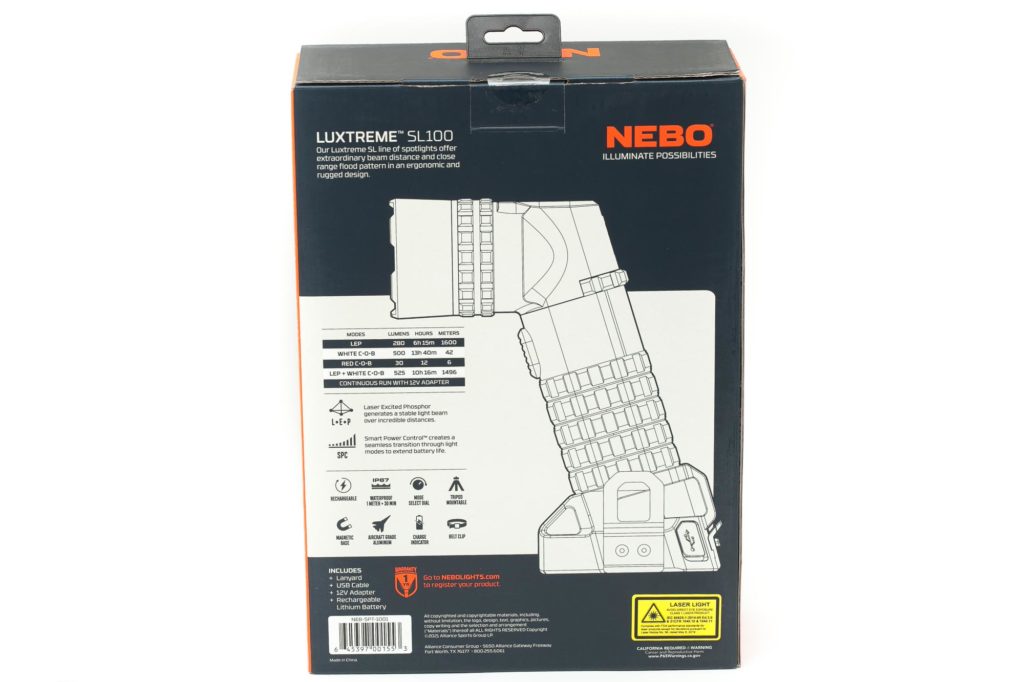
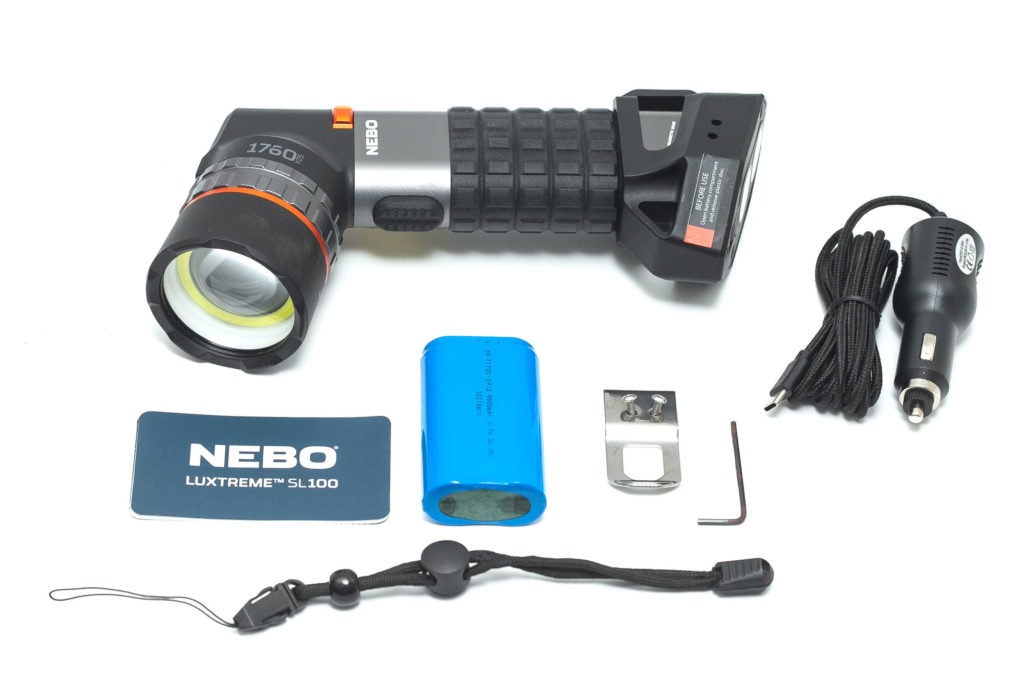
The packaging has a nice clear window to showcase the flashlights in full glory. It’s also screwed down to the inner packaging, with the belt clip. So you have to unscrew that before you are able to remove it from its packaging. Unfortunately, mine arrived damaged with the plastic window torn. What else is inside the package:
- The flashlight: Nebo Luxtreme SL100
- Proprietary battery (2*21700 parallel for 9000mAh capacity)
- Lanyard
- Belt clip
- Car adapter (12V – with USB-C plug)
- USB-C cable (not pictured)
- Manual
Here’s a Nebo unboxing video I made:
Flashlight in use
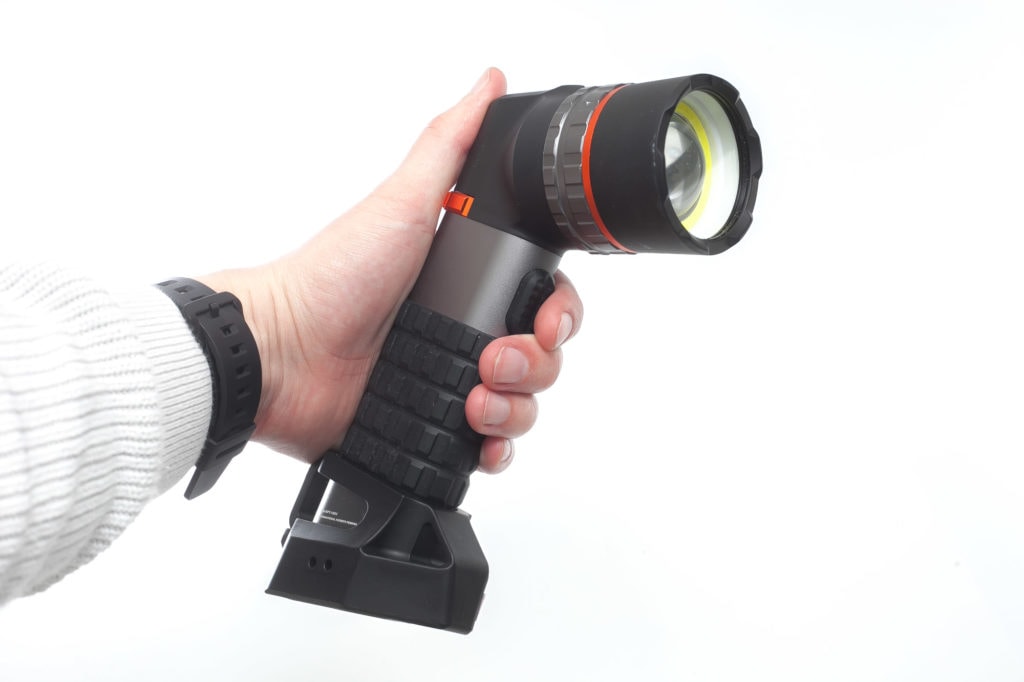
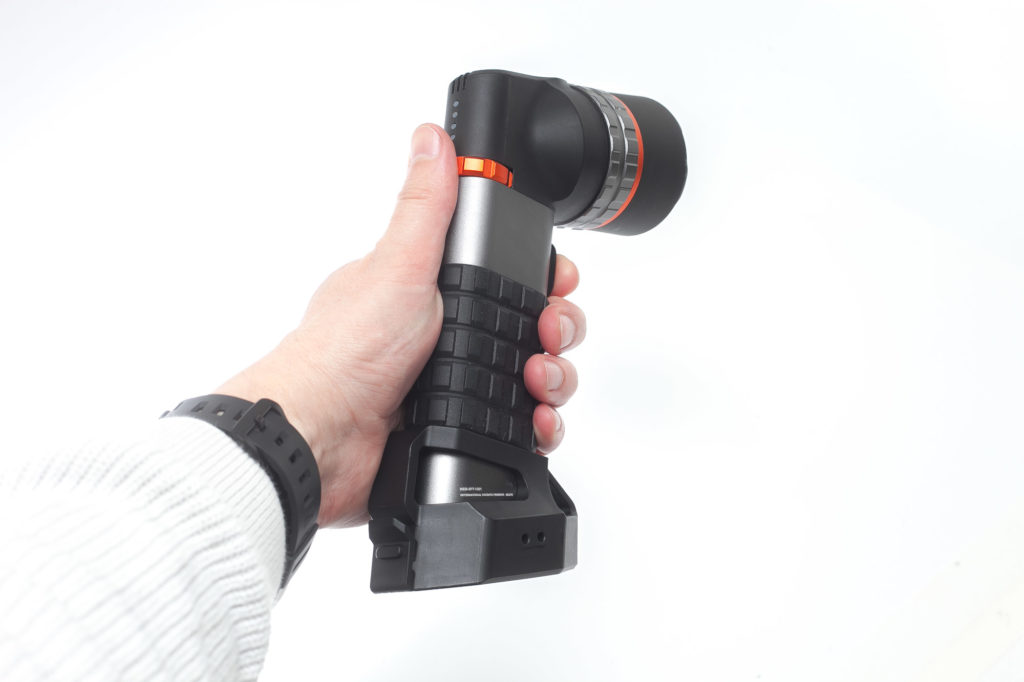
There are all kinds of flashlights with different shapes and forms, and some almost look like a gun. And this is one of them.
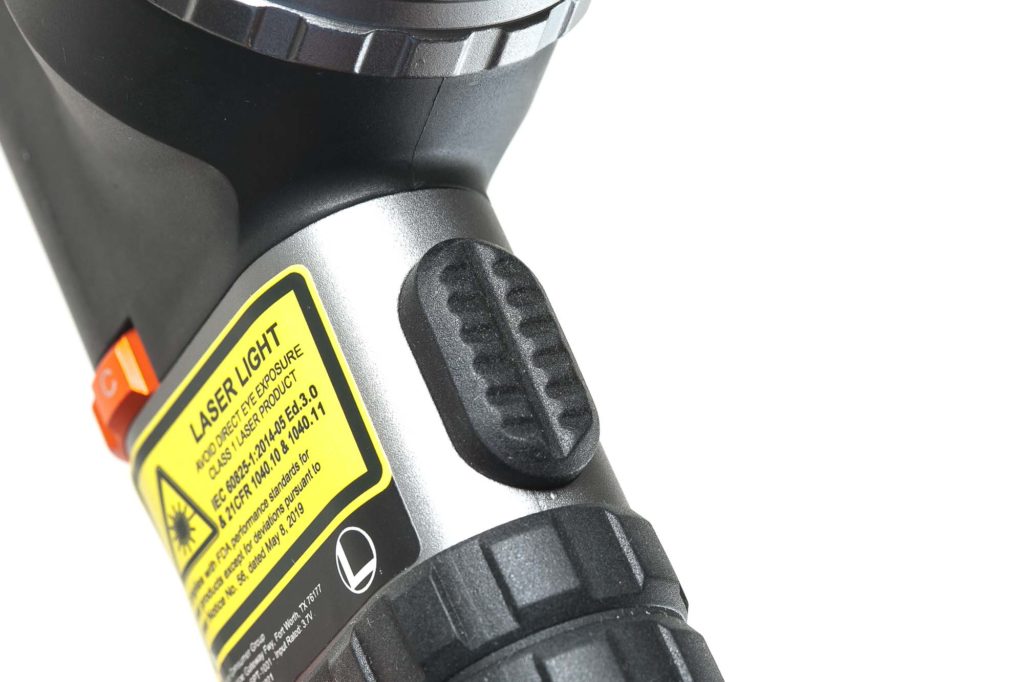
You just hold it like you would hold a gun, with the switch located where your index finger rests. The switch is very easy to find because it sticks out, even if you’re wearing hand gloves. It has 2 functions: activating the light in the current mode, or activate the red COB by pressing the switch for a few seconds..
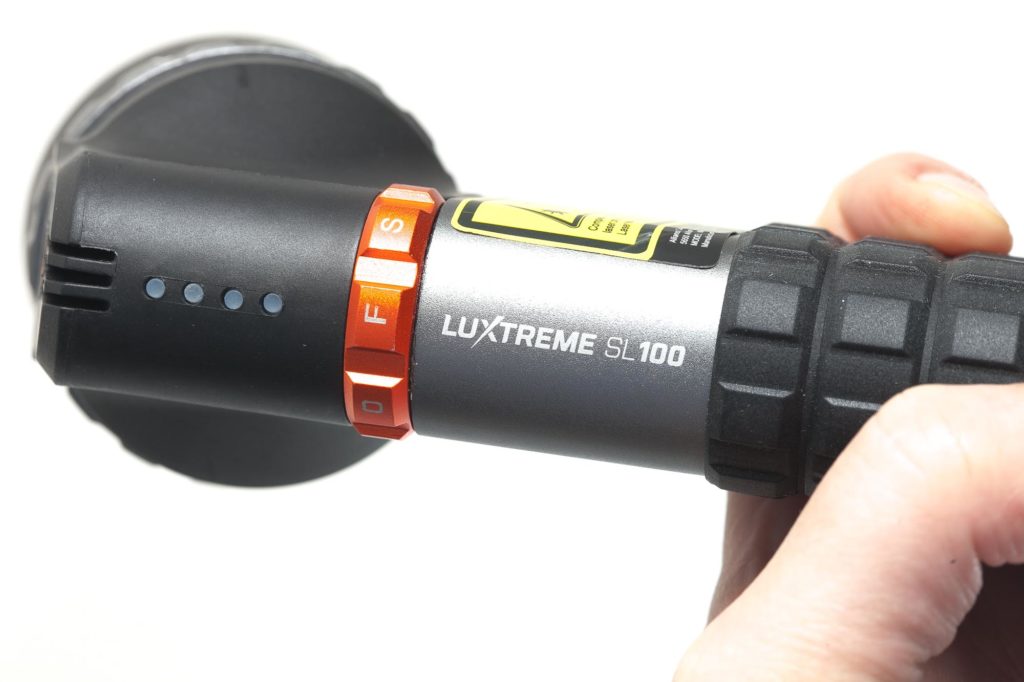
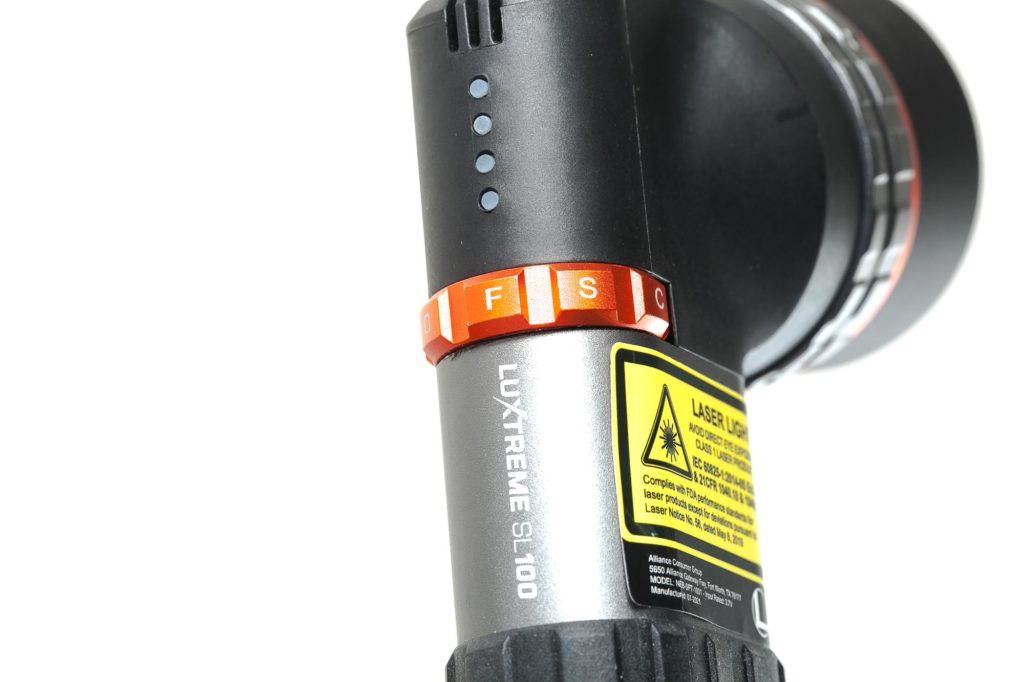
To change modes, there’s an orange dial that you can rotate with your thumb. The dial has 4 settings, each assigned with a letter. O – F – S – C from left to right. My assumption would be they refer to the following:
- O = Off
- F = Flood (COB light)
- S = Spot (LEP laser light)
- C = Combo (LEP + COB)
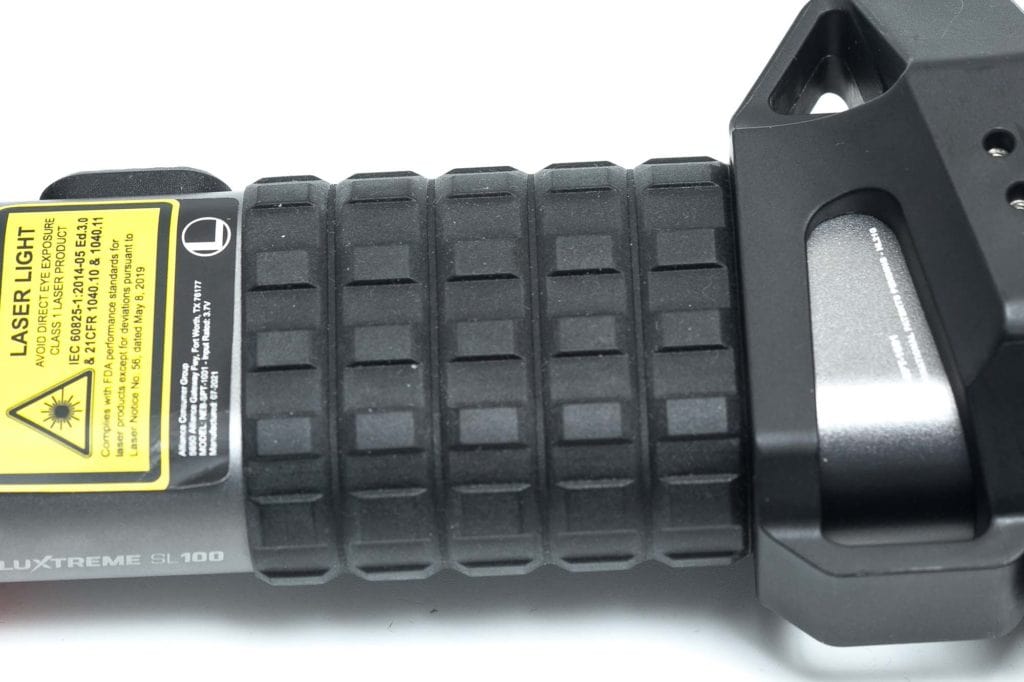
The handle is covered with rubber, so it won’t slip out of your hands and feels nice comfy, and grippy. The light does have quite a bit of weight to it though, so it’s not a luxury to use the included lanyard or the belt clip. In the Nebo commercial video below, you can see how a search and rescue team carries the SL100 on their belt clips.
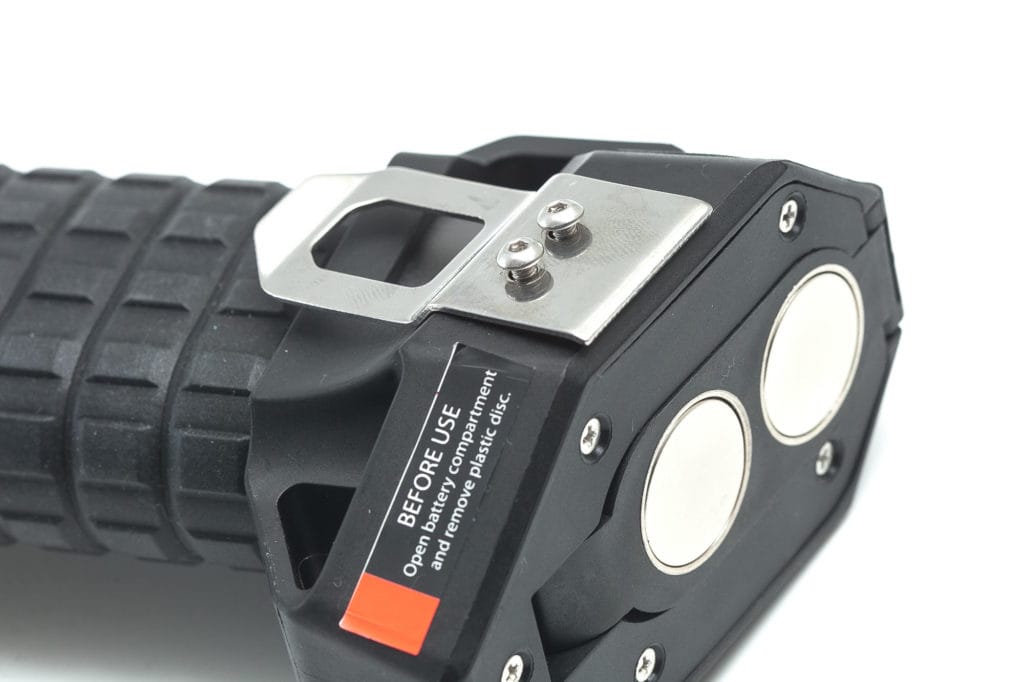
It’s important to note that the belt clip can be attached to either side. Great for right-handed and left-handed people! Nice touch Nebo!
Even if you’re not using it for this type of work, it has a few cool features that may also fit your needs.
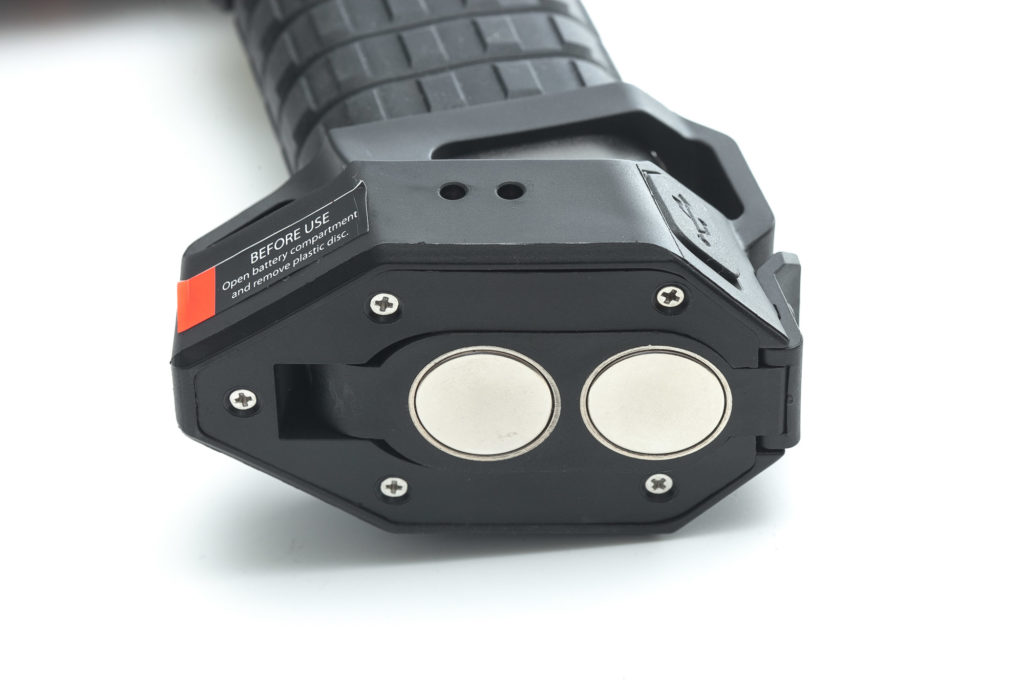
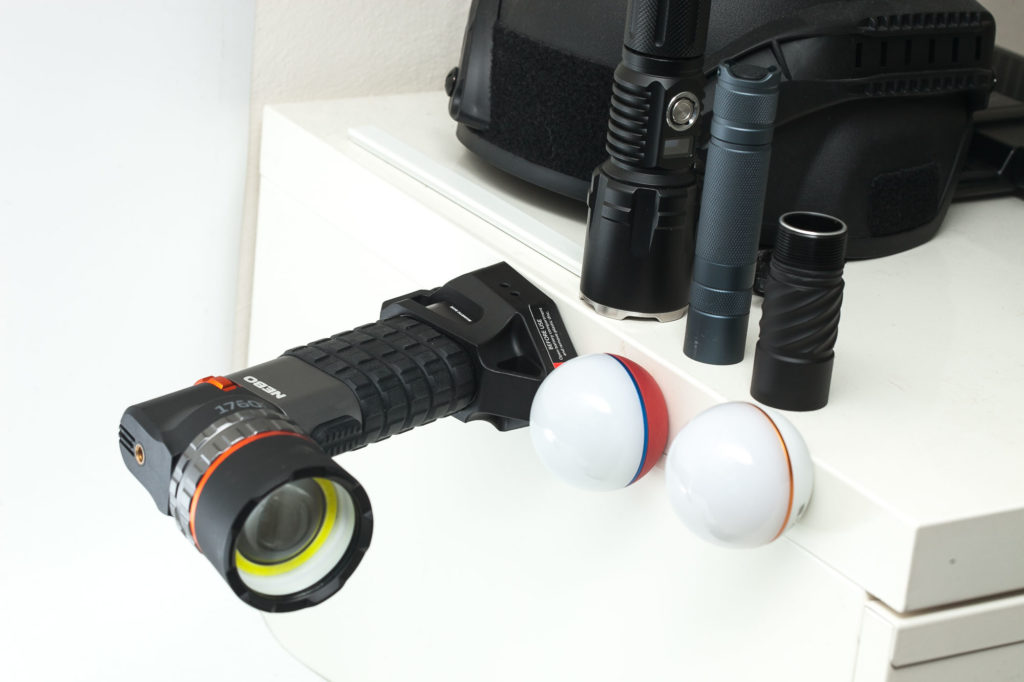
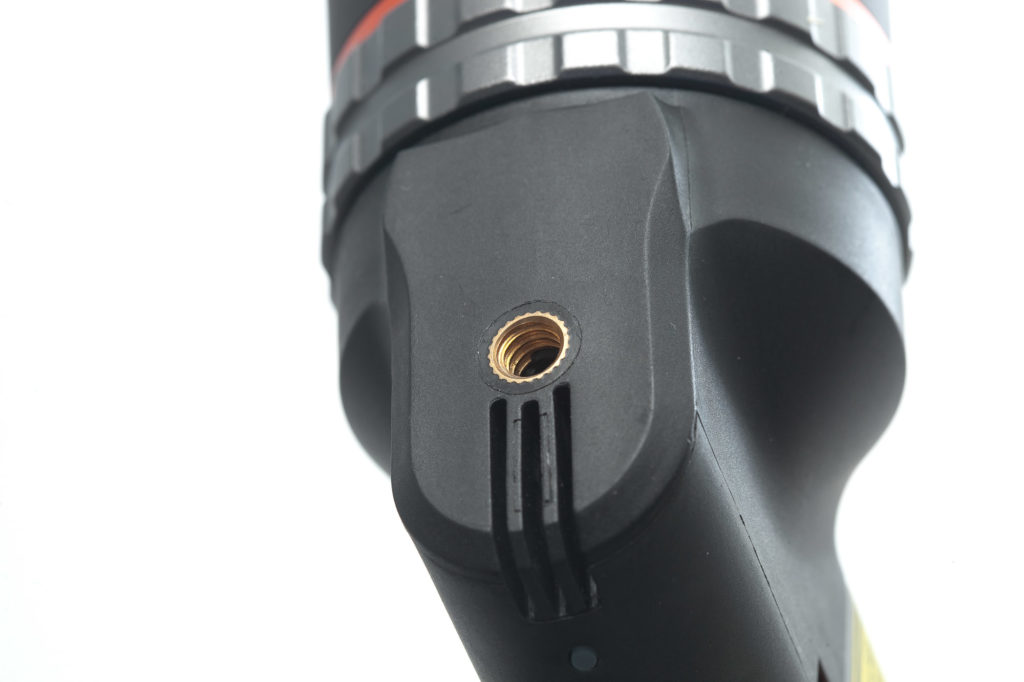
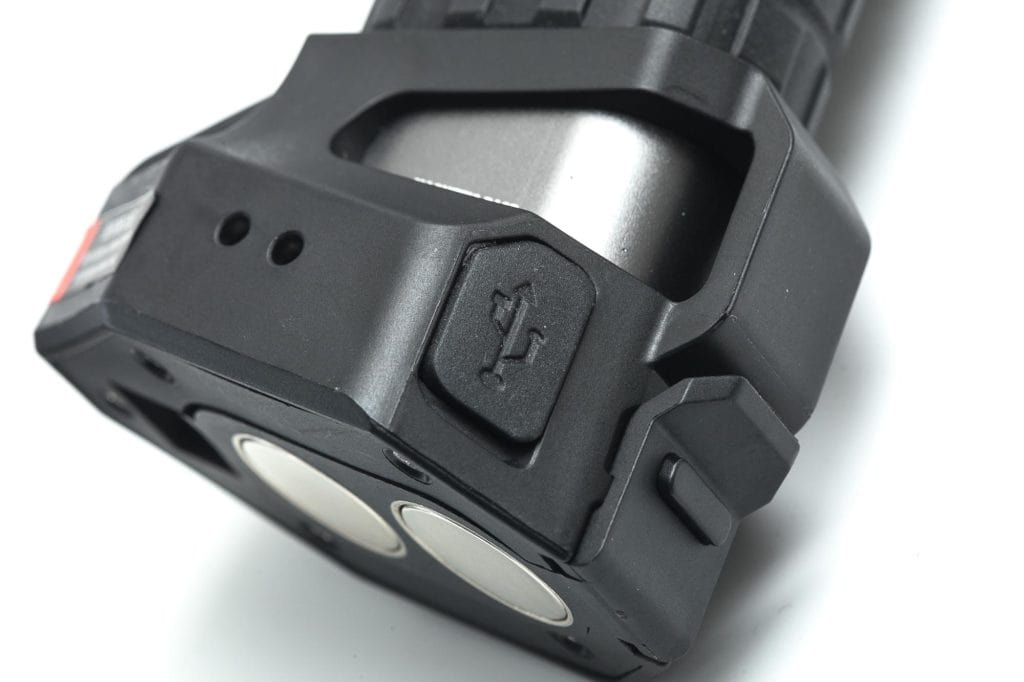
You can put it on a flat surface or upside down on a camera tripod. That’s great for close-up work because the light won’t bump around. This could be a great camping solution, especially if you consider the included car adapter. But it’s also very useful with the spotlight setting, because it will give you a stable beam. BTW the tripod mount is located on top of the flashlight and not at the bottom, likely because the bottom of the light is just a giant battery door with 2 built-in magnets.
These magnets are very strong, just like the one used in the Nebo Slyde King 2K. But the SL100 uses 2 magnets and has no trouble attaching horizontally to something metal, even being so heavy. You need quite a bit of force to pull it straight off metal. The easiest way to remove the light (when using the magnets) is using the flashlight as a lever.
Build Quality, and Warranty
Having a rubber handle is not only helpful for grip, but it also has a few more benefits.
- Your hands won’t get too cold
- It’s protective (dropping or hitting something)
The light is made up of different kinds of materials. The battery door and bottom of the flashlight are plastic. The handle (underneath the rubber) is aluminum. The area above the switch, where the battery level indicators and the tripod attachment are, is plastic. And lastly, the bezel is likely made of aluminum.
The bezel has a matte finish, but is a bit sensitive to scuffs, just like the plastic part at the neck. We shouldn’t forget this is a work light, something that will be used in harsh conditions and is not meant to be a shelf queen.
btw. the bezel is removable and gives you access to the COB LED, and the rest of the pill.
Warranty:
The short manual shares the following: This product is guaranteed against all defects in workmanship and materials for the original owner for two years from the date of purchase.
LED, Lens, Bezel, Beam, and Reflector
Like I said earlier, it’s not fair to call this (just) a spotlight (or thrower), because besides the LEP (laser excited phosphor), it also has a COB LED.
If you didn’t know, you wouldn’t probably be able to tell that the COB has 2 colors, white and red. The white light is accessible in the F and O position, while the red light is accessible in all 4 positions, including O (=Off).
This means that O isn’t just an Off position, it’s more of a standby feature. And unfortunately, because of the battery setup, it’s impossible to measure parasitic drain in the Off/standby position, because I’m very curious about that.
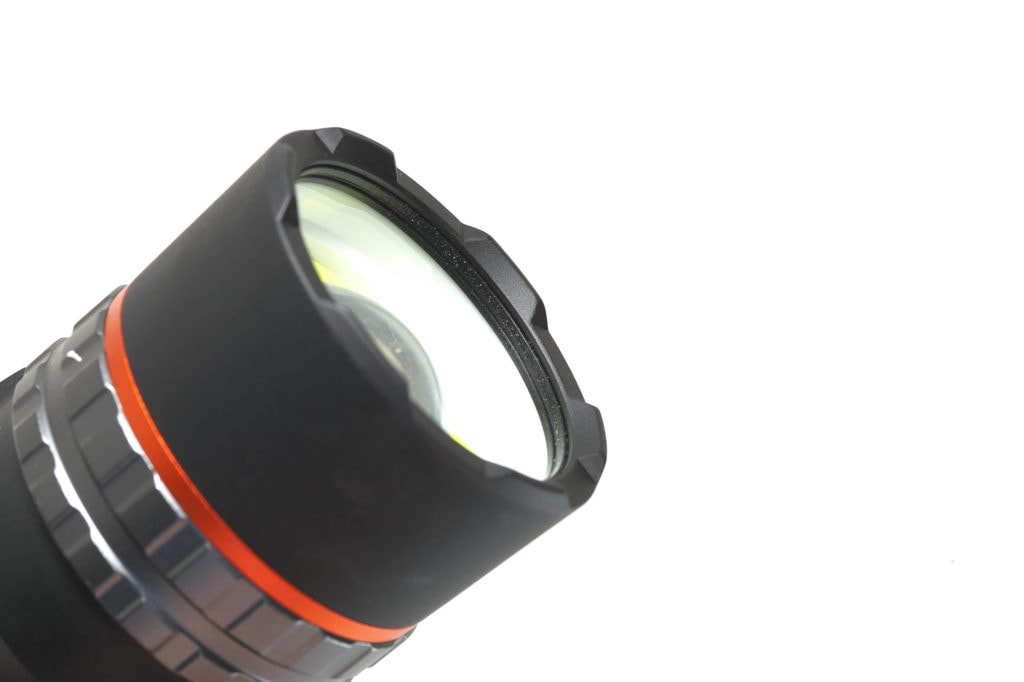
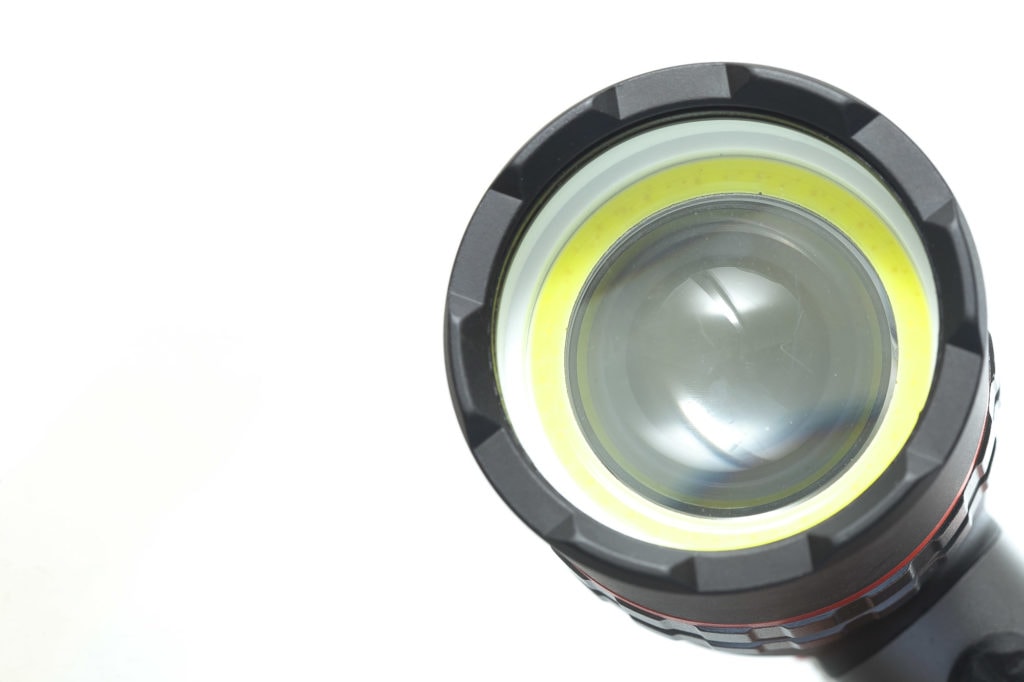
The COB is built into a ring around the convex lens that is used for the LEP. That way, you can have either or both at the same time. Clever idea.
The LEP is located in the middle, and the LEP module is the ‘shine through’ type. That’s how I call it anyway. It’s not using the traditional mirror-type LEP module.
To access the COB light source, you just need to unscrew the black bezel. The bezel is not glued and can be removed by hand.There’s a protection lens, that protects the COB and LEP. The COB is placed on an aluminum board, which is held down by a couple of Torx screws. I haven’t gone any further, but you will likely end up getting to the LEP once you remove those screws and boards.
The COB gives a very wide and smooth beam (flood) and is bright enough for most close up work. Unfortunately, the COB, nor the LEP have several output modes. Both are single mode.
I’ve given it a thought, and just like I have a single-mode tactical light with me every night I go out for beamshots (in the middle of nowhere), I can understand that some people prefer single modes. You press that switch, and you know what you will get.. There is no chance you will accidentally hit a Strobe mode, a Moon mode, or programming mode. It will do the same, each and every time you press that switch. So for search and rescue, that might be an important factor… Might be, because I don’t have any experience with this.
The COB beam is very cold white. Here are the LED measurements in terms of CCT (color temperature) and CRI (color render indexing).
I measured the COB with my Opple Light Master PRO and got the following readings:
- CCT: 6054K
- Ra (CRI): 66.9
- DUV: 0.0021
That’s relatively cold, as expected, but not too cold. The CRI is around 70, which is also normal.
The beam of the LEP is yellow.
Dimensions and size comparison
- Height: 195 mm / 7.677 ”
- Bezel diameter: 60 mm / 2.37 ”
Weight:
- With battery pack: 643.3 g / 22.69 oz
Flashlight comparison
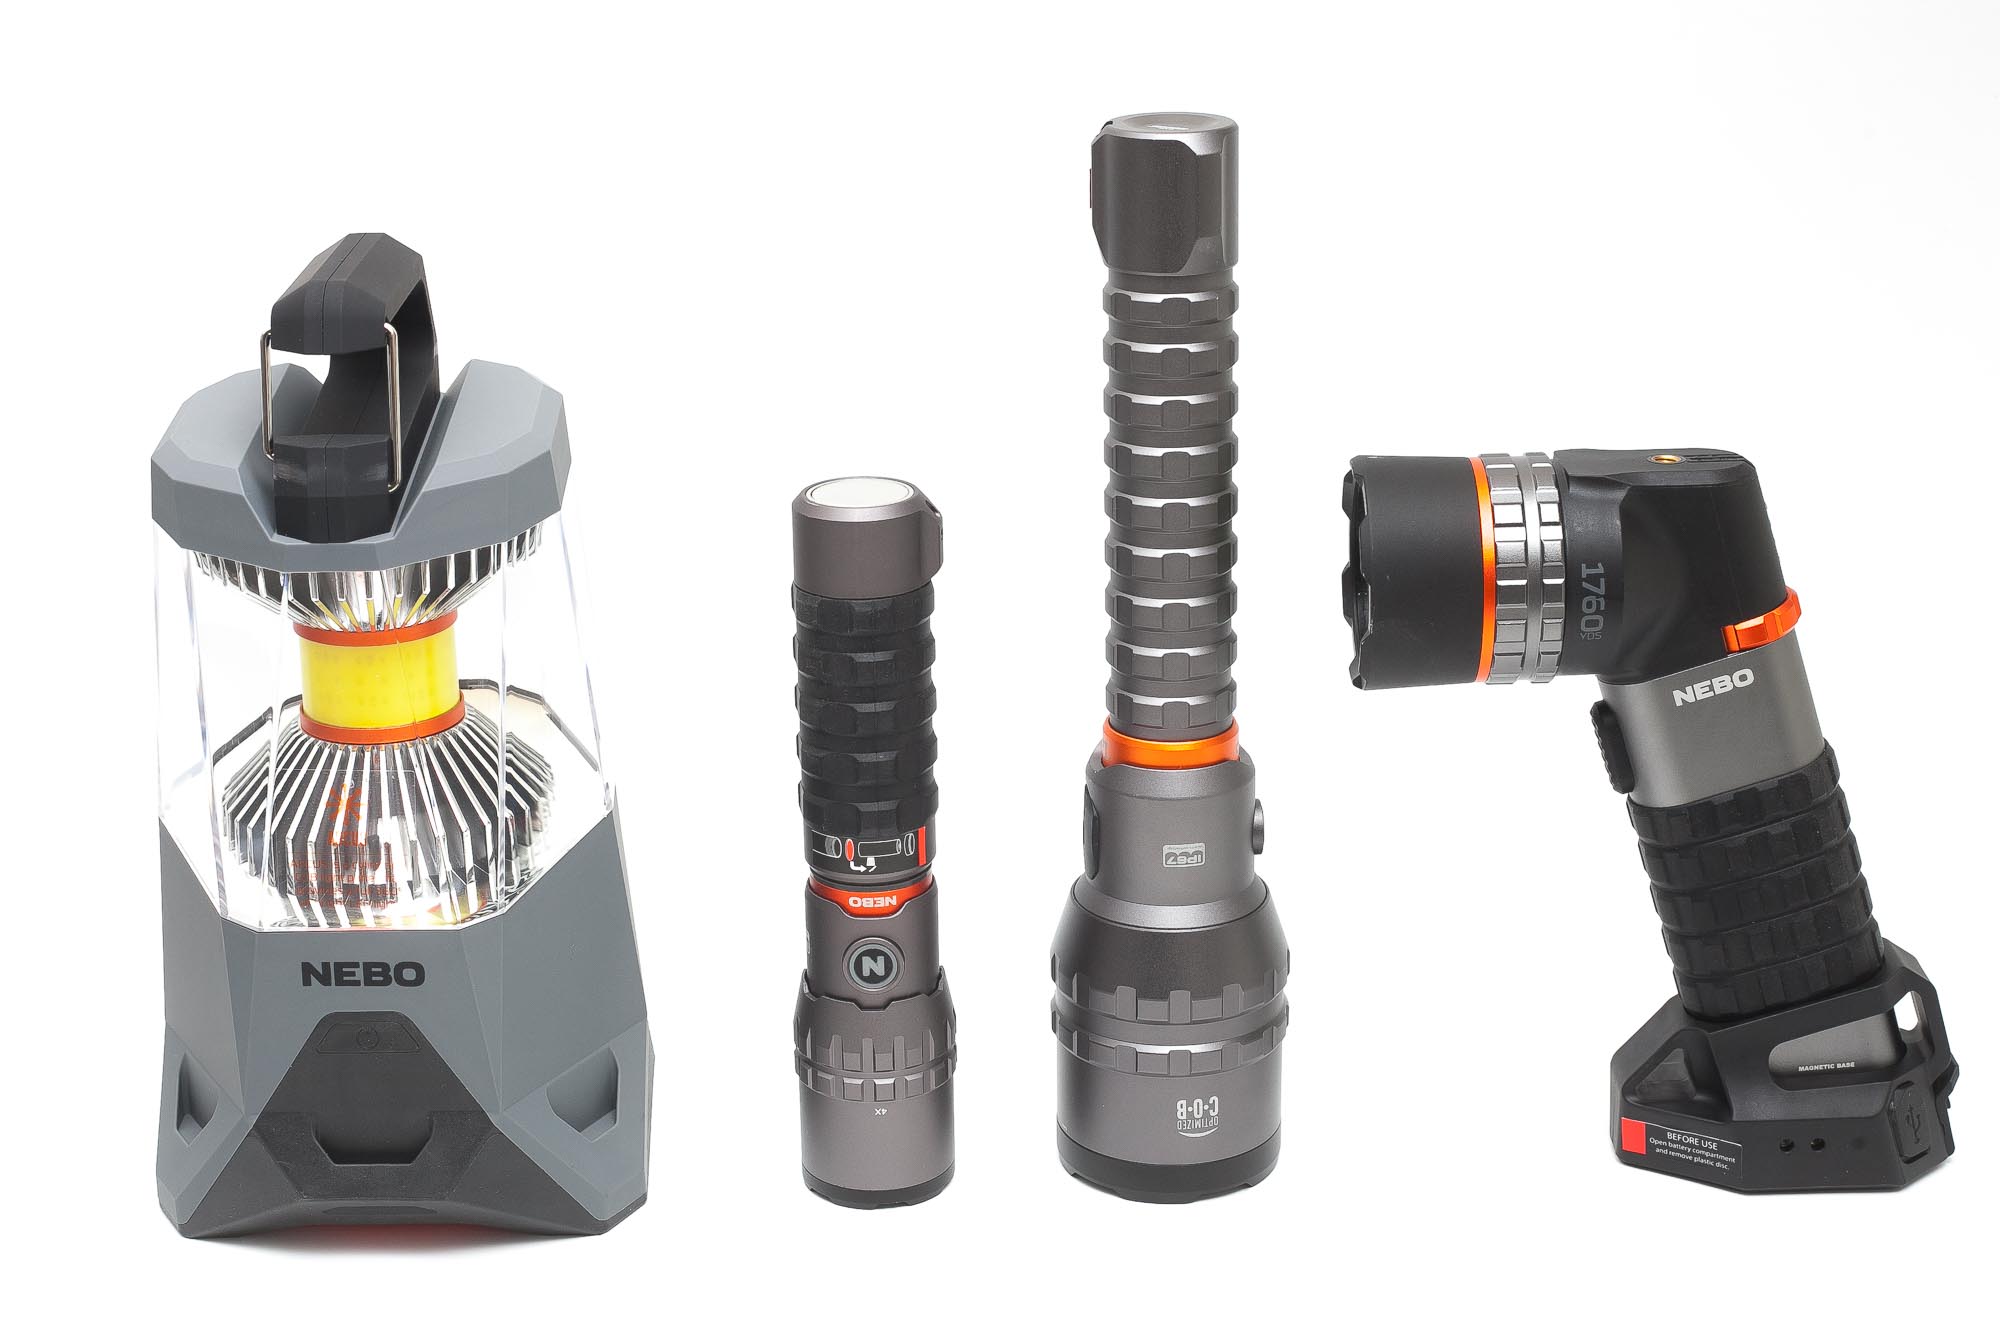
Size compared to other Nebo flashlights
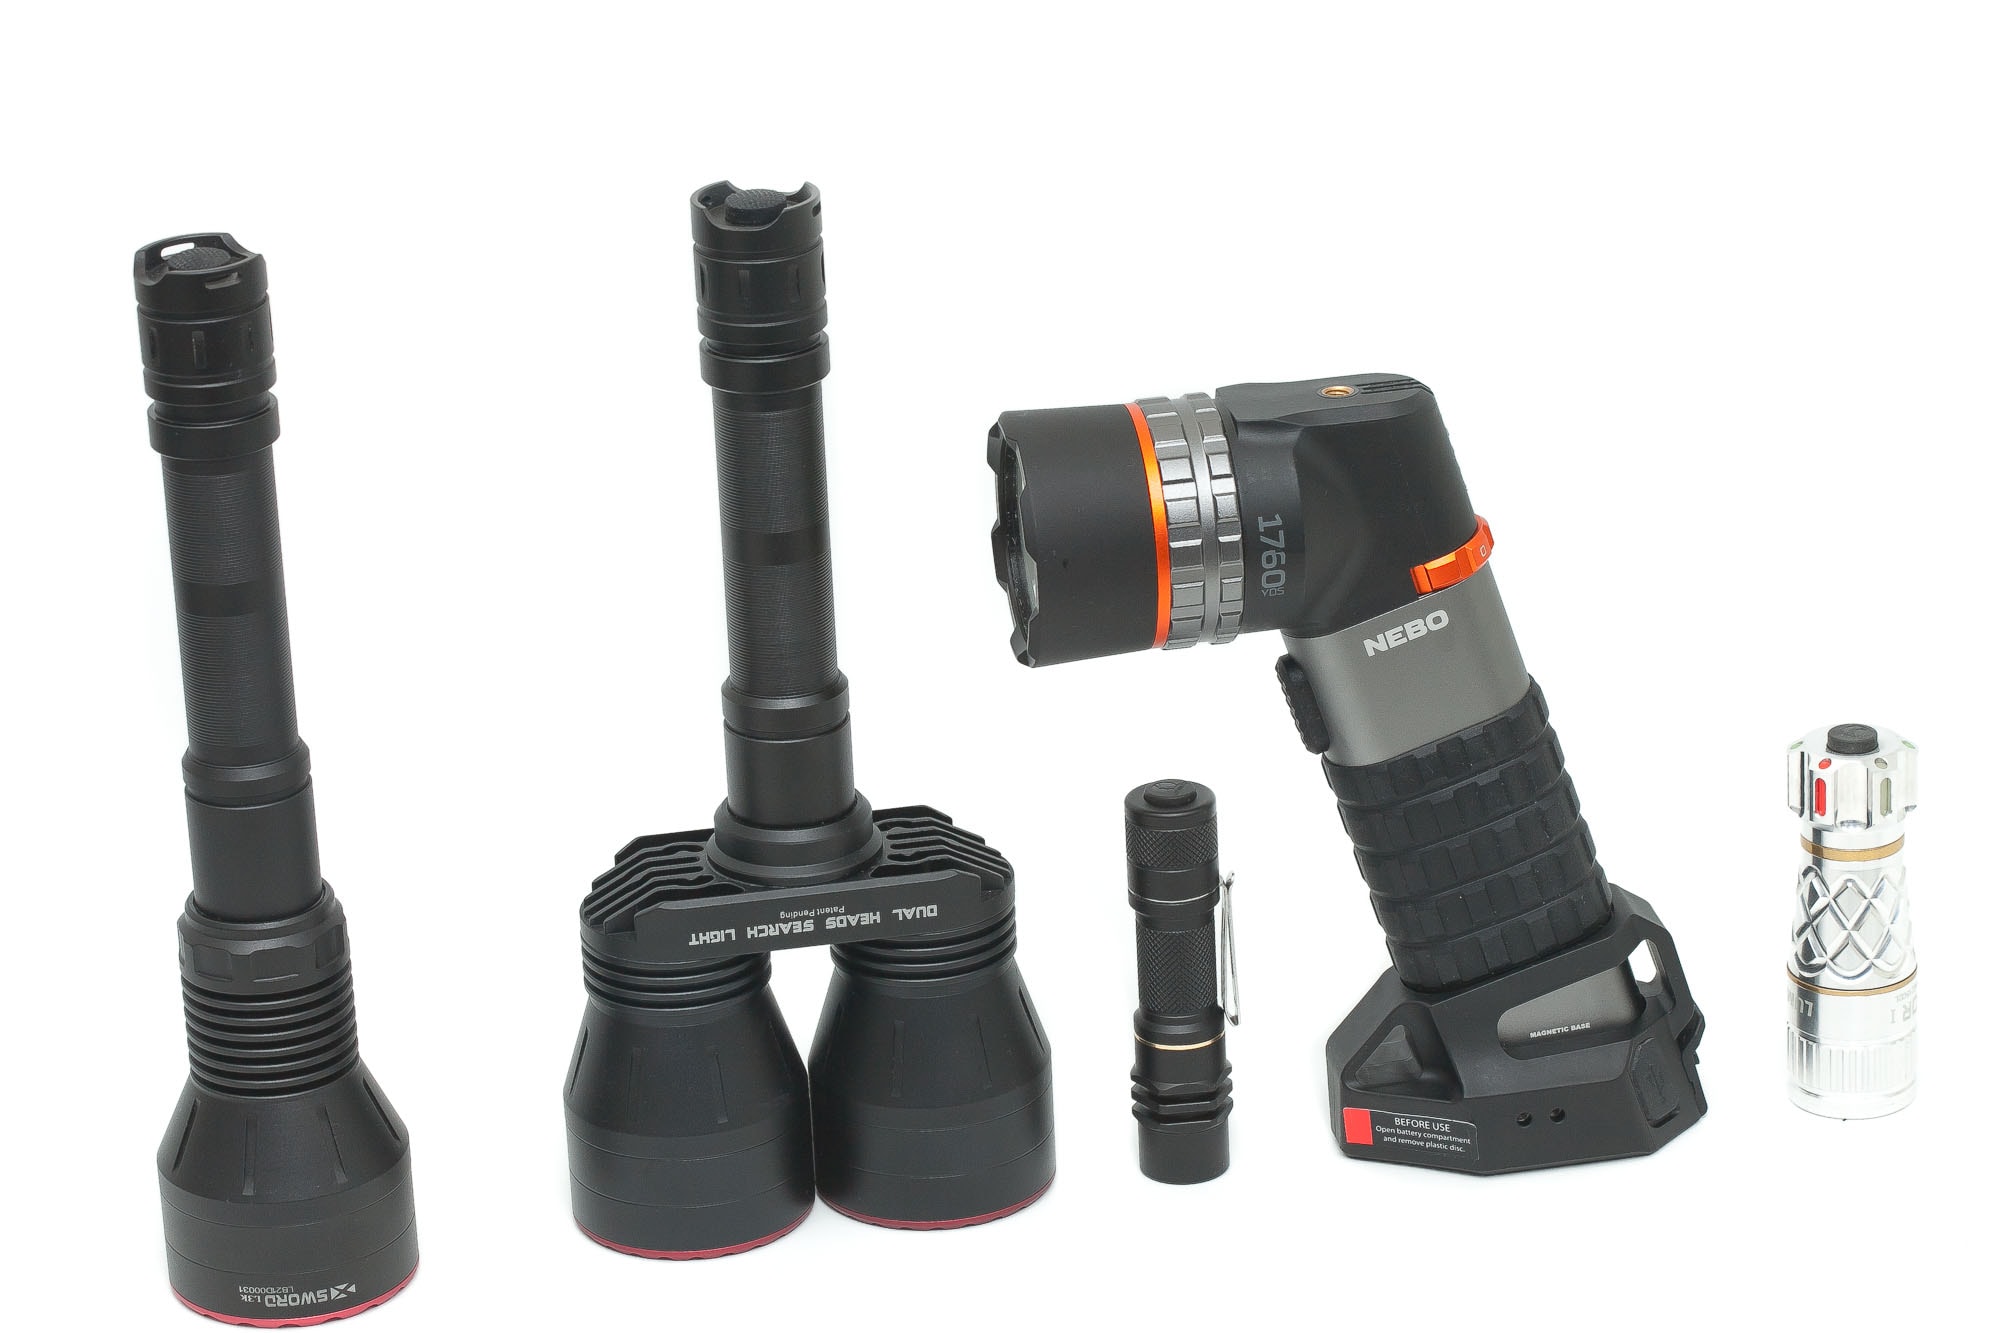
LEP competition, from left to right: Maxtoch Xsword L3K, Maxtoch Owleyes W PRO, Lumintop Ant Man, Nebo Luxtreme SL100, Lumintop Thor 1
Driver & User Interface:
The SL100 has 4 light options: COB white, COB red, LEP, and combo. Each mode has only 1 output, so that makes it very easy to use. To change light source, you turn the dial knob, from O – F – S – C.
You can access the red light from all positions by a long-press, including from the O (off) position.
Available modes:
- COB white, COB red, LEP, and combo COB + LEP
From OFF: (position F – S – C )
- Single-click: On
- Long-press: Red COB light
From OFF: (position O)
- Single-click: battery level indicator
- Long-press: Red COB light
From ON:
- Single-click: Off
- Long press: Red COB light
Shortcuts:
- There is only 1 shortcut to red from all modes.
Mode memory:
- There is no mode memory because each setting has only 1 output mode
Blinky modes menu:
- None
Low battery warning:
- The battery level indicators warn you
Lock-out mode:
- No
PWM:
- Only noticeable with the red light
Firmware / UI Conclusion:
The UI is very straightforward, which is great for a flashlight like this. The only thing I would have liked to see was different output modes.
When the light is on, and you change the light source, it has a very nice fade, instead of an abrupt on/off.
Batteries & Charging
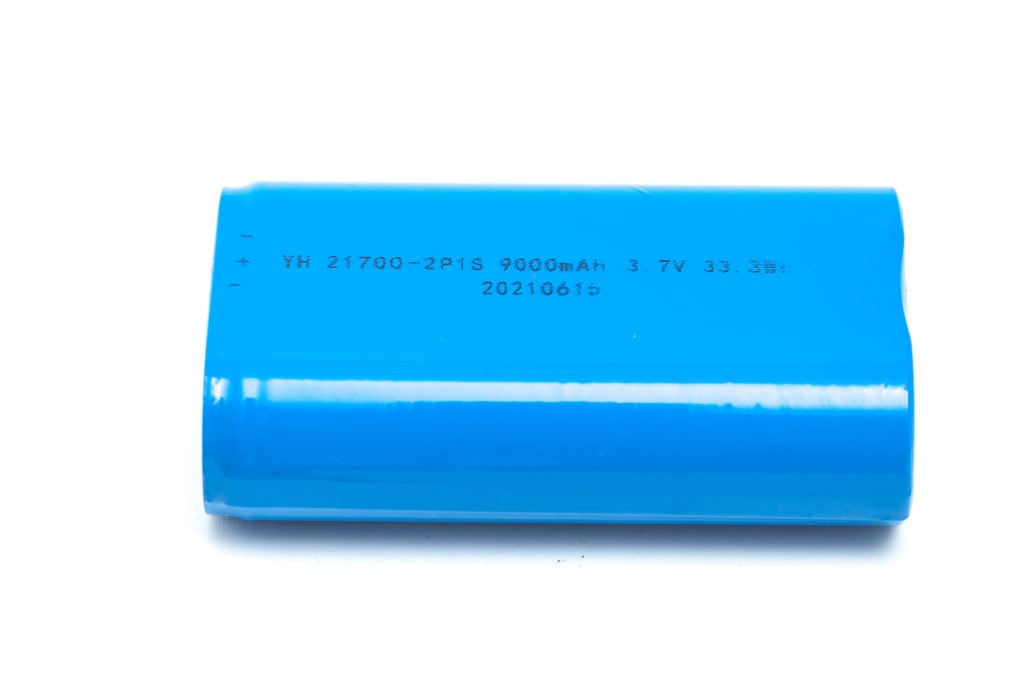
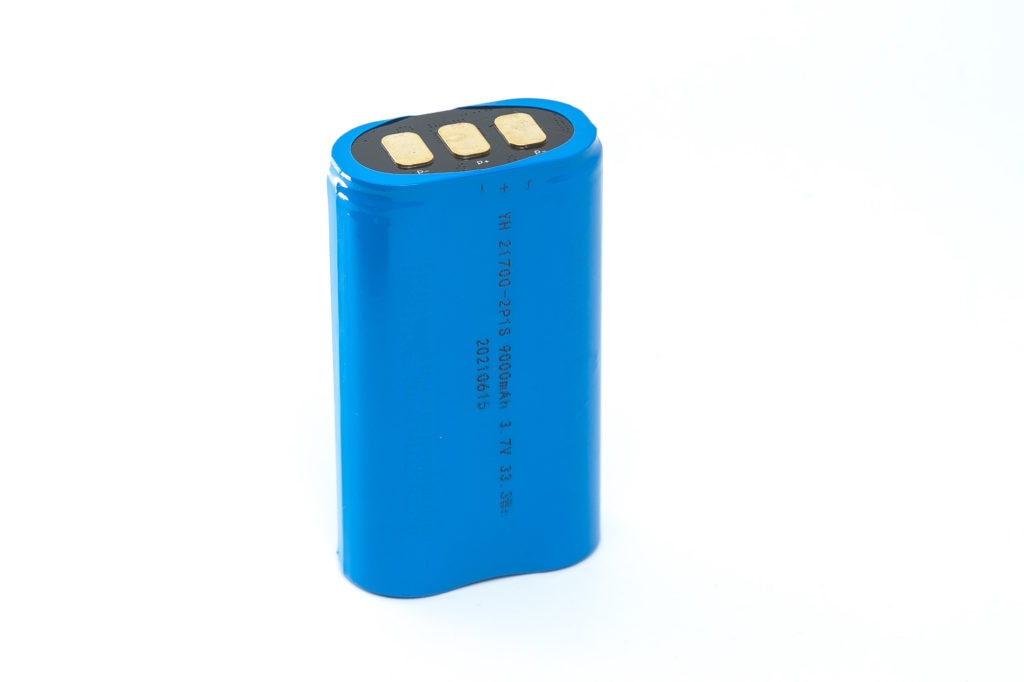
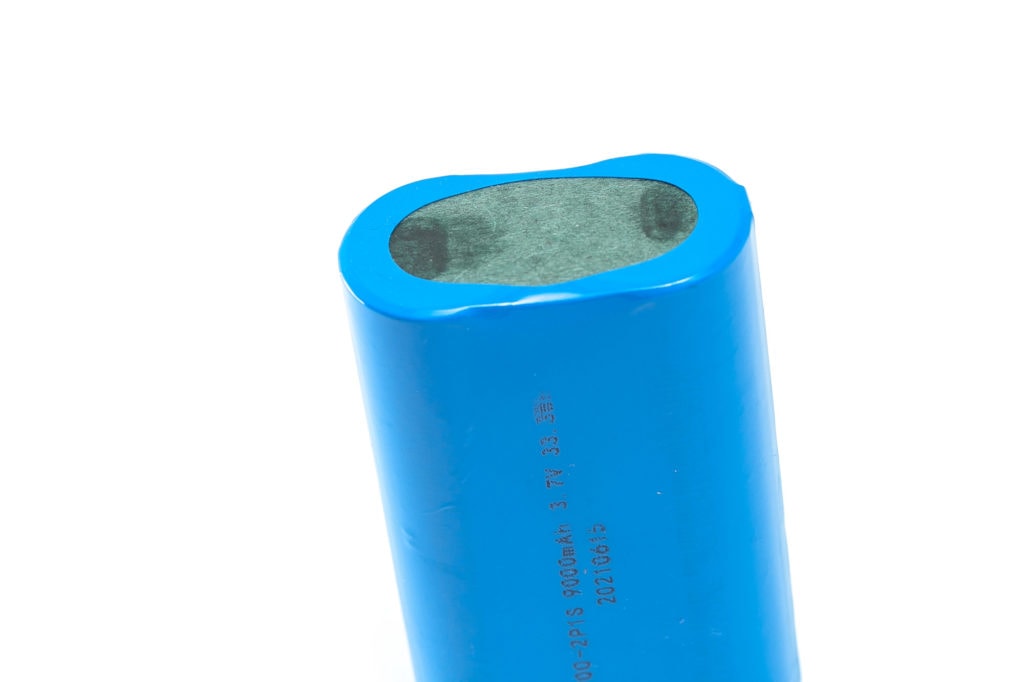
Nebo includes a battery pack with the following text: YH 21700-2P1S 9000mAh 3.7V and includes the battery production date: 20210615. It has 3 connection pads on top, with 2 for negative, and 1 for a positive signal. I don’t think you can easily replace it, but with some soldering skills you should be able to replace the pack when it breaks.
Because it’s 9000mAh, each battery should have a capacity of 4500mAh, which is average for a 21700 battery.
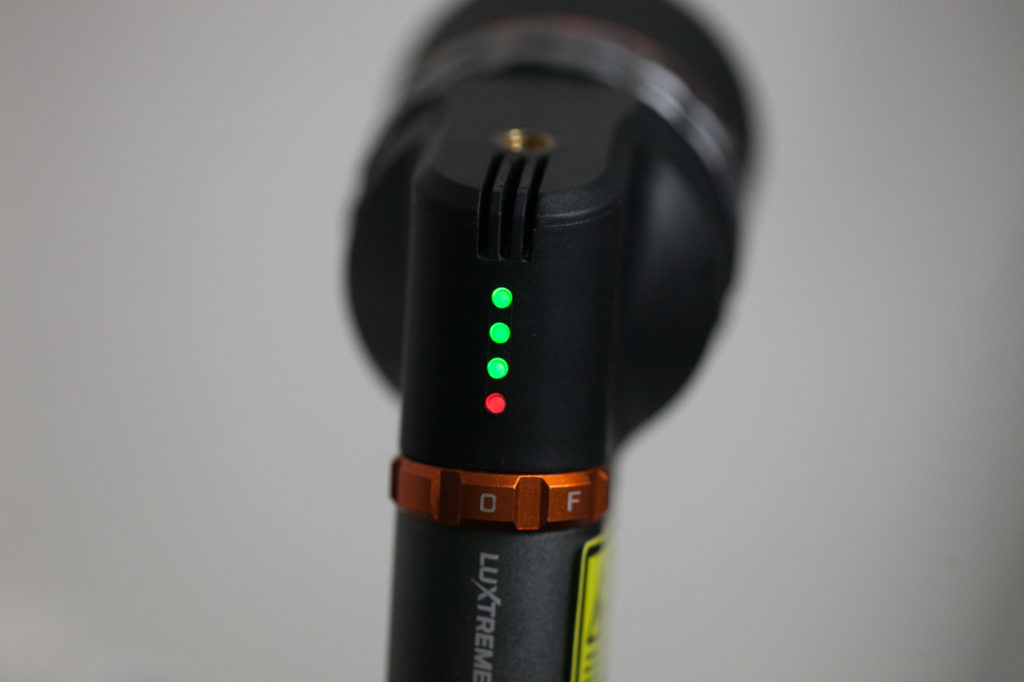
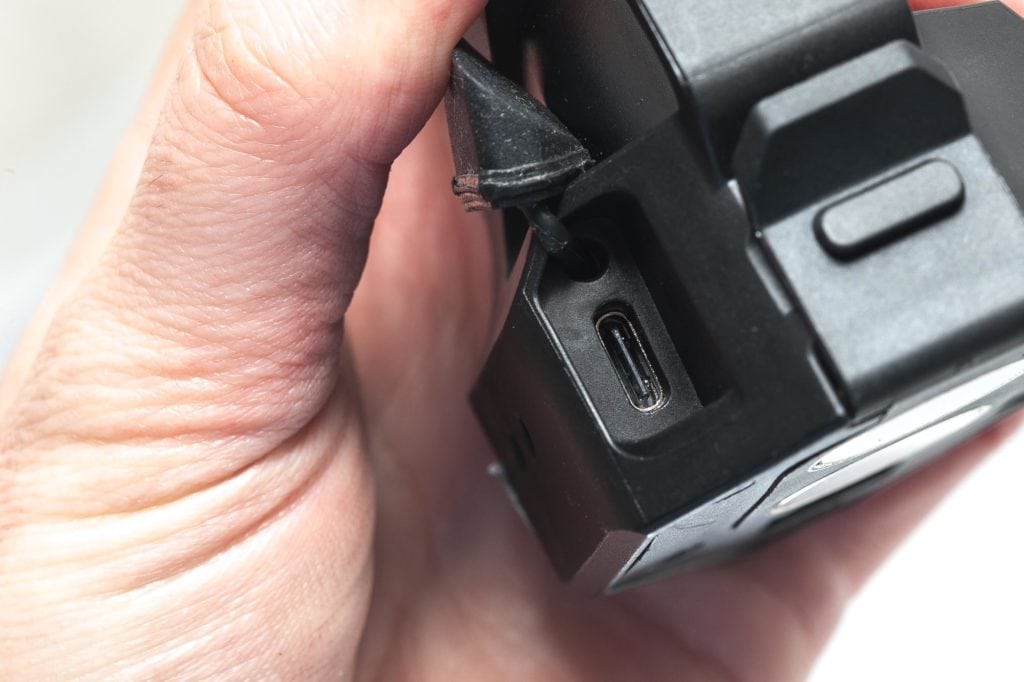
For charging, you better use the included USB-A to USB-C cable, because others may not fit well. If you don’t use a USB meter like me, you can still figure out it’s not charging by looking at the charge indicator lights near the dial switch. If they stay off, the USB cable isn’t connecting.
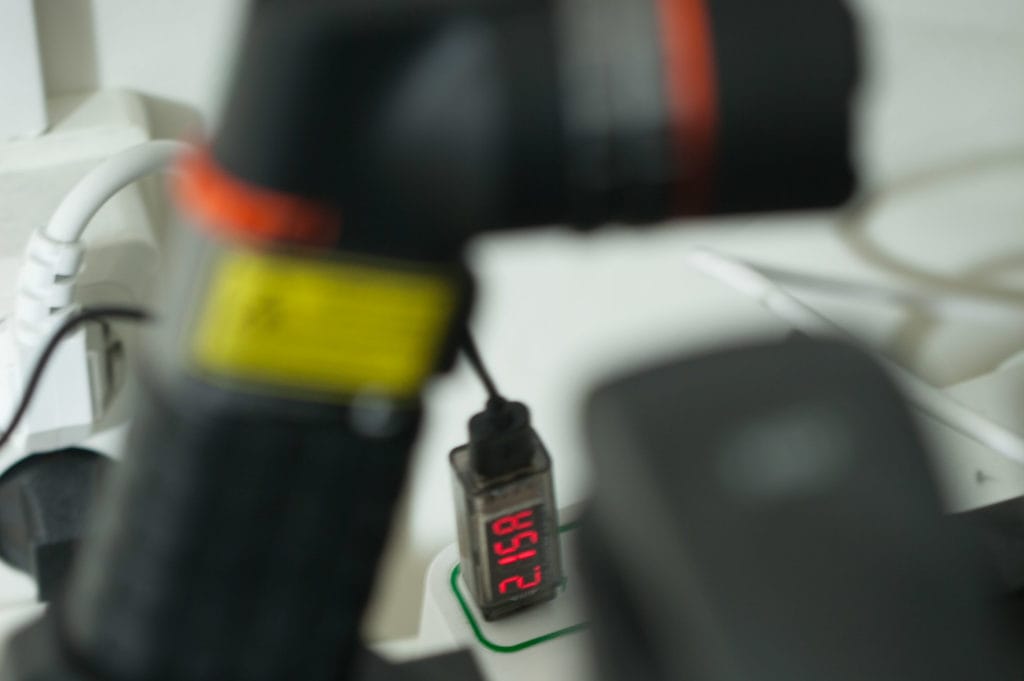
The charge rate is just above 2A, and charges the battery in about 6 hours, according to my personal testing. After about 5h 30min the charge lights turn solid, but the charge has not finished completely yet. You can also charge it with a USB-C to USB-C cable, depending on the power source. My desktop computer USB-C port charged the light just fine, but my USB power adapter didn’t.
While charging, the battery level indicators blink, starting with only 1 light, up to 3 green lights. When all charging lights turn solid, the battery is full. Not completely full, because it will continue charging at a charge rate of about 0.2A.
12V car adapter
Then there’s the 12V car adapter with USB-C cable.
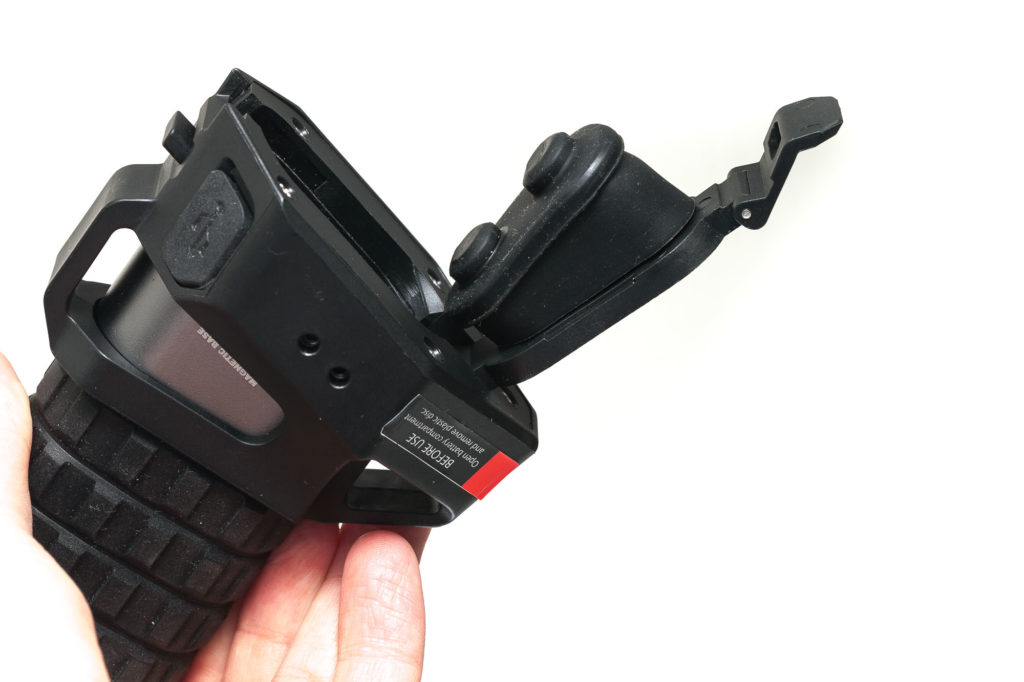
I didn’t test the specific car adapter, but I added the battery insulator (so there is no contact) and attached the USB-C cable, and the light works directly from the USB port. I’m not sure if that’s supposed to be done, but it works.
That would mean, that you can use the flashlight, with the 12V adapter, for continuous light. Perfect for places where you can use the car for search and rescue. etc.
Performance test
Lumen measurements:
All output numbers are relative to my homemade Integrating Sphere. It is set up with an Extech SDL400 Lux Meter for measurements including a Kenko PRO1D ND-16 filter. The base measurement is done with a Convoy S2+ that has been tested at 255 lumens.
For Amp readings, I use a Fluke 77III DMM. For higher amps I now use a Fluke 325 True RMS clamp meter. For microamps, I use a cheap DMM with an easy-to-use micro amp setting.
I took the measurements using the included batterypack.
| Mode | Specs | turn on** | 30sec | 10minutes |
|---|---|---|---|---|
| LEP | 280 lm | 327 lm | 321 lm | 182 lm |
| COB | 500 lm | 609 lm | 580 lm | 156 lm |
| LEP+COB | 525 lm | 615 lm | 598 lm | 271 lm |
| Red | 30 lm | 20.20 lm | 19.66 lm | 19 lm |
It’s good to see that mine performed even better than specs. That’s a little unusual these days, except for a few brands.
**Both the LEP and COB don’t start at peak output. They start at about 90% and quickly increase to peak output within a second or 2. I wrote down the highest output I could measure at ‘turn on’ which was in reality about 2-3 seconds.
I’m not sure how well my Luxmeter can measure the red light, so take that with a grain of salt in terms of actual output.
Parasitic drain:
- Impossible to measure
Runtime:
The runtime test was done with the 50cm integrating sphere, including the Kenko Pro1D ND-16 filter and Extech SDL400 data logging Lux Meter.
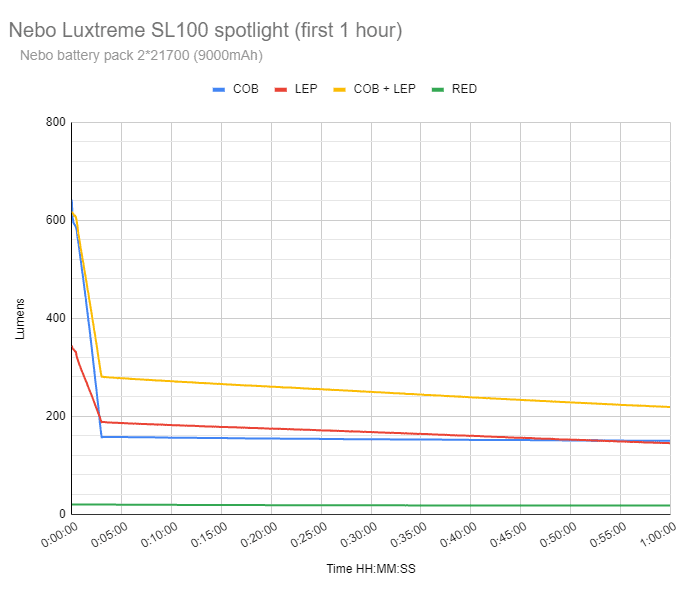
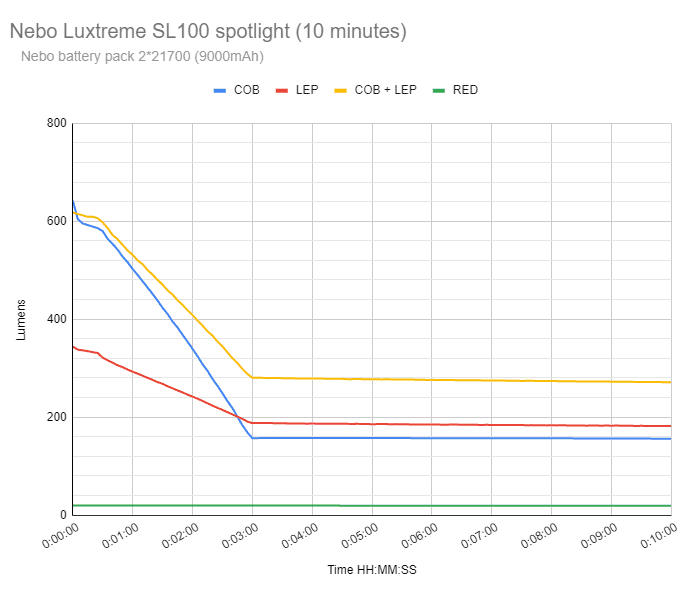
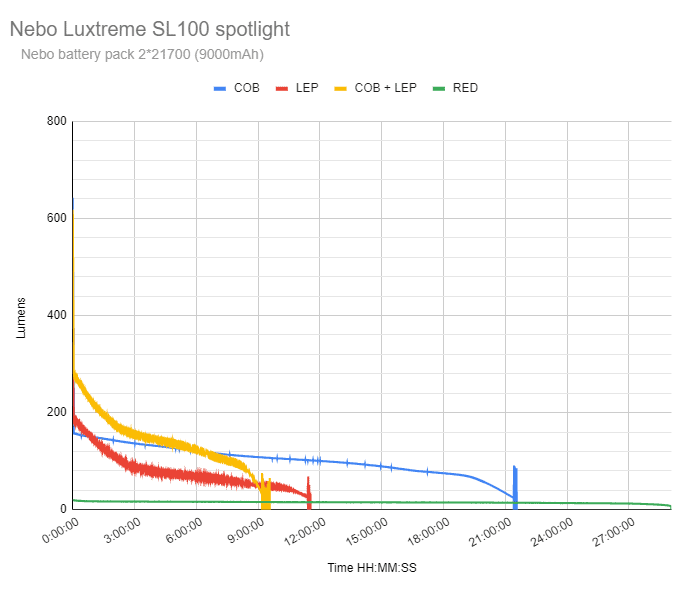
COB, LEP, and COB+LEP runtimes have a 3 minute drop as you can see in the runtime graphs above.
LEP starts at around 327 lumens and at 30 seconds it’s down to 321 lumens. After 10 minutes the output is down to 182 lumens. After 11h06min it reached 32 lumens (10% of the measurement at 30 seconds). At 11h25min it turns on and off, to show that the battery is empty.
COB starts over 600 lumens, and after 30 seconds it’s 580 lumens. After 10 minutes it’s down to 156 lumens. At 19h55min it’s down to 10%, but at 21h24min it finally turns off for the first time.. It will continue blinking to warn you that the battery is empty.
COB+LEP starts over 600 lumens and after 30 seconds it’s down to 598 lumens. At 8h50min it is down to 10%, and at 9h11min it starts turning off and on.
Red light runs for 29h03min before it turns off. The last measured output was 7 lumens.
Throw Measurement
Measurements were taken both indoors at 5 meters and outdoors at 20 meters with a professional Hagner E4-X Lux Meter. COB at 5 meters, and LEP at 20 meters. Measurements were taken 30 seconds after turn on. Here are the measurements:
| Light source | Specs | Candela | meters | yards | miles |
|---|---|---|---|---|---|
| COB | 42 meters | 350 | 37 | 41 | – |
| LEP | 1600 meters | 676,000 cd | 1644 meters | 1798 yards | 1.02 miles |
Again good news. The measurements for the LEP were even a bit higher than specs.
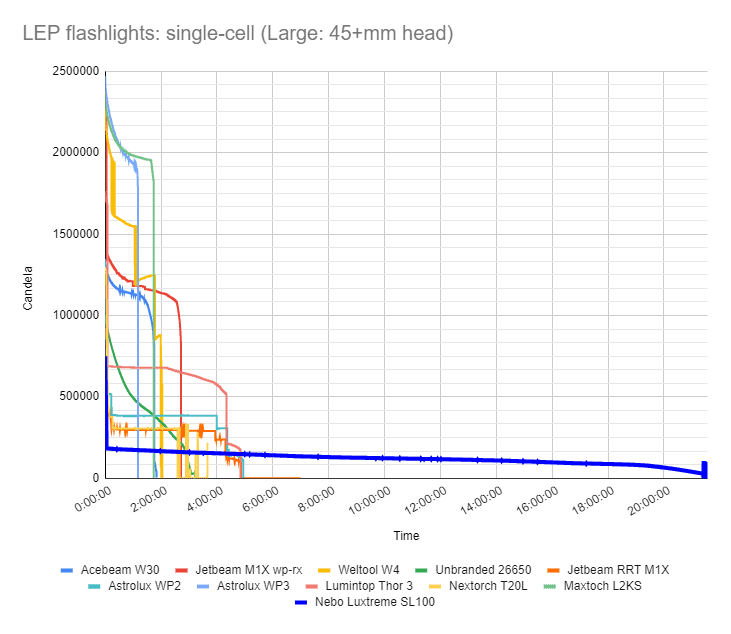
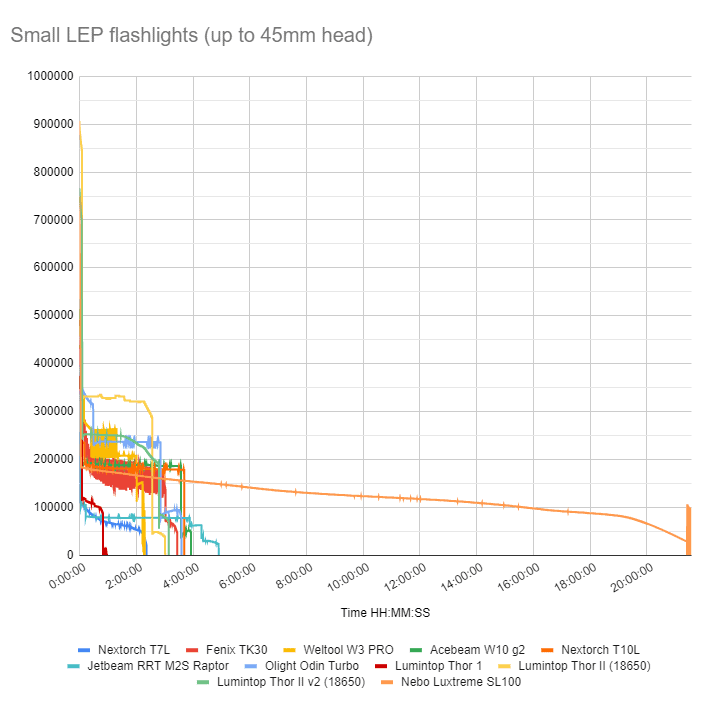
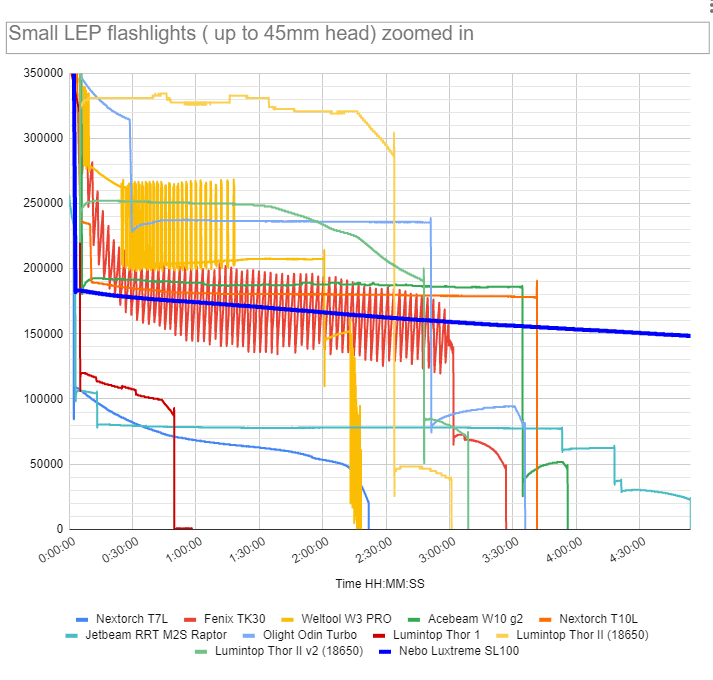
I also compared it to other LEPs from the bigger ones to the smaller ones. You see that the runtime is just extreme, but the sustained throw isn’t the highest. It still means that it’s above 100,000 cd till 15h38min.
Beamshots
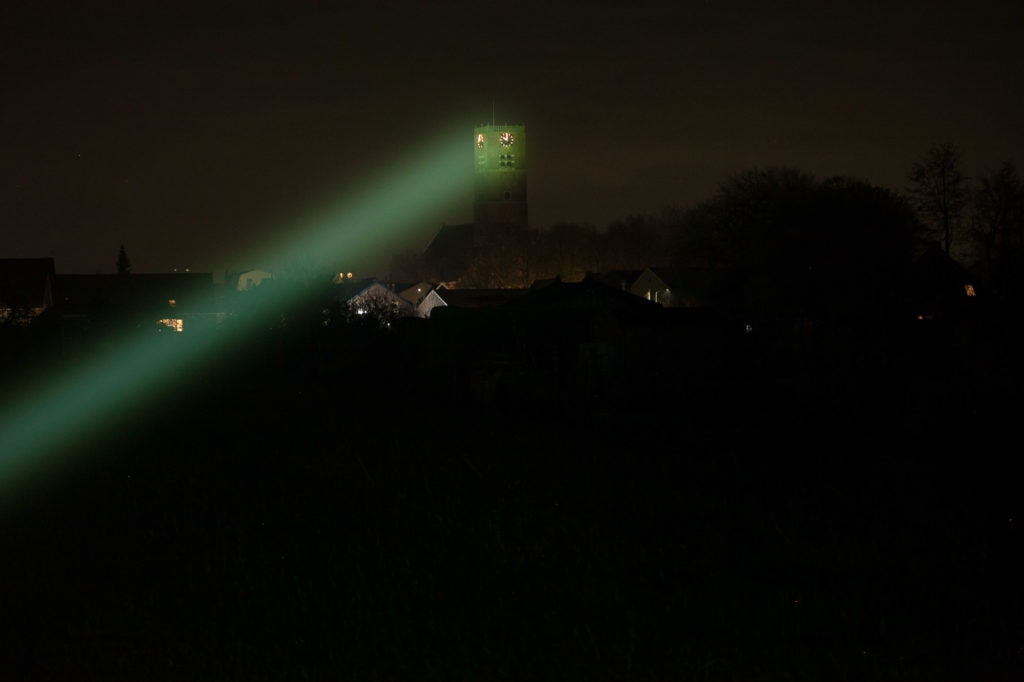
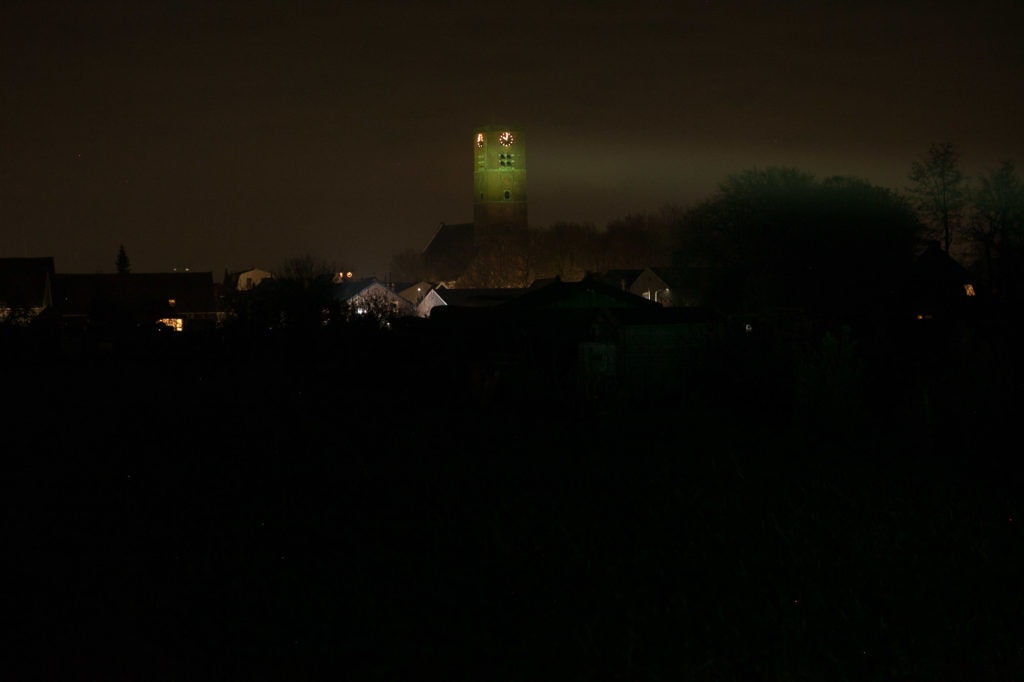
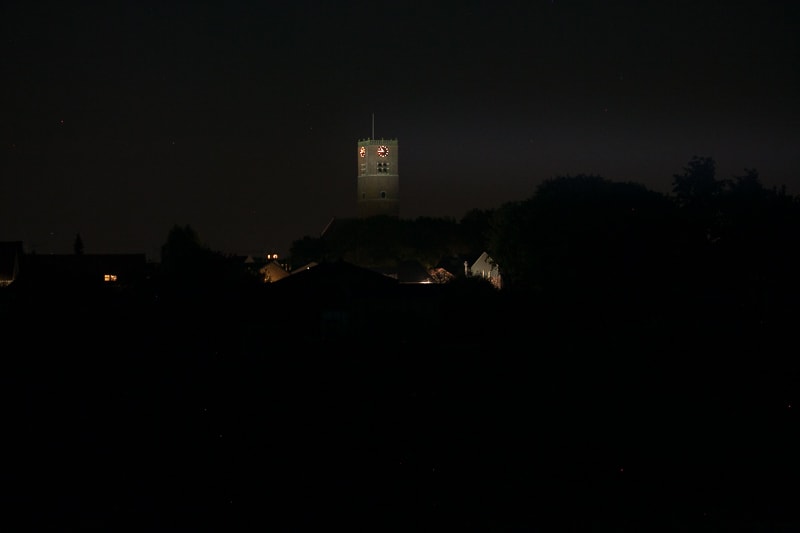
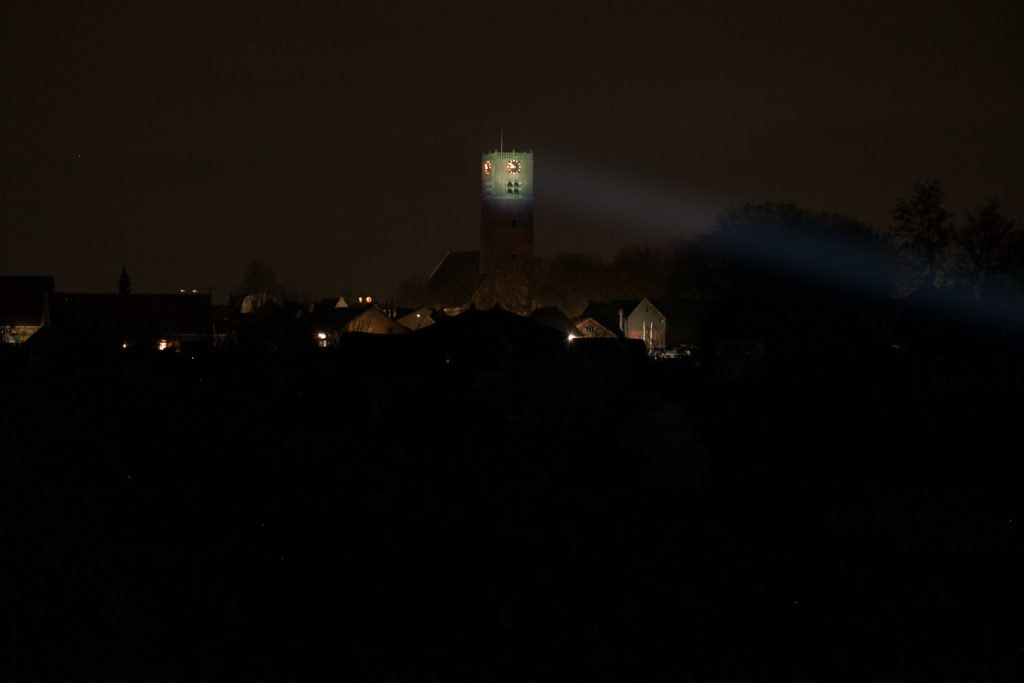
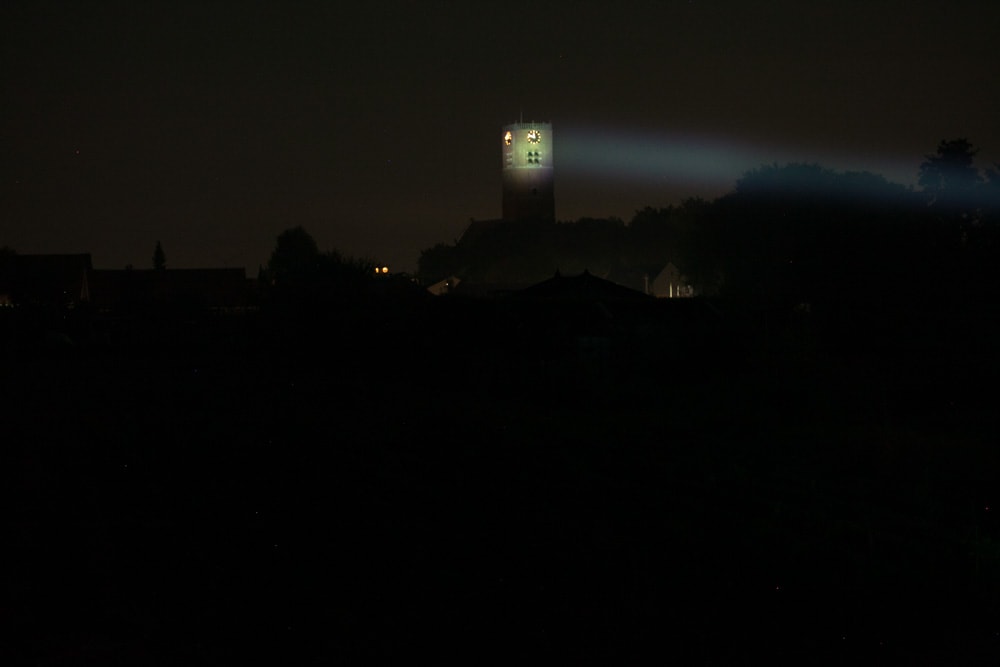
For the tower beamshots, I used a Canon EOS 5D Mk2 and a 100mm lens. manual settings: ISO1600, .5sec , F4, 5000K
The tower is about 450 meters / 492 yards away.
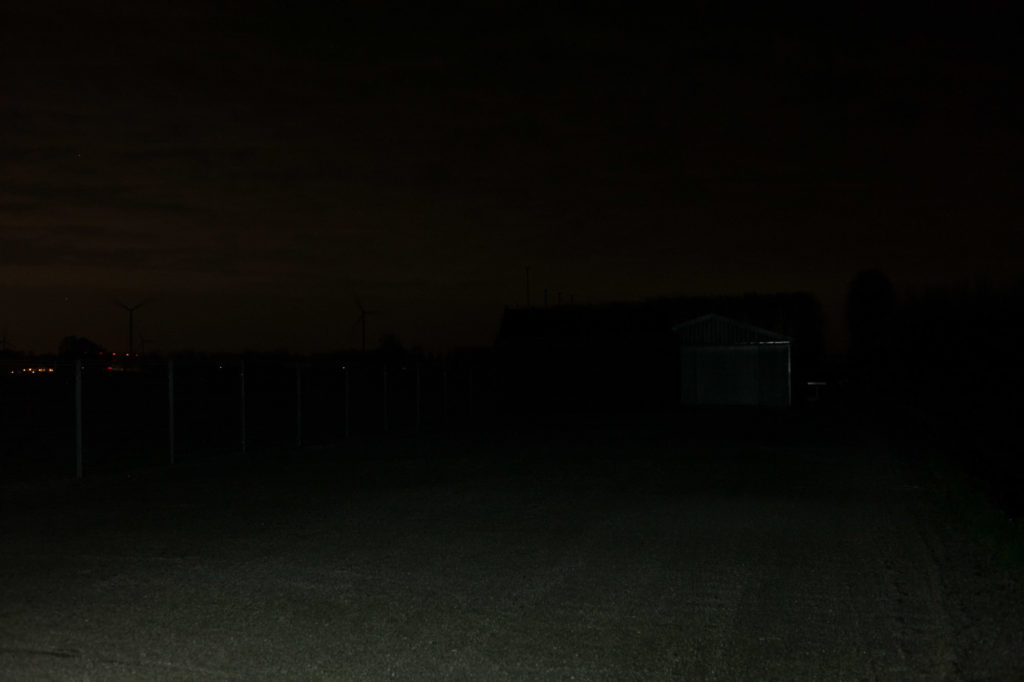
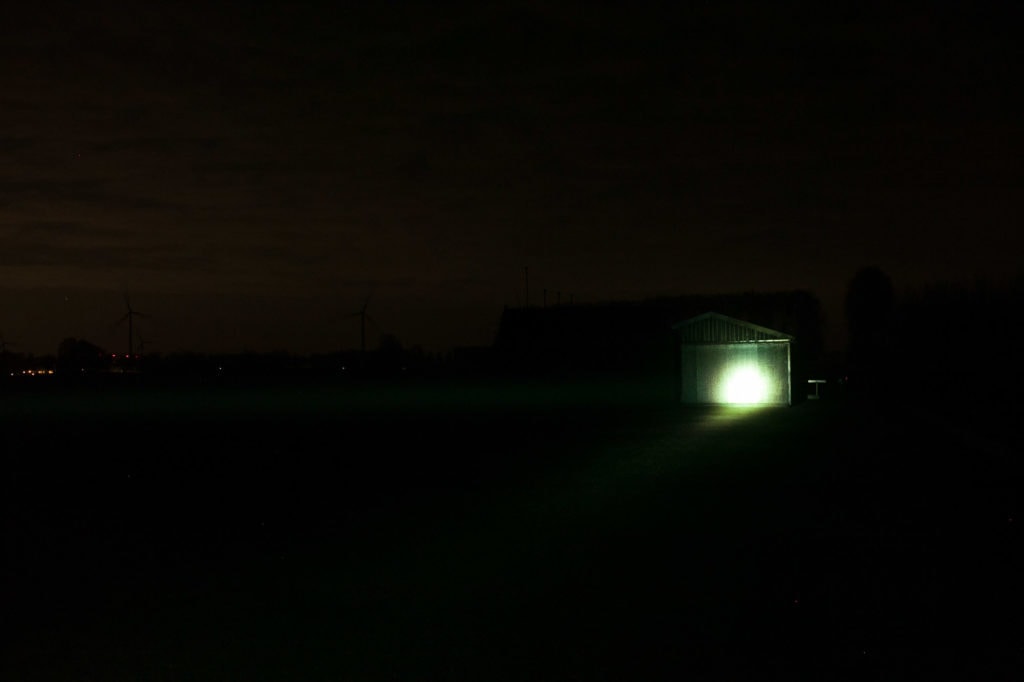
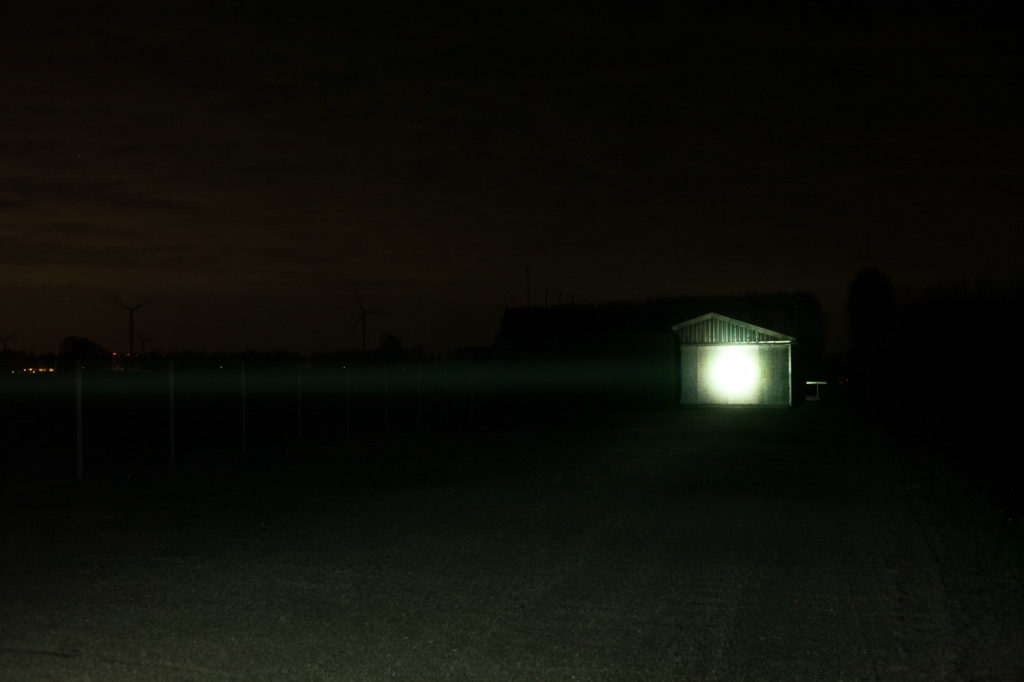
For the shed beamshots, I used a 50mm lens. manual settings: ISO1600, 1/4sec , F4, 5000K
The shed is about 65 meters / 71 yards away
Disclaimer: This flashlight was sent to me for review at no cost by Nebo UK. I have not been paid to review, nor have I been holding back on problems or defects.
Final Verdict
Pros
- Feels good in hand (not slippery)
- Includes a very strong belt clip + lanyard
- Dual light source (COB + LEP)
- Red light for emergencies and extra long runtime
- Smooth transition when toggling between light sources
- Extremely long runtimes in all modes
Cons
- No different output levels per light source
- Output drops within 3 minutes
- Not in the same league as other LEPs, but runs much longer
- Mixed materials used including plastic (near the tripod mount)
Explanation on star ratings:
1: Avoid: my phone flashlight would be a better choice – 2: Poor: significant defect or issues; almost unusable – 3: Average: some defects or issues; but still usable 4: Good: recommended (minor issues) – 5: Great: highly recommended
4 stars: ★★★★
I think I have something with simple UIs.. the Nebo Luxtreme SL100 has a very easy-to-understand UI which I like. Keep in mind the actual purpose of this light (search and rescue etc) a simple UI has some benefits. Another benefit is its exceptionally long runtime.
Within 5 minutes, the candelas have dropped to about 180,000 cd (almost 850 meters / 930 yards), which is not a bad beam reach, but it’s much lower than other LEP lights with the same head/lens diameter. Also the COB output drops around the same time. It would be great if it had a higher sustained output.
Nebo Luxtreme SL100 discount coupon
Get 15% off your next Nebo purchase with our unique 1Lumen discount code: 1lumen
1lumen selects and reviews products personally. We may earn affiliate commissions through our links, which help support our testing.