1lumen selects and reviews products personally. We may earn affiliate commissions through our links, which help support our testing.
Nitecore SRT6i review
Nitecore SRT6i specs
| Brand & Model | Nitecore SRT6i |
|---|---|
| Flashlight category | Tactical flashlight, Long Range, Search Light, Weapon Light |
| LED | Cree XHP35 |
| Max. output | 2100 lumens |
| Max. beam distance | 510 meters |
| Max. beam intensity | 65,200 cd |
| Battery config. | 1*21700, 2*CR123A, 2*RCR123/16340 |
| Onboard charging | USB-C |
| Modes | 3 |
| Blinkies | 1 |
| Waterproof | IPX68 |
| Review publication date | February 2023 |
Review intro:
Nitecore, known primarily for their tactical lights, lives their motto, “Keep Innovating,” and shows it in their newly released Smart Ring Tactical light, the SRT6i. An upgrade from the SRT6, the SRT6i boasts a number of major improvements including doubling the output, redesigning the Smart Selector Ring, adding their patented Strobe Ready™ button, and using the high powered i-Series battery.
Just because a light has a tail switch doesn’t mean it’s actually “tactical” in any way, but not long after I received this light and started using it, I could tell the SRT6i was the real deal. There’s too much to talk about in the introduction, so let’s get into it!
Package quality.
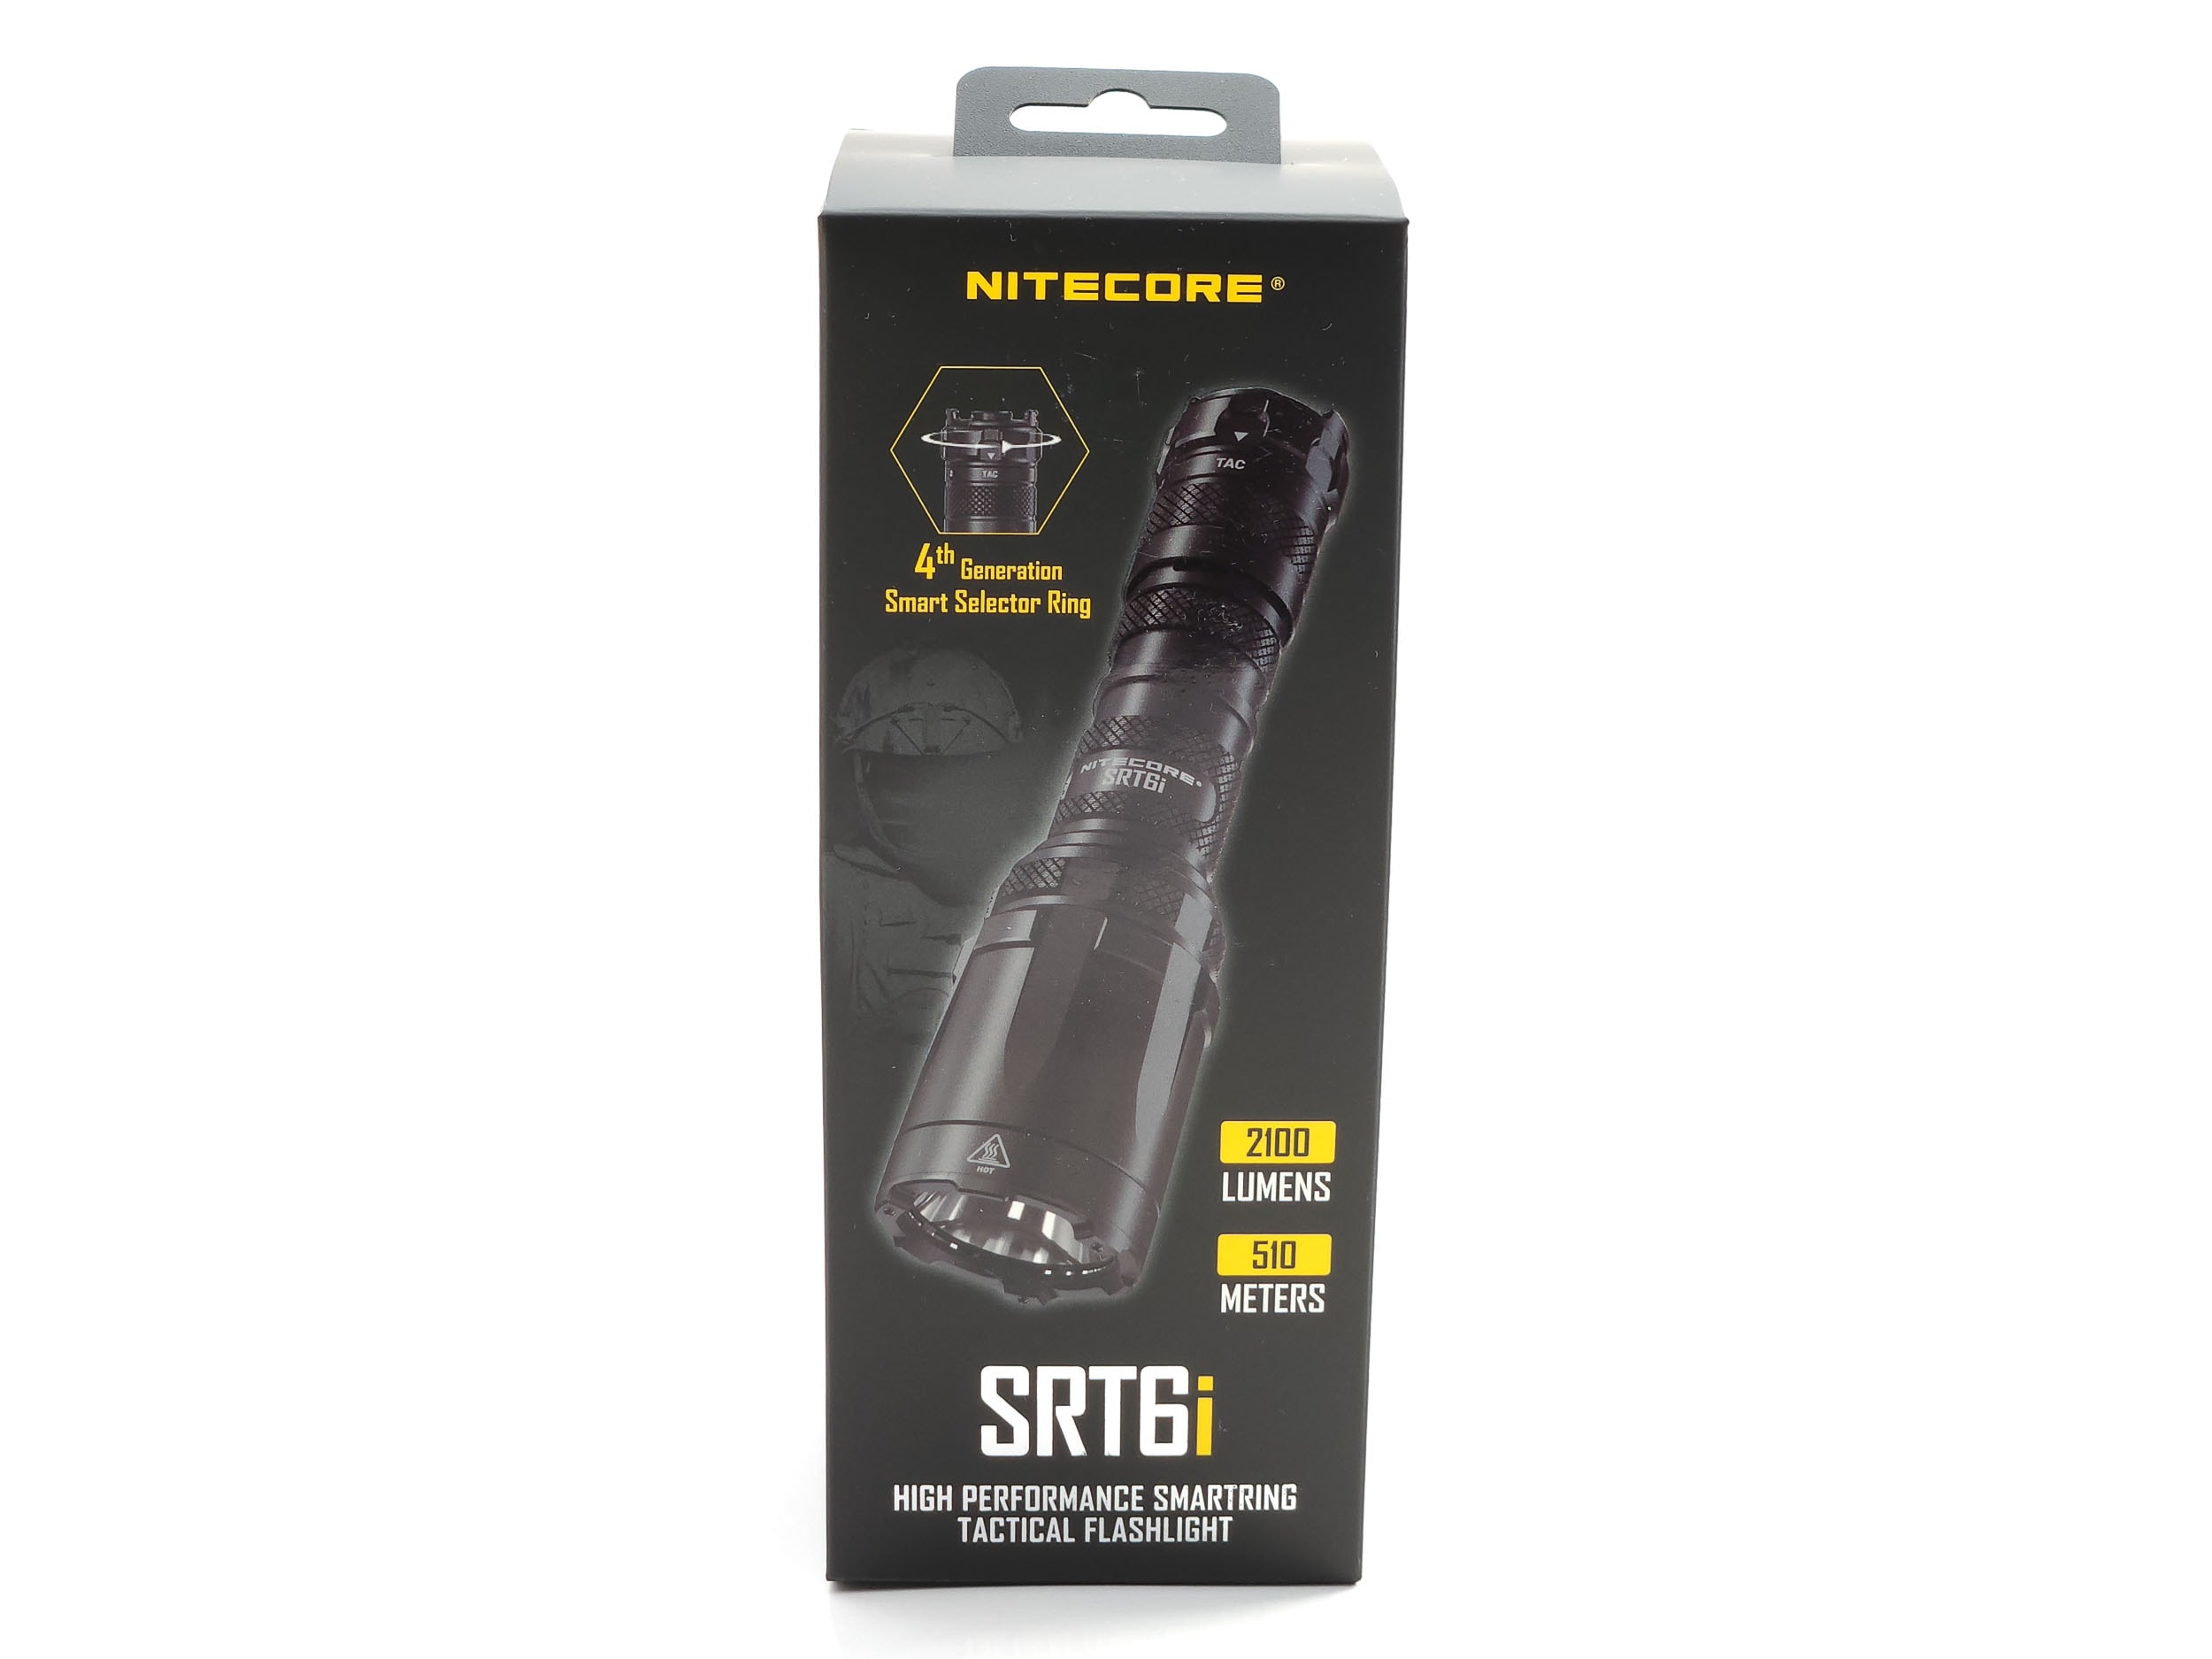
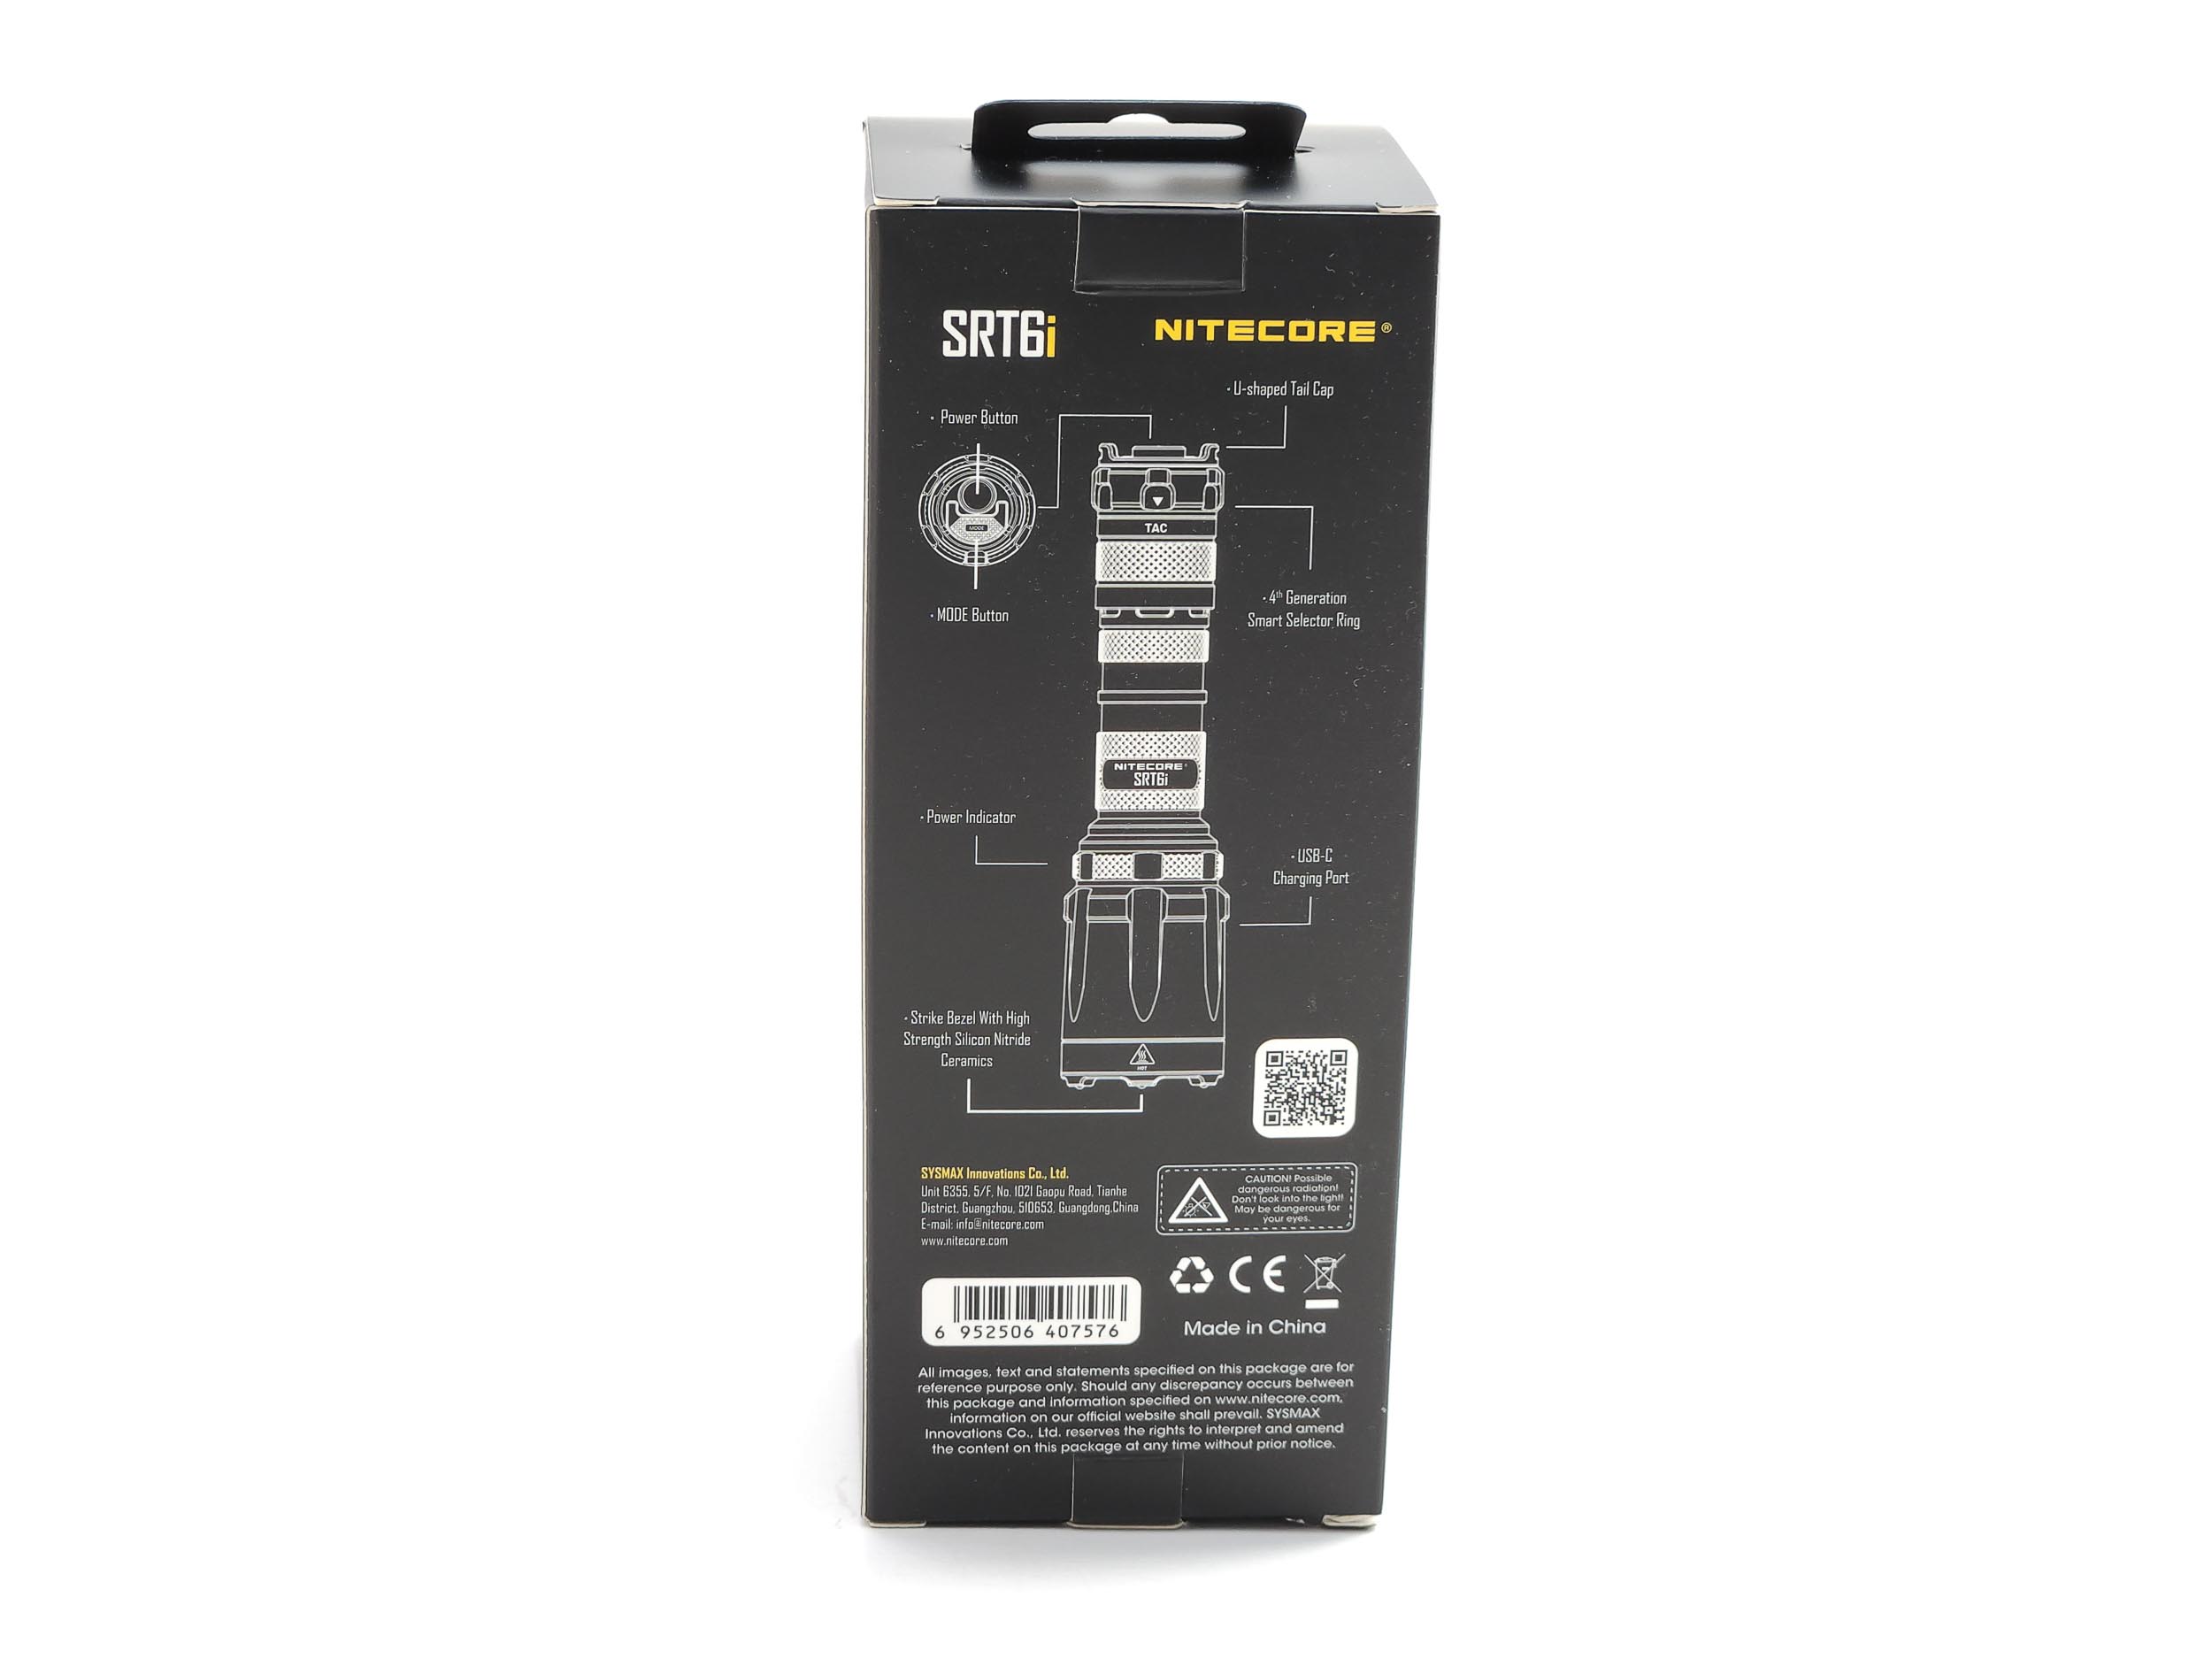
Nitecore’s packaging is top notch and definitely something you would, and sometimes can, find in a physical store. The black box has a glossy picture of the SRT6i on the front with a couple of bullet points, while the back has plenty of detailed information. There’s also a tab at the top for hanging on one of those pegboard hooks that merchandise is displayed on in stores.
Opening the box reveals a molded plastic tray that holds the light and accessories. The light is pressed into a form-fitting creche, while the accessories are stashed below. The plastic tray actually has a bottom to it that helps keep all of the accessories from spilling all over while you’re removing it, and a large tab at the top to grab onto and pull the whole thing out. All in all, it’s very nicely packaged.
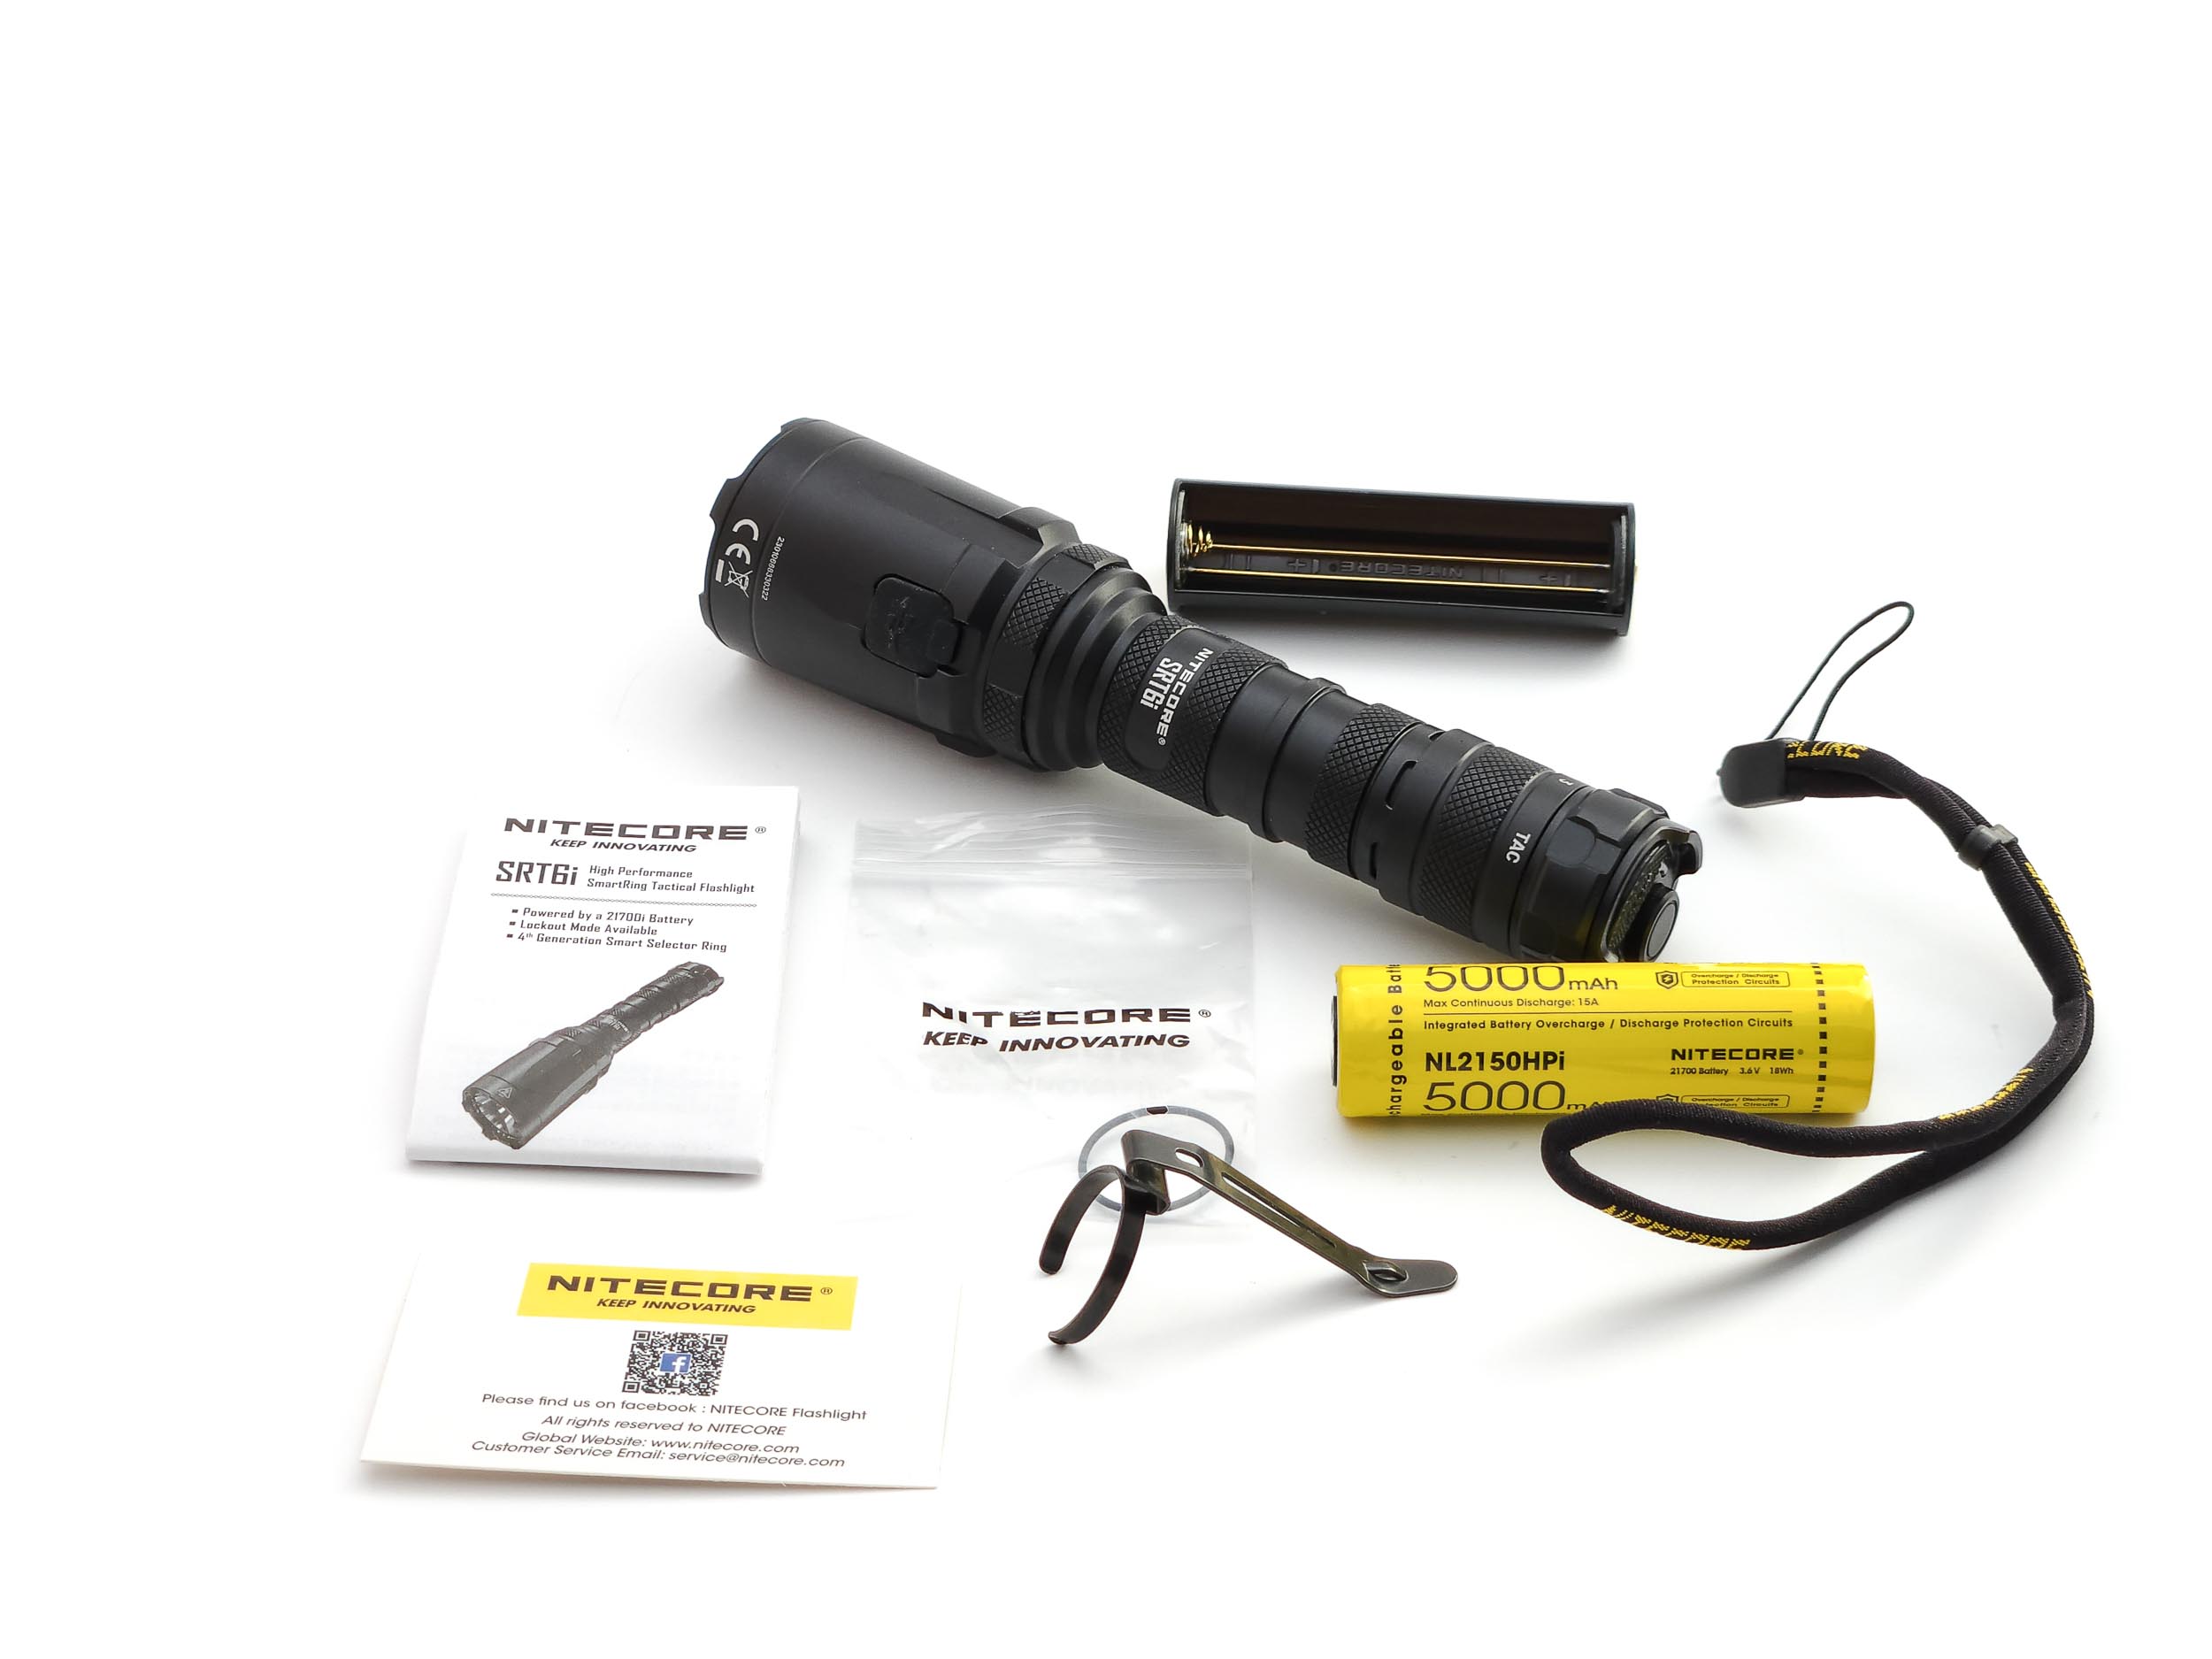
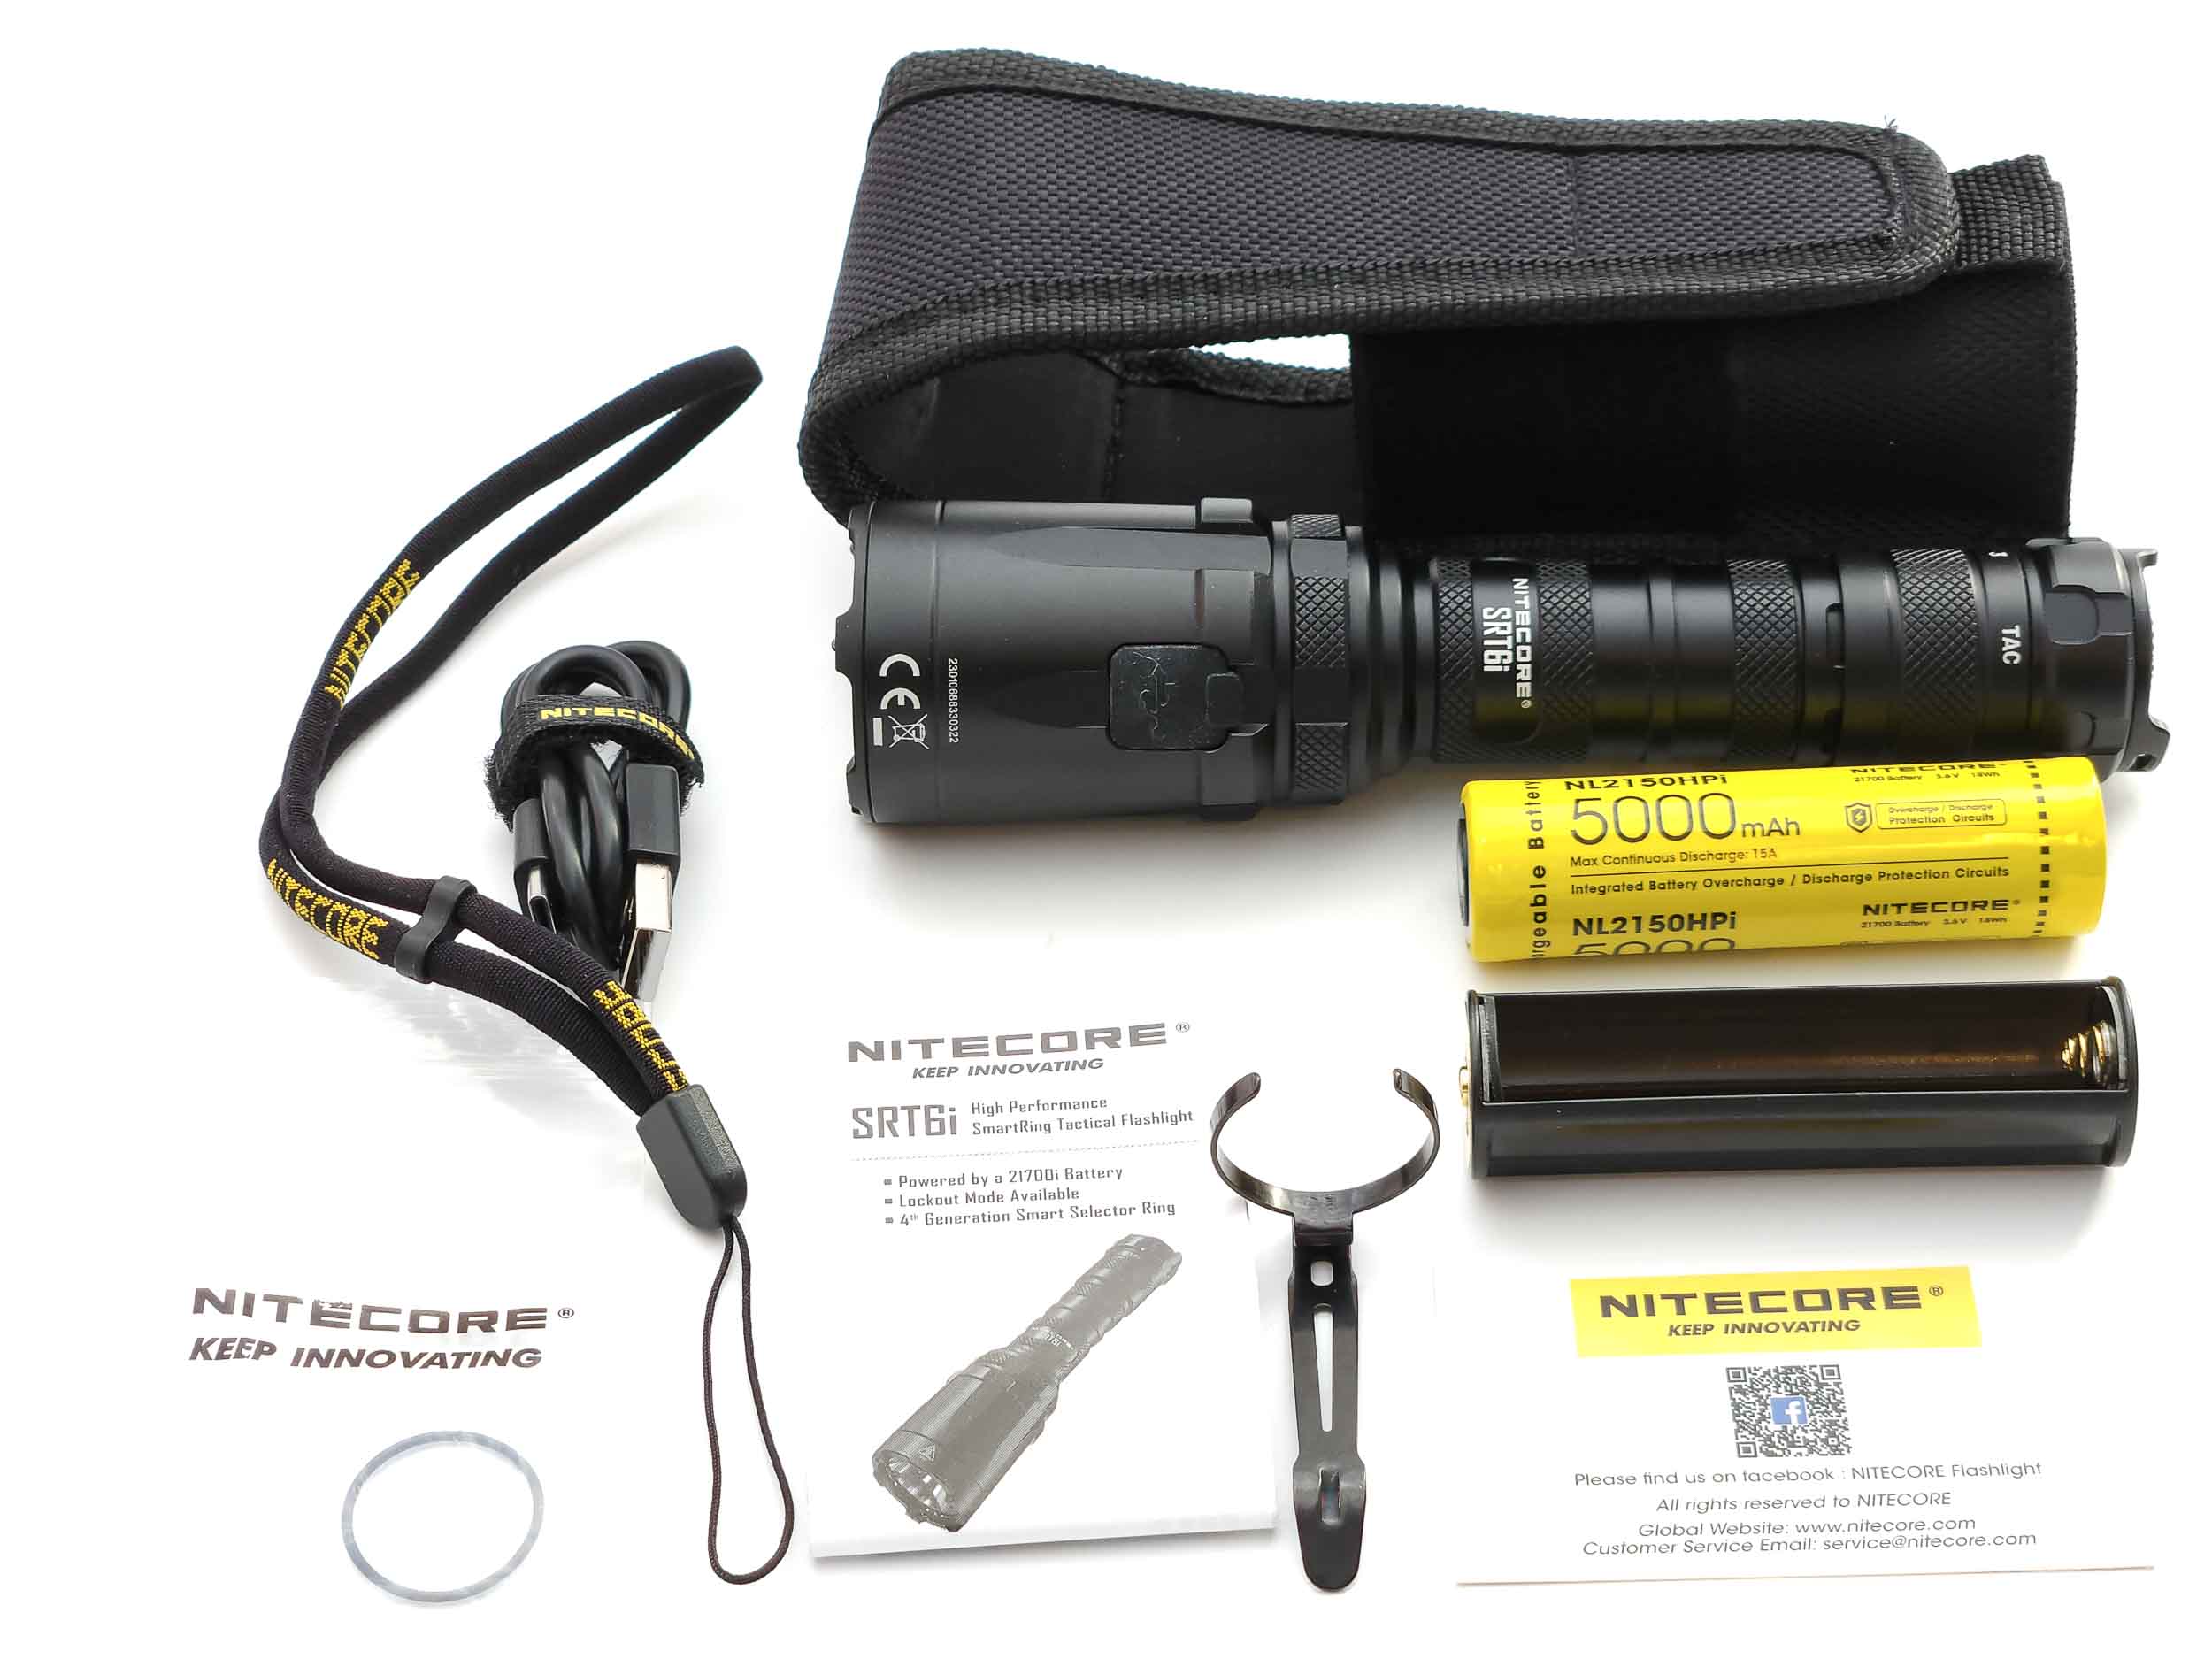
The complete contents of the box include:
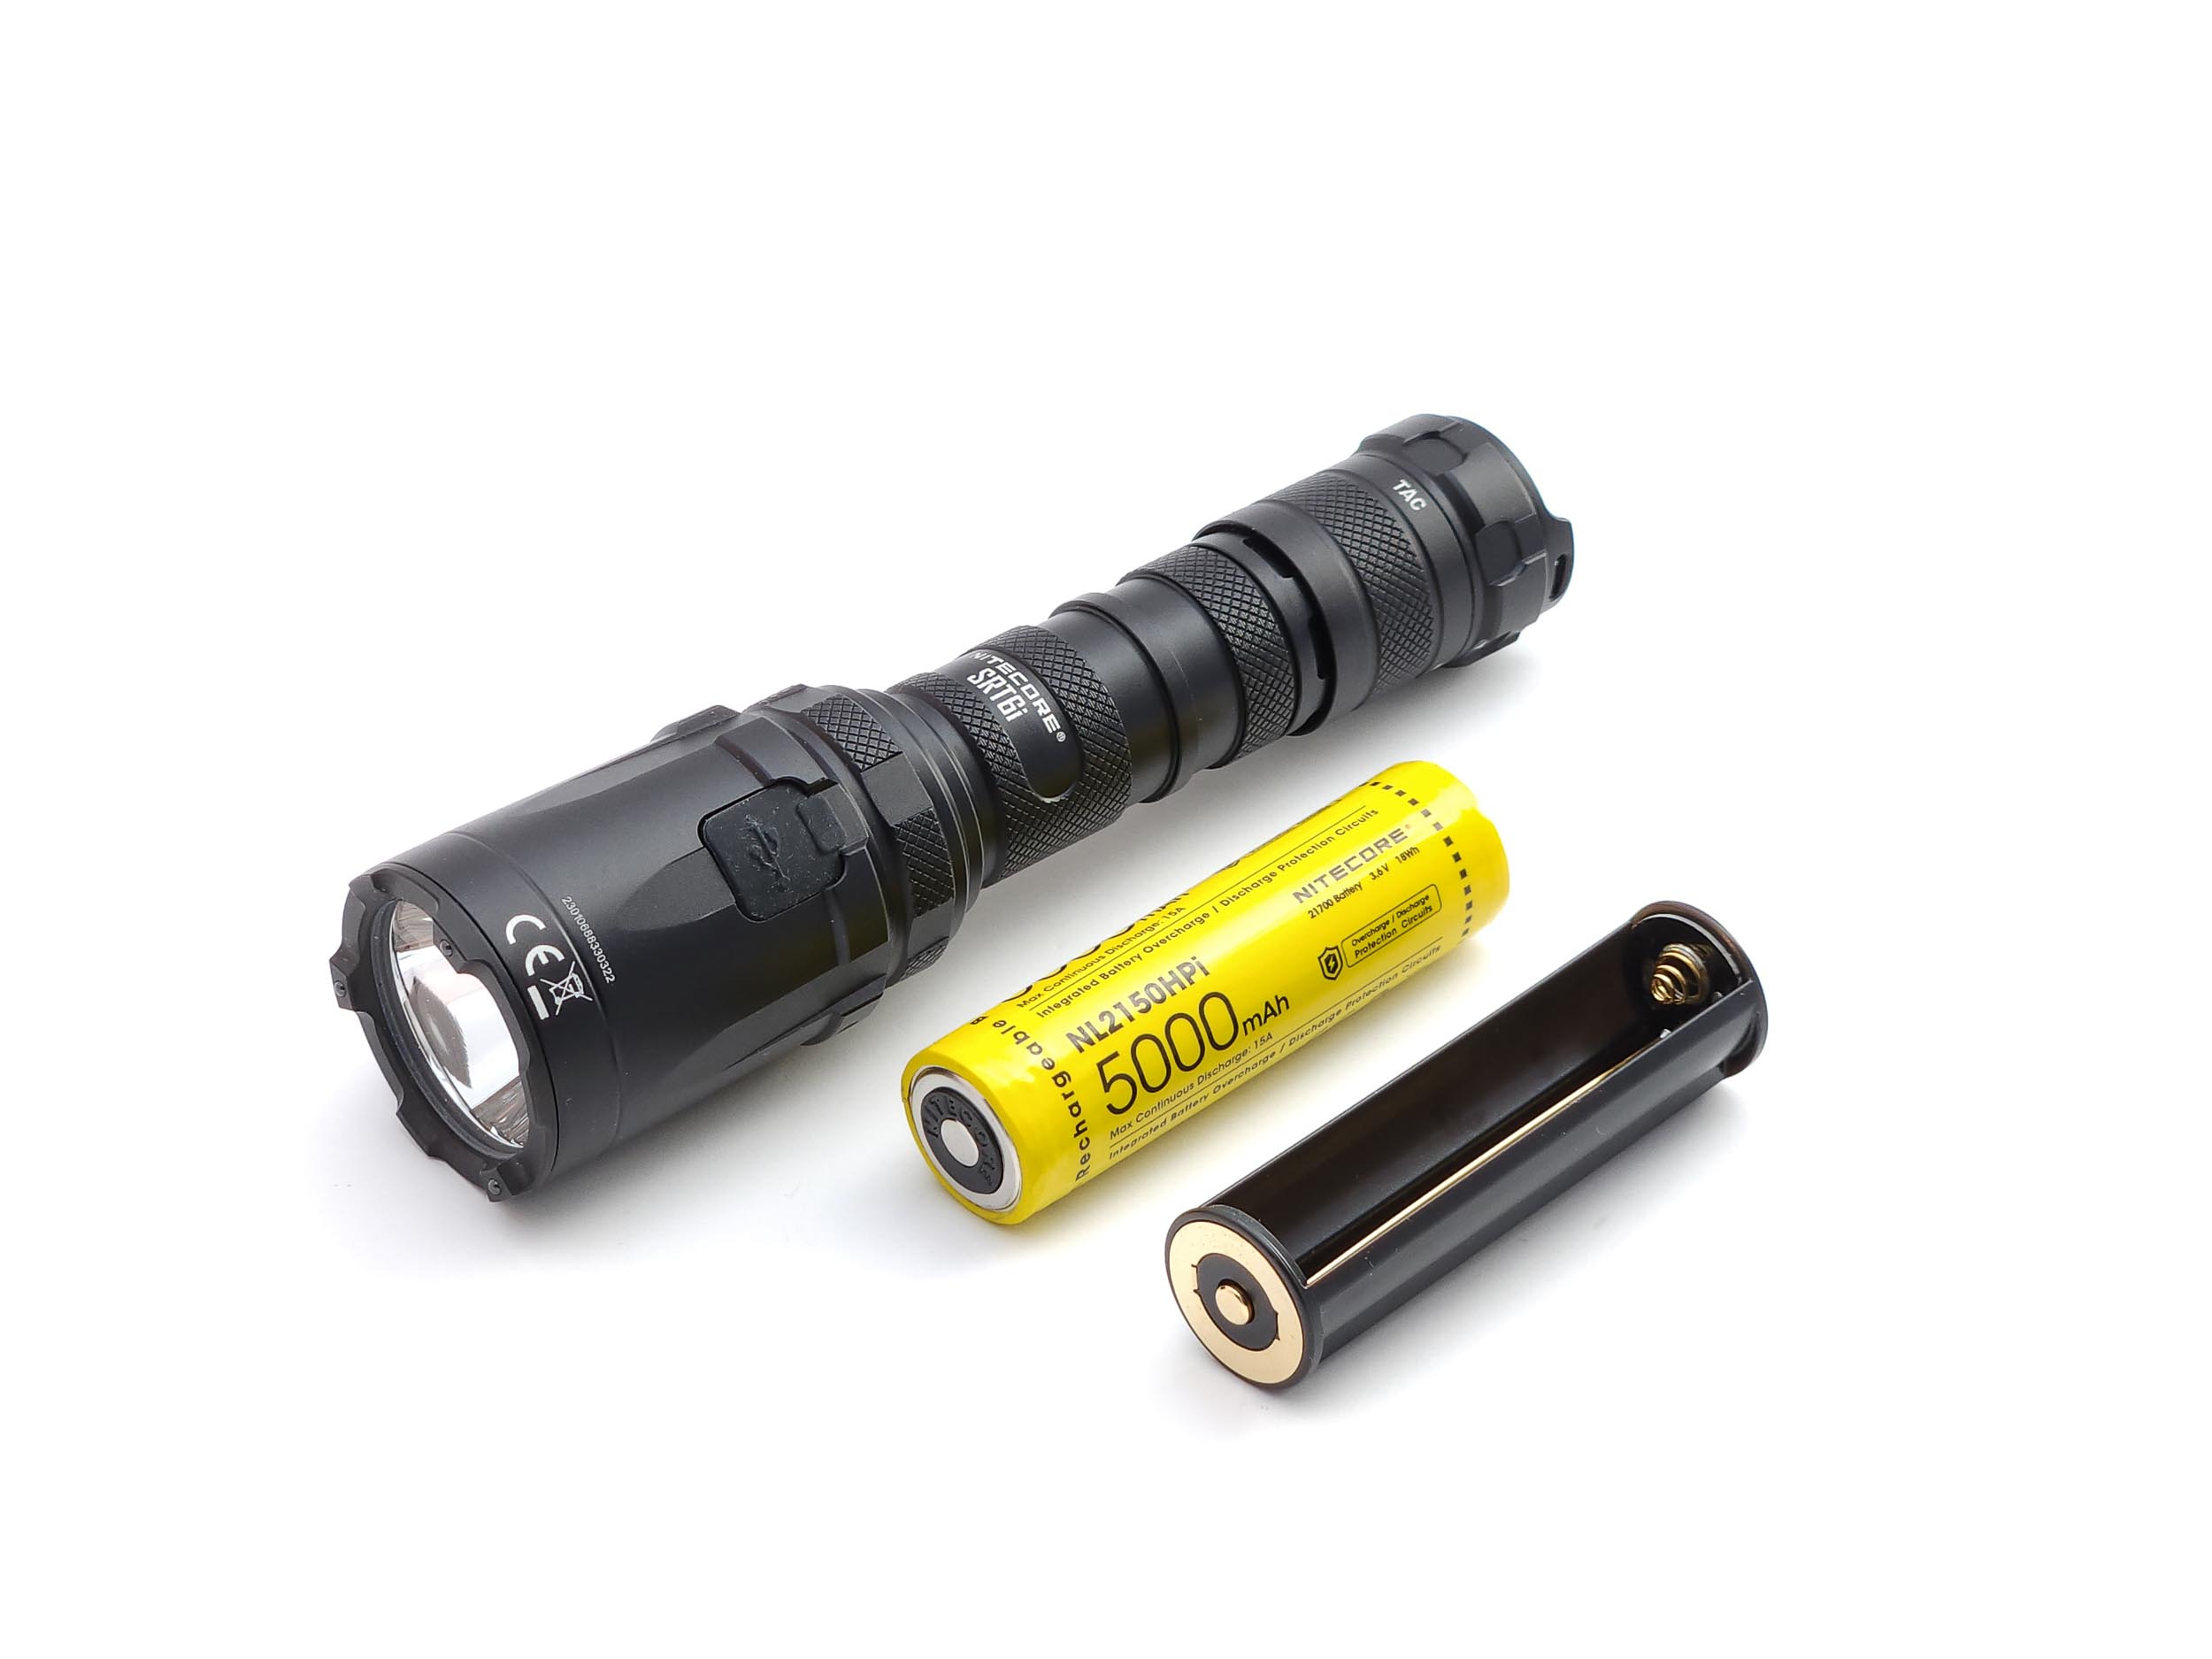
- Nitecore SRT6i, with NL2150HPi battery inside
- Clip
- CR123A battery magazine
- USB-C charging cable
- Lanyard
- Holster
- Instruction Manual
- Warranty card
- Spare o-ring
Flashlight in use
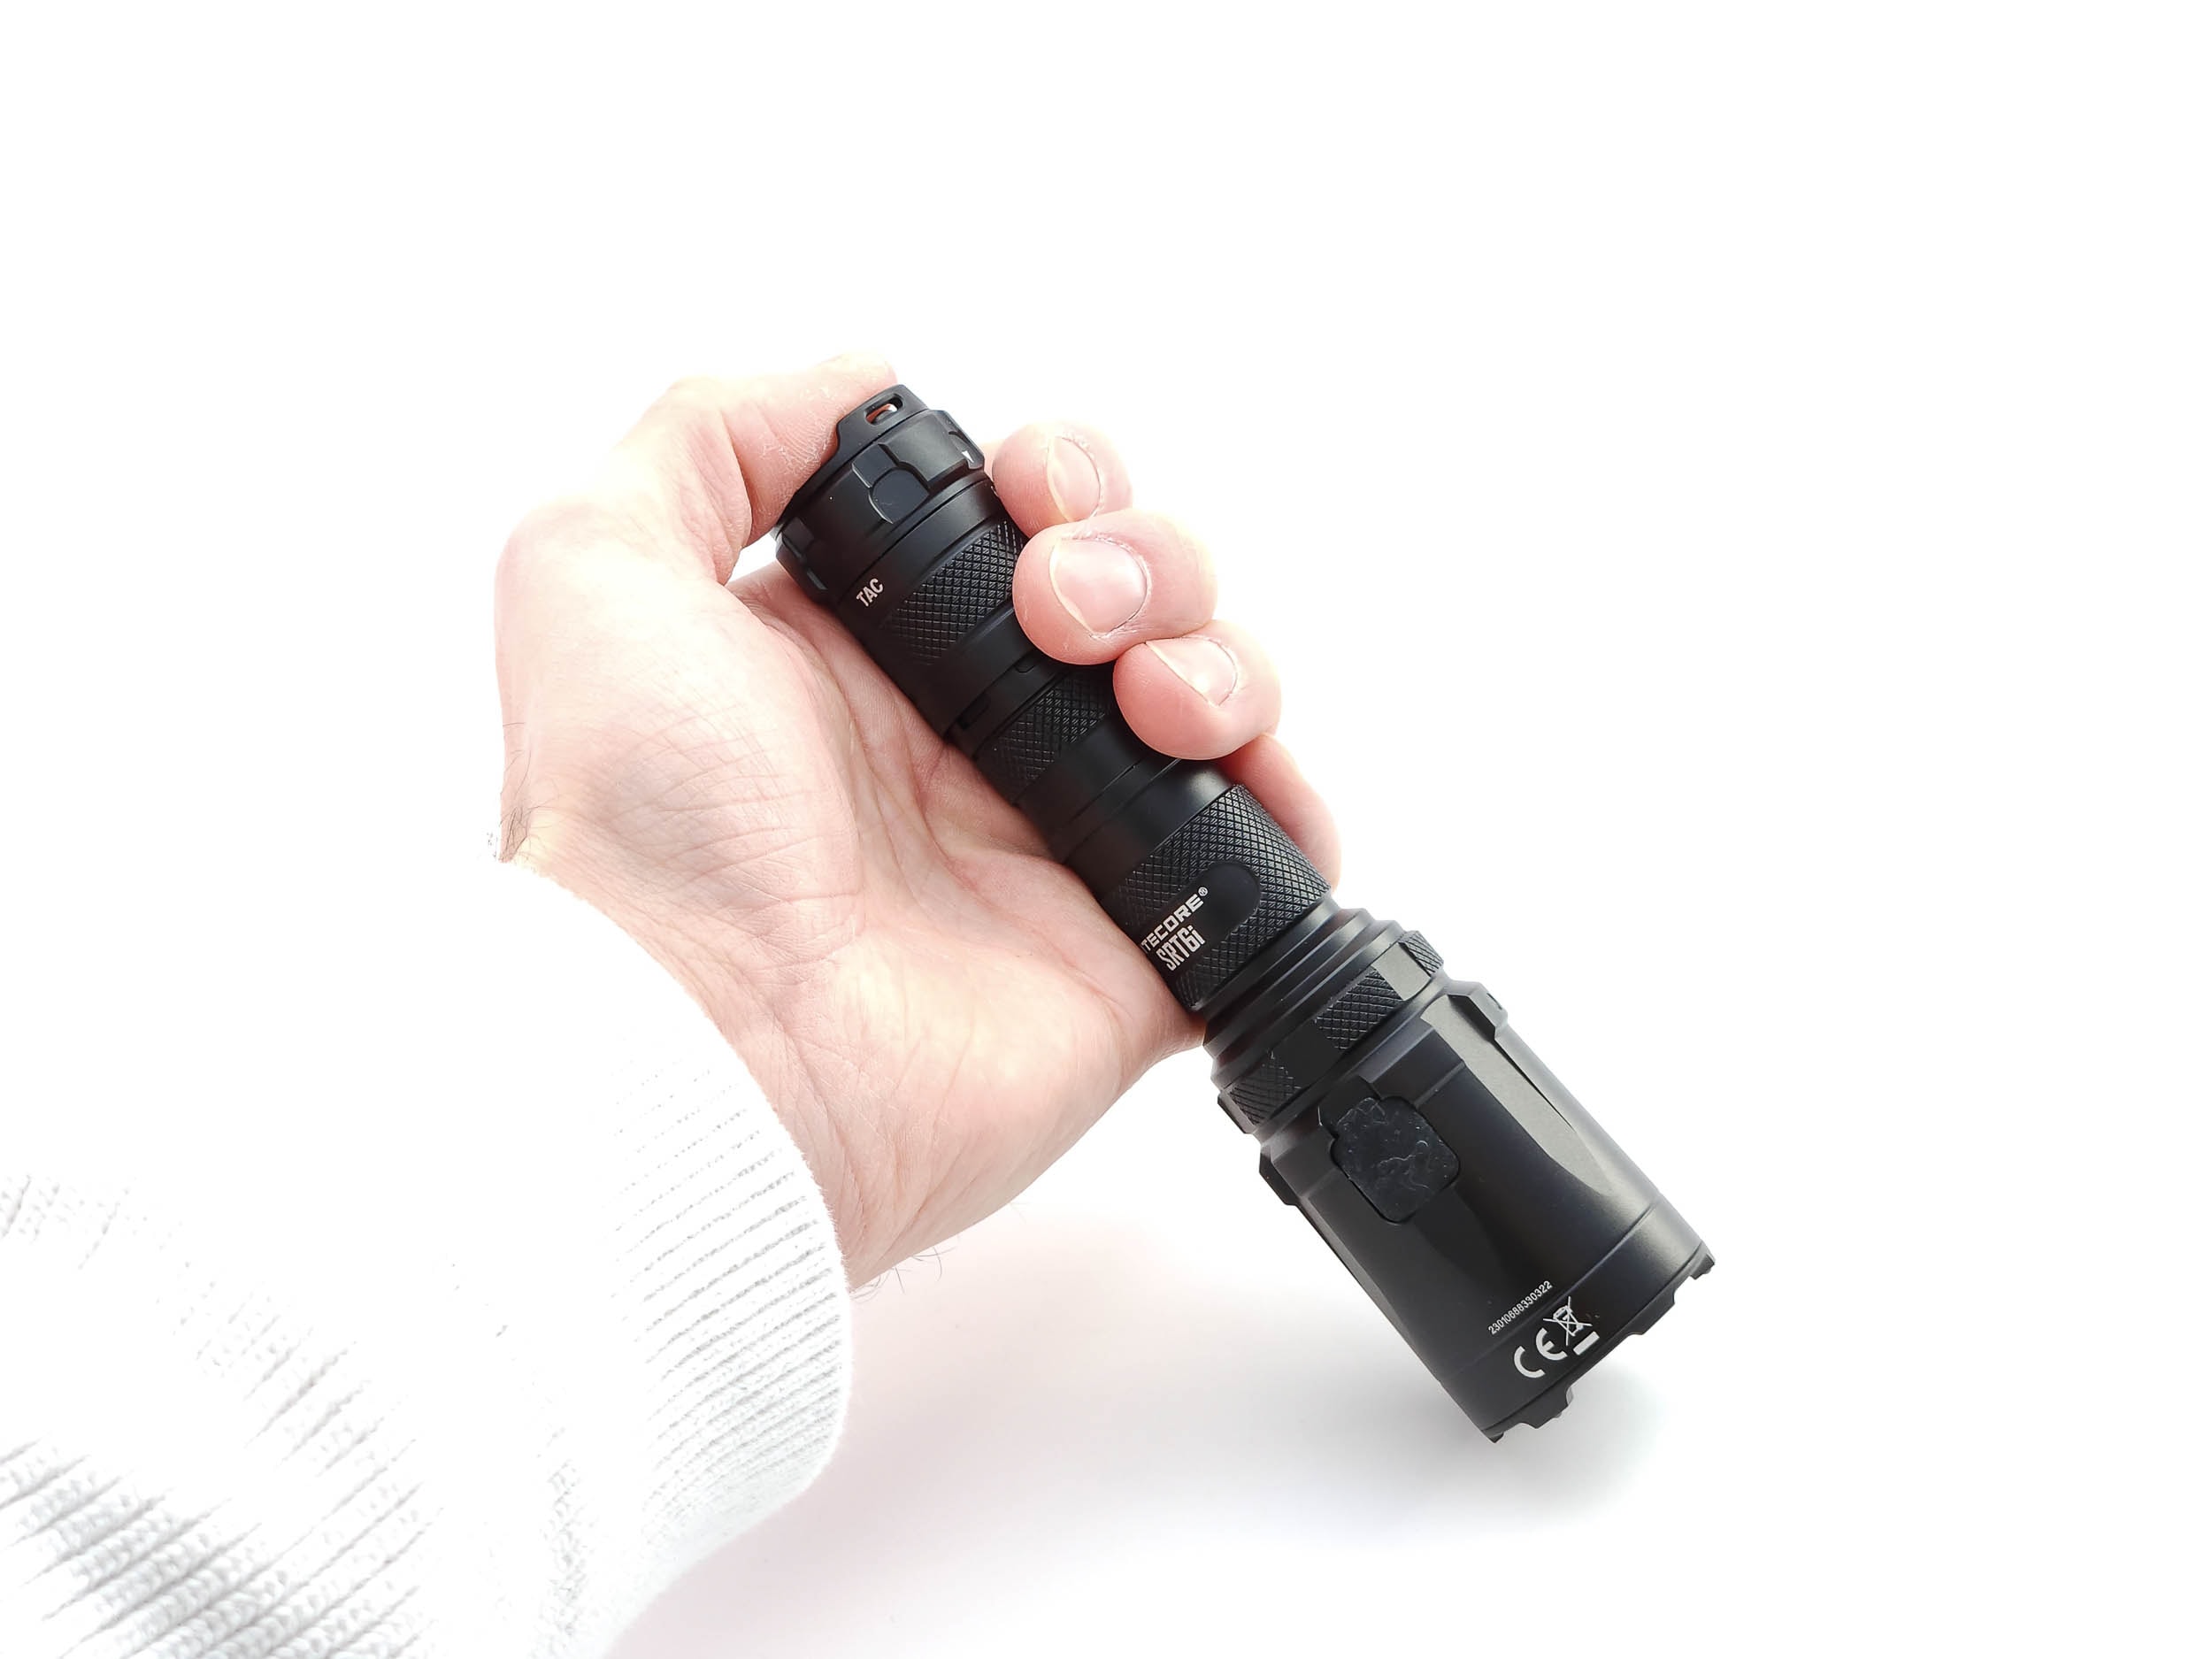
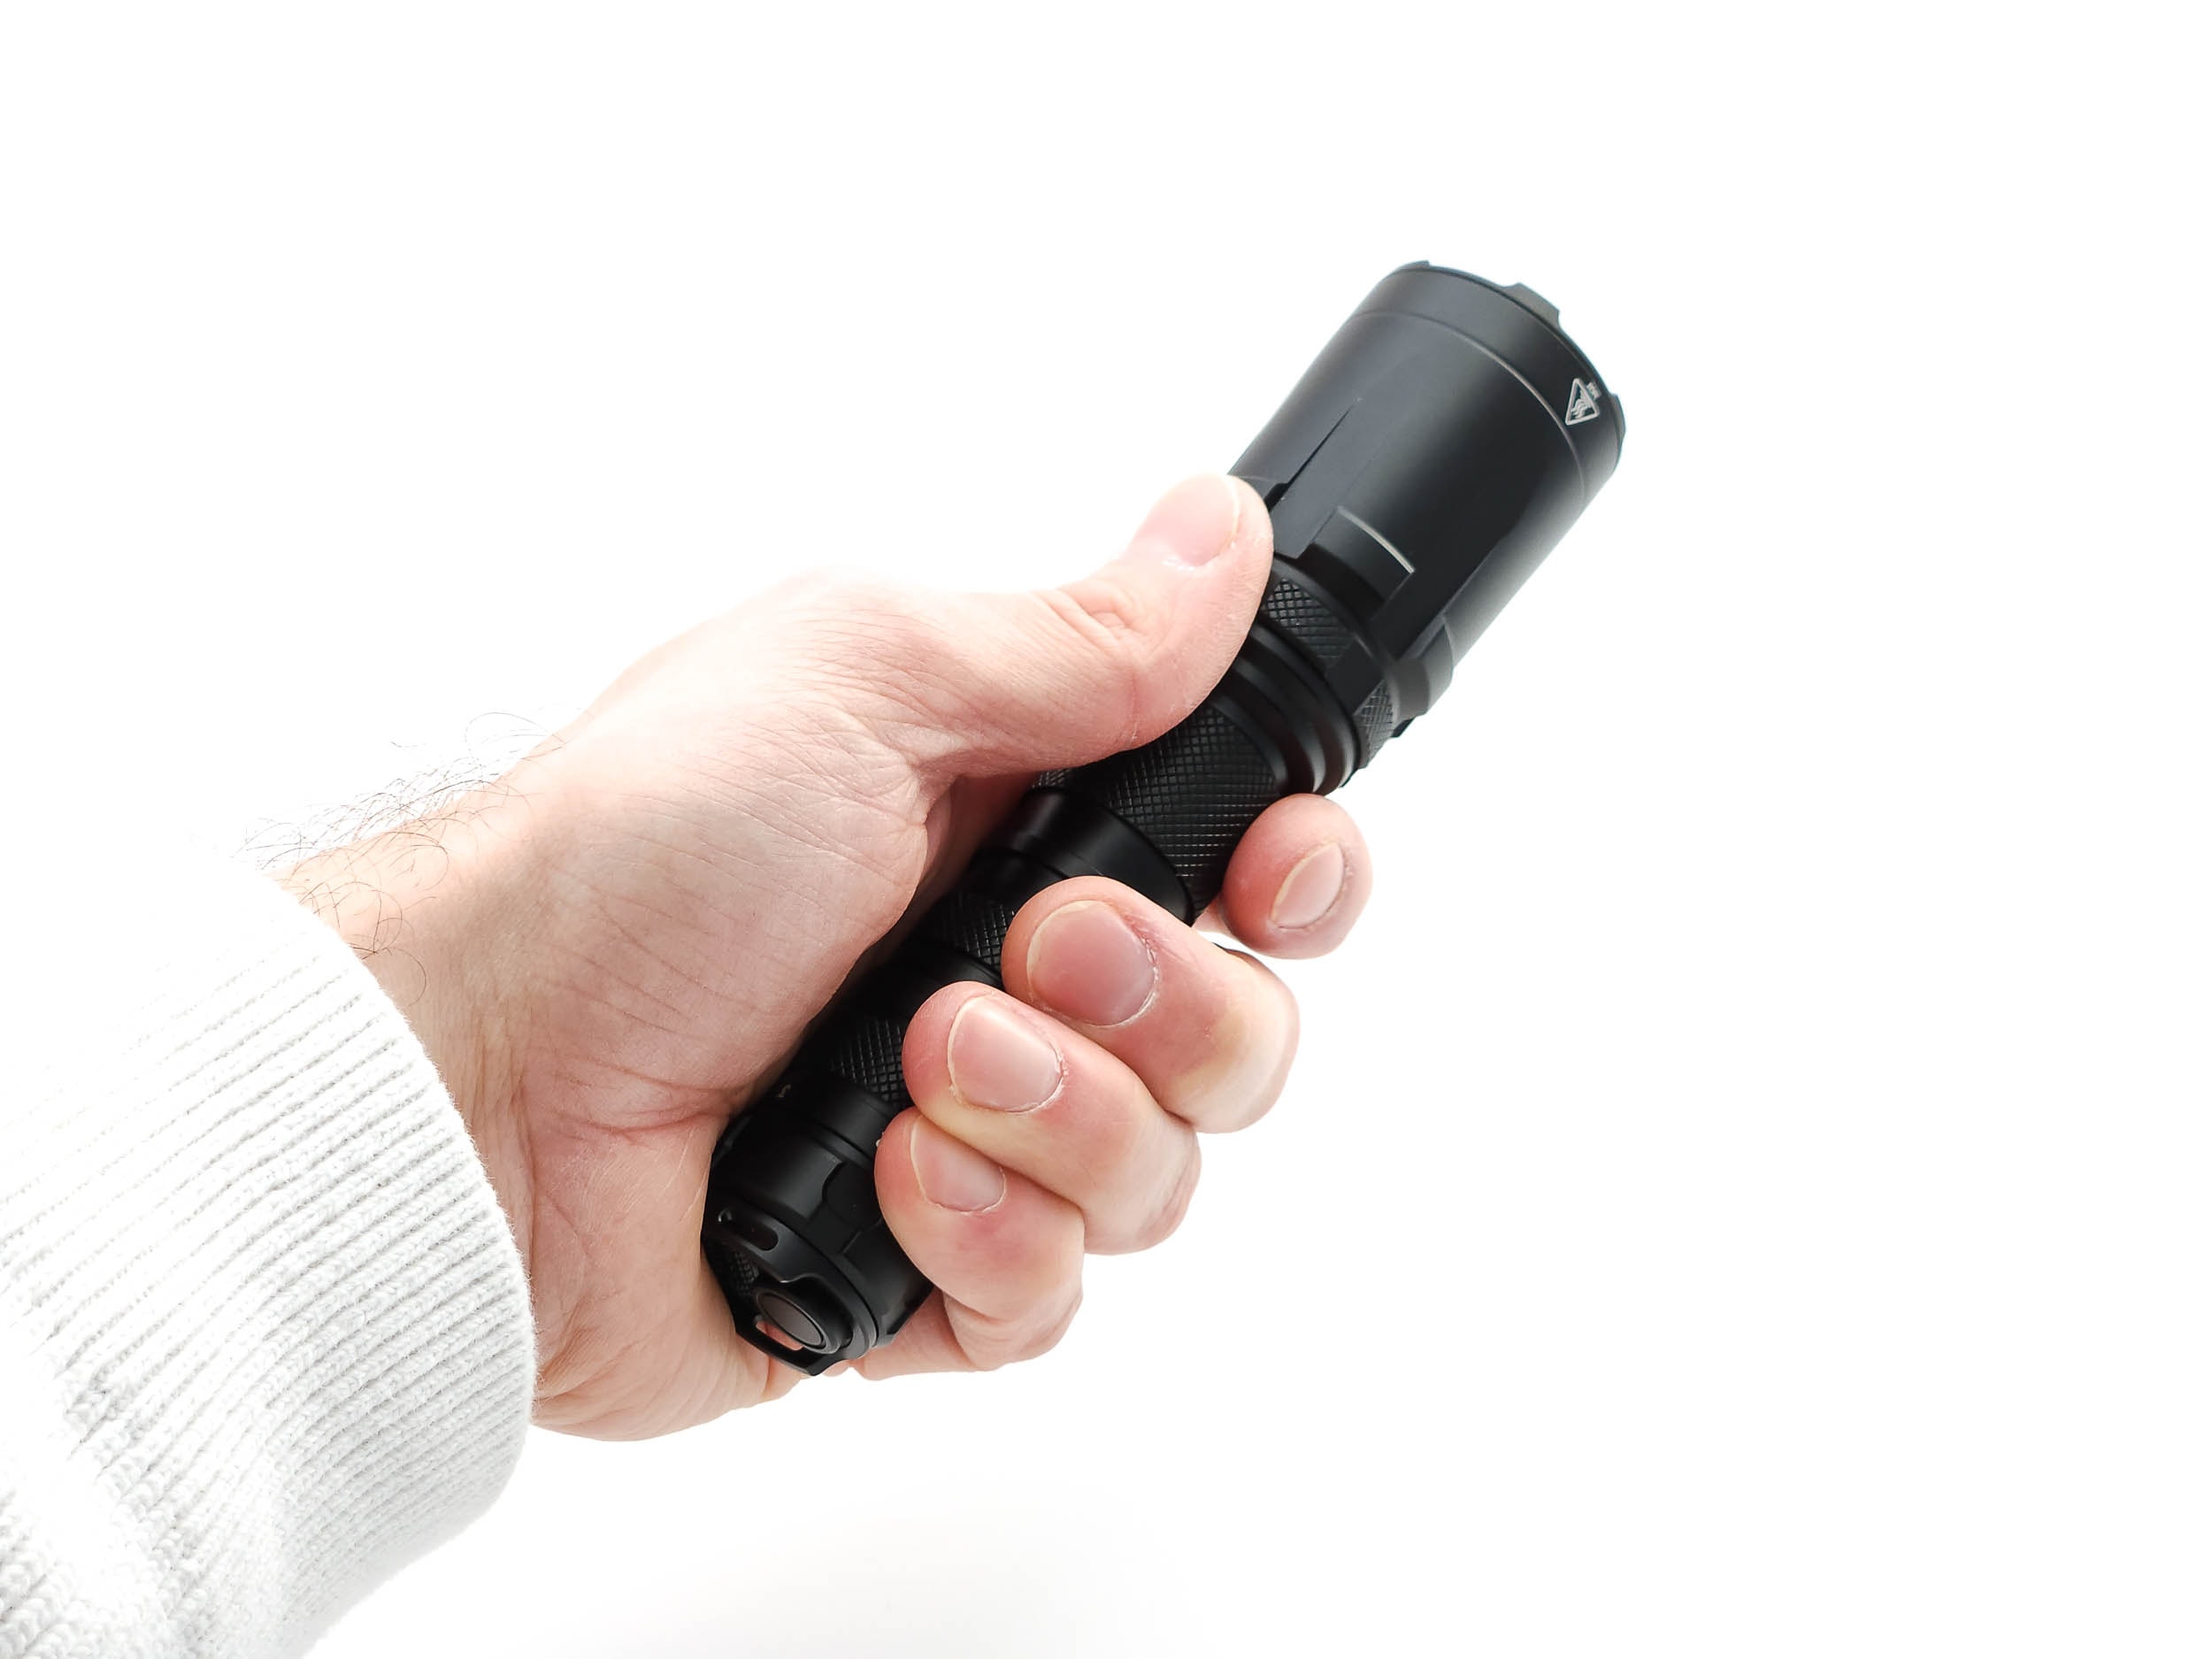
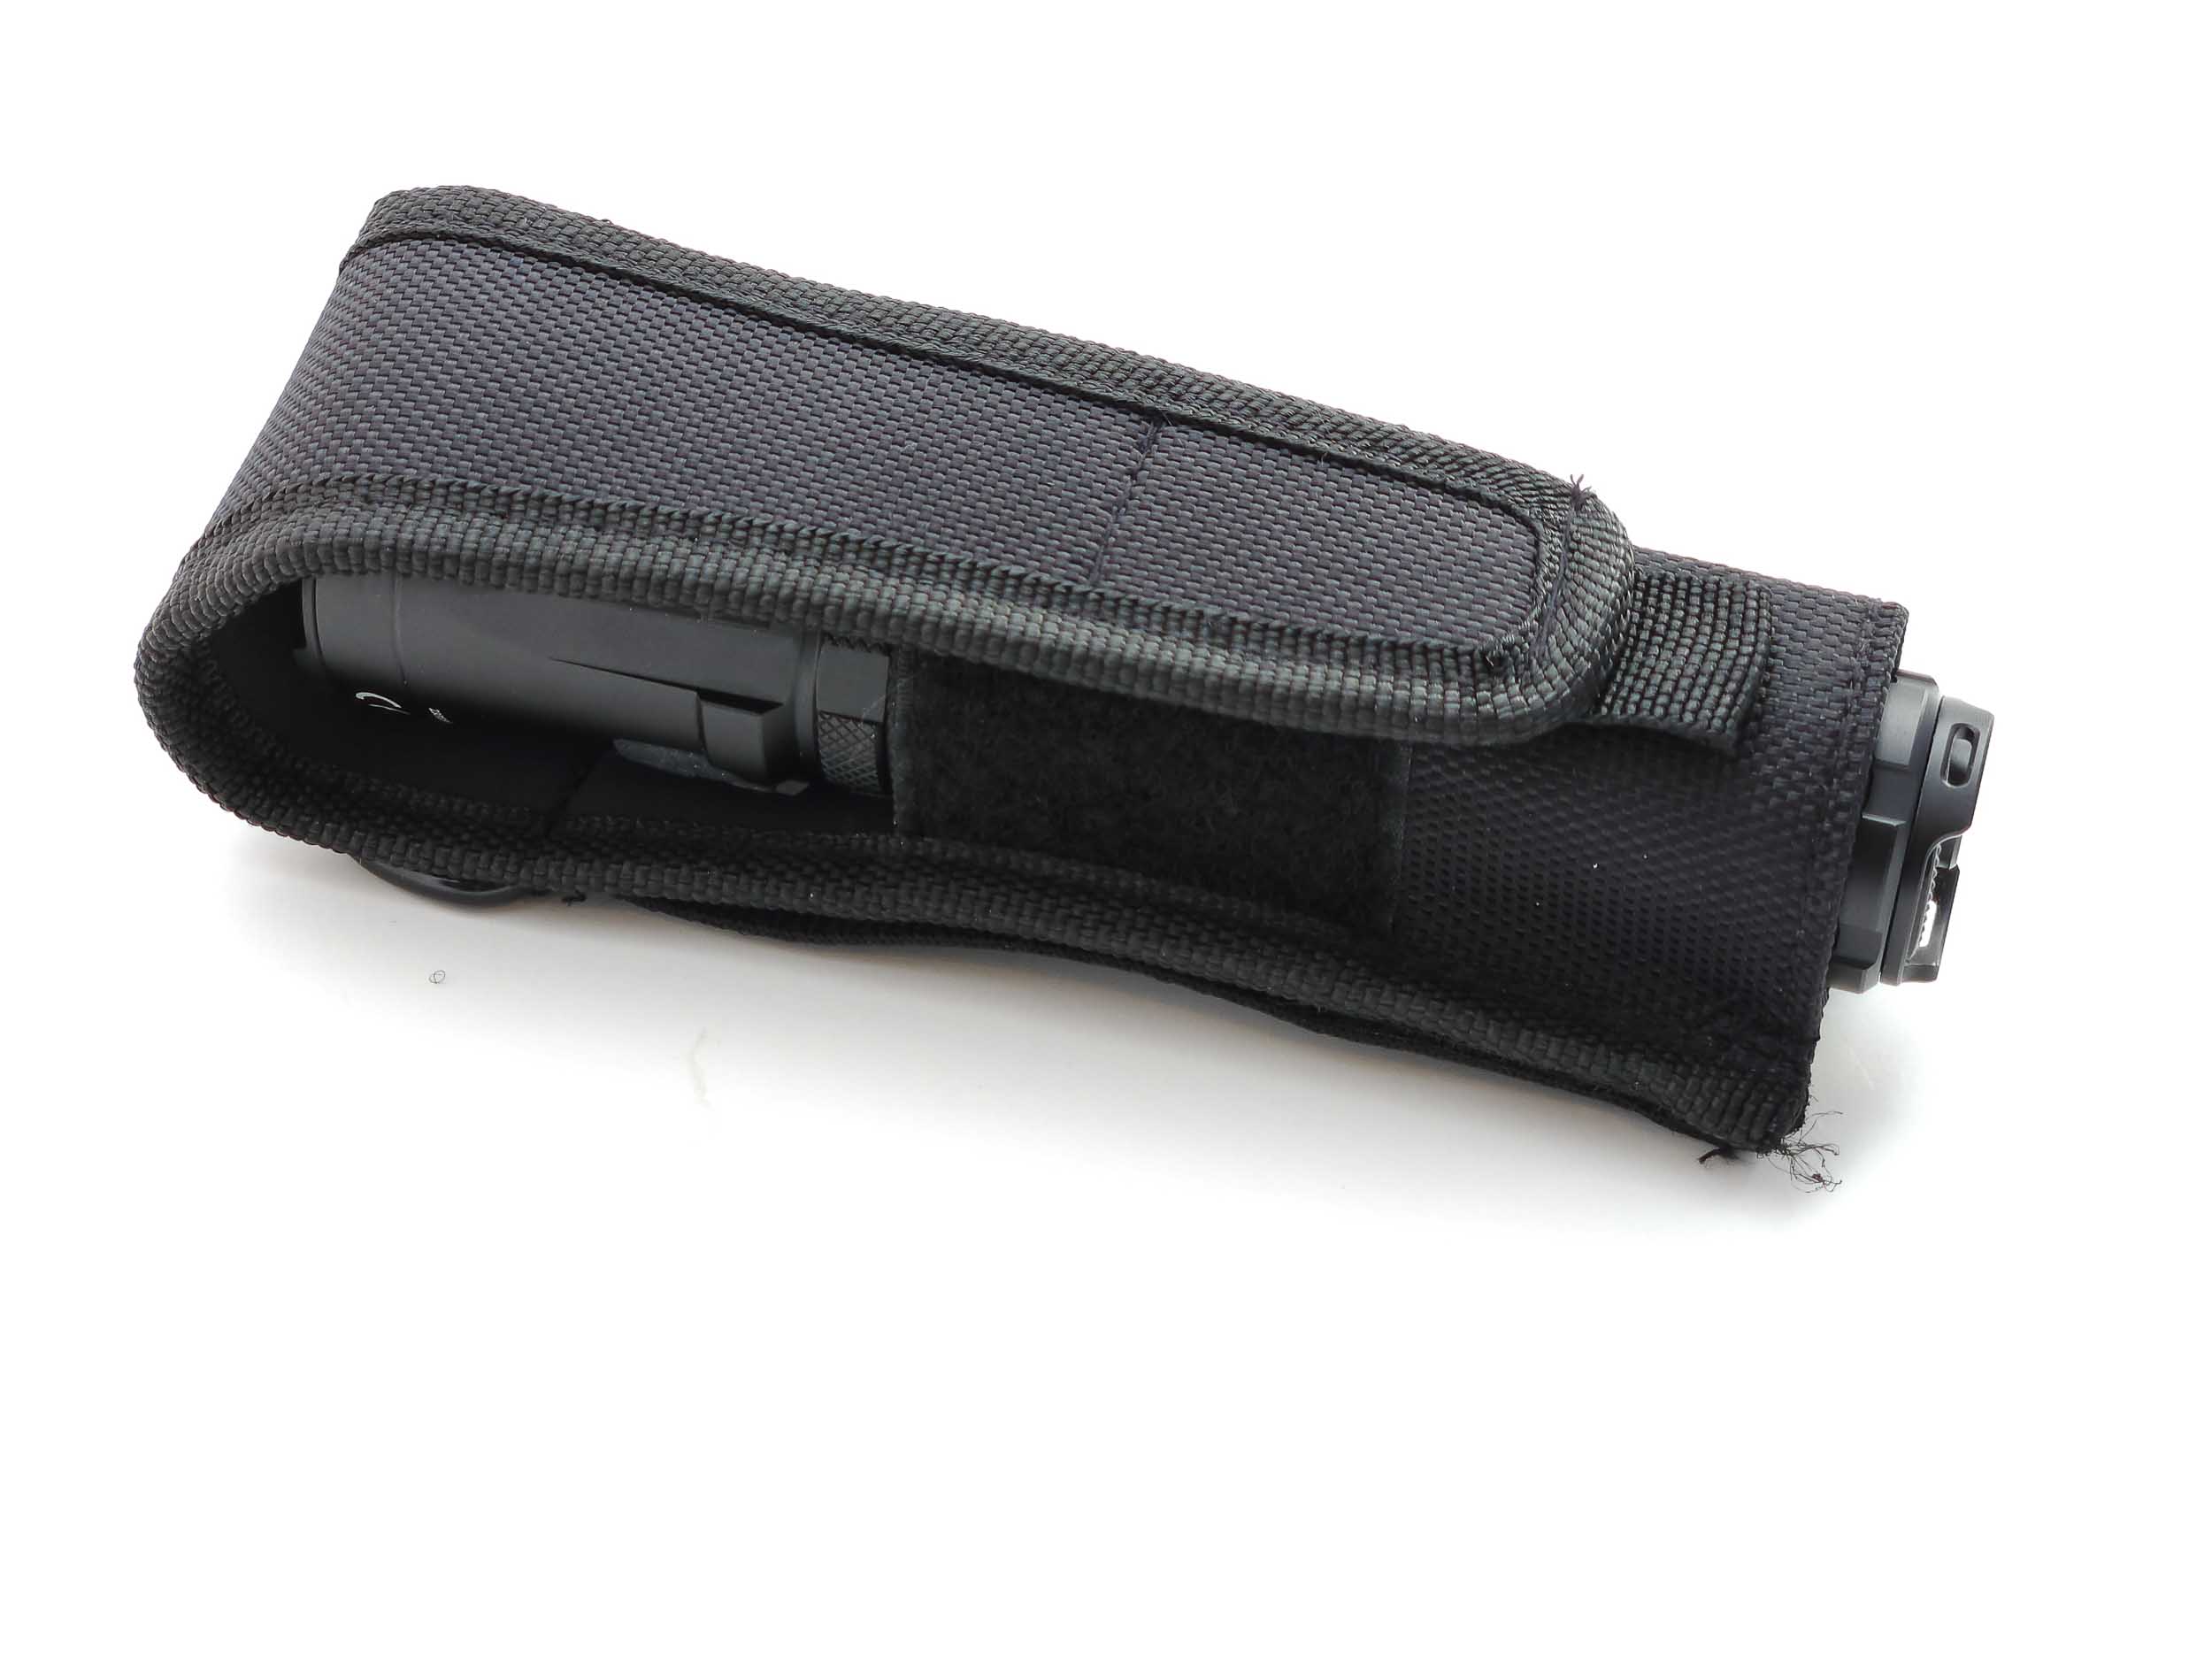
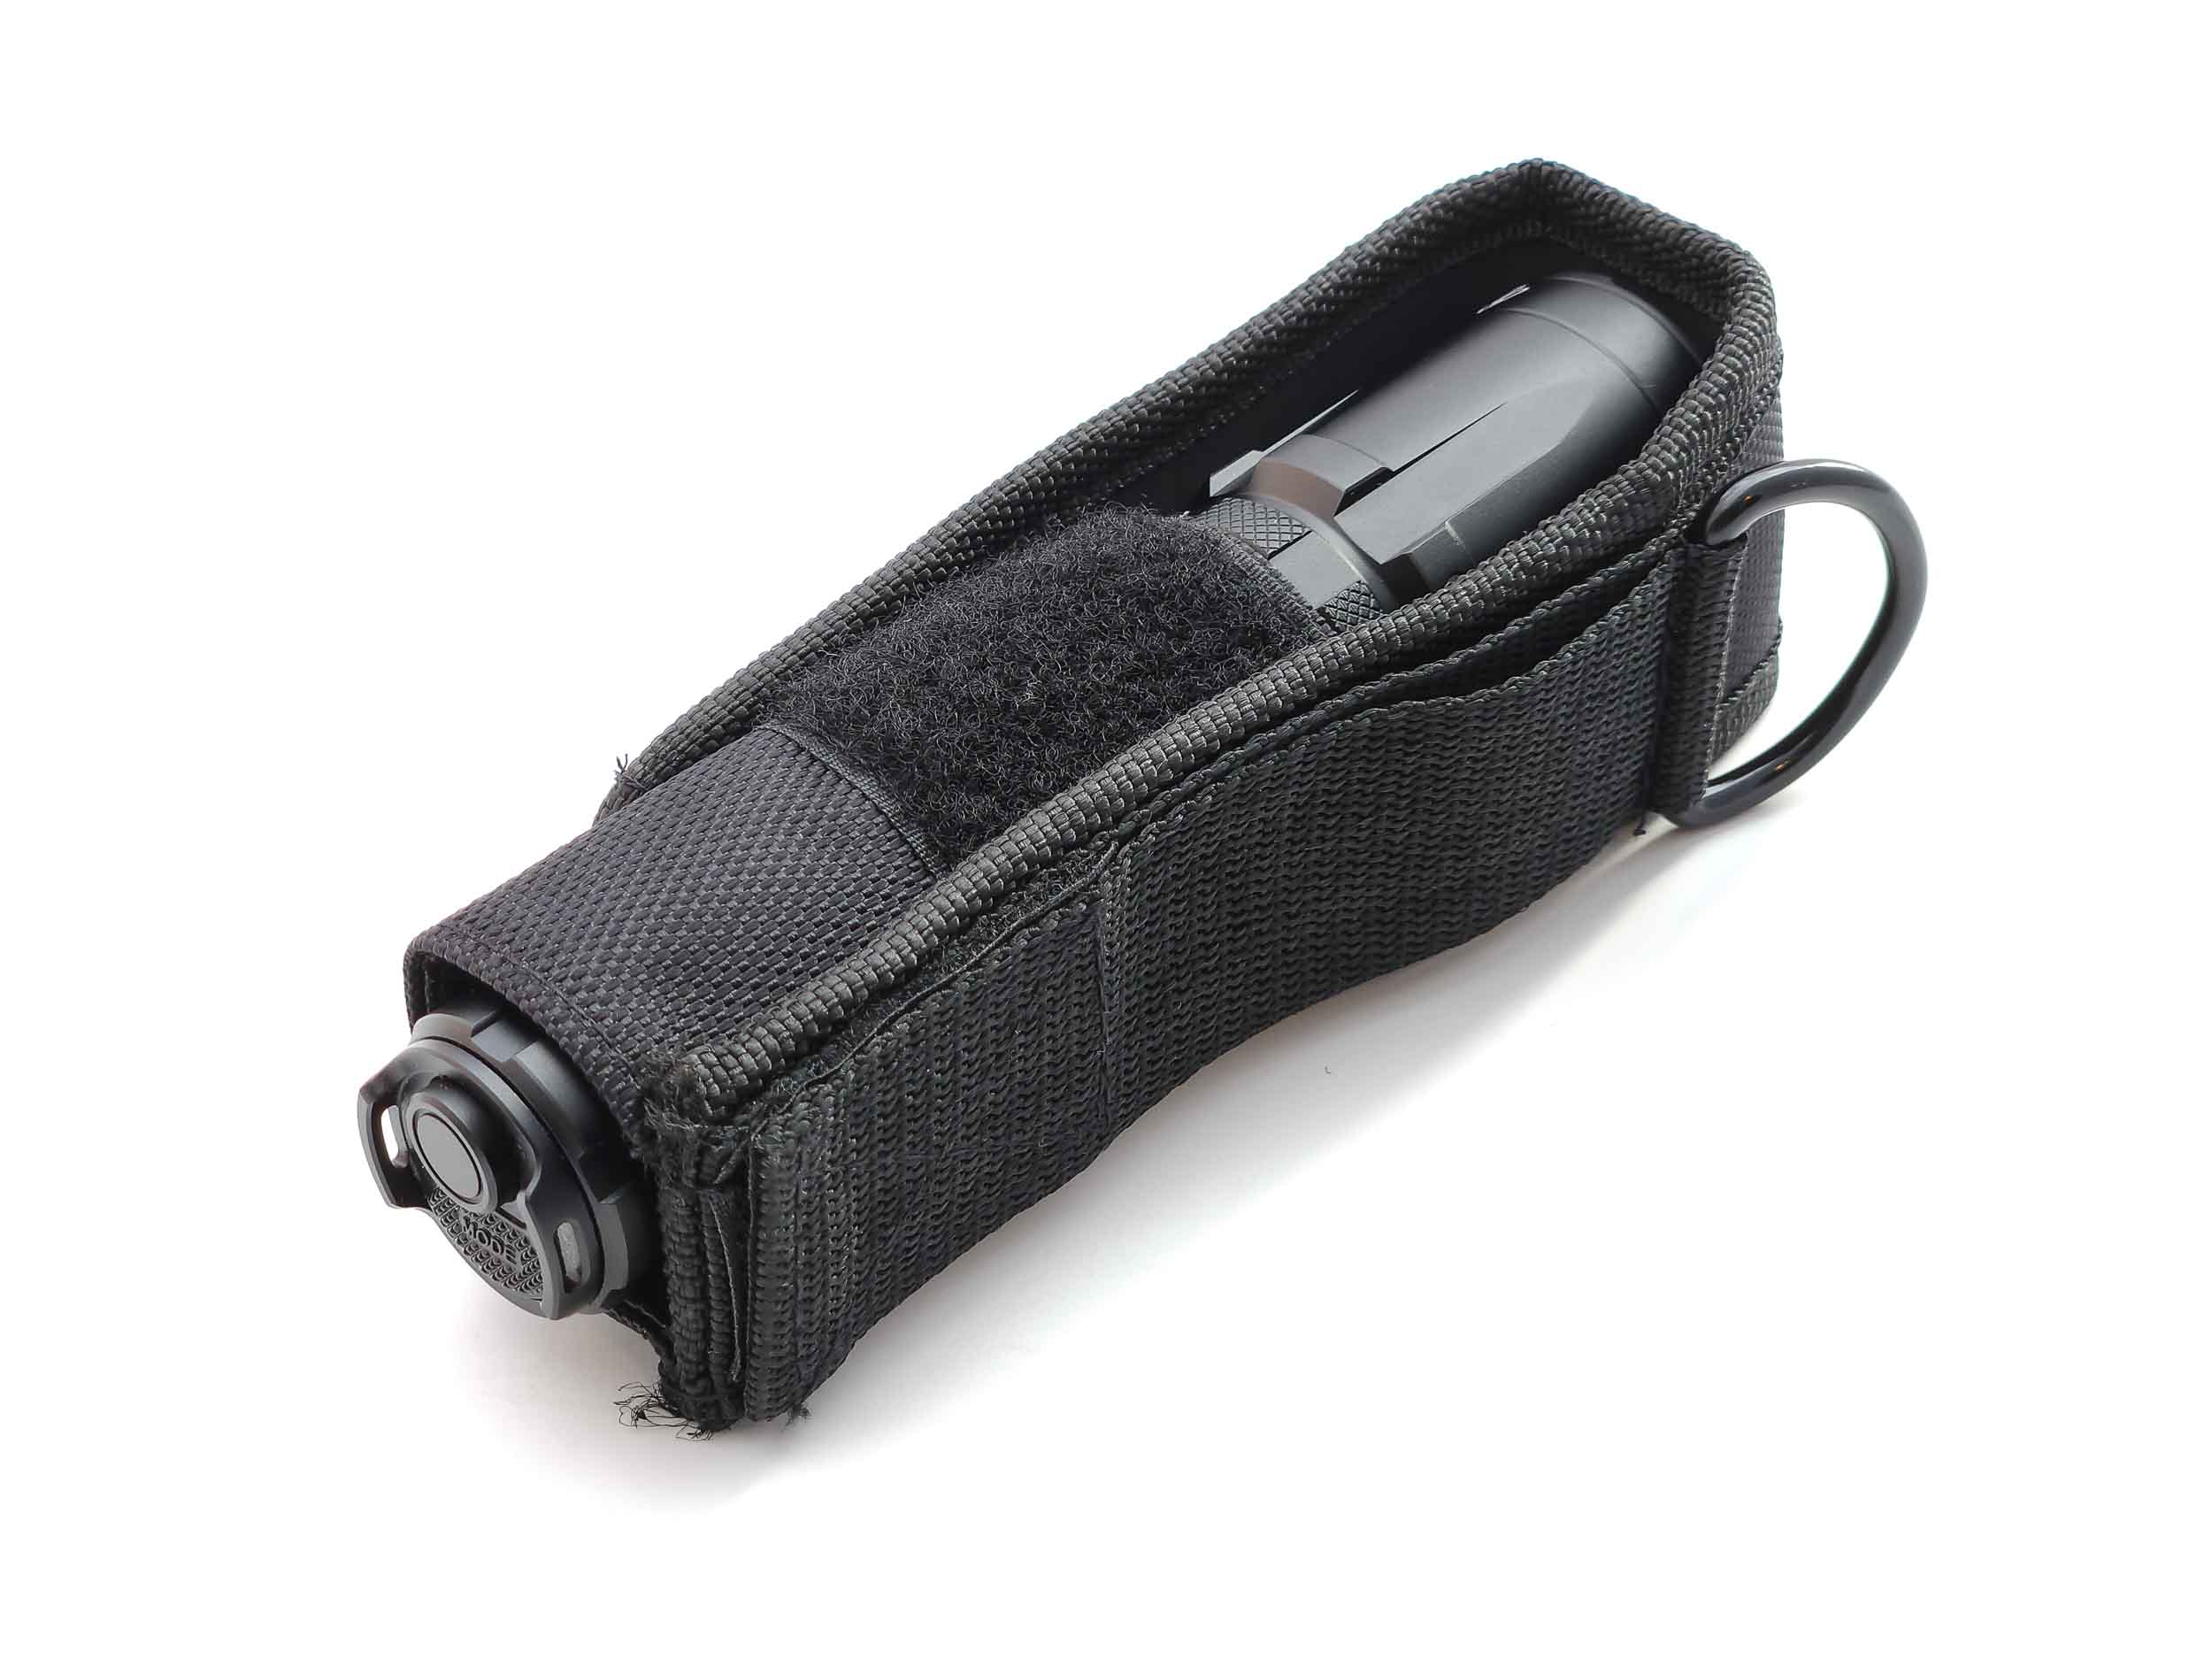
The SRT6i has a large head and deep reflector which allows for the long throw which is its primary selling point. It’s got all the other tactical fixings, but seems to be primarily designed as a long range searchlight. Because the head is so big it’s not going to fit in your pocket, so it’s nice that Nitecore includes a holster to help carry it yet keep it easily accessible. The holster is pass-through with no bottom, so the light can only be inserted tail down which isn’t really a big deal, but that means in order to remove and use it, you have to pull it out by the head, then rotate it in your hand to get to the tail switches. It also leaves the tail switches exposed, so you’ll want to make sure it’s locked out.
On the outside, the holster is made of tough webbing as most are, but on the inside, there’s actually a layer of stiff foam which helps protect the light. The flap is held down by hook and loop, and has a small tab at the end to help grasp and open it.
For carrying, there’s a two-level belt loop on the back: One fixed loop to slide a belt through, and one which closes with a long length of hook and loop, which you can slide around a strap on a bag or something similar. The hook and loop strap is about two inches across though, so it’s not compatible with MOLLE setups without some type of adapter. There’s also a strong, steel D-ring at the top of the holster you can use to clip it on something.
Though the head is so big, the SRT6i does feel balanced in your hand, if you’re holding it in a standard grip where your index finger is acting as a fulcrum of sorts to prop up the head. In the overhand grip, however, the head’s weight makes itself known, and your wrist will have to do more work to keep it pointed up.
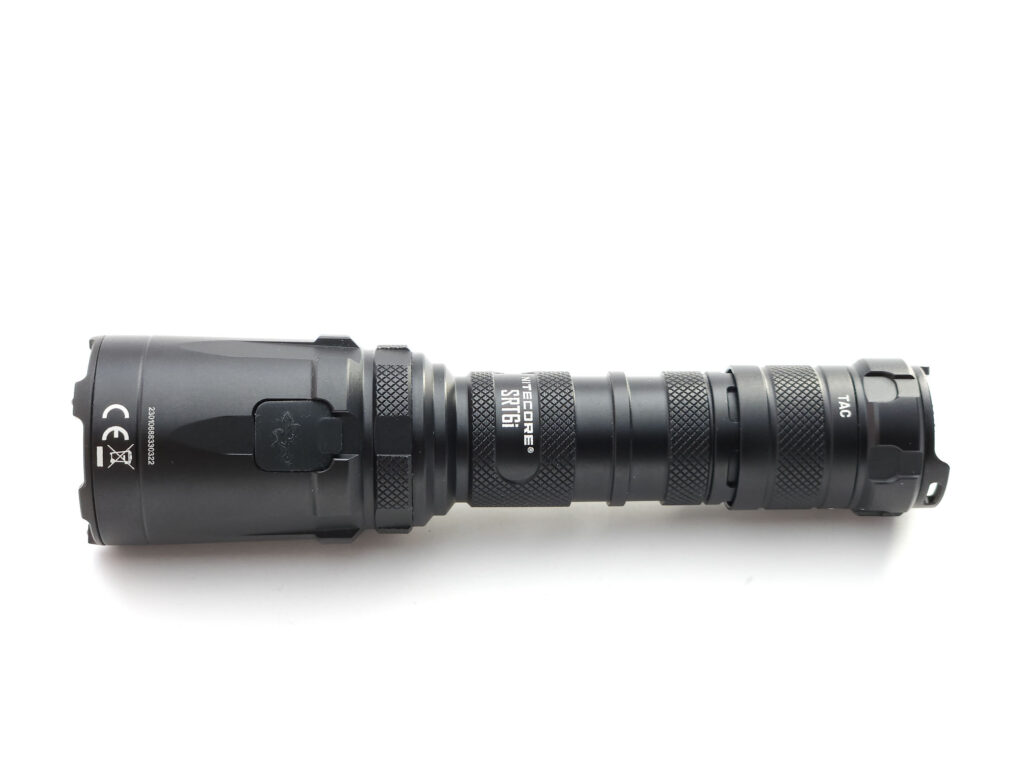
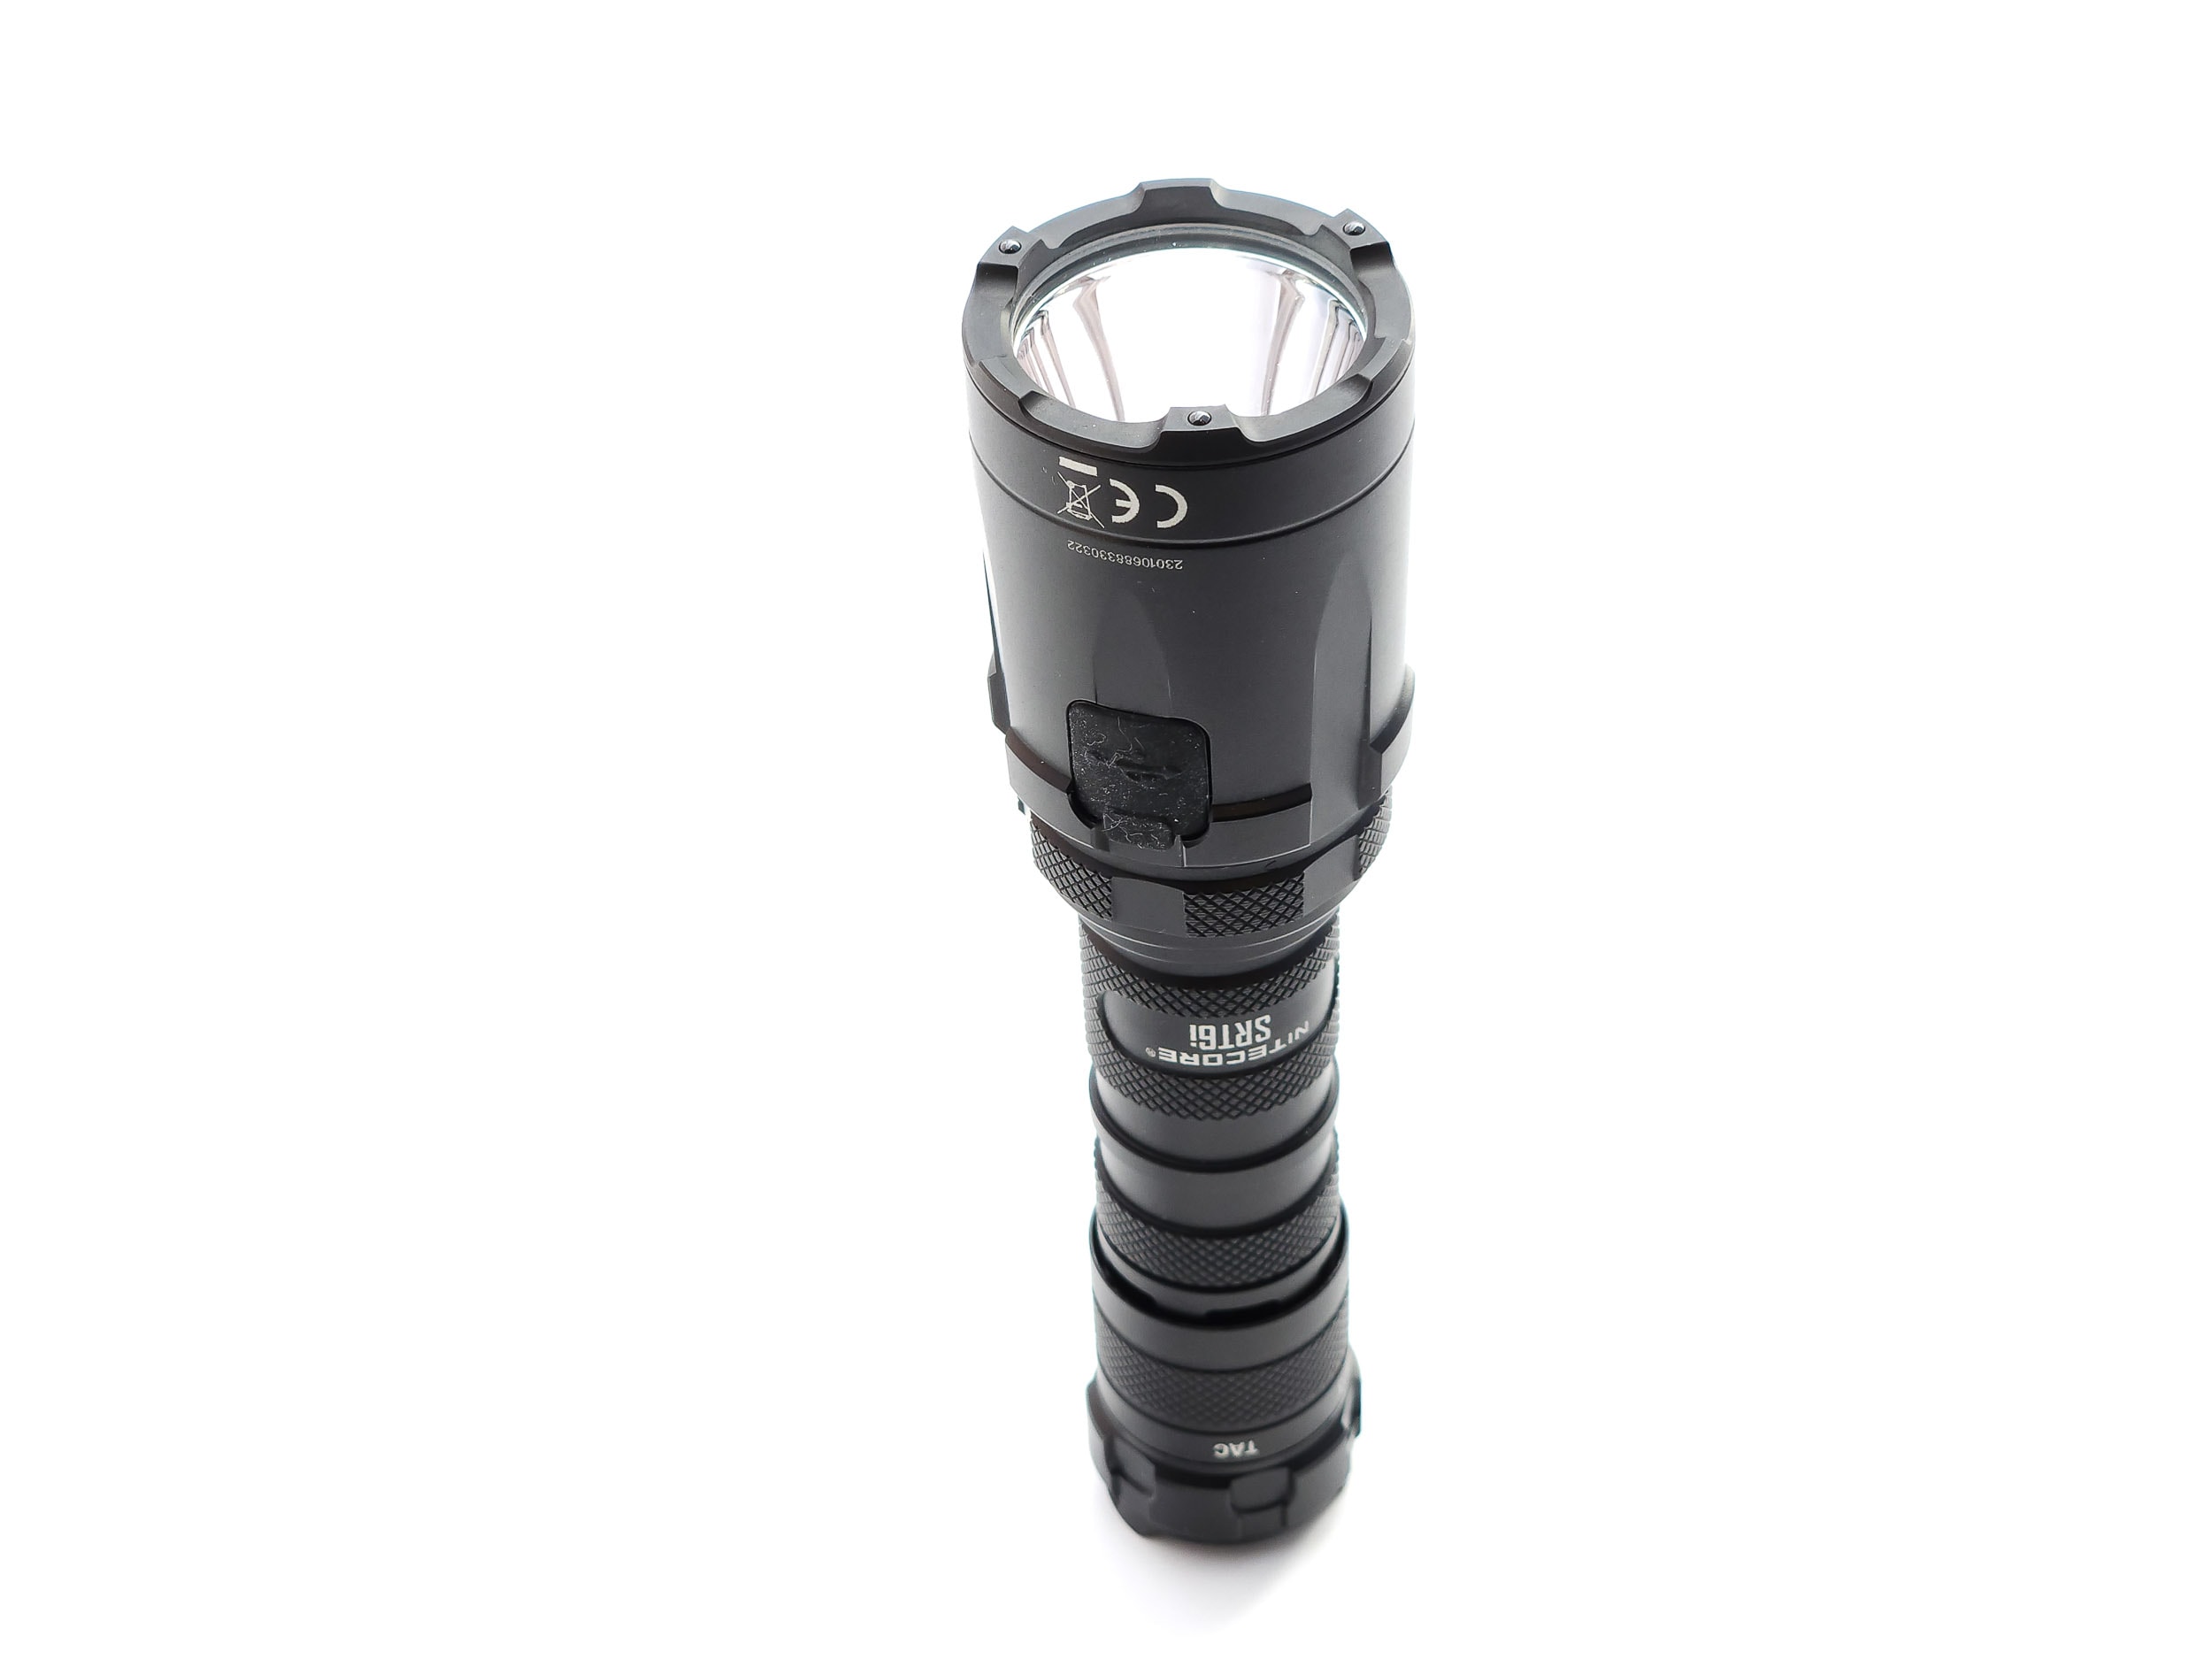
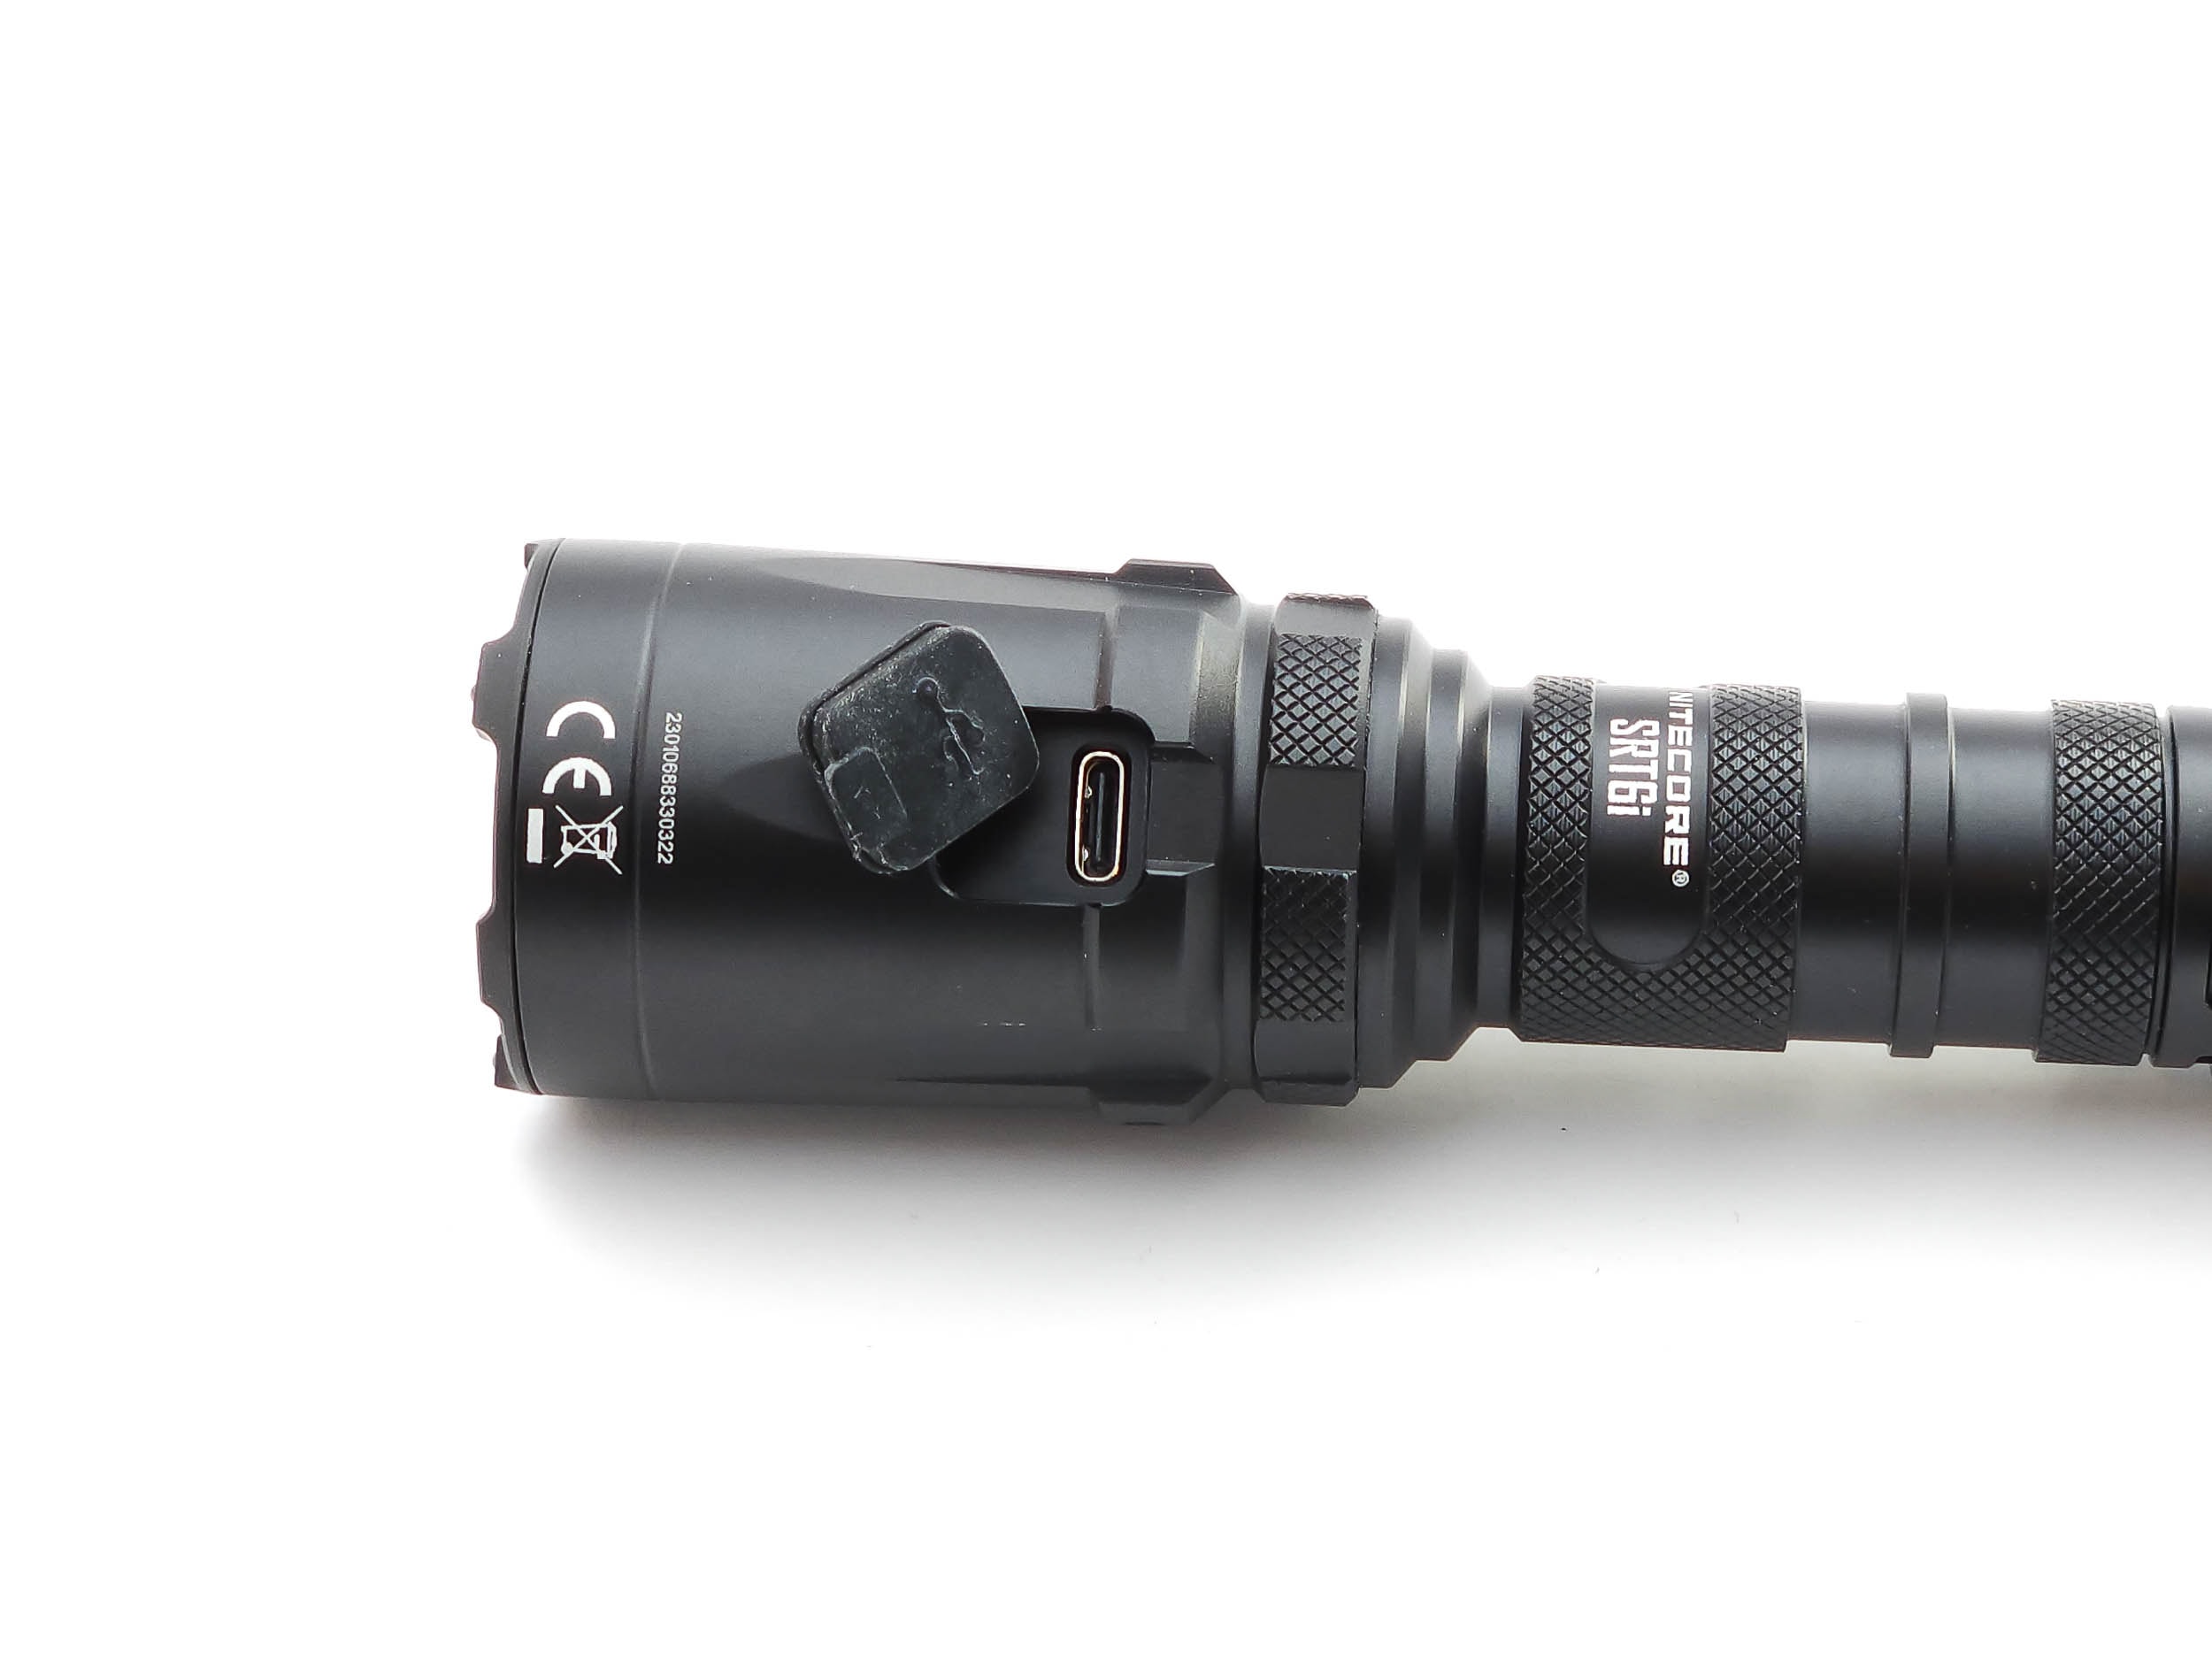
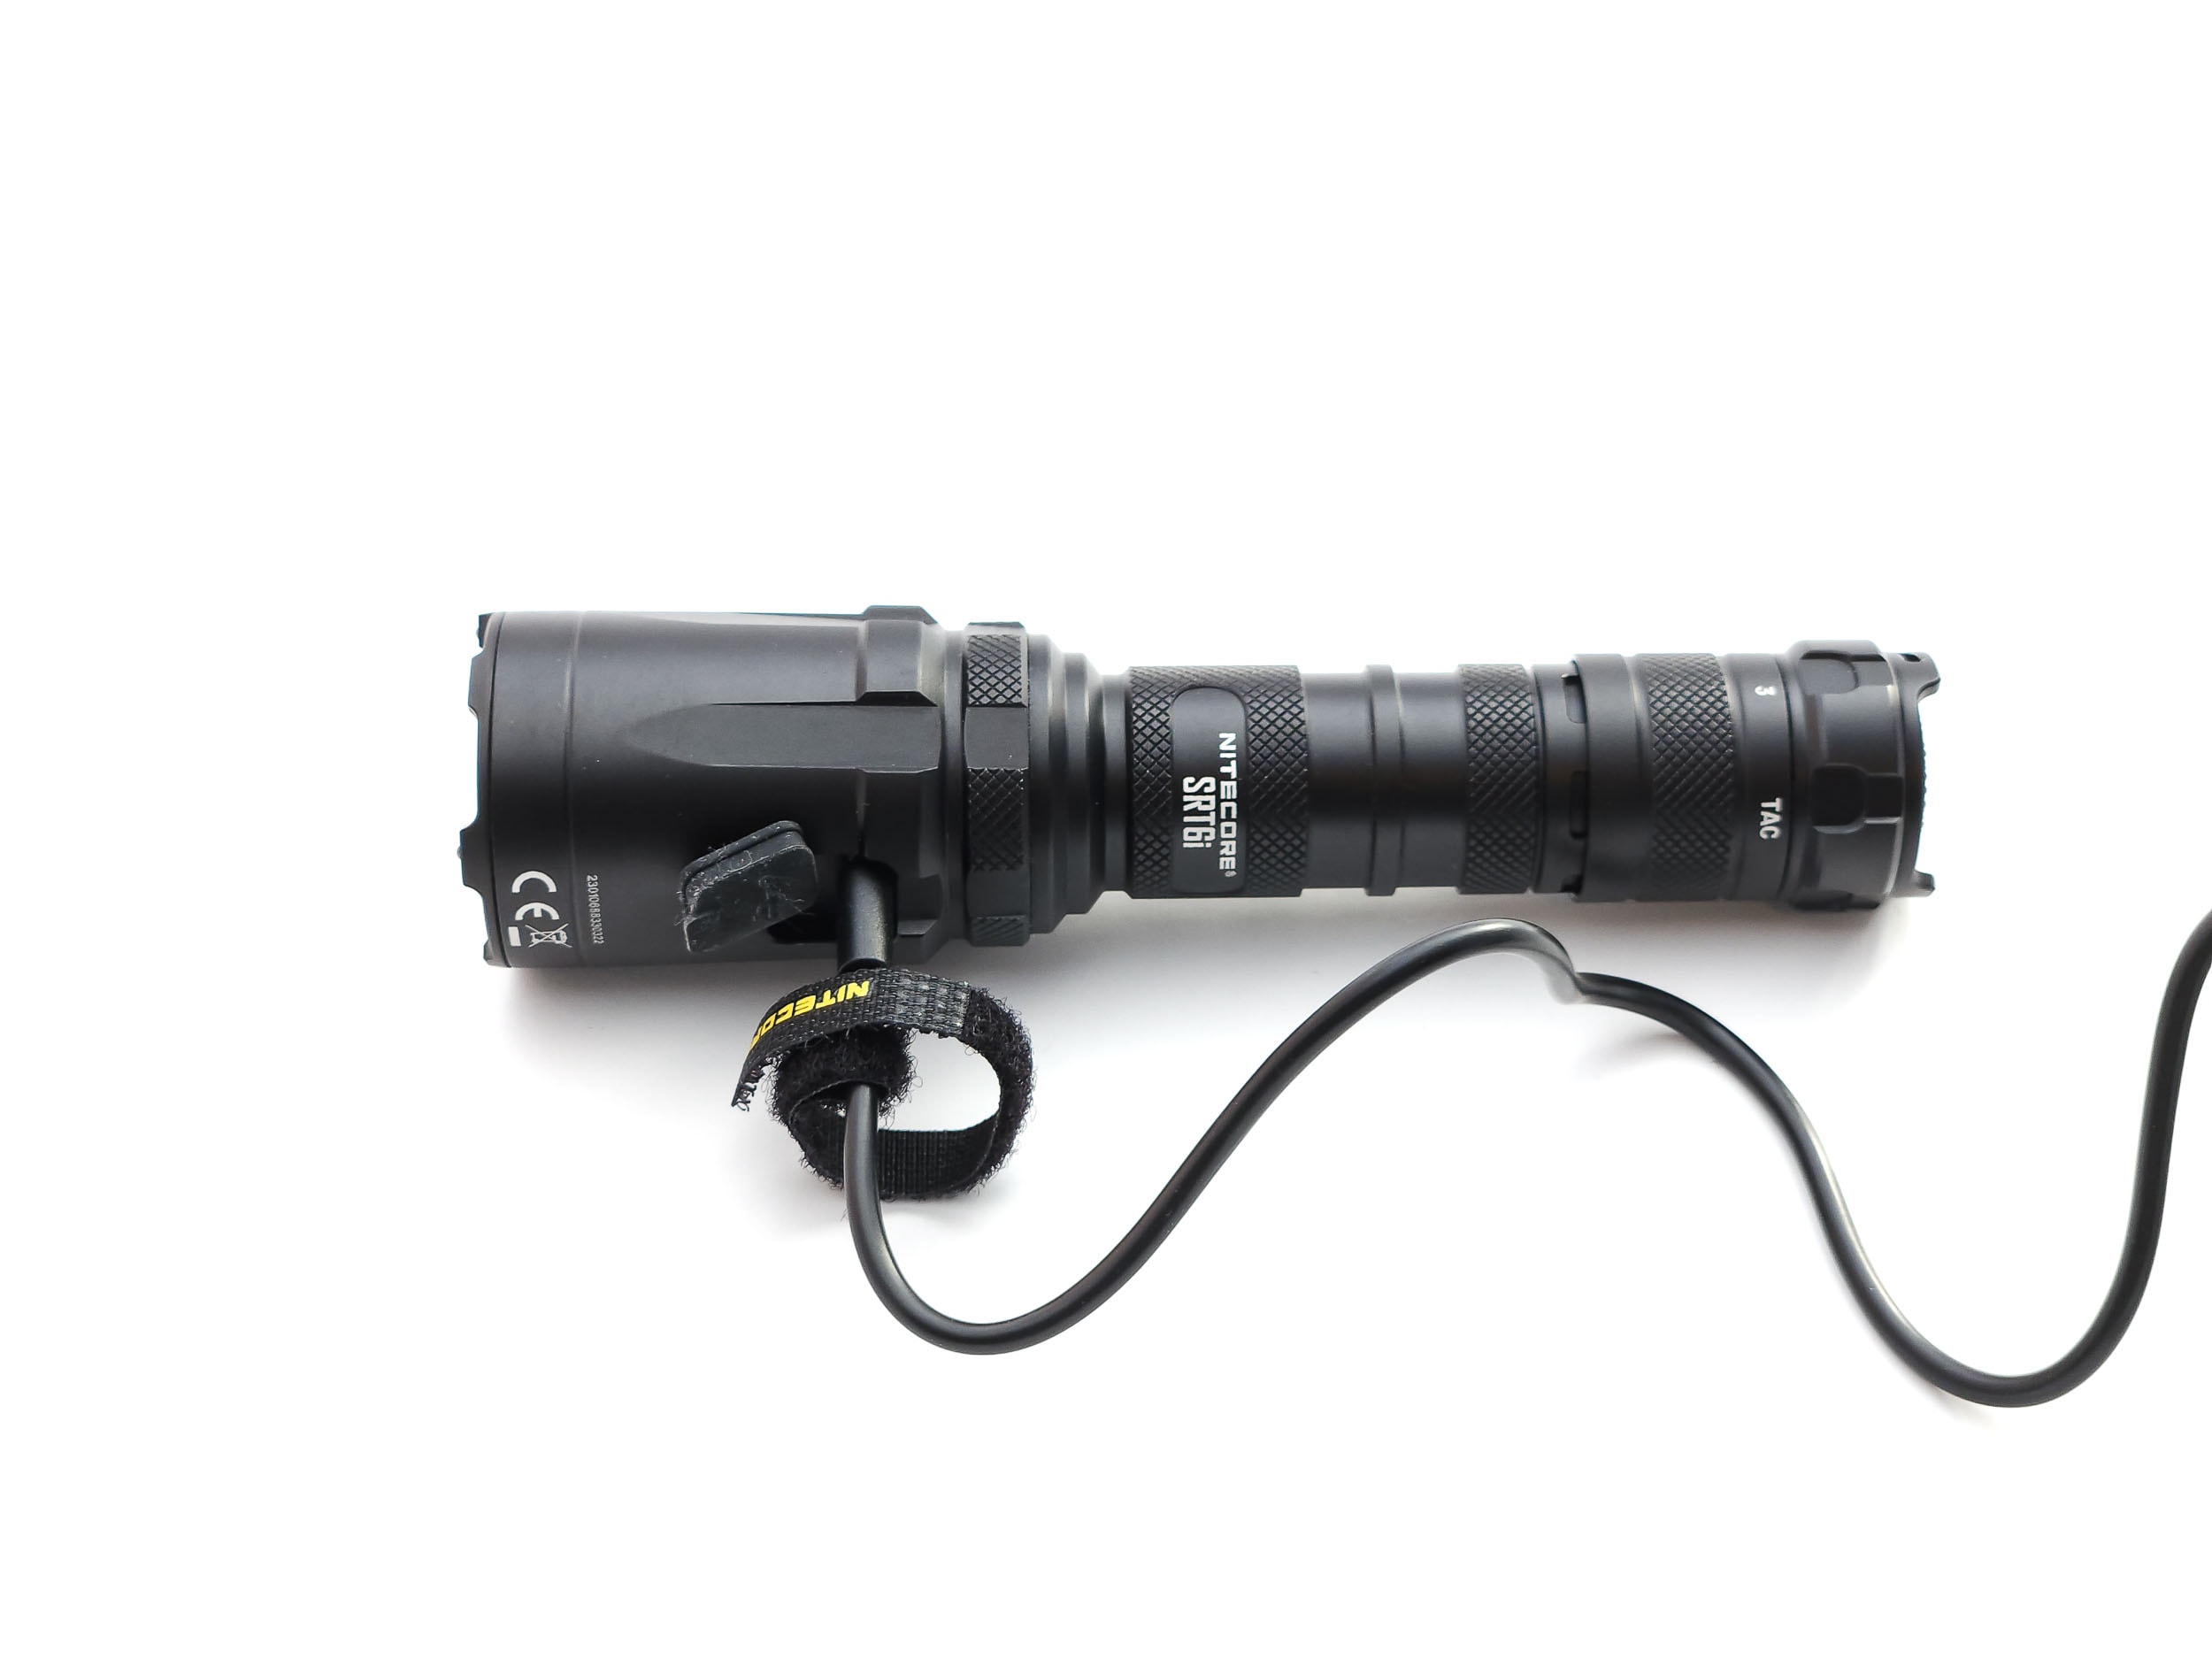
You’ll find the onboard USB-C charging port on the head, under a thick and snug-fitting rubber cover, which also happens to be located in one of the six flat cutouts which the light can come to rest on instead of rolling around. Also on the head, above the USB-C port there’s the serial number and some regulatory markings while opposite that is an etching that reminds you that the light gets hot. In between those is the blue battery indicator light.
The head of the SRT6i is glued onto the body, but the tail cap can still be removed, and in fact, this is how you get the clip on. It’s a friction clip, but the arms sit under the tail cap so it shouldn’t be able to be pulled off if it snags on something. Additionally, it shouldn’t even rotate, since there are channels cut into the body where the clip can rest in. It’s a pretty neat design, but I don’t think I’ll be clipping this to anything due to the light’s size, and the fact that the clip isn’t very strong. Mine was actually slightly bent to the side when I took it out of the box and doesn’t make contact with the body when attached. Having the clip attached makes it slightly more difficult to insert into the holster; you have to make sure the clip is angled towards the “corner” of the holster, otherwise it won’t fit.
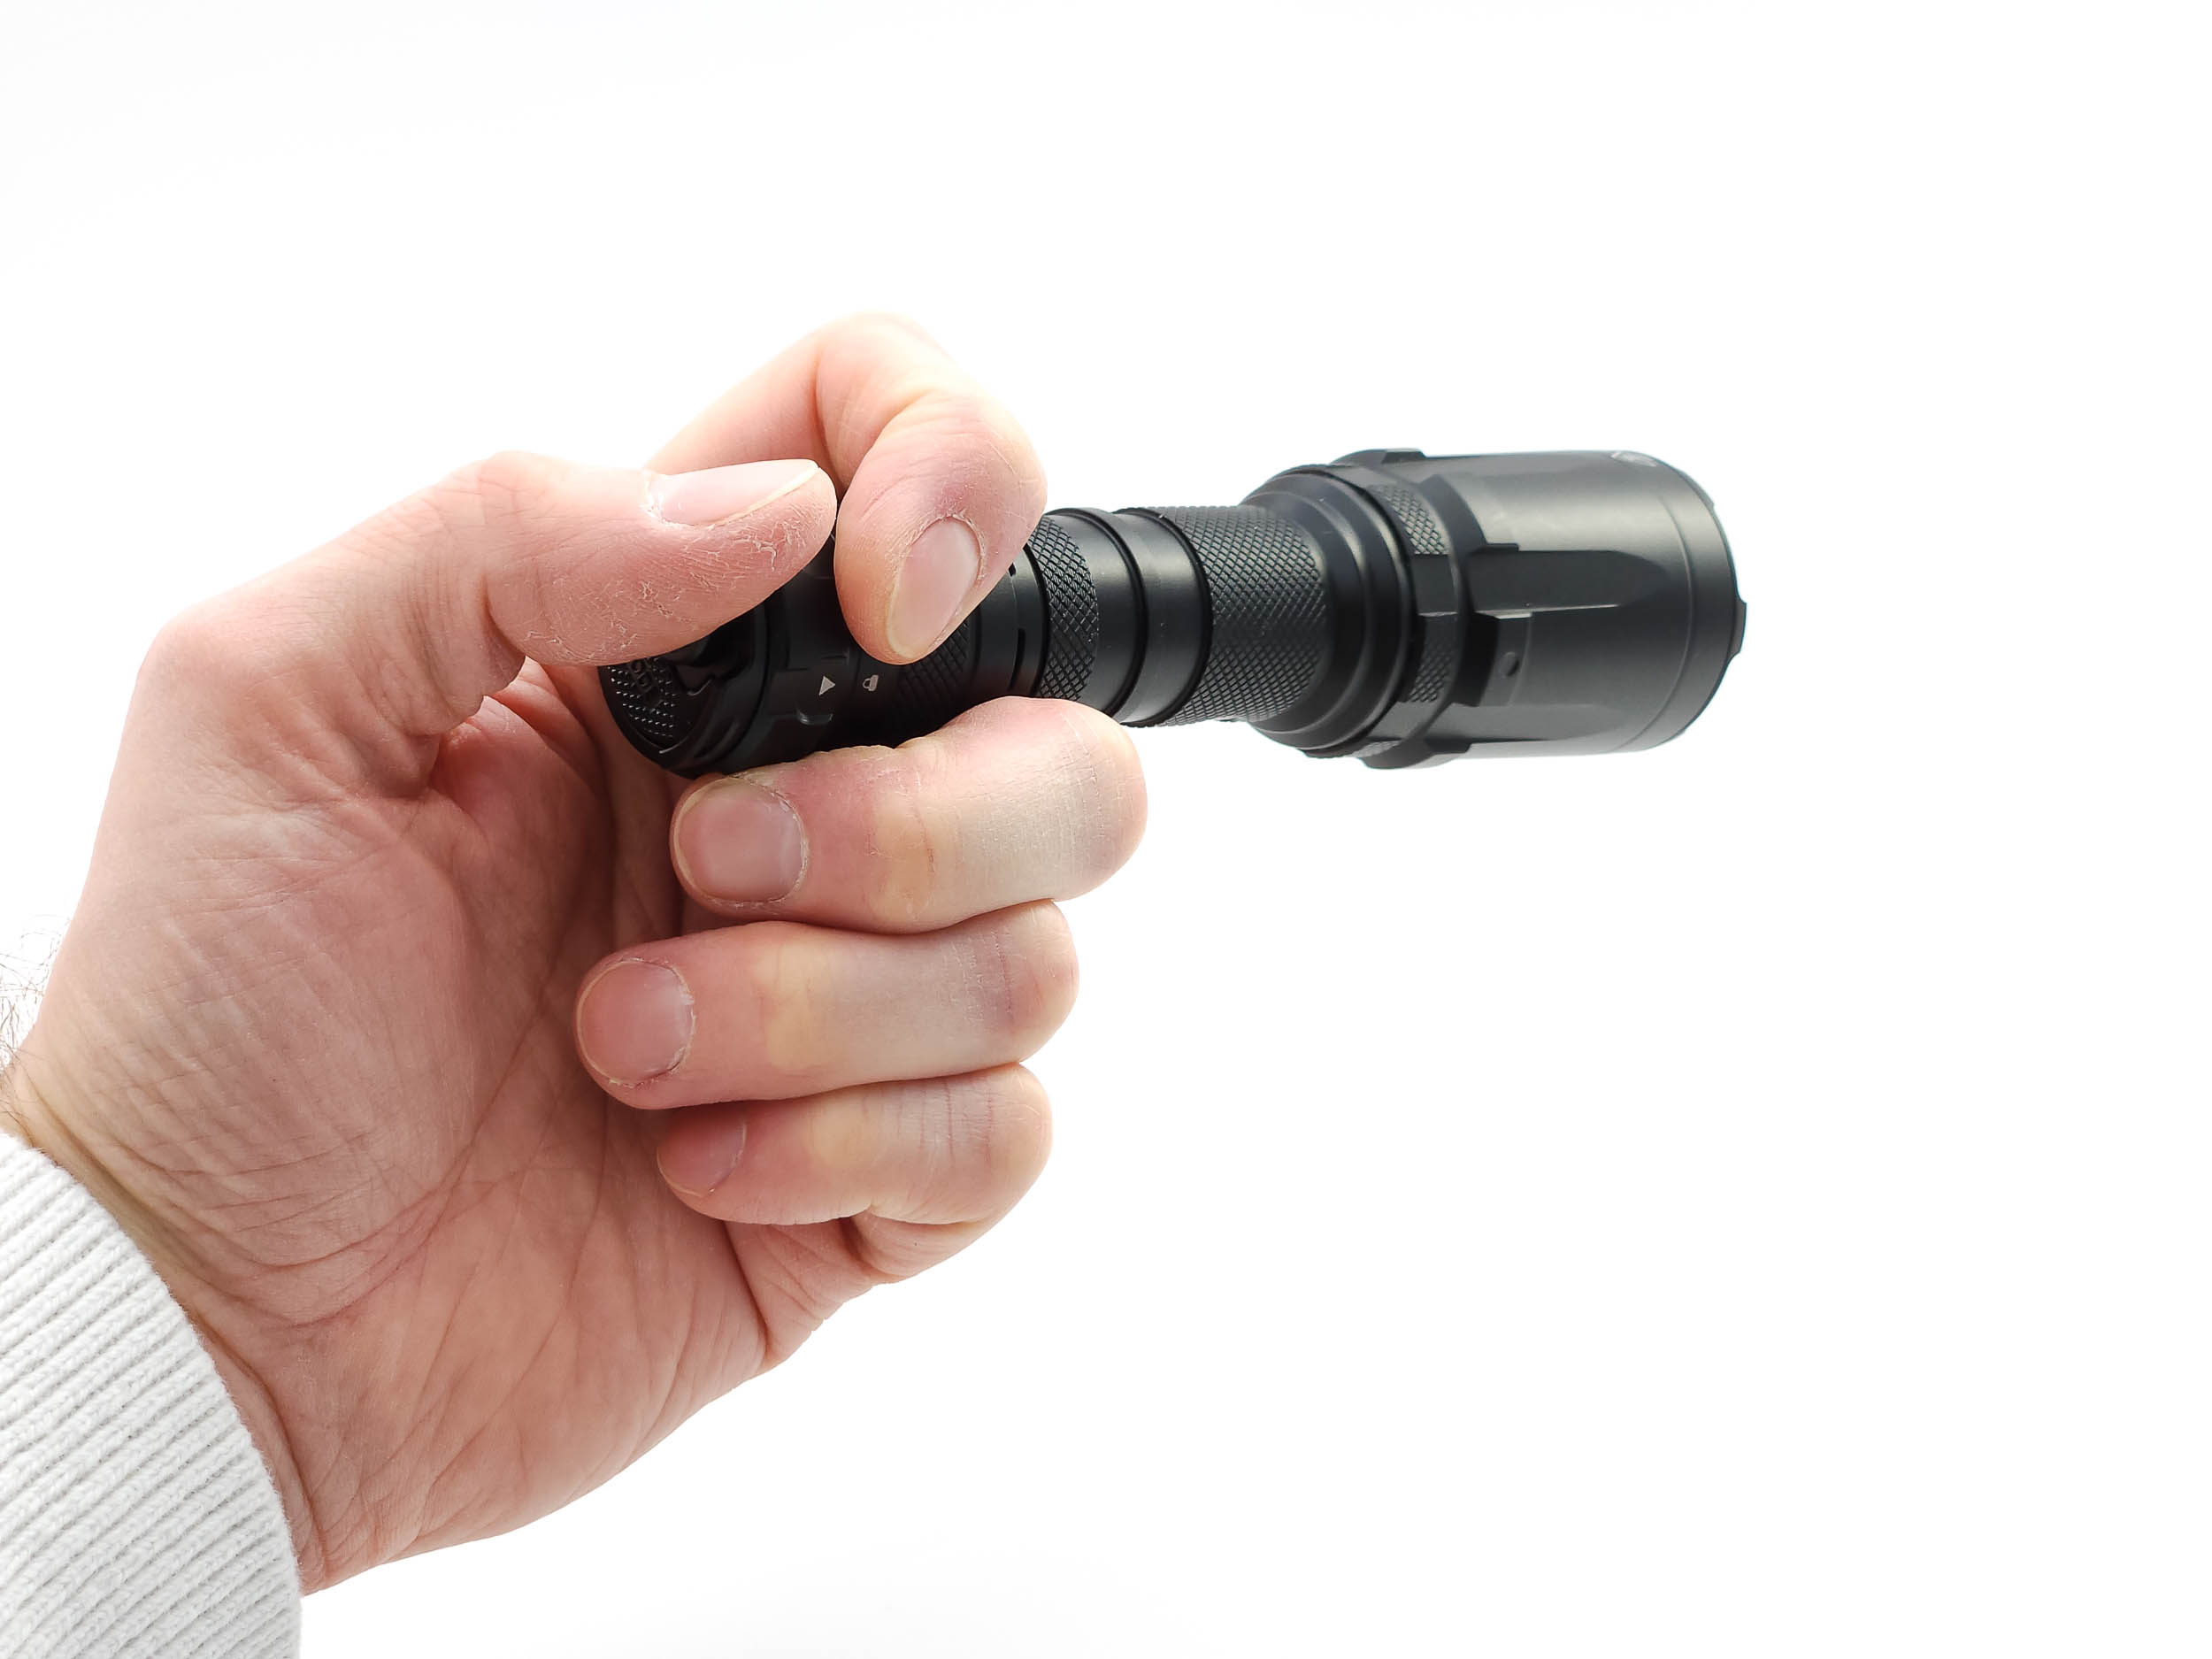
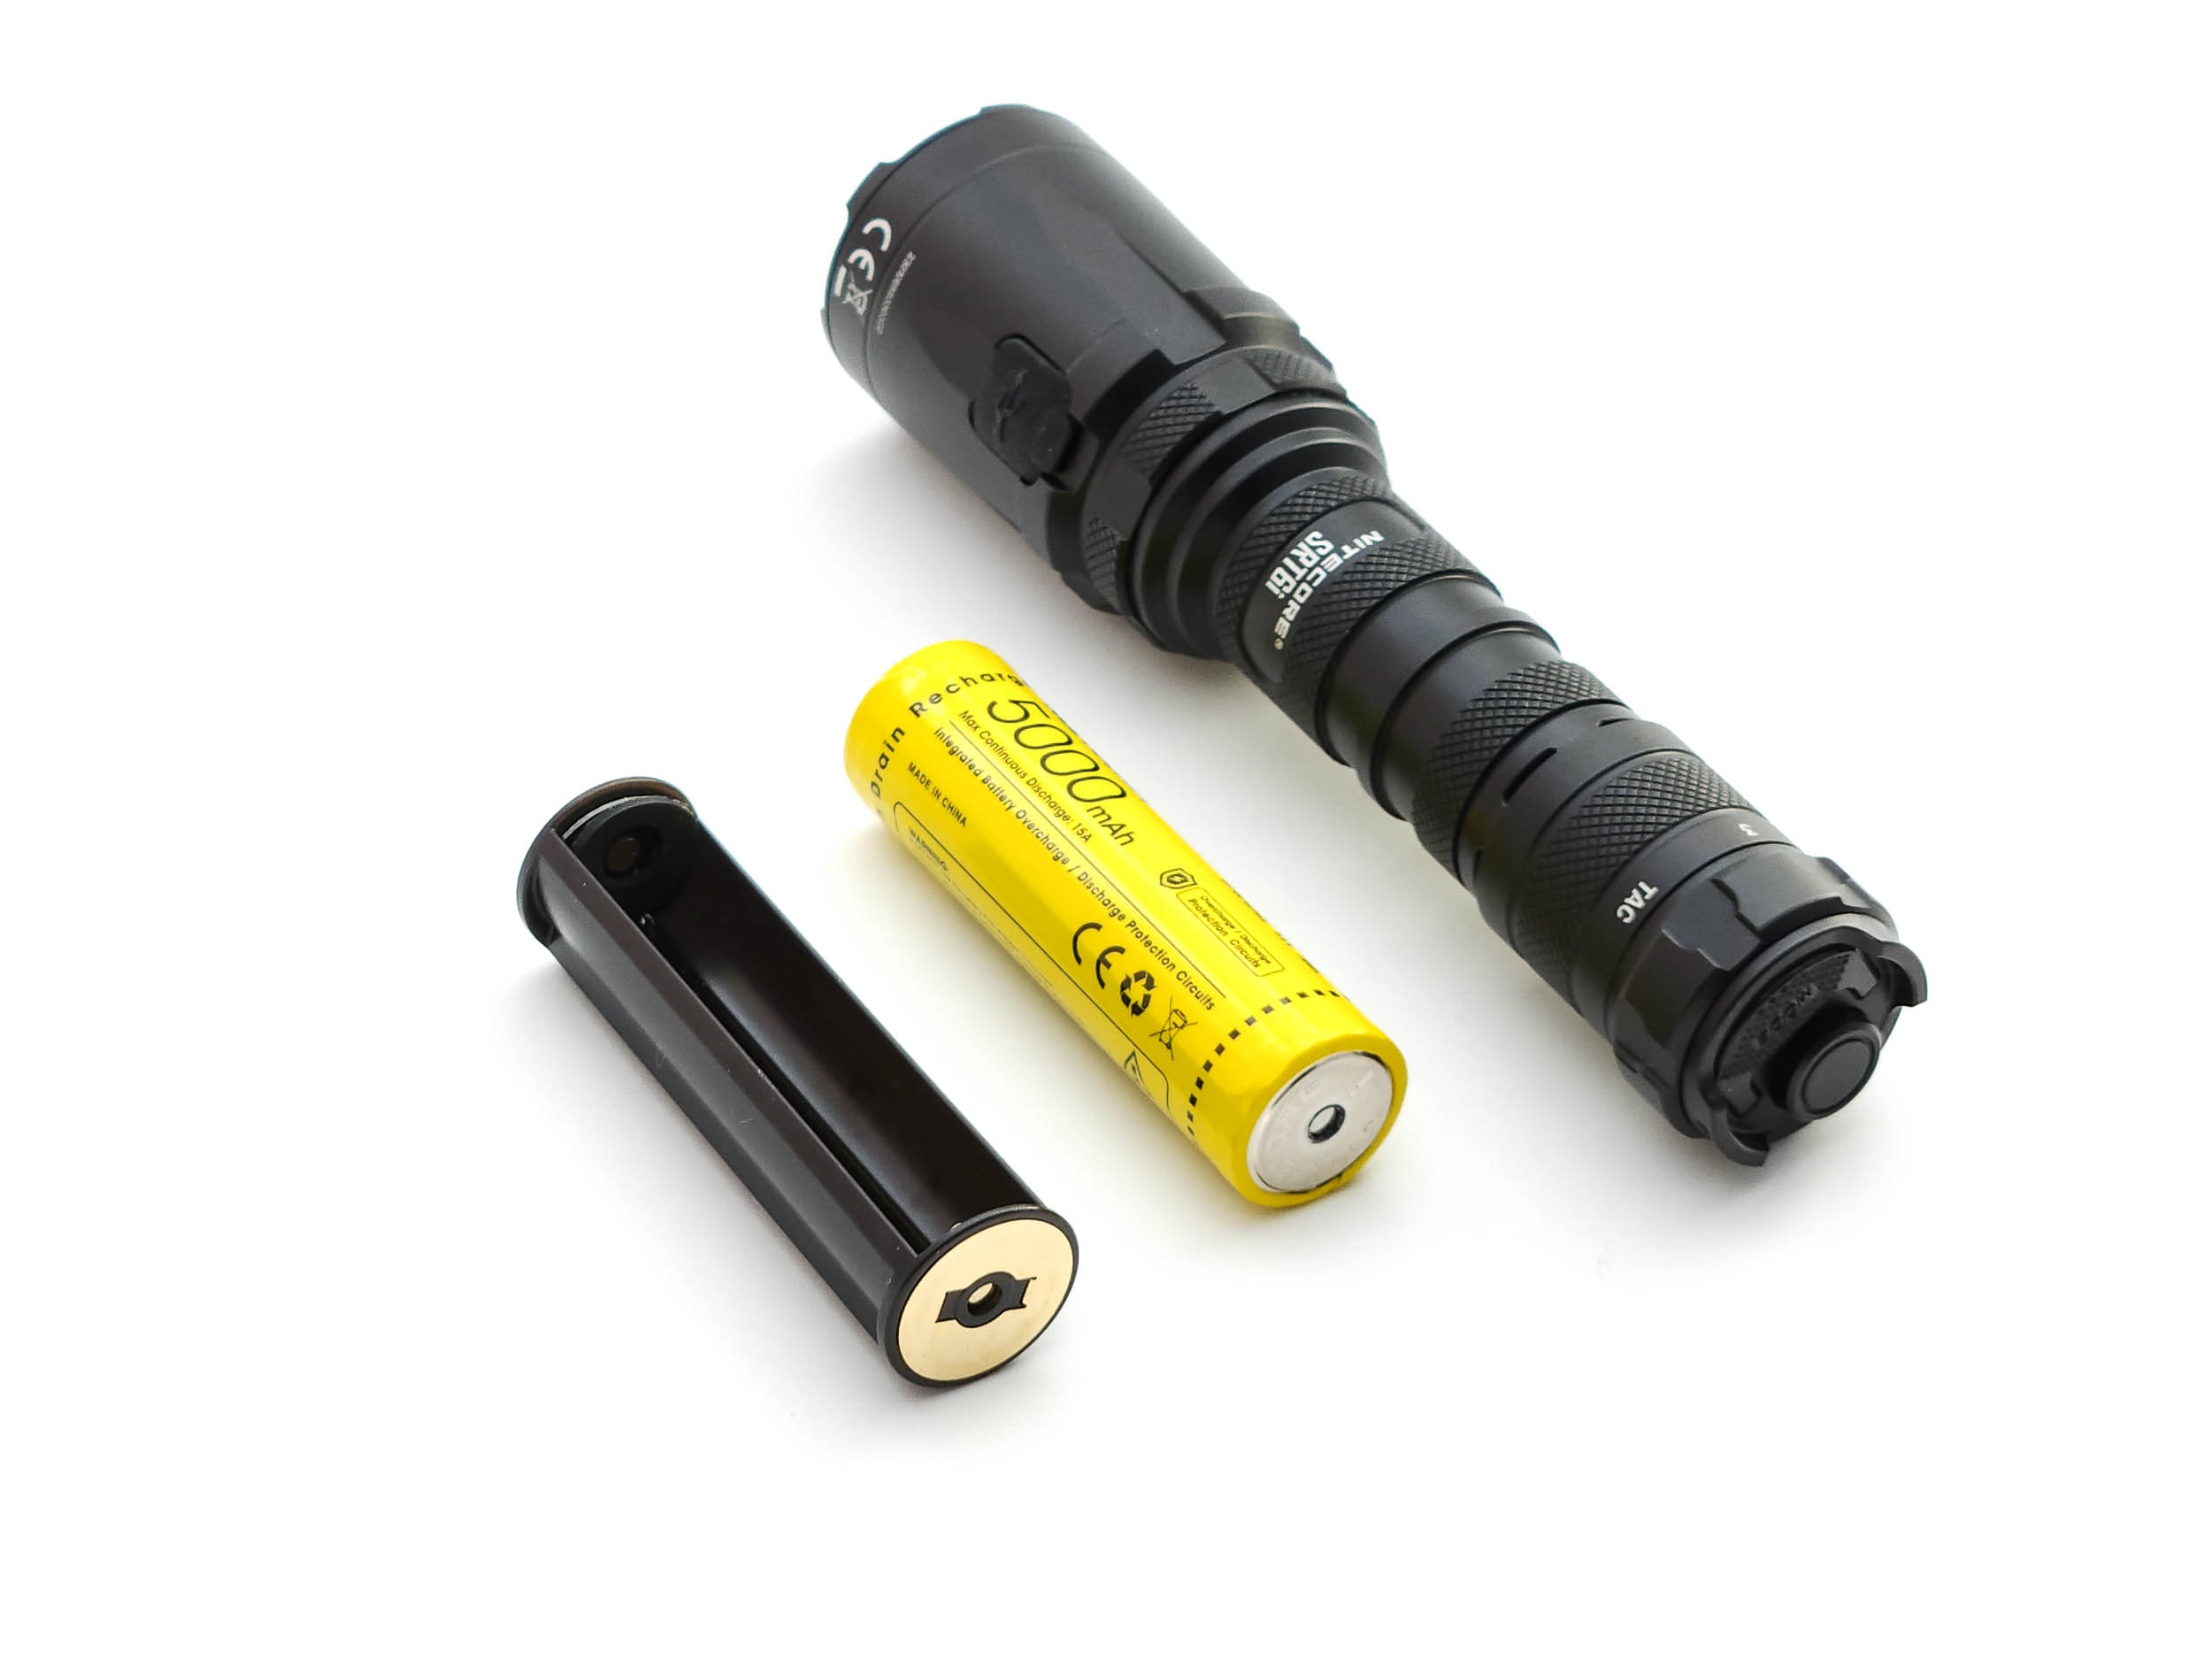
On the tail cap, you’ll find the most interesting features of the SRT6i. First up is the Smart Selector Ring. This is billed as being the 4th generation and is very different from the previous generation, found on the SRT6. This version is designed to be easily twisted between 5 different settings with the thumb and index finger while still in the overhand hold. You don’t need to switch holds or use both hands to change settings with the 4th generation Smart Selector Ring like you would have had to in older versions, which is pretty innovative, if you ask me. The 4th generation ring does away with the “Infinitely Variable Brightness” smooth ramping, like how the Jetbeam RRT01 operates, and returns to its roots with a few set levels. Keep in mind this is not an enthusiast light like the RRT01, where it’s fun to play around with the smooth rotary control, but a true tactical light, where you would need to know exactly what you’re setting the light to in a high tension situation. So you have lockout, 1, 2, and 3, which are low, mid, and turbo, and TAC.
The second impressive feature on the tail cap are the switches. That’s right, switches; there are two of them. You might think that in a tactical light, that would make things confusing, but they’re designed so differently that there’s no way to mistake one for the other. If you push really hard you might depress both of them (whichever is activated first will take precedence), but you will definitely not mistake them.
The first button is circular, and acts as your standard on/off switch. A half press will get you momentary activation in the 123 modes, while a full press will lock that brightness in.
The second switch is flat, almost flush against the back of the light, but aggressively knurled, so you can find it by feel. This is the patented, second-generation Strobe Ready™ button! No matter what mode the Smart Selector Ring is set to (except lockout), a half press on this button will always give you momentary turbo (3), while a full press will always give you momentary strobe meaning essentially between these two dual-stage e-switches, you always have access to nearly every mode the light has to offer. TAC works a little differently than 123 in that half pressing the on/off switch gives you momentary 1 and a full press gives you momentary 3, but the Strobe Ready™ button’s functions remain the same.
The SRT6i has a lot going on! They also advertise that it’s compatible with a number of weapon mounts and other separate accessories, but those are not covered here.
LED, Lens, Bezel, Beam, and Reflector
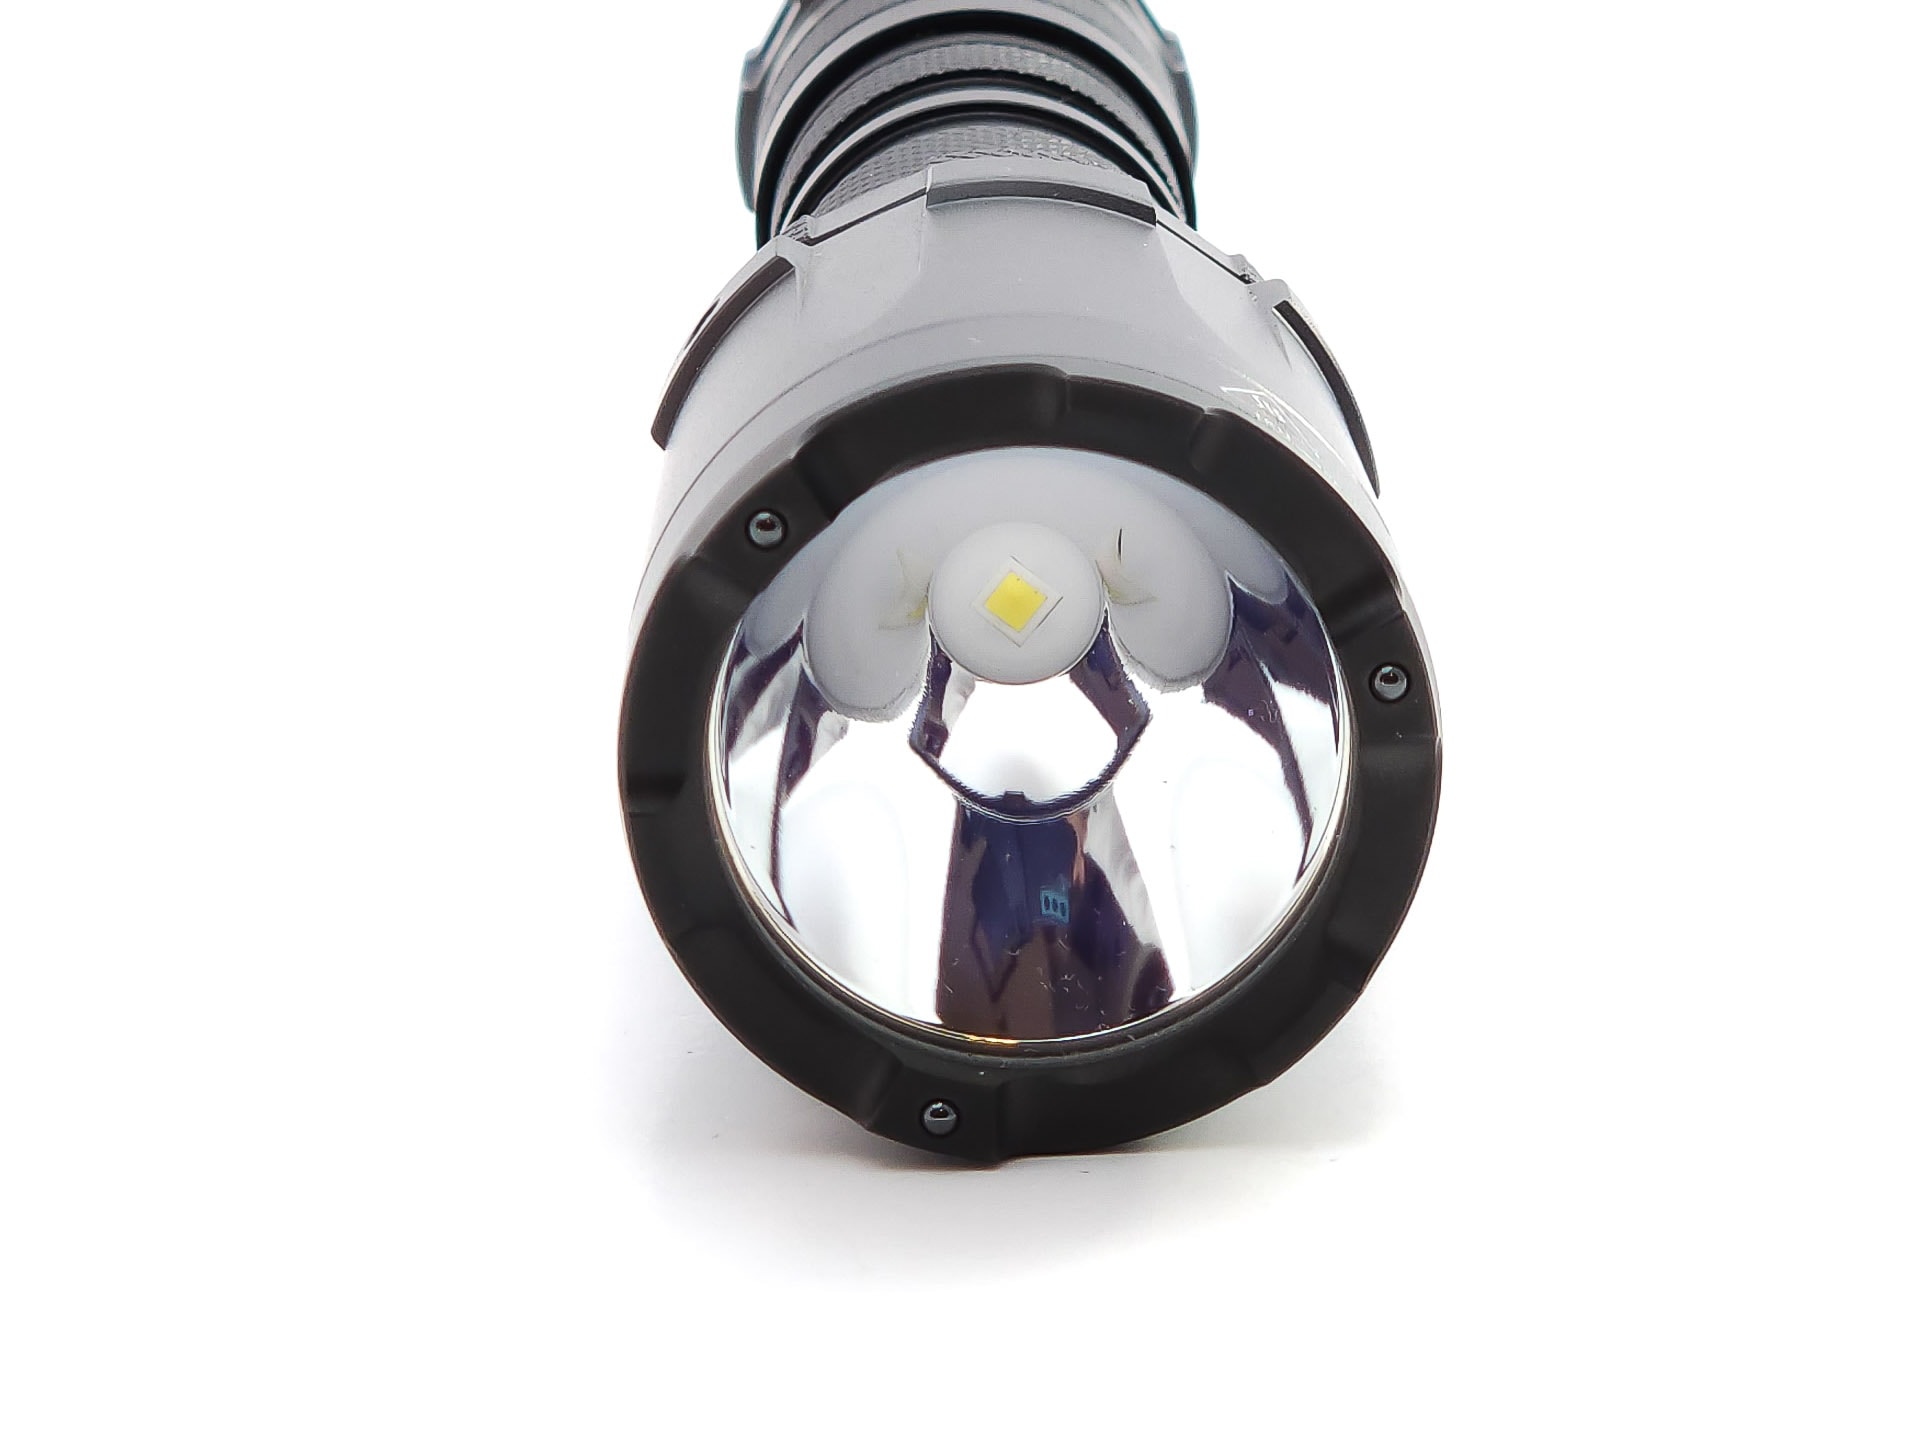
The SRT6i uses a 6500K Cree XHP35 HI as its emitter, which is domeless, and a smooth reflector. (Please note the product page for the SRT6i only states that it “Utilizes a high performance LED” and does not mention the XHP35. We had to ask Nitecore for this information.) The XHP35 (XHP standing for “Extreme High Power”) is a 3.45mm x 3.45mm quad-die emitter, meaning it’s essentially four emitters in one, that runs at 12V instead of a standard, single emitter, which would run at 3V.
XHPs are, as the name implies, very powerful, and thus a good choice for the job. The reflector opening is large enough that it could fit a 7070 size emitter like the XHP70, but I can’t speculate as to the reason the 3535 sized XHP was used. The emitter and reflector are covered by a glass lens with purple, scratch-resistant, anti-reflective coating on both sides, and topped with a strike bezel. The crenulations on the strike bezel alternate higher and lower heights and the higher three are fitted with silicone nitride ceramic balls which are advertised as being ultra-strong strike points. I don’t doubt that they’re strong (silicone nitride rates 8.5 on the Mohs scale, if you can remember back to elementary school science), but they’re so small that you would have to strike a surface (presumably glass) dead on in order to actually hit those instead of the aluminum bezel. If they stuck out further or covered the entire surface of the crenulations, they would be much easier to use, but I don’t even want to test that feature because I’d likely just bust up the bezel.
Those three crenulations actually extend high enough to block a tiny bit of the beam, so you can see three indents at the edge of the spill. Thankfully it doesn’t really detract from the beam much.
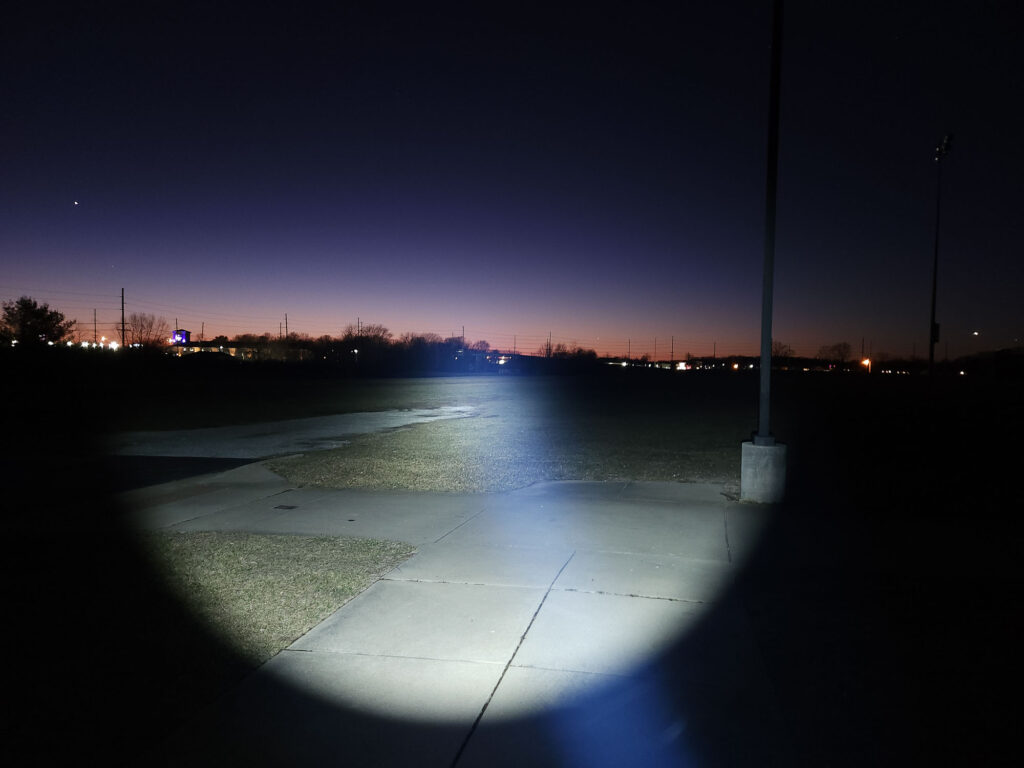
This light has an interesting beam, if you want to get into detail. There is a bright hotspot, but if you look really closely, the center of the hotspot is actually slightly dimmer than the ring around it. There’s also some artifacts in the hotspot, which is the result of the square emitter and smooth reflector. Beyond that is some bright spill that does have a greenish tint on lower levels, while there’s an overall large amount of spill that would be perfectly circular if it weren’t for the crenulations. On turbo, that does light up a lot of ground.
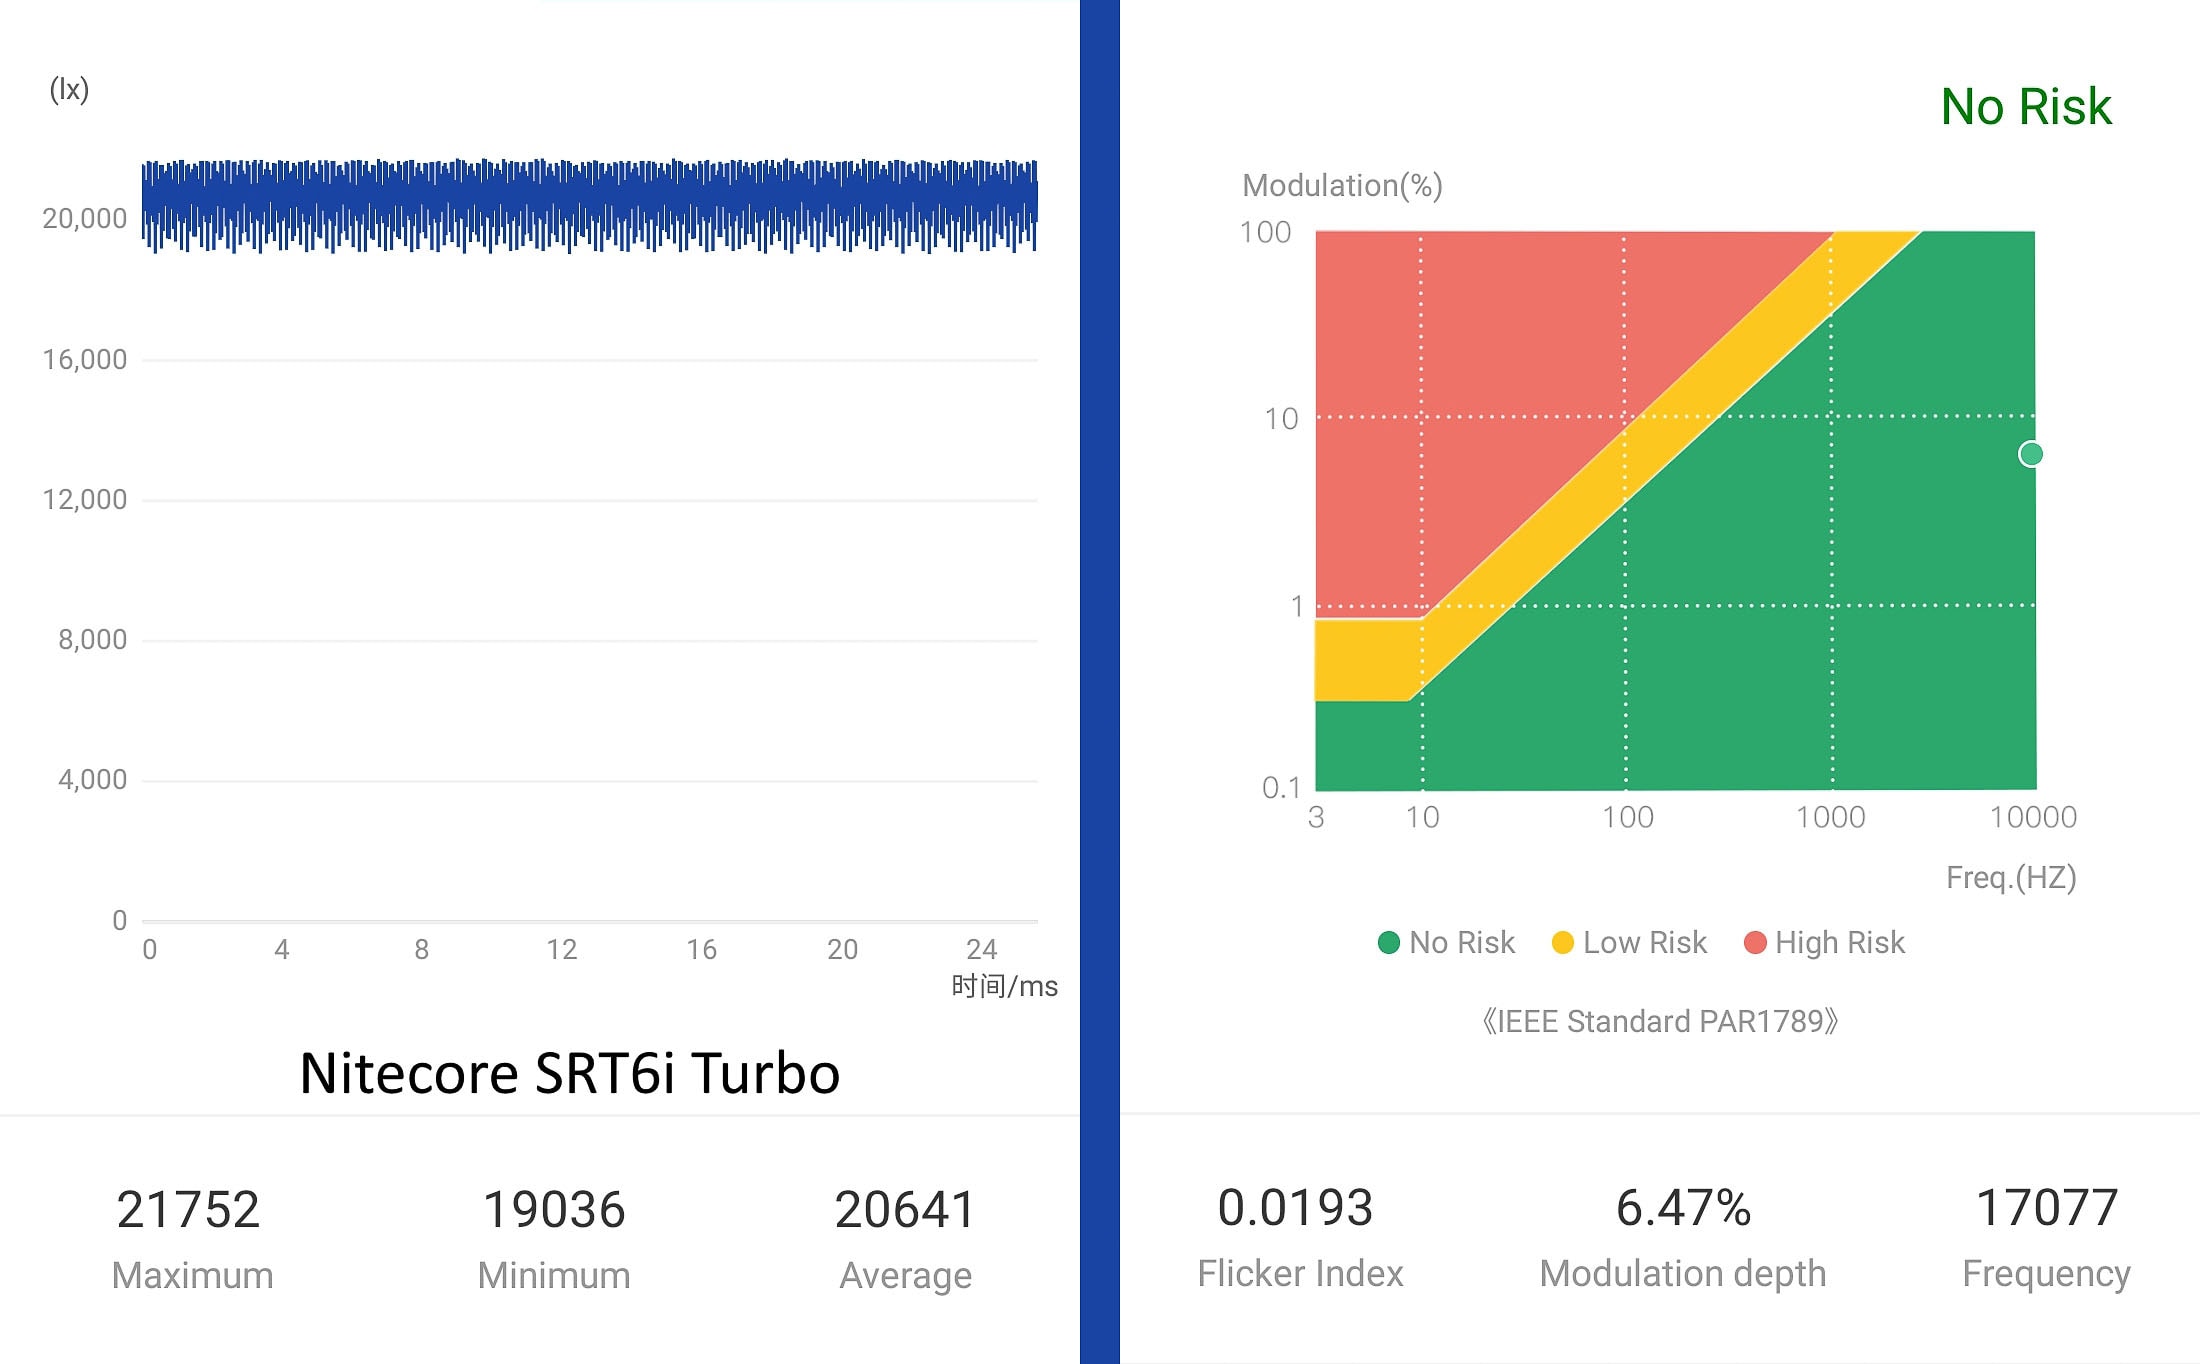
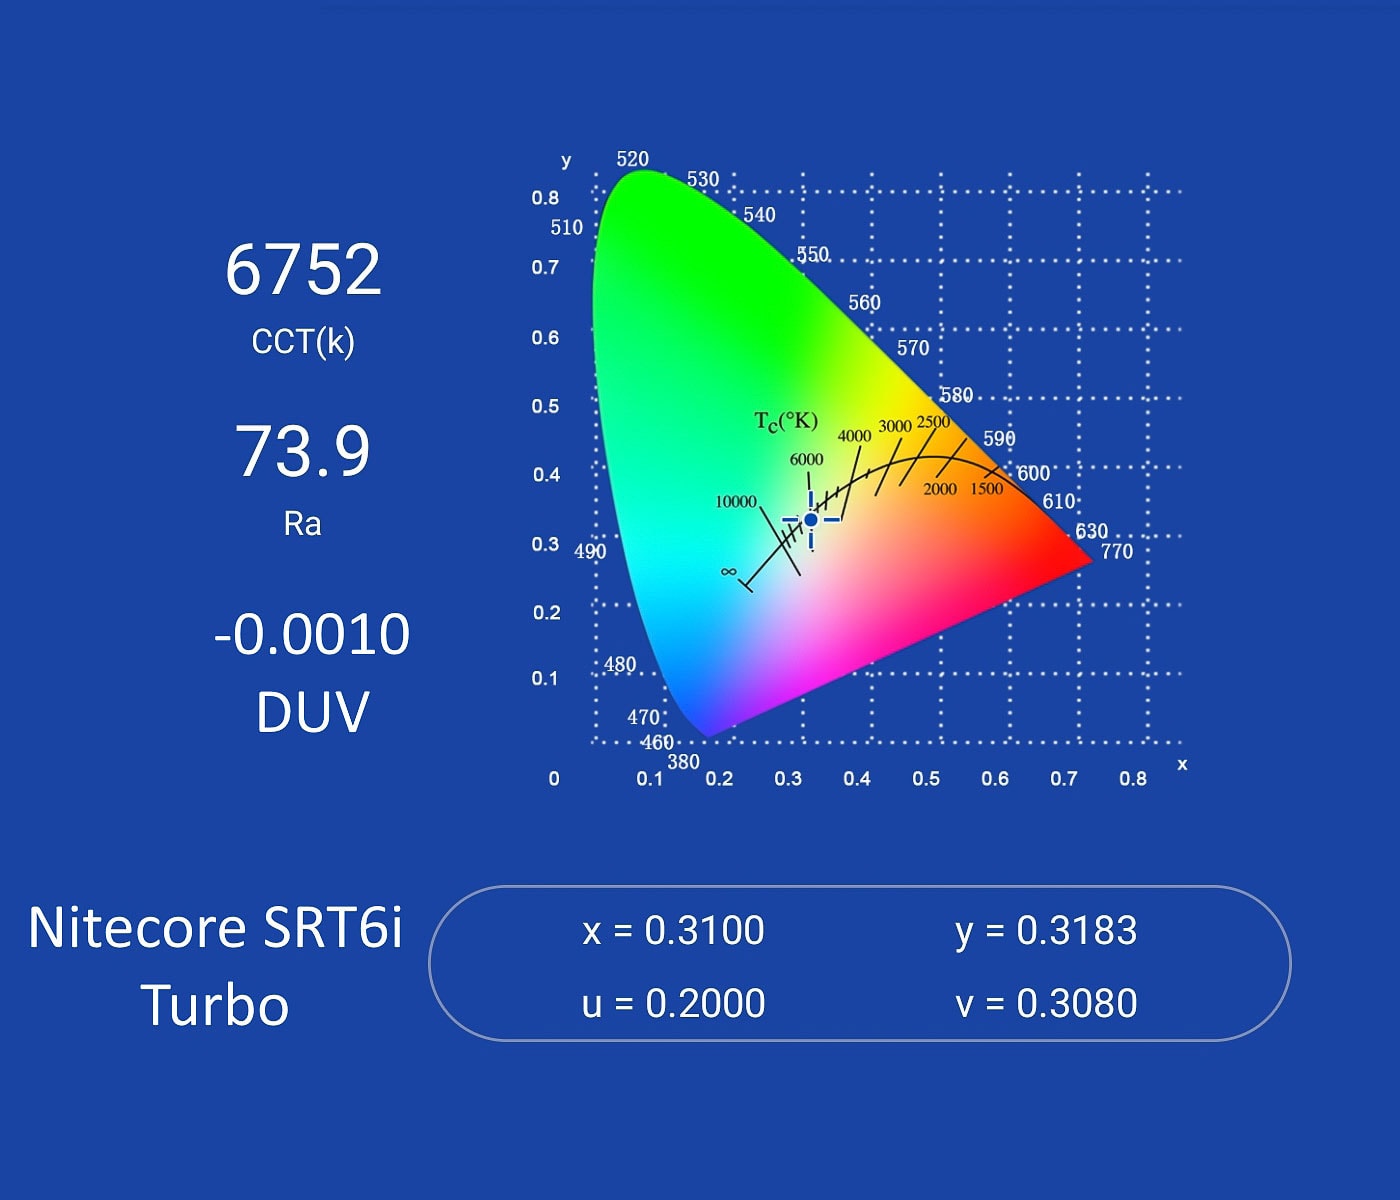
My Opple Light Master Pro shows that the XHP35 has <75 CRI and is in the 6500K range for CCT, which is to be expected. DUV is very close to neutral on 1 and 2, and even negative on turbo. The most flicker comes from turbo, but it’s still well within acceptable limits.
| Mode | CCT | CRI | DUV | Flicker |
|---|---|---|---|---|
| 1 Low | 5849K | 70.4 | 0.0052 | 1867 Hz |
| 2 Mid | 5997K | 72.0 | 0.0031 | 22629 Hz |
| 3 Turbo | 6752K | 73.9 | -0.0010 | 17077 Hz |
Dimensions and its competition
Dimensions:
Because of the large head which houses the large reflector and the specialty tail cap, this is a large light, even for a 21700.
| Nitecore SRT6i | Millimeters | Inches |
|---|---|---|
| Length | 165 mm | 6.5 in |
| Head diameter | 40 mm | 1.6 in |
| Body diameter | 26 mm | 1.0 in |
Dimensions are rounded to the nearest millimeter, and to the nearest tenth of an Inch.
Weight:
| Nitecore SRT6i | Weight in grams | Weight in oz |
|---|---|---|
| Without battery: | 167 g | 5.9 oz |
| With battery | 243 g | 8.6 oz |
Weight is rounded to the nearest gram, and to the nearest tenth of an Oz.
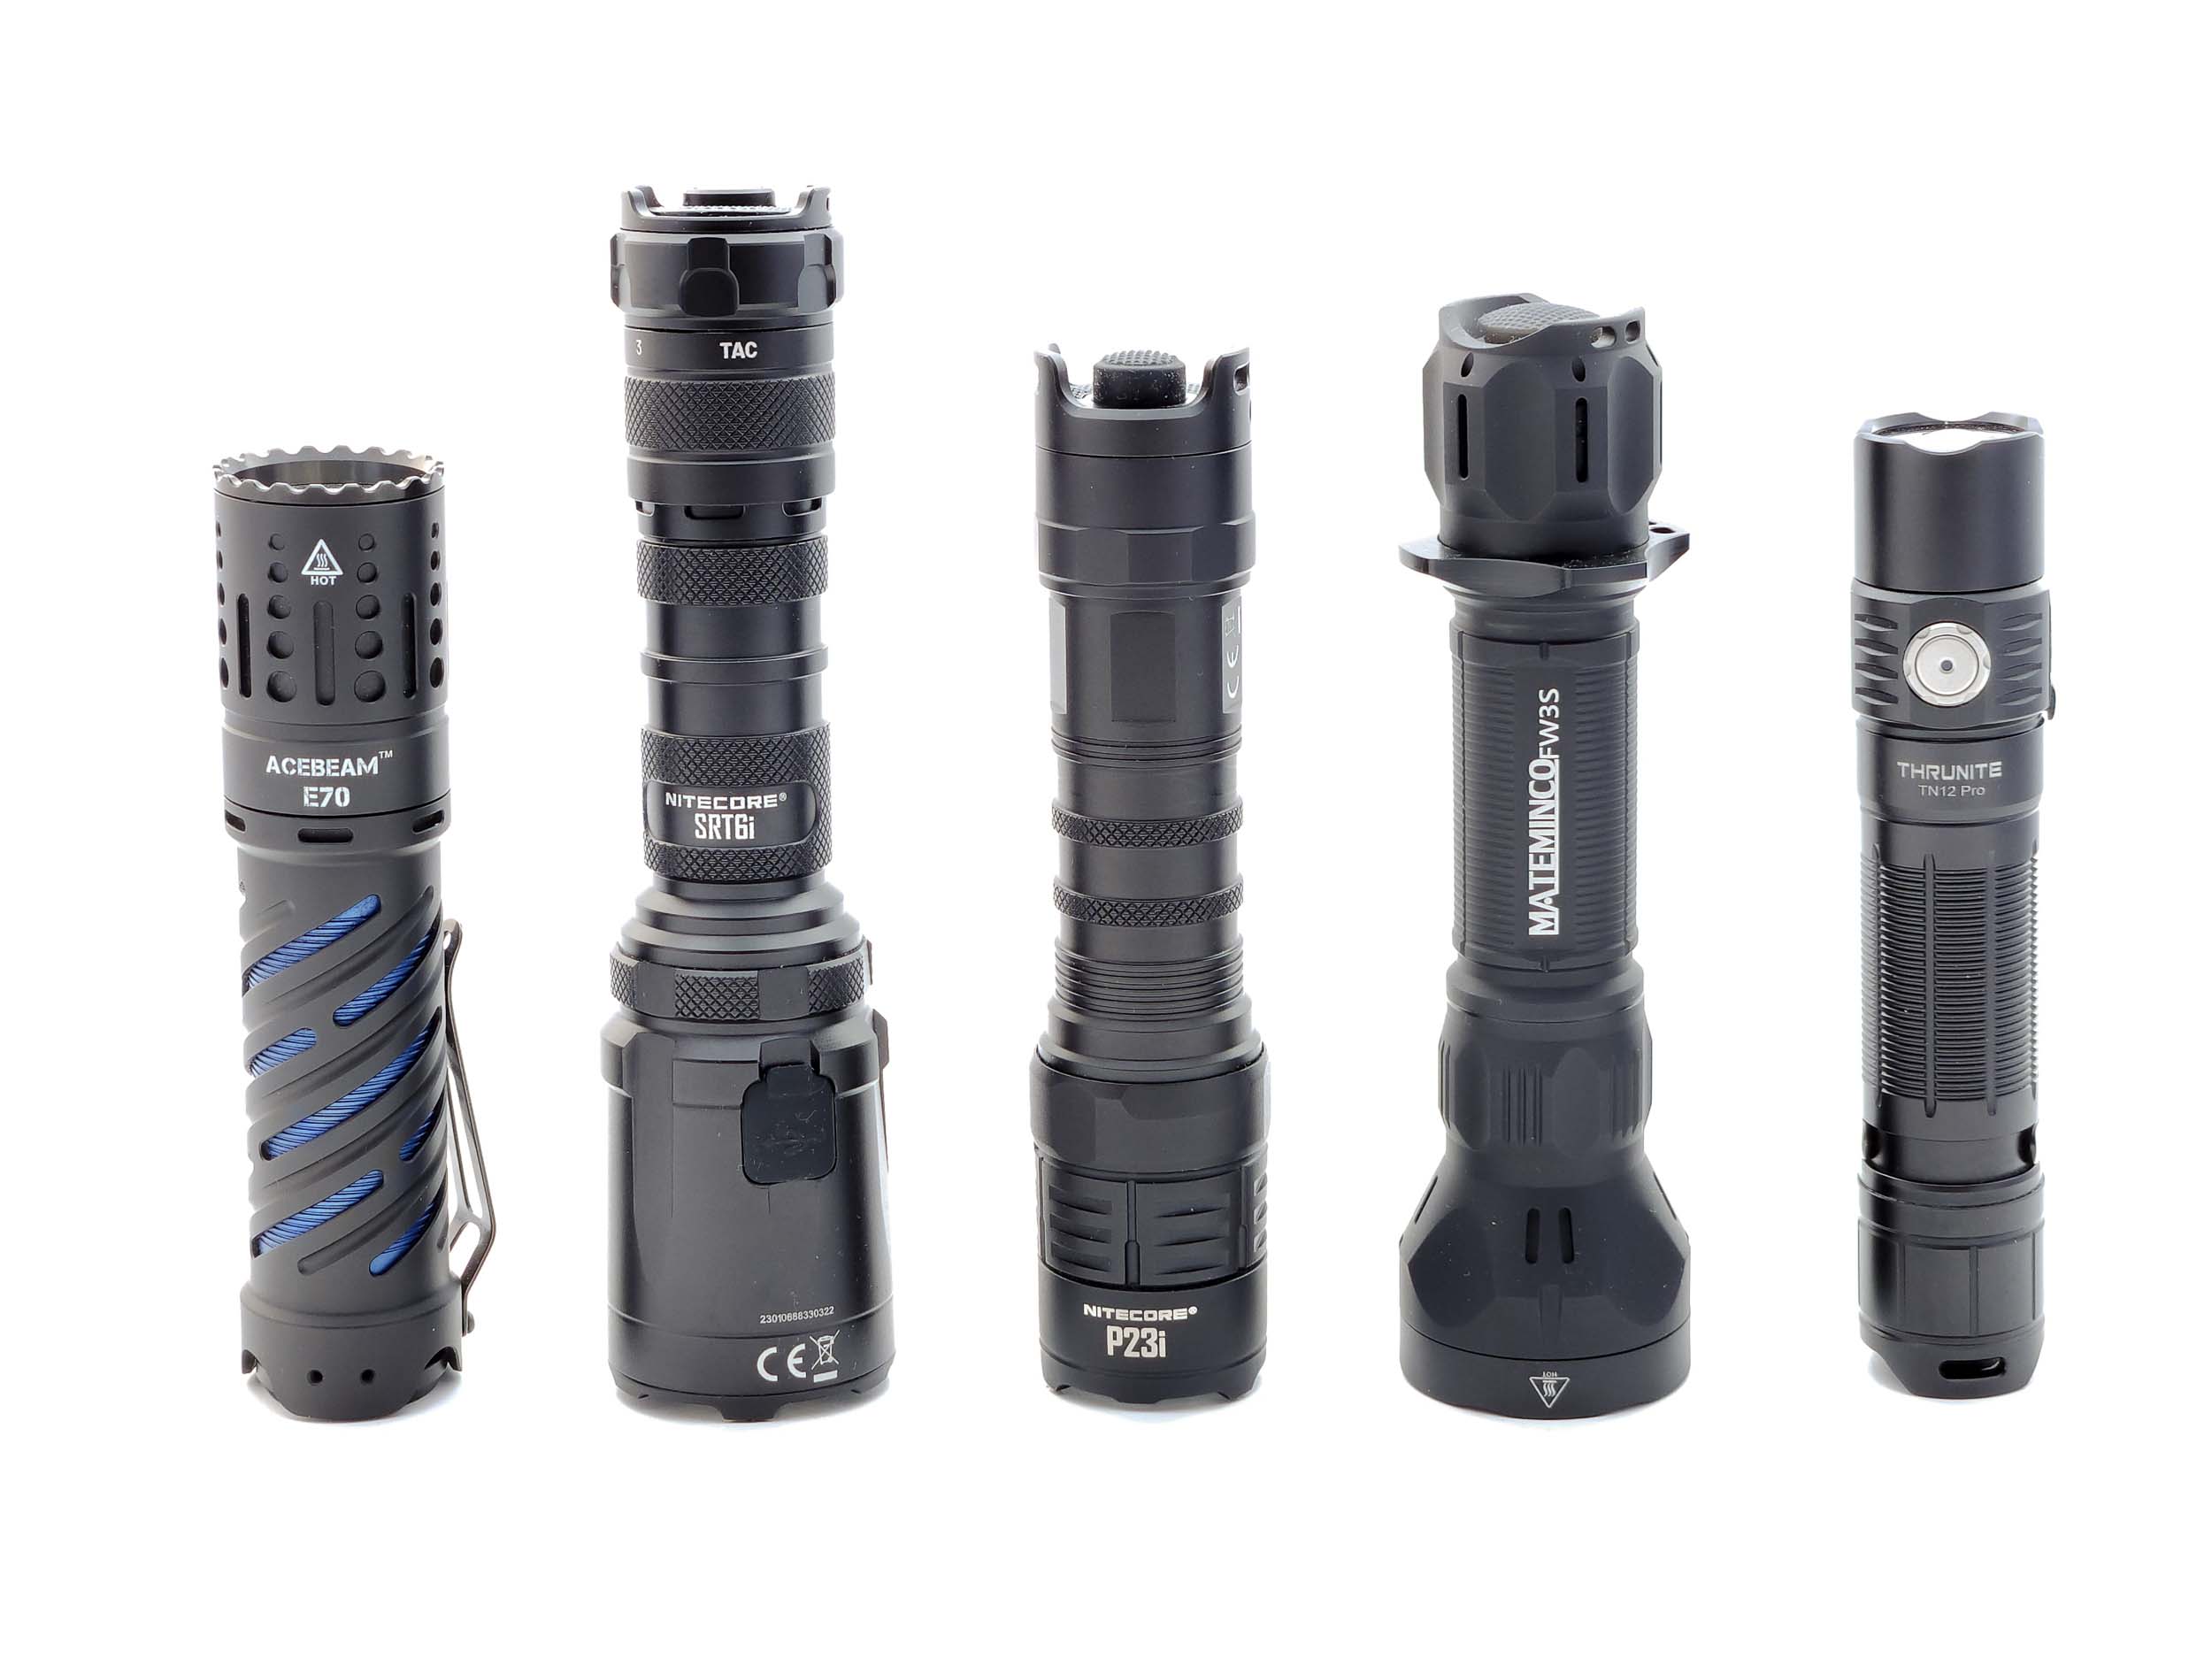
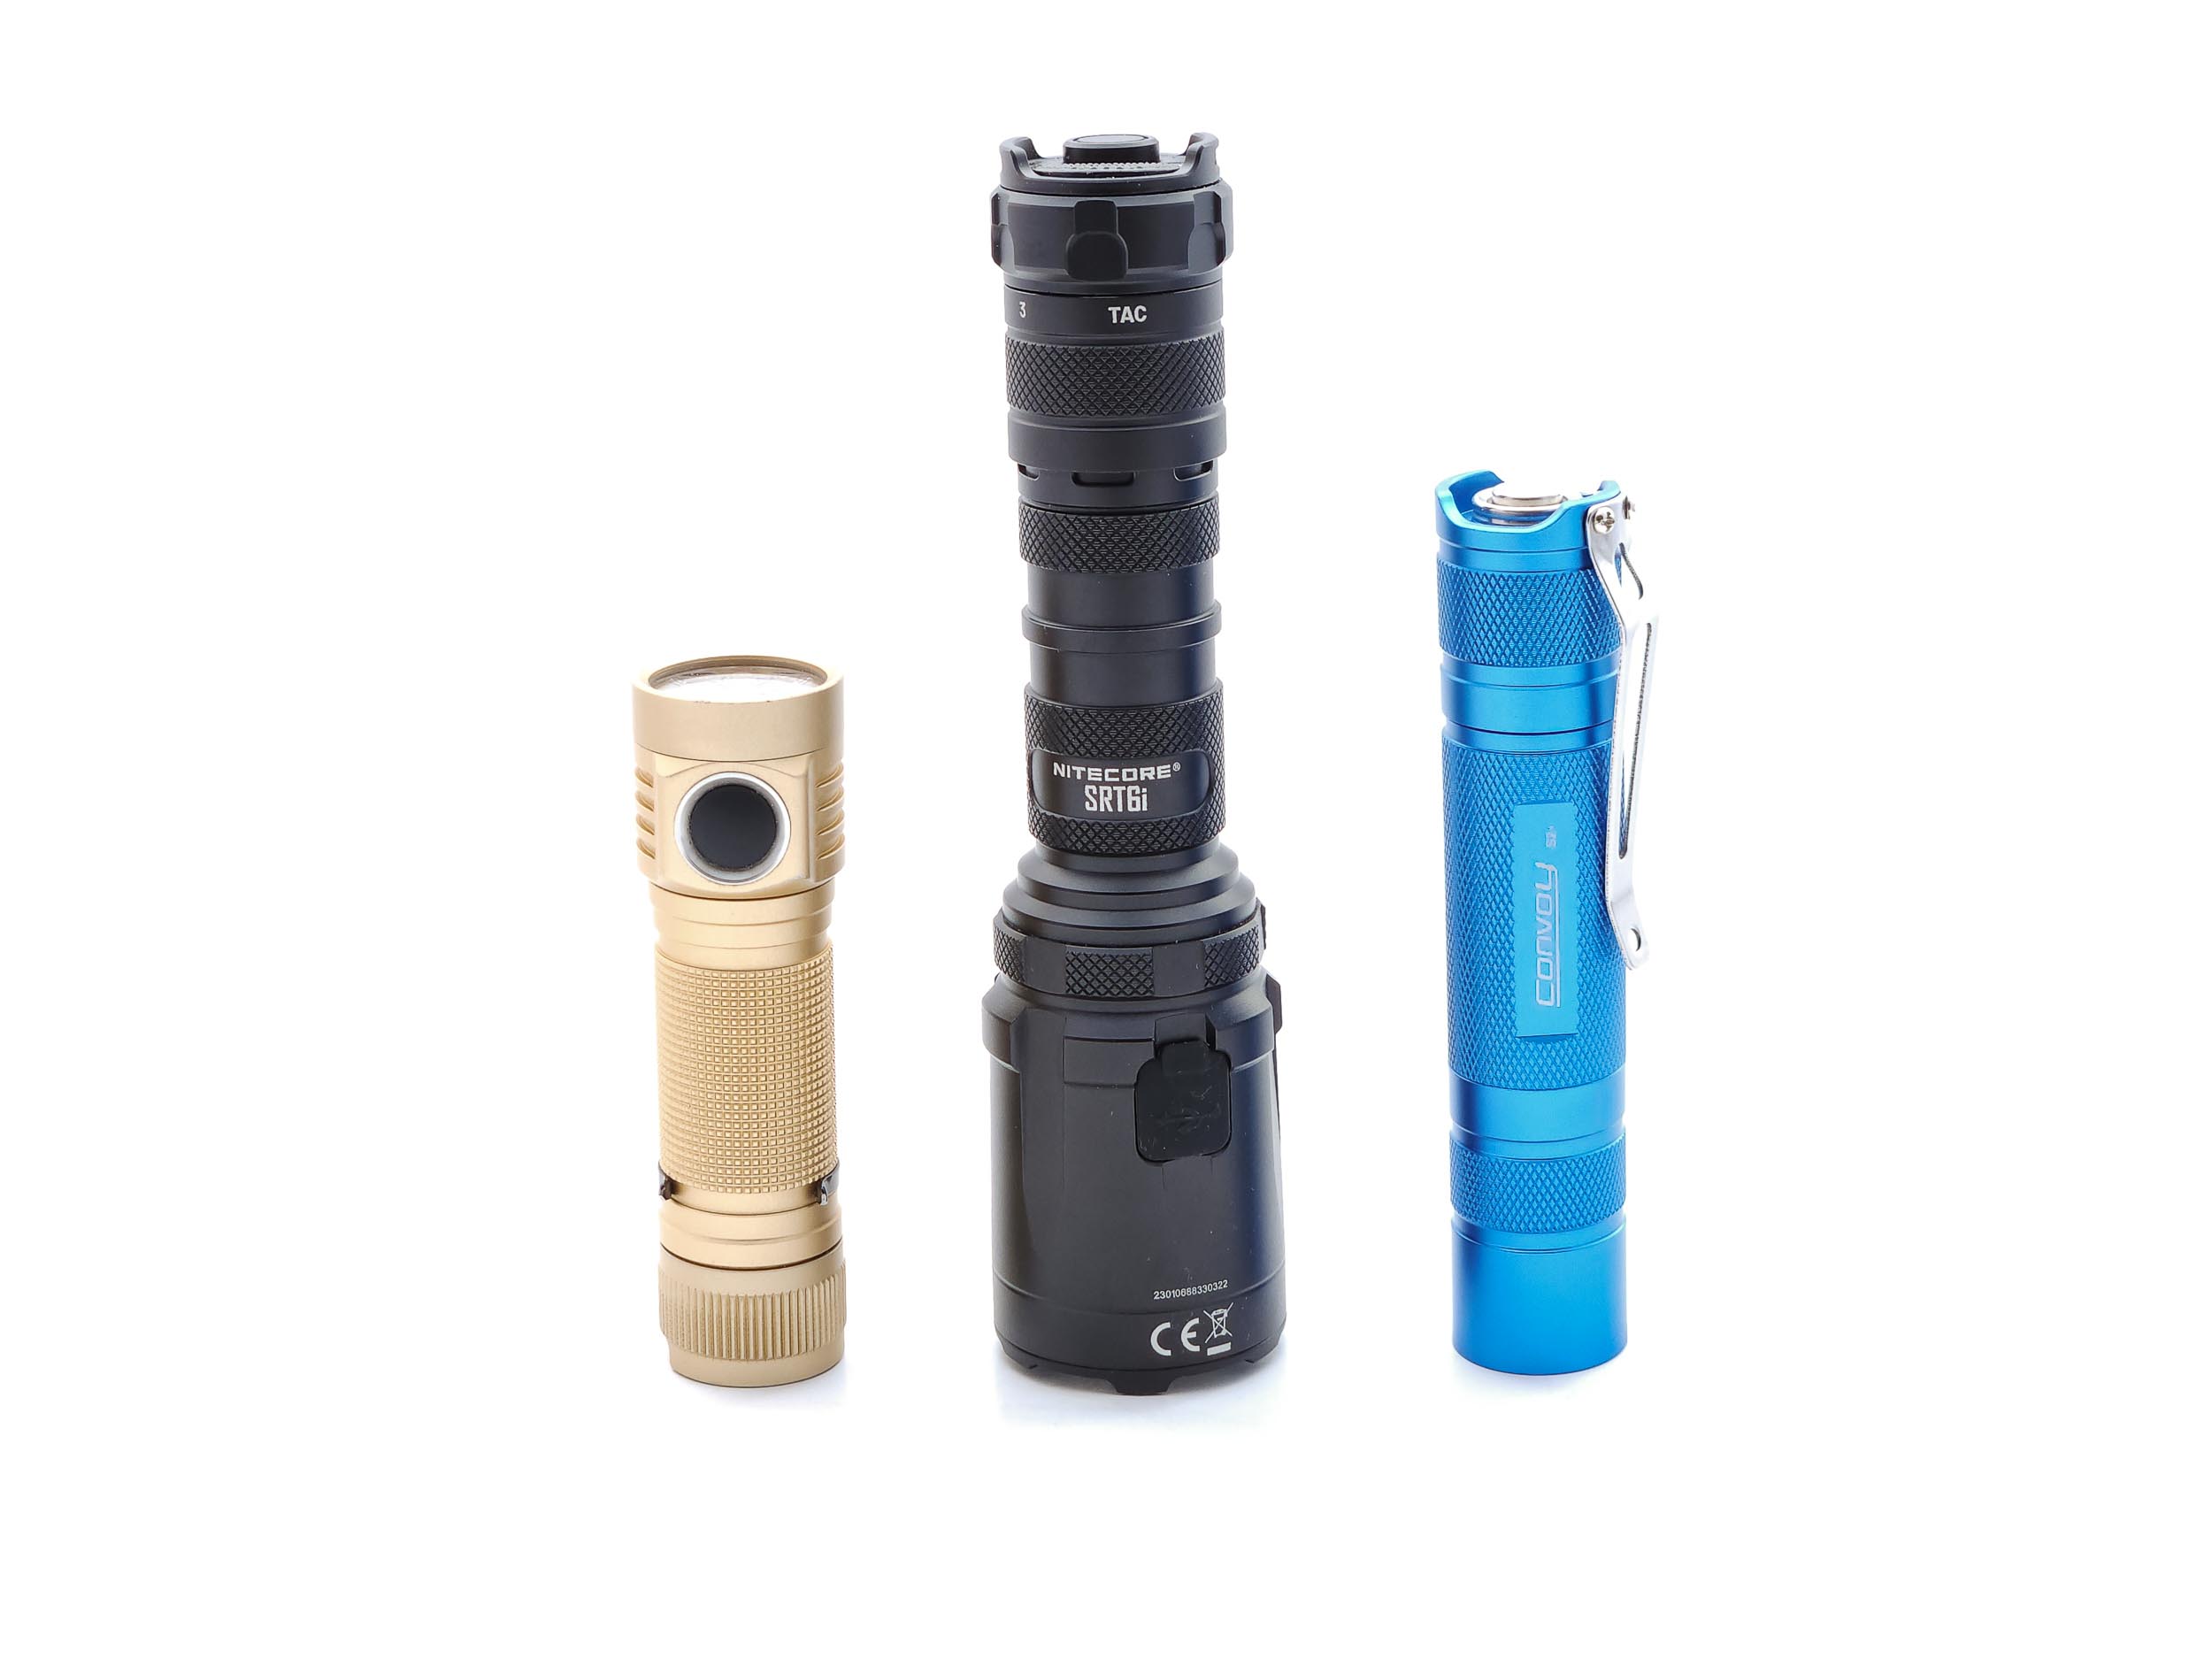
Flashlight size comparison with its competition:
Group 1: Acebeam E70, Nitecore SRT6i, Nitecore P23i, Mateminco FW3S, ThruNite TN12 Pro
Group 2: Emisar D4V2, Nitecore SRT6i, Convoy S2+
Nitecore SRT6i UI: User Interface and Driver
Since the XHP35 is a 12V emitter, the SRT6i uses a boost driver to provide the necessary voltage.
As I mentioned before, the SRT6i has two buttons: A circular on/off switch, and a flat Strobe Ready™ mode paddle. I’ll refer to them here as the circular and mode buttons.
Available modes:
- 1 (low), 2 (mid), 3 (turbo), TAC
Available blinky modes:
- STROBE
From OFF:
- 123 Modes
- Half-press circular: Momentary selected mode
- Single click circular: Engage selected mode
- Half-press mode: Momentary 3/turbo
- Full press mode: Momentary strobe
- TAC Mode
- Half-press circular: Momentary selected mode
- Full press circular: Momentary 3/turbo
- Half-press mode: Momentary 3/turbo
- Full press mode: Momentary strobe
From ON:
- Single click circular: Off:
- Half-press mode: Momentary 3/turbo
- Full press mode: Engage strobe
Mode memory:
- The Smart Selector Ring is used to change modes, so it will stay in the selected mode until changed.
Shortcuts:
- To Turbo: Half-press mode button
- To Strobe: Full press mode button
Low voltage warning:
- The battery indicator light on the side of the head will blink rapidly when the voltage gets low and the light will step down until it turns off at 2.9V.
- Additionally on 3/turbo, the light will ramp back up briefly, and then the output will drop down just as briefly before leveling back out for a few more minutes before it officially steps down. I’m not sure if this is by design, but I tested it a few times, and the graph looked almost the same each time.
Strobe/blinkies
- Nitecore’s Srobe Ready™ lights use a variable strobe mode. When holding the mode button all the way down, it starts at 16 Hz and speeds up to 20 Hz over the course of about 5 seconds, then repeats. This is done to further disorient whoever’s on the receiving end.
Lock-out mode:
- Turn the Smart Selector Ring all the way to the left to the padlock icon to lock out the light.
PWM
- PWM is not visible.
Additional/summary info on the UI:
- Also note that if you are in one mode and you turn the Smart Selector Ring to a different mode, the light will stay on and change to that mode. If you turn it to the lock icon, it will blink and shut off.
- I’m impressed; the Smart Selector Ring and dual switches give the SRT6i a simple yet very full UI! You can access nearly every level in any mode!
Nitecore SRT6i Charging and batteries
One thing you’ll need to keep in mind when considering the SRT6i is that it uses Nitecore’s i-series NL2150HPi battery, so the only 21700 battery you can use is the NL2150HPi. If you’re not familiar with this battery, Nitecore has engineered it so that there are positive poles and negative rings on both ends of the battery. They advertise this as minimizing size, weight, and internal resistance to allow for a high power draw of 15 continuous Amps.
15 Amps is a fairly standard draw for a 5000mAh 21700, and the NL2150HPi is protected, so that extra circuitry does add to the length and weight, so I’m not sure it adds a performance benefit there, but it does power some of Nitecore’s accessories such as the TSL10i, a tail cap with RGBW indicator LEDs in it, and the RSW2i, another tail cap with a USB-C connected remote pressure switch. On the SRT6i, it allows the dual e-switches to function without a second tube in the body of the light. They have also designed a line of accessories around the bare battery itself, such as a diffused light and USB-C power bank function.
Whether or not there’s a performance benefit, the SRT6i has contacts for positive and negative on both ends, so a standard 21700 will not make the correct connection. Thankfully the battery is warrantied for a full year and batteries don’t tend to wear out that quickly, so that might not be a big deterrent. On the other hand, if you use a flashlight regularly and go through multiple batteries per day, you would have to invest in a whole new set of i-series batteries in order to use this light in that manner. Nitecore does offer chargers that will work with the i-series batteries, though it looks like the difference is that spring-loaded negative posts have two buttons that are off center, so they would touch the negative ring on the rear of the i-series battery. So really, you could probably charge an i-series battery in a regular charger, but you’d have to be careful about angling it correctly so you’re not hitting the positive terminal on the rear. On second thought, maybe that’s not the best idea.
If you don’t have that i-series battery infrastructure in place, you’re still in luck, because the SRT6i offers on-board USB-C charging. I tried a number of different chargers, but every time it took about 4 hours and 40 minutes to fully charge the battery from low voltage protection cutoff (2.9V to 4.1V, according to the battery indicator light, see below). That’s a long charge. Since it’s a 5000mAh battery, it seems to be charging at about 1A, though a battery of that capacity could easily and safely take 2A and still be under the 1/2C recommended charging speed. Again, if you’re going to put this light to heavy use, you’ll probably need multiple batteries because you simply will not have the time to wait for it to recharge.
While charging, the blue battery indicator light will blink slowly until it’s finished, at which point it will stay on. One neat feature is that when you unplug the USB-C cable from the light or insert the battery, the battery indicator light will blink out the charge (ex. 4 blinks, pause, 1 blink = 4.1V). My test model blinks out 4.1V when fully charged, but when I tested the battery with my multimeter, it showed 4.2V, so the light’s voltage readout was slightly off, but not bad. This blue indicator light will also remain on while the light is on, too.
The SRT6i also includes a battery magazine which can hold two CR123A or two RCR123A (16340) batteries for use in this light. I do not have those types of batteries, so I did not test them.
If you’re going to use the battery magazine, please remember your CR123A safety:
- Never mix old and new CR123As
- Never try to recharge CR123As
- Never pair a CR123A with an RCR123A/16340
Performance test
To obtain these numbers, I used a very rudimentary integrated shoebox and ceilingbounce on my Samsung Galaxy S10. Measurements have been calibrated using a standardized calibration light provided by 1Lumen.
Lumen measurements (for each mode)
I was disappointed that I could not get a reading of 2100 lumens for turbo either at turn on or 30 seconds in, but it does a good job exceeding mid and low lumen levels by more than 10%.
| Mode | Specified | turn on | 30 sec | 10 minutes |
|---|---|---|---|---|
| 1 Low | 30 | 35 | 34 | 34 |
| 2 Mid | 300 | 336 | 336 | 332 |
| 3 Turbo | 2100 | 1744 lm | 1691 lm | 625 lm |
| Turbo at 3.6V | – | 1225 | 1207 | 333 |
Due to the nature of the battery and switches, it’s not possible to accurately measure amperage.
Battery Life: Runtime graphs
While turbo doesn’t reach 2100 lumens either at turn on or ANSI 30 seconds, the peak actually came around 40 seconds in, at 1881 lumens. That’s a lot closer to 2100, but it makes a really weird pattern. I ran the turbo test a few times, but it was always the same.

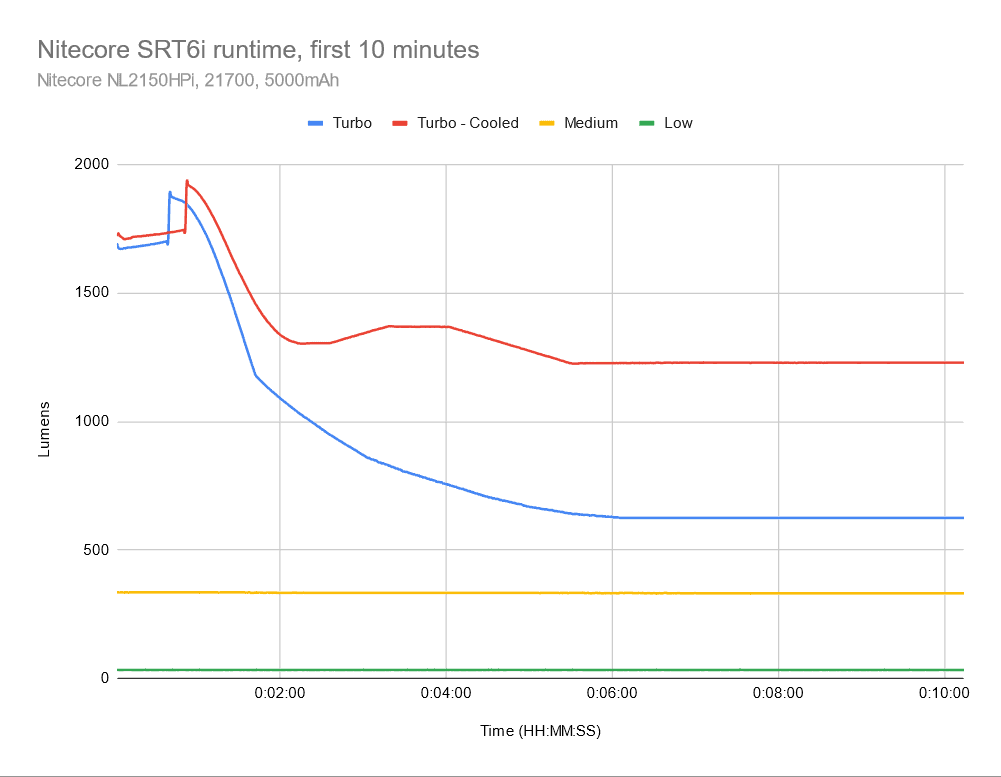
You can also see Nitecore’s patented Advanced Temperature Regulation at work on turbo, though the external temperature of the light never got too high. The other modes are purely regulated, resulting in very exact outputs, which is always nice to see.
| Mode | Specified | Measured runtime ANSI | Time till shut off |
|---|---|---|---|
| 1 Low | 70h | – | – |
| 2 Mid | 7h 30min | 7h 54min | 8h 13min |
| 3 Turbo – cooled | 30min | 1h 29min | 3h 50min |
| 3 Turbo – uncooled | – | 2h 56min | 4h 56min |
Nitecore’s measurement for turbo runtime is without the ATR so that it maintains a high level of output. I performed a runtime test of turbo with a fan pointed at the light to simulate those conditions and included it here as well. However as you can see from the graph, that’s still not a really good comparison. That 30 minute runtime must be on a truly bare-bones setup. But! In the cooled test, the light did make it to 1925 lumens! The 10 minute graph shows that it still starts out at about the same level, but vaults to that peak around the one minute mark; that must be the ATR in effect. It does hold around 1200 lumens for about 50 minutes, so if you’re out in the cold, you’ll get a lot of light out of the SRT6i.
ANSI FL1 standards: The runtime is measured until the light drops to 10% of its initial output (30 seconds after turning on). This does not mean that the flashlight is not usable anymore. The last column shows how long the light actually works till it shuts off. If there is a + symbol, it means that the test was stopped at that particular point, but the light was actually still running. This happens on certain occasions, with certain drivers, firmware, or batteries.
Peak beam intensity and beam distance measurements
The numbers for candela were obtained with a UNI-T UT383S luxmeter at 5 and 15 meters, then averaged.
| Mode | Specified | Candela measured | Meters | Yards |
|---|---|---|---|---|
| 1 Low | 800 cd | 1058 cd | 65 m | 71 yd |
| 2 Mid | 7700 cd | 14,594 cd | 242 m | 265 yd |
| 3 Turbo | 65,200 cd | 99,617 cd | 631 m | 690 yd |
| 3 Turbo – peak | – | 100,463 cd | 634 m | 693 yd |
Since the peak output happens about 40-50 seconds in, I also took a measurement of that, too.
As you can see, the candela numbers I measured are much higher than Nitecore’s specifications! They’re so high, that I took three sets of measurements, recalibrated my setup, and tested other known lights to ensure my readings were accurate, which to the best of my knowledge and ability, they are.
Extra info: Peak beam distance according to ANSI FL1 standards: The calculated value of distance in meters at which the flashlight produces a light intensity of 0.25 lux. (0.25 lux is about the brightness of a full moon shining on an object). The columns ‘Meters’ and ‘Yards’ use rounded numbers.
Beamshots
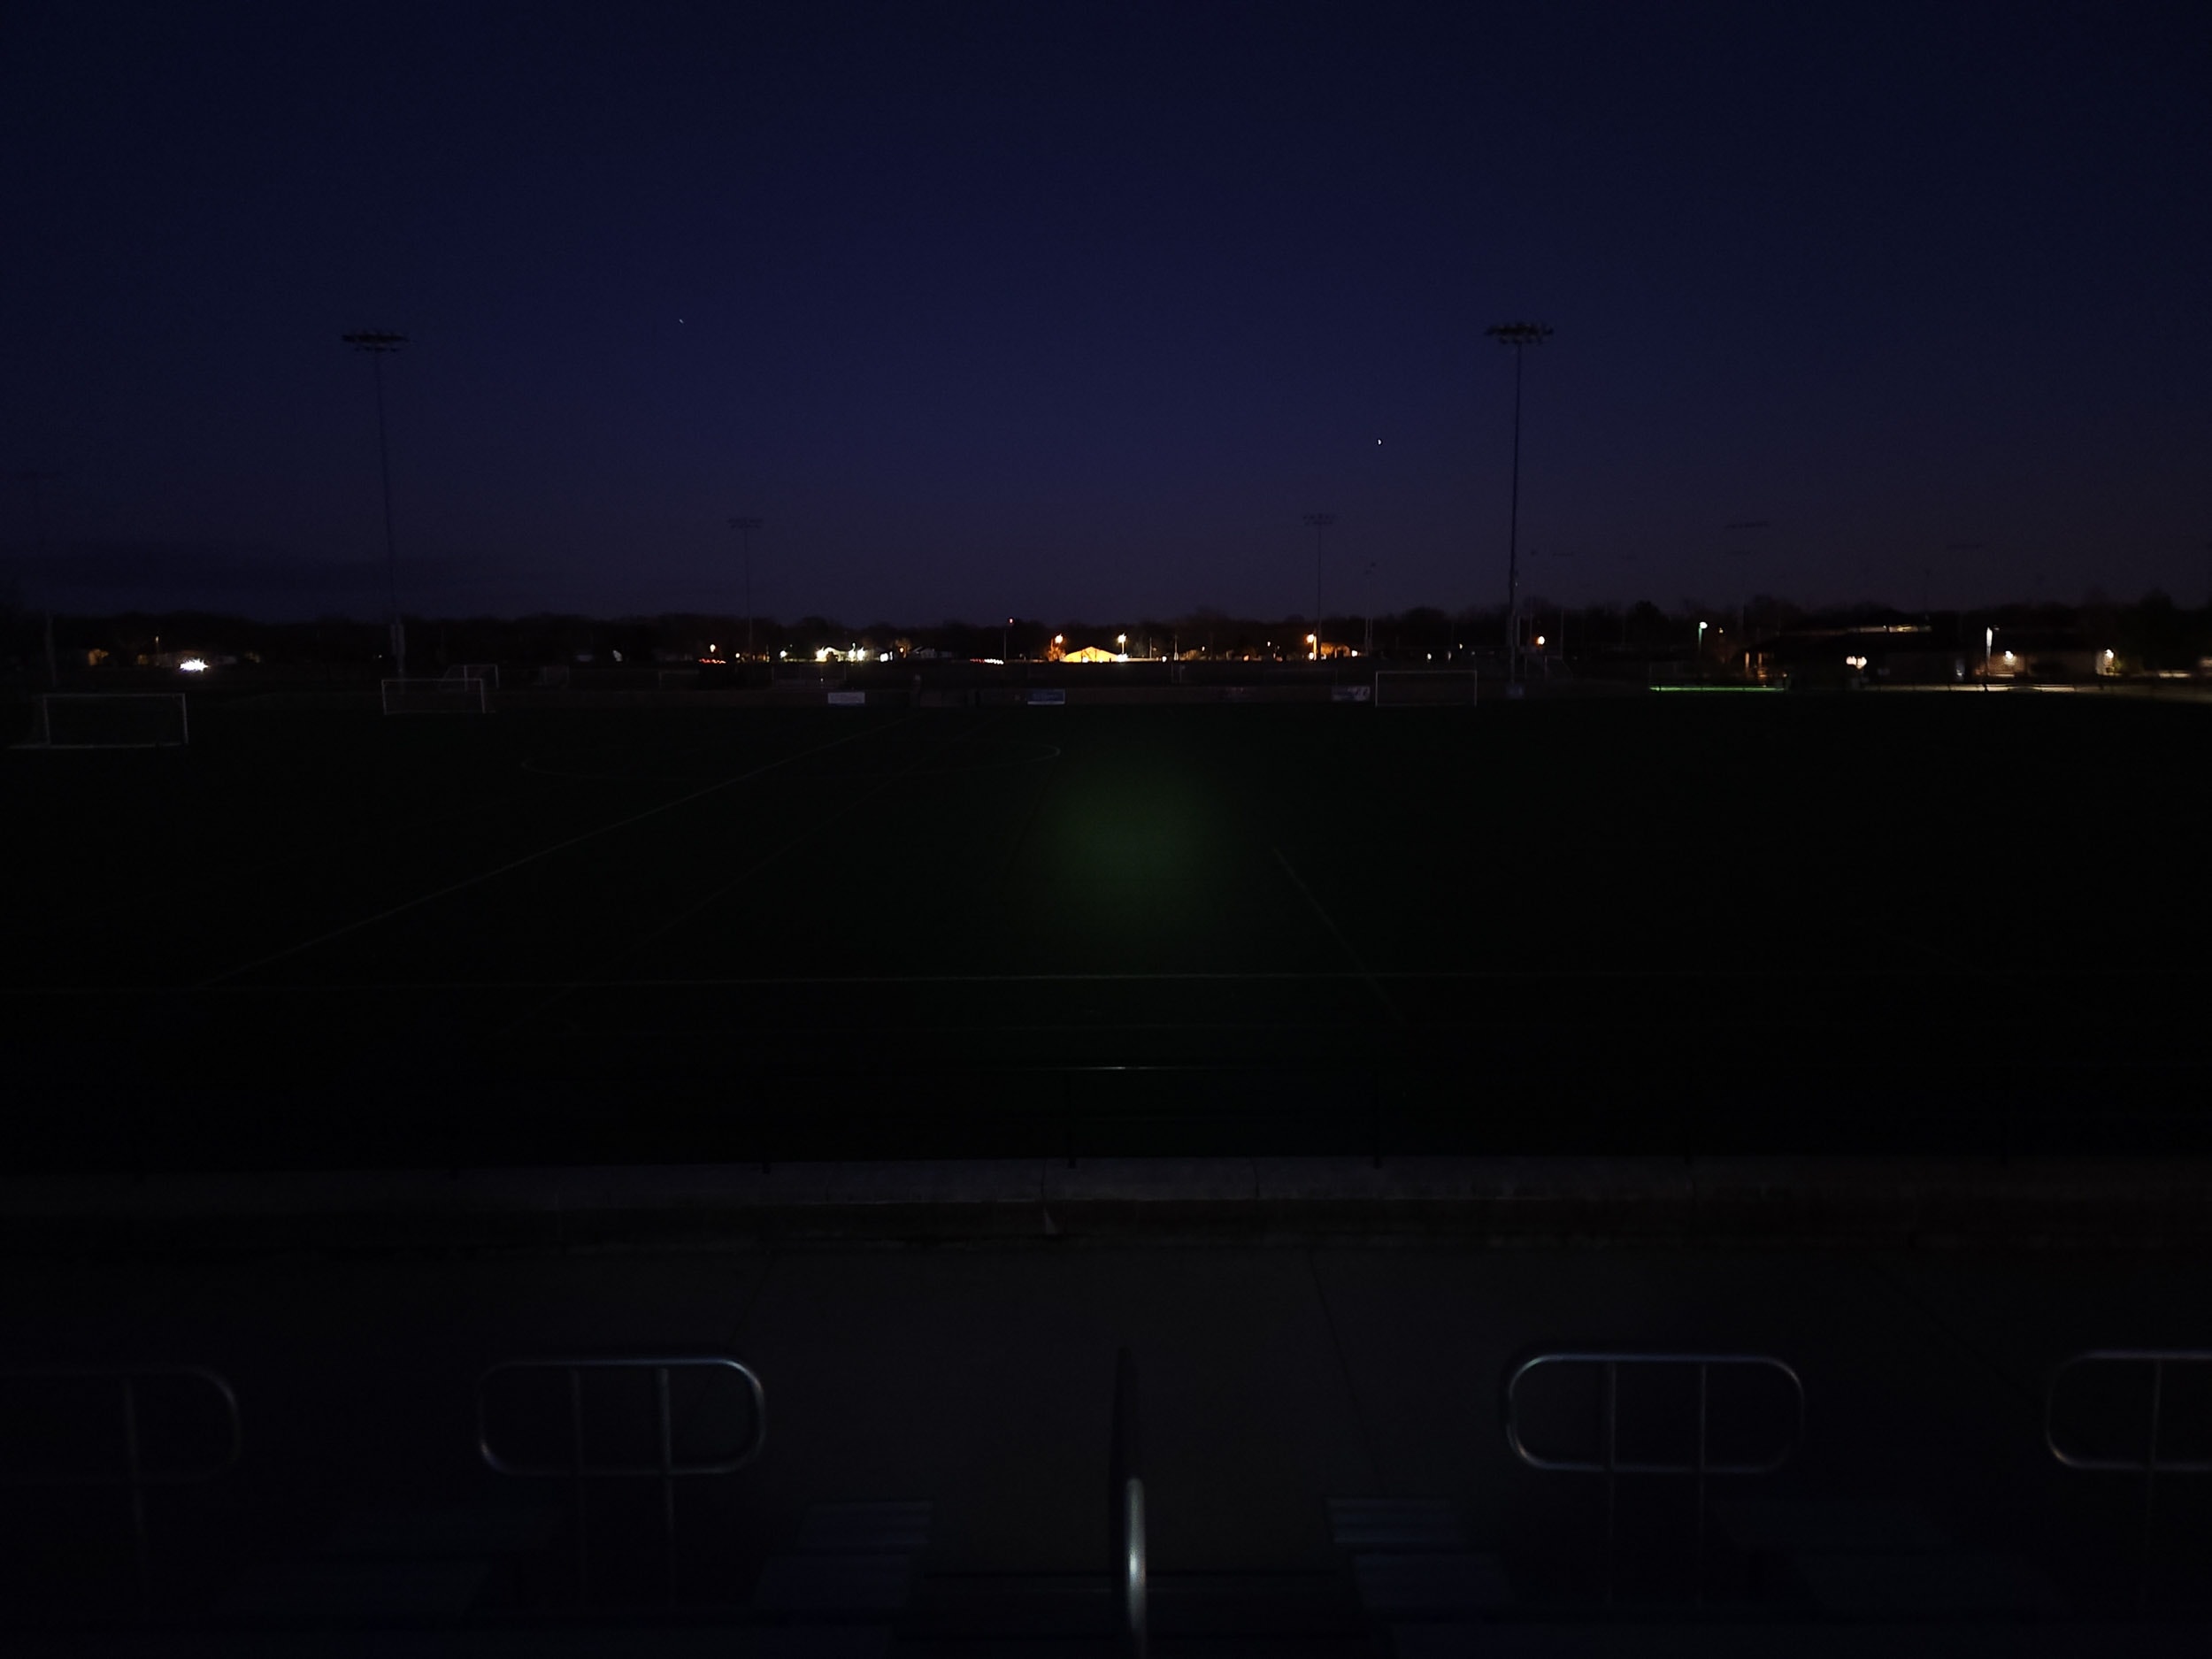
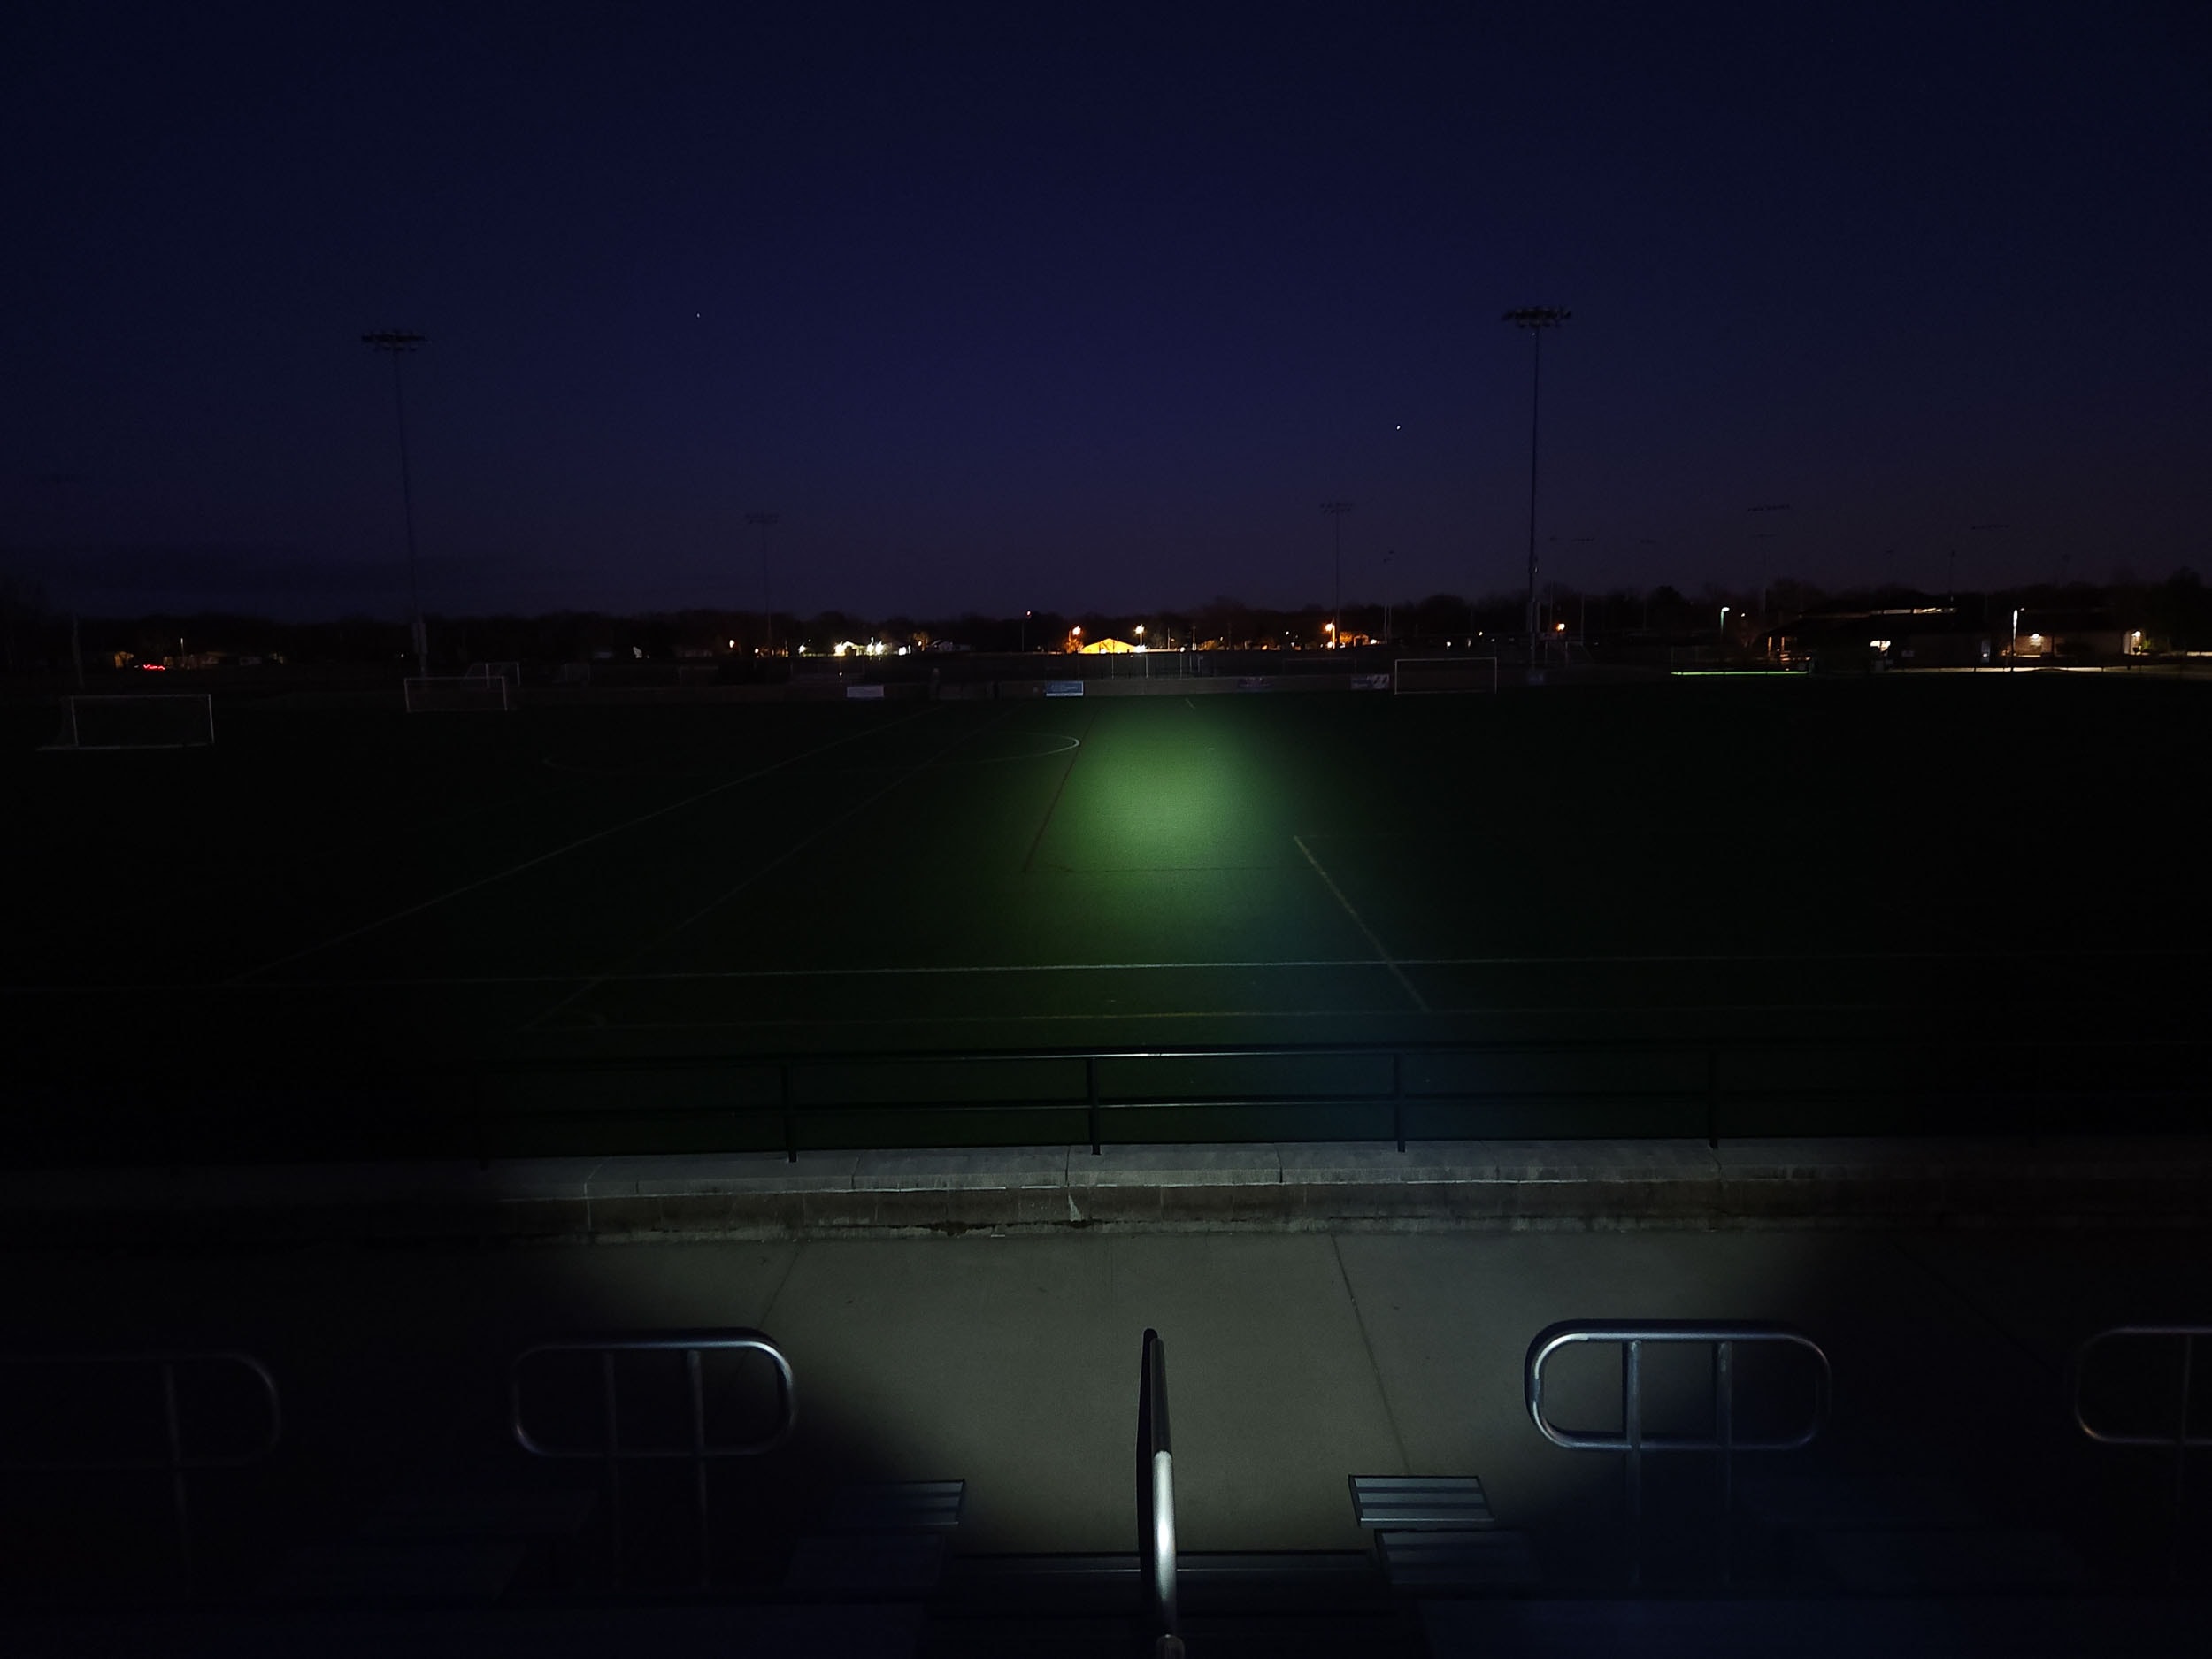
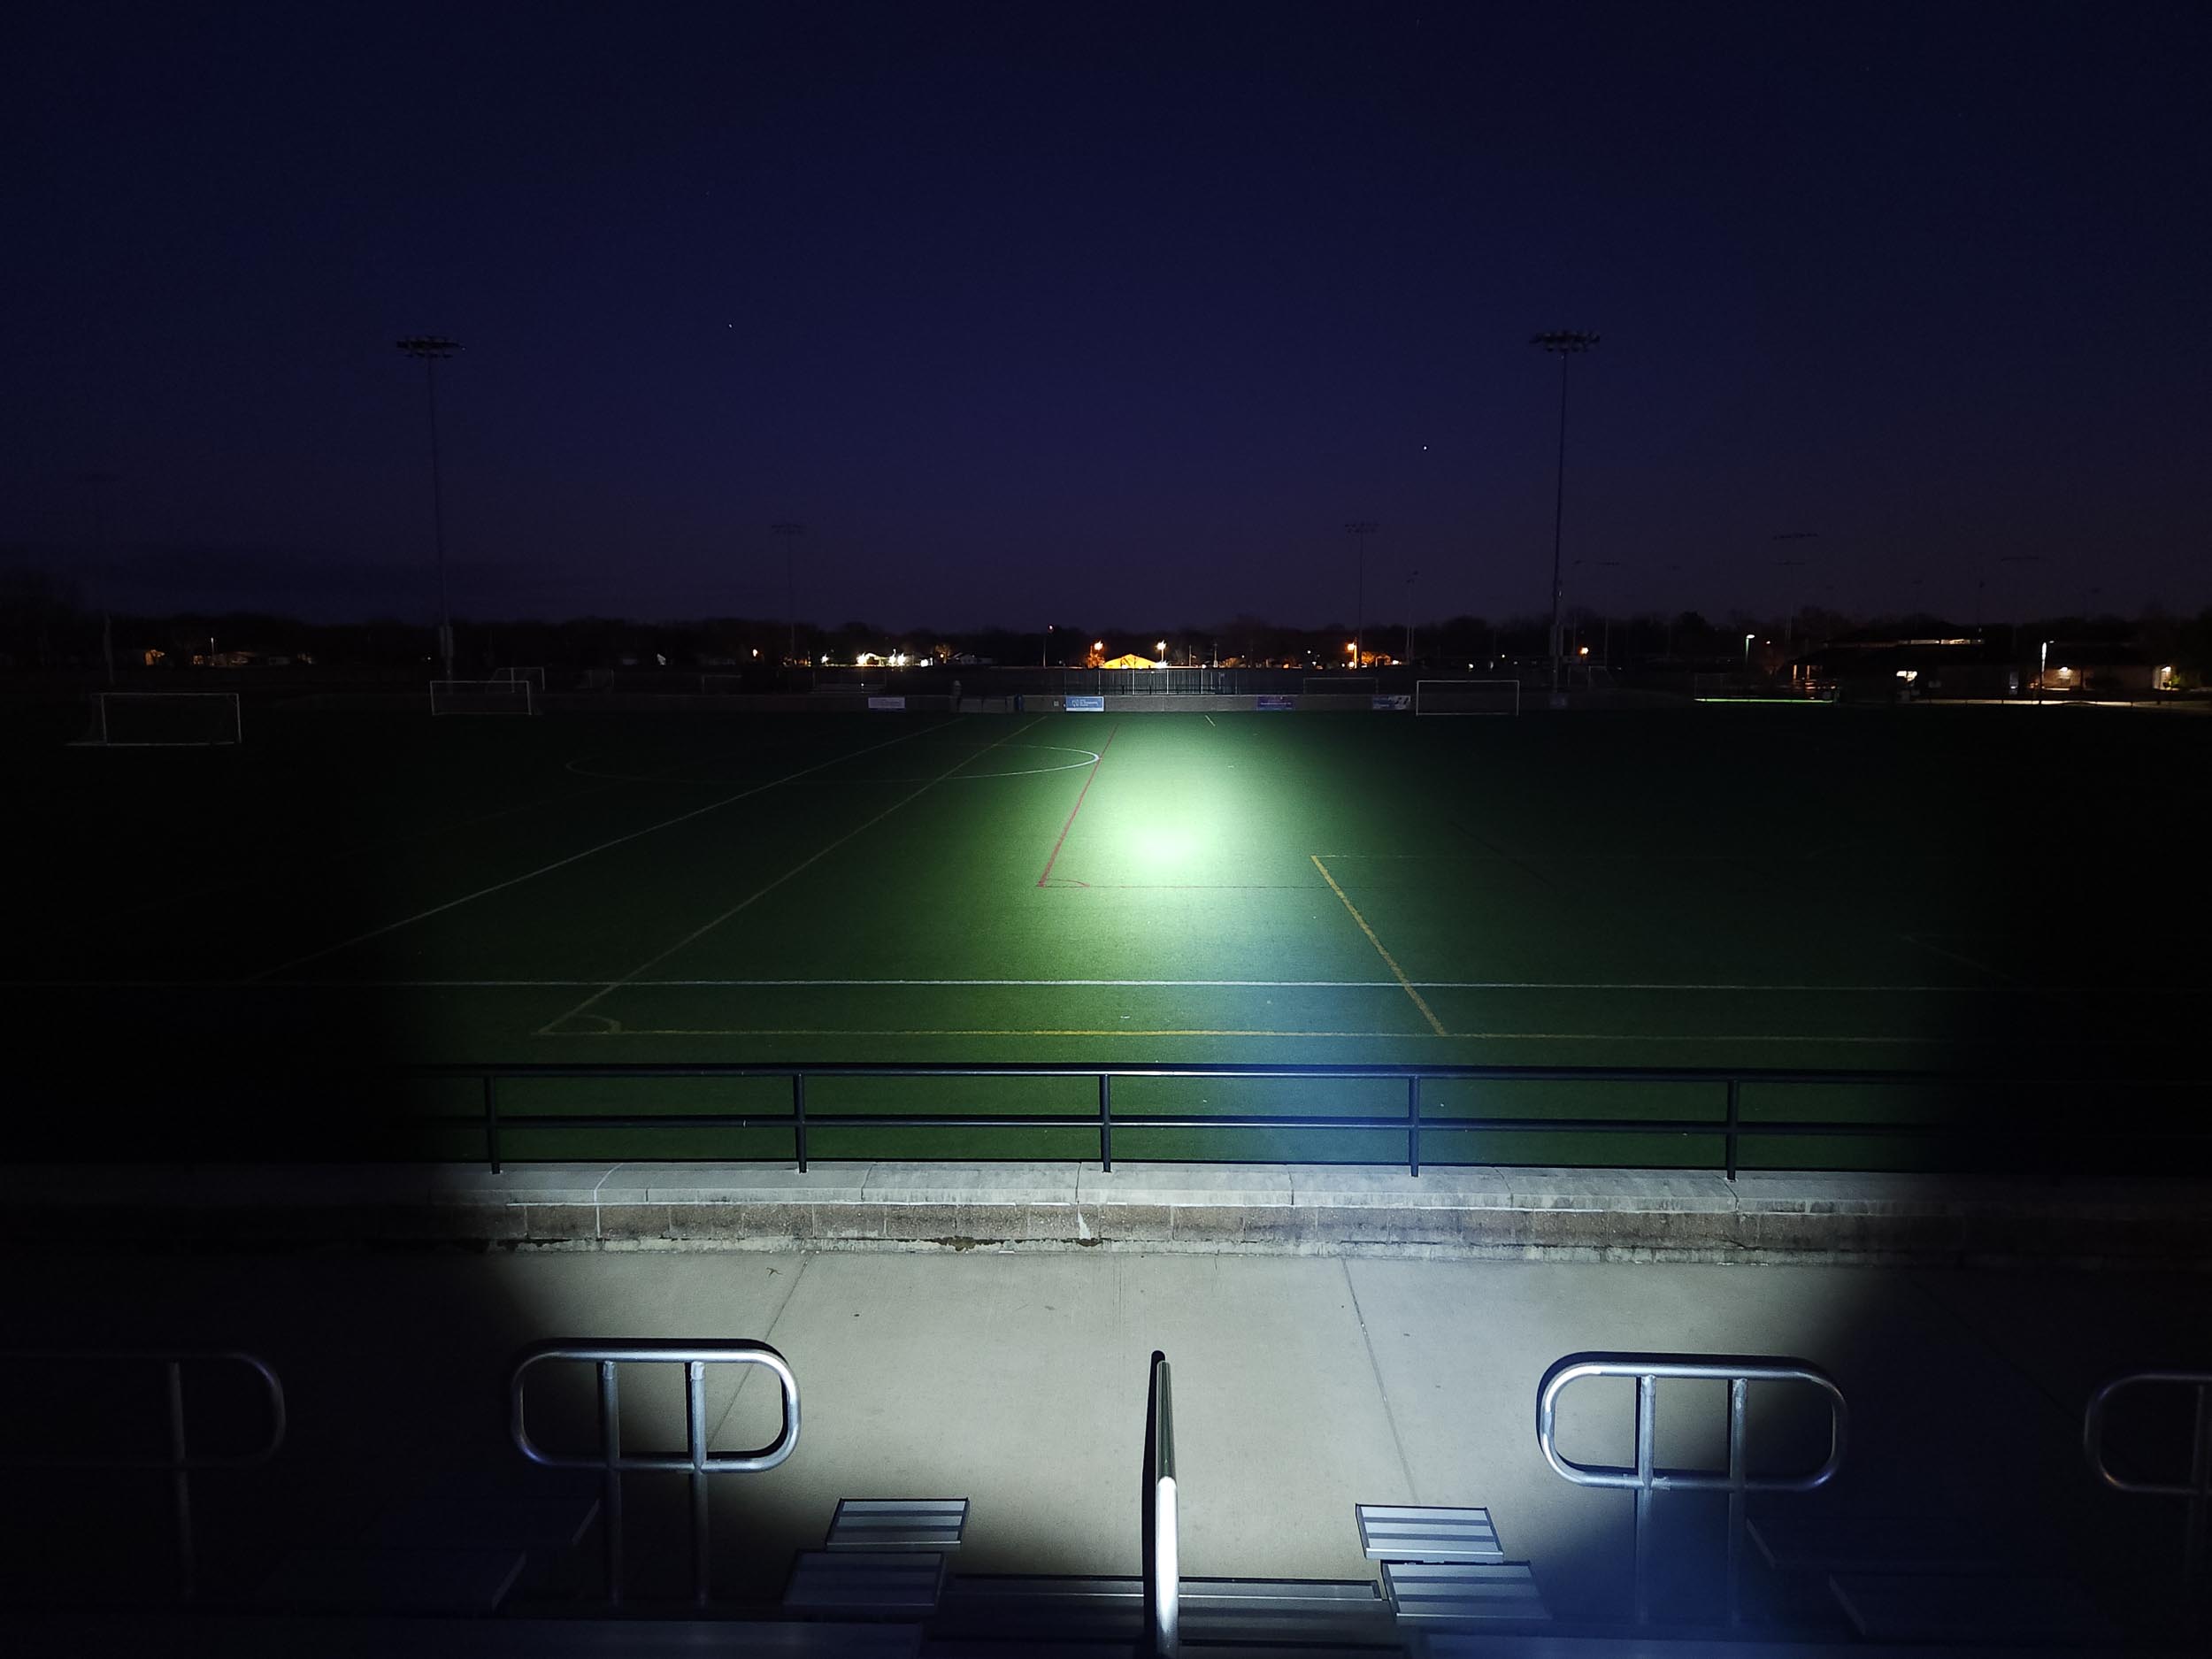
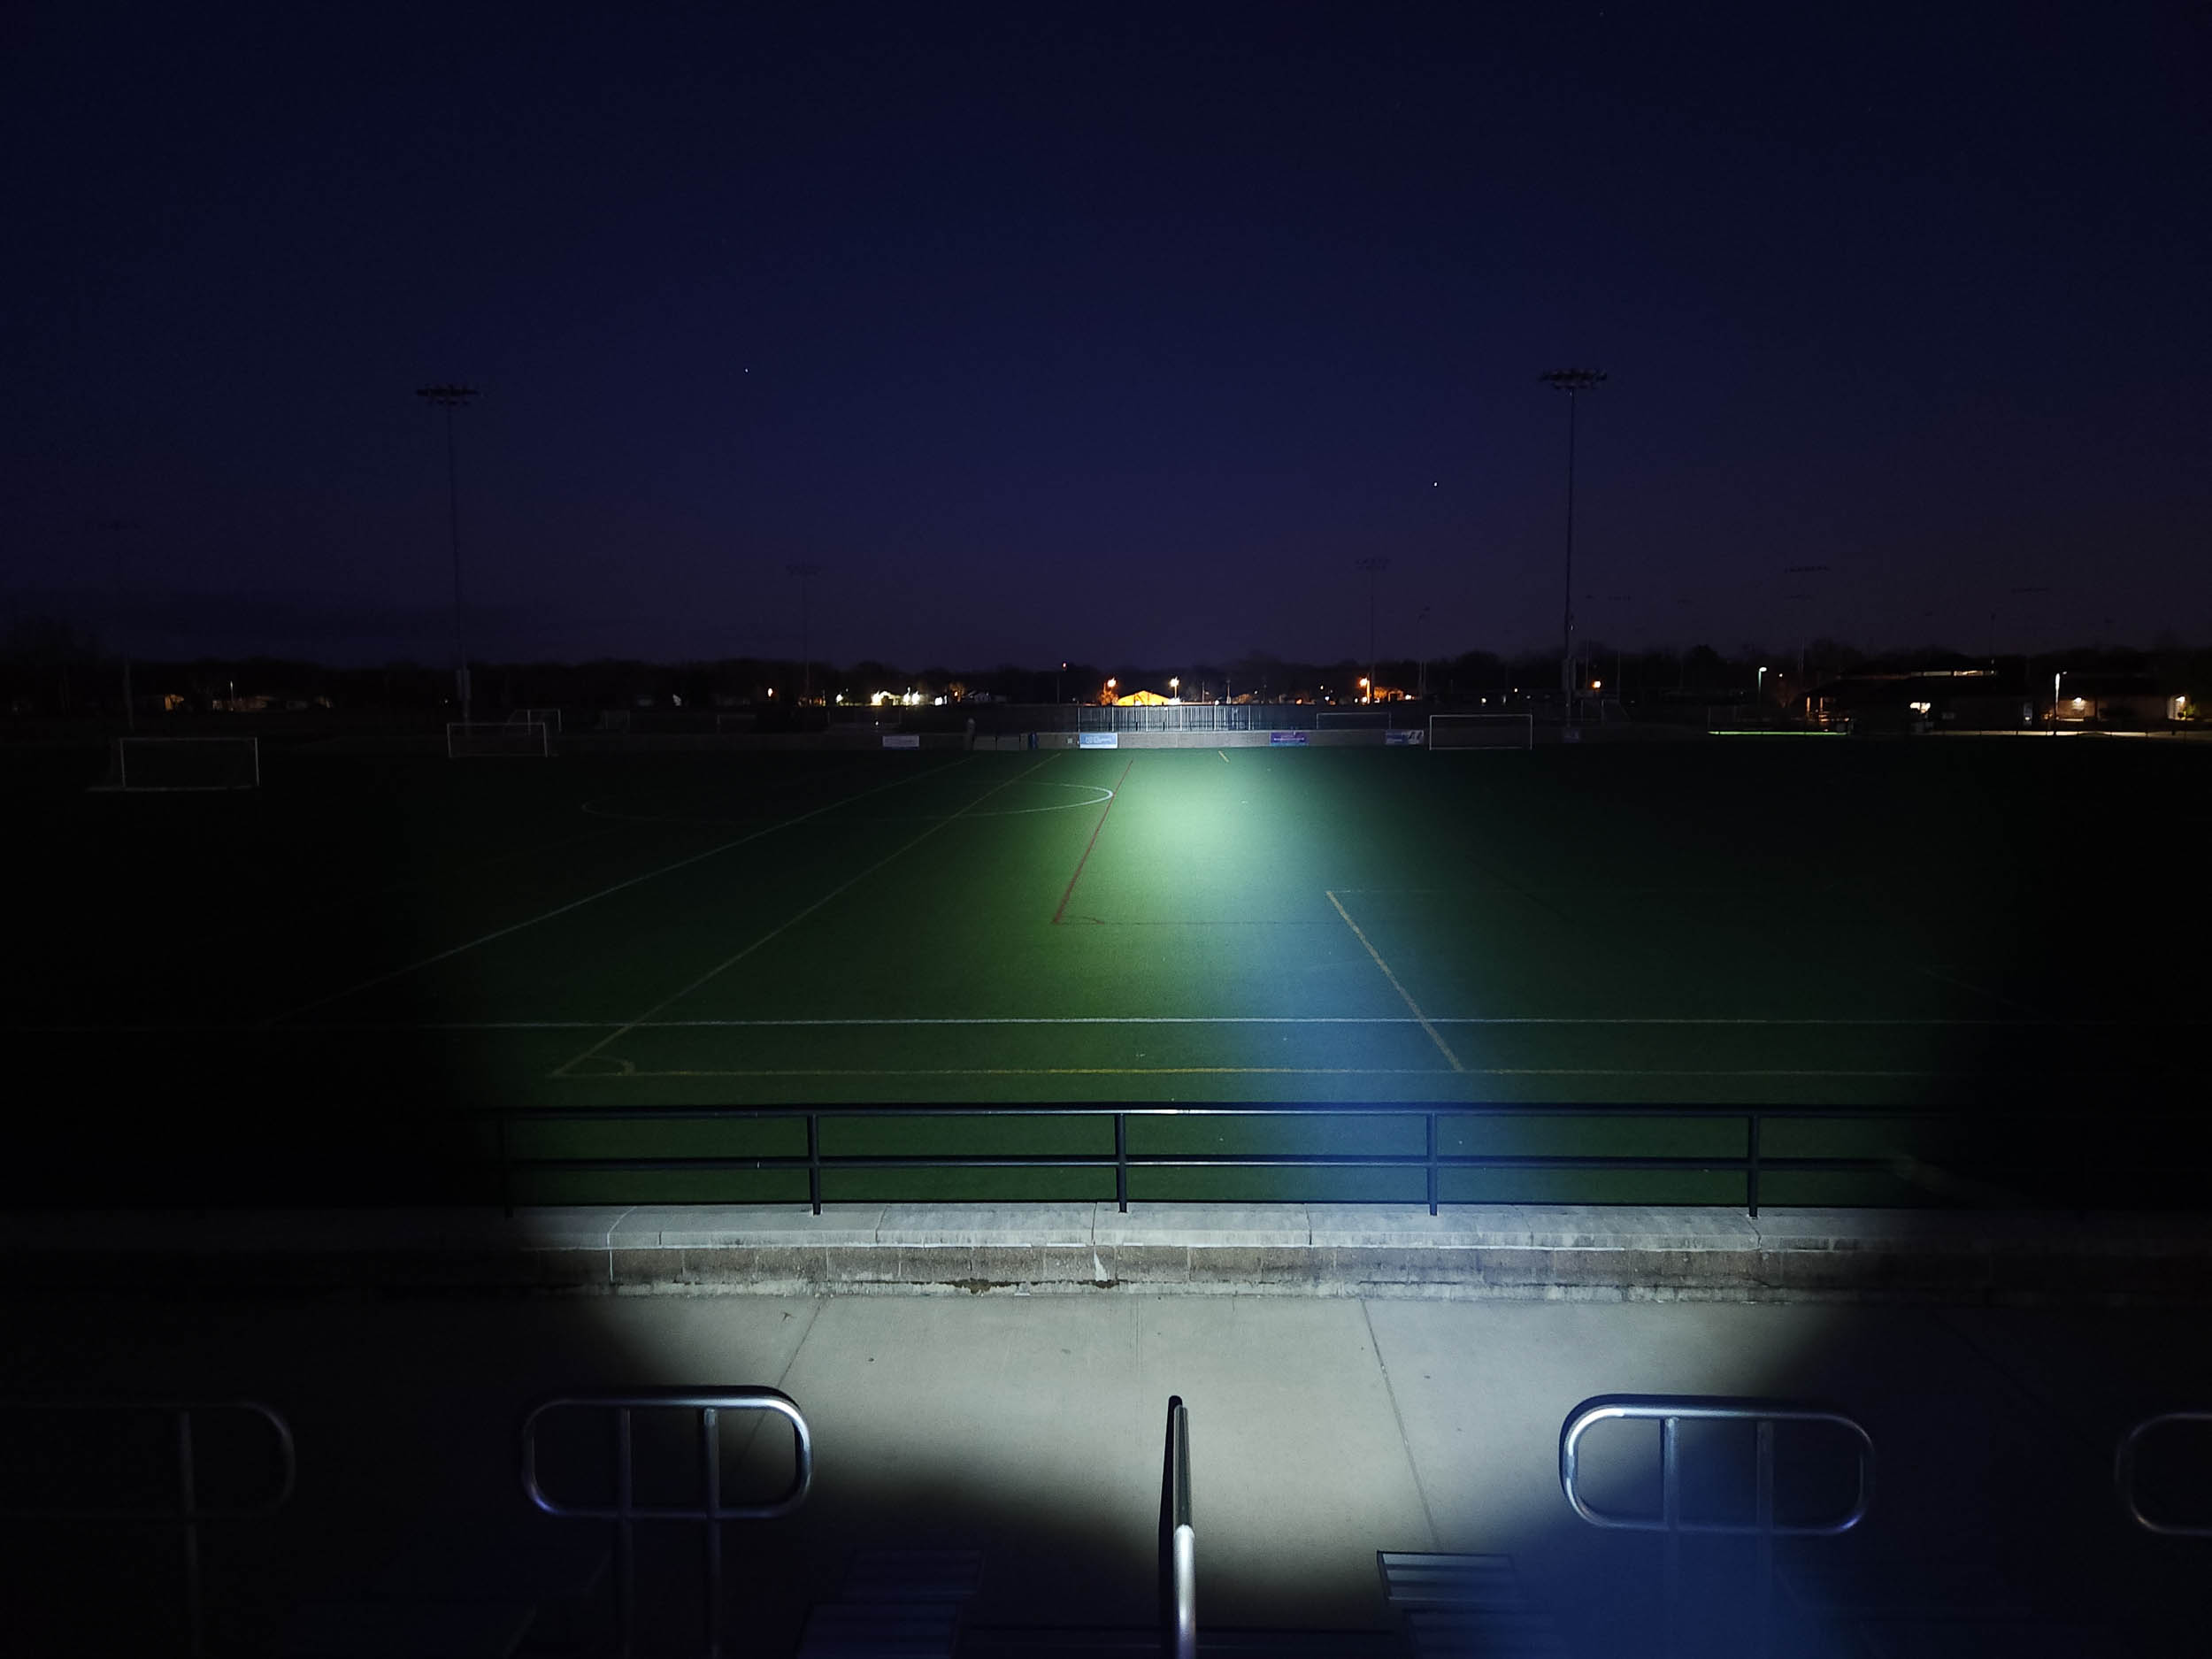
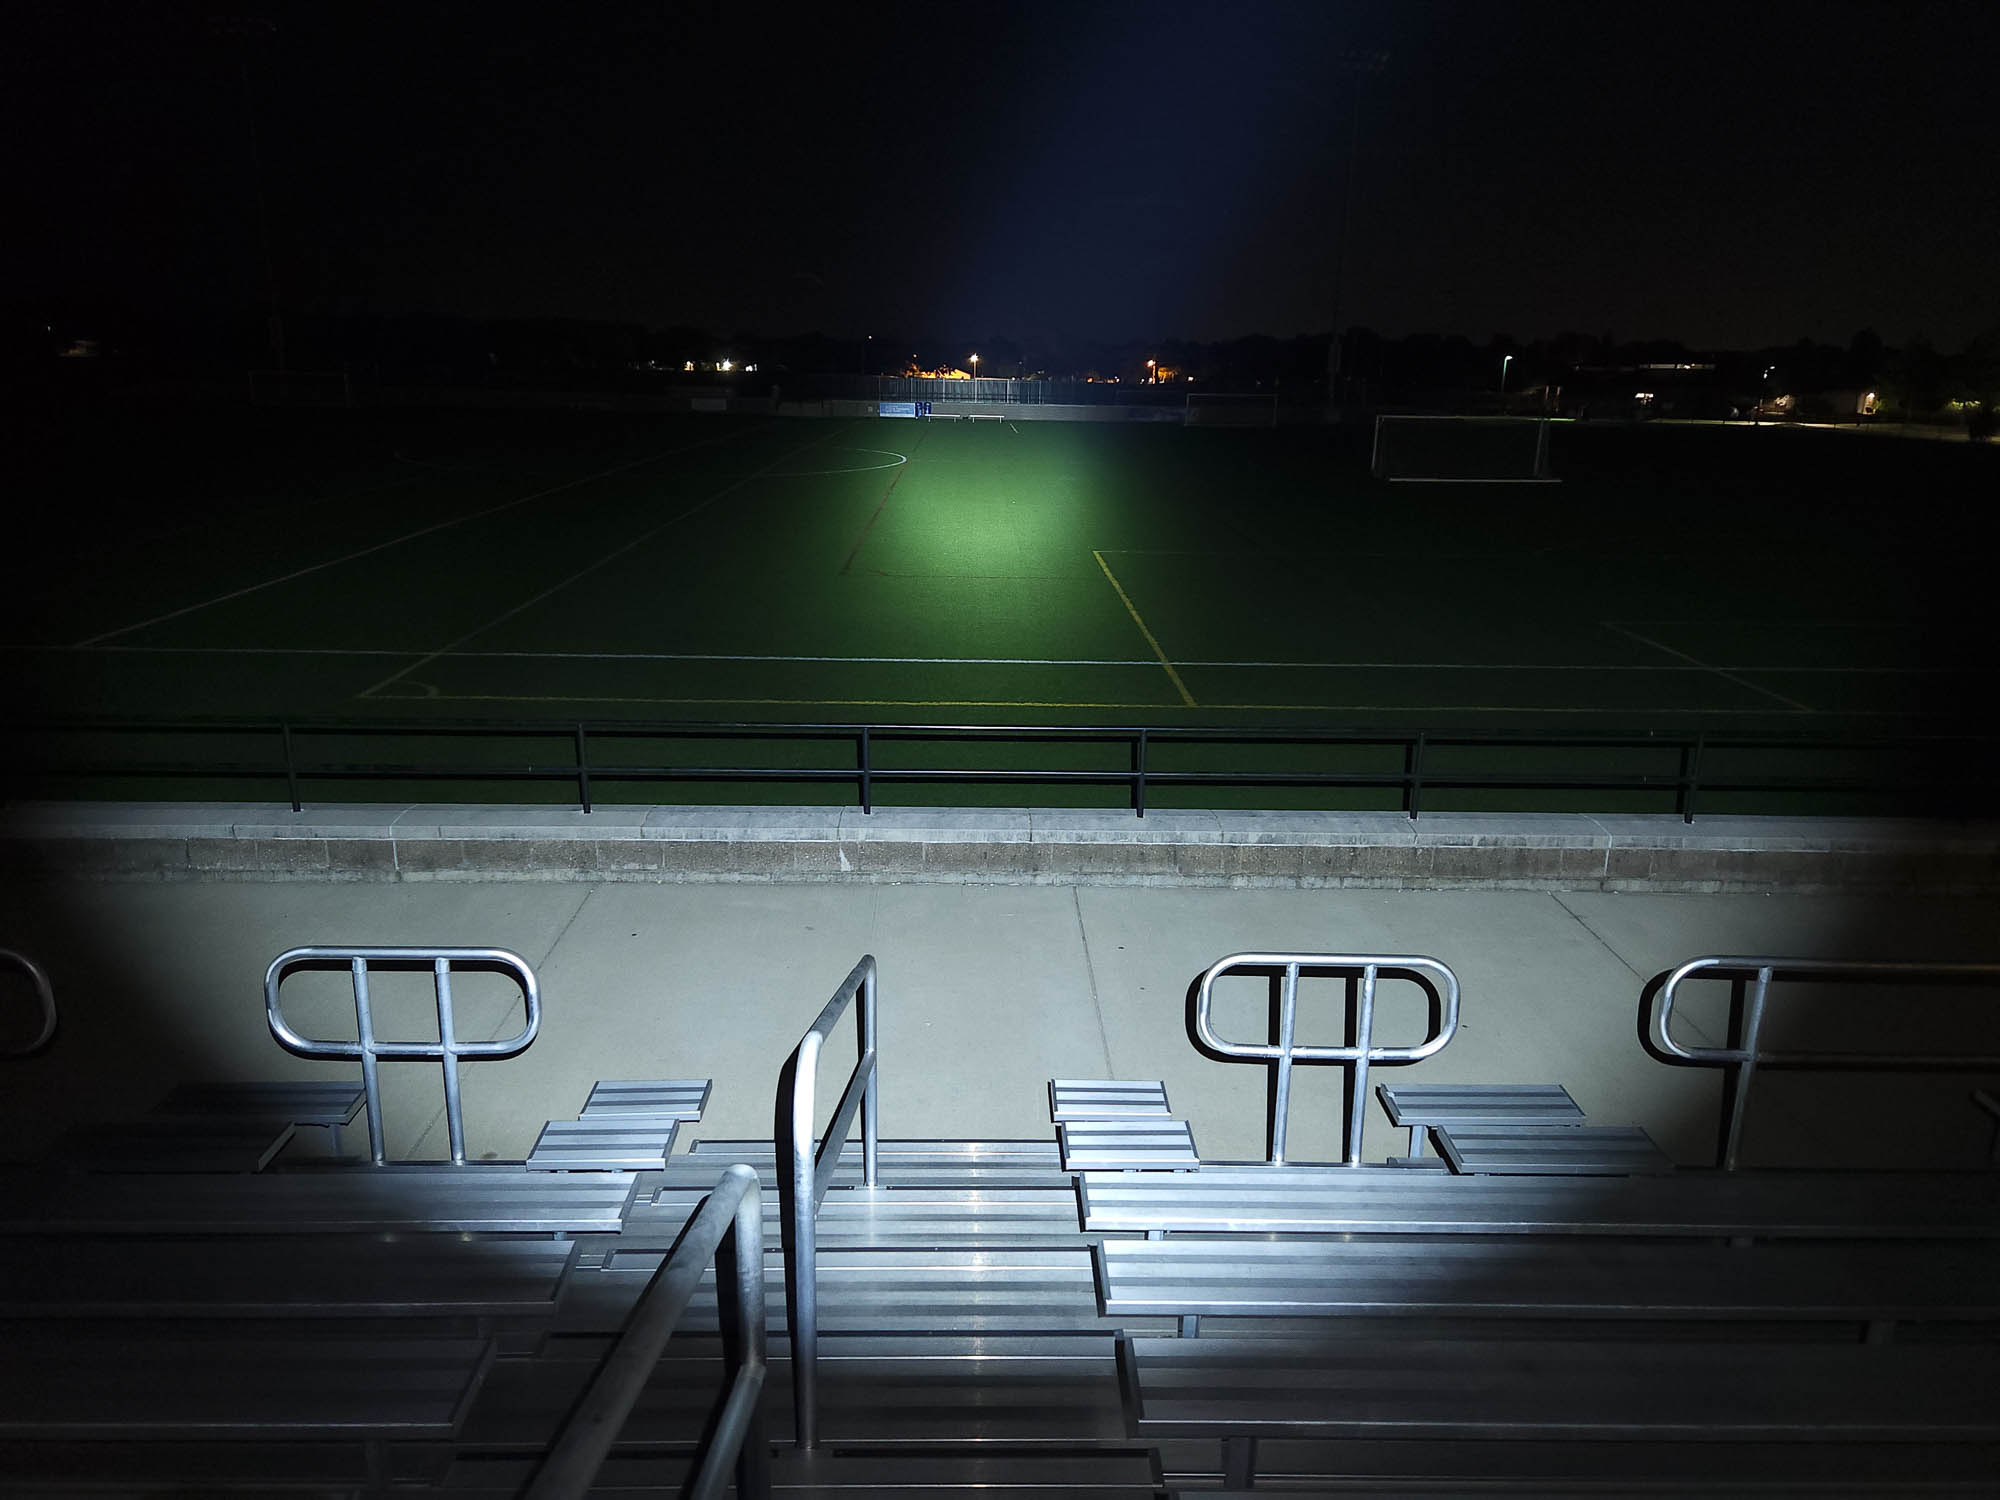
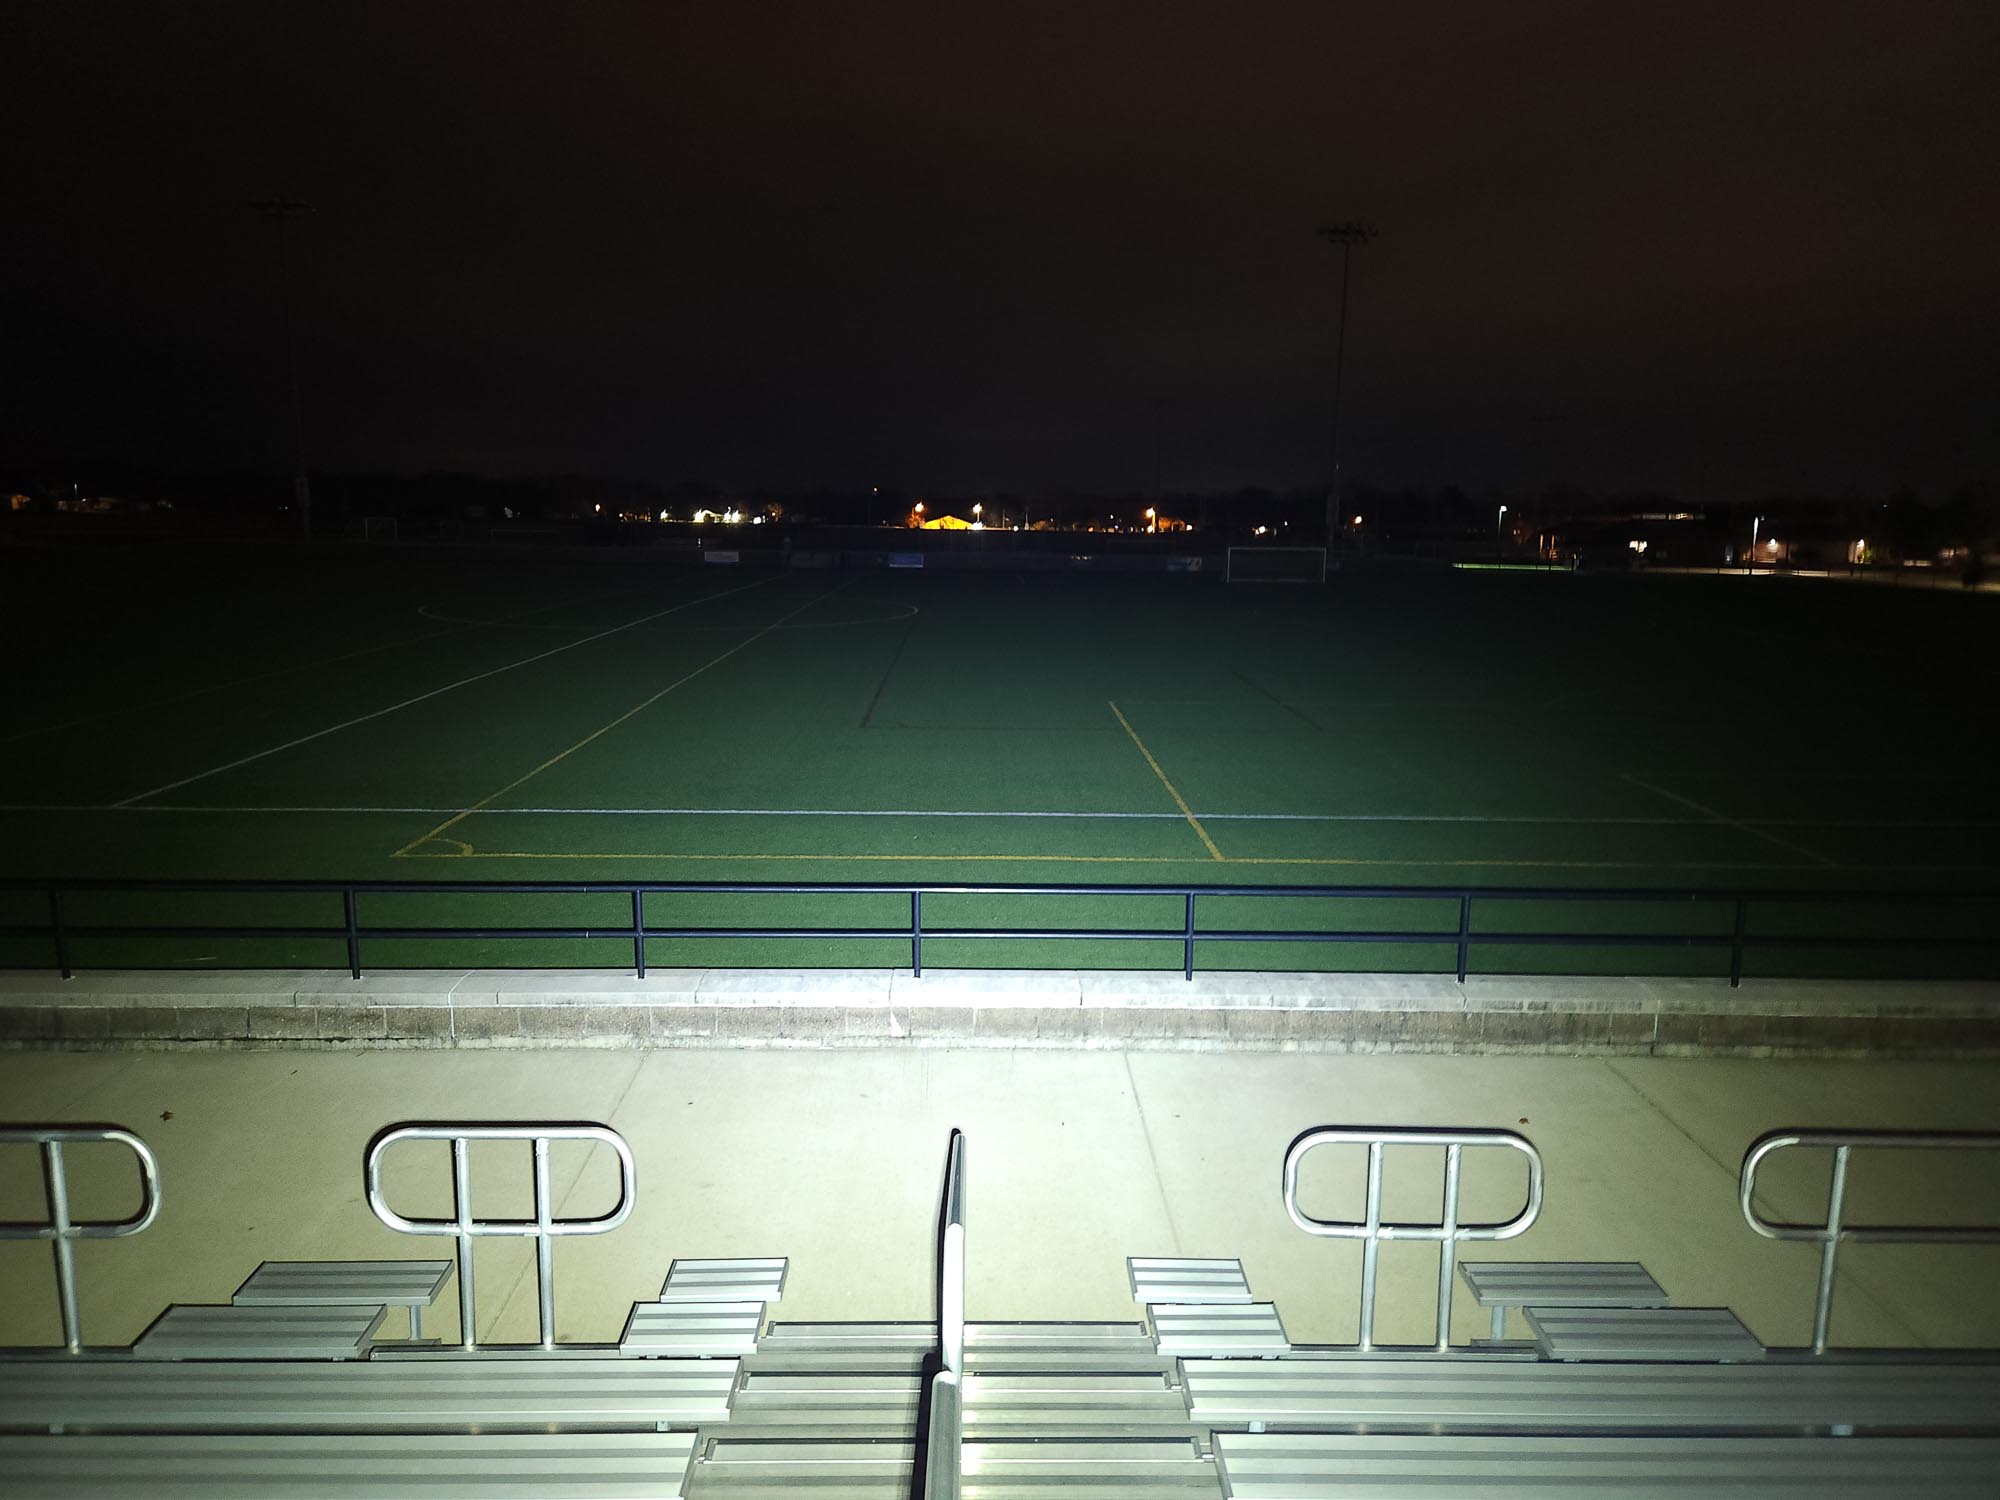
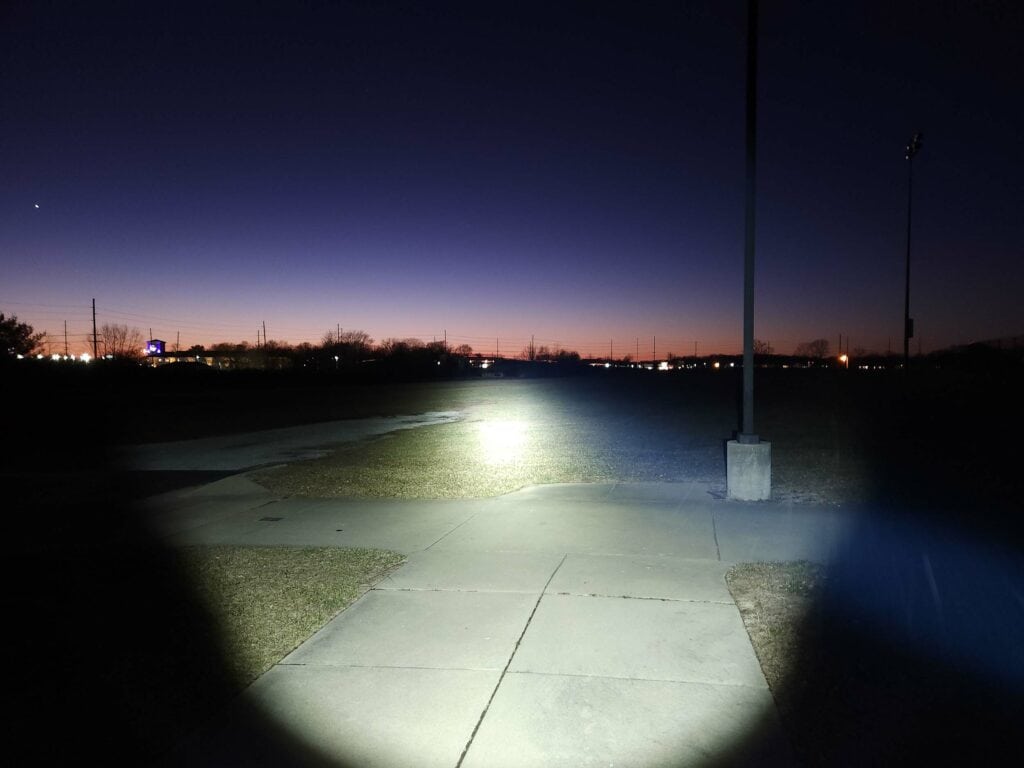
These were taken with a Samsung Galaxy S22+ using pro mode and the following settings:
- WB 5000K
- ISO 200
- Speed 0.5
Distance to the other end of the playing field is 100 meters, and the distance to the bridge is 400 meters.
Beamshots of the following flashlights compared:
- Mateminco FW3S
- ThruNite TN12 Pro
Disclaimer: This flashlight was sent to me for review at no cost by Nitecore. I have not been paid to review, nor have I been holding back on problems or defects.
Final Verdict
Pros
- Always have access to turbo and strobe
- Smart Selector Ring allows for quick and easy one-handed operation
- Includes battery and integrated charging (especially since it’s proprietary)
- Powerful throw
- Great regulation and temperature management
Cons
- Proprietary battery!!
- Long charge time
- Holster does not allow for quick draw
- Not the best clip
Explanation on star ratings:
1: Avoid: a match would be a better choice – 2: Poor: significant defect or issues; almost unusable – 3: Average: some defects or issues; but still usable 4: Good: recommended (minor issues) – 5: Great: highly recommended

4.5 stars: ★★★★⋆
Tactical lights are a dime a dozen. Or rather, lots of companies like to call their tail-switch products “tactical” lights when really, that’s the only feature they have in common with real tactical lights. Nitecore is not one such company. When they say their products are tactical, they mean it, and the SRT6i shows it.
Its distinctive dual tail switches and Smart Selector Ring give you one-handed access to 3-4 modes in any selected output level, including always having instant turbo and instant strobe. Now that’s what I call a tactical light! On top of that, add sustaining ~600 lumens (~1200 cooled!) that can be thrown the length of two full football fields (American or European), and you’ve got yourself a quality light.
There is the matter of powering all of that, though. The SRT6i is locked into the i-Series battery and while it’s high powered and long lasting, you cannot use a regular 21700 in this light. If you regularly go through multiple batteries during your usage and don’t already have Nitecore’s i-Series batteries, you will be buying new batteries to do the same thing with the SRT6i. Not only that, but unless you want to wait over 4, almost 5 hours to charge each of those in the light, you’ll probably want a Nitecore charger, too. With all of that, the price starts to add up so you’ll have to think hard about that when considering this light.
All in all, I think the Nitecore SRT6i is a very good light and I really want to give it 5 whole stars, but the proprietary battery hurts, so I’ll say,
- If the proprietary battery doesn’t matter to you or you already have Nitecore i-Series batteries, the SRT6i is worth 5 stars.
- If you don’t already have that i-Series battery infrastructure, I give it 4 stars.
Taking both of those scenarios into consideration, I give the SRT6i 4.5 stars overall. I’d recommend it if you need a real tactical light; just be aware of the battery situation.
Nitecore SRT6i discount code
Get 15% off by using discount code 15OFF on orders above $75. Below $75, use our unique coupon code 1Lumen to get 10% off.
1lumen selects and reviews products personally. We may earn affiliate commissions through our links, which help support our testing.