1lumen selects and reviews products personally. We may earn affiliate commissions through our links, which help support our testing.
Olight i3T v2 EOS review
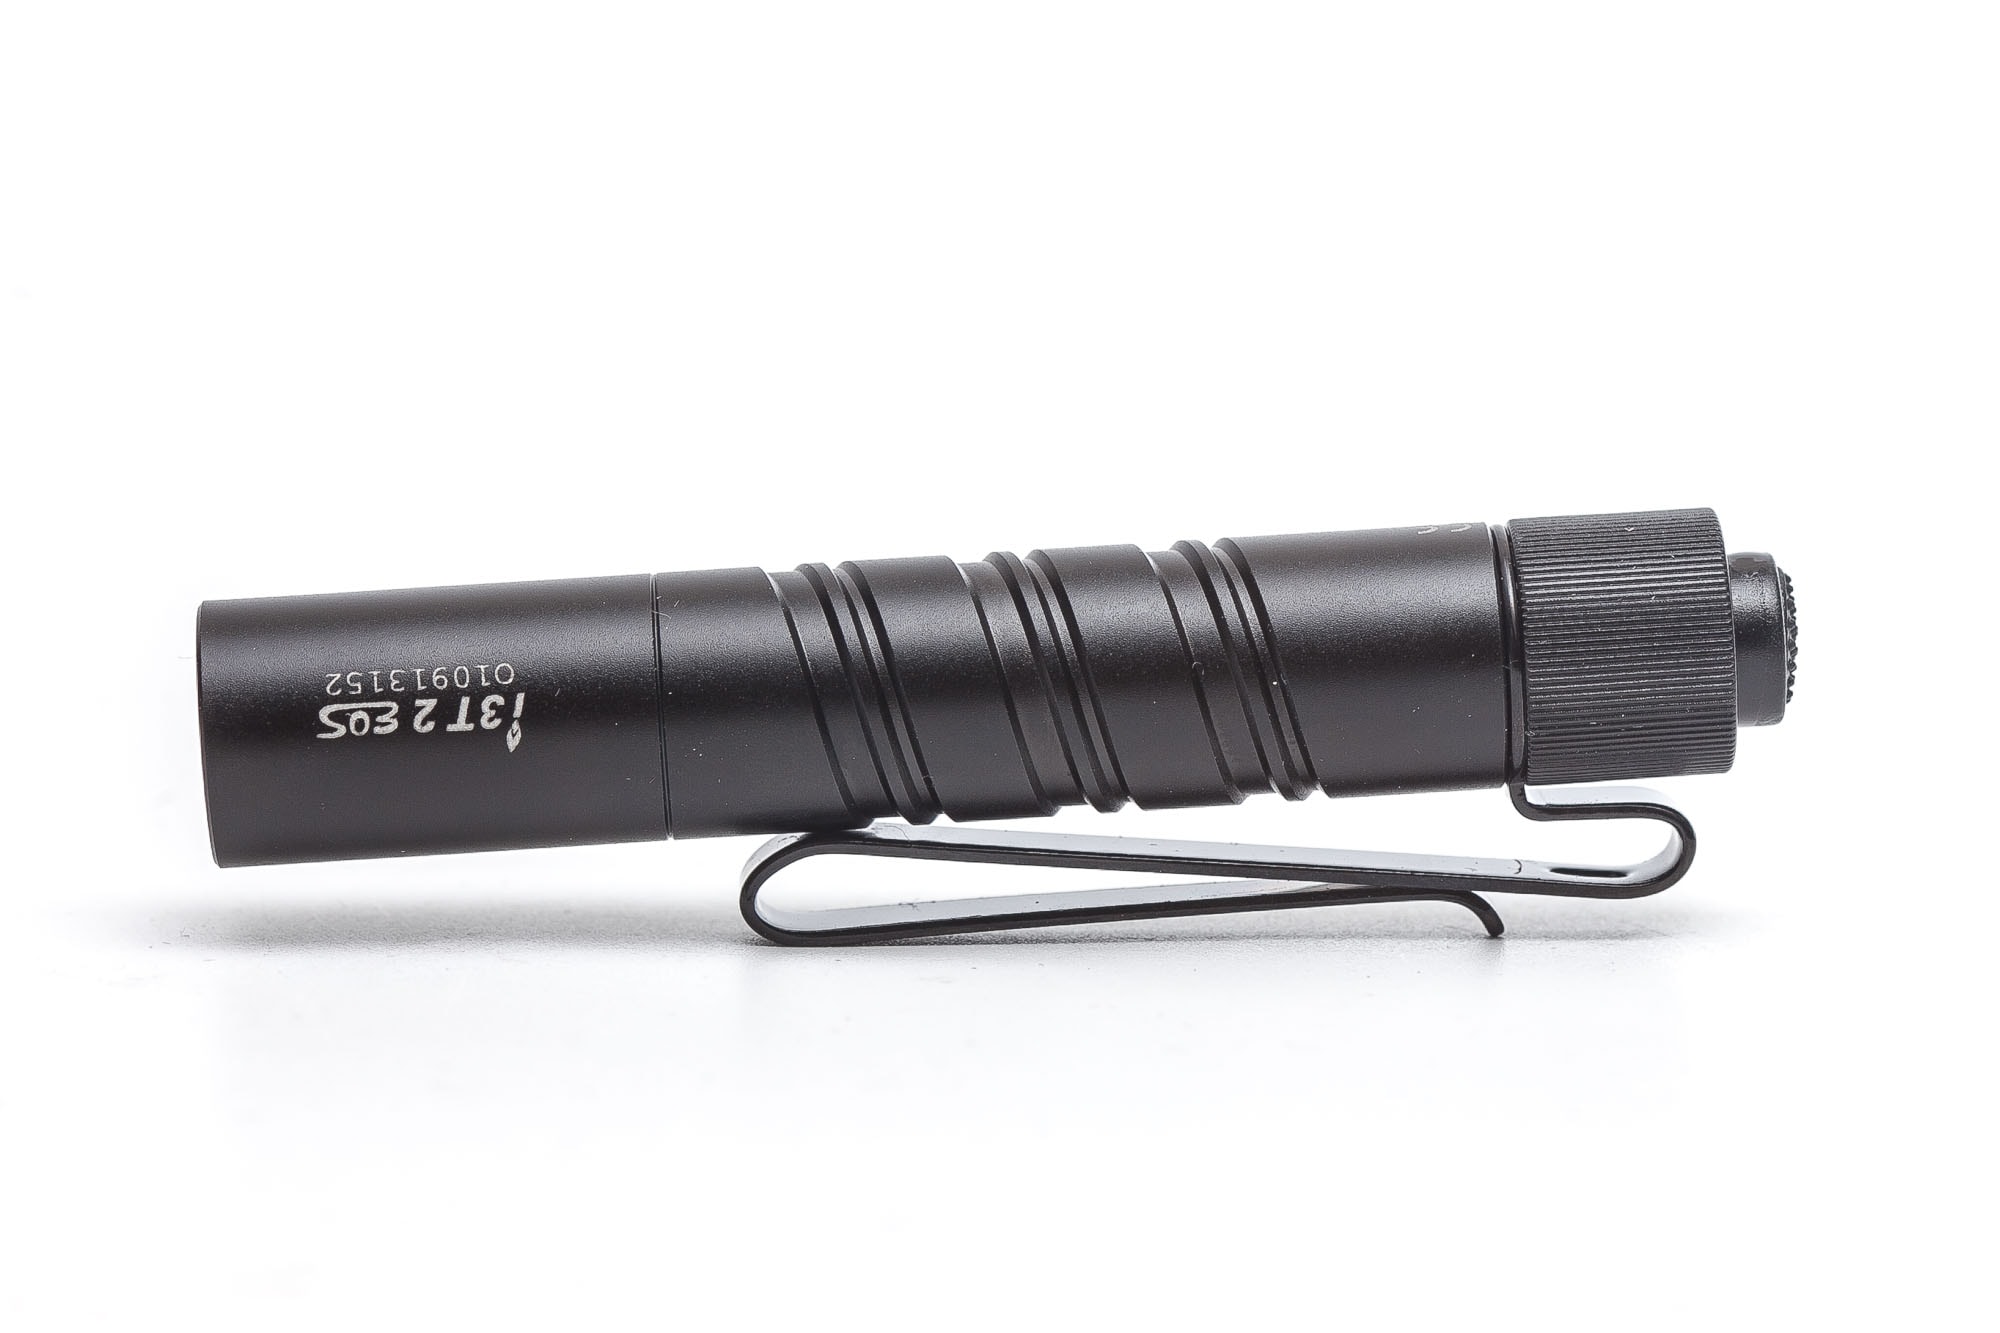
Olight i3T v2 EOS specifications
| Brand/model | Olight i3T v2 EOS |
|---|---|
| Flashlight category | EDC / keychain |
| LED | N/A |
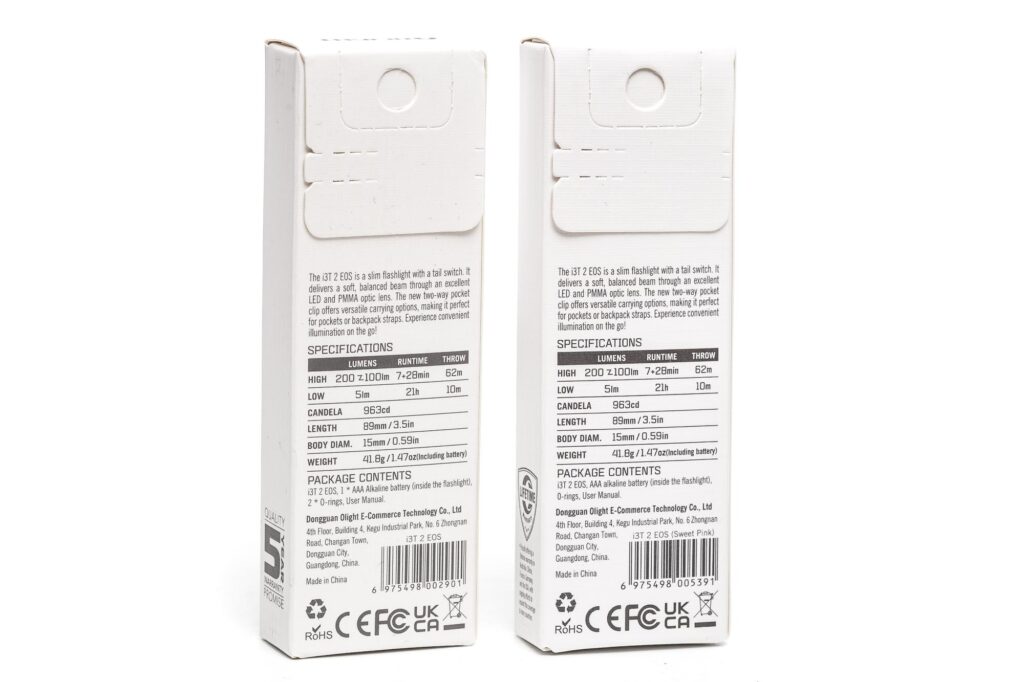
| Max. output | 200 Lumens |
| Max. beam distance | 62 meters |
| Max. beam intensity | 963 cd |
| Battery config. | 1*AAA / 10440 |
| Onboard charging | N/A |
| Modes | 2 |
| Blinkies | N/A |
| Waterproof | IPX8 |
| Review date | February 2024 |
Review intro:
You might be saying: this doesn’t look like a new light? That’s correct! It’s an upgraded version of the i3T, and now called the Olight i3T 2. So, what’s been upgraded? Well, the clip.. and….. you can now program your first mode! More on that in the UI section of this review.
Oh, and since someone pointed out that the Olight i3T 2 is likely the brightest flashlight in its class, I just had to get one for testing.
btw. don’t forget to remove the insulating film from the rear before your first use.
Package quality.
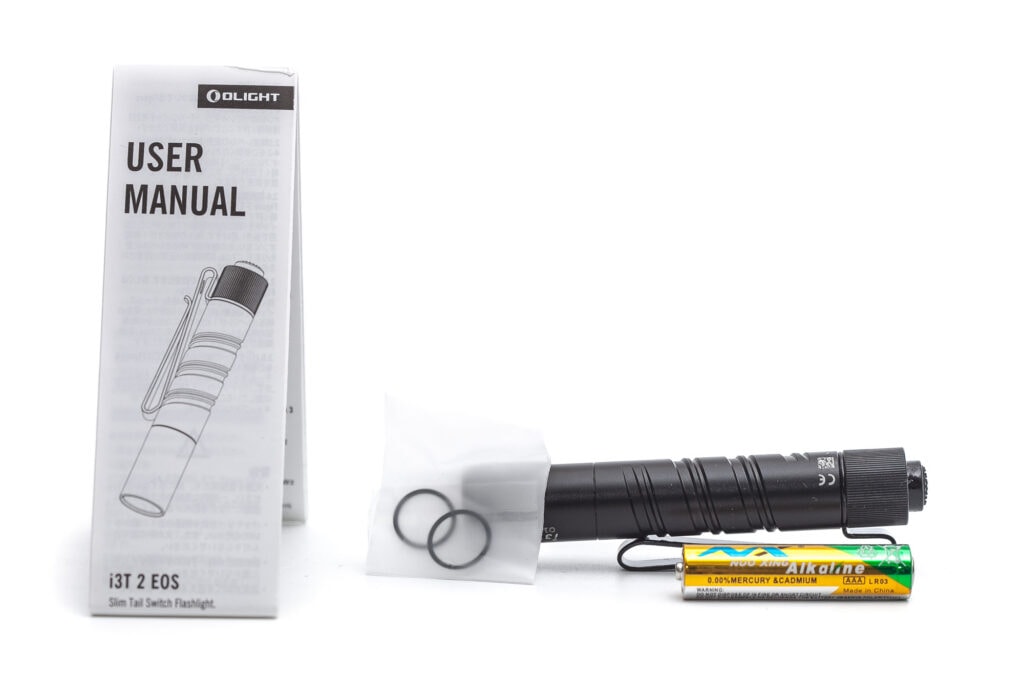
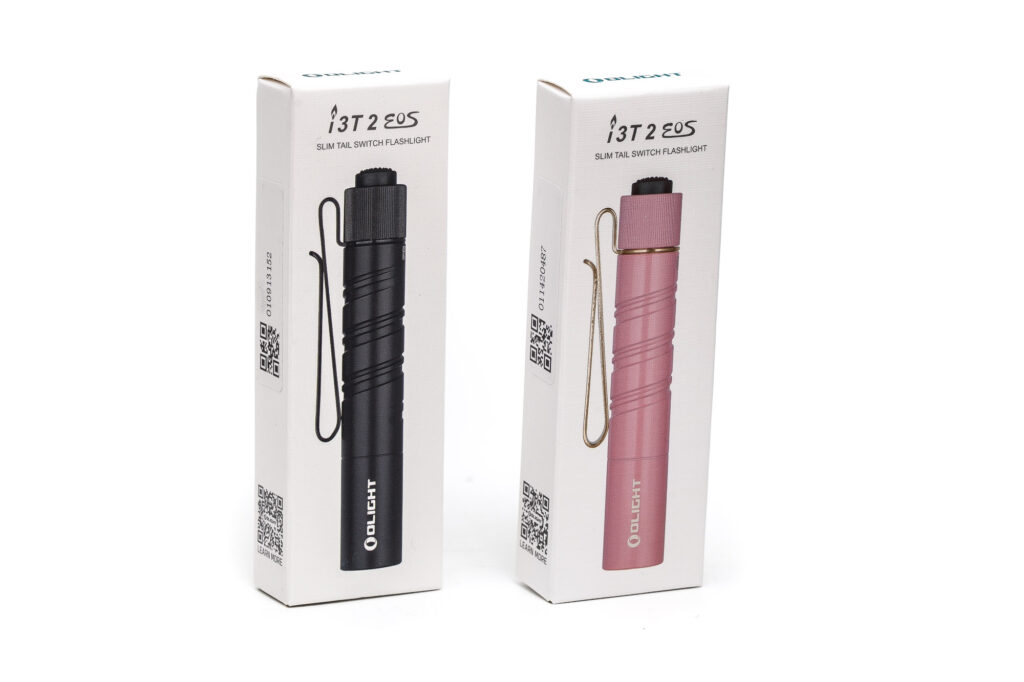
The packaging is pretty basic, but looks fine for the price, and it contains the following:
- Olight i3T 2 EOS
- Pocket clip (pre-attached)
- Alkaline AAA battery
- User manual
Note: some parts of this review are copied from the original review, when applicable.

Flashlight in use, Build Quality, and Warranty
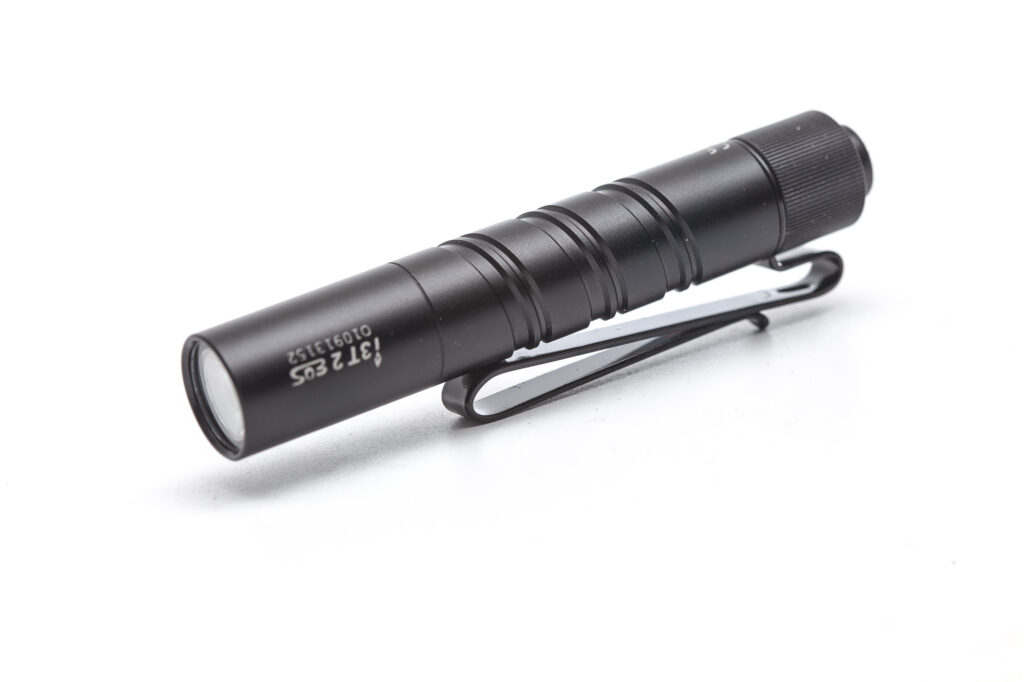
The Olight i3T 2 EOS carries over most of its features from the Olight i3T v1.
Both have a single switch, located at the tail-end. It’s a forward-clicky switch: half-pressing the switch will give you momentary light. When you repeat the half-pressing, you’ll switch between the 2 modes, high and low. When you fully press the switch, you’ll hear a click, and then your mode is set. If you want to change modes, you have to turn the light off and repeat the half-pressing until you have the other mode selected.
Keep in mind that reverse clicky switches work in a different way: they will only turn on when you fully press the switch, after you hear the click.
There’s no way you can tail-stand the i3T 2 EOS, because of the protruding switch.
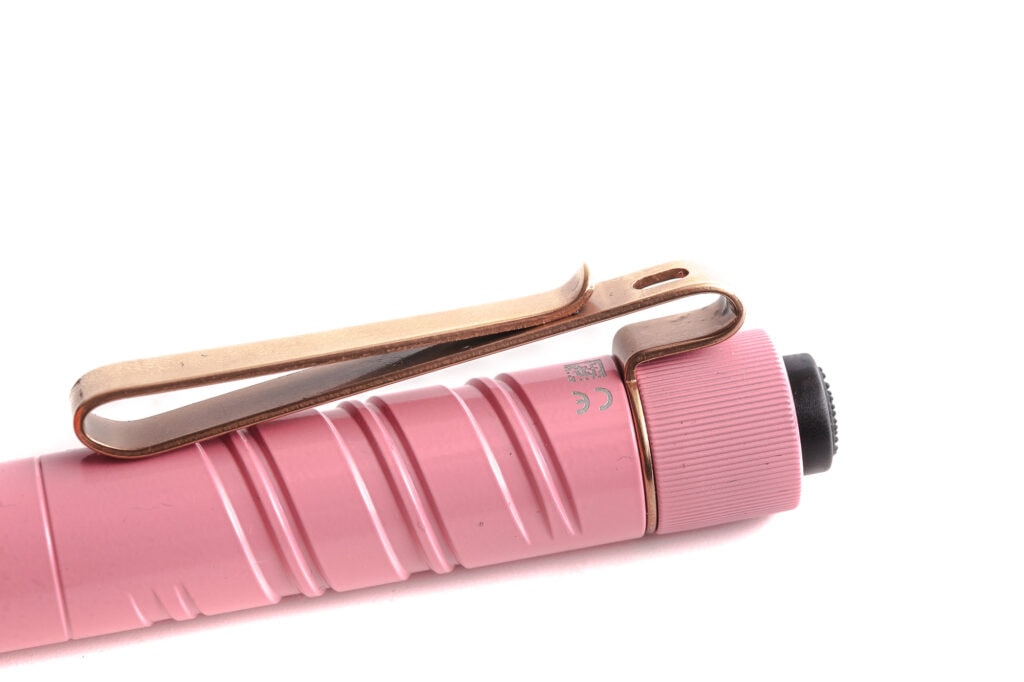
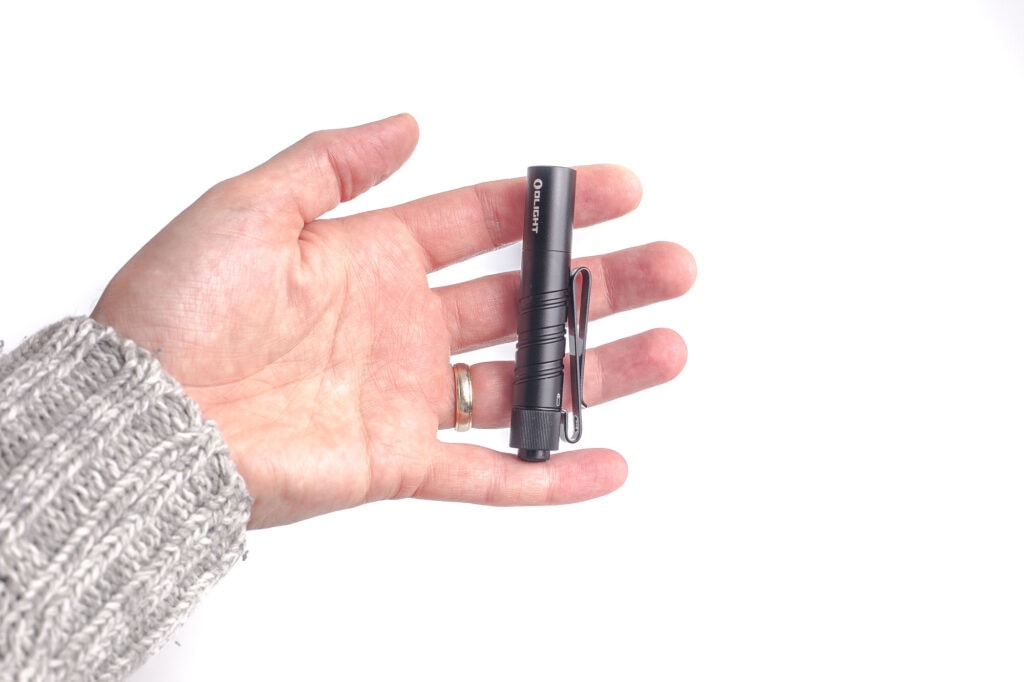
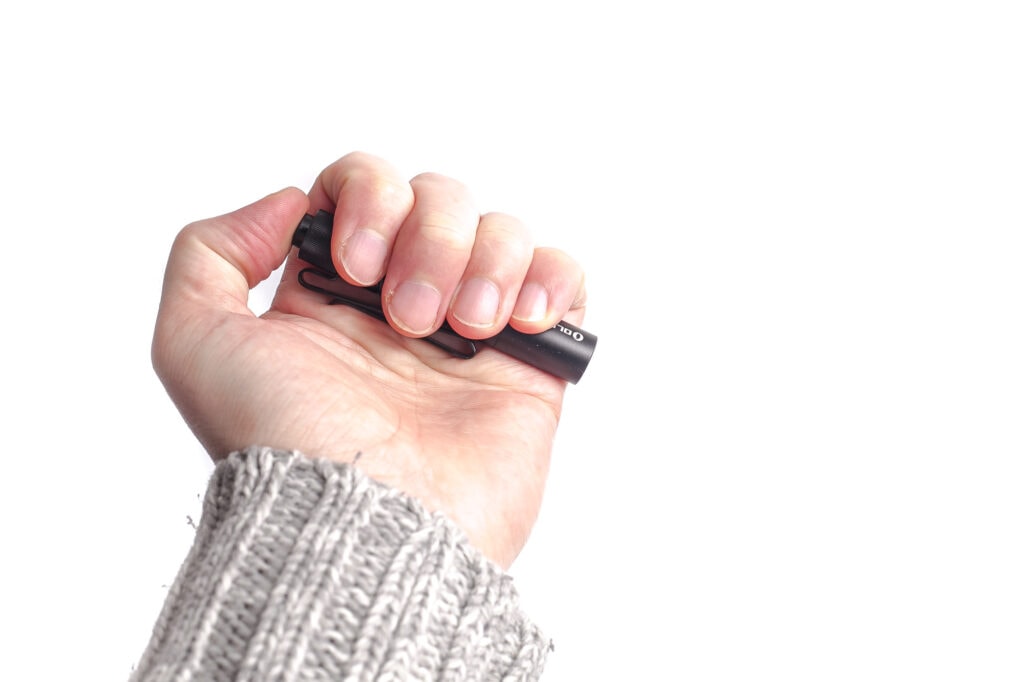
In terms of carrying, you can use the pre-attached 2-way pocket clip. It’s attached just below the tailcap, and as the name implies, can either point it upwards or downwards. The clip also has a tiny hole, that you can use to attach a lanyard and keychain. The package, however, doesn’t include a lanyard, or a split ring, but there are plenty of them online for cheap. The pocket clip also serves as an anti-roll feature, so it won’t roll off the table.
As a keychain light, I think it should have a lanyard attachment on the body, and not just on the pocket clip.
And on top of that, you can use the clip to attach the light to a baseball cap, so it can serve as a ‘headlamp’ as well.
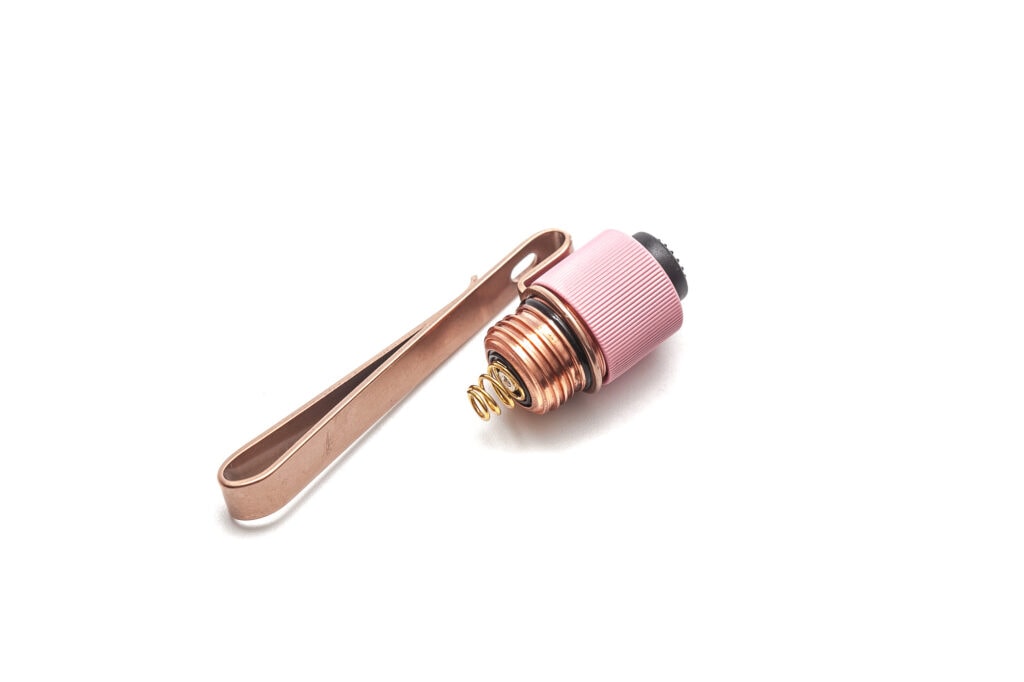
The 2nd version has a different style pocket clip, as it is now attached to the body much stronger. The first version could be clipped on and off, but this new one doesnt. You need to unscrew the tailcap before you can remove the clip. Pretty nice! Also, it sits deeper in your pocket than the first version.
The i3T 2 EOS is a very capable keychain flashlight. But you can also use it for EDC, because of the low weight, and small size. But for EDC, I’d recommend getting little bit brighter flashlight. Also, make sure you check out its bigger sibling, the Olight i5R EOS, an AA-sized flashlight.
The claimed output of 200 lumens should be good enough for things around the house, but the output may not be enough for outdoor activities like camping, etc.. unless you just use it to walk around the campsite, or if it’s used by kids. Also, if you are using the Alkaline battery, your output will decrease much quicker than with a NiMH or 10440 lithium battery.
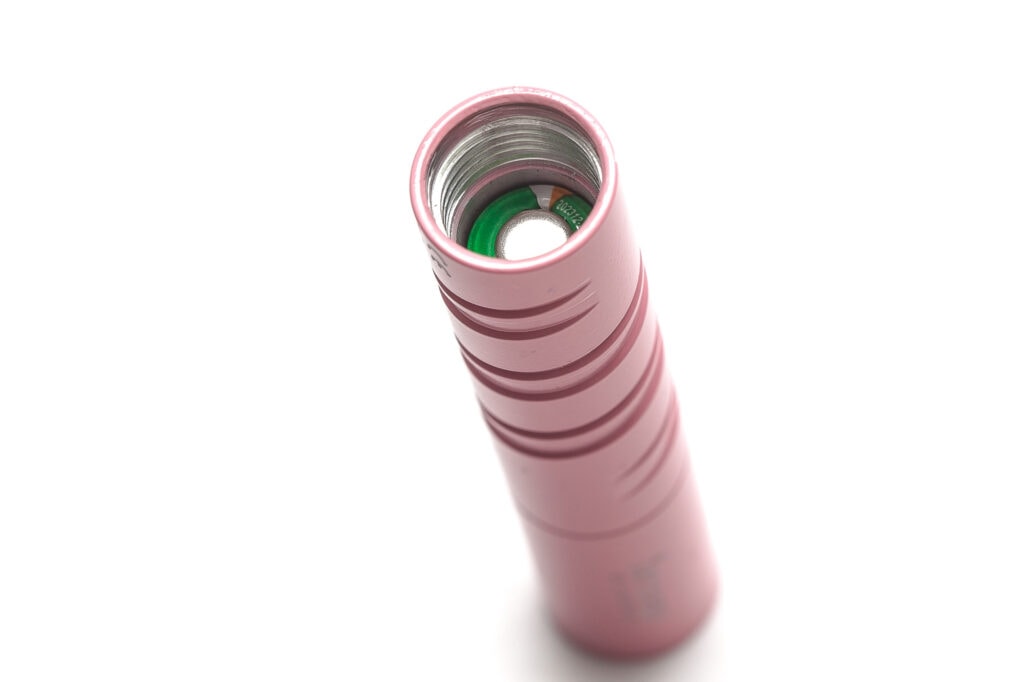
The switch is actually the only part you can unscrew from this flashlight. Everything else is glued tightly. When you unscrew the tailcap, it feels nice and hefty, and you’ll notice the copper/brass threads.
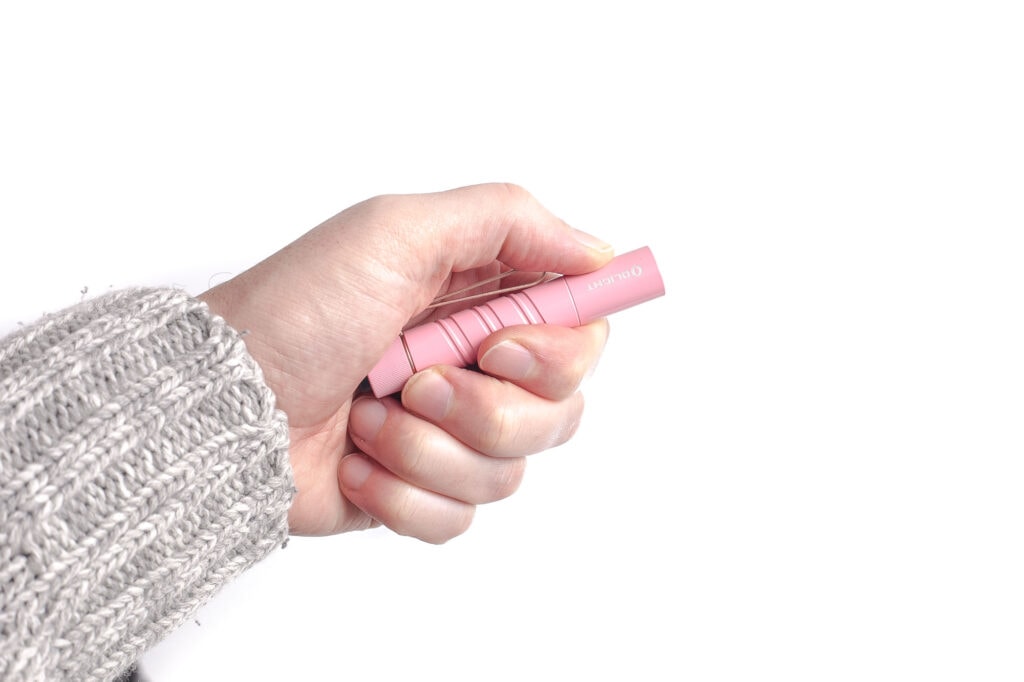
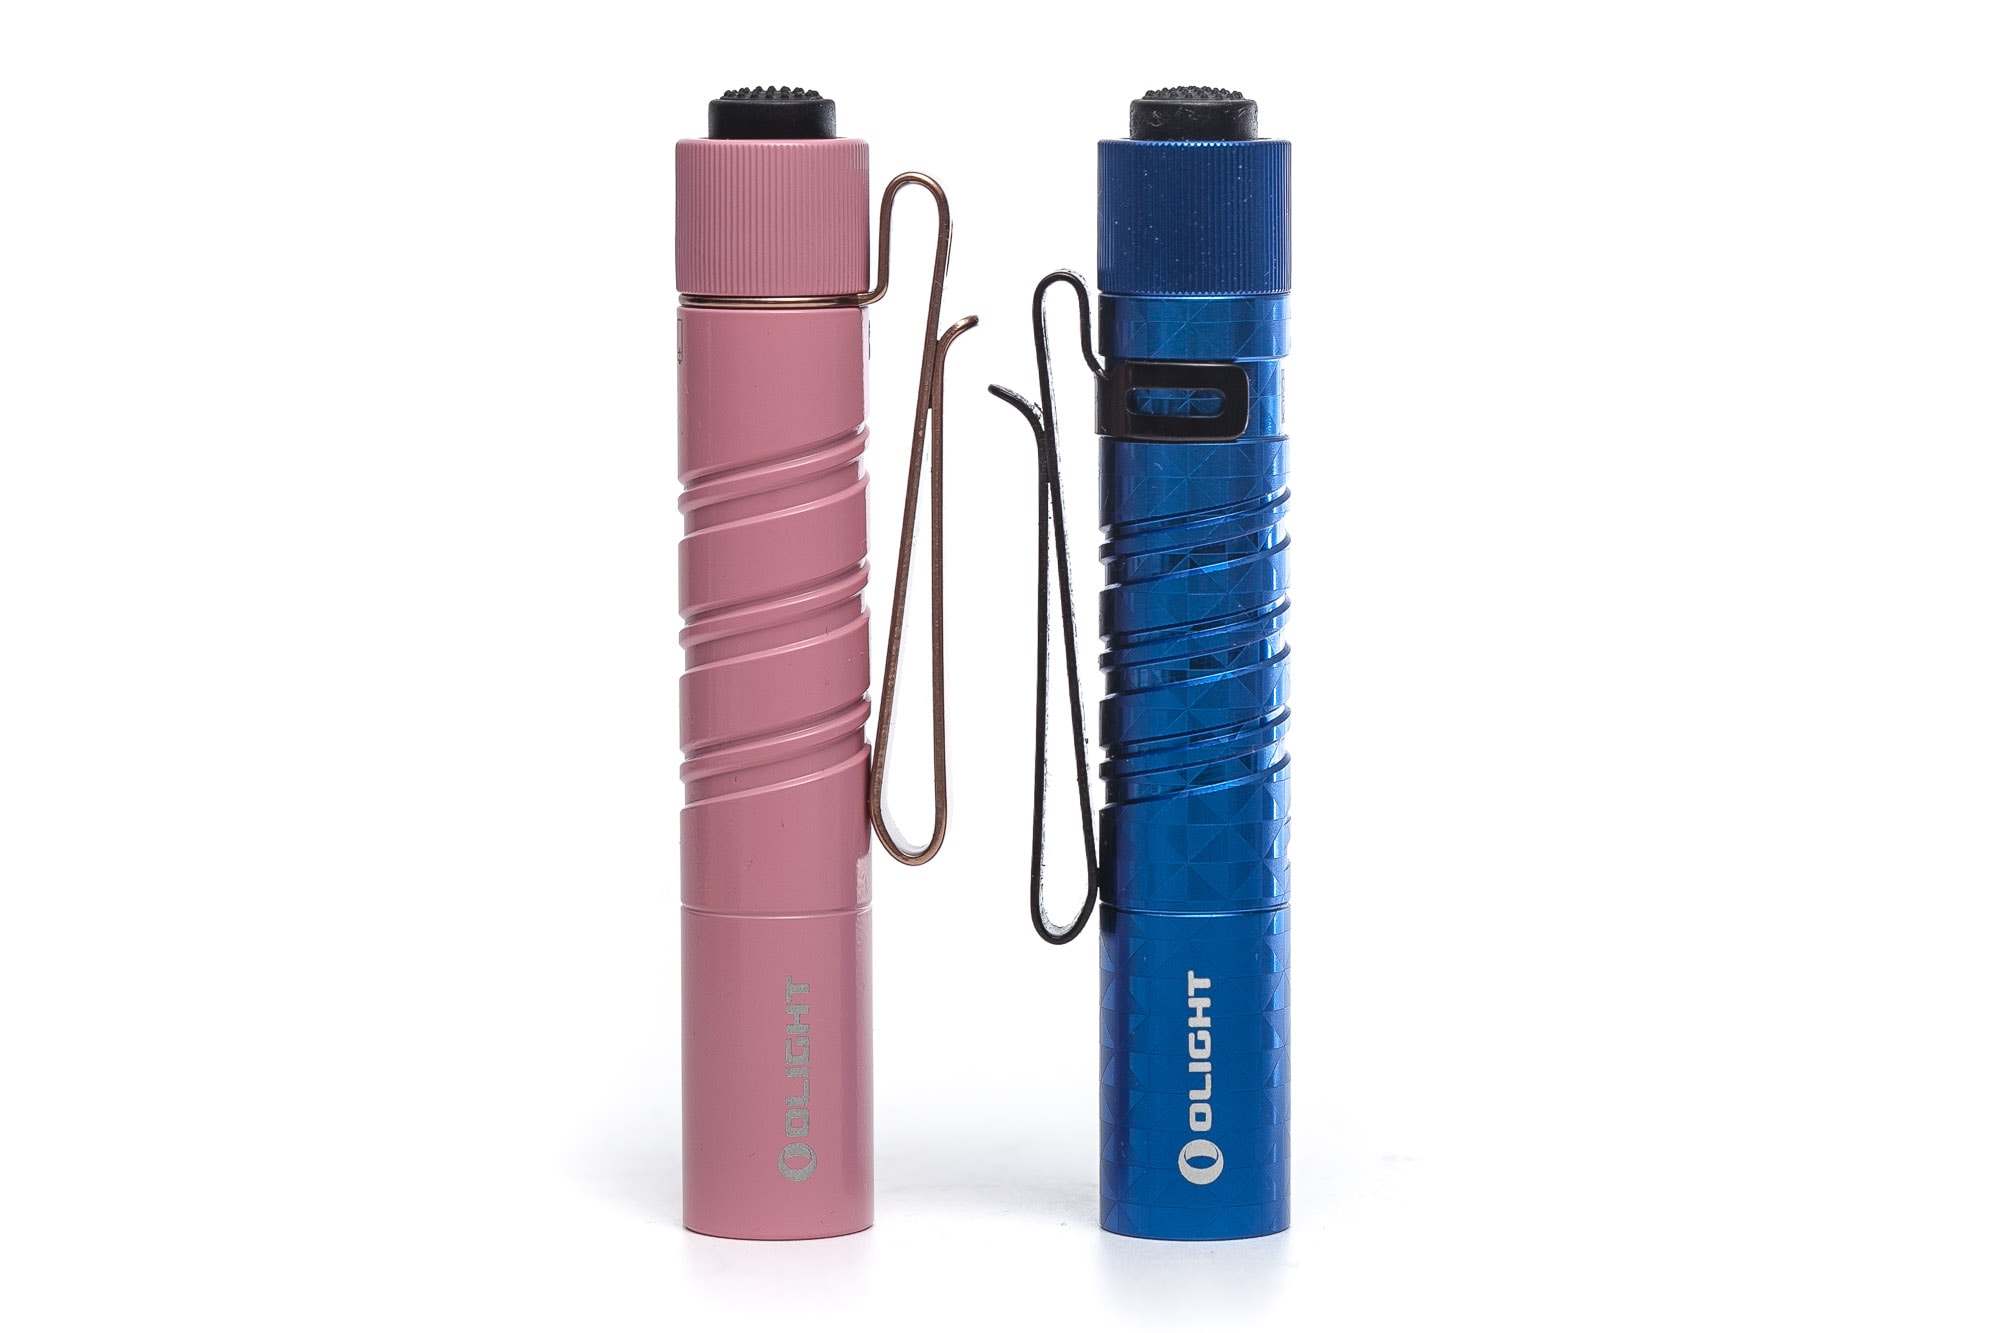
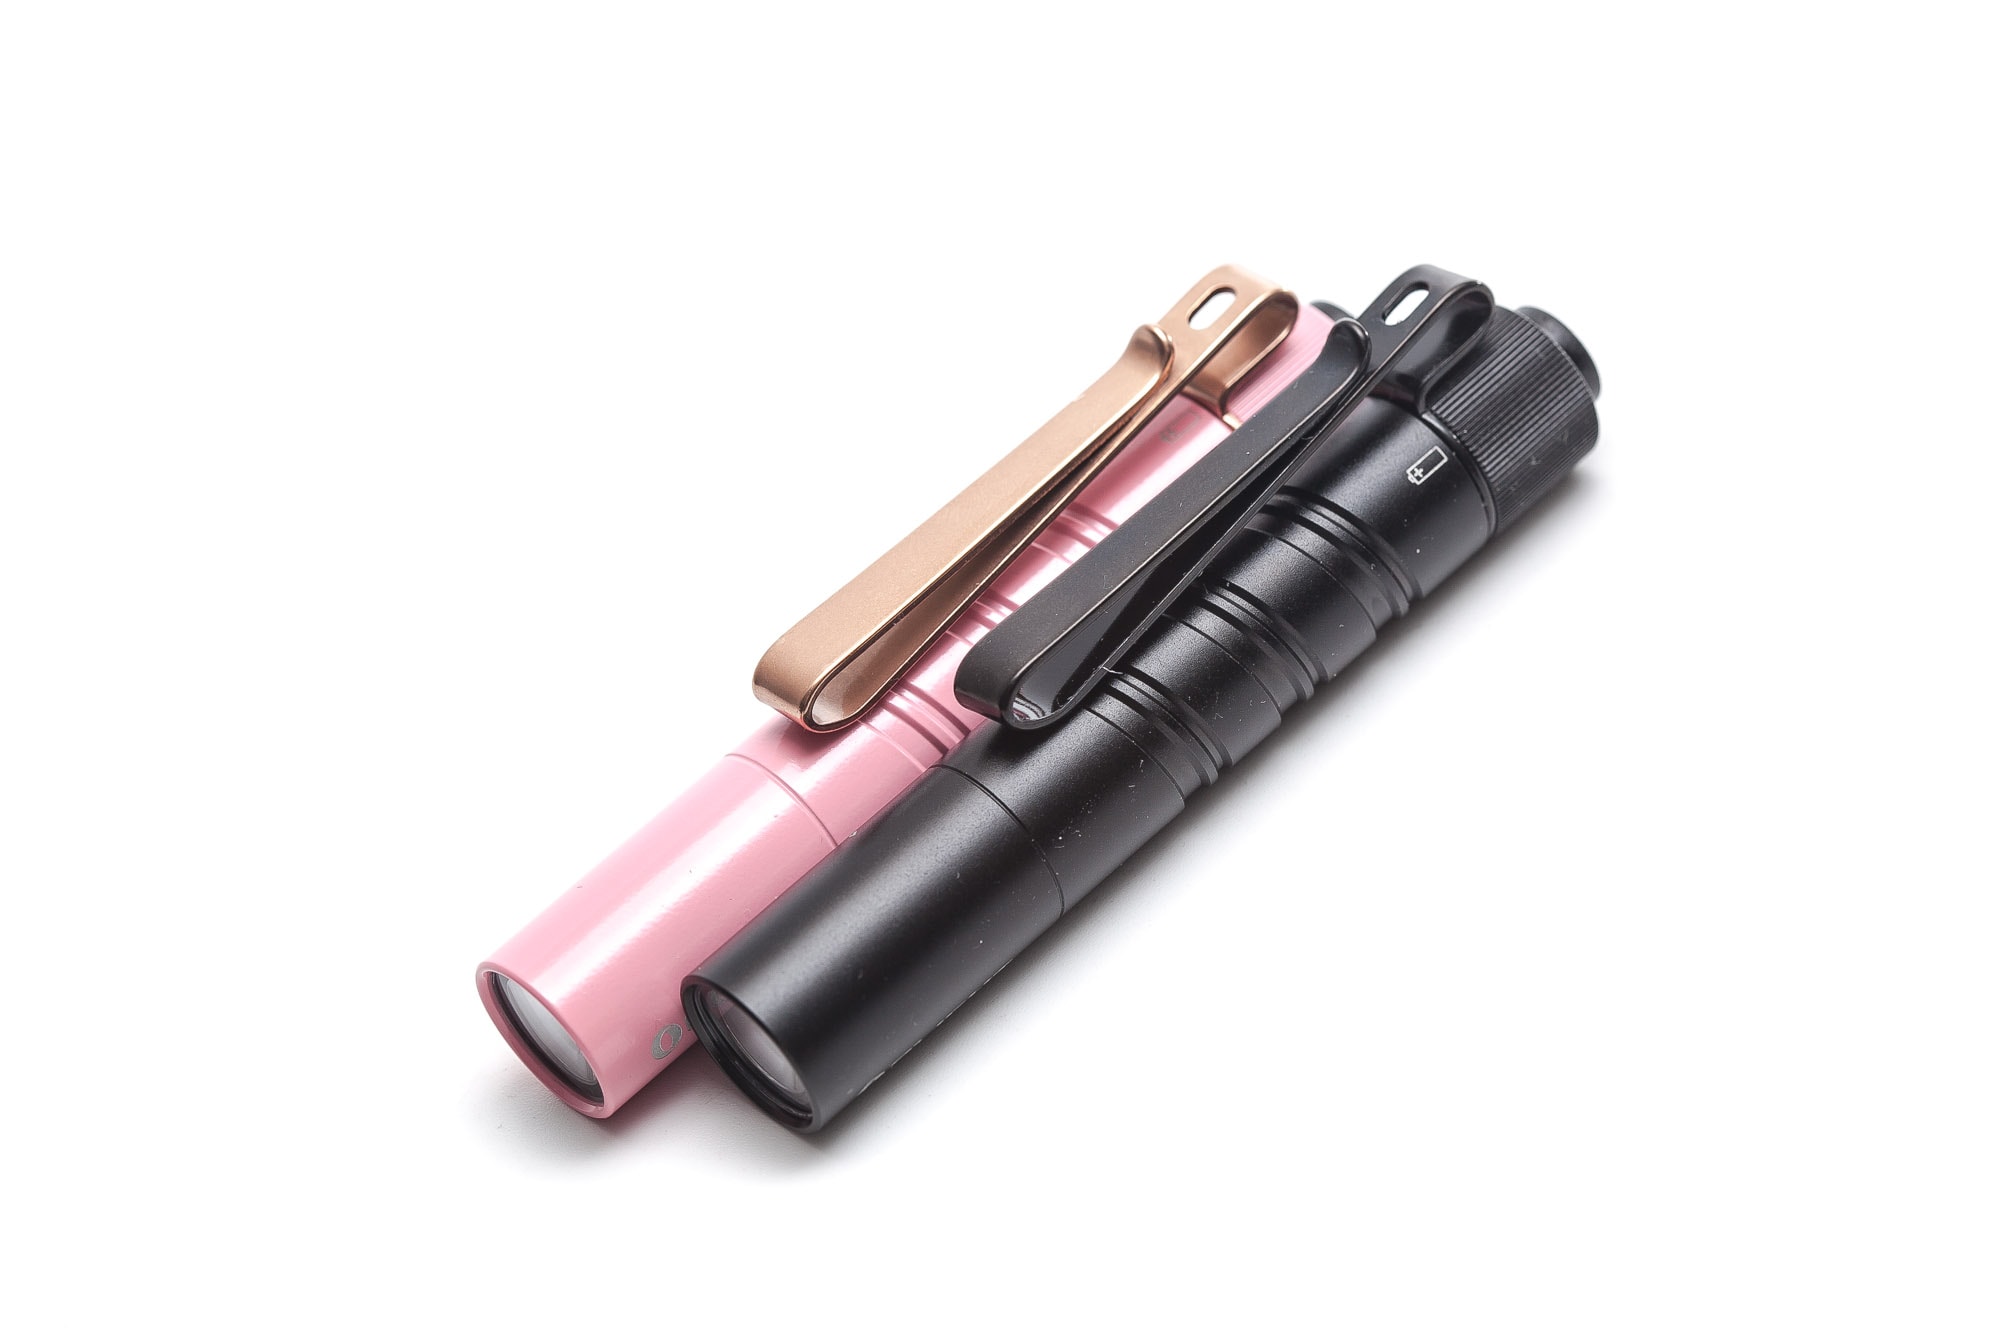
The battery tube doesn’t have the traditional knurling, but 2 parallel lines going around the body. Please see the images.
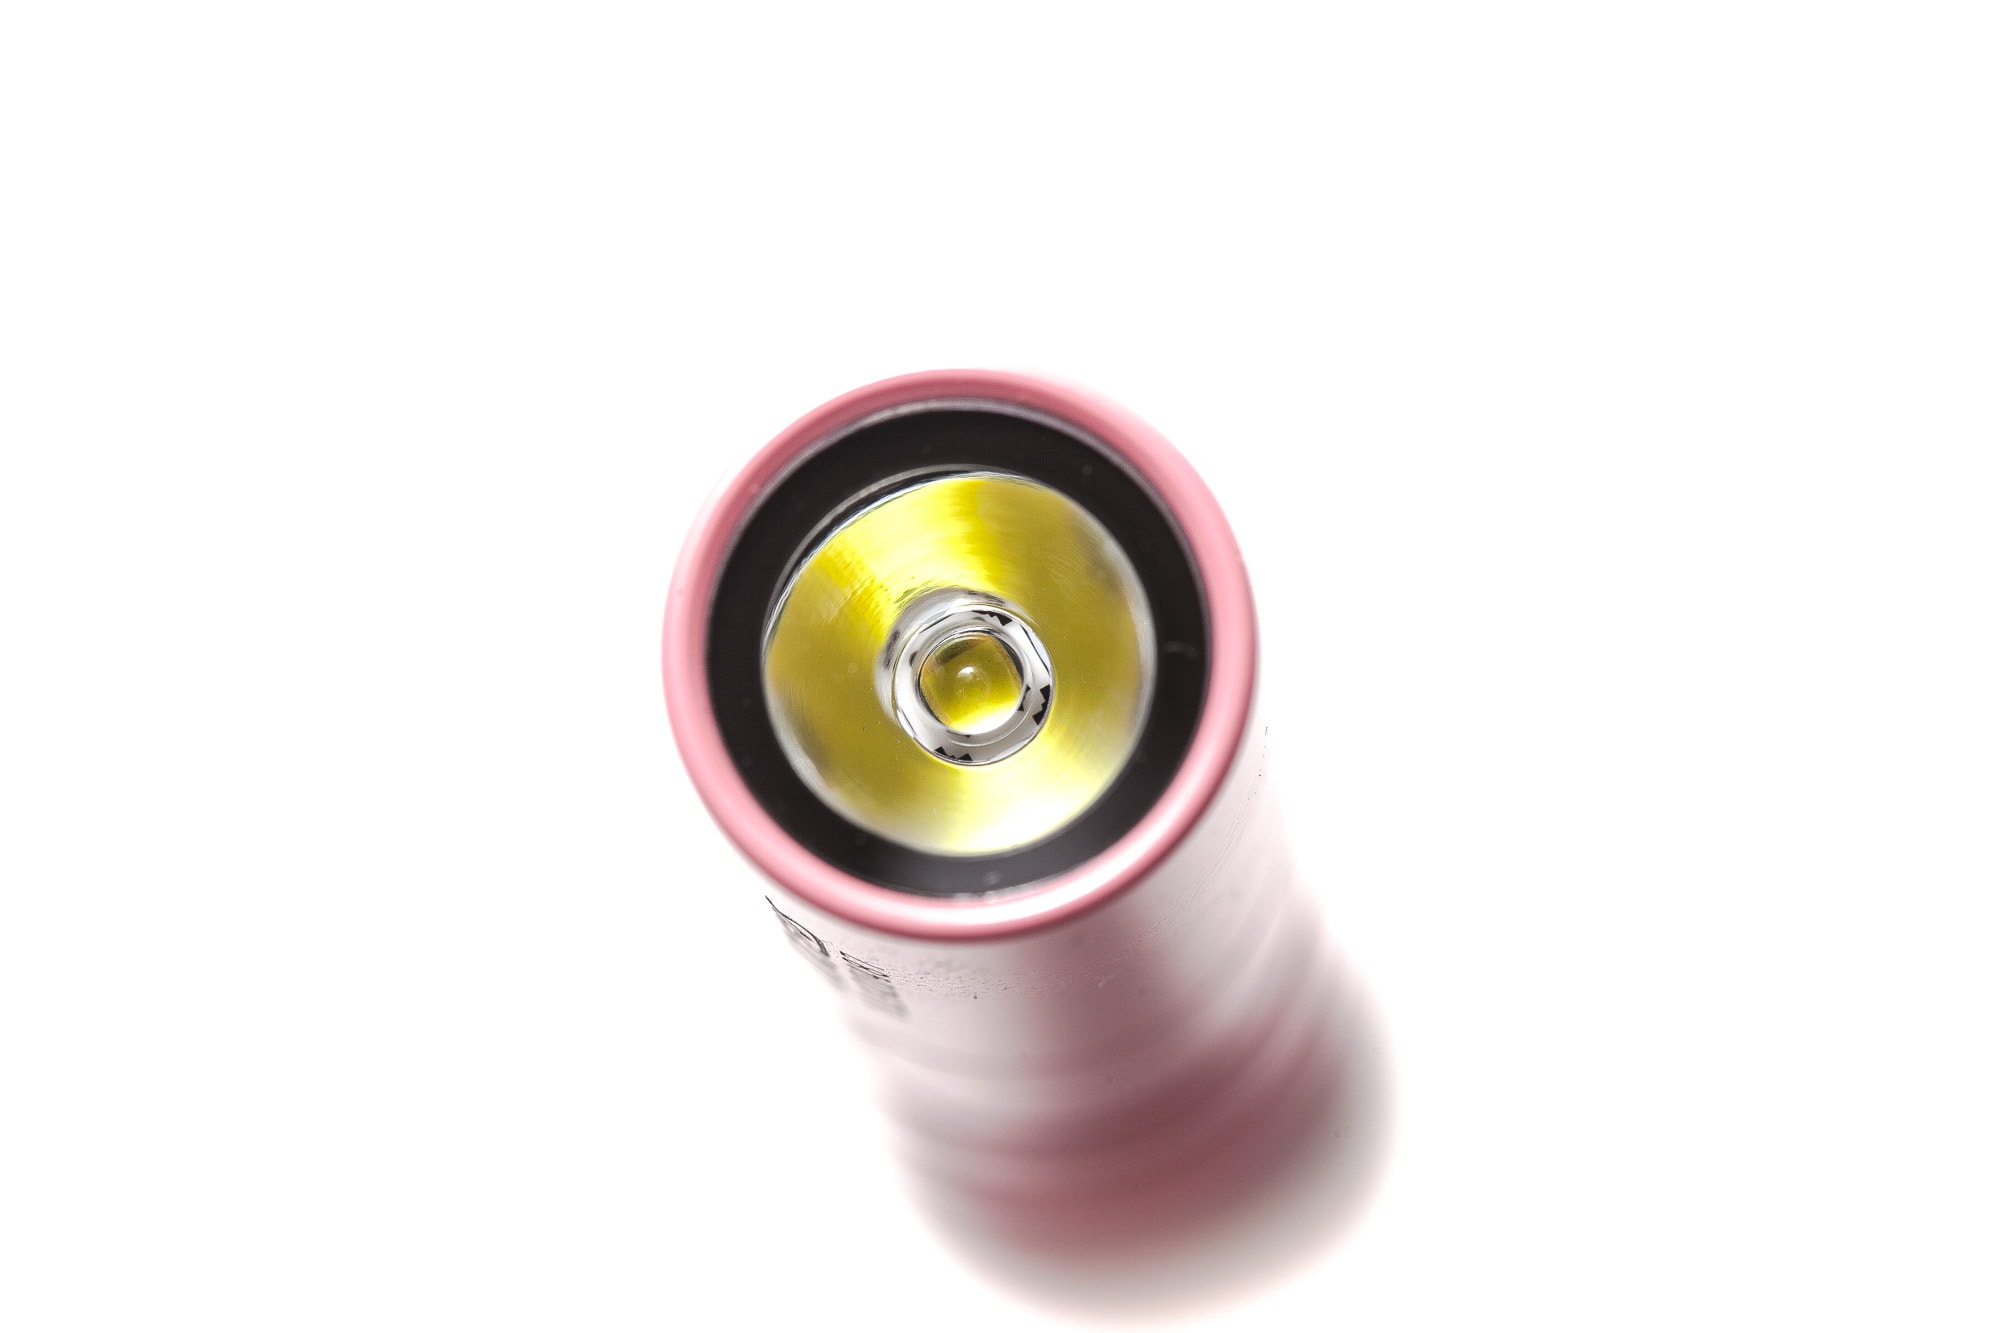
The pink anodization is a little glossy and without any defects, chips or other problems. Keep in mind that the pink version is the same flashlight as the normal i3T 2 EOS, except for the coating.
Olight warranty:
30-day no-hassle returns and a as of January 2023, lights sold in certain markets (US, EU) get a lifetime warranty. From Olight: If you purchased an Olight® product from the USA after January 1st, 2023, the local service centers will honor your LIFETIME WARRANTY for your purchase. If your Olight product (including its structure, built-in battery, LED, or lens) ever experiences any issues, we promise to take care of it. If we are unable to repair your product, we will promptly replace it with a product in perfect working condition, which will be of equal or better physical condition. If your purchase is a limited or discontinued edition of Olight product, we will repair or replace it with another Olight product of the same or higher value. We will warrant all Olight products that exhibit any defects in material and workmanship under normal use. However, please note that this LIFETIME WARRANTY does not cover loss, theft, deliberate damage, or cosmetic damage.


LED, Lens, Bezel, Beam, and Reflector
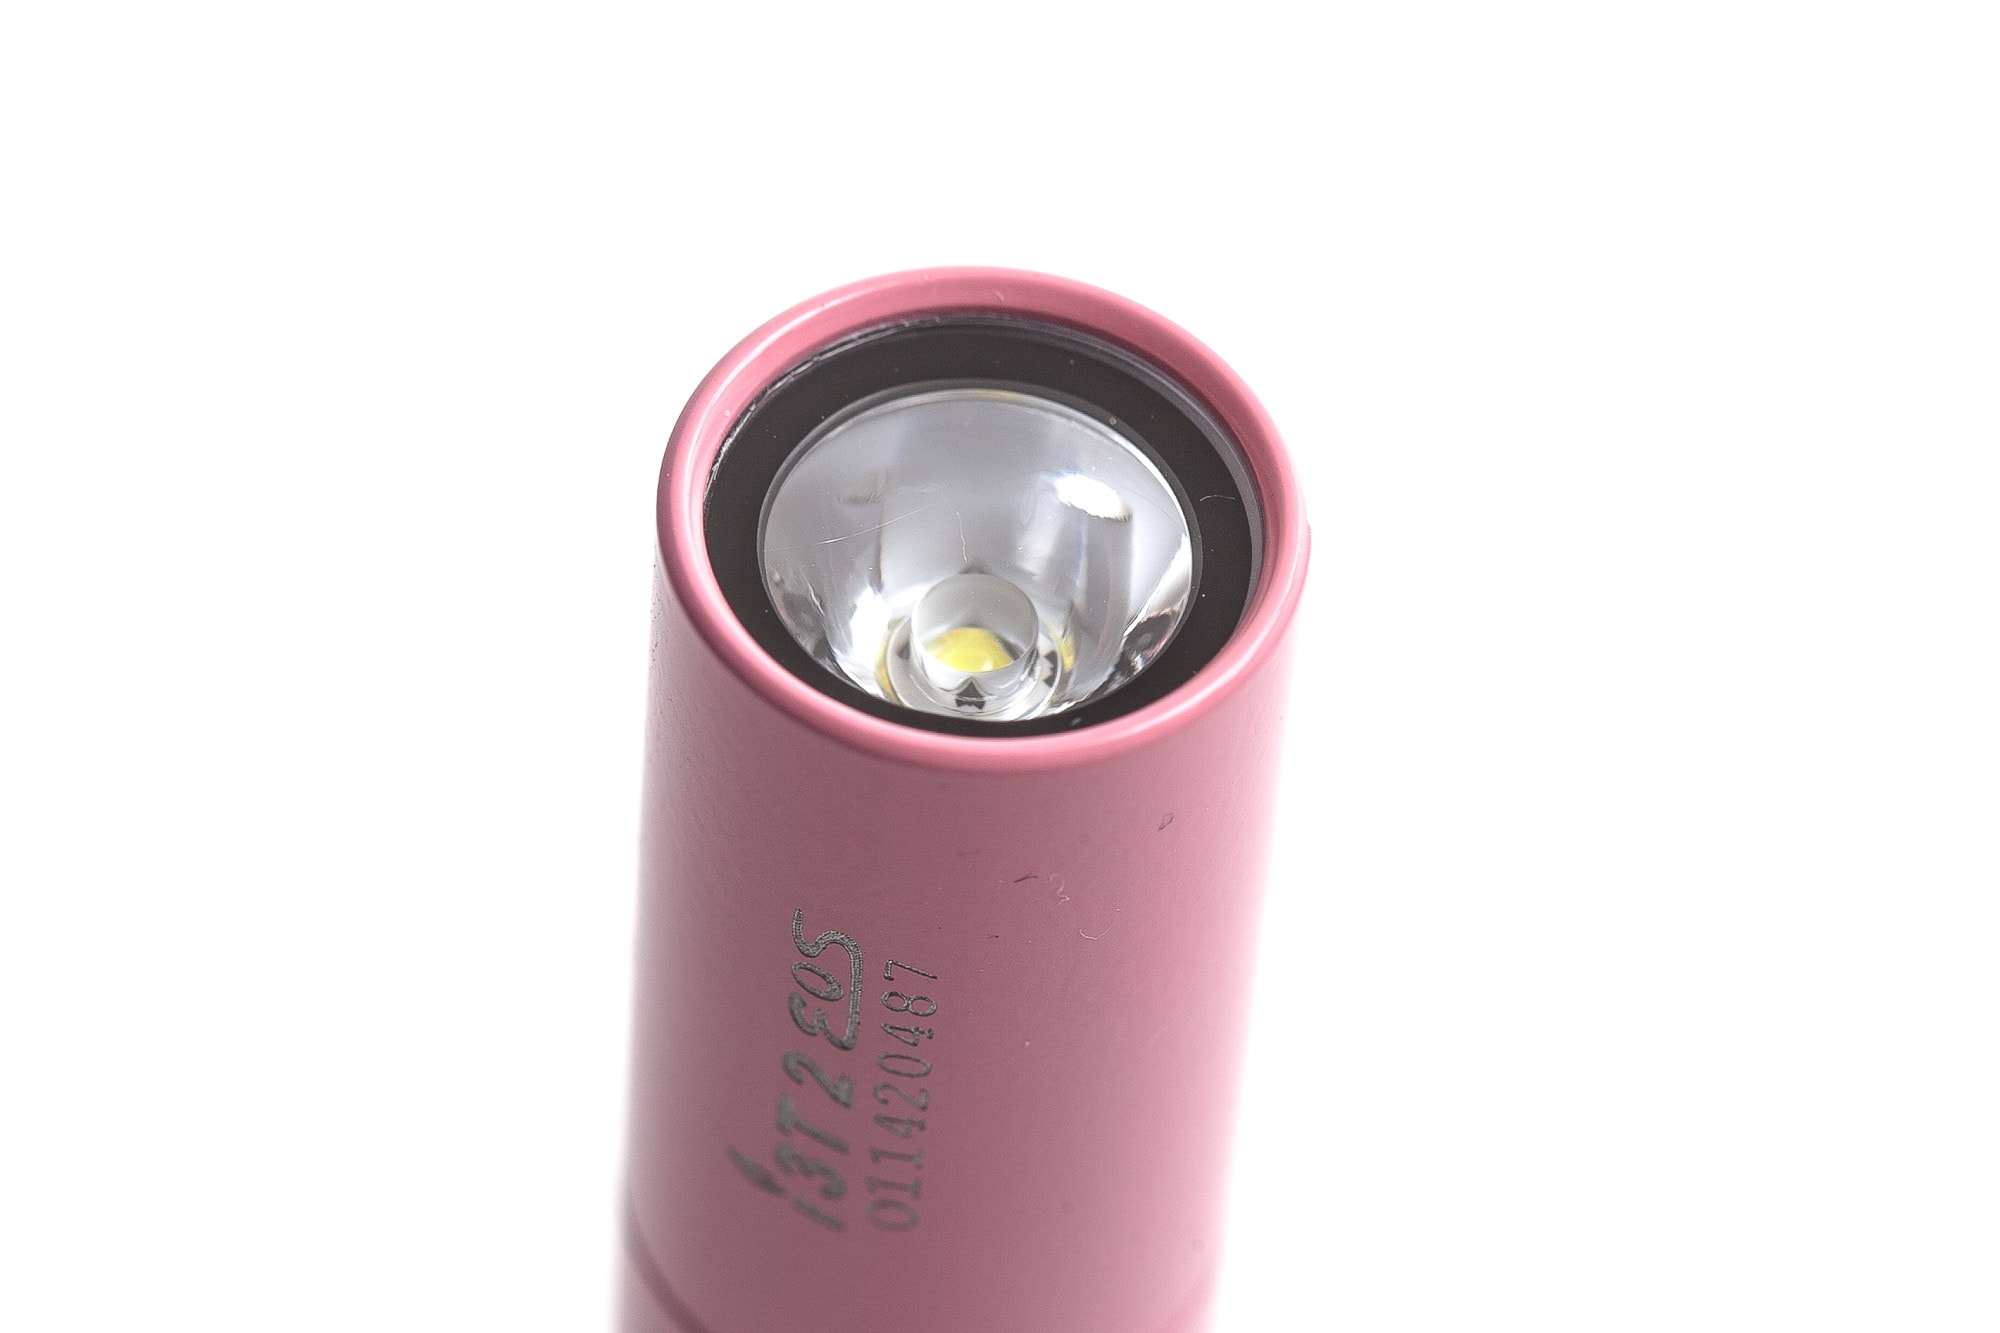
High Performance LED (5700-6700k) CRI70
Sometimes, Olight shares the make and model of their LED, but not this time. This time, it’s simply called High Performance LED (5700-6700k). This means that the beam is cool white, and likely low CRI.. but we’re going to tetst that, of course.
But like with all reviews, we don’t just go off the specifications, we actually test it.
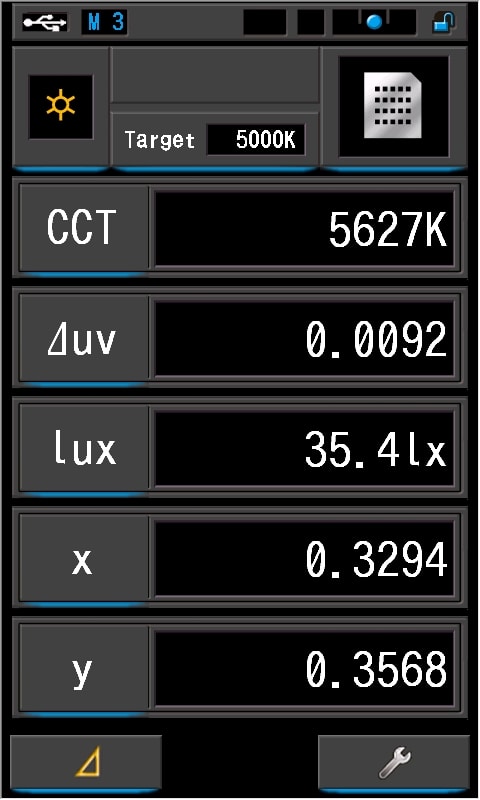
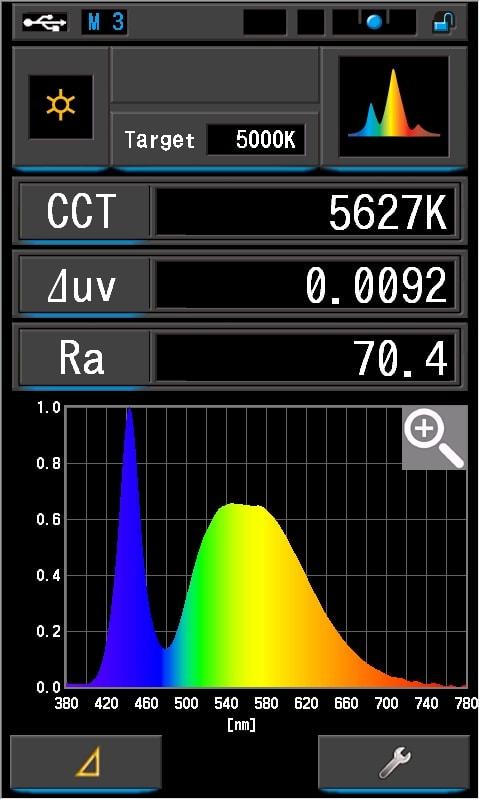
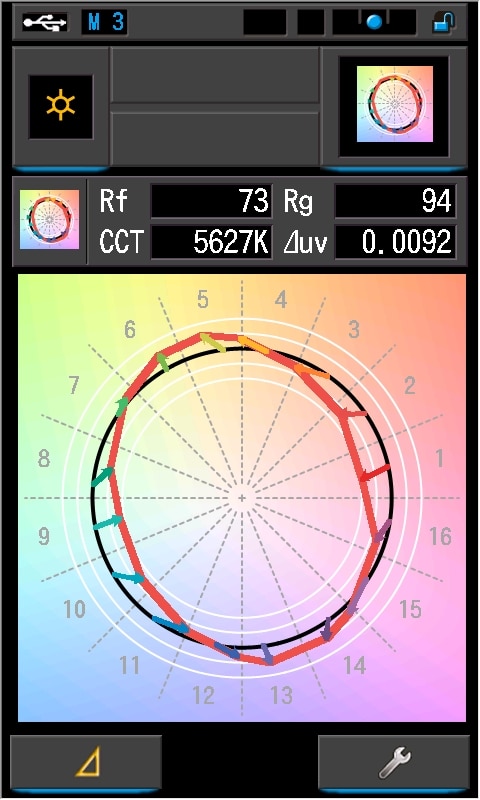
For testing, I used a Sekonic C-800 spectrometer.
If you don’t understand what this all means, no worries. CCT is the color temperature of the light. The lower the number, the warmer. 2700K is pretty warm white, while 6000K would be going towards cool white.
I personally like it between 5000K and 5500K..
Spectral measurements:
I used a Sekonic C800 spectrometer to measure the flashlight at 5 meters distance.
| Mode: | CCT: | CRI Ra: | duv |
|---|---|---|---|
| High | 5627 K | 70.4 | 0.0092 |
DUV is a bit positive, which means a little greenish. A negative DUV would be a bit more pinkish. A CRI Ra of 70.4 is average for LED flashlights.

Dimensions and its competition
Dimensions:
| Olight i3T 2 EOS | Millimeters | Inches |
|---|---|---|
| Length | 89 mm | 3.5 in |
| Head+body diameter | 15 mm | 0.6 in |
Dimensions are rounded to the nearest millimeter and the nearest tenth of an Inch.
Weight:
| Olight i3T 2 EOS | Weight in grams | Weight in oz. |
|---|---|---|
| Without battery: | 31.1 | 1.1 oz |
| With AAA alkaline battery | 41.8 | 1.5 oz |
Weight is rounded to the nearest gram and tenth of an Oz.
Olight i3T 2 Flashlight comparison
Size compared to other keychain flashlights
Group 1, from left to right: v2 Olight i3T 2 EOS, v1 Olight i3T EOS
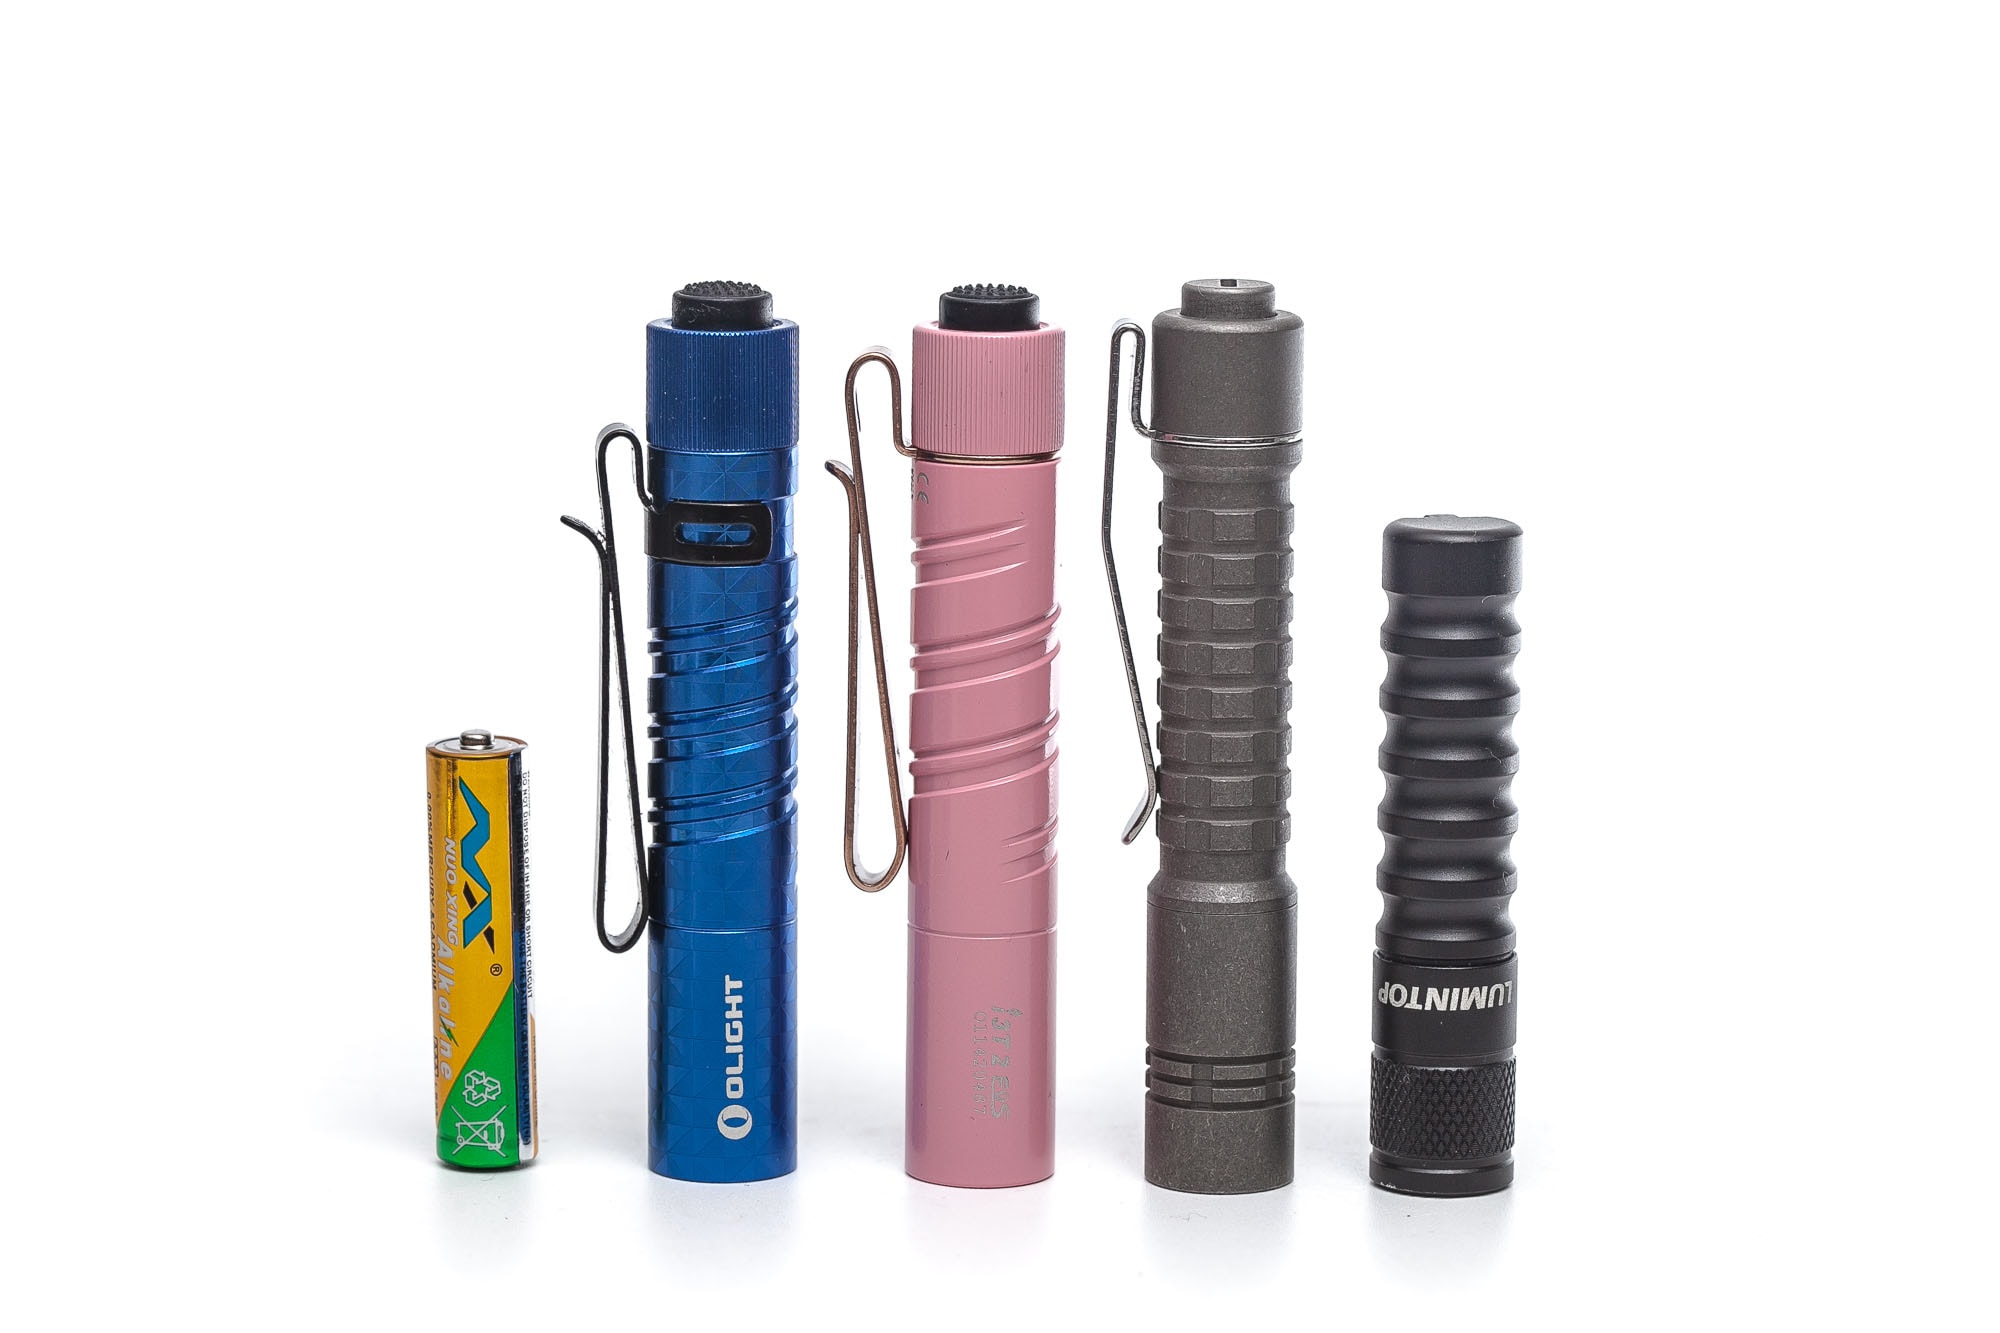
Group 2, AAA flashlights from left to right: Olight i3T, Olight i3T 2, Reylight Pineapple Mini, Lumintop EDC01
Group 3, AA and AAA flashlights, Acebeam Pokelit AA, Olight i5R, Olight i3T, Olight i3T 2, Fenix E12.


Olight i3T 2 EOS UI : User interface and driver
The i3T EOS has a simple UI with 2 modes and a forward clicky switch (that is protruding). This means that you have momentary mode by a half press, and you can’t change modes when the flashlights it turned on.
But Olight added a new features, where you can set the initial brightness, see more below.
Available modes:
- Default: high, low
From OFF, default:
- Half-press: momentary On
- Single-click: High
- Multiple half-presses: change between low and high mode
From ON default:
- Single-click: Off
Set initial brightness level Low to High, or High to Low
See Figure 5-1 in the manual
- By default the first mode is High, and the second is low.
- But you can change this to go from Low to High
- You can do this by 5 half-presses, and holding the button down at the 5th press. (do not click)
- You should see the output changing at every half-press you do, and when you hold the fifth press, you can see the output change from low to high, or high to low
Figure 5-2 in the manual
I can’t seem to get this to work. I can easily change the first output with 5 taps, but when I do the 9 taps and hold, nothing happens. I’ve done this like 10-15 times by now, and still nothing changes.
Shortcuts:
- There are no real shortcuts. The first mode is by default High.. so a tap and click is Low
Mode memory:
- No, it will always start in the first mode (but you can change this from High to Low if you want, see above)
Blinky modes menu:
- No, there are none
Low battery warning:
- The flashlights will start flashing at low battery. This is about 3.1V with 10440, and betwen 0.85-0.9V with Eneloops
Lock-out mode:
- No, just turn the light off.
PWM:
- Not visible by eye.
Firmware / UI Conclusion:
- Just how I prefer it, simple! And you can change it from Low to High if you want.
Olight i3T v2 EOS Charging and batteries
Olight includes an Alkaline AAA battery, and I’d recommend using it directly, or just getting rid of it.
I wouldn’t trust alkaline batteries in my flashlights, especially not when the flashlight is not being used on a frequent base. Instead, I’d recommend getting rechargeable AA batteries like Panasonic Eneloop (just the white ones) or similar.
There’s just too many times Alkaline batteries destroyed flashlights, so be warned.
And something else that is interesting: Olight even says you can use 10440 batteries with it! But, unfortunately, they did not include one. I tested this with a non-branded 10440 I have, just for the fun.
BTW. if you are going to use the included battery, make sure you don’t leave it in the flashlight for too long. Also, I don’t recommend keeping the flashlight in the box for too long, because the battery is loaded inside the flashlight. Even though it has an insulating film for not shorting the battery, it doesn’t help against leaking!
| Charge type | Fits | No fit | Charge time |
|---|---|---|---|
| – | All AAA and 10440 | – |
Performance test
This is the gear I use for testing:
| Gear | Purpose | Link to buy |
|---|---|---|
| Hagner E4-X | Measuring beam intensity (throw) | Inquire at Hagner.se |
| 2* Extech SDL400 | Lumens and logging runtimes | Amazon.com, Amazon.co.uk, |
| Leica Disto D2 | Distance for throw measurements | Amazon.com, Amazon.co.uk, |
| Sekonic C-800 | Spectrometer for LED measurements | Amazon.com, Amazon.co.uk |
| Uni-T UTi260B | Thermal Image camera | Amazon.com, |
Lumen measurements:
How Lumens are Measured: Understanding ANSI FL1 Standards How Lumens are Measured: Understanding ANSI FL1 Standards: The ANSI FL1 standards specify that output in lumens should be measured 30 seconds after turning on, as this is the standardized time for measuring brightness according to the industry standard. This is why we focus on this part in our measurements. The ANSI FL1 standards require an ambient temperature of 22 ± 3°C. We record the ambient the ambient temperature to identify potential reasons for any observed discrepancies.The output measurements in this review are based on my homemade integrating spheres, each equipped with an Extech SDL400 Lux Meter. For consistency and accuracy, a calibration light (Convoy S2+ with 249lm and a Convoy S2+ with 261lm) is measured before each set of lumen measurements.
One of the lux meters uses an ND camera filter for high-output lights to prevent the lux meter from maxing out. This is either the Kenko PRO1D ND16 for up to about 80,000 lumens or the Gobe ND32 for anything above.
All of my readings were taken from a fully-charged Panasonic Eneloop AAA, noname 10440 and the included Alkaline cell.
The measurements were taken manually at turn on and 30 seconds. The 10-minute numbers are taken from the runtime graph. The Alkaline numbers were all taken from the runtime graph, because I had no way of recharging a depleted Alkaline battery, lol. I could only do 1 test, and I choose the runtime test, and do my best to measure the lumens in the meantime.
| Mode (battery) | Specified | Turn on | 30 sec | 10 min |
|---|---|---|---|---|
| Low (Eneloop) | 5 lm | 5 lm | 5 lm | 5 lm |
| High (Eneloop) | 200 lm | 188 lm | 187 lm | 104 lm |
| Low (10440) | – | 5 lm | 5 lm | – |
| High (10440) | – | 306 lm | 302 lm | 161 lm |
| Low (Alkaline) | 5 lm | – | – | – |
| High (Alkaline) | 200 lm | 183 lm | 175 lm | 98 lm |
I try to use rounded lumen numbers, except for maybe Low or Moonlight/Firefly modes.
Ambient temperature during testing:
- 18.5 degrees Celsius
Olight i3T v2 EOS Battery life and runtime
How Runtimes are Measured: Understanding ANSI FL1 Standards About ANSI FL1 runtime standards: The runtime is measured until the light drops to 10% of its initial output (30 seconds after turning on). This does not mean that the flashlight is not usable anymore. The last column shows how long the light actually works till it shuts off. If there is a + symbol, it means that the test was stopped at that particular point, but the light was actually still running. This happens on certain occasions, with certain drivers, firmware, or batteries.Runtime tests were conducted in my 50cm homemade integrating sphere, paired with the Extech SDL400 data logging Lux Meter. Temperatures from the moment the runtime test started.
| Mode | Specified | Runtime (ANSI FL1) | Time till shut off |
|---|---|---|---|
| Low Eneloop (18.7 °C) | 21h | 17h 18min | 17h 18min+ |
| High Eneloop (18.3 °C) | 7min + 28min | 58 min | 1h 25min+ |
| High 10440 (18.4 °C) | – | 46 min | 46 min |
| High Alkaline (18.7 °C) | 7min + 28min | 34 min | 4h 42min |
The flashlight starts blinking when the battery is low. This is about 3.15V with 10440 and 0.85-0.90V with Eneloops. Alkaline kept running for a long time at low output.
Had to test Low mode twice because my luxmeter ran out of batteries about 15 hours in, lol. The flashlight doesn’t really switch off, but keeps blinking/flashing for many hours.
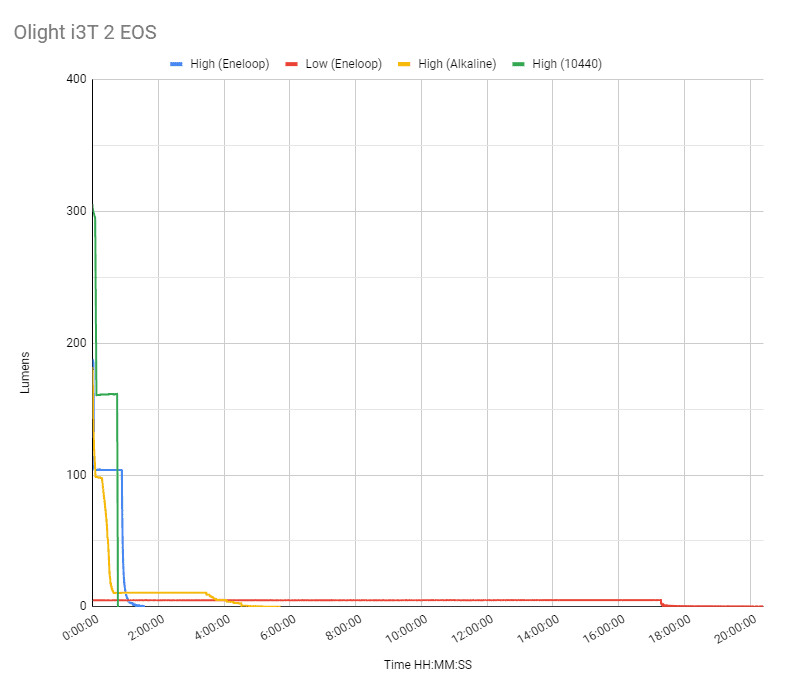
Olight claimed a 71% longer runtime vs v1, but that’s not true. I don’t know where they get those numbers from. Also, my measurements of the v1 were better than they
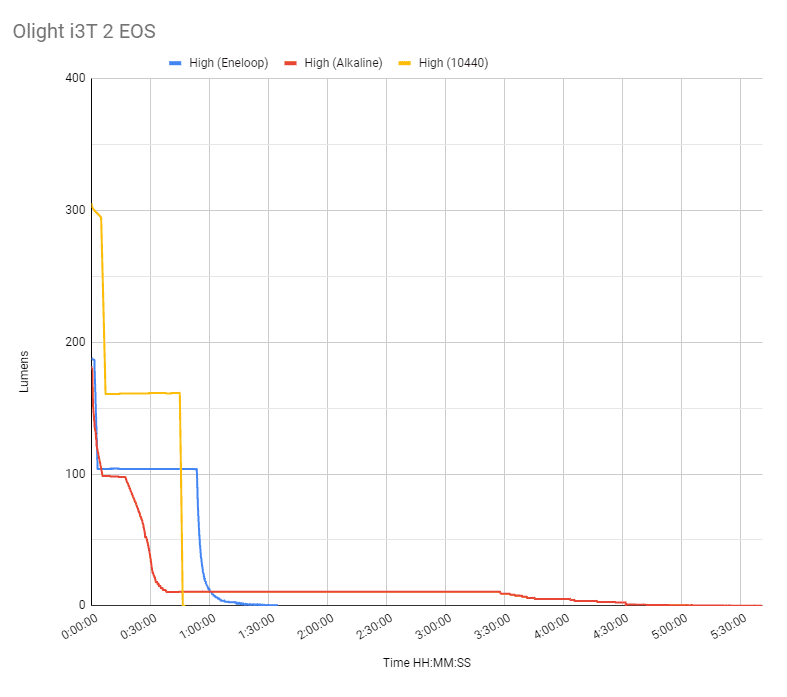

Olight i3T v1 vs Olight i3T v2
Here’s the comparison graph between v1 and v2.
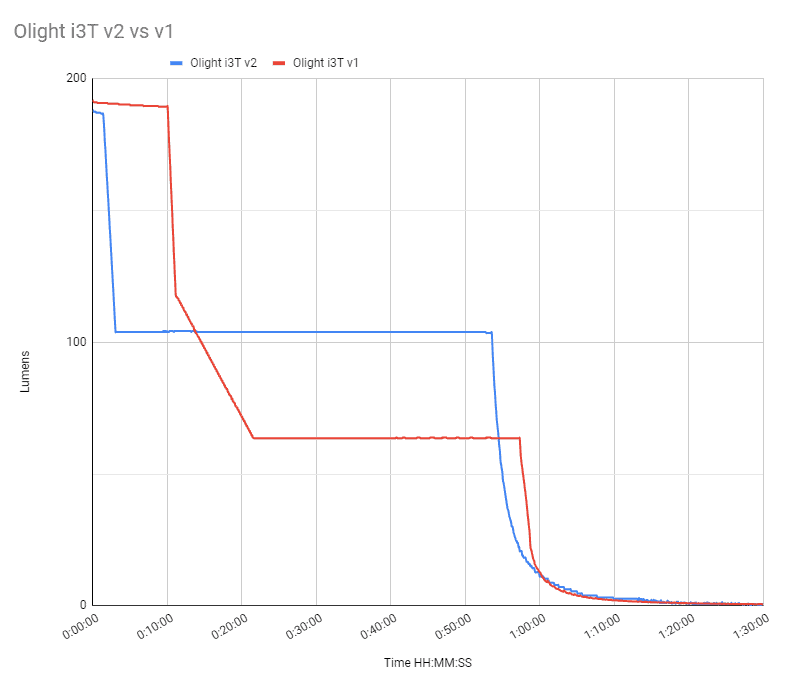
From this graph I would say: get the v1 instead of the v2, since you can get 10 minutes of almost 200 lumens instead of 2.
Olight i3T v2 EOS Peak beam intensity and beam distance measurements
About Peak beam intensity: Understanding ANSI FL1 Standards About peak beam intensity The calculated value of distance in meters at which the flashlight produces a light intensity of 0.25 lux. (0.25 lux is about the brightness of a full moon shining on an object). This means that the intensity has decreased so much, it becomes difficult to see darker objects, or objects that don’t reflect light. The columns ‘Meters’ and ‘Yards’ use rounded numbers.Measurements were taken indoors with a Hagner E4-X Lux Meter. The measurements were taken 30 seconds after turn on.
| Mode | Specified | Candela measured | Meters | Yards |
|---|---|---|---|---|
| High | 963 cd | 975 cd | 62 m | 68 yd |
This is less distance than the v1
Ambient temperature during testing:
- 18.4 degrees Celsius
Beamshots
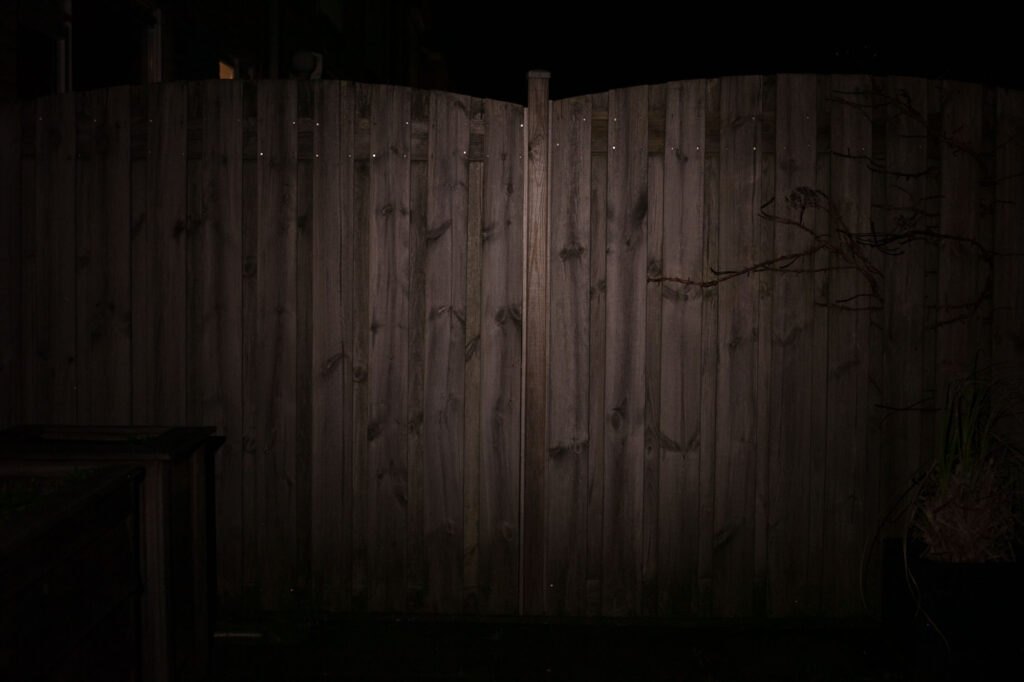
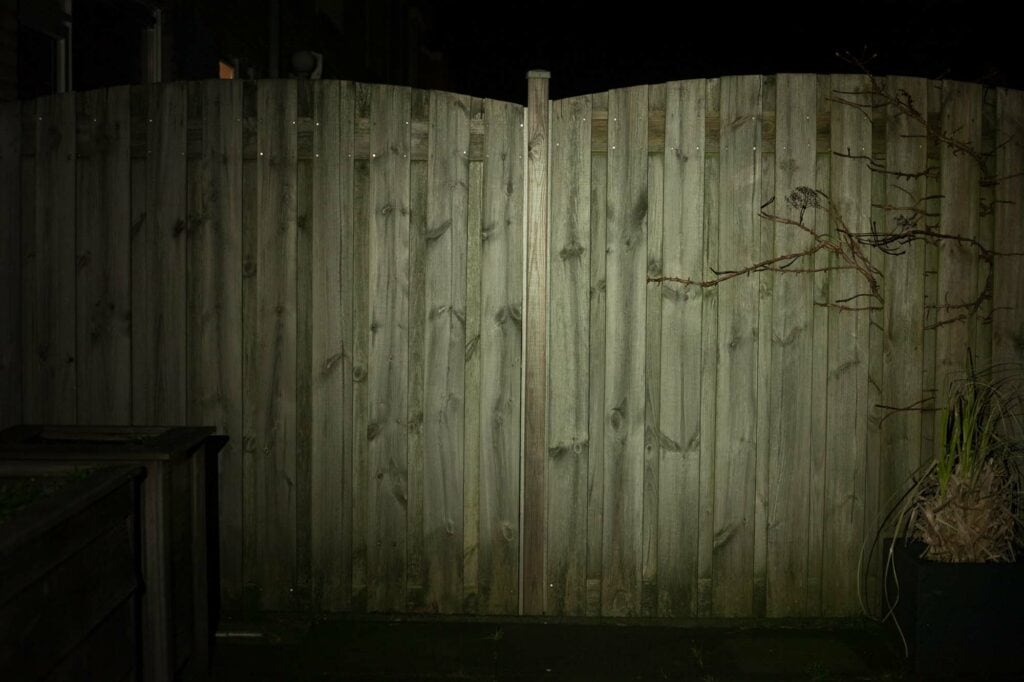
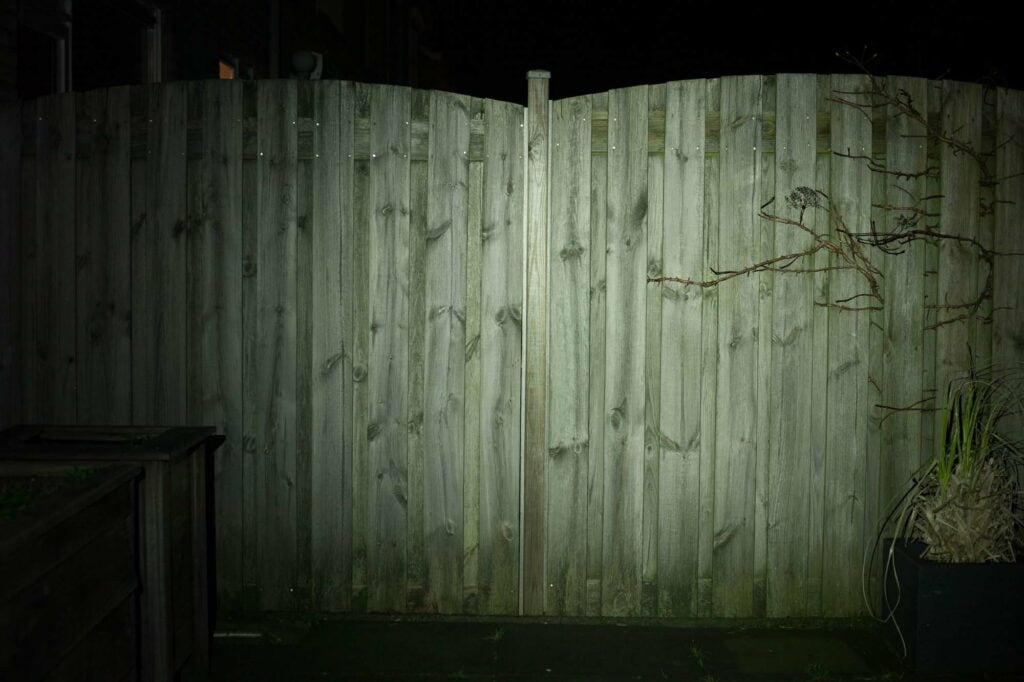
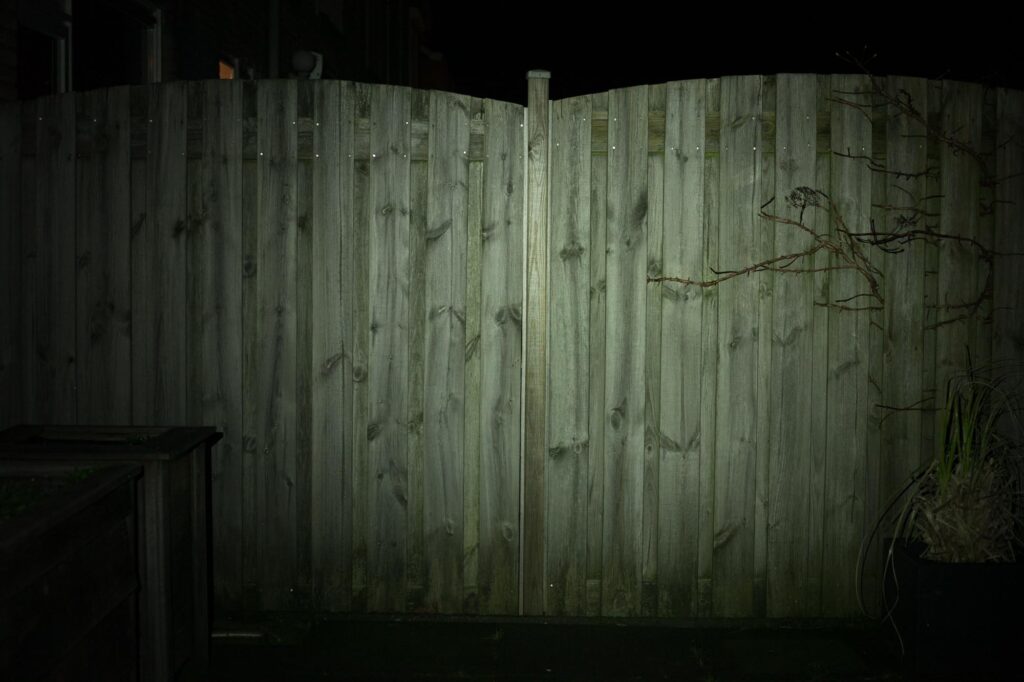
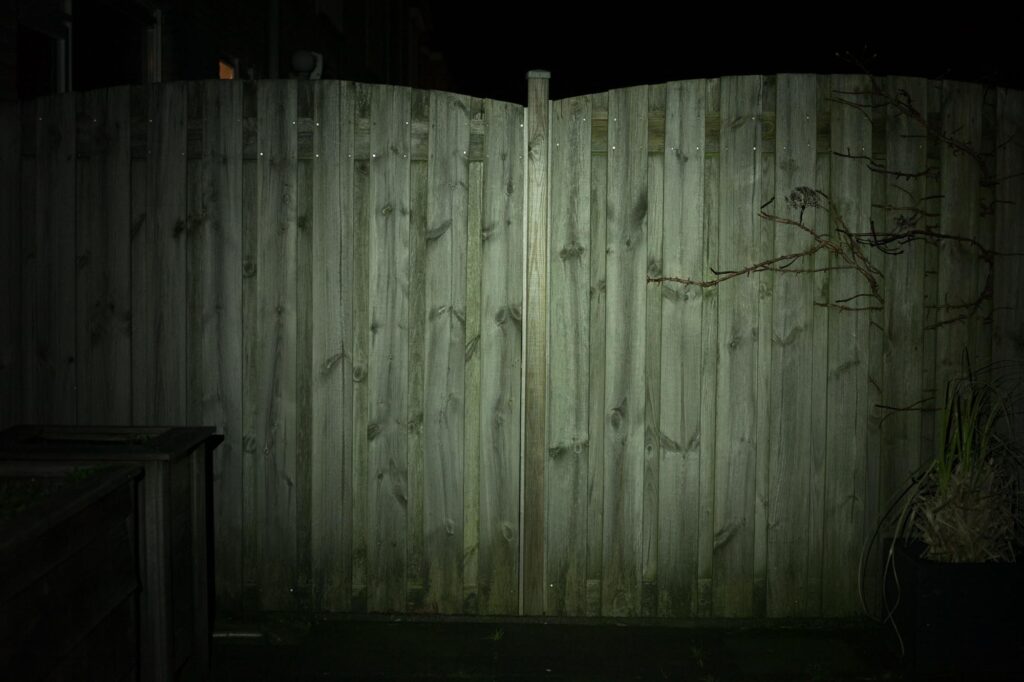
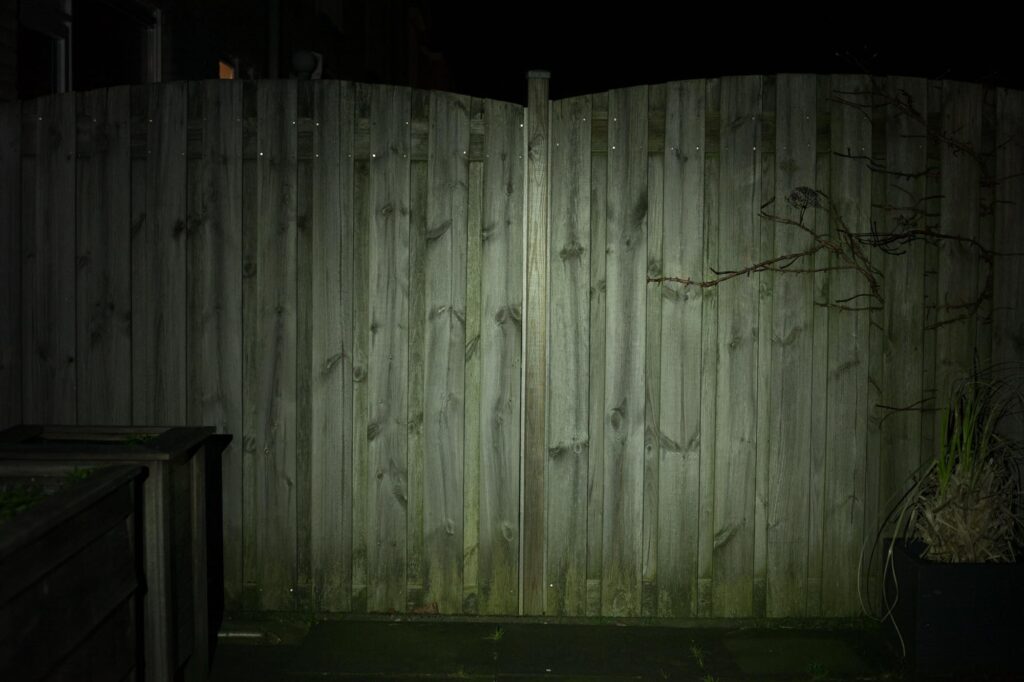
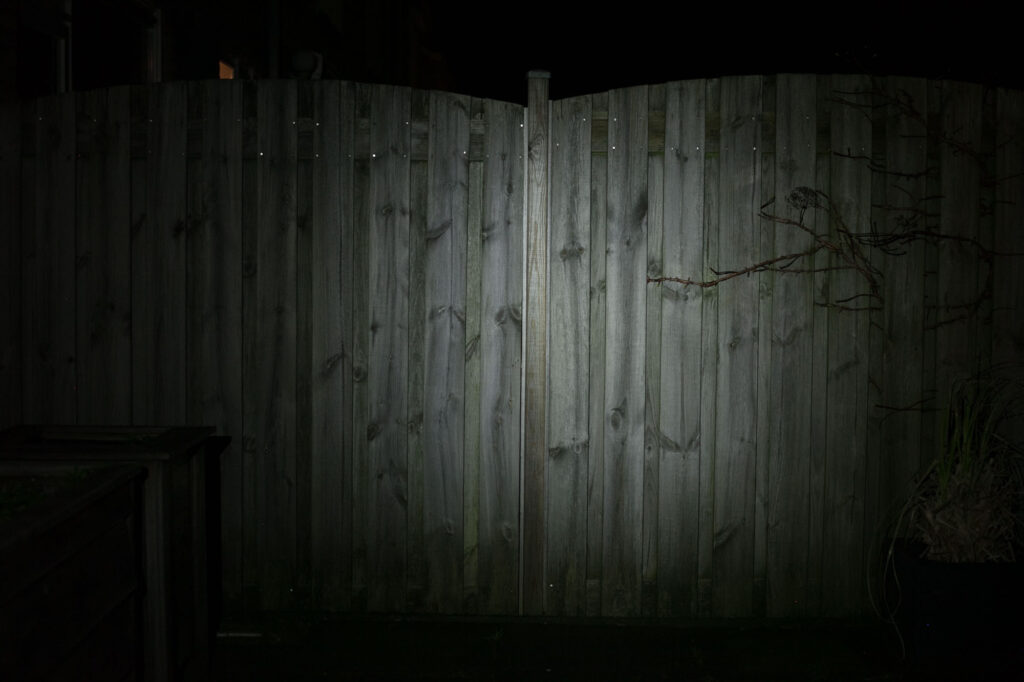
For the following beamshots, I used a Canon EOS 5D Mk2 with a 50mm lens. Manual settings: ISO1600, 1/30sec, F4, 5000K. The wall of the shed is 5 meters, and the fence is 4 meters.
Compared the beamshots of the following flashlights:
- Olight i3T
- Olight i3T 2
- Olight i5R EOS
- Speras M10 (cw)
- Speras M10 (nw)
- Lumintop Tool AA 2.0
- Fenix E12
Please note that the following beamshots are mainly intended to showcase the beam pattern and beam quality, rather than overall performance. These images are typically taken directly after activation, and in different seasons or weather conditions, and therefore do not fully represent its overall performance. For accurate performance metrics, such as output, beam distance, and runtimes, you need to look at the performance section of this review.

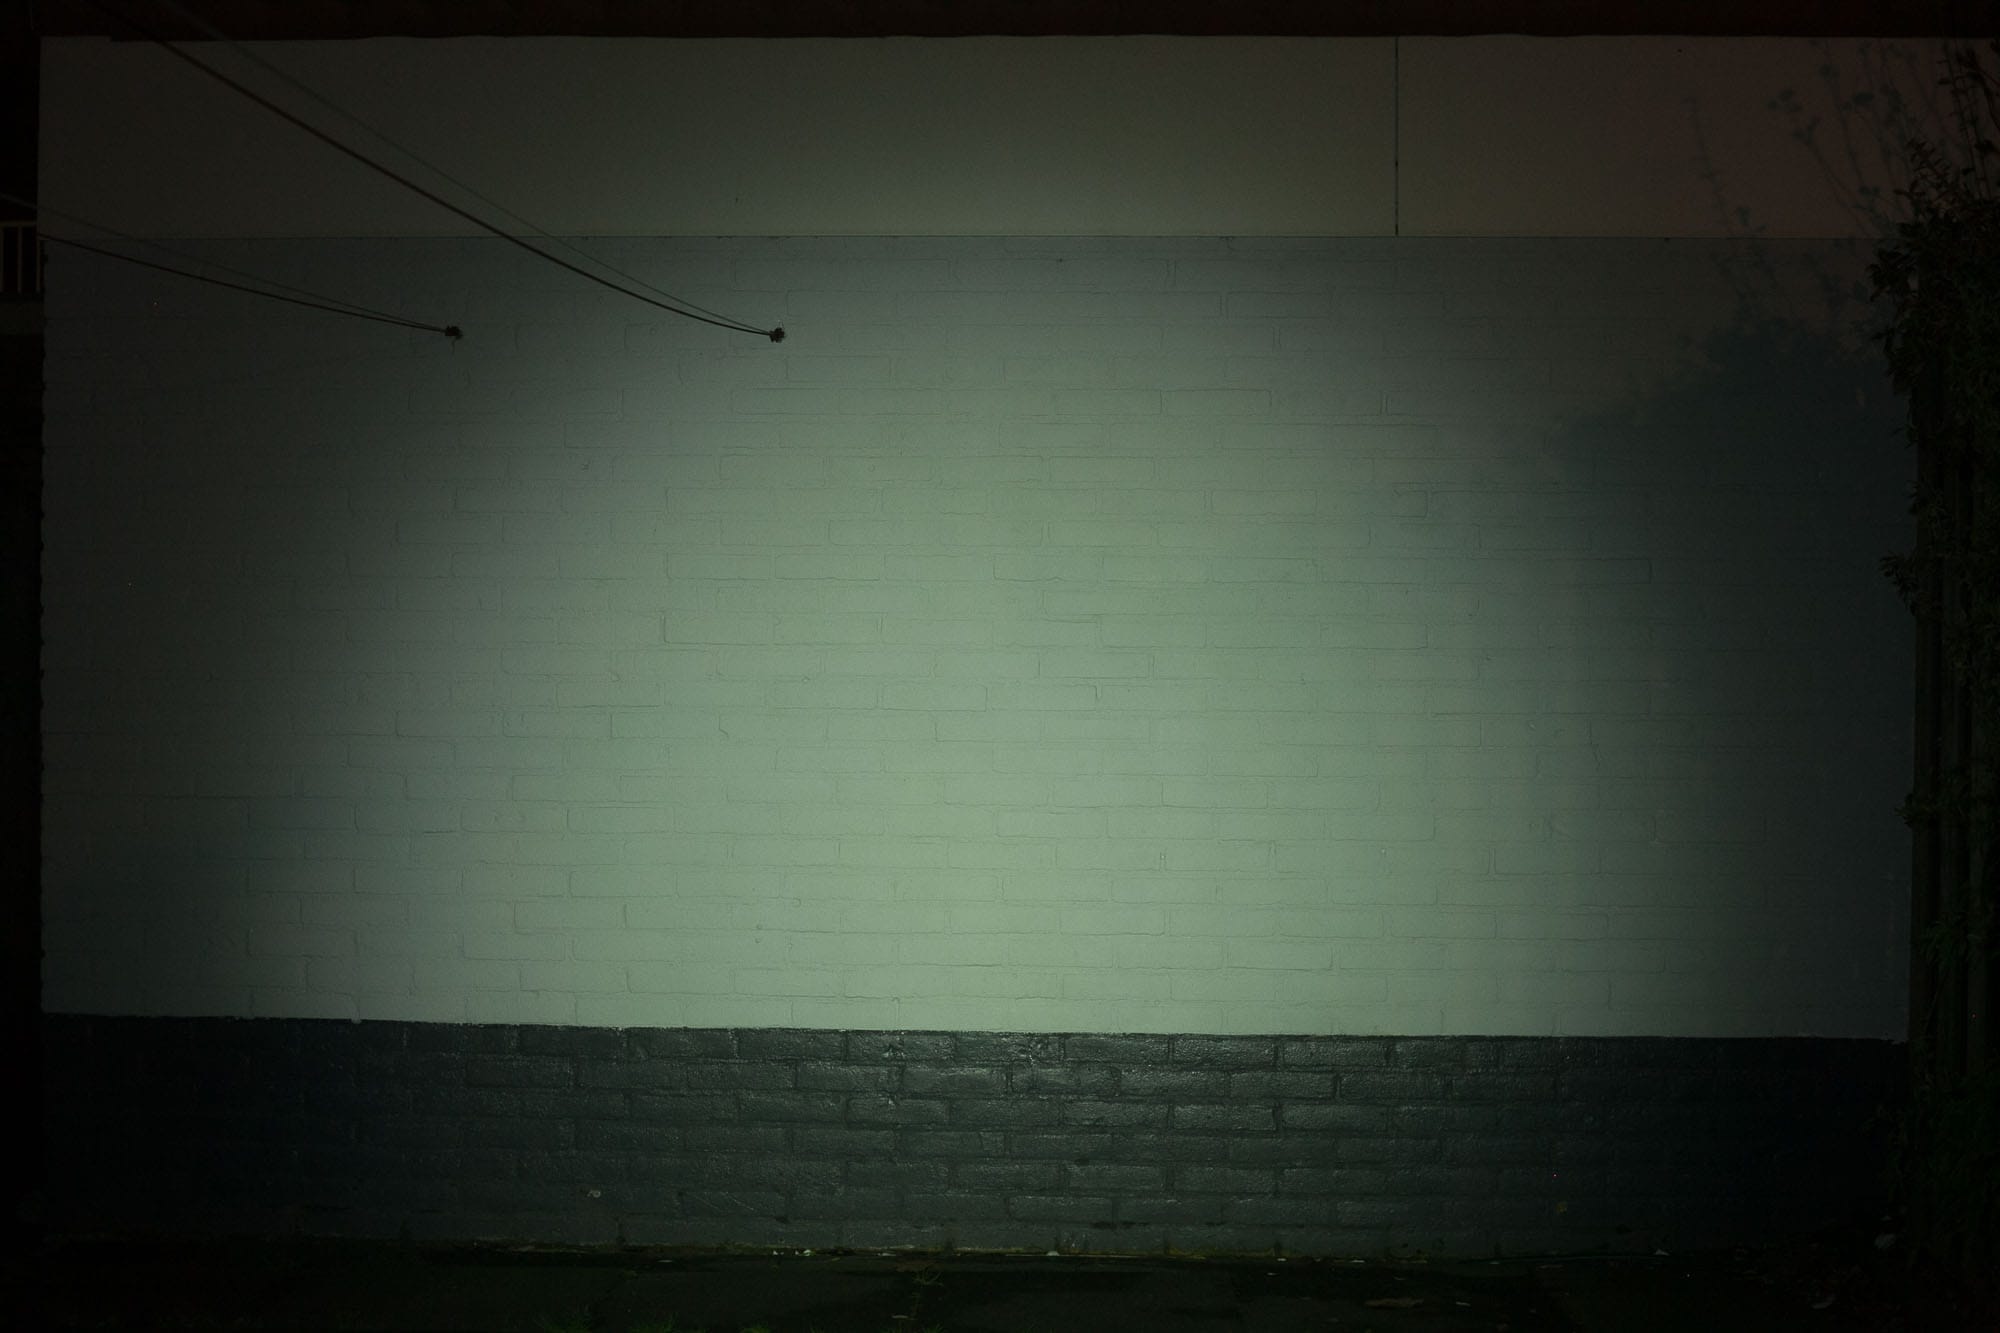
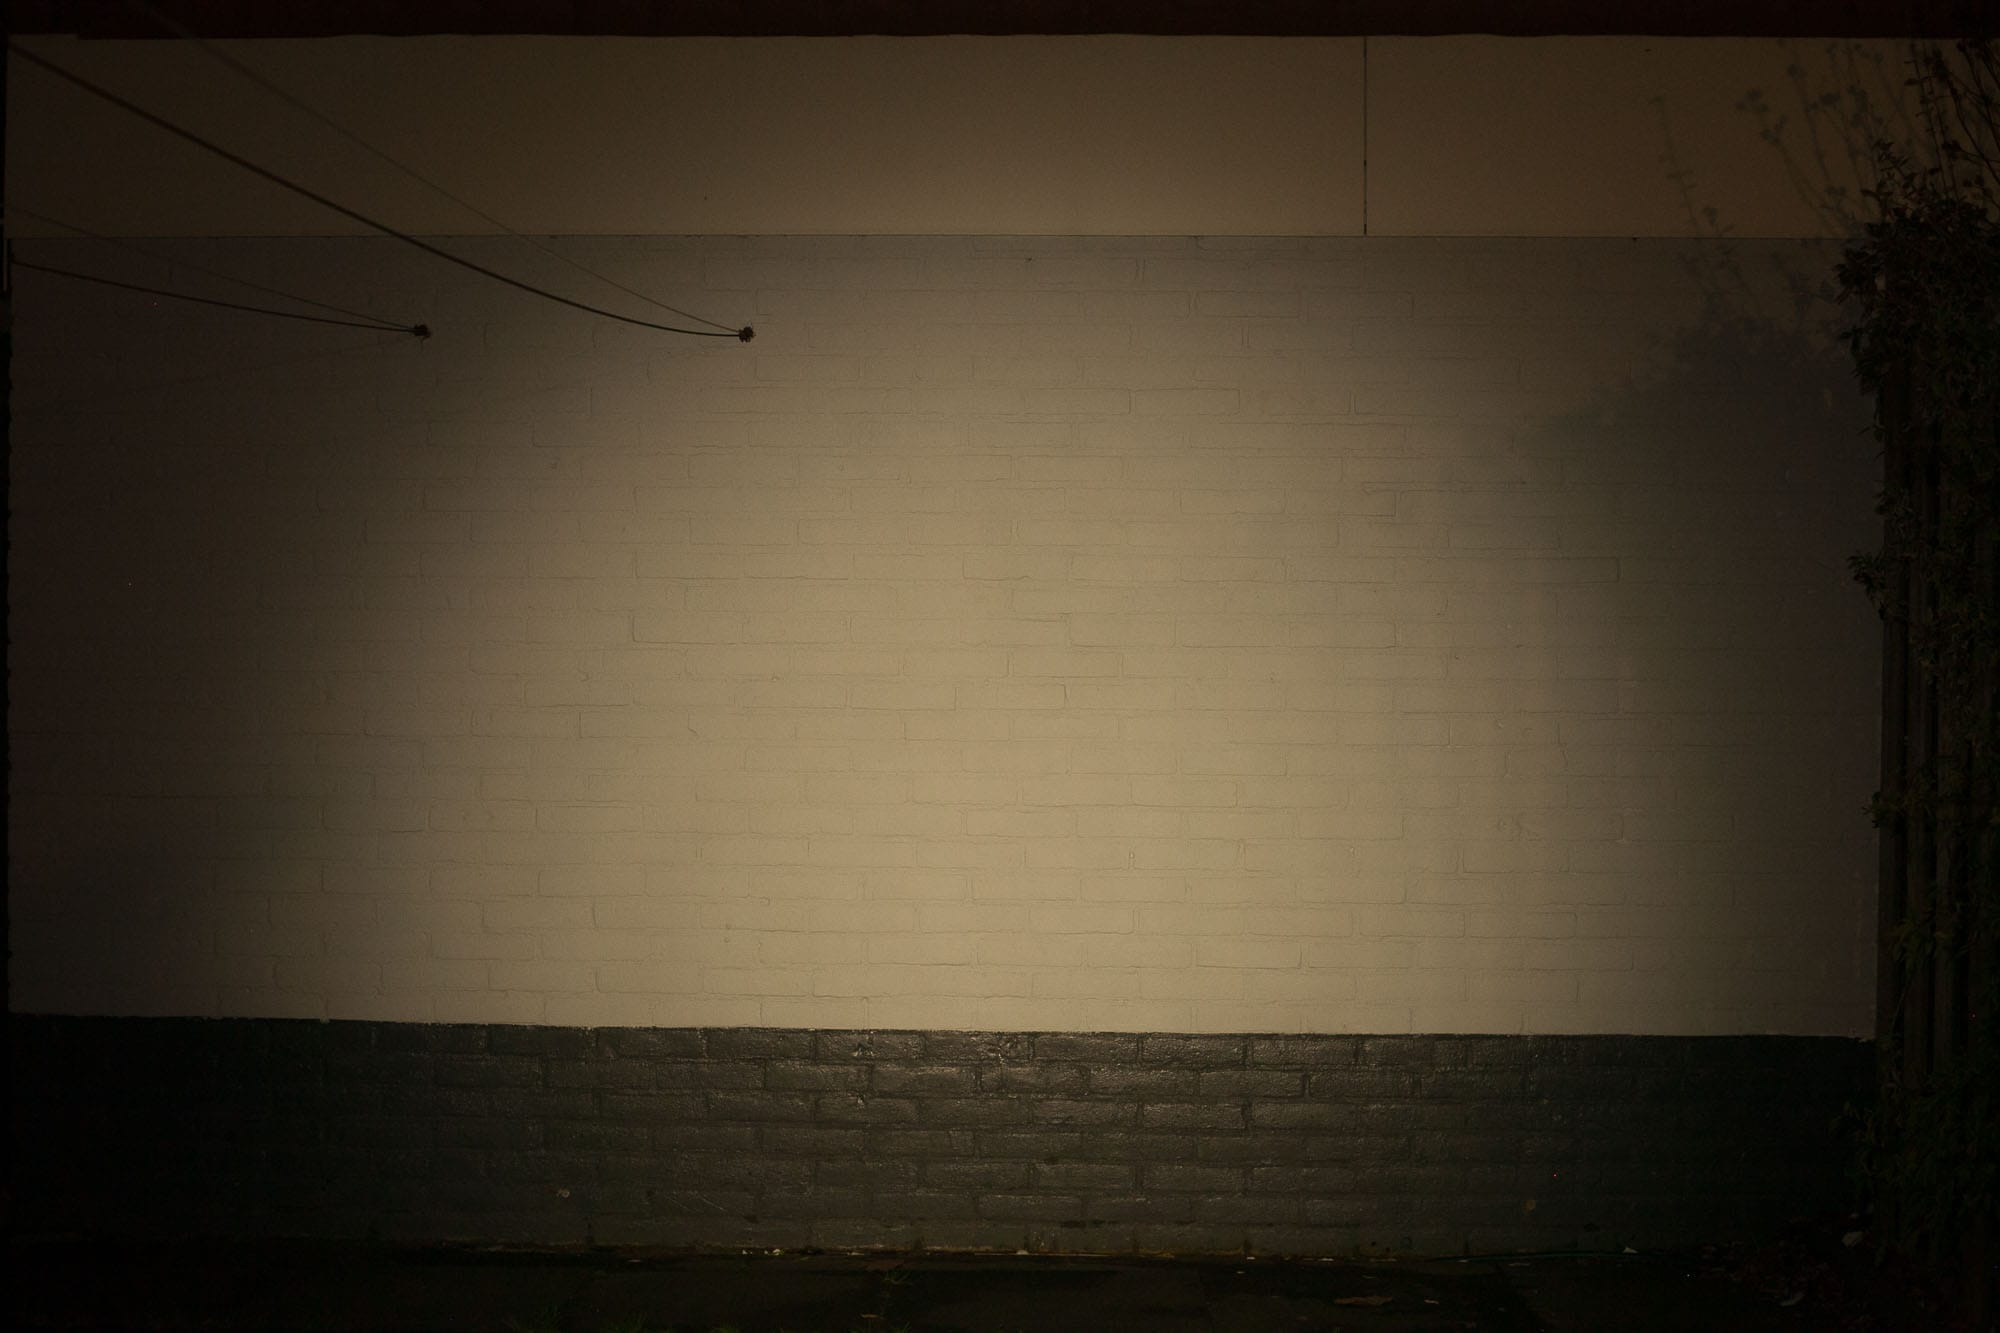
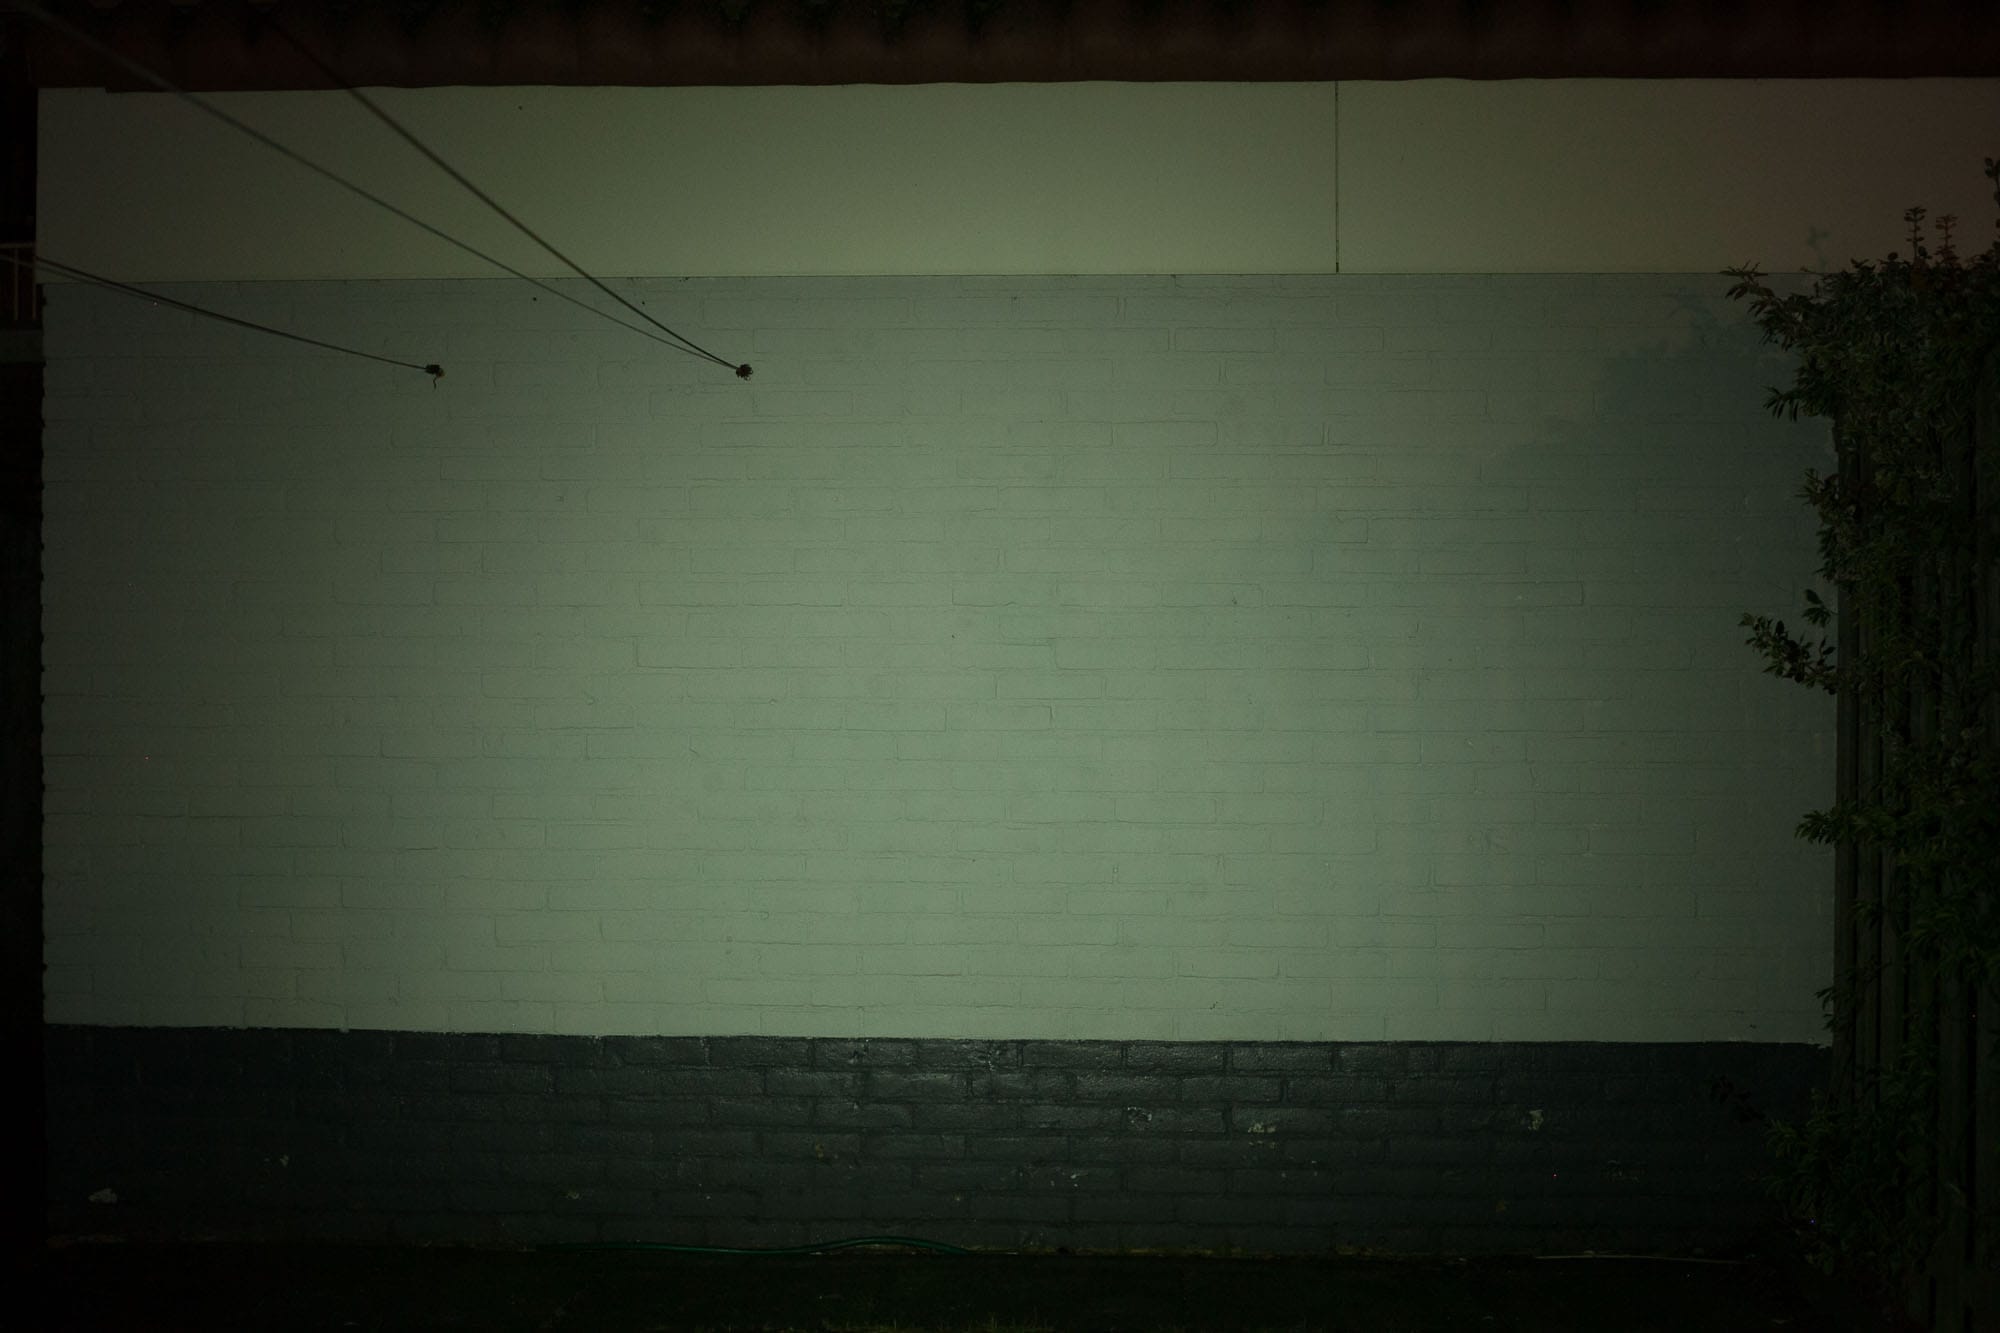
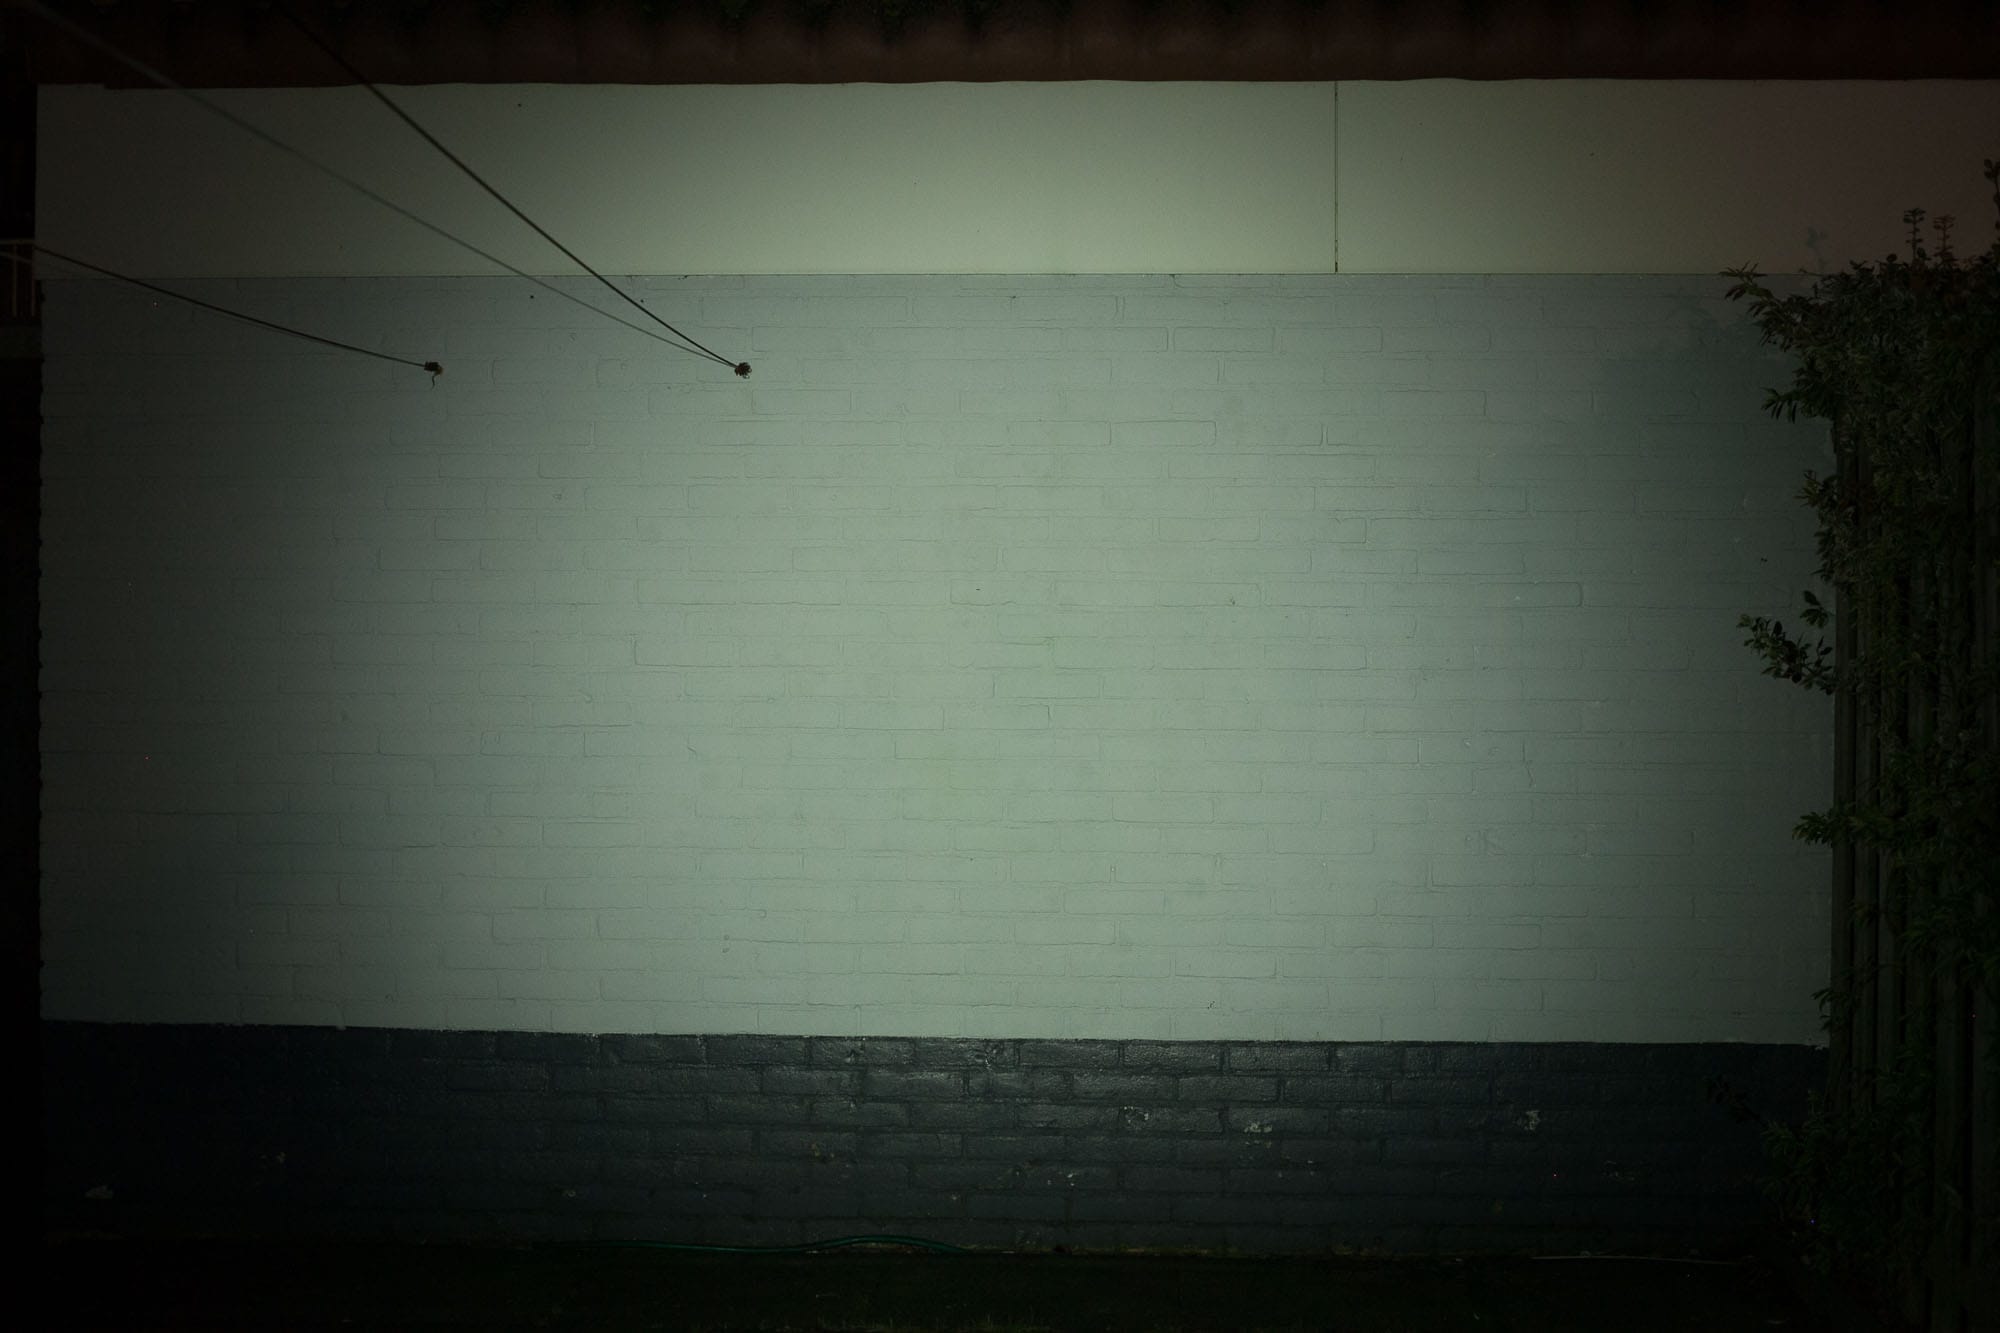
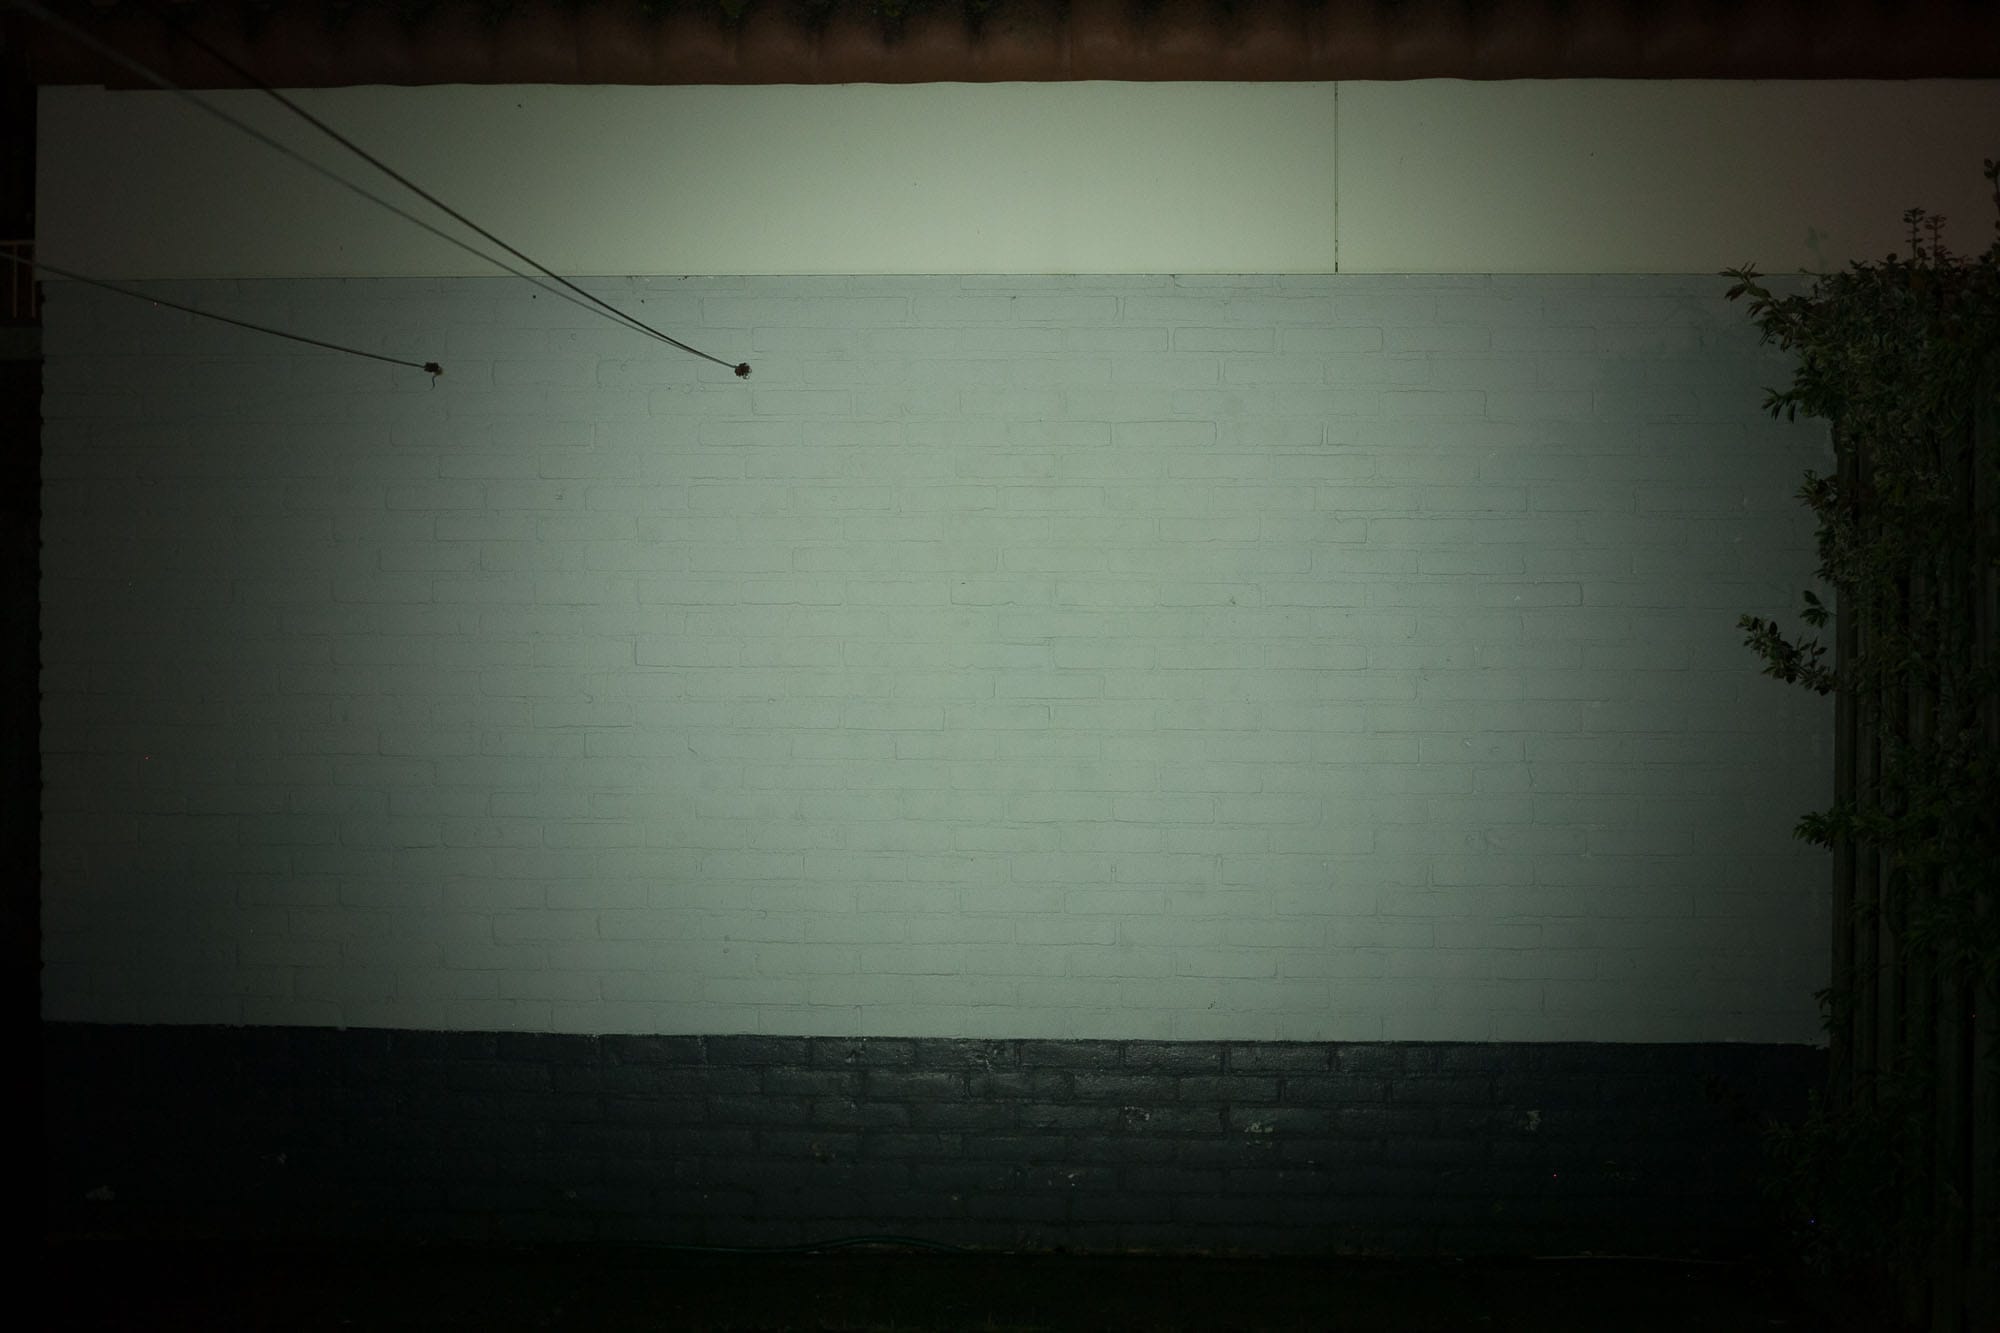
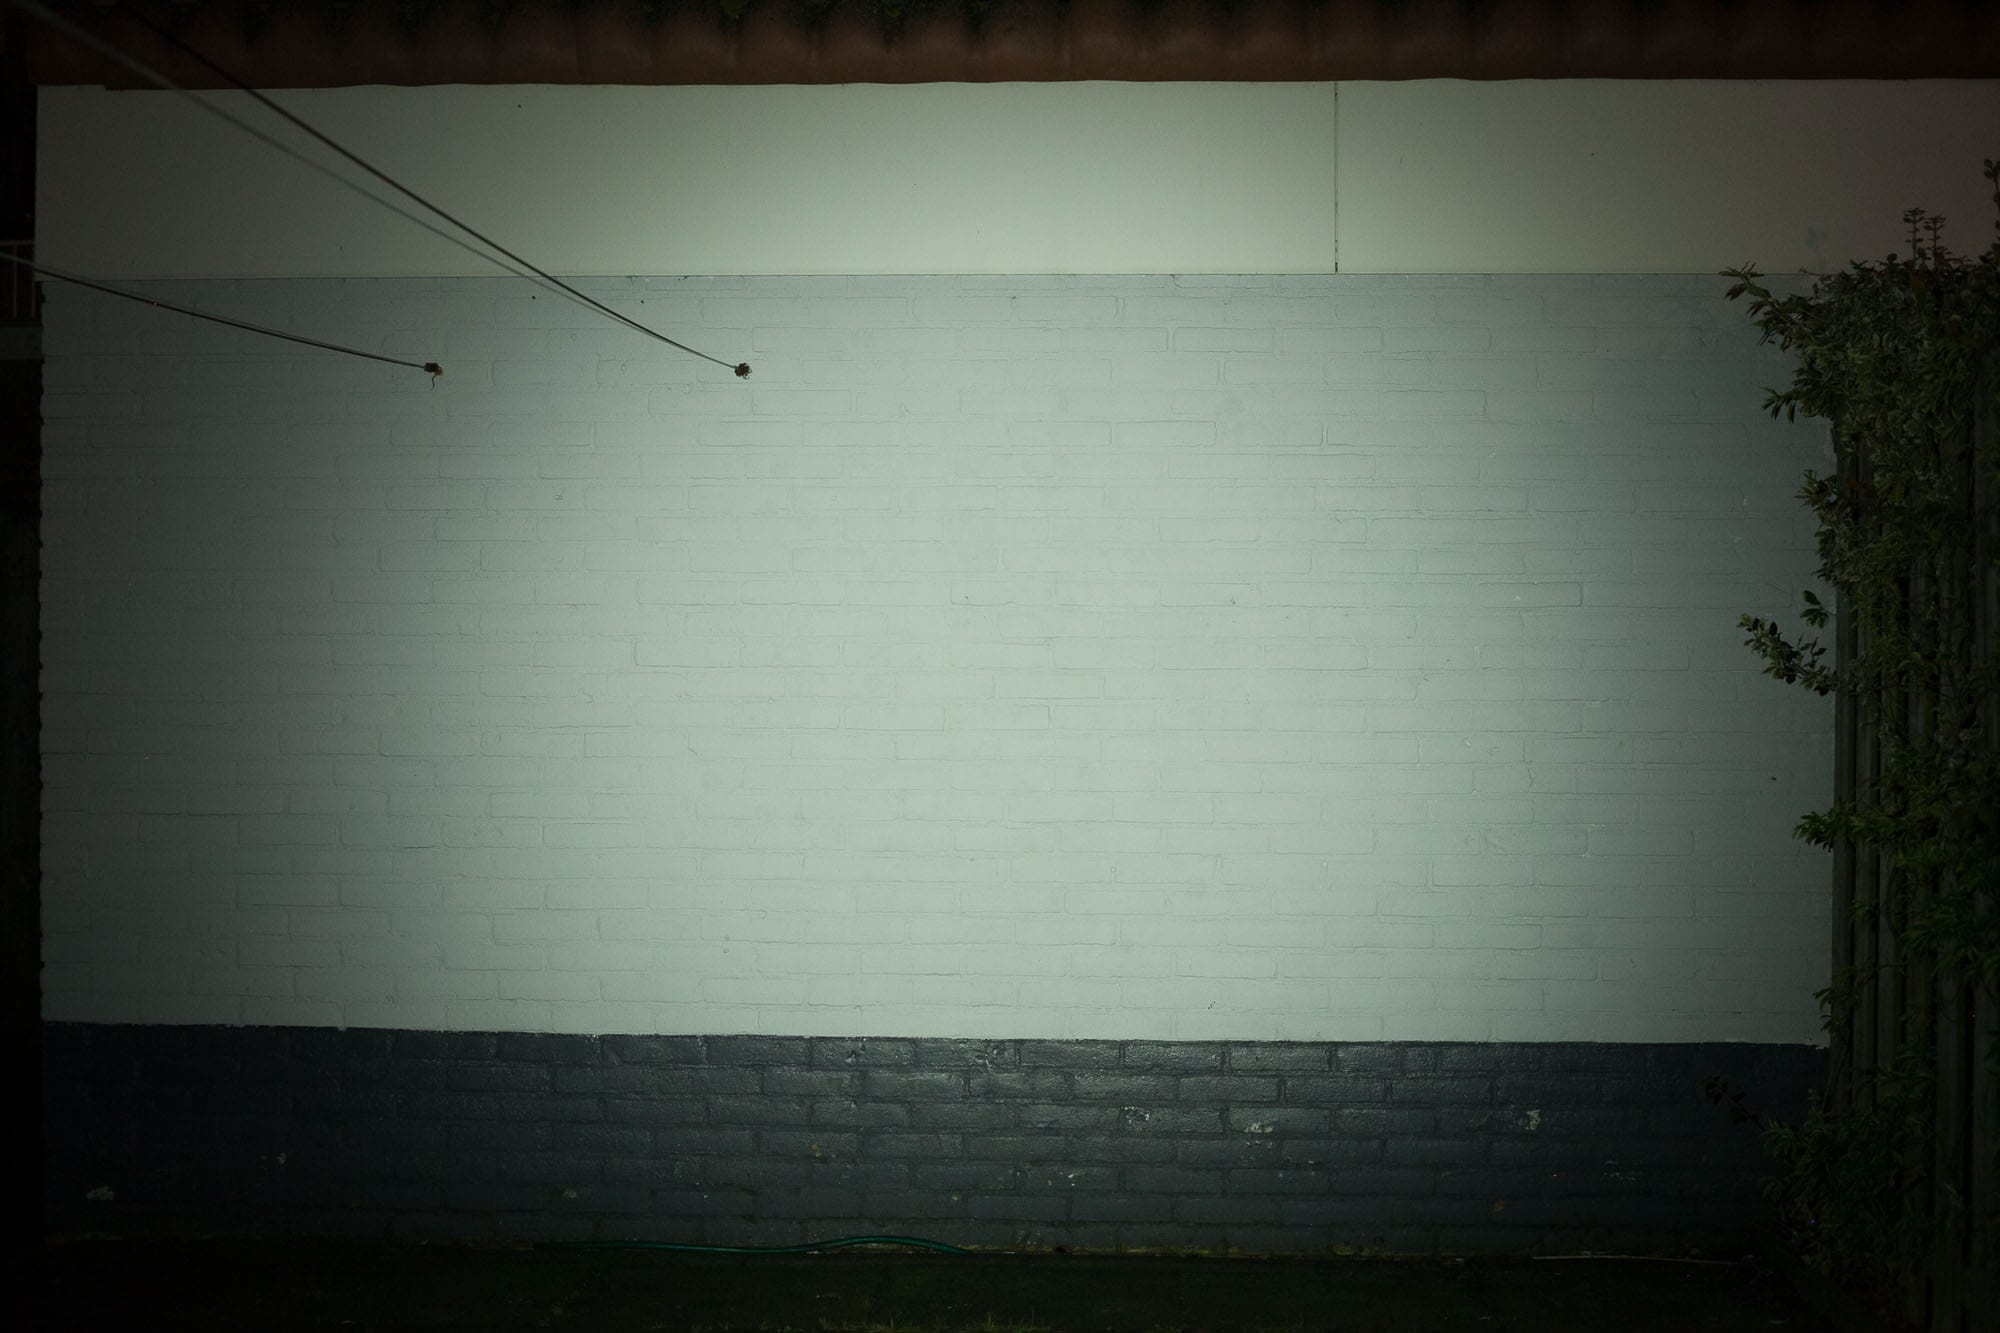
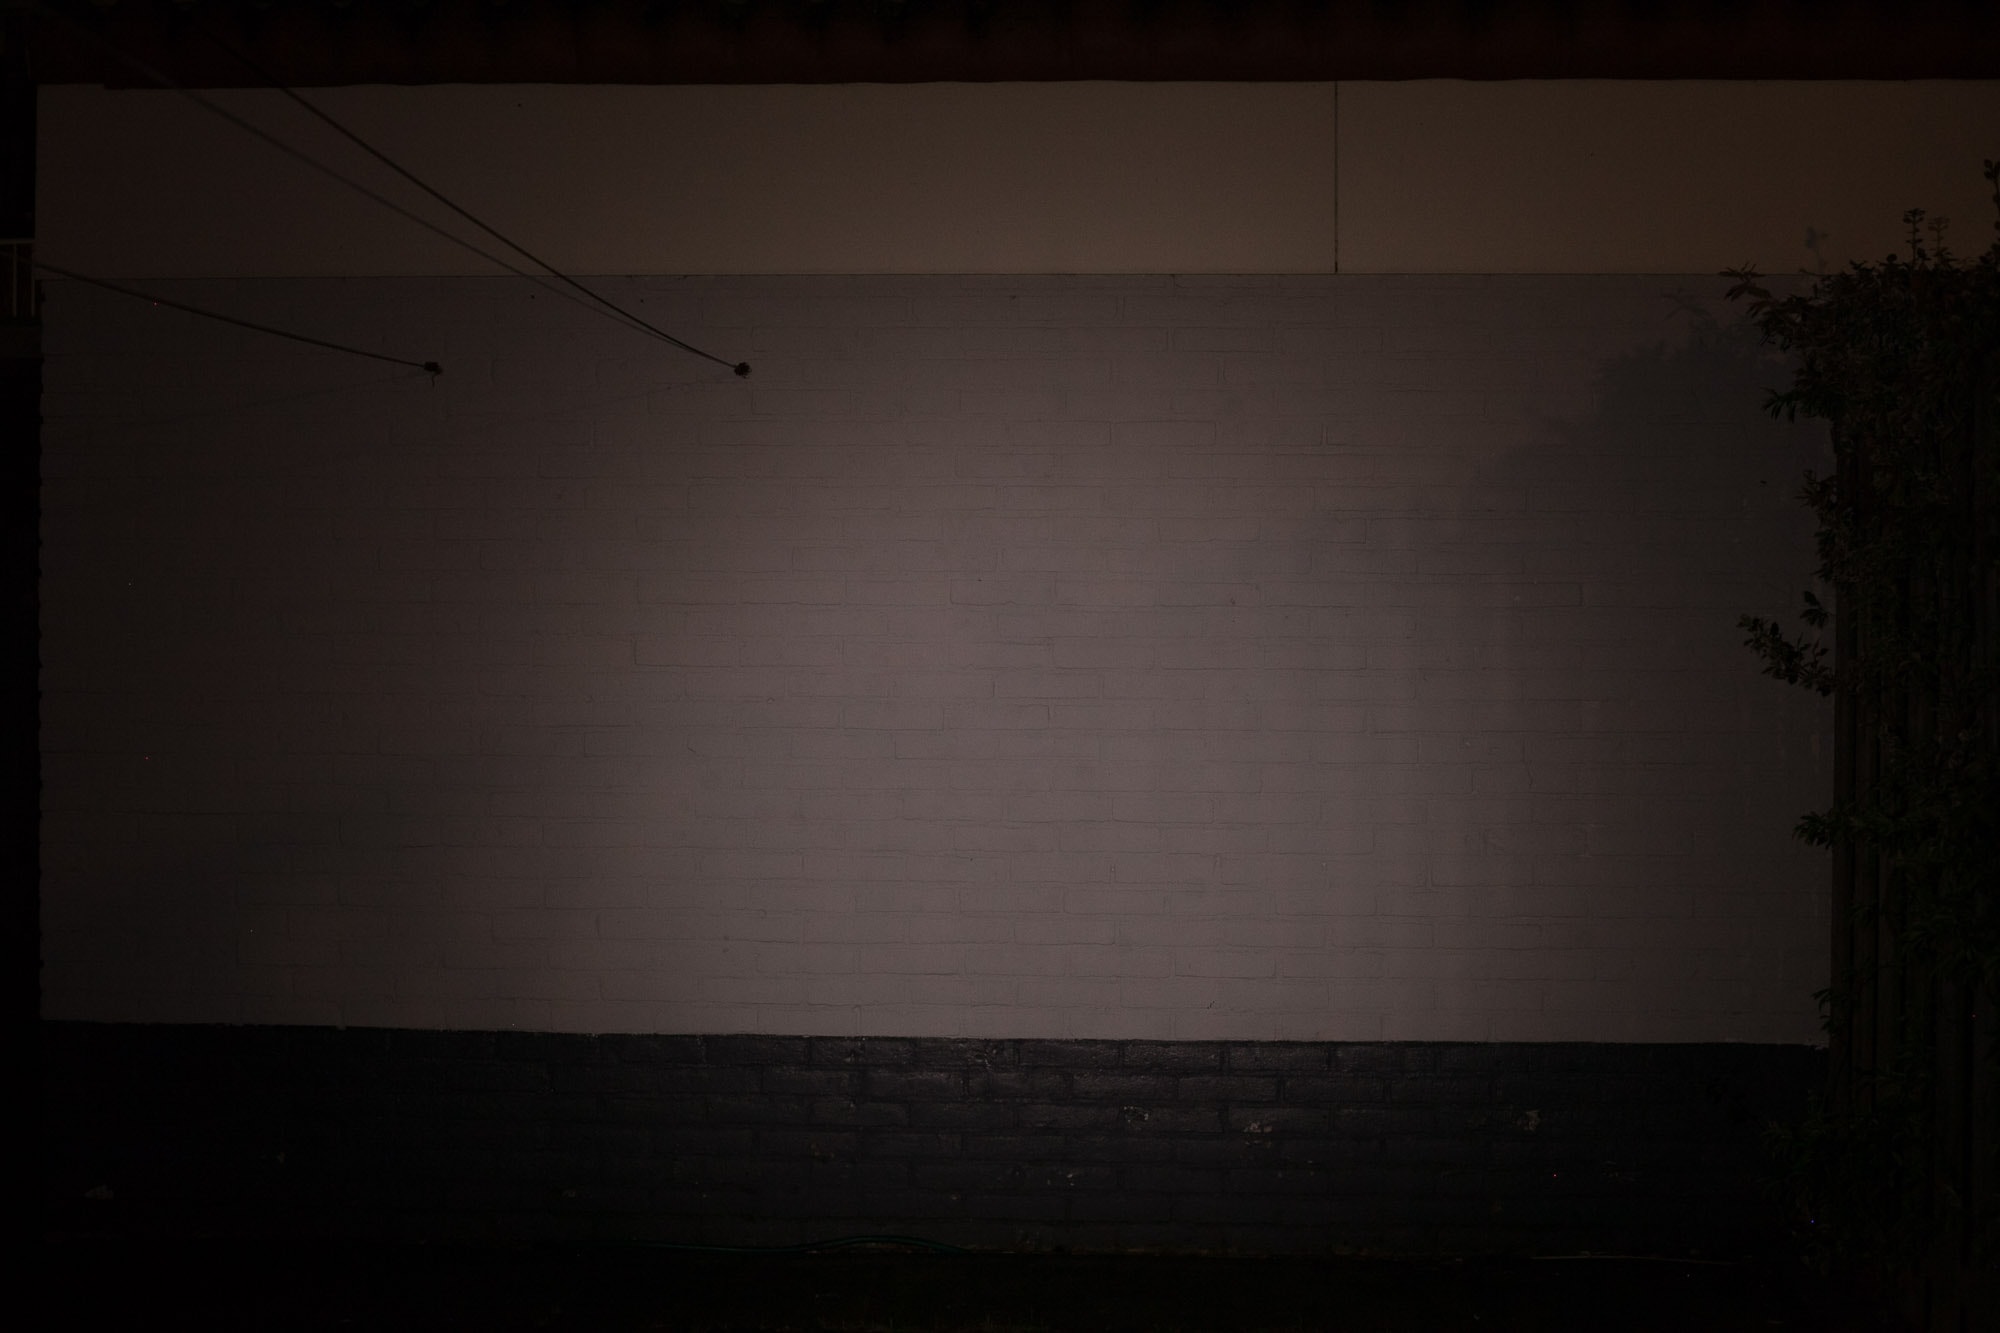
There is no major difference in output between the v1 and v2, even though the v1 is a tad brighter when measured. In person, this is really not an issue. The real difference is visible in the runtime graphs, after about 2 minutes. Then the difference becomes much more apparent.

Disclaimer: This flashlight was sent to us for review at no cost by Olight. We have not been paid to review, nor have we been holding back on problems or defects.
Final Verdict
Pros
- Simple UI with 2 modes
- 2-way pocket clip (now not easily detachable)
- Works with Alkaline, NiMH, NiCad, and even 10440 batteries
- Plenty bright for its size.. the brightest in fact
- No PWM
- Able to set your initial brightness (either High or Low)
Cons
- Need to use the pocket clip in order to attach it to your keys
- Manual is not clear about changing initial mode changing, with Figure 5-2 (9 taps)
- Inferior performance compared to v1
Explanation on star ratings:
1: Avoid: my phone flashlight would be a better choice – 2: Poor: significant defect or issues; almost unusable – 3: Average: some defects or issues; but still usable 4: Good: recommended (minor issues) – 5: Great: highly recommended

4 stars: ★★★★
While our star rating provides a reliable indicator, we encourage you to read the full review to make an informed decision based on your own needs and preferences.
The i3T 2 is definitely a very nice little flashlight. It’s currently the brightest dedicated AAA flashlight out there, especially if they are going to discontinue the v1. (Not taking into account the 10440 powered lights)
Still a great flashlight, but I was expecting better performance than the v1, but that is not the case.
It lacks a keychain attachment on the flashlight itself, so you need to use the pocket clip to connect it. This could be a pro and a con. For me, as a keychain light, I prefer not to use the pocket clip.
For EDC, the 2-way clip can come in pretty handy, as it clips a baseball cap without a problem, and it carries deeper in your pocket with the clip. Plus, you decide whether you want it to start with High or Low.
Just keep in mind to use the included Alkaline battery as soon as possible, and get yourself some rechargeable batteries like the Panasonic Eneloop, 10440 lithium ion, or the 1.5V Xtar lithiums.
Buy your Olight i3T 2 EOS with a discount
Use our exclusive 1lumen discount code to get an extra 10% off anything you order at Olightstore.com (USA). Coupon code: 1lumen
1lumen selects and reviews products personally. We may earn affiliate commissions through our links, which help support our testing.