1lumen selects and reviews products personally. We may earn affiliate commissions through our links, which help support our testing.
Olight Javelot review
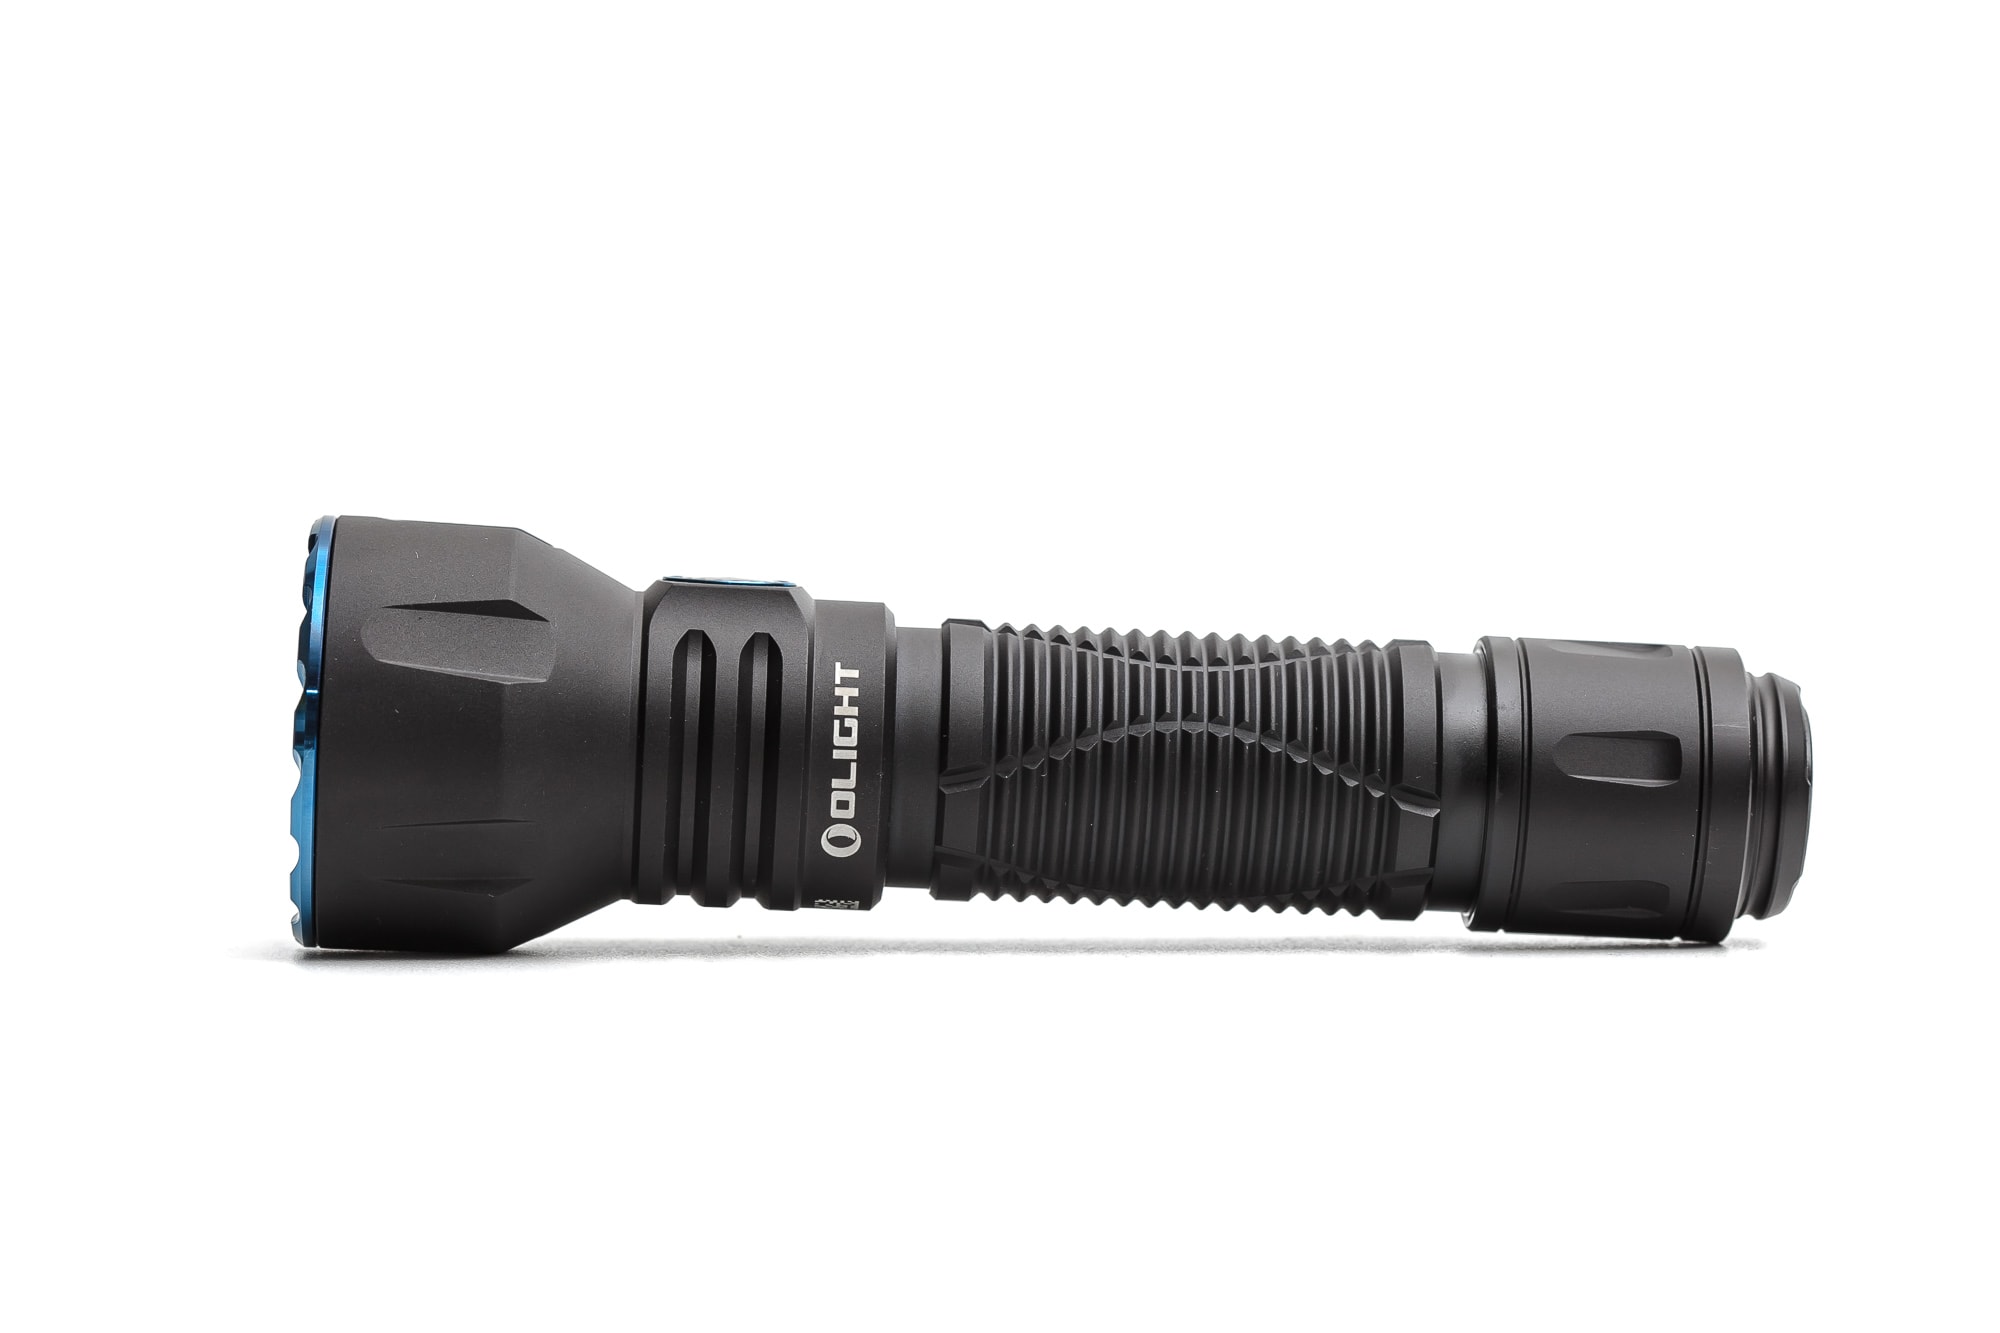
Olight Javelot specifications
| Brand/model | Olight Javelot |
|---|---|
| Flashlight category | Pocketable long-range / tactical long-range |
| LED | N/A |
| Max. output | 1,350 Lumens |
| Max. beam distance | 730 meters |
| Max. beam intensity | 134,000 cd |
| Battery config. | 1*21700 |
| Onboard charging | USB-C |
| Modes | 5 |
| Blinkies | Strobe, SOS |
| Waterproof | IPX8 |
| Review date | March 2024 |
Review intro:
Olight is a well-established brand in the flashlight industry, with very interesting designs and features, and some of the best-performing flashlights.
Will the real Olight Javelot please stand up?
Let me introduce you to the original Olight Javelot flashlight. In the past, Olight produced many types of Javelot flashlights, such as Mini, Pro, Tac, or Turbo. But why did Olight wait to produce a ‘normal’ Javelot? And was it worth the wait?
Let’s find out.
What’s in the package
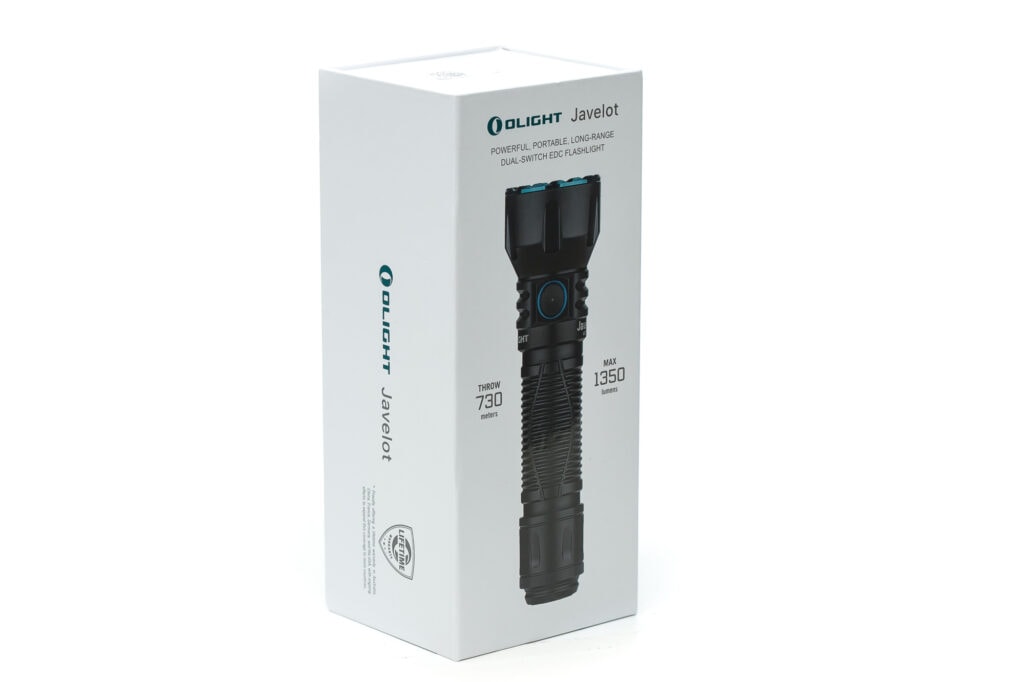
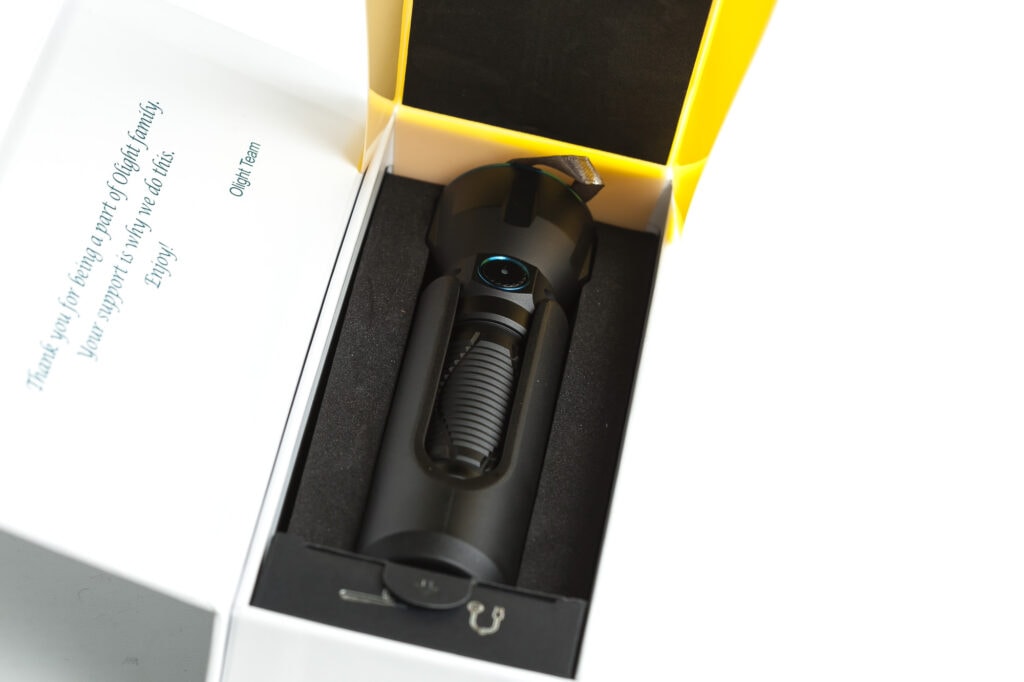
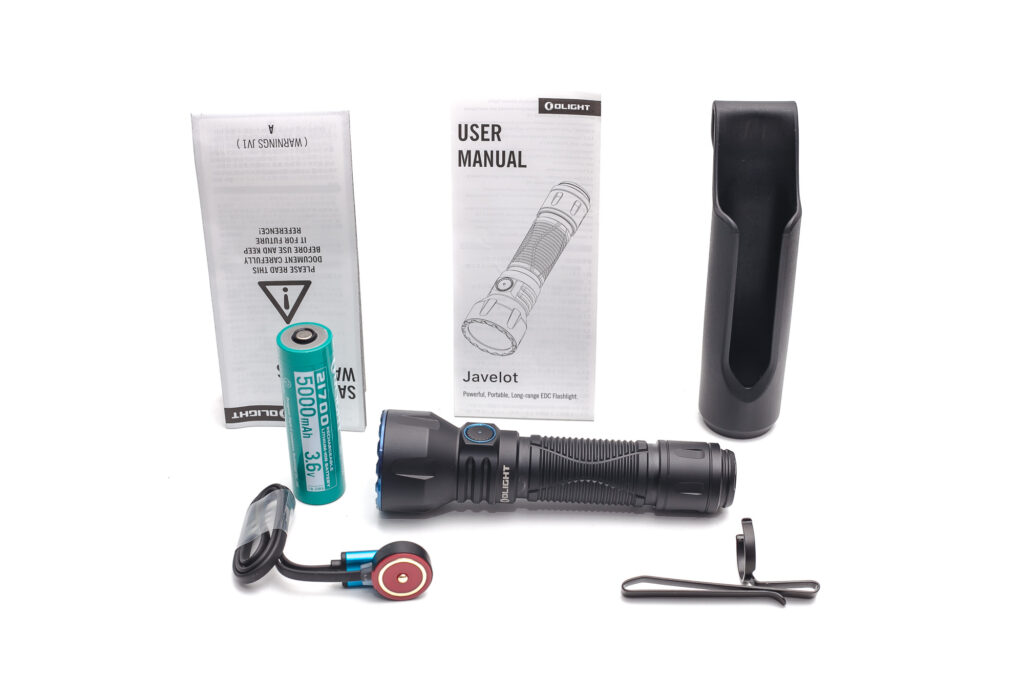
Olight is known for having some of the best packaging in the flashlight industry. The packaging is very well organized and thoughtfully laid out. Similar to other Olight boxes, there’s an image of the flashlight on the top of the box with its specifications. Here’s what you can expect to receive:
- Olight Javelot
- Plastic holster
- Pocket clip
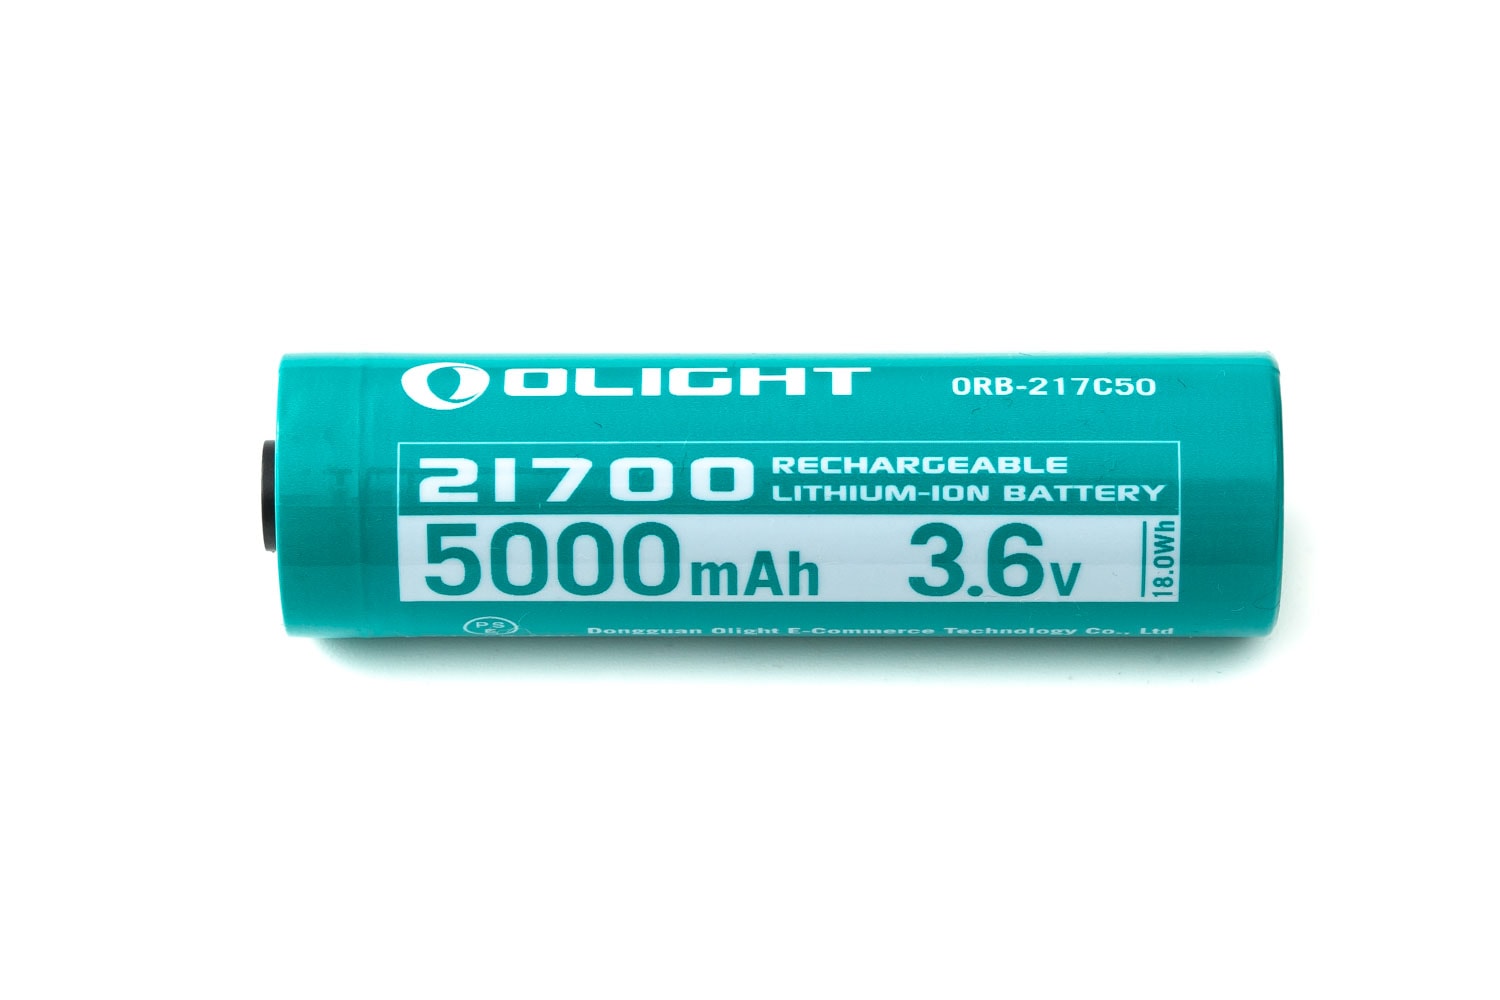
- Olight ORB-217C50 battery (21700 with 5,000 mAh)
- Magnetic charging cable MCC
- User manual
- Safety warning
Flashlight in use, Build Quality, and Warranty
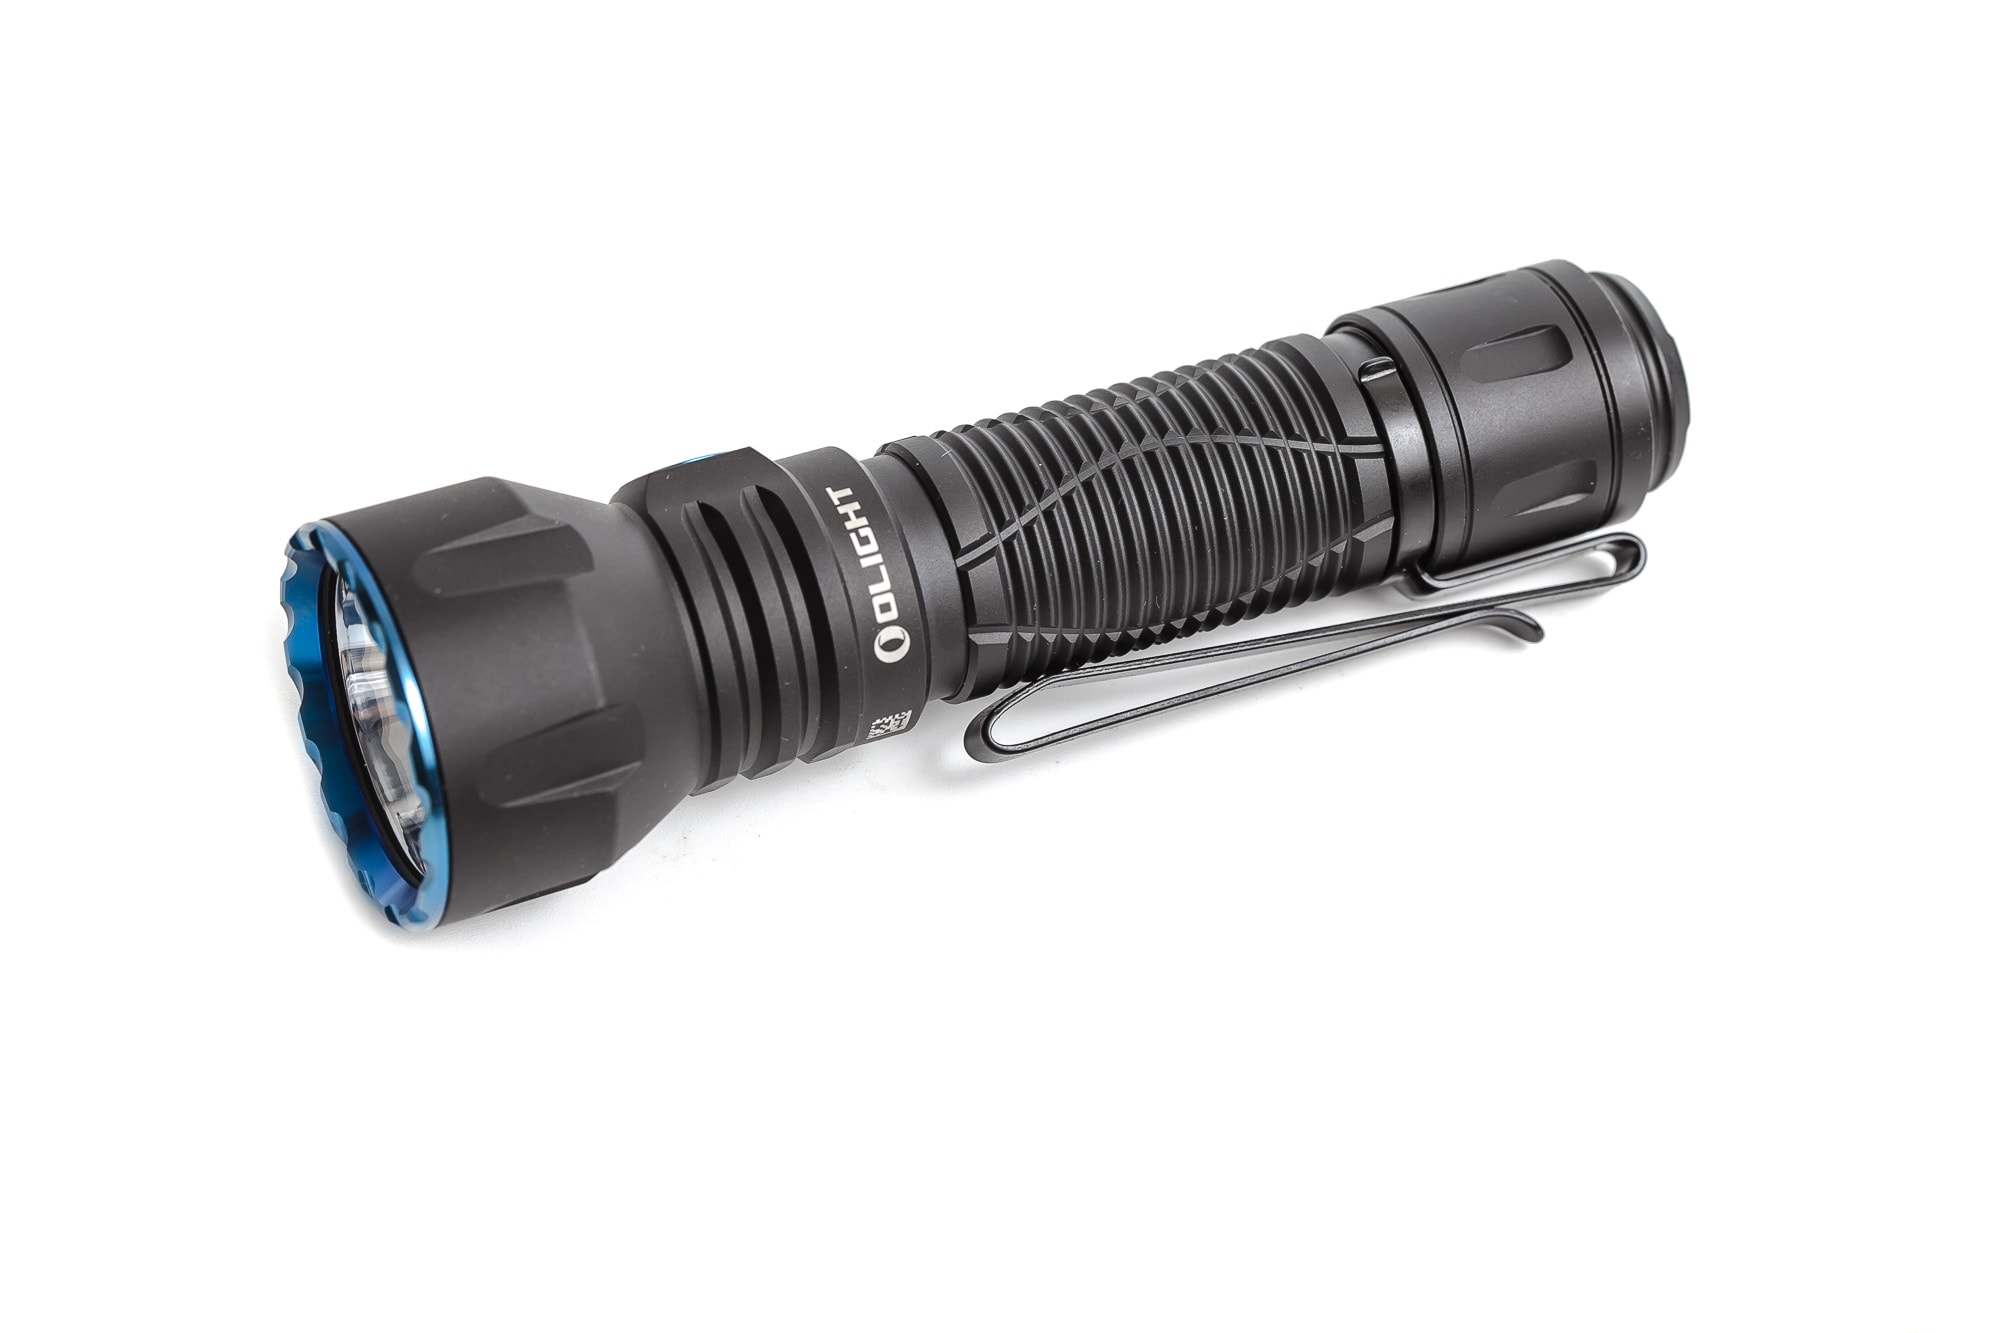
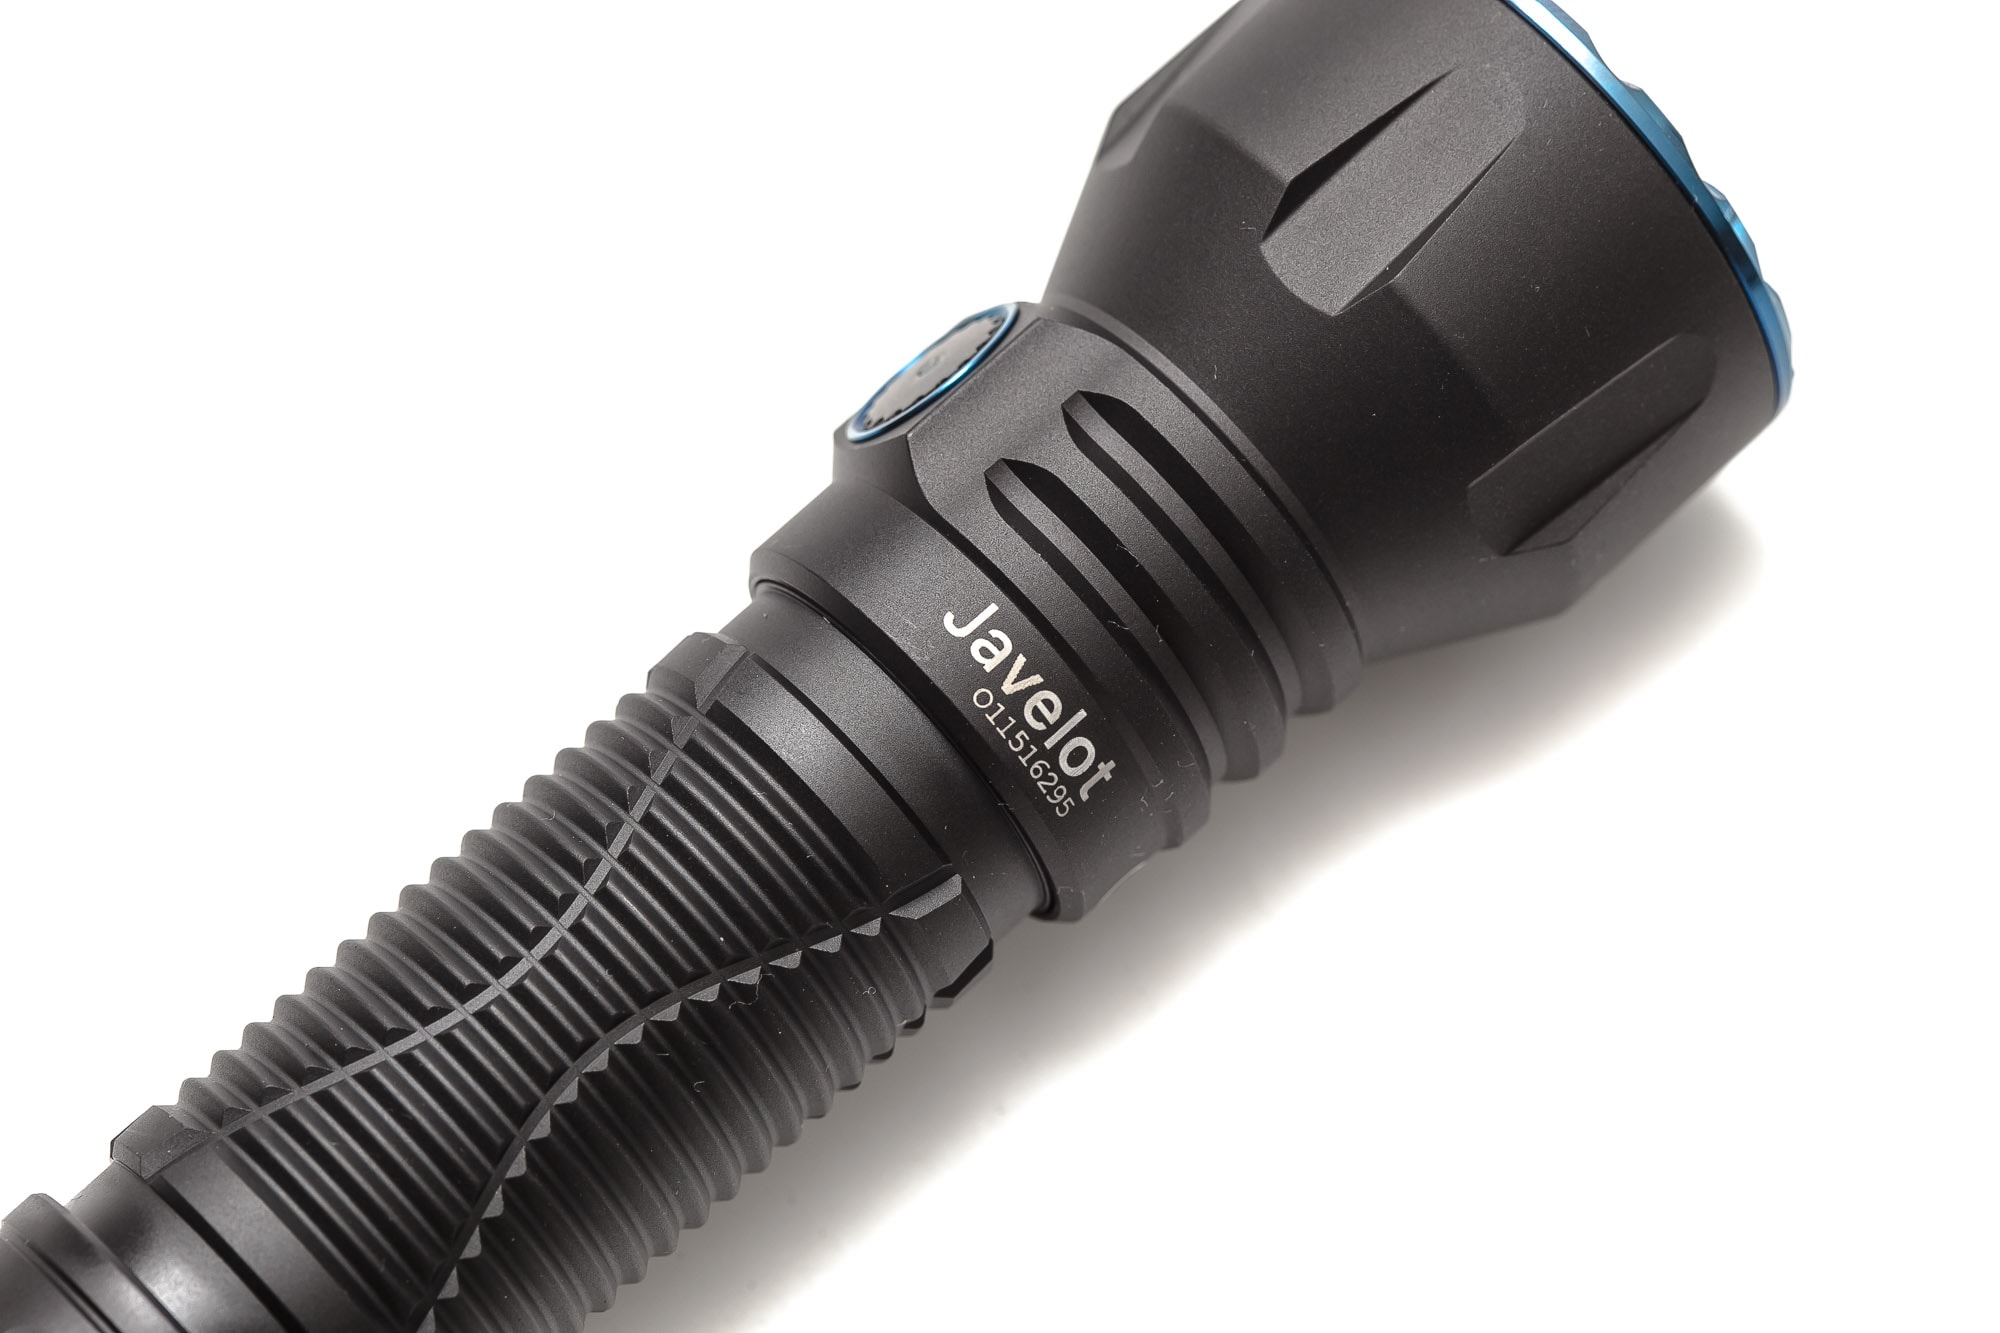
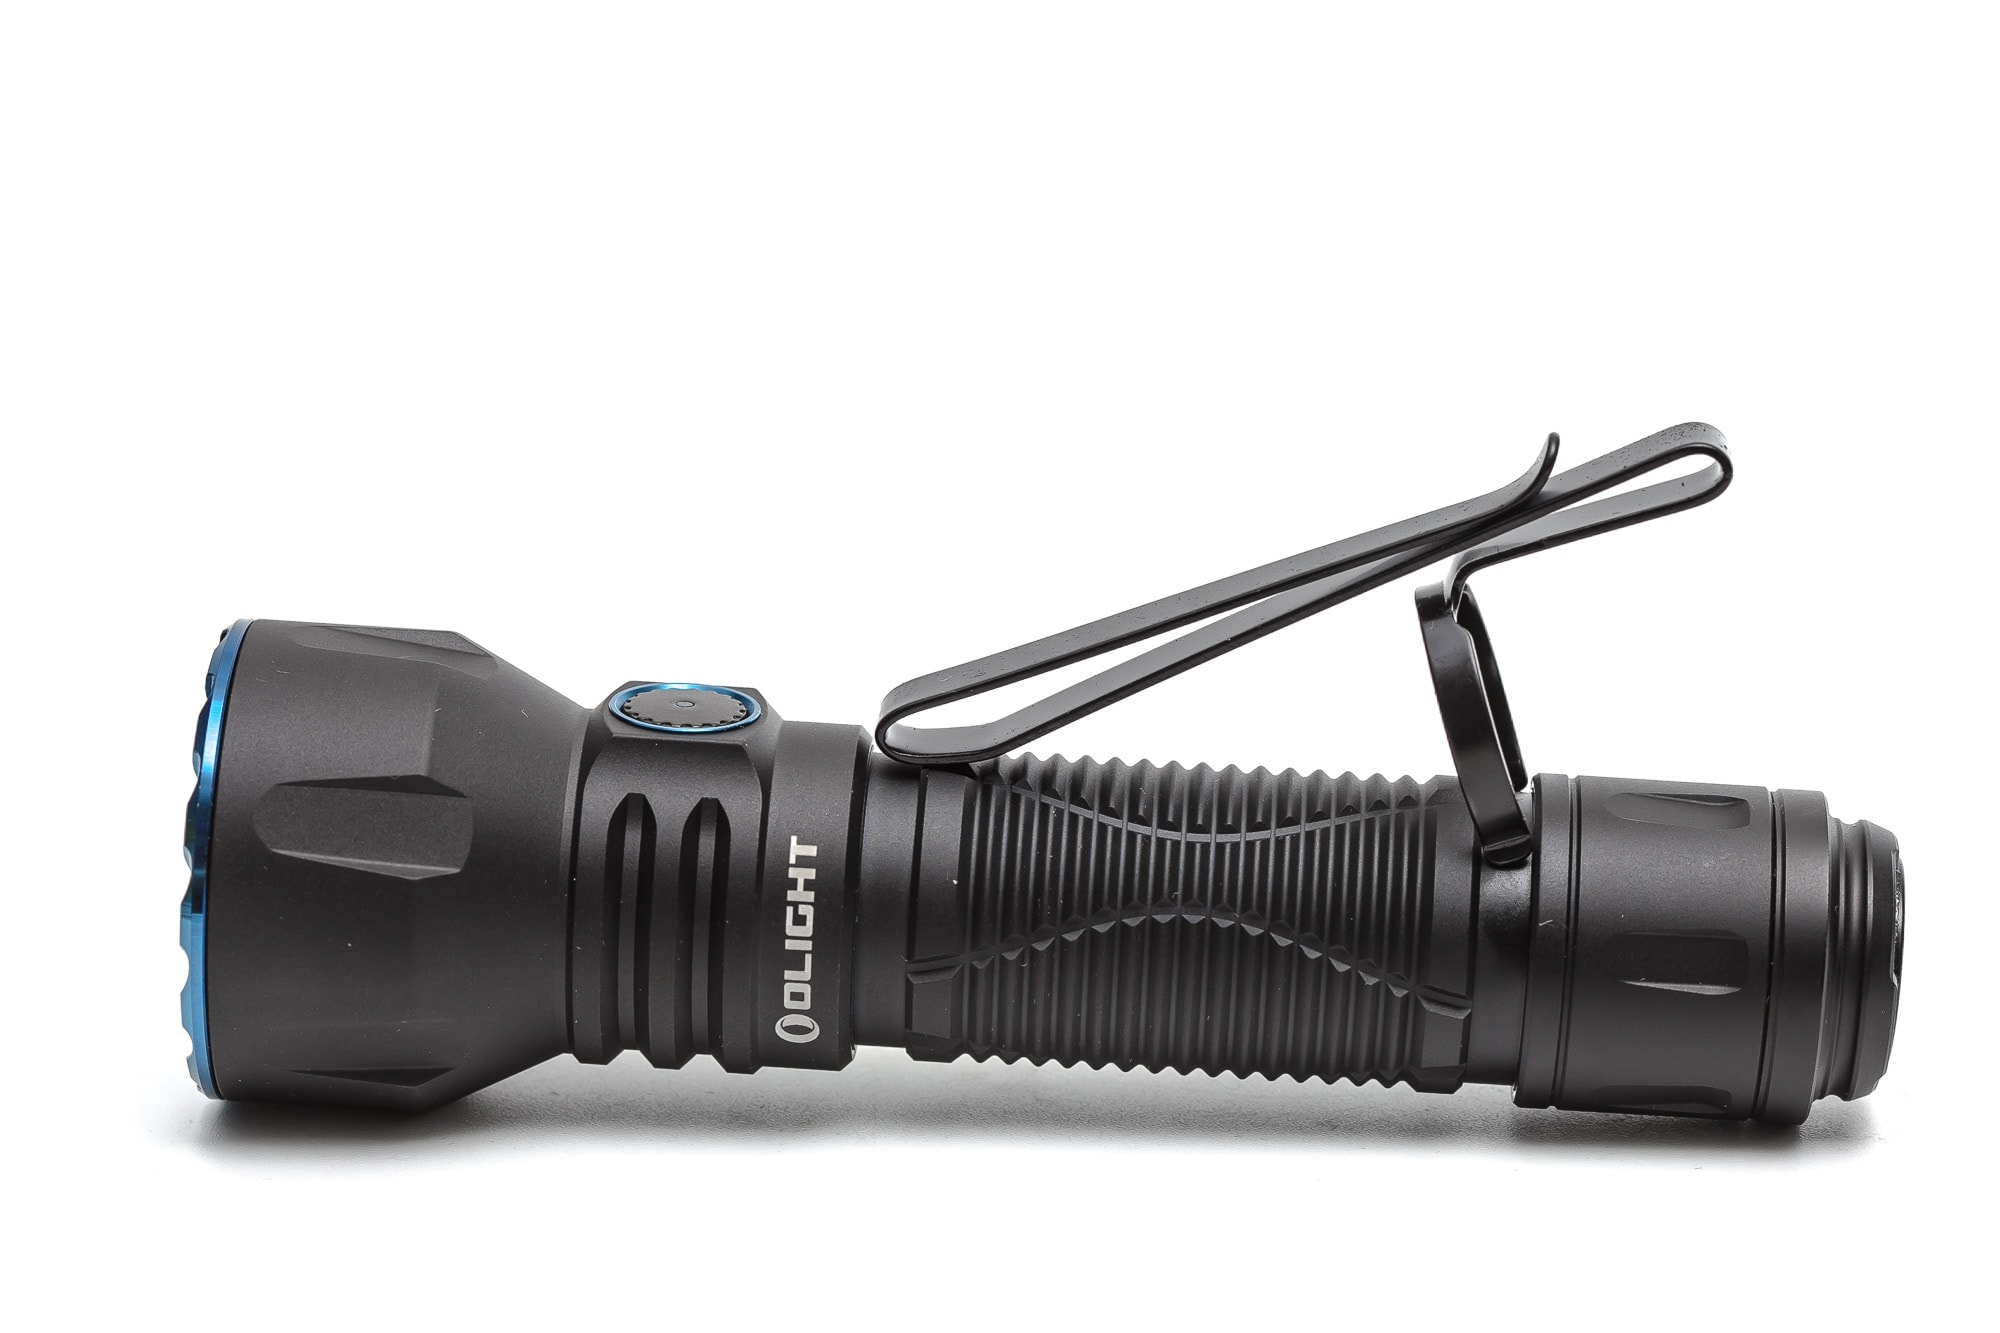
Each Olight model I’ve reviewed thus far has been exceptional in terms of build quality, fit, and finish. The Javelot continues this tradition, and it has a nice black coating with a beautiful matte finish.
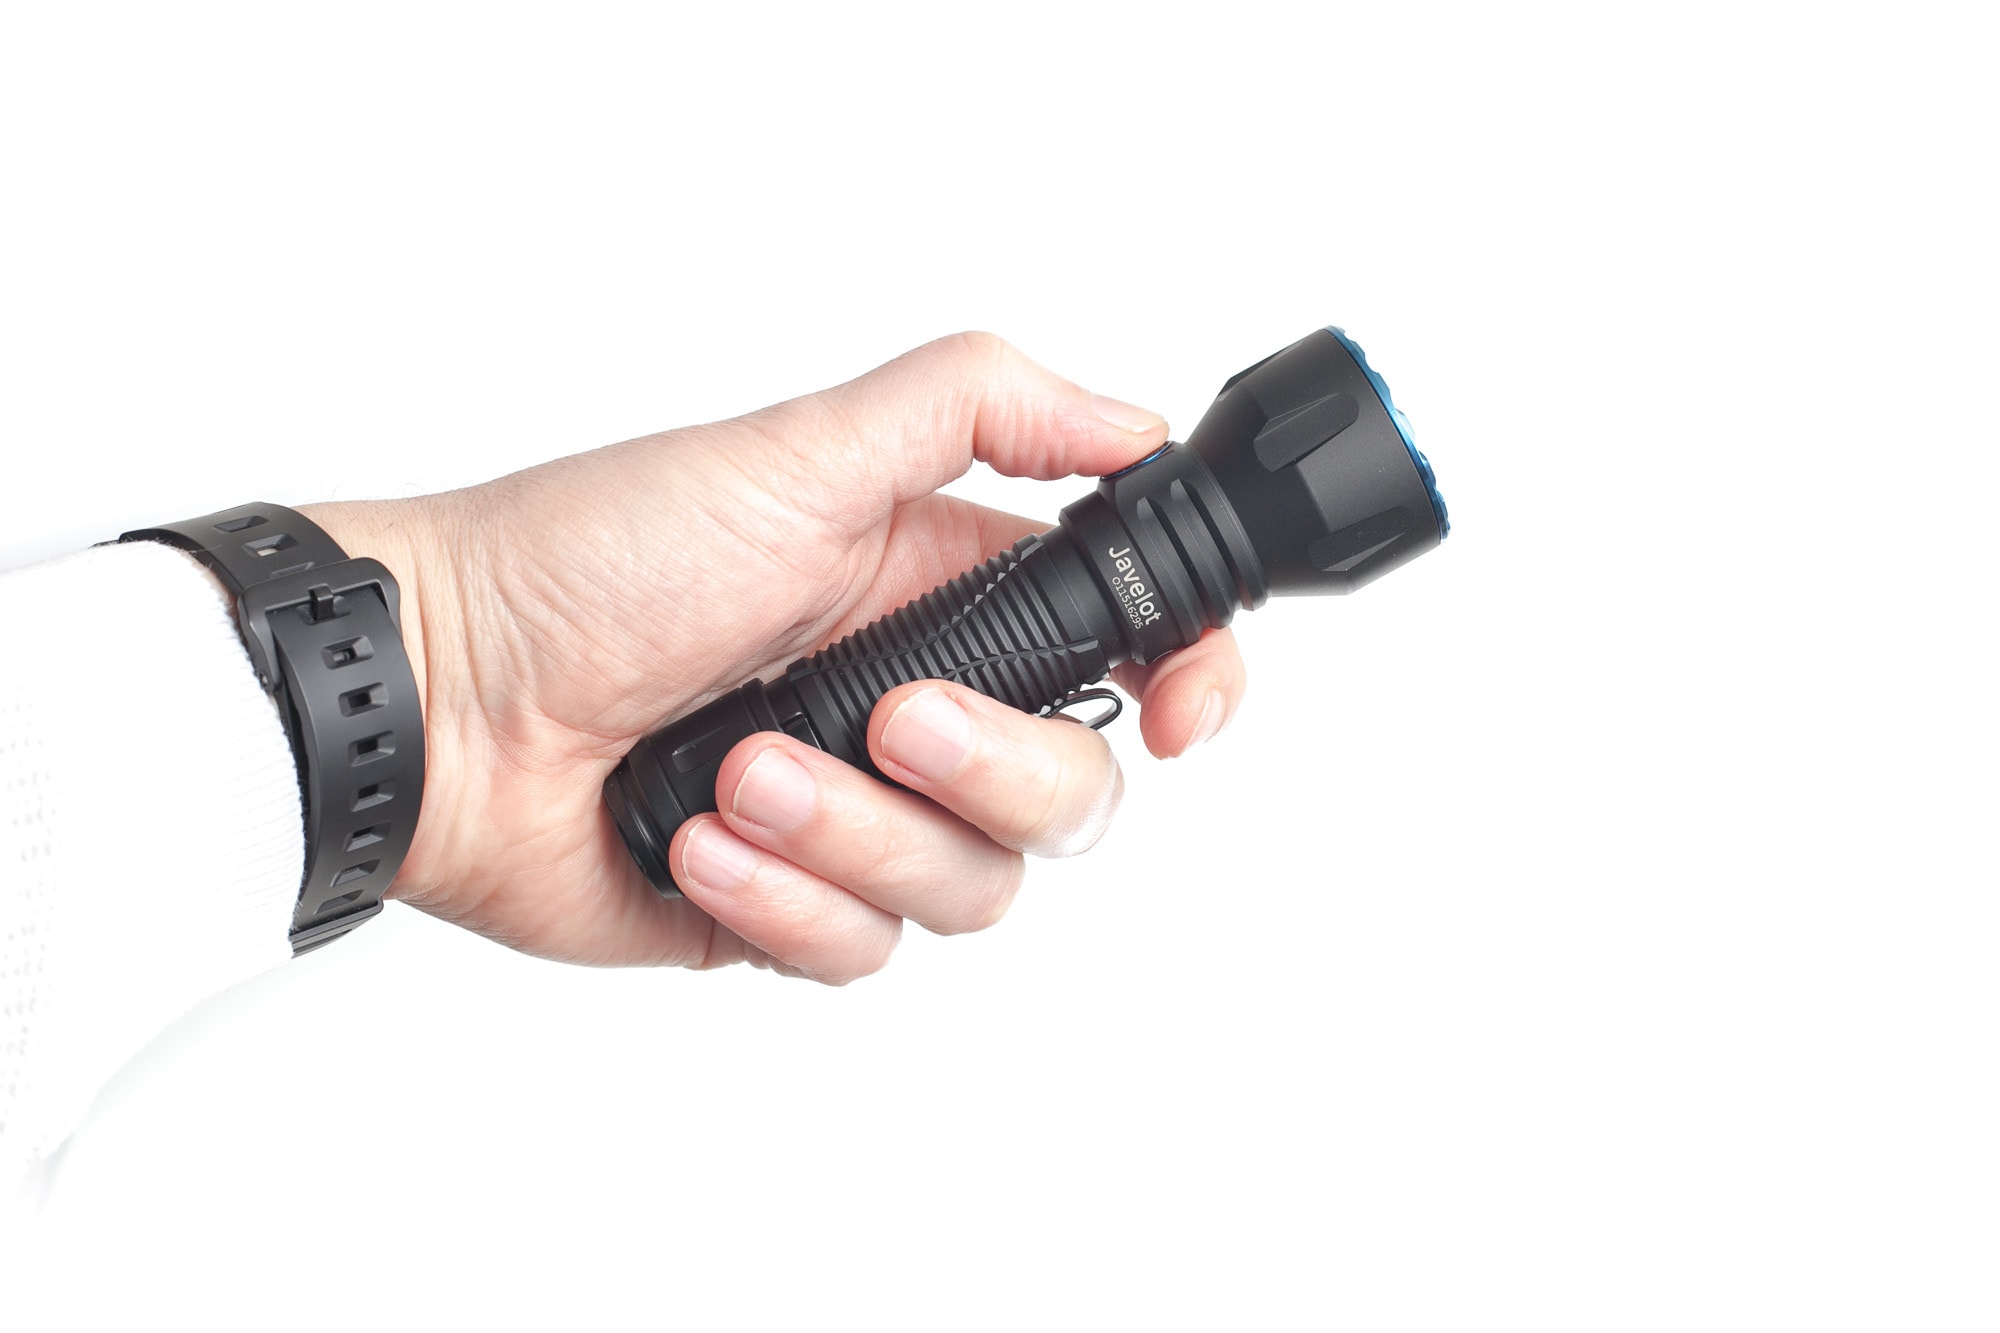
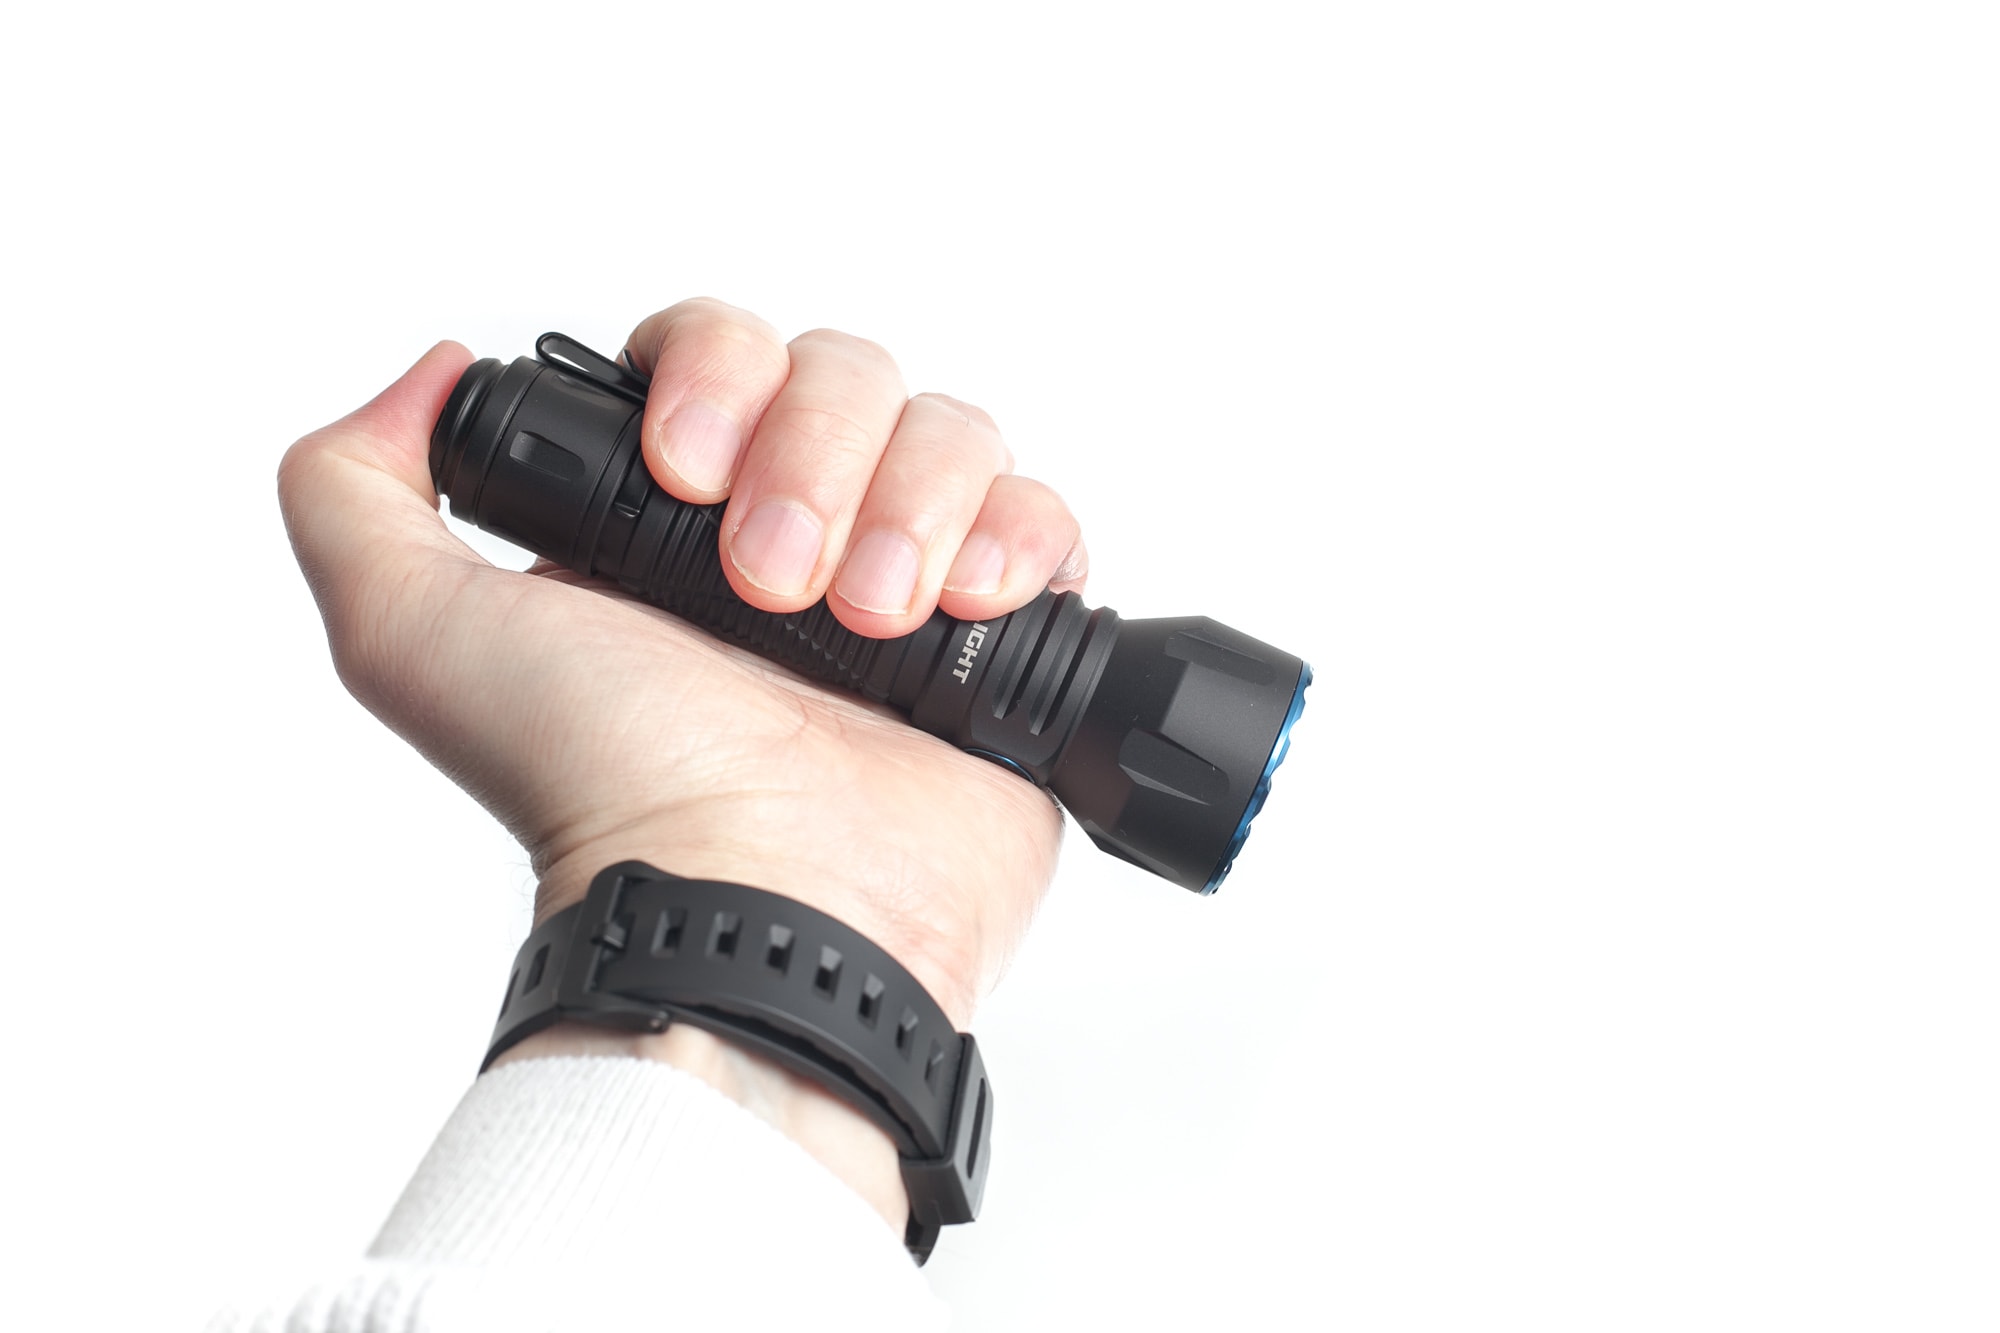
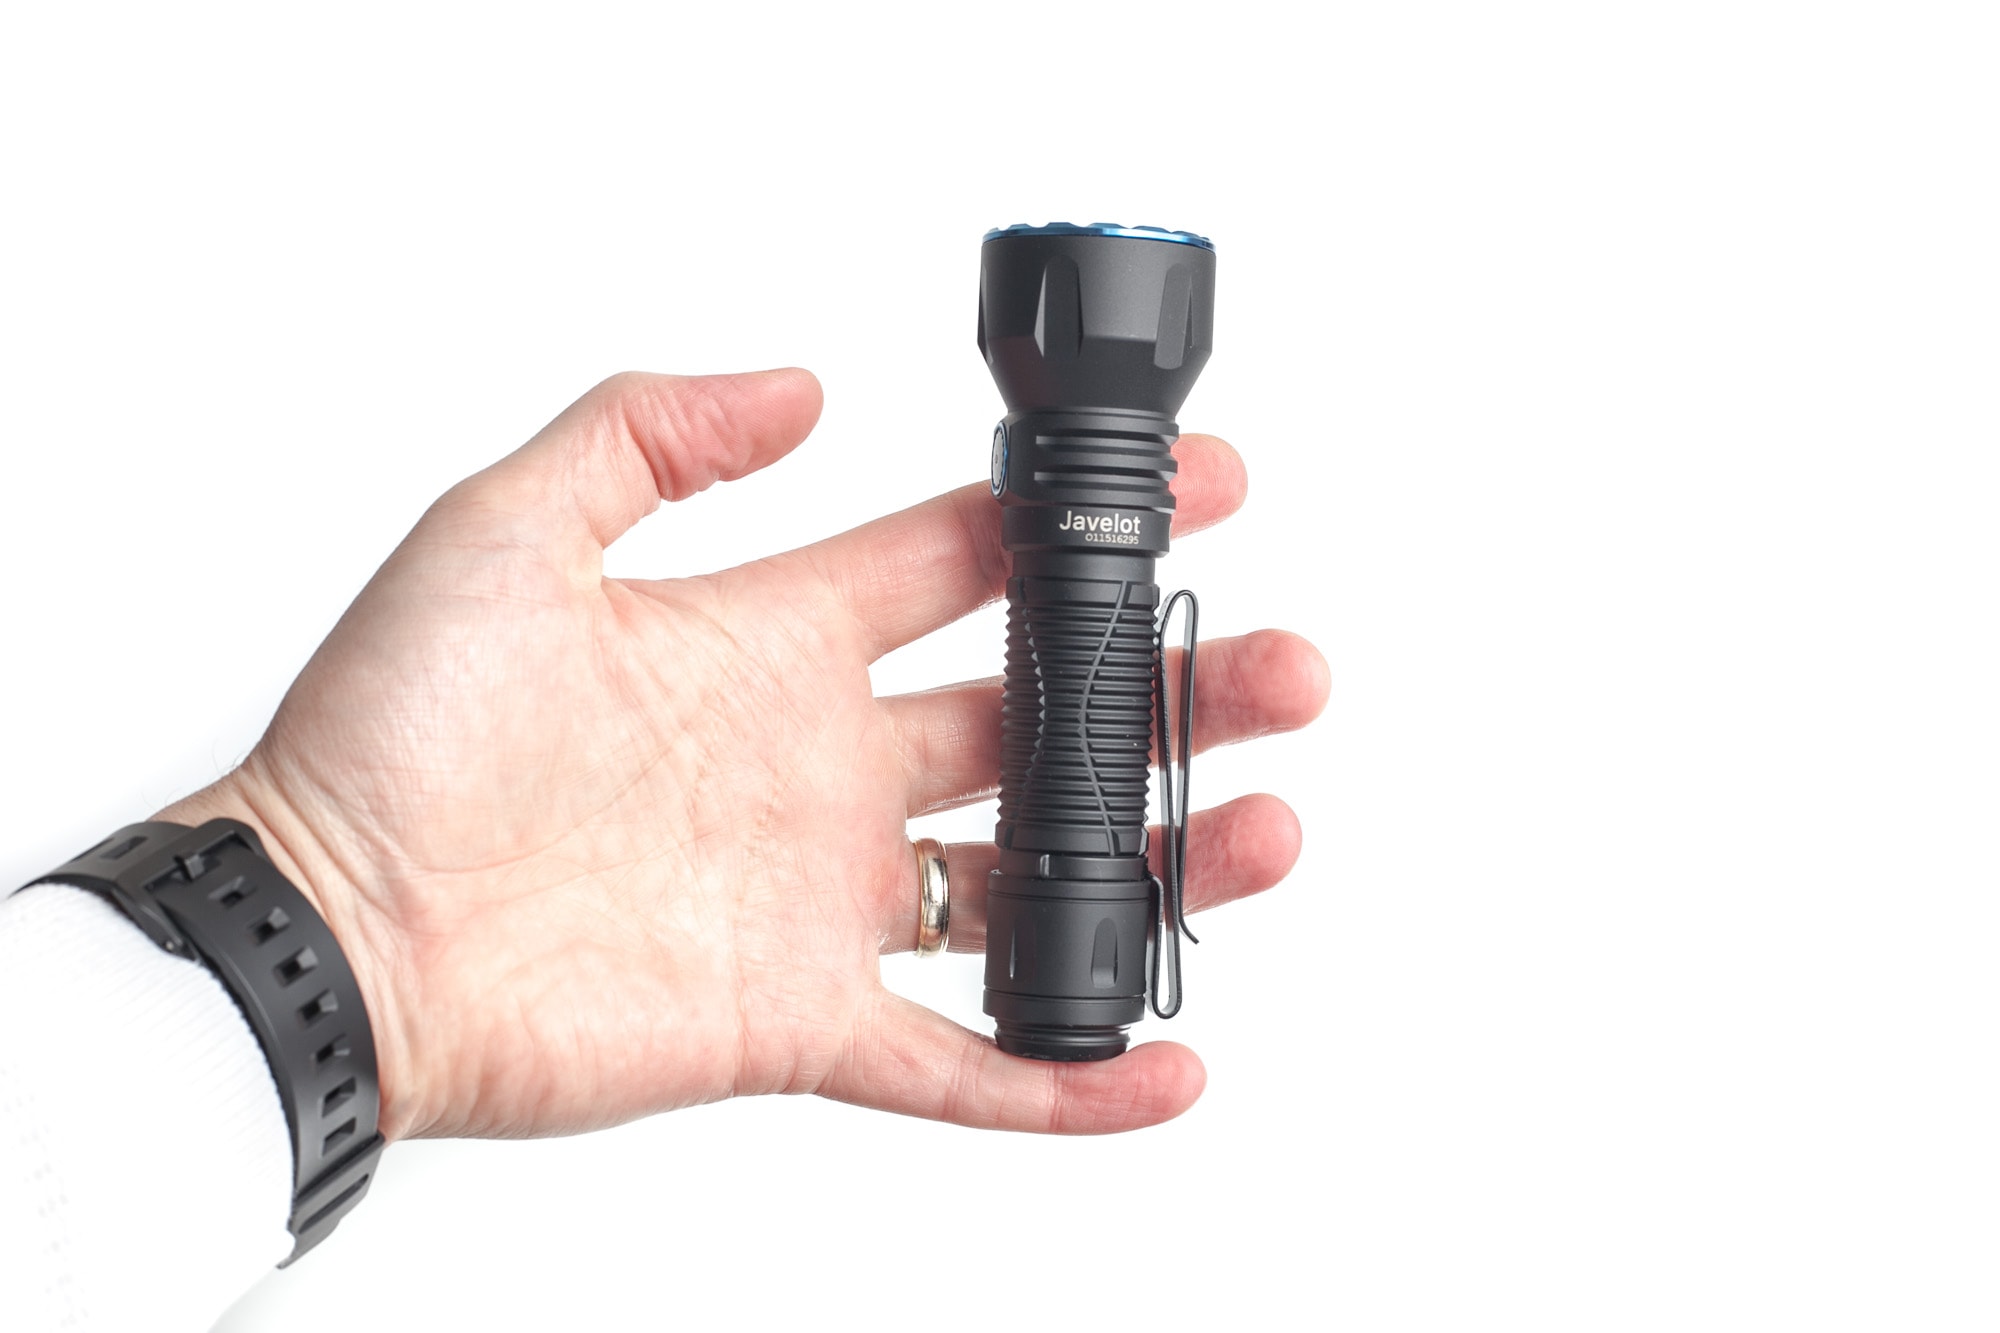
The Olight Javelot is a tactical-style thrower flashlight similar in handling to other tactical Olight flashlights, but it has a larger head. It feels comfortable in my hand and has a nice grippy finish. It is lightweight enough to carry around for a long time without any difficulty.
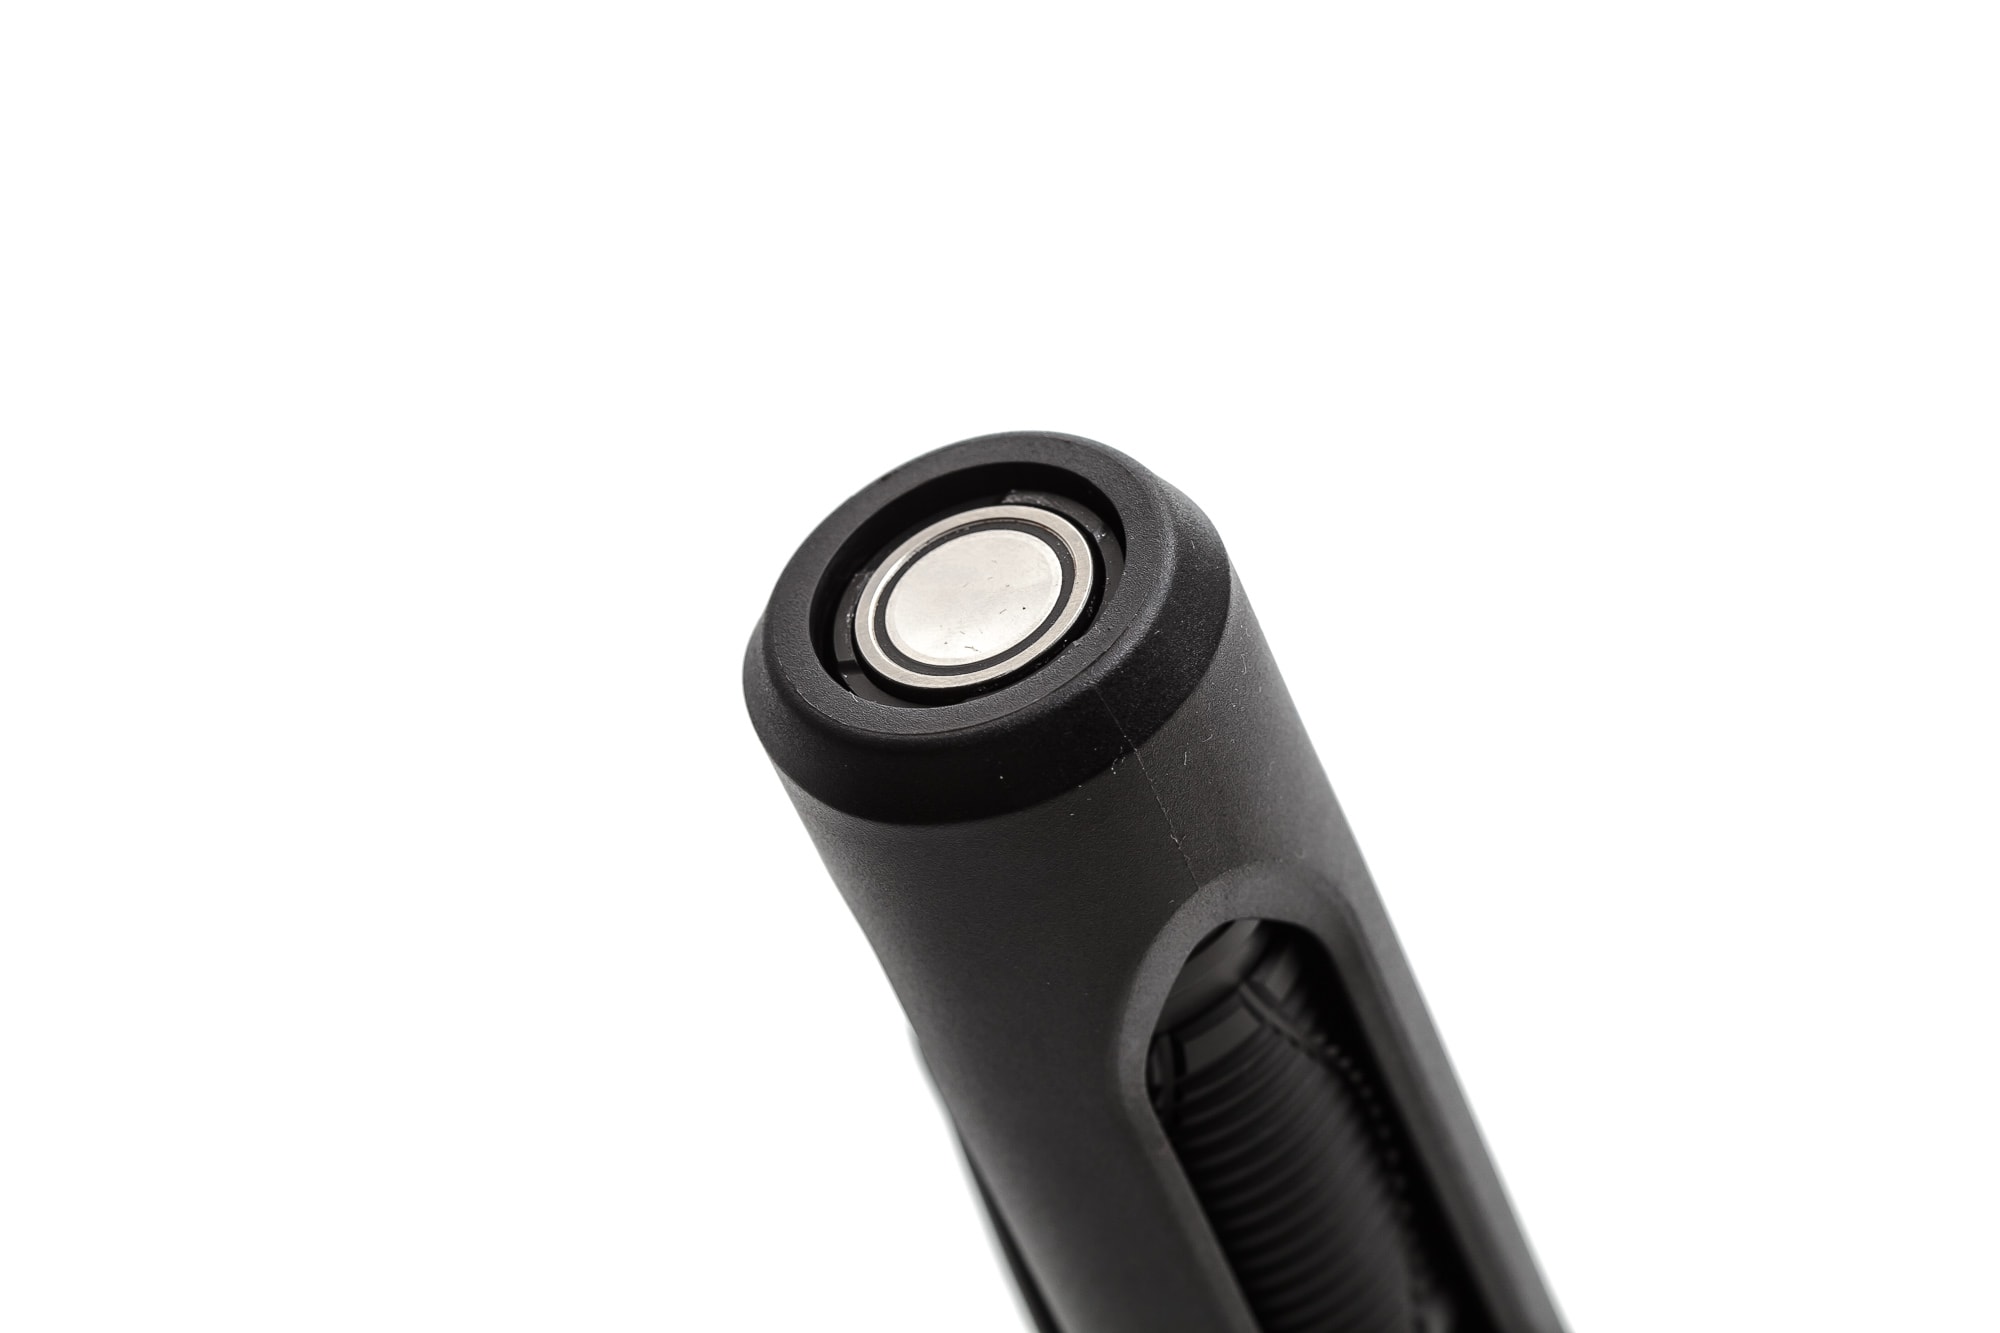
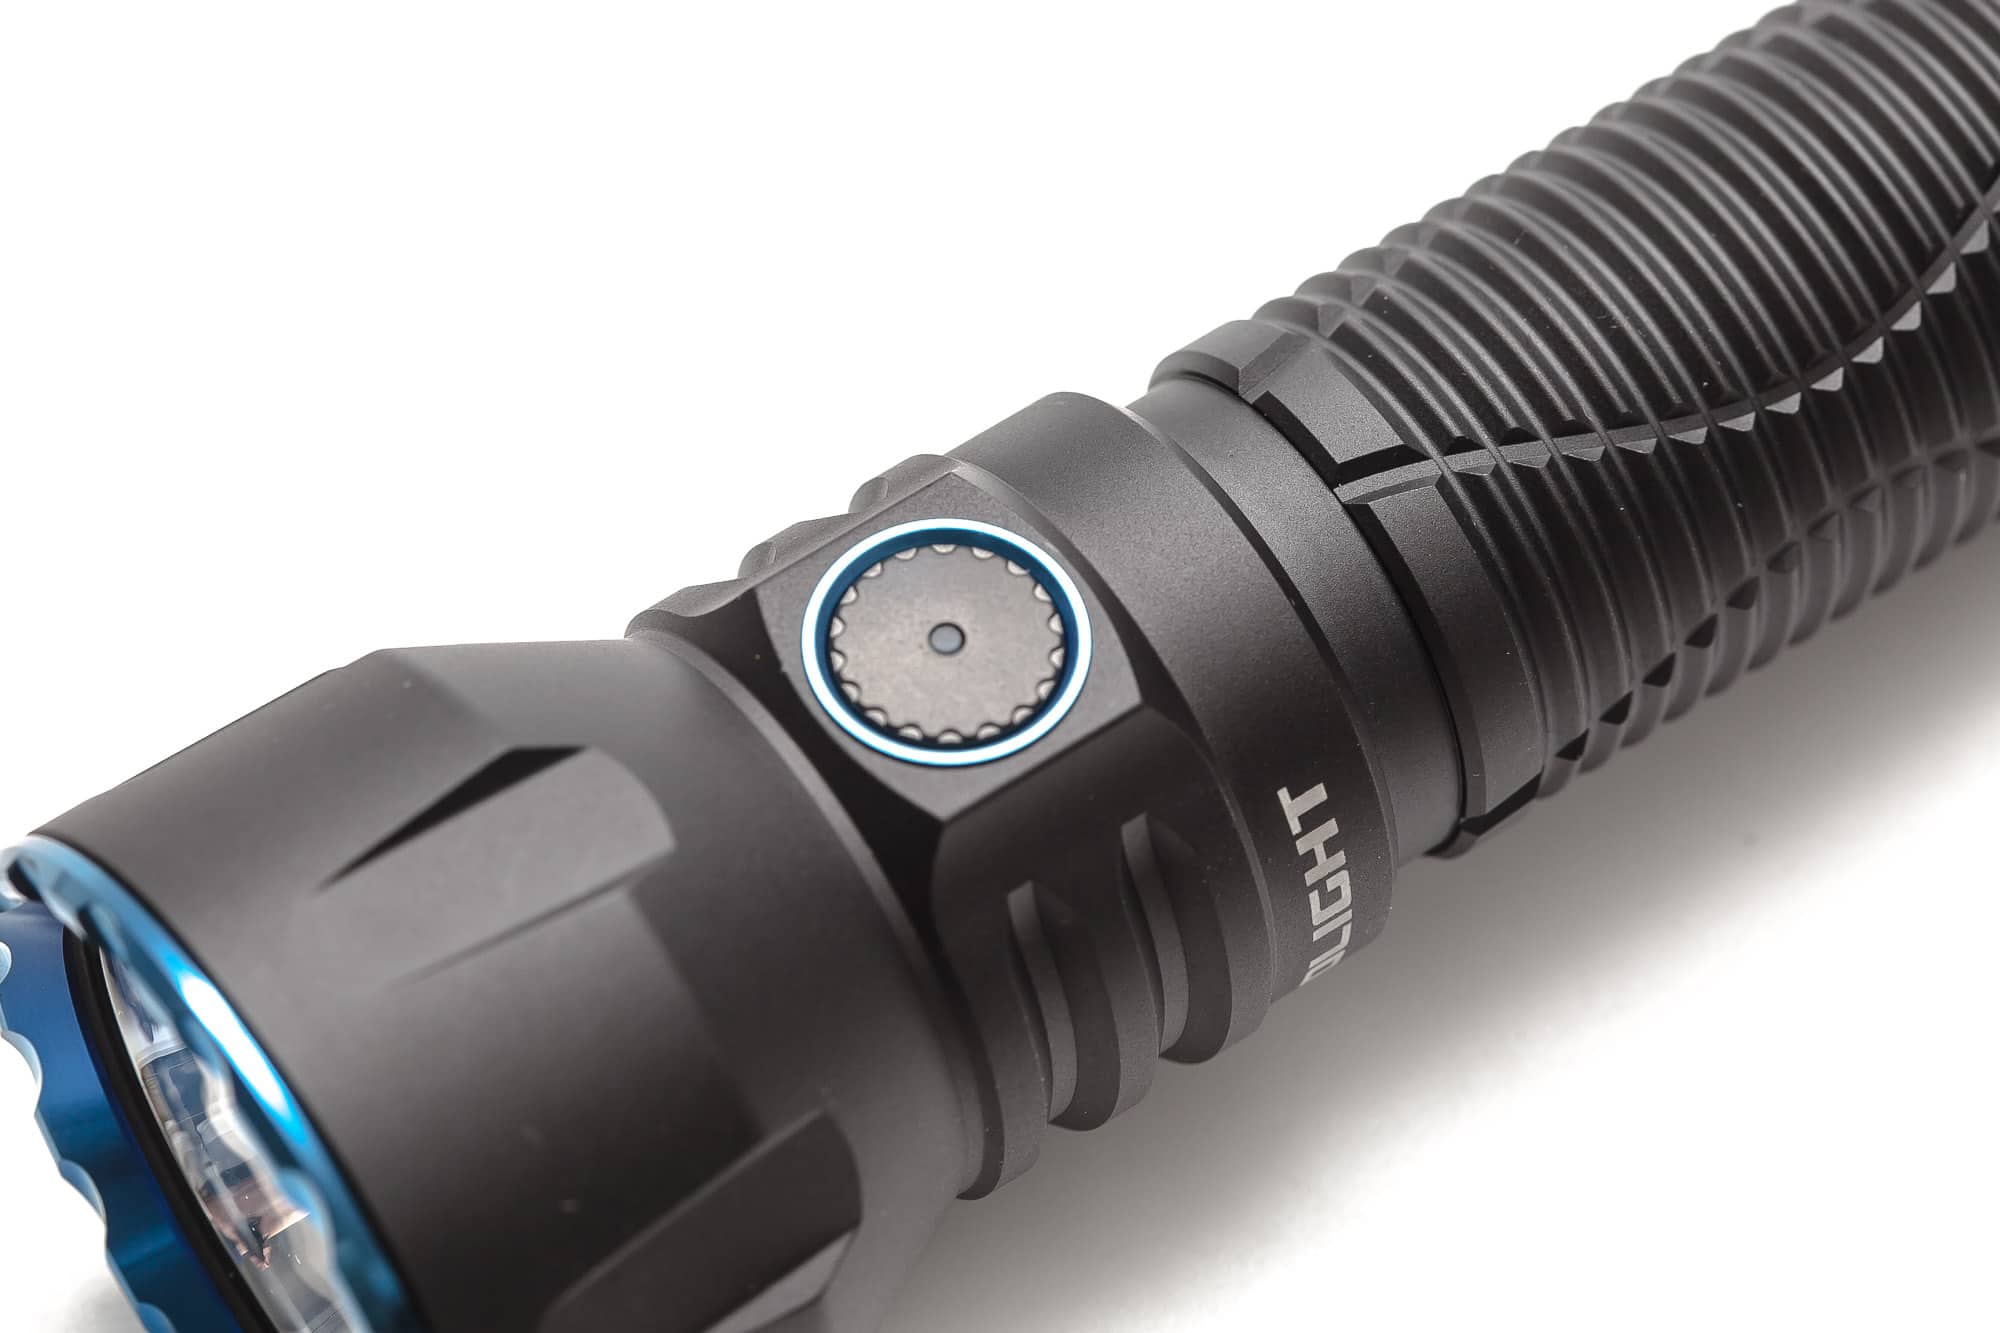
For power and mode switching, you have two options. One is the side switch, which is used for normal and general use, and is great for the underhand grip. The other is the rear switch, which is designed for tactical use in the overhand position. The rear has a two-stage switch and functions similarly to the Warrior series, with the only difference being that it’s renewed. The travel of the switch is shorter, which might make it a little easier to use.
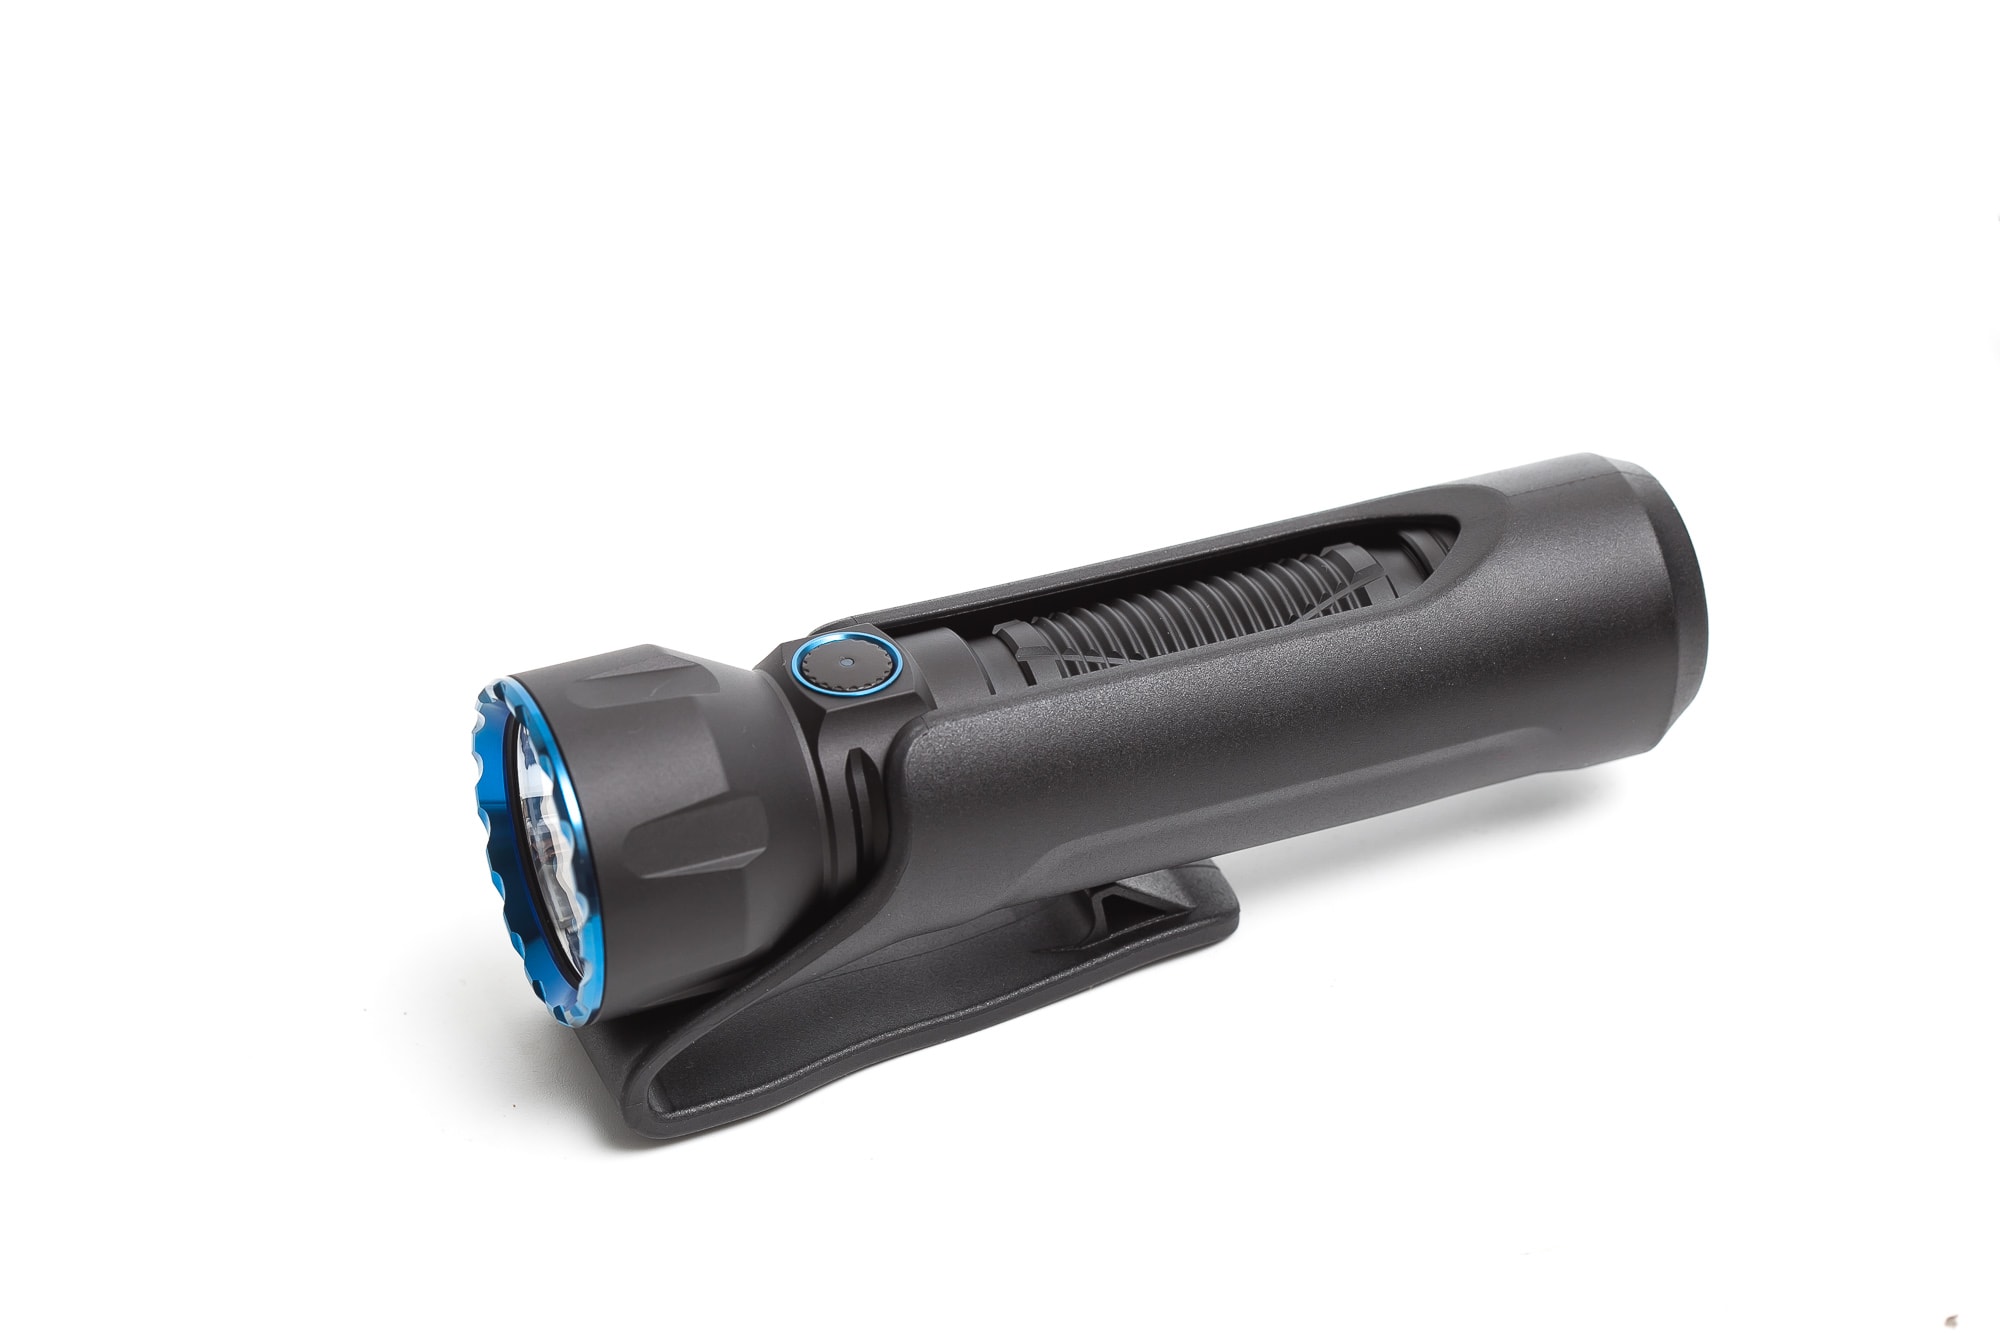
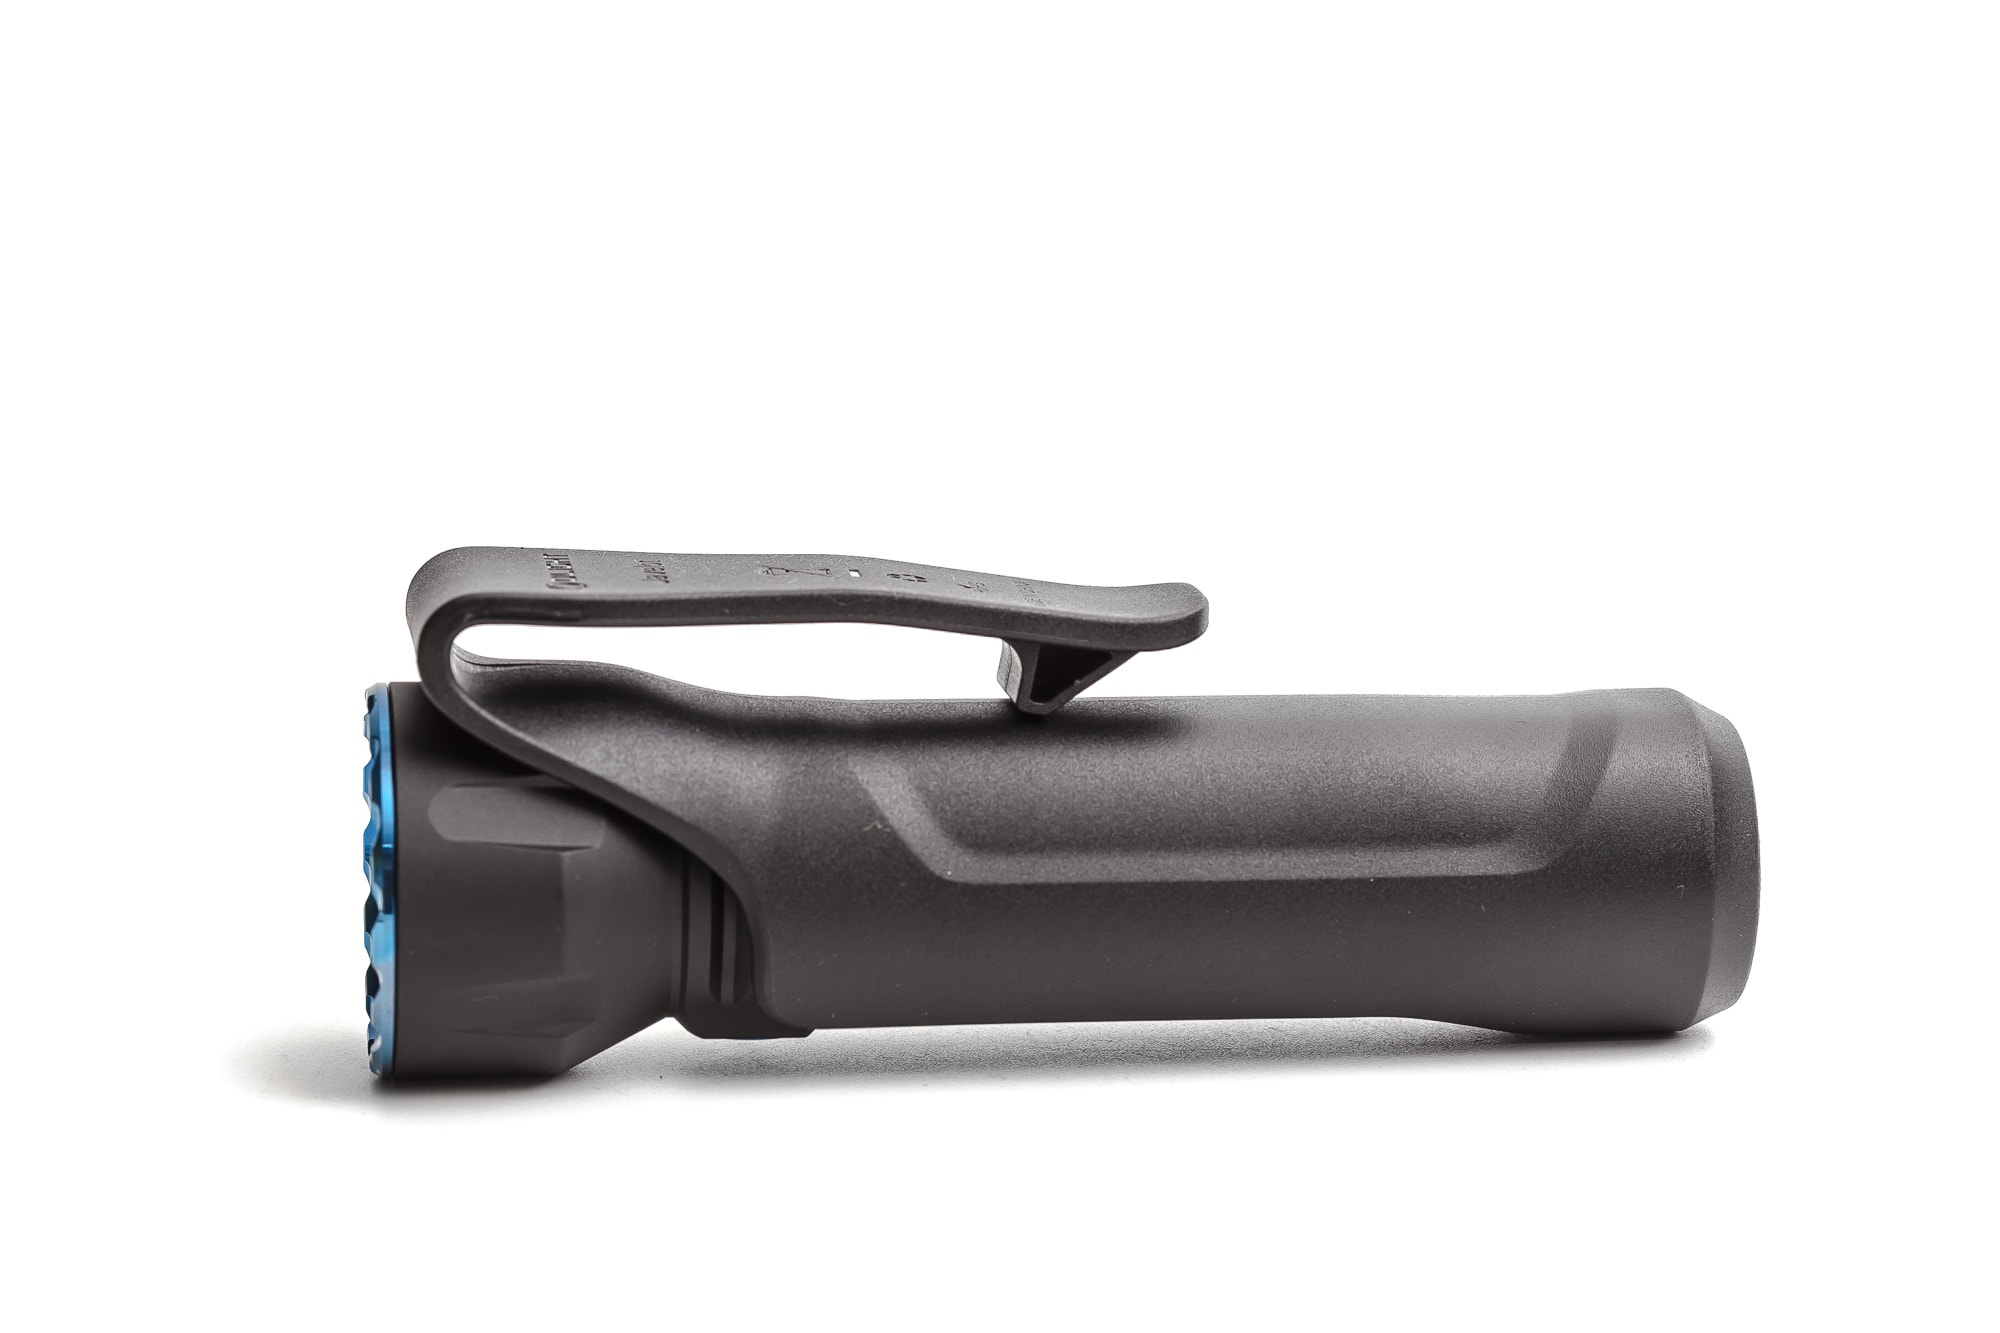
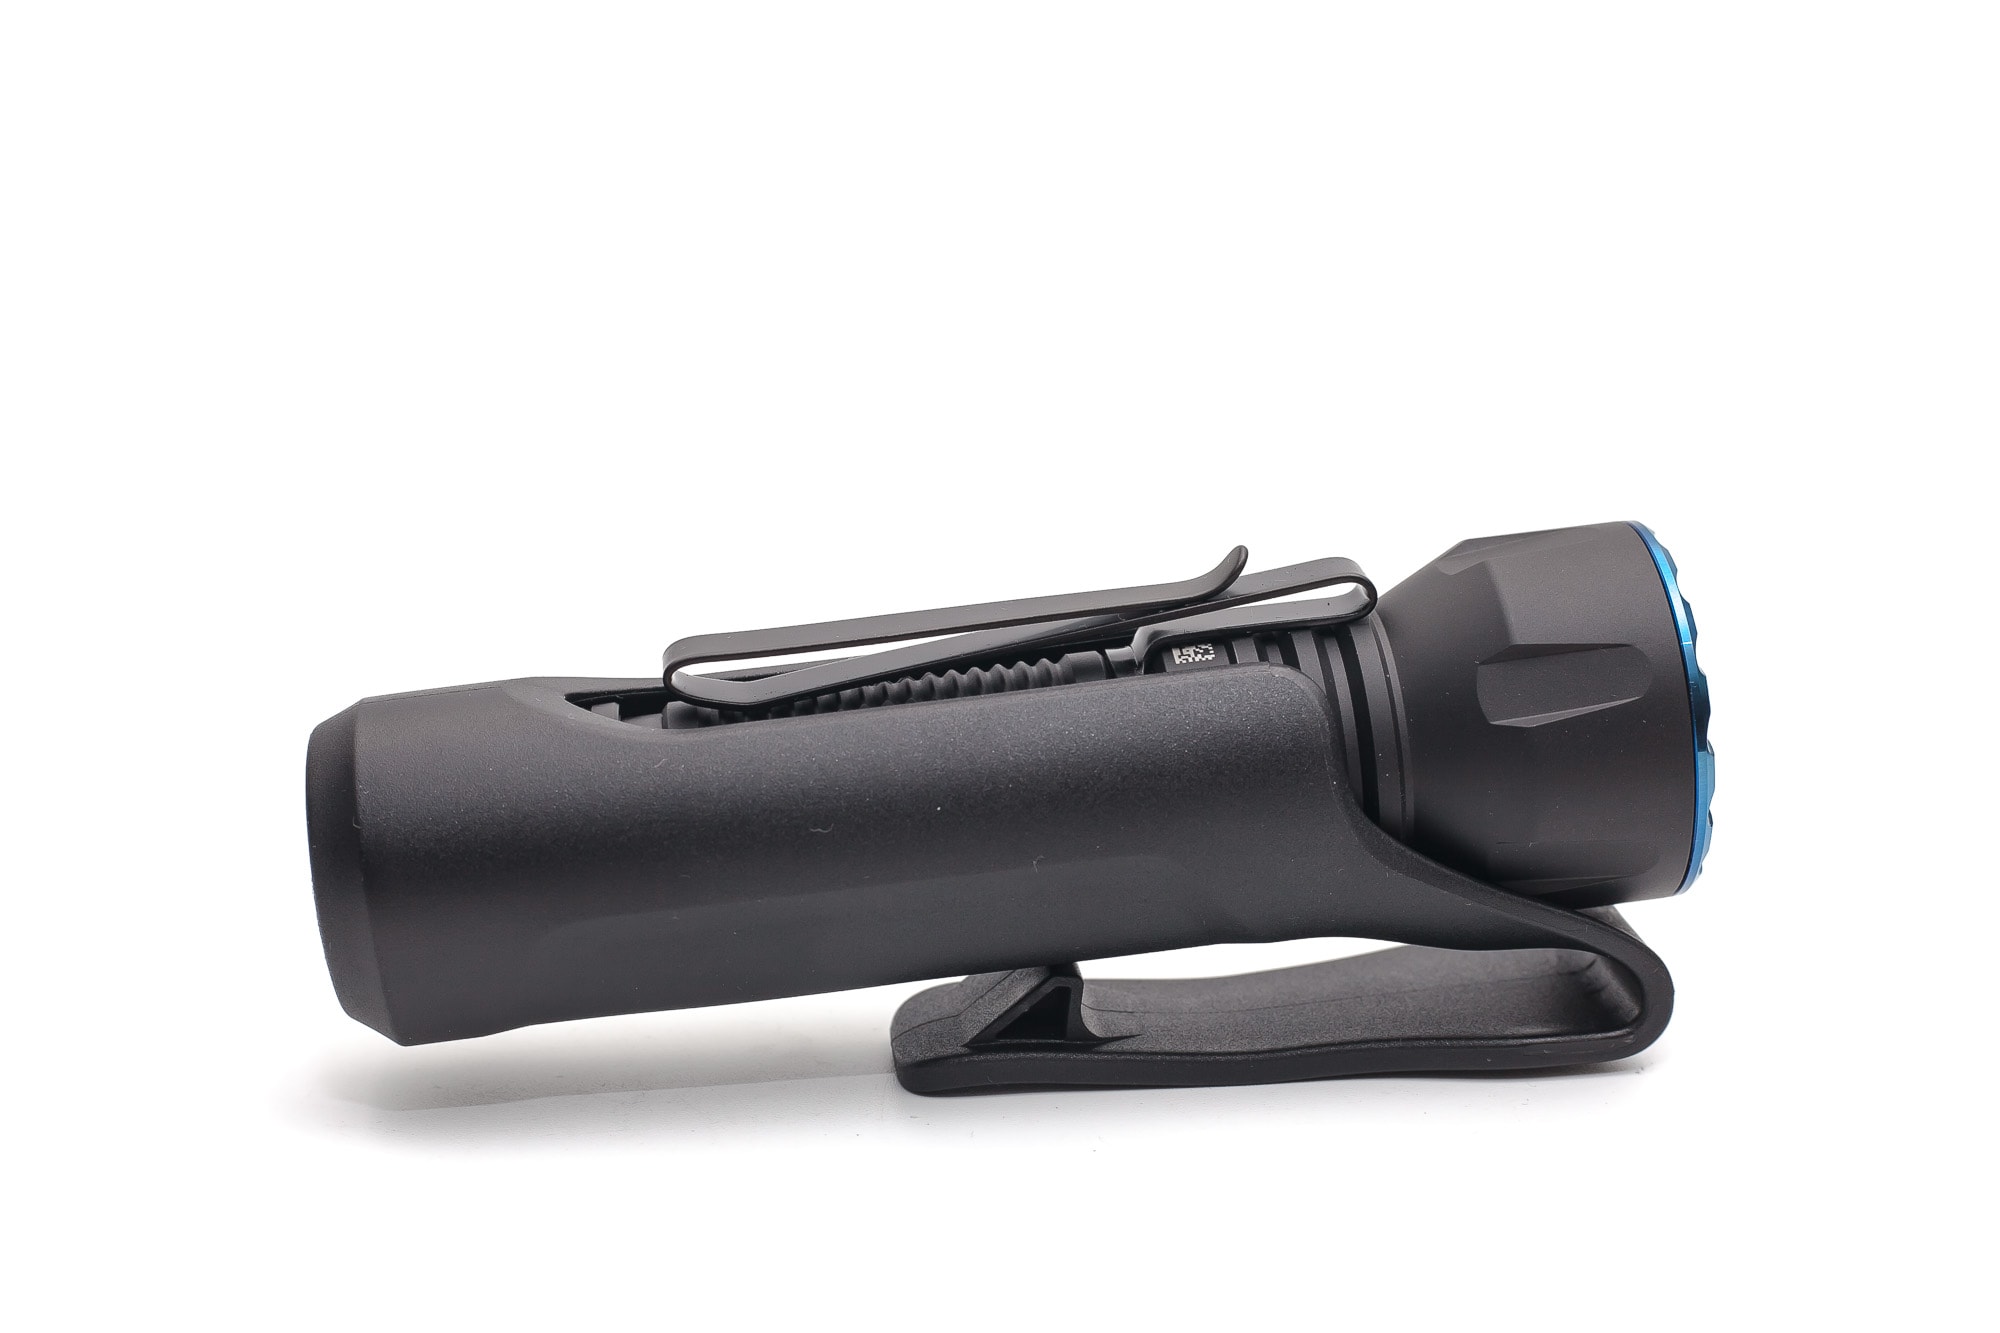
There are multiple ways to carry the Javelot, and Olight includes a hard plastic holster and a removable pocket clip. This time, the holster is a simple one without a USB-C charging port.
By default, the pocket clip is not attached to the flashlight. There are two spots available where you can connect the pocket clip (see pictures), but you cannot use the plastic holster if you attach the clip near the tailcap. However, if you attach the clip near the head of the flashlight, you can still use the holster.
If you plan on using a lanyard, you’ll need to get creative as there is no lanyard attachment point. If you choose to carry it in your pants or pocket, be sure to use the lockout feature.
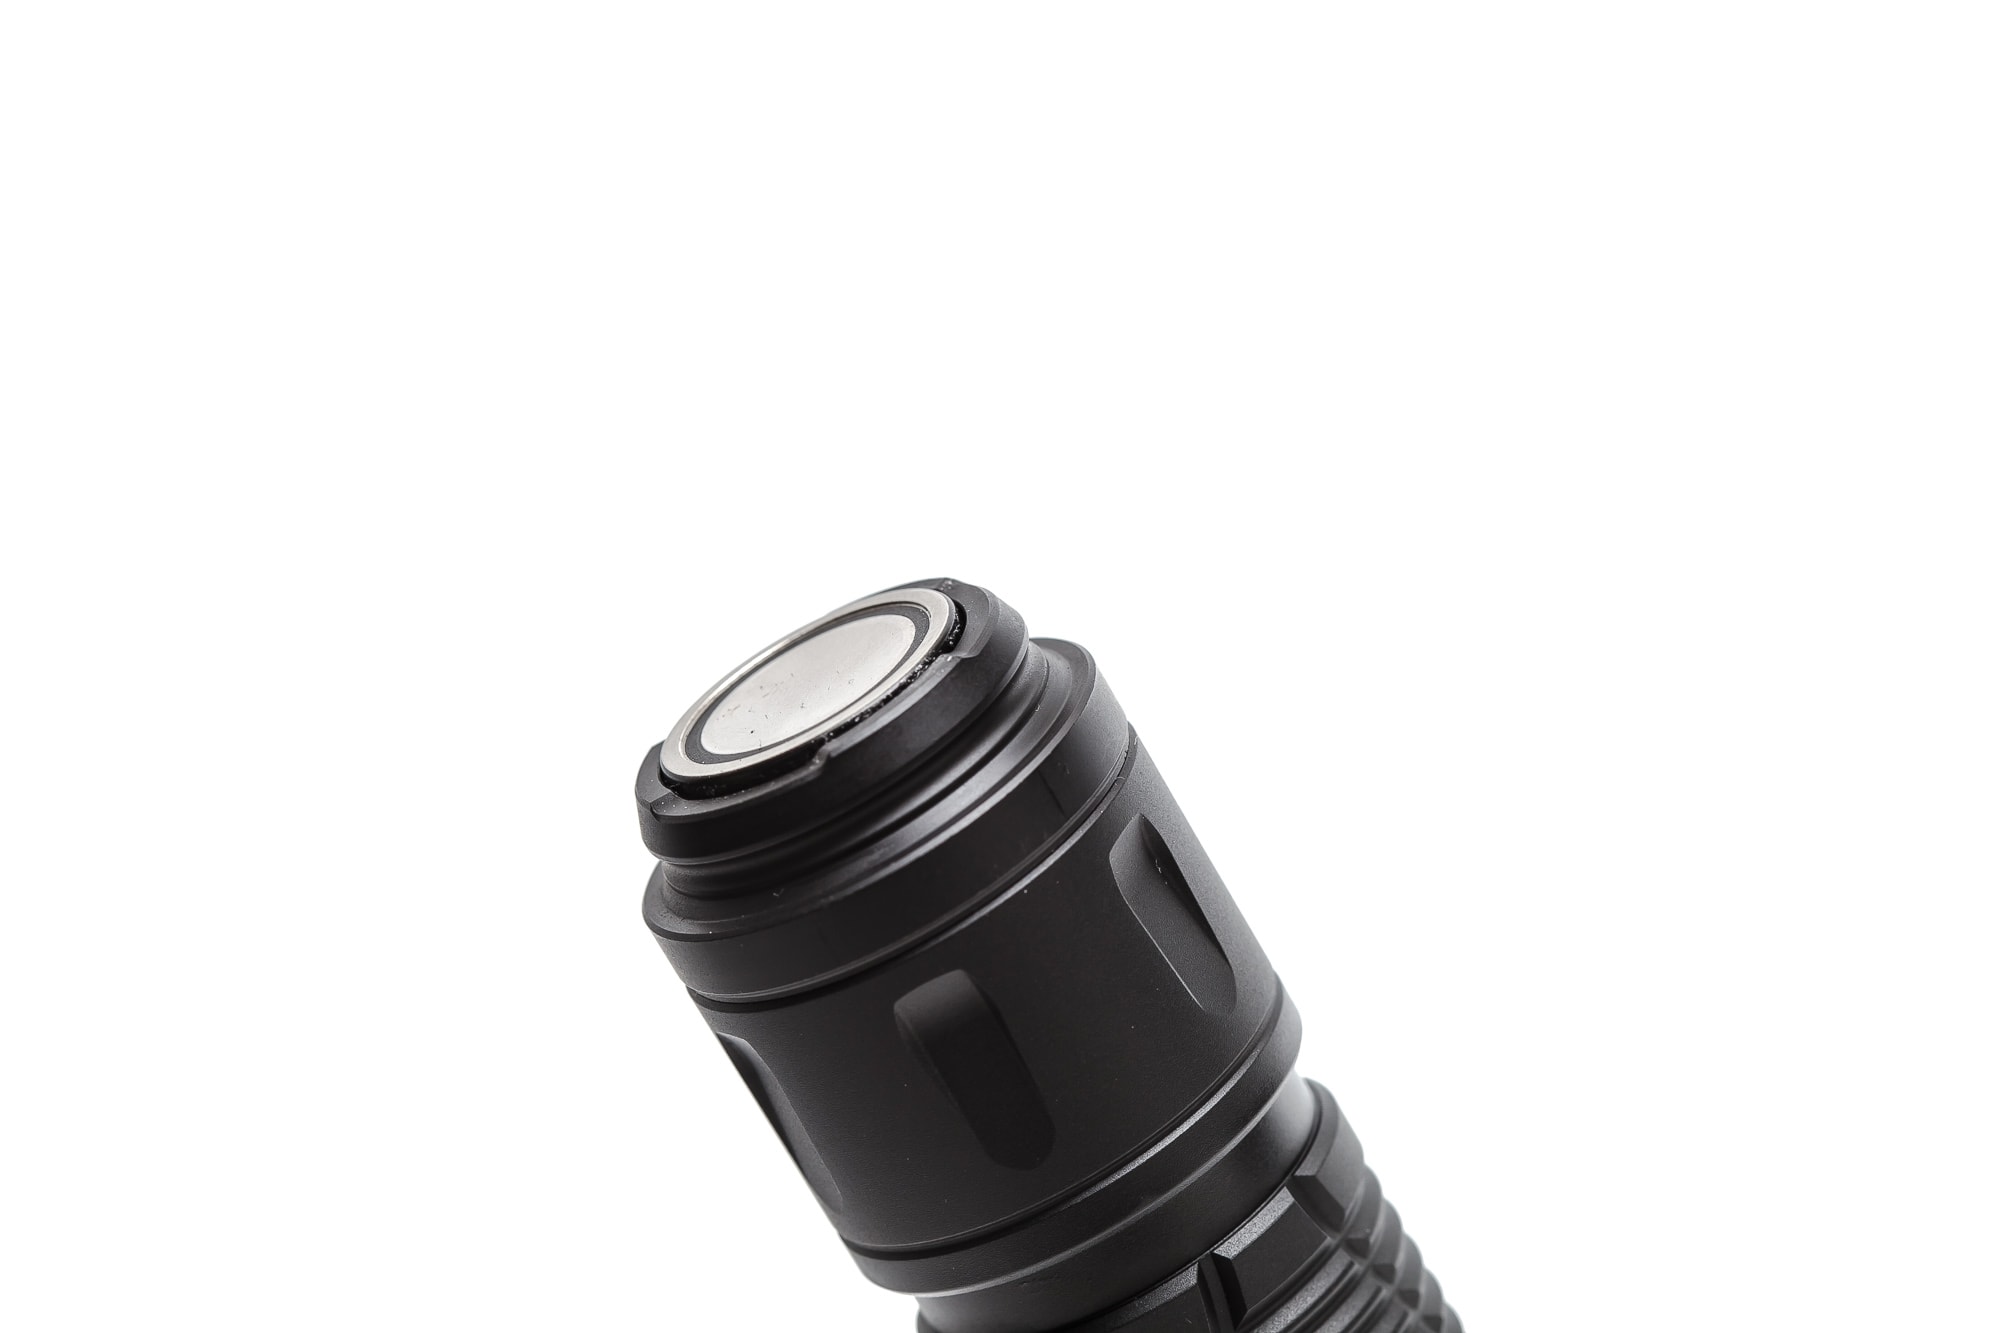
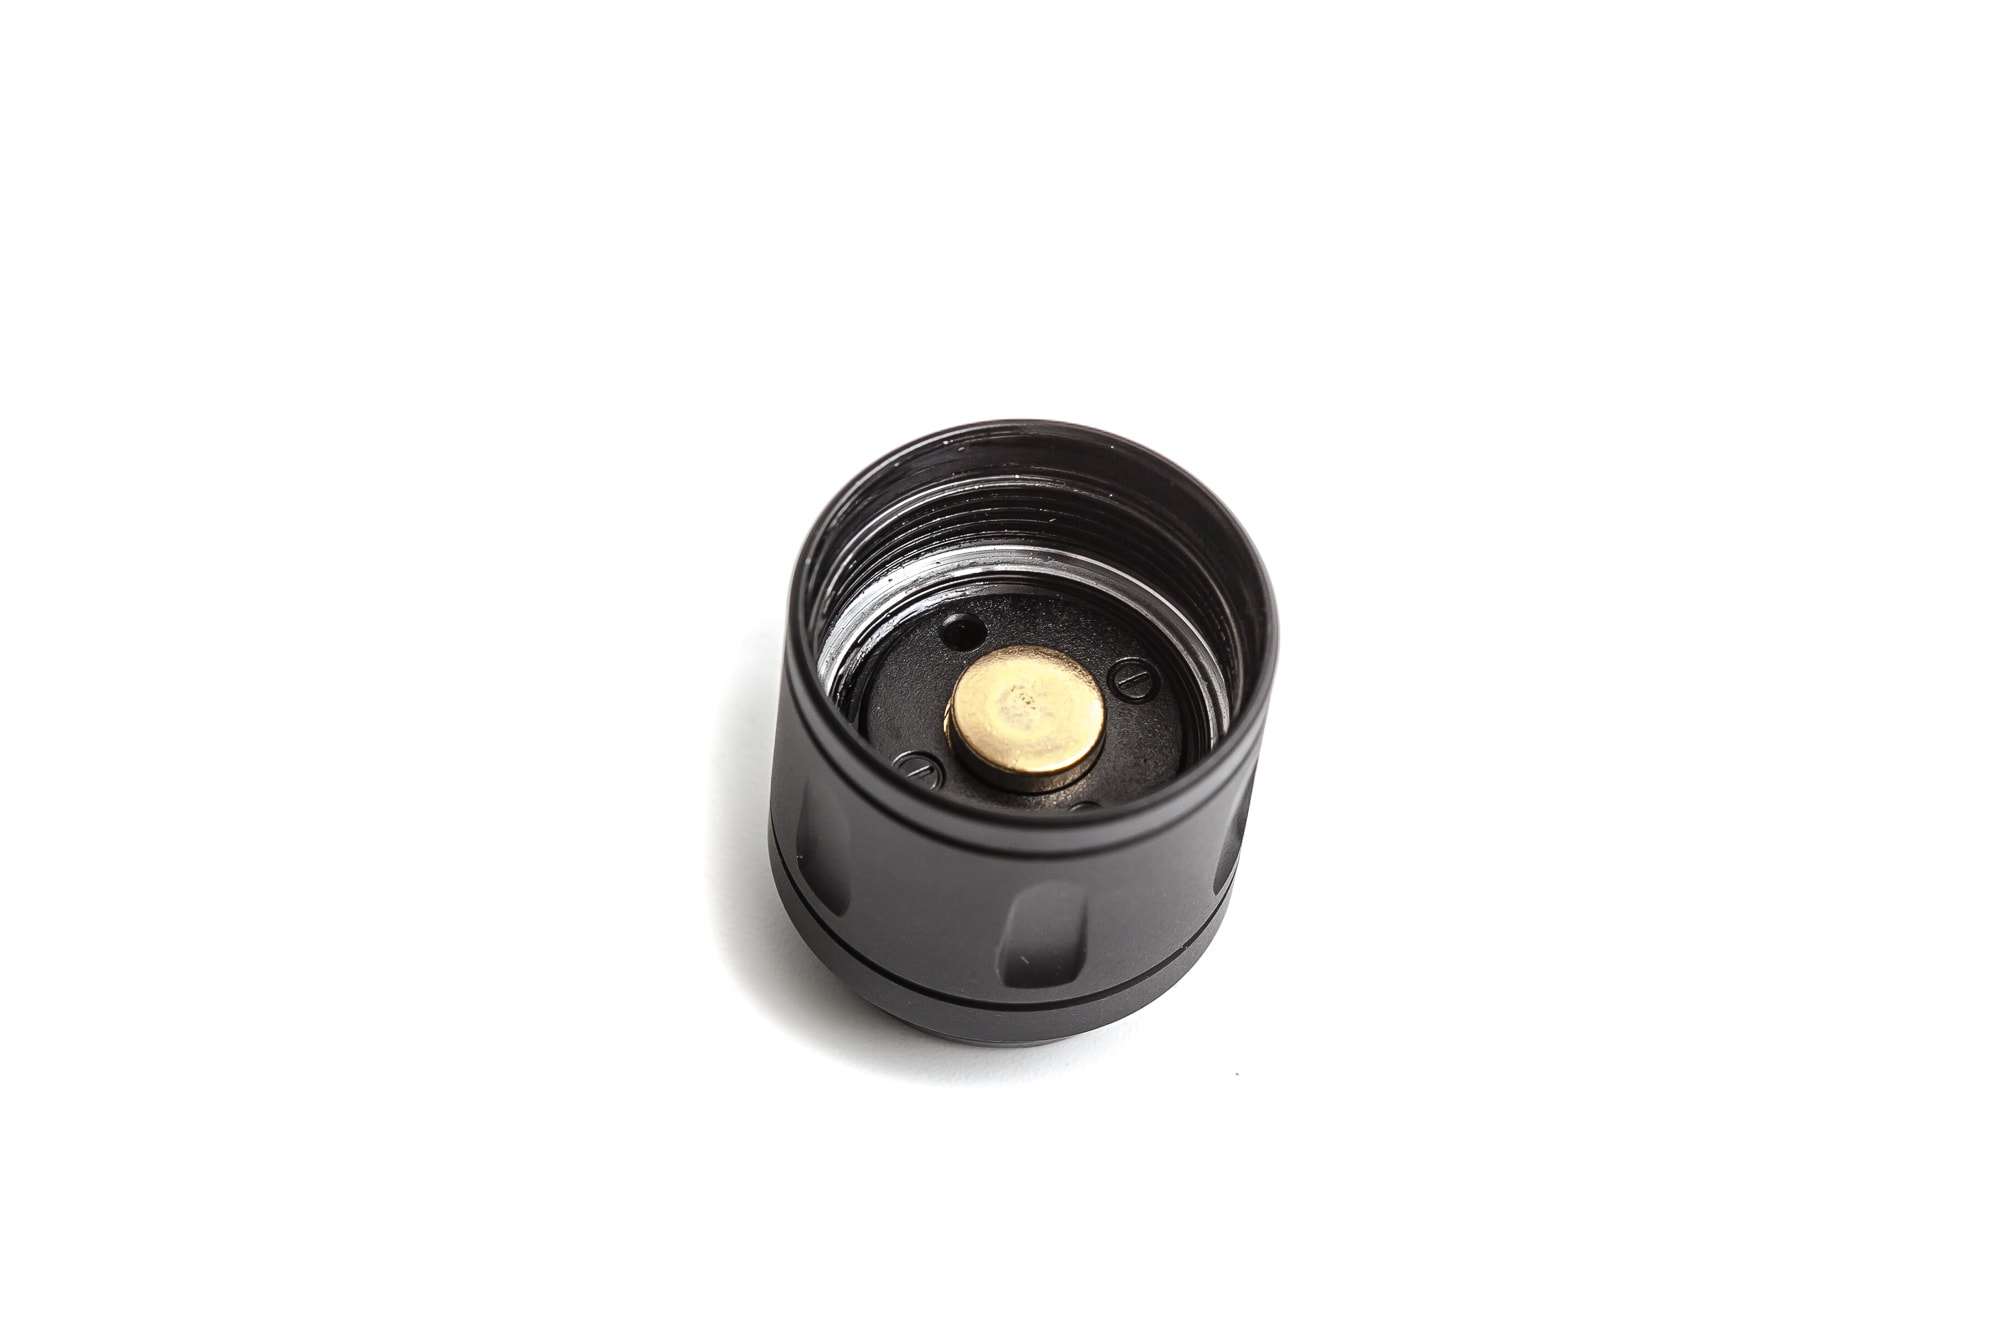
There’s a built-in magnet on the tailcap of the flashlight, which allows you to attach the magnetic charging cable or hang it onto something metal. This makes it even more versatile
Warranty:
Olight’s warranty is the best in the industry: 30-day no-hassle returns and as of January 2023, lights sold in certain markets (US, EU) get a lifetime warranty. From Olight: If you purchased an Olight® product from the USA after January 1st, 2023, the local service centers will honor your LIFETIME WARRANTY for your purchase. If your Olight product (including its structure, built-in battery, LED, or lens) ever experiences any issues, we promise to take care of it. If we are unable to repair your product, we will promptly replace it with a product in perfect working condition, which will be of equal or better physical condition. If your purchase is a limited or discontinued edition of Olight product, we will repair or replace it with another Olight product of the same or higher value. We will warrant all Olight products that exhibit any defects in material and workmanship under normal use. However, please note that this LIFETIME WARRANTY does not cover loss, theft, deliberate damage, or cosmetic damage.

LED, Lens, Bezel, Beam, and Reflector
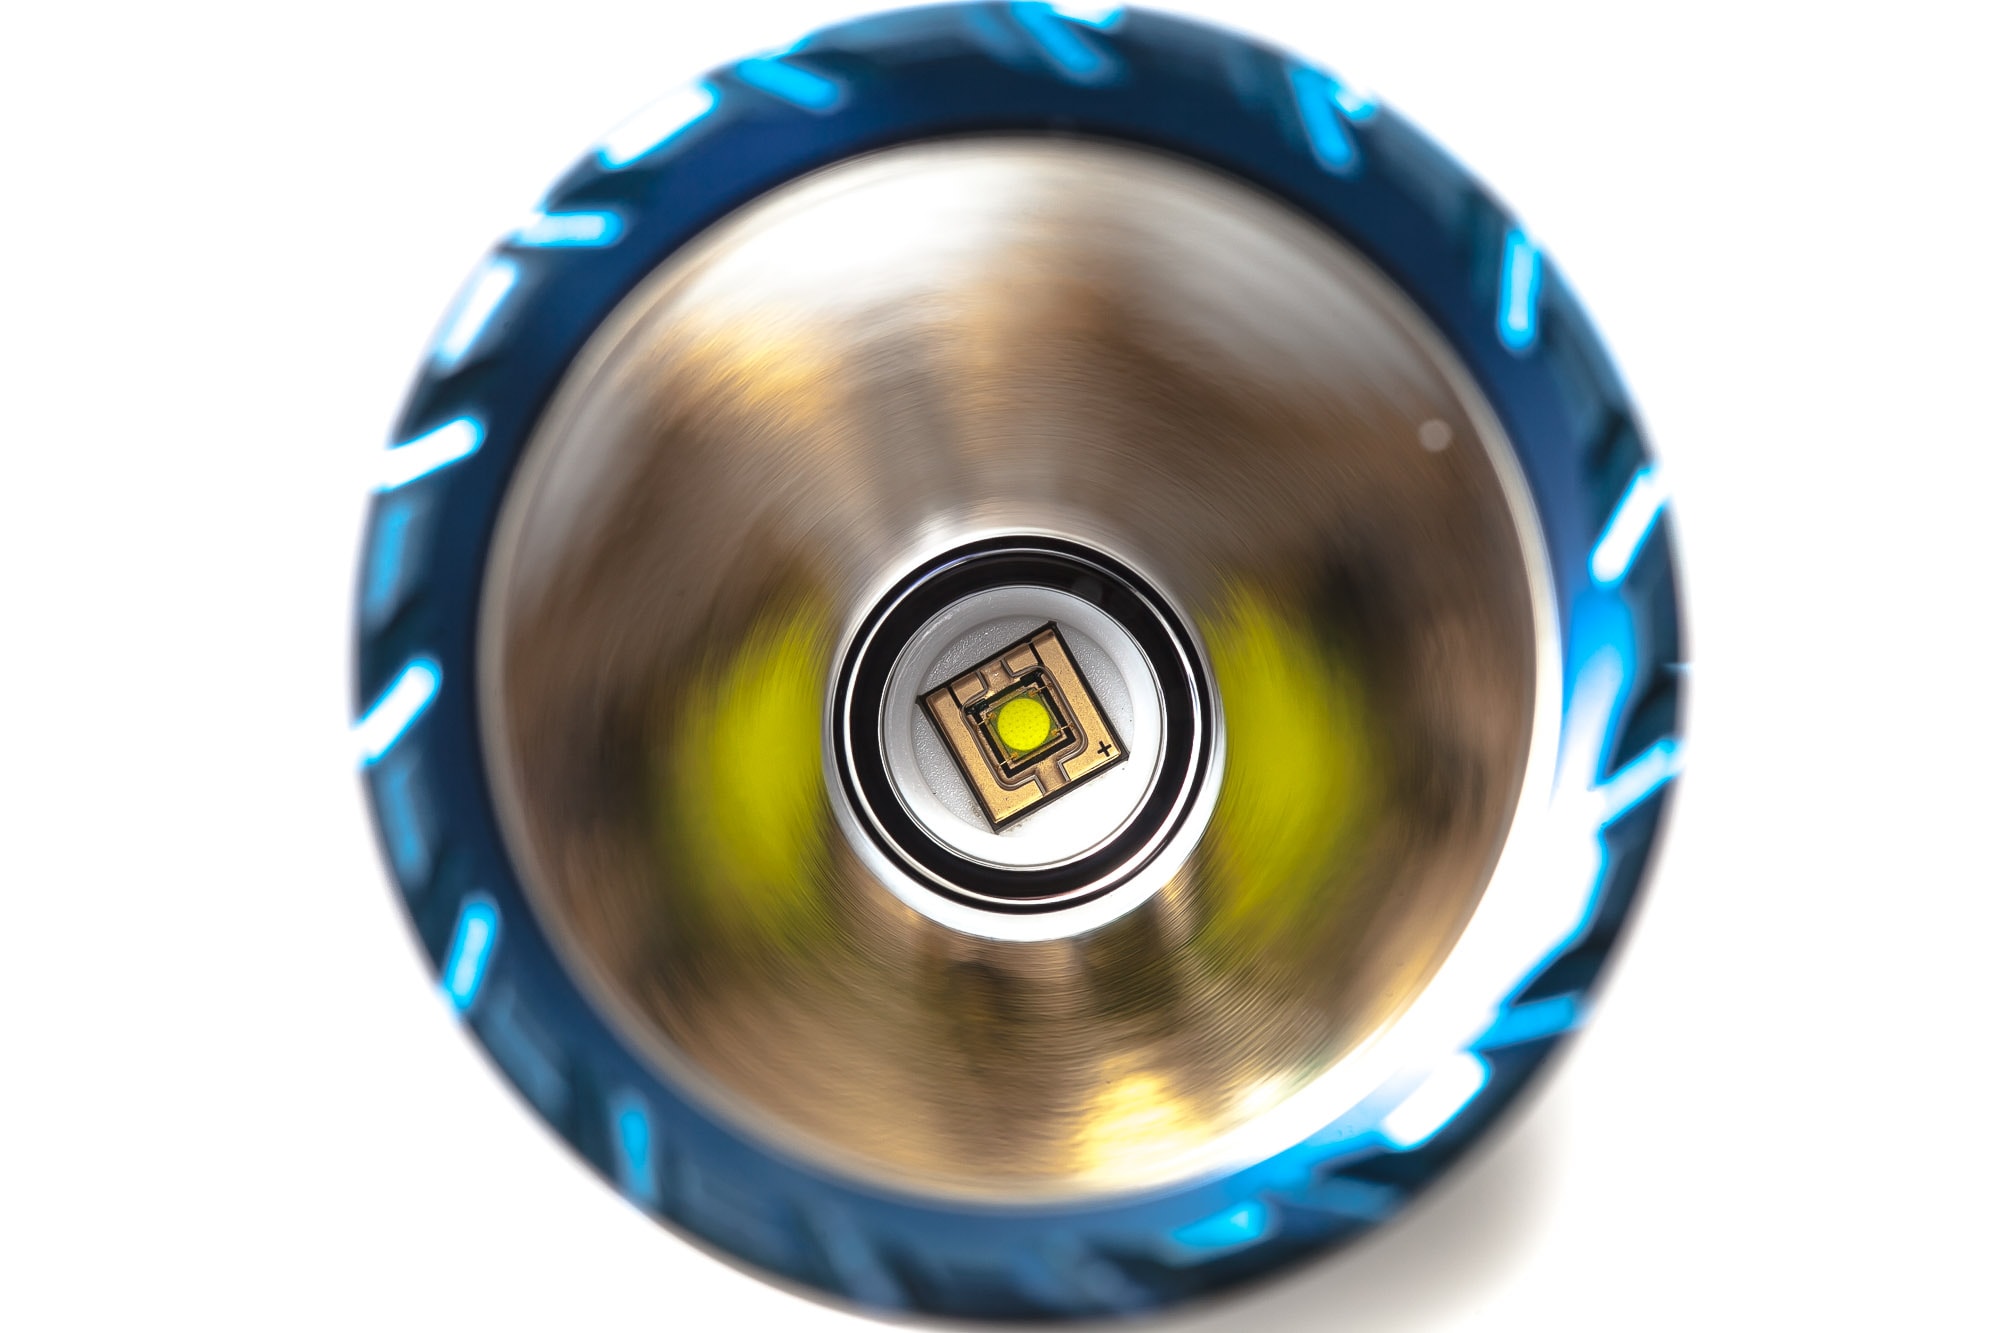
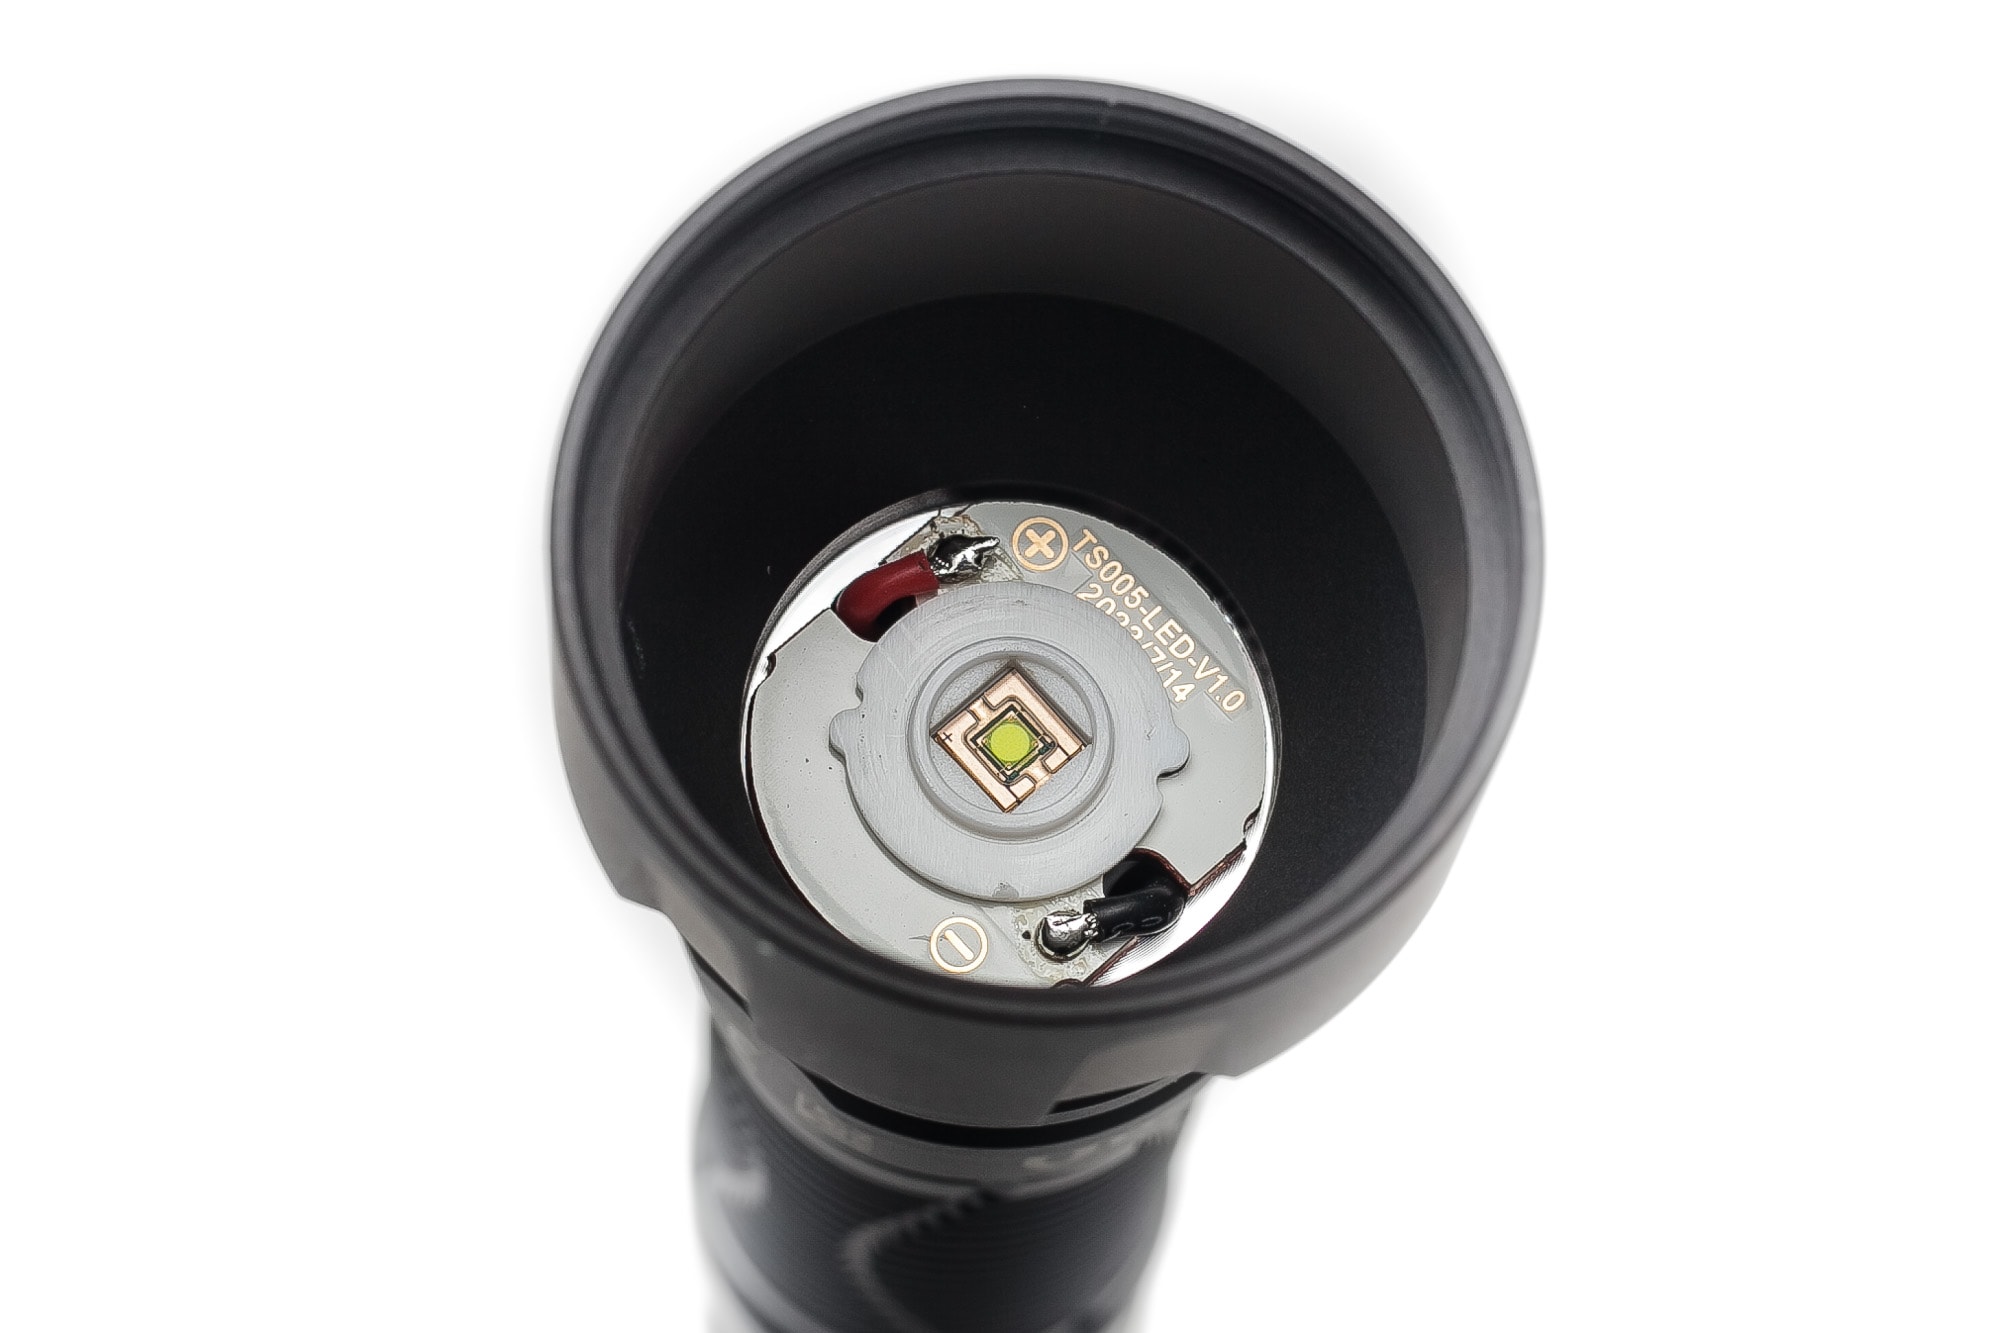
Like most of their other models, Olight doesn’t mention the brand or model of the LED they used.
If you look through the front lens (with anti-reflective coating) you’ll see a smooth reflector with a cool looking LED. We’ve seen this LED a couple of times in our reviews over the past year or so. It appears to be manufactured by Rayten Lighting and has the product code RT-5050CW-S72-1C1B-NVPE.
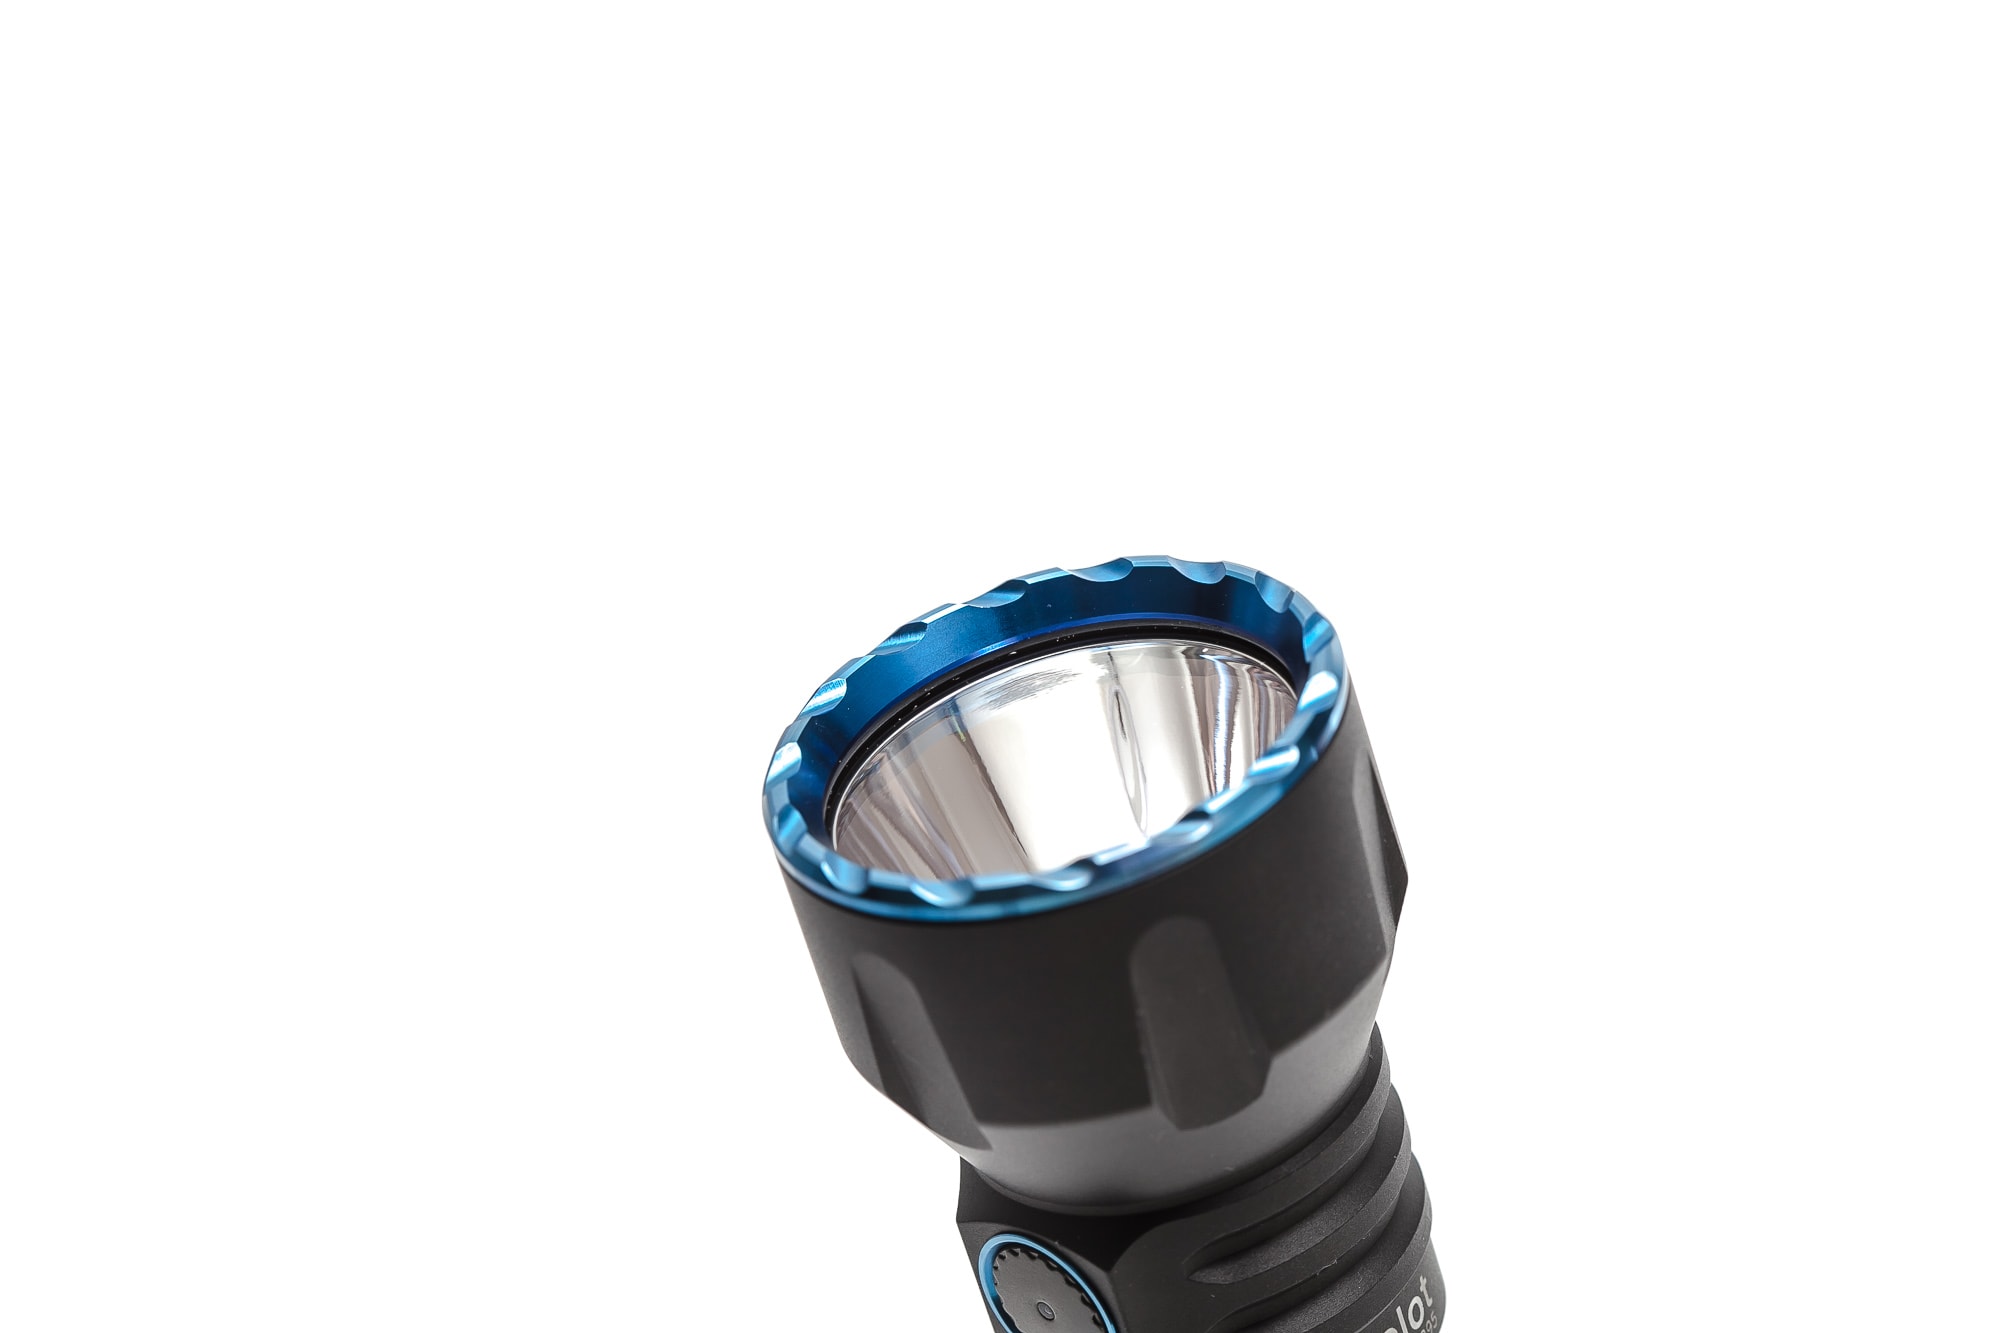
To protect this, Olight is using a uniquely machined blue bezel. It’s interesting to note that I could remove the bezel by hand. Perhaps they forgot to glue it?
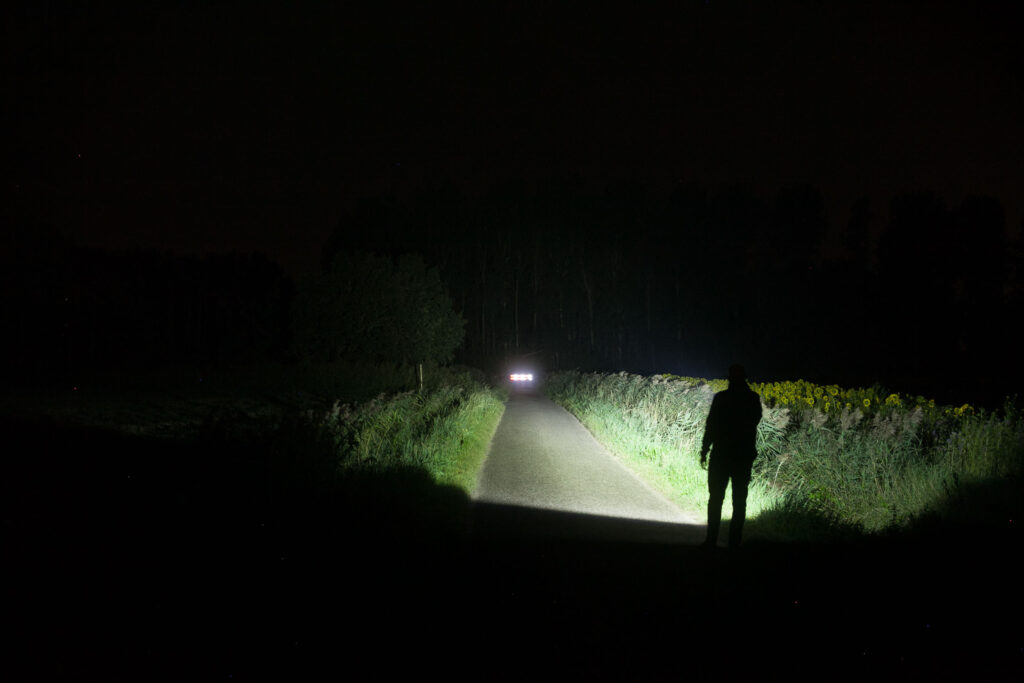
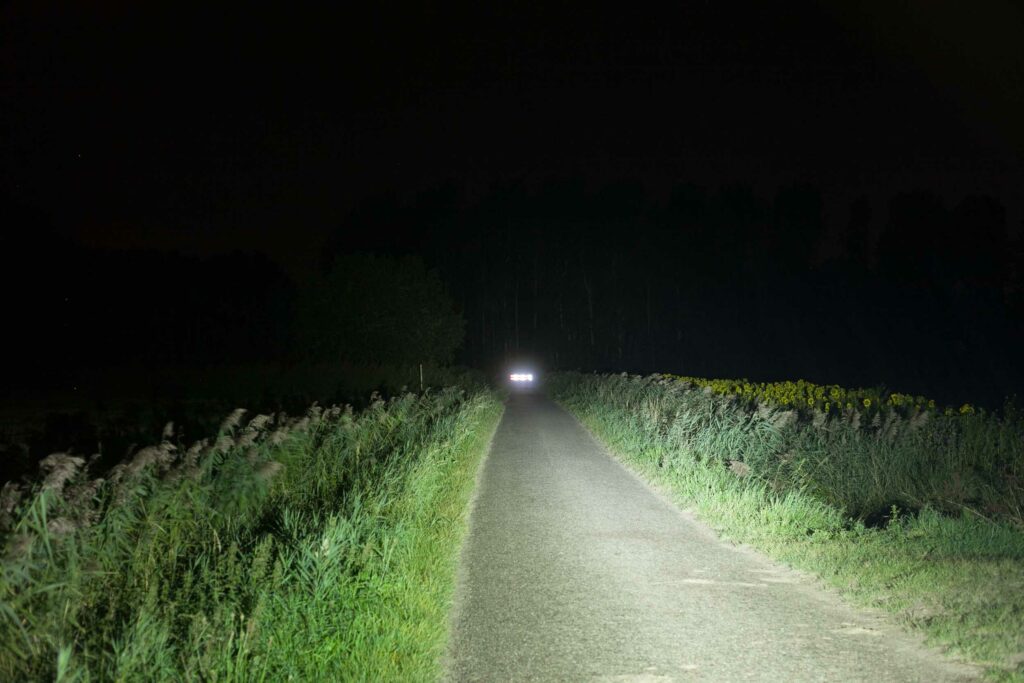
The beam has a very defined hotspot, some weak spill and with some artifacts at close ranges. That’s the nature of smooth reflectors, though. It’s definitely not the prettiest tint I have seen; it’s green, especially at lower outputs. The higher the outputs you get, the less green the beam becomes. It’s still much worse than the Luminus SST40 which some people complain about being greenish.
In Turbo, it’s still greenish, but not as bad, and outdoors it doesn’t really bother!
Spectral measurements:
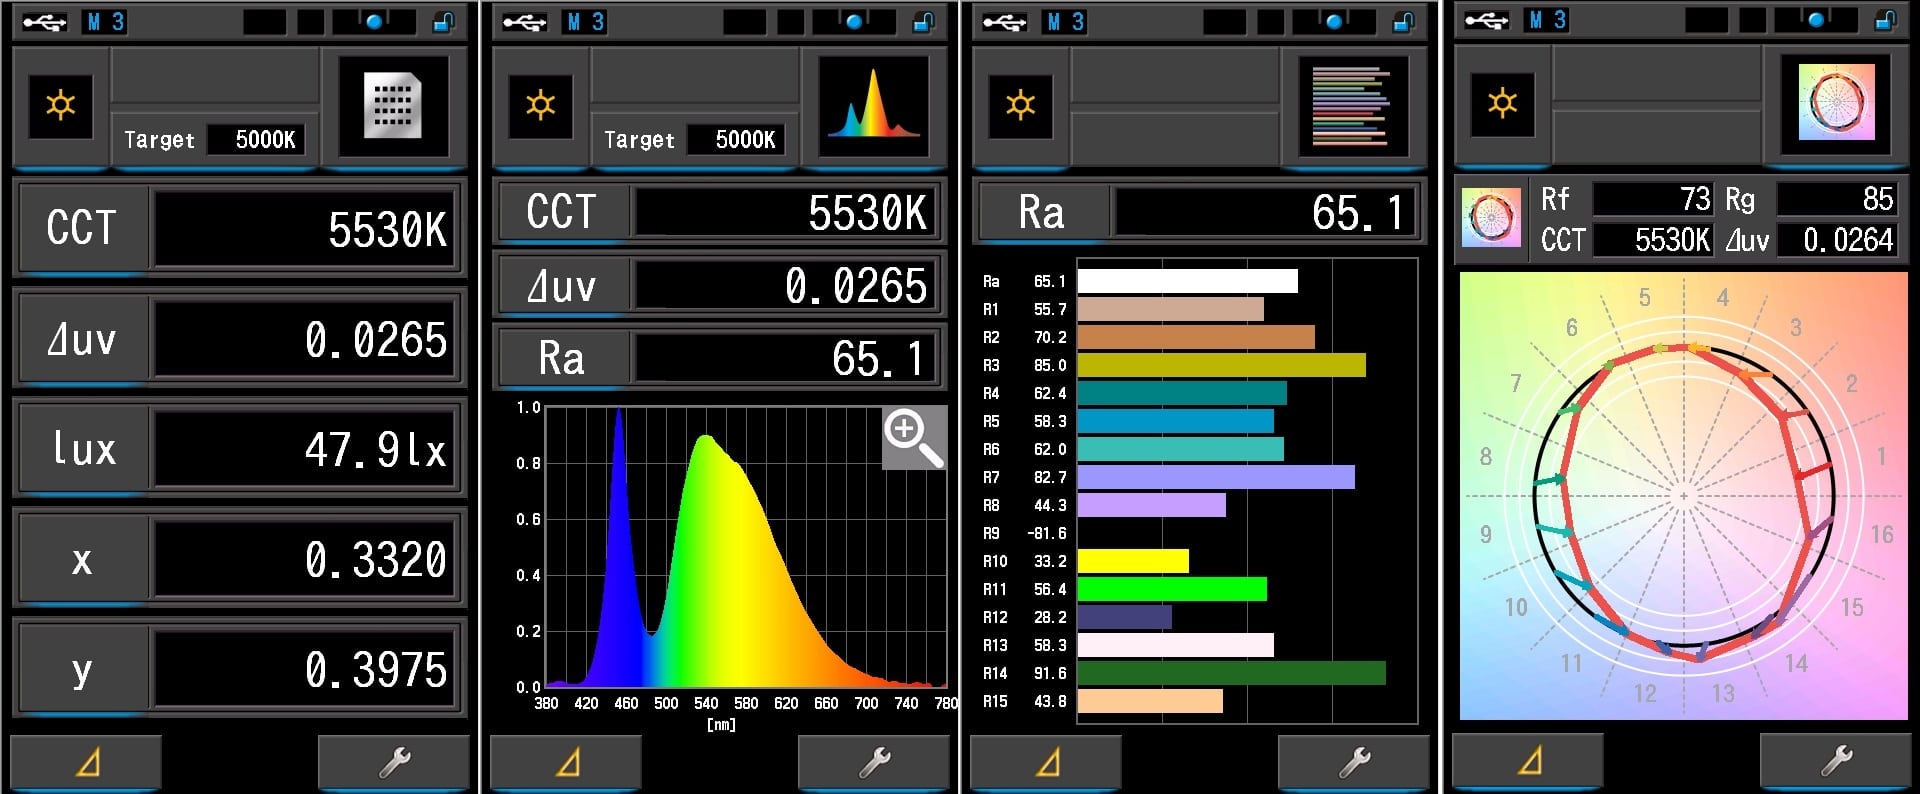
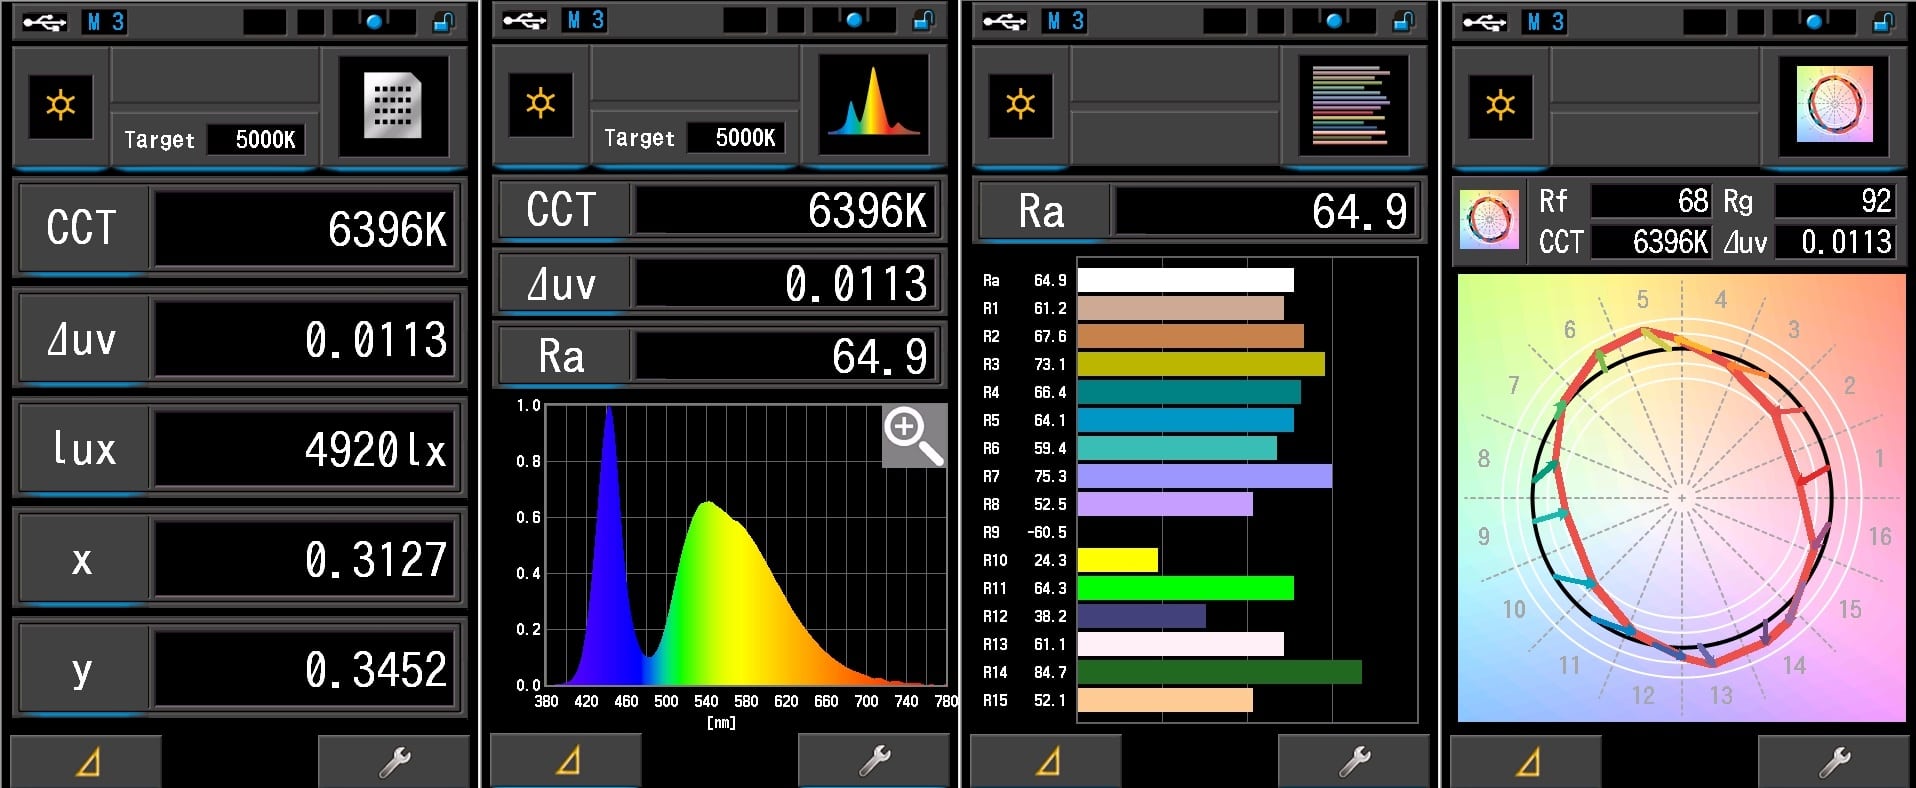
I used a Sekonic C800 spectrometer to measure the flashlight at a 5-meter distance.
| Mode: | CCT: | CRI Ra: | duv | TM30 Rf | TM30 Rg |
|---|---|---|---|---|---|
| Low | 5530K | 65.1 | 0.0265 | 73 | 85 |
| Turbo | 6396K | 64.9 | 0.0113 | 68 | 92 |
You’ll notice the shift in CCT as well as DUV.
Dimensions and its competition
Dimensions:
| Olight Javelot | Millimeters | Inches |
|---|---|---|
| Length | 139 mm | 5.5 in |
| Head diameter | 40 mm | 1.6 in |
| Body diameter | 26 mm | 1 in |
| Tailcap diameter | 28 mm | 1.1 in |
Dimensions are rounded to the nearest millimeter and the nearest tenth of an Inch.
Weight:
| Olight Javelot | Weight in grams | Weight in oz. |
|---|---|---|
| Without battery: | 129 g | 7.1 oz |
| With battery | 202 g | 4.6 oz |
Weight is rounded to the nearest gram and tenth of an Oz. Measured without pocket clip attached.
Olight Javelot Flashlight comparison
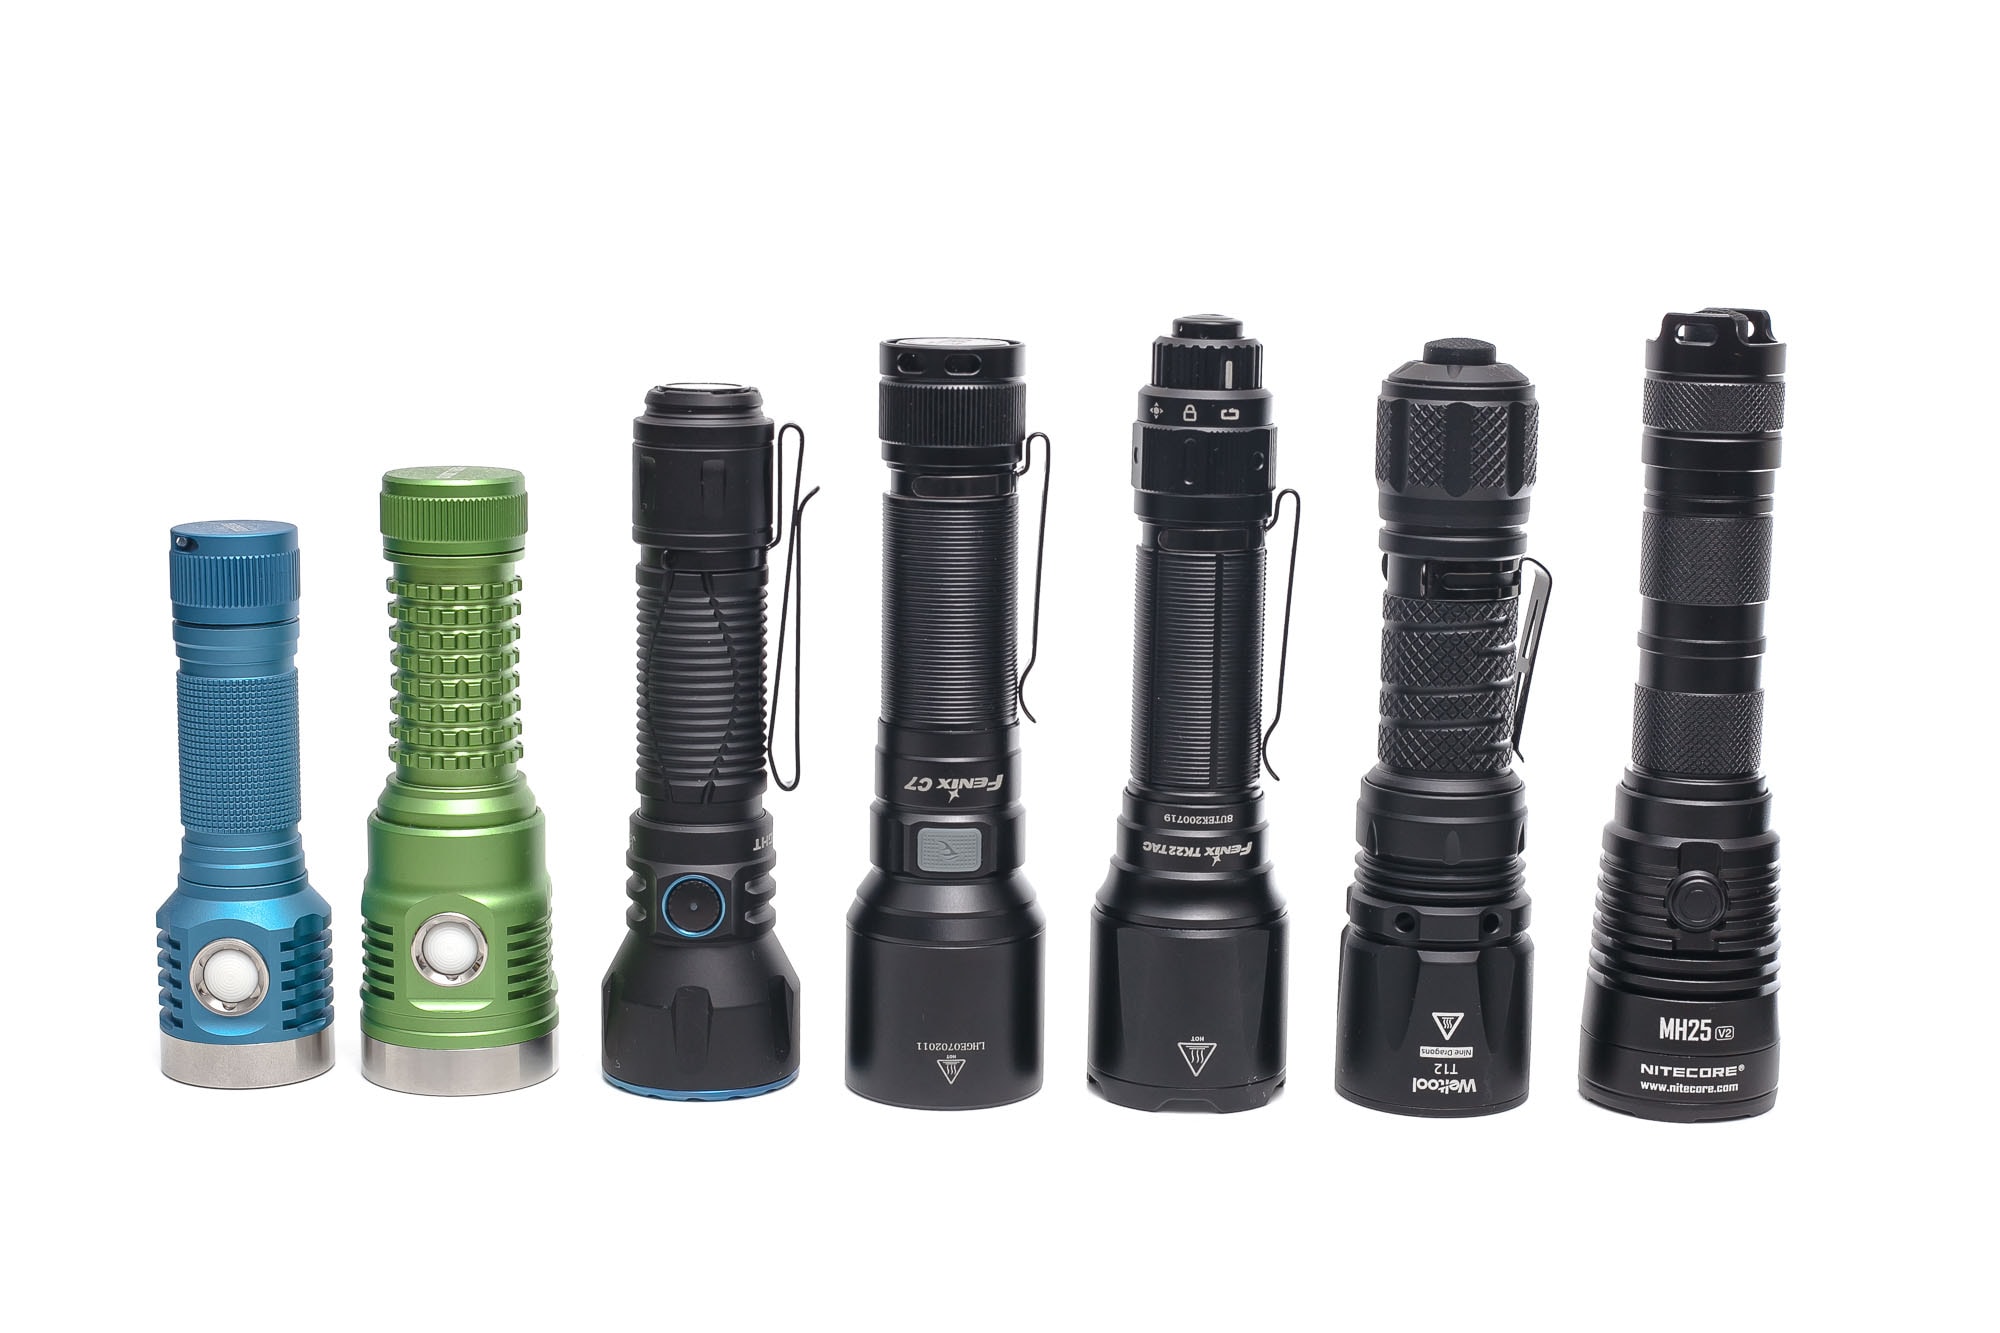
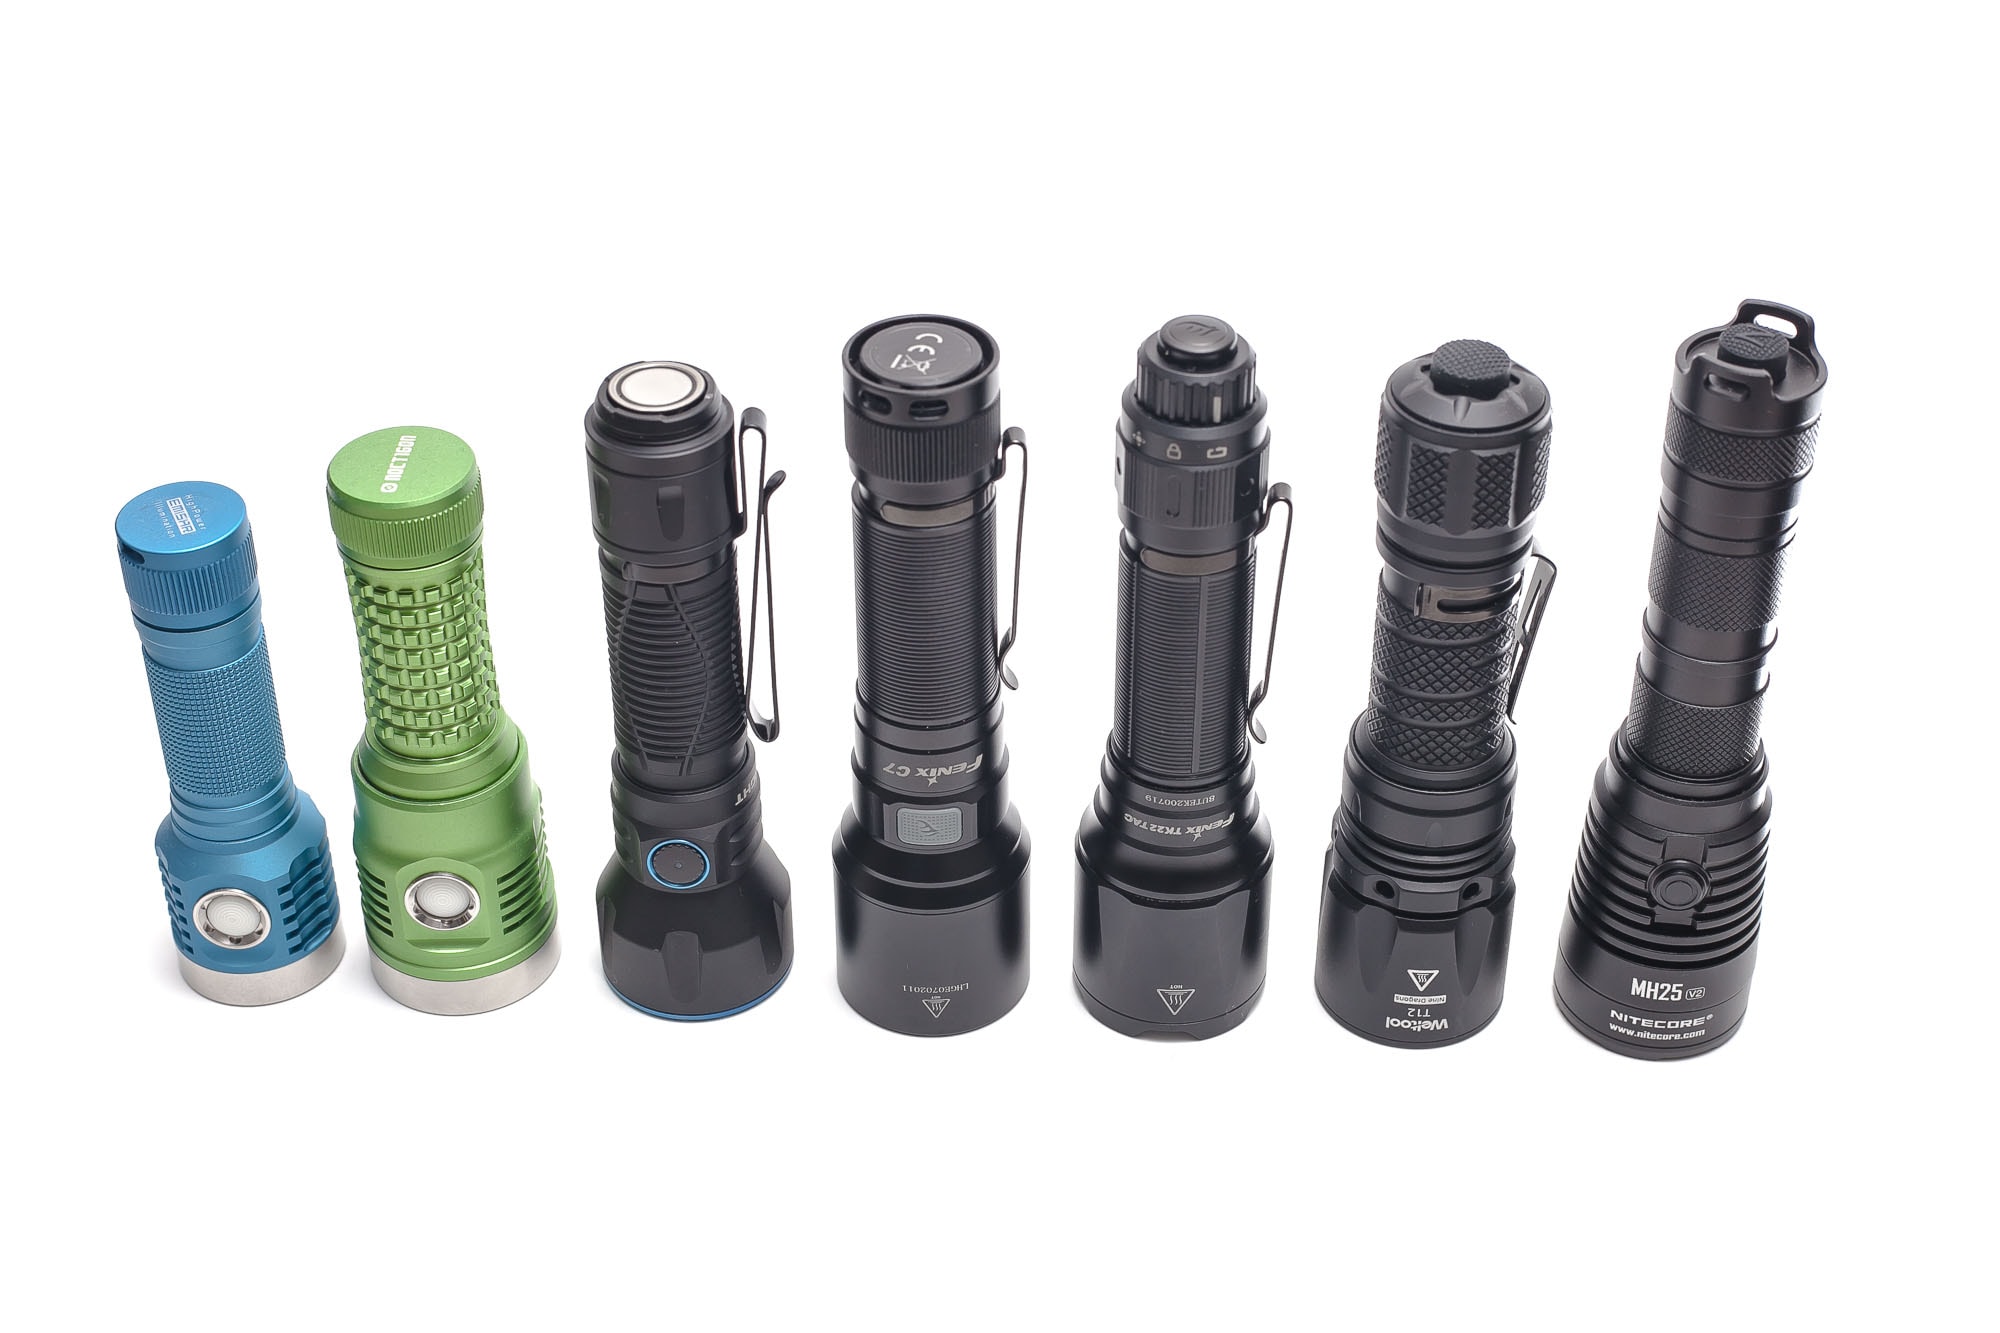
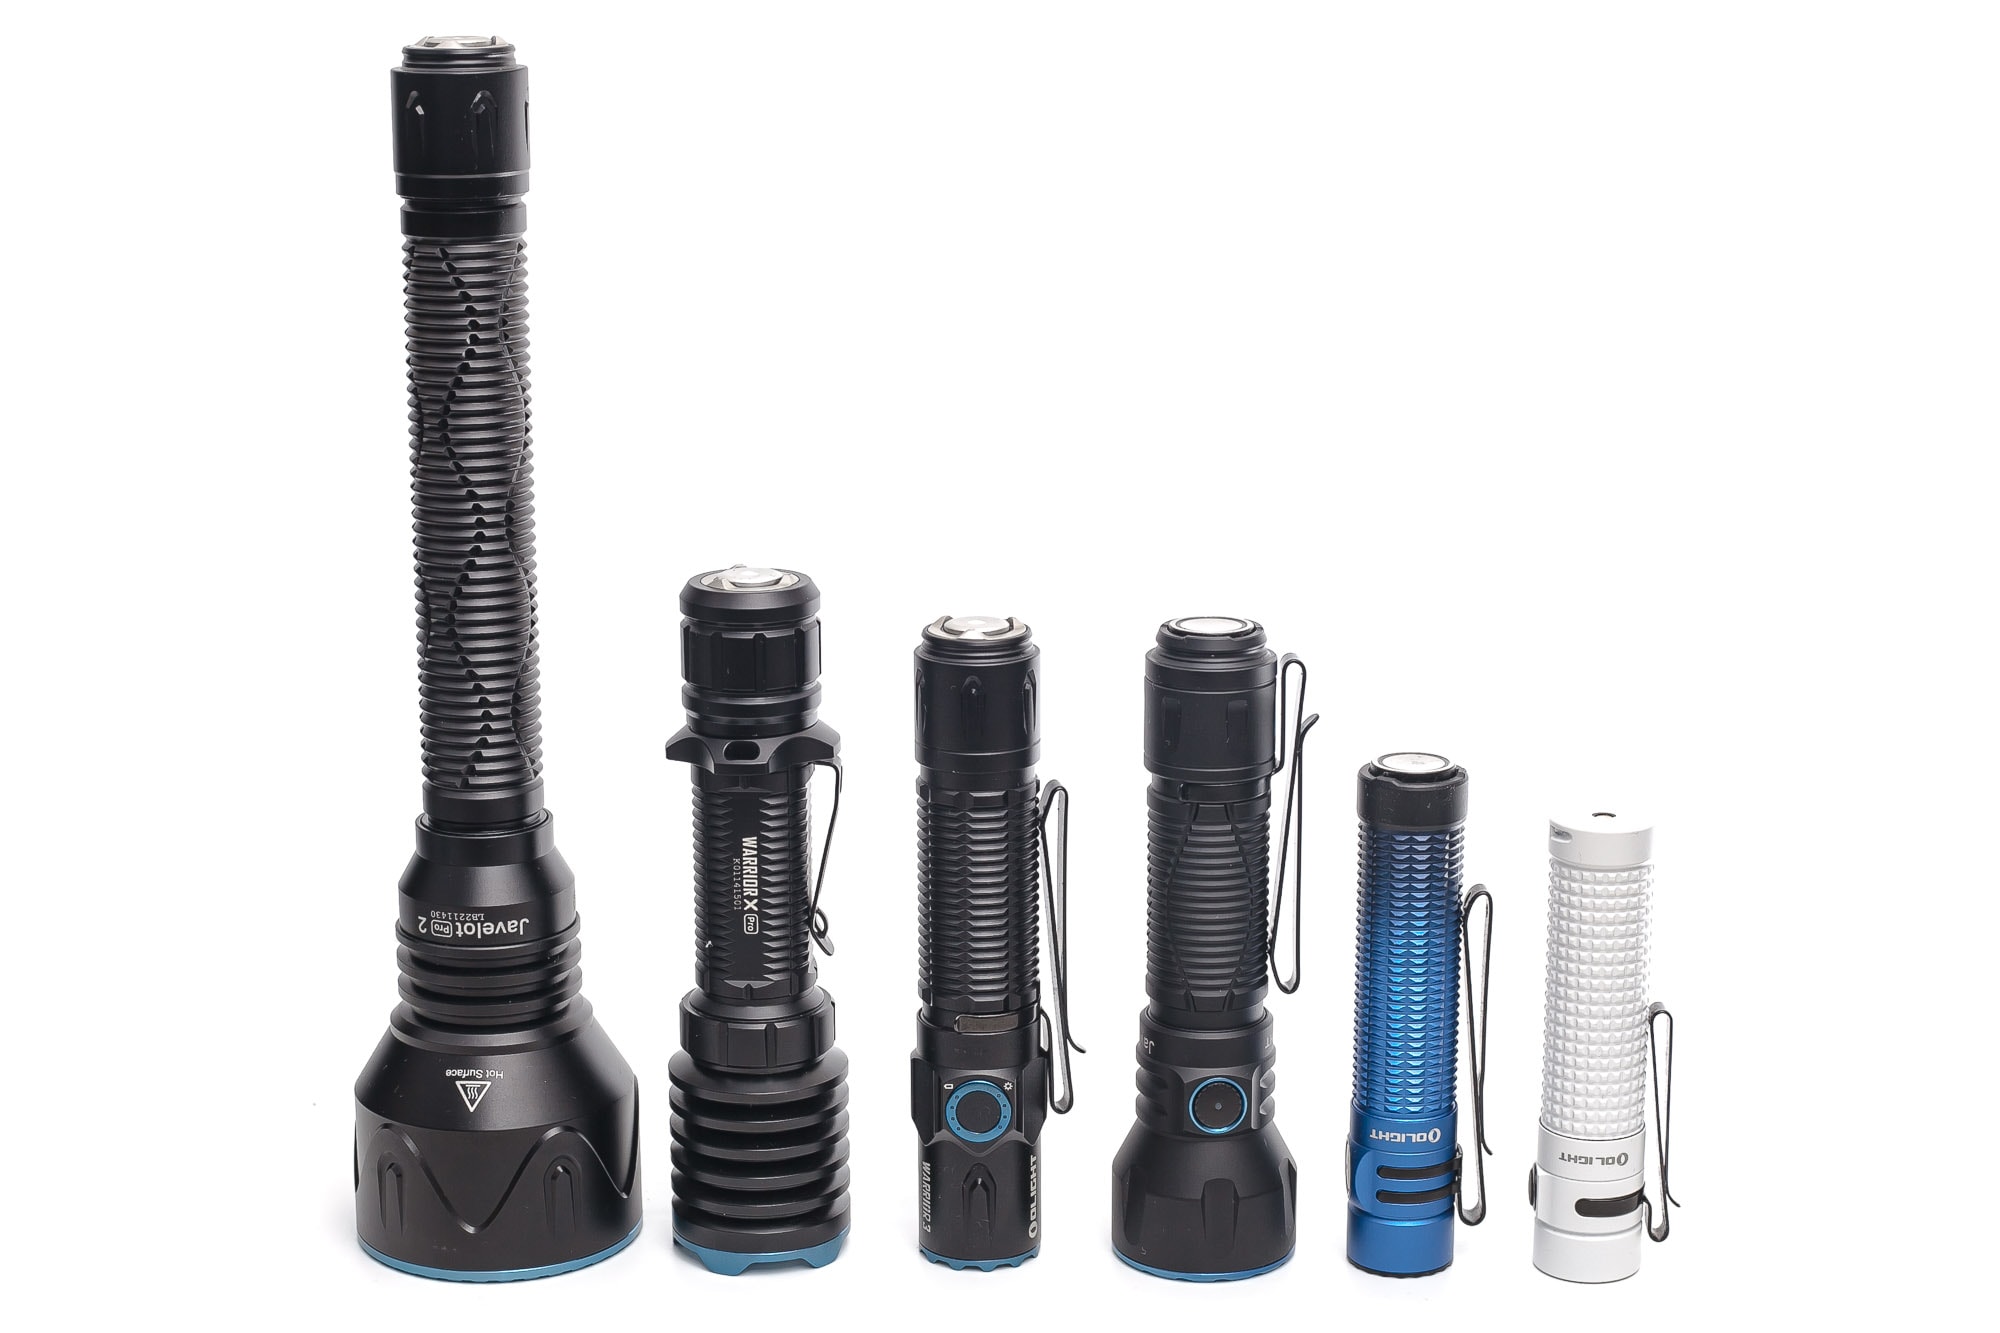
Size compared to other small tactical / thrower flashlights and Olight flashlights.
Group 1, from left to right small throwers: Emisar D1 v2, Noctigon DM11, Olight Javelot, Fenix C7, Fenix TK22 Tac, Weltool T12, Nitecore MH25 v2
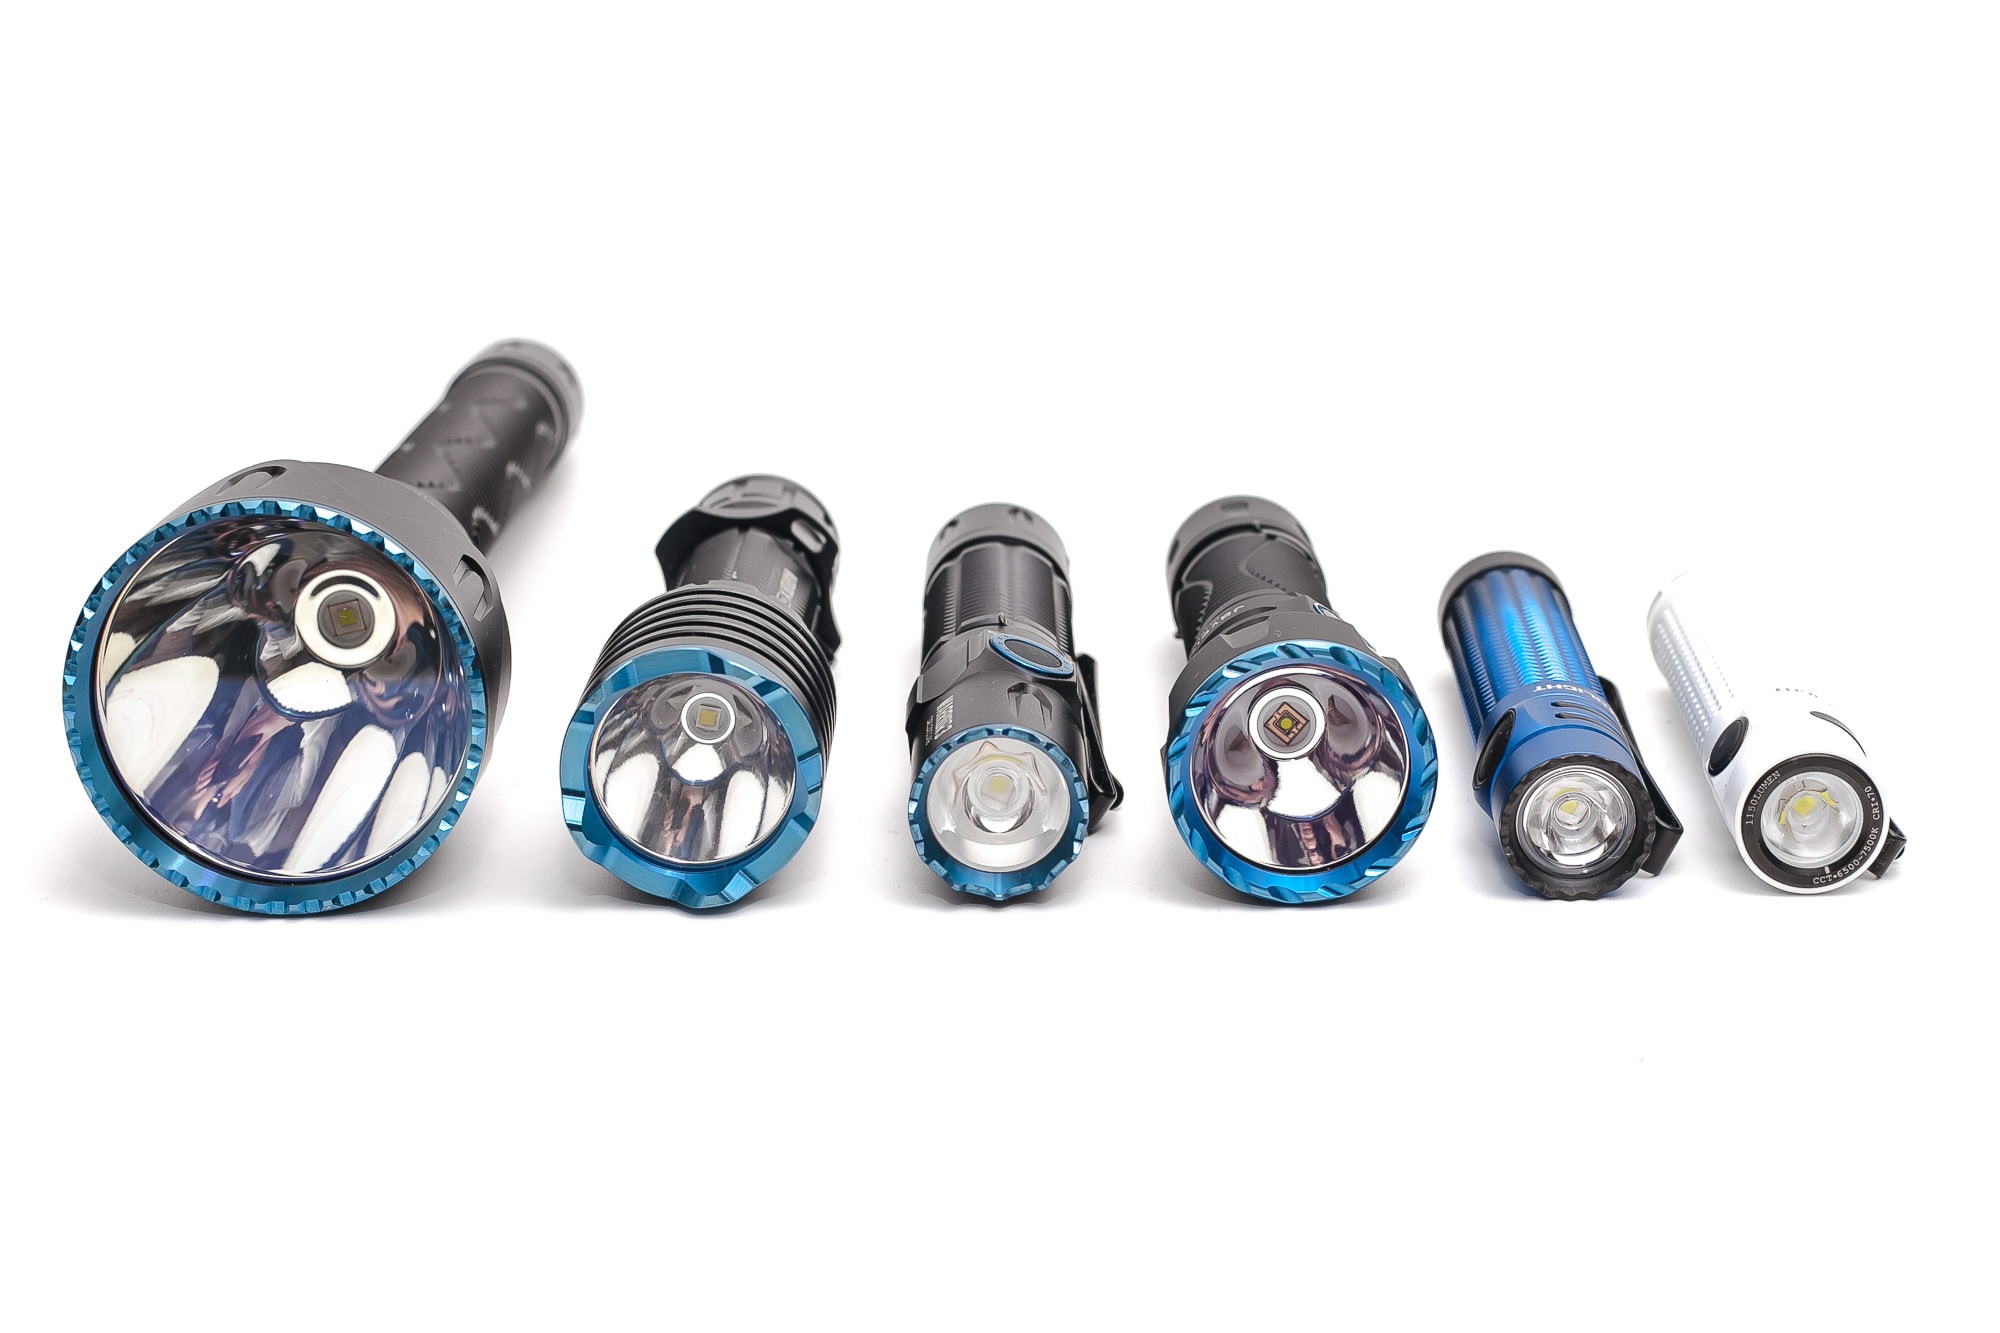
Group 2, from left to right Olight flashlights: Olight Javelot Pro 2, Olight Warrior X Pro, Olight Warrior 3, Olight Javelot, Olight Warrior Mini 3, Olight S2R baton 2.
Olight Javelot UI : User interface and driver
The Javelot flashlight features two switches that can be used interchangeably. One is located at the rear while the other is on the side. Both switches can turn the light on or off. For instance, if you turn on the light using the rear switch, you can use the side switch to turn it off, and vice versa.
The rear switch has 2 simple mode configurations that you can choose from: Standard mode and Tactical mode.
How to change the tactical switch mode configuration?
To switch between the two mode configurations, follow these steps: press and hold the tail switch, and while holding the tail switch, click the side switch once. There is no time limit, so you can do it as slowly or quickly as you want. Just make sure to keep holding down the tail switch. It’s important to note that changing this setting won’t affect the functionality of the side switch.
The available main modes:
- Moon, Low, Medium, High, Turbo
The available special modes (blinkies):
- Strobe
2 Tail Switch configurations
Tail Switch Configuration 1 (Standard Mode)
The default configuration has 4 options. Low (Momentary on), Low (continuous), Turbo (Momentary On), and Turbo (continuous).
- Short half-press: Low (continuous)
- Short full-click: Turbo (continuous)
- Half-press and hold (more than 1 second): Momentary Low (release the button to turn the light off)
- Full-click and hold (more than 1 second): Momentary Turbo (release the button to turn the light off)
Tail Switch Configuration 2: (Tactical Mode)
- Half-press: momentary Medium
- Ful-click: momentary Strobe
There is no continuous mode with Tactical configuration. A fast click doesn’t do anything, nor does a short half-press. Not that the side switch continues working the same.
Side switch
The side switch gives you access to more modes. And keep in mind that you don’t need the tail switch for power.
Available modes:
- Moon, Low, Medium, High, and Turbo
- (Moon and Turbo are not part of the default menu cycle)
Side switch from OFF:
- Single-click: goes to last used mode (it has mode memory, including Moon, but excluding Turbo)
- Double click: Turbo (not working with mode memory, unlike Moon and the default mode group)
- Triple-click: Strobe
- Press and hold 1 sec: Moon
- Press and hold 3+ sec: the light will turn on Moon mode briefly, and then enters lockout mode
Side switch from ON:
- Single-click: Off
- Double click: Turbo
- Triple-click: Strobe
- Press and hold: cycle through the modes from low to high.
Side Switch Shortcuts:
- To Turbo: Double-click side switch from either On or Off
- To Moon: from off: press and hold
- To Strobe: Triple-click from on or off
Mode memory:
- Yes, it includes Moon mode even when it is not part of the normal cycle. But it may be unnecessary since you can access Moon mode at all times from the off position with a long press.
- Turbo won’t be memorized
Blinky modes:
- Yes, Strobe. You can triple-click the side switch from either On or Off to activate strobe. You can also fully press the tail switch when in Tail Configuration mode 2: Tactical Mode.
Low battery warning:
- There is a small LED indicator inside the side switch. It will indicate the following:
- Solid green: 60%+
- Orange: 10-60%
- Red: ~10% (this is about 3.23V and you can only use Moon, Low and Medium)
- Red blinking: ~5% (This is about 3.13V, and if you turn the light off, you can’t turn it back on again)
Lock-out mode:
- You can activate the electronic lockout mode by pressing the side switch for over 2 seconds. It will briefly turn on in Moon mode and then lock out. Repeat this to unlock. I recommend always carrying it in the locked-out position.
- You can not do a physical lockout by unscrewing the tailcap. The driver has 2 springs, 1 for the positive and the other for the negative terminal. It would work if you unscrew it all the way, but you might lose the tailcap then.
PWM:
- Not visible by eye.
Firmware / UI Conclusion:
- I really love this type of UI, because it gives you 2 UIs in 1, with a very normal UI in the underhand grip, and a tactical UI in the overhand grip.
Olight Javelot Charging and batteries
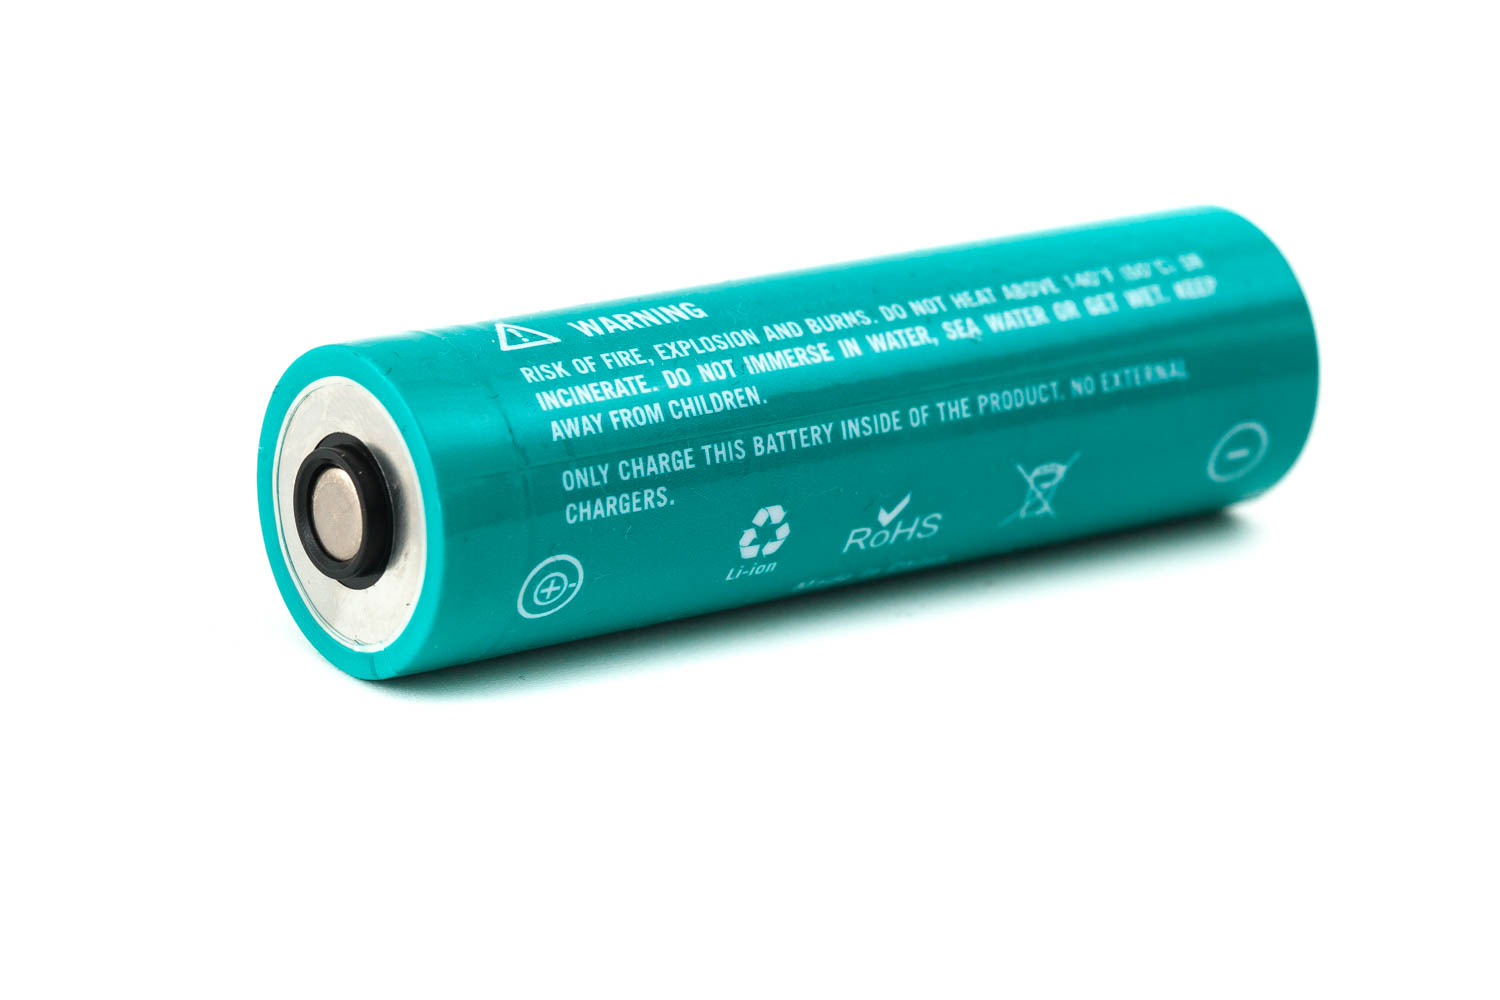
Olight includes a proprietary 21700 battery with a capacity of 5,000mAh, called Olight ORB-217C50. The battery arrived at 3.63 volts and has a positive and negative terminal on the front. To use the rear switch, the negative terminal on the rear of the battery is also used. You can’t use the tail switch without the negative terminal in the rear.
TIP: If you really don’t want to use the rear switch or you don’t want to accidentally activate the light, you can add a piece of plastic between the tailcap and the battery on the rear. That way, you deactivate the tail switch, but you can still use the side switch.
Because of this setup, you can’t replace this battery with a normal 21700. However, if you have a 21700 battery charger with protruding positive terminals, you can still charge this Olight battery in it. Just be careful not to touch the negative terminal on the battery to the positive terminal of the charger!! Do this at your own risk.
Charging works with the included MCC1A magnetic charging cable. The USB meter shows a 5.1V and 1.9 Amps at the highest I could see, which is 9.7-9.8 watts. During charge, a red light is visible, and it takes 3 hours and 44 minutes to turn green. However, the charge was not finished yet, and it continued charging for a long time. When the light turned green, it was charging at about 200mA and dropped to 0.078Amps 25 minutes later. In 1 test I waited 2 hours after the light turned green, and I measured 4.09V.. That is a pretty safe, but low voltage though. In the end… if you remove the charger when it turns green, it is about 4.07V, and has roughly 90-95% of charge in it.
One reason could be my USB meter adding some resistance.
| Charge type | Fits | No fit | Charge time |
|---|---|---|---|
| Flashlight with Magnetic charging | Olight 21700 proprietary | non proprietary | 3h 44 min |

Performance test
This is the gear I use for testing:
| Gear | Purpose | Link to buy |
|---|---|---|
| Hagner E4-X | Measuring beam intensity (throw) | Inquire at Hagner.se |
| 2* Extech SDL400 | Lumens and logging runtimes | Amazon.com, Amazon.co.uk, |
| Leica Disto D2 | Distance for throw measurements | Amazon.com, Amazon.co.uk, |
| Sekonic C-800 | Spectrometer for LED measurements | Amazon.com, Amazon.co.uk |
| Uni-T UTi260B | Thermal Image camera | Amazon.com, |
Lumen measurements:
How Lumens are Measured: Understanding ANSI FL1 Standards How Lumens are Measured: Understanding ANSI FL1 Standards: The ANSI FL1 standards specify that output in lumens should be measured 30 seconds after turning on, as this is the standardized time for measuring brightness according to the industry standard. This is why we focus on this part in our measurements. The ANSI FL1 standards require an ambient temperature of 22 ± 3°C. We record the ambient the ambient temperature to identify potential reasons for any observed discrepancies.The output measurements in this review are based on my homemade integrating spheres, each equipped with an Extech SDL400 Lux Meter. For consistency and accuracy, a calibration light (Convoy S2+ with 249lm and a Convoy S2+ with 261lm) is measured before each set of lumen measurements.
One of the lux meters uses an ND camera filter for high-output lights to prevent the lux meter from maxing out. This is either the Kenko PRO1D ND16 for up to about 80,000 lumens or the Gobe ND32 for anything above.
All of my readings were taken from a fully-charged Olight ORB-217C50 battery with 5,000 mAh.
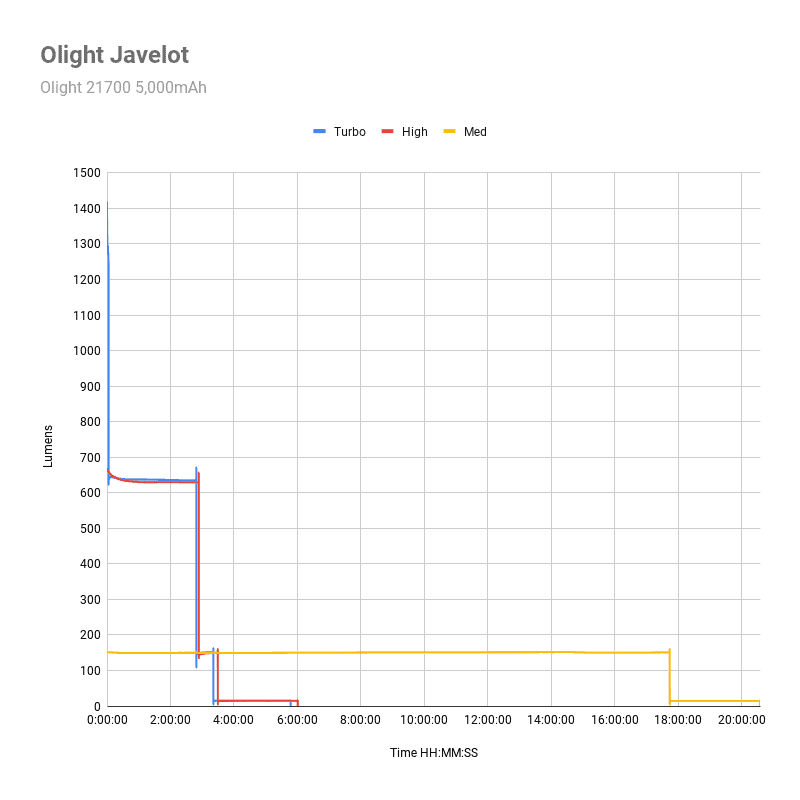
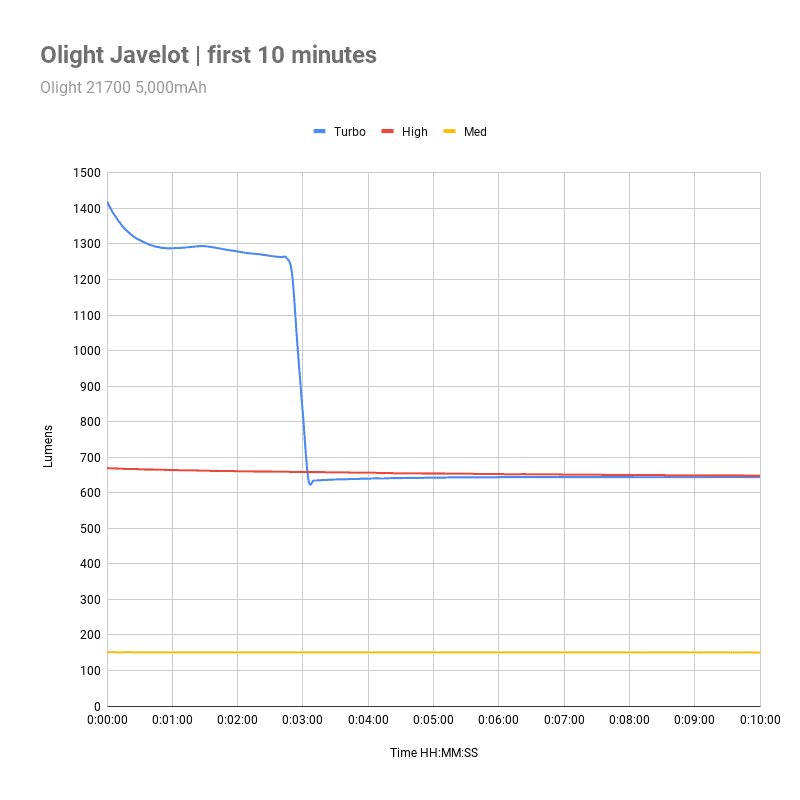
The measurements were taken manually at turn-on and after 30 seconds. The output numbers at 10 minutes are taken from the runtime graph.
| Mode | Specified | at turn on | 30 sec | 10 min |
|---|---|---|---|---|
| Moon | 0.5 lm | 0.6 lm | 0.6 lm | – |
| Low | 15 lm | 14 lm | 14 lm | – |
| Med | 150 lm | 152 lm | 151 lm | 150 lm |
| High | 650 lm | 671 lm | 666 lm | 648 lm |
| Turbo | 1350 lm | 1405 lm | 1361 lm | 644 lm |
| Turbo 3.78V* | – | 668 lm | 662 lm | – |
I used an ND filter, and Moon mode showed 1 lux.. this could be a bit higher, lower because of the low output. Turbo at 3.78V is about the same as high mode. So this means that you can’t activate Turbo at this low Voltage. 660+ lumens is still good though.
Ambient temperature during testing:
- 20.0 °C
Olight Javelot Battery life and runtime
How Runtimes are Measured: Understanding ANSI FL1 Standards About ANSI FL1 runtime standards: The runtime is measured until the light drops to 10% of its initial output (30 seconds after turning on). This does not mean that the flashlight is not usable anymore. The last column shows how long the light actually works till it shuts off. If there is a + symbol, it means that the test was stopped at that particular point, but the light was actually still running. This happens on certain occasions, with certain drivers, firmware, or batteries.Runtime tests were conducted in my 50cm homemade integrating sphere, paired with the Extech SDL400 data logging Lux Meter. Ambient temperatures from the moment the runtime test started.
| Mode | Specified | Runtime (ANSI FL1) | Time till shut off |
|---|---|---|---|
| Moon | 72 days | – | – |
| Low | 7.5 days | – | – |
| Med (18.3 °C) | 20h | 17h 43min | 20h 34min |
| High (18.2 °C) | (170+30min) 3h 20min | 3h 29min | 6h 00min |
| Turbo* (18.9 °C) | (2+175+25min) 3h 22min | 3h 21min | 5h 47min |
Edit: Olight read our review, and updated their specifications in their manuals and on their website. Now they are pretty close to my measurements.
Medium: The last output drop at 17h 43minutes was to 14.5 lumens, while the ANSI FL1 10% would have been 15.1 lumens (151 lumens after 30 seconds).. so in theory, it’s so close that 20 hours is pretty reasonable as well.
The end voltage after these runtimes were btween 3.09 and 3.11 Volts.
Olight Javelot Peak beam intensity and beam distance measurements
About Peak beam intensity: Understanding ANSI FL1 Standards About peak beam intensity The calculated value of distance in meters at which the flashlight produces a light intensity of 0.25 lux. (0.25 lux is about the brightness of a full moon shining on an object). This means that the intensity has decreased so much, it becomes difficult to see darker objects, or objects that don’t reflect light. The columns ‘Meters’ and ‘Yards’ use rounded numbers.Measurements were taken indoors at 5 meters with a Hagner E4-X Lux Meter. The measurements were taken 30 seconds after turn on.
| Mode | Specified | Candela measured | Meters | Yards |
|---|---|---|---|---|
| Moon | – | 50 cd | 14 m | 15 yd |
| Low | – | 1,375 cd | 74 m | 81 yd |
| Med | – | 14,800 cd | 243 m | 266 yd |
| High | – | 67,000 cd | 518 m | 566 yd |
| Turbo | 134,000 cd | 137,750 cd | 742 m | 812 yd |
Please keep in mind that Moon mode measured about 2 lux at 5 meters. This is pretty low, so it could easily be 1.X or 2.X lux. Turbo was pretty close to what Olight claimed.
Ambient temperature during testing:
- 20.2 °C
Beamshots
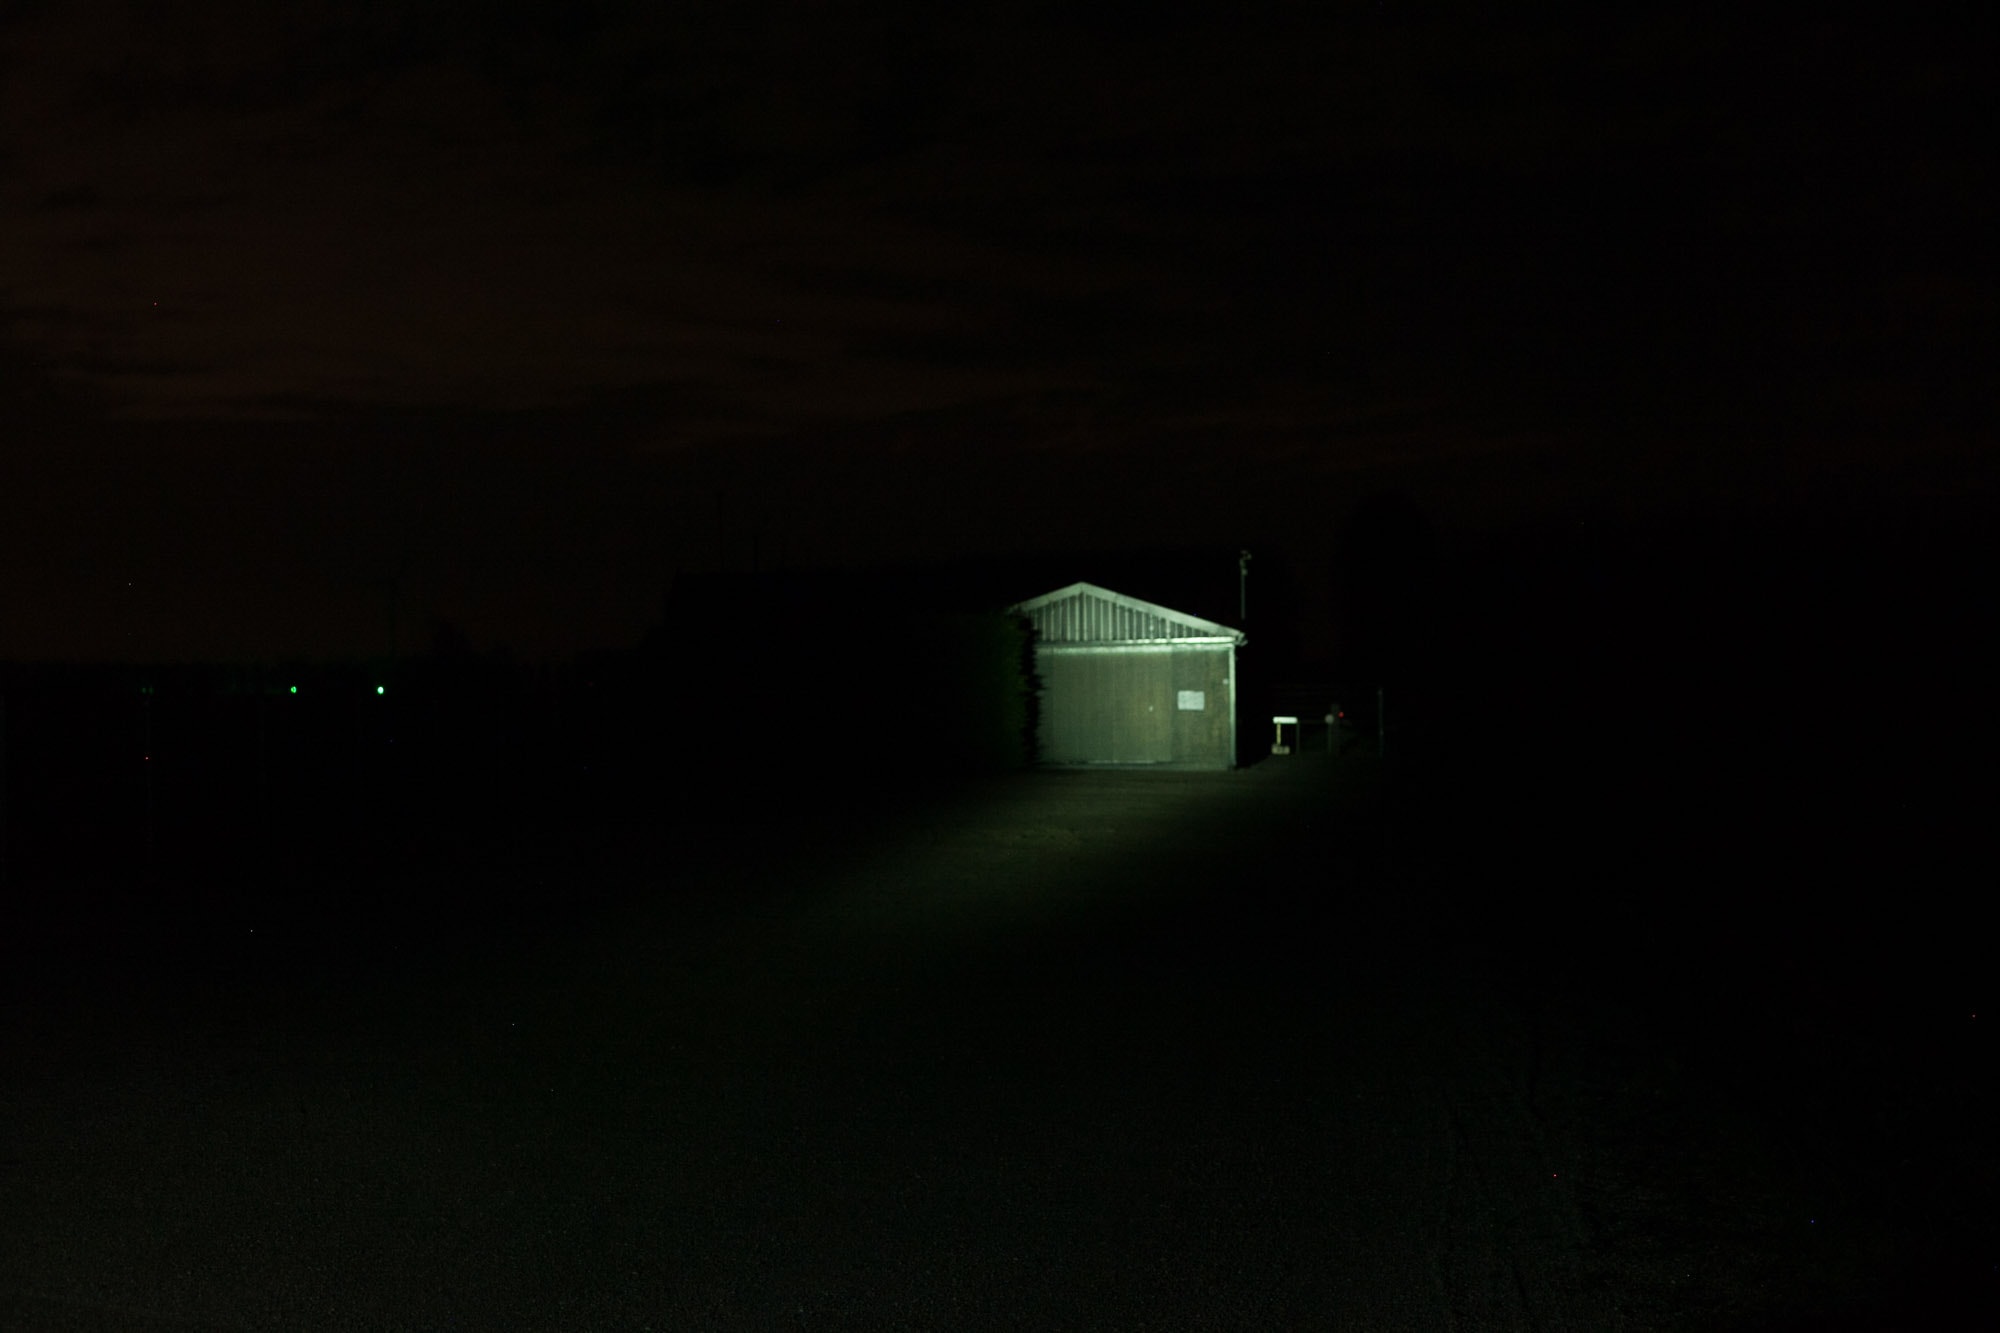
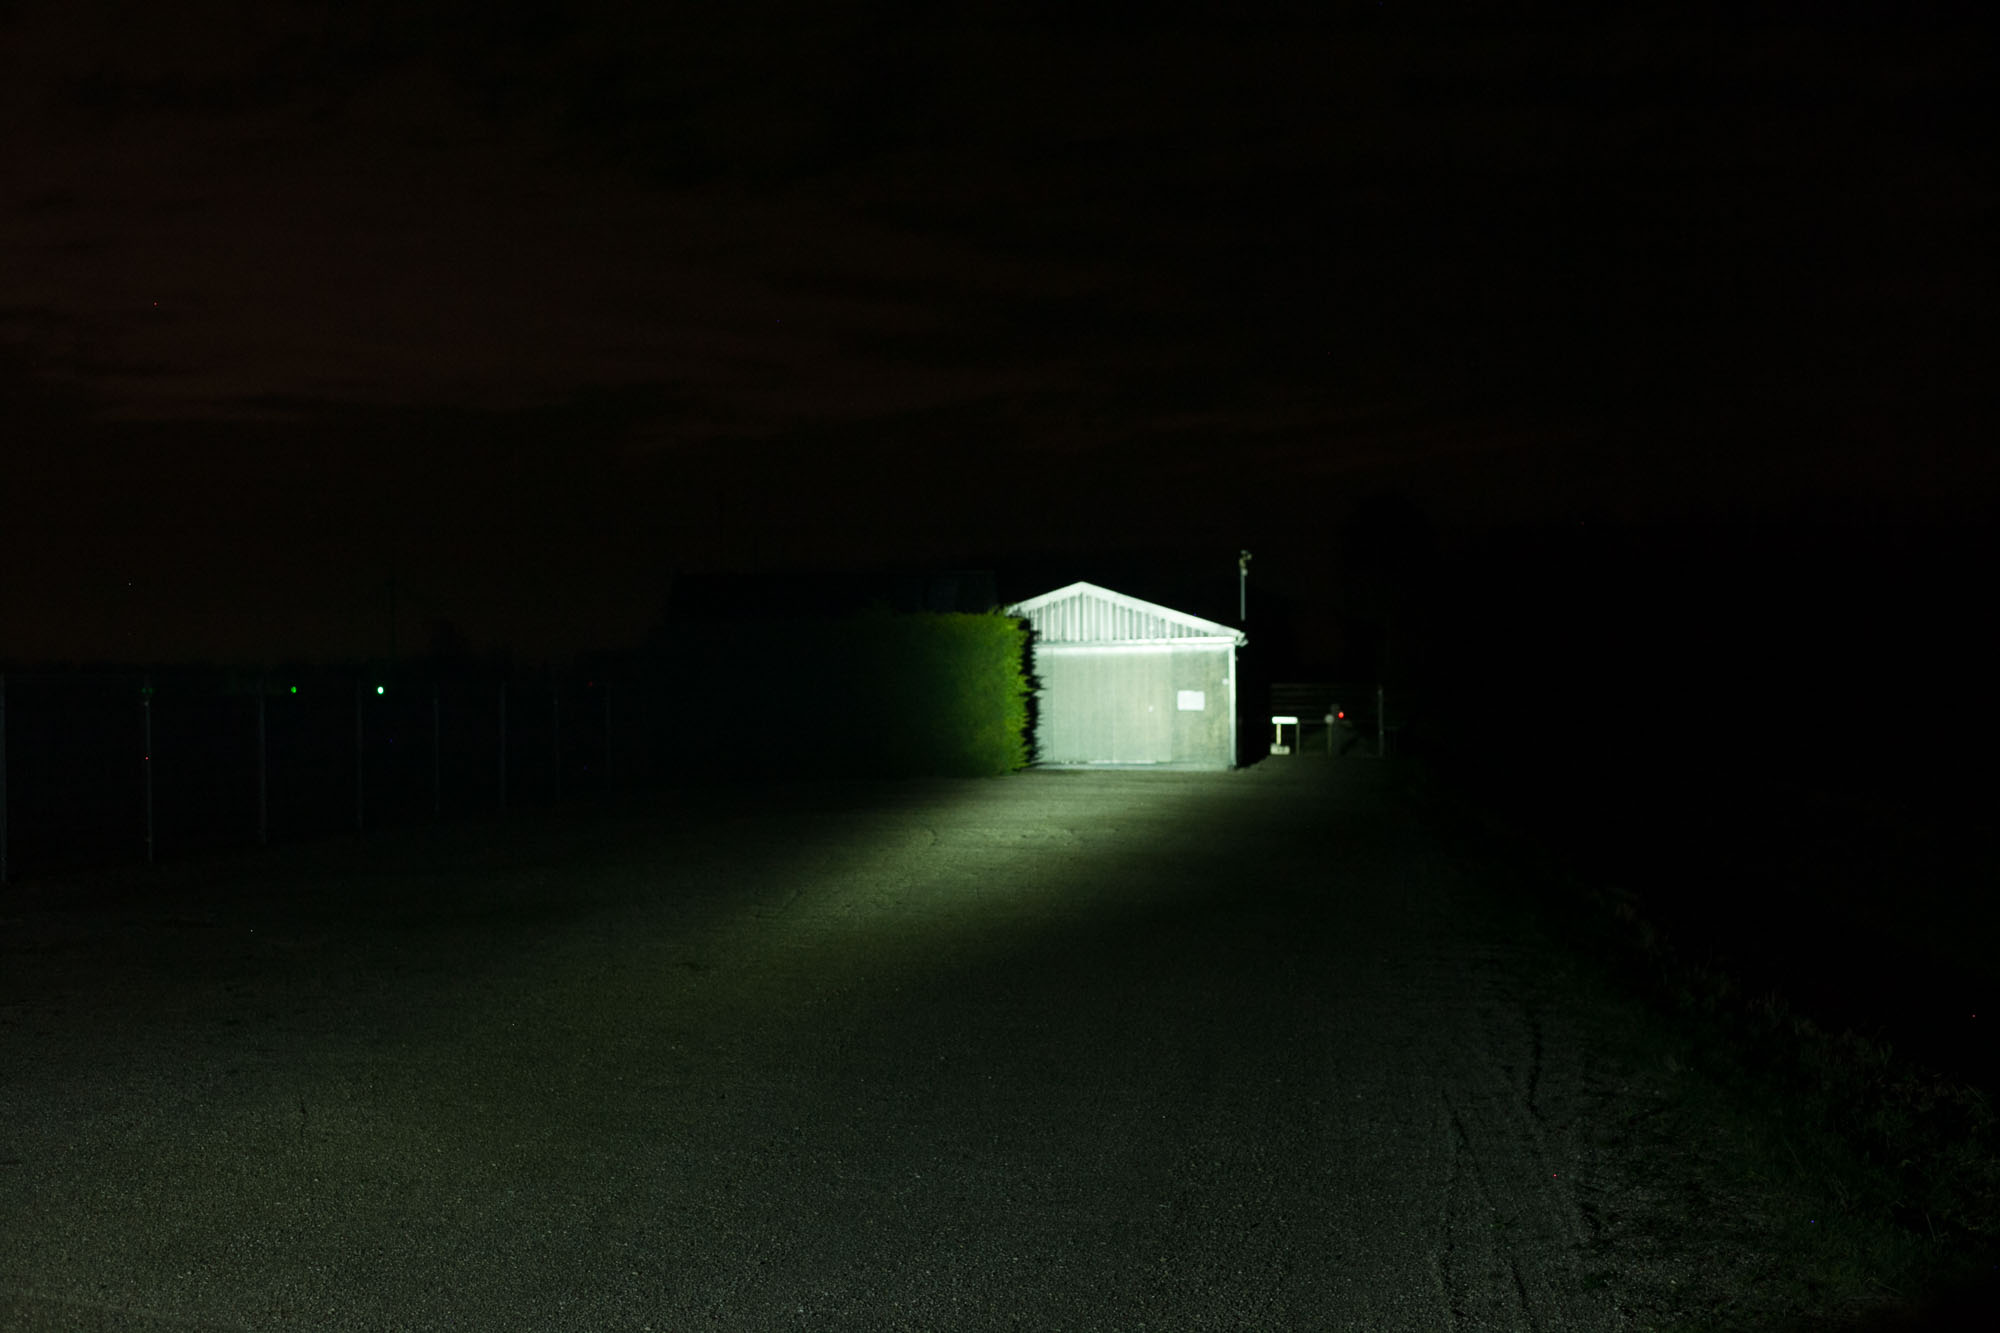
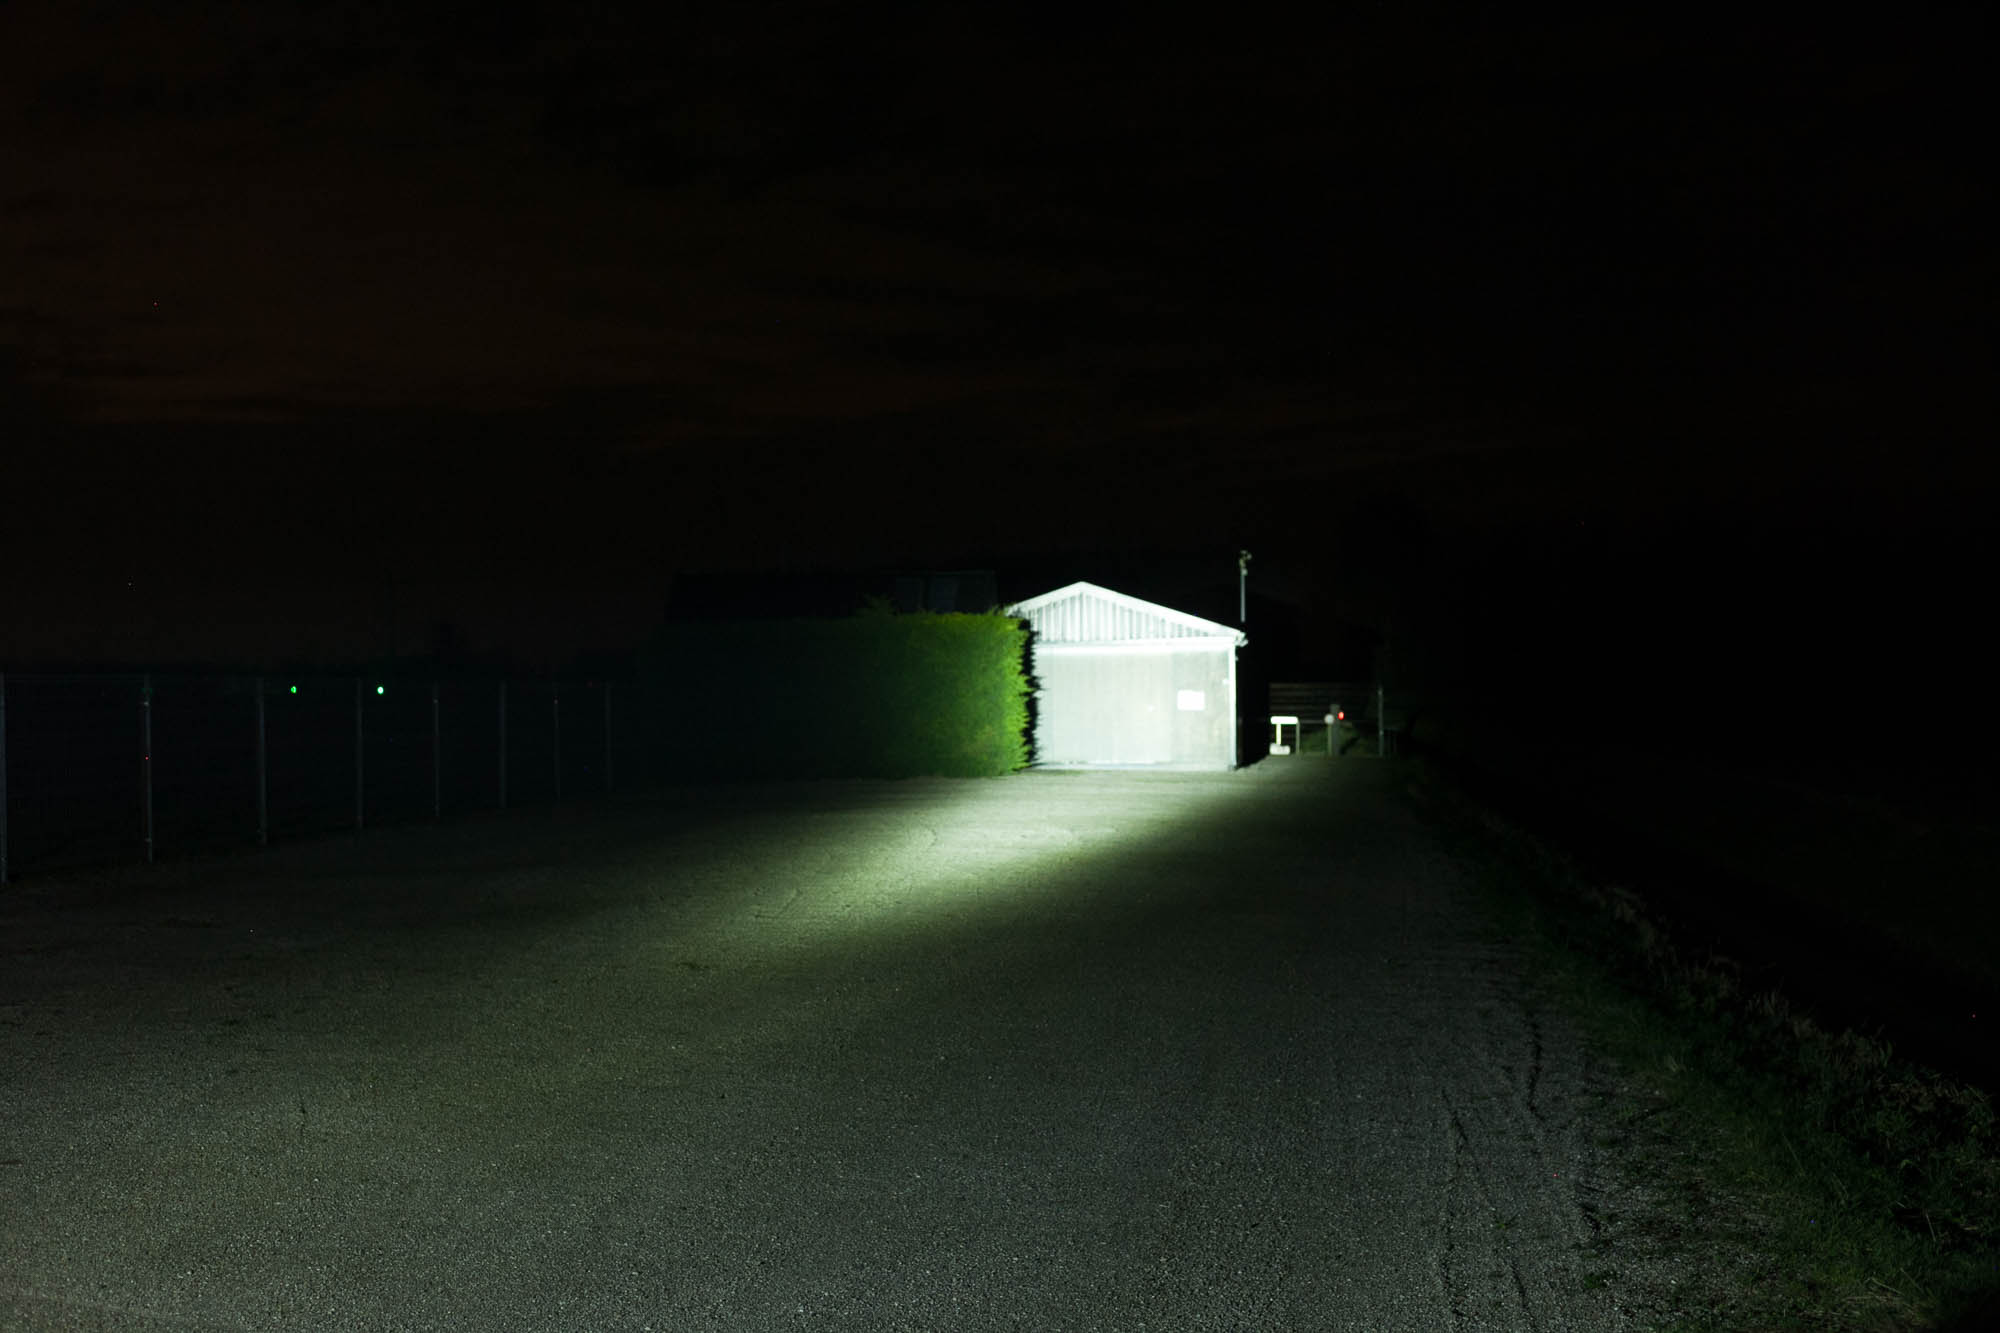
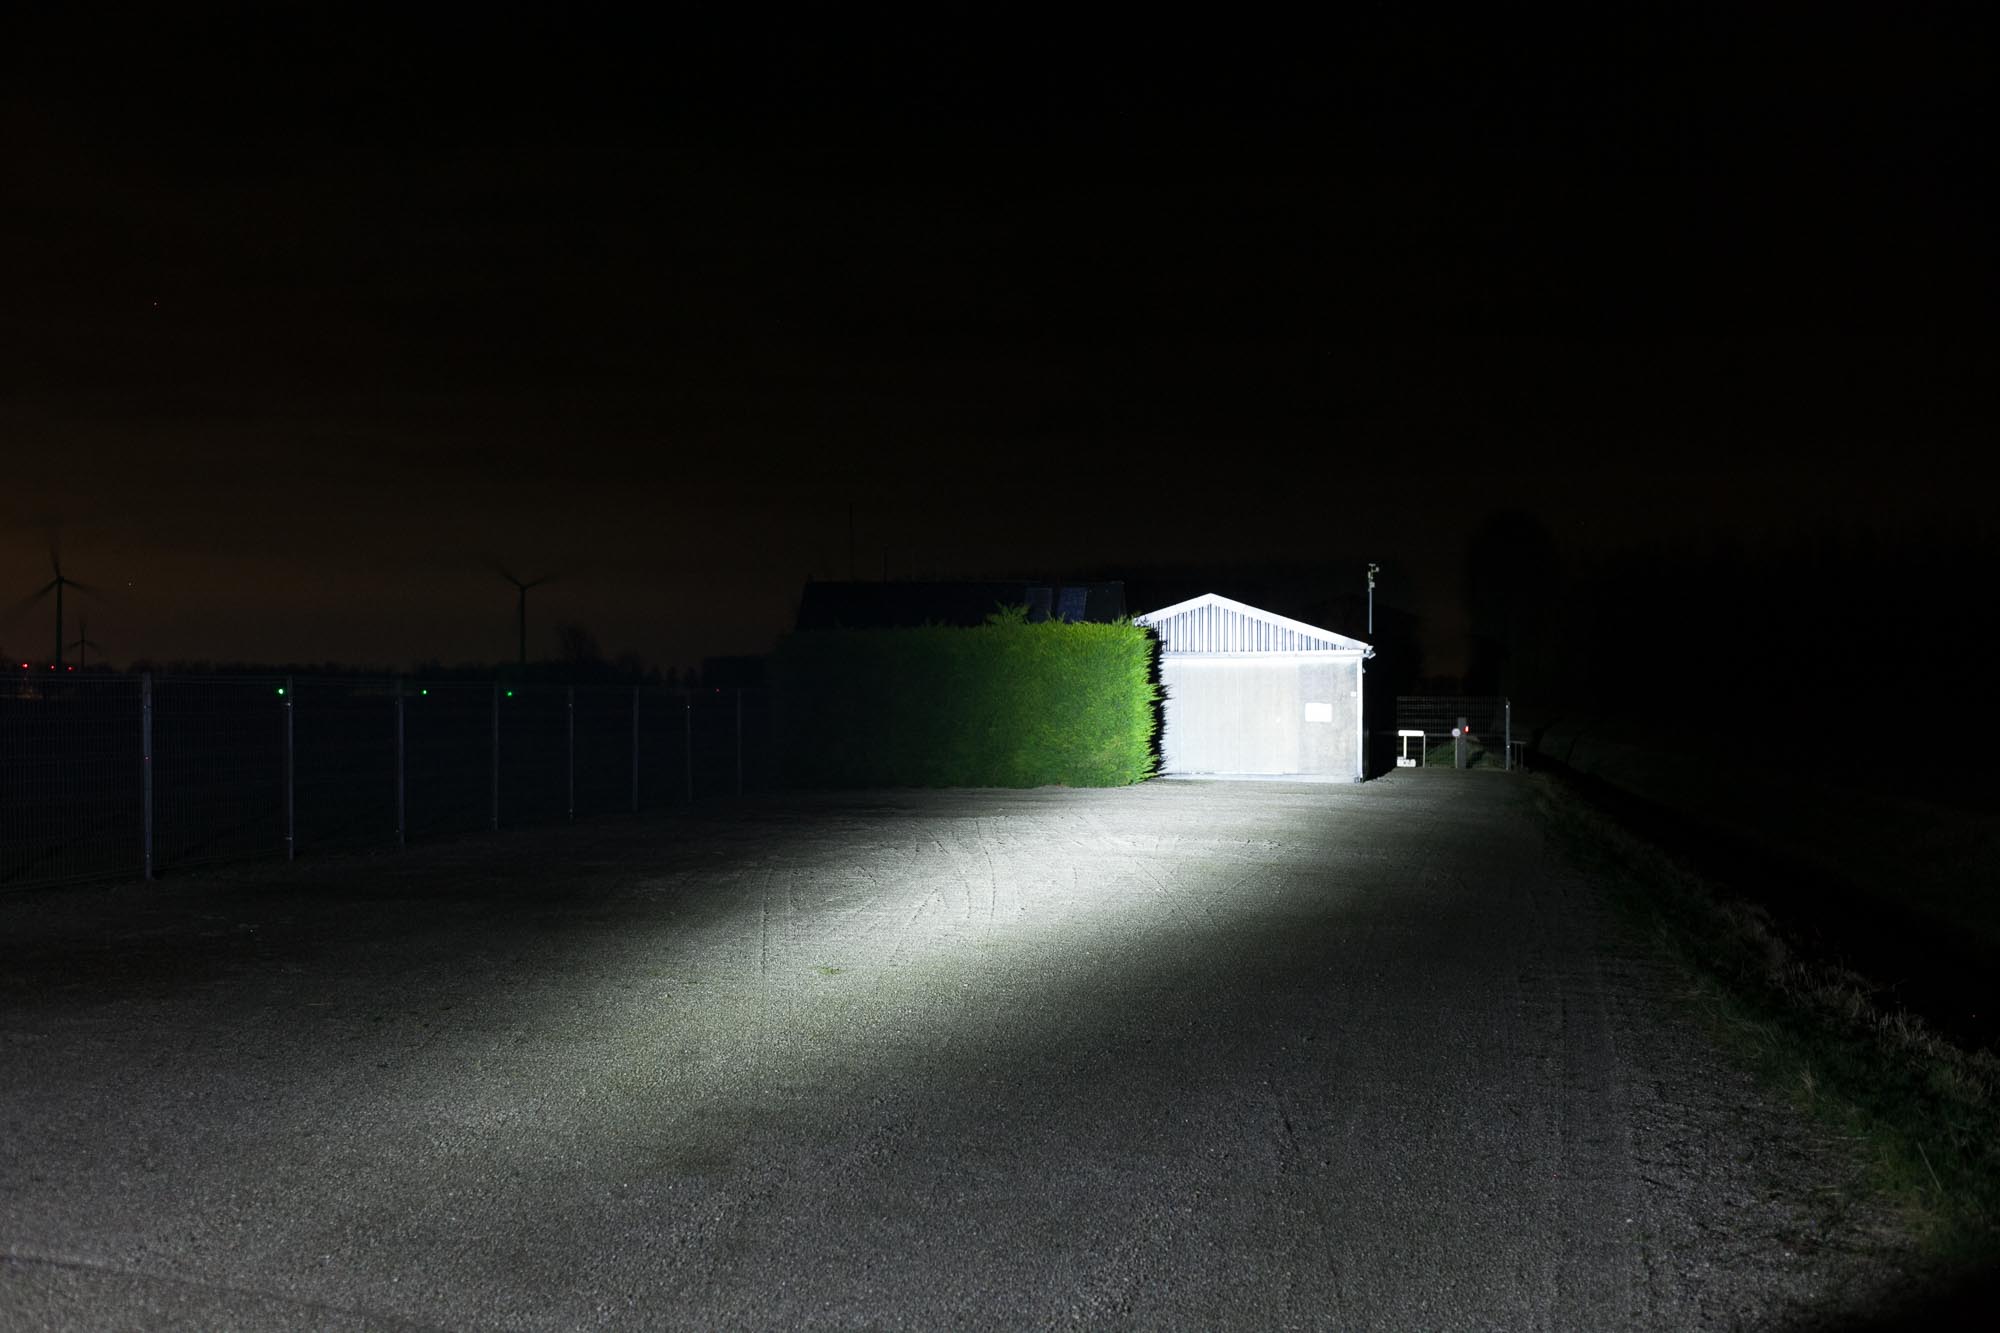
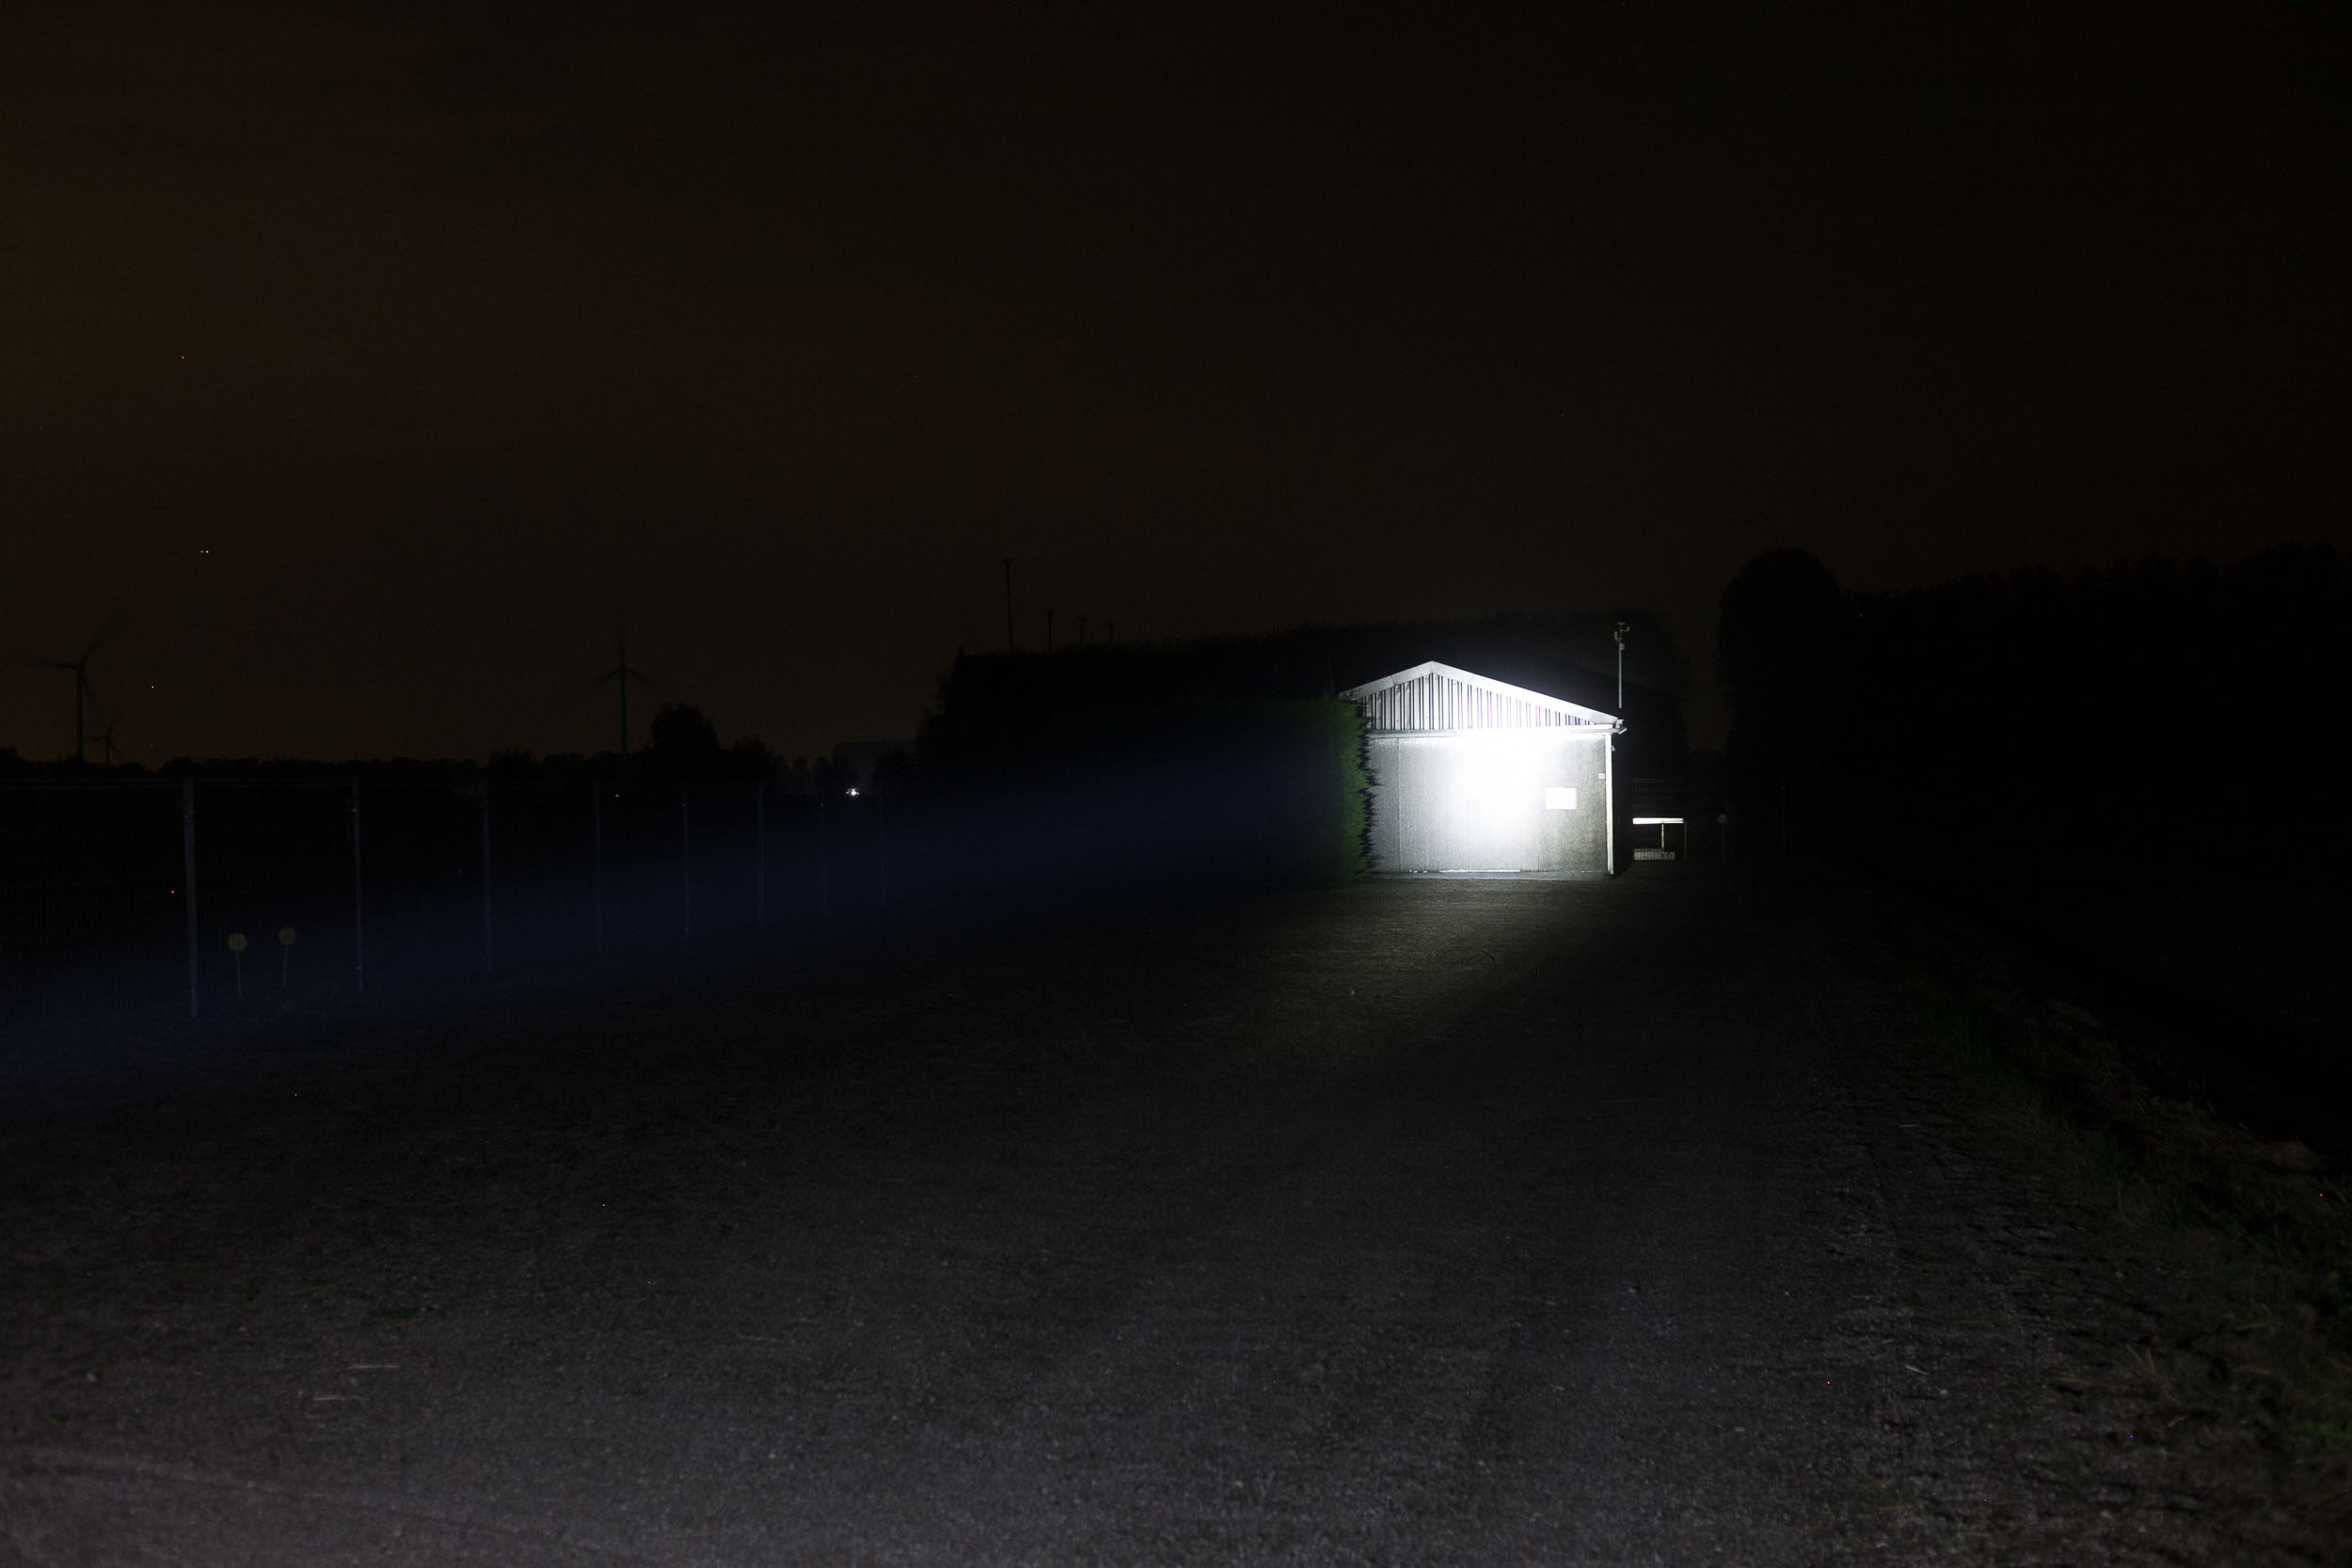
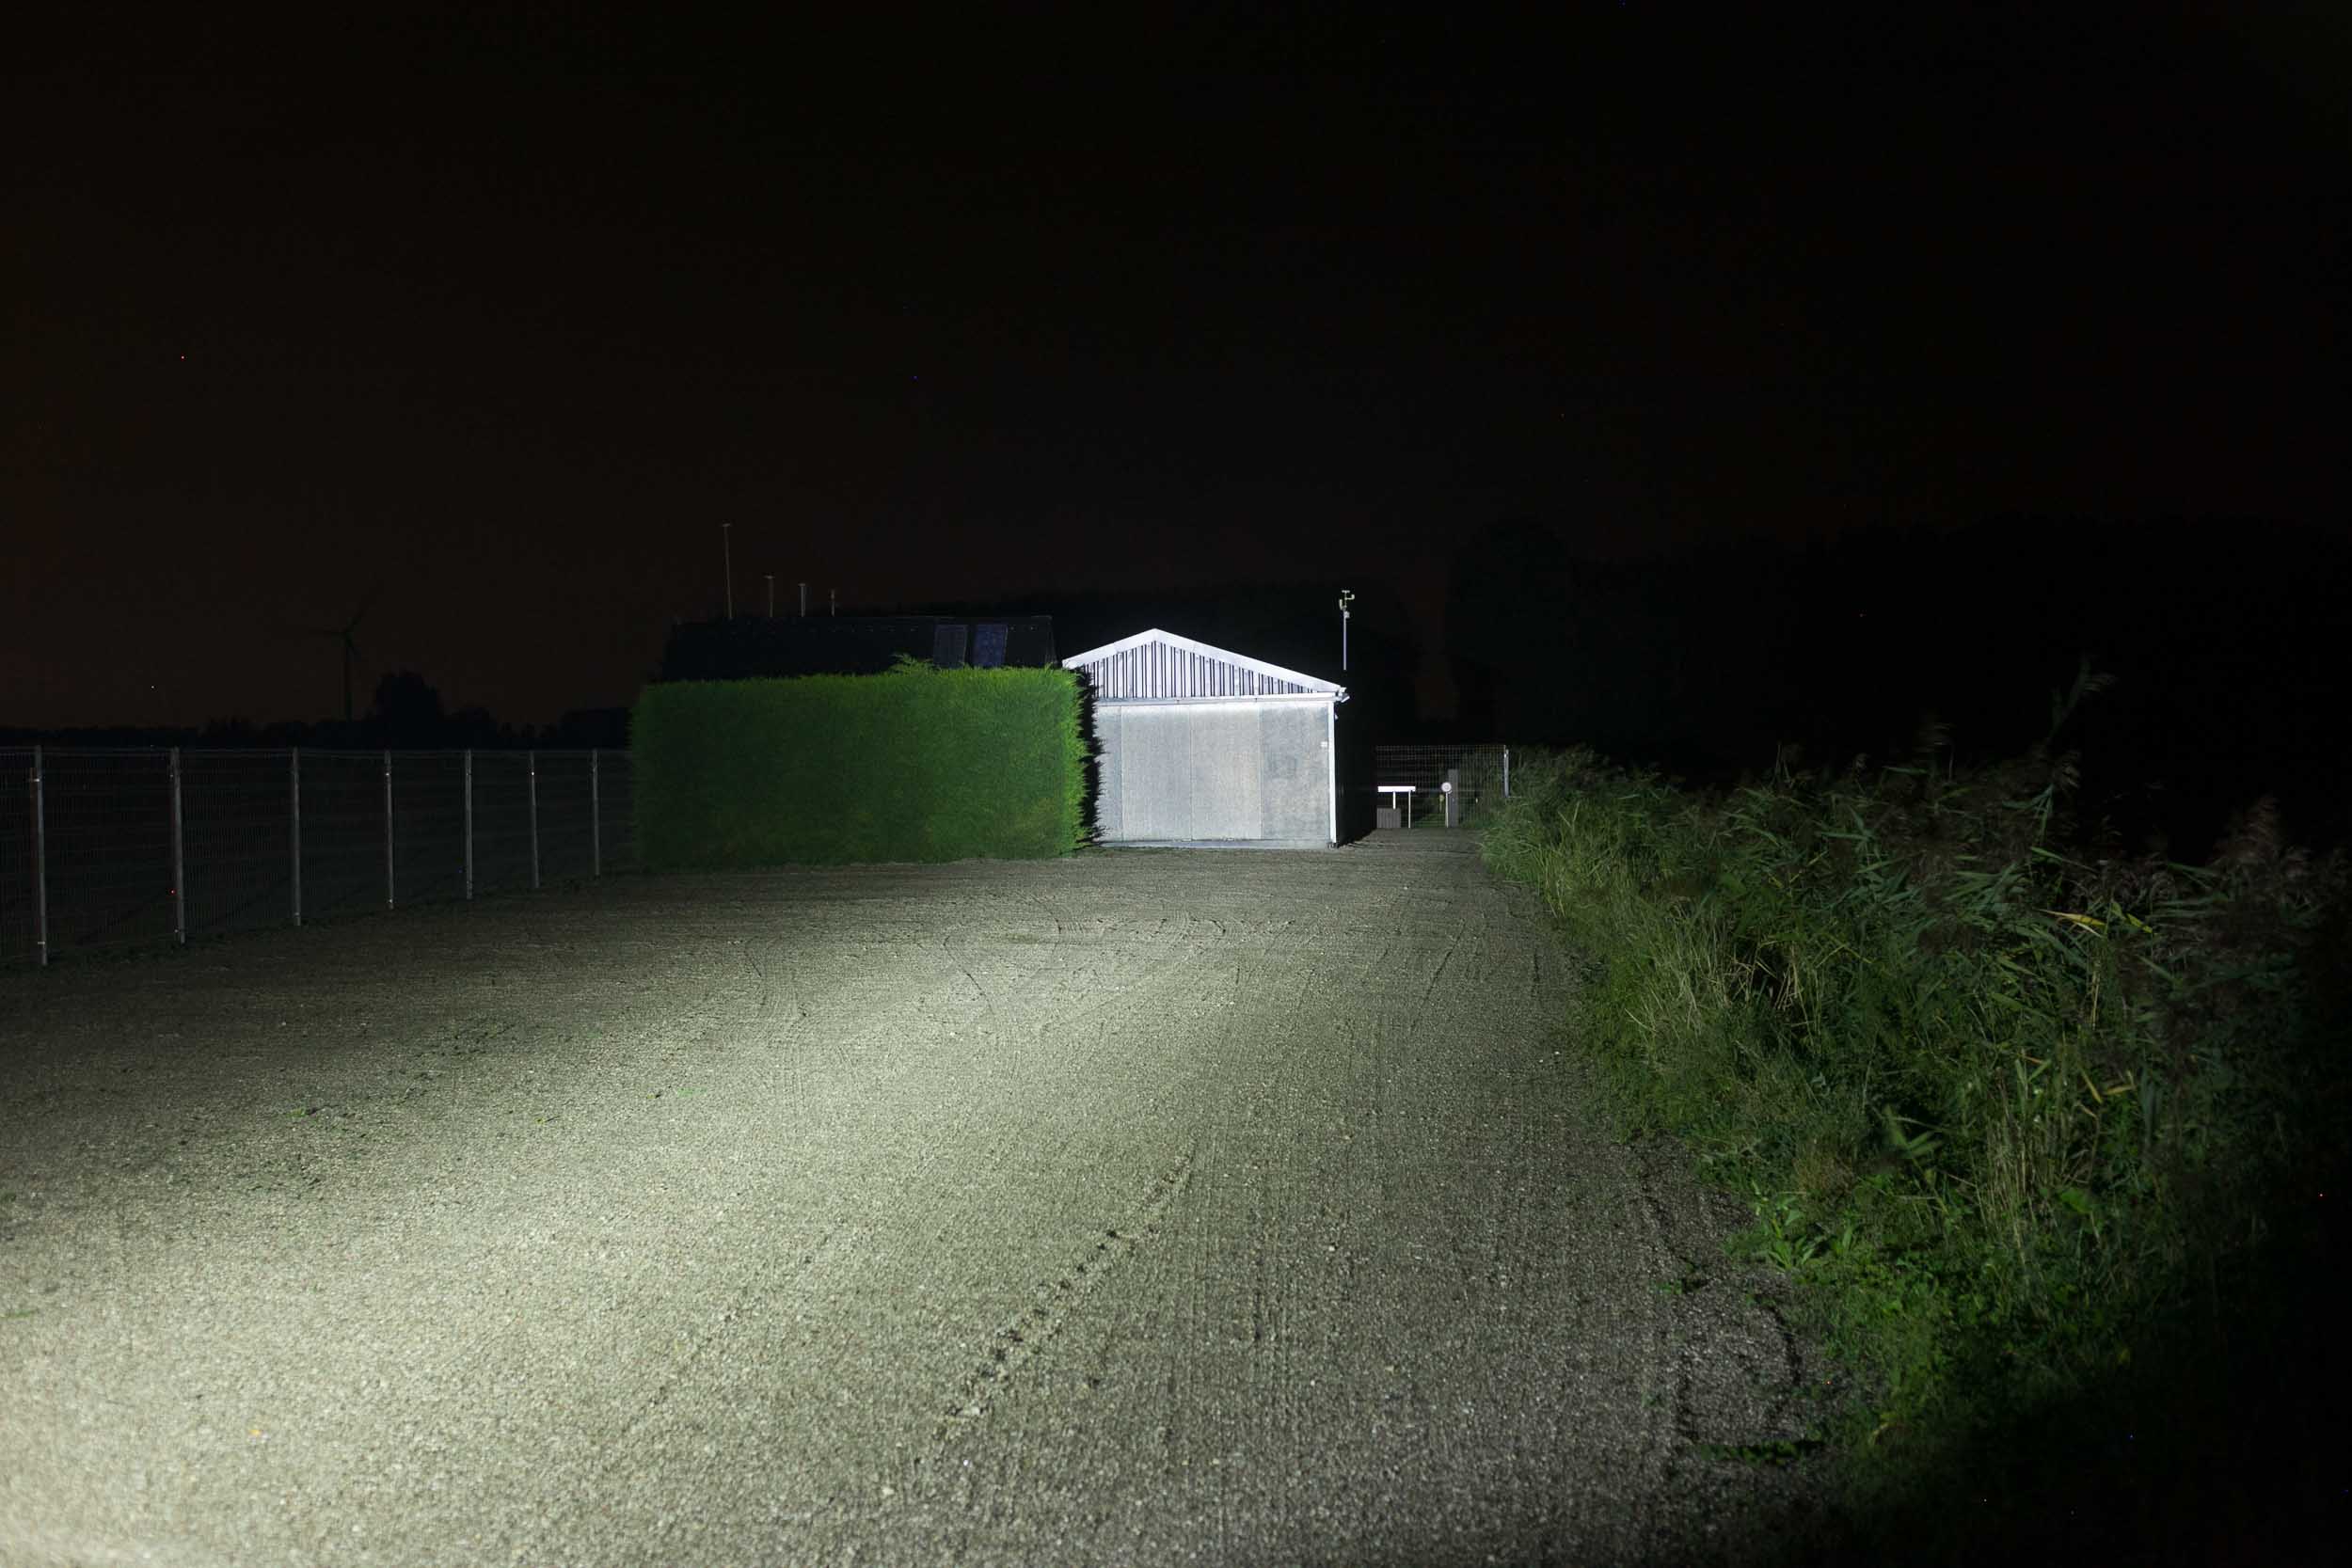
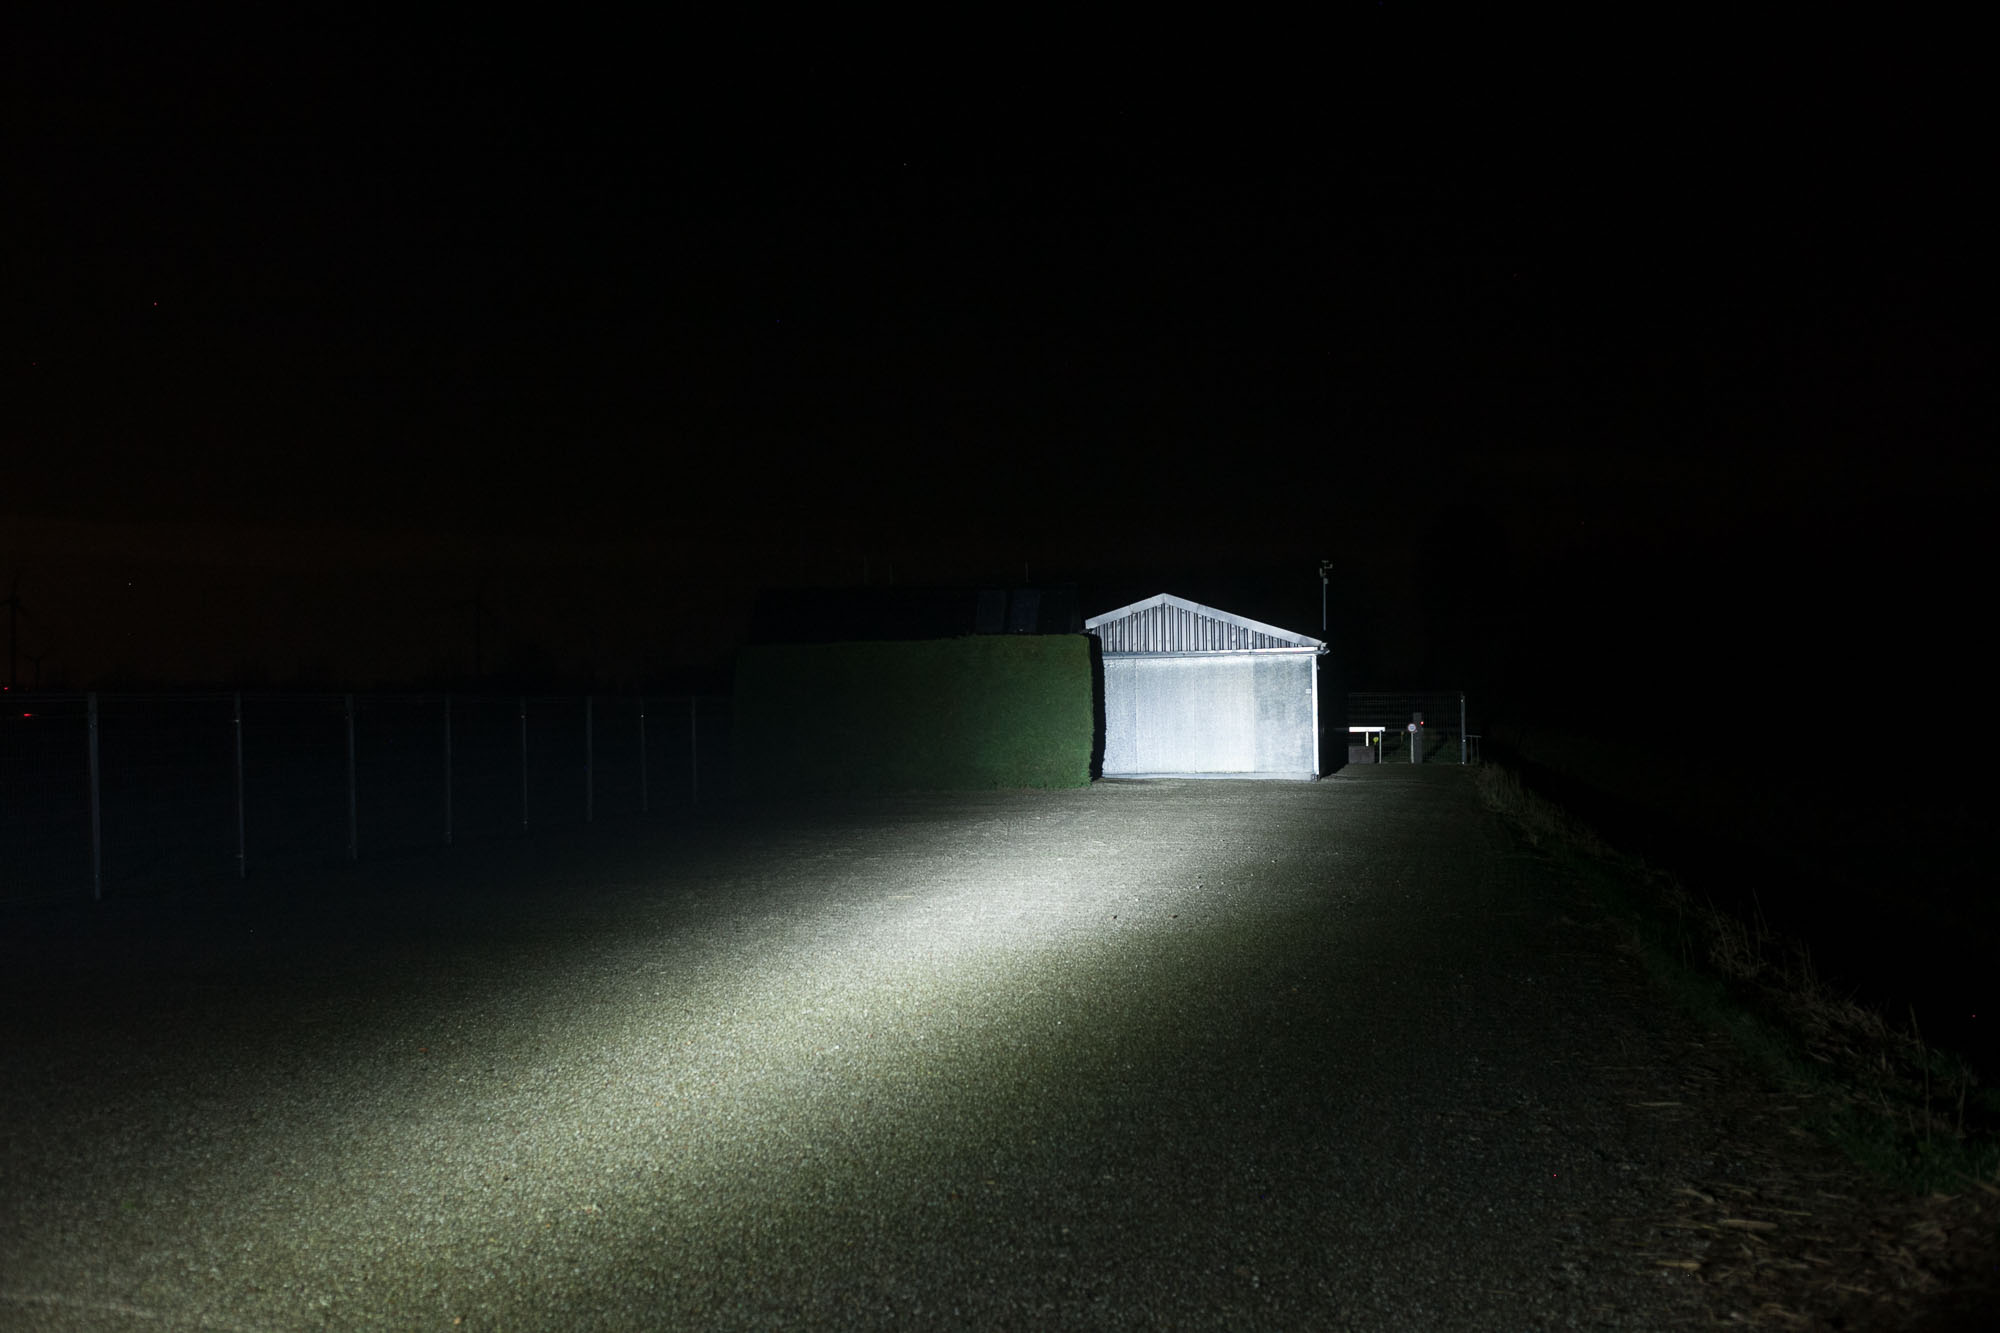
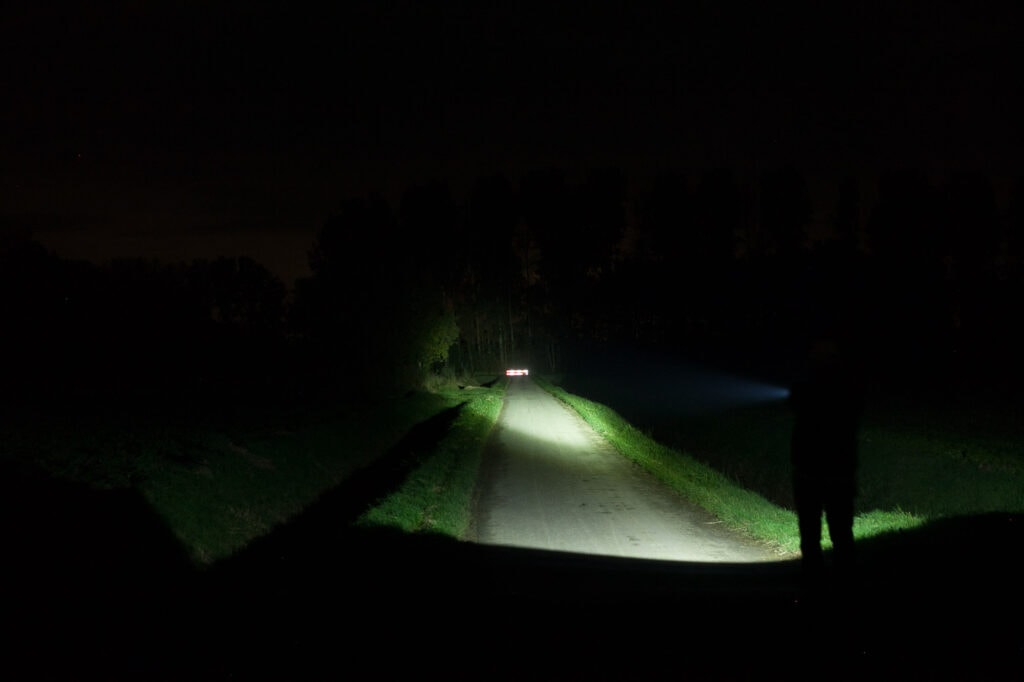
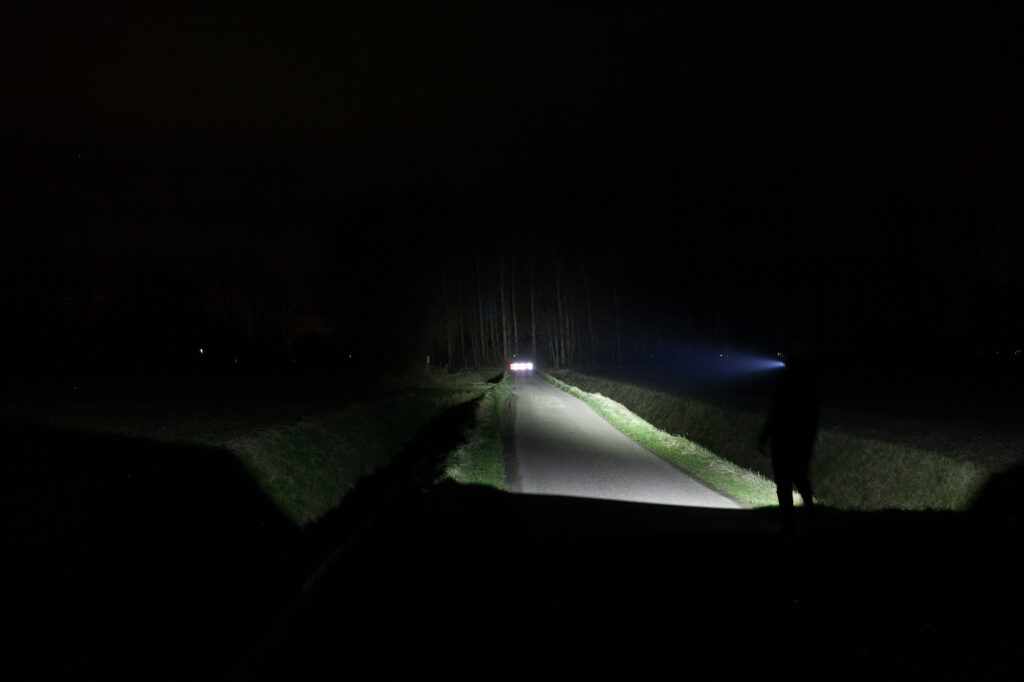
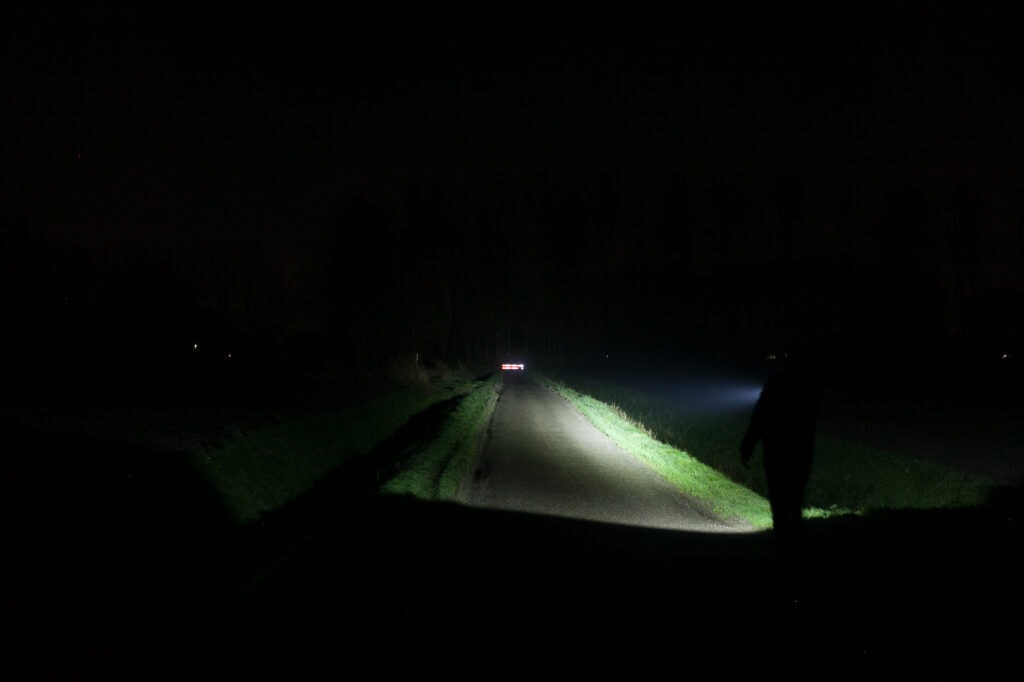
For the following beamshots, I used a Canon EOS 5D Mk2 with a 50mm lens. Manual settings: ISO1600, 1/4sec, F4, 5000K
The shed is about 65 meters / 71 yards away, and the reflective fence is about 200 meters.
Explore and compare the beamshots from the following flashlights:
- Olight Javelot
- Olight Javelot Mini
- Weltool T12
- Maxtoch Archer M Pro v2
- NEXTORCH TA30C MAX
Please note that the following beamshots are mainly intended to showcase the beam pattern and beam quality, rather than overall performance. These images are typically taken directly after activation, and in different seasons or weather conditions, and therefore do not fully represent its overall performance. For accurate performance metrics, such as output, beam distance, and runtimes, you need to look at the performance section of this review.





Disclaimer: This flashlight was sent to us for review at no cost by Olight. We have not been paid to review, nor have we been holding back on problems or defects.
Final Verdict
Pros
- Tactical and normal UI
- Dual switch design
- 2-stage switch for momentary/continous use
- Includes battery and charger so you don’t need to buy a separate charger
- Throws plenty far for its size
Cons
- LED produces a green beam, especially at lower outputs
- No USB-C charging
Explanation on star ratings:
1: Avoid: my phone flashlight would be a better choice – 2: Poor: significant defect or issues; almost unusable – 3: Average: some defects or issues; but still usable 4: Good: recommended (minor issues) – 5: Great: highly recommended

4.5 stars: ★★★★⋆
While our star rating provides a reliable indicator, we encourage you to read the full review to make an informed decision based on your own needs and preferences.
The beam reaches pretty far for its size, but it’s green in the lower modes.
Edit: Olight read our review and updated their runtime specifications. They now match up with our testing!
Olight introduced USB-C charging for their flashlights recently, but the new Javelot does not include it. Instead, it uses its proprietary magnetic charging, but it would have been nice if Olight implemented USB charging on more of its lights.
Olight includes a high-quality 5,000mAh battery in the box, so you are ready to go and don’t need to buy a separate 21700 charger.
I really like the unique dual switch design, which works well for both normal and tactical use depending on whether I use the underhand grip or the overhand grip. All in all, a nice hybrid thrower/tactical light.
Buy your Olight Javelot with a discount
Use our exclusive 1lumen discount code to get an extra 10% off anything you order at Olightstore.com (USA). Coupon code: 1lumen
1lumen selects and reviews products personally. We may earn affiliate commissions through our links, which help support our testing.