1lumen selects and reviews products personally. We may earn affiliate commissions through our links, which help support our testing.
Olight Seeker 4 Pro review
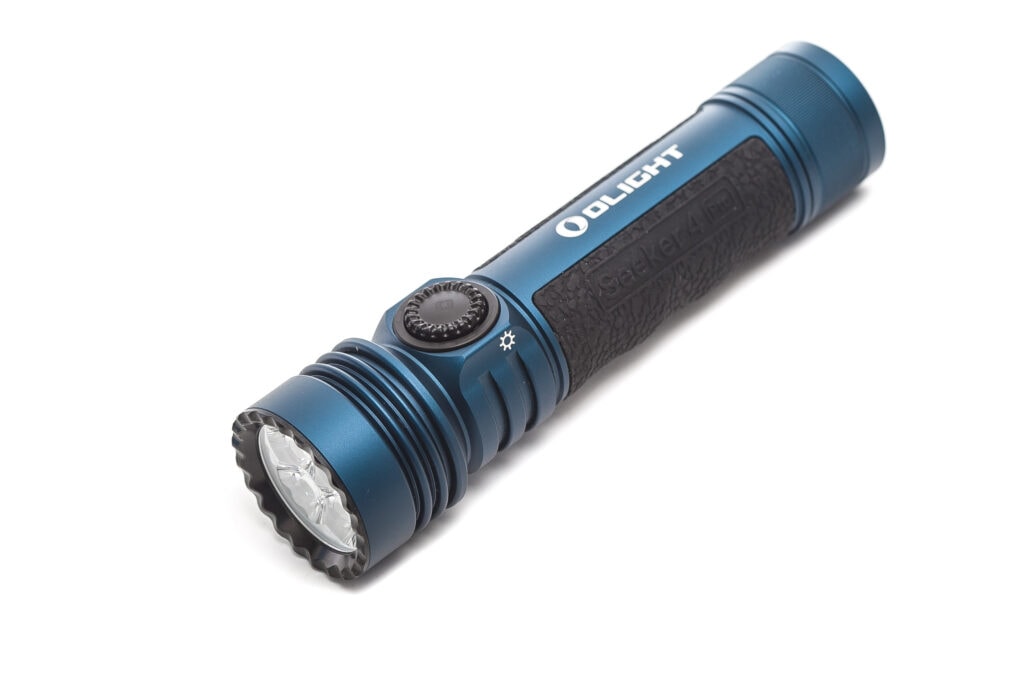
Olight Seeker 4 Pro specifications
| Brand/model | Olight Seeker 4 Pro |
|---|---|
| LED | N/A (4*?) |
| Lumens | 4,600 lm |
| Max beam distance | 260 meters |
| Max beam intensity | 16,895 cd |
| Battery config. | 1*21700 |
| Onboard charging | Magnetic (proprietary) |
| Main modes | 4, but also includes stepless dimming |
| Blinkies | Strobe |
| Reflector | Smooth/TIR |
| Waterproof | IPX8 |
| Review date | September 2023 |
Introduction:
This one gets me quite excited, because this is the successor of the best sustained output flashlight in the 21700 EDC category. In our review of the Seeker 3 Pro, we showed that it could sustain the highest output of all the flashlights we tested in this size/category. Now, 2 years later we have the Seeker 4 Pro on our plate.
Unlike some brands that make new versions of a flashlight, without any real changes.. (They start with the letter L and the other with an A)…. Olight actually updates things with every new edition. And so the Seeker 4 Pro has some new features, but also removed some features, which people might feel relieved.
So let’s find out what they are, and if it beats the Seeker 3 Pro… and if so… that would be amazing…
Oh… and don’t forget to remove the battery insulator before trying to using it.
Package quality.
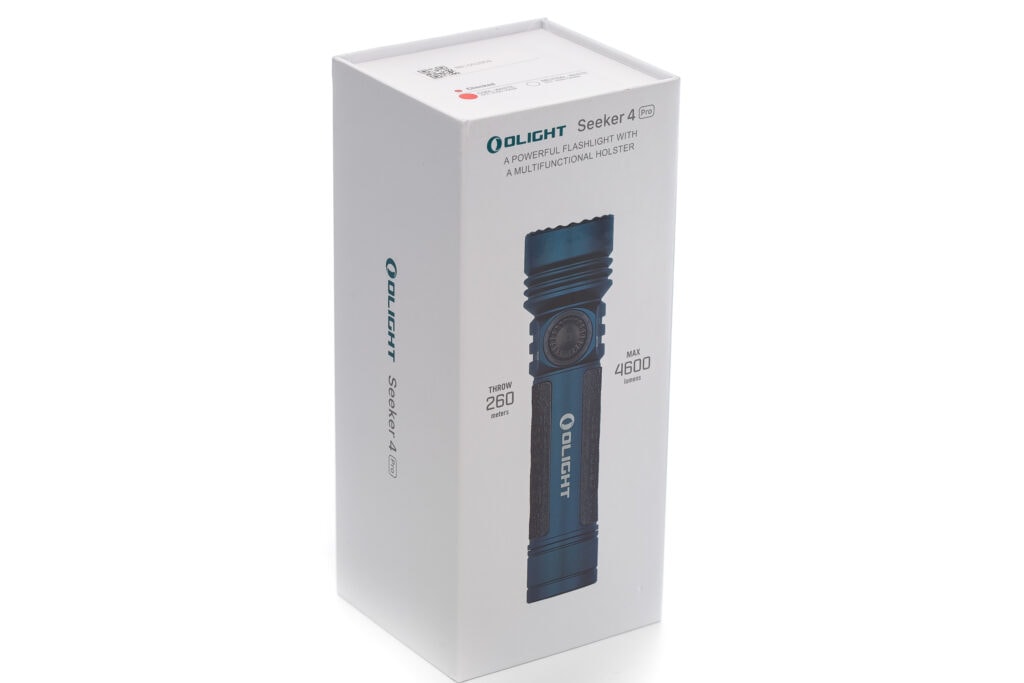
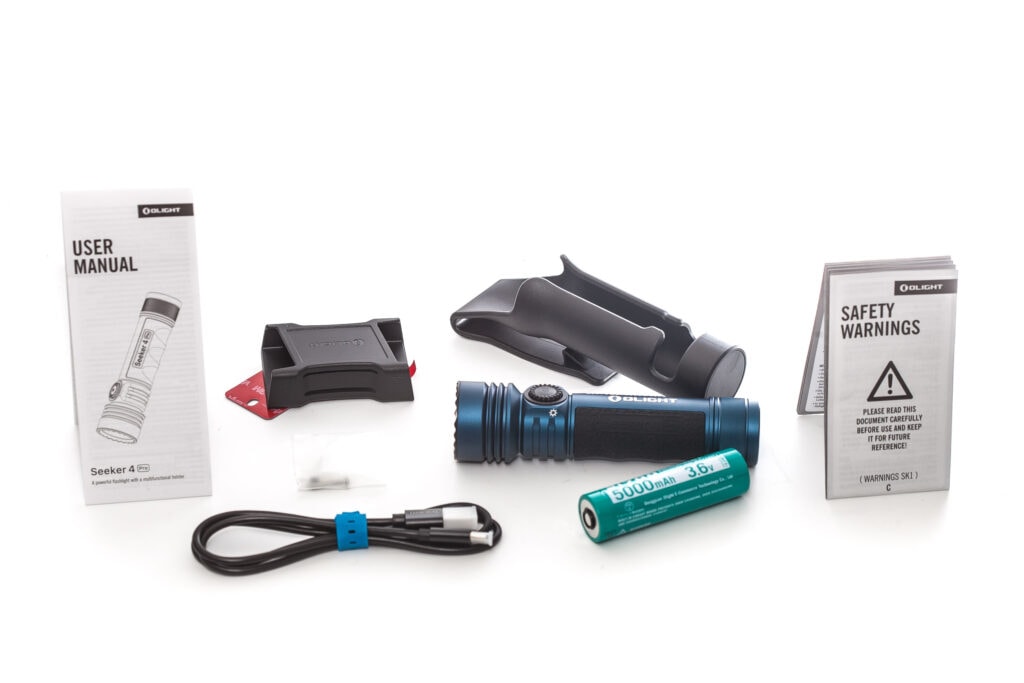
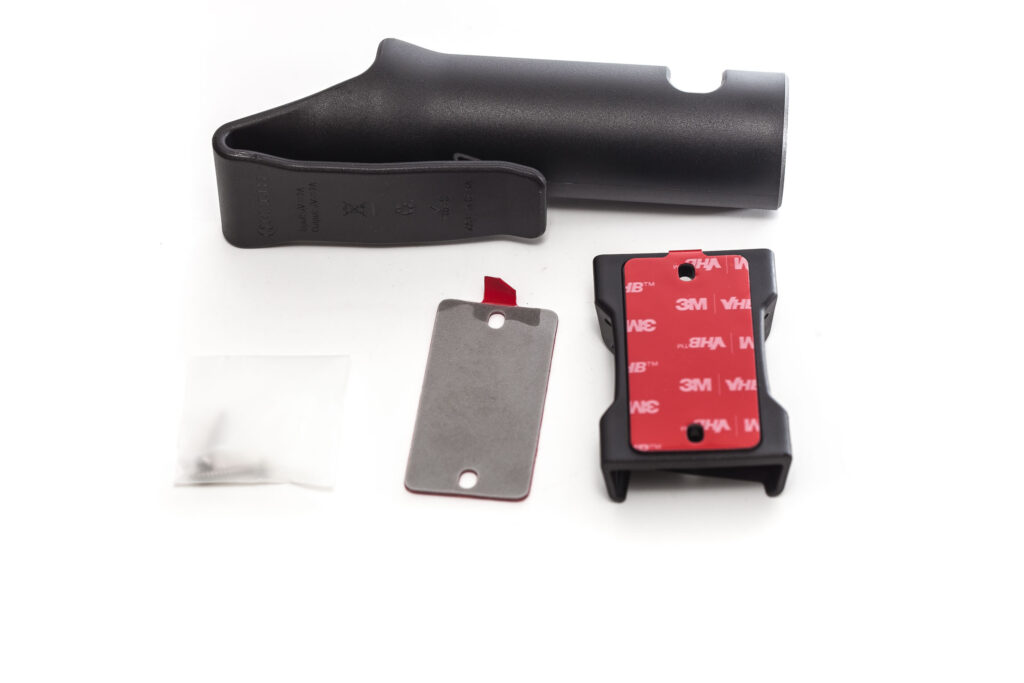
If you own any Olight flashlight, you know that they take care of every little detail, and that includes their amazing packaging. No generic box, but a specifically designed package for every flashlight. So, they want to give you the best experience, and the best first impression. And that’s what they do with the Seeker 4 Pro as well. And this is what you get:
- Olight Seeker 4 PRO
- Olight 21700 battery (5000mAh)
- USB-C charging cable
- Charging holster with magnetic pads, and USB-C port
- Manual
The holster of the Seeker 3 Pro has been replaced by an optional plastic carry holster with built-in charging pads.
Flashlight in use
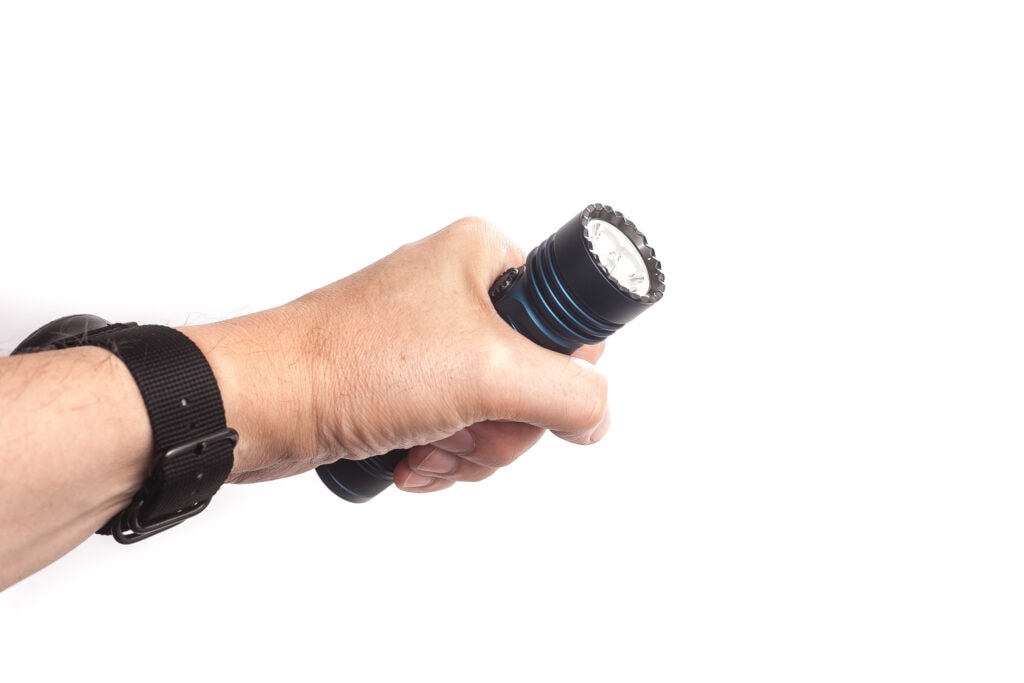
If you’re into flashlights, you know that all flashlights with high output heat up. And you’d also know that most flashlights are hard to hold after a few minutes, when the flashlight reaches bbq temperatures.
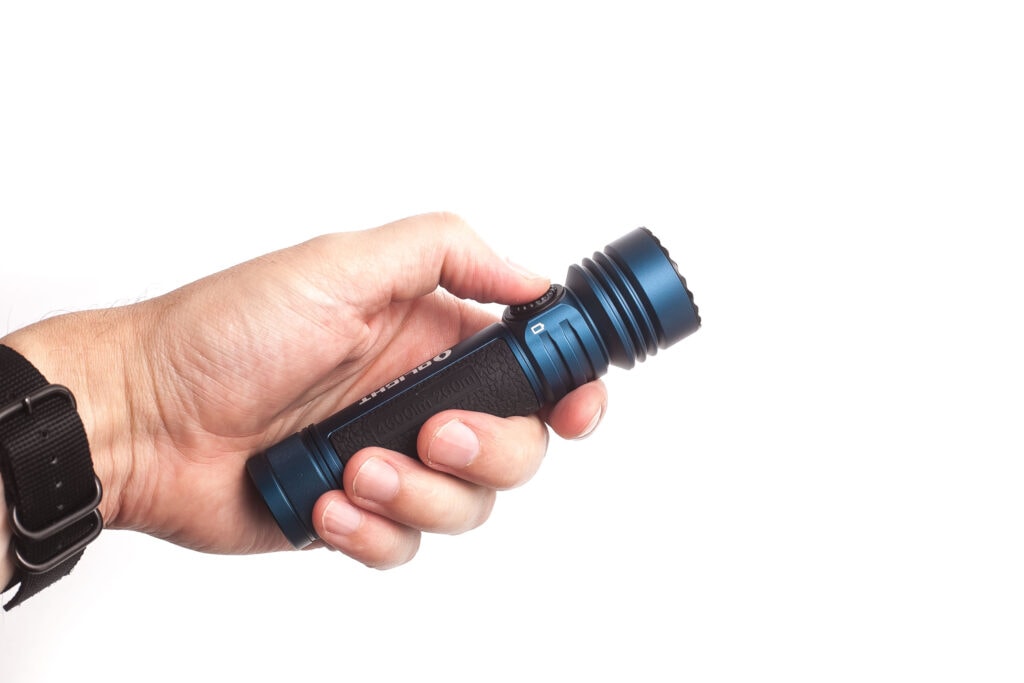
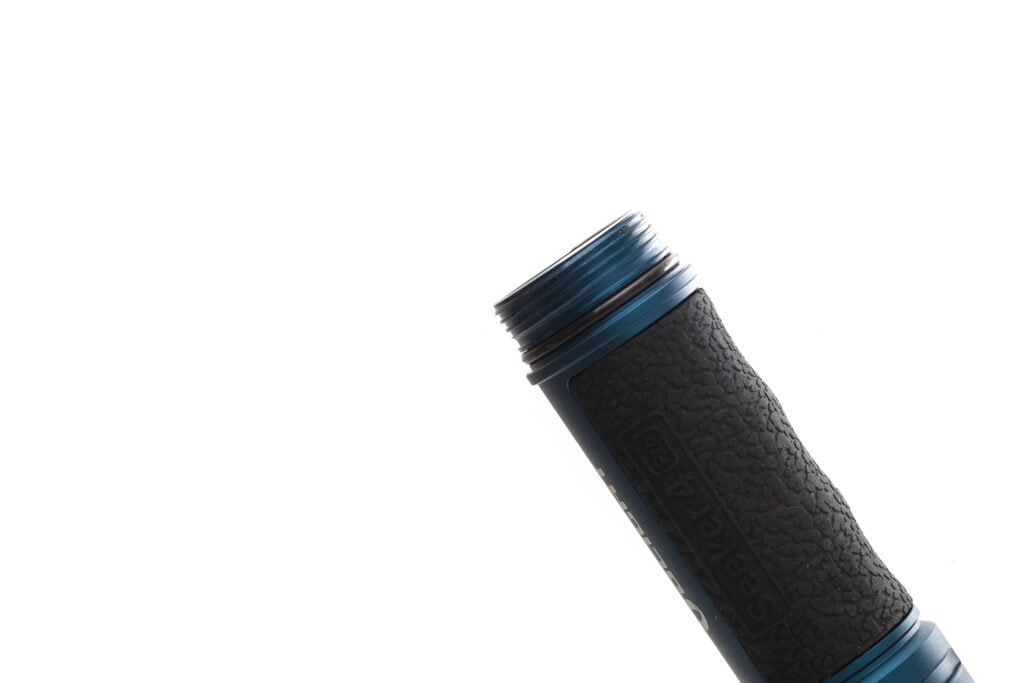
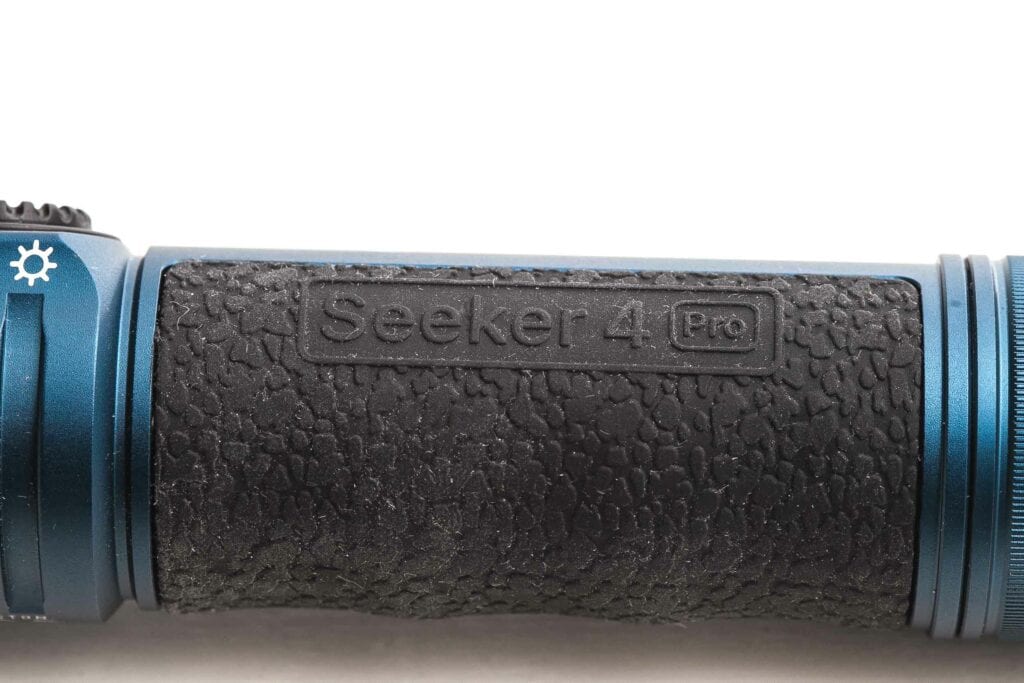
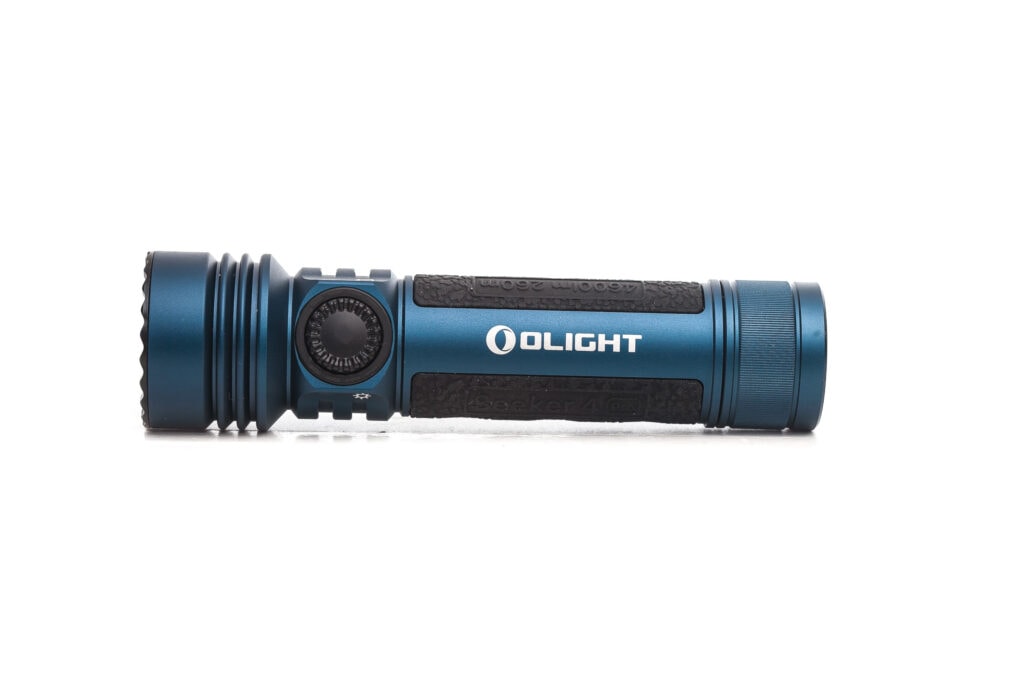
Olight has been on the forefront when it comes to innovation. And even if it sounds like something very simple, their rubberized grip helps tremendously. They have been using this layer of rubber on many higher-output models, including its predecessor the Olight Seeker 3 Pro, but also the Olight Marauder 2, and Olight Marauder Mini, to name a few. And this helps with keeping the temperatures exposed to your skin, in check.
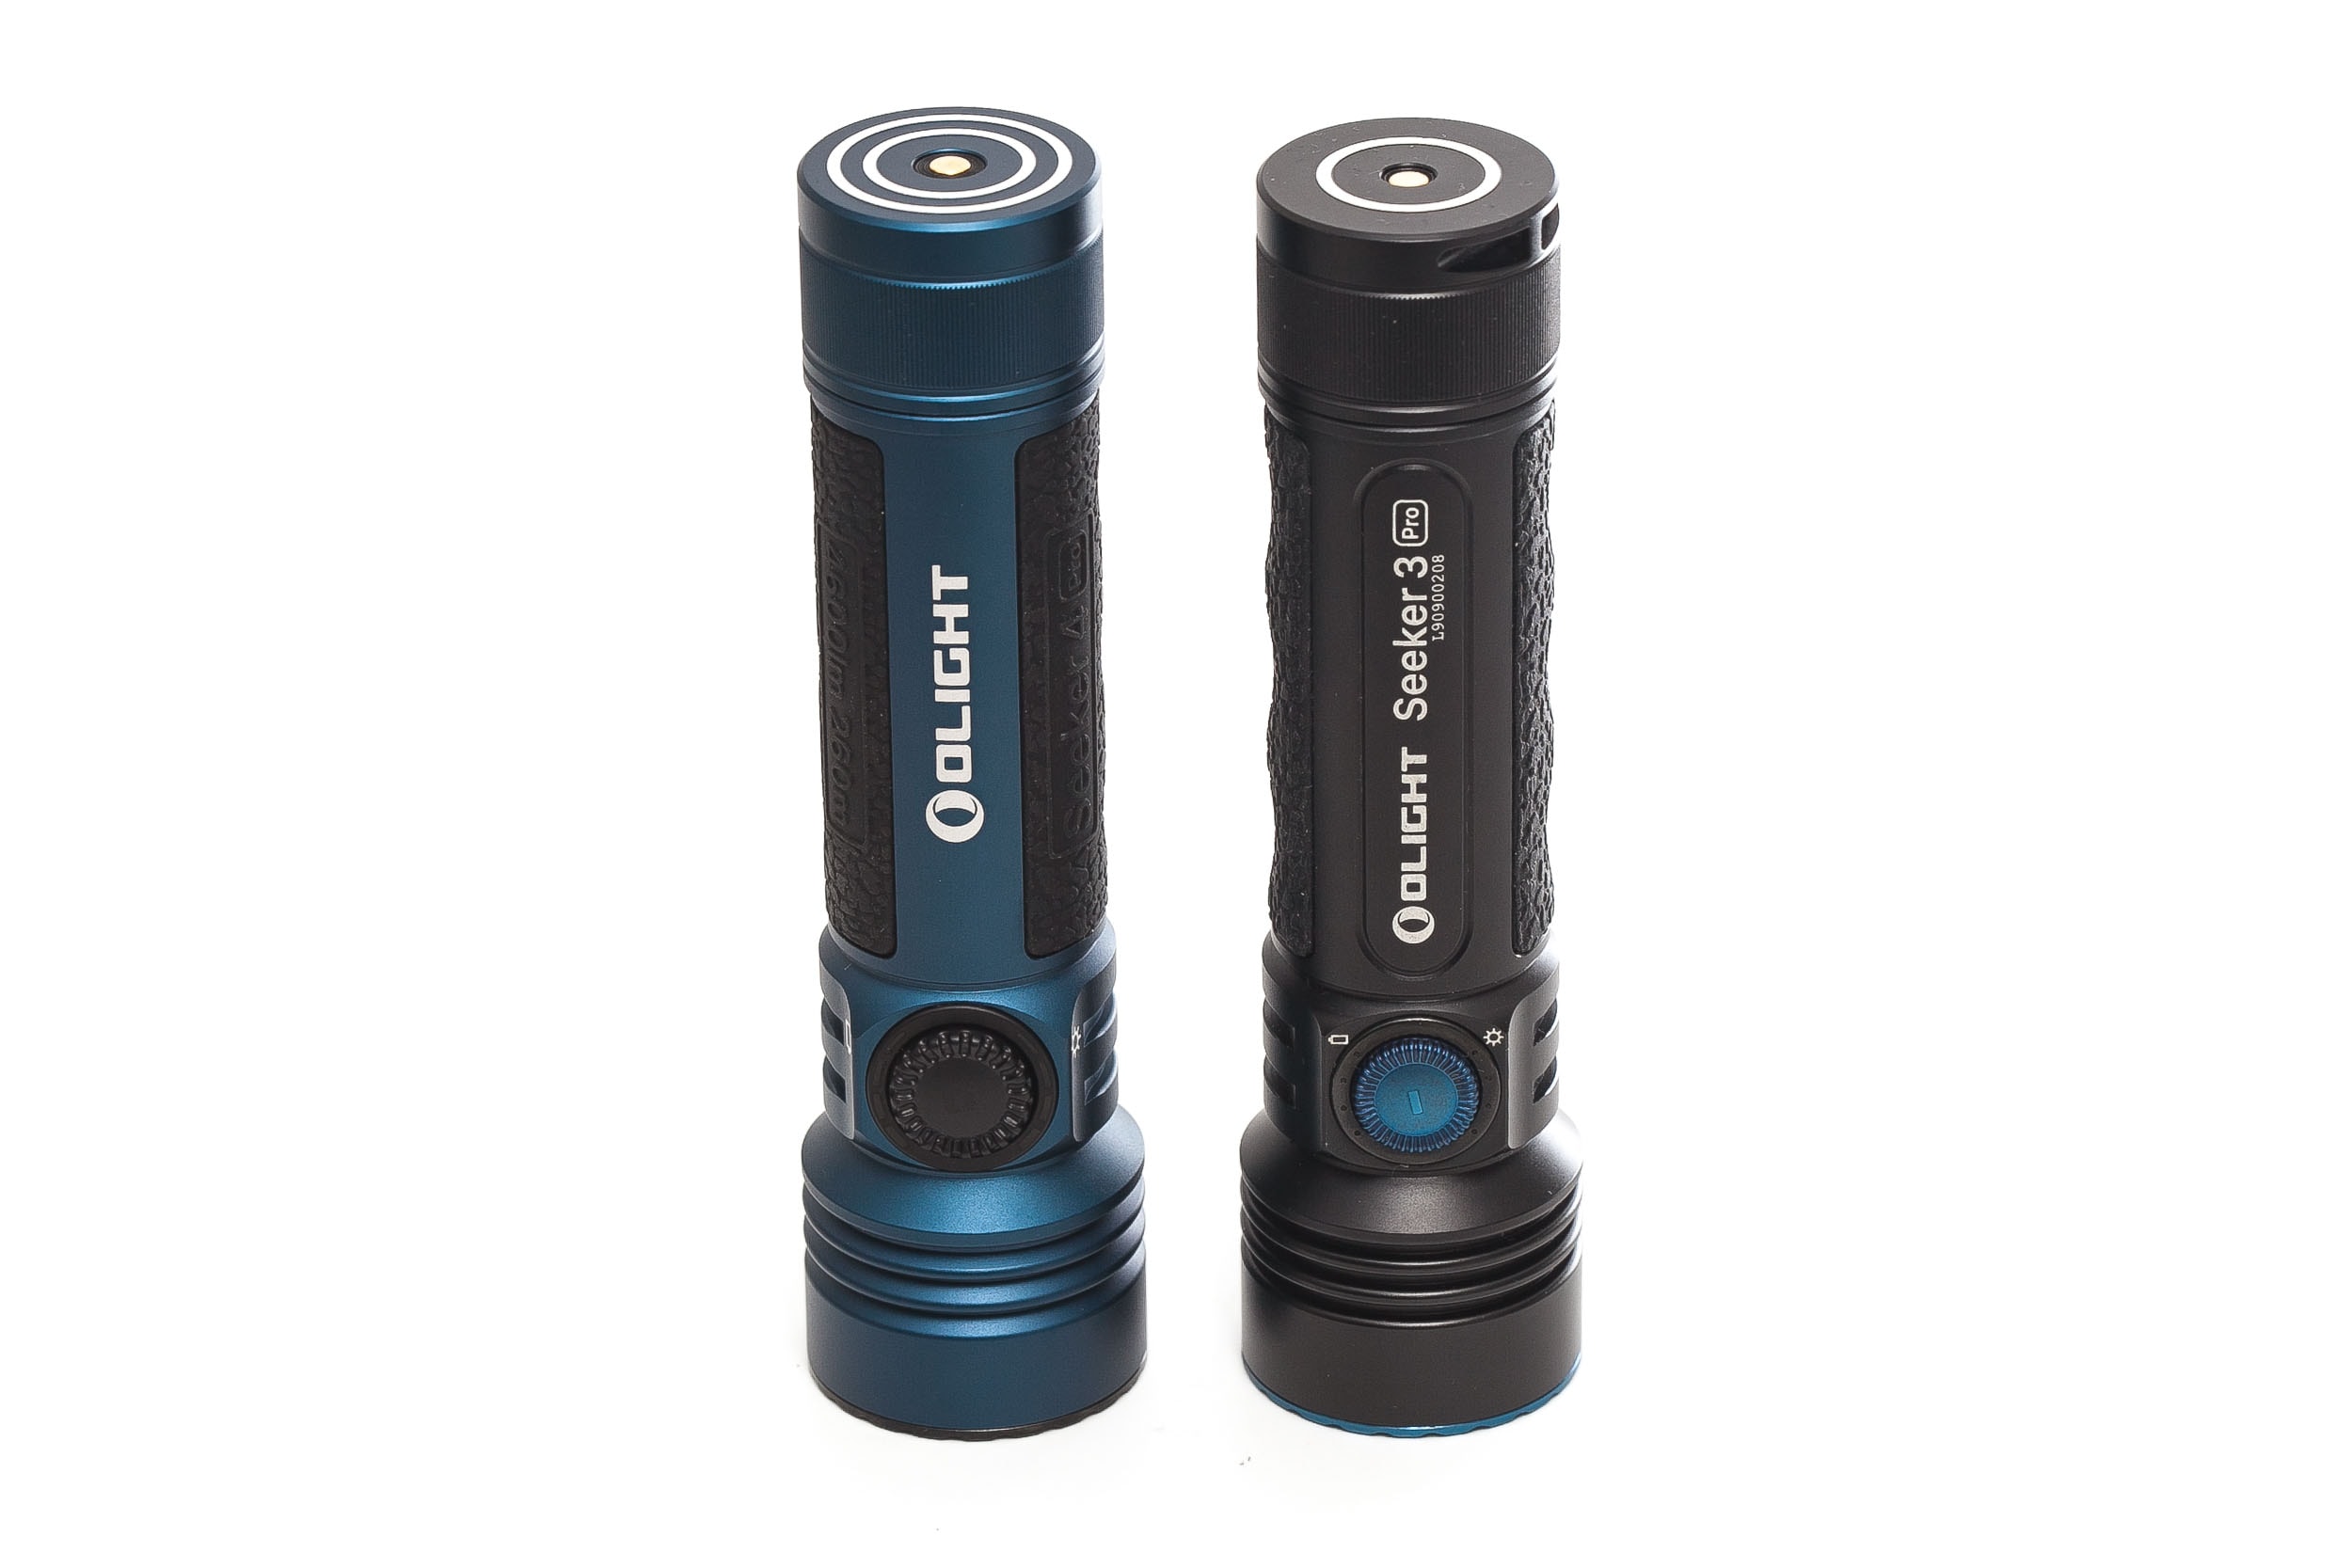
When holding in a normal underhand position, your thumb will rest naturally around the switch, so your finter don’t feel like you’re playing piano for the first time.
The switch itself is pretty unique as well, and I’m glad to say that it’s also improved! Hooray.
By default, it is deactivated, or how we normally call it: locked out. Well.. not entirely, and I will explain what is going on.
To unlock the switch, you have to rotate the switch 90 degrees. And once it’s unlocked a single click will bring you back to your last used output. You can then press and hold for increased steps in output, from Low to High.. or just rotate the switch for stepless dimming. This means that that the output increases/decreases in visible incremental steps. Rotate clockwise to increase output, and counter-clockwise to reduce output. The switch has greatly improved functionality, and even quick turns will register as an increase or decrease. This was the problem with the 3 PRO, as well as the Marauder 2 for example. I hope this new switch design will be copied to other models soon as well, as this is a great improvement.
However, there is something new to the Seeker 4 Pro, and that is direct access to Moon mode, from the Lockout out state. This is new, since it doesn’t work on the Seeker 3 Pro.
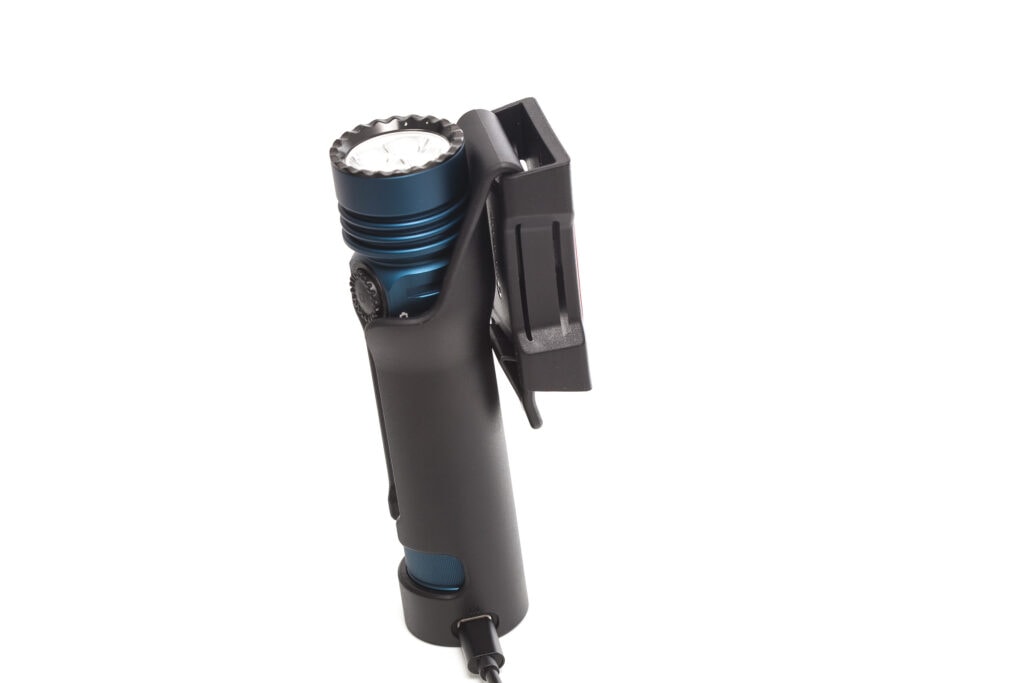
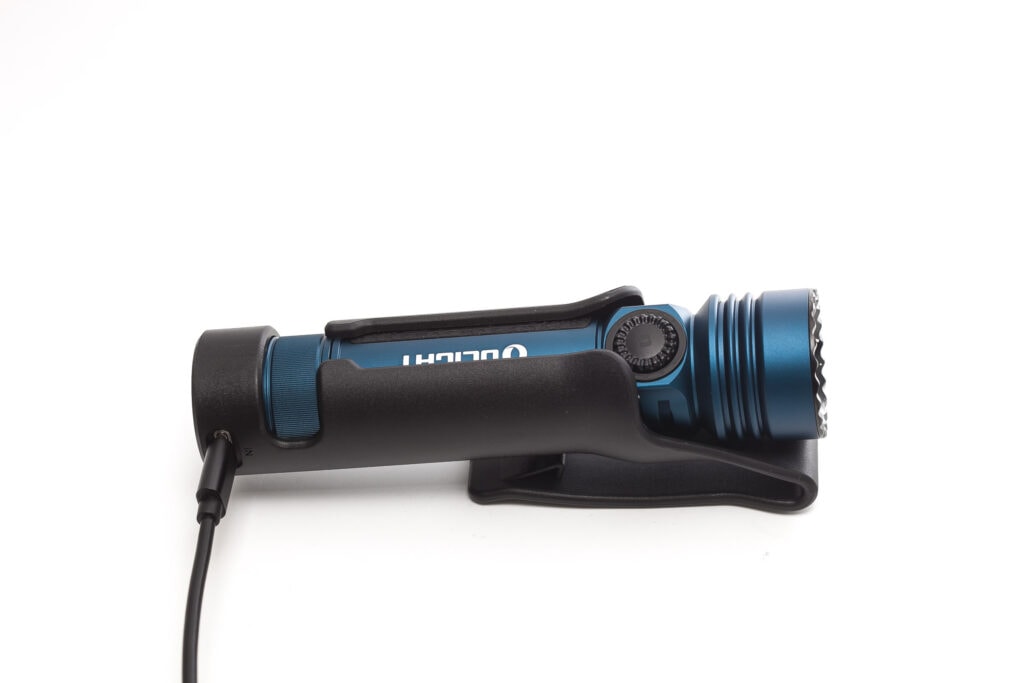
There’s no lanyard included in the box, and the 4 Pro has nothing to attach a lanyard to. There are no tiny lanyard holes in the tailcap. Instead, they included a plastic holster with built in charging adapter. On the outside of the charging adapter, you can attach a USB-C cable, so you can charge it on the fly.
Tailstanding: Yes, that is possible.
Also, it’s interesting to know that the holster has 2 unique features as well. When you remove the flashlight from the holster, it will automatically unlock! And when you insert the flashlight back in the holster, it will automatically reduce its output.
Differences between the Seeker 3 Pro, and Seeker 4 Pro.
- The Seeker 4 Pro has direct access to Moon mode, even in locked state (this will unlock the light)
- The Seeker 4 Pro has a much better (and bigger) switch
- The Seeker 4 Pro loads the battery in a normal way, with the positive termainal towards the head, while the 3 Pro had it reversed
- The Seeker 4 Pro does not include a proximity sensor
- The Seeker 4 Pro has a double charging pad, so it can be used with the newly designed charging holster
- The Seeker 4 Pro does NOT have a lanyard attachment, unlike the Seeker 3 Pro
- The Seeker 4 Pro has an extra charging pad, so it can also charge with the new style of charging adapters
Having said all that, I’m a bit surprised about the lockout changes and the removal of the proximity sensor. I had thought they used these for extra safety. The 4 Pro can now be turned on with a long press, and does not have a proximity sensor for extra safety. Many people will celebrate the removal of the proximity sensor, but I do feel like these 2 changes (turn on by long press, and removal of proximity sensor) could lead to some problems.
I can see people using this flashlight in many situations, ranging from EDC, hiking, camping, walking the dog, or just to use around the house.

Build Quality, and Warranty
At the moment of writing, the Seeker 4 Pro is available in 3 variations: Midnight Blue, Matte Black, and Orange. But I’m pretty confident to see other colors in the near future including some special, limited editions.
I briefly explained in the previous part that the 4 Pro has this rubbery cover around the battery tube for better grip, and protecting against heat.
It’s definitely an Olight with top of the line quality, just like all other Olight flashlights in this category. Perhaps there could something be said about the smallest lights like the Olight Omini, but that’s about it. The Seeker 4 Pro is not ‘cheap’, but that’s also kind of impossible with these features, build quality, R&D, and warranty.
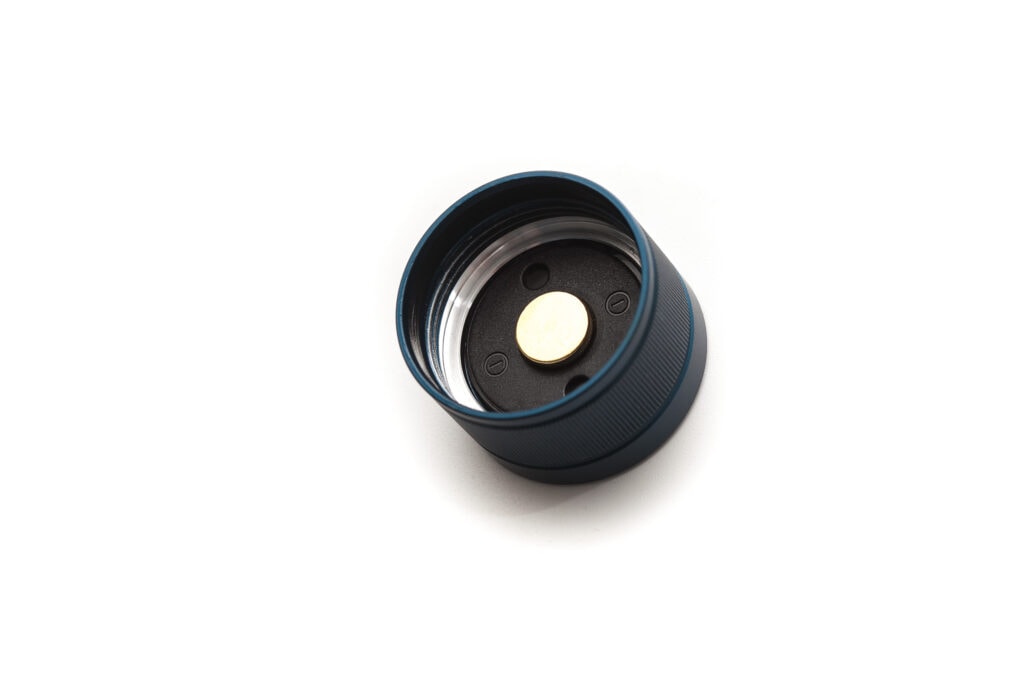
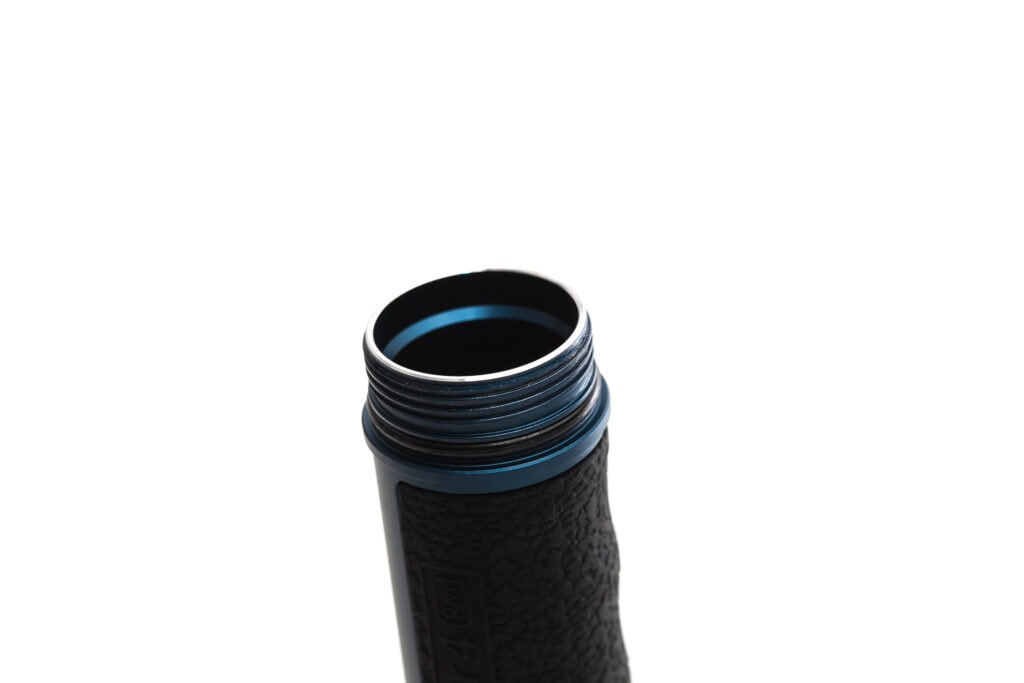
There’s only 1 part of the flashlight that can be opened/moved, and that’s the tail cap. And fortunately, that also got an upgrade from the Seeker 3 Pro, because now you can insert the battery the normal way.
Olight warranty:
If you purchased an Olight® product from Australia, China, France, Germany or the USA after January 1st, 2023, the local service centers in these countries will honor your LIFETIME WARRANTY for your purchase. If your Olight® product (including its structure, built-in battery, LED, or lens) ever experiences any issues, we promise to take care of it. If we are unable to repair your product, we will promptly replace it with a product in perfect working condition, which will be of equal or better physical condition. If your purchase is a limited or discontinued edition of Olight® product, we will repair or replace it with another Olight® product of the same or higher value.

LED, Lens, Bezel, and Reflector
Olight is one of the few companies that don’t like to show the exact type of emitters used. When you’re new to flashlights and just want a good looking, high-quality flashlight, you probably don’t even think about this. But for quite a few people who are into flashlights, the type of LED is one of the reasons why they buy/don’t buy a flashlight.
Since a couple of years, Olight has been adding several LED types as well, so I’m glad to say that the Seeker 4 Pro is available in CW (5700-7000K) and NW: (4000-5000K).
It’s quite funny to see that both versions can differ so much. 4000K and 5000K are in my opinion quite far apart with 4000K being more yellow (warm) and 5000K about perfect white.
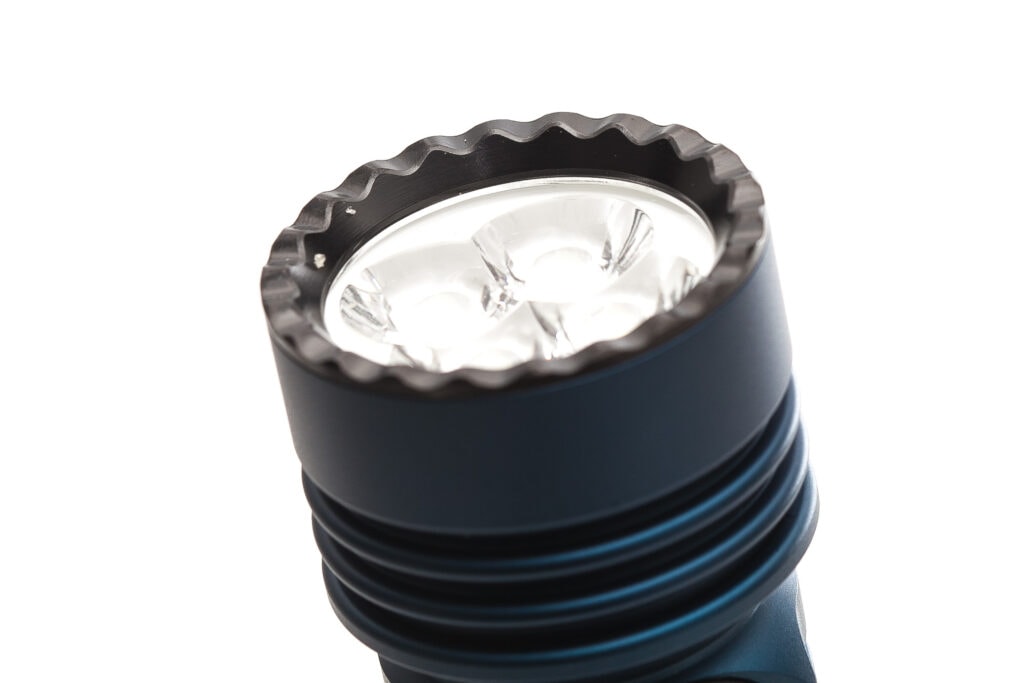
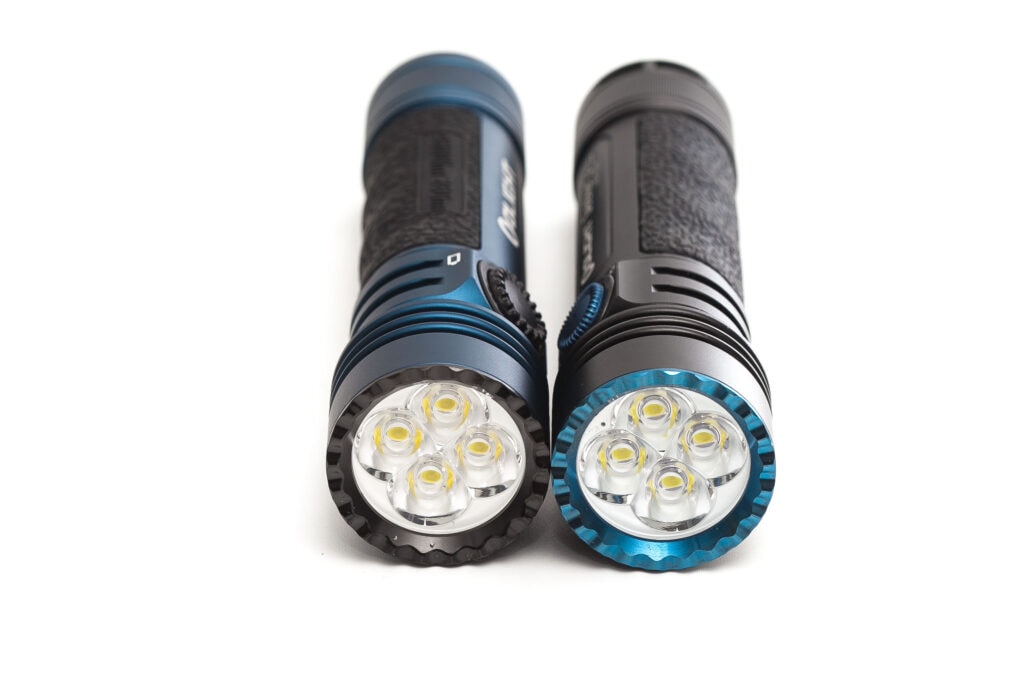
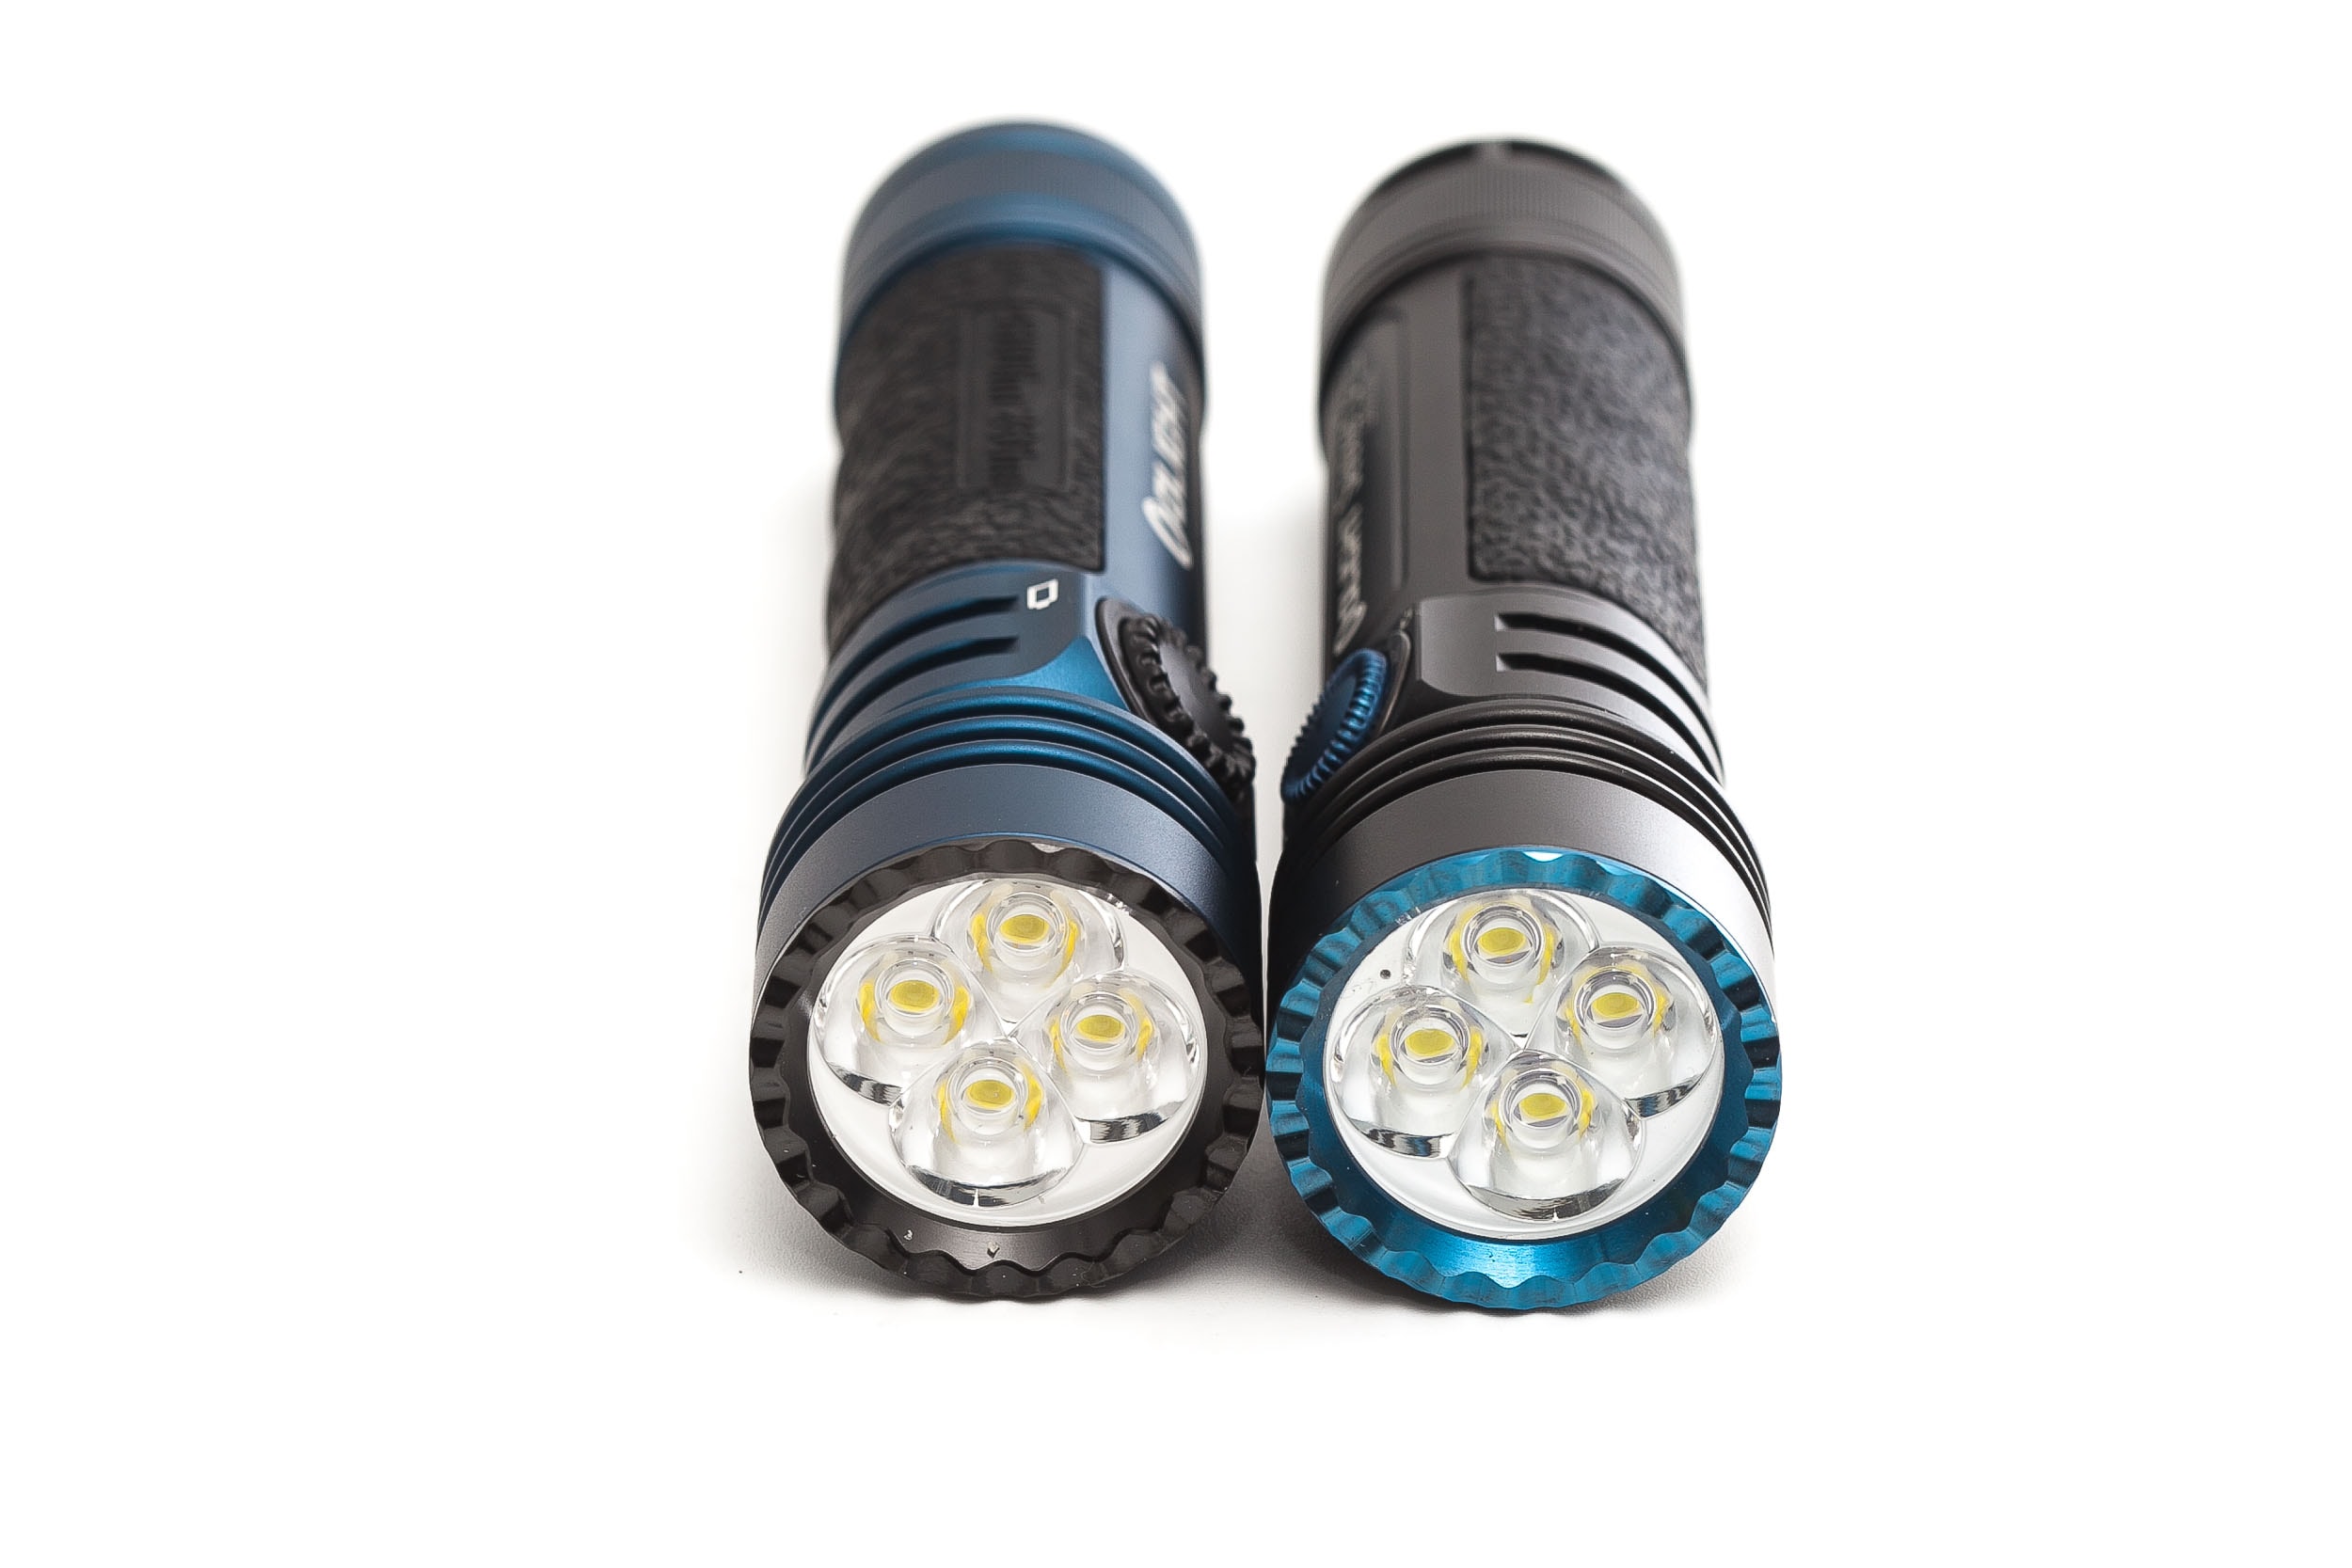
There’s 4 LEDs behind/inside a hybrid optic. It looks like 4 normal reflectors, but at the same time, it looks like TIR optics. So, therefore I’m just calling it a hybrid optic. And there is something unique about these.. which I think it is, and that’s what they say about it: First Laser Microperforation in Flashlight Industry.
I’m not sure how that works, but they added: 1,200 laser micro-pierced holes create new hidden brightness and battery indicators while still keeping IPX8 waterproof.
And to protect these optics, Olight added a slightly, not aggressive, crenelated bezel. Its color is Black on the blue version, and orange, and it’s blue on the black version.
The beam has a clear hotspot without an extremely sharp edge. The transition between hotspot and spill is relatively smooth although clearly existent.
The version I am reviewing is the Cool White version, with a CCT between 5700K and 7000K, and I’m very curious to see what the specifics are on mine.
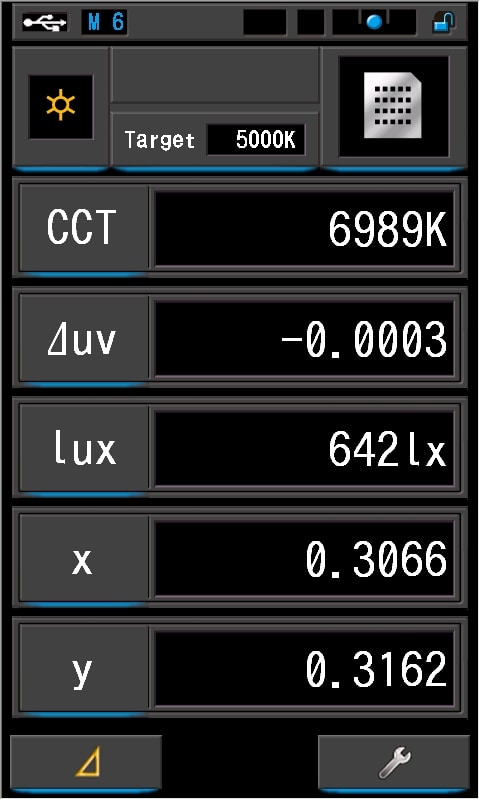
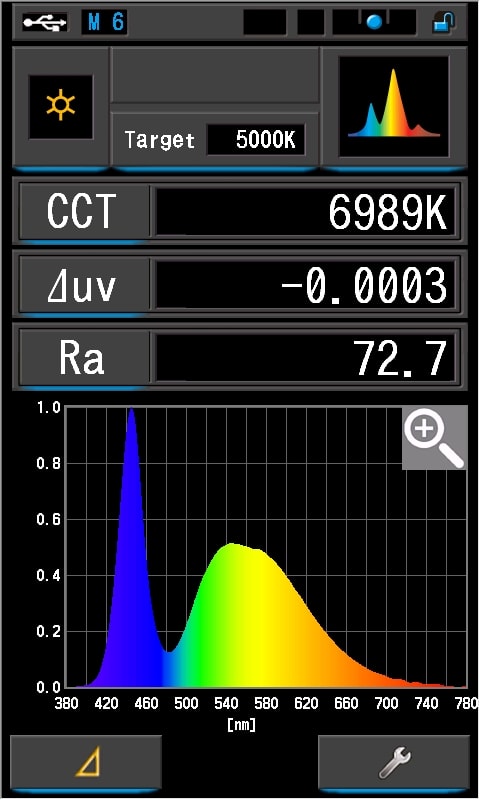
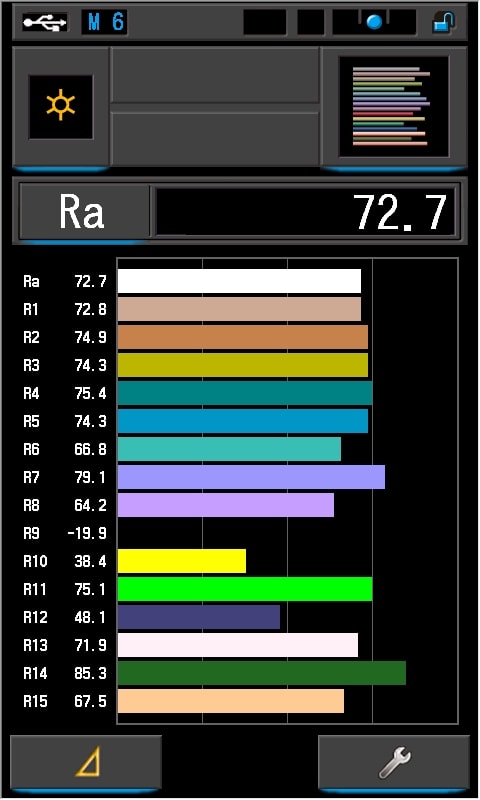
I tested the beam quality with a Sekonic C-800 Spectrometer and got the following:
- CCT: 6989K
- (CRI) Ra: 72.7
- duv: -0.0003
This means that the CRI is standard, low, and that the beam color is pretty cold.
Dimensions and size comparison
Dimensions:
| Olight Seeker 4 Pro | Millimeters | Inches |
|---|---|---|
| Length | 133 mm | 5.2 in |
| Head diameter | 35mm | 1.4 in |
| Tailcap diameter | 30mm | 1.2 in |
Dimensions are rounded to the nearest millimeter, and to the nearest tenth of an Inch.
Weight:
| Olight Seeker 4 Pro | Weight in grams | Weight in oz. |
|---|---|---|
| Without battery: | 135 g | 4.7 oz |
| With battery | 207 g | 7.3 oz |
Weight is rounded to the nearest gram, and to the nearest tenth of an Oz.
Olight Seeker 4 Pro flashlight comparison
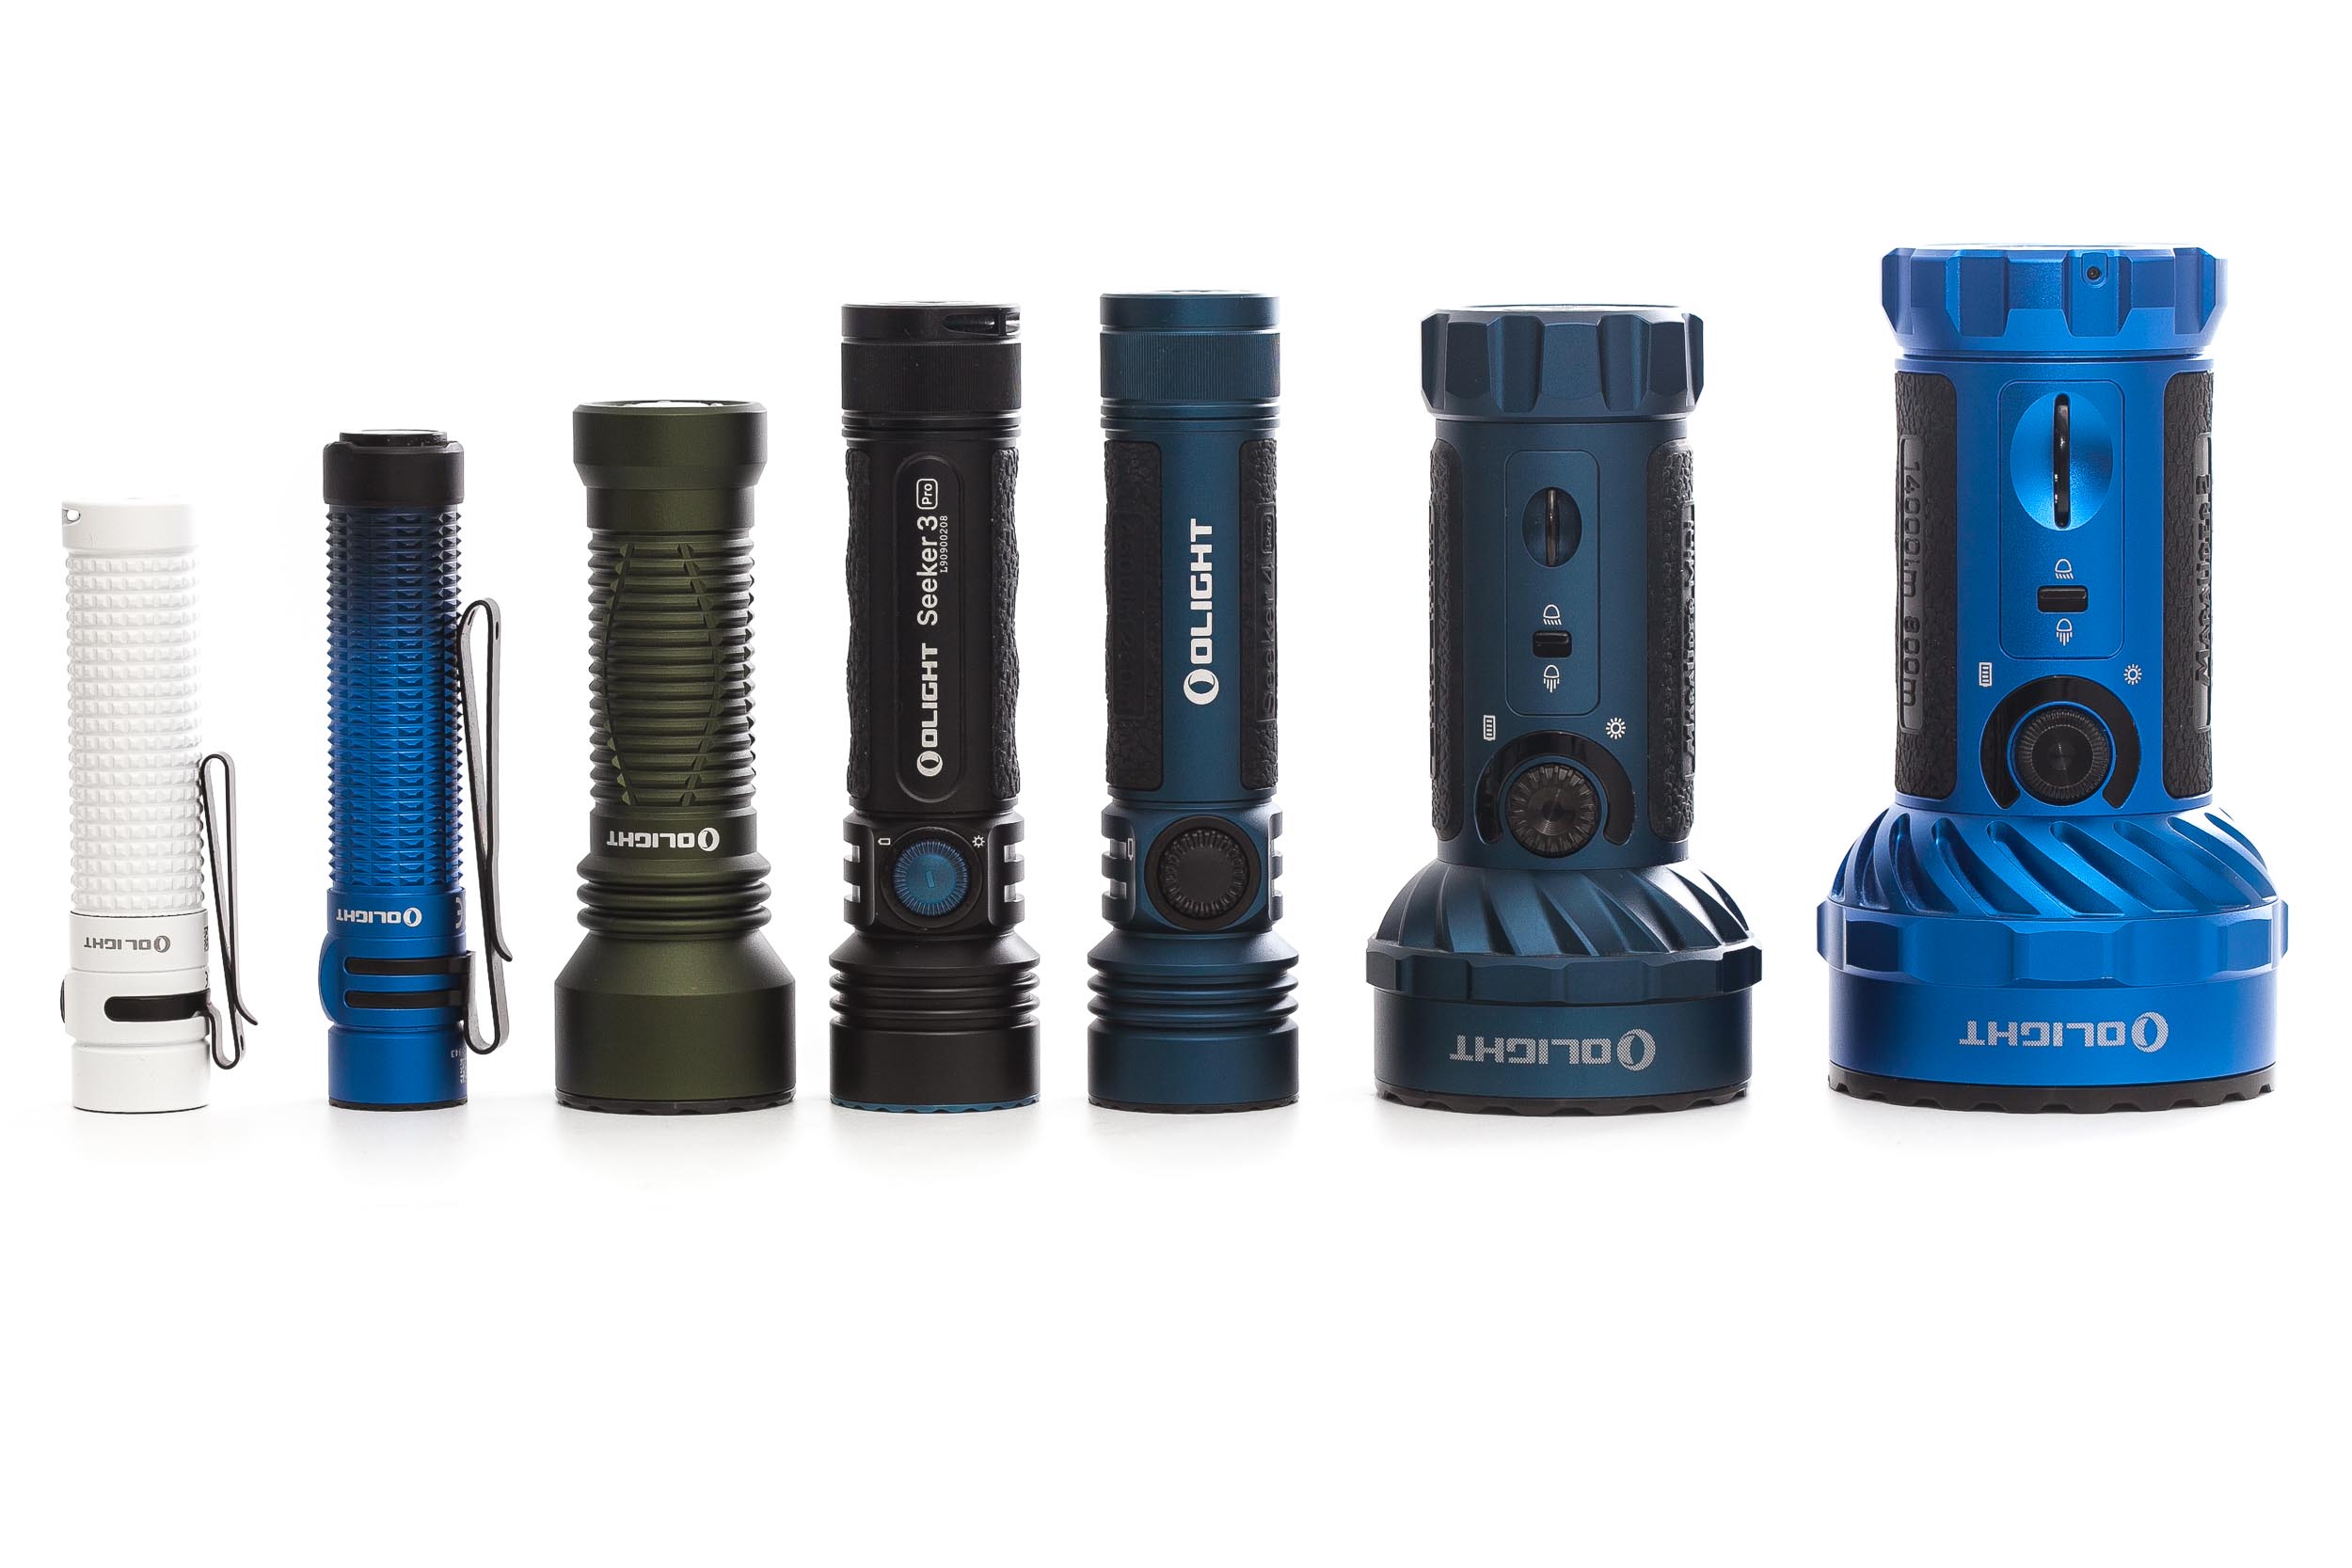
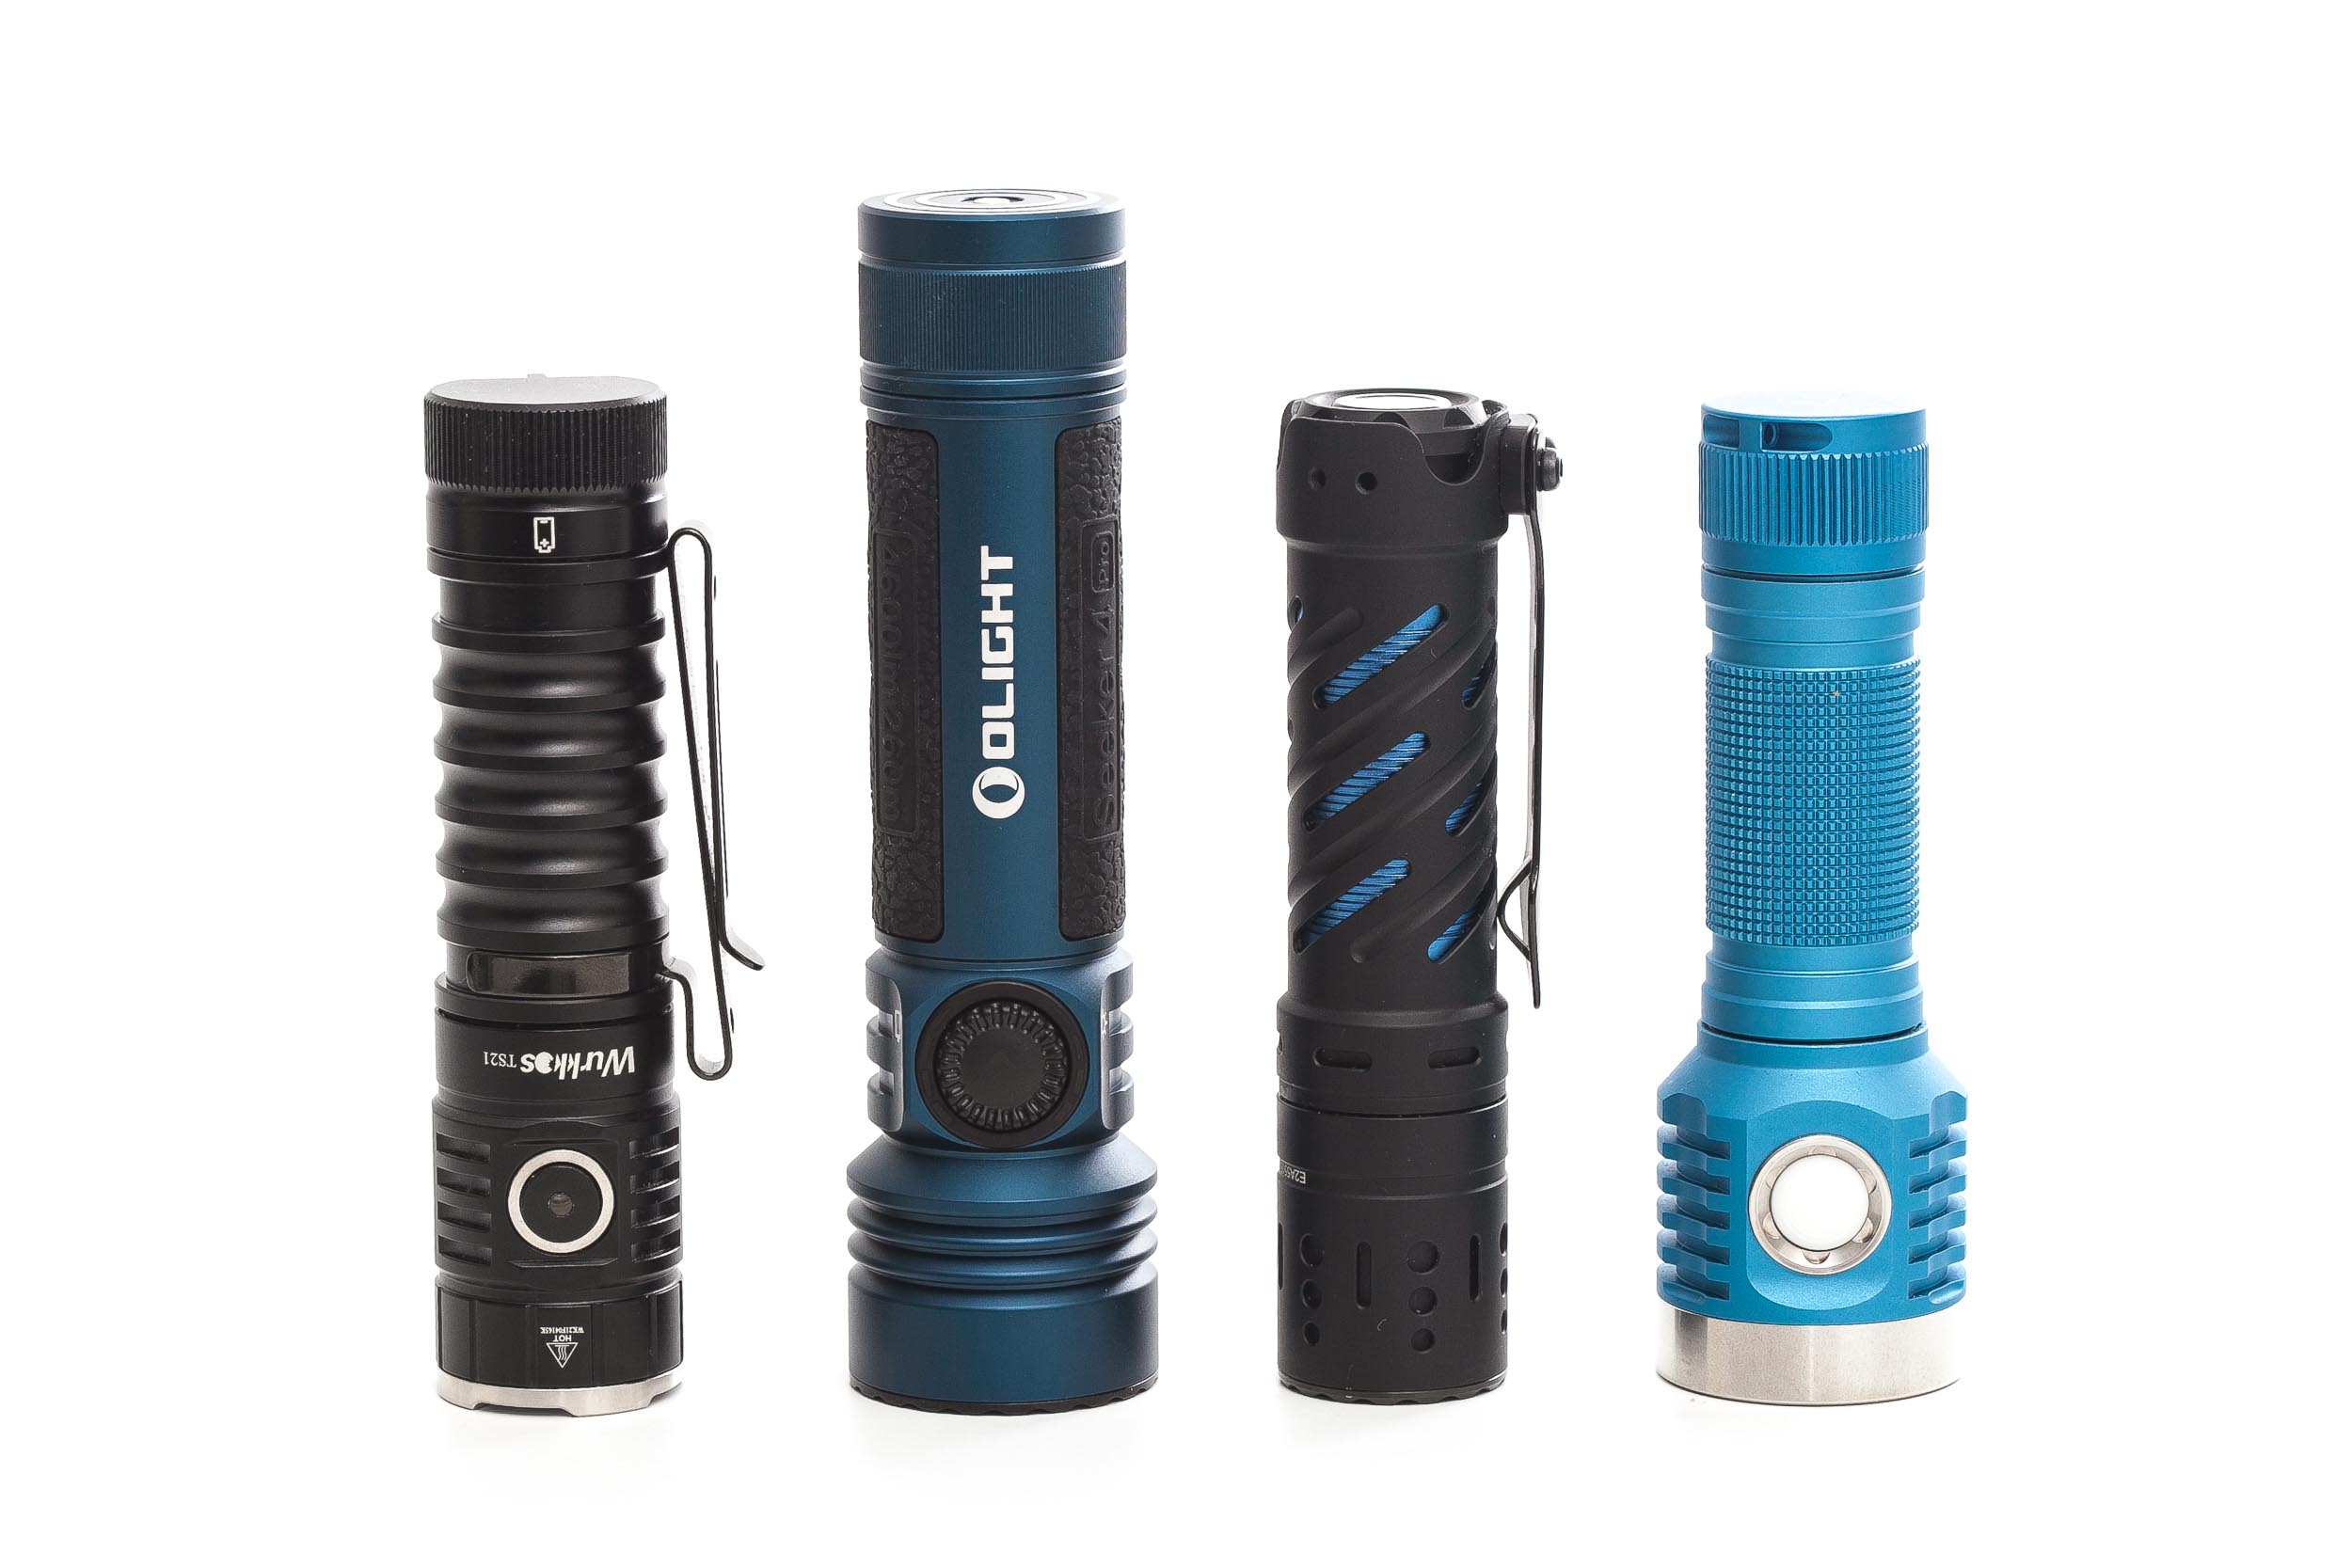
Size compared to other Olight flashlights, and some great EDC flashlights
Group 1, Olight Seeker 4 Pro vs Olight Seeker 3 Pro
Group 2, Olight flashlights from left to right: Olight S2R baton II, Olight Warrior Mini 3, Olight Seeker 4 mini, Olight Seeker 3 Pro, Olight Seeker 4 Pro, Olight Marauder Mini, Olight Marauder 2.
Group 3: Wurkkos TS21, Olight Seeker 4 Pro, Acebeam E70 Mini, Emisar D1 (v2).

Driver & User Interface:
How to unlock the Olight Seeker 4 Pro?
Before using the flashlight, you have to rotate the switch 90 degrees or more before you can use it. This is a lock-out (safety) feature. So when you haven’t used the flashlight for at least 30 seconds, you have to rotate the knob to unlock the light.
However, there is another way to unlock the Seeker 4 Pro, and that’s imply holding the switch pressed for several seconds to activate Moon level. Now it’s also unlockded.
To change the brightness you either rotate the knob, or just press-and-hold the switch. The latter will jump from Low to High, and rotating will increase/decrease the output in very small incremental steps.
Available modes:
- Incremental steps (from Low to High)
- Moon, Low, Medium, High and Turbo
- Strobe
From OFF when unlocked
- Rotate the switch at least 90 degrees to unlock
- Press and hold the switch to go directly to Moon mode (which also unlocks the light)
From OFF when unlocked (turned dial 90degrees or more):
- Single-click: to last used mode, including Moon, but no Turbo
- Double click: Turbo (and double click to return to previous used mode)
- Triple-click: Strobe
- Press and hold: Moon (also works when the flashlight is locked!)
From ON:
- Single-click: Off
- Double click: Turbo (and when in turbo you can do a double click to go to last used mode)
- Triple-click: Strobe (you can then double click to go to Turbo, or press and hold to run through the main modes)
- Turn dial clockwise: increase brightness in incremental steps
- Turn dial counter-clockwise: decrease brightness
- Press and hold switch: Run through 3 modes: Low, Medium, High
Shortcuts:
- To Turbo: double click from on and off (when unlocked)
- To Moon: long-press from off
- To Strobe: triple click from on and off
Mode memory:
- Yes, but no strobe or Turbo
Blinky modes menu:
- Only strobe. Triple click for Strobe, (and a double click to go to Turbo mode, or press and hold to go back to the 3 main modes, or single click to turn the light off).
Low battery warning:
- On the right side of the switch are 4 battery indicator LEDs that show the battery status.
- 4 lights =75%+
- 3 lights = 50-75%
- 2 lights = 25-50%
- 1 light green = 10-25% (This is the only one out of 4 that will turn red)
- 1 light red = ~10%
Lock-out mode:
- There is a auto-lock feature that will lock it 30 seconds after the light is turned off. You have to turn the dial at least 90 degrees to get to use the light again, or press and hold the switch for several seconds to activate moon mode.
PWM:
- Not visible to the eye
- The small battery indicator LEDs next to the switch have severe PWM, but that’s not a problem.
Olight Seeker 4 Sleep Timer
- There’s a sleep timer available with a 3 minutes timer and 9 minutes timer.
- To activate the sleep timer, do the following: 2 clicks, and the second click hold the switch. So it goes like this, click, click-hold.
It’s not 2 clicks and then click and hold, but at the second click you continue pressing that switch for a few seconds. The light will shortly blink 1 or 2 times. If you see it blinking once the 3-minute timer is activated. If it blink 2 times, the 9-minute timer is activated. Just repeat the 2 clicks-hold to switch between the short and long timer.
Proximity sensor
- Uhmmm there is no proximity sensor anymore! The Seeker 3 Pro had one, but is removed on the Seeker 4 Pro.
Summary:
I like the fact that you can unlock it by press-and-hold the switch for moon mode. But on the other hand, that also makes it more sensitive to users to unlock by accident.
Batteries & Charging
Note: you have to unscrew the tailcap, and remove the battery insulator before your first use.
I’m glad to say that you can insert the battery in the Seeker 4 Pro the normal way. This is a nice improvement over the Seeker 3 Pro, which had the battery reversed.
With most of their larger flashlights, Olight uses a proprietary charging system. That means you usually can’t replace the Olight battery with a regular battery. However, there are some exceptions like the Olight Perun 2 Mini. The Seeker 4 Pro does indeed not accept any other batteries.
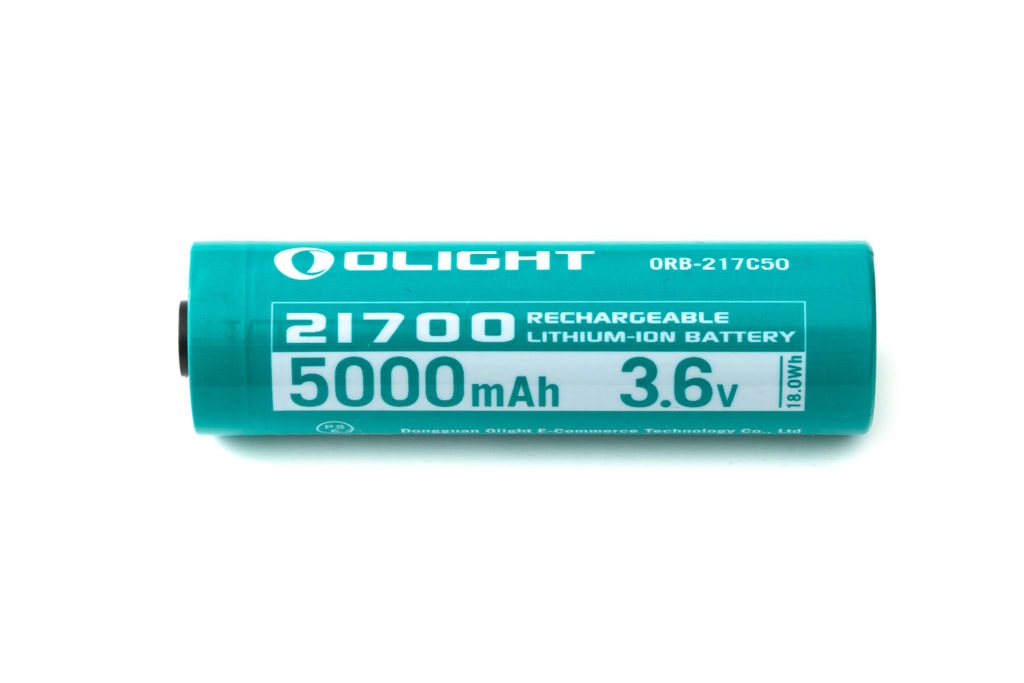
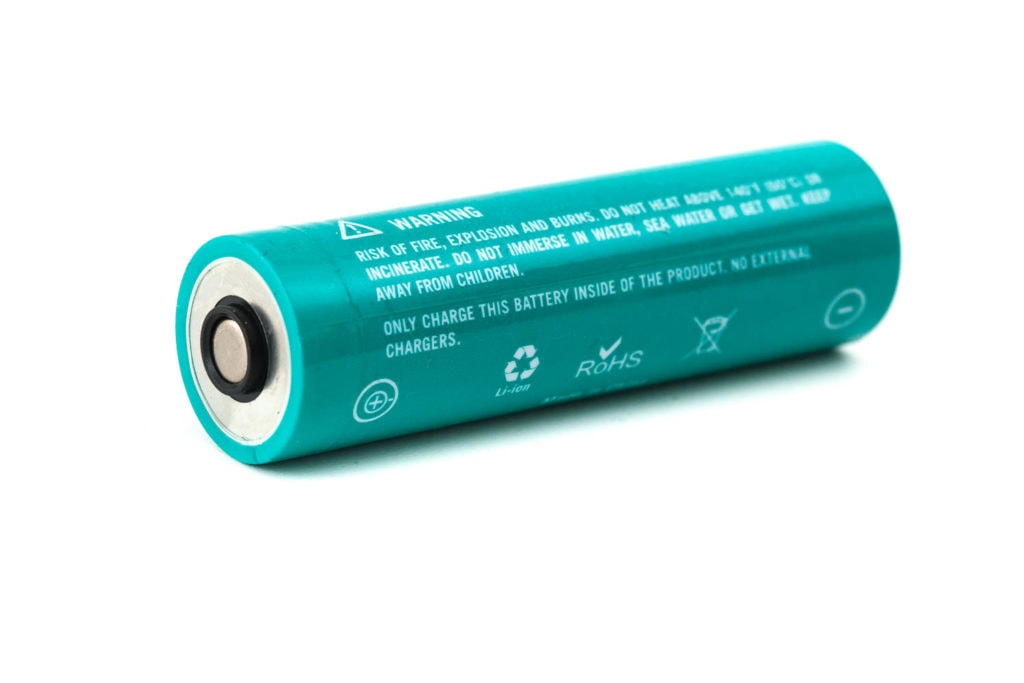
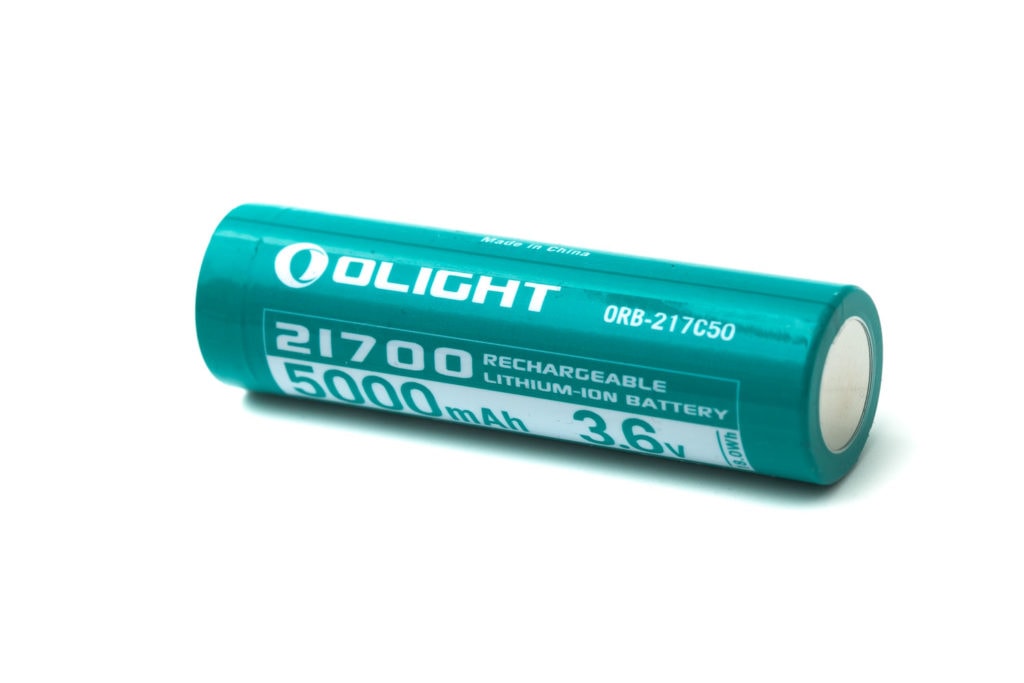
The 21700 battery included is an Olight ORB-217C50, Lithium-Ion battery with 5000mAh. That is a lot more capacity than a regular 18650 battery, but only slightly larger in dimension. It arrived at 3.8V, which is a good ‘storage voltage’. Most people think you can’t charge this battery in a normal charger, but that’s not correct. You can, as long as the positive terminal can make contact with the charger. If your charger does not have a nipple on the positive terminal pad, you can use a small magnet. But be warned, magnets on the loose can cause problems!
So even if you loose the charging cable, you can still charge it!
But, it’s important to note that about 95% of the currently available 21700 battery chargers won’t fit this Olight battery because their bays are too short. You need something with longer bays to fit this battery in. I am using the Nitecore UMS2 charger for this, which I upgraded by adding some solder to the positive terminal.
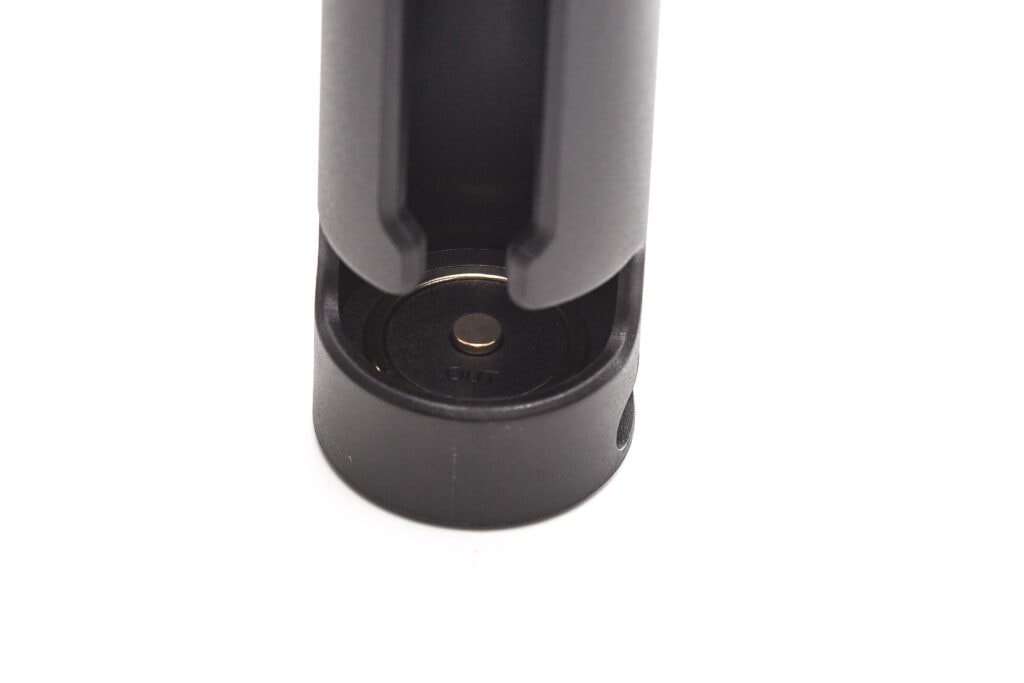
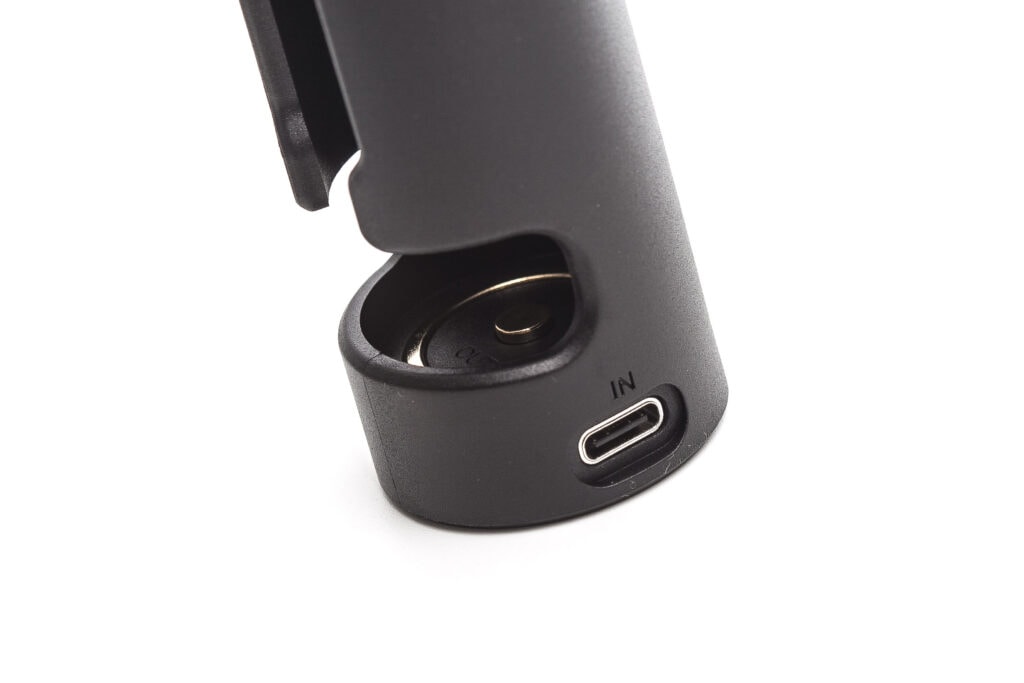
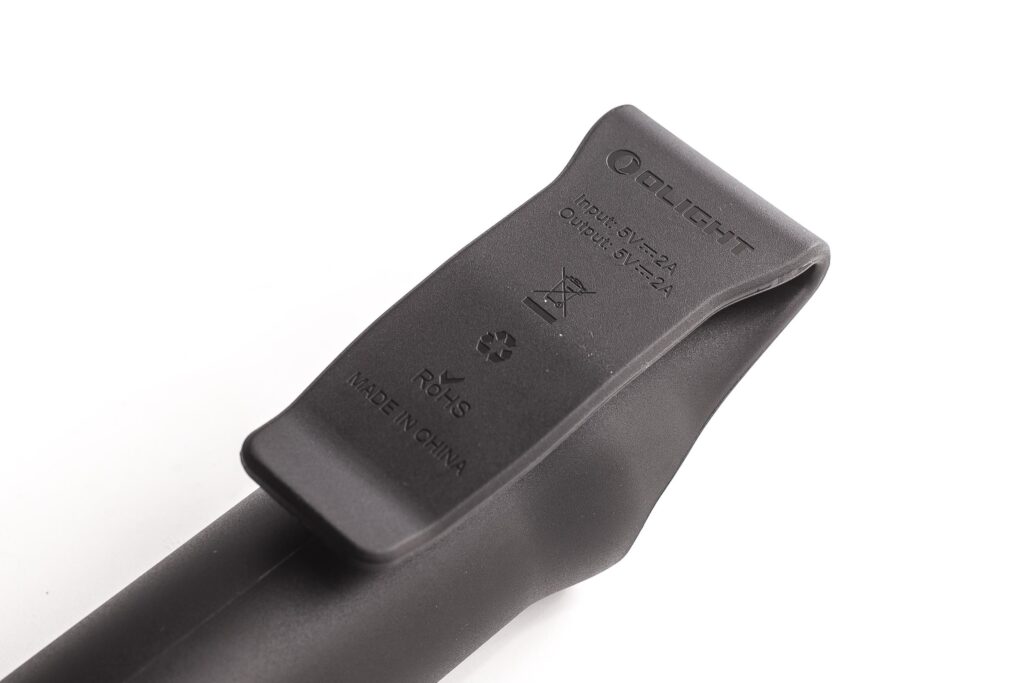
This time, Olight choose for a newly designed charging system. This is still magnetic charging, but built into the plastic holster. Plus, the distance between the positive and negative charging pads have increased. This change makes it so the older Seeker 3 Pro can not be charged in this new style holster. The total charge time was exactly 3 hours, and 00 minutes. The maximum charge current on my USB charger was about 1.8A
What is nice about this, is that you only need a USB-C cable to charge it. I guess this was still something of a complaint for many people. The use of a proprietary charging cable.
Keep in mind that you can still charge the Seeker 4 Pro with a normal MCC3 magnetic charging cable!
Performance
This is the gear I use for testing:
| Gear | Purpose | Link to buy |
|---|---|---|
| Hagner E4-X | Measuring beam intensity (throw) | Inquire at Hagner.se |
| 2* Extech SDL400 | Lumens and logging runtimes | Amazon.com, Amazon.co.uk, |
| Leica Disto D2 | Distance for throw measurements | Amazon.com, Amazon.co.uk, |
| Sekonic C-800 | Spectrometer for LED measurements | Amazon.com, Amazon.co.uk |
| Uni-T UTi260B | Thermal Image camera | Amazon.com, |
Lumen measurements:
How Lumens are Measured: Understanding ANSI FL1 Standards How Lumens are Measured: Understanding ANSI FL1 Standards: The ANSI FL1 standards specify that output in lumens should be measured 30 seconds after turning on, as this is the standardized time for measuring brightness according to the industry standard. This is why we focus on this part in our measurements. The ANSI FL1 standards require an ambient temperature of 22 ± 3°C. We record the ambient the ambient temperature to identify potential reasons for any observed discrepancies.The output measurements in this review are based on my homemade integrating spheres, each equipped with an Extech SDL400 Lux Meter. For consistency and accuracy, a calibration light (Convoy S2+ with 249lm and a Convoy S2+ with 261lm) is measured prior to each set of lumen measurements.
For high-output lights, one of the lux meters uses an ND camera filter to prevent the lux meter to max out. This is either the Kenko PRO1D ND16 up till about 80,000 lumens or Gobe ND32 for anything above.
All of my readings were taken from a fully-charged Olight 21700 5000mAh.
The measurements were taken manually at turn on and 30 seconds. The 10 minute numbers are taken from the runtime graph.
| Mode | Specified | turn on | 30 sec | 10 minutes |
|---|---|---|---|---|
| Moon | 5 lm | 6 lm | 6 lm | – |
| Low | 50 lm | 45 lm | 44 lm | – |
| Med | 300 lm | 274 lm | 273 lm | 272 lm |
| High | 1200 lm | 1094 lm | 1090 lm | 1079 lm |
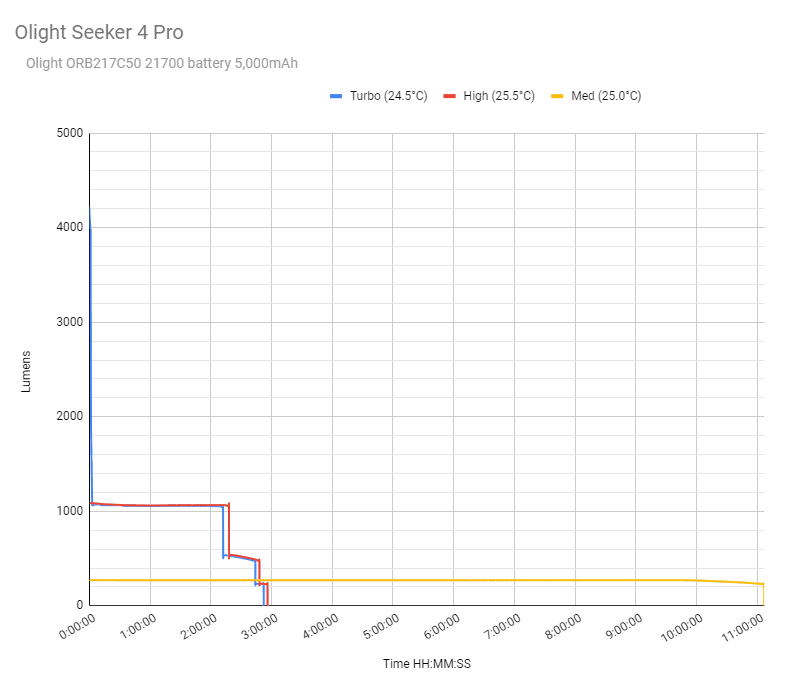
| Turbo | 4600 lm | 4210 lm | 4088 lm | 1071 lm |
| Turbo at 3.77V | – | 2797 lm | 2762 lm | – |
According to the manual, Low mode could run for 60 hours, and Moon for 15 days, so I skipped those modes for runtime testing.
I’m surprised the numbers don’t match the specifications. Usually, Olight is pretty close, but this time, they aren’t.
It’s still great to see that it reaches almost 2800 lumens at turn on, when the battery has been depleted to 3.77V.
Olight Seeker 4 Pro battery life and runtime
How Runtimes are Measured: Understanding ANSI FL1 Standards About ANSI FL1 runtime standards: The runtime is measured until the light drops to 10% of its initial output (30 seconds after turning on). This does not mean that the flashlight is not usable anymore. The last column shows how long the light actually works till it shuts off. If there is a + symbol, it means that the test was stopped at that particular point, but the light was actually still running. This happens on certain occasions, with certain drivers, firmware, or batteries.The runtime test was done with the 50cm integrating sphere, including the Extech SDL400 data logging Lux Meter.
| Mode | Specified runtime | Measured runtime (ANSI FL1) | Time till shut off |
|---|---|---|---|
| Moon | 15 daysh | – | – |
| Low | 60h | – | – |
| Med | 11h | 11h 06min | 11h 06min |
| High | 3h (135min-35min-10min) | 2h 56min | 2h 56min |
| Turbo* | 2h 39min(2.5min-122min-35min) | 2h 44min | 2h 52min |
After the runtimes, the battery measured 2.88V-2.89V.
Here’s the runtime graphs, with the ambient temperature added. The second graph is the zoomed-in version on the first 10 minutes only. You can see Turbo mode dropping from about 1.5 minutes

Here’s the Seeker 3 pro compared to other 21700 flashlights
https://docs.google.com/spreadsheets/d/e/2PACX-1vTmQ9KSe51vsV3hdSTNXXb1zrVUWAtLRrzY-S5XrS0qwQ2R1y2_nBRirx1j0dCR4Ckd-s61_QdyFQAG/pubchart?oid=626670048&format=interactiveOlight Seeker 4 Pro peak beam intensity and beam distance measurements
About Peak beam intensity: Understanding ANSI FL1 Standards About peak beam intensity The calculated value of distance in meters at which the flashlight produces a light intensity of 0.25 lux. (0.25 lux is about the brightness of a full moon shining on an object). This means that the intensity has decreased so much, it becomes difficult to see darker objects, or objects that don’t reflect light. The columns ‘Meters’ and ‘Yards’ use rounded numbers.Measurements were taken indoors at 5 meters distance with a Hagner E4-X Lux Meter. The measurement was taken 30 seconds after turn on.
| Mode | Specified | Measured | in meters | in yards |
|---|---|---|---|---|
| Moon | 0 cd | 0 m | 0 yd | |
| Low | – | 150 cd | 24 m | 27 yd |
| Med | – | 1,050 cd | 65 m | 71 yd |
| High | – | 4,300 cd | 131 m | 143 yd |
| Turbo | 16,895 cd | 16,850 cd | 260 m | 284 yd |
Moon mode was too weak to measure at 5 meters distance. And Turbo was right on point.
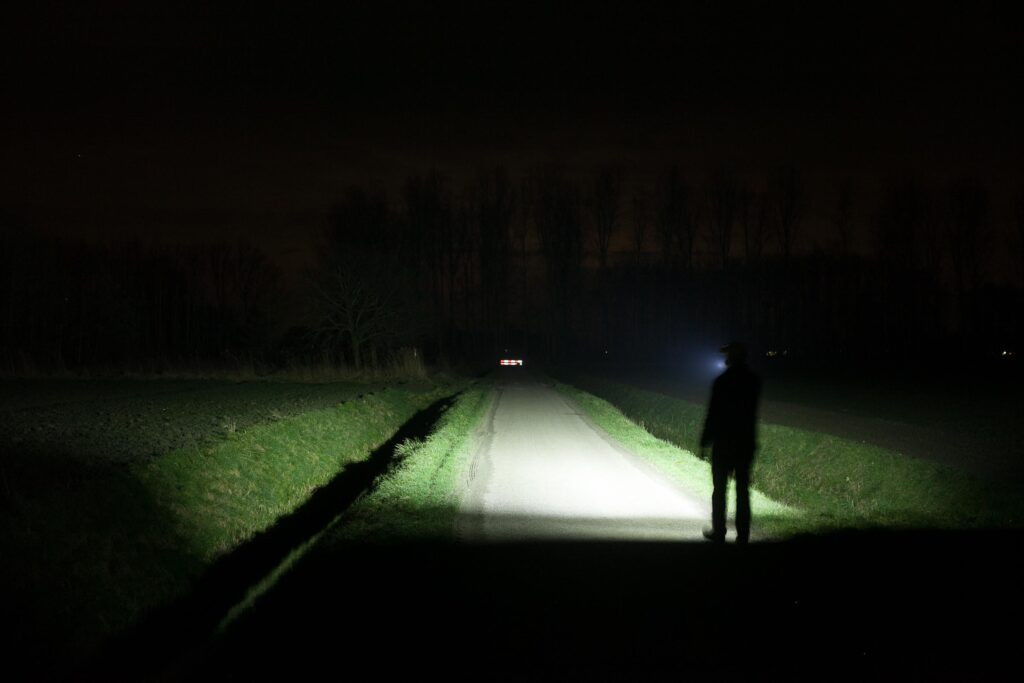
Beamshots
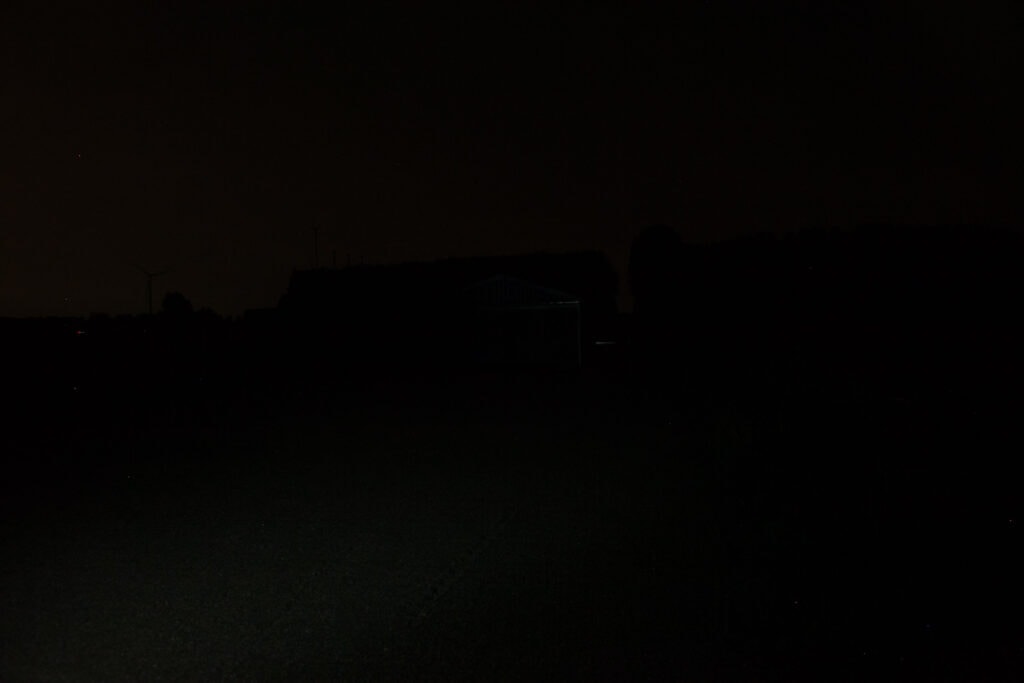
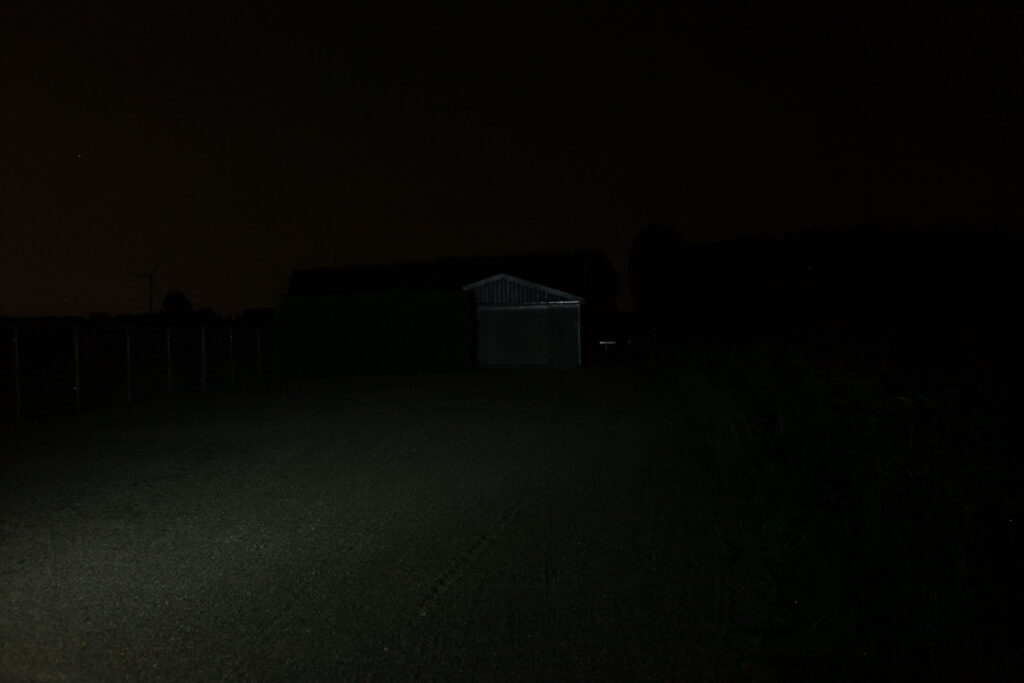
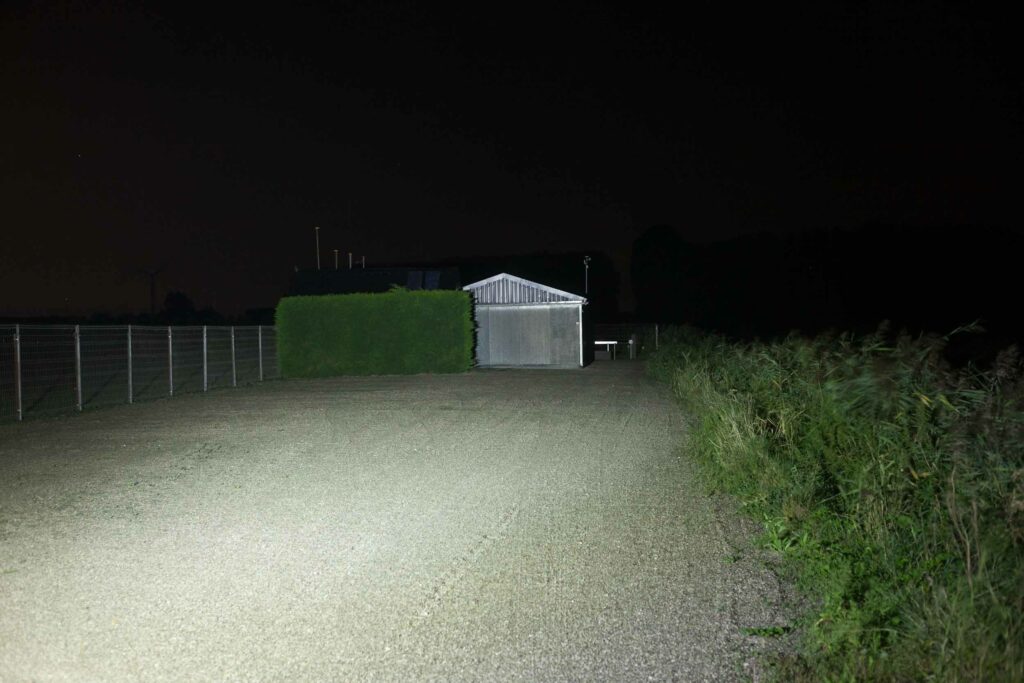
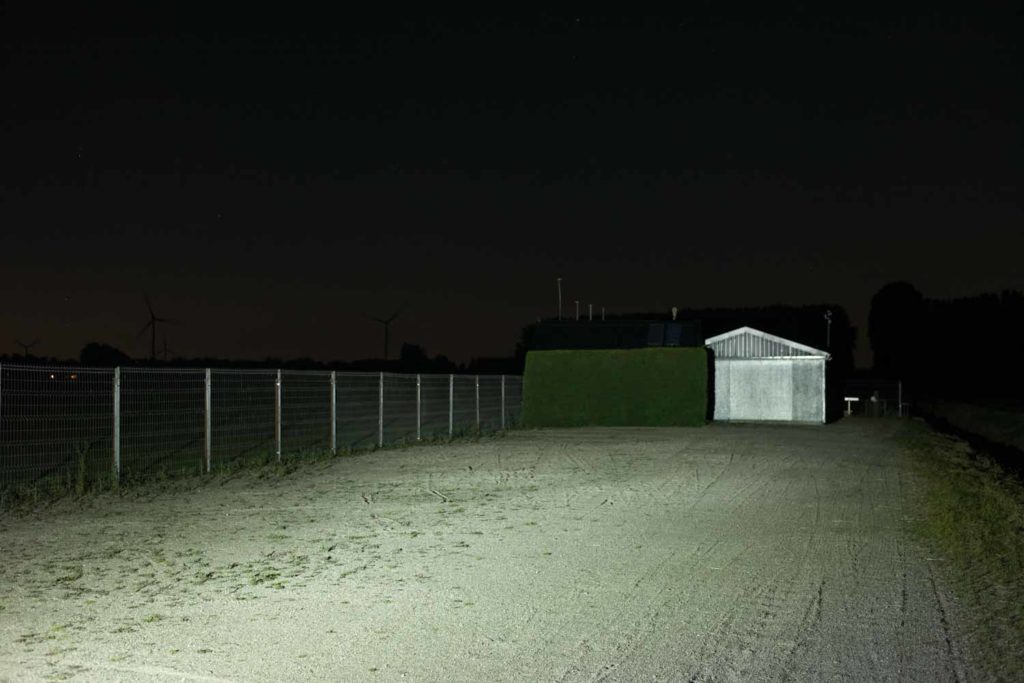
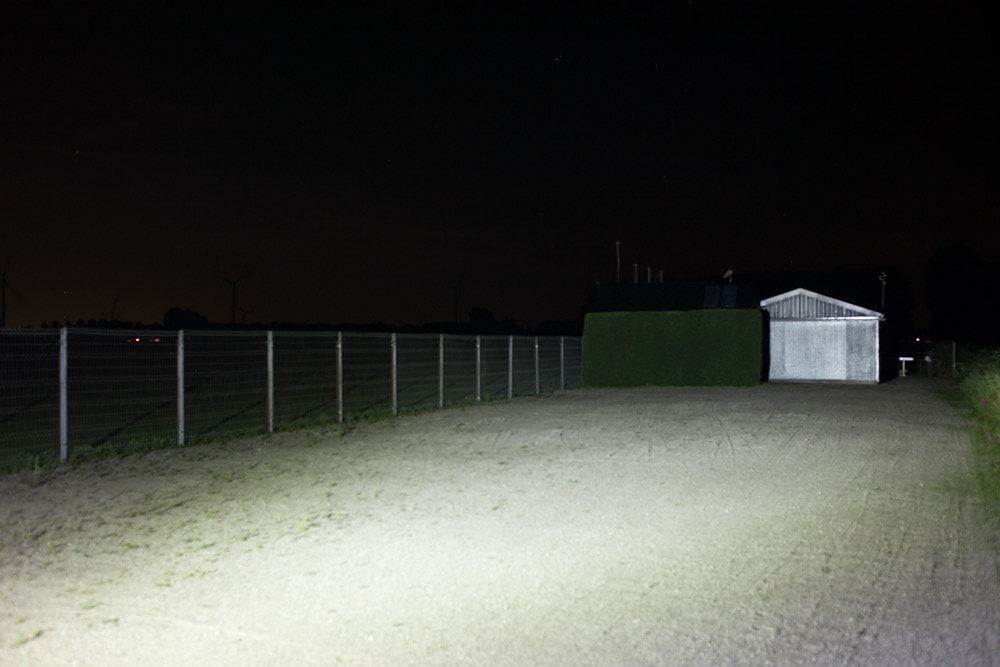
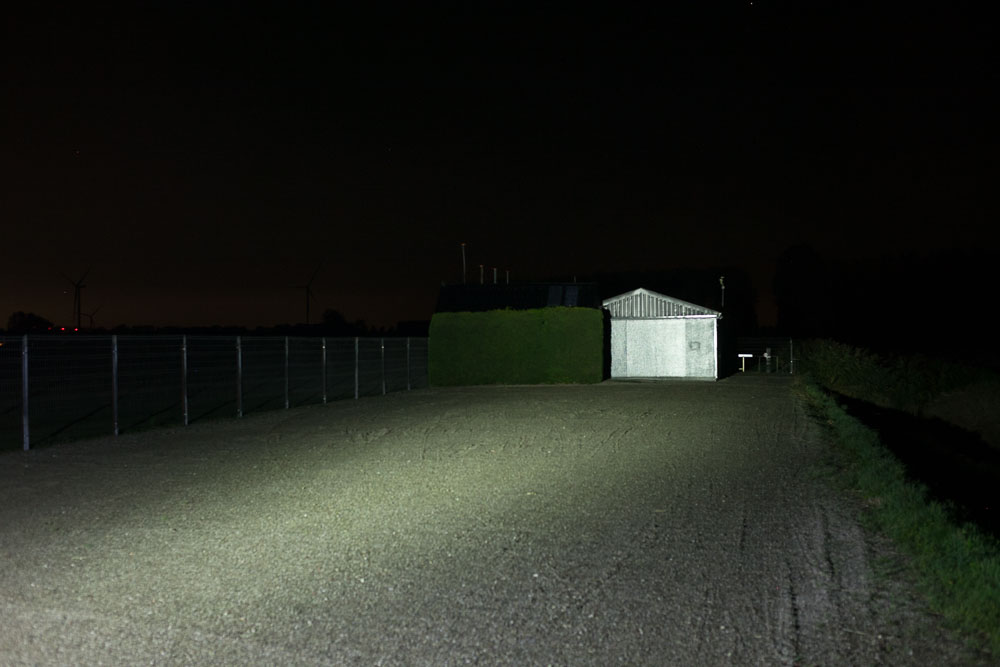
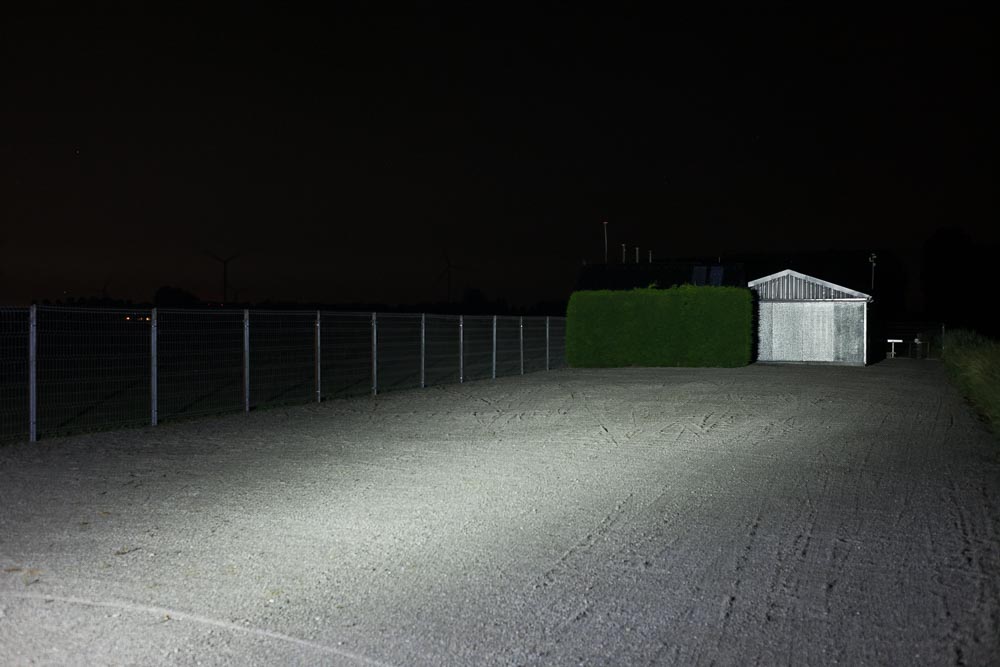
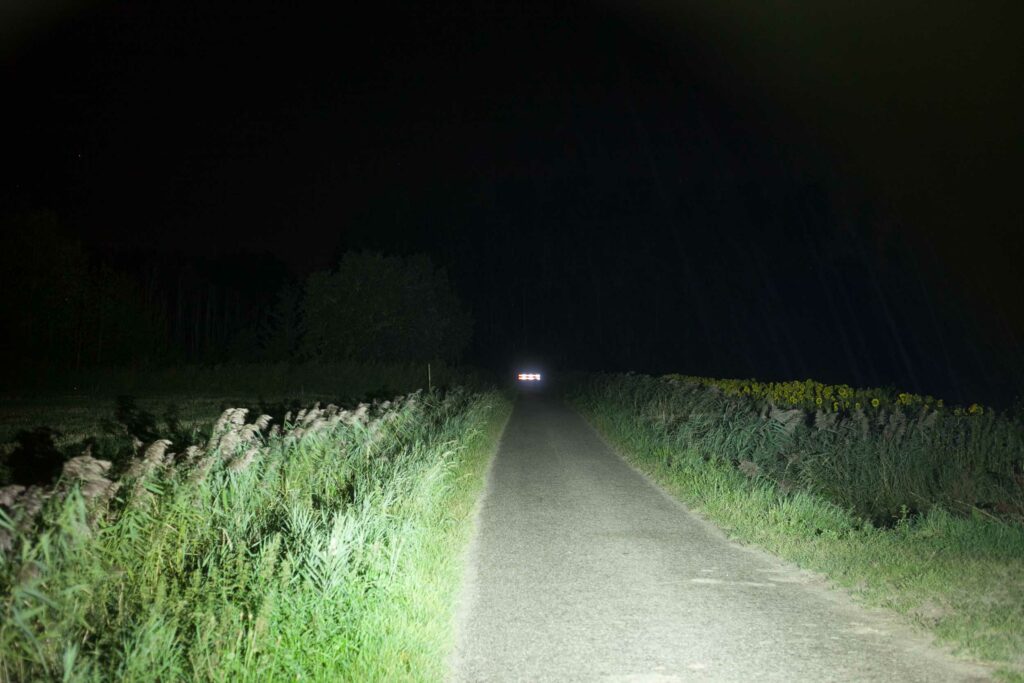
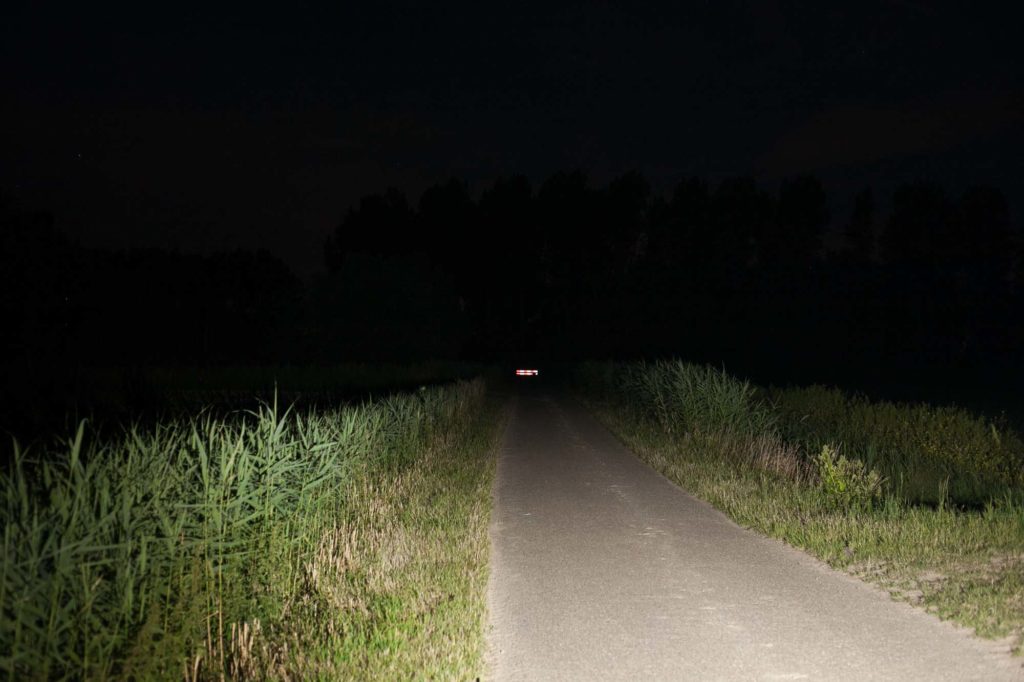
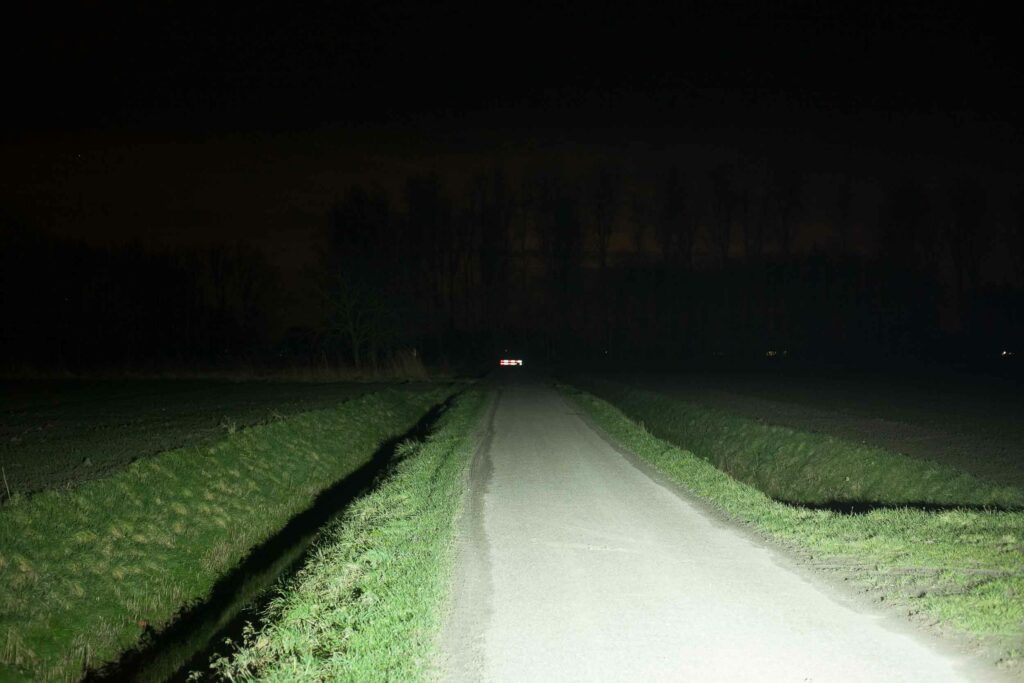
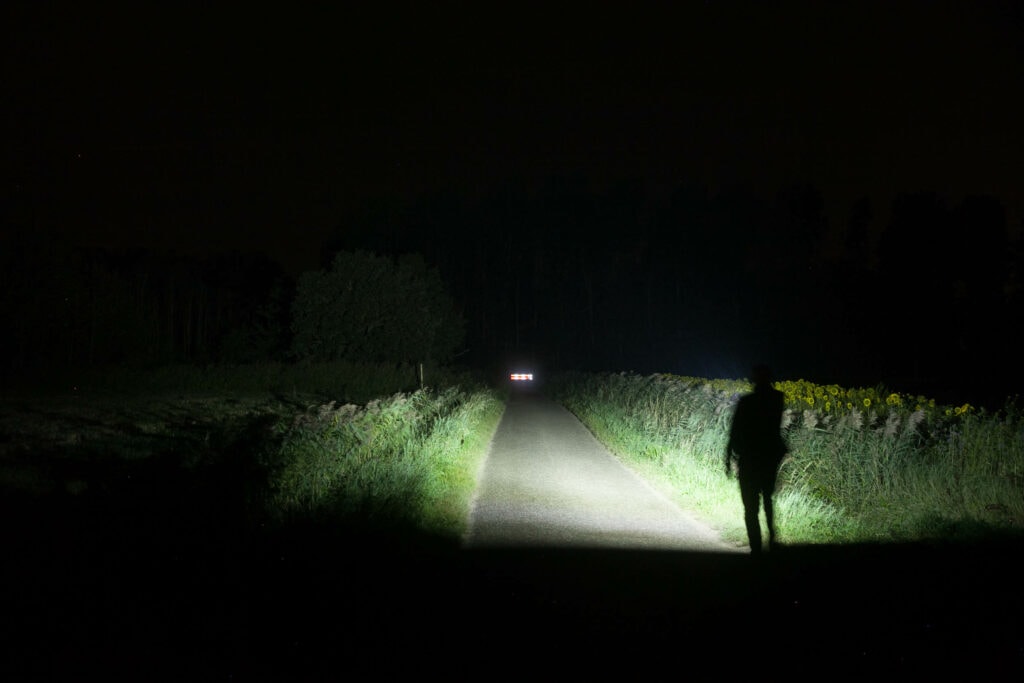
For the following beamshots I used a Canon EOS 5D Mk2 and a 50mm lens. manual settings: ISO1600, 1/4sec , F4, 5000K
The shed is about 65 meters / 71 yards away, and the reflective fence about 200 meters
Modes from Low to Turbo, compared to other flashlights. Here is the list with flashlights pictured below:
- Olight Seeker 4 Pro
- Olight Seeker 3 Pro
- Acebeam E70 (Stainless steel)
- Fenix E35
- Amutorch E3H
- Acebeam E70 Mini
- Nitecore EDC27


Disclaimer: This flashlight was sent to me for review at no cost by Olight. I have not been paid to review, nor have I been holding back on problems or defects.
Final Verdict
Pros
- Safety features (auto lockout)
- Very bright
- Ready-to-go with a battery, charge holster, and USB-C charging cable
- 2 ways of changing output, press-and-hold, and turning the dial
- Rotating dial for output has been improved!
- Proximity sensor has been removed (could also be a con)
- Short cuts to Moon, Turbo, and Strobe
Cons
- 30 seconds auto lockout can be a bit bothersome
- Not reaching specified output
- No proximity sensor (could also be a pro)
- Uses a new proprietary charging mechanism (but with USB-C cable)
- Rubber cover around battery tube gets dirty quickly
Explanation on star ratings:
1: Avoid: my phone flashlight would be a better choice – 2: Poor: significant defect or issues, much better options available at the same price – 3: Average: some defects or issues – 4: Good: recommended (minor issues) – 5: Great: highly recommended
4.5 stars: ★★★★⋆
Phew… that was another interesting flashlight to review. Since I tested the Seeker 3 Pro, I was hoping to see a nice upgrade with higher sustained output. But alas, it wasn’t. They perform so close that it’s hard to call for a winner.
However, the Seeker 4 Pro still has one of the highest sustainable outputs of any EDC flashlight.
Keep in mind that I had my calibration light recalibrated long after the Seeker 3 Pro review was done. So I trust the current measurements more.
Having said all that, the Seeker 4 Pro does not have a proximity sensor anymore, nor does it have a lanyard attachment. But it does have a few other feature changes as well. I mentioned them (as far as I could find out) in the review. But to sum them up quickly: bigger and better rotating switch, no proximity sensor, long-press for unlock, and the battery inserts the ‘normal’ way.
All in all, if you’re into larger lights for EDC, the Seeker 4 Pro should definitely be something to consider.
Olight Seeker 4 PRO discount code
Use our exclusive 1lumen discount code to get an extra 10% off anything you order at Olightstore.com (USA). Coupon code: 1lumen
1lumen selects and reviews products personally. We may earn affiliate commissions through our links, which help support our testing.