1lumen selects and reviews products personally. We may earn affiliate commissions through our links, which help support our testing.
Olight Warrior Mini 2 review
Olight Warrior Mini 2 specs
| Brand/model | Olight Warrior Mini 2 |
|---|---|
| Category | Tactical flashlights |
| LED | N/A (Luminus SST40) |
| Lumens | 1750 lm |
| Beam intensity | 12,300 cd |
| Battery config. | 1*18650 |
| Material | Aluminum |
| Modes | 5 |
| Blinkies | Strobe |
| Reflector | Mix TIR with light-reflecting system and reflector |
| Waterproof | IPX8 |
| Review date | June 2021 |
Olight Warrior Mini 2 Review introduction:
The 1st generation Olight Warrior Mini has been a very popular flashlight for flashoholics and the average Joe who likes something bright and good. The Olight Warrior Mini was/is a very small, pocketable flashlight with Tactical functionality. Even though its popularity, some people had some incidents with it.
High-power flashlights, like the Warrior Mini needs special care. This means you should always lock it while carrying it. But some people didn’t do that and hurt their pockets…..and skin.
The new Olight Warrior Mini 2 is taking care of all that. It now has a new safety feature built into it, namely a proximity sensor.
This is not the first time Olight uses this type of safety feature, but it’s definitely the first in such a small light.
You can see that Olight clearly listens to its customer base, and if you shout loudly, you will likely be heard by Olight. Extra safety features are welcomed by many users. If you don’t like safety features, there might be some way around it.. but that’s not recommended
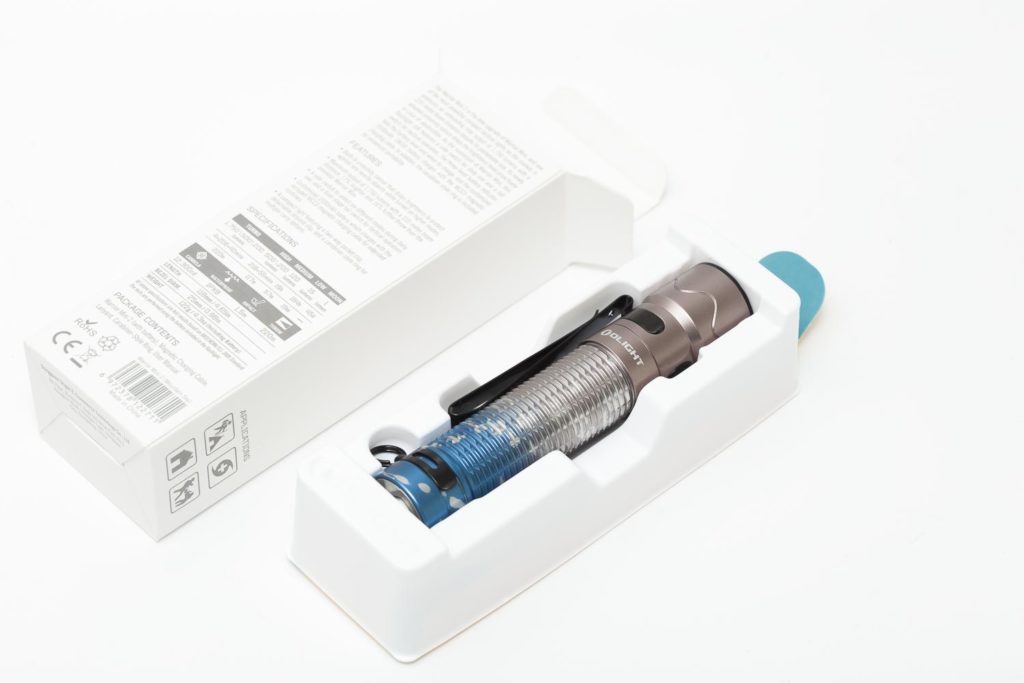
Package quality.
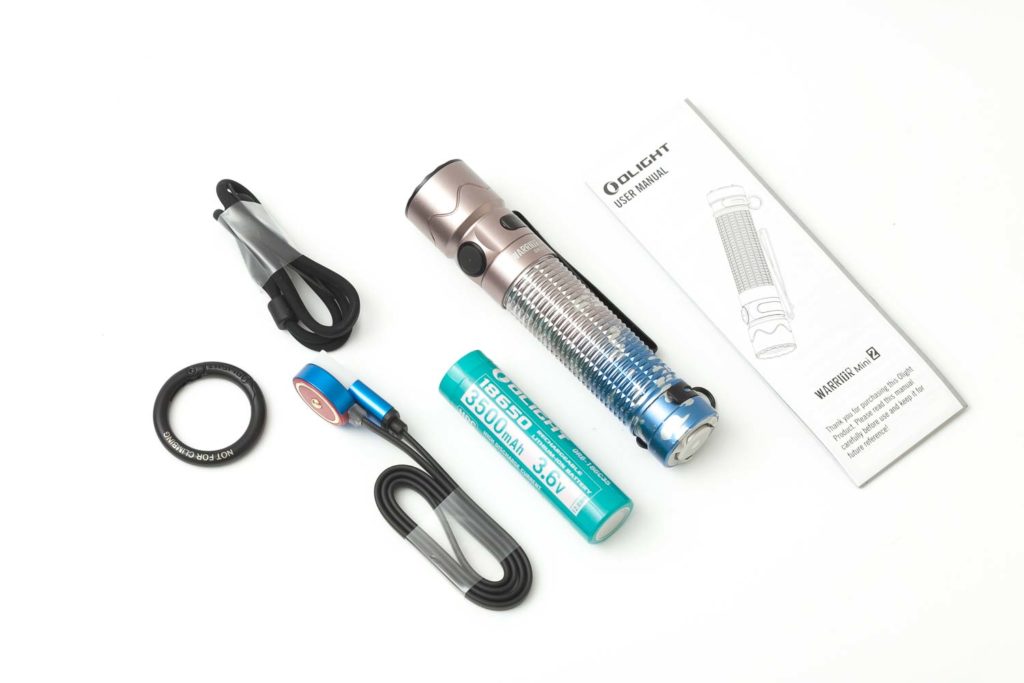
When it comes to packaging, Olight never disappoints. The presentation of the Warrior Mini 2 is no exception. You’ll find the following in the box:
- Olight Warrior Mini 2
- 3500mAh 18650 battery (Olight proprietary)
- MCC3 charging adapter
- Carabiner style ring
- Lanyard
- Manual in many languages
Olight Warrior Mini 2 in use
Let’s dive more into the Warrior Mini 2 review:
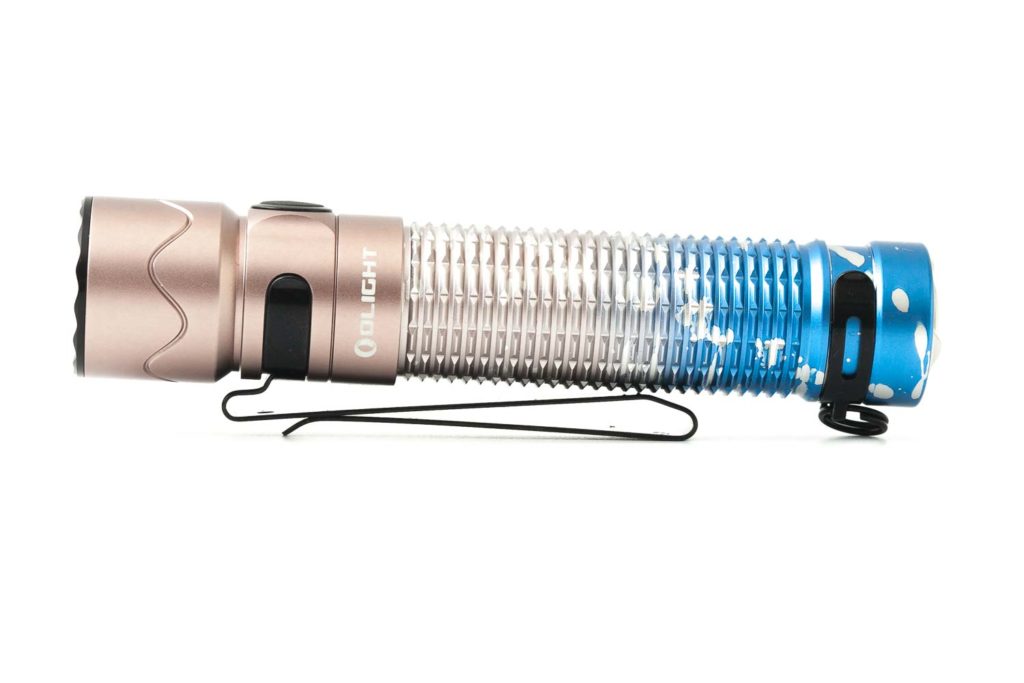
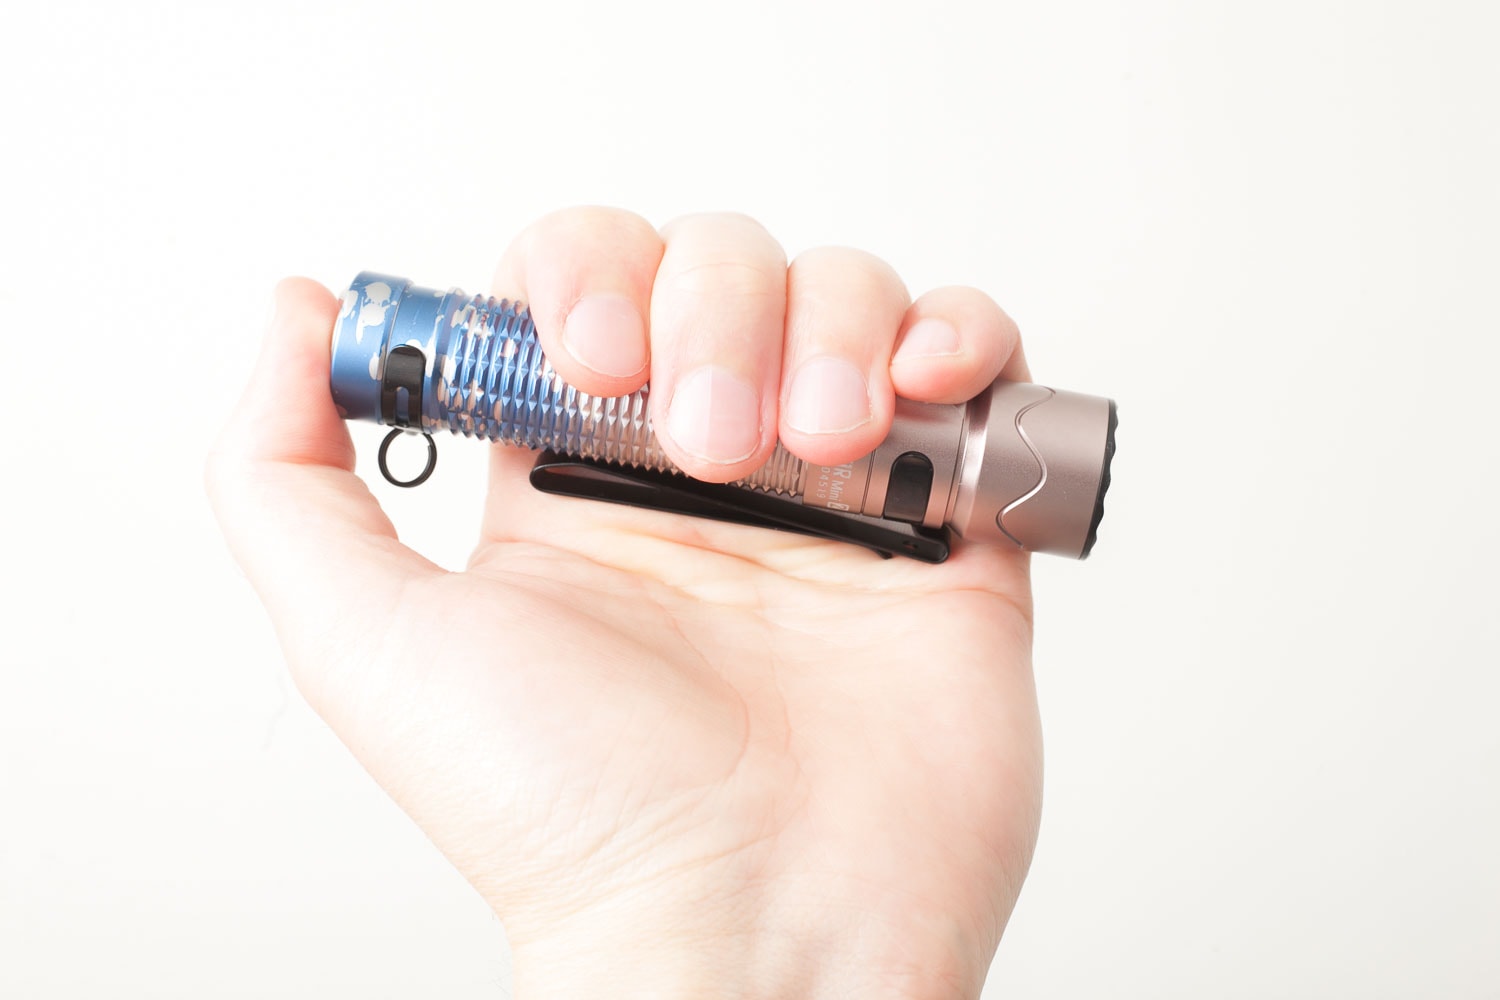
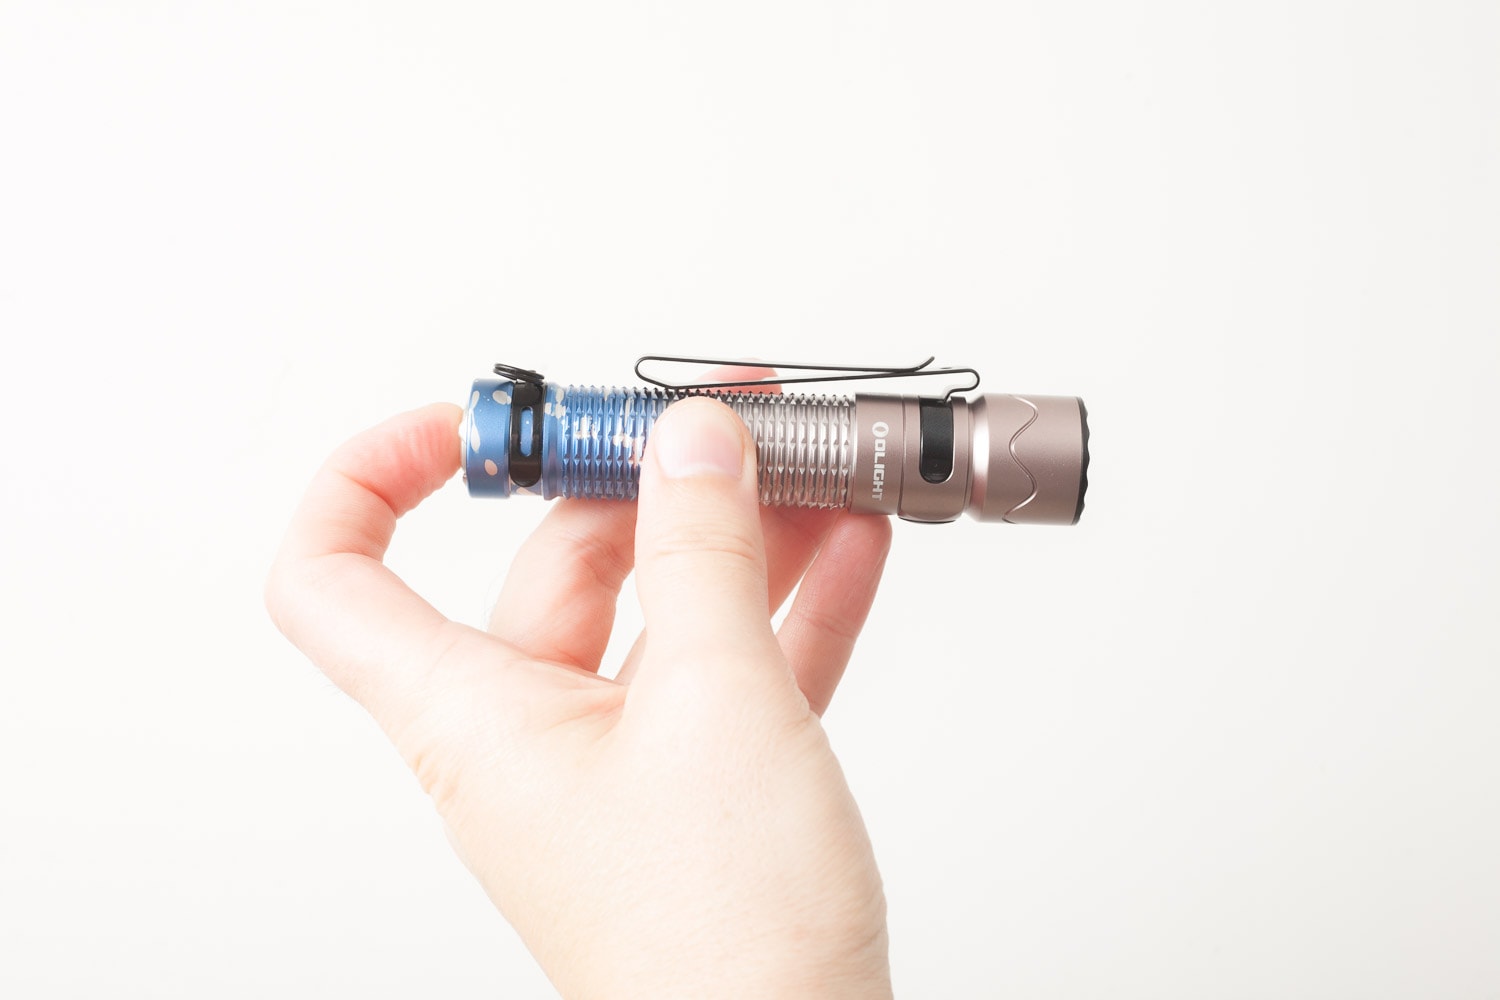
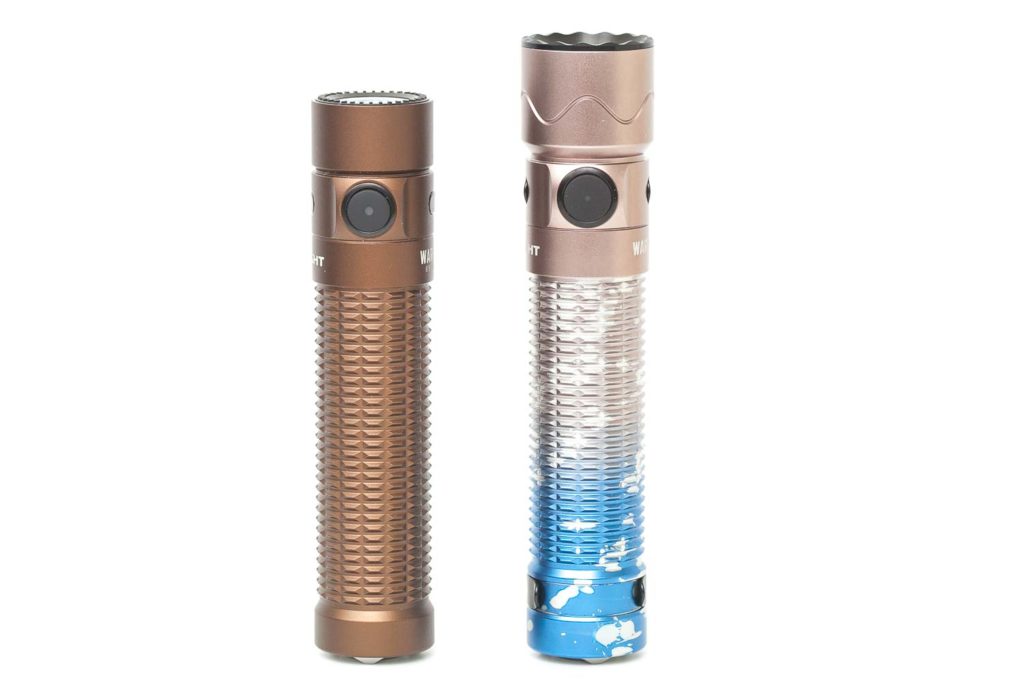
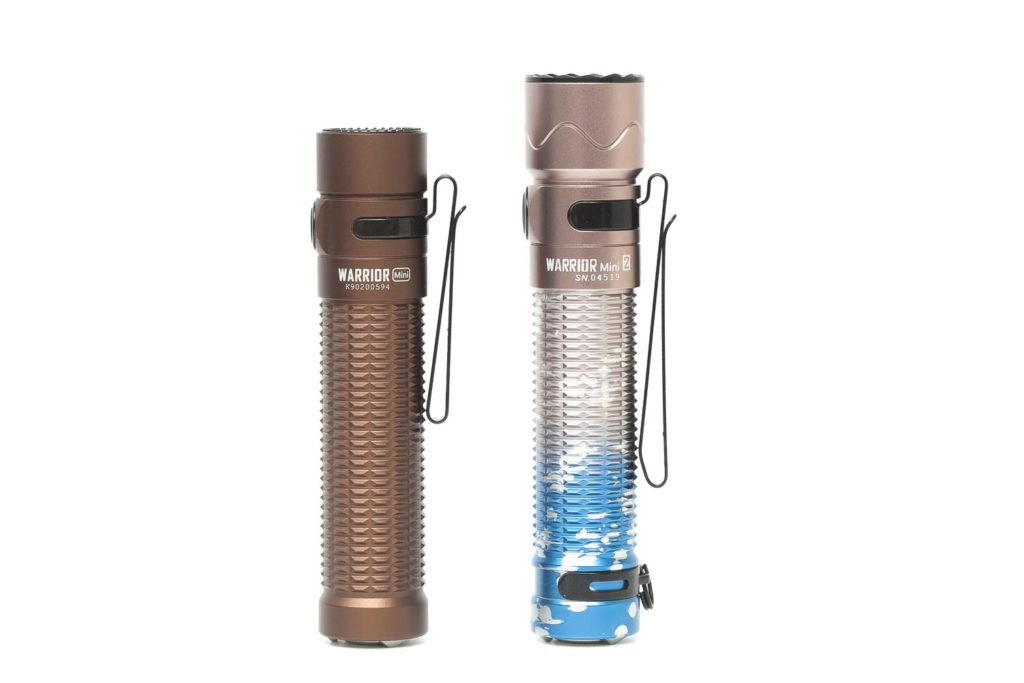
More often than not, a next-generation flashlight looks very similar/same to the previous one. But the Warrior Mini 2 doesn’t look identical, but close. It almost looks like a different model. Although very similar, it definitely is a bit longer and has a few new interesting. features.
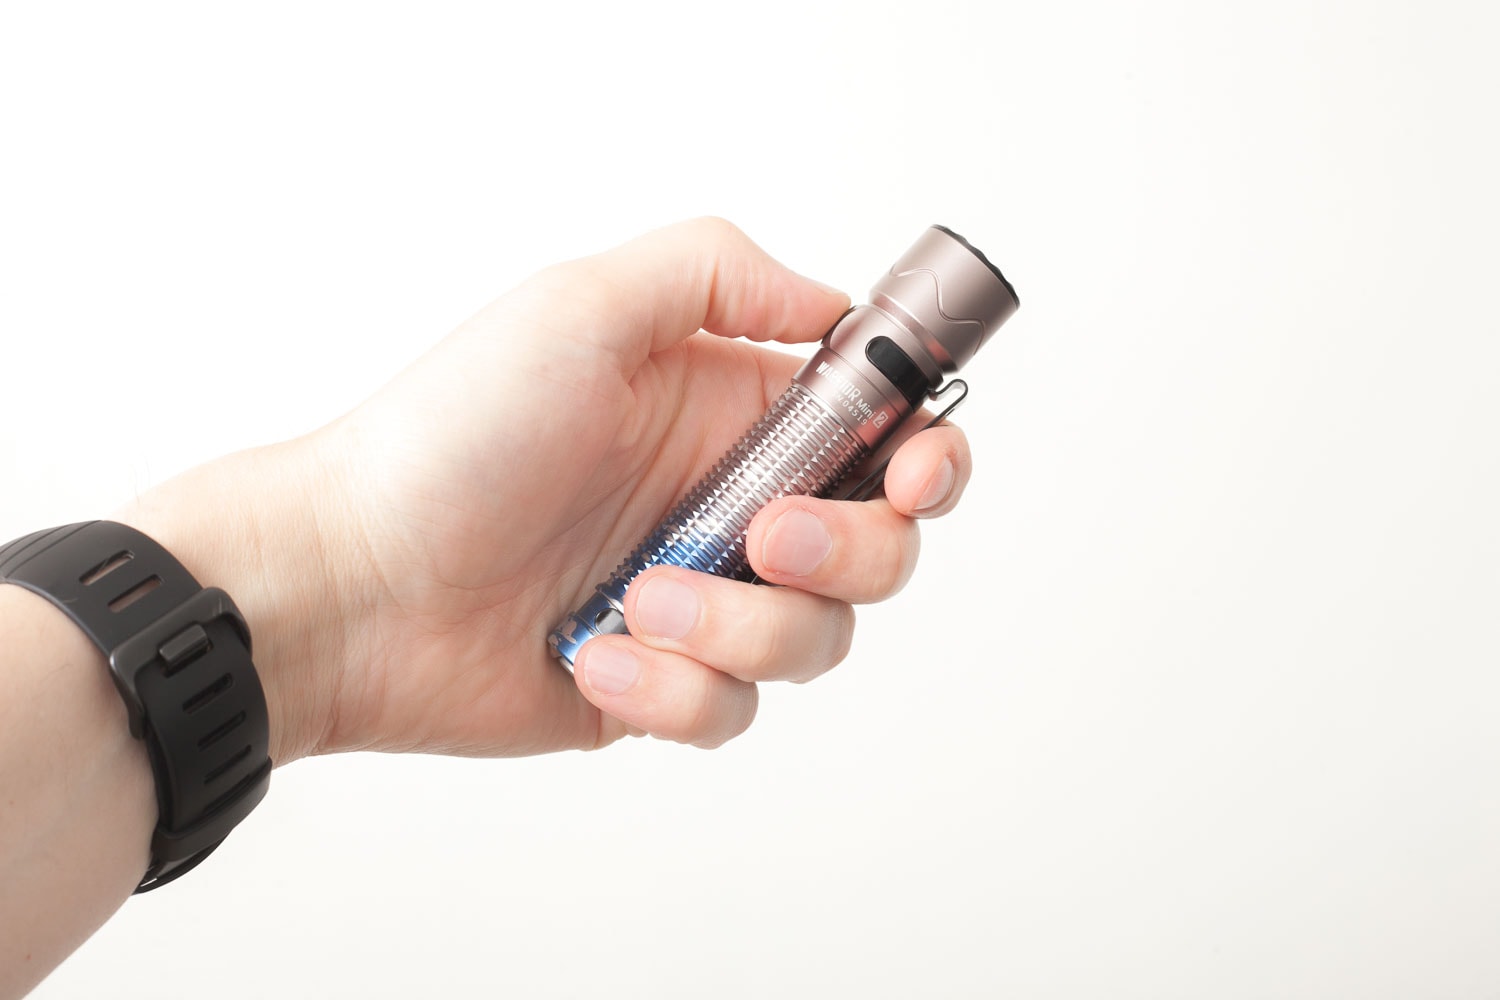
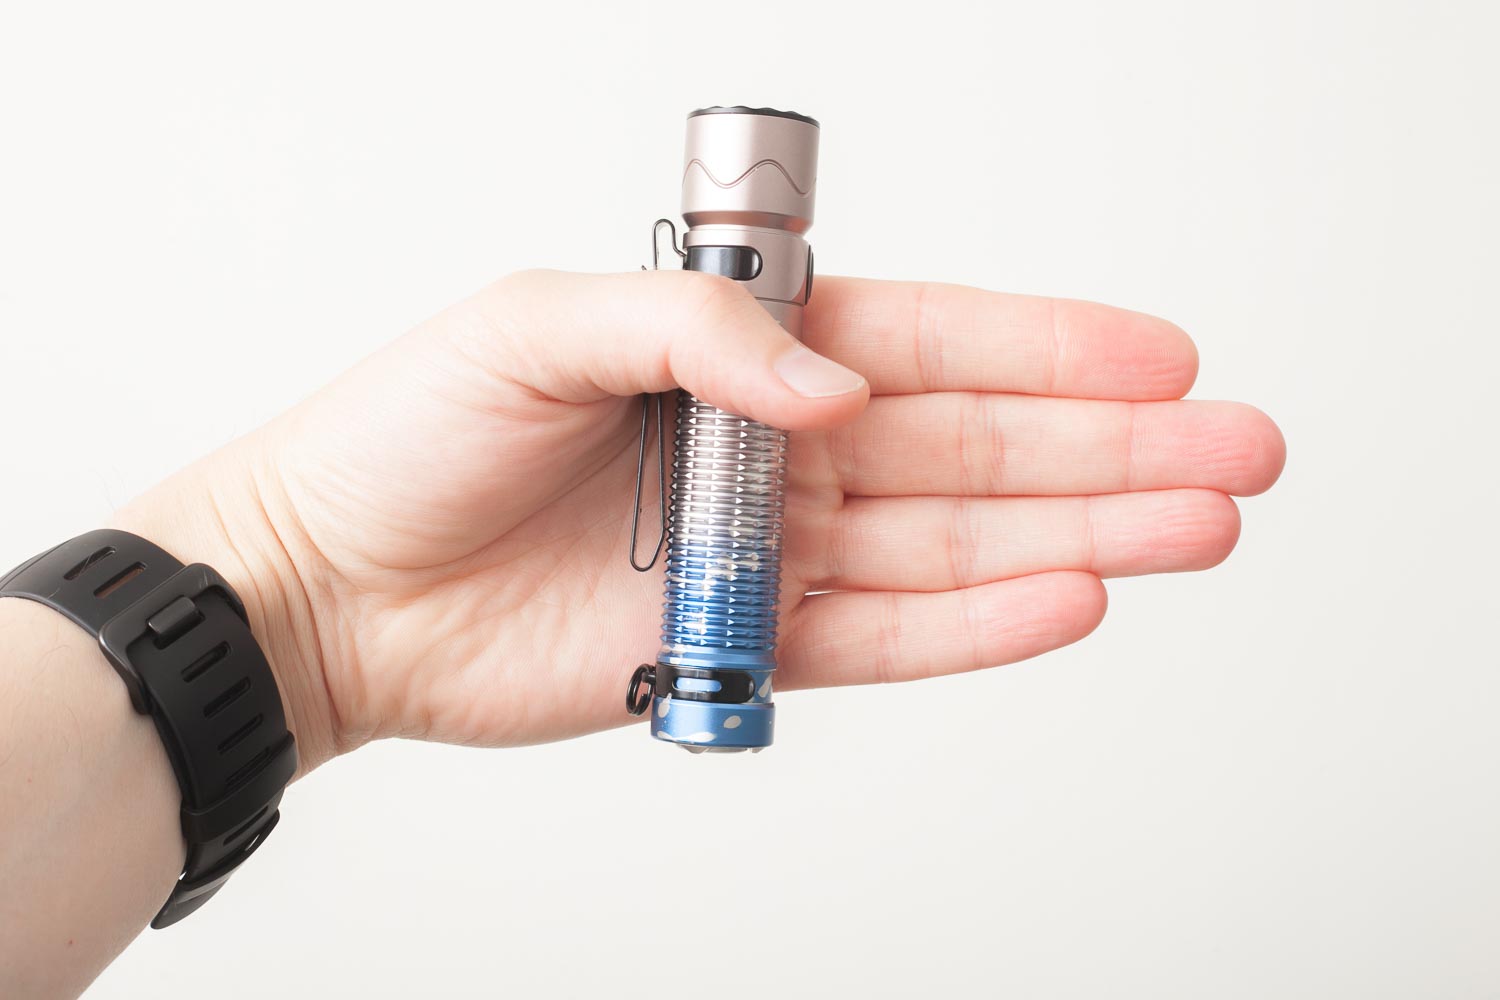
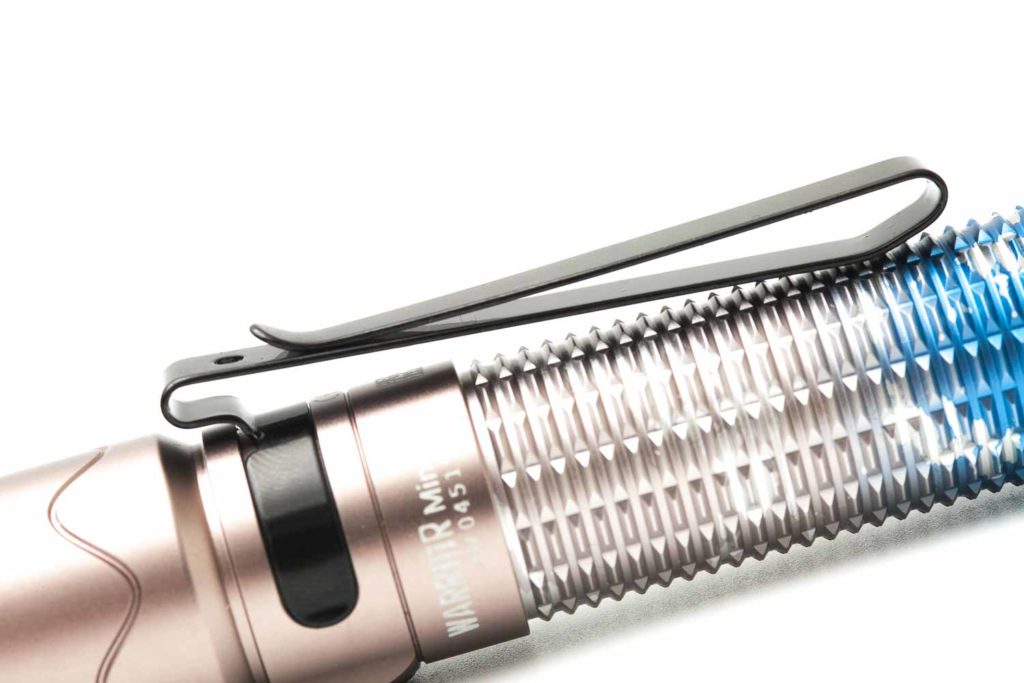
When you hold it in your hands, it feels pretty solid and not slippery at all. The deep carry pocket clip is sturdy, but I haven’t tried to stress it. From my experience, they don’t like to be pulled too hard. It’s a 2-way pocket clip, so you can carry it both ways, pointing up, and pointing down. Please check out all the pictures to give you a better understanding.
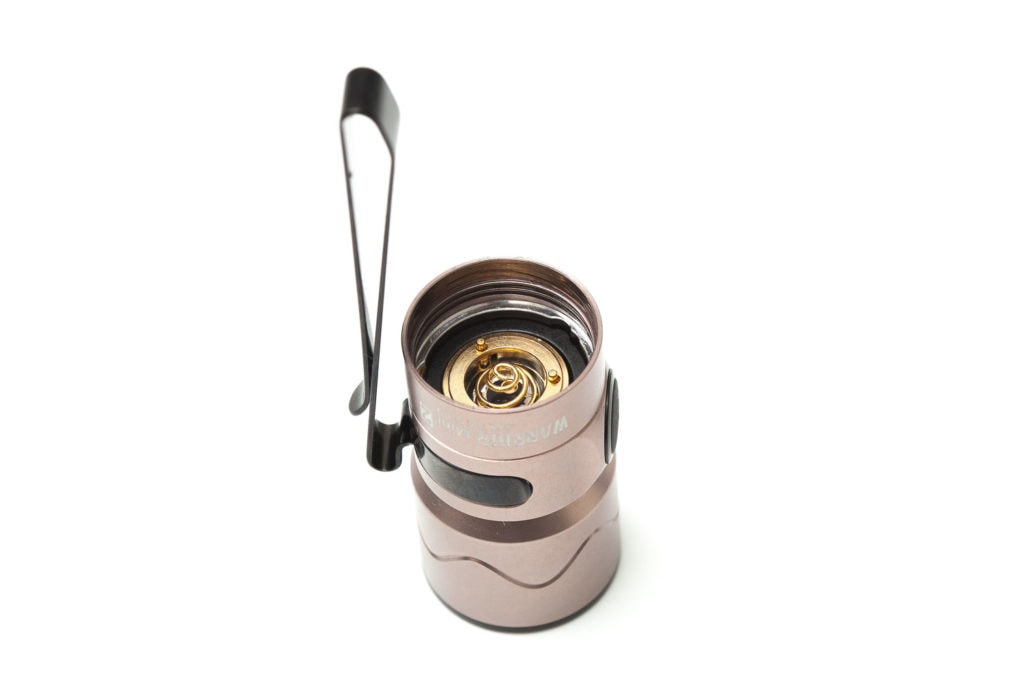
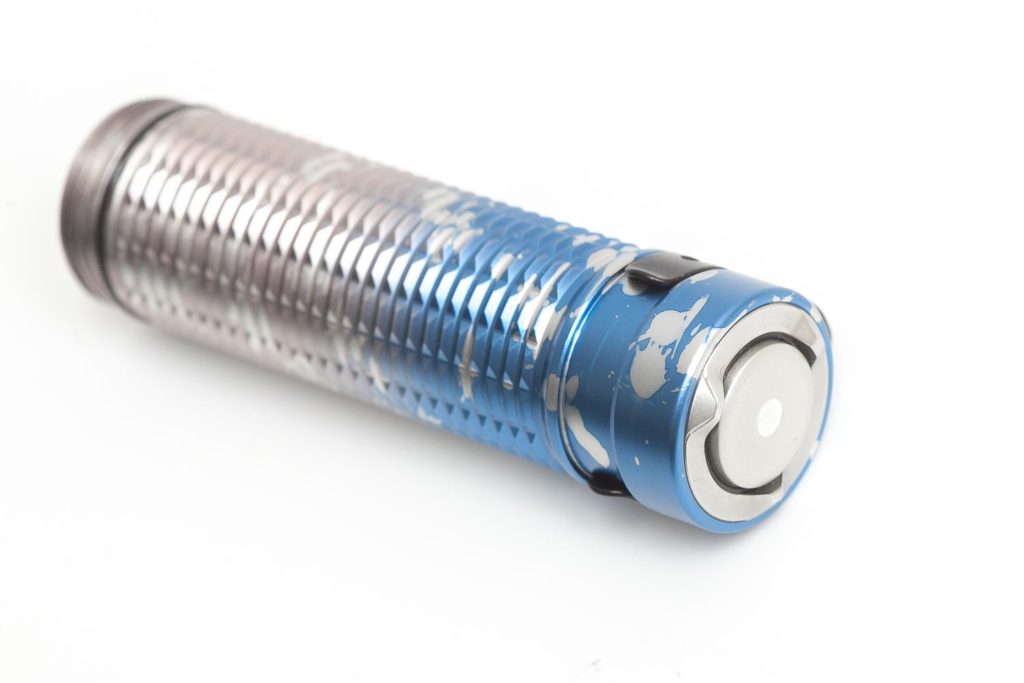
The Warrior Mini doesn’t have a tailcap. The body unscrews near the head, and that’s where you insert the battery. The switch is built into the body and can’t be removed. There’s a pretty strong magnet built into the tailcap. This is used to attach the MCC3( magnetic charging cable), but it can also be used to attach the flashlight to something metal.
There’s two switches: a tail- and a side switch. You can use them interchangeably. You don’t have to use the tail switch to turn the light on or off. You can use the side switch for that as well. The tail switch has four options: momentary Medium, continuous Medium, momentary Turbo, and continuous Turbo. The momentary feature activates when you hold the switch longer than 1 second, either fully pressed till you hear a click for Turbo or halfway for Medium. If you release the button after 1 second, the light will turn off. This is only in regular mode, there is also a Tactical mode, but I will talk about that in the User Interface section.
You can carry it in a hand-down position with your thumb on the side switch, or in a tactical position with your thumb on the tail switch.
Warning: Please always use the LOCKOUT mode when carrying it in your pocket. Even though it has a proximity sensor built in.
Tailstanding: easy peasy. But just a tiny bit unstable, but very stable on a metal underground.
Build Quality, and Warranty
If you own any Olight flashlight, you know what their lights look like in terms of build quality. They are top-notch, so my review of the Warrior Mini 2 could end here.. lol
My first official Olight dates back to around 2013 or 2014, but at that time I wasn’t really impressed with the quality. This has changed over the years, and now they build some really good quality lights and have a large fan base.
Olight’s design is always unique for each flashlight they produce. Even a 2nd generation flashlight may look a bit different and likely has different features. The 2nd gen Warrior Mini not only looks different, but it also has a few new features as well!
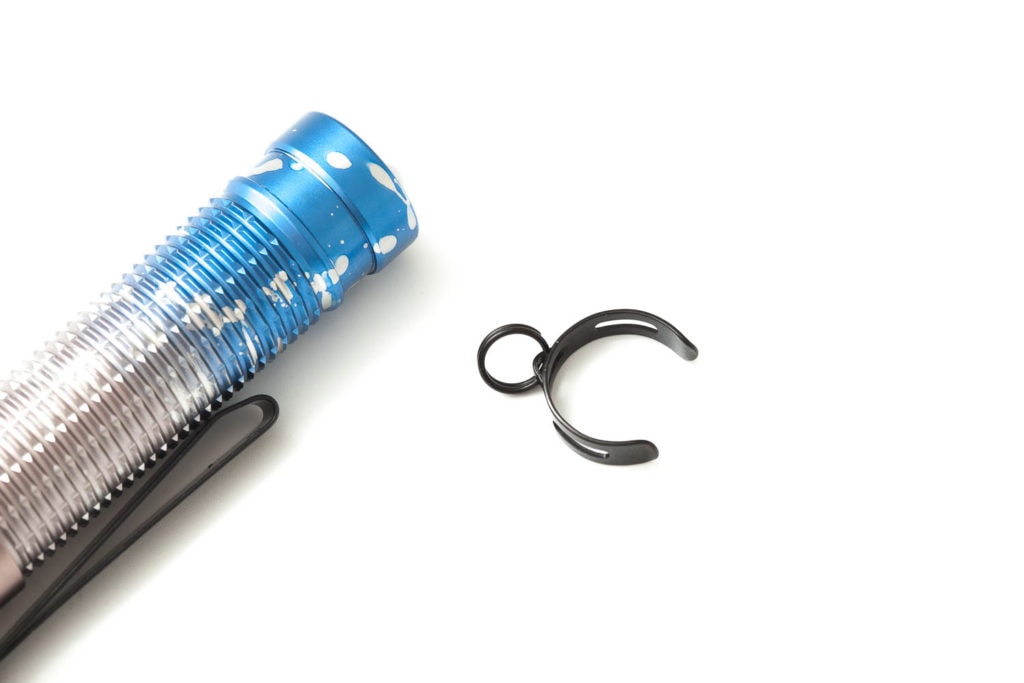
Threads and anodization look good and of high quality without any scuffs or missing Anno. And since I wondered where to attach the lanyard on the 1st gen Warrior Mini, they now included a specially designed lanyard attachment. This ring can also be used in combination with the included carabiner-style ring. This makes it easy to attach the light to your belt loops.
Olight’s warranty: https://www.olightstore.com/warranty
Orders can be returned for any reason within 30 days from the date the order was received. Returned items must be in the same condition, unworn, and in the original packaging. Once you apply for a refund or replacement, we will send you a return label to return the item to us, no need to pay for the shipping cost. Free or promotional items must be returned along with the original item when being fully refunded.
Once your return is received, a refund will be processed, and a credit will automatically be applied to your original payment method. Please note that it might take 2-5 working days for a refund to show up on any bank statements. For your replacement, we will re-send a new item to you as soon as possible (within two weeks.)
For items purchased from third-party platforms within 30 days, we recommend you contact the original seller first, so they may take care of you. If you have any issues with them, please contact us.
Within 2 or 5 years of purchase: please contact our customer service at [email protected], or visit https://www.olightstore.com/contacts/warranty.html, to apply for the warranty work. We may need your serial number, the date of purchase and a simple description about your issue. If your item needs to be returned for repair or replacement, we will provide you an RMA case number and application form to return the defective light together. You will need to cover the shipping cost, no need to pay for the repair.
LED, Lens, Bezel, and Reflector
Olight is known not to include many details on the LEDs they use. So you won’t be able to find anything like the CCT, bin, or tint. Sometimes, however, they do include an approximate, as they did on the Olight S1r baton III.
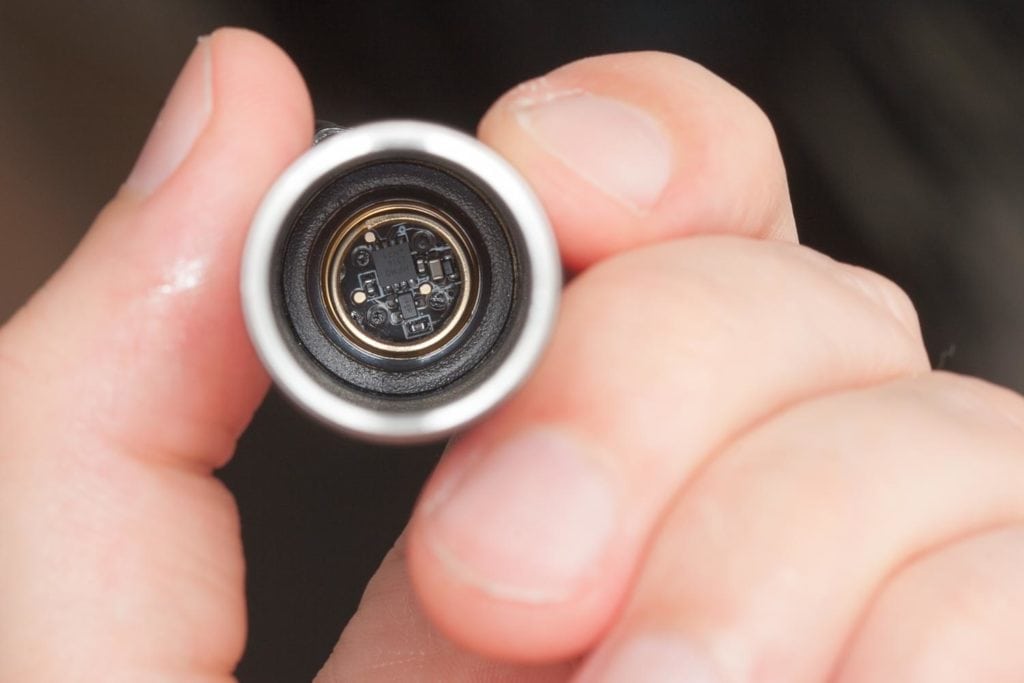
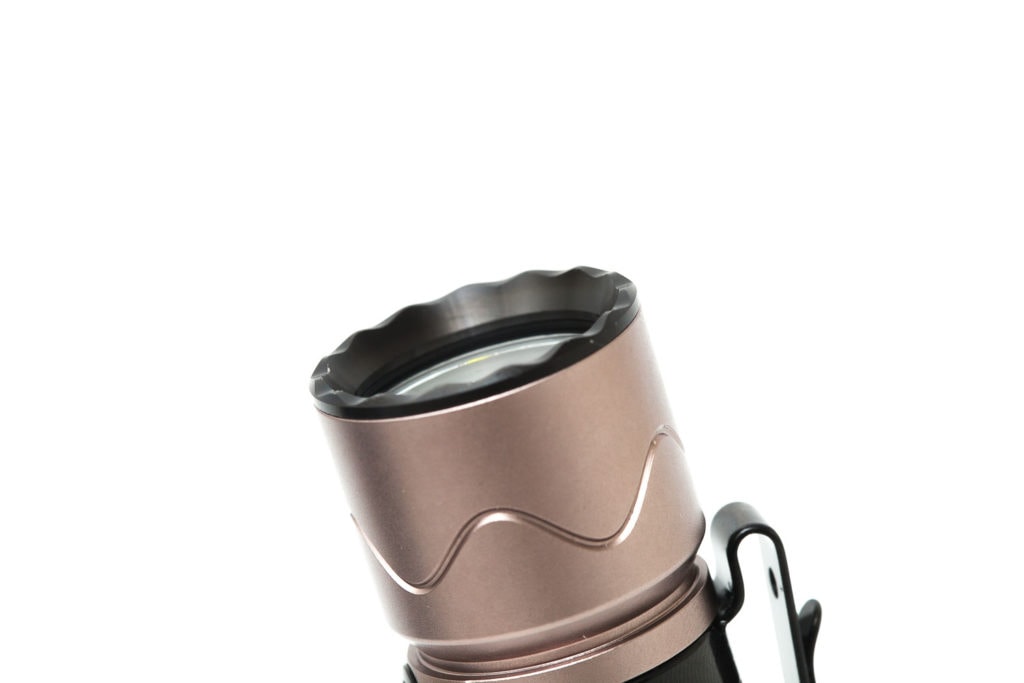
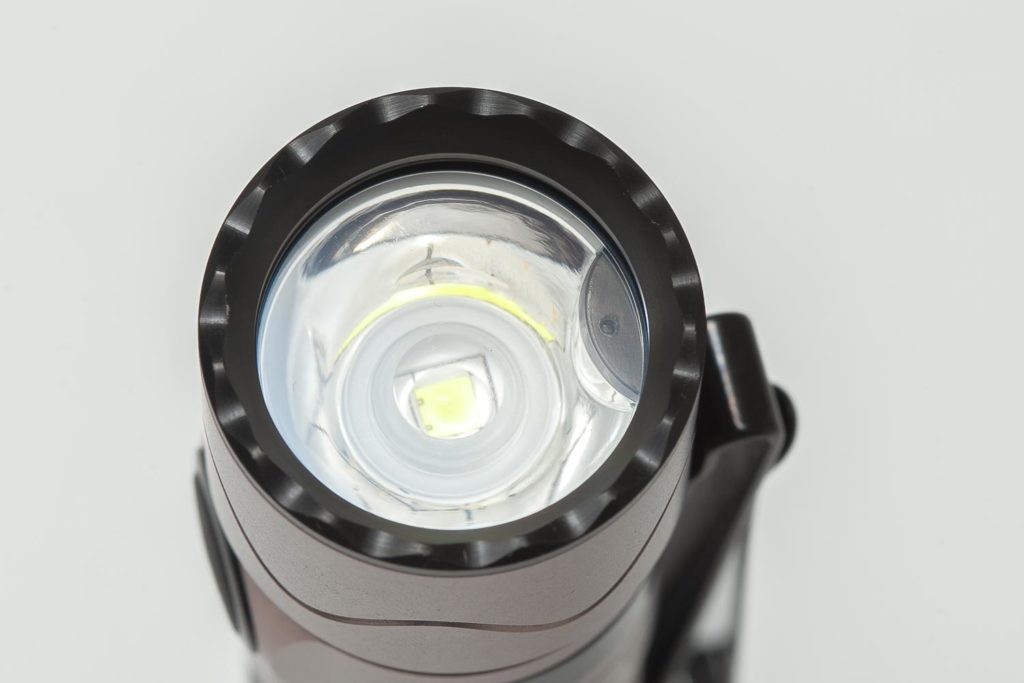
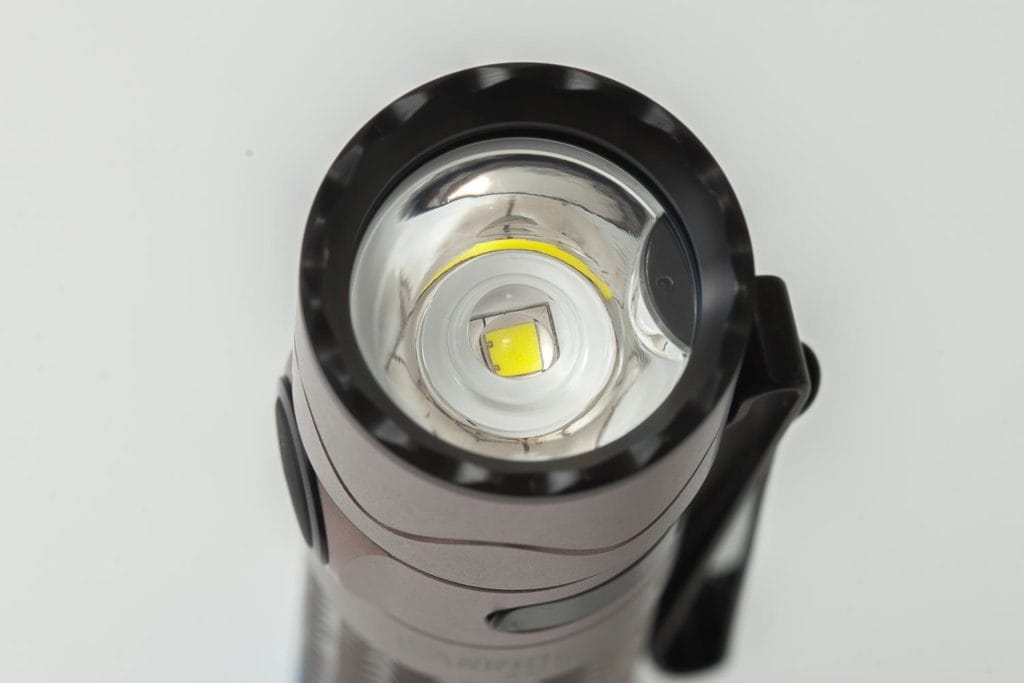
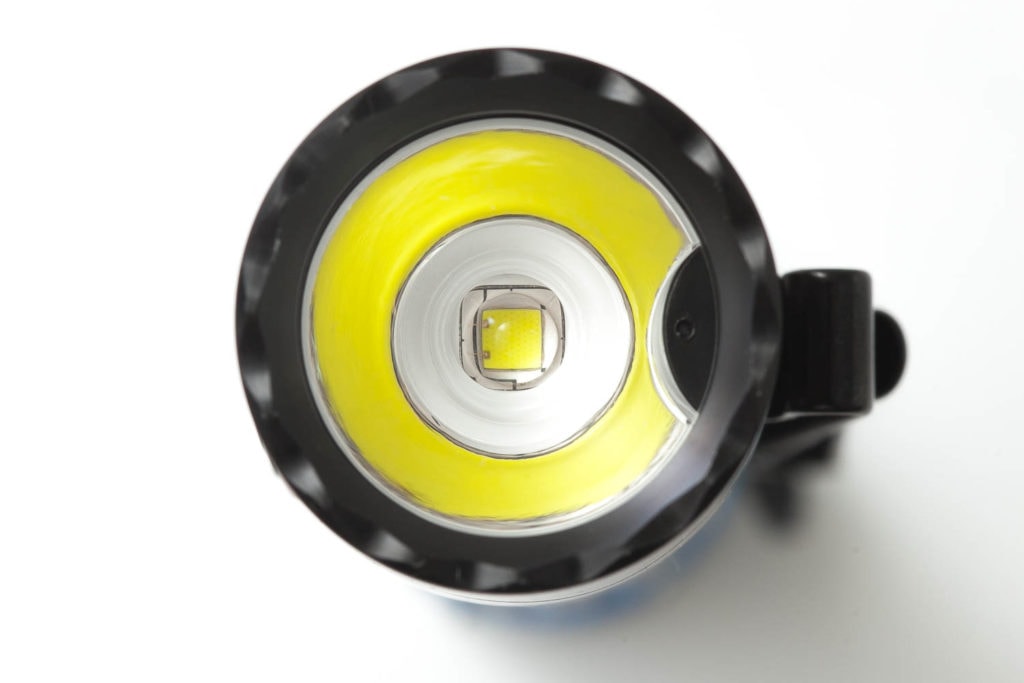
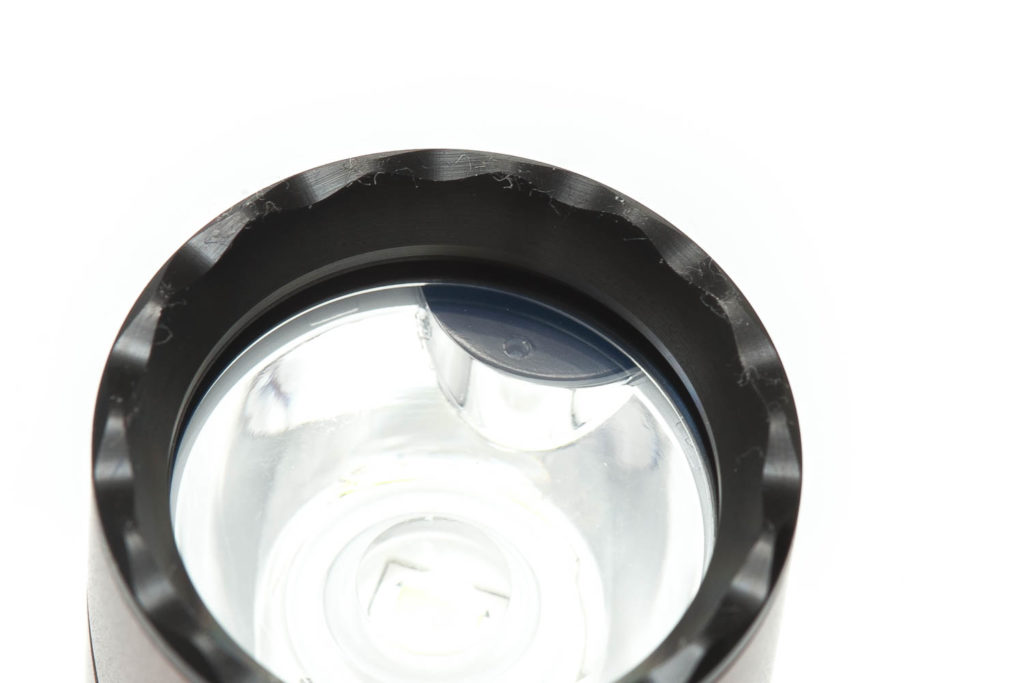
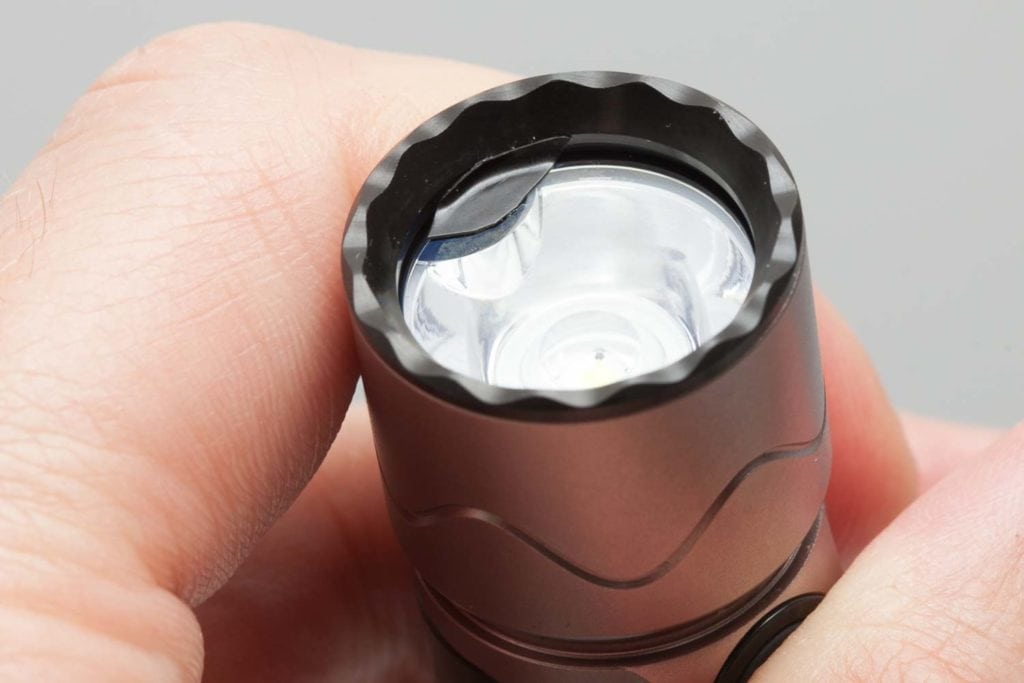
But when I look into the barrel of the Warrior Mini 2, I notice a well-known LED, namely a Luminus SST40. The LED sits in a TIR optic that looks different from the 1st gen Olight Warrior Mini. It looks like a combination of a reflector and TIR. There’s clearly a smooth reflector, but also the characteristics of a TIR optic. And to be honest, it looks like it is using something that looks like a mini wavien collar, that reflects the light and therefore loses less light coming out.
The beam color is slightly cool, without being blue or purple or anything. The Mini 2’s bezel has some crenelations but isn’t sharp, and you can’t remove it to take a look at the internals. That’s probably done on purpose, and I don’t blame them for it.
One of the main ‘improvements’ over the Mini 1 is the proximity sensor. The proximity sensor detects the reflection of the light and registers that as ‘something close’, and reduces the output. This sensor is visible through the front glass, and this yet proves again, that Olight builds its own flashlights from scratch with their own unique characteristics. It will reduce the output and turns the light off after 60 seconds. No more burned pants.
Unfortunately, I couldn’t figure out how to deactivate the proximity sensor through the firmware, so I made a life hack: a piece of black tape stuck on top of the sensor. No, I wouldn’t recommend doing that, but I had to in order to do the runtime tests.
Dimensions and size comparison
Olight Warrior Mini 2 dimensions
- Length: 118.1 mm / 4.65 ”
- Head diameter: 25.28 mm / 1”
- Body diameter: 22.2 mm / 0.88 ”
Olight Warrior Mini 2 Weight:
Only with the pocket clip attached. The other attachment has been removed
- Empty: 70.7 g / 2.49 oz
- With battery: 120.1 g / 4.23 oz
Olight Warrior Mini 2 Tactical Flashlight comparison
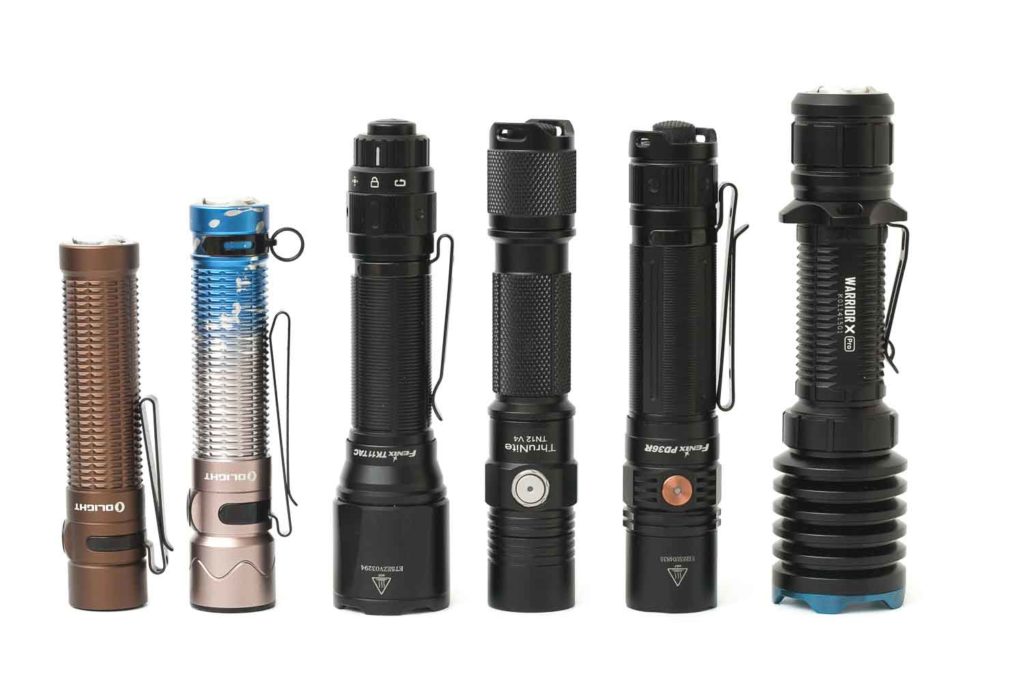
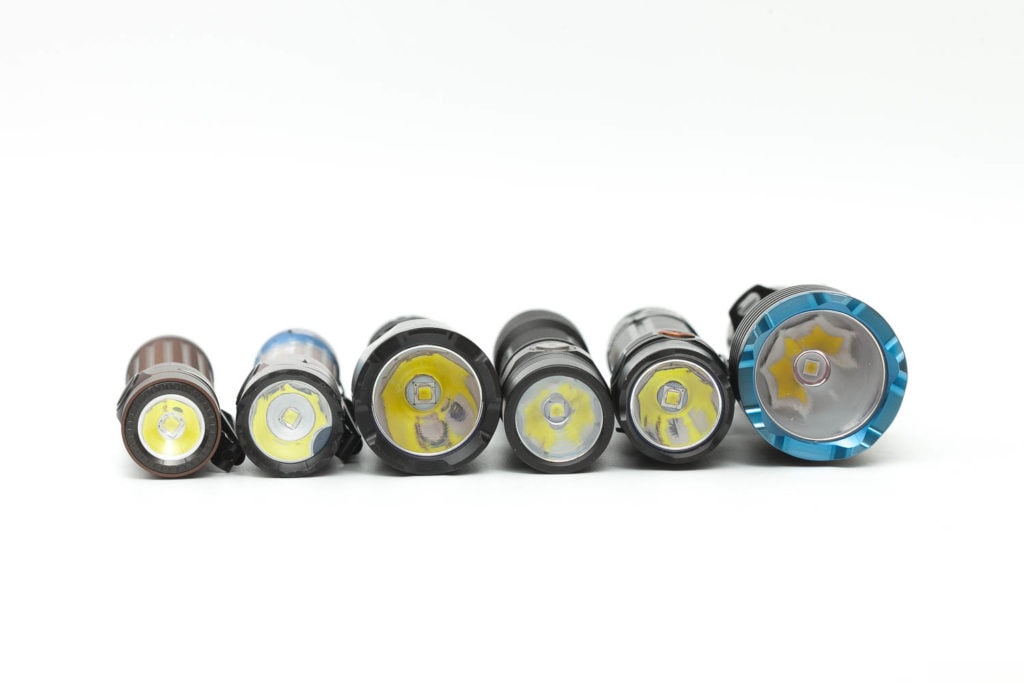
The Warrior Mini 2 compared to some of the best tactical flashlights
Group 1 from left to right: Olight Warrior Mini, Olight Warrior Mini 2, Fenix TK11 TAC, Thrunite TN12 v4, Fenix PD36R, Olight Warrior X PRO
Group 2, from left to right: You can see that the Mini 1 and Mini 2 look different in design and size. The Mini2 is quite a bit larger.
Driver & User Interface:
The Warrior Mini 2 uses 2 switches just like the Mini 1. Both switches can be used interchangeably. For example: If you turn the light on with the rear switch, you can use the side switch to turn it off, and of course vice versa.
The rear (tail) switch has 2 menu configurations. You can switch between these 2 settings by doing the following: Press and hold the tail switch and while holding the tail switch, you simply click the side switch just 1 time. There’s no time limit, you can do it slowly or as quickly as you want. Just remember to keep pressing the tail switch. (Changing this setting doesn’t influence the functionality of the side switch)
2 Tail Switch configurations
Tail Switch Configuration 1 (default configuration, everyday use)
The default configuration has 4 options. Medium (Momentary on), Medium (continuous), Turbo (Momentary On), and Turbo (continuous).
- Short half-press: Medium (continuous)
- Short full-click: Turbo (continuous)
- Half-press and hold (more than 1 second): Momentary Medium (release the button to turn the light off)
- Full-click and hold (more than 1 second): Momentary Turbo (release the button to turn the light off)
Tail Switch Configuration 2: Tactical mode: Momentary Turbo and momentary Strobe only
- Half-press: momentary Turbo
- Ful-click: momentary Strobe
There is no continuous mode with this Tactical configuration. A fast click doesn’t do anything, nor does a short half-press.
Side switch
The side switch can access more modes. And keep in mind that you don’t need the tail switch for power.
Available modes:
- Moon, Low, Medium, High, and Turbo
- (Moon and Turbo are not part of the default menu cycle)
Side switch from OFF:
- Single-click: goes to last used mode (it has mode memory, including Moon)
- Double click: Turbo (not working with mode memory, unlike Moon and the default mode group)
- Triple-click: Strobe
- Press and hold 1 sec: Moon
- Press and hold 2+ sec: Lockout
Side switch from ON:
- Single-click: Off
- Double click: Turbo
- Triple-click: Strobe
- Press and hold: cycle through the modes from low to high and back to low again.
Side Switch Shortcuts:
- To Turbo: Double-click side switch from either On or Off
- To Moon: from off: press and hold
- To Strobe: Triple-click from on or off
Mode memory:
- Yes, including Moon even when Moon is not part of the normal cycle. This is a great and useful feature.
- Turbo won’t be memorized
- High will only be memorized for 10 minutes, and will then revert back to Medium mode
Blinky modes menu:
- Yes, Strobe.. a triple click with the side switch from either On or Off / or a fully press the tail switch when in Tail Configuration mode 2.
Low battery warning:
- There is a small LED indicator inside the side switch. It will indicate the following:
- Solid green: 60%+
- Orange: 10-60%
- Solid red: 5-10%
- Blinking red: below 5%
Keep in mind that the flashlight will not turn off until the battery reaches a certain Voltage. The low voltage warning doesn’t mean Low Voltage Protection. Fortunately, it’s built into the battery, but after the runtime tests, the battery was about 2.6V. A little on the low side in my opinion
Lock-out mode:
- You can activate the electronic lockout mode by pressing the side switch for more than 2 seconds. It will briefly turn on in Moon and then locks out. Repeat this to unlock.
PWM:
- It almost looks like there is some PWM in the lowest mode, but if there is, it’s negligible, or not even present. It
Firmware / UI Additional info:
The UI is great if you don’t mind the single click for off and Press-and-hold for mode changing. but you have direct access to Moon, Turbo, and Strobe. And if you use Low or Medium, you have access to that mode within 1 click as well. I think this is a great and useful UI.
On top of that, the proximity sensor will detect any close obstacles and reduce the output that way. This is a great safety feature, and it also helps you reduce the risk to get blinded when accidentally pointing to something reflective up close.
Olight Warrior Mini 2 battery & charging
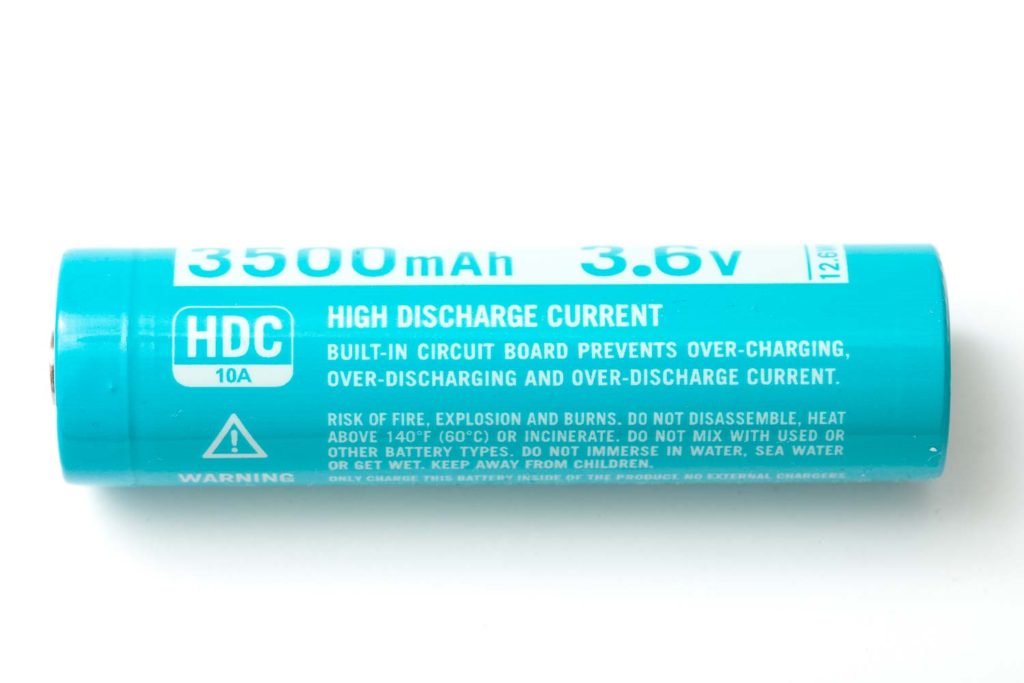
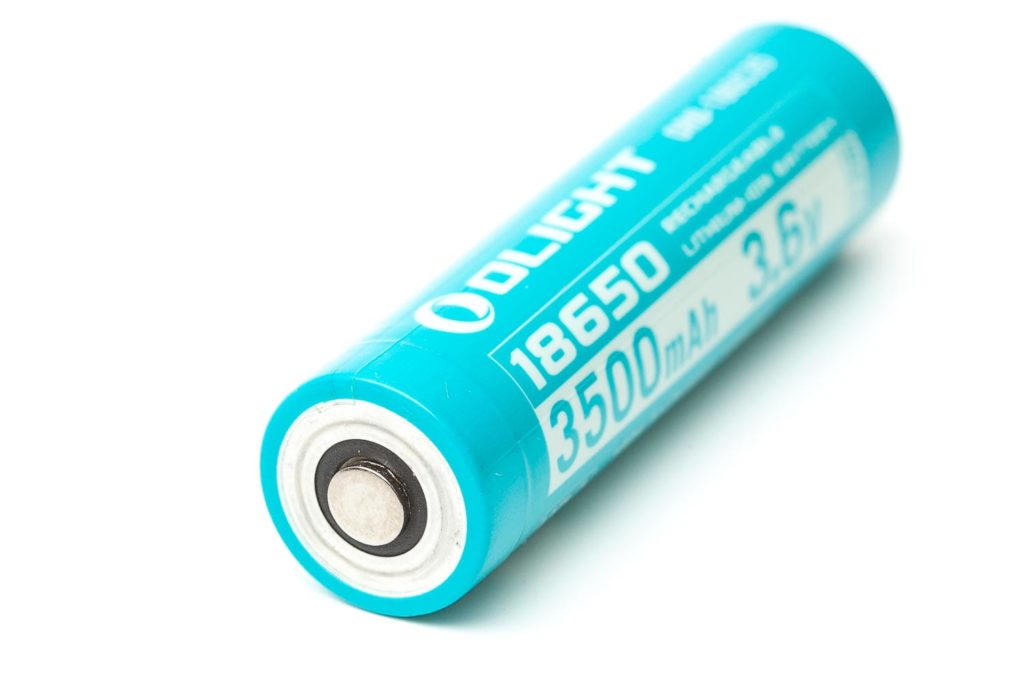
Olight added a 3500mAh 18650 Olight rechargeable lithium-ion battery with the Warrior Mini 2, just like with the Mini 1. The battery is coded: Olight ORB186C35 and arrived with 3.66 volts. The wrapper mentions 10A, which I assume, means a maximum discharge current of up to 10A. Olight adds high-quality batteries with probably all of their lights these days. That way they can guarantee good-performing flashlights to all users.
Olight ORB186C35 is a proprietary battery, which means you can only use this battery inside the Olight. You can’t use a regular 18650 battery. The Warrior Mini 2 has a built-in charge system that uses a magnetic attachment. The cable has a normal USB-A port on 1 end, and a magnetic adapter that will attach itself to the tail switch, on the other end. However, you can still charge the battery in a normal 18650 charger.
I like the fact that Olight provides you with this ready-to-use package. That way, you can even gift a high-quality rechargeable flashlight to people who are not very technical and don’t know anything about Lithium-Ion batteries. And especially with the new proximity sensor built into the light, the Olight Warrior Mini has even become more foolproof.
The max charge current is around 1.1A, but most of the charge it’s lower. It starts at a lower current and also finishes with a lower current. During charging a red indicator LED is visible on the end of the charging cable near the magnet. When the battery is at 95% charge, the LED will turn green. However, this doesn’t mean means the battery is fully charged yet. If you have a USB tester, you can see that the battery continues charging when the light is green, at roughly 0.25A. The charge current reduces the closer it gets to a full charge.
The pictures of the battery below to the 1st gen, but are the same battery, except for the color. Gen1 has a slightly different kind of green/blue.
Performance test
Olight Warrior Mini 2 Lumen measurements:
All output numbers are relative to my homemade Integrating Sphere. It is set up with an Extech SDL400 Lux Meter for measurements including a Kenko PRO1D ND-16 filter. The base measurement is done with a Convoy S2+ that has been tested at 255 lumens.
Testing flashlights with a proximity sensor is very difficult. The moment you put it into an integrating sphere, it notices something is going on and reduces the output. So even though Medium mode was very easy to test, Turbo wasn’t.
All of my readings were taken from a fully-charged Olight ORB186C35 with 3500mAh.
| Mode | Specs | at turn on | 30 seconds | @ 10 min |
|---|---|---|---|---|
| Moon | 1 | 0.64 | 0.64 | – |
| Low | 15 | 13 | 13 | – |
| Medium | 120 | 116 | 116 | 116 |
| High | 500 | 486 | 485 | 479 lumens |
| Turbo | 1750 lm | 1721 lm | 1658 lm | 472 lumens |
This is actually the first Olight I reviewed that didn’t meet the advertised output. I’m not saying that 1658 lumens is bad, but it’s not 1750 either. Also, nobody is going to notice that 100-lumen difference.
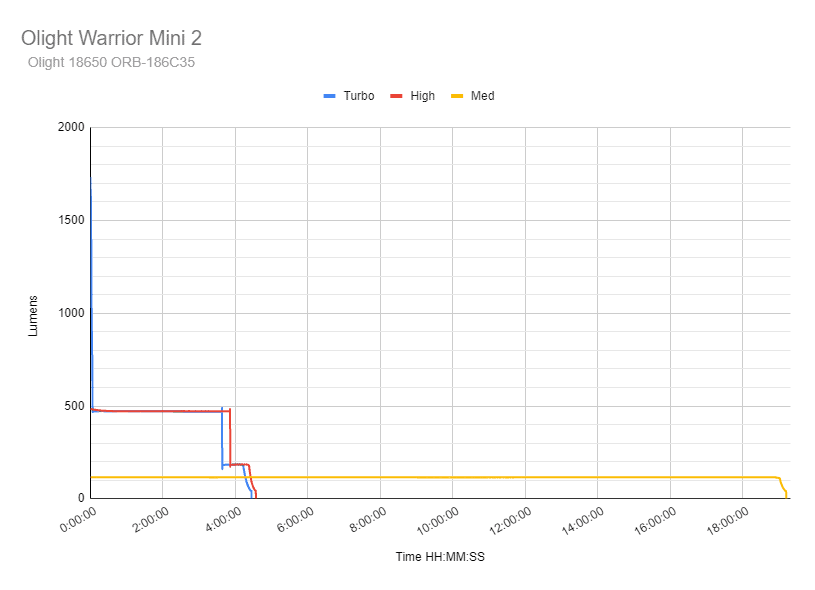
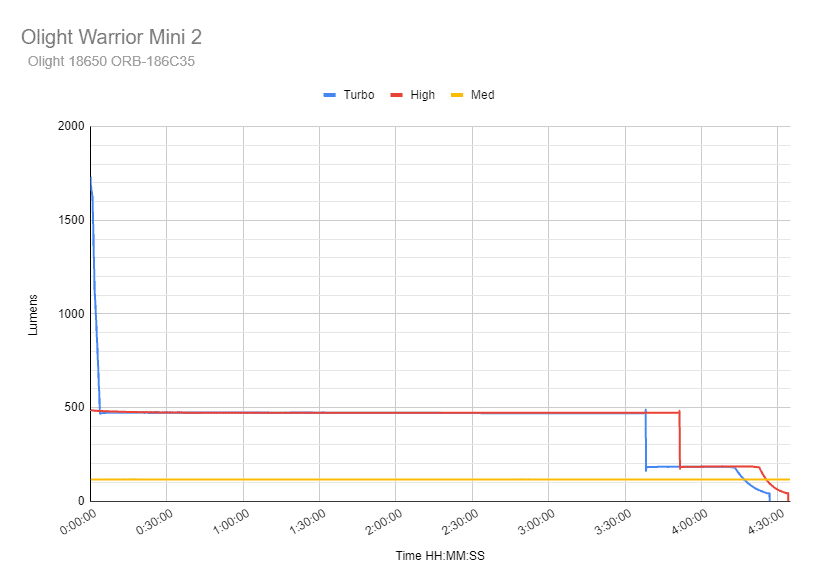
Olight Warrior Mini 2 battery life / runtime graph:
The runtime test was done with the 50cm integrating sphere, including the Kenko Pro1D ND-16 filter and Extech SDL400 data logging Lux Meter.
Given that the Warrior Mini 2 uses a proximity sensor, it’s impossible to do any measurements above Medium mode. High and Turbo will automatically step down almost instantly. I found a trick to disable the sensor by simply sticking some tape on top of the sensor. There’s probably a ‘proper’ way to disable the proximity sensor, but even after a tip I received, I couldn’t make it work.
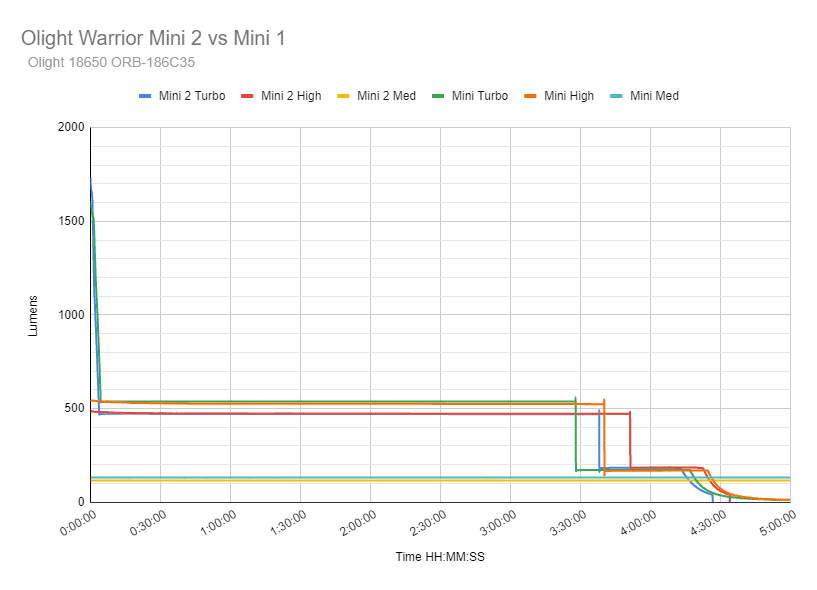
And then compared to the Olight Warrior Mini version 1:
In terms of performance comparison with the Mini 1, the sustained Turbo output is lower for the Mini2 but runs a tiny bit longer. When the 1st gen Mini comes near the end of the runtime, it continues glowing for a while, while the Mini2 just turns off completely.
Medium mode has a lower output on the Mini 2, but runs about an hour longer than the Mini 1.
Throw Measurement
Measurements were taken indoors with a professional Hagner E4-X Lux Meter.
| Mode | Specs | Measured candelas | in Meters | in Yards |
|---|---|---|---|---|
| Moon | – | 0 | 0 | 0.00 |
| Low | – / 19m | 75 cd | 17m | 19 |
| Med | – / 57m | 825 cd | 57m | 63 |
| High | – / 117m | 3475 cd | 118m | 129 |
| Turbo | 12,300 cd / 220m | 12,250 cd | 221m | 242 |
Moon mode was too low to really measure from 5 meters distance.
My measurements were on par with the specs, for all modes. Olight didn’t mention the candela measurements for the lower modes, but just showed the distance in meters. They are still very close to my measurements as well.
Compared to the Olight Warrior Mini 1, the 2nd generation throws quite a bit farter: 12,250 cd vs 9325 cd from the former generation. 221 meters vs 193 meters.
Olight Warrior Mini 2 Beamshots
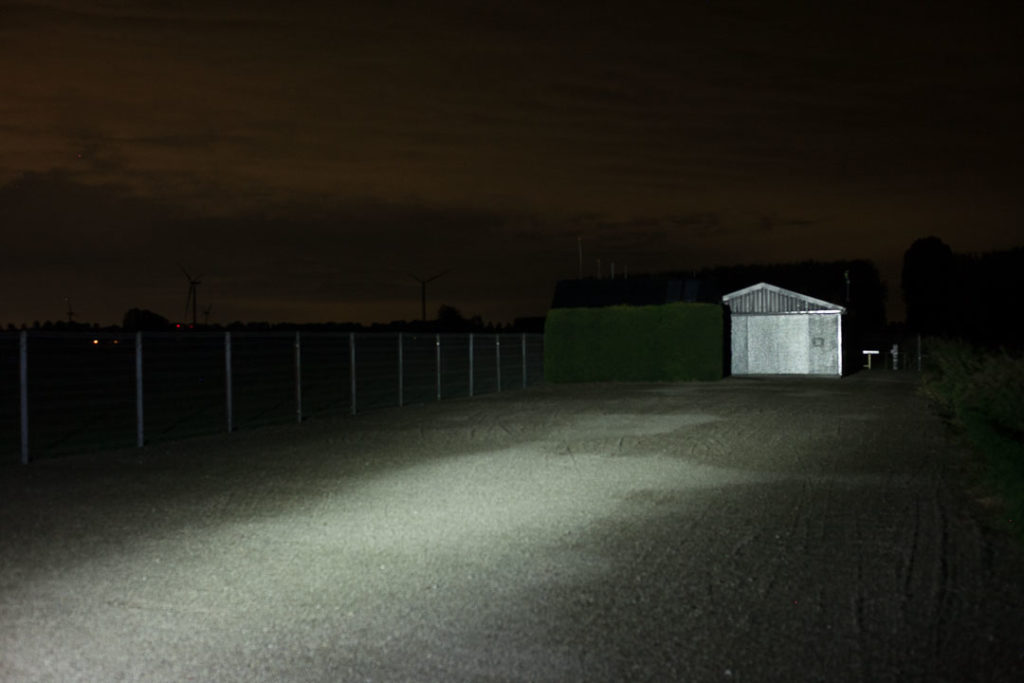
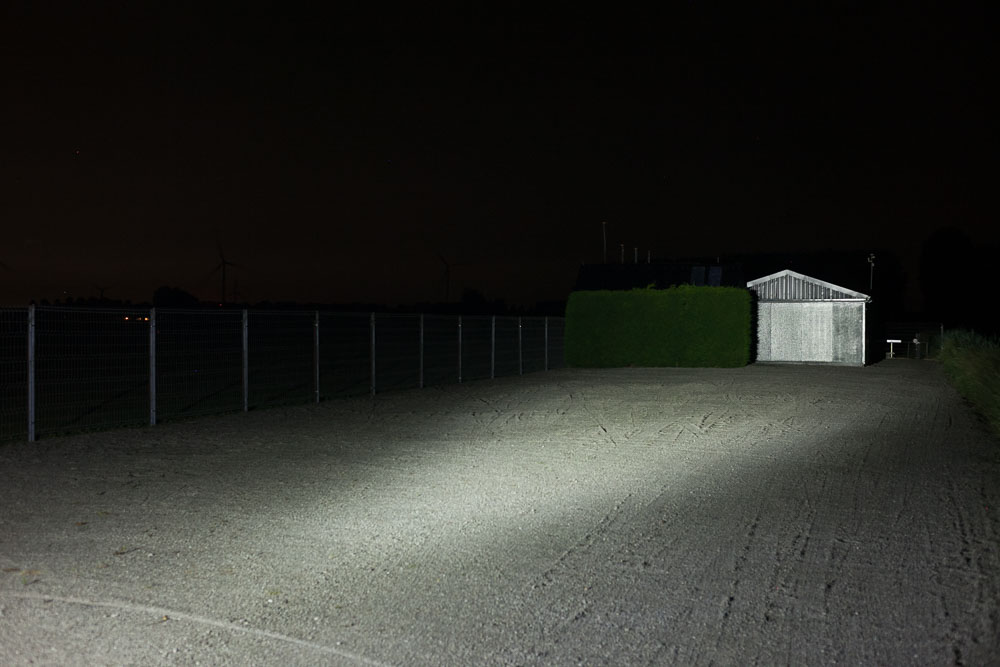
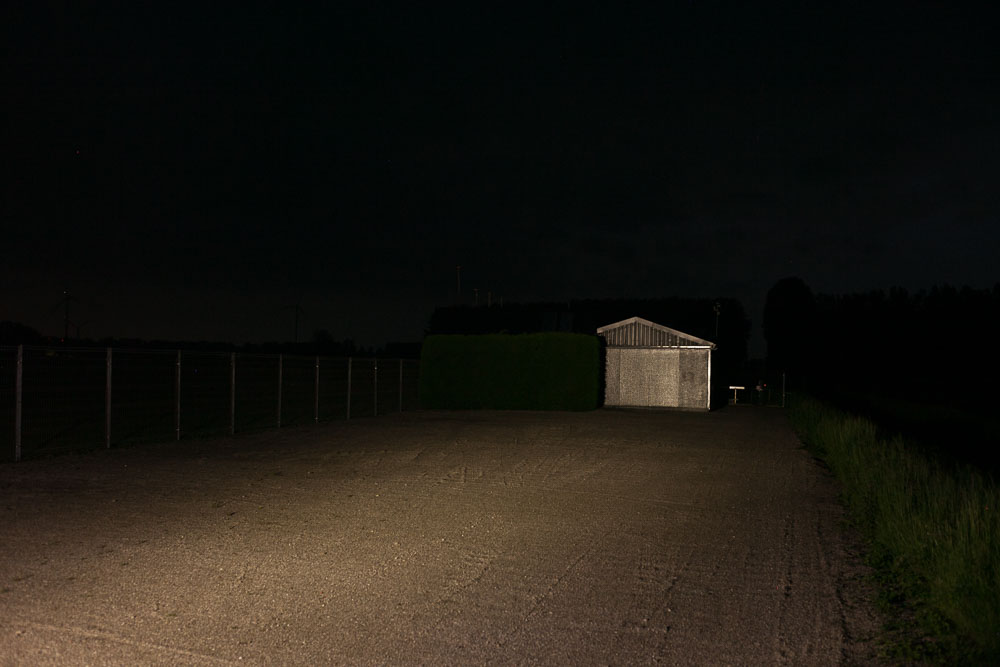
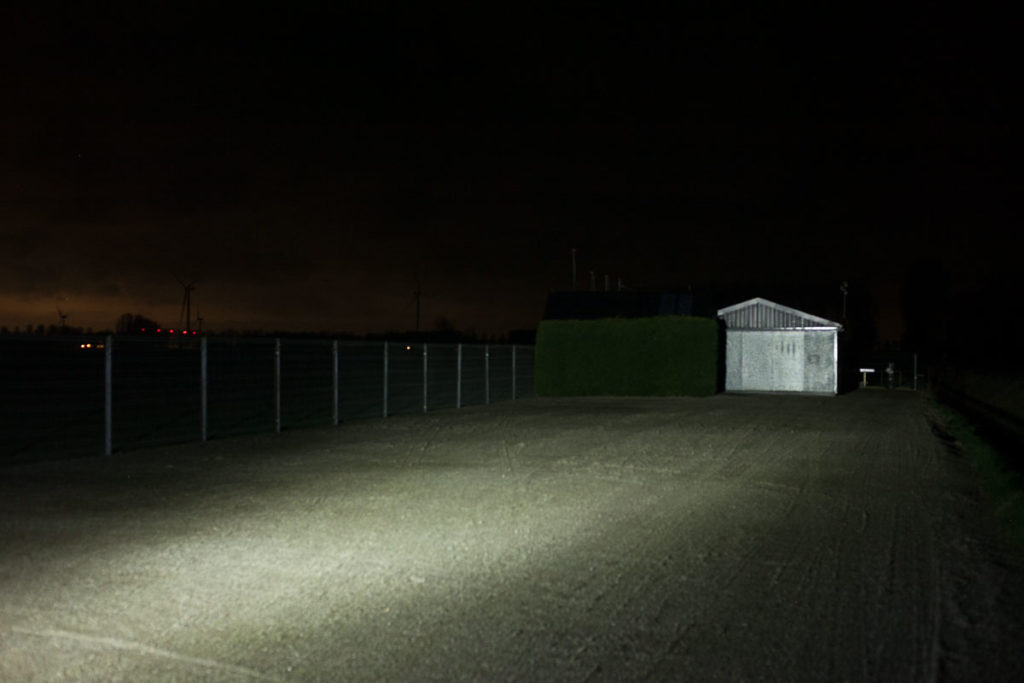
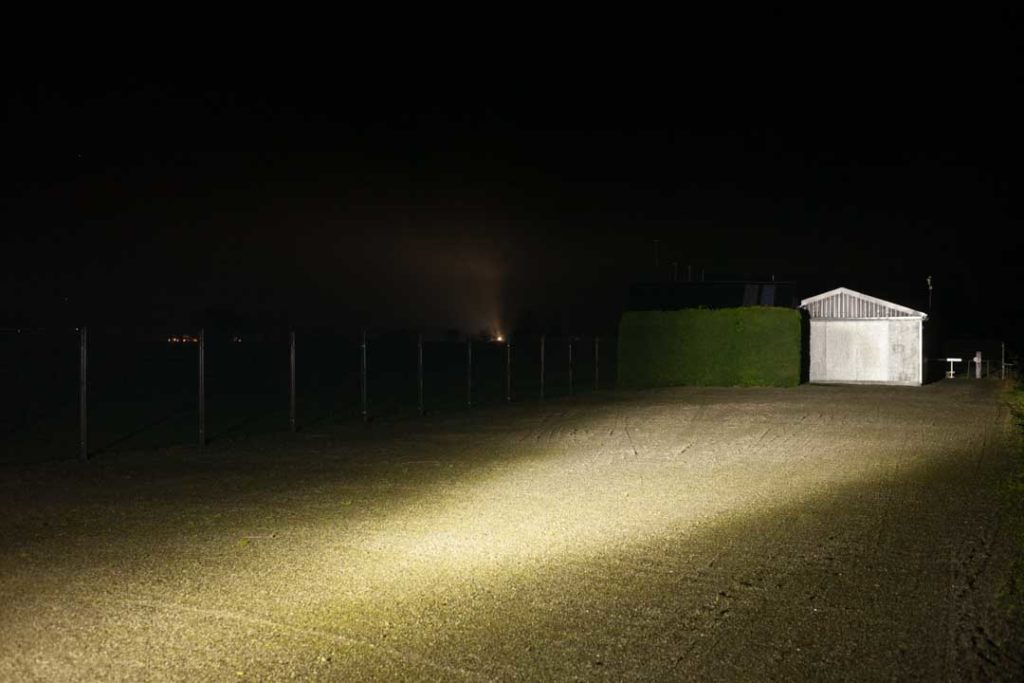
For the following beamshots, I used a Canon EOS 5D Mk2 and a 50mm lens. manual settings: ISO1600, 1/4sec , F4, 5000K
The shed is about 65 meters / 71 yards away.
- Olight Warrior Mini 2 vs Baton 3
- Olight Warrior Mini 2 vs M2R Pro
Disclaimer: This flashlight was sent to me for review at no cost by Olight. I have not been paid to review, nor have I been holding back on problems or defects.
Final Verdict
Pros
- Ready-to-use package with battery and charging cable
- Very interesting and useful UI
- Increase in throw over the older generation, and longer runtime
- Includes a proximity sensor that increases safety.
- Includes a new attachment ring for lanyard and carabiner-style ring
Cons
- Proprietary battery setup (not always a con, but for some it is)
- The proximity meter makes it hard to test runtime
- Sustained output is a little lower than the 1st gen Warrior Mini
Explanation on star ratings:
1: Avoid: my phone flashlight would be a better choice – 2: Poor: significant defect or issues, much better options available at the same price – 3: Average: some defects or issues – 4: Good: recommended (minor issues) – 5: Great: highly recommended
5 stars: ★★★★★
I really like the Warrior Mini, since it was one of the smallest tactical flashlights. The Olight Warrior Mini 2 is a safer flashlight because of the proximity sensor, but it’s also noticeably longer. Still, I grade the flashlight based on its performance, uniqueness, and quality 5 stars.
Buy Olight Warrior Mini2
The link below is for the normal Warrior Mini 2, not the limited edition
Use our exclusive 1lumen discount code to get an extra 10% off anything you order at Olightstore.com (USA). Coupon code: 1lumen
1lumen selects and reviews products personally. We may earn affiliate commissions through our links, which help support our testing.
