1lumen selects and reviews products personally. We may earn affiliate commissions through our links, which help support our testing.
Ripsshine ML1 review
Ripsshine ML1 specifications
| Brand & Model | Ripsshine ML1 |
|---|---|
| Flashlight category | Mini Thrower / Keychain light |
| LED | 1*Osram CSLMN1.TG |
| Max. output | 550 lumens |
| Max. beam distance | 355 meters |
| Max. beam intensity | 31,680 |
| Battery config. | 1* 10220 |
| Onboard charging | USB-C |
| Main modes | 4 |
| Blinkies | Strobe |
| Waterproof | IPX8 |
| Review publication date | March 2024 |
Review intro:
4 years ago, Lumintop surprised the flashlight community when they released a scaled-down version of their popular GT Micro pocket thrower. Before that, the GT Micro was the successor of the GT Mini, and the progenitor? The legendary BLF GT, aka gigathrower. The GT Nano was pretty small-in fact, it was ridiculously small; keychain-size small, but still had ridiculous beam distance, beating many larger EDC lights.
Ripsshine, the startup Chinese company who brought us the fan cooled HF1 (Lumintop Mach 46950 analogue), has also produced a light in the likeness (okay, more like essence) of the GT Nano. This one’s the Ripsshine ML1 pocket thrower. There’s some differences between it and the Nano, but the essence is present here. It’s still tiny, it’s crazy, so let’s take a look.
What’s in the package
The ML1 comes in a pretty standard package. This isn’t a retail unit, and. I’m not complaining because it;s utilitarian. Flipping open the lid reveals the Ripsshine ML1 is nestled in closed cell foam with the accessories on the side.
- Ripsshine ML1
- 10220 110 mAh li-ion battery
- O-rings
- Instruction manual
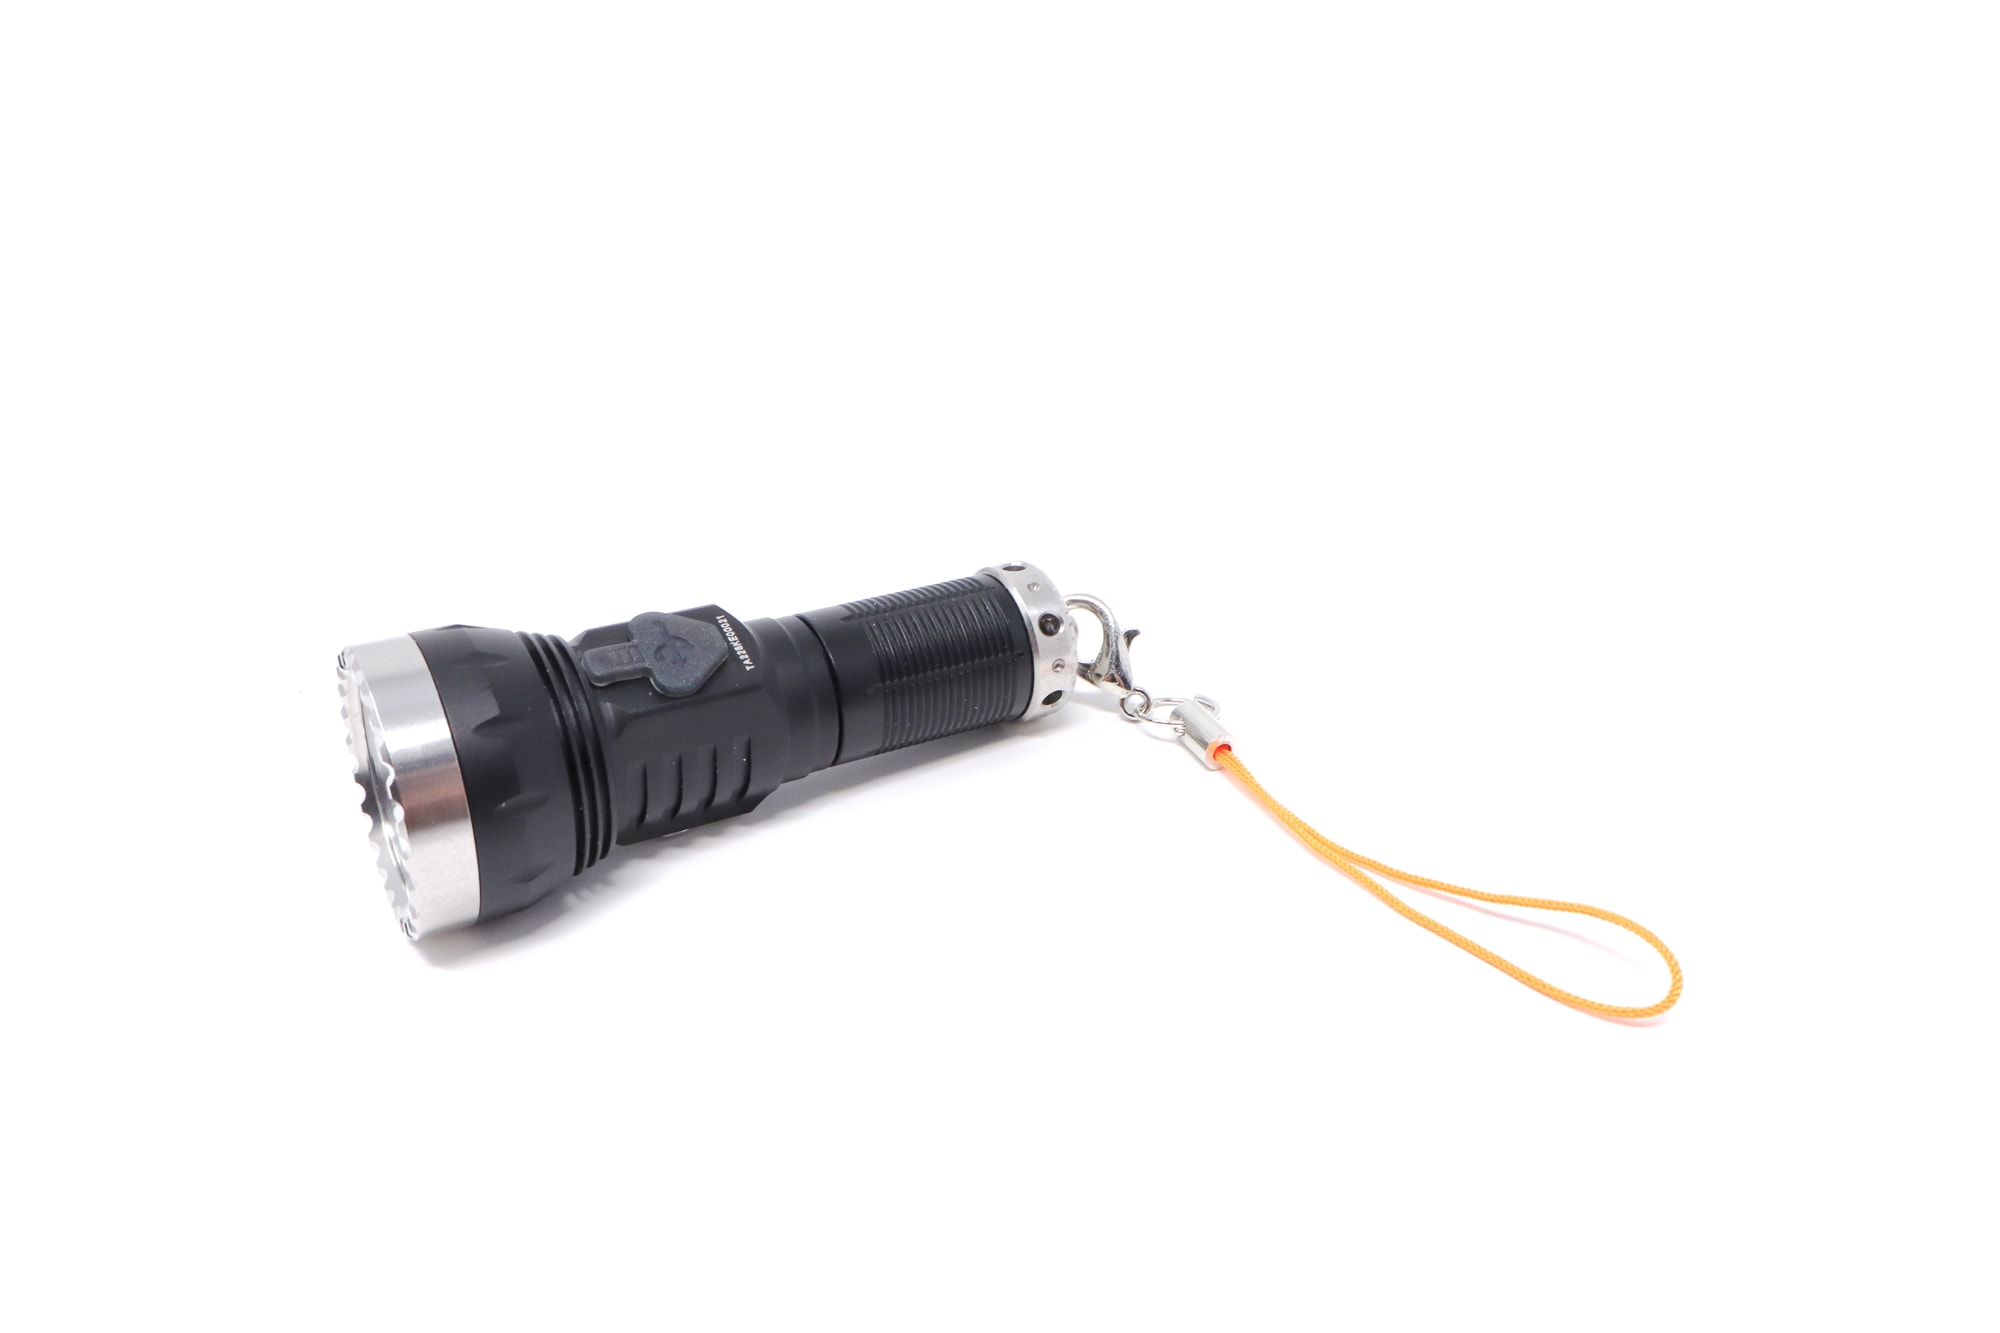
- Lanyard
- USB type C cable
This is a ready-to-go kit! You even get an ultra short USB C cable for charging (it’s the shortest I’ve seen; 5 inches total). The lanyard is less of a lanyard and more of a keychain mounting lead with a quick release clip on one end. The battery was in the tube under an isolator, so remove that, and I recommend giving the cell a charge since it was sitting at 3.8 volts, so an acceptable level for access to all modes.

Flashlight in use, Build Quality, and Warranty
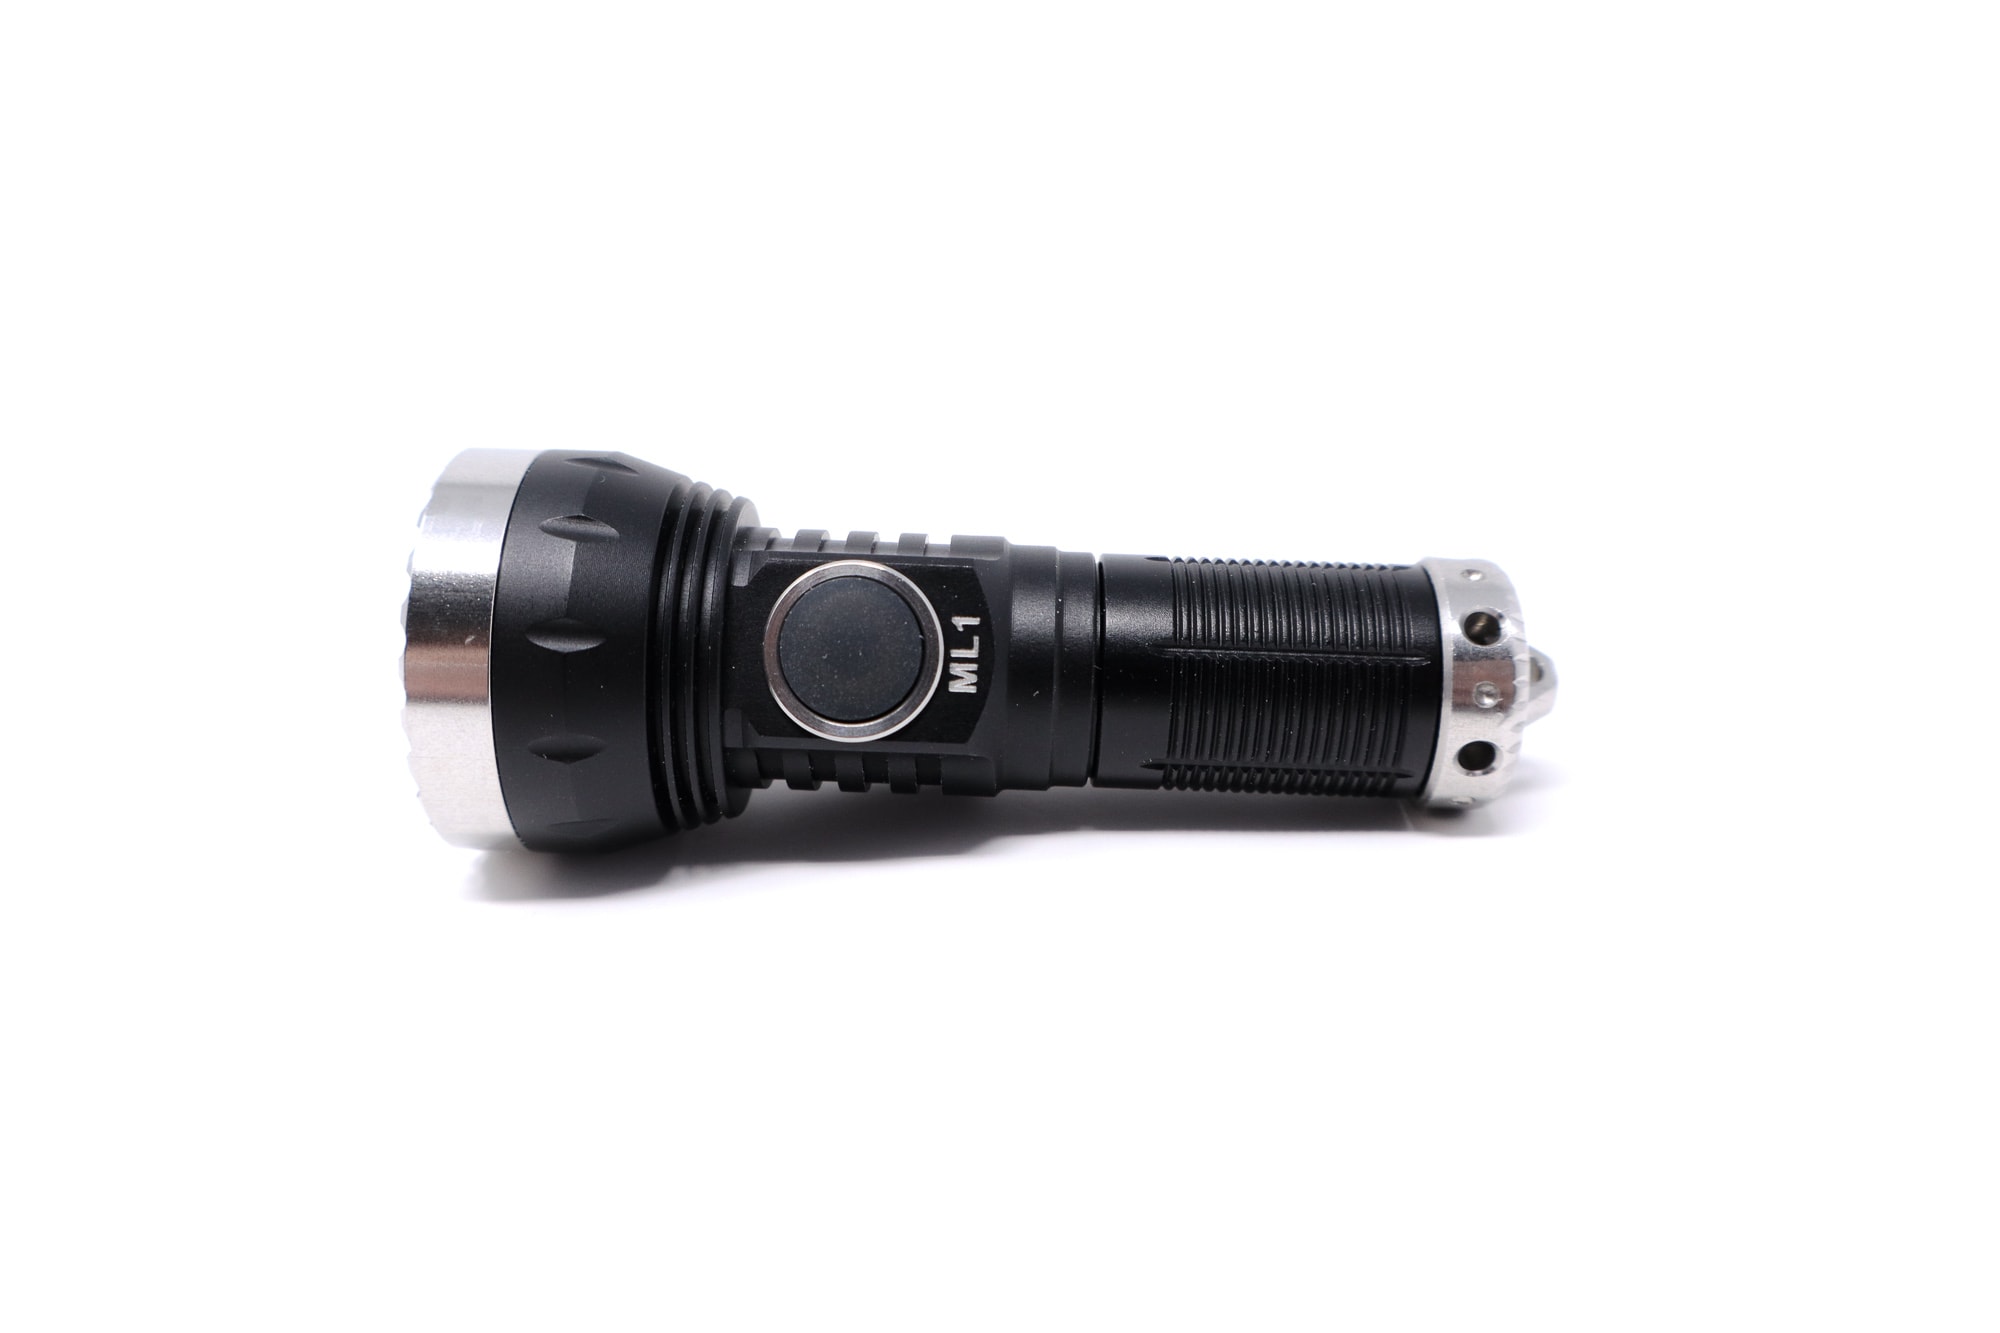
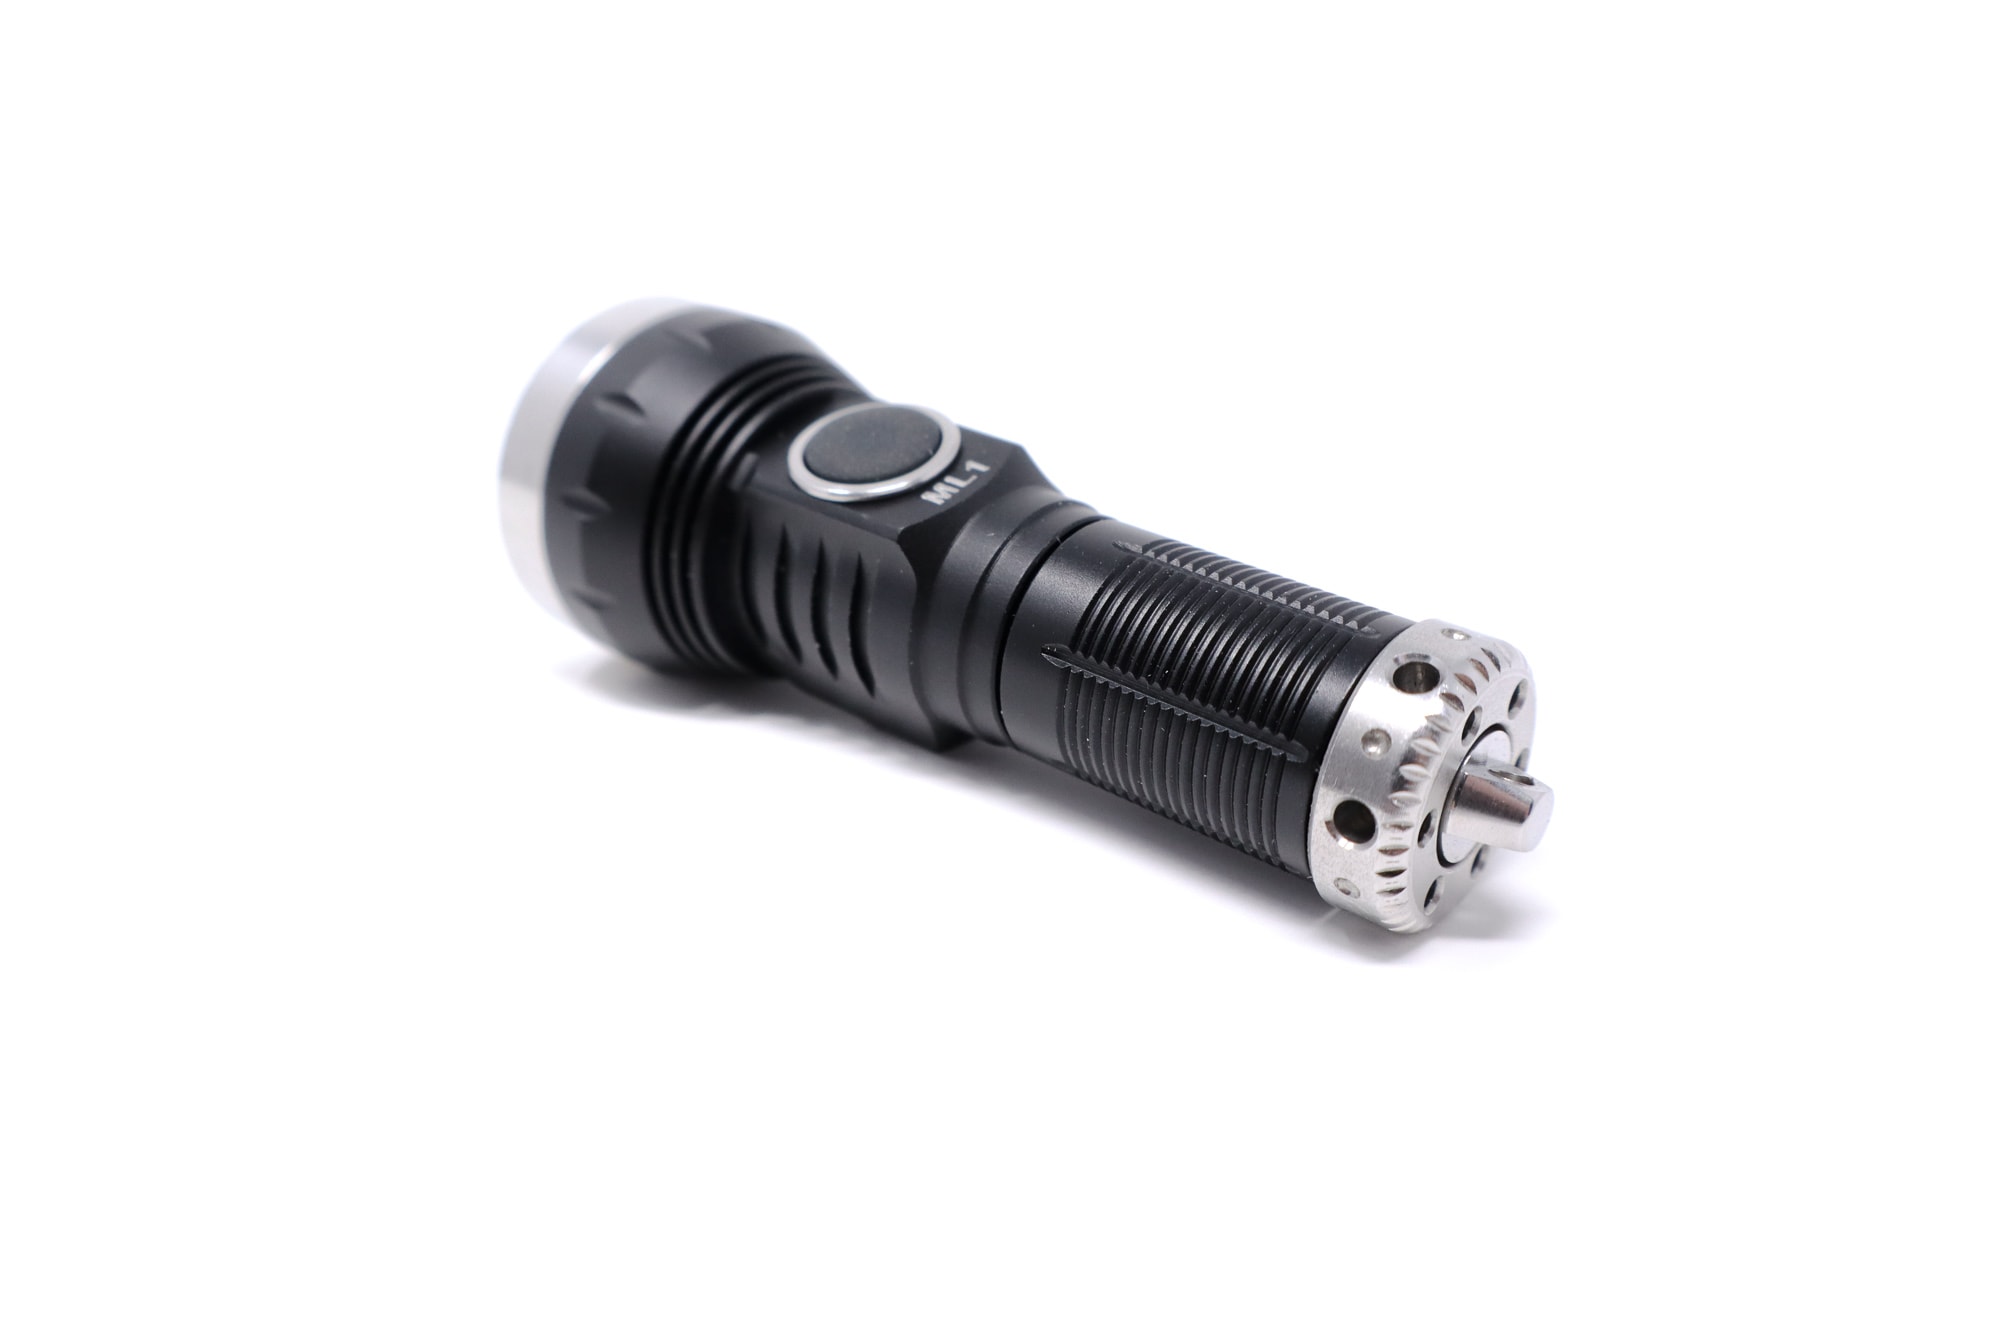
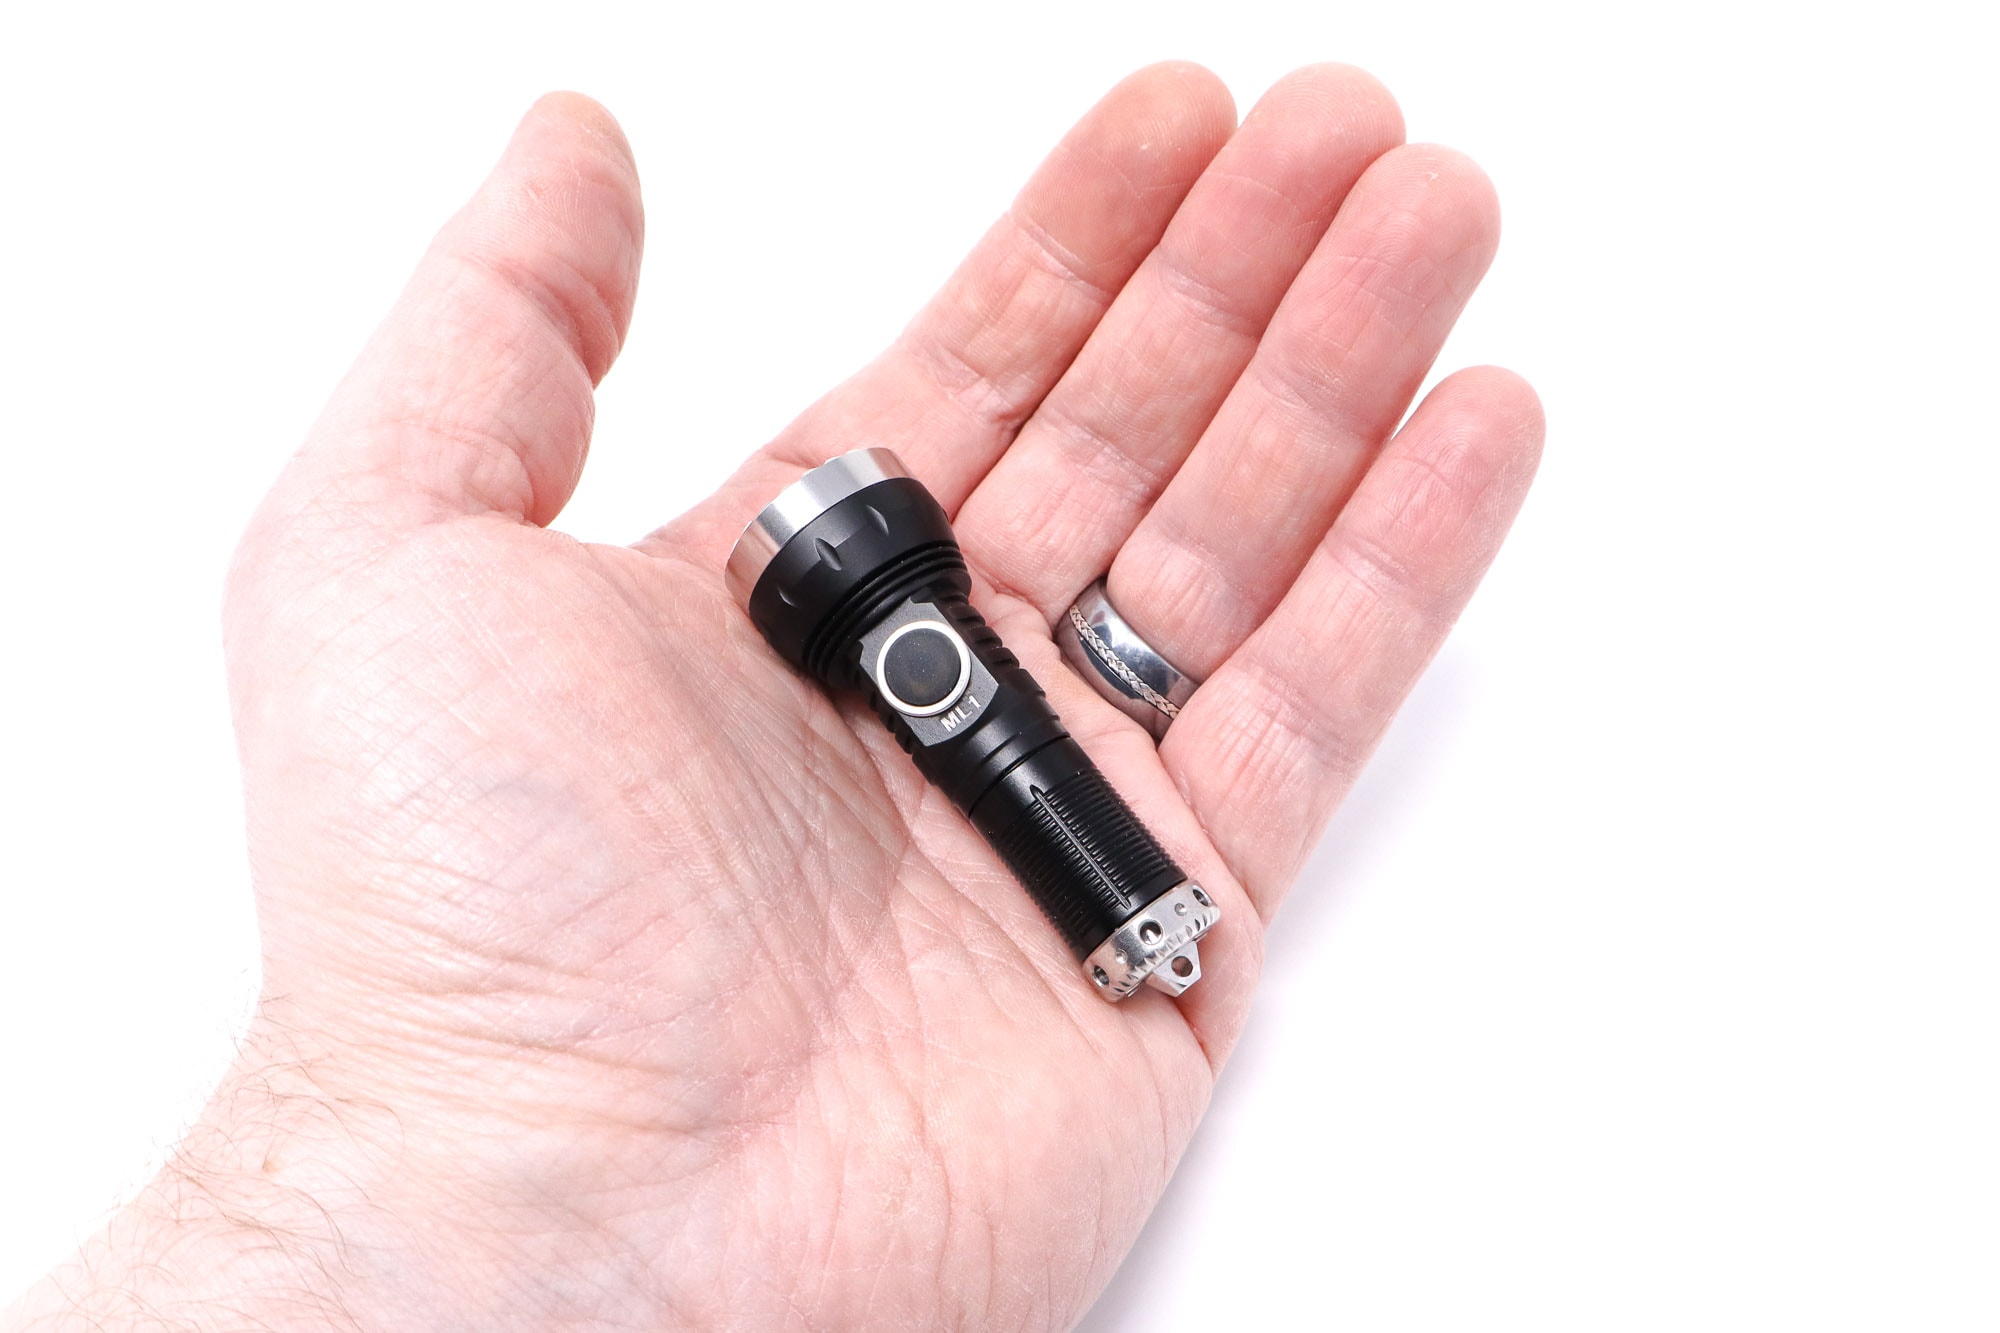
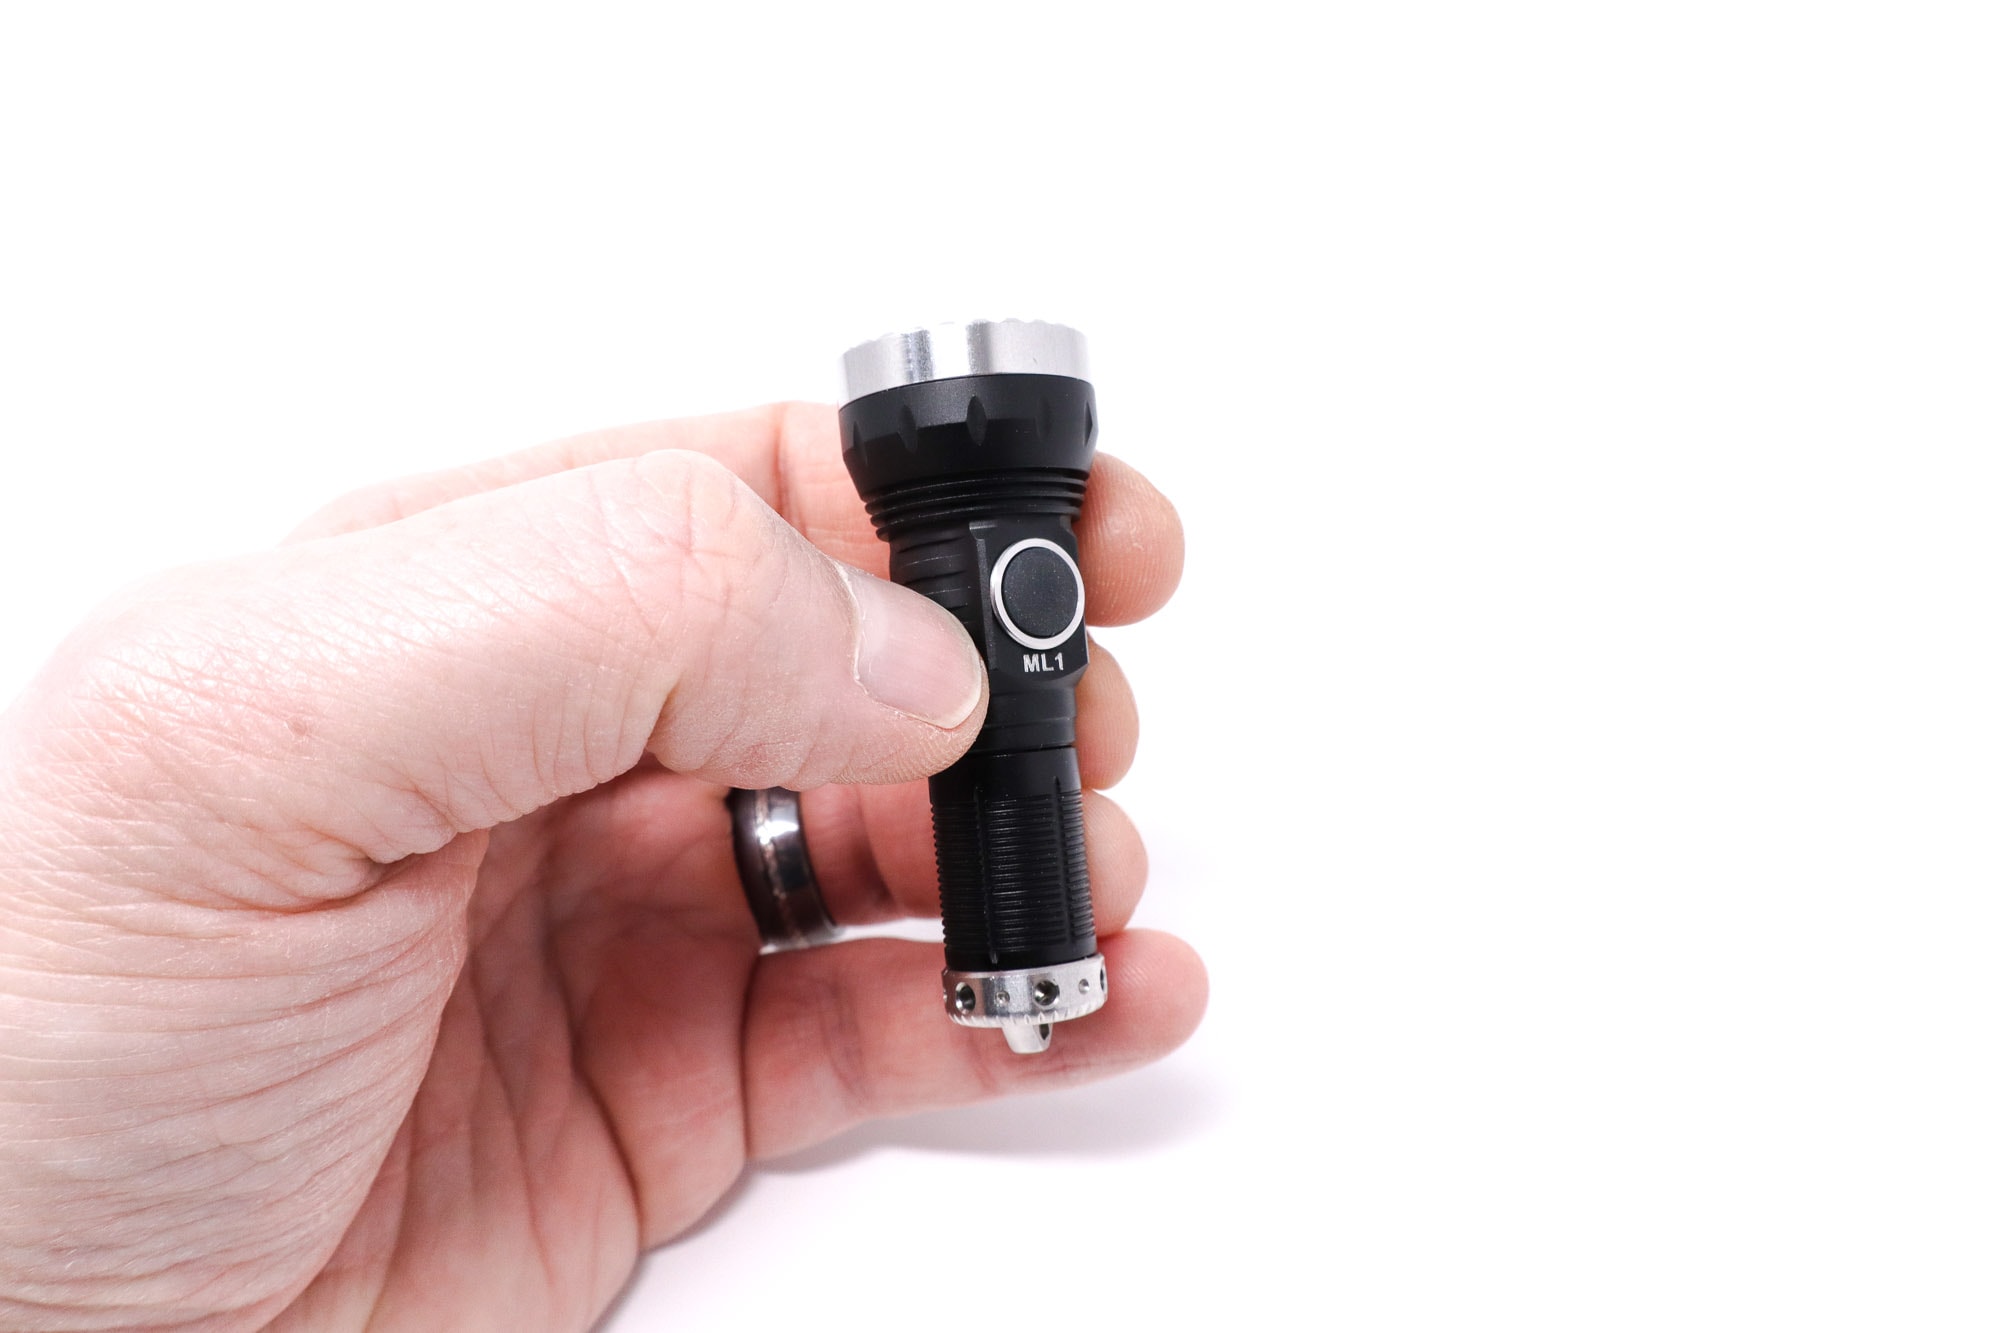
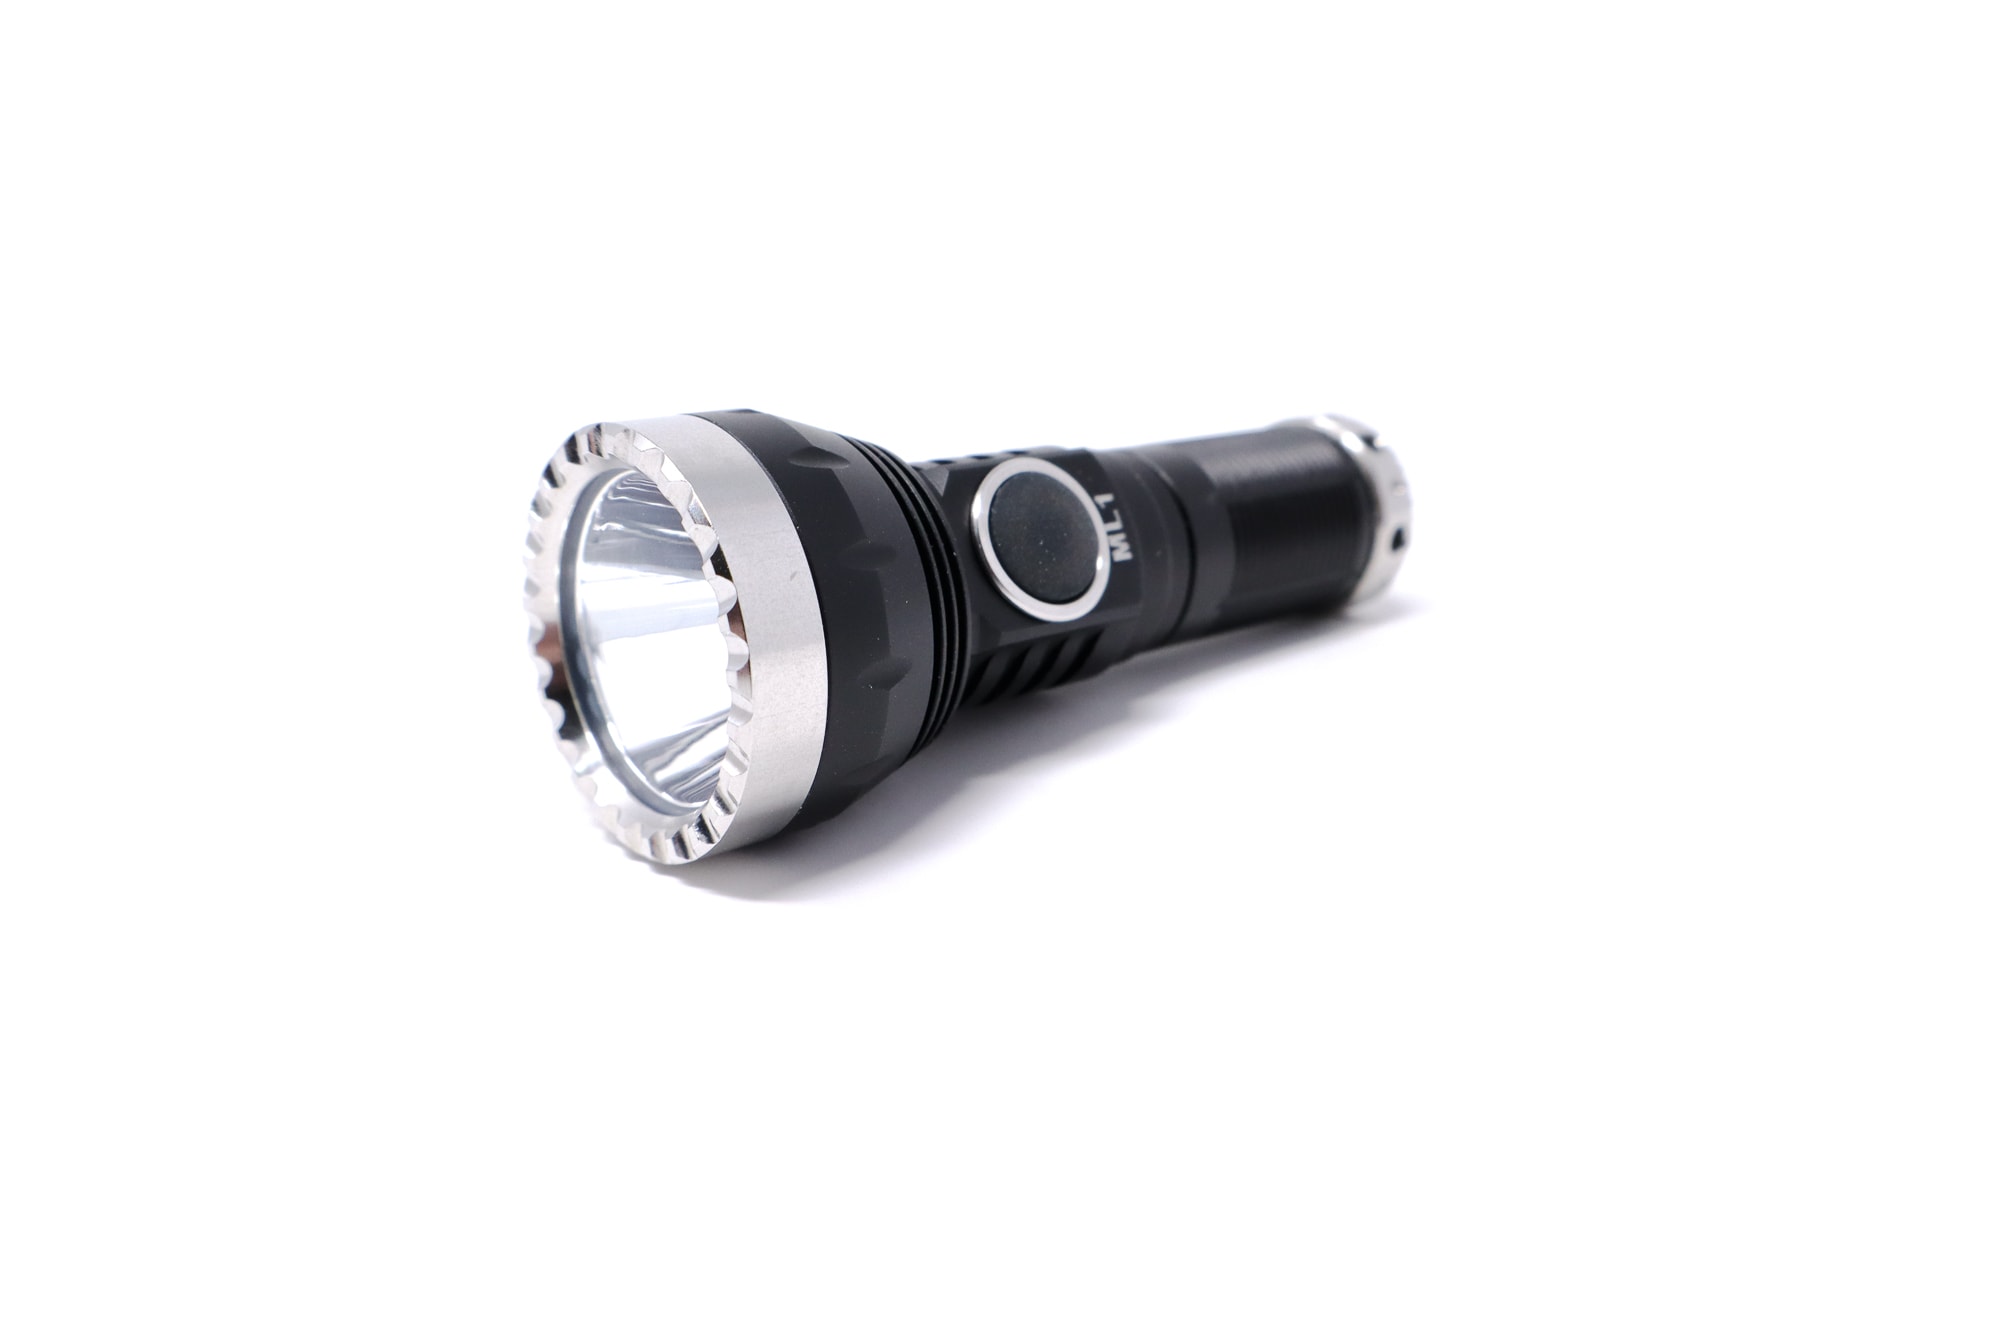
The ML1 fits into a very small corner of flashlight use cases. It’s too small to be a dedicated thrower or a general purpose light. It’s small and light enough to stand in as a really throwy keychain dangler, but in my opinion it’s too heavy for keychain duty (note that heavy keychains can wear out your car’s ignition switch over time). The form factor is thrower-like with a large head with a tiny body, and I found the best way to hold it was like a cigarette. It’s not the most intuitive light handling-wise, but it’s not bad. The tube has some reeding for grip a-la Fenix lights, and the head looks almost identical to the Nano with tiny heatsinking fins. It’s topped with a stainless bezel.
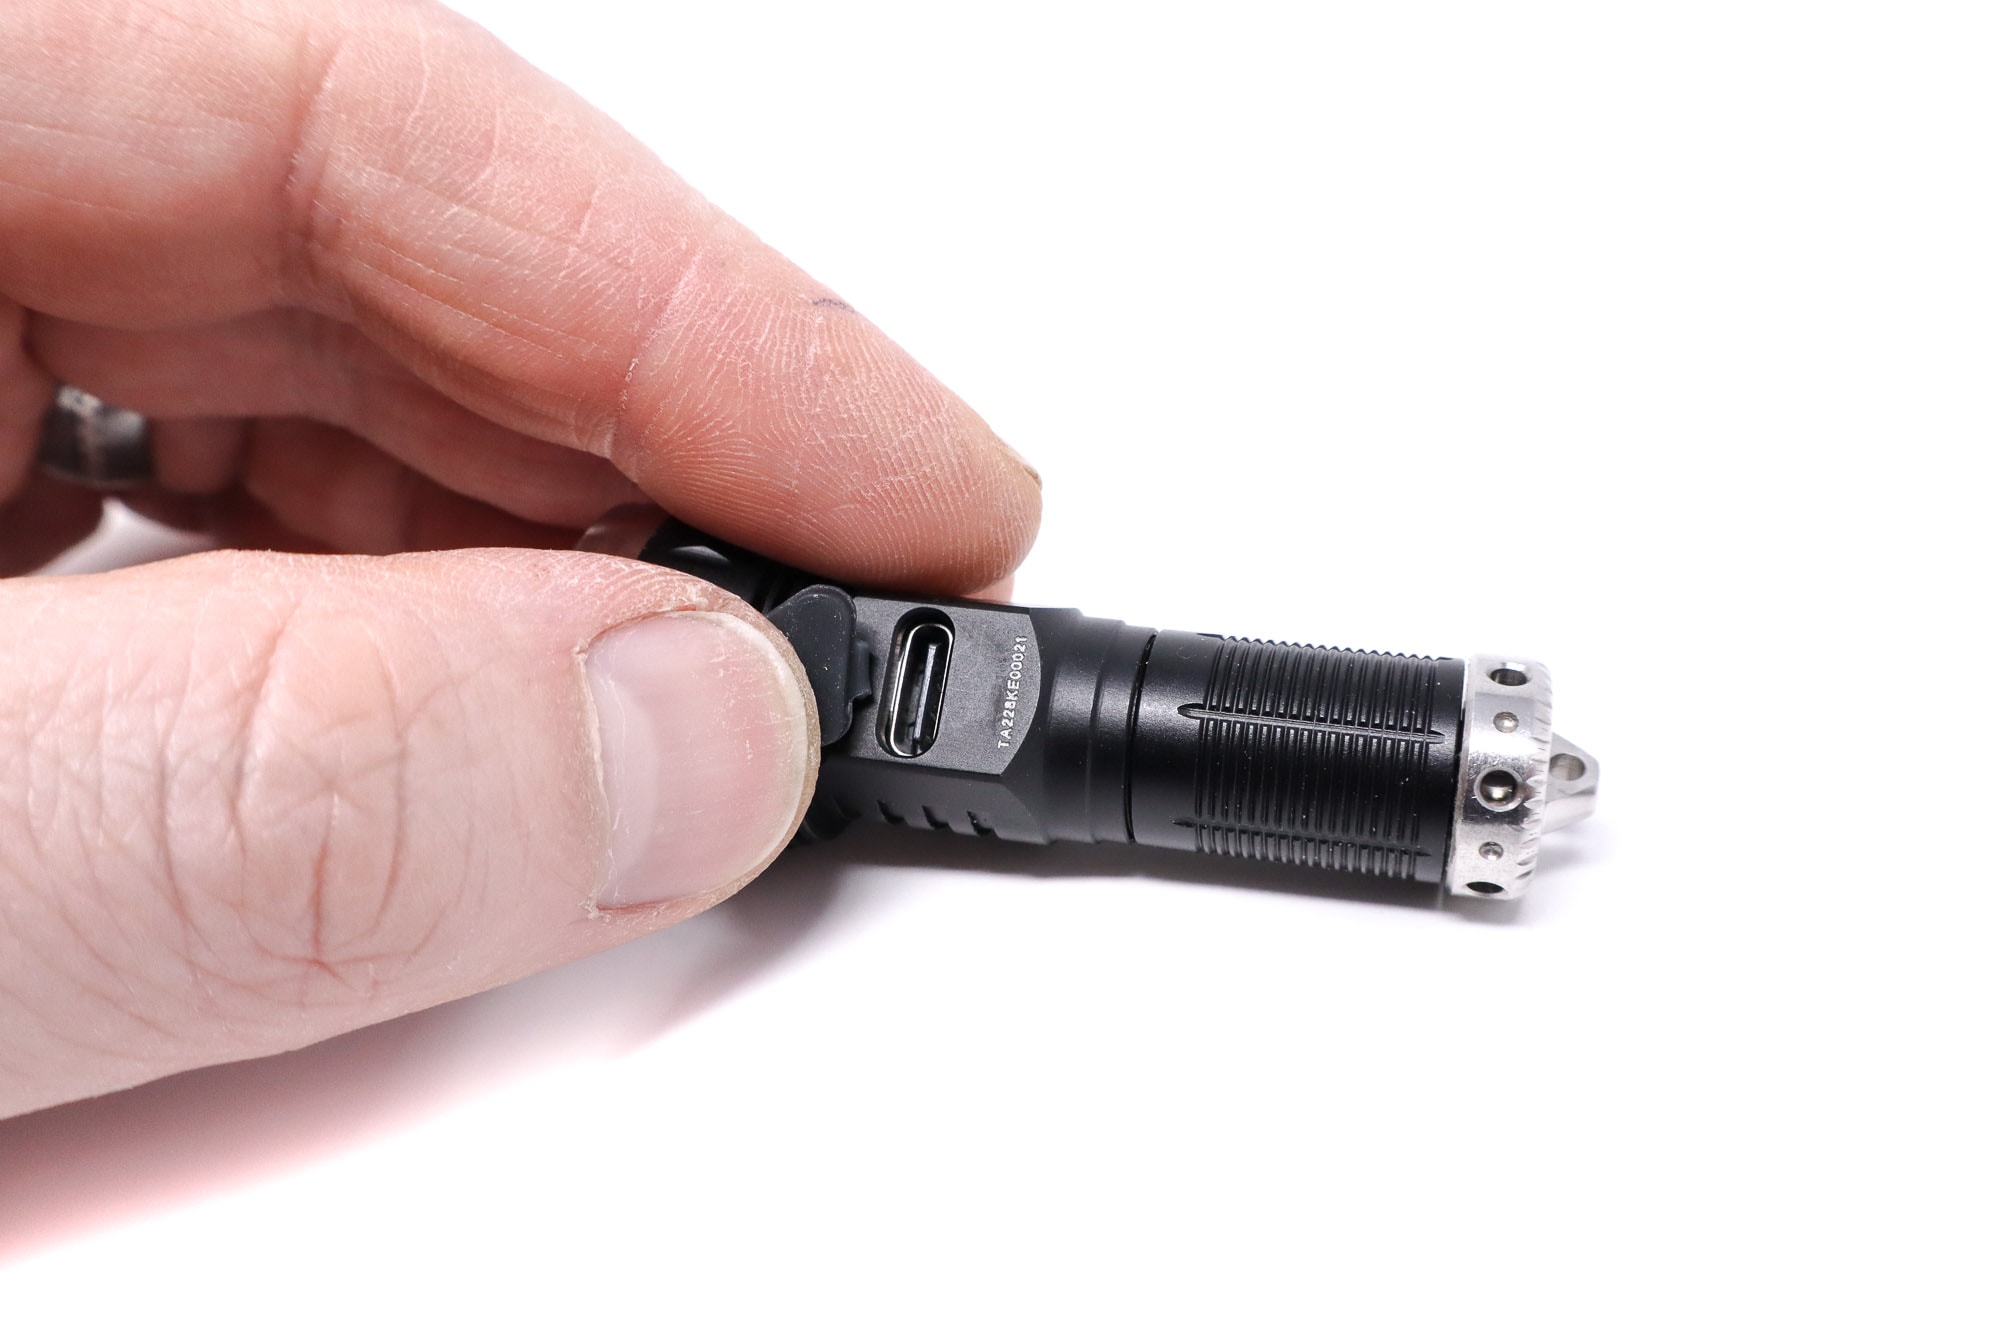
There’s a single e-switch behind the head, and opposite that is the USB C charge input (under a rubber cover). How they jammed a full size charge port in here is beyond me, but they did and that’s great. The switch? It’s tiny and set in a press-fit stainless bezel, and has typical e-switch click action. However, the action is very low and it takes what seems like unreasonable force to activate. There’s also a fair amount of give with the switch boot before it makes contact with the switch button. Due to that, I did find myself poking the charge port cover at times. It has a LED backlighting for charge and on state. It stays lit green on standby, and turns red when the battery gets low. However, the backlight is pretty uneven and only lights up half the boot.
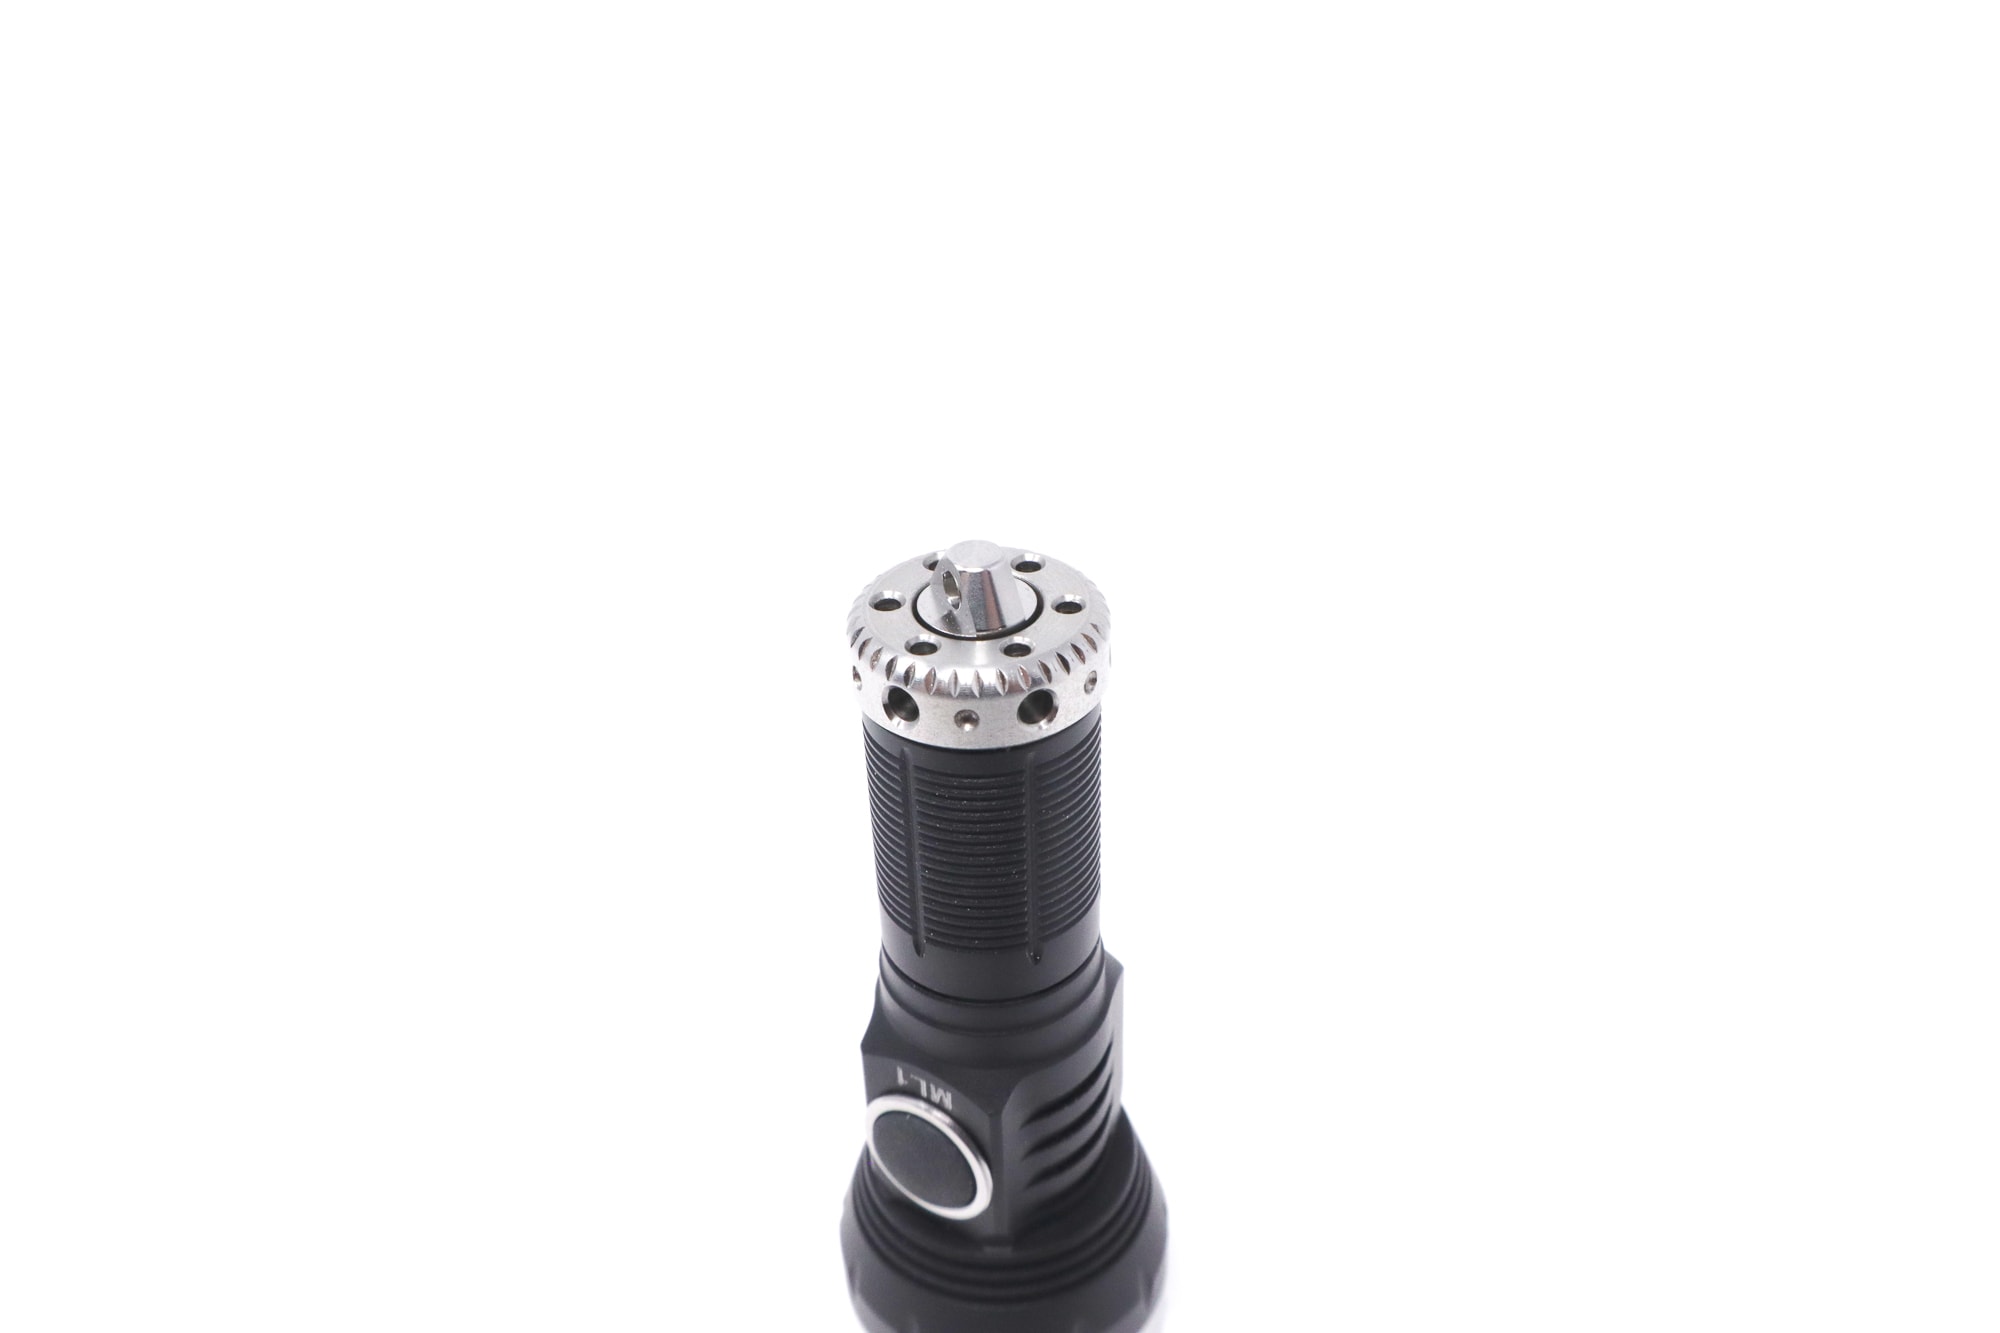
The rear of the battery tube has a pointed stainless lanyard mounting point and a fidget spinning deal with holes for glow/tritium rods. The spinner is ball bearing supported and a slight flick sends it spinning for a while. Tail standing is not possible, and there’s no anti-roll features.
Build quality for the Ripsshine ML1 is good. I don’t know if these are made in-house or by an ODM for Ripsshine, but there’s no major quality issues. The machining of the spinner is tidy, but the fixed lanyard mount had some errant machine marks. There’s probably a bit of misalignment in the centering gasket, which produced an oblong inner ring around the hotspot. Overall fit, finish, and feel is great for the price, which is right around $40 US. Milled from 7075 aluminum alloy, which is superior to 6061 and 6063 in toughness, disability, and strength.
The machining is nice and tidy with no anomalies to speak of, and so’s the finish. It’s not specifically mentioned, but probably some kind of hardcoat anodizing. It comes in black only, and the finish was more of a semi gloss, which isn’t my favorite.
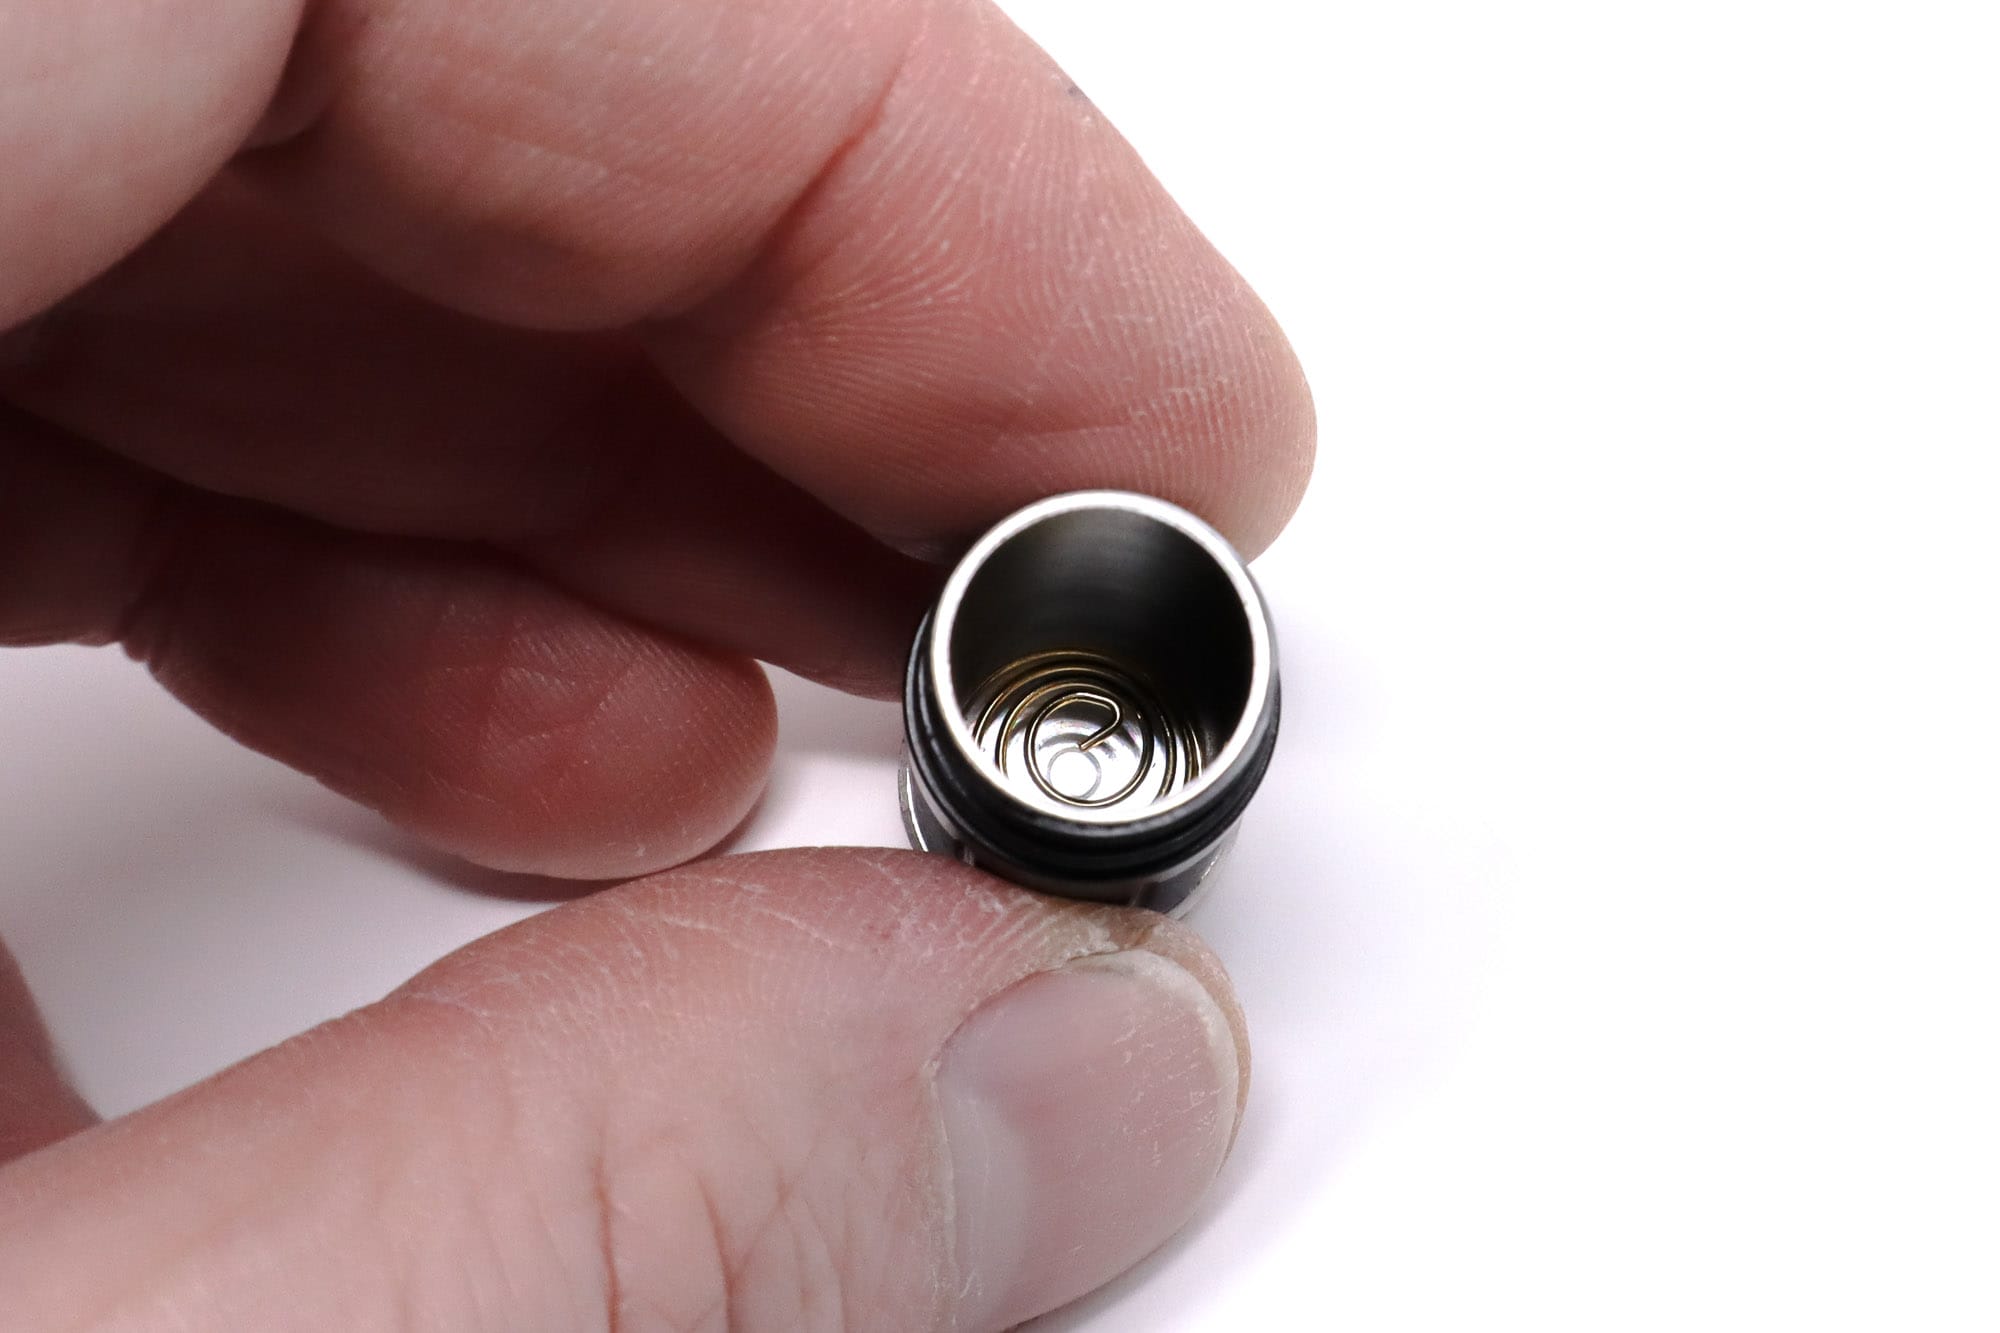
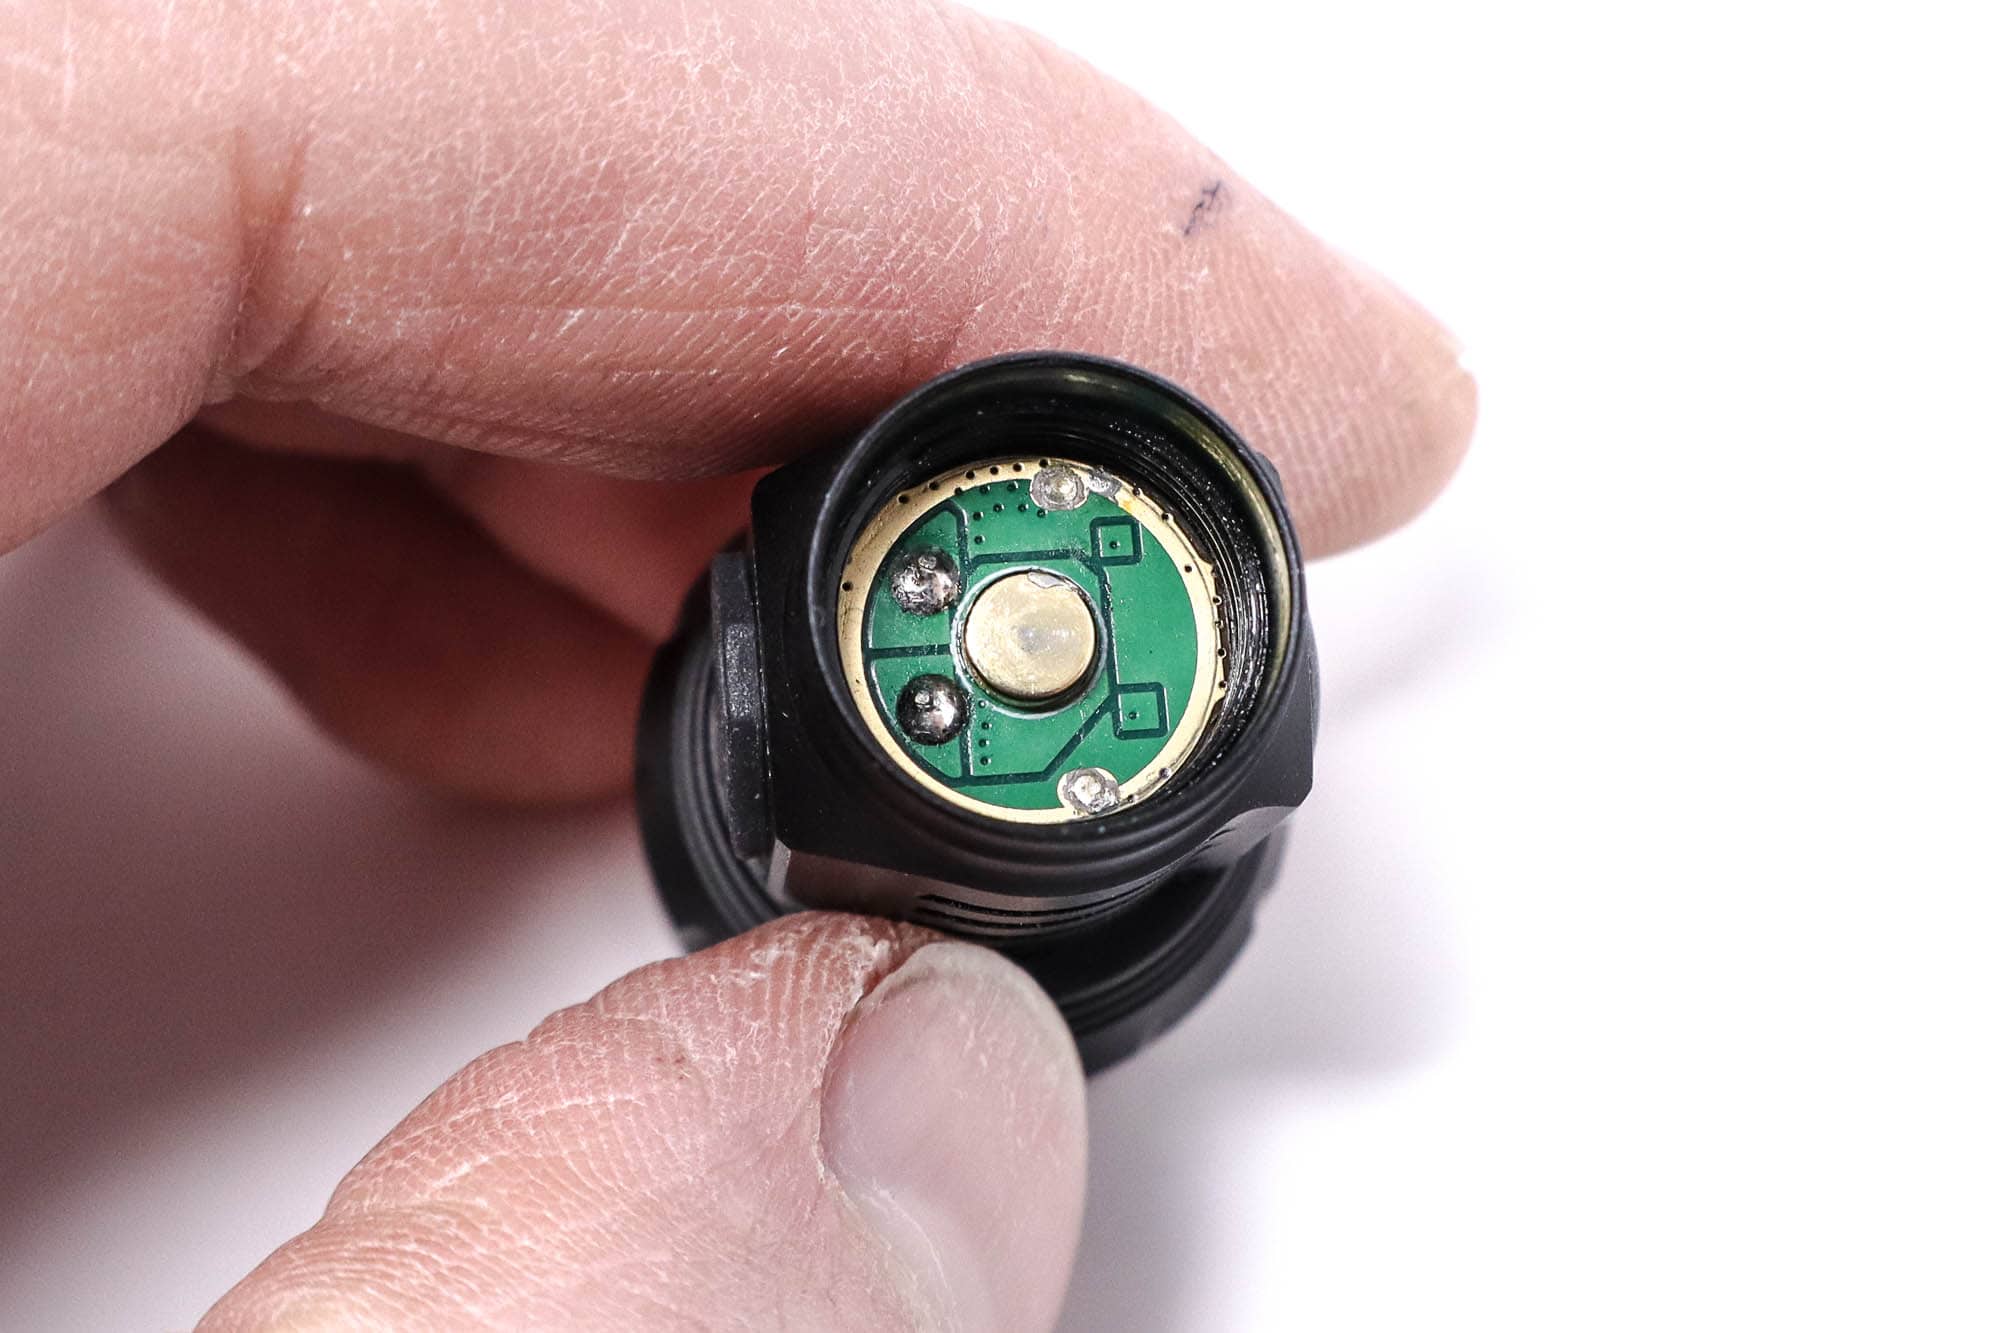
The light breaks down pretty easily: The bezel unscrews, and after prying out the lens (it sits below the edge of the head and the o-ring sits between the lens and reflector) the reflector falls free. A word of caution: The centering gasket is a tiny translucent plastic ring and doesn’t stick to the reflector base or the LED, so if and when it comes off and falls on the floor, good luck and godspeed finding it. The battery tube unthreads from the head and the battery loads from the front. The driver has a flat contact and there’s a very bouncy coil spring at the base of the tube. The threads? Tiny triangular cut, but still smooth. There’s o-rings everywhere, and Ripsshine gives the ML1 an IPX8 rating with 1.5 m drop protection.
Warranty (pulled from the manual): 30-day return policy for factory defects or issues with a 5 year limited warranty for damage or malfunctions not caused by abuse or modifications. Accessories have a 1 year warranty.

LED, Lens, Bezel, Beam, and Reflector
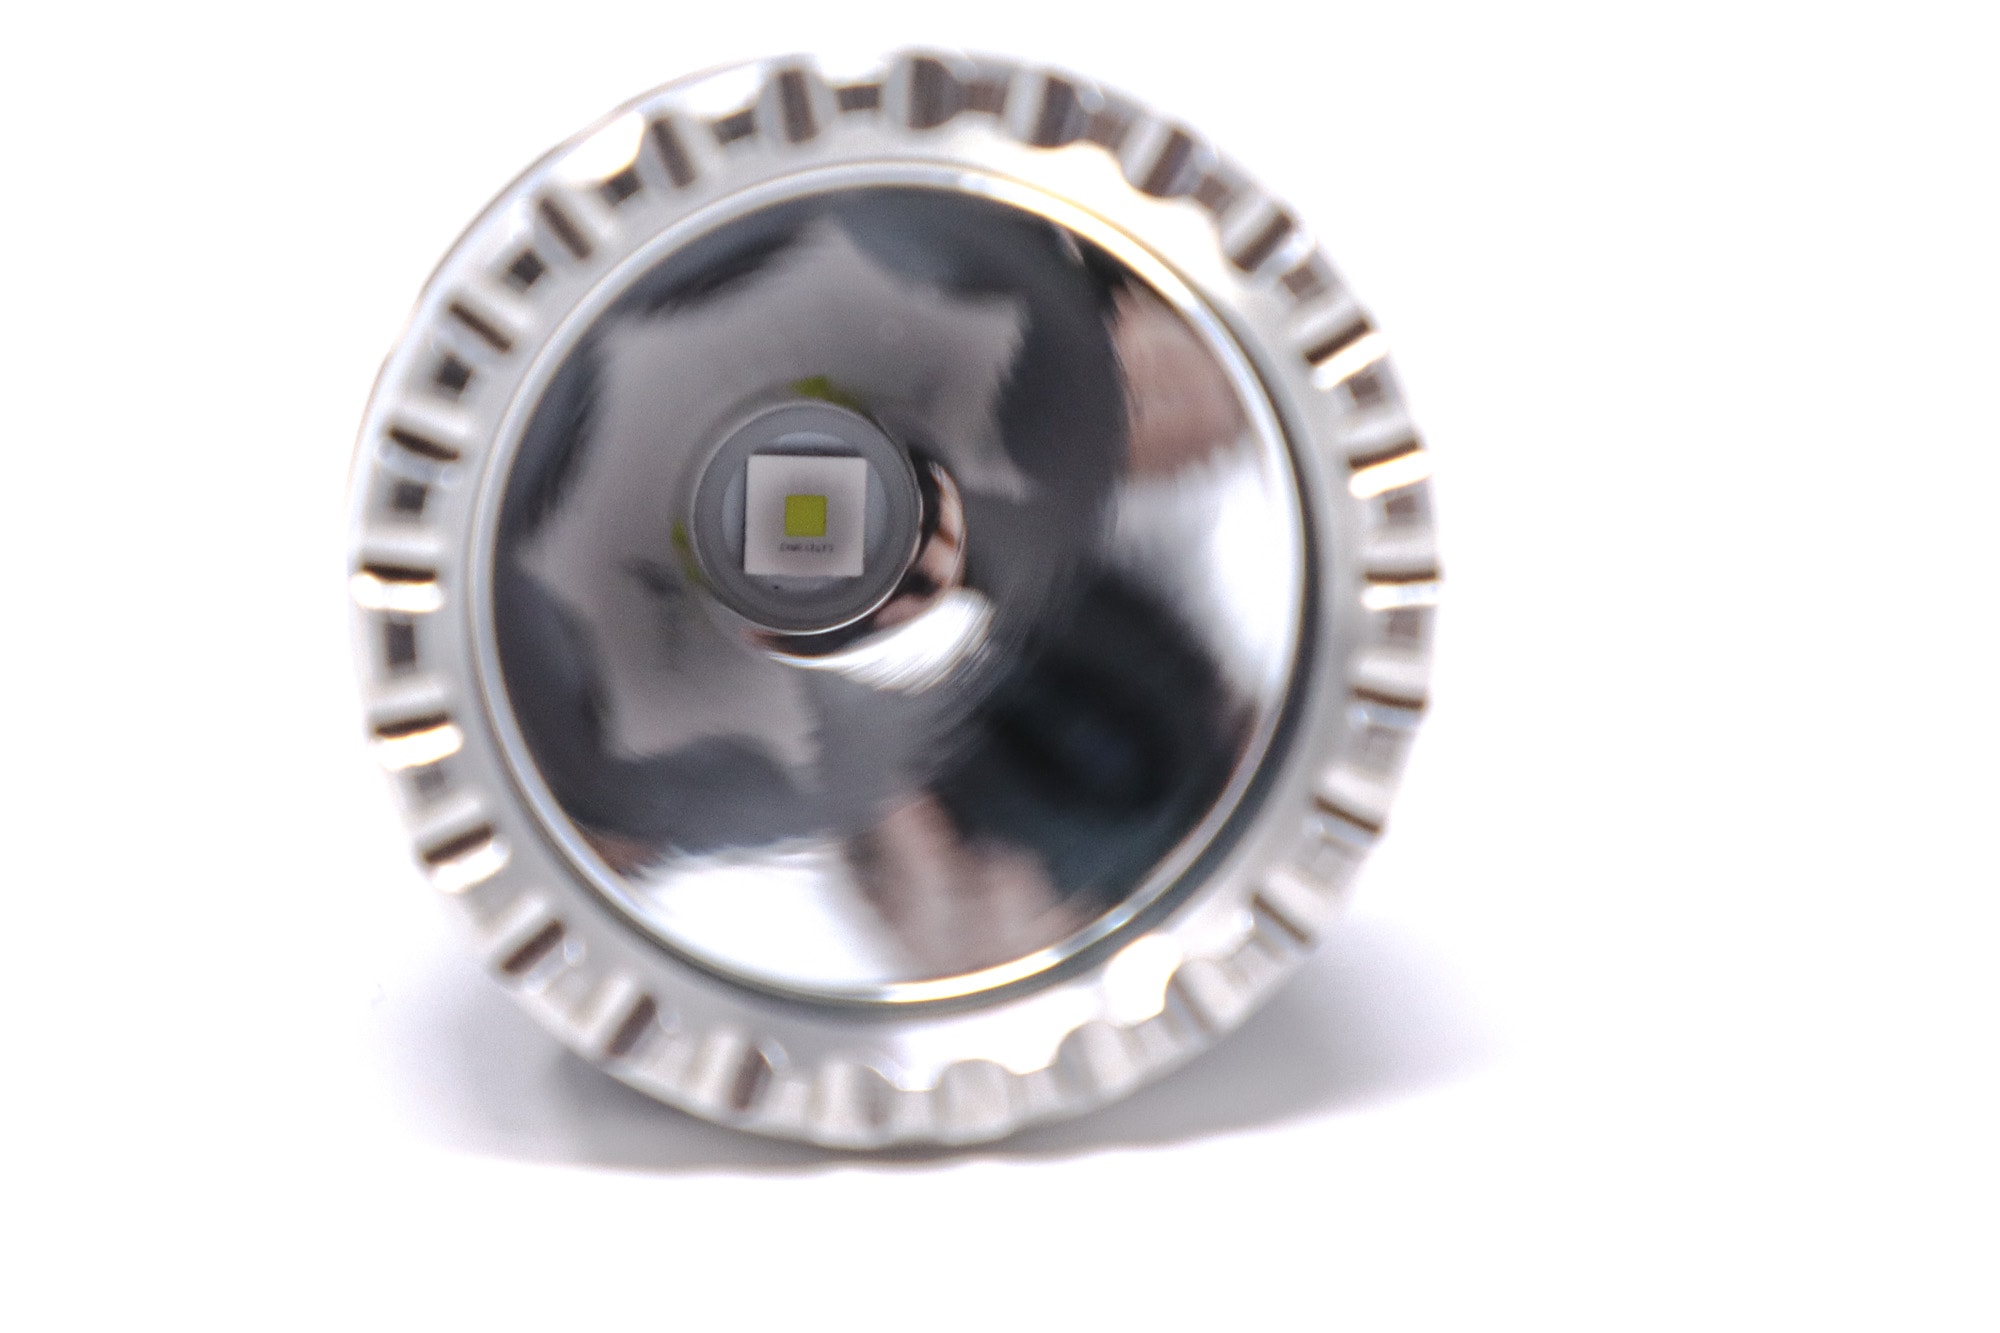
The ML1 uses the Osram KW CSLNM1.TG. This LED has been around and around the block in tons of thrower lights. It’s the 1mm2 version of Osram’s 3030 size OSTAR domeless high intensity LEDs. It’s a high intensity LED, with very high cd/mm2, so you get a tight hotspot and lots of throw even in small reflectors. CCT is cool white around 6000-6500K.
The reflector is SMO (smooth) or maximum beam distance. The lens is a dual AR coated unit made from hardened glass. The beam is all thrower, but it’s still really useful. There’s bright spill surrounding a tight hotspot with a faint ring around the perimeter. There’s lots of beam distance here, but the beam is still useful enough for general purpose use.
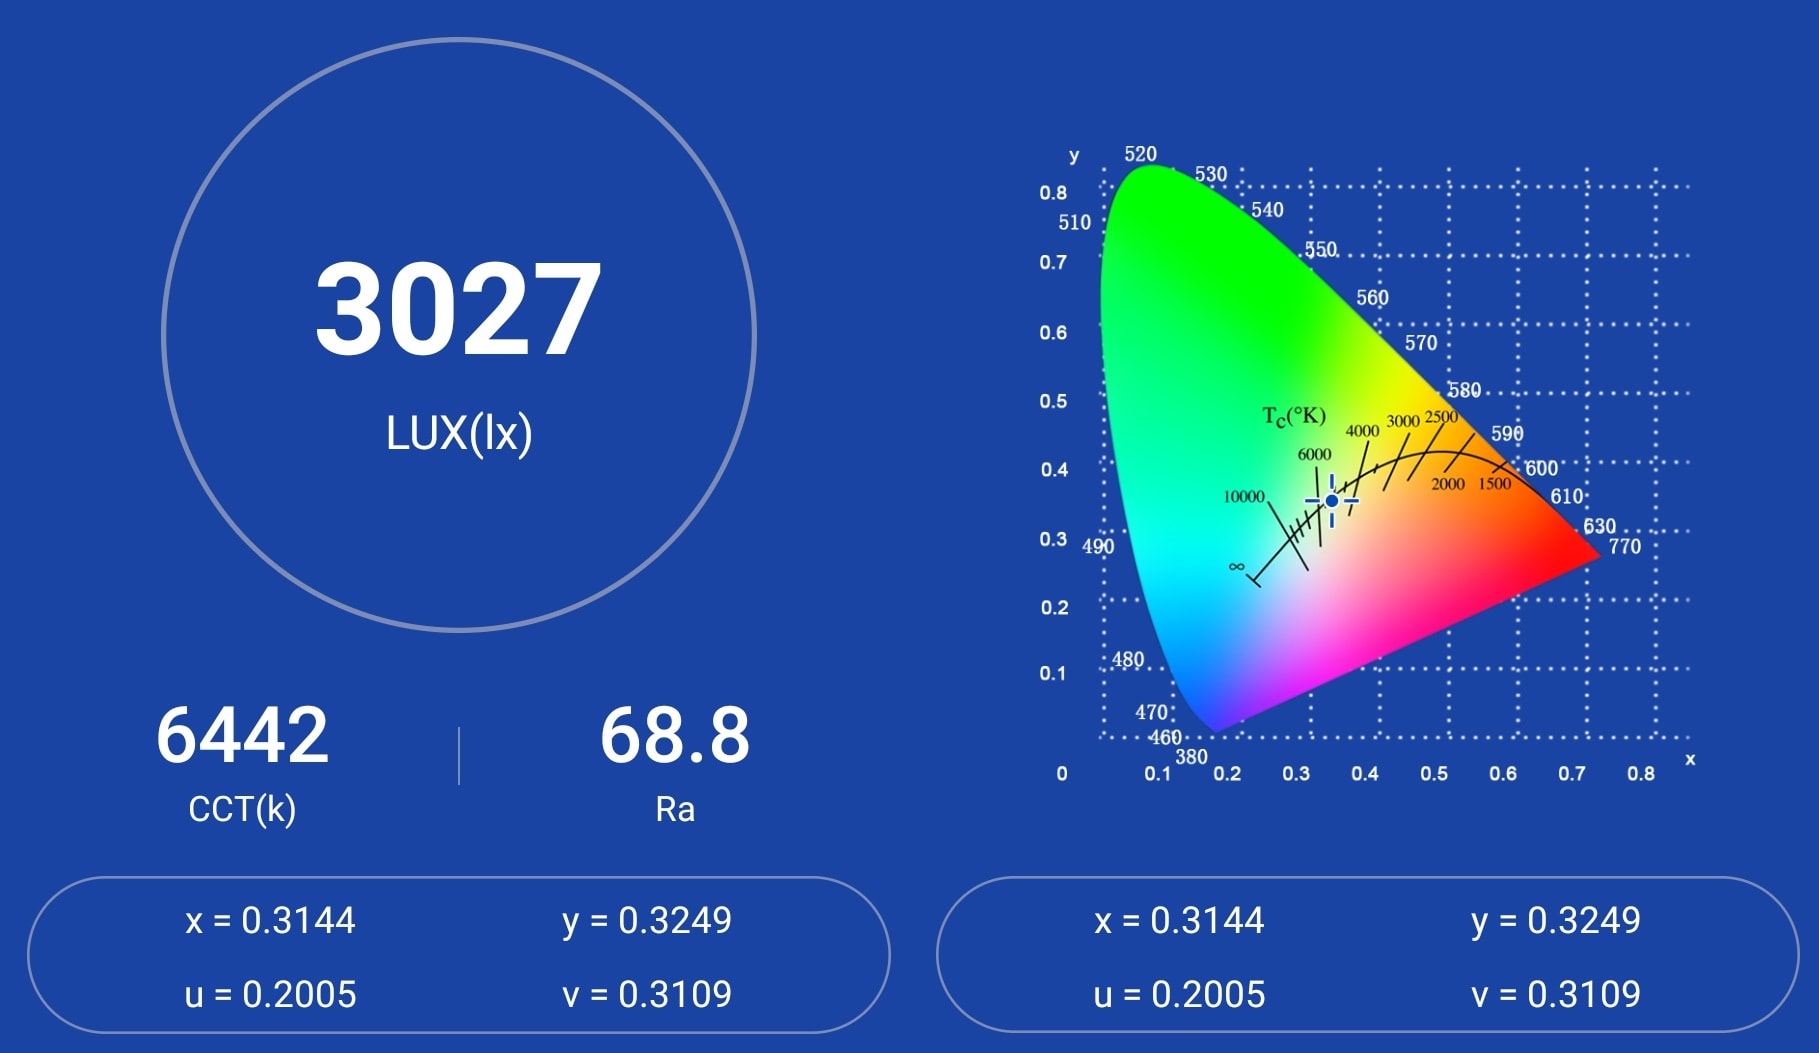
Spectral measurements:
I used an Opple Lightmaster Pro to measure the flashlight at 1 meters from the sensor
| Mode: | CCT: | CRI Ra: | duv |
|---|---|---|---|
| Turbo | 6442K | 68.8 | 0.0002 |
Dimensions and its competition
Dimensions:
| Ripsshine ML1 | Millimeters | Inches |
|---|---|---|
| Length | 65 mm | 2.5 in |
| Head diameter | 24 mm | 0.9 in |
| Body diameter | 15 mm | 0.6 in |
Dimensions are rounded to the nearest millimeter and the nearest tenth of an Inch.
Weight:
| Ripsshine ML1 | Weight in grams | Weight in oz |
|---|---|---|
| Without battery | 25 g | 0.6 oz |
| With 10220 battery | 30 g | 1 oz |
Weight is rounded to the nearest gram and tenth of an Oz.
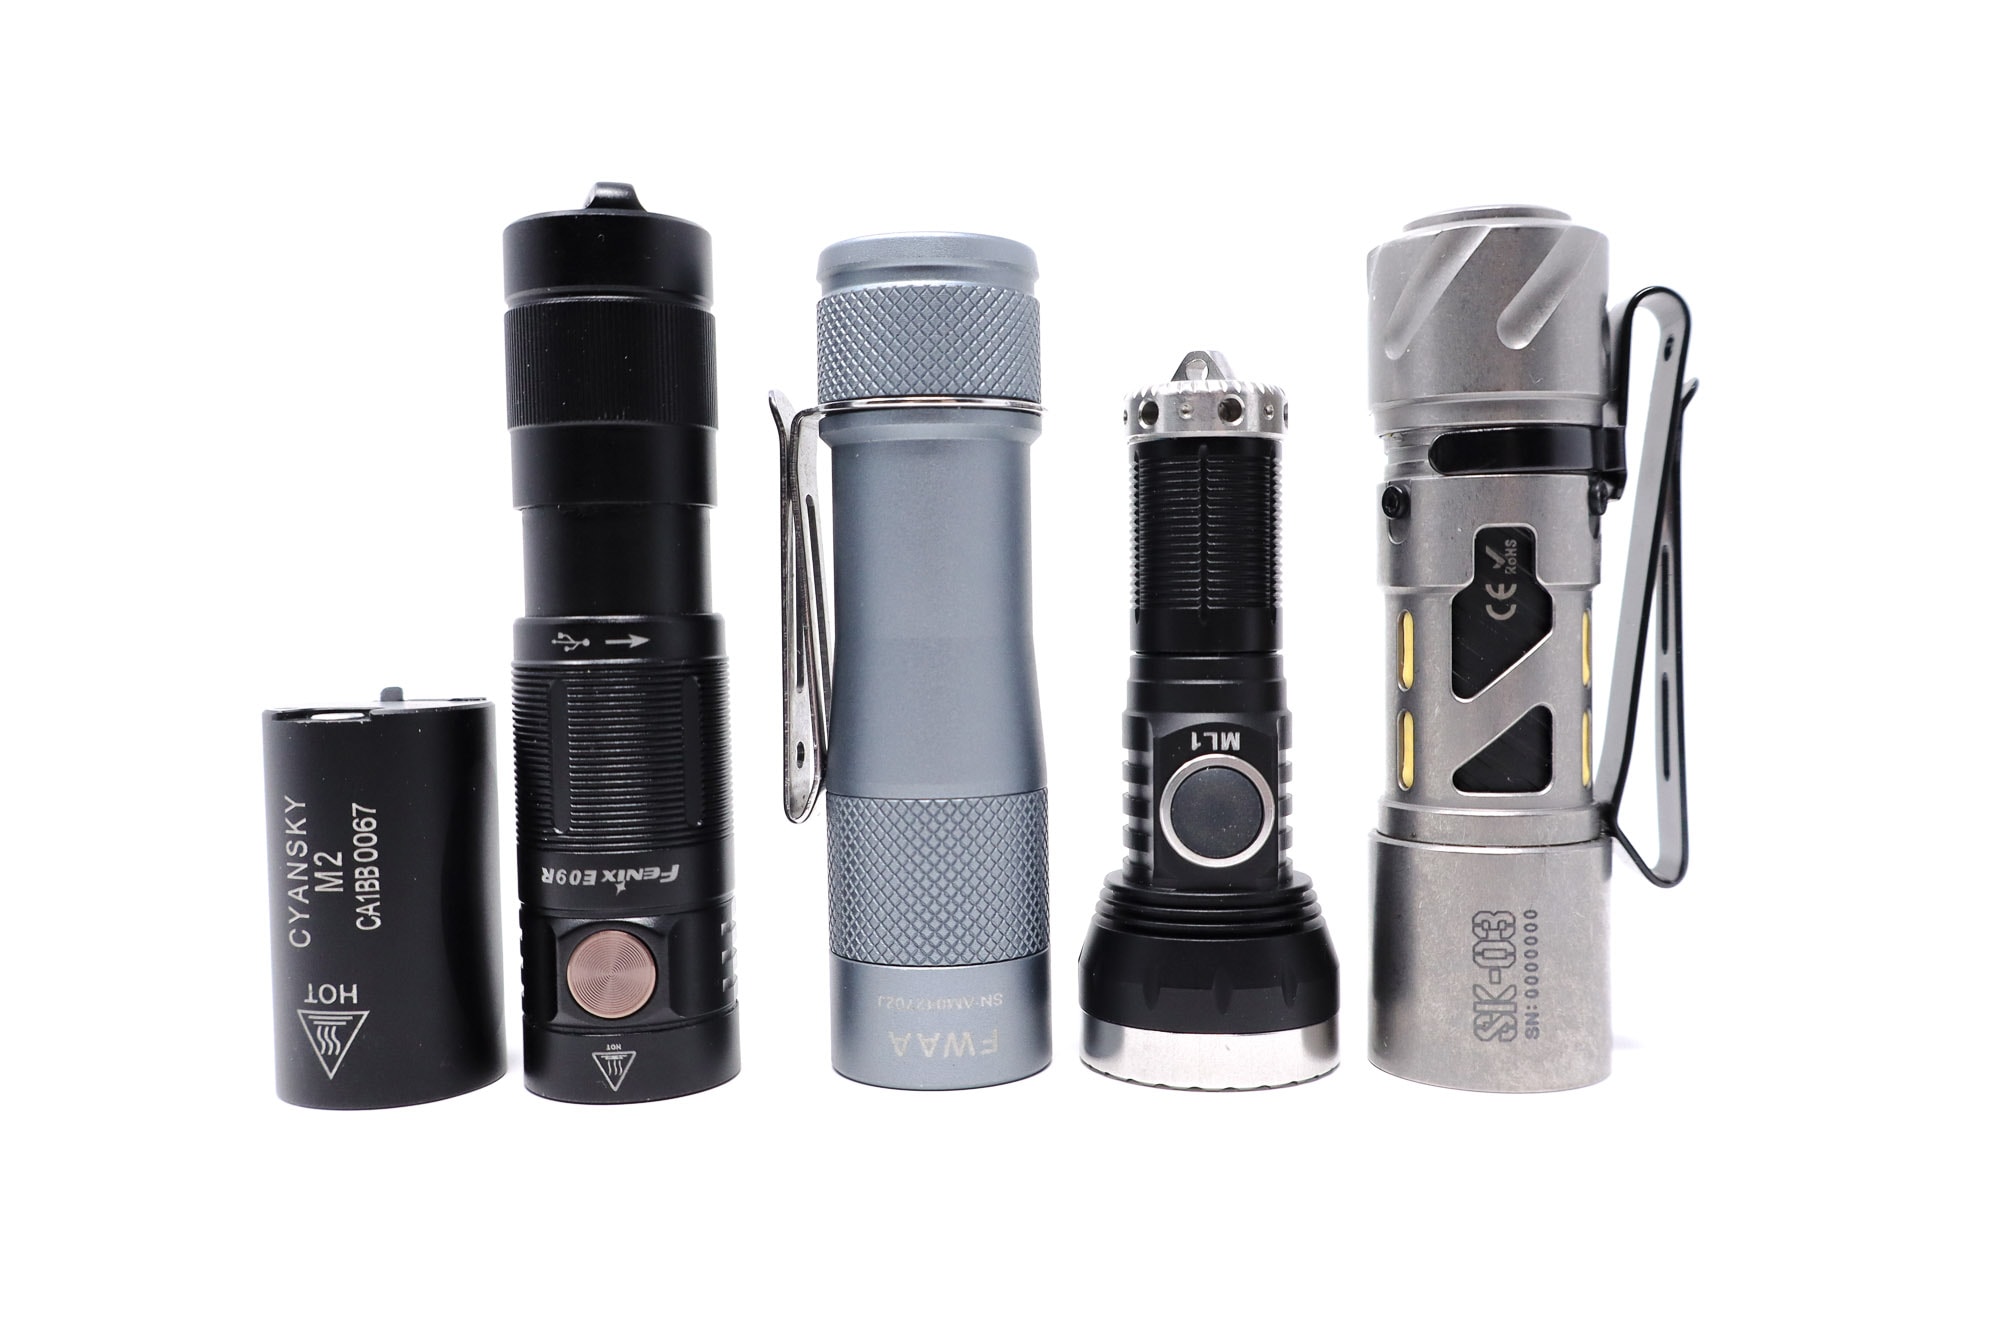
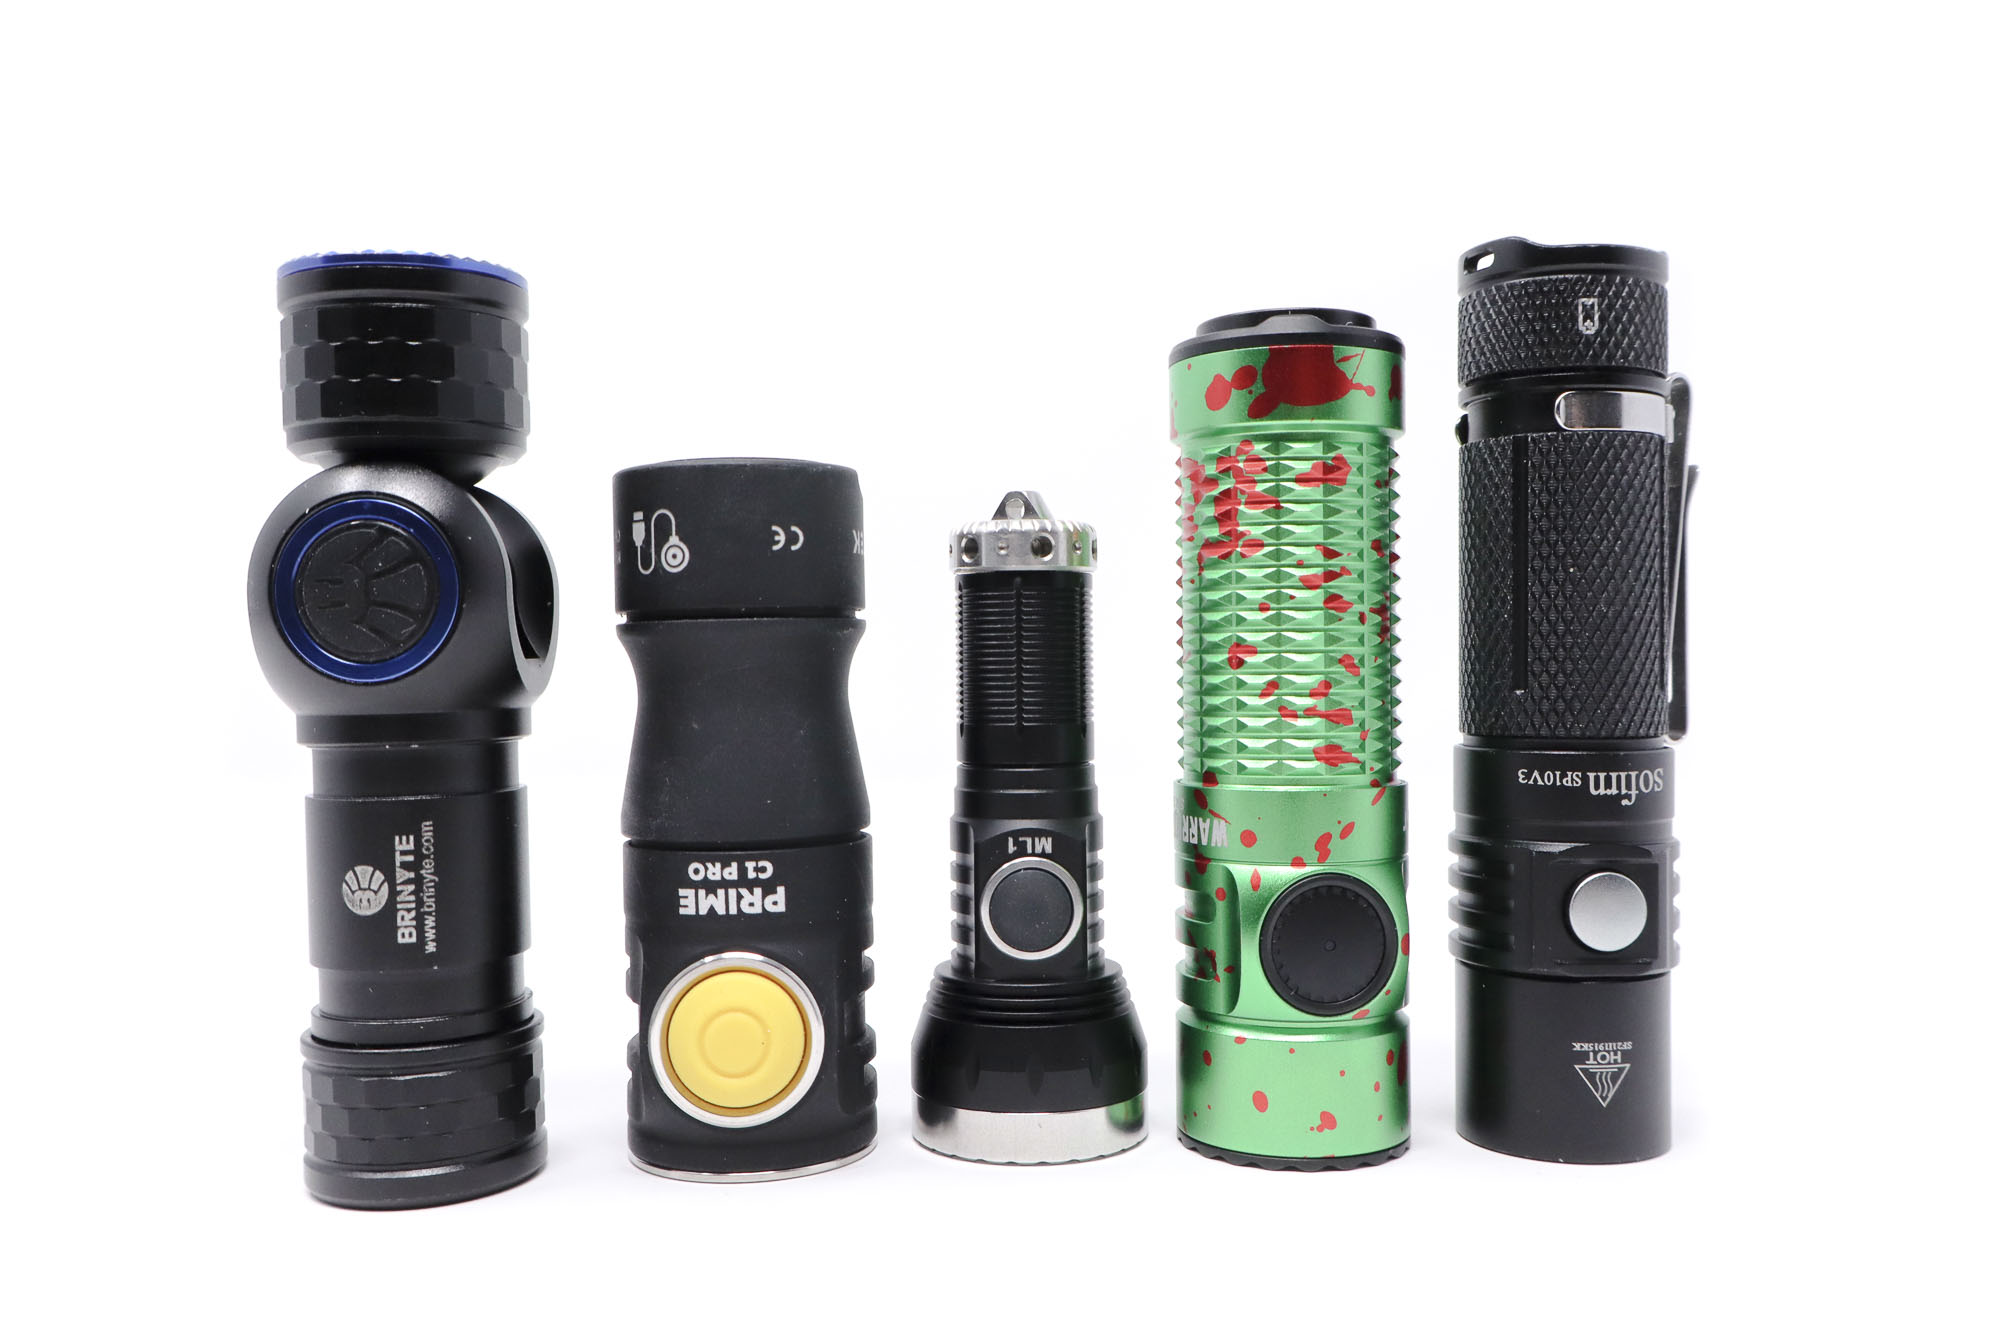
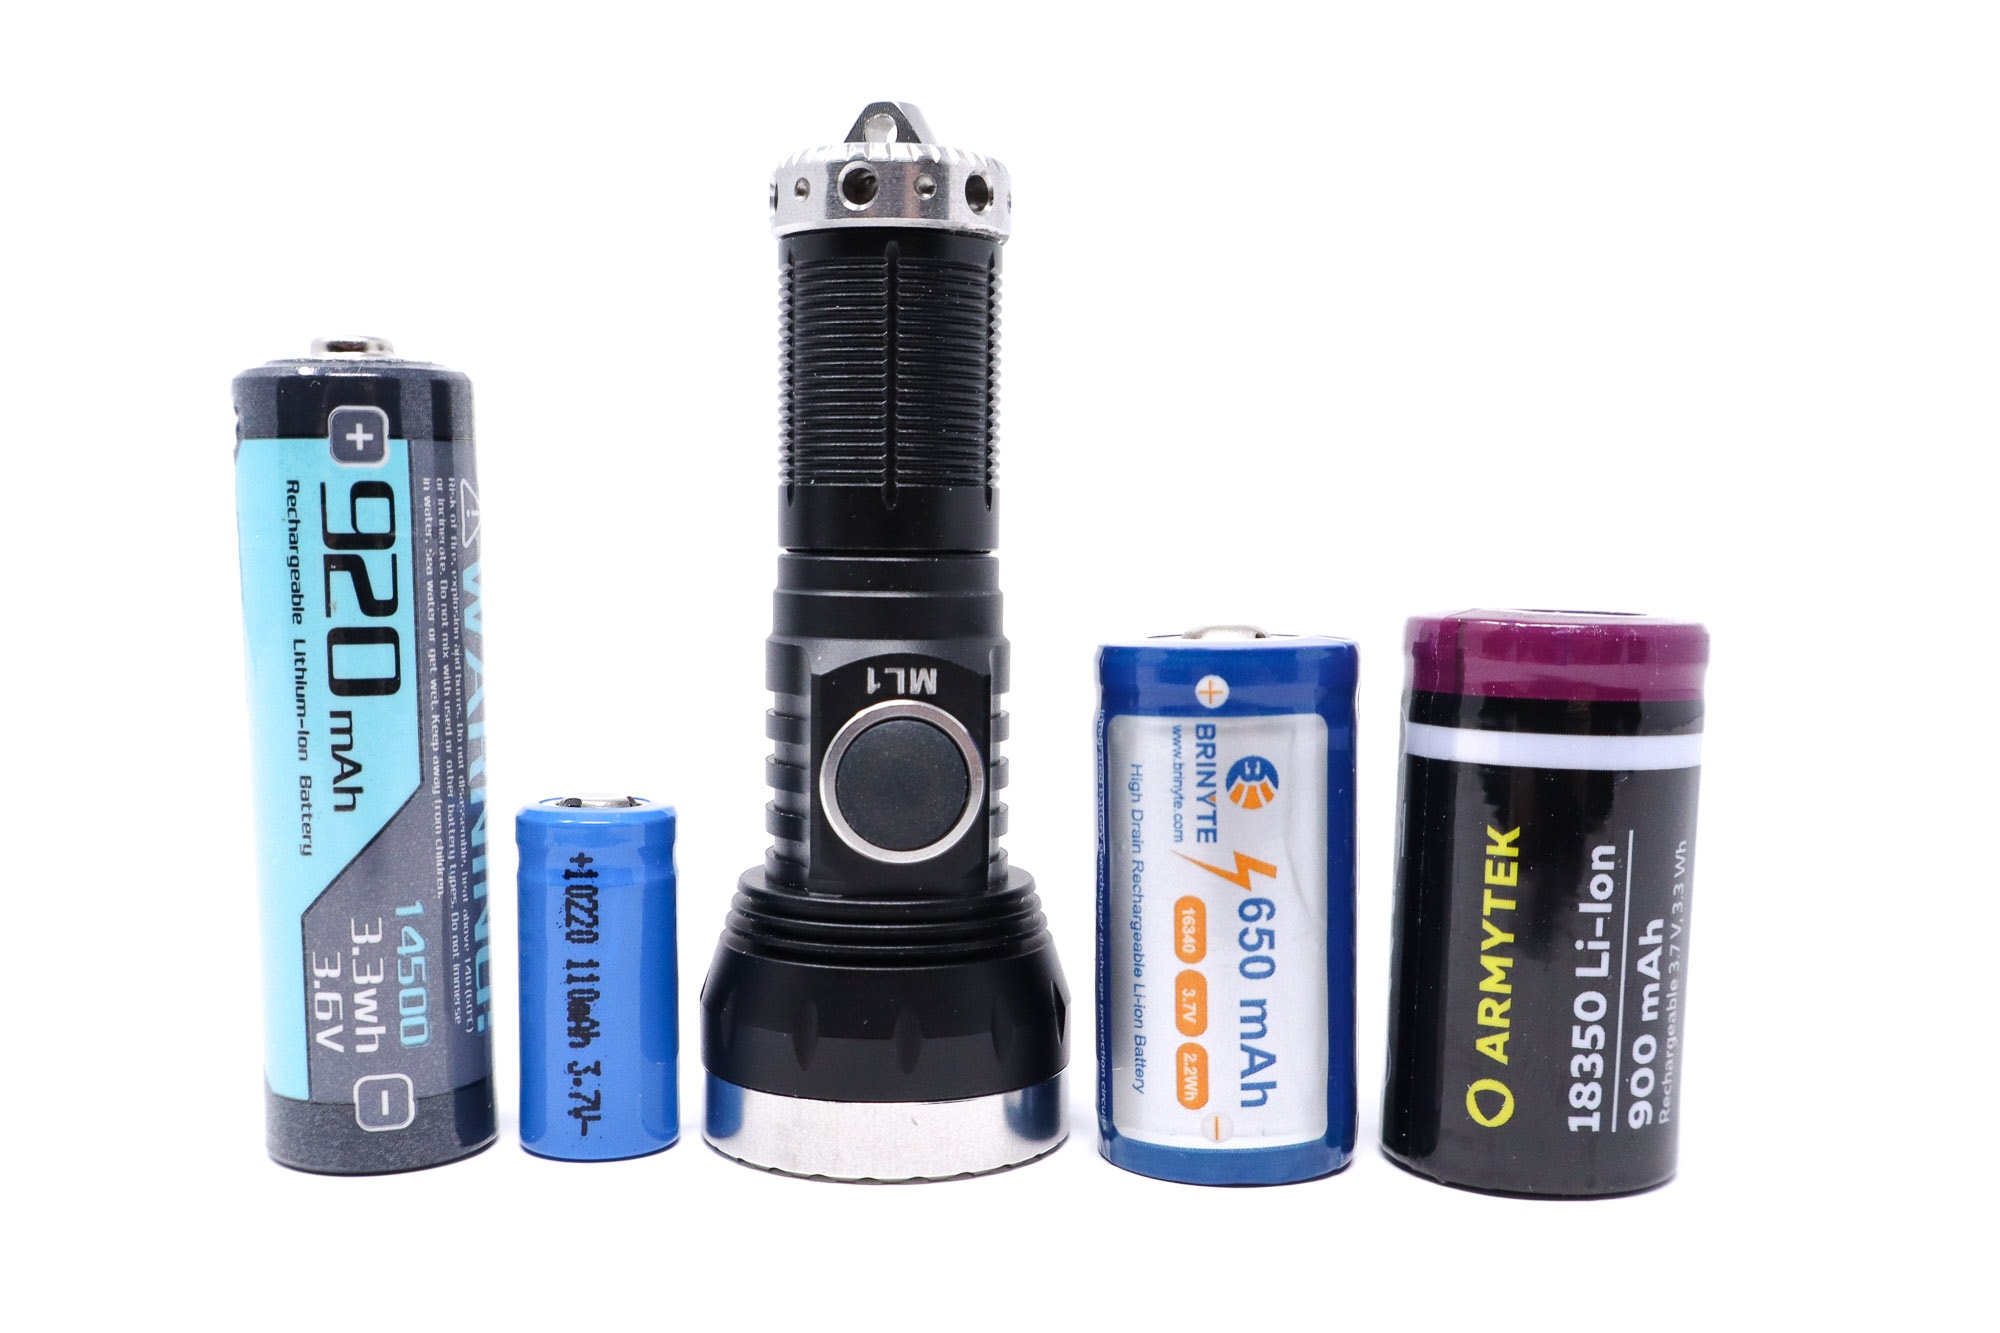
Flashlight size comparison with its competition:
Group 1 left to right: Cyansky M2, Fenix E09R, Lumintop FWAA, Ripsshine ML1, Loop Gear SK03
Group 2 left to right: Brynite HL16, ArmyTek Prime C1 Pro Max, Ripsshine ML1, Olight Warrior Nano, Sofirn SP10 V3
Group 3 reflectors left to right: Cyansky M2, Ripsshine ML1, Sofirn SP10 V3, Thorfire TG06

Ripsshine ML1 UI: User Interface and Driver
The details are sketchy with the driver. My guess is we’re dealing with a direct driver here, so some FETs with the brightness controlled via PWM. It keeps the price down and helps achieve maximum output. The UI is nothing fancy here, with 5 standard modes plus Turbo. The Strobe function is called ‘Flasher’ here, but it’s essentially a 1 Hz flasher.
Available modes:
- Moon, Low, High, Turbo
Available blinky modes:
- Flasher/Strobe
From OFF:
- Press and hold for +1 second: Moon
- Double-click in Moon mode: Flasher
- Single click: Turns on in last memorized mode
- Double click: Turbo
- Click 6 times: Turns off the switch LED. Repeat to turn back on
From ON:
- Press and hold for +1 second: Turns off
- 1 click: Switches modes Low to High
- Double click: Turbo
Mode memory:
- Yes, a single click returns to last memorized mode
Shortcuts:
- To Moon: Press and hold +2 seconds from off
- To Turbo: Double click from on or off
- To Flasher: In Moon mode, double click
Low voltage warning/protection:
- When the battery is 3.1 volts, the light will flash and the output will drop to 20%. High mode becomes unavailable. Under 3.1 volts, the output drops to Moon, and under 3 volts, the light shuts down for LVP. The switch LED also turns red and flashes during LVP.
Strobe/blinkies
- 1 Hz Flasher/strobe
Lock-out mode:
- None. The light can be locked out manually by unscrewing the tube ¼ turn.
PWM
- Yes, fast PWM, but not visible with the naked eye.
Additional/summary info on the UI:
- This is an okay UI, and while it gets the job done, it’s not the most refined. The lloonnnggg press and hold for off is actually closer to 3 seconds to turn off and tiring at times. The mode spacing? There’s no Medium/Mid mode, so Low-High seems like it would be a big gap, but in reality, it isn’t. Ripsshine says there’s LVP and intelligent thermal control, but I think that’s a fancy way of saying timed step down.
Ripsshine ML1 Charging and batteries
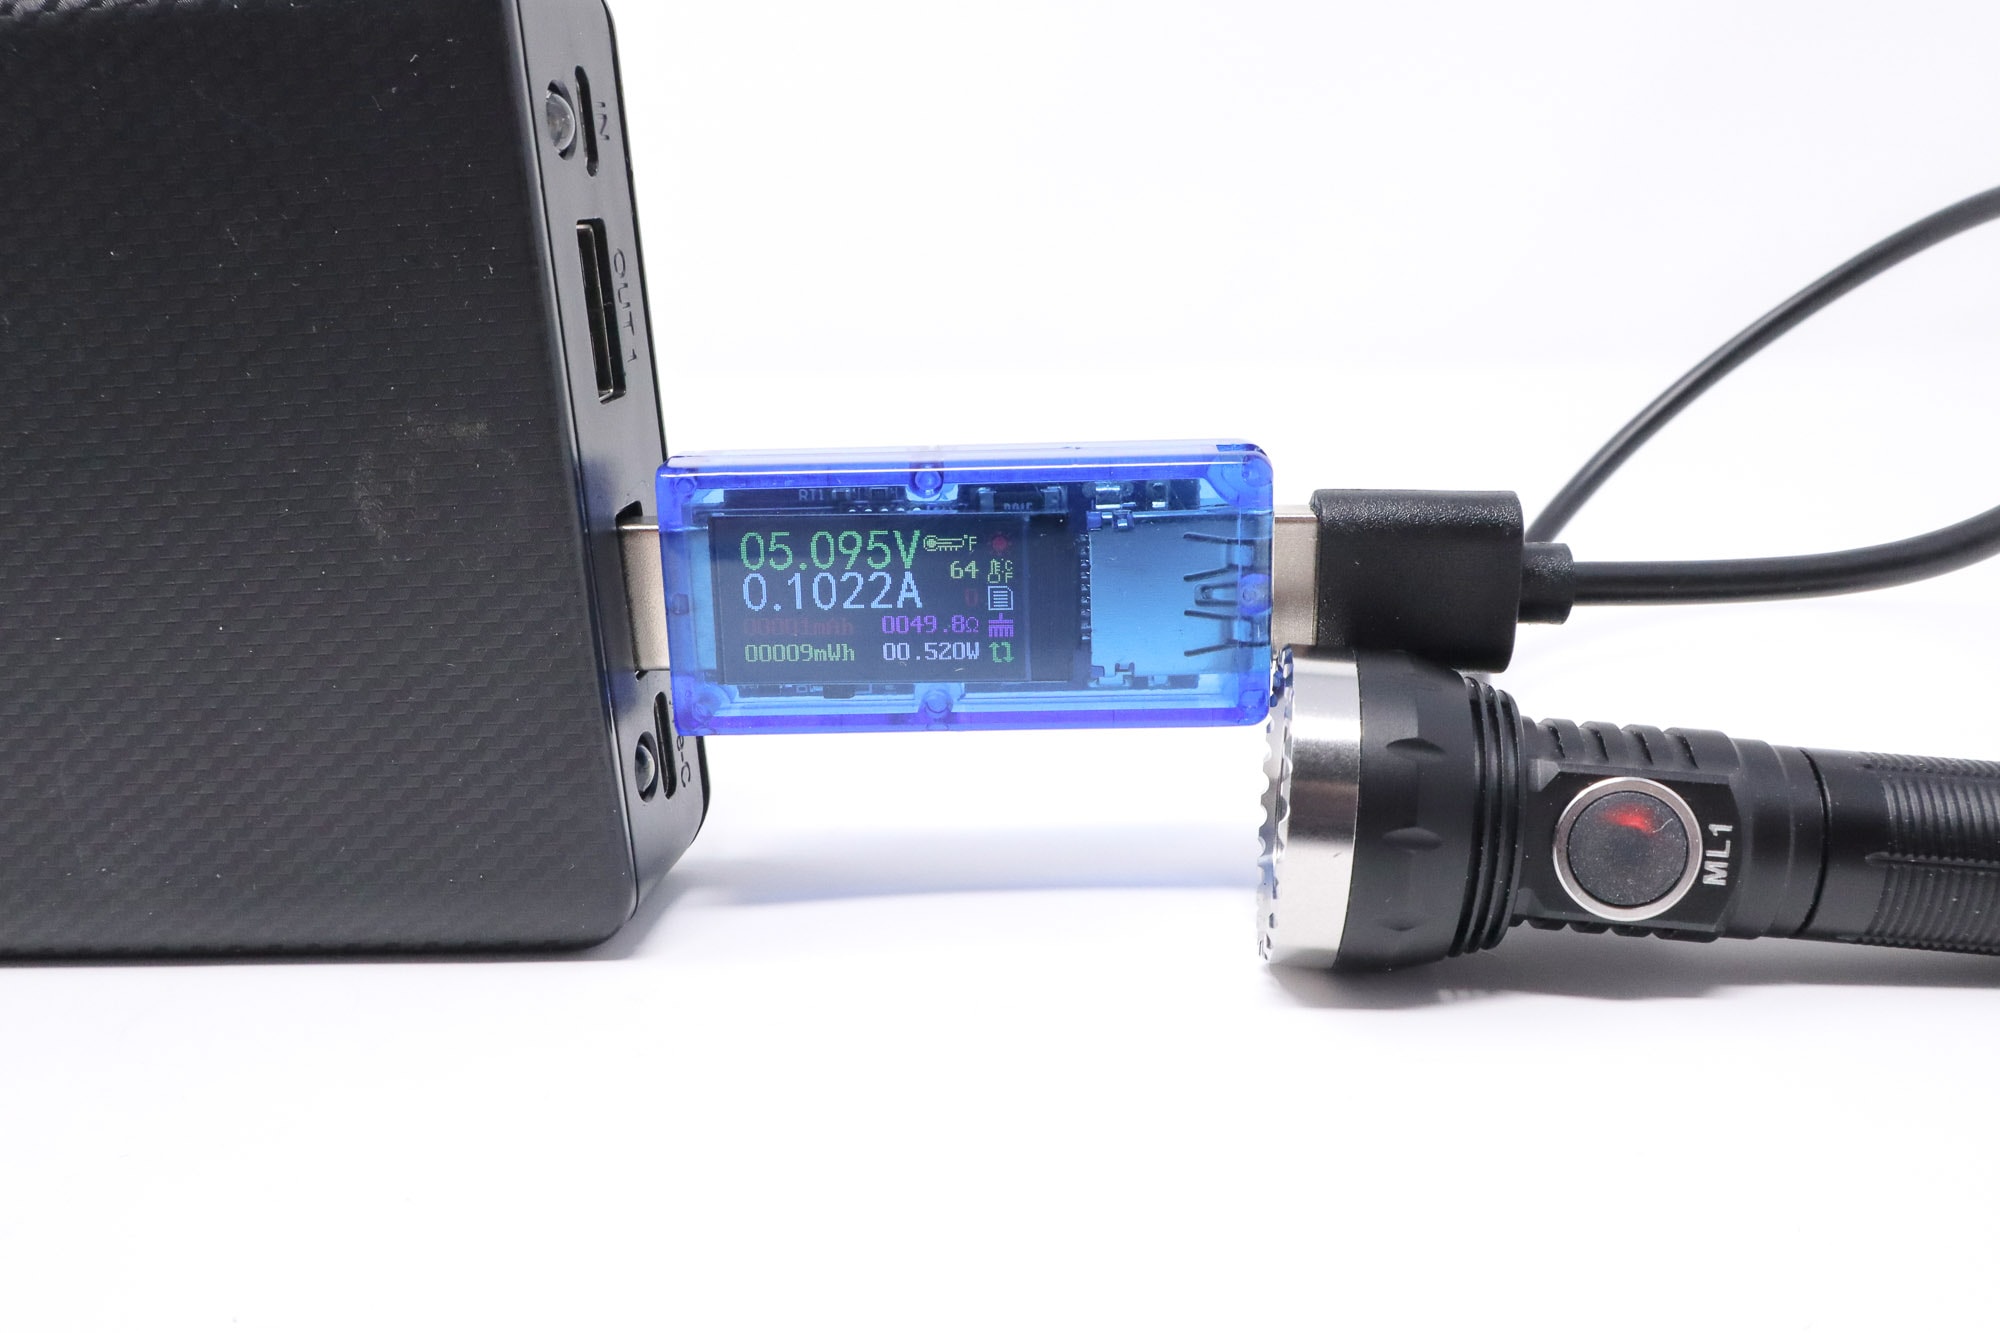
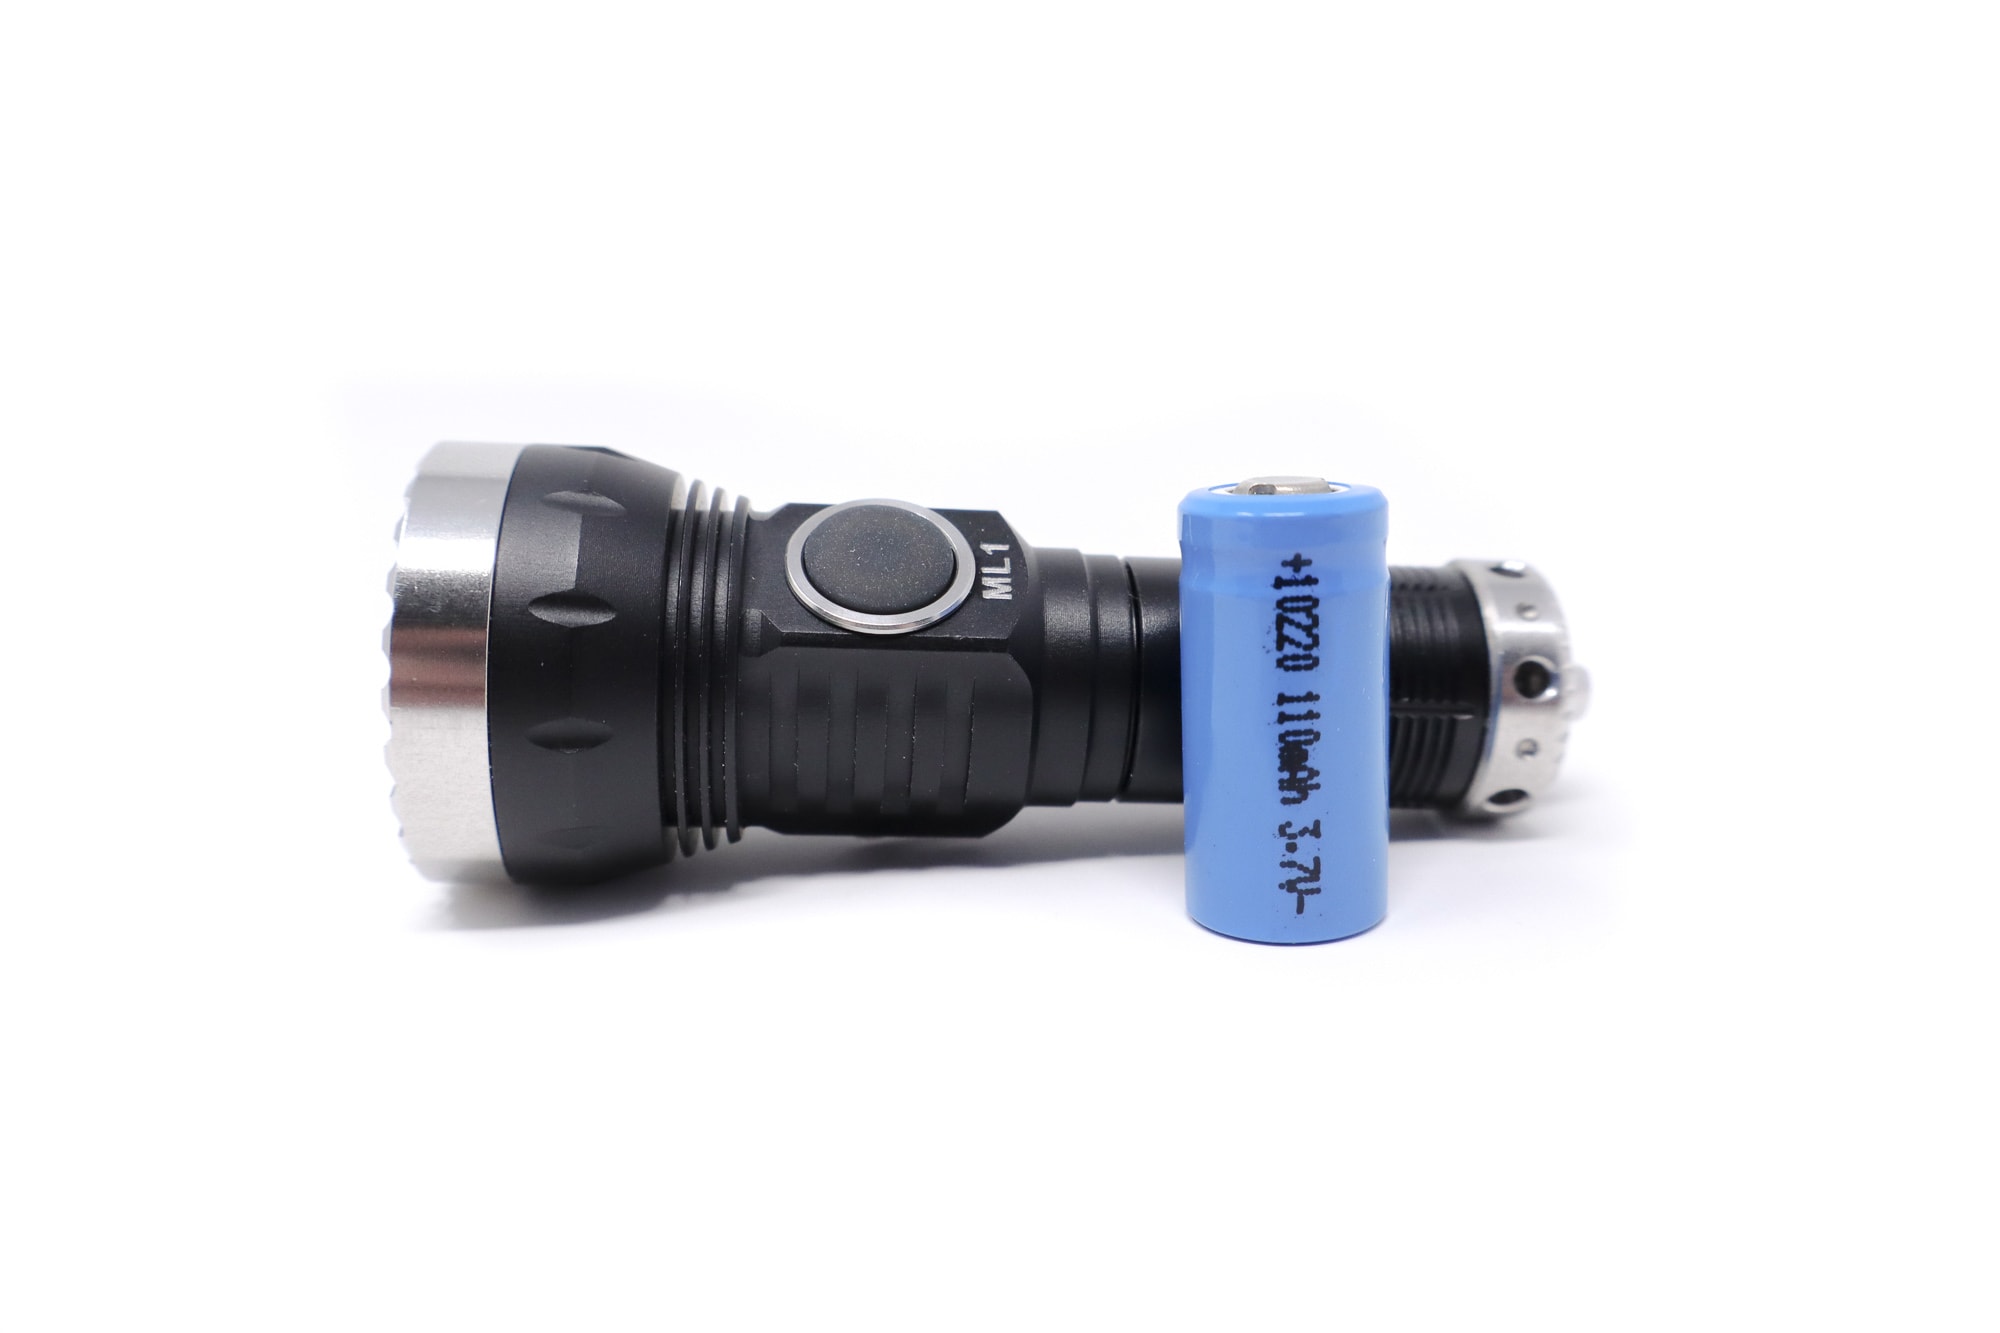
The ML1 uses one of the tiniest flashlight batteries around. This is a 10220 cell, so 10 mm in diameter and 22 mm long with 110 mA of capacity. The manual says you can use a 10440 cell as well, but that’s quite impossible since it won’t fit (too long). The GT Nano used an even smaller one, the 10180 (although a 10440 and 3x AAA tubes became available). The 10220 is a flat top cell, and Ripsshine includes a blue wrapper mystery cell.
There is onboard USB C charging, something the Nano didn’t have. That light has a weird adapter thingy with micro USB, so this is a huge upgrade in my book. No mention of the charge rate, but my Ruideng AT35 showed about 90-100 mA on the charge rate. Charge time was about 80 minutes from 2.8 volts and added 110 mA on the nose to the cell. The end voltage was 4.13 volts.
| Charge type | Fits | No fit | Charge time |
|---|---|---|---|
| Onboard USB-C | Flat top 10220 cell | Everything else | 80 minutes |
Performance test
Lumen measurements
How Lumens are Measured: Understanding ANSI FL1 Standards How Lumens are Measured: Understanding ANSI FL1 Standards: The ANSI FL1 standards specify that output in lumens should be measured 30 seconds after turning on, as this is the standardized time for measuring brightness according to the industry standard. This is why we focus on this part in our measurements. The ANSI FL1 standards require an ambient temperature of 22 ± 3°C. We record the ambient the ambient temperature to identify potential reasons for any observed discrepancies.Lumens are measured in my 50 cm integrating sphere with a Digi-Sense 20250-00 data logging luxmeter. The sphere has been calibrated with a Convoy S2+ measured to 260 Lumens and the figures are within 10% of actual.No current measurements due to the isolated current path. The battery was fully charged prior to the testing.
| Mode | Specified | 0 sec. | 30 sec. | 10 min. |
|---|---|---|---|---|
| Moon | 1.5 | N/A | N/A | – |
| Low | 80 | 61 lm | 63 lm | 54 lm |
| High | 300 | 253 lm | 207 lm | 53 lm |
| Turbo | 550 | 405 lm | 295 lm | 37 lm |
Ambient temperature during testing:
- 19.5 °C
Parasitic drain:
- N/A
The outputs are down a bit from spec, but nothing crazy and it seems pretty bright for a tiny light. There’s more than enough output for keychain-type tasks.
Ripsshine ML1 Battery Life: Runtime graphs
How Runtimes are Measured: Understanding ANSI FL1 Standards About ANSI FL1 runtime standards: The runtime is measured until the light drops to 10% of its initial output (30 seconds after turning on). This does not mean that the flashlight is not usable anymore. The last column shows how long the light actually works till it shuts off. If there is a + symbol, it means that the test was stopped at that particular point, but the light was actually still running. This happens on certain occasions, with certain drivers, firmware, or batteries.Lumens are measured in my 50 cm integrating sphere with a Digi-Sense 20250-00 data logging luxmeter. The sphere has been calibrated with a Convoy S2+ measured to 260 Lumens and the figures are within 10% of actual. I use a Digi-Sense 20250-92 data logging thermocouple for the temperature measurements. The probe is affixed to the head using kapton tape and uses the same 5 second sampling rate for logging. The battery was fully tested before the tests and I tested Low, High, and Turbo with the fully charged battery.
| Mode | Specified | Runtime (ANSI FL1) | Time till shut off |
|---|---|---|---|
| Low | 45min | 44min 10 sec | 44min 10sec |
| High | 33min 10sec (total) | 30min 50sec | 30min 50sec |
| Turbo | 31min (total) | 10min | 30min 45sec |
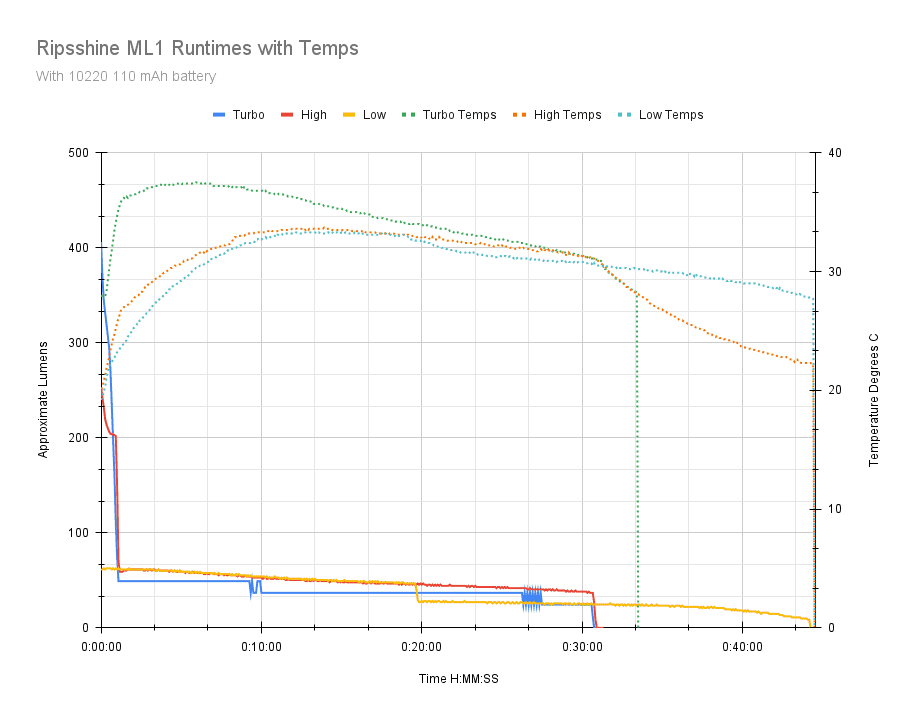
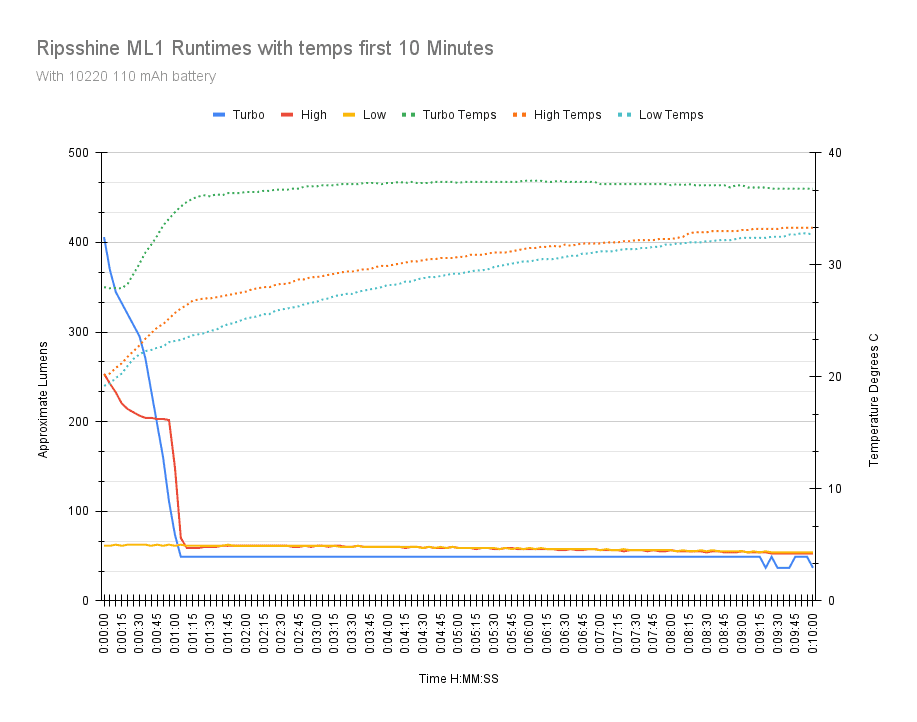
The results aren’t surprising for a 110 mAh battery. I came in close to the advertised runtimes on ANSI for High and Low, but Turbo was predictable, and the specs accurately reported the step down (which is why the ANSI is 10 minutes-still a respectable figure). The Turbo step down happens around 30 seconds, and there doesn’t look like any thermal regulation for any modes. The output looks like there’s a linear, unregulated driver at work, which makes sense.
The battery runs out of gas before it really has a chance to get hot, so temps were kept in check at under about 40 C. If you use a 10440 with this light it would be much better.
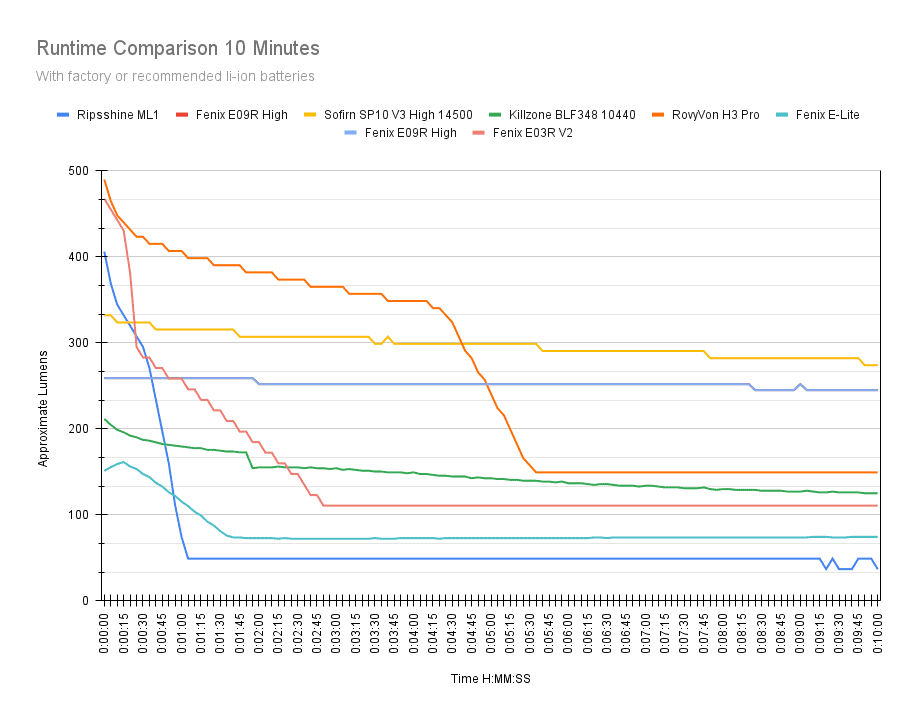
For the comparison graph, I included similar lights. To keep it fair, for the lights with swappable Nimh/li-ion batteries, I kept it to li-ion cells and ran either Turbo or High modes.
As you can see, the ML1 is severely limited (along with the RovyVon H3 Pro) by the small capacity cell, but holds its own in the first 10 minutes. Since the ML1 only runs for 30 minutes, the graph is limited to that, even though the other lights ran for much longer (except the H3 Pro). Again, a 10440 battery would really help it out here.
Peak beam intensity and beam distance measurements
About Peak beam intensity: Understanding ANSI FL1 Standards About peak beam intensity The calculated value of distance in meters at which the flashlight produces a light intensity of 0.25 lux. (0.25 lux is about the brightness of a full moon shining on an object). This means that the intensity has decreased so much, it becomes difficult to see darker objects, or objects that don’t reflect light. The columns ‘Meters’ and ‘Yards’ use rounded numbers.Beam distances are measured using a Uni-T UT383S luxmeter measured indoors at 5 meters using the included fully charged battery. Measurements taken at 30 seconds. The battery was recharged and allowed to cool between the High and Turbo mode measurements.
| Mode | Specified | Candela measured | Meters | Yards |
|---|---|---|---|---|
| Moon | ? | 125 cd | 22 m | 24 yd |
| Low | ? | 3925 cd | 125 m | 137 yd |
| High | ? | 12,325 cd | 222 m | 243 yd |
| Turbo | 31,680 | 16,500 cd | 257 m | 281 yd |
| Turbo start | ? | 19,550 cd | 280 m | 306 yd |
Ambient temperature:
- 19.6°C
The throw figures are coming up short, and I don’t know where Ripsshine got that 31,680 cd number, but I’m guessing they didn’t measure at 5 meters and didn’t do the ANSI measurement. Still, 250+ meters from a keychain light the size of my pinky finger is mighty impressive.
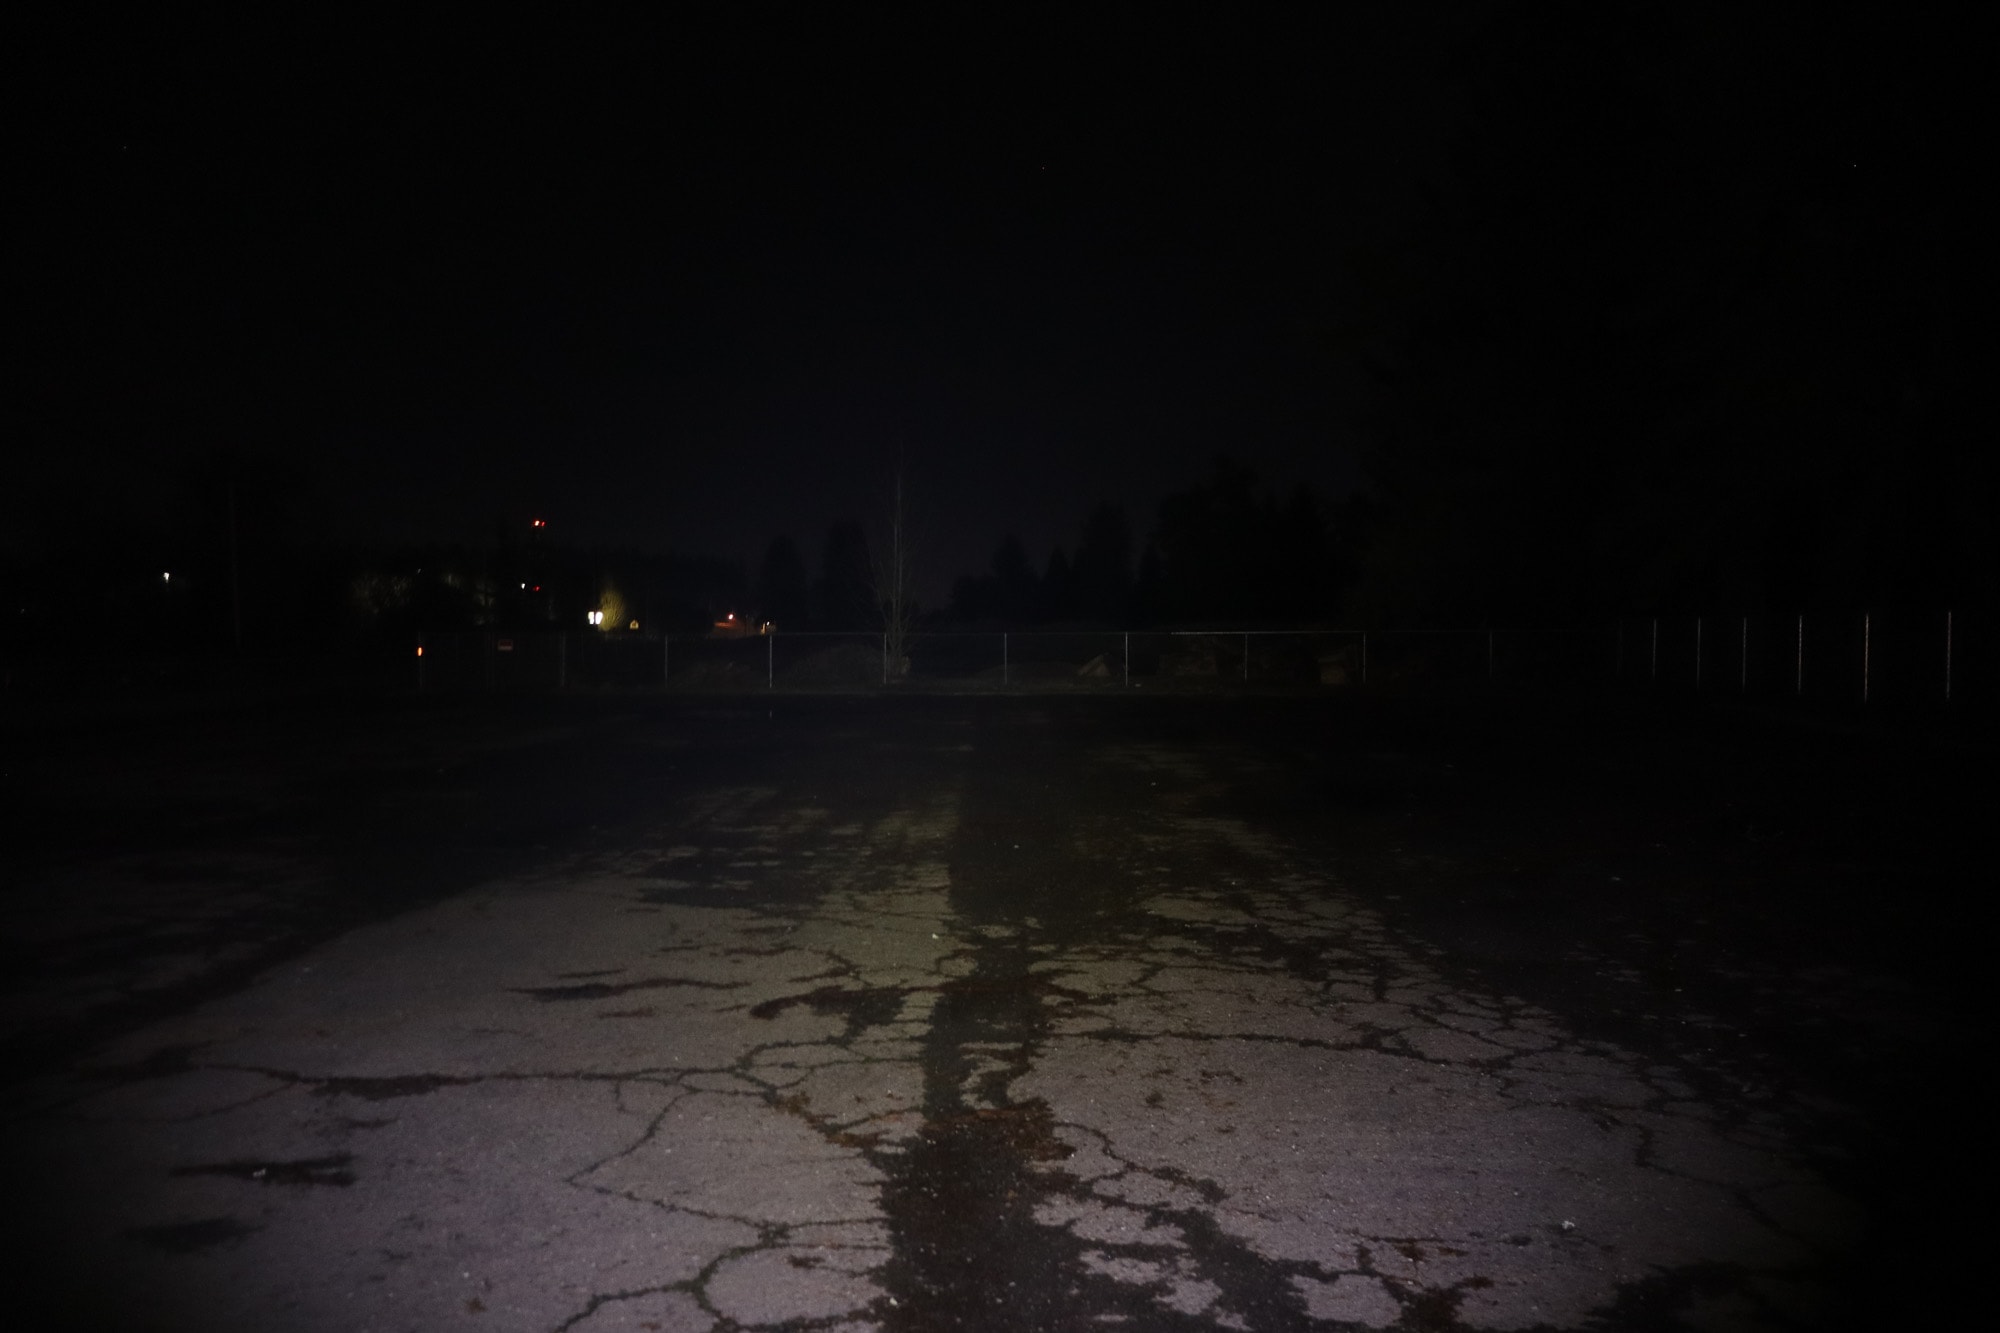
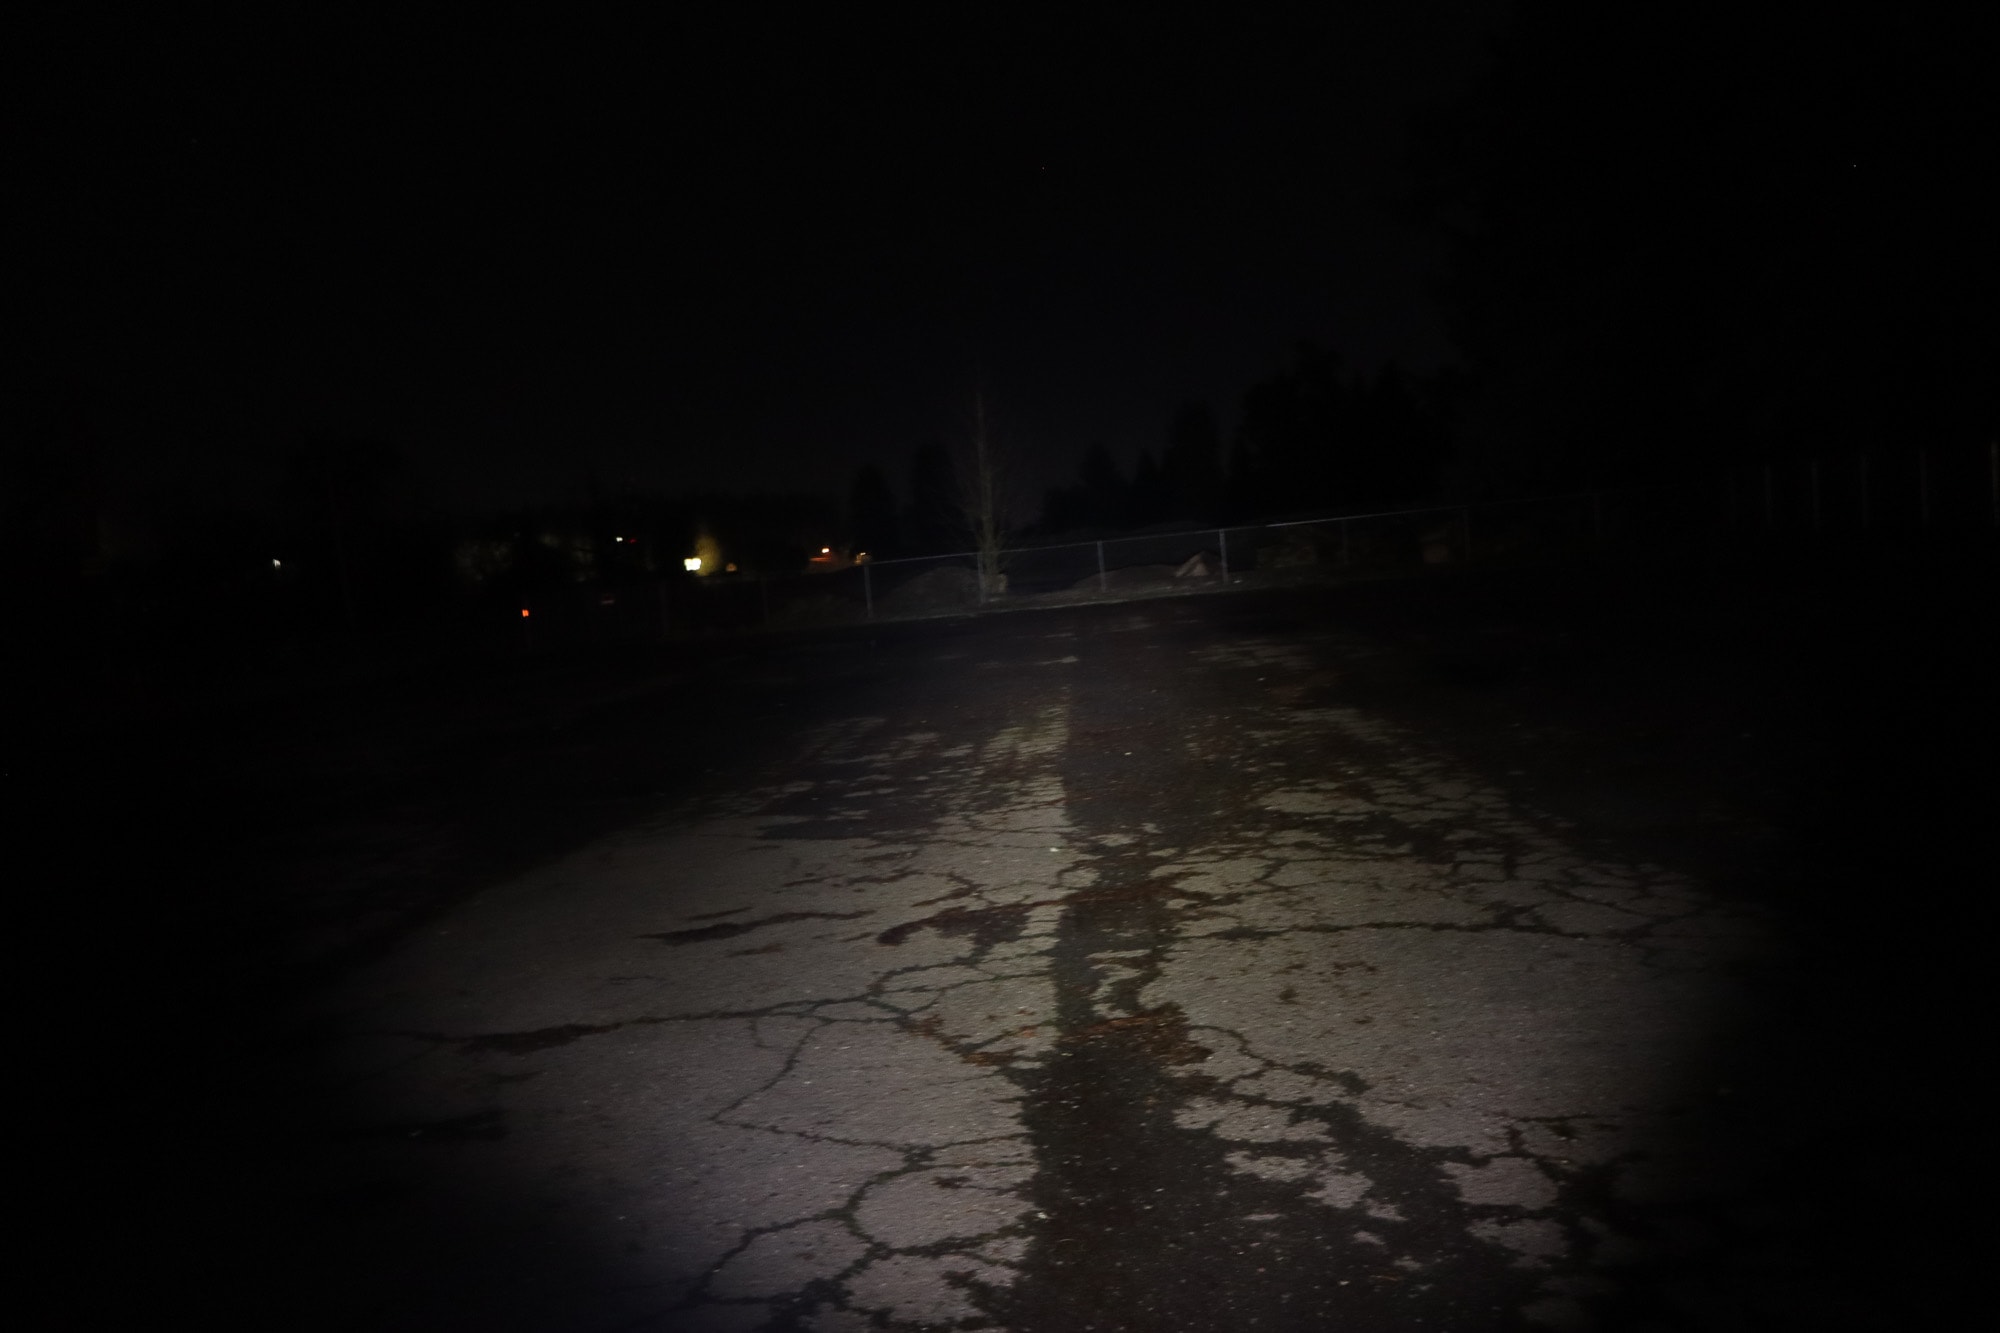
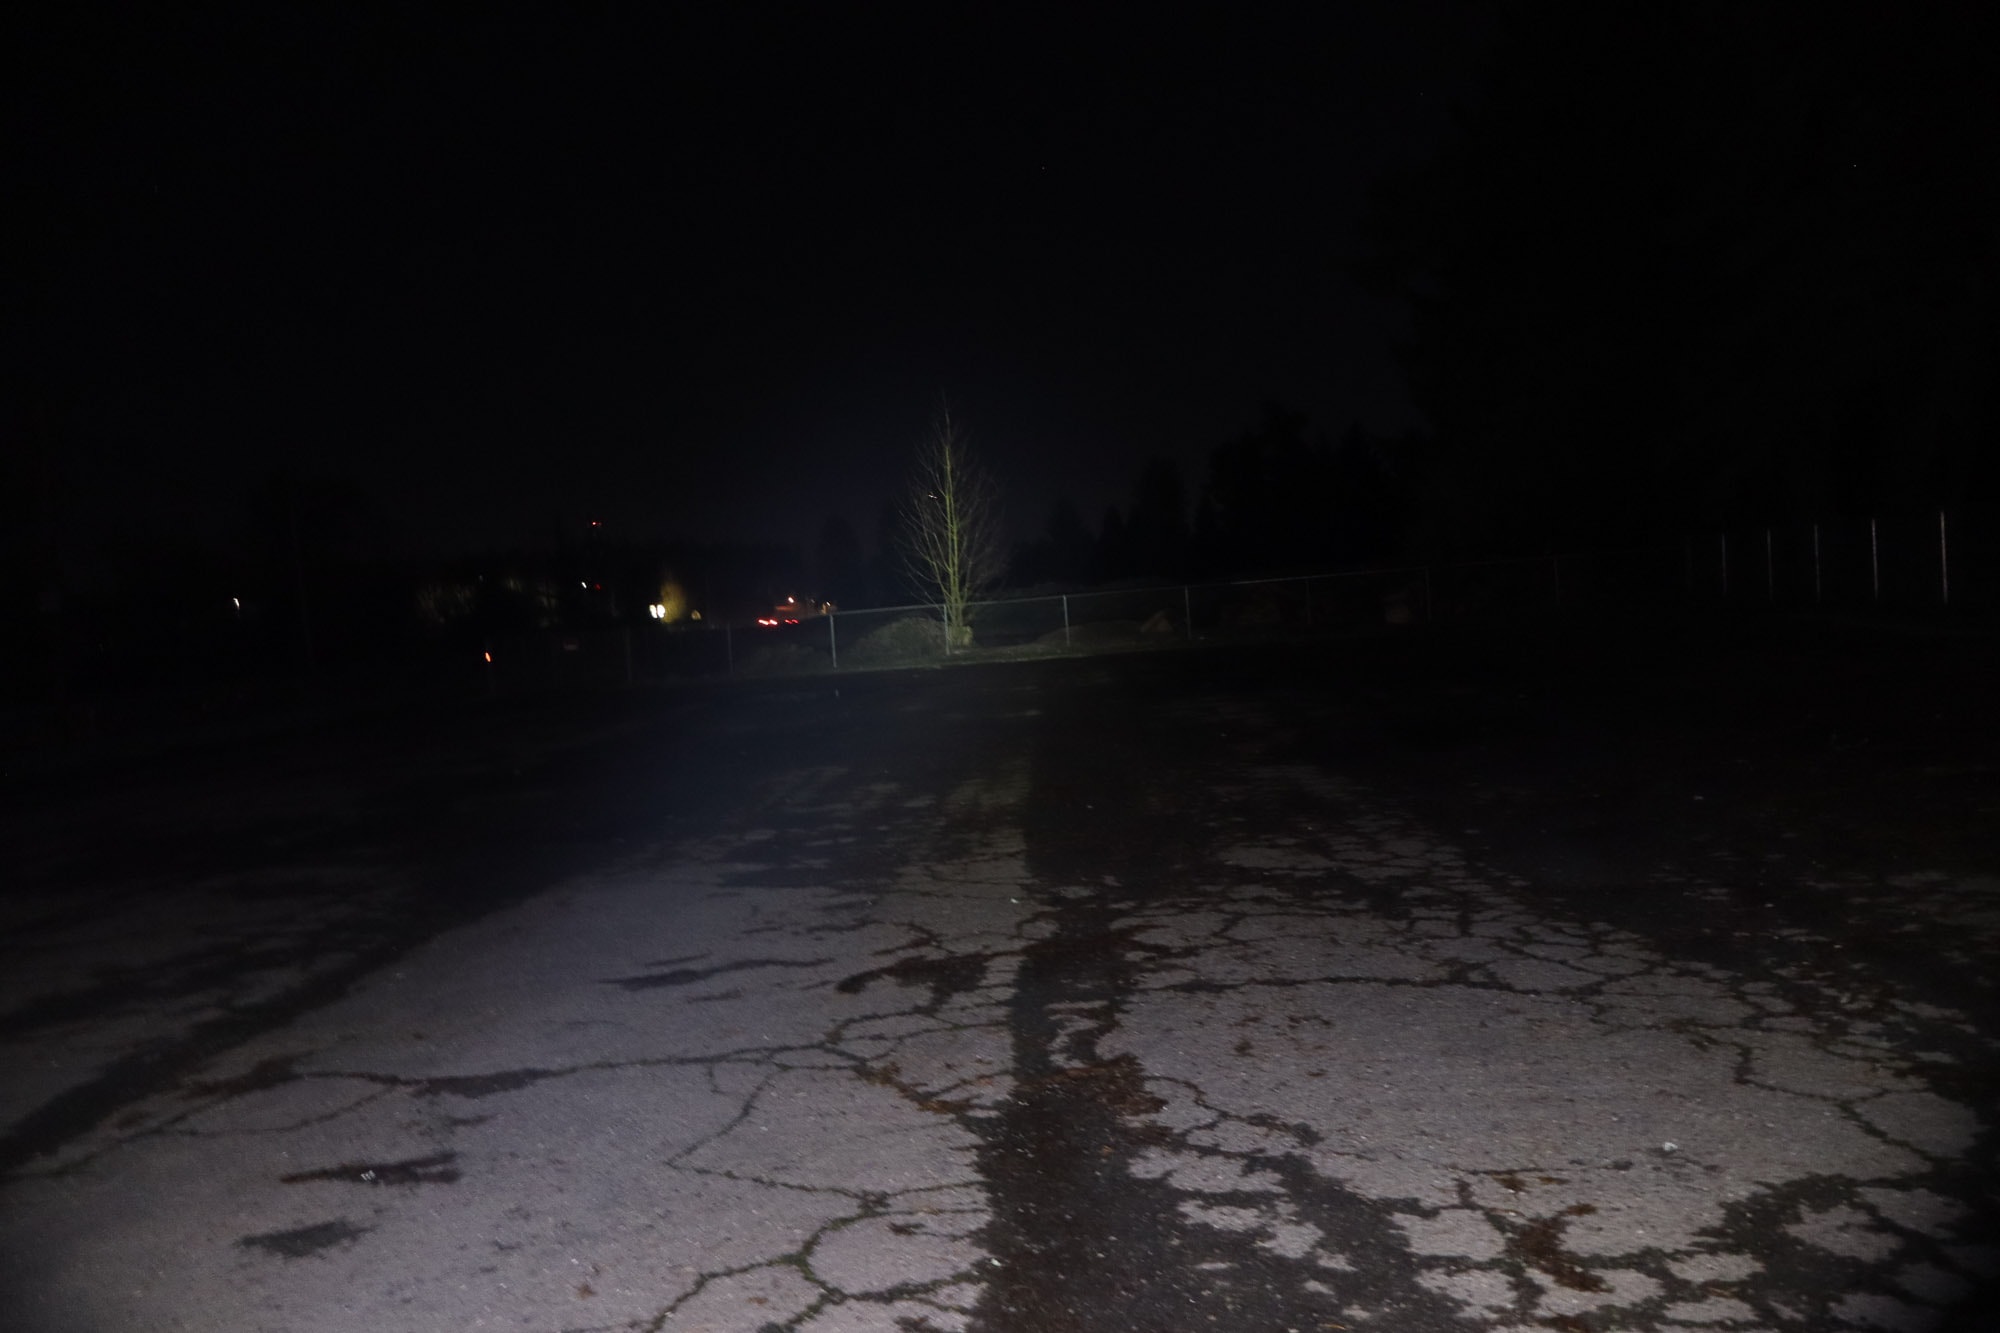
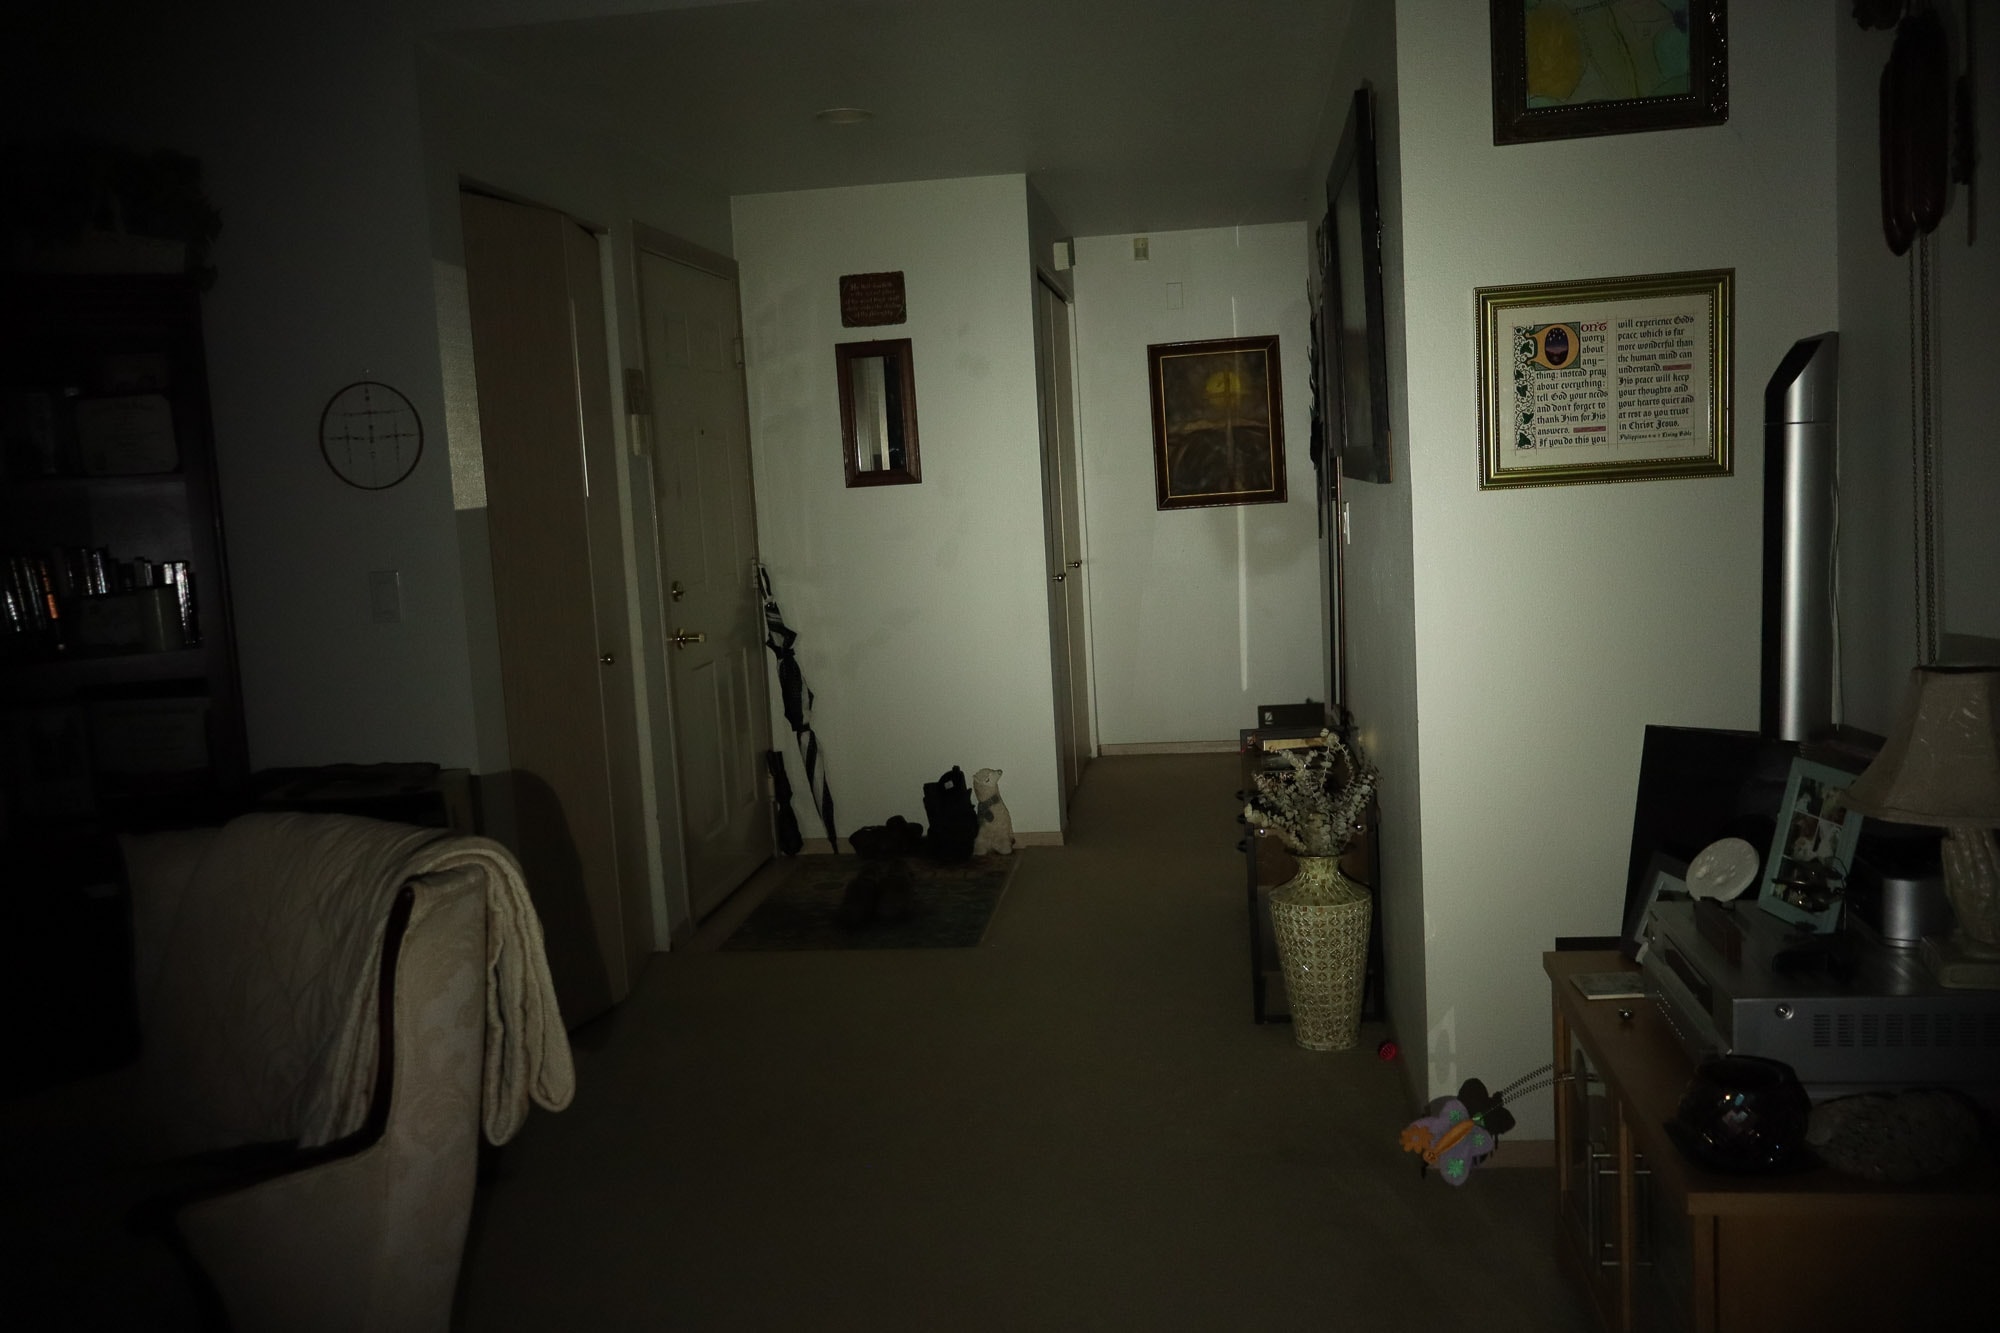
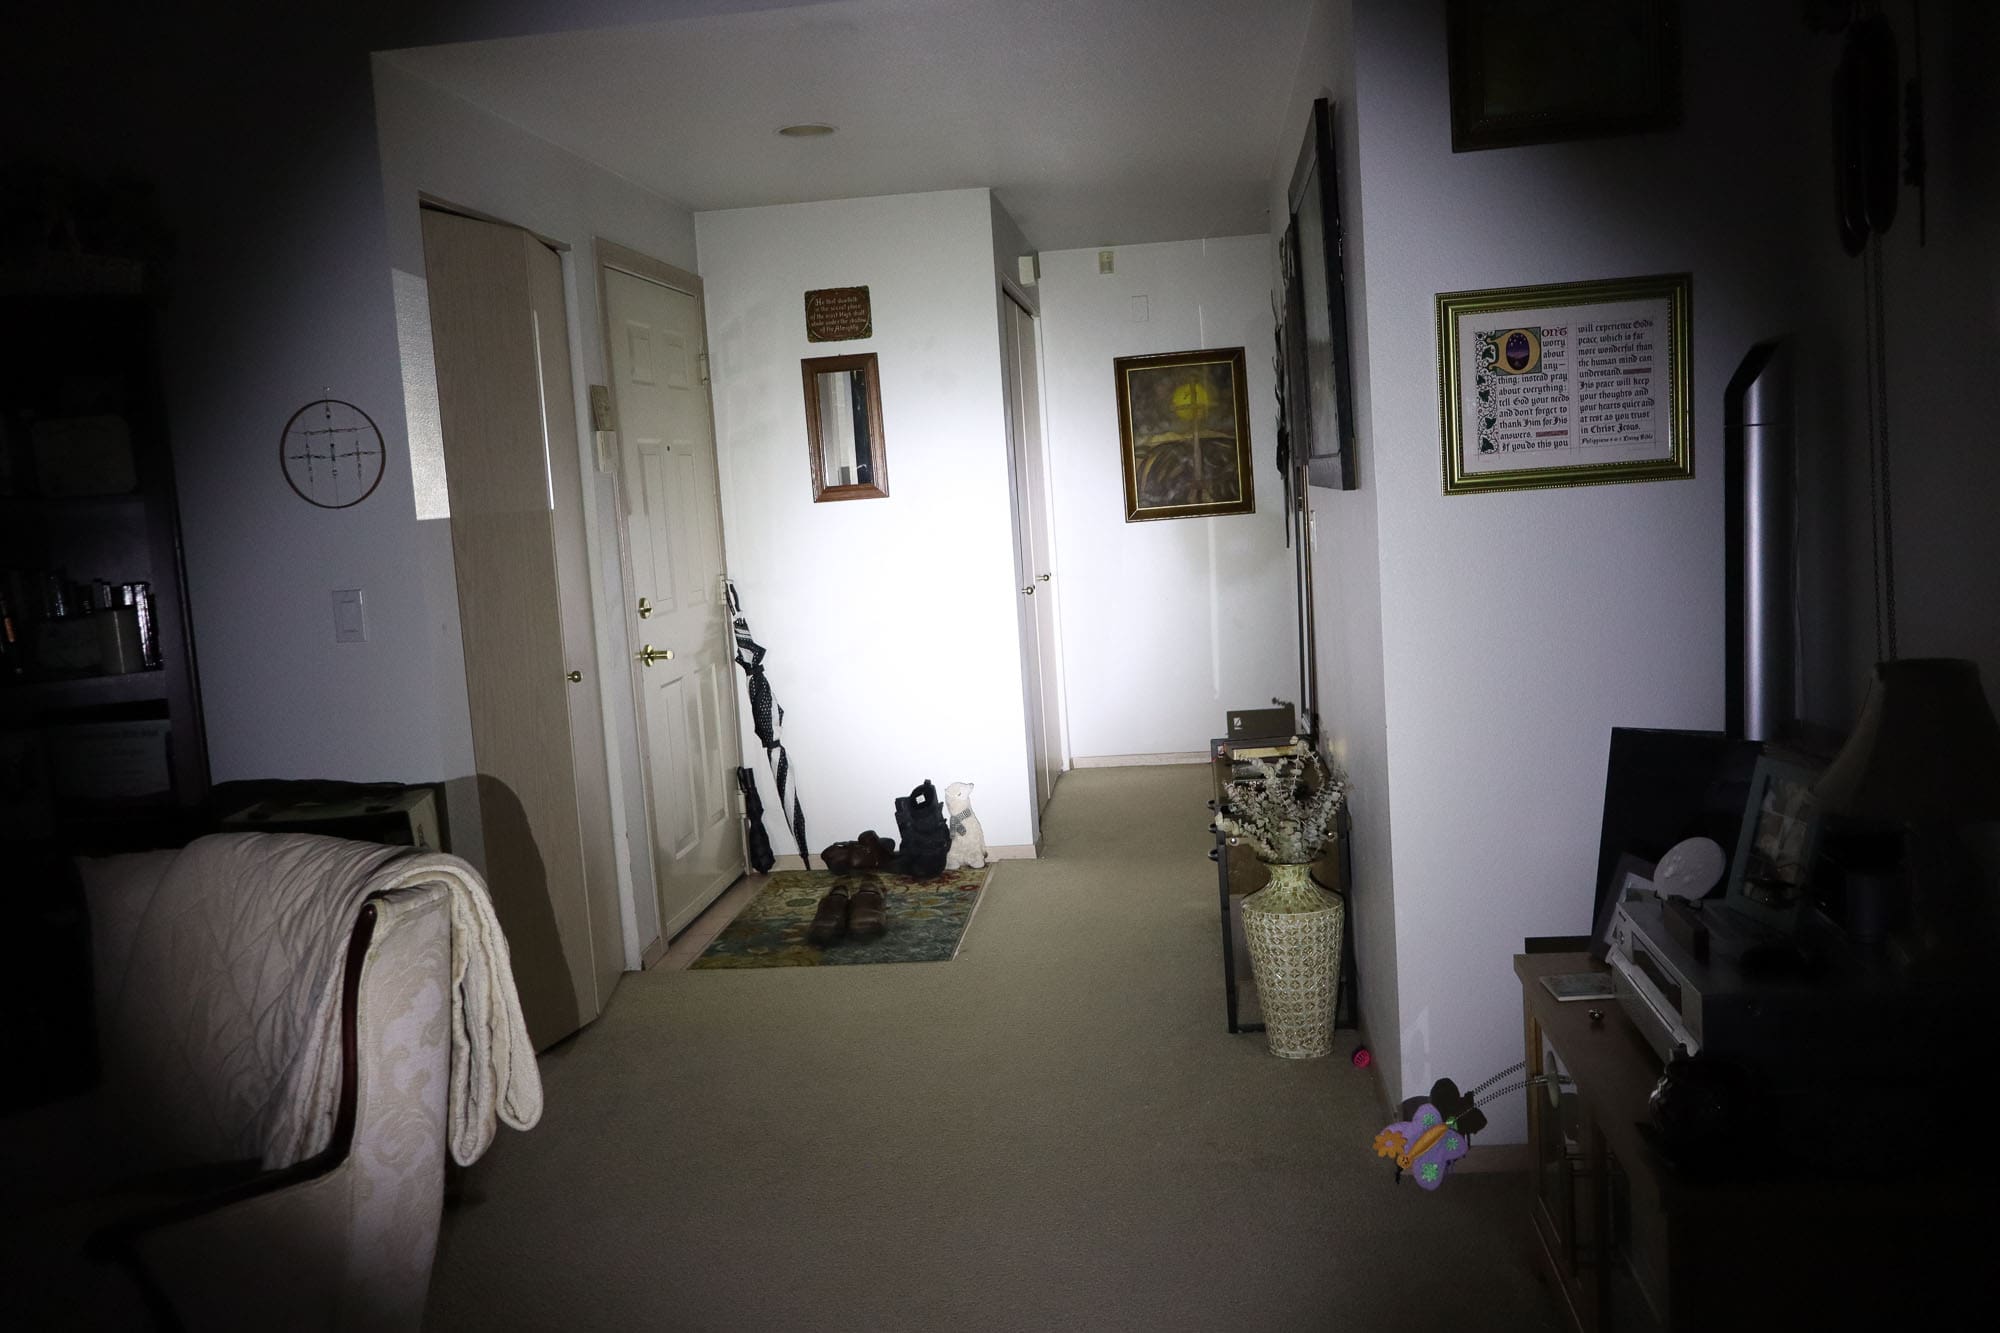
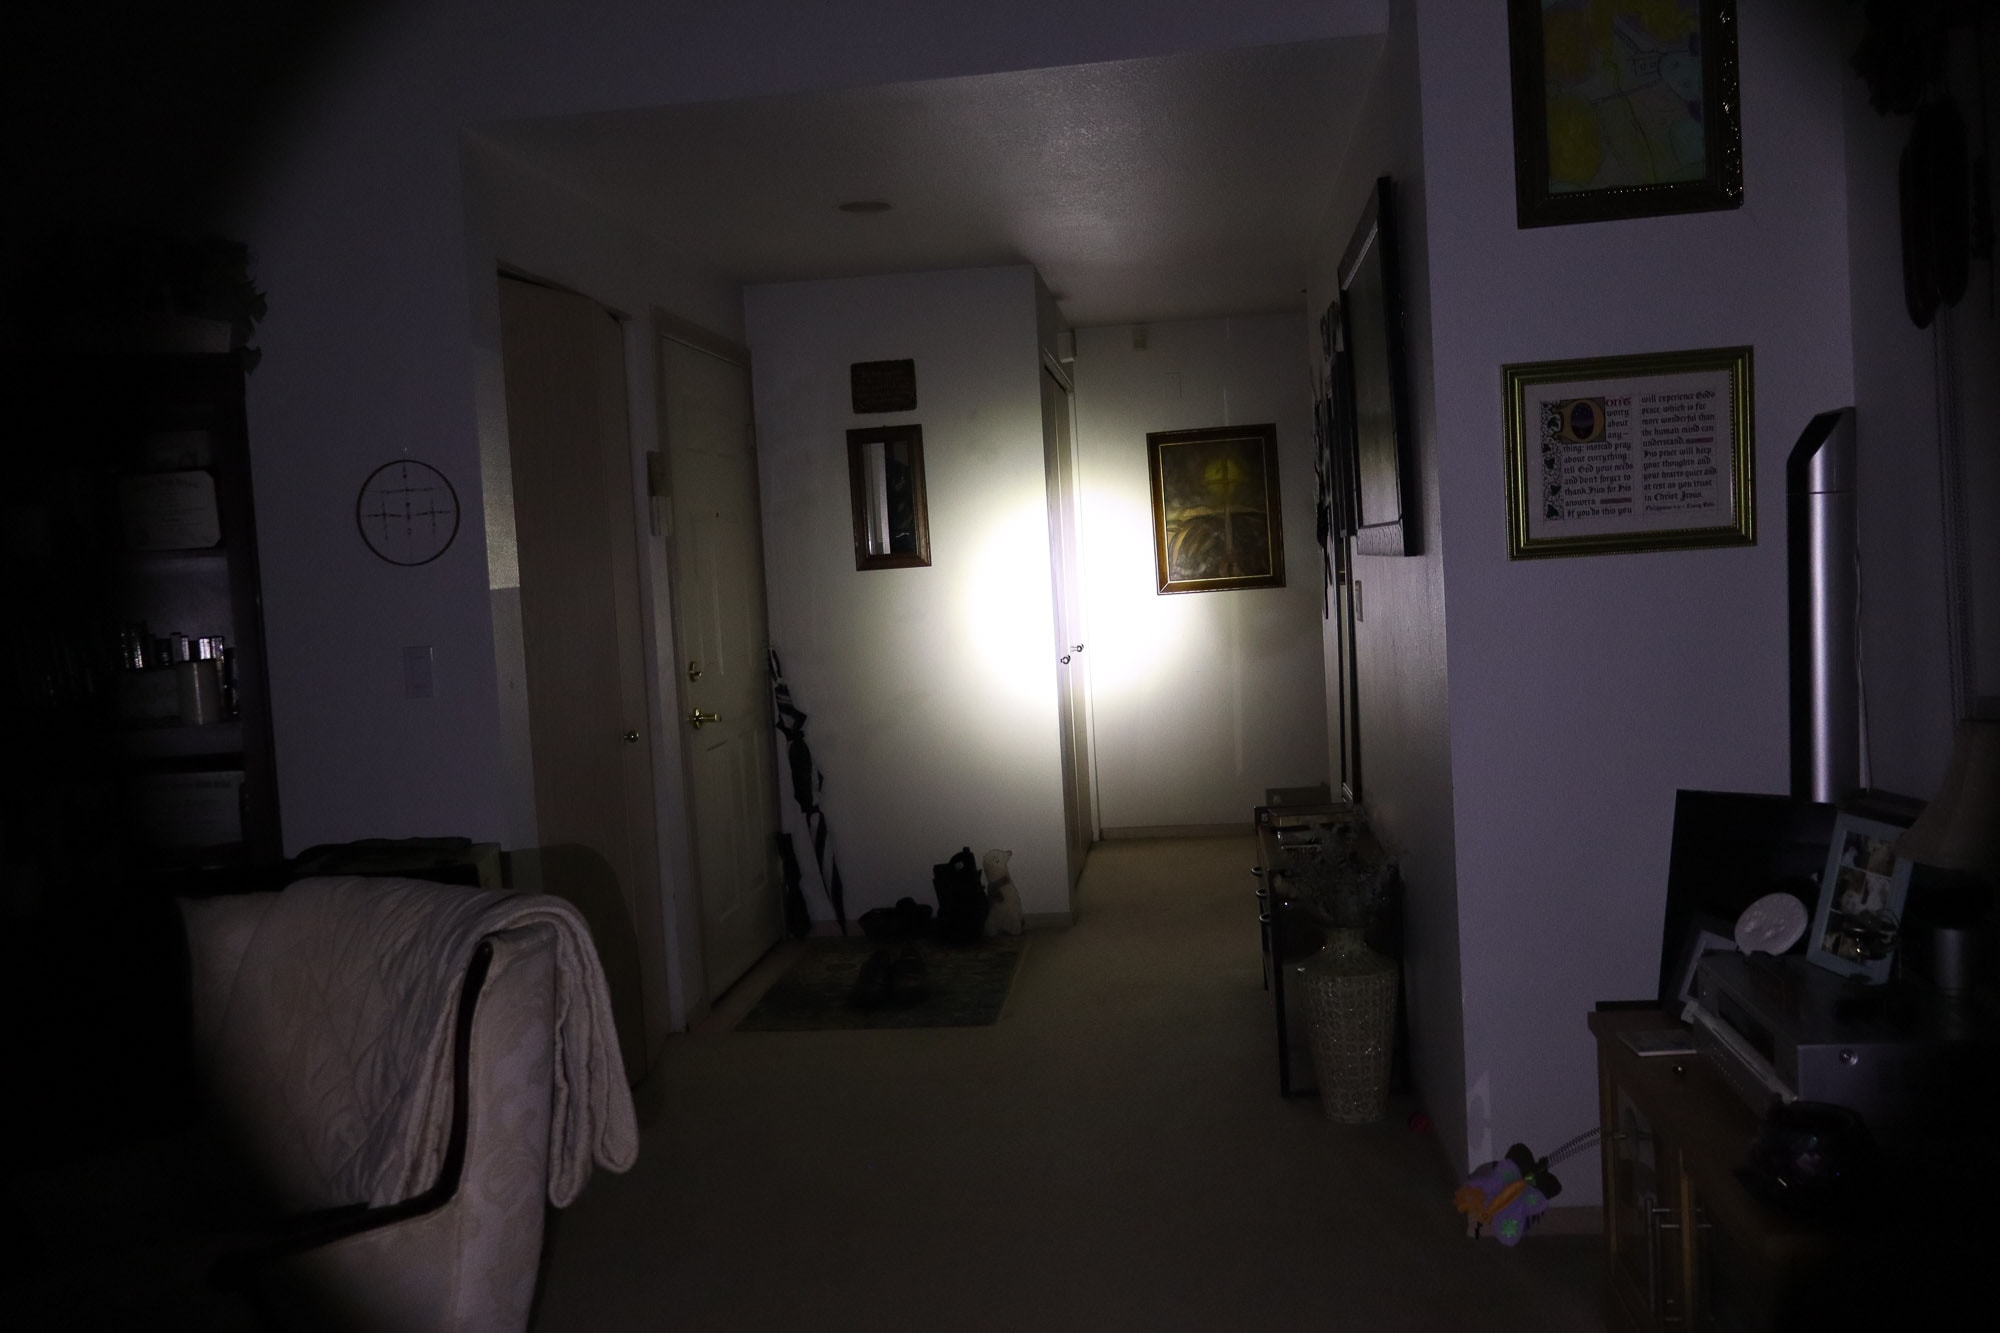
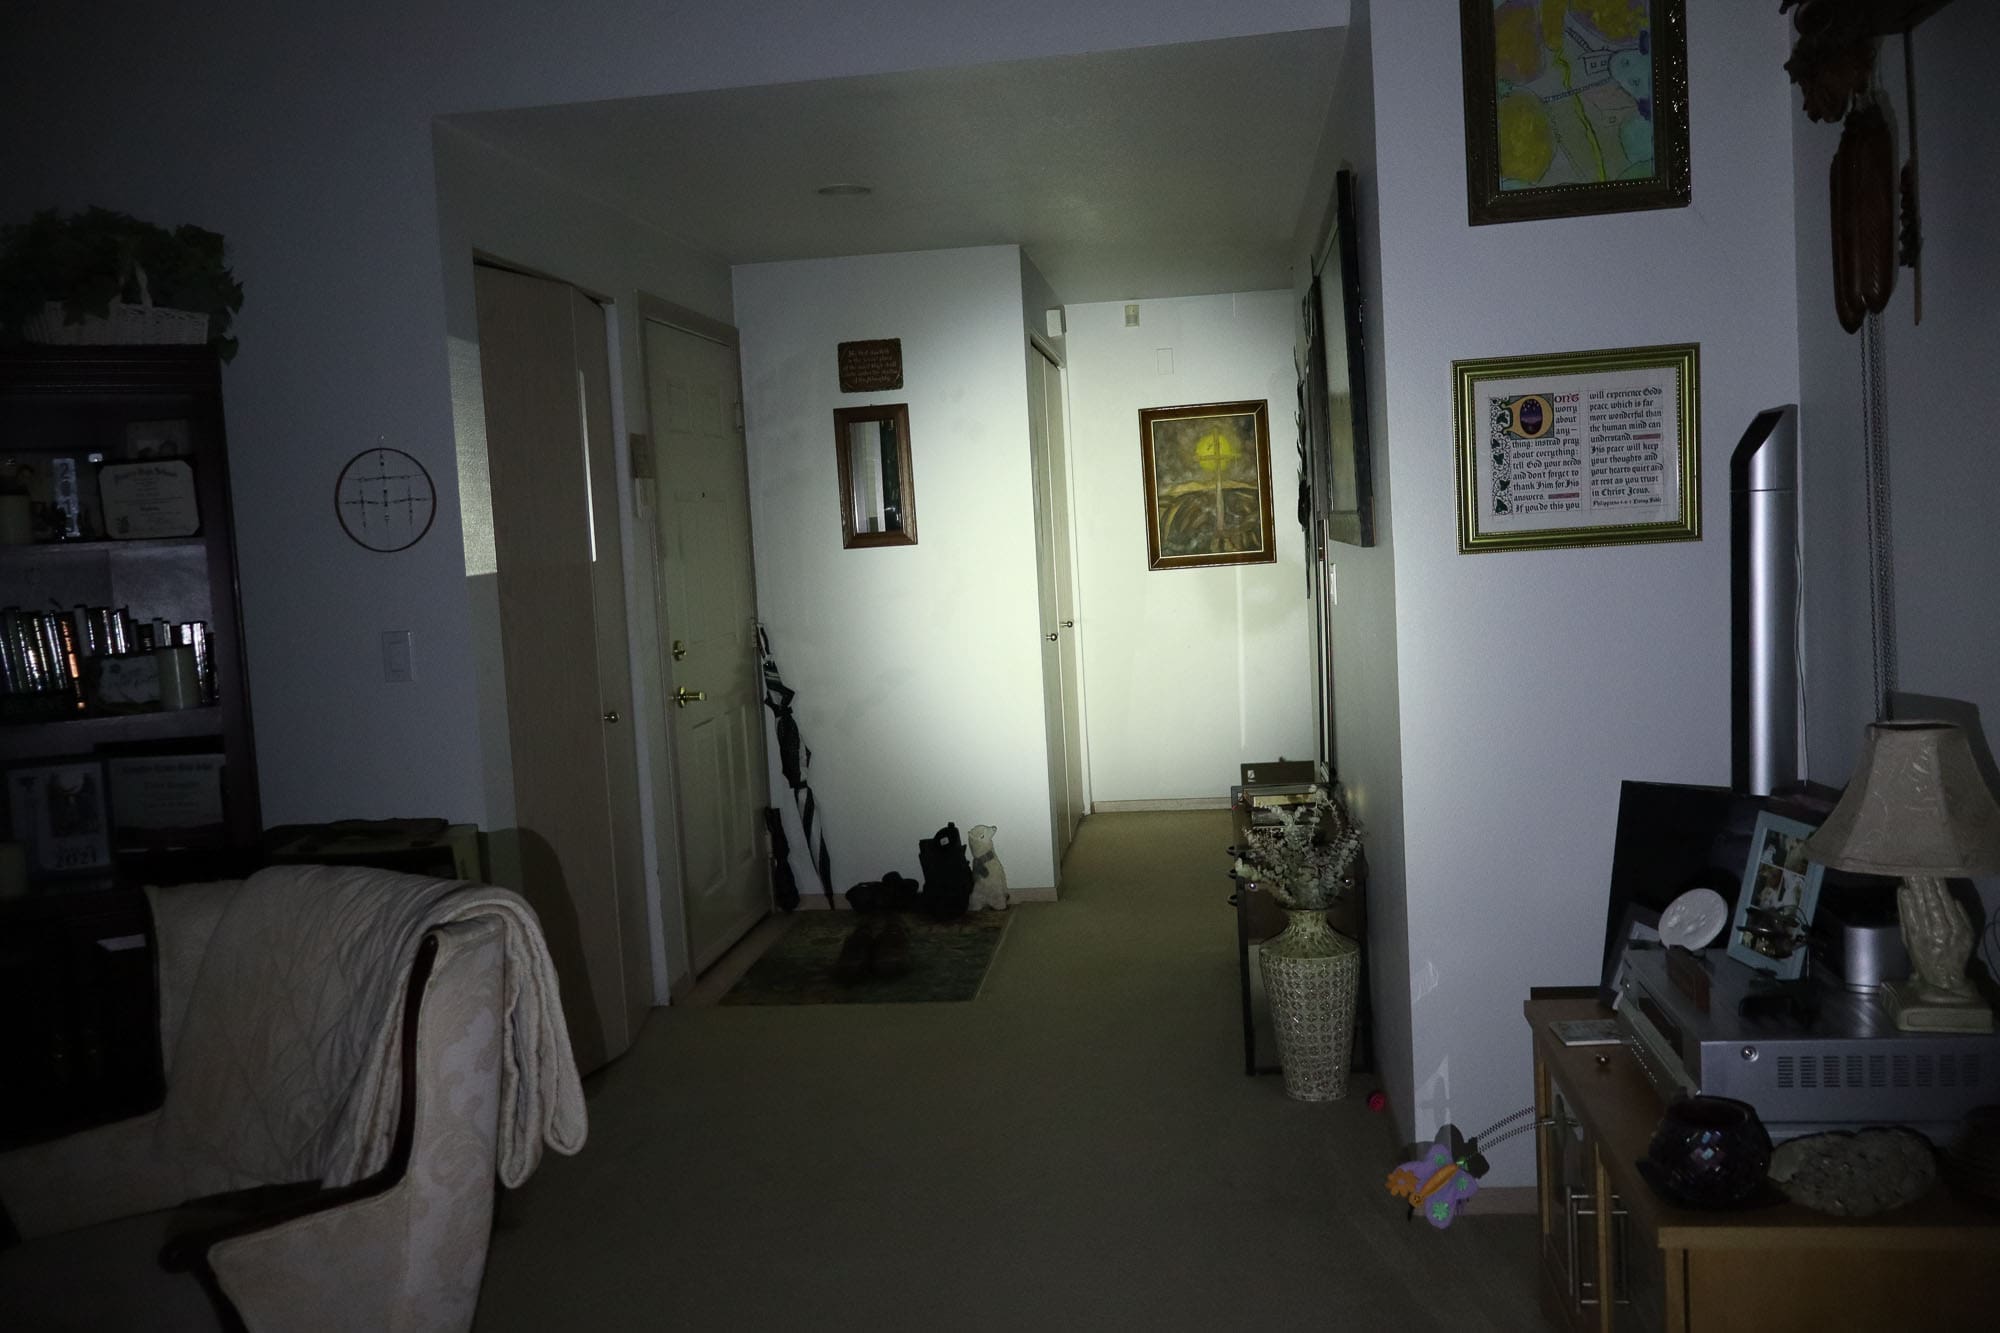
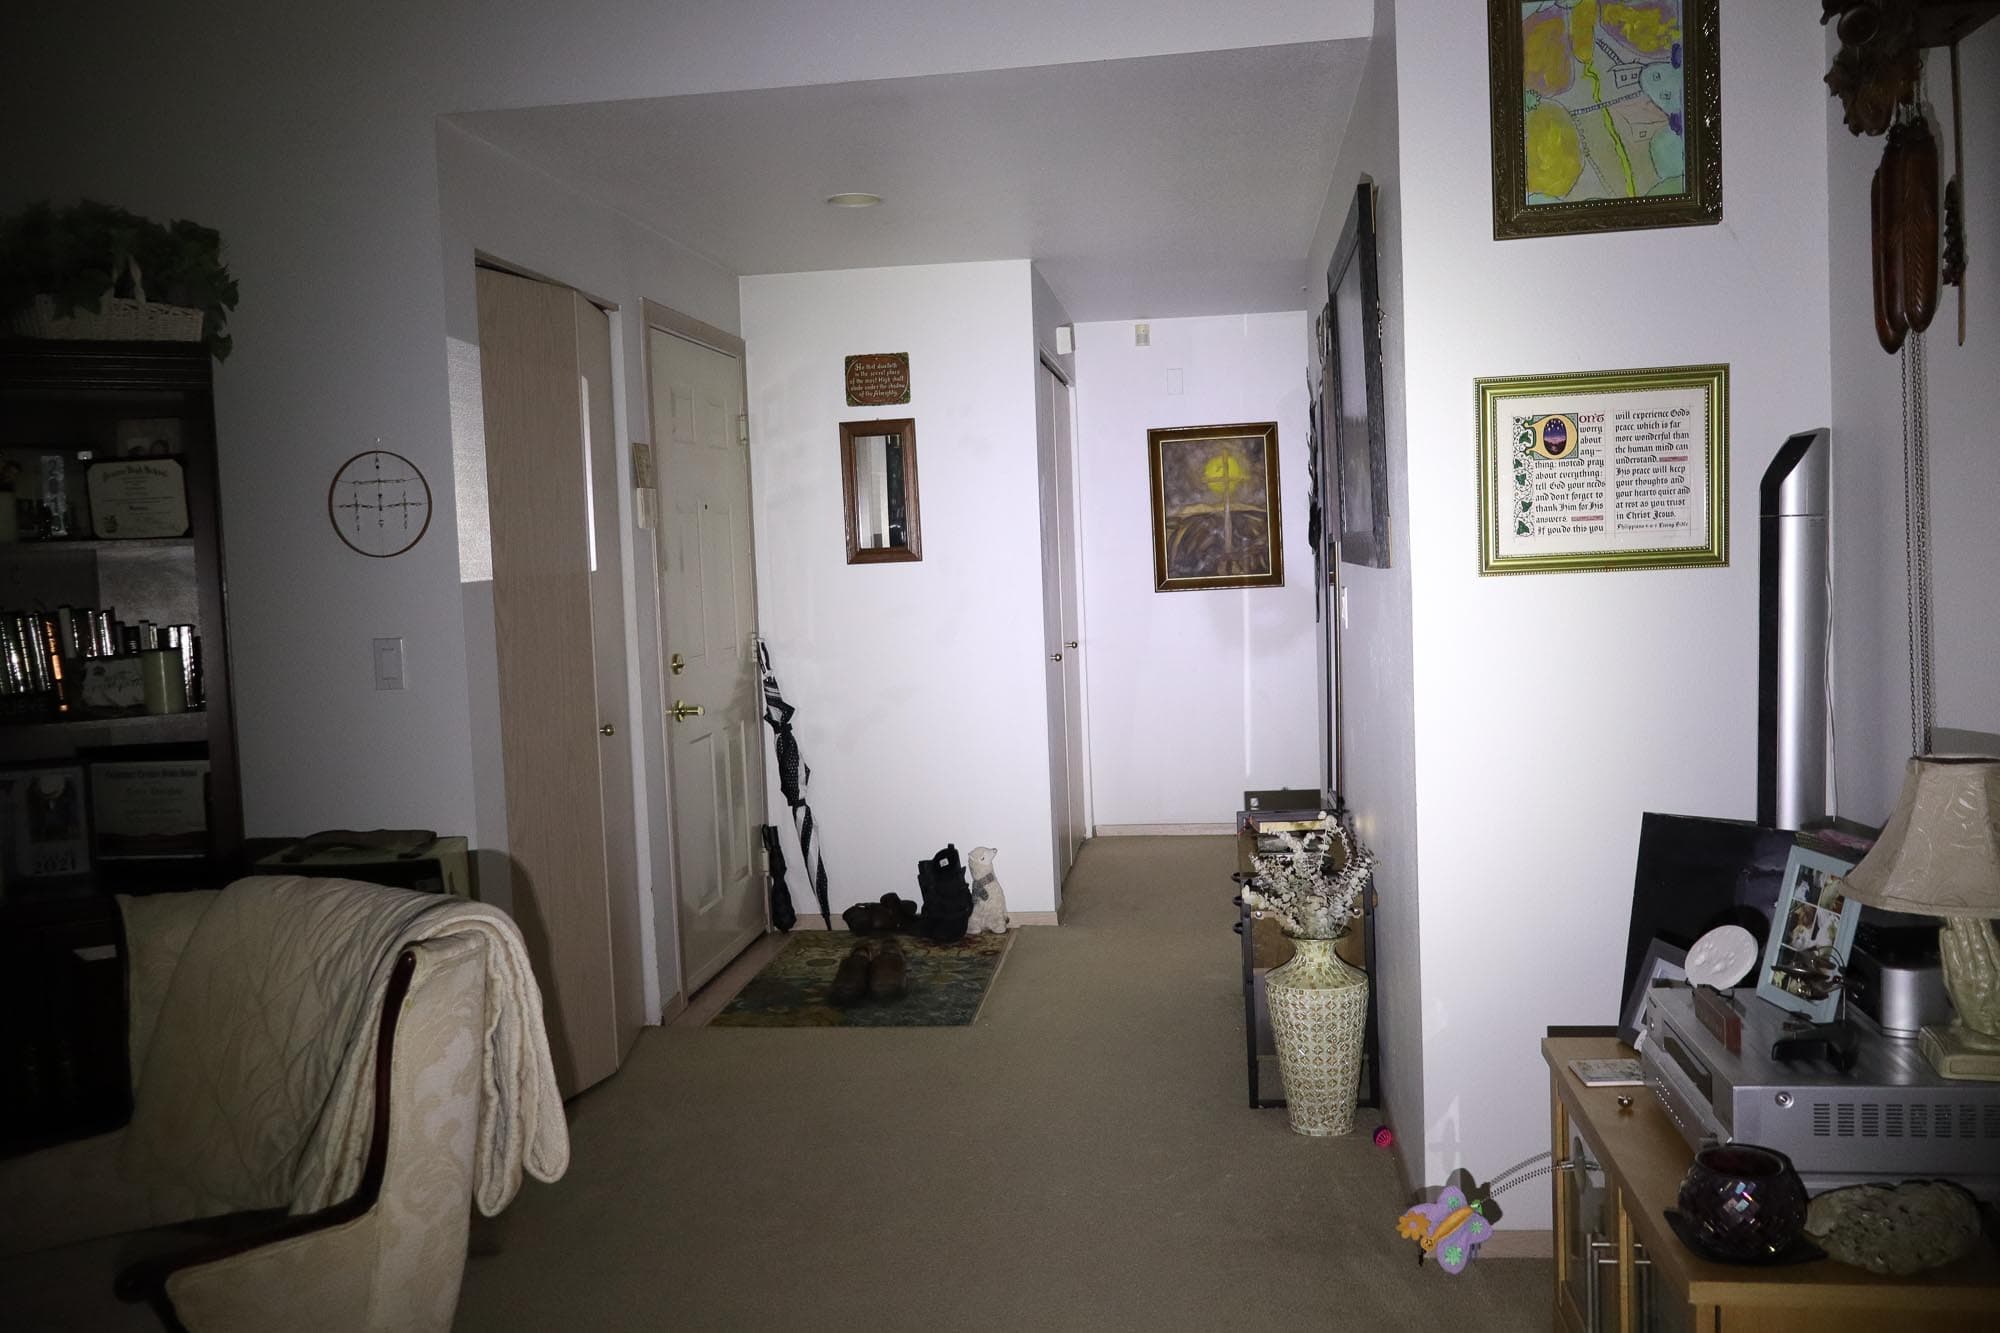
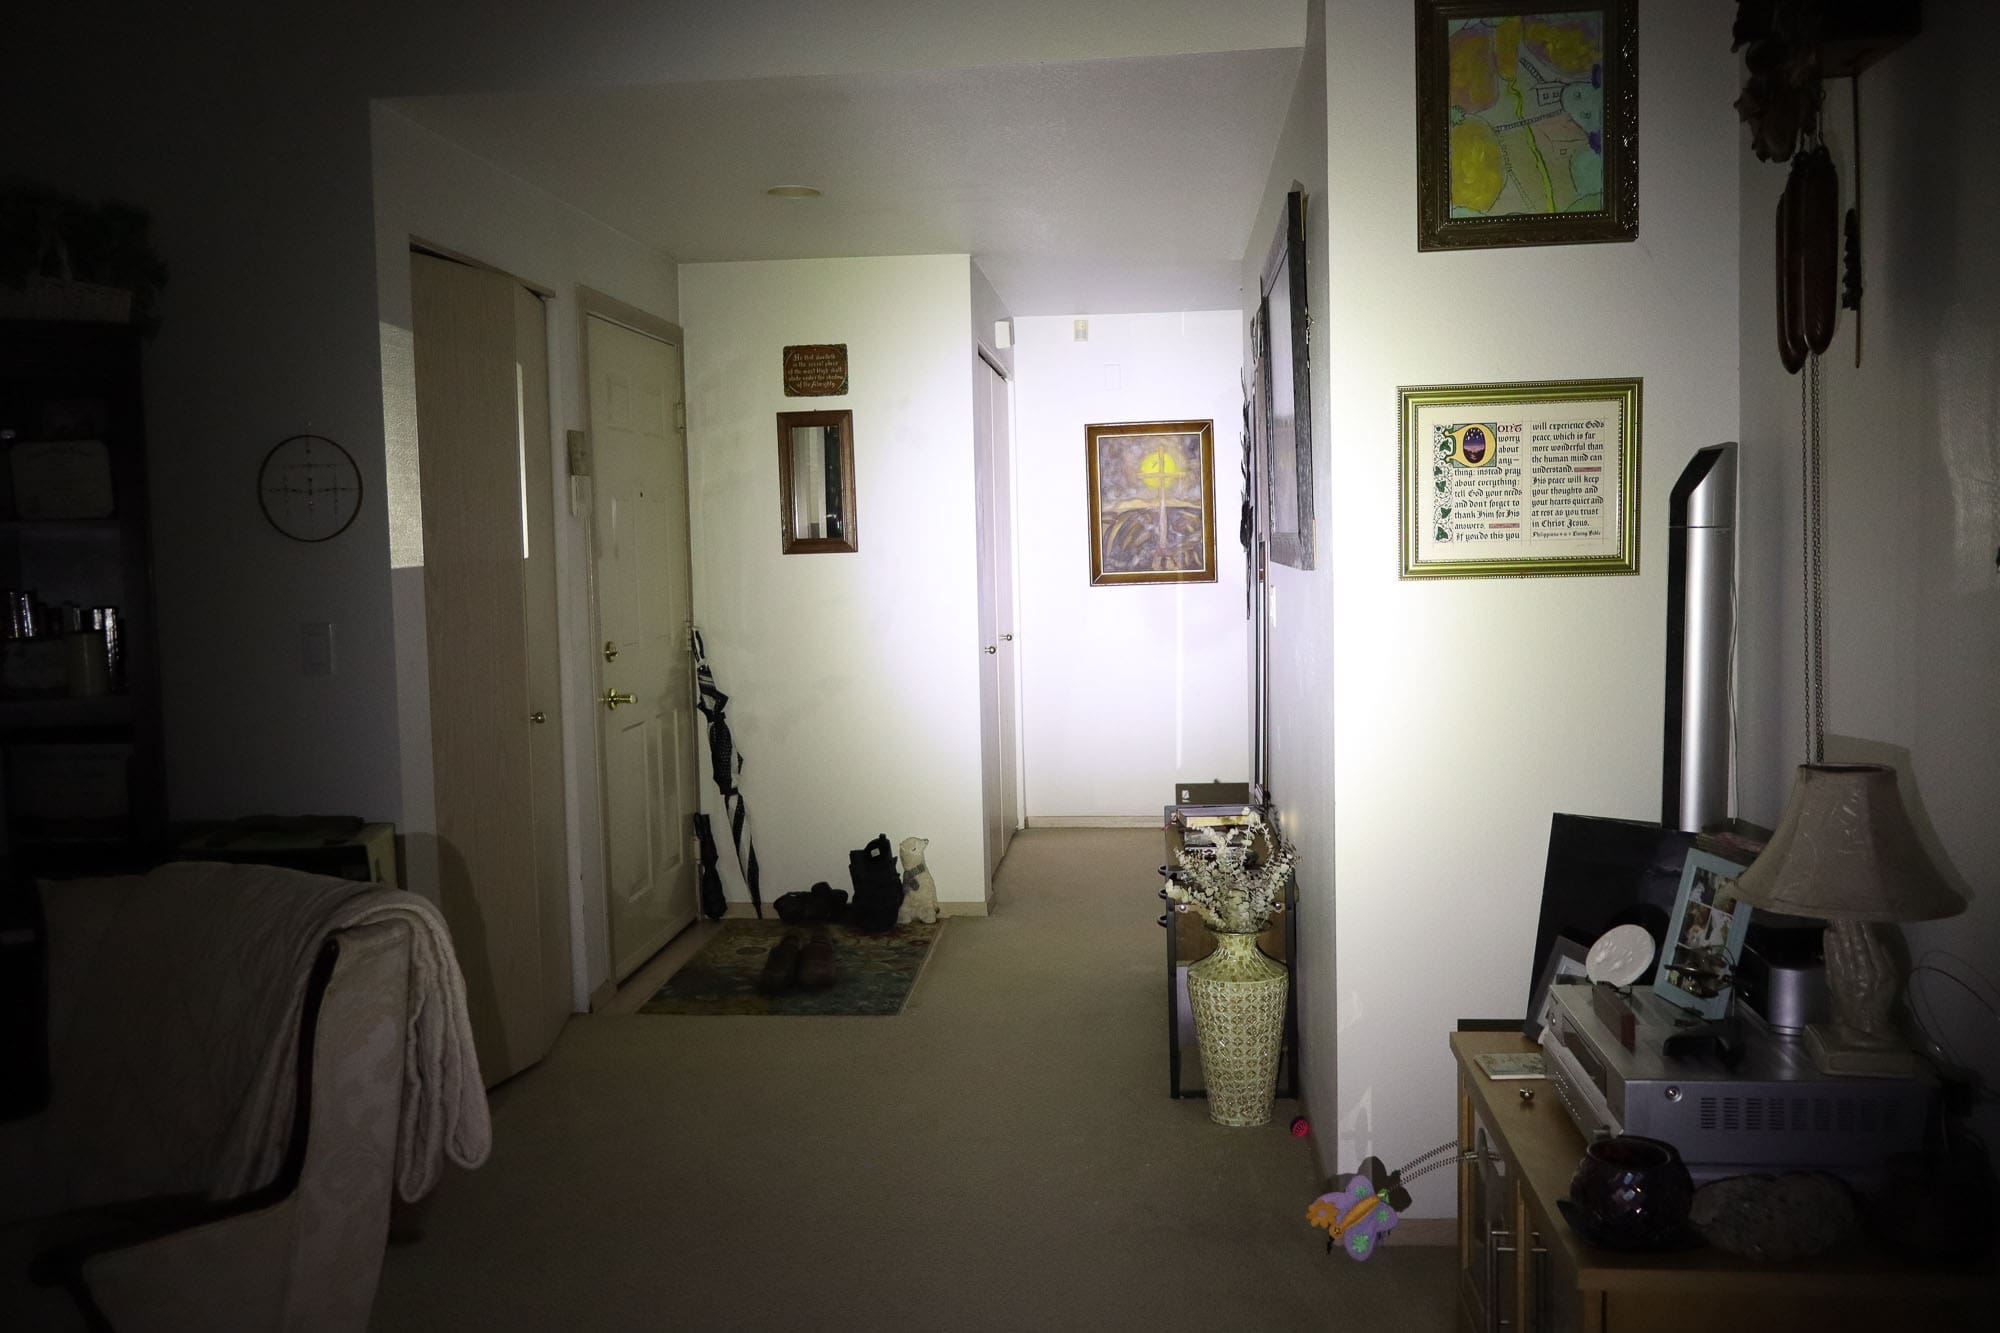
Beamshots
Camera settings and distance: All photos taken with a Canon EOS R100 and Canon R-FS 18-45mm STM lens. The indoor photos settings were set to 1/25s, f4.5 ISO 1600 and 5000K WB. The outdoor photos were taken at 0.4s f/4.5 and ISO 1600 at 5000K WB. The fence is 40 meters away.
Beamshots of the following flashlights compared:
Indoors:
- Ripsshine ML1
- Sofirn SP10 V3 (High mode on 14500)
- Rovyvon H3 Pro (High mode on internal li-ion battery)
- Fenix E09R (Burst mode)
- Fenix E03R V2 (High mode)
Outdoors:
- Ripsshine ML1
- Thrunite Archer 2A V3 (High)
- Fenix LD22 (High)
- Rovyvon H3 Pro (High)
Please note that the following beamshots are mainly intended to showcase the beam pattern and beam quality, rather than overall performance. These images are typically taken directly after activation, and in different seasons or weather conditions, and therefore do not fully represent its overall performance. For accurate performance metrics, such as output, beam distance, and runtimes, you need to look at the performance section of this review.

Disclaimer: This flashlight was sent to us for review at no cost by Ripsshine. We have not been paid to review, nor have we been holding back on problems or defects.
Final Verdict
Pros
- Nice build quality
- Decent output
- Can be disassembled
- Onboard USB C charging
- Great beam distance
- Fidget spinner
Cons
- Didn’t meet output or beam distance specs
- UI needs refinement
- Switch needs work
- Could really benefit from a 10440 cell
Explanation on star ratings:
1: Avoid: a match would be a better choice – 2: Poor: significant defect or issues; almost unusable – 3: Average: some defects or issues; but still usable 4: Good: recommended (minor issues) – 5: Great: highly recommended

4.5 stars: ★★★★⋆
While our star rating provides a reliable indicator, we encourage you to read the full review to make an informed decision based on your own needs and preferences.
The notion of ‘nothing’s sacred’ has trickled down into the flashlight domain, where designs sometimes ‘trade hands’ like hand-me-downs amongst siblings. It’s not a new thing by any means. Companies collaborate/partner with each other under ODM/OEM agreements to produce like-in-kind products with unique features, branding, etc. Just enough to keep everything legal-like and infringement-free.
Ripsshine falls into this oikos, and that’s a good thing. I like the true onboard USB C charging, the stainless bezel, and while more of a superfluous feature, the fidget spinner with glow tube holes is groovy. I like the simplicity of this thing. What sells this light though is the throw/size ratio which is absolutely off the charts. It’s pretty remarkable to see a keychain dangler with 250+meters of beam distance at respectable output levels.
The performance? Take that with a grain of salt since it’s a tiny battery, but for what it is, it’s not bad at all. Misses? The switch could use refining for user-friendliness. The UI: Hold for off isn’t bad, but it would be better if it was actually 1 second (like the manual says) and I think a Medium mode would be helpful also.
If Ripsshine is reading this, please make a 10440 tube for this as it would help the output and runtimes a lot. So, is this Ripsshine ML1 a legit GT Nano analogue or a poser? I think it’s a passable stand-in. It adds some creature comforts the Nano doesn’t have like onboard USB C charging, stainless bezel, and a simple UIl, so if you care about those, by all means pick up a ML1.
However, the GT Nano offers larger battery options, so if you want longer runtimes, and an enthusiast UI (the Nano has NarsilM) go for that one. 4.5 stars for the ML1.
Buy your Ripsshine ML1 here
1lumen selects and reviews products personally. We may earn affiliate commissions through our links, which help support our testing.