1lumen selects and reviews products personally. We may earn affiliate commissions through our links, which help support our testing.
Skilhunt M200 v3 review
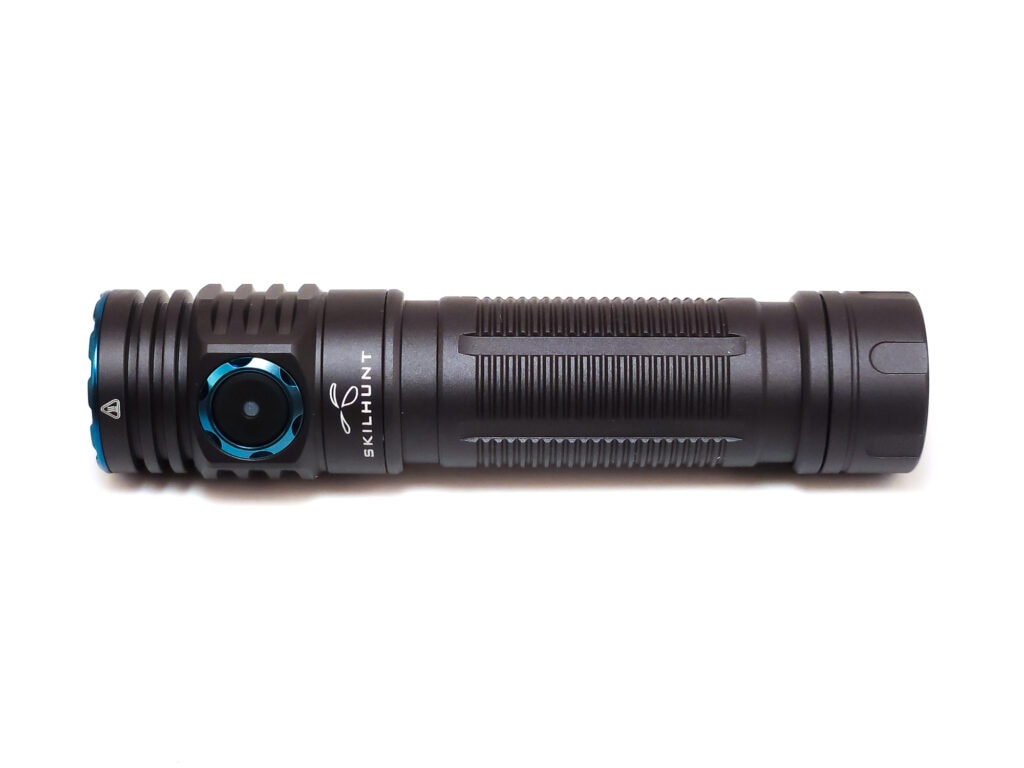
Skilhunt M200 v3 specifications
| Brand & Model | Skilhunt M200 v3 |
|---|---|
| Flashlight category | EDC flashlight |
| LED | Cree XP-L2 6500K (as tested) Nichia 519a 4500KSamsung LH351D 4000K |
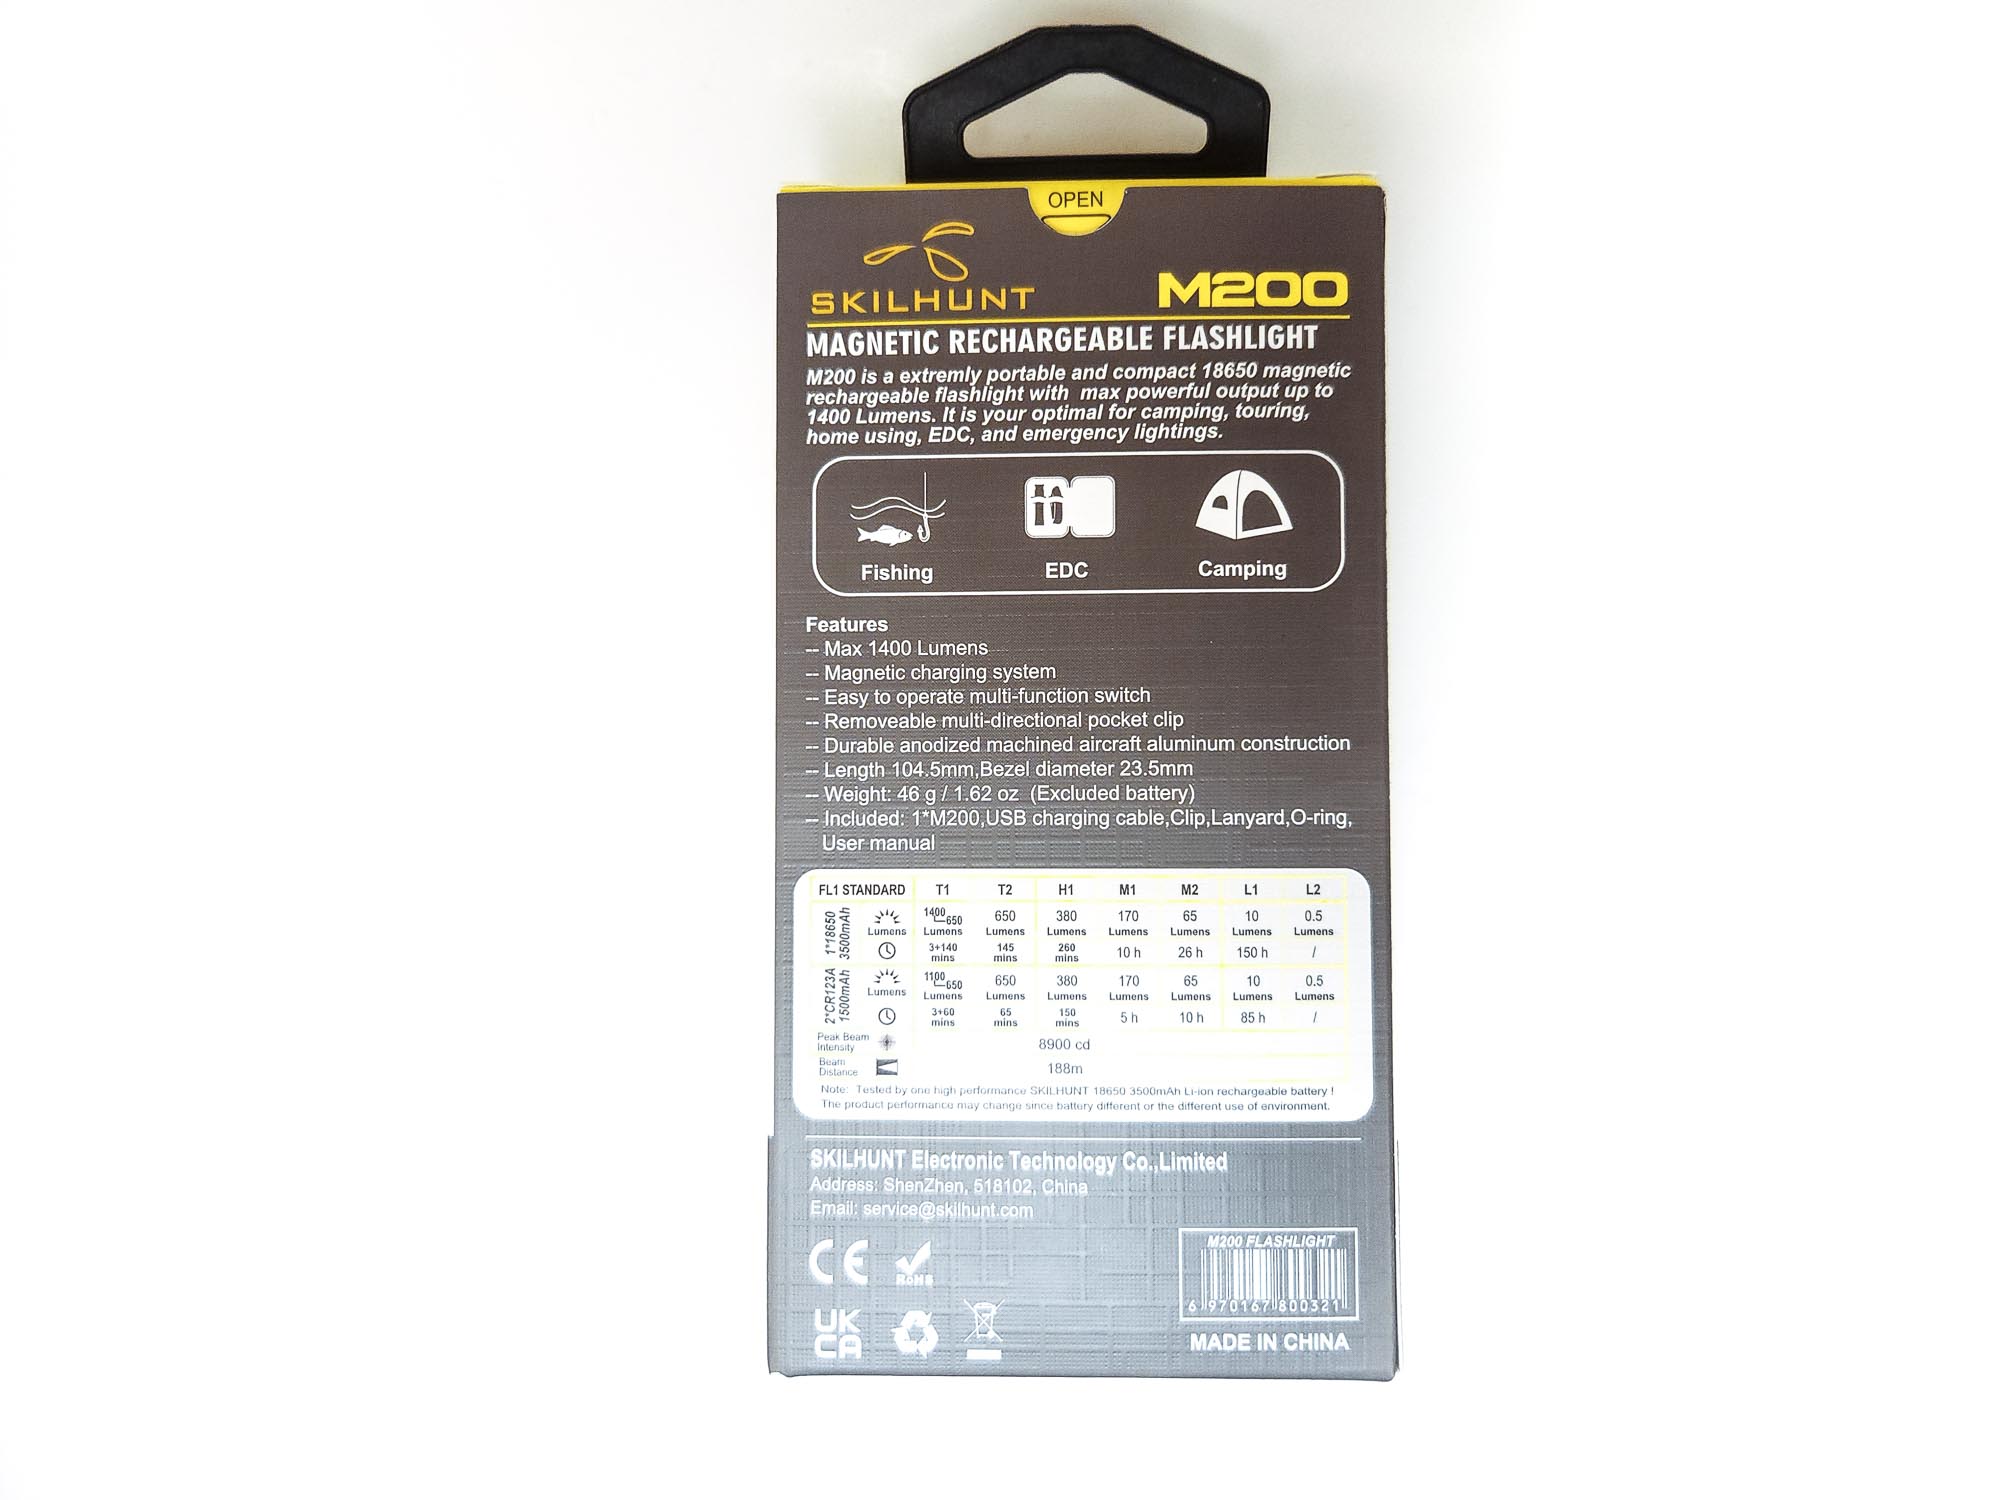
| Max. output | 1400 lumens |
| Max. beam distance | 188 meters |
| Max. beam intensity | 8900 cd |
| Battery config. | 1*18650, 2*CR123A |
| Onboard charging | Proprietary magnetic for 18650 |
| Modes | 7 |
| Blinkies | Strobe, SOS, beacon |
| Waterproof | IPX8 |
| Review publication date | December 2022 |
Introduction:
Skilhunt is a manufacturer of many solid EDC, keychain, and right-angle headlights, the most popular of which include the H04 headlamp and M150 small EDC light. The M200, middle child between the M150 and M300, is the second in that line to receive the v3 treatment. Two of the main differences between the previous version include new emitter options (v2 only had an XP-L and LH351D) and a new UI. The customizable v2 UI was pretty highly favored among enthusiasts, so how does the new UI compare? What about the rest of the light? I’m excited to find out and I hope you are, too.
Package quality.
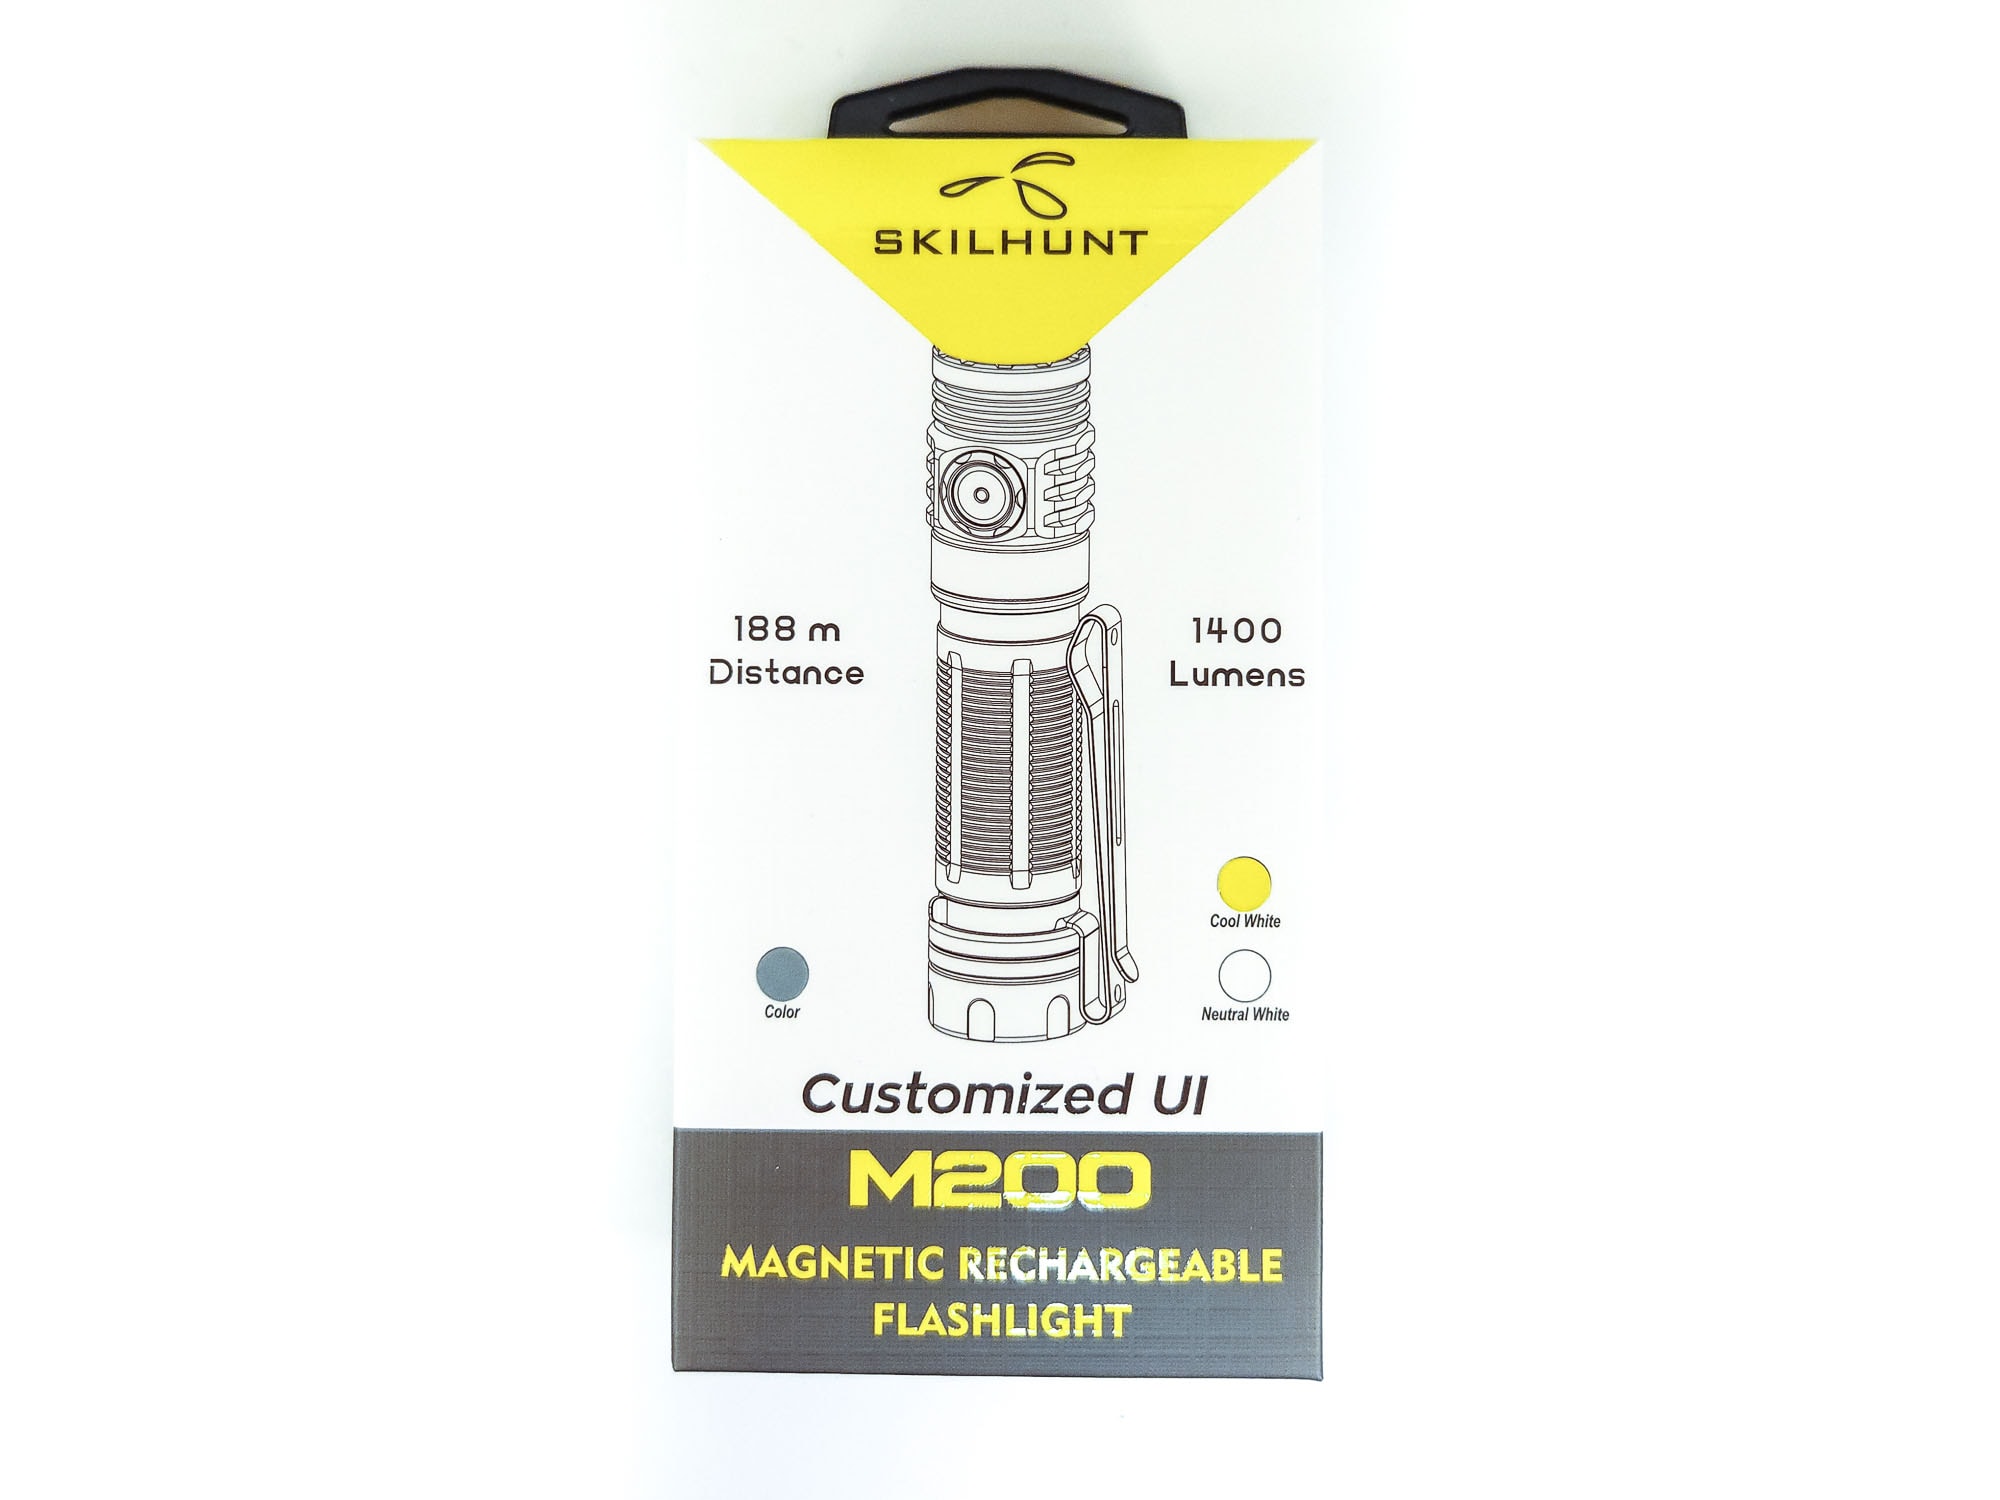
The Skilhunt M200 comes in a very professional-looking white, gray, and yellow Skilhunt box that would be right at home in a physical store. There’s a drawing of the light on the front along with stickers denoting the light’s color and emitter choice, while the specs and plenty of other information are included on the back. The sides only have the Skilhunt’s URL and a QR code. When you open it up, there’s a nice pull tab on the cardboard insert which will help you remove that and the plastic insert which cradles the light and bears Skilhunt’s logo. Usually, manufacturers will just toss the accessories into the back of that plastic insert, slide it into the box, and call it a day, but Skilhunt wraps them up neatly and slides them into a box attached to the cardboard insert. This is a nice touch and shows that we’re not dealing with a budget light here.
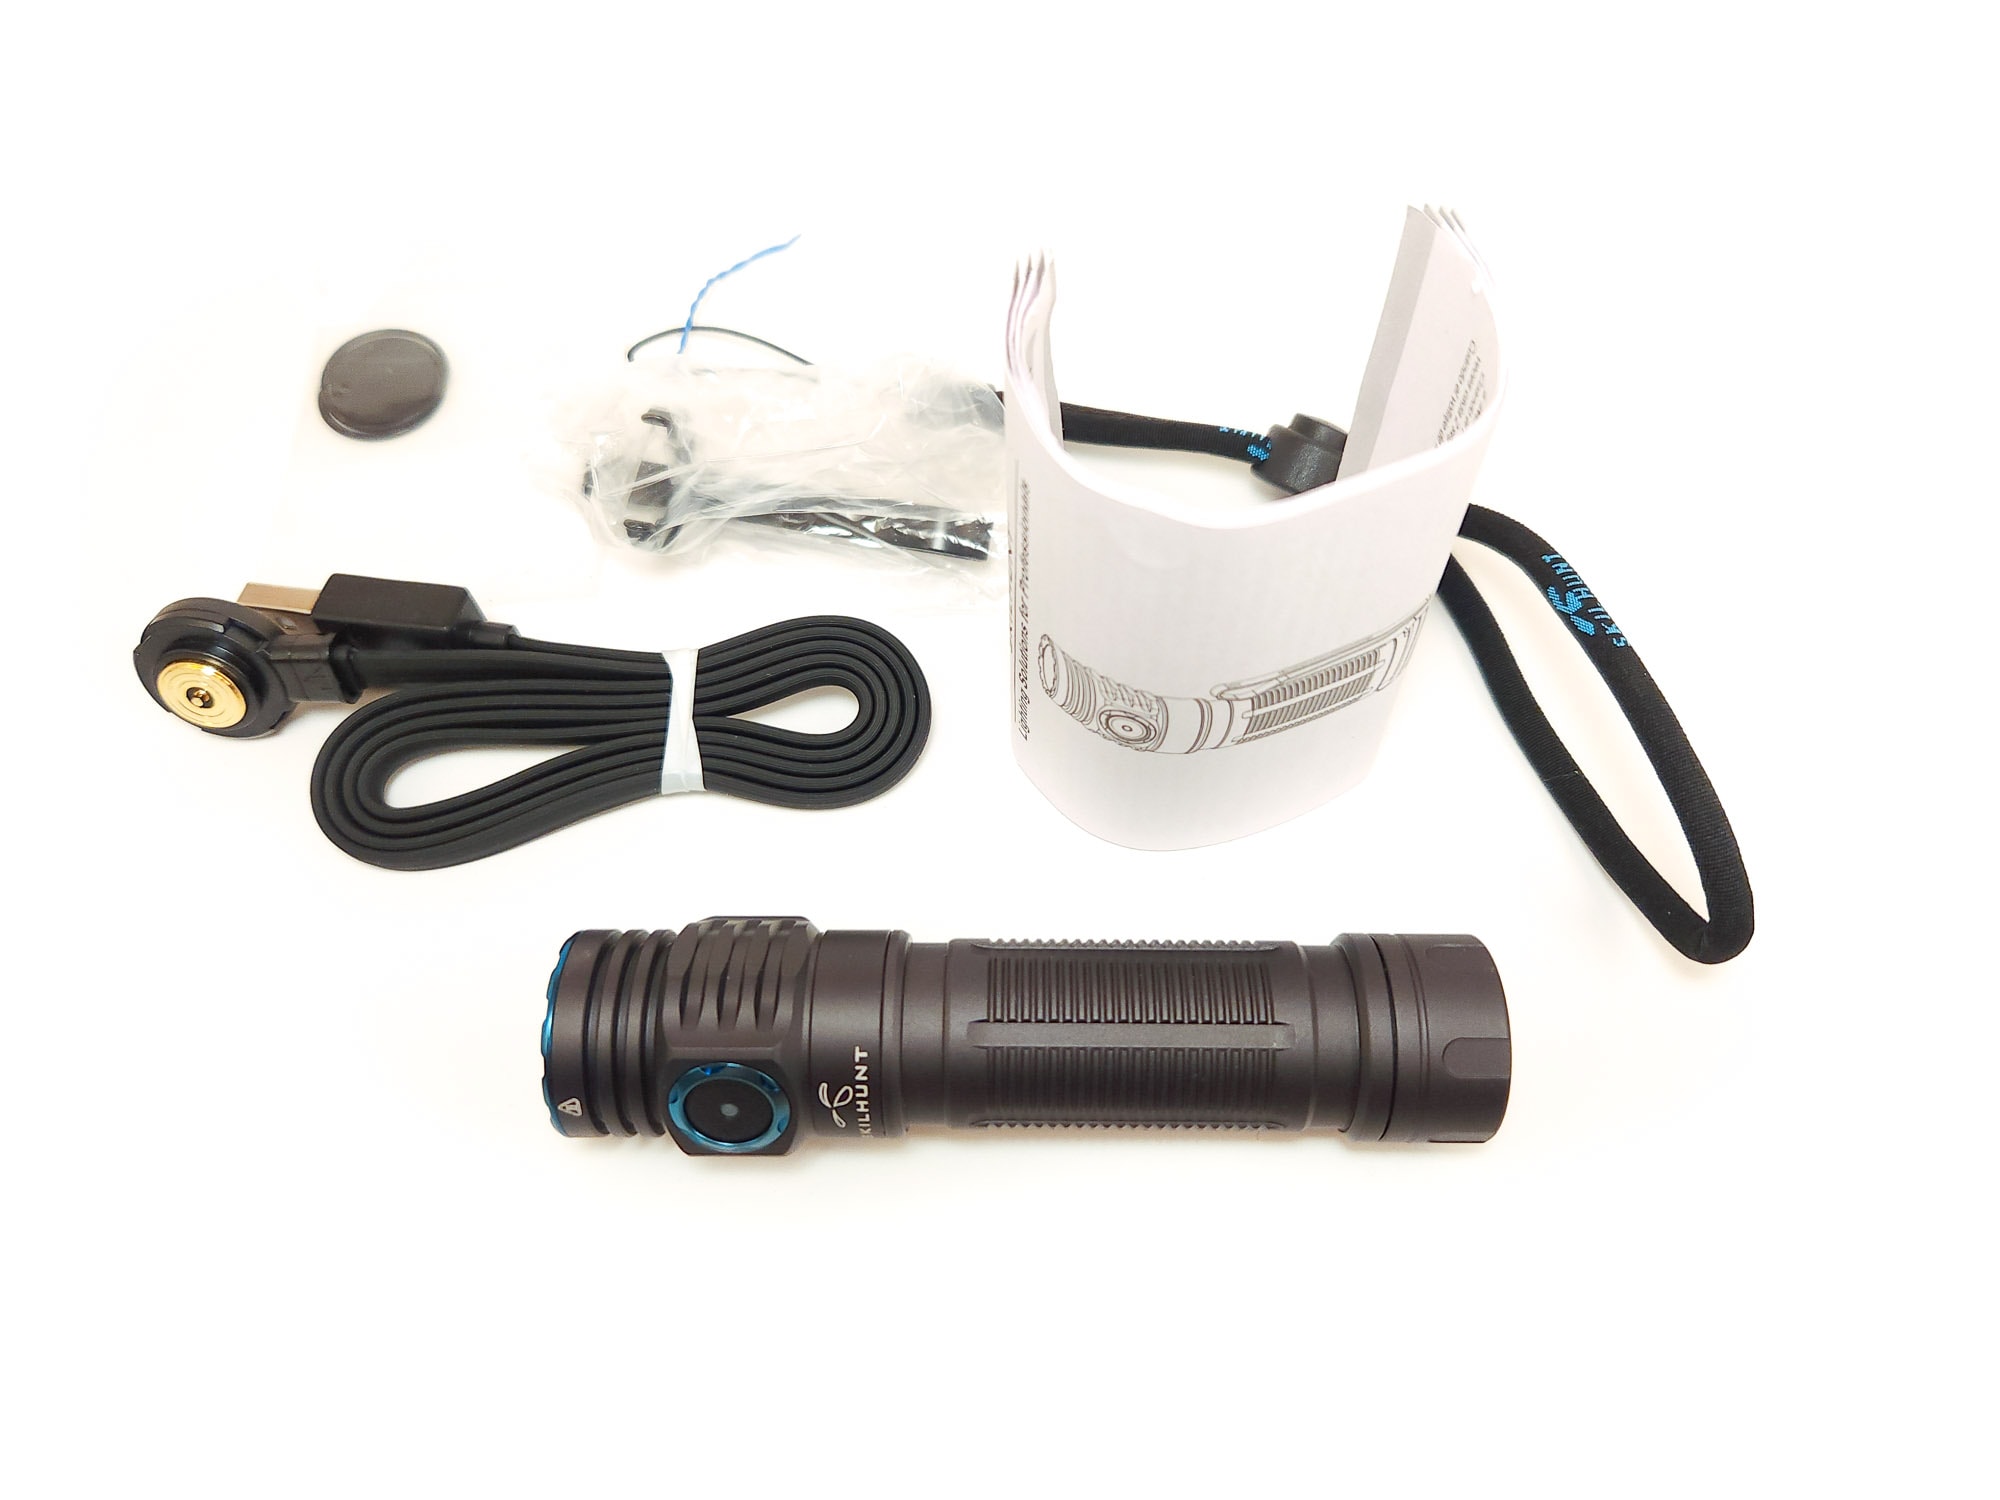
The contents of the box are:
- Skilhunt M200 v2 with clip installed (and optional battery)
- USB magnetic proprietary charger (MC-20)
- Lanyard
- Plastic zip top bag with two o-rings and a rubber blank to replace the tailcap magnet
- Instruction manual
Flashlight in use
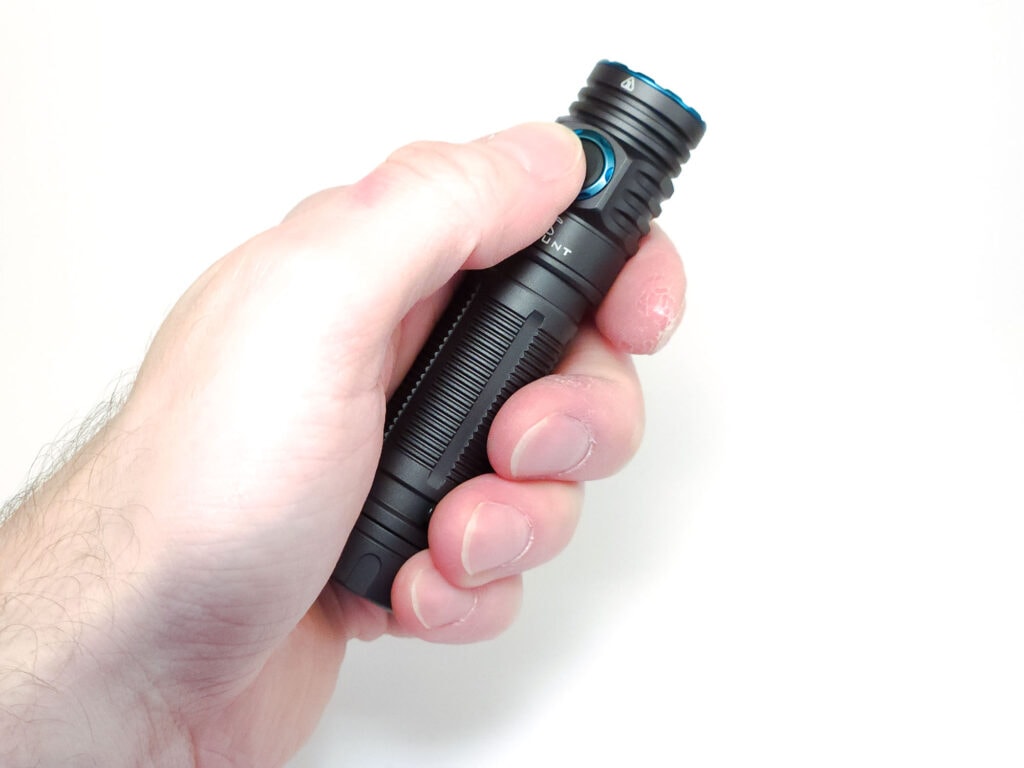
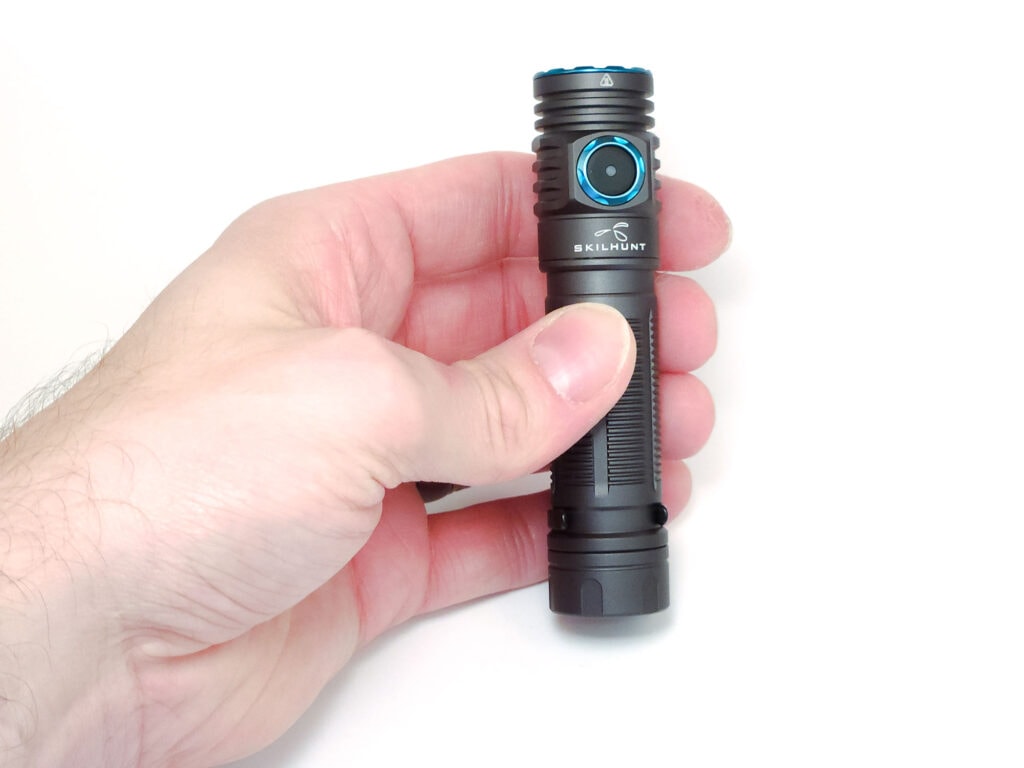
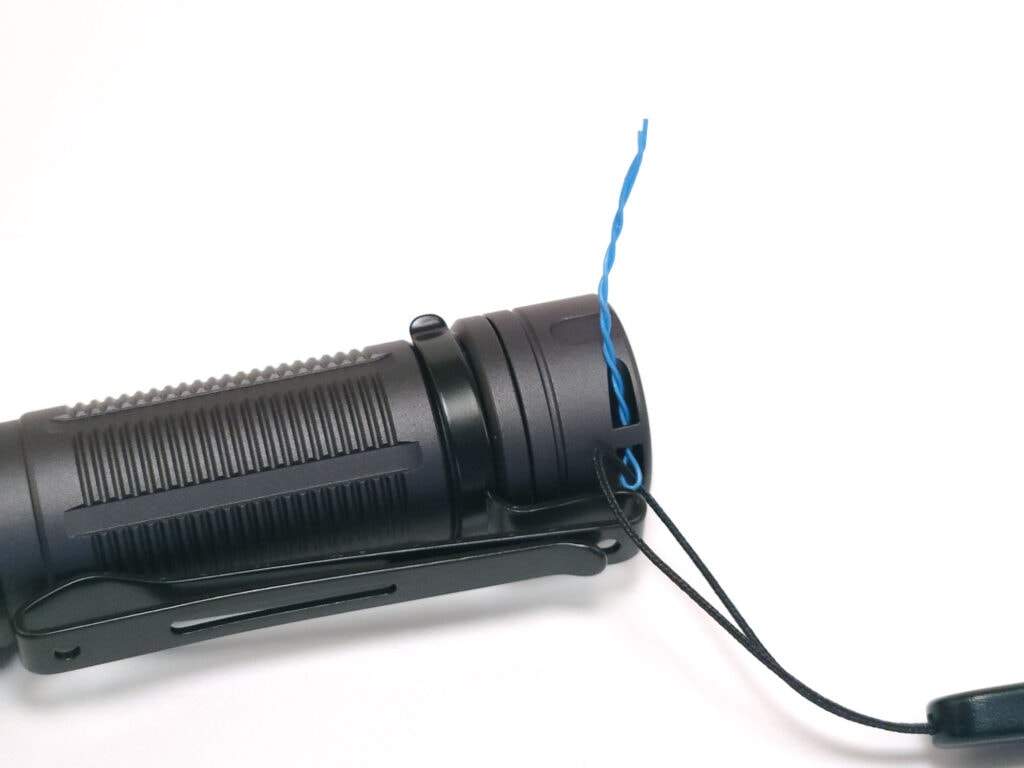
There are a number of improvements to the M200 v3 over the v2, one of which is a new and improved clip. This clip is two-way and deep carry, and resembles the one from the M150, but it’s one piece, so it doesn’t have the flange on the end for your pocket to catch on. The internal opening is also wider, allowing for it to be clipped to thicker fabric. This, combined with the overall compact size compared to other 18650 lights (for example, those with tail switches) makes it fairly easy to pocket. I won’t say it disappears into your pocket, but it’s definitely kept out of the way. Do note that the magnetic charging port is on the rear of the head, so if you have keys or something else which might stick to that, just be aware. The body of the light has identical grooves on either end, so you can attach the clip on either side, and there are small holes in either end to thread the lanyard through if you wanted to, too. While the clip is snug around the body, the arms are thinner than the grooves on the body, so there is a tiny bit of play up and down when it’s attached.
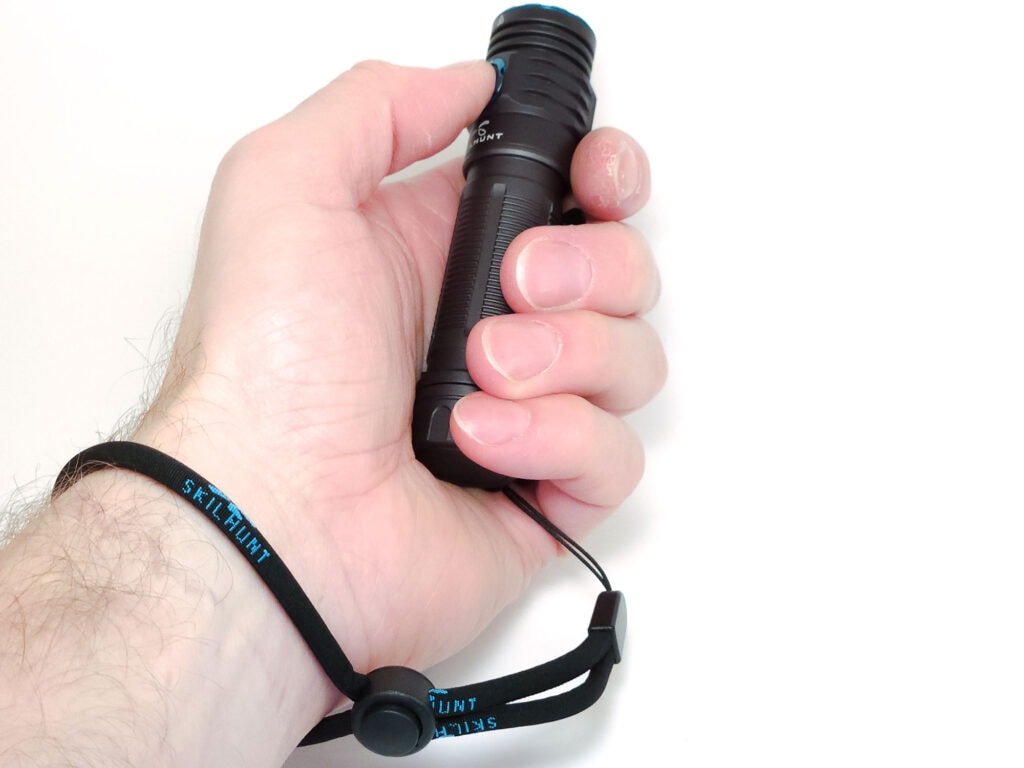
Skilhunt included their standard lanyard with the M200. It’s a little more fancy than most brands, as it has Skilhunt’s branding on it, along with a sliding cinch to tighten it around your wrist. But the thing that stands out to me about Skilhunt’s lanyard is that they include a very small twisty tie at the end. It is completely twisted up into a single filament, if you will, to help you thread the lanyard through the small side opening in the tail cap! It’s just a really nice touch, since lanyard holes on any light can be tiny.
Perhaps the biggest change in v3 of the M200 is the UI. Previously, Skilhunt’s M-series used two “mode groups,” A and B. You could switch between these, and even customize the number of levels available in mode group B. This has been replaced, for better or worse, with a single mode in v3 that acts very different from v2, so if you’re used to v2’s UI, you’ll have to relearn this. v3 has 7 levels: L2, L1, M2, M1, H1, T2, and T1, organized into four main groups; low, medium/high, turbo, and strobe.
The low group can be accessed by holding from off; medium/high by a single click from off; turbo with a double click; and strobe by three clicks. Within these groups, holding the button will rotate between the levels/modes inside them, so you can toggle between L2 and L1; or M2, M1, and H1; or T2 and T1. In the strobe group, however, you must double click to switch between strobe, SOS, and beacon.
You can’t always switch between these groups without turning the light back off and on again. From medium/high, you can get to turbo and back with double-clicks and into strobe with triple click, but you can’t get back from strobe and you can’t get to low at all. And if you hold from off for low, you cannot get into any other mode. That’s unfortunate, as it’s really nice to go from moonlight (low) into the regular group (medium/high).
So what do you do with this light? The M200 v3 is marketed as an EDC light, and it fills that role rather well. With the M200, you get the power and runtime of an 18650 in a package that’s not too much longer than some 14500 lights. Slide that into your pocket with the very nice new clip, toss the magnetic charger into your bag, and you’re ready to go. I’ve really enjoyed carrying this light around and will definitely continue to do so in the future. The selection of light levels, while perhaps not as dynamic as with v2, is still enough to cover most situations from low moonlight to sustained medium and high, and even a burst of extra high turbo if you need it. Take it on a walk, use it around the house or work, or just keep it with you. The general purpose nature of the M200 allows it to fill most roles quite well.
Build Quality, and Warranty
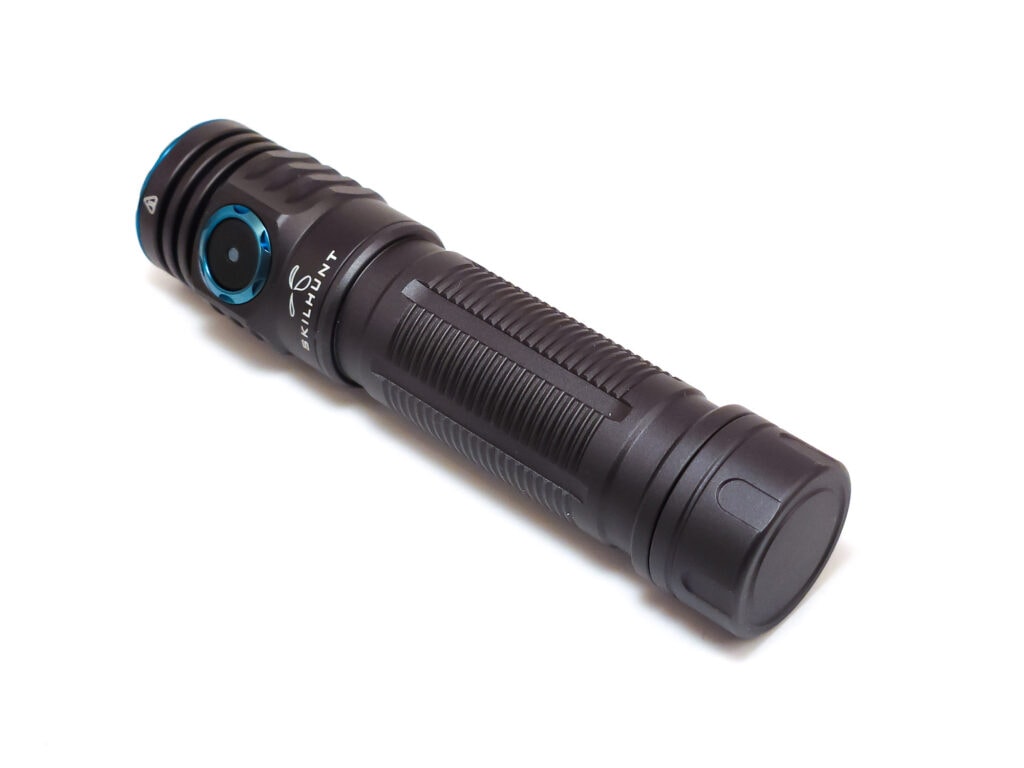
Like all of Skilhunt’s lights, the M200 is well-made. It comes in two anodization colors, black and gunmetal gray. My test model is gray, but in the comparison pictures later on, you can see it next to a black M150 v2. The blue accents of the bezels around the emitter, switch, and charging port are a nice touch.
The M200 feels solid in your hand, but there’s a matter of battery size. Granted, I do not have a Skilhunt 18650 to test with so your results with that battery will likely be different, but my Samsung 30Q rattles in the body since the Skilhunt 18650s are reported to be 18.6mm in diameter, while the 30Q is 18.3mm. A ThruNite 18650, which is 18.6mm, is much more snug diameter-wise, but please note that at 70+mm long, it does not work in this light. I dented the bottom trying to screw down the tail cap. Skilhunt’s 18650s have a length of 69mm, but I do not know if that includes the button. Sofirn’s 67mm button top 18650s fit well, though.
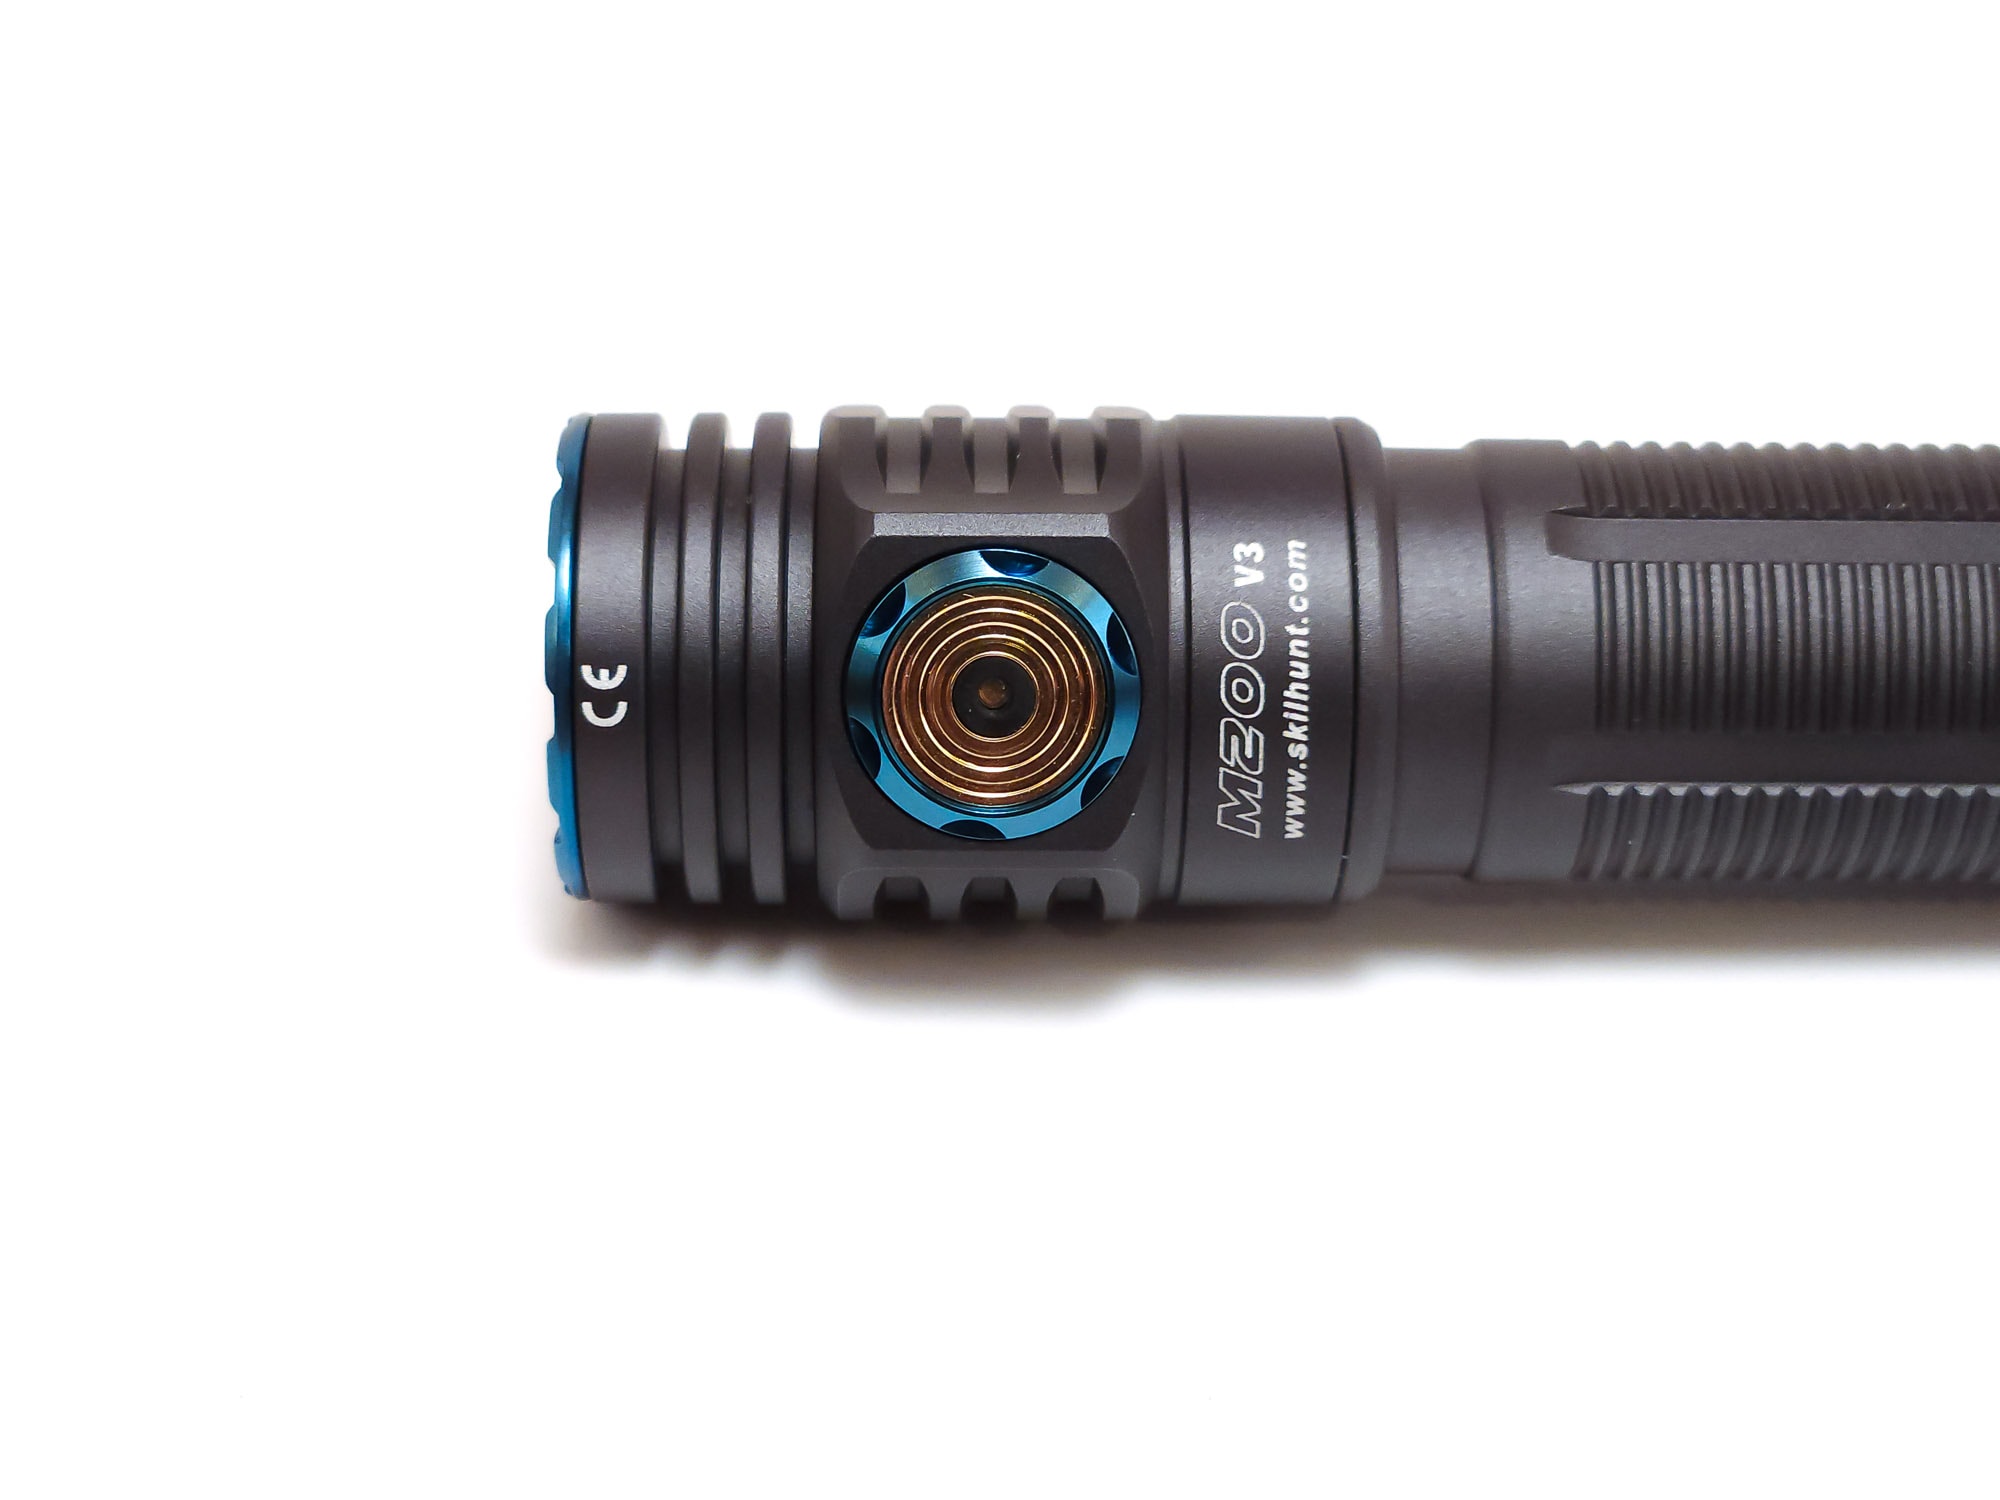
Like with a lot of lights, the M200’s electronic side switch is round, and the charging port on the opposite side of the head is also round so it can make for some confusion if you’re trying to feel for the button. Luckily, there are some tactile differences. Both the charging port and the button have a bezel around them and though both are slightly recessed from the bezel (new in v3). The button is plastic and entirely smooth save for a small indicator light at the center which is silicone and sticks out slightly, while the charging port is metal and has a few rings in it, giving it more texture.
I feel like the button on this light is a little vague and sometimes if you don’t press just right or hard enough, it will not register the click, but if you give it a solid push, it’ll be fine. On the other hand, that raised bezel around the switch isn’t enough to prevent accidental clicks while in your pocket or bag. So, you’ll want to use lockout, which is 4 clicks in v3 instead of the hold from off like in v2. That’s a more secure way to lock a light out, though the 4 clicks to unlock is ever so slightly more involved than using another hold to unlock. However, as someone who doesn’t want to have to unlock my light all the time to use it, v3 also included momentary moonlight from lockout! I love having the ability to pull out my light and be able to use it without having to unlock it, yet still having it be safe from accidental activation. Double clicking while locked out will toggle the indicator light in the switch which blinks red every few seconds, on or off.
The body has perpendicular grooves cut into it, interspersed with large grooves parallel to the body which help tremendously with grip. The head has large cooling fins just below the bezel, just like in v2, but v3 has additional cooling fins adjacent to the button and magnetic charging port. These fins also have flat sections on them which, in addition to the raised switch and charging platforms, will keep the light from rolling around.
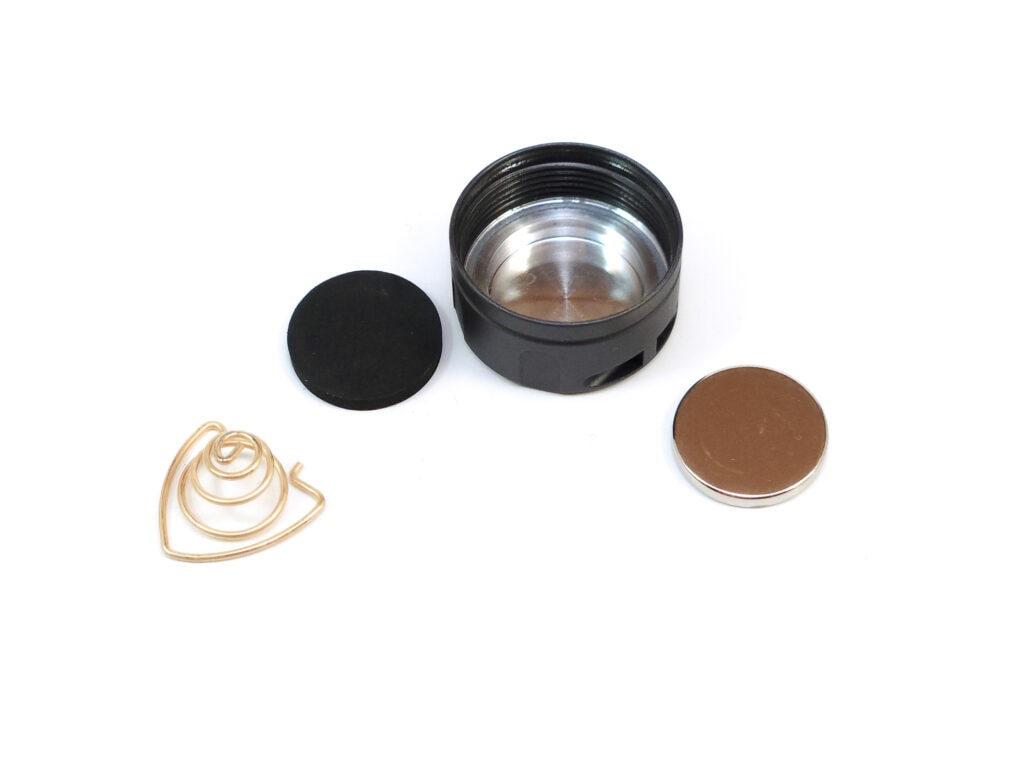
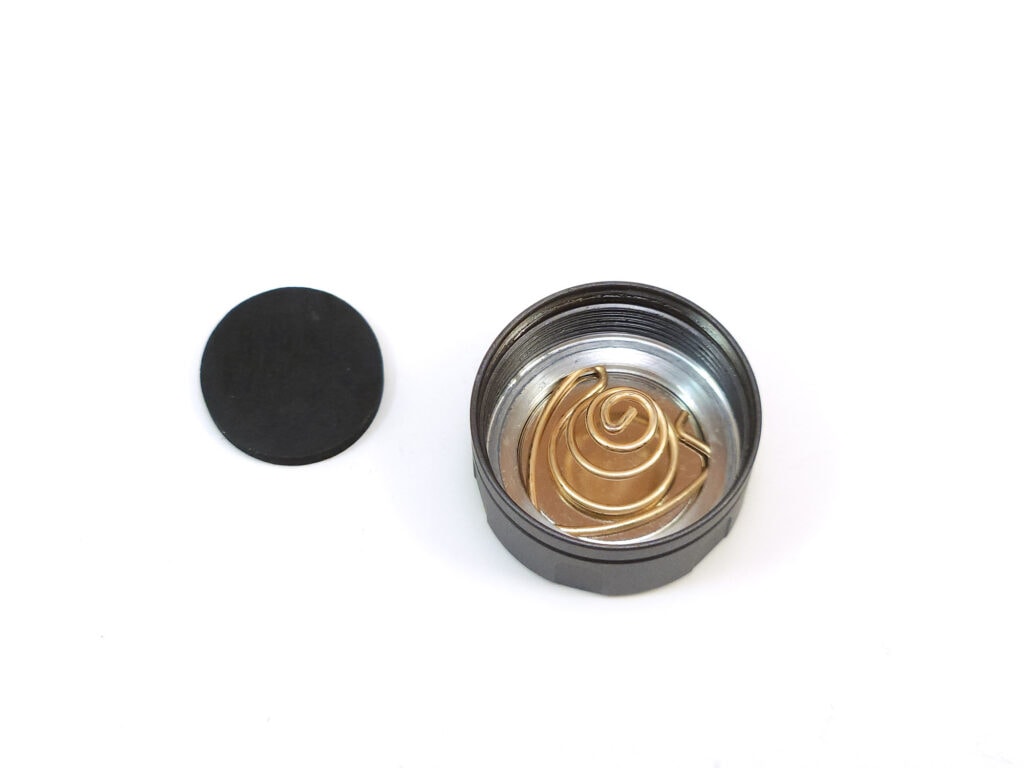
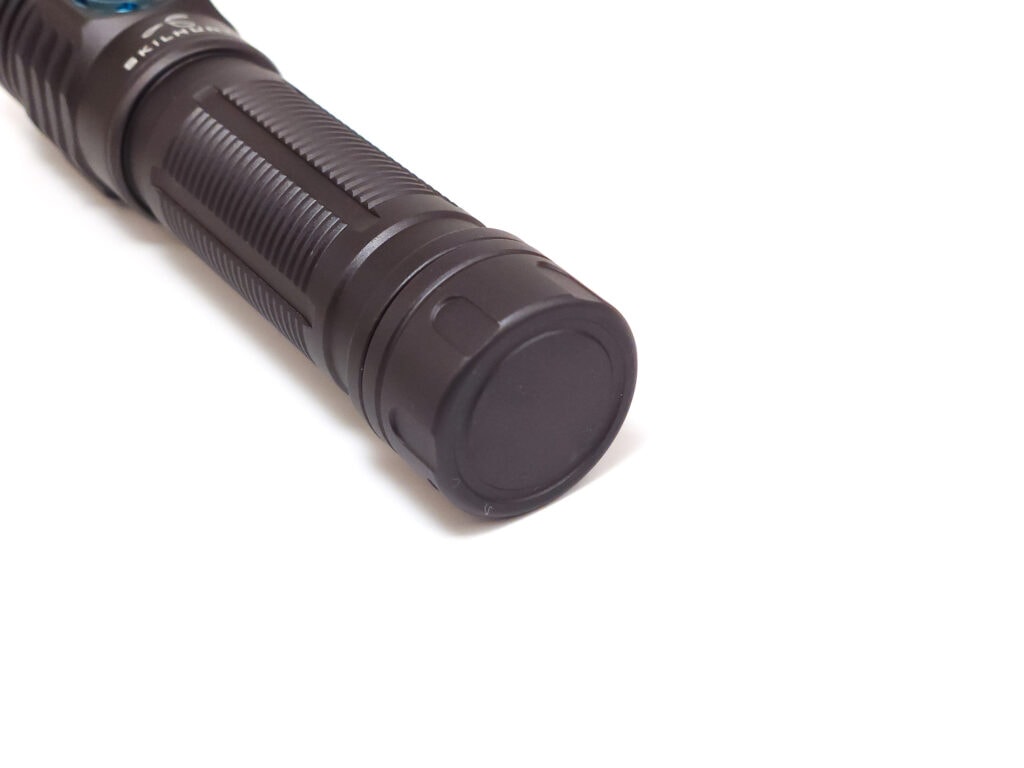
The tail cap is flat, so it can tail stand, and has a magnet in it. One of the neat things about the M-series is that those magnets are removable. If you’d like to do that, you’ll first have to remove the spring by pinching the arms which keep it locked into the tail cap with some needle nose pliers. After that, the magnet just comes right out and you can replace it with the rubber disc which comes with the light.
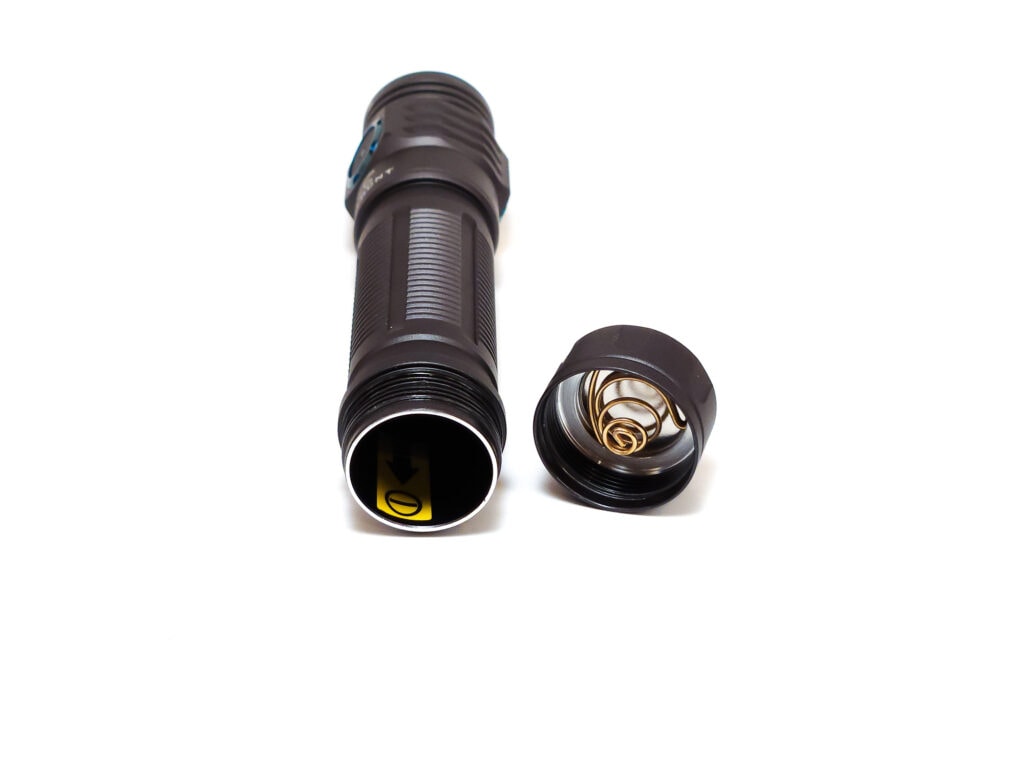
I believe the body tube and tail cap are the same as the ones used in v2, which is fine because they’re still good. The threads on the tail of the body are anodized, so physical lockout is possible with a twist of the tail cap, but the head is glued on. The M200’s dual springs allow for a variety of batteries, if you don’t get one with the light. Right inside the tube, there’s a sticker indicating that the negative end of the battery should be pointing out of the backside of the tube. I think this could be improved with a simple illustration of the direction the battery should be inserted.
The M200 v3 is covered by Skilhunt’s standard warranty. You can read the full text of it on their service page.
To summarize:
- Free product replacement due to defect within 15 days of purchase
- Free product repair due to defect within 24 months of purchase
- Paid repair available after 24 months
- Warranty may not be honored if purchased from unauthorized dealer
- Warranty does not cover normal wear or non-defect damage
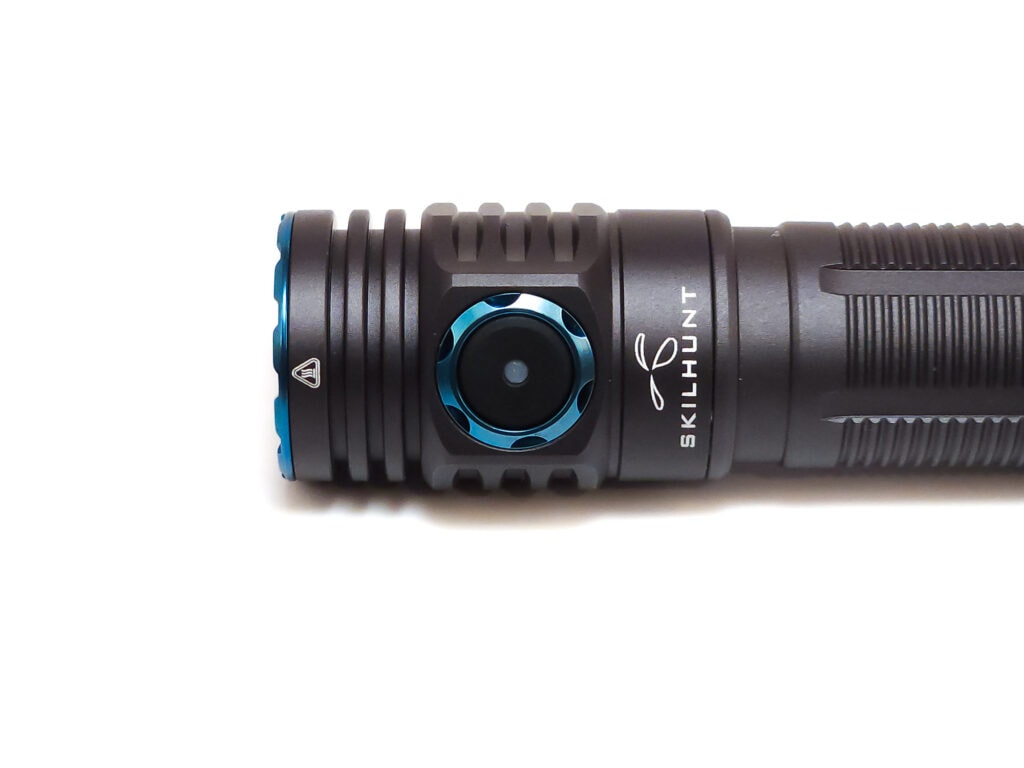
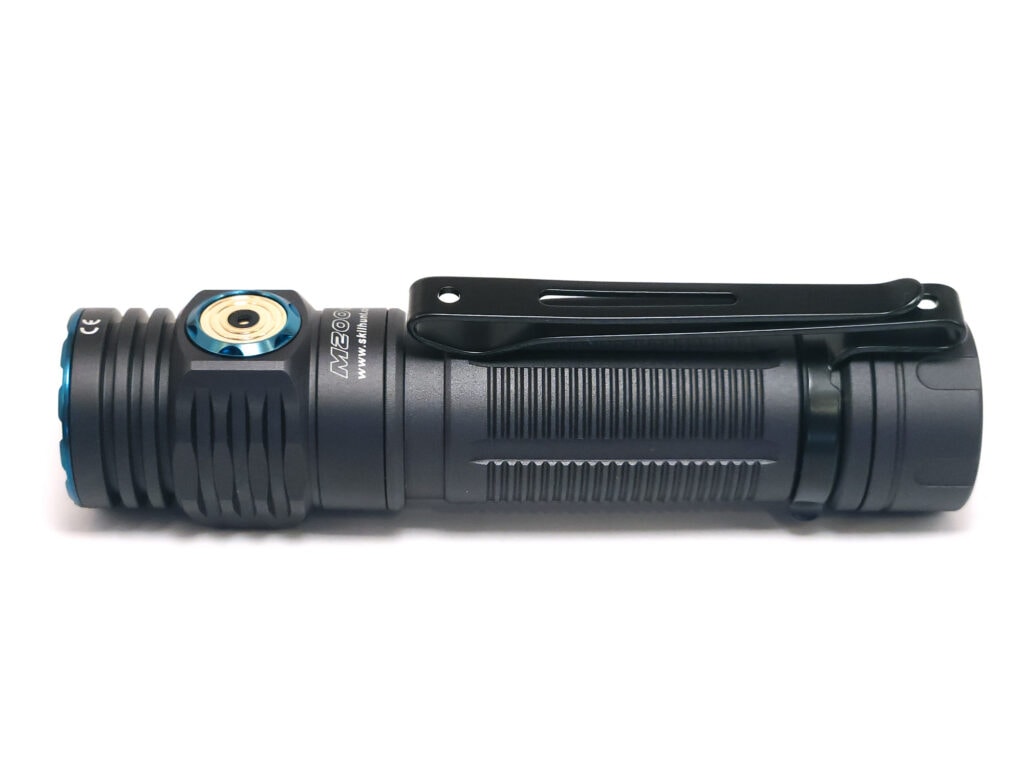
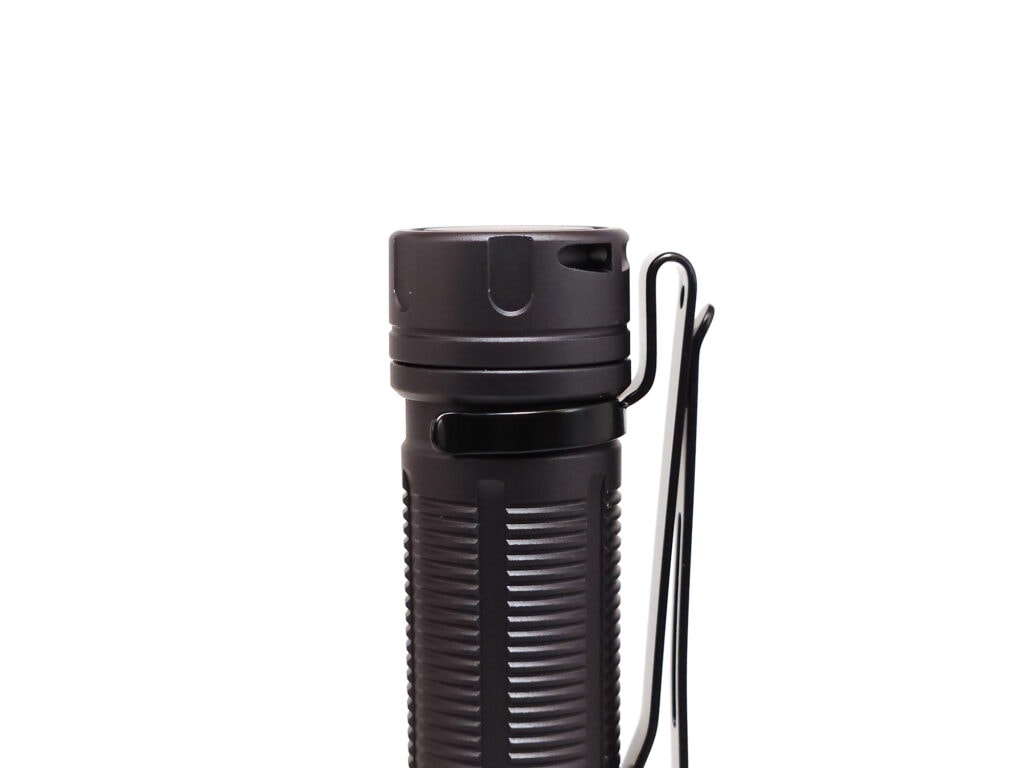
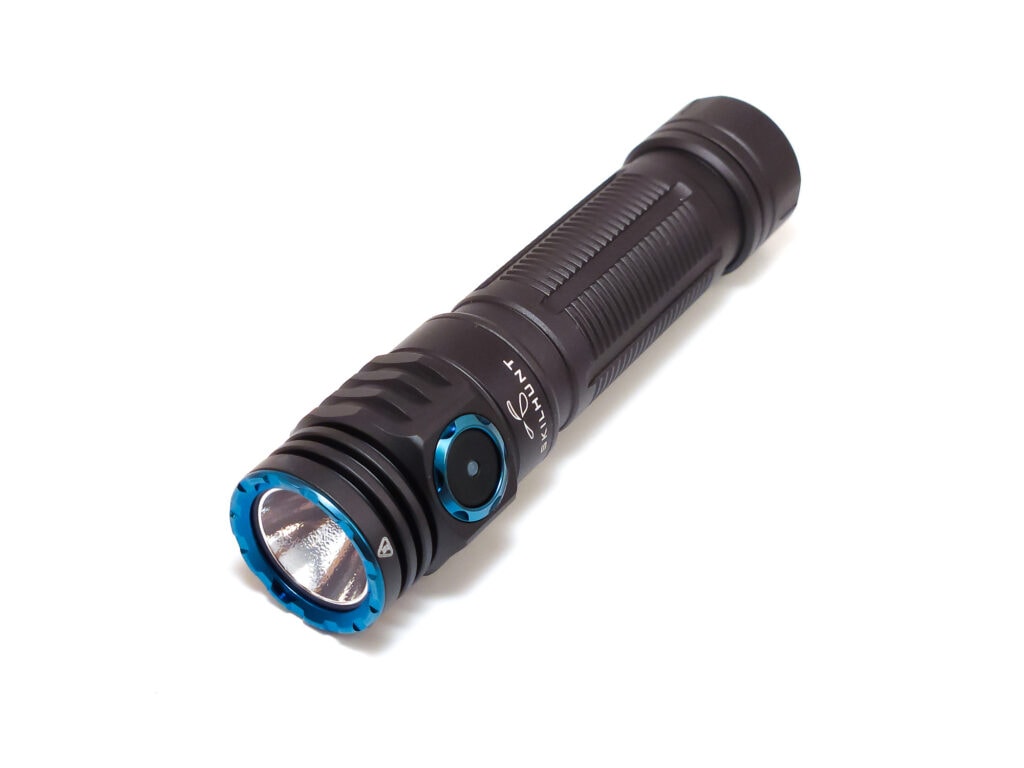
LED, Lens, Bezel, Beam, and Reflector
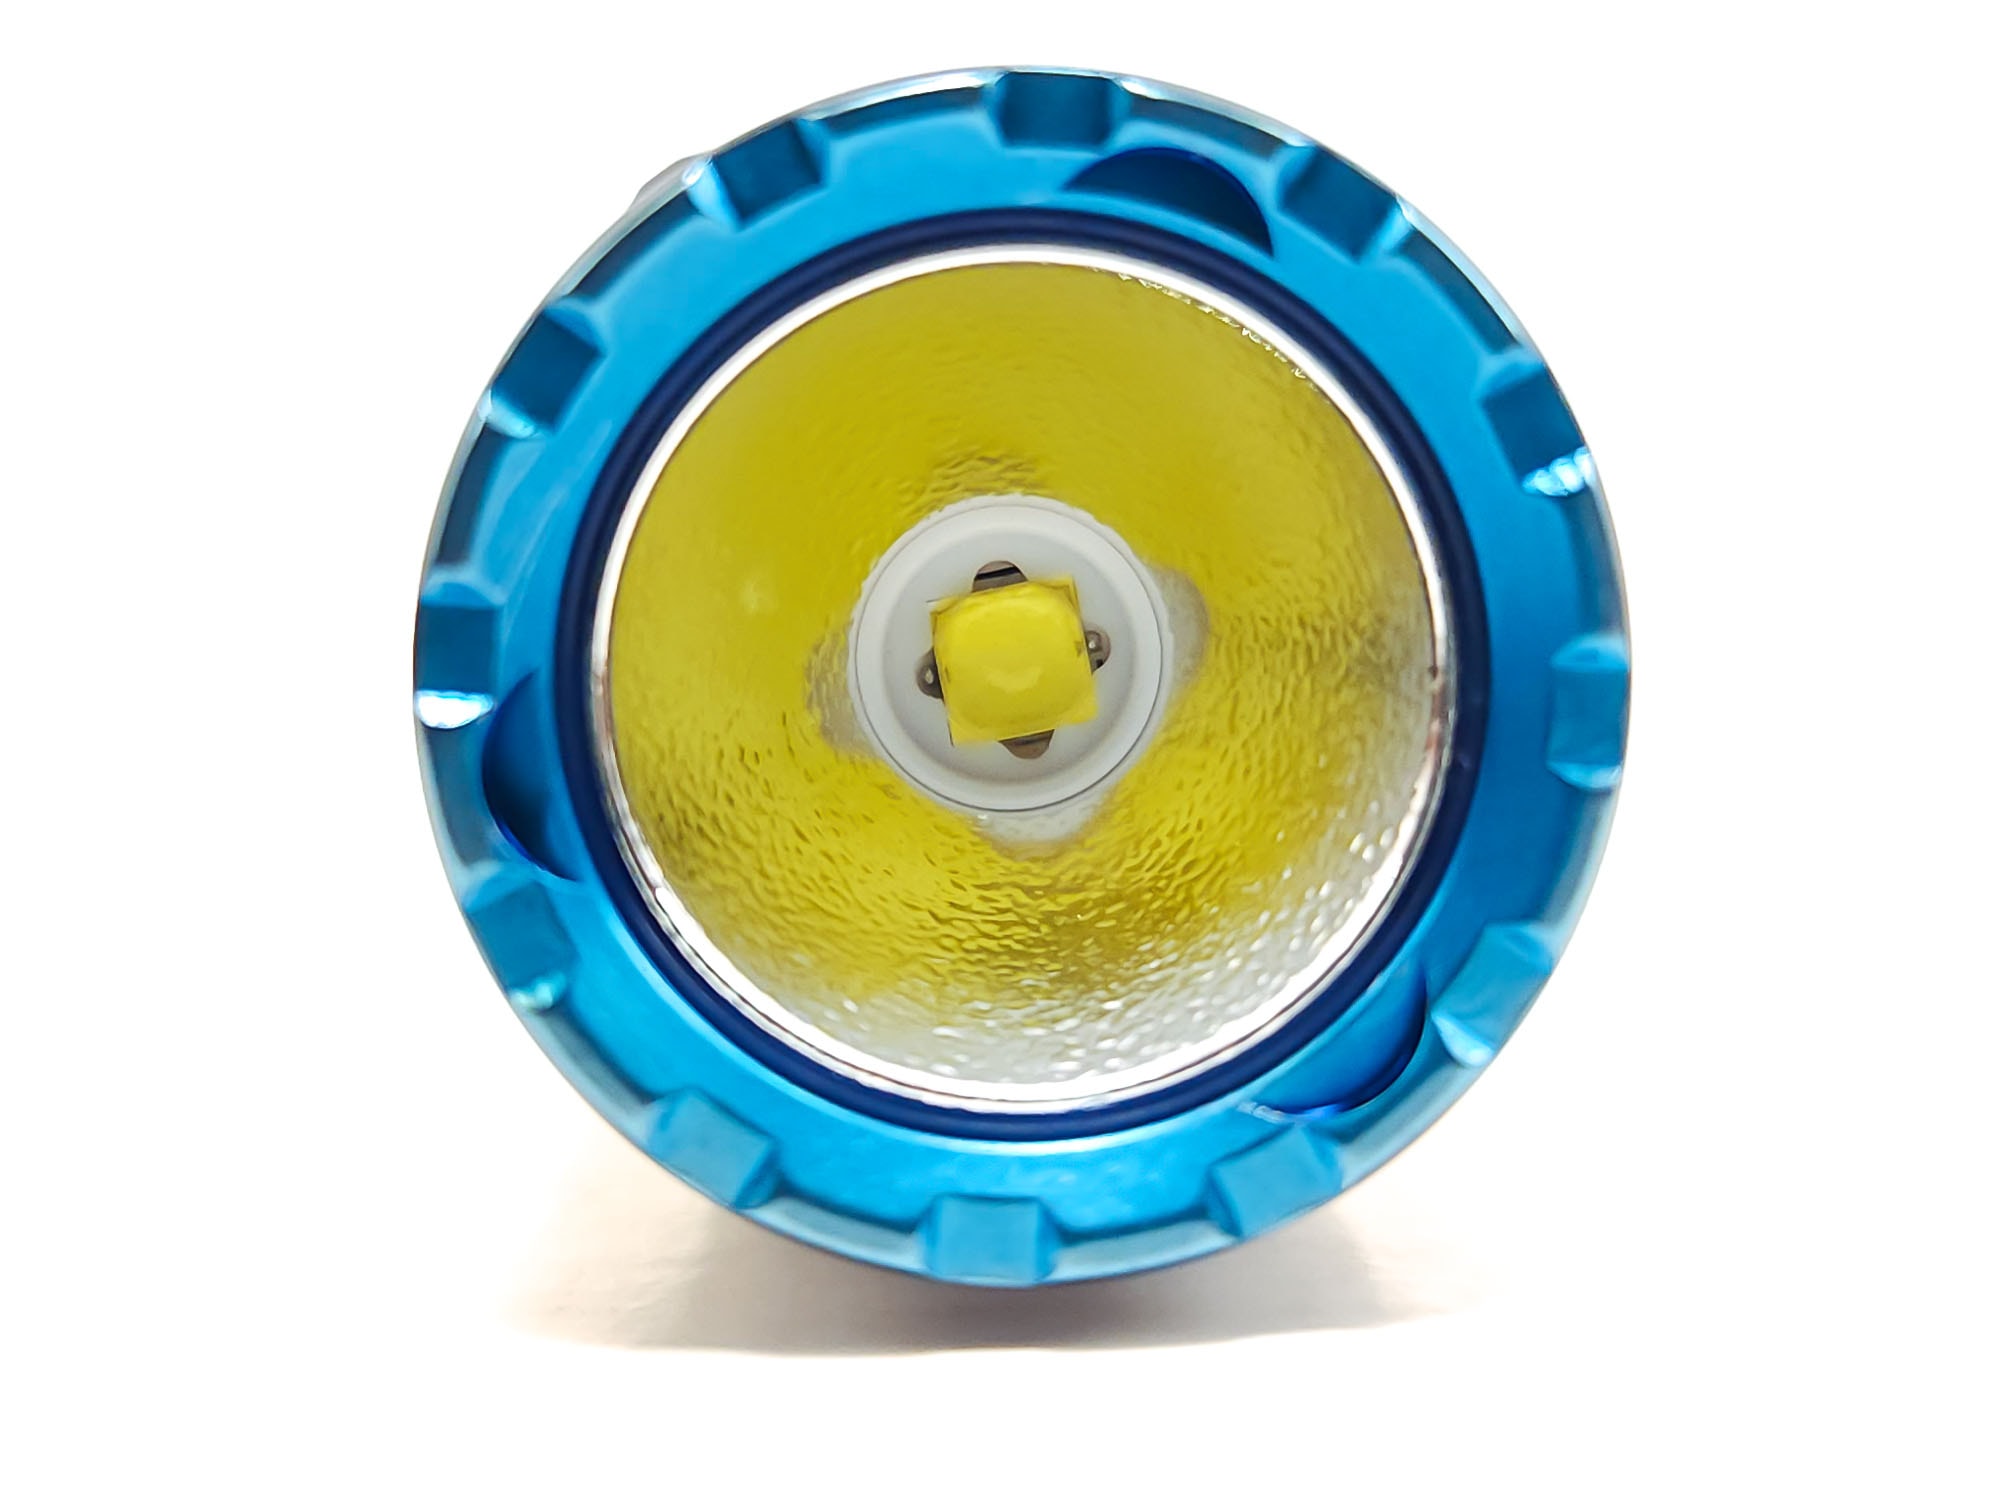
My test model came with the Cree XP-L2 6500K emitter, so this beam information will be centered around that. You also have the option of getting the M200 v3 with a Samsung LH351D in 5000K or a Nichia 519a in 4500K, both of which are high CRI, while the XP-L2 is not.
This is a change from the M200 v3, which used either a Cree XP-L HD or Samsung LH351D emitter. They’re very similar emitters to their previous counterparts, though the v2 had a maximum 1000 lumen output but the v3 has a 1400 lumen output. Like many other lights with cool emitters, the M200 v3 has a yellowish hotspot with greenish and blueish spill. The blue isn’t very pronounced, but you’ll see the yellow/green in most levels. You’ll mostly notice it against a white wall, but when you’re illuminating other things, the tint shift gets distracting.
The LH351D and 519a will be more neutral, but the beam pattern should be about the same.
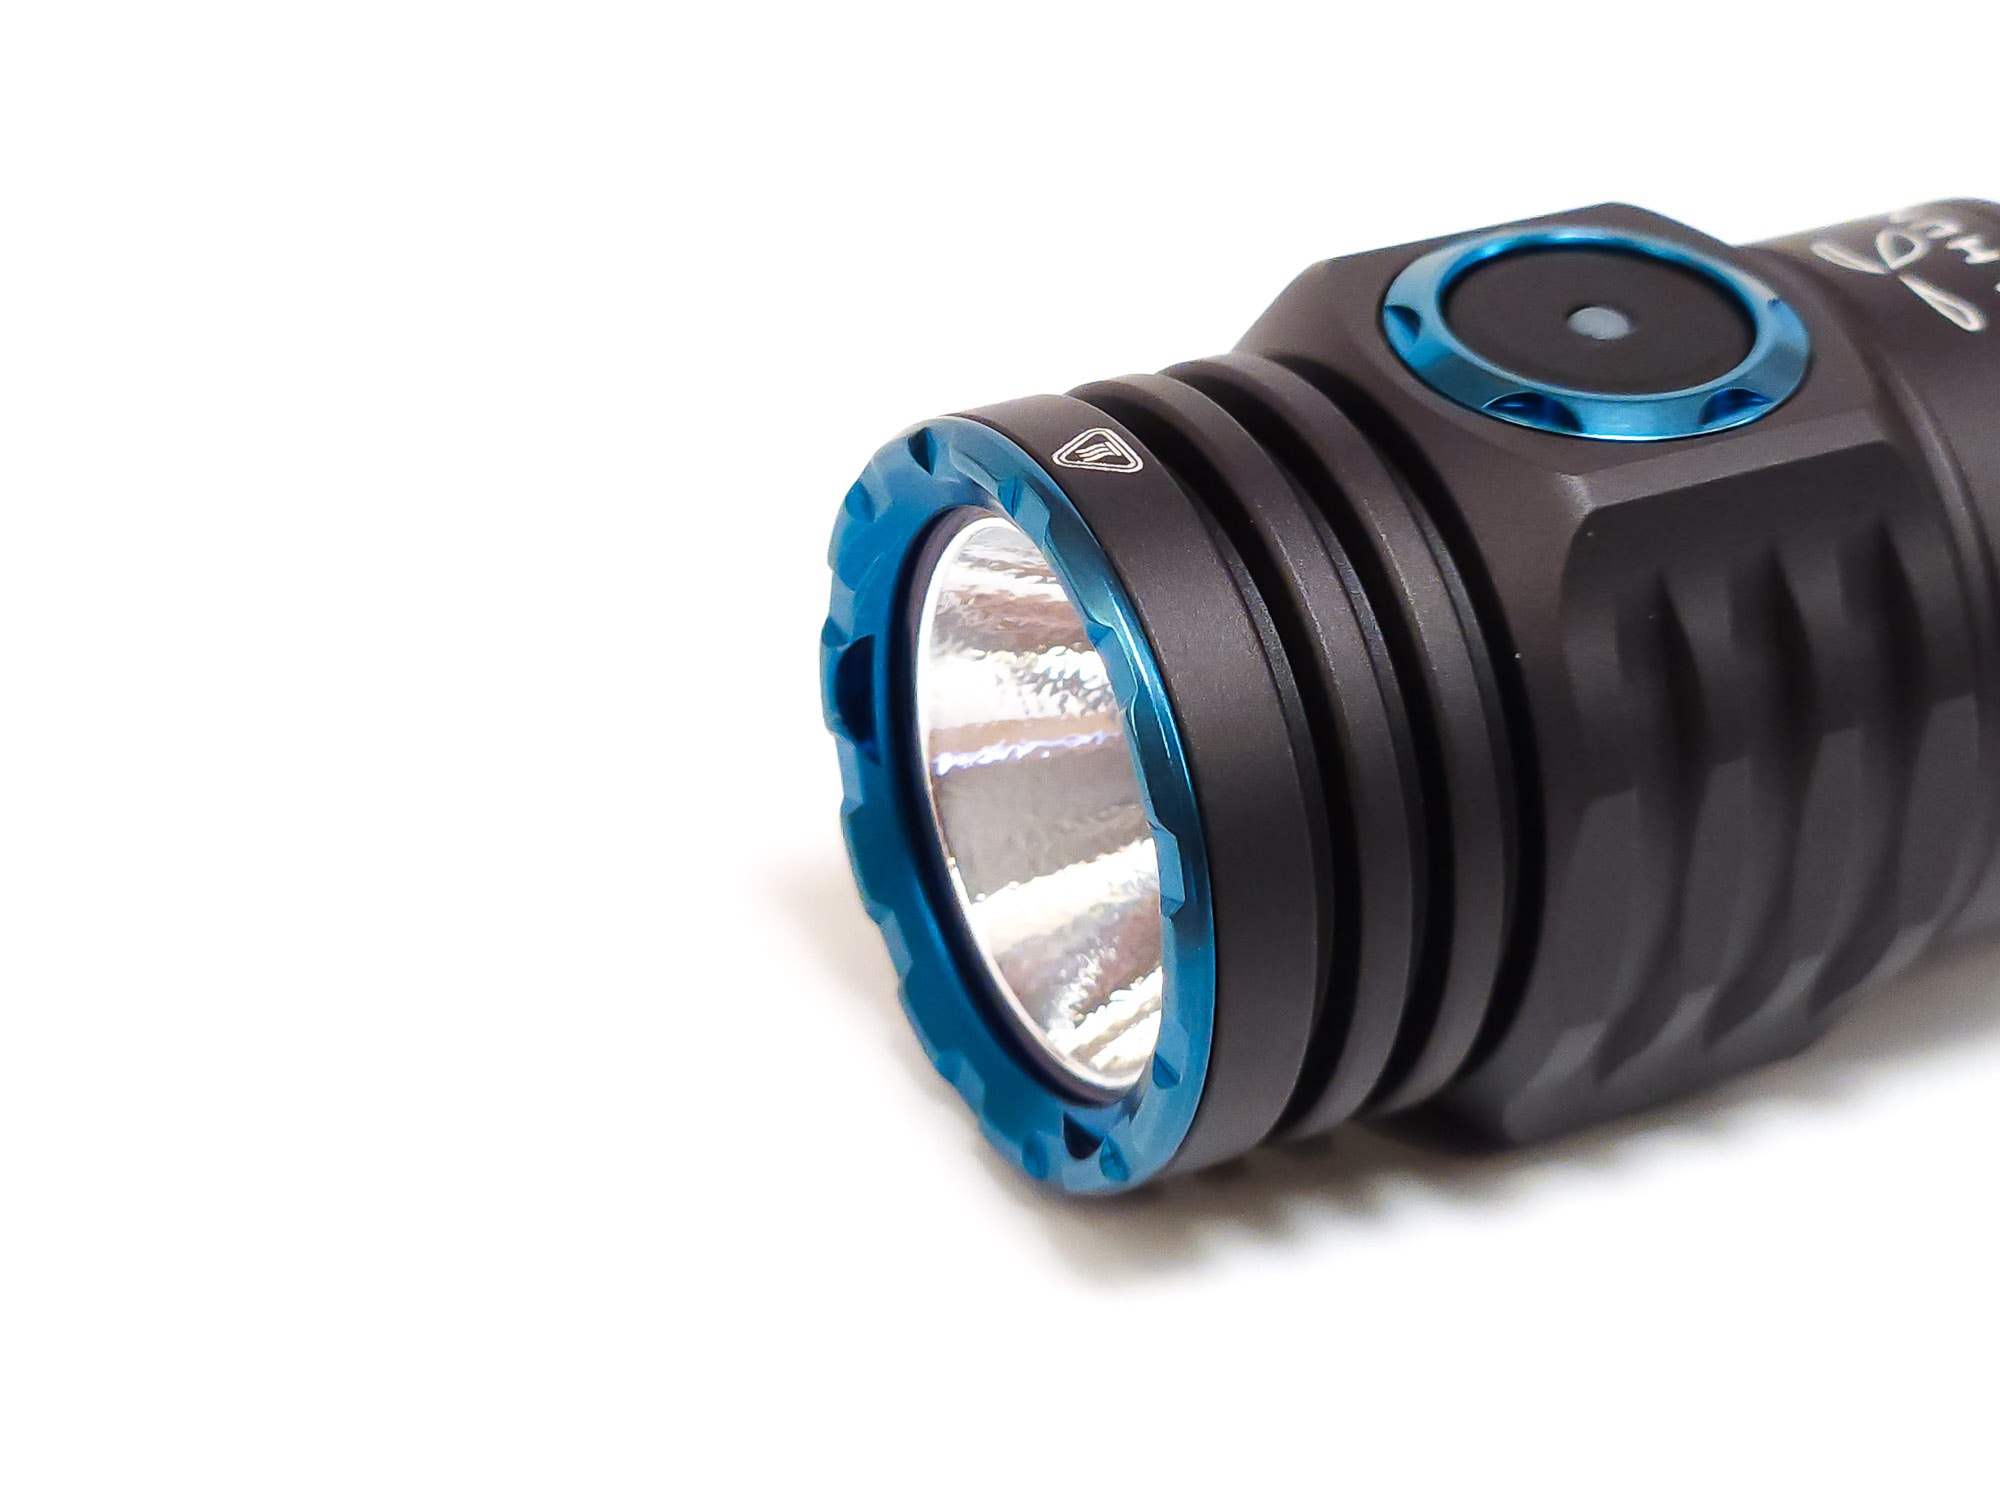
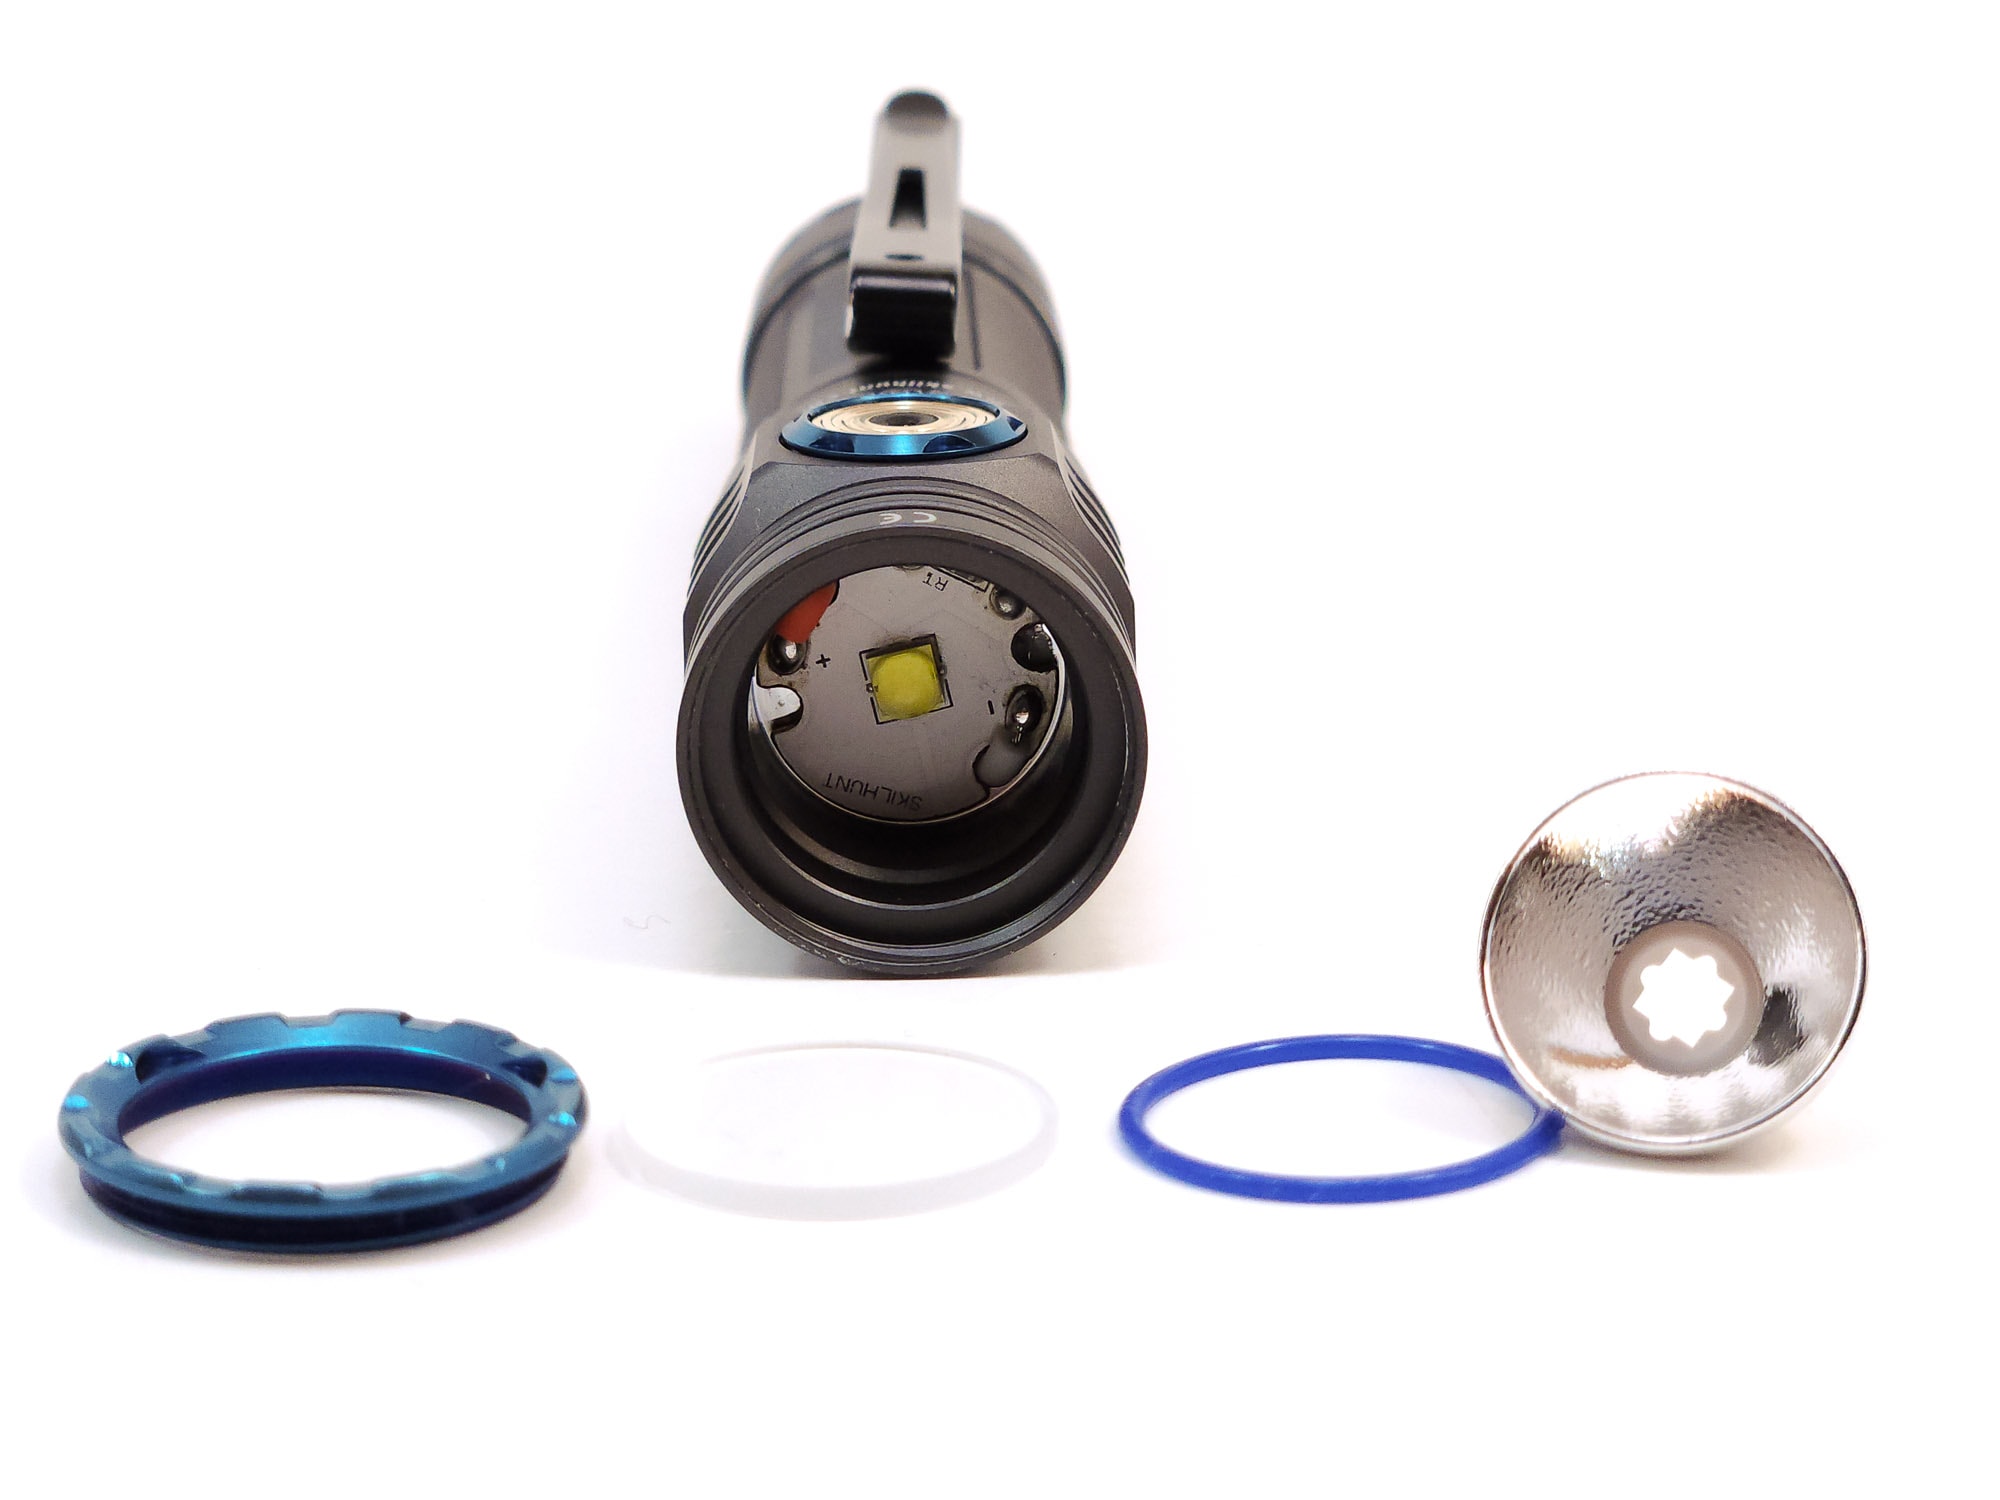
The emitter is focused by an orange peel reflector, and protected by an anti-reflective coated glass lens. This is held down by a new, slightly crenulated, blue bezel. It’s actually very easy to unscrew the bezel and remove the o-rings and reflector, so swapping the emitter is possible.
One thing of note is that on my model, when turning on L1 or advancing from L2 to L1, there is a brief flash which is brighter than L1. I can’t say if that’s only on my light or every M200 v3.
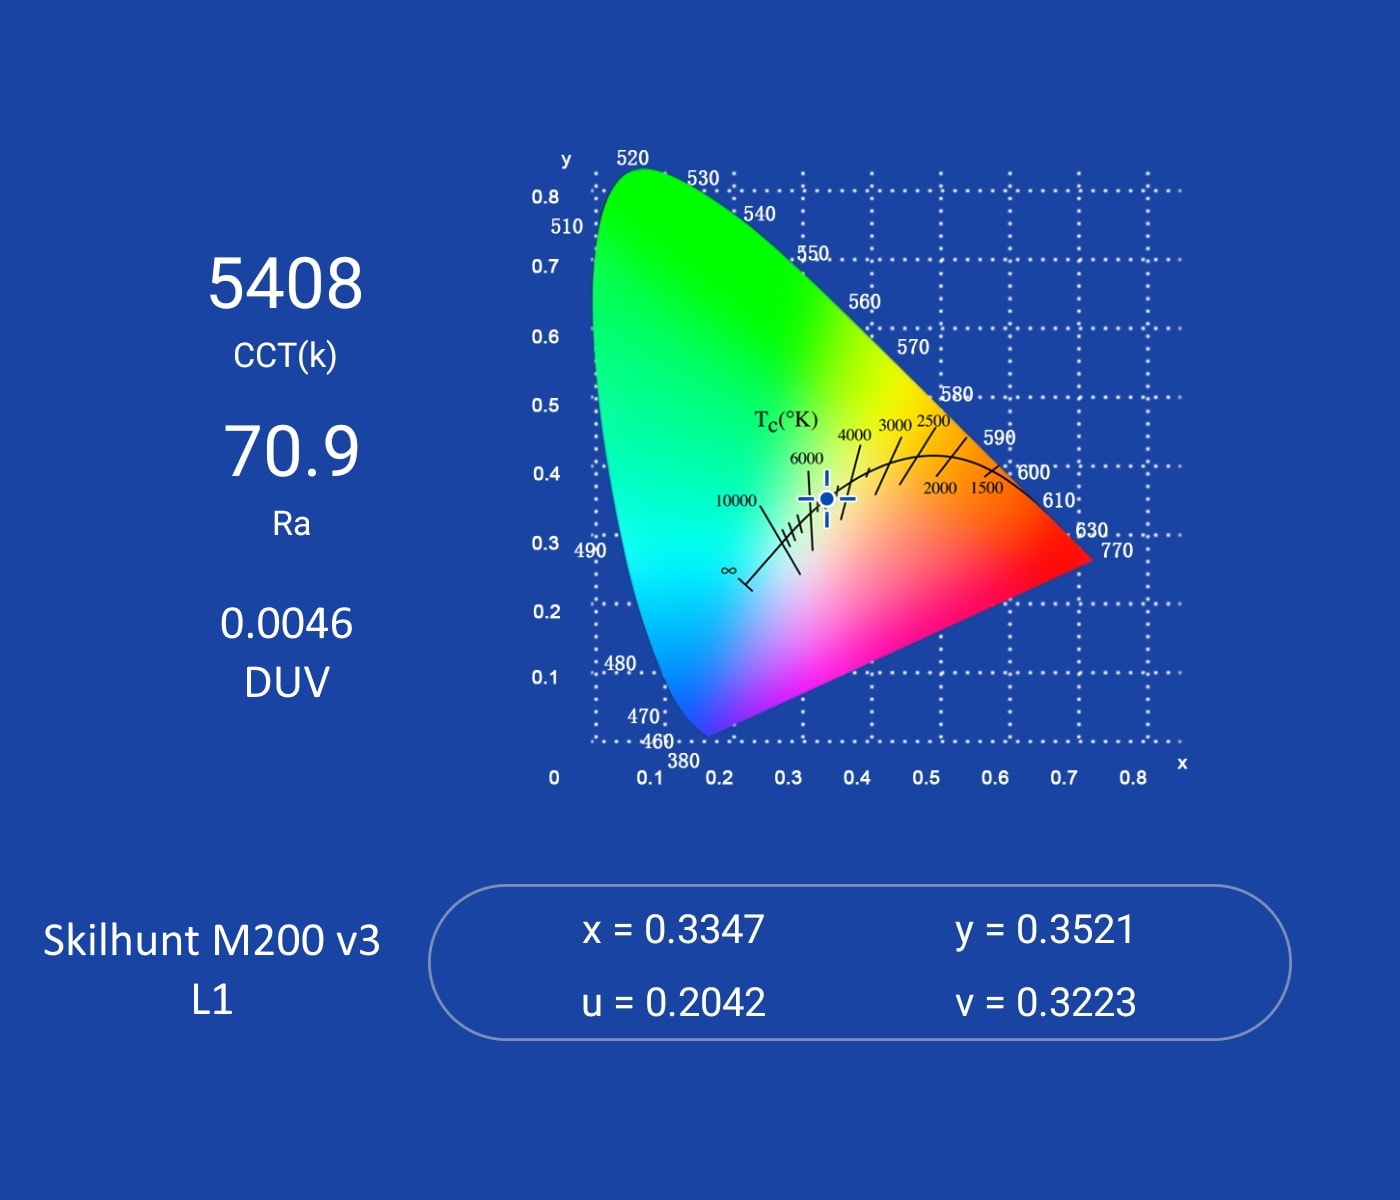
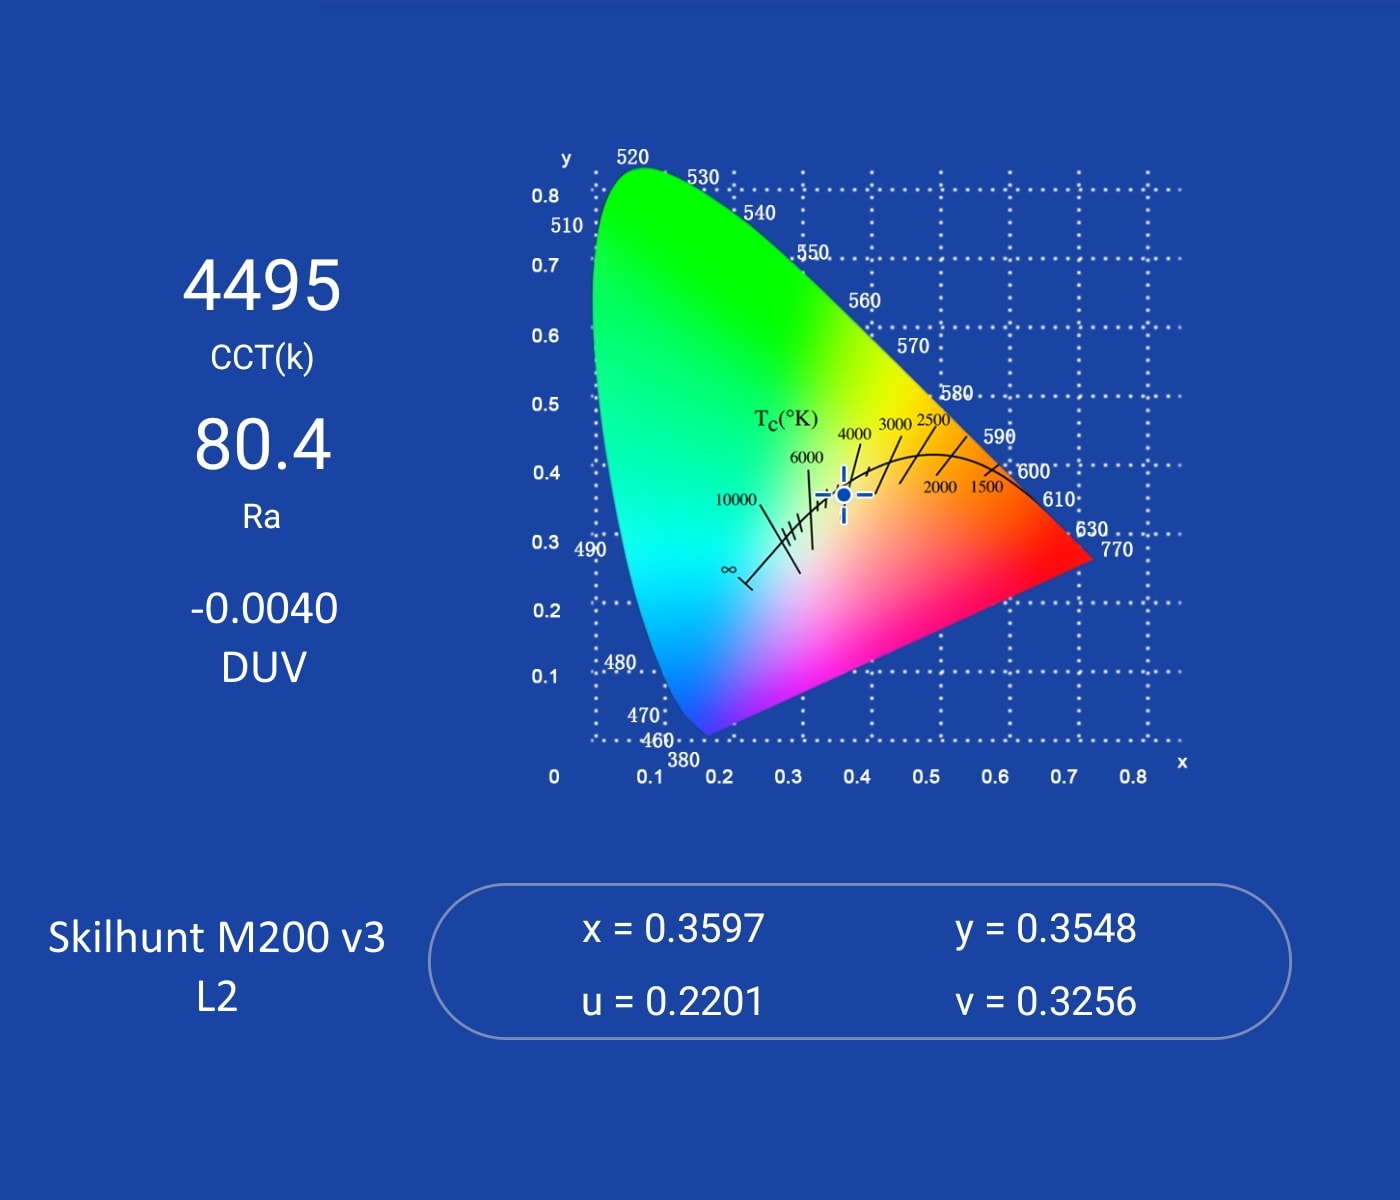
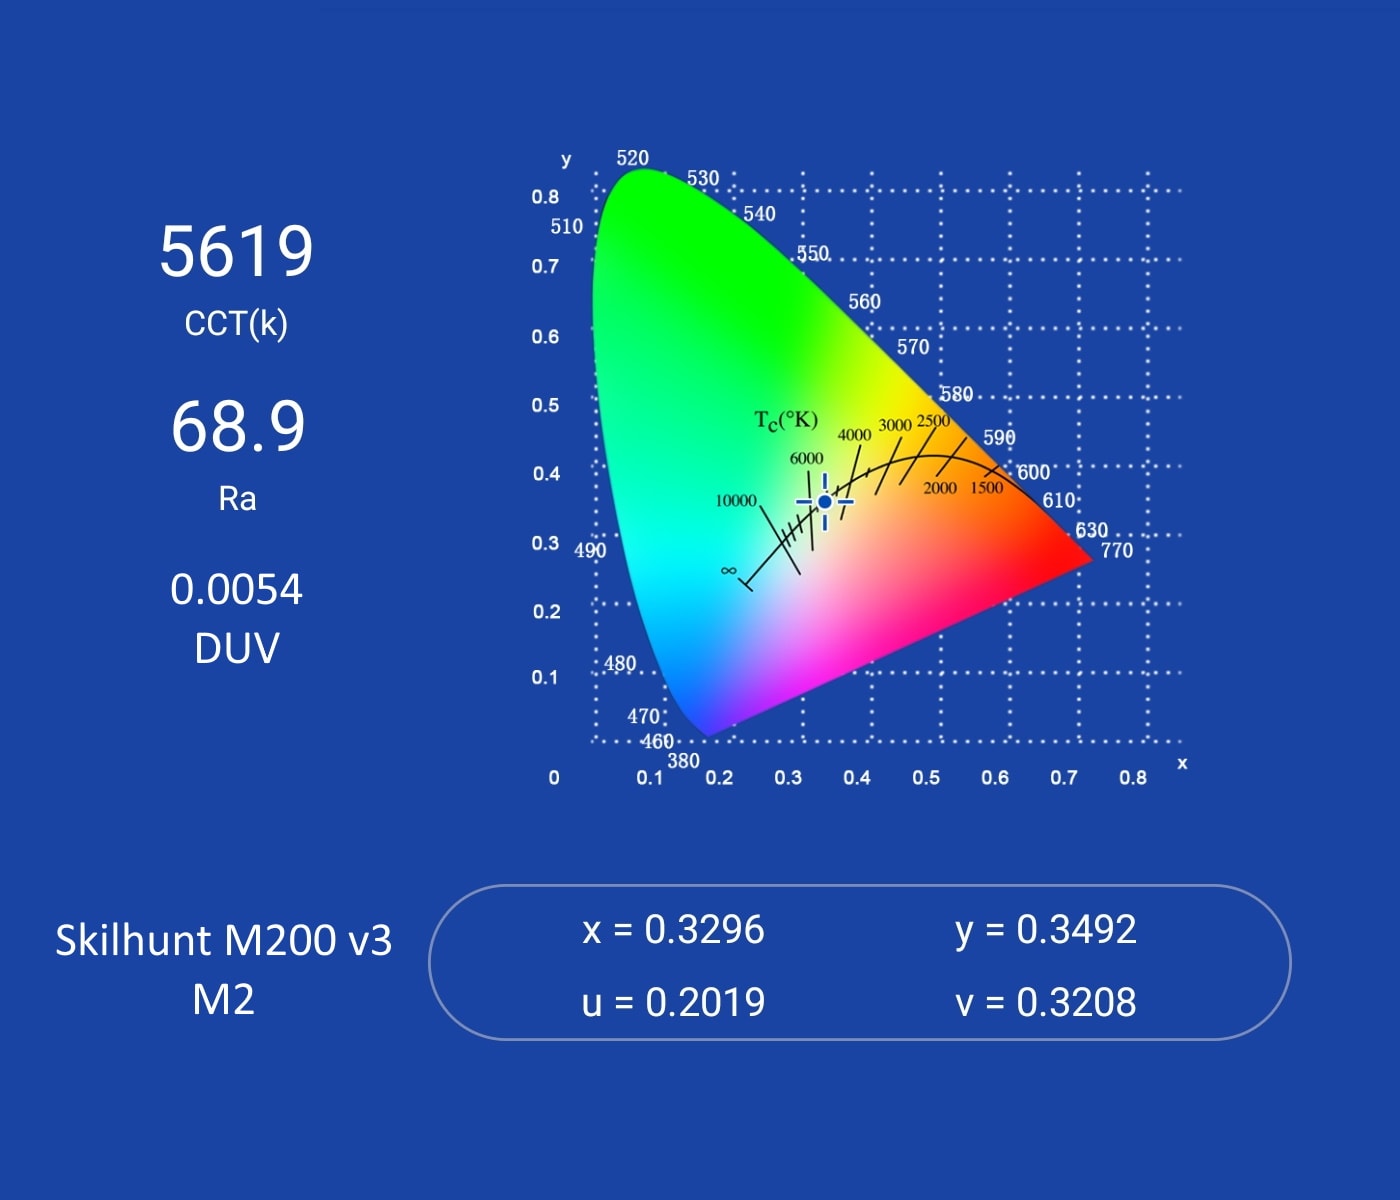
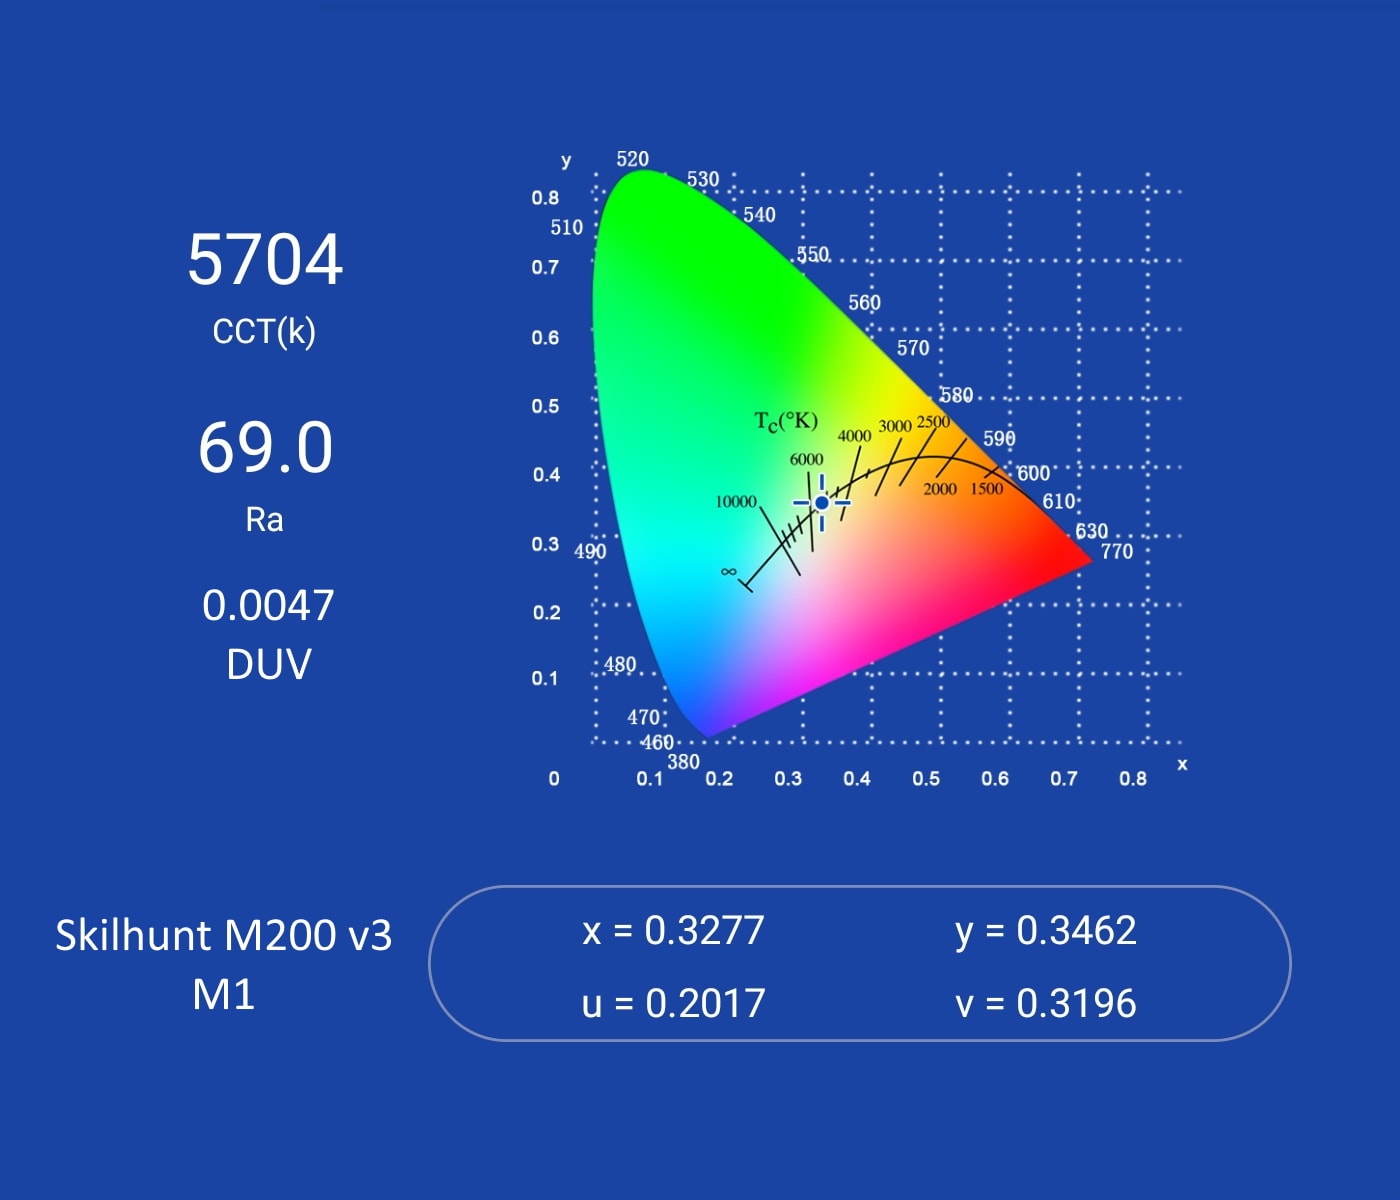
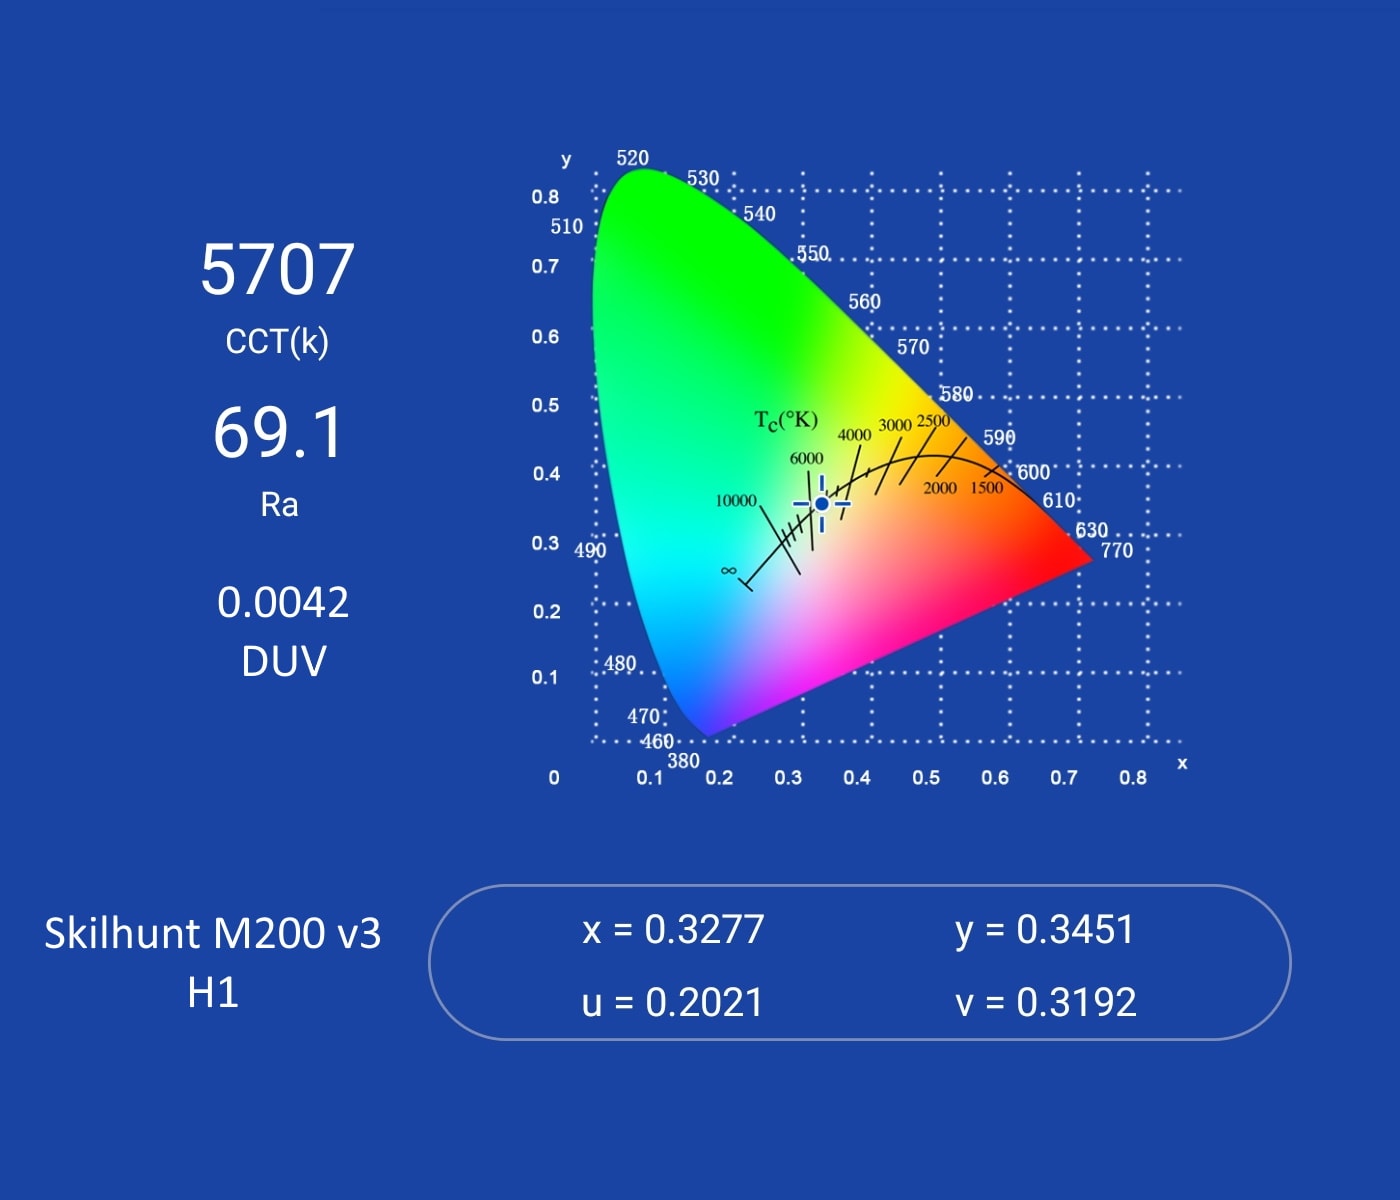
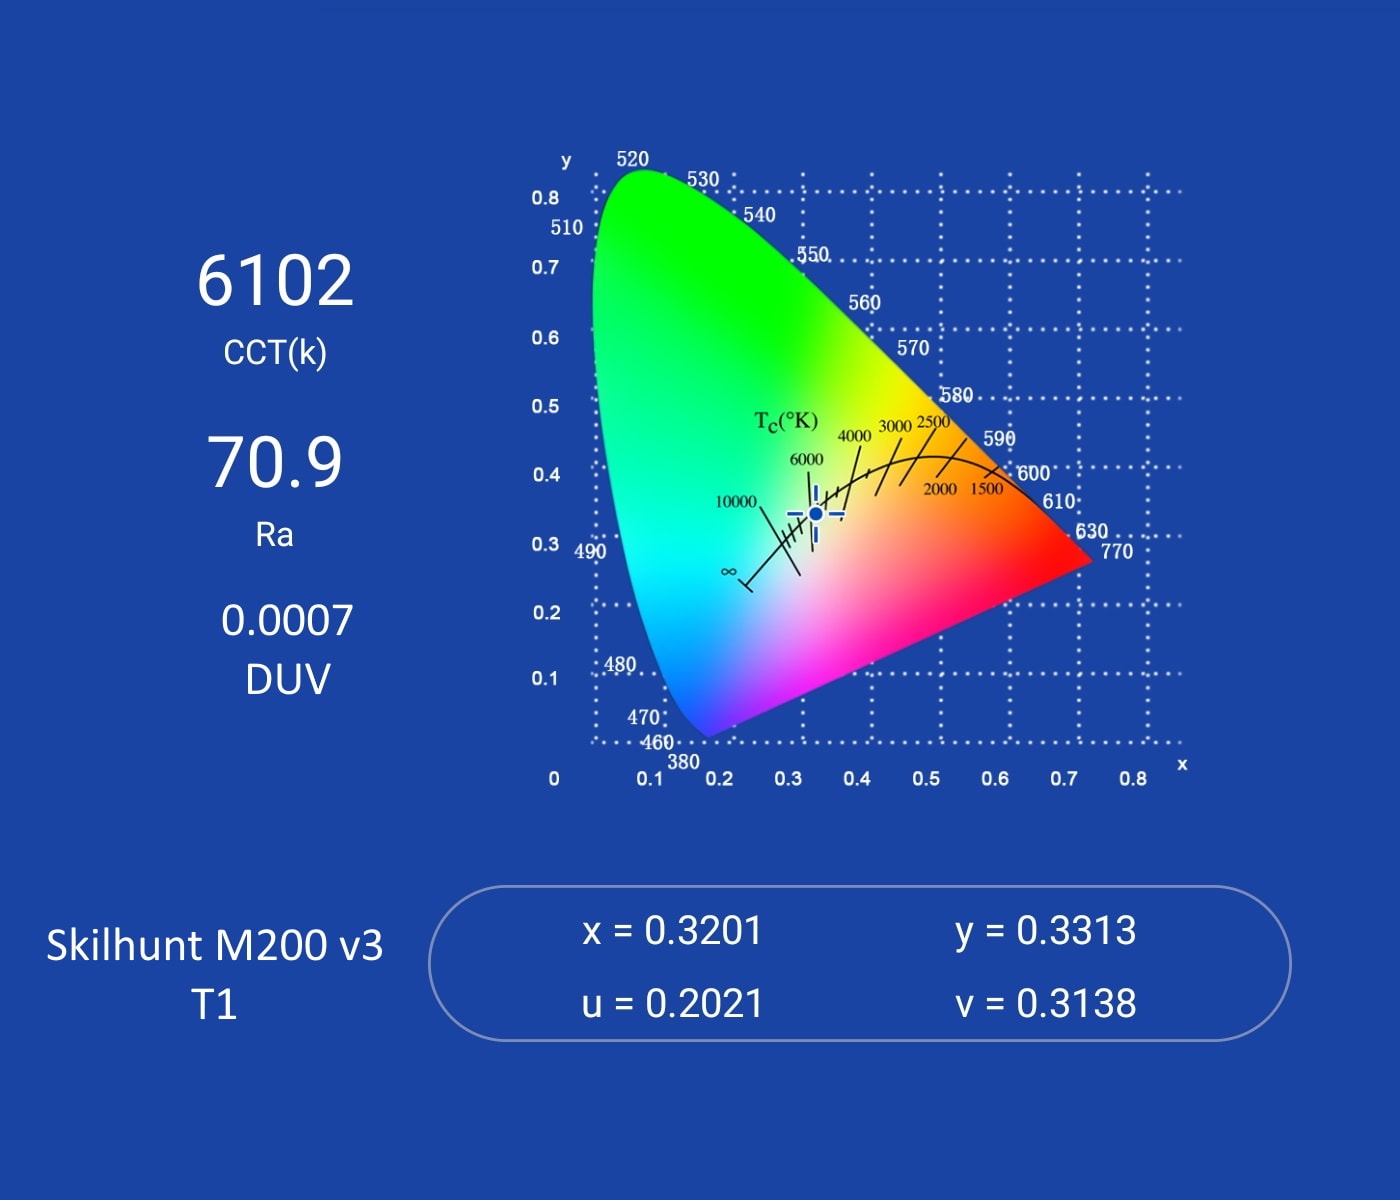
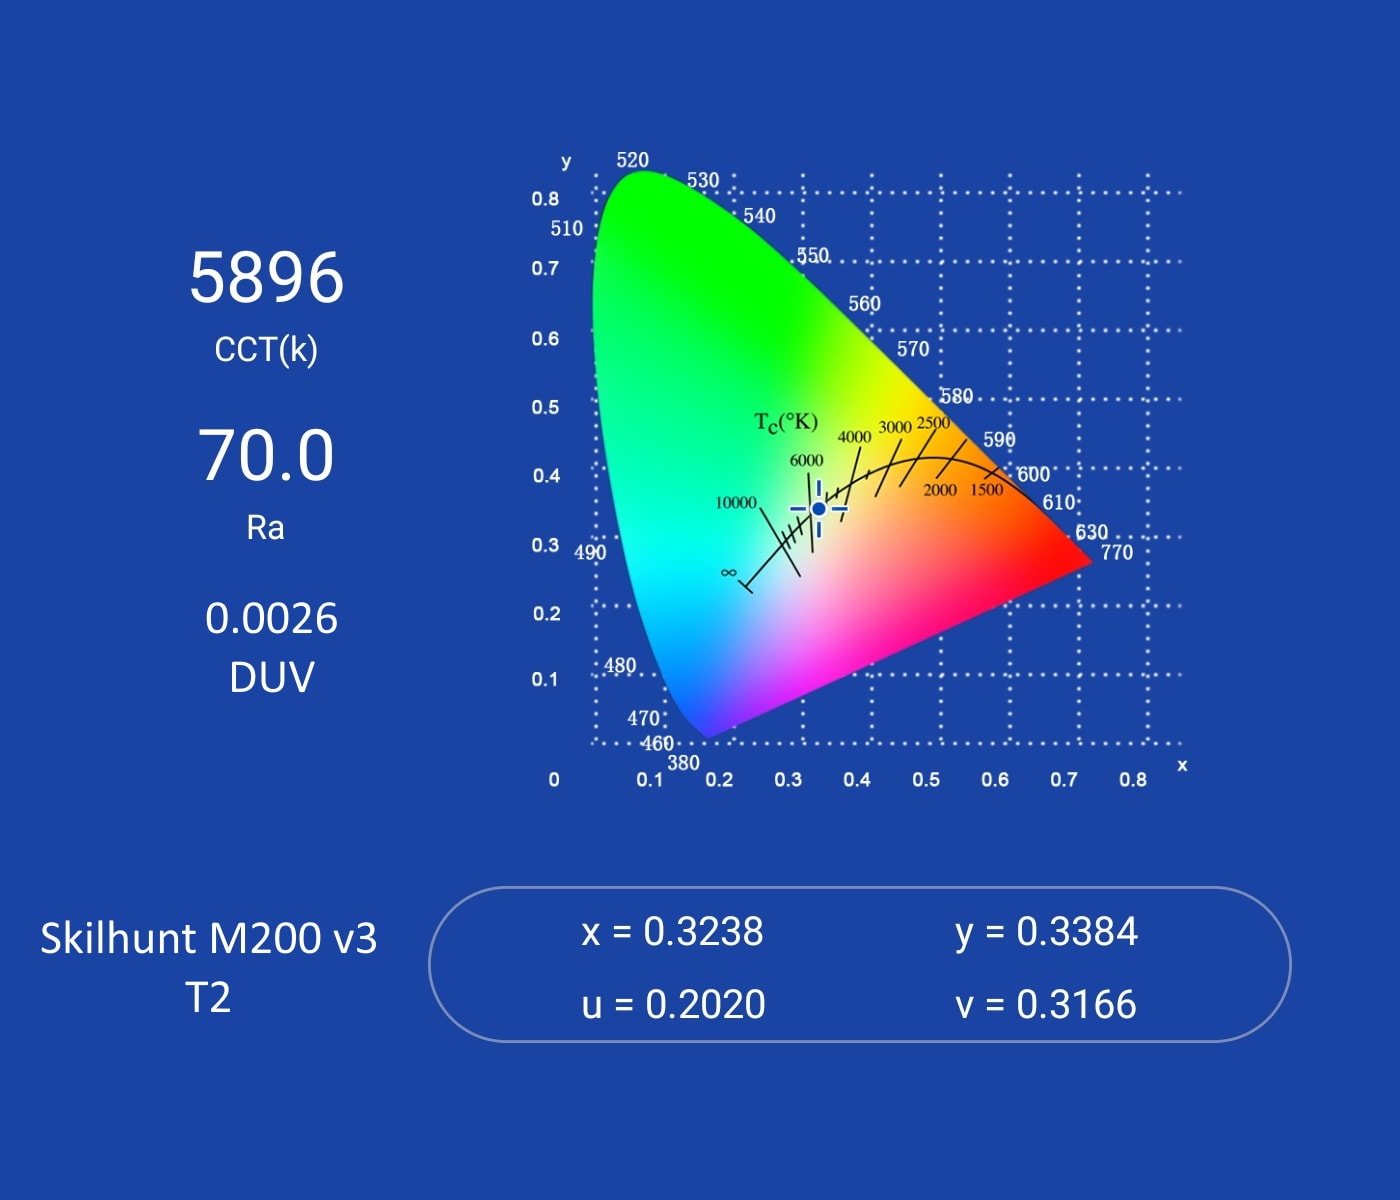
I was surprised in my Opple Light Master Pro measurements to find that L2, the lowest mode, registered 4500K, 80 CRI, and negative DUV. I measured it twice to be sure, because that definitely was unexpected from an XP-L2. For being 6500K, most of the measurements hover below 6000, except for T1, which was somewhat of another surprise. Not unwelcome, though.

Dimensions and size comparison
Dimensions:
| Millimeters | Inches | |
|---|---|---|
| Length | 104 mm | 4.1 in |
| Head diameter | 24 mm | 0.9 in |
| Head diameter, widest diagonal | 28 mm | 1.1 in |
| Body diameter | 22 mm | 0.8 in |
Dimensions are rounded to the nearest millimeter, and to the nearest tenth of an Inch.
Weight:
| Weight in grams | Weight in oz | |
|---|---|---|
| Without battery: | 52g | 1.8oz |
| With battery (Samsung 30Q) | 98g | 3.5oz |
Weight is rounded to the nearest gram, and to the nearest tenth of an Oz.
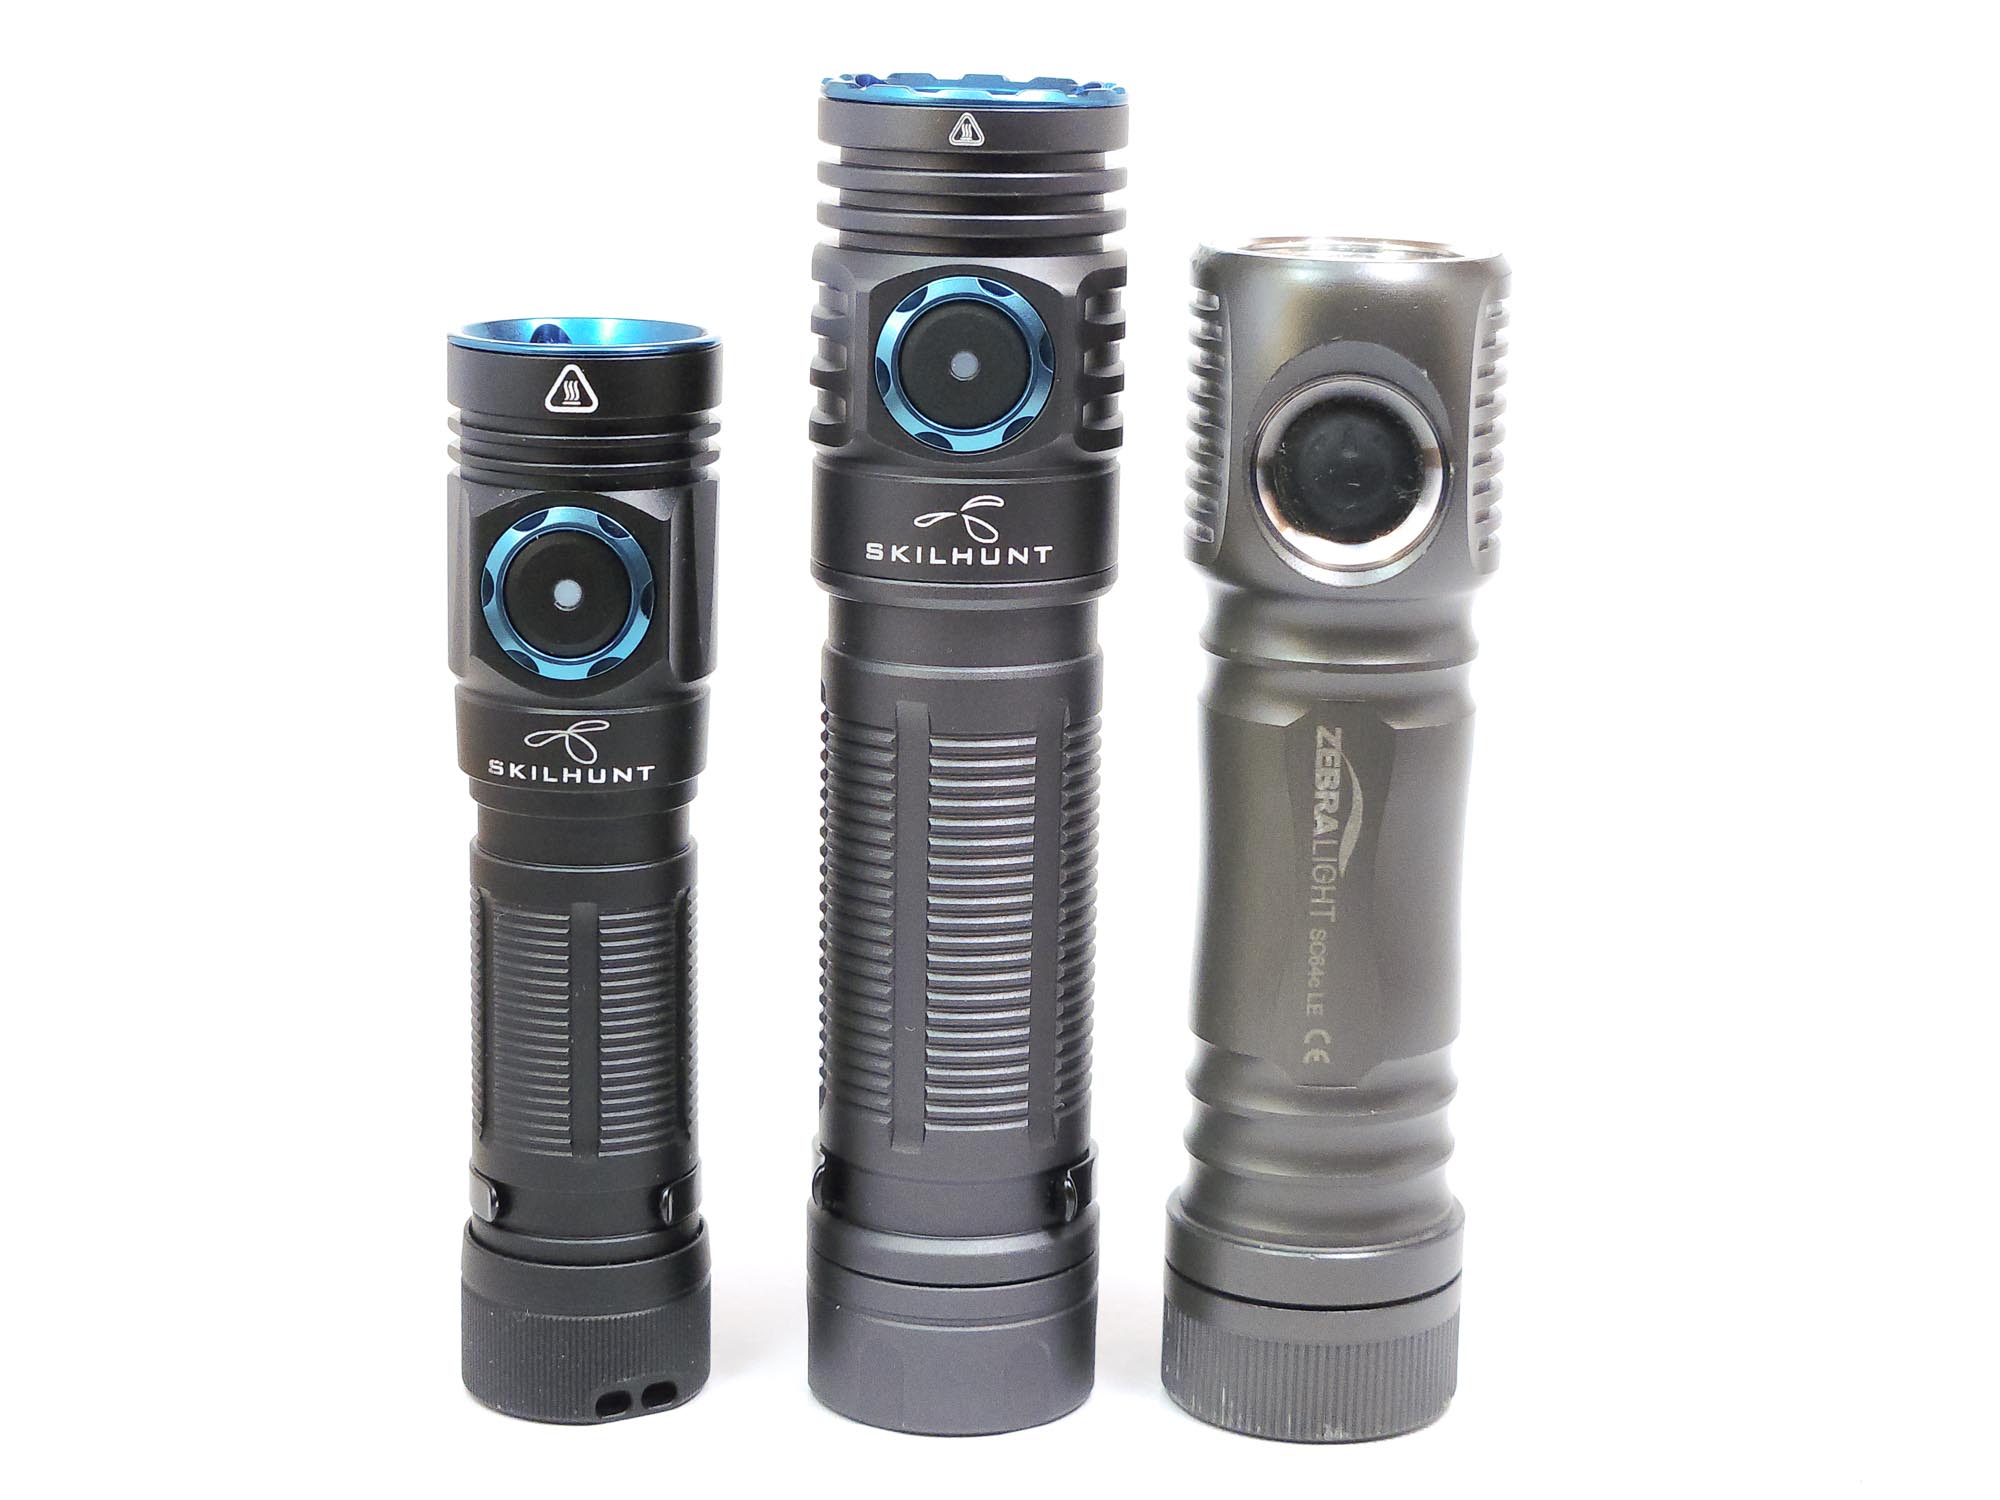
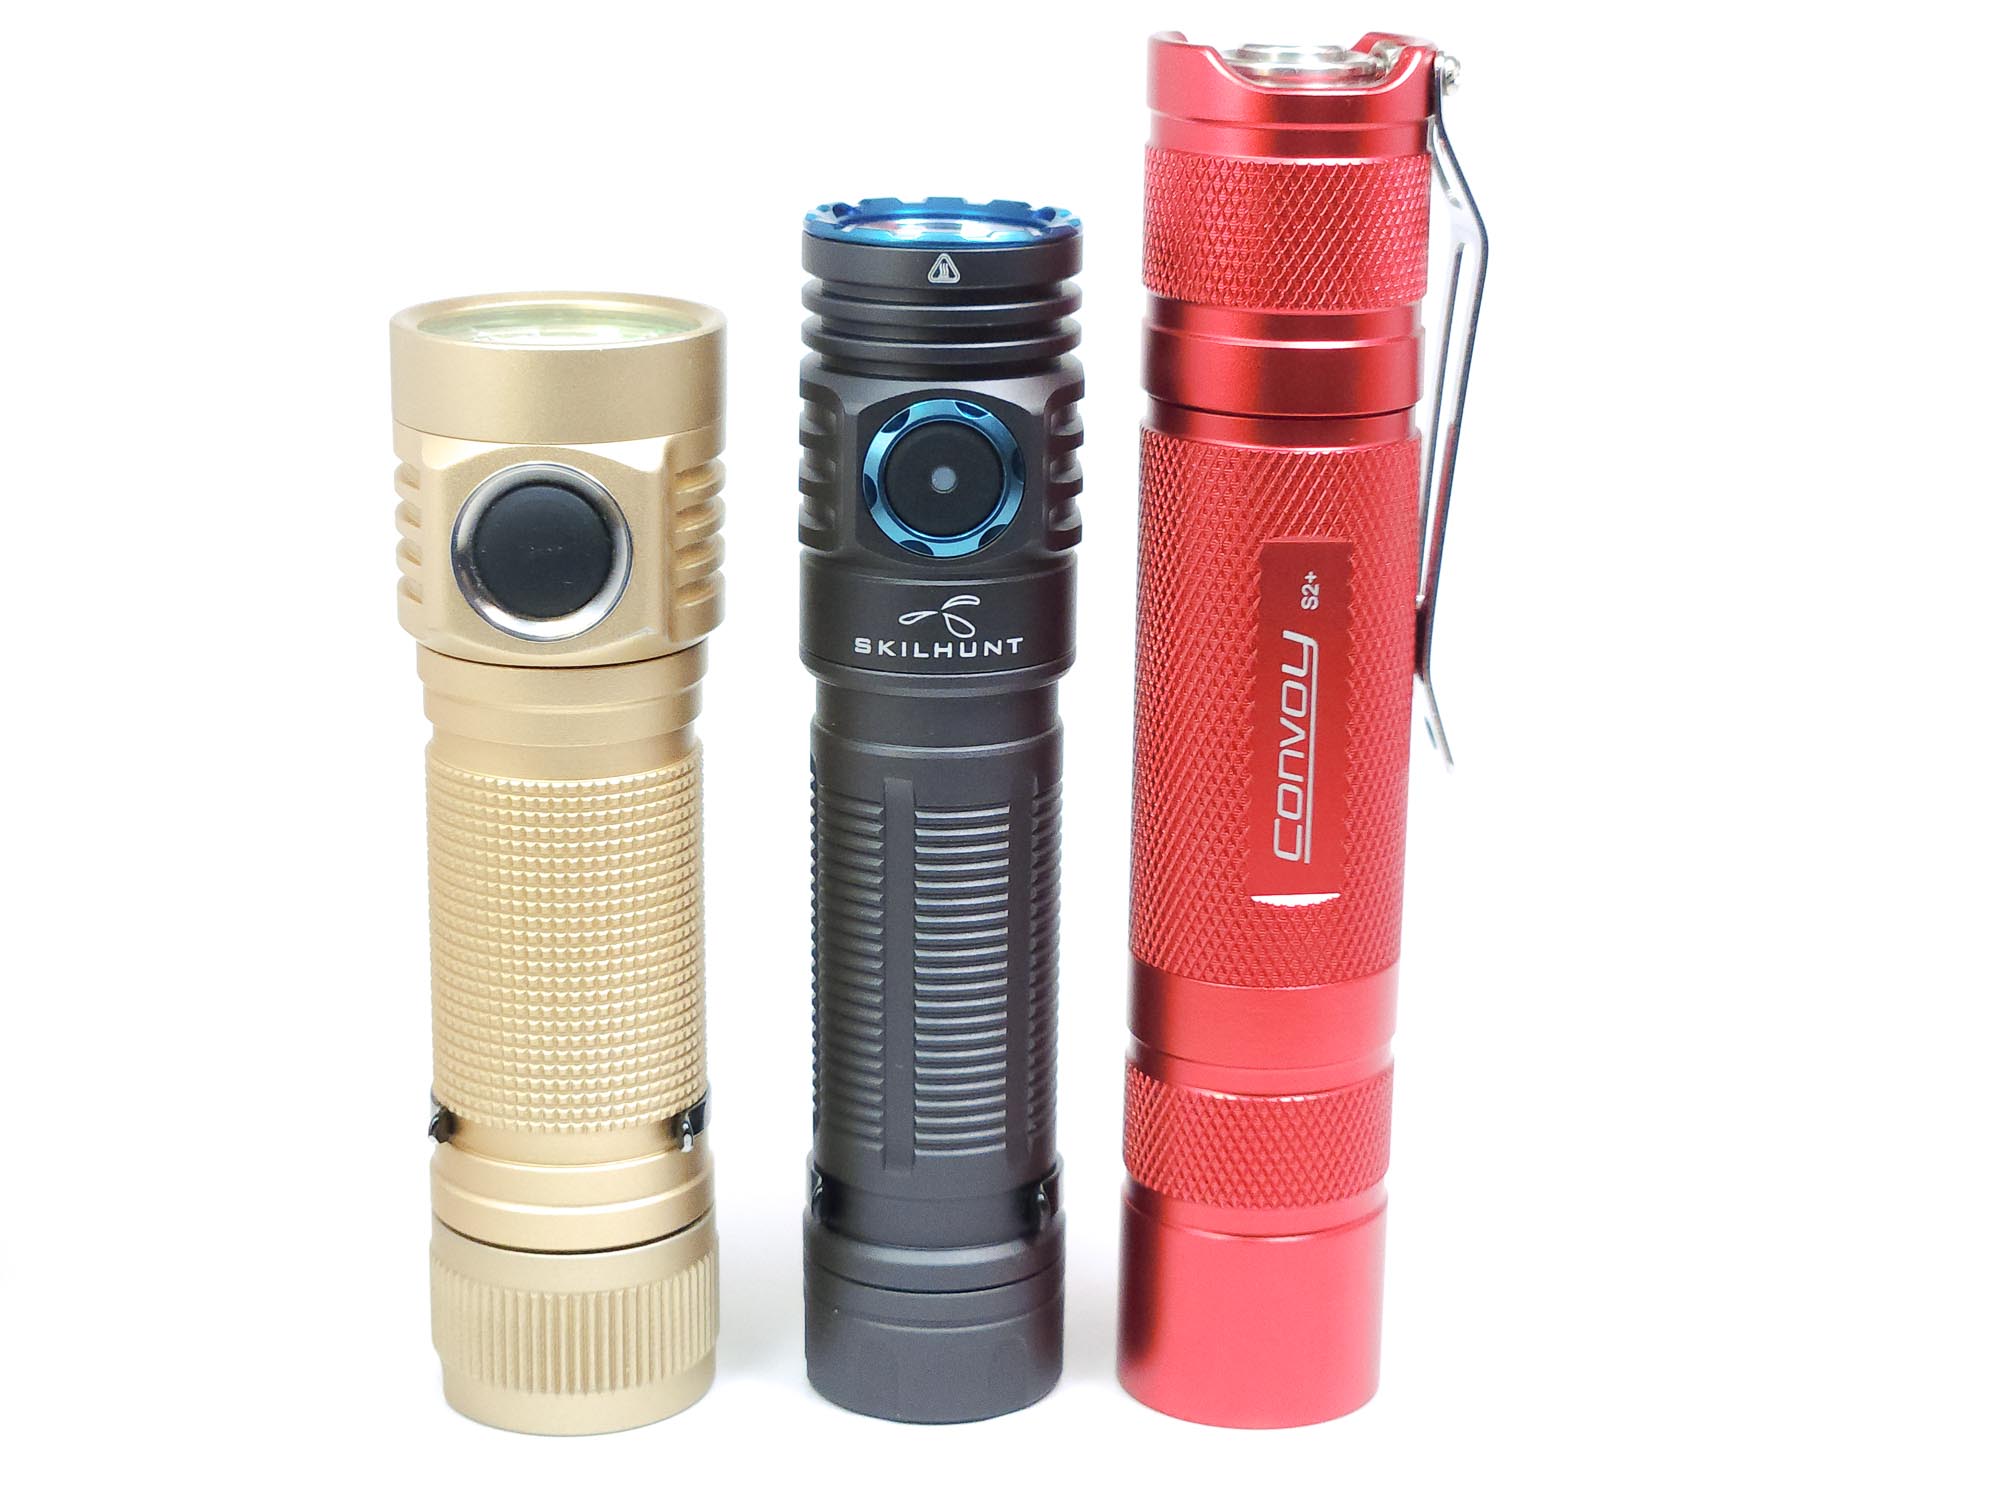
Flashlight size comparison with its competition:
As you can see, it’s a fairly small light, for an 18650.
Group 1: Skilhunt M150 v2, Skilhunt M200 v3, Zebralight SC64c LE
Group 2: Emisar D4V2, Skilhunt M200 v3, Convoy S2+
Driver & User Interface:
Available modes:
- L2, L1, M2, M1, H1, T2, T1
Available blinky modes:
- Strobe, SOS, beacon
From OFF:
- Press and hold: Memorized low mode: L2 or L1
- Single click: Memorized regular mode: M2, M1, or H1
- Double click: Memorized turbo mode: T2 or T1
- 3 clicks: Memorized strobe mode
- 4 clicks: Lockout
From ON:
- Press and hold: Cycle next level within the same mode (except strobe)
- 1 click: Off
- Double click: Memorized turbo level (except from low mode)
- 3 clicks: Memorized strobe mode
Mode memory:
- Each of the modes retains its level
Shortcuts:
- To Low: Hold from off
- To Turbo: Double-click from off or regular mode
- To Strobe: Triple-click from off or regular mode
Low voltage warning:
- When the battery is getting low, the indicator light on the switch blinks red
Strobe/blinkies
- Triple-click to get into strobe mode
- Double click to cycle through strobes
- Strobes
- Strobe
- SOS
- Beacon
Lock-out mode:
- Electronic lockout is possible with 4 clicks from off
- When in electronic lockout, you can hold for momentary moonlight (L2)
- Physical lockout is also possible by unscrewing the tail cap
PWM
- L1 and L2 do have PWM, according to Opple, but it wasn’t visible to me by eye or on my phone’s camera.
Additional/summary info on the UI:
- While the v3 UI is a departure from what we had in v2, it’s still well thought out and easy to move through.
Batteries & Charging
My test model from Skilhunt did not include one of their batteries, so all recording testing was performed with a Samsung 30Q.
Skilhunt offers a choice of two batteries with this light: The BL-131 or the BL-135. Both are protected, button top, and 69mm by 18.6mm. The differences are that the BL-131 is 3100mAh, with 15A continuous discharge and apparently 30A burst, while the BL-135 has 3500mAh capacity with 8A continuous discharge and 17A burst.
I tested output with several batteries I had; the Samsung 30Q I used for testing, a Molicell P28A, a Wuben-branded 18650, and a Sofirn 18650. Each one came out with nearly the same lumen measurements, so my assumption is that my numbers should be very similar to what you’d see with a stock battery.
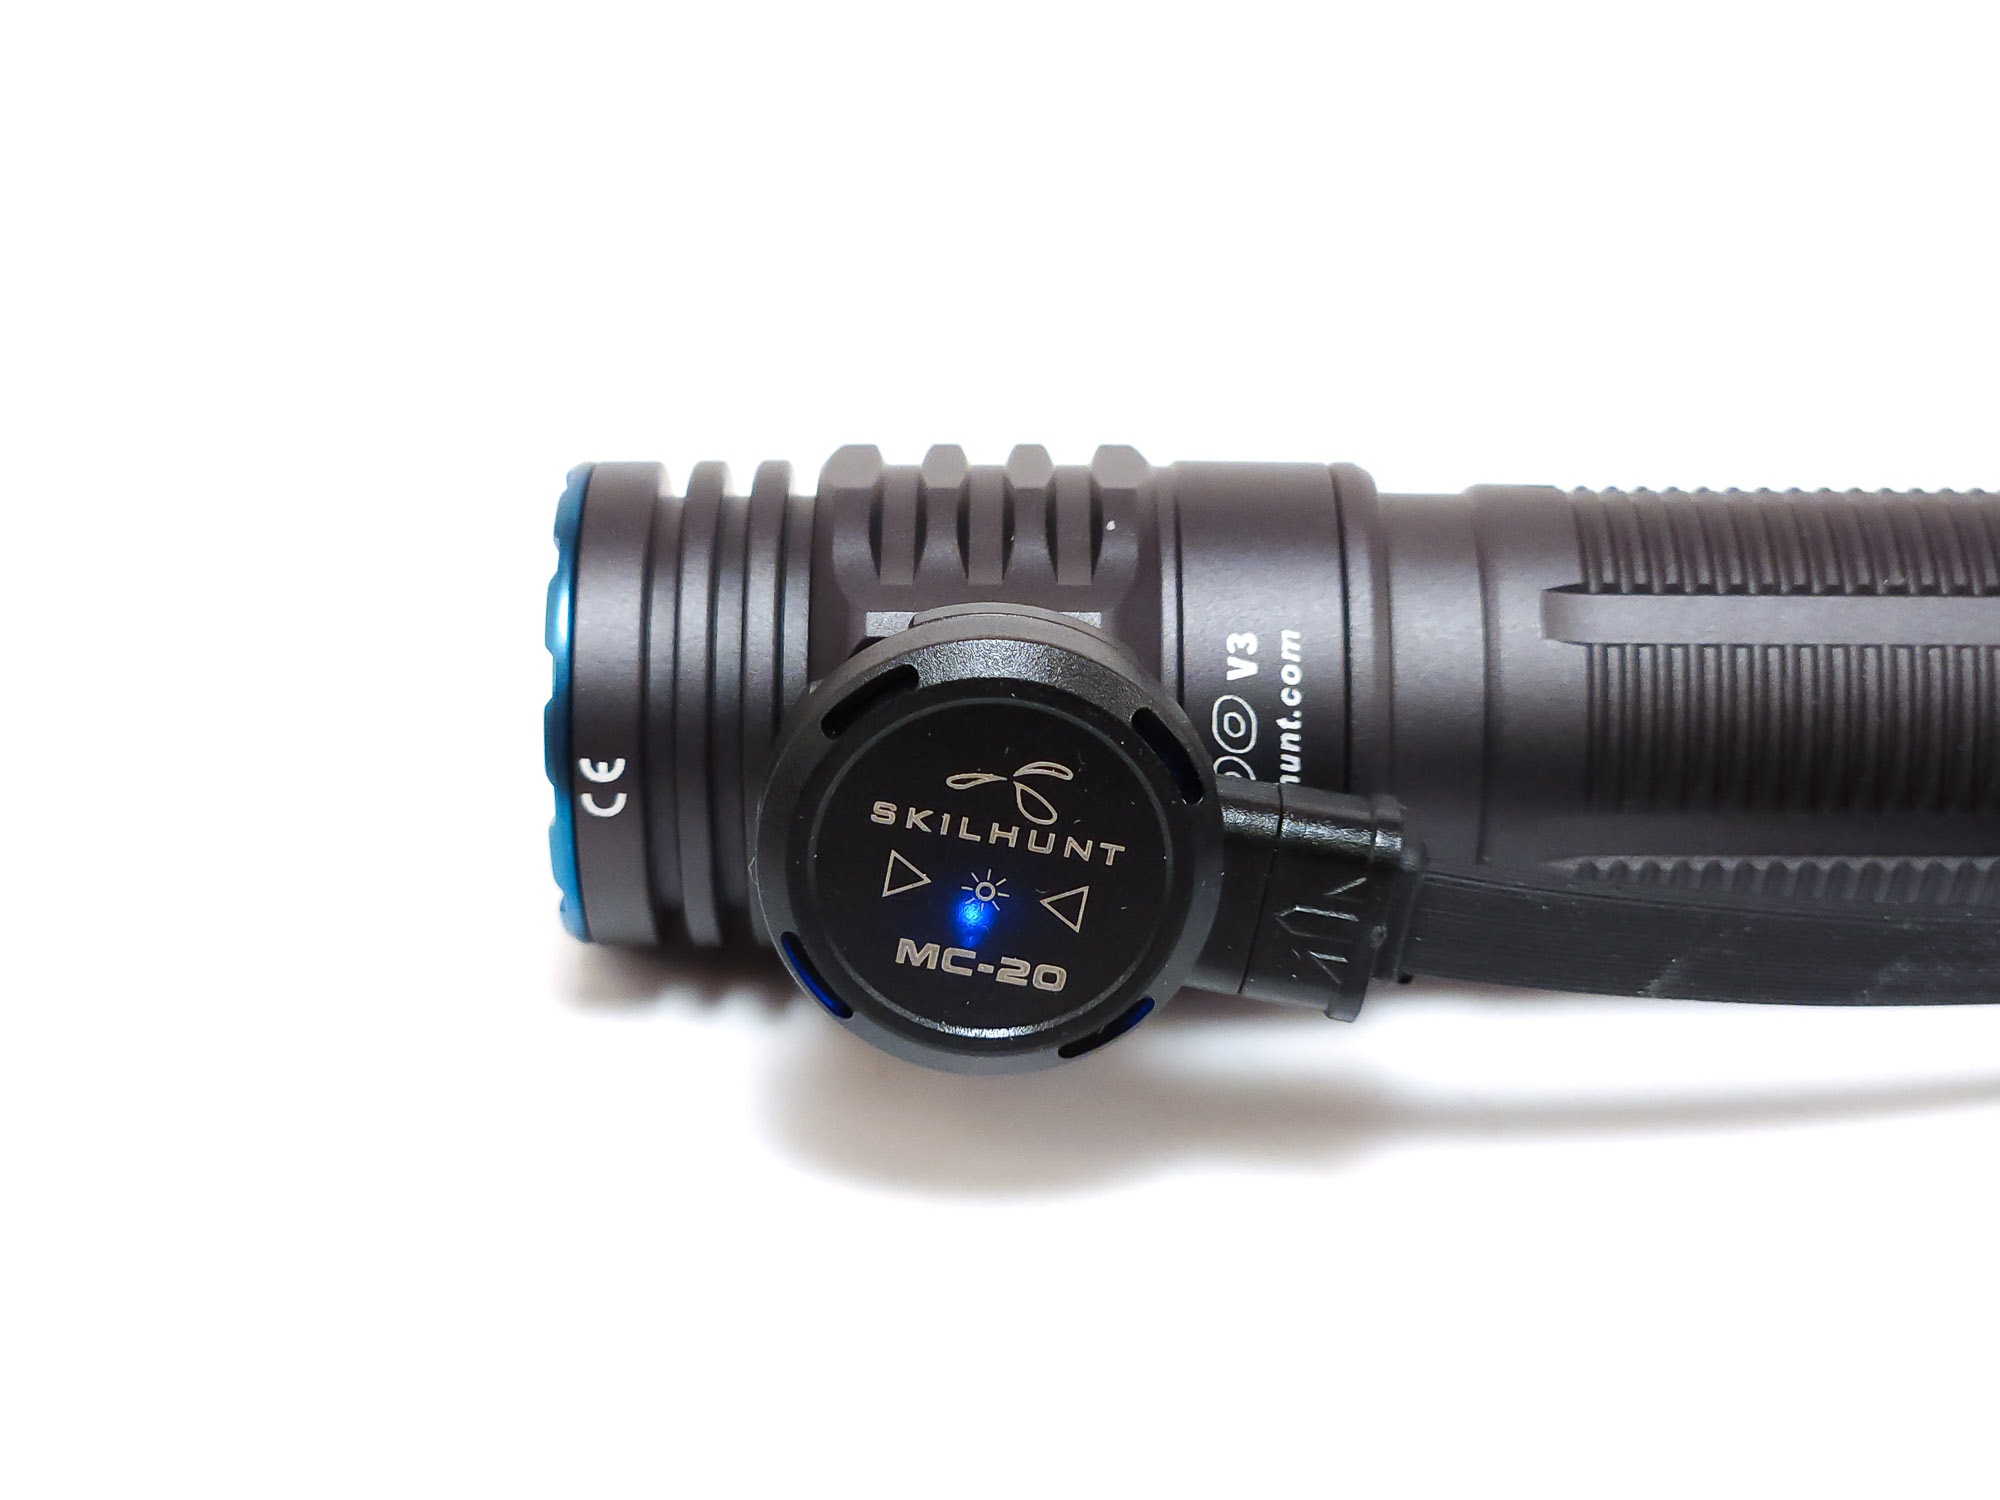
The M200 comes with one of Skilhunt’s proprietary magnetic charging cables. I personally don’t mind the proprietary charging. I have my own charger and usually take the battery out and stick it in there, though I understand having different chargers for different lights is not always welcome. This one in particular is an MC-20, which has a 2A charge, as compared to their MC-10, which has a 1A charge. They are physically identical, so you can use an MC-10 with the M200, though it will take longer to charge. Since charging should ideally be done at half of the capacity battery, ex. a battery that has a capacity of 3000mAh should be charged at 1.5A, 2A for a 3500mAh or 3100mAh battery is a little bit high but not exactly bad for the battery. For my 3000mAh 30Q and 2800mAh P28A, 2A is more than I’d prefer, so keep that in mind when selecting a battery.
Sometimes I found the magnetic charging to be a little finicky. The charger has a tiny post which slots into a tiny hole on the charging port that is surrounded by a small, rubber gasket. A few times when I connected the charger, the red light on it blinked continuously until I jiggled it a bit, so it must not have made a good connection at first. Usually, it clicked in and the light turned blue immediately, though. Similarly, in my testing, charging took about 2.5 hours, though one time the light on the charger remained red well past 2.5 hours, so I left it to see how long it would take. At around 3 hours and 40 minutes, I picked it up and it immediately turned blue. I’m wondering if there was a poor connection on that charge as well.
The M200 has low voltage protection on the driver, and it kicks in around 2.9V. Charging took on average, 2.5 hours, which is about right for 2A and a 3000mAh battery, and terminated around 4.13V. Incidentally, you can use the light on any mode while charging, even without the battery.
Performance test
To obtain these numbers, I used a very rudimentary integrated shoebox and ceilingbounce on my Samsung Galaxy S10. Measurements have been calibrated using a standardized calibration light provided by 1Lumen.
Lumen measurements (for each mode)
Overall output is pretty good, and close to Skilhunt’s specs, which puts turbo at a 40% increase over v2! L2 is a decent moonlight mode, though sometimes the spill can illuminate more than I need in the pitch darkness. The ability that v2 had to set which modes you wanted in Mode Group B is missed here, because some of the levels seem a little too close together. The difference between M1 and H1, and H1 and T2 aren’t really that much, perception-wise. If they removed M1 and H1 and replaced it with a ~250 lumen mode, there would definitely be a greater perceived change between the modes. Overall, I can’t complain, though.
Raw measurements:
| Mode | Amps at start | Specs | turn on | 30 sec | 10 minutes |
| L2 | 0.00 | 0.5 | 0 lm | 0 lm | 0 lm |
| L1 | 0.02 | 10 | 6 lm | 6 lm | 6 lm |
| M2 | 0.10 | 65 | 56 lm | 56 lm | 56 lm |
| M1 | 0.28 | 170 | 166 lm | 166 lm | 166 lm |
| H1 | 0.70 | 380 | 400 lm | 400 lm | 397 lm |
| T2 | 1.40 | 650 | 689 lm | 672 lm | 651 lm |
| T1 | 2.94 | 1400 | 1472 lm | 1396 lm | 640 lm |
| Turbo at 3.6V | 2.61 | – | 962 lm | 906 lm | 625 lm |
1Lumen calibration:
| Mode | Amps at start | Specs | turn on | 30 sec | 10 minutes |
|---|---|---|---|---|---|
| L2 | 0.00 | 0.5 | 0 lm | 0 lm | 0 lm |
| L1 | 0.02 | 10 | 6 lm | 6 lm | 6 lm |
| M2 | 0.10 | 65 | 50 lm | 50 lm | 50 lm |
| M1 | 0.28 | 170 | 149 lm | 149 lm | 149 lm |
| H1 | 0.70 | 380 | 361 lm | 358 lm | 356 lm |
| T2 | 1.04 | 650 | 617 lm | 602 lm | 584 lm |
| T1 | 2.94 | 1400 | 1319 lm | 1251 lm | 573 lm |
| Turbo at 3.6V | 2.61 | – | 830 lm | 812 lm | 560 lm |
Amps were measured with a Klein Tools MM300 digital multimeter to the best of my ability.
Parasitic drain:
- Skilhunt says quiescent drain is 38μA, though I could not measure any.
Battery Life: Runtime graphs

| Mode | Specified | Measured runtime ANSI | Time till shut off |
|---|---|---|---|
| L2 | – | – | – |
| L1 | 150h | – | – |
| M2 | 26h | – | – |
| M1 | 10h | 9h 06min | 9h 19min |
| H1 | 4h 20min | 3h 22min | 3h 39min |
| T2 | 2h 25min | 2h 34min | 2h 48min |
| T1 | 2h 23min | 2h 04min | 2h 23min |
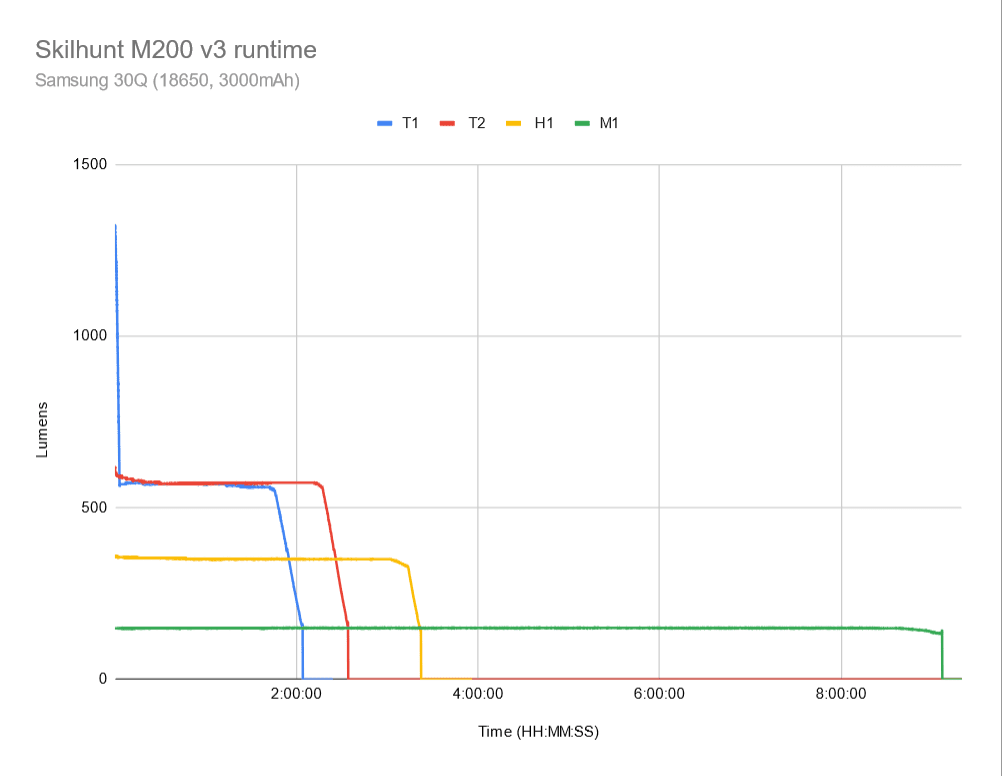
T1 takes a real runtime hit from that 3 minutes of turbo and loses about half an hour against T2, so unless you really need that lumen boost, you might as well just use T2. H1 and M1 don’t meet their specifications, but the Samsung 30Q is a 3000mAh battery, while Skilhunt’s 18650 options come in at 3100mAh and 3500mAh. I’d estimate that if you had a BL-135, that extra 500mAh would get you very close to, if not past, specs. I did not measure modes lower than that on account of their extended run times.
Regardless of battery, we do get to see that the M200 v3 makes good use of its constant current driver to deliver regulated power over the light’s runtime. Three minutes for T1 to fully step down is pretty nice, and then sustaining ~600 lumens for the rest of the runtime on both T1 and T2 is pretty good for an 18650 light! I like seeing those flat line graphs!
ANSI FL1 standards: The runtime is measured until the light drops to 10% of its initial output (30 seconds after turning on). This does not mean that the flashlight is not usable anymore. The last column shows how long the light actually works till it shuts off. If there is a + symbol, it means that the test was stopped at that particular point, but the light was actually still running. This happens on certain occasions, with certain drivers, firmware, or batteries.
Peak beam intensity and beam distance measurements
The numbers for candela were obtained with a UNI-T UT383S luxmeter at 5 and 15 meters, then averaged. L1 and L2 measurements were taken at 1 and 2 meters due to the low output.
Raw measurements:
| Mode | Specified | Candela measured | Meters | Yards |
|---|---|---|---|---|
| L2 | – | 9 cd | 6 m | 7 yd |
| L1 | – | 90 cd | 19 m | 21 yd |
| M2 | – | 250 cd | 32 m | 35 yd |
| M1 | – | 750 cd | 55 m | 60 yd |
| H1 | – | 2188 cd | 94 m | 103 yd |
| T2 | – | 3788 cd | 123 m | 135 yd |
| T1 | 8900 cd | 8300 cd | 182 m | 199 yd |
| T1 at turn on | – | 8938 cd | 189 m | 207 yd |
1Lumen calibration:
| Mode | Specs | Candela measured | Meters | Yards |
| L2 | – | 10 | 6 m | 7 yd |
| L1 | – | 97 | 20 m | 22 yd |
| M2 | – | 270 cd | 33 m | 36 yd |
| M1 | – | 810 cd | 57 m | 62 yd |
| H1 | – | 2363 cd | 97 m | 106 yd |
| T2 | – | 4091 cd | 128 m | 140 yd |
| T1 | 8900 cd | 8964 cd | 189 m | 207 yd |
| T1 at turn on | – | 9653 cd | 196 m | 214 yd |
The peak beam intensity is spot on to Skilhunt’s specifications, even exceeding that at turn on! These are decent numbers for a light with an orange peel reflector, as the orange peel gives you more usable spill in exchange for some throw.
Extra info: Peak beam distance according to ANSI FL1 standards: The calculated value of distance in meters at which the flashlight produces a light intensity of 0.25 lux. (0.25 lux is about the brightness of a full moon shining on an object). The columns ‘Meters’ and ‘Yards’ use rounded numbers.
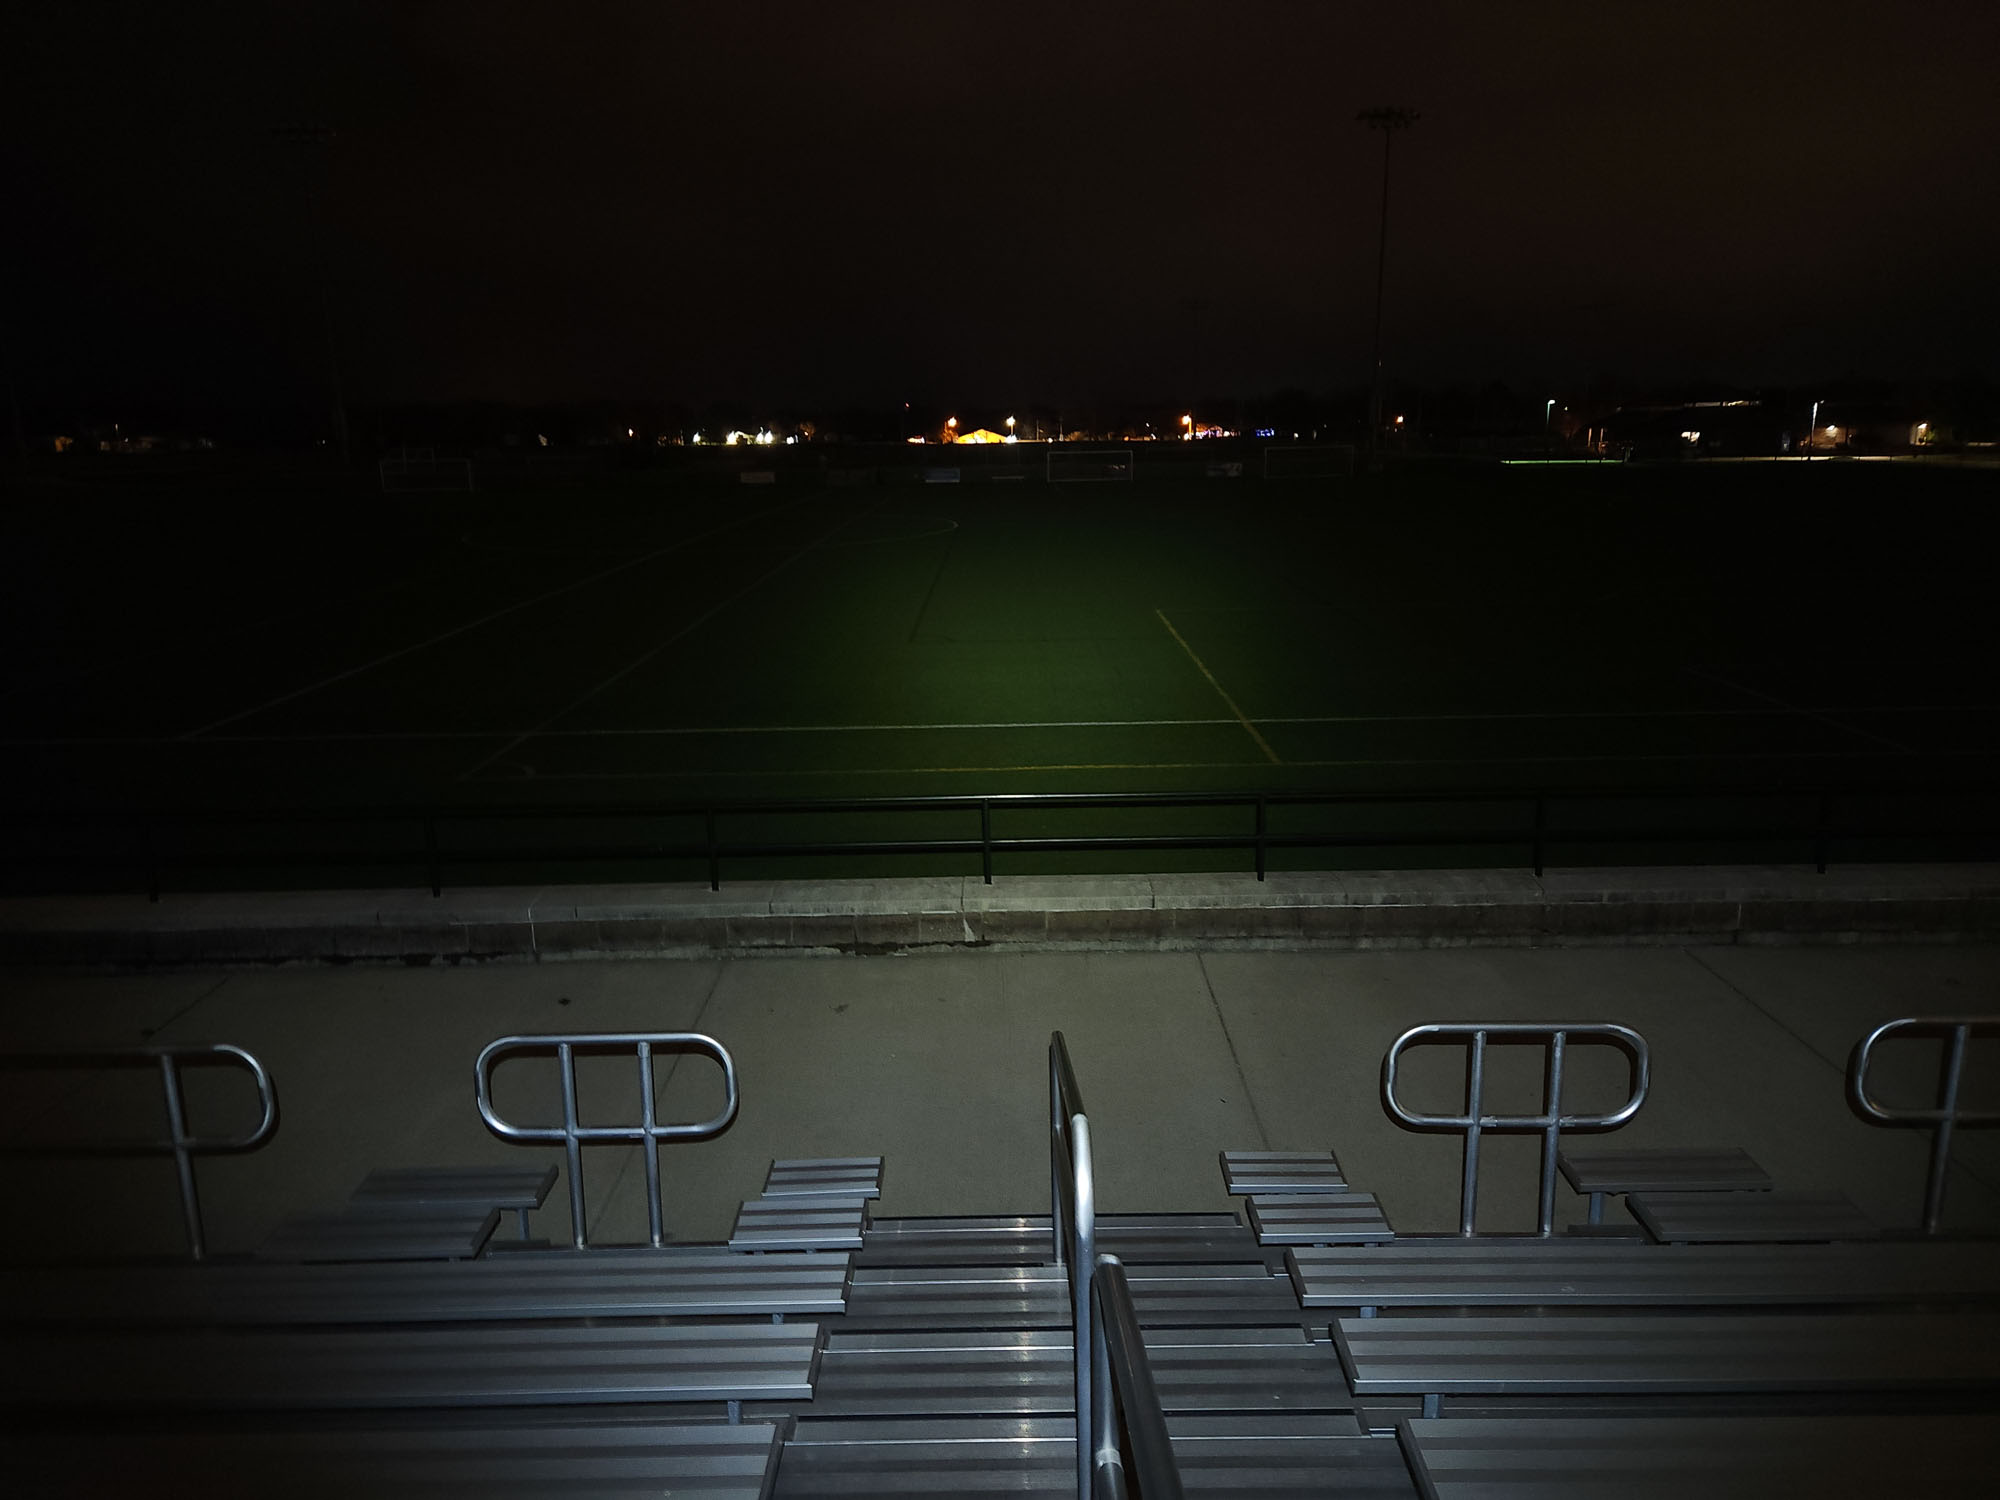
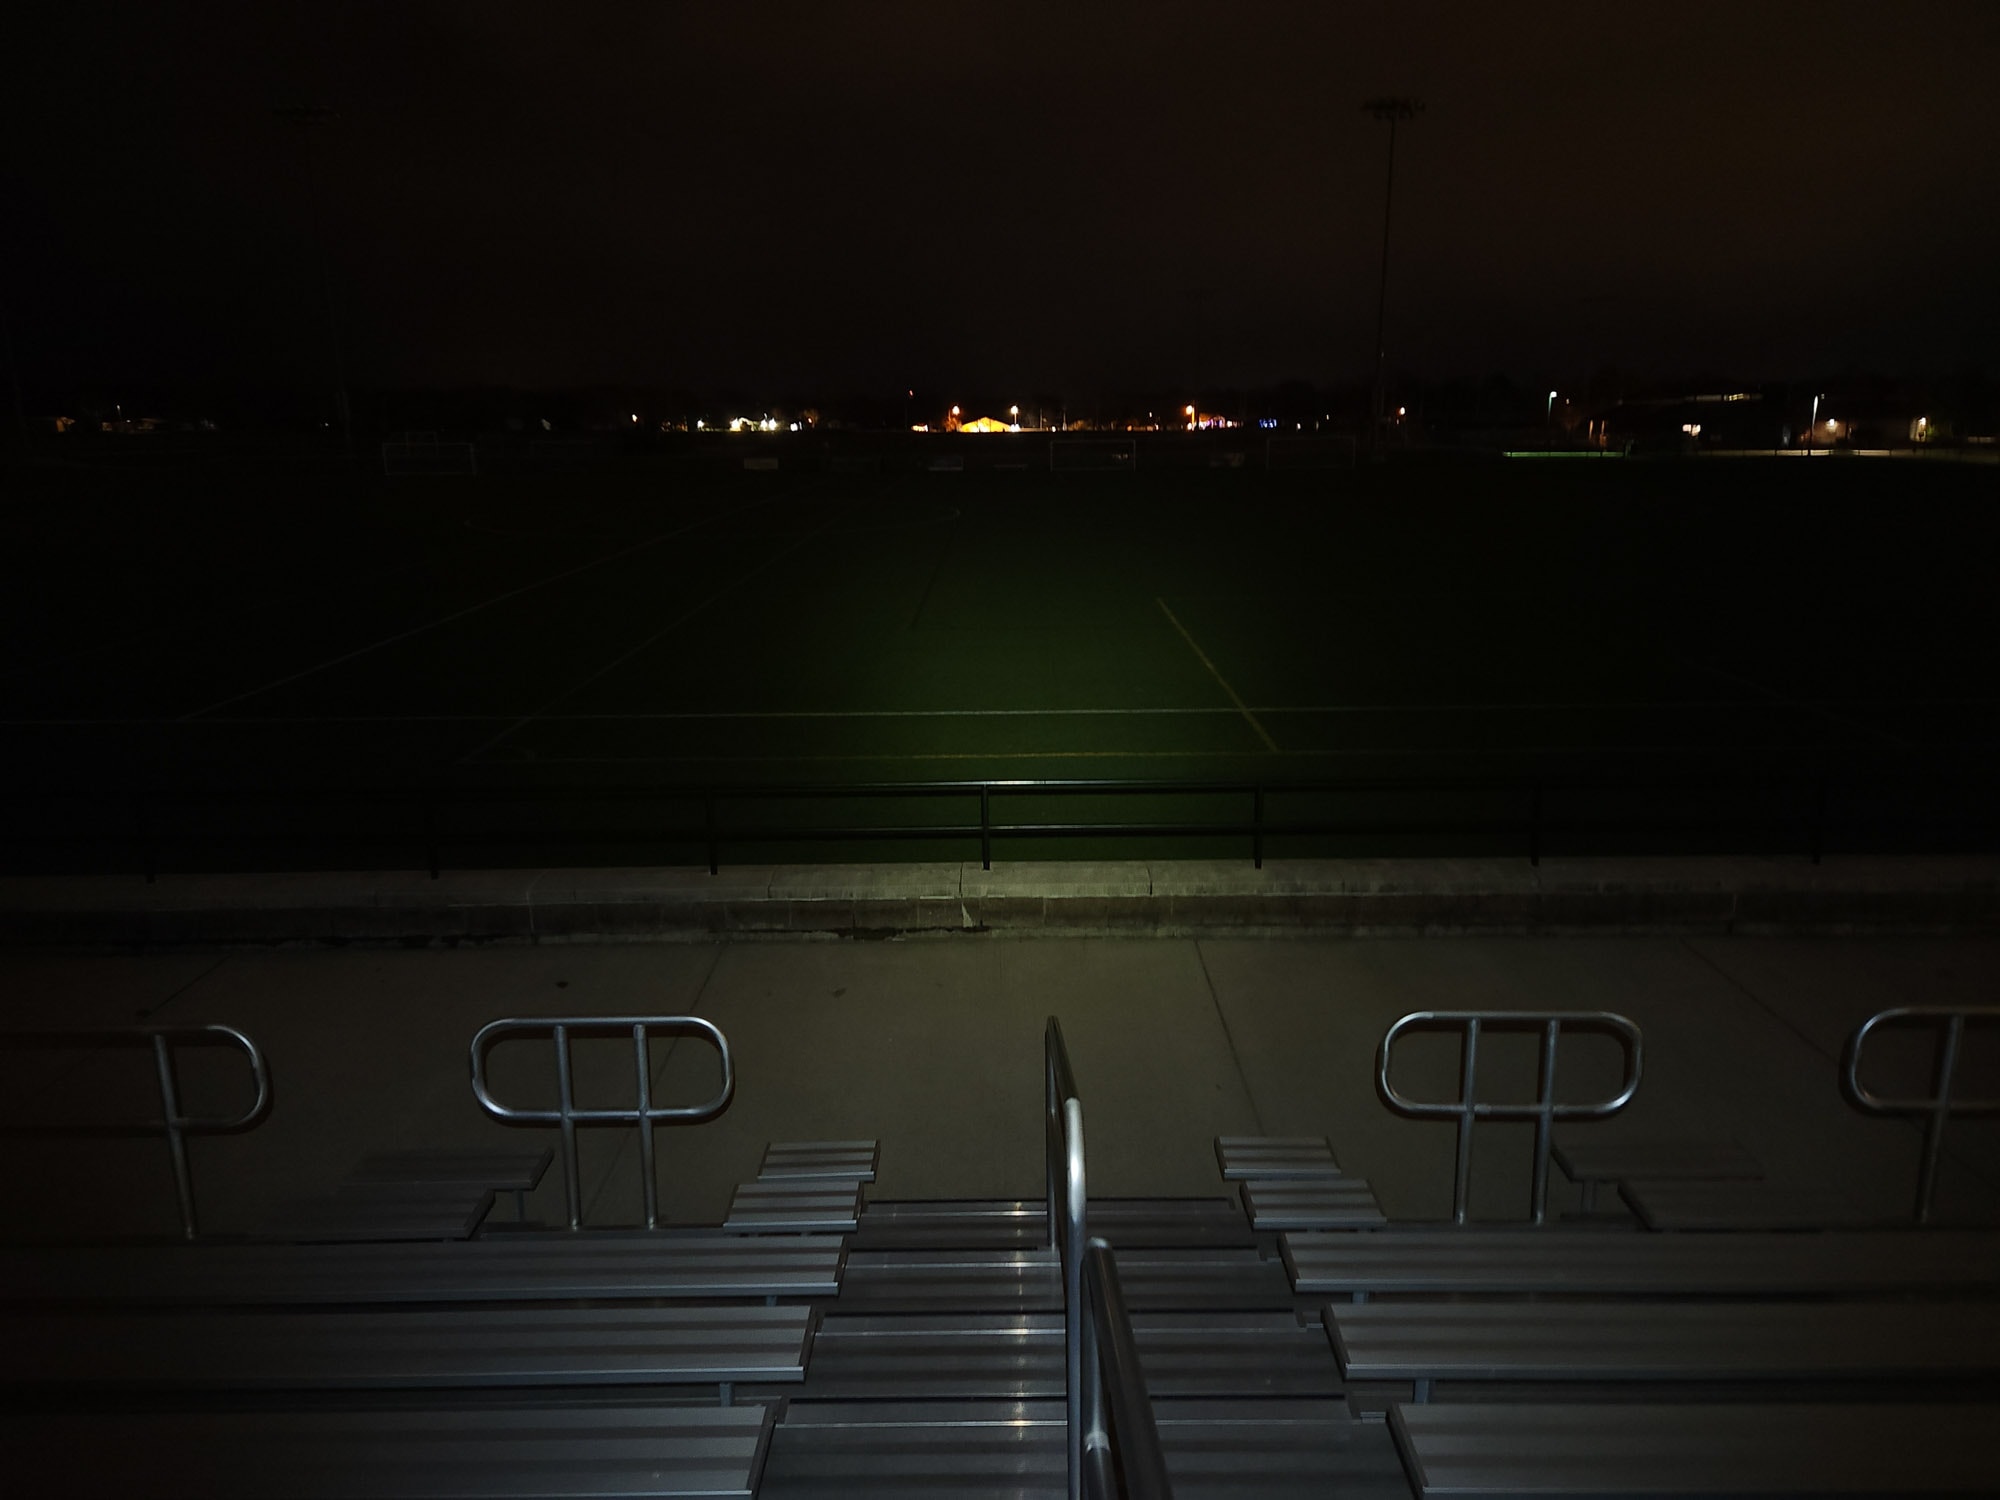
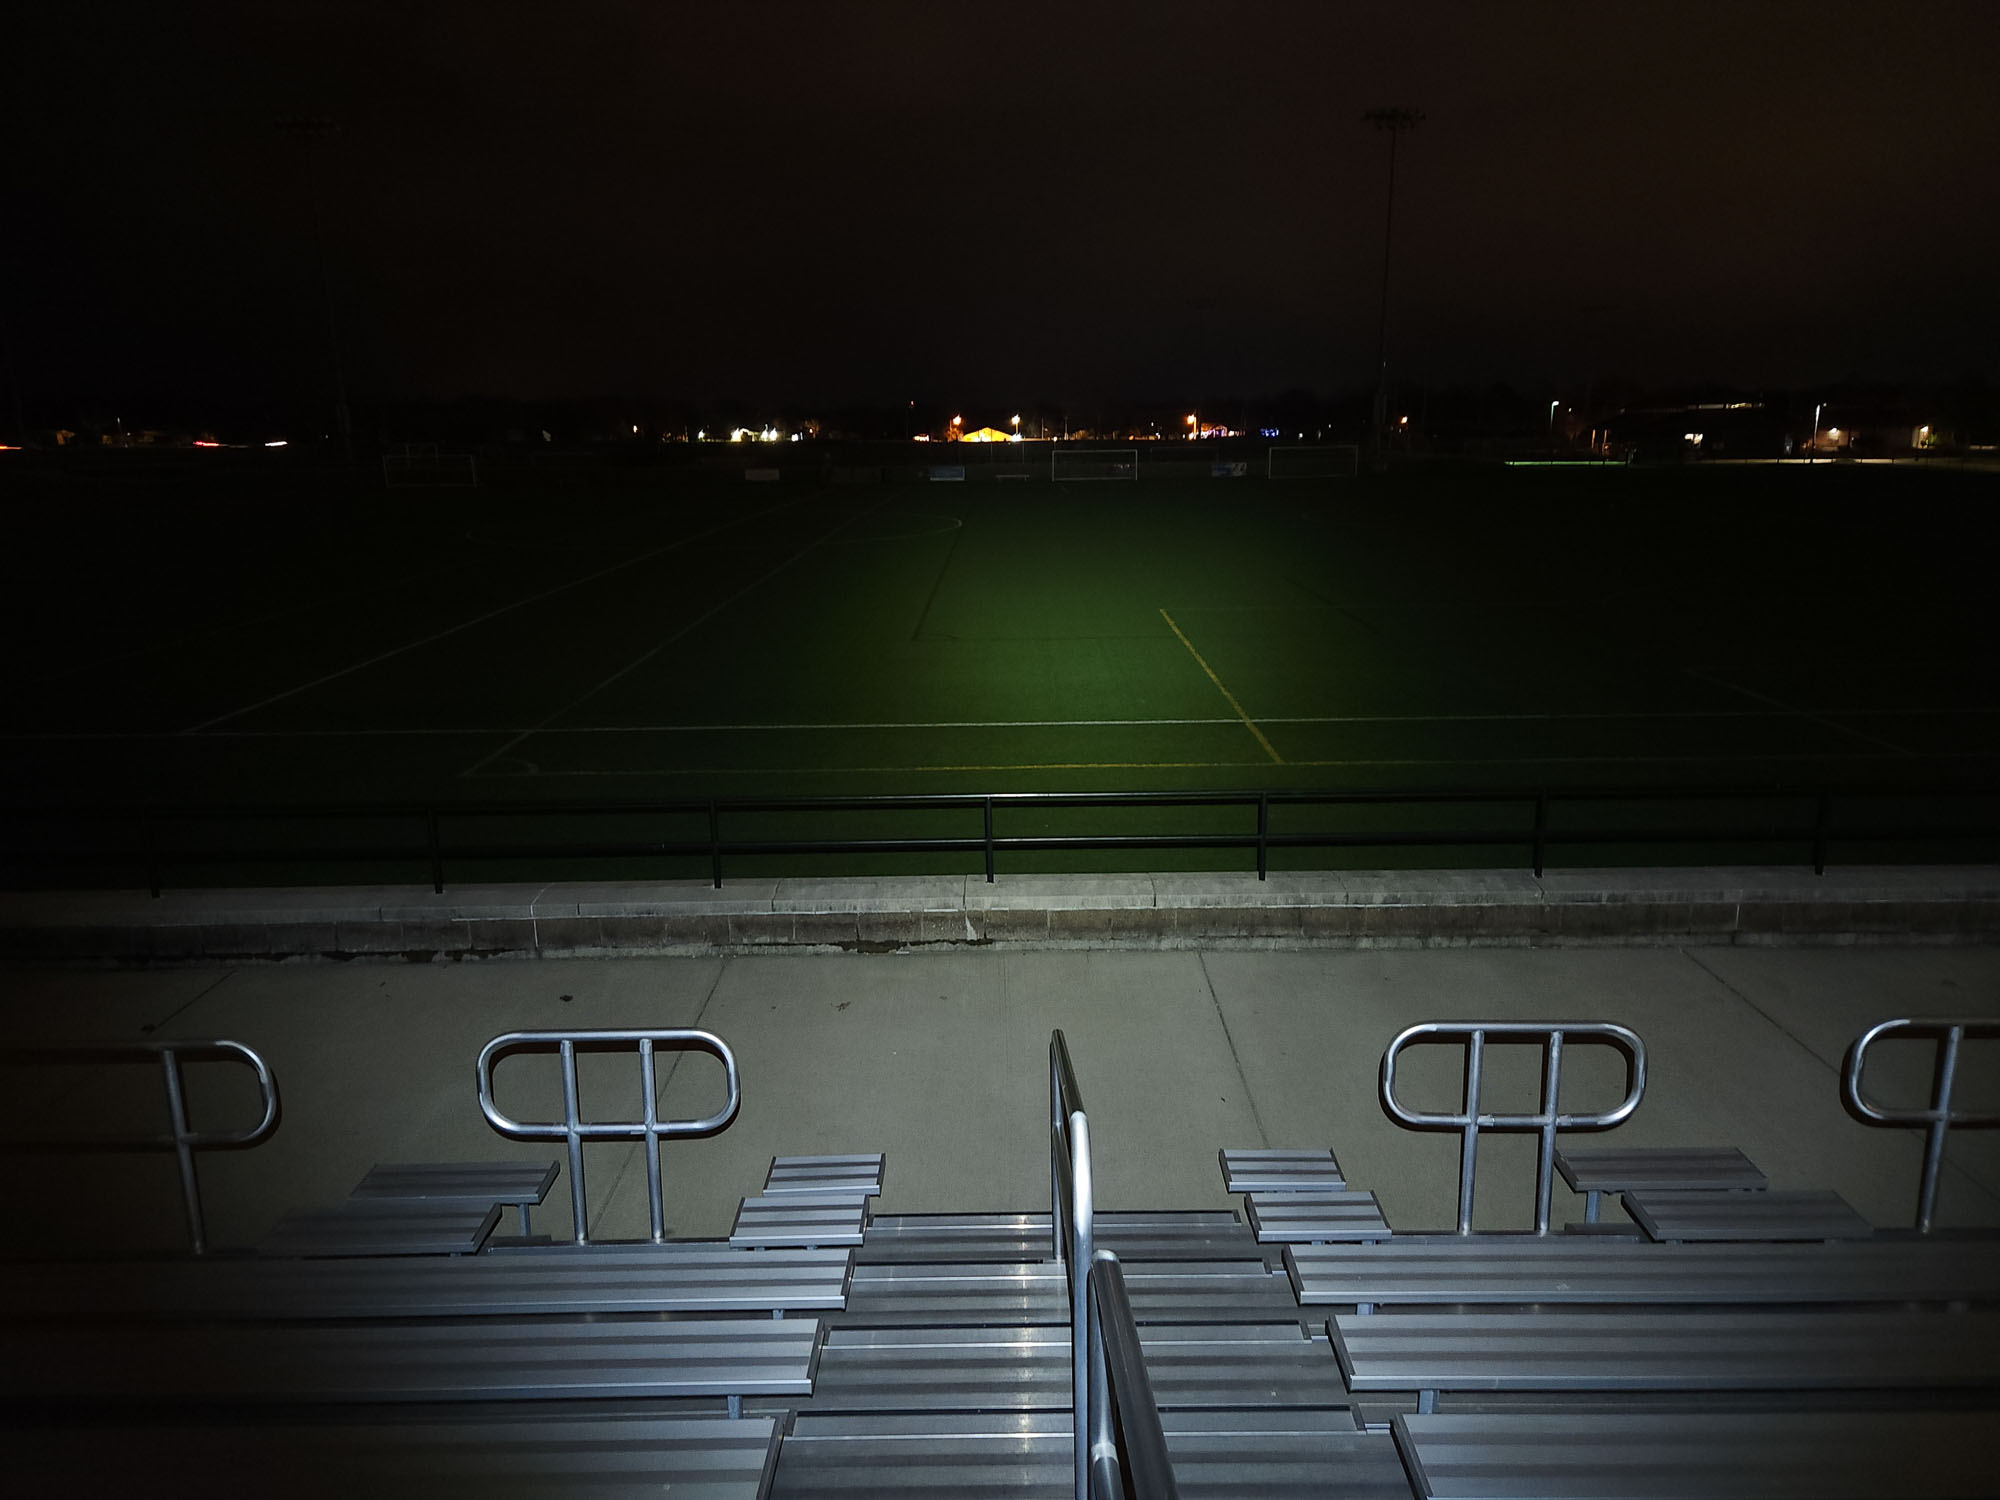
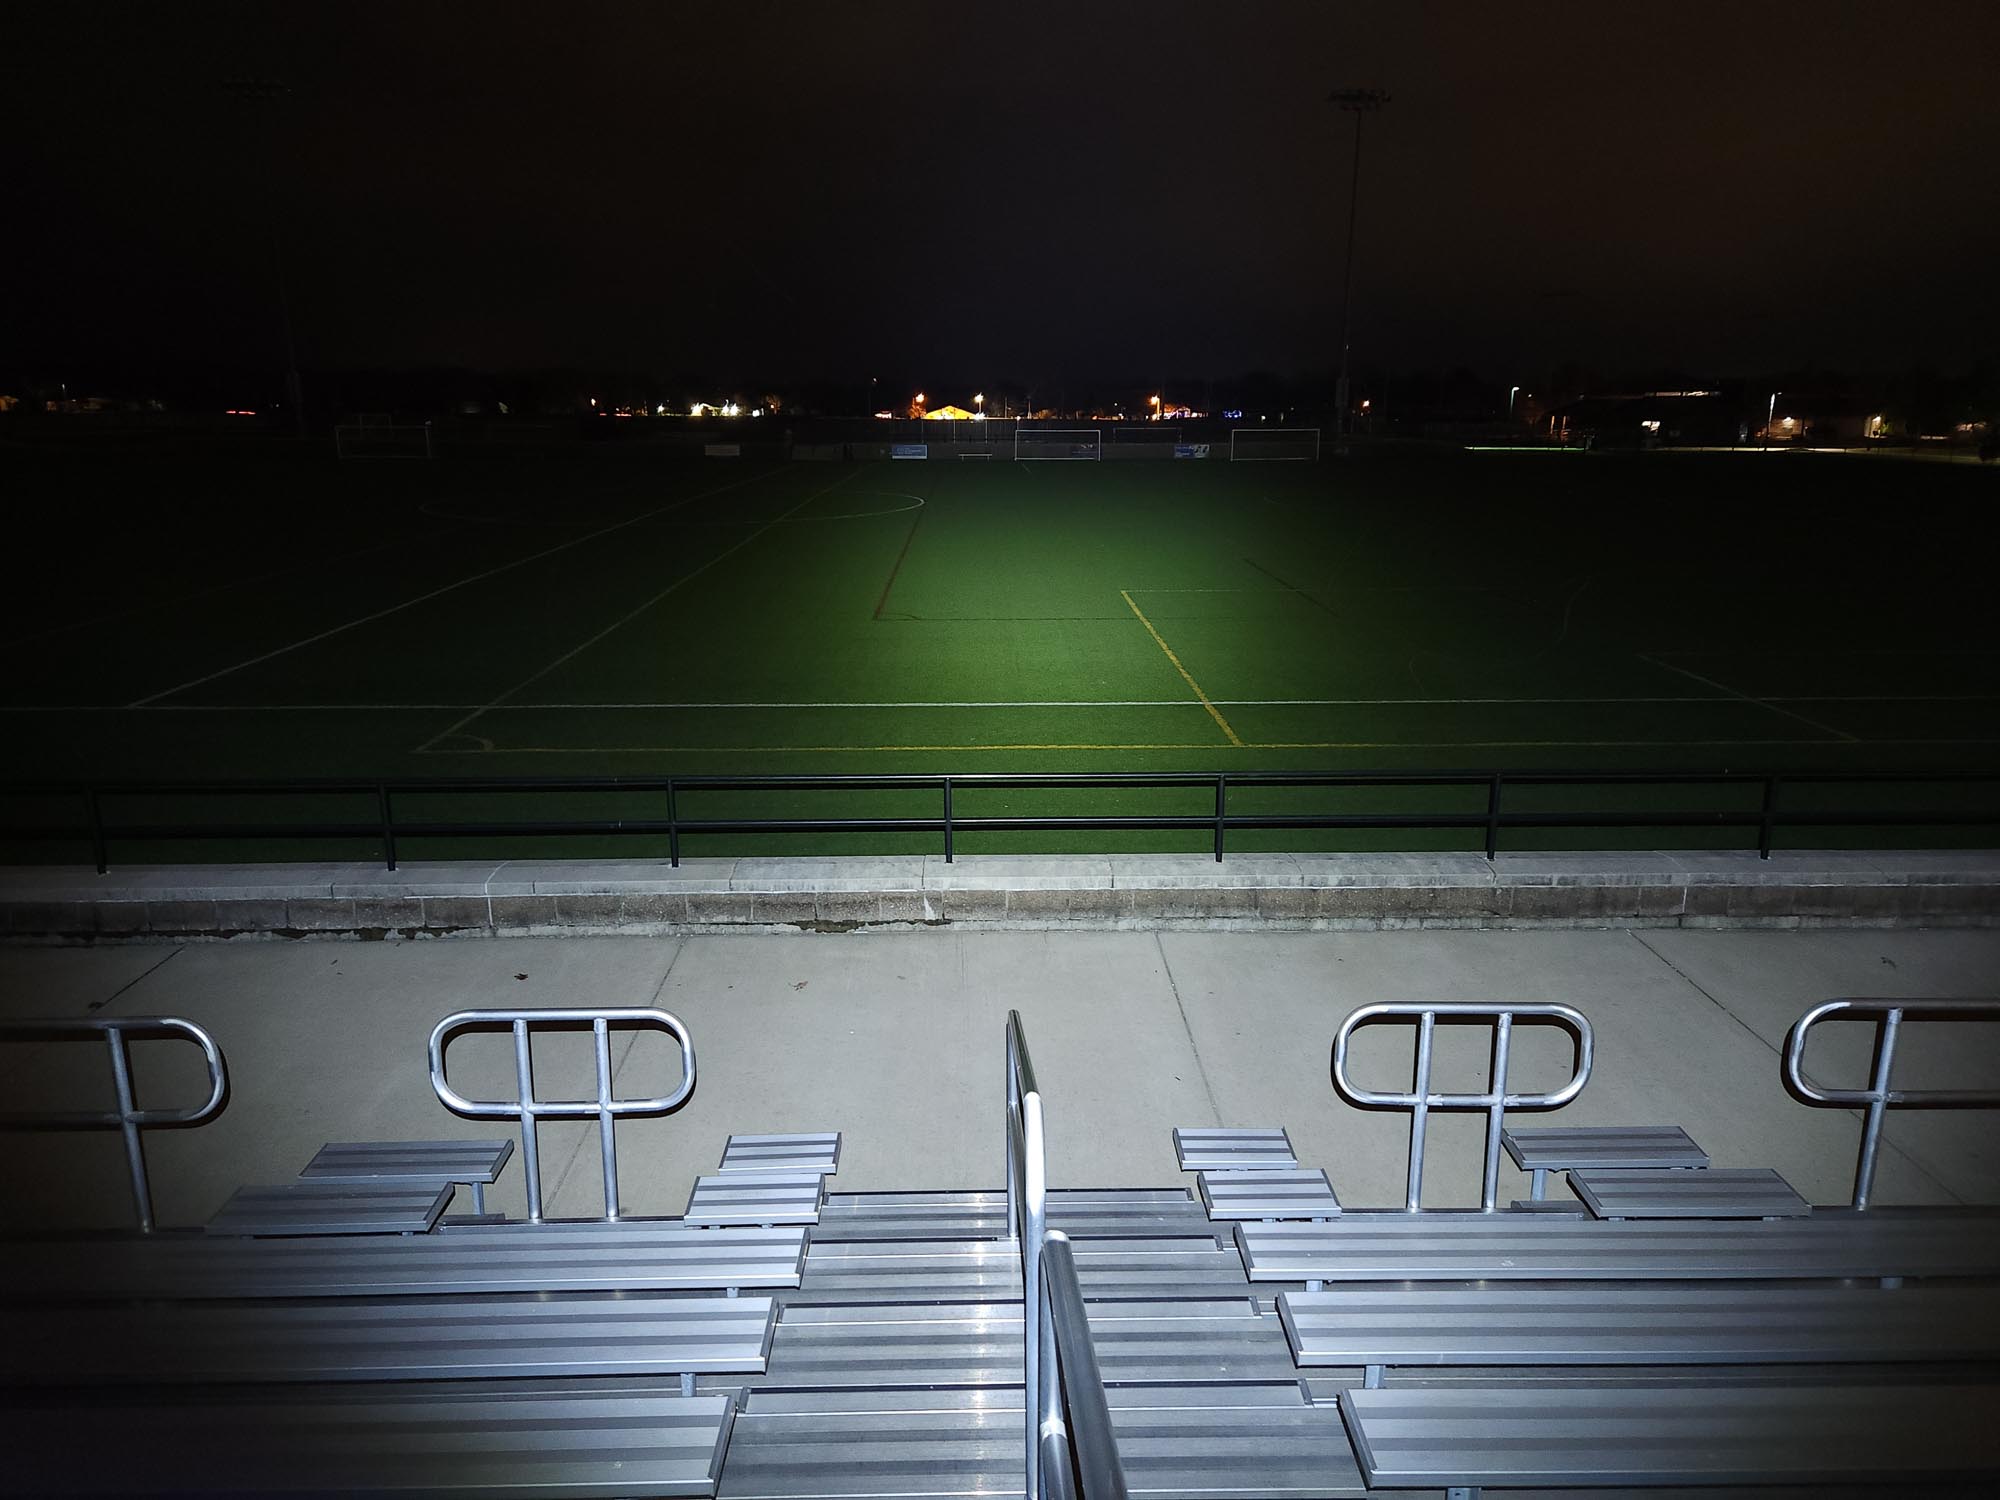
Beamshots
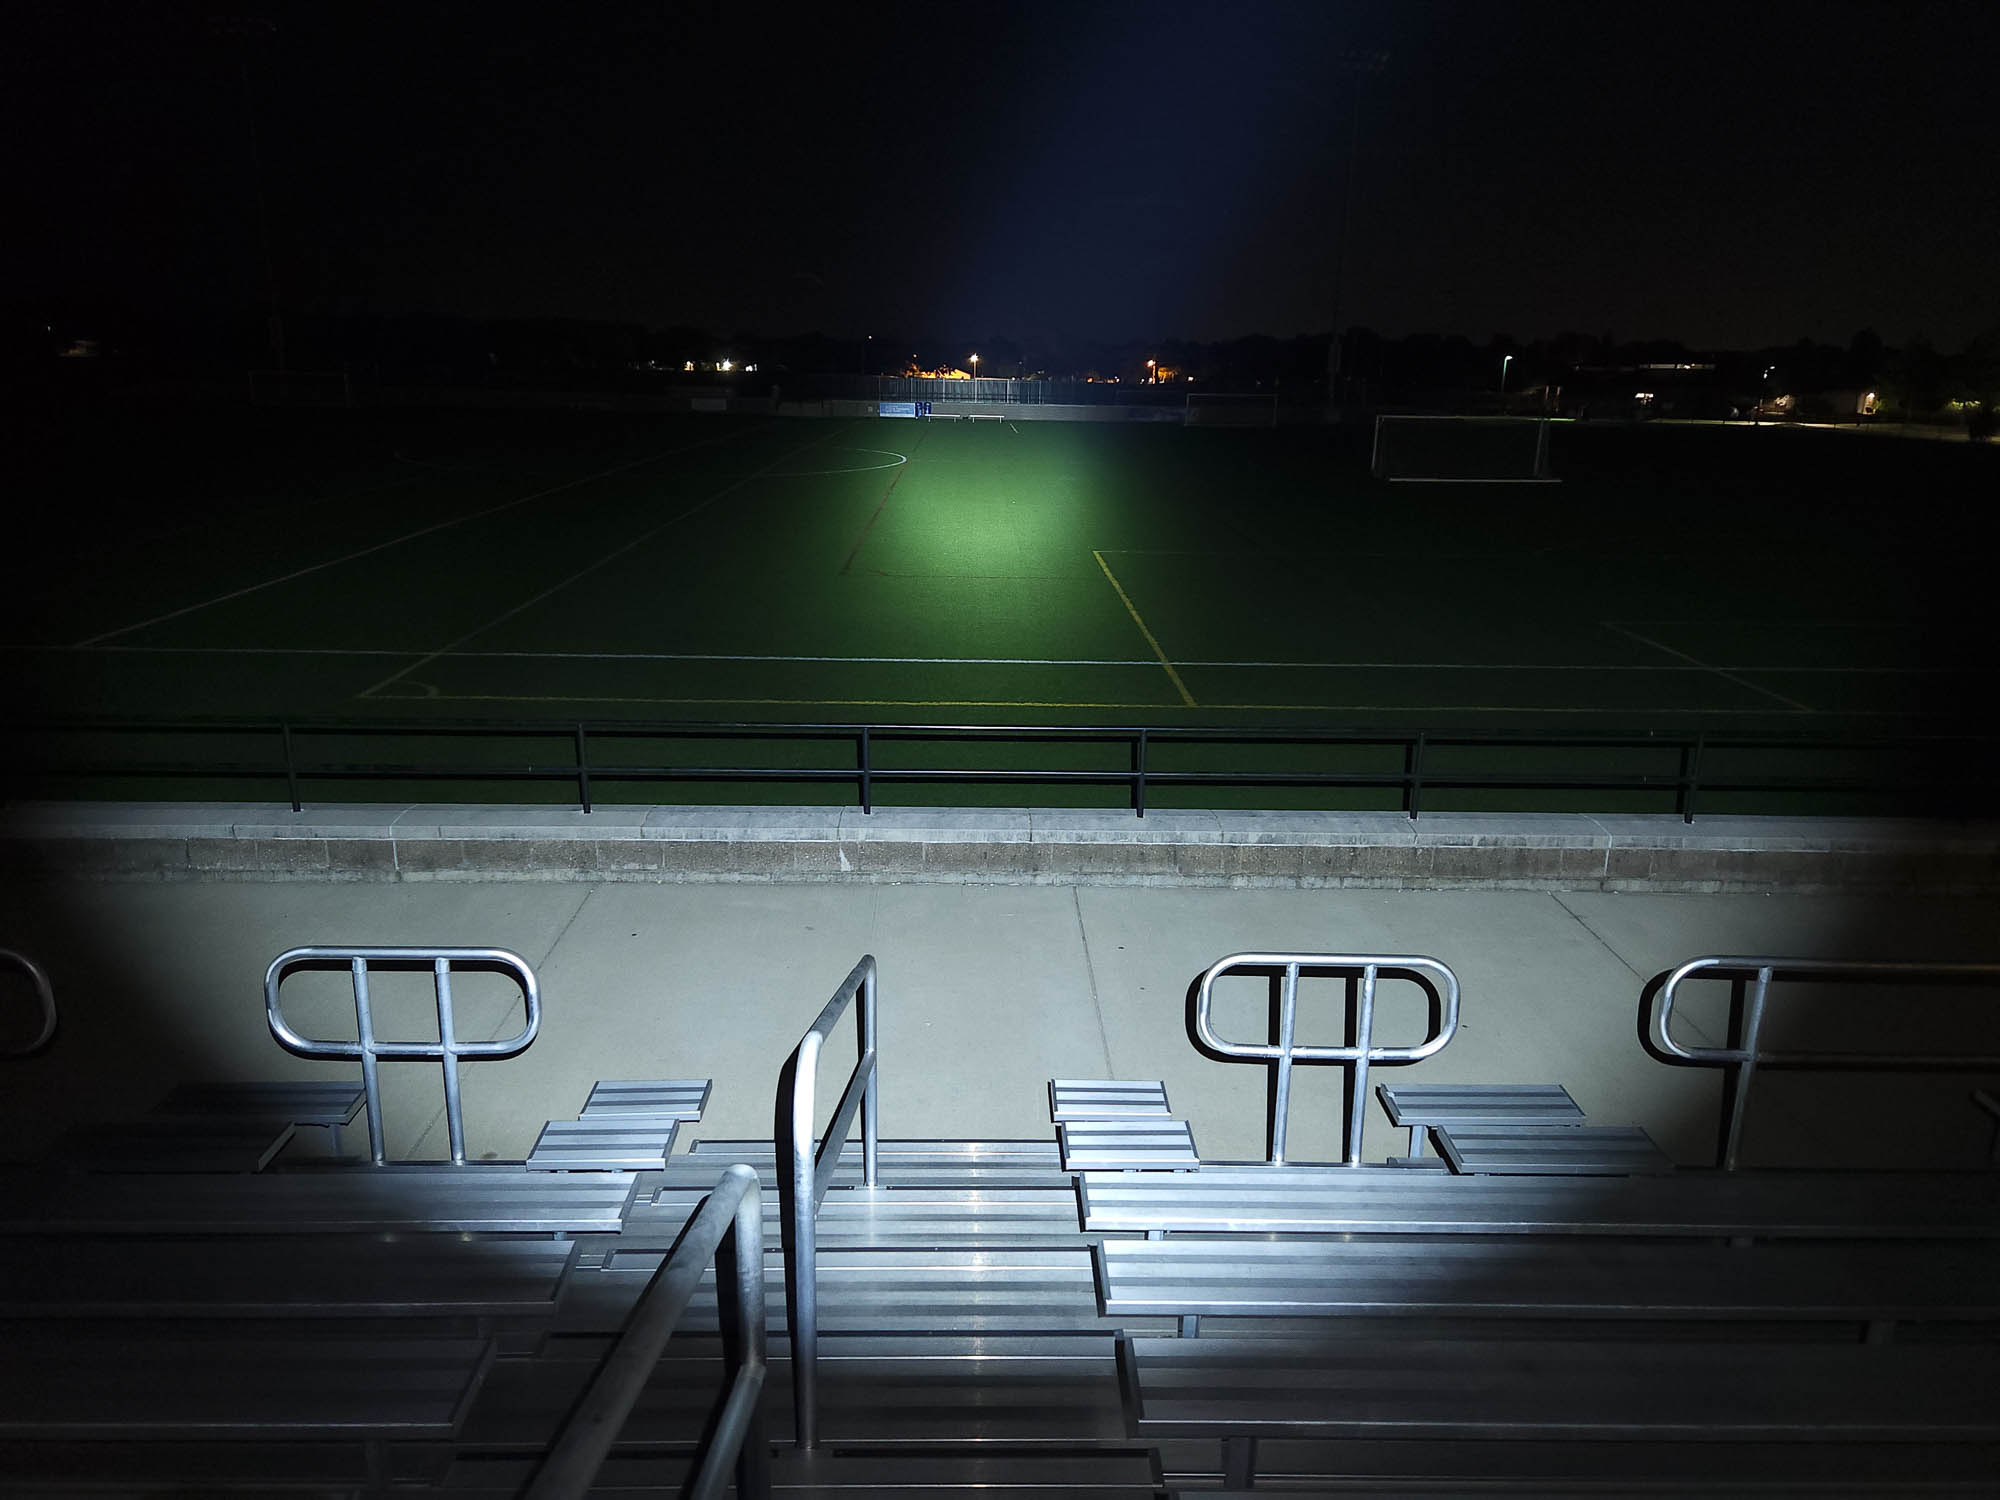
These were taken with a Samsung Galaxy S22+ using pro mode and the following settings:
- WB 5000K
- ISO 200
- Speed 0.5
The other end of the playing field is about 100m away.
Beamshots of the following flashlights compared:
- Skilhunt M200 v3
- Sofirn SC31T Pro
- ThruNite TN12 Pro

Disclaimer: This flashlight was sent to me for review at no cost by Skilhunt. I have not been paid to review, nor have I been holding back on problems or defects.
Final Verdict
Pros
- Can be had as a full package with battery (which you should take) and integrated charging
- Much improved clip
- Compact size good for pocket carry
- ~40% higher output than v2 with XP-L2
- Smooth, regulated output
Cons
- Somewhat inconsistent button
- Inability to move from low to main levels
- Proprietary magnetic charging can be touchy
- Tint shift on the XP-L2 can be annoying
Explanation on star ratings:
1: Avoid: a match would be a better choice – 2: Poor: significant defect or issues; almost unusable – 3: Average: some defects or issues; but still usable 4: Good: recommended (minor issues) – 5: Great: highly recommended

5 stars: ★★★★★
Skilhunt delivers a solid EDC light in the M200 v3. While enthusiasts favored v2’s UI due to its customizability, that doesn’t mean v3’s UI is bad. It’s more like many other lights in this category now. On the hardware side of things, nearly everything is a positive: Additional cooling fins, a crenulated bezel, and recessed button, ~40% higher output on T1 (with the XP-L2), and a massively improved clip. Heck, the clip alone makes the upgrade to v3 a winner. Now, the increase in output with the XP-L2 comes with less desirable tint shift in its beam, but there are two other emitter options, both of which have high CRI and neutral tint.
I liked reviewing this light. It’s going to have a permanent place in my EDC rotation due to its ease in carriability, usability, and regulation. I’ve given the v2 as a gift before, and I would still definitely still consider it for that purpose as well.
As a result, I give the Skilhunt M200 v3 five stars.
Buy the Skilhunt M200 with a small discount
Get 6% discount at Skilhunt by using the following discount code: blf06
1lumen selects and reviews products personally. We may earn affiliate commissions through our links, which help support our testing.