1lumen selects and reviews products personally. We may earn affiliate commissions through our links, which help support our testing.
Cyansky M1R Review
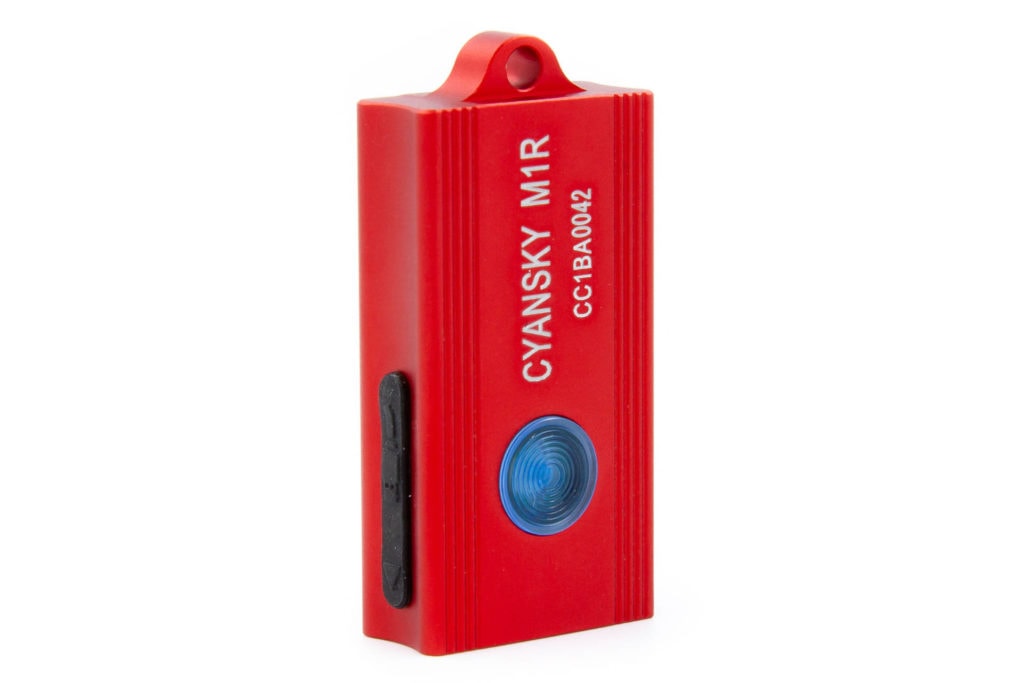
Cyansky M1R specifications
| Brand/model | Cyansky M1R |
|---|---|
| Flashlight category | Keychain flashlight |
| LED | Unknown |
| Max. Lumens | 200 Lumens |
| Max. Beam intensity | 756 cd |
| Battery config. | Internal |
| Onboard charging | USB-C |
| Modes | 6 |
| Blinkies | Red flash |
| Reflector | TIR |
| Waterproof | IPX8 |
| Review date | February 2022 |
Introduction:
Today in my hands I have the Cyansky M1R – it’s an all-in-one keyring light filling multiple functions, offering white, red, and UV emitters all in a small form factor.
One of the things I’m most curious about – is it pronounced cyan-sky, or see-yan-ski? Maybe one of these days I’ll find out…
While I’ve definitely seen Cyansky’s name around the place, I haven’t read all that extensively about their other lights apart from the other reviews on 1Lumen, and by all indications, they make solid lights. Does this light continue the tradition? Let’s find out.
Package quality.
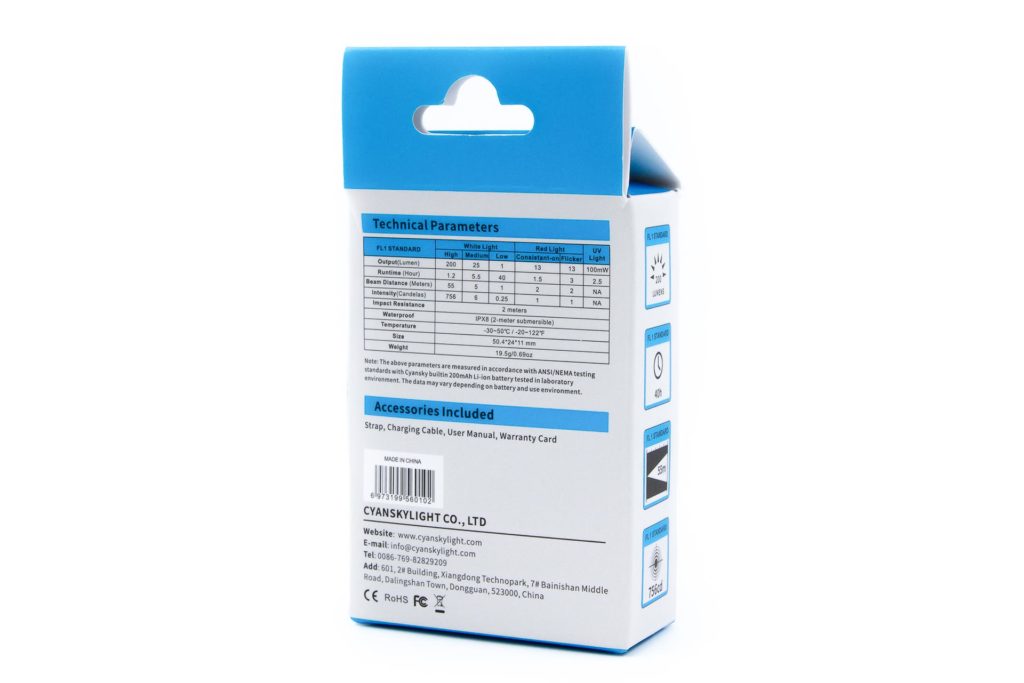
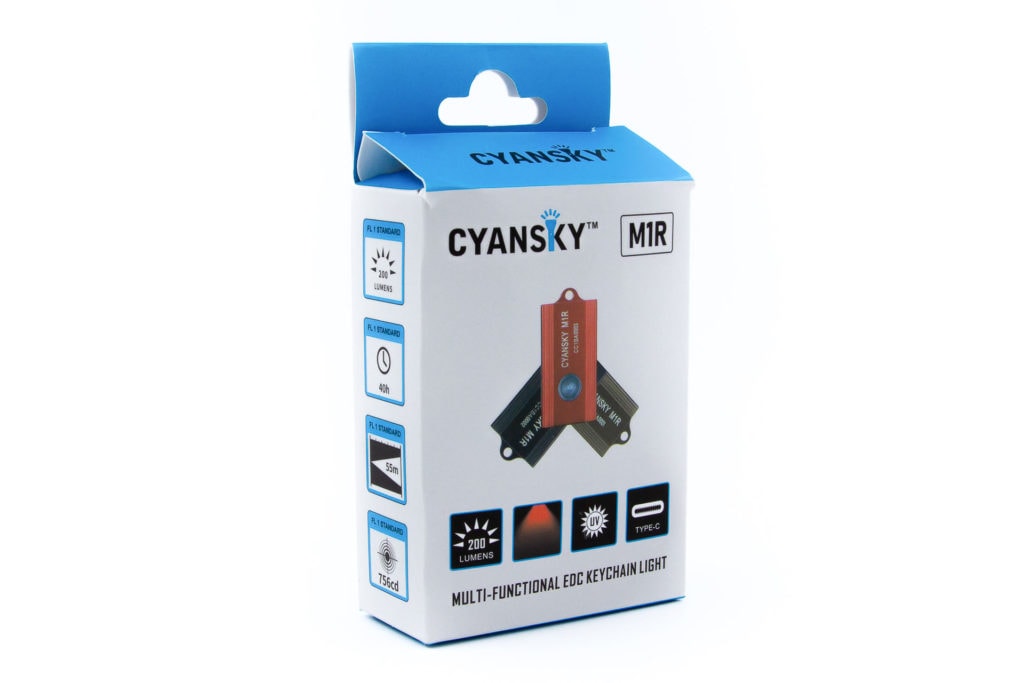
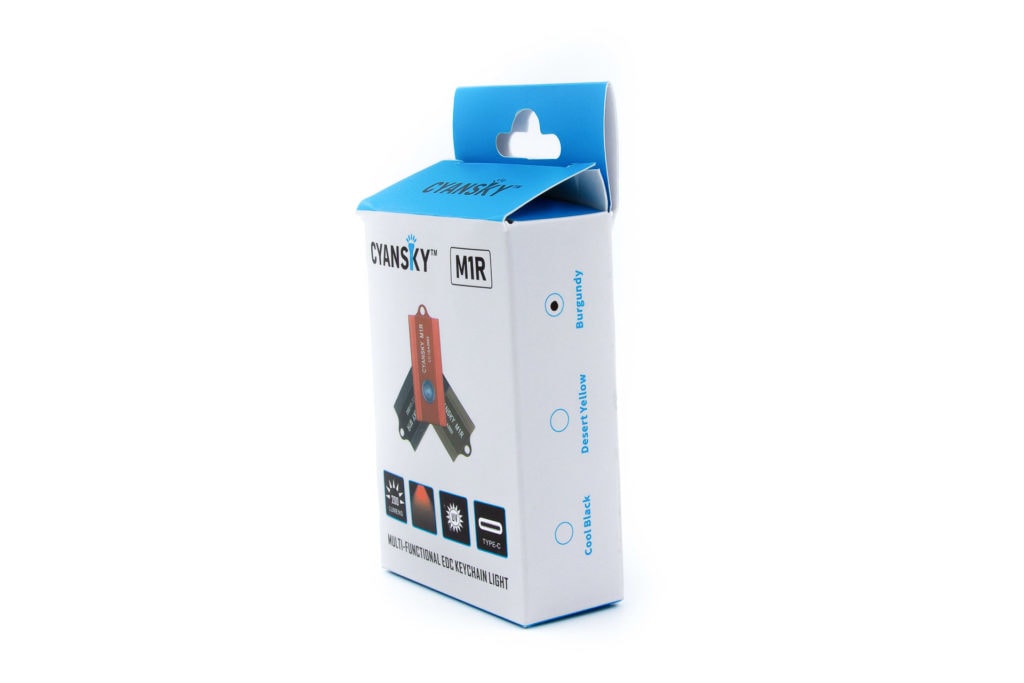
My initial thought after opening the box the light was shipped in – so cute! The packaging is suitably small, and I love it. All the details of the light are in print around the box, and they’ve chosen interesting colour names. While I would have chosen something like Black/Red/Desert Tan, they’ve chosen Cool Black/Burgundy/Desert Yellow.
To each their own, though!
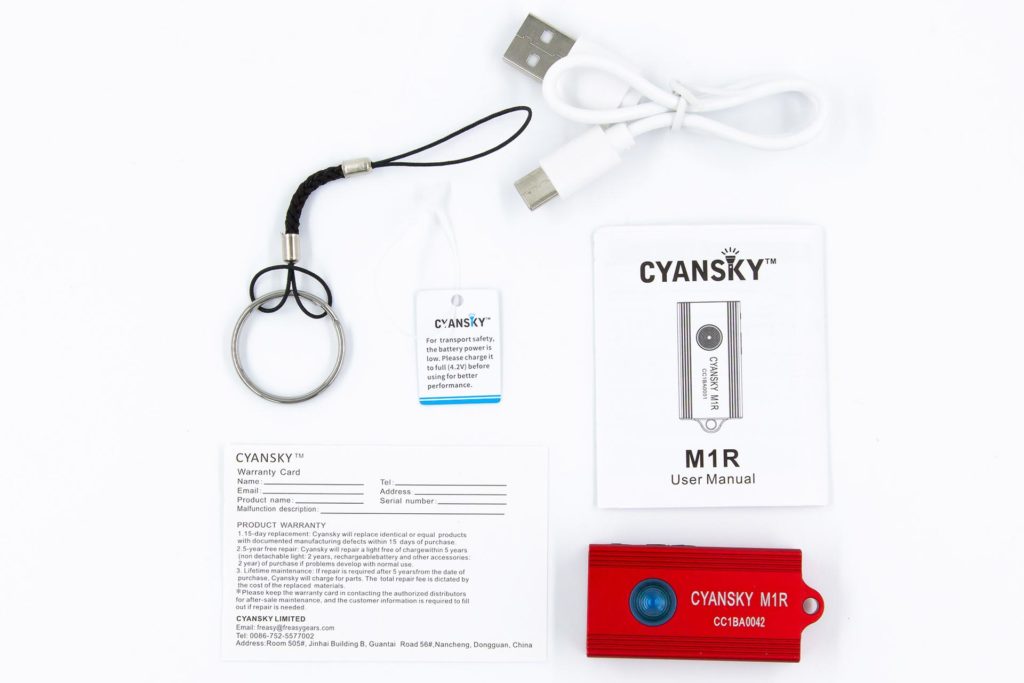
Inside the outer packaging, I find:
- M1R in a plastic holder
Tucked neatly behind it, we have:
- USB-A to USB-C charging cable
- Warranty card
- Manual
- A small note about needing to charge the light before use
- Keyring attachment
As expected, everything you need to get up and running. The plastic that the M1R sat in appears to be made of a similar plastic to other inserts I’ve had before which were recyclable, but this doesn’t have the recycling logo, so I’m not sure if it truly is.
Flashlight in use
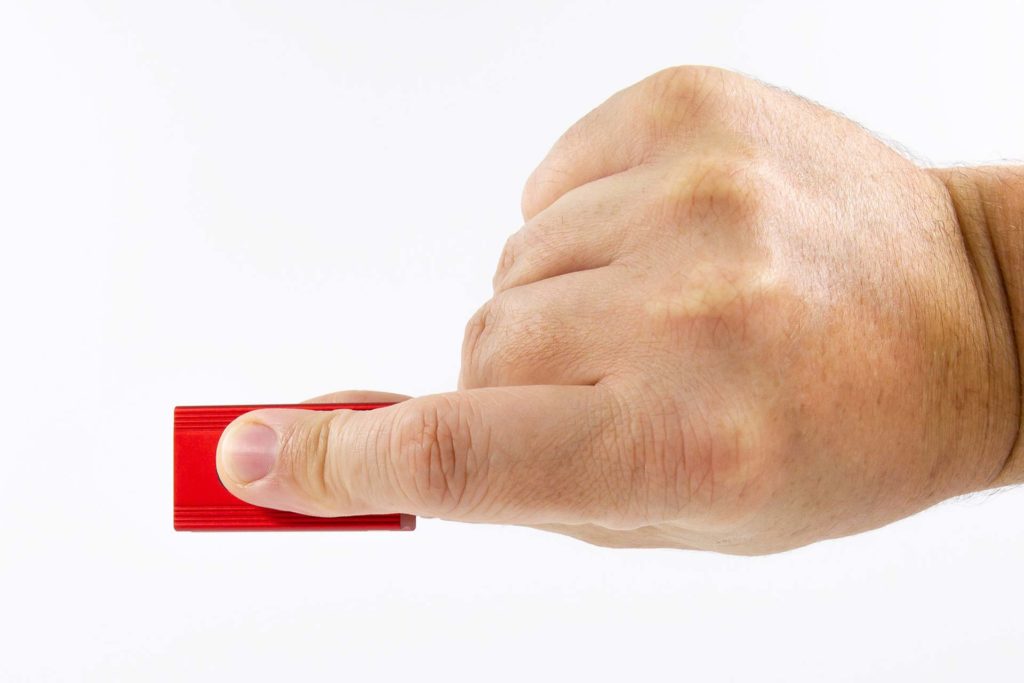
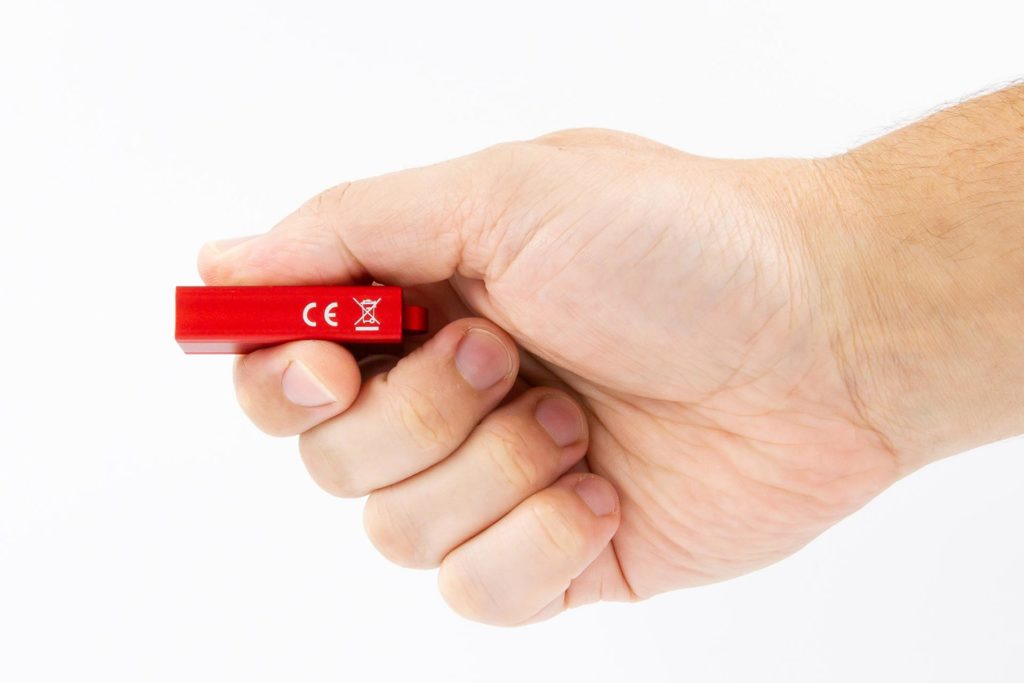
Holding and using the M1R is quite easy, due to its size – it slips into your hand, and can almost be lost in there if you so choose. Holding it with your thumb on the button in an under-hand hold would probably be the most common way that it would be used, as any kind of other hold could lead to a more RSI-prone position.
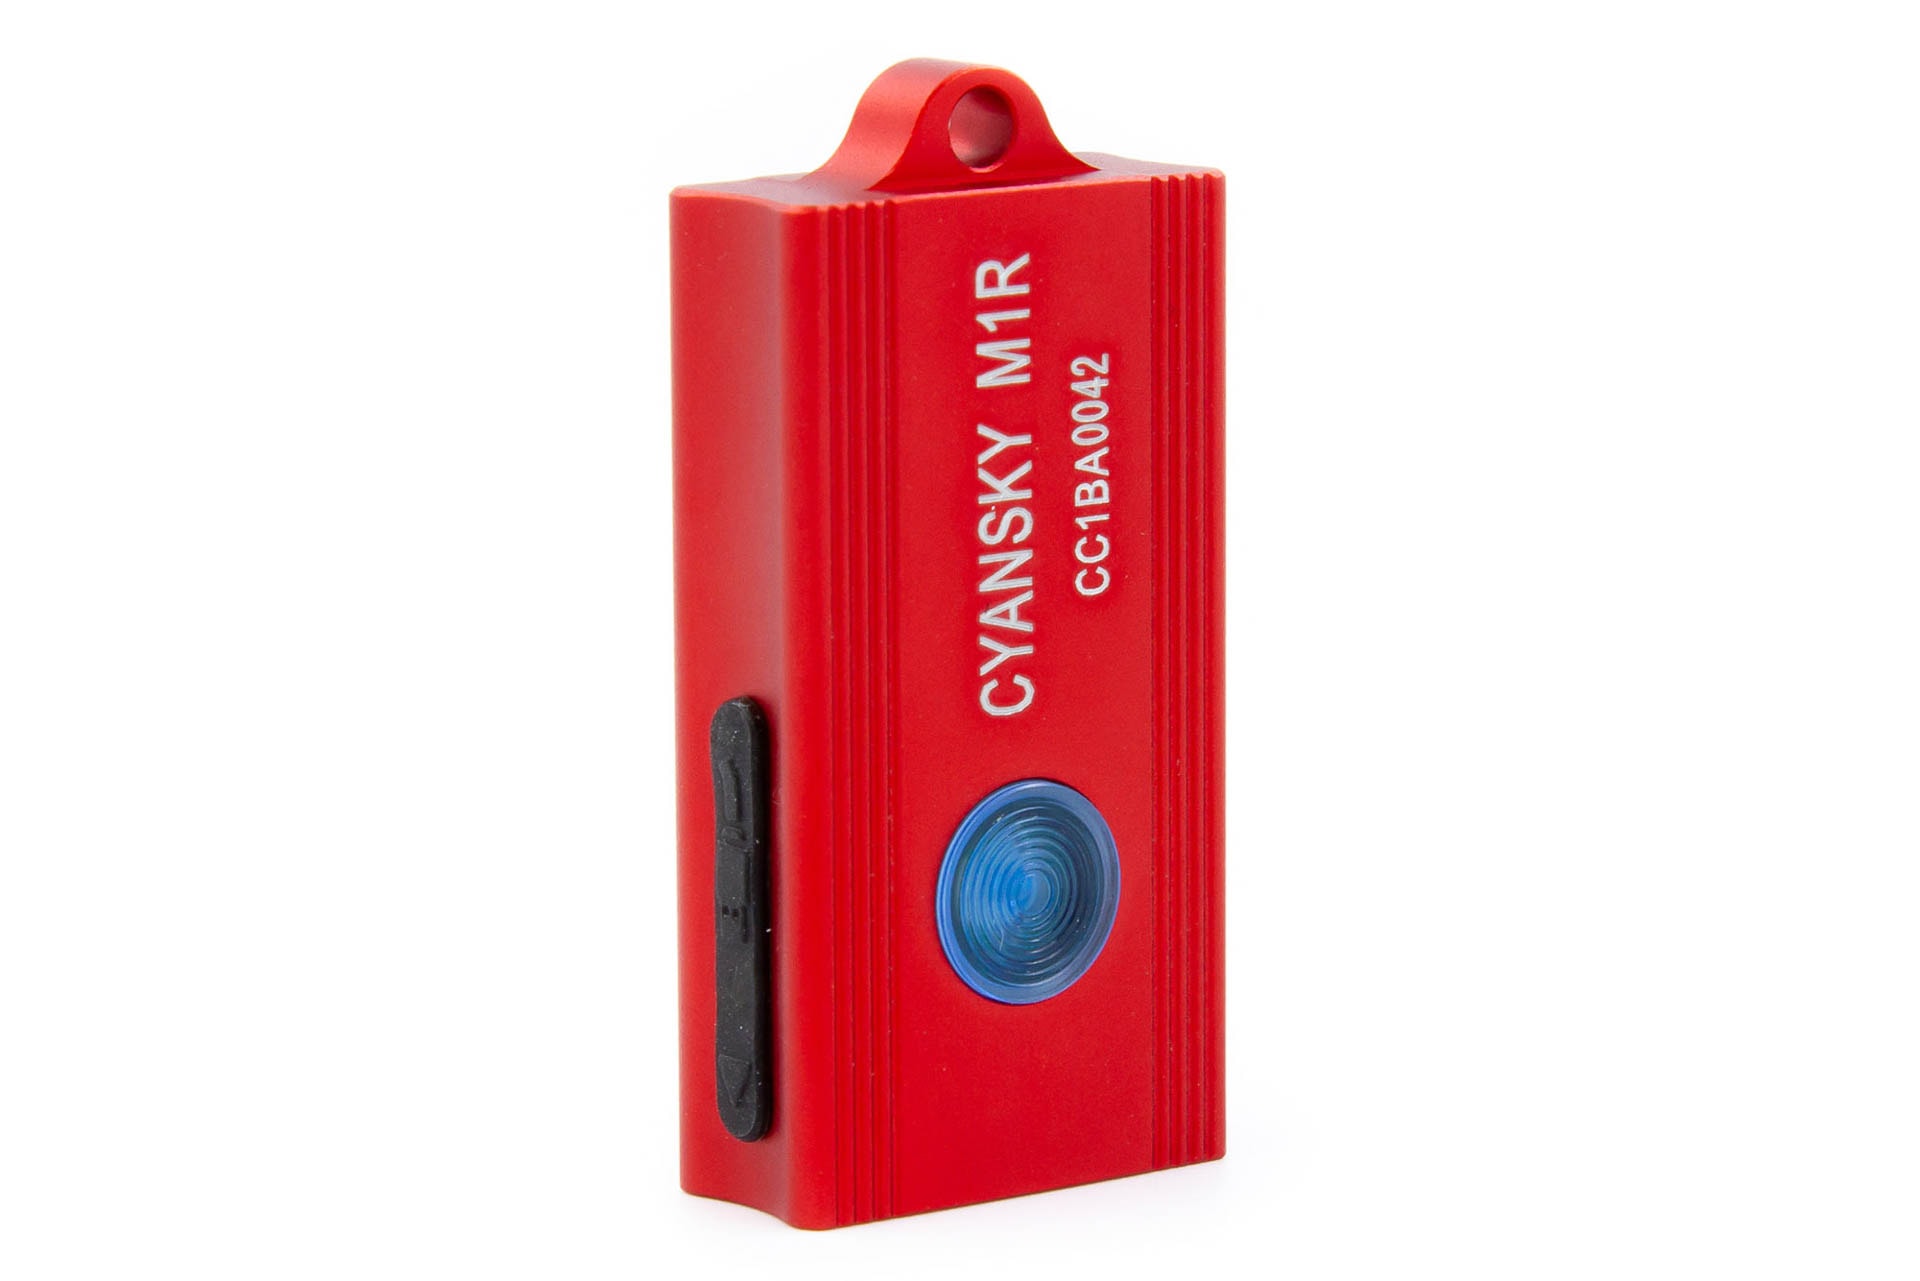
It’s fairly smooth to hold, as the anodisation is top-notch; the only thing that will really give you grip on it is the button and the charging cover cap.
The e-switch itself has a fairly tactile click, though the switch cover feels fairly smooth to the touch. Closing my eyes and resting my thumb on the button, I can’t discern the ridges that are grooved in the button, even though I know they’re there (or is that just nerve damage?). It also doesn’t protrude much, so if you’re in a panic situation and need to grab the light in a hurry, it may not be immediately identifiable which side you’re holding.
Because of the protruding keyring attachment, it can’t tail-stand, but that’s not really the purpose it’s going for.
It also fits in a fob pocket quite well, if you don’t want to have it on a keyring.
Build Quality, and Warranty
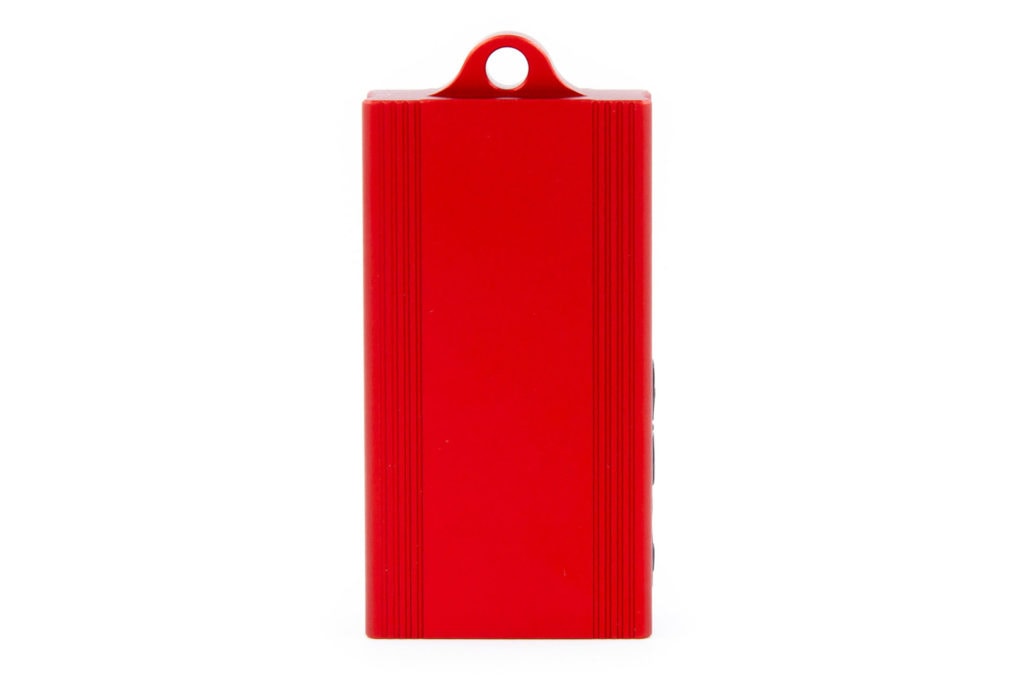
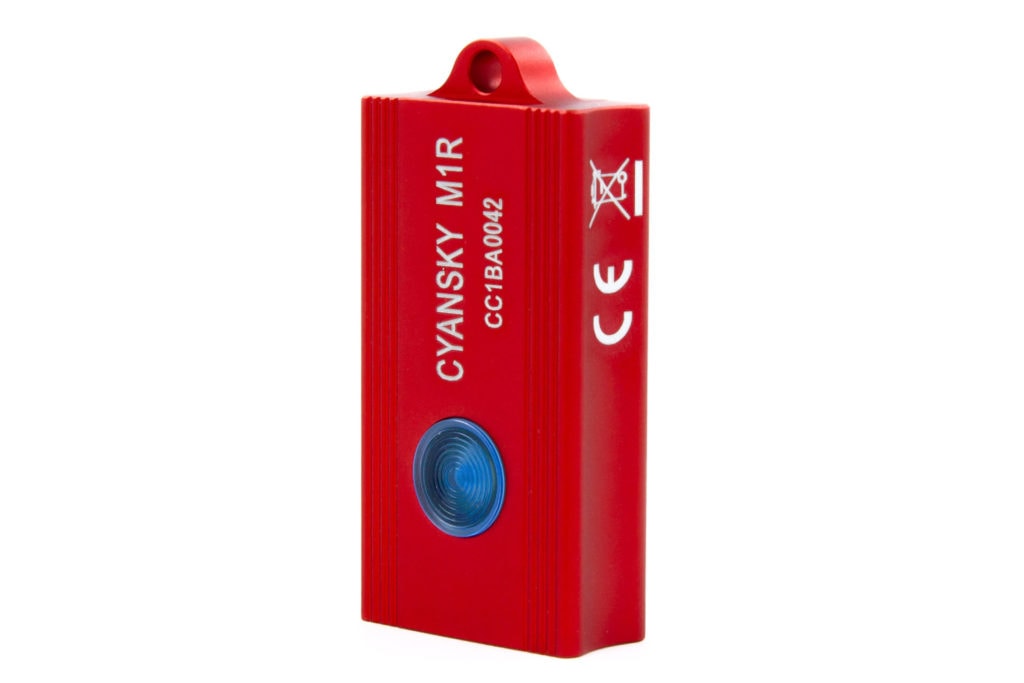
The M1R is made from a single piece of aluminium, which makes it feel quite solid, despite it weighing next to nothing. The anodisation on it has a lovely satin feel to it, with the text having a little more texture.
A comment was made to me by a mate of mine that it looks like a small external SSD enclosure… and now I can’t get that image out of my head.
The milled lines running along the length of the light next to the side are almost purely aesthetic; there’s no real grip to be offered by it.
There’s no sharp edges, despite being quite boxy; everything is chamfered sufficiently to avoid discomfort. Very much appreciated!
The keyring attachment is fairly large, in my opinion. I would have preferred a smaller keyring attachment similar to that found on the Nitecore TINI2, but I can recognise that using a lanyard-style attachment is to reduce scratching the anodisation. I initially felt that the snap-ring should be smaller as I’d be more likely to attach it to an existing set of keys, but it’s a simple matter to un-loop the lanyard, and attach it to something else.
I can’t find any mention of warranty through the documentation, but I would dare say there’d be at least a DOA warranty applicable from the store you buy it from.
LED, Lens, Bezel, Beam, and Reflector
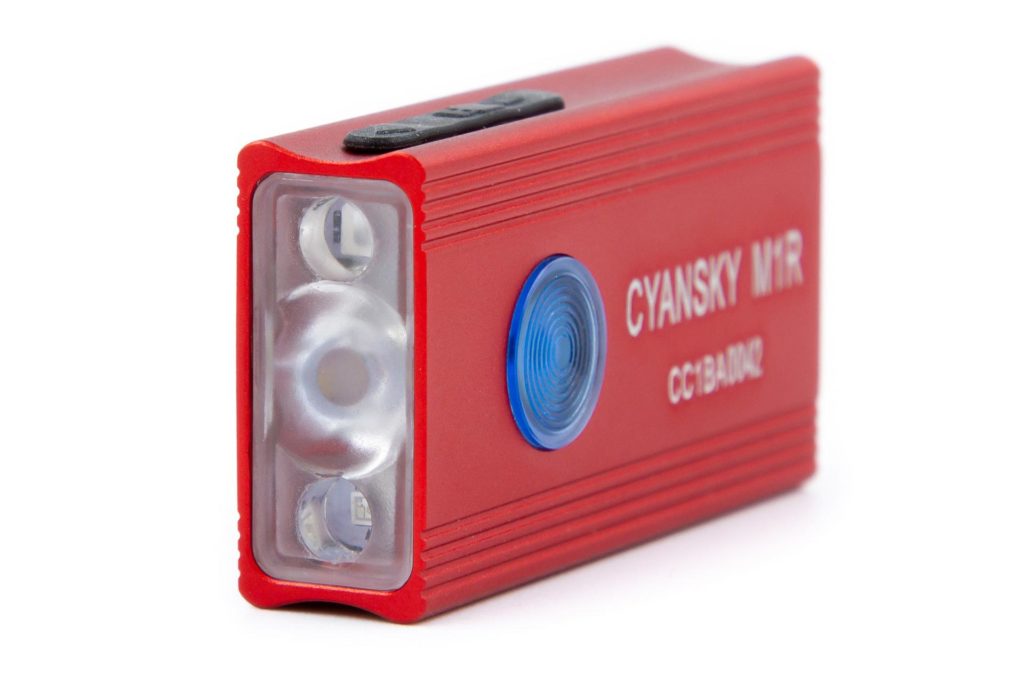
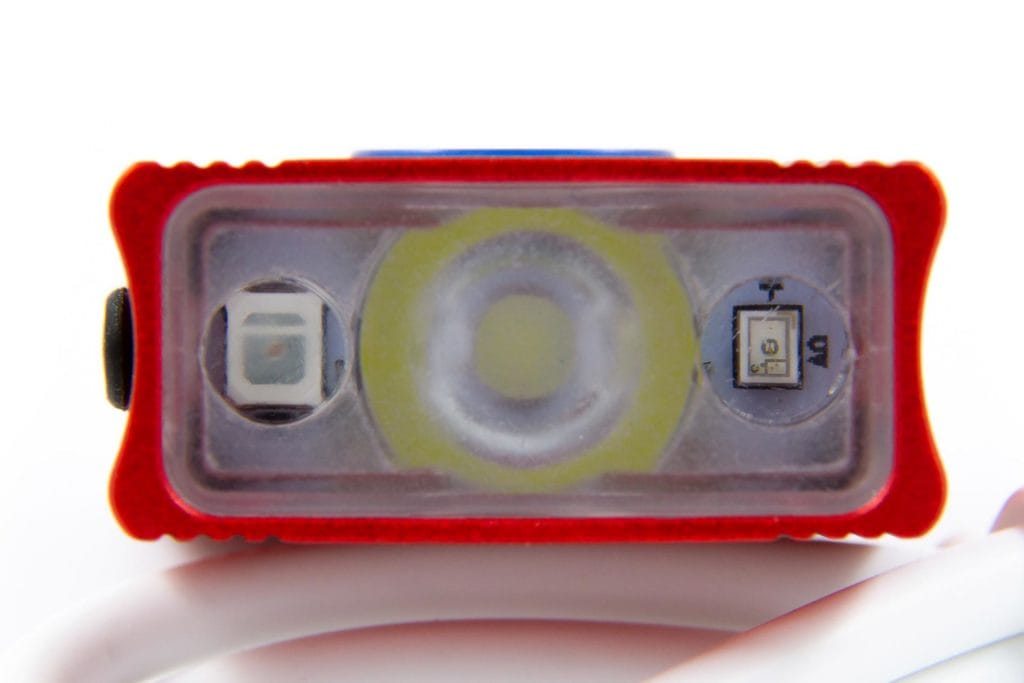
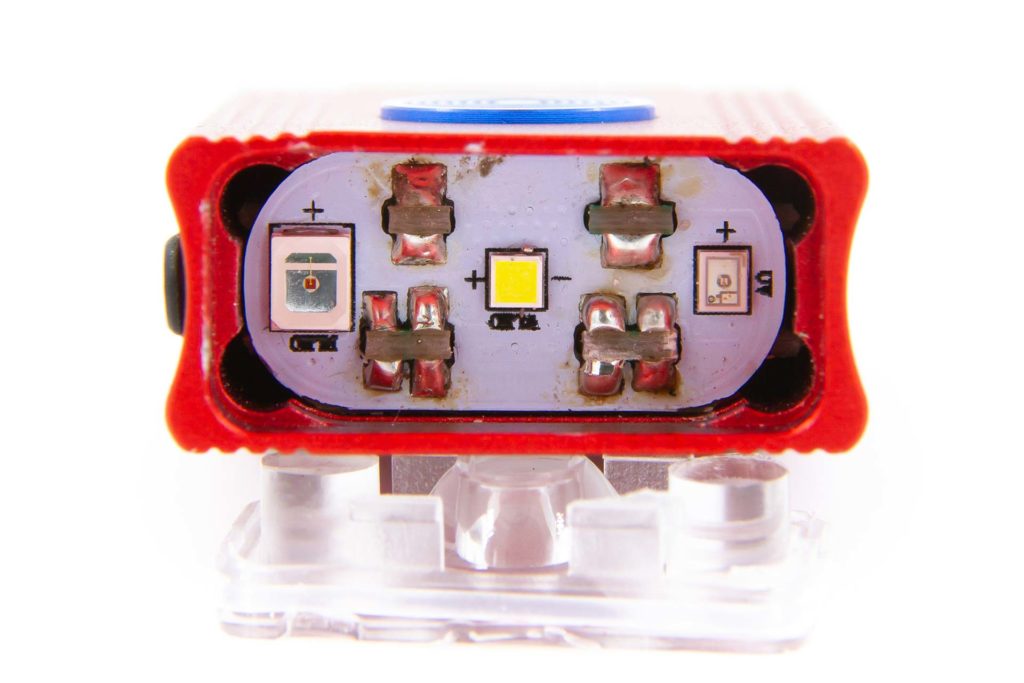
There are three emitters that are used on the M1R, excluding the aux emitters behind the power button. They sit behind a custom TIR, using a frosted area for white, and a clear area for both red and UV.
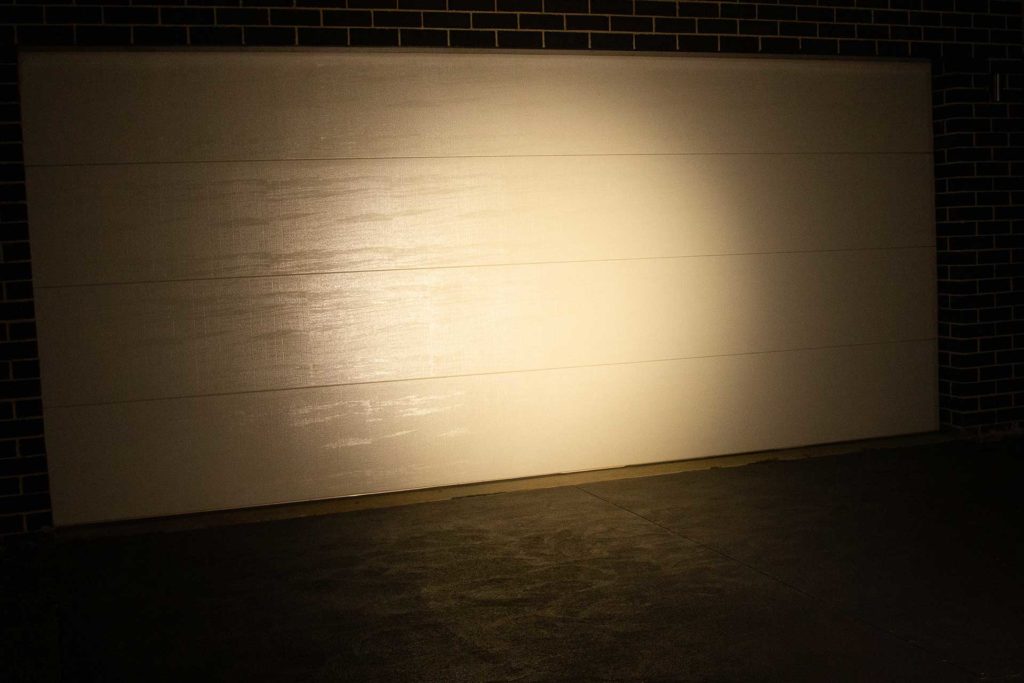
This gives the white light a very diffused look, with an almost oval hotspot. This is actually probably not a bad thing at all for its intended uses!
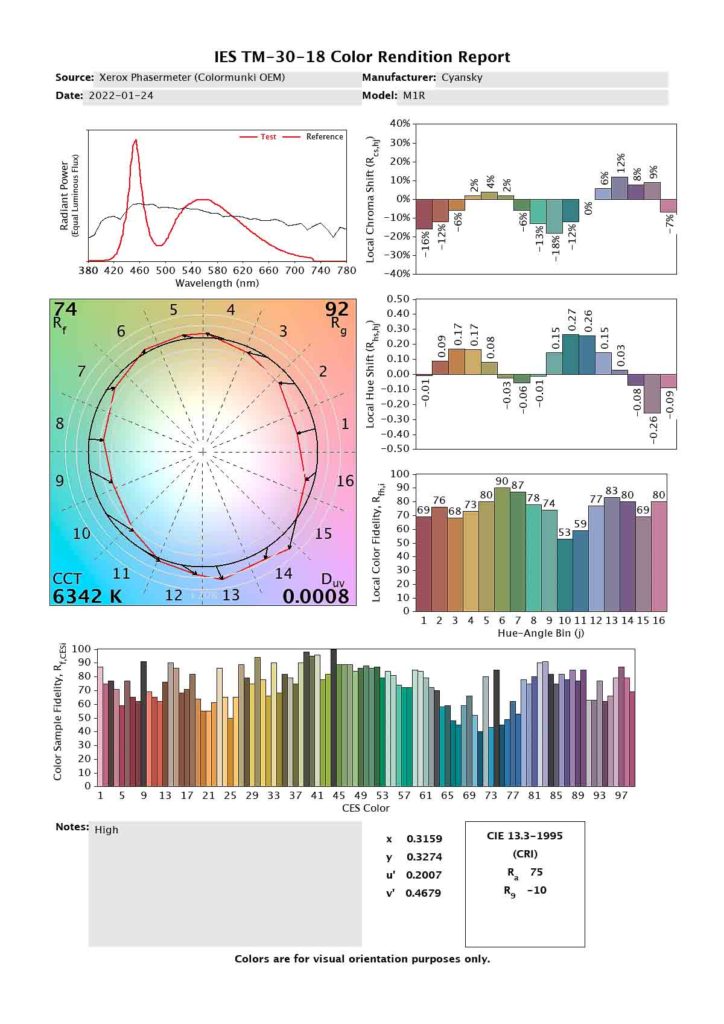
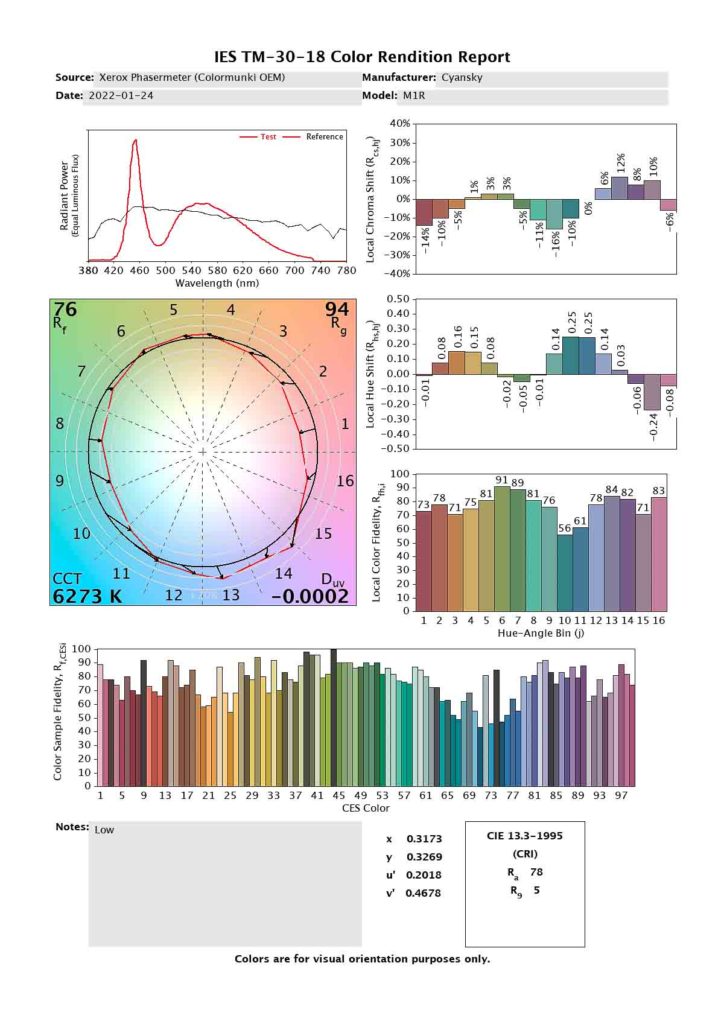
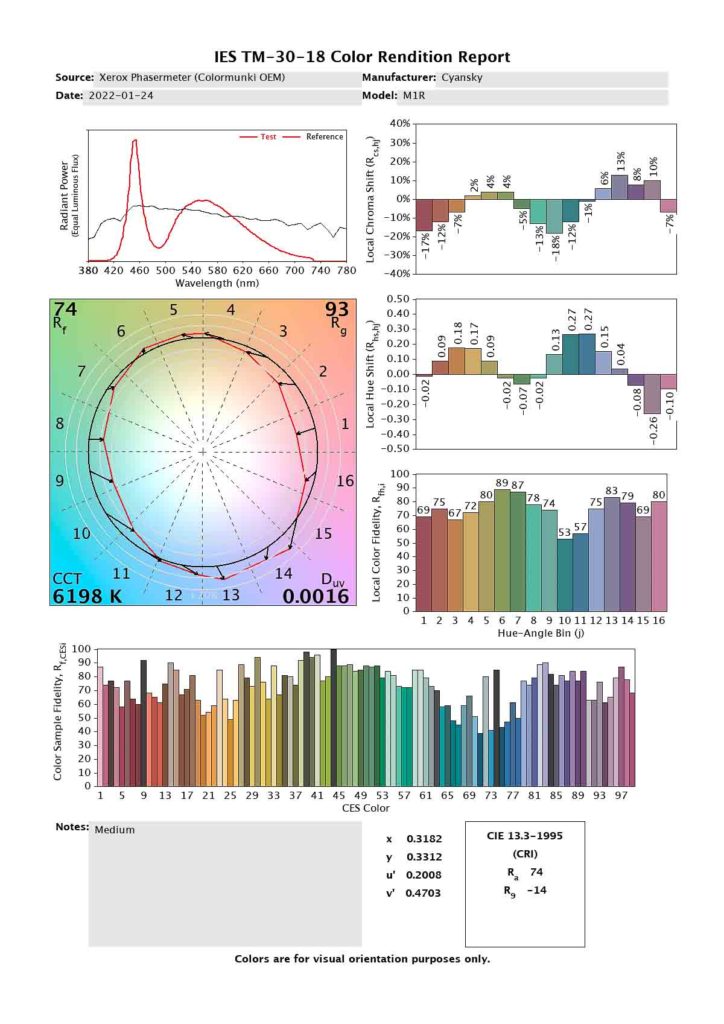
While not specified anywhere, the Xerox Phasermeter shows that the colour temperature of the white emitter is around 6300k.
The red and UV, due to the emitter type and clear lens, are very floody. For the red this is okay, but given the low output of the UV, a more focused lens would be better to not need the light almost touching something to get it to fluoresce.
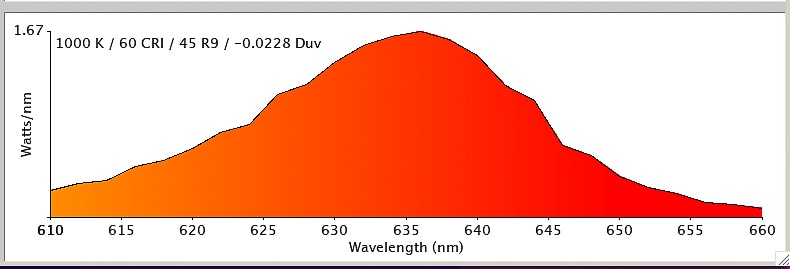
The wavelength of the red emitter peaks at around 637nm, and the UV peaks around 395nm – myself, I would have gone with 660nm and 365nm, although this may be something done to keep production costs down. In the charts below, the UV output saturated my spectrograph, so I’m making an assumption on wavelength, but it’s definitely not 365nm, nor 405nm.
The UV also has considerable visible light, but that’s expected without a ZWB filter.
I’ve noticed some discrepancies in output for red and UV though – on the Cyansky website, an image on the product page shows red as 5 lumens and UV as 3W. Yet further down the page at the output/runtime table, it shows red as 13 lumens, and UV as 100mW.
https://cyanskylight.com/product/m1r-multifunctional-keychain-light/
I’m not sure if the higher numbers were an initial design, and it had to be modified down, but it was slightly confusing.
UPDATE: After all other parts of the review were complete, I’ve popped the TIR off. I’m still not sure what the white emitter is, but it’s not a commonly used one in the flashlight world. It measures 1.7mm x 1.7mm, and it’s definitely not a Nichia E17A.

Dimensions and size comparison
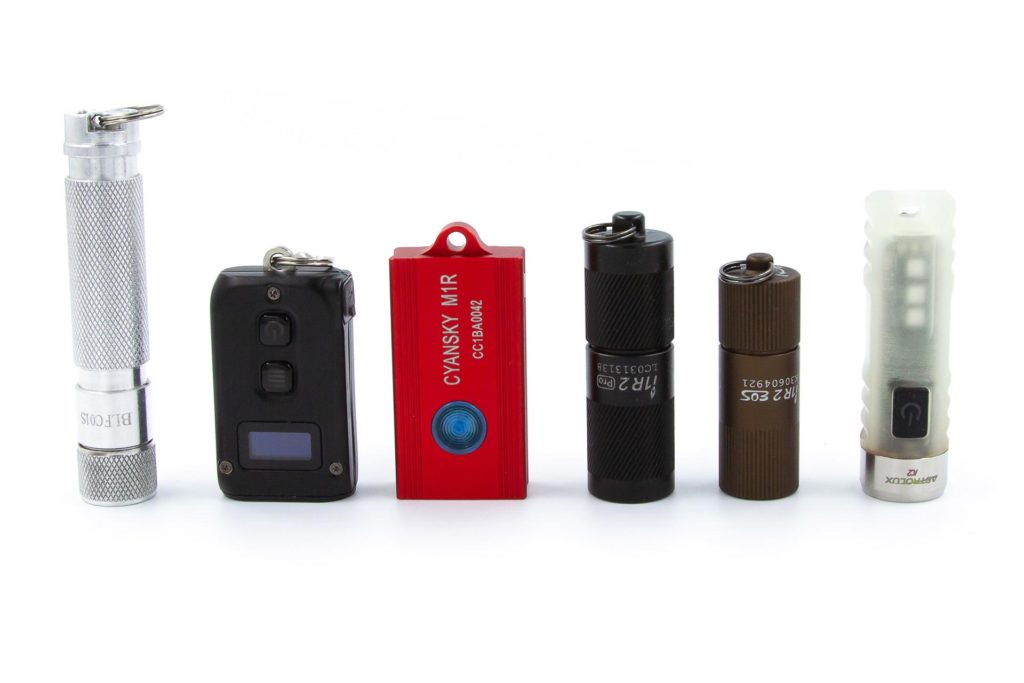
- Length: 50.4mm / 1.98 inches
- Width: 24 mm / 0.94 inches
- Height: 11 mm / 0.43 inches
Weight:
- Light itself: 19.5 grams / 0.69 oz.
- With keychain attachment: 23.6 grams / 0.83 oz.
Flashlight size comparison with the competition
Other keychain flashlights
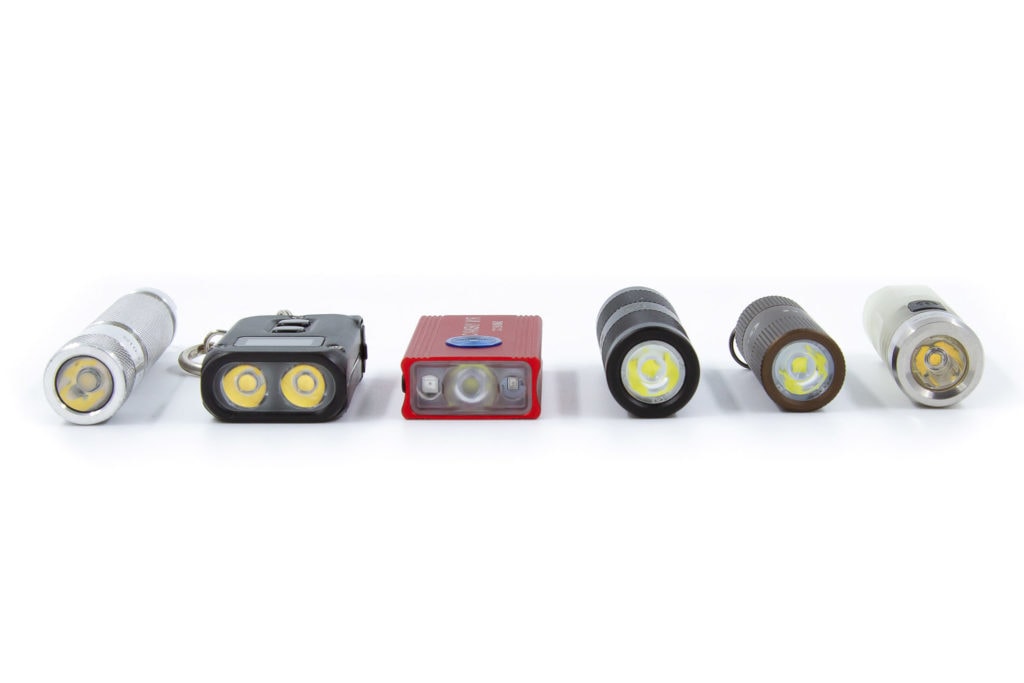
Sofirn C01S BLF edition, Nitecore TINI2, Cyansky M1R, Olight i1R 2 Pro, Olight i1R 2, Astrolux K2
Driver & User Interface:
The firmware on the M1R keeps the white and the Red/UV quite separate, by keeping them in separate “modes”. If you’re in the “white light” mode, to use any of the Red/UV options, you need to switch to that mode from Off.
I’ve detailed it below, but it’s far more intuitive to do in real life than it sounds.
From OFF:
- Press and Hold:
- 0.5 seconds: turn on the light in the current mode.
- 1.5 seconds: light will briefly flash in current mode, but will then turn on the other mode (and change that to be the current).
- Single click: Check battery status.
- Double click: Lockout mode.
- 3 clicks: N/A
- 4 clicks: Check battery status (same as 1 click)
From ON:
- Press and Hold:
- 0.5 seconds: turn off the light.
- 1 click: Cycle modes.
- White: Cycle L/M/H
- Red/UV: Cycle Red/Red flash/UV.
- Double click: N/A
- 3 clicks: N/A
- 4 clicks: Cycles modes (same as 1 click)
So if I’ve last used the white modes, holding from off for 1.5 seconds will first turn on white, then change to red/UV. After turning it off, it will turn on again in red/UV, or if holding 1.5 seconds from off, will turn on red/UV, then change to white.
Mode memory:
- Turning on the light returns to the last-used mode.
Low voltage warning:
- When the voltage drops below X, the light will drop down to a lower brightness level. If the light is on low, the battery level indicator will blink red.
Strobe/blinkies
- Red blink only – activated by choosing Red/UV mode (1.5s hold from off when in “white” mode), then click to select.
Lock-out mode:
- Clicking twice from off activates the lockout mode; the light will blink twice, then lock. Double-click again to unlock, which will then turn on the light.
PWM
- There’s PWM visible by camera, but not immediately to my eye.
Additional info on the UI: Something interesting to note which I’ve alluded to above – four clicks appears to replicate the behaviour of 1 click, 5 clicks replicates two clicks, and so on and so forth. That means that 14 clicks should technically lock the light out – and it does. Hmmm!
Batteries & Charging
The battery inside the M1R is a 200mAh Li-Ion pouch; this is charged by USB-C cable. One is included in the package in case you don’t already have one (or a whole bunch, like I do) lying around.
In testing, I was able to charge via the included cable as expected, as well as USB-C to USB-C – but there’s no benefit to doing so, as it doesn’t charge faster. The only benefit of this is if you no longer have any USB-A charging ports around.
The battery charges at around 200mA initially, and then slows down as it approaches full. It takes around 1.5 hours to fully charge from depleted.
While charging, the M1R still turns on, so you can use it while attached to a power bank for hugely increased runtime, as an example.
Performance
For my readings, I use the following:
Lux Meter: For lumen readings and runtimes, an Adafruit TSL2591 connected to a Raspberry Pi running Ubuntu, using RuTiTe by bmengineer in a custom sphere. A UNI-T UT383S is used for candela readings.
DMM: UNI-T UT139C and UNI-T UT210E – 16AWG wire is used directly into the 139C via some banana plugs, and 8AWG wire in a loop for the UNI-T. The DMM I use depends on how high the expected current will be – I use the 139C for <10A, and the 210E for >10A.
Lumen measurements (for each mode)
| Mode | Specs | turn on | 30 sec | 10 min |
|---|---|---|---|---|
| Low | 1 Lm | 1 lm | 1 lm | 1 lm |
| Med | 25 Lm | 19 lm | 19 lm | 9 lm |
| High | 200 Lm | 82 lm | 76 lm | 37 lm |
Something… something really isn’t right here.
I will accept that there’s a possibility that my sphere really doesn’t like diffused lights like this, but this is definitely a large drop from expected output. I’ve tested again after removing the TIR as mentioned in the LED section of the review. Now, admittedly this makes it even more floody and if my sphere isn’t accepting of mules, it’ll show lower output:
| Mode | Amps at start | Specs | urn on | 30 sec | 10 min |
|---|---|---|---|---|---|
| High (no TIR) | – | 200 Lumens | 65 | 62 | 30 |
Hmm. So while it’s around 80% of the output I got with the TIR, that doesn’t explain that the recorded output out of the box is 40% of the expected, based on documentation.
Runtime graph
I’ve performed a runtime in both High and Medium; adding a Low runtime would unnecessarily extend the runtime graph.
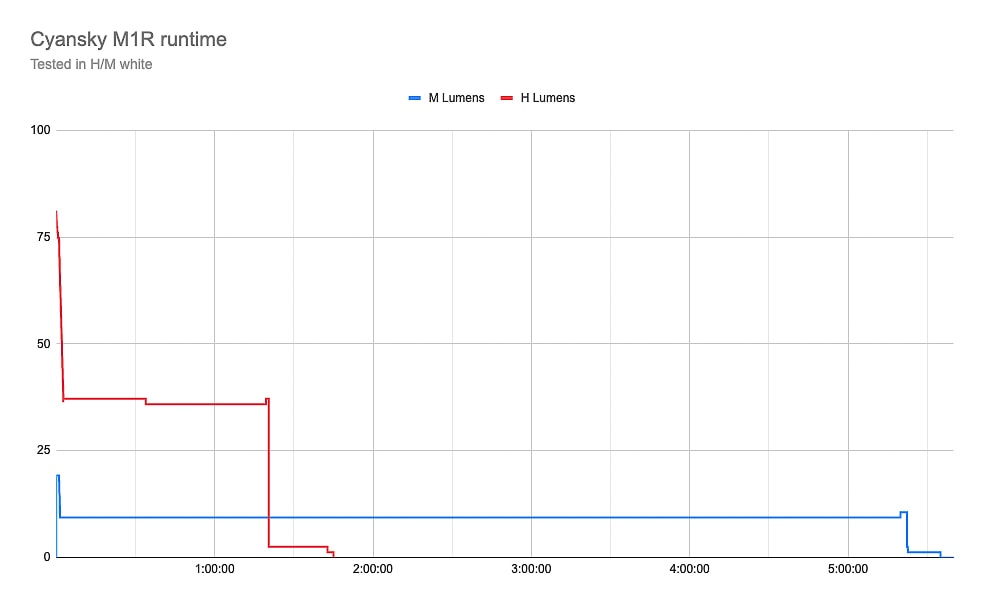
So, as mentioned above… something isn’t right. While the runtime is approximately right for High (specified as 1.2 hours, and it’s at ~1.33 hours it drops off to fairly low), the output is just far below expected, at around 40% of documented output. I’ve repeated this test a number of times, and keep getting the same result, or within a few lumens.
Throw numbers:
Readings were taken with the Uni-T UT383S – distances in the chart.
| Mode | Specs | Candela measured | Meters | Yards |
|---|---|---|---|---|
| Medium (2m) | 6cd | 120cd | 21.91 (438% claimed) | 24 |
| High (2m) | 756cd | 476cd | 43.63 (79% claimed) | 48 |
| High (5m) | 756cd | 500cd | 44.72 (81% claimed) | 49 |
… So Medium is ridiculously far above what’s specified, and High is moderately below.
I tested Medium three or four times after this to check because it doesn’t seem right, and I was getting within a few cd each time. So, I’m assuming that my measurements are correct within a small margin of error (but not a fourfold error).
Beamshots
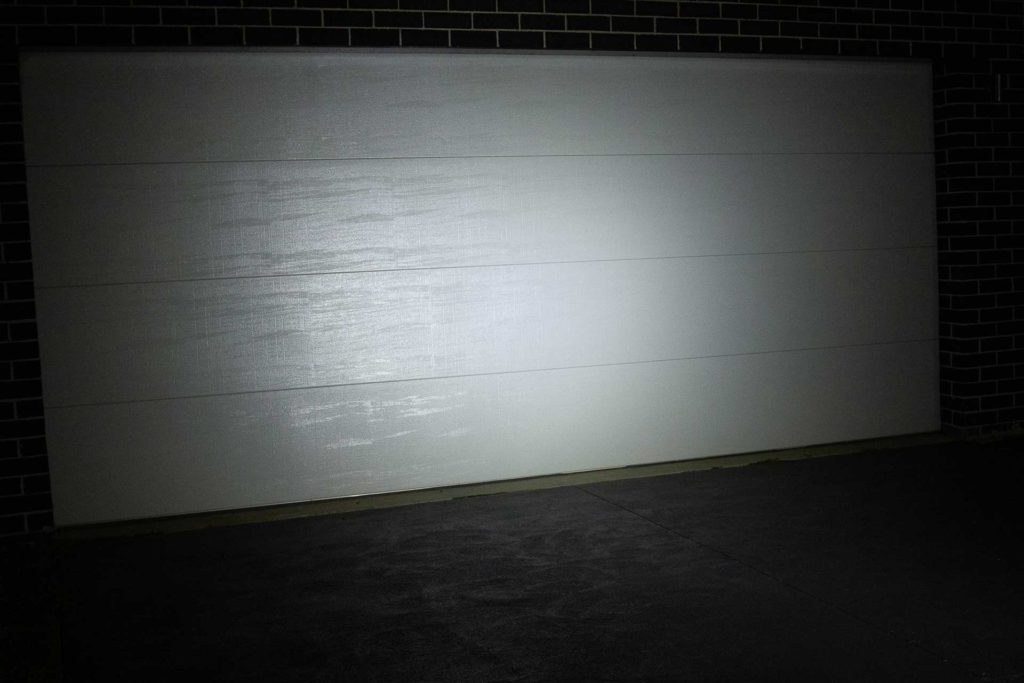
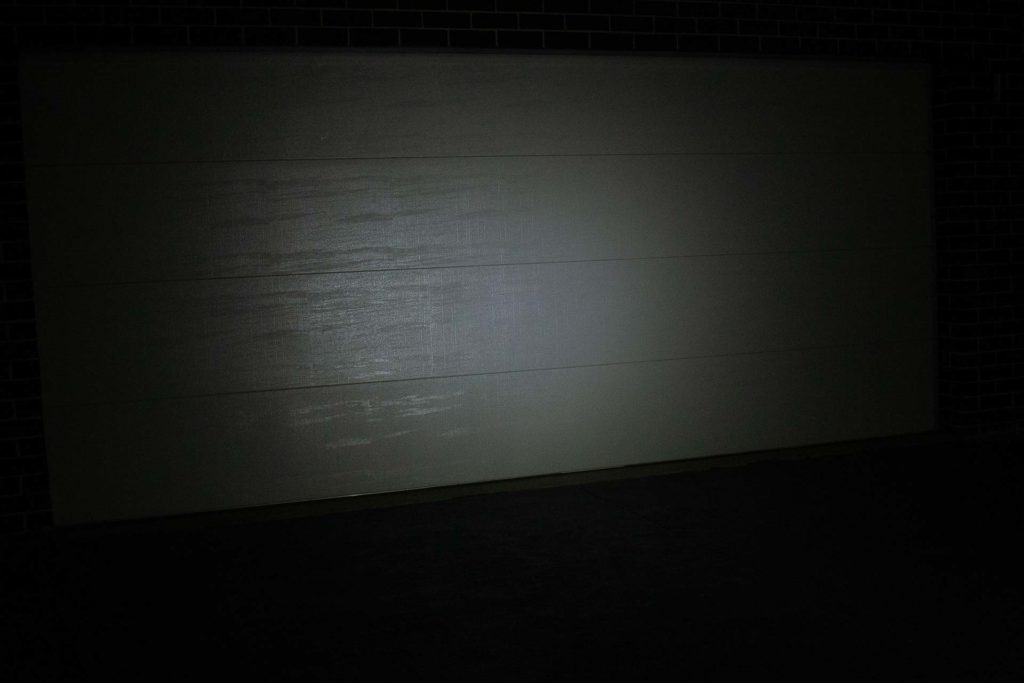
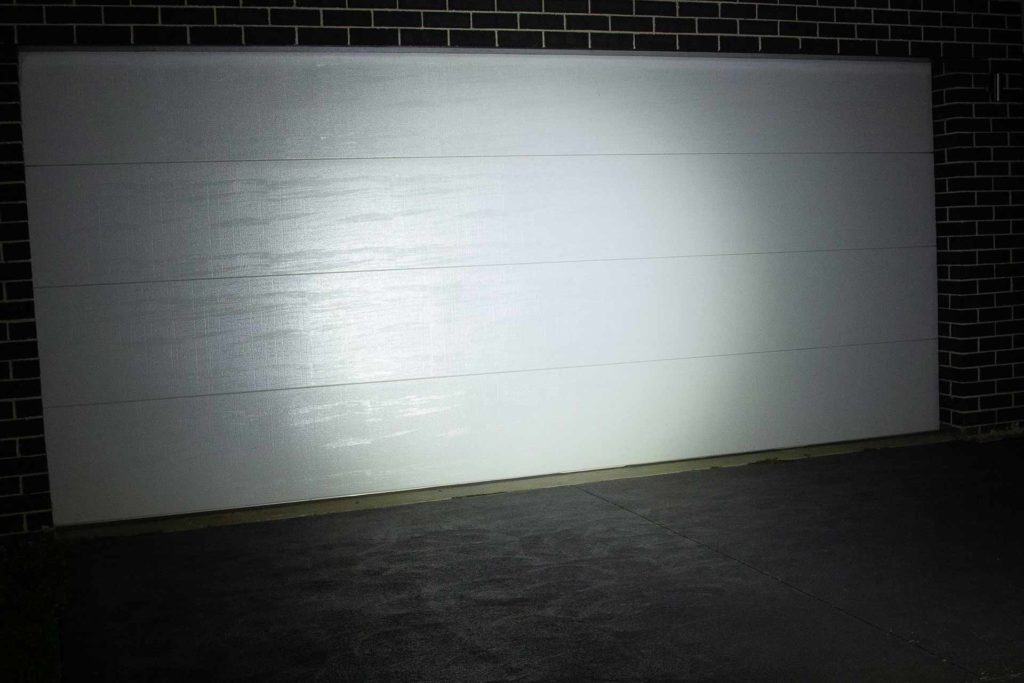
M1R in High and Medium, vs Olight i1R2 Pro, and Astrolux K2 (both on their highest mode). Shots taken at 0.3s, f6.3, ISO 1600. This deviates from my normal beamshot settings, as I felt this was truest to how my eyes perceived it.

Disclaimer: This flashlight was sent to me for review at no cost by Cyansky. I have not been paid to review, nor have I been holding back on problems or defects.
Final Verdict
Pros
- Very lightweight
- Three emitter options quite useful
Cons
- Output nowhere near claimed
- Candela all over the place somehow
- No way to switch between white and red/UV while on
Explanation on star ratings:
1: Avoid: my phone flashlight would be a better choice – 2: Poor: significant defect or issues; almost unusable – 3: Average: some defects or issues; but still usable 4: Good: recommended (minor issues) – 5: Great: highly recommended

2.5 stars: ★★⋆
So… there’s a lot to digest here.
On paper, there’s a few good ideas put together in a single body, but put into practice, each idea falls short of its intent. The total is not greater than the sum of all parts on this one.
I want to like this light. I really do. But there’s just so much that bothers me about it, that I can’t in good conscience be too enthusiastic about it.
I give the Cyansky M1R 2.5 stars – with some tweaks this could be onto something good, but as it is, or at least the light I received, I can’t see myself using it often at all.
Cyansky M1R For Sale
The Cyansky M1R is discontinued
1lumen selects and reviews products personally. We may earn affiliate commissions through our links, which help support our testing.