1lumen selects and reviews products personally. We may earn affiliate commissions through our links, which help support our testing.
Skilhunt H300 Nichia review
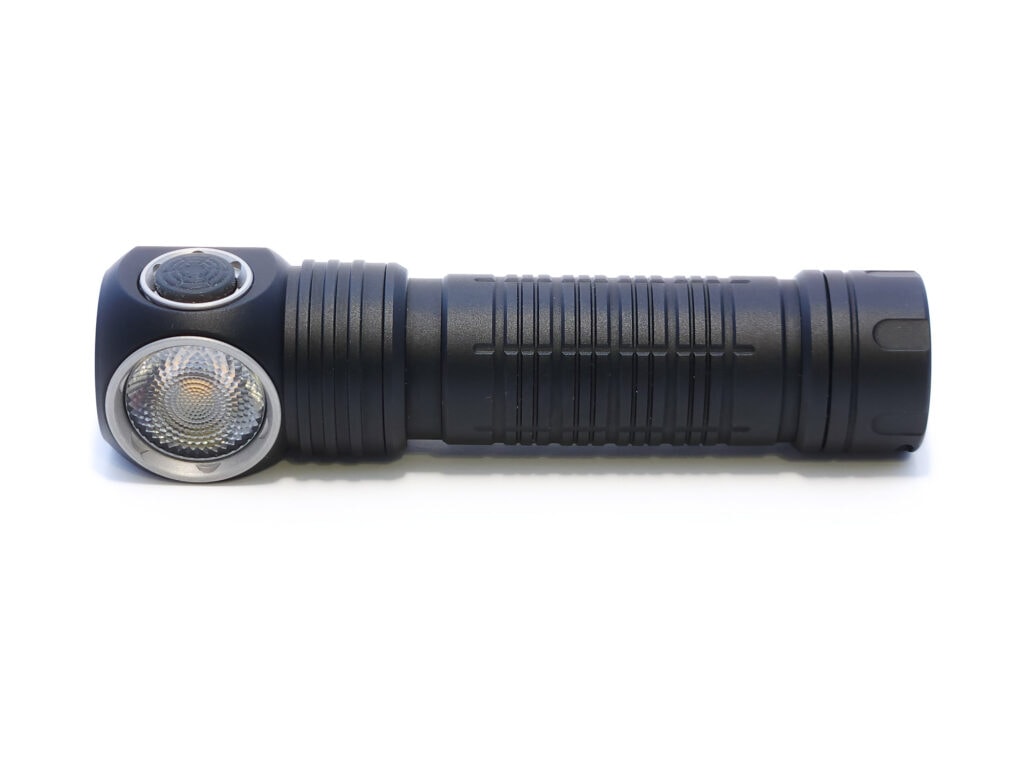
Skilhunt H300 specs
| Brand & Model | Skilhunt H300 (Nichia 144 version) |
|---|---|
| Flashlight category | Headlamp / right-angle |
| LED | Nichia 144ART 4500K (as tested) |
| Max. output | 1500 lumens |
| Max. beam distance | 134 meters |
| Max. beam intensity | 4500 cd |
| Battery config. | 1*18650 (as tested), 2*CR123A |
| Onboard charging | Proprietary Magnetic |
| Main modes | 7 |
| Blinkies | Strobe, SOS, Beacon |
| Waterproof | IPX8 |
| Review publication date | May 2023 |
Review intro:
We previously reviewed the Skilhunt H300 with the Cree XHP 50.2 emitter, but Skilhunt now has a few other options, including Nichia’s 144ART, which is what I’ll be covering here. Much of the rest of the review should be similar, as this is only a different emitter in the otherwise same host. If you’re interested in the 144ART, read on!
Package quality.
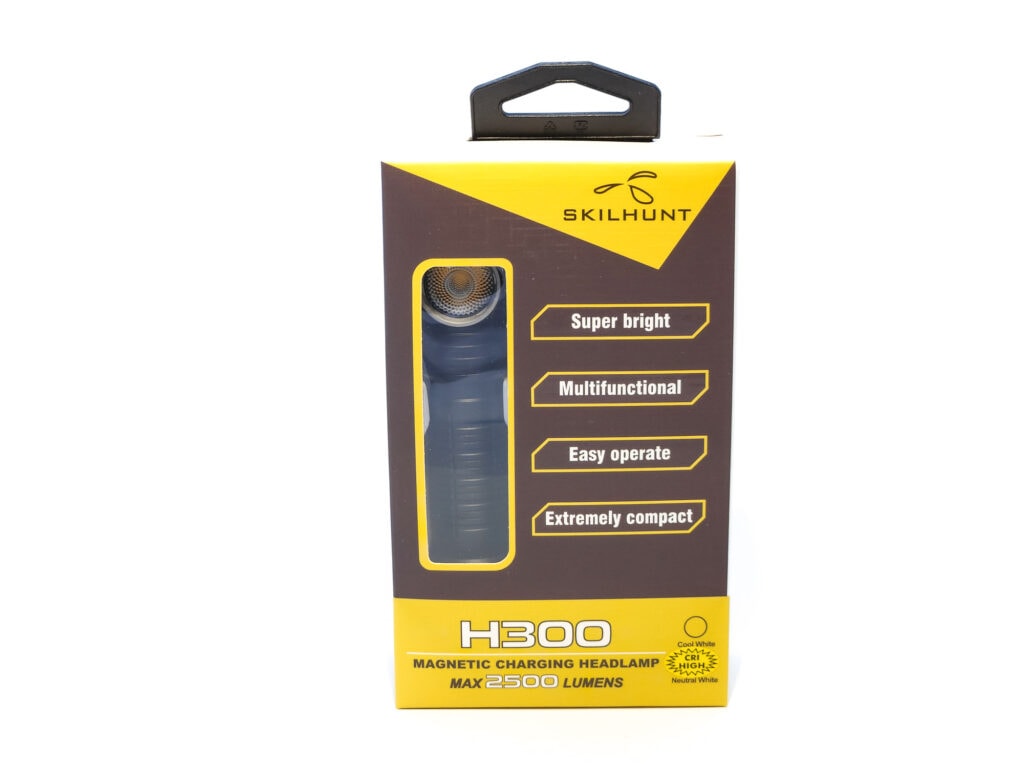
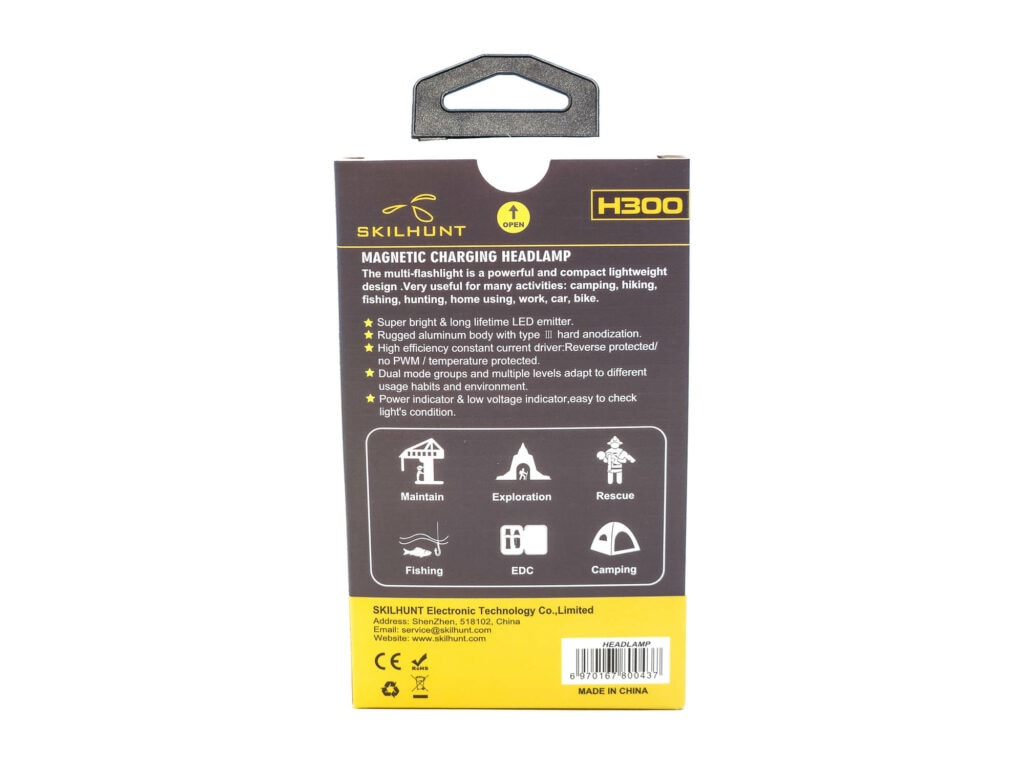
Skilhunt’s packaging always looks shelf-ready, and the H300’s is no different. For the H300, there’s a clear plastic window in the front which shows off the light. It’s a little too small to see the whole light, though. I appreciate that there’s a tab you can use to pull the tray out of the box, and that the light is cradled in a molded plastic insert, while the accessories are kept together in a cardboard tray under that. It looks very professional.
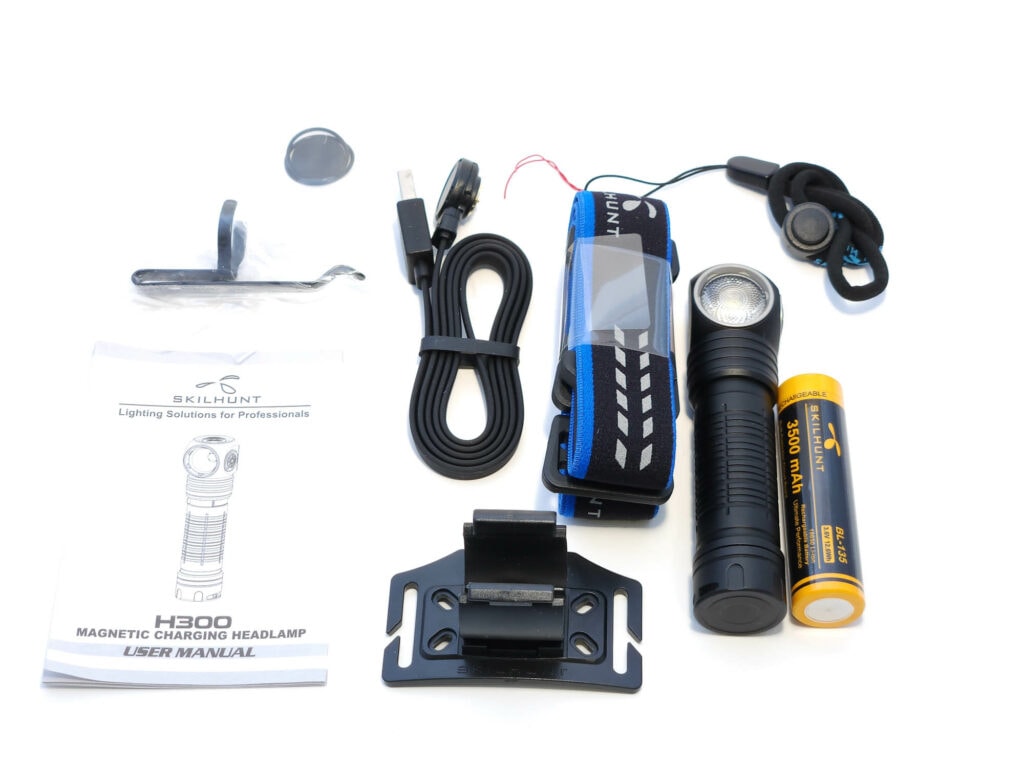
Inside the box, you’ll find
- Skilhunt H300
- Skilhunt 18650 (BL-135) optional
- Clip
- Lanyard
- Headband and clip
- Plastic zip-top bag with spare o-rings and rubber disk to replace magnet
- Skilhunt MC-20 USB charging cable
- Instruction manual
Flashlight in use
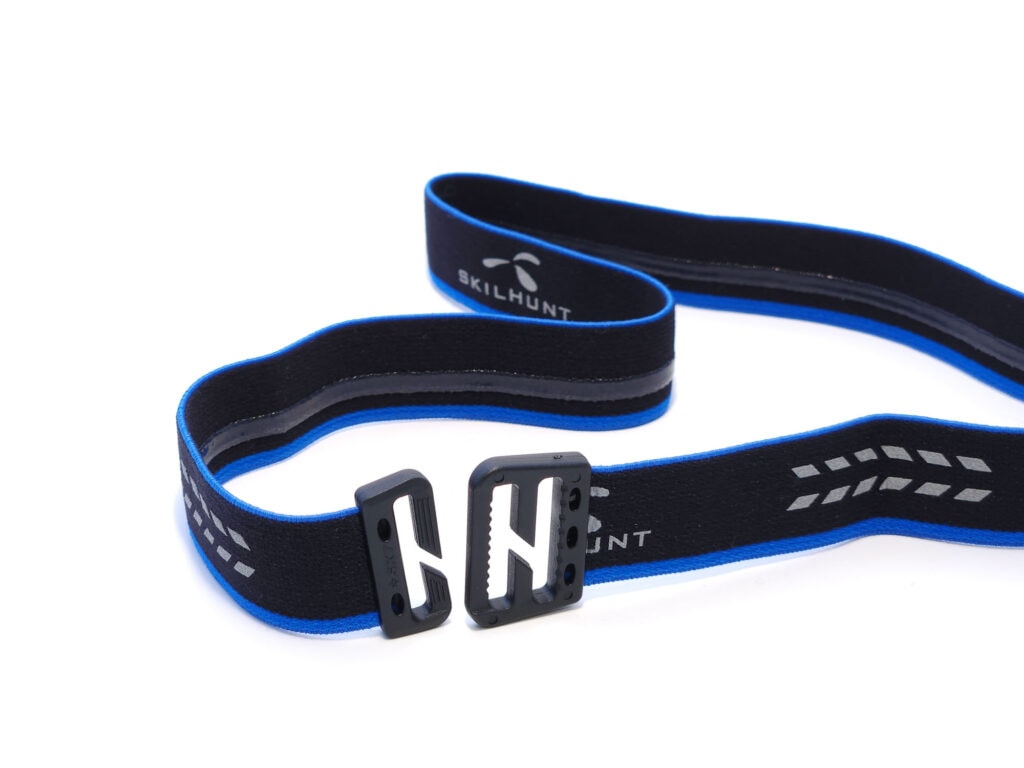
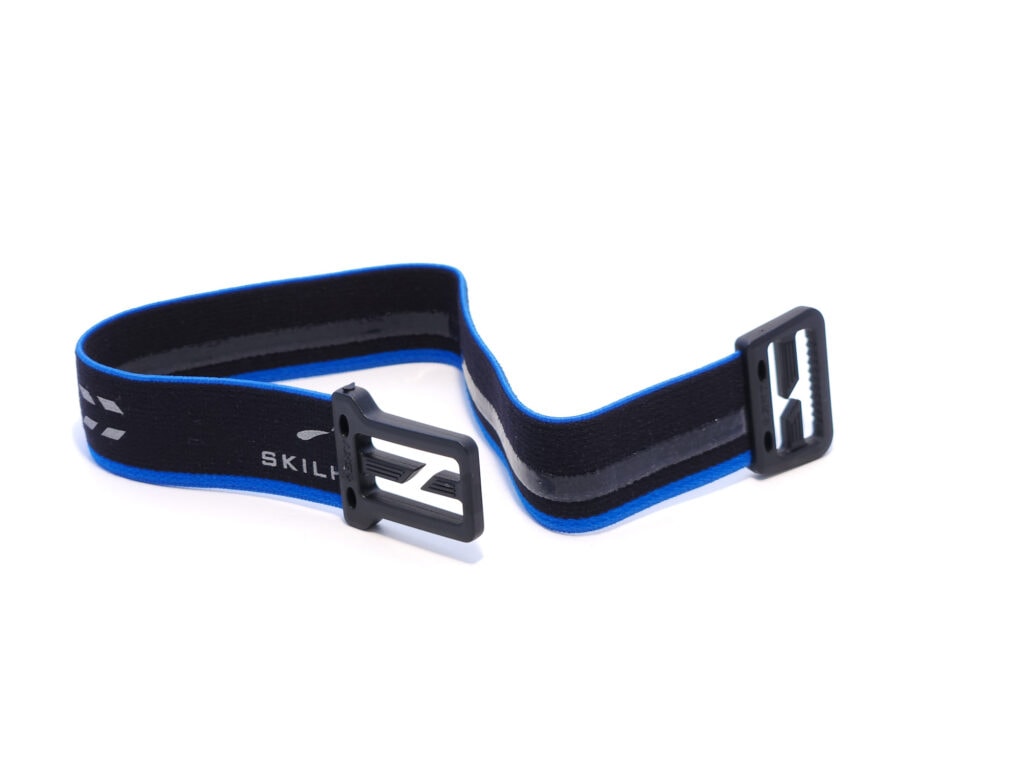
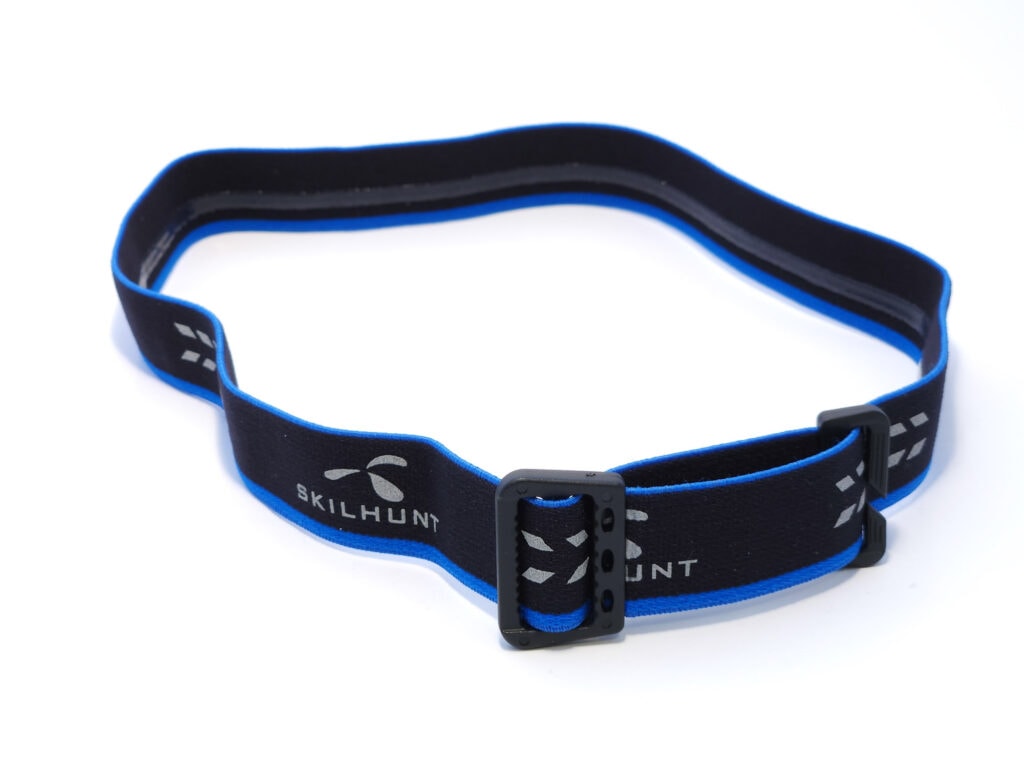
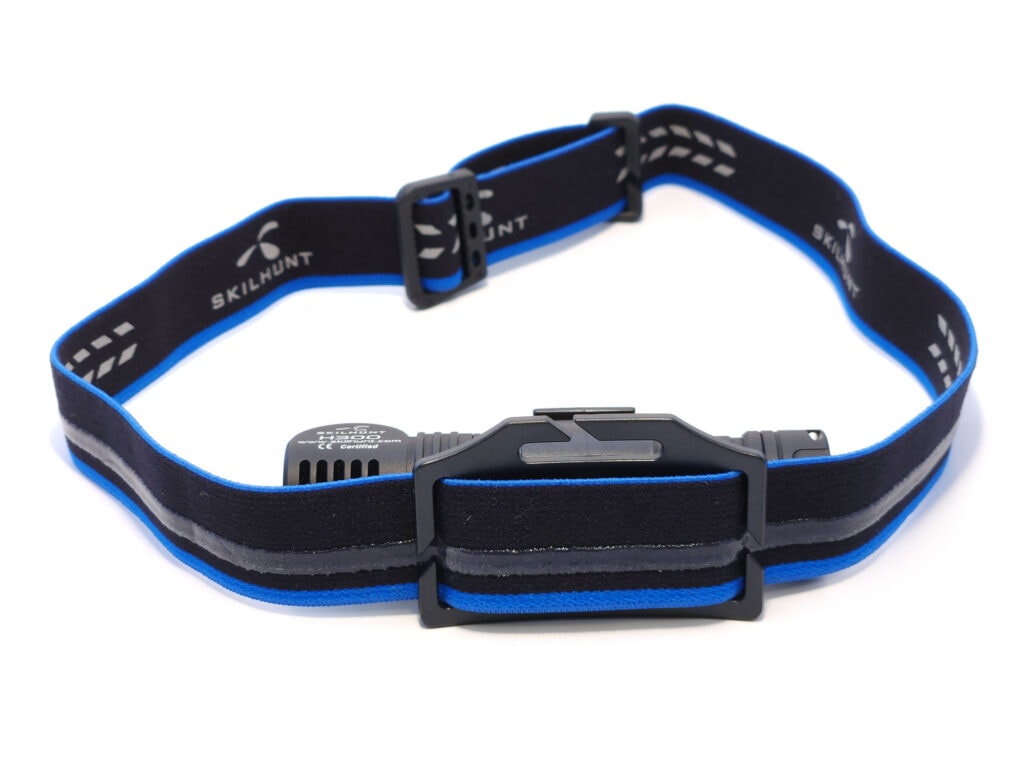
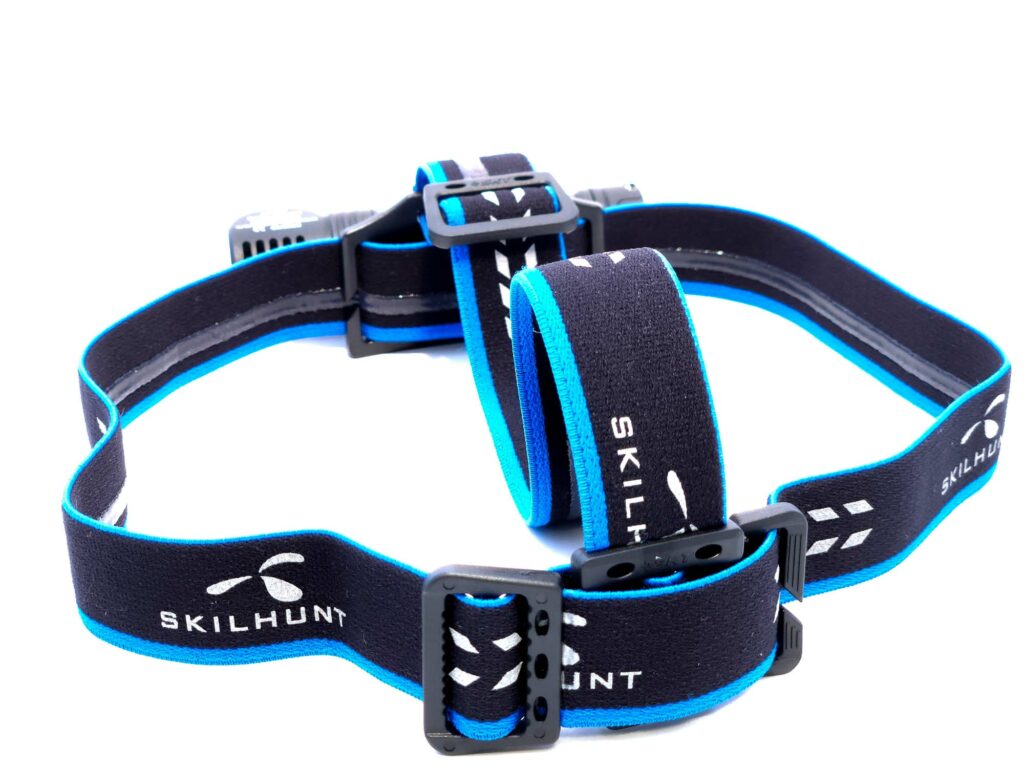
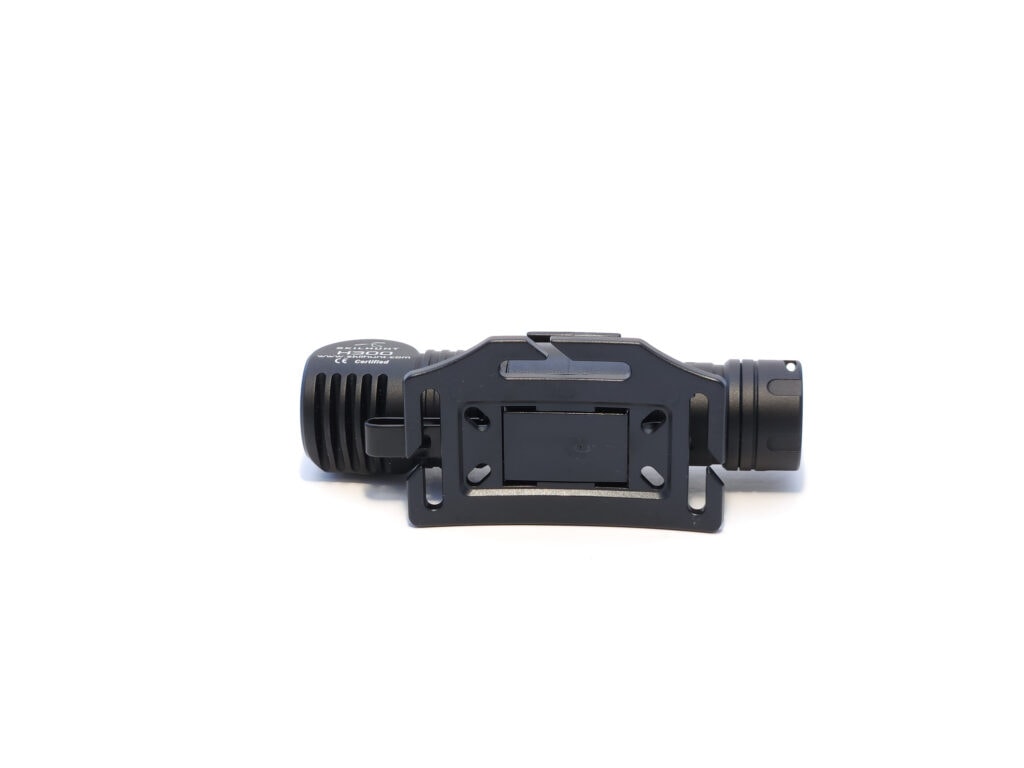
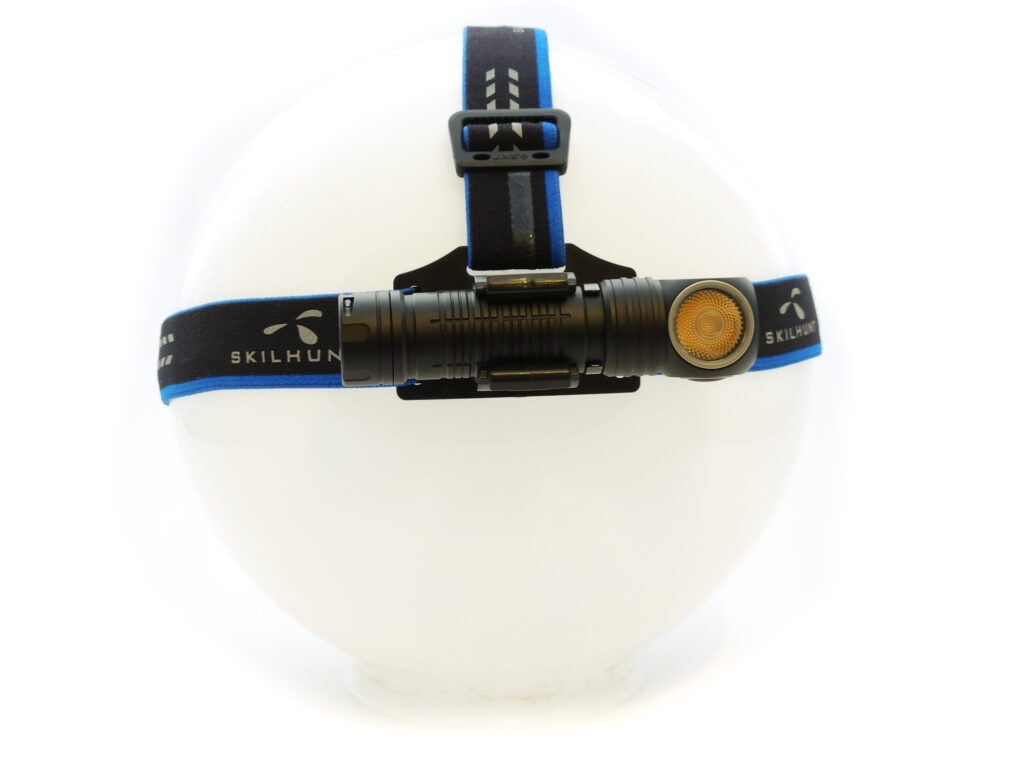
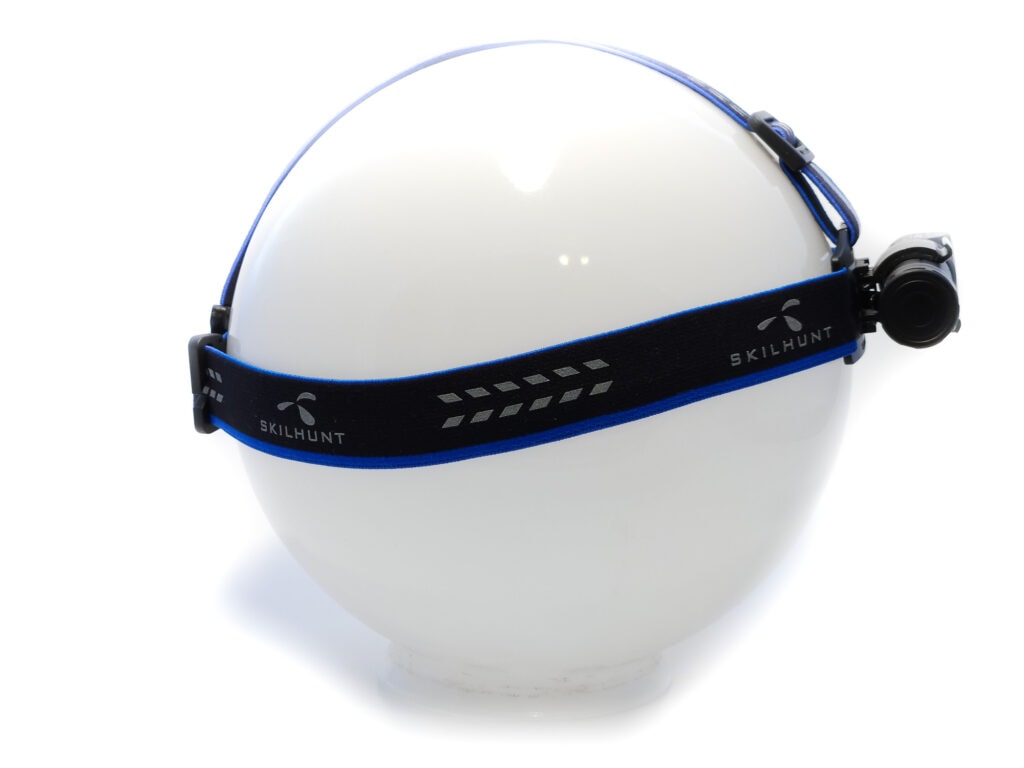
Not to take anything away from their flashlights, but Skilhunt is especially known for their great headlamps, and one of the key components of a headlamp is its headband. Skilhunt’s headband is regularly recommended for other headlamps (of the same body diameter), and may (subjectively) be the best one out there. It comes in three parts: A headband, a strap which goes over the top of your head, and a plastic clip for the light. You have to attach the top strap and clip to the headband, but it’s not too bad. The band just slips into through small cuts in the clips, then you can tighten it to your liking. Especially with the strap that goes over your head, it holds in place nicely and doesn’t put too much strain on your neck.
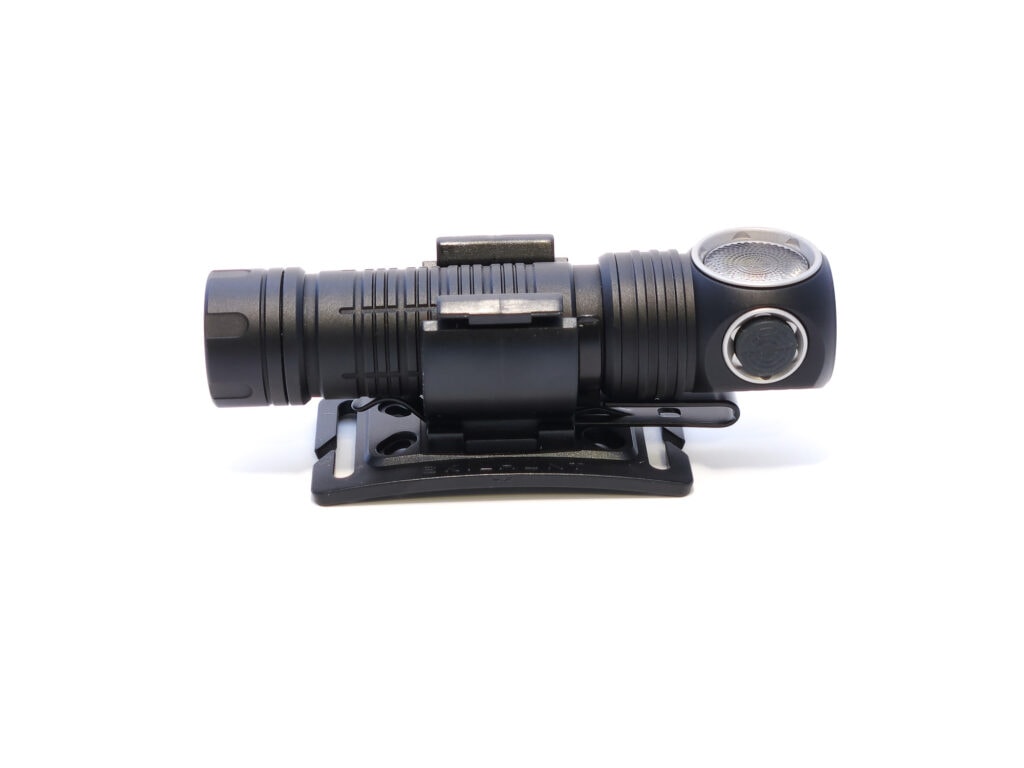
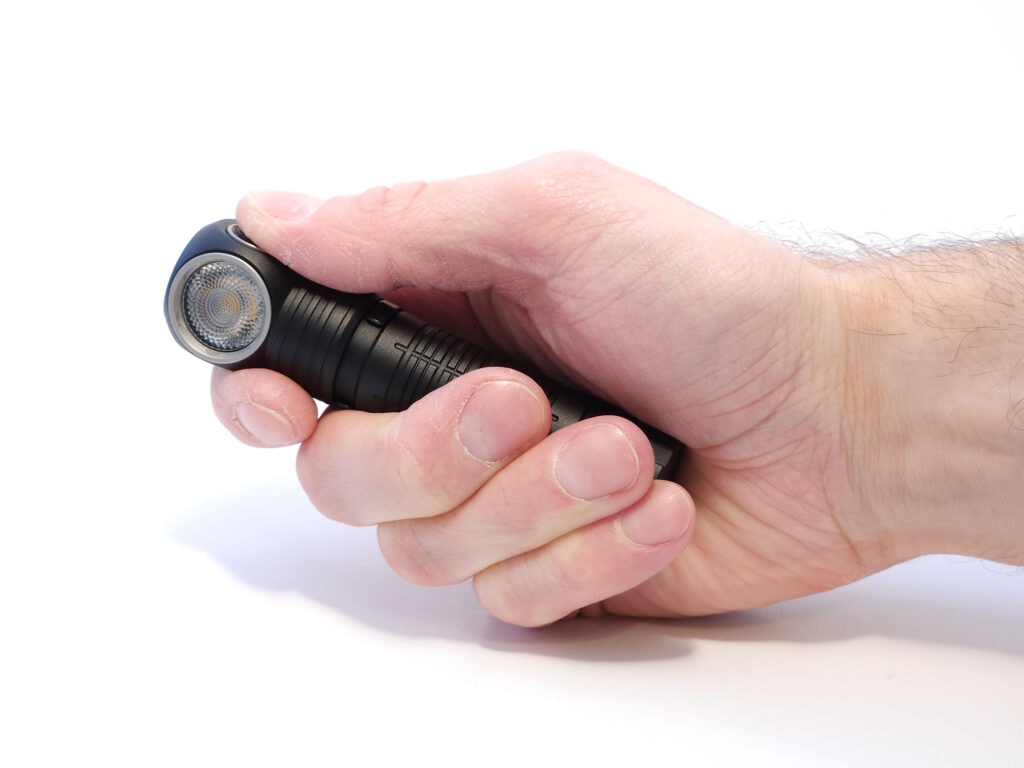
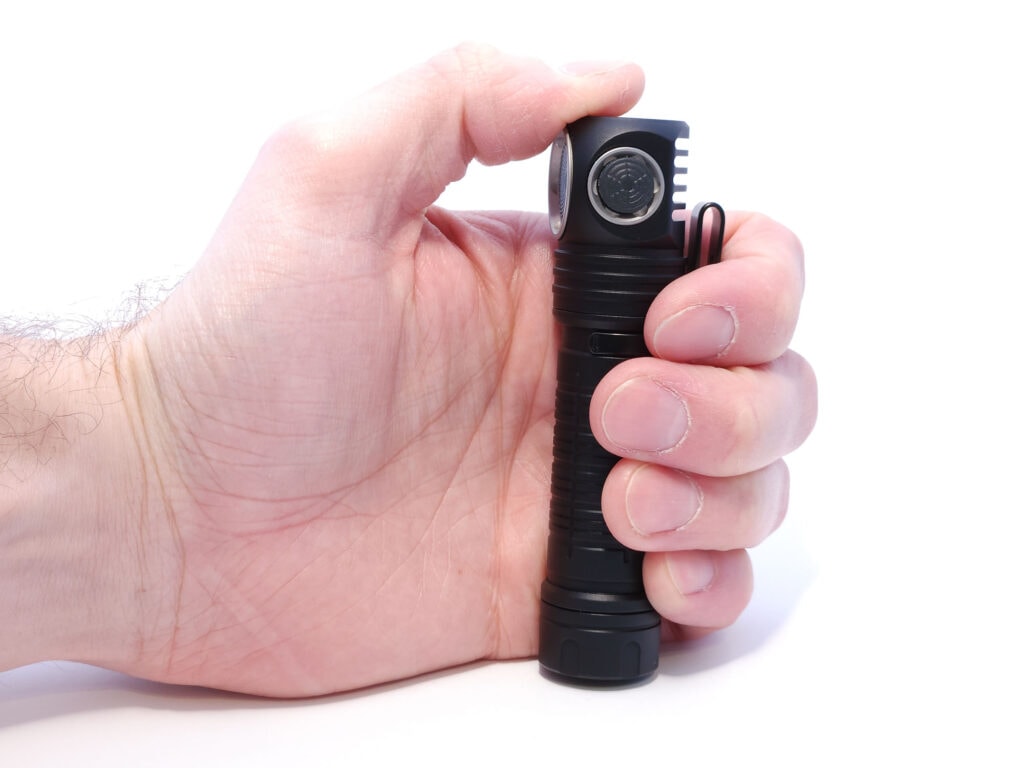
Another thing that the H300 has over other headlamps is that the button is on the side of the head, if you’re standing it up, that is. When clipped into the headband, the button is on the top (or bottom, depending on how you insert it) of the light, allowing for easier activation than if it was on the top of the head. It actually works well for holding the light as well, as it places the button right at your thumb, if you’re using your right hand. In the left hand, it gets awkward to try to activate or change modes.
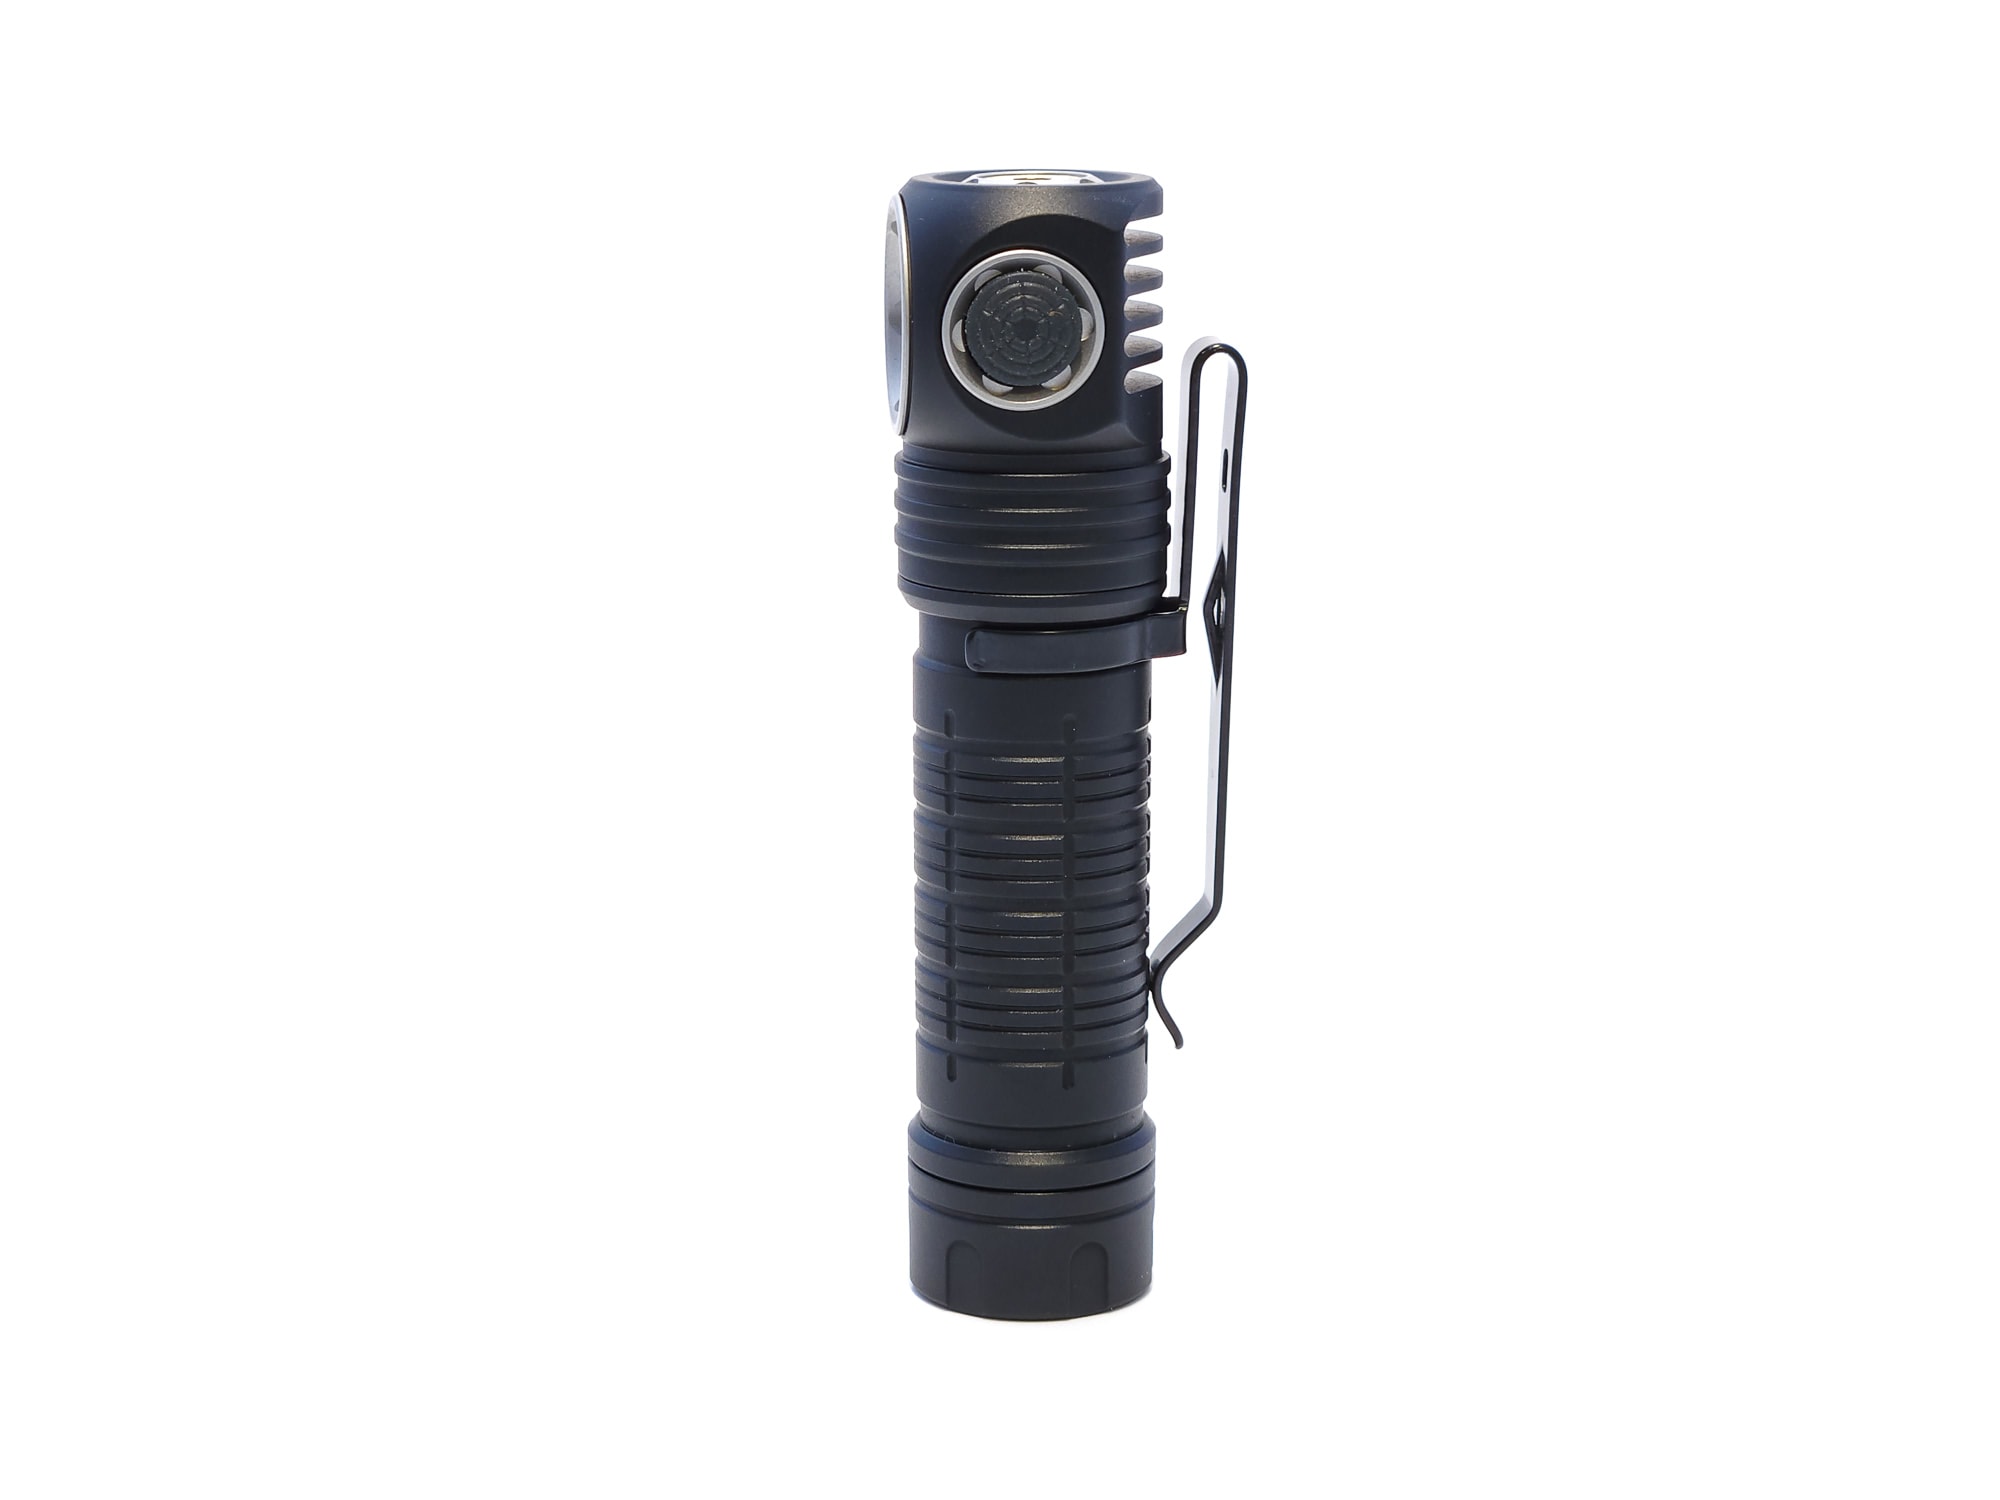
The clip is fairly deep carry, though it’s loose. You can leave it on while putting the light in the headband, if you don’t mind not being able to rotate the light. It only goes on the light one way.
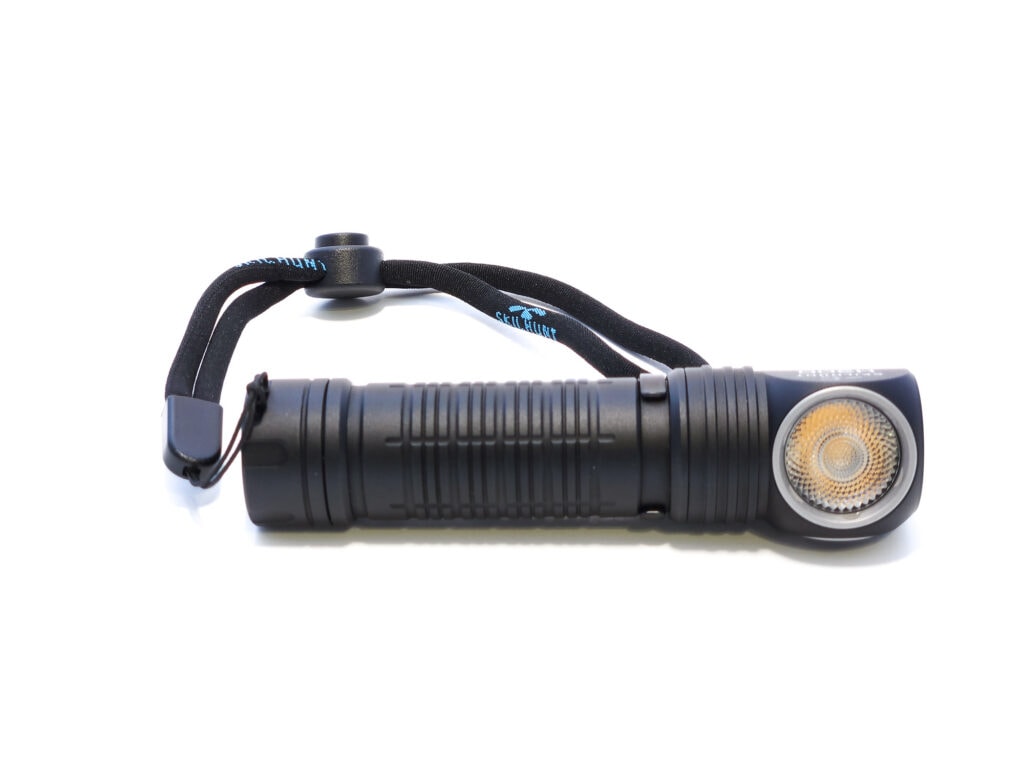
There’s an included lanyard which has a cinch strap with a button to keep it tight against your wrist. Skilhunt twists a small cable onto the loop end of their lanyards to make it easier to thread through the tiny holes in the tail cap. They’re on the side of the tail cap, so you can still tail stand with the lanyard on.
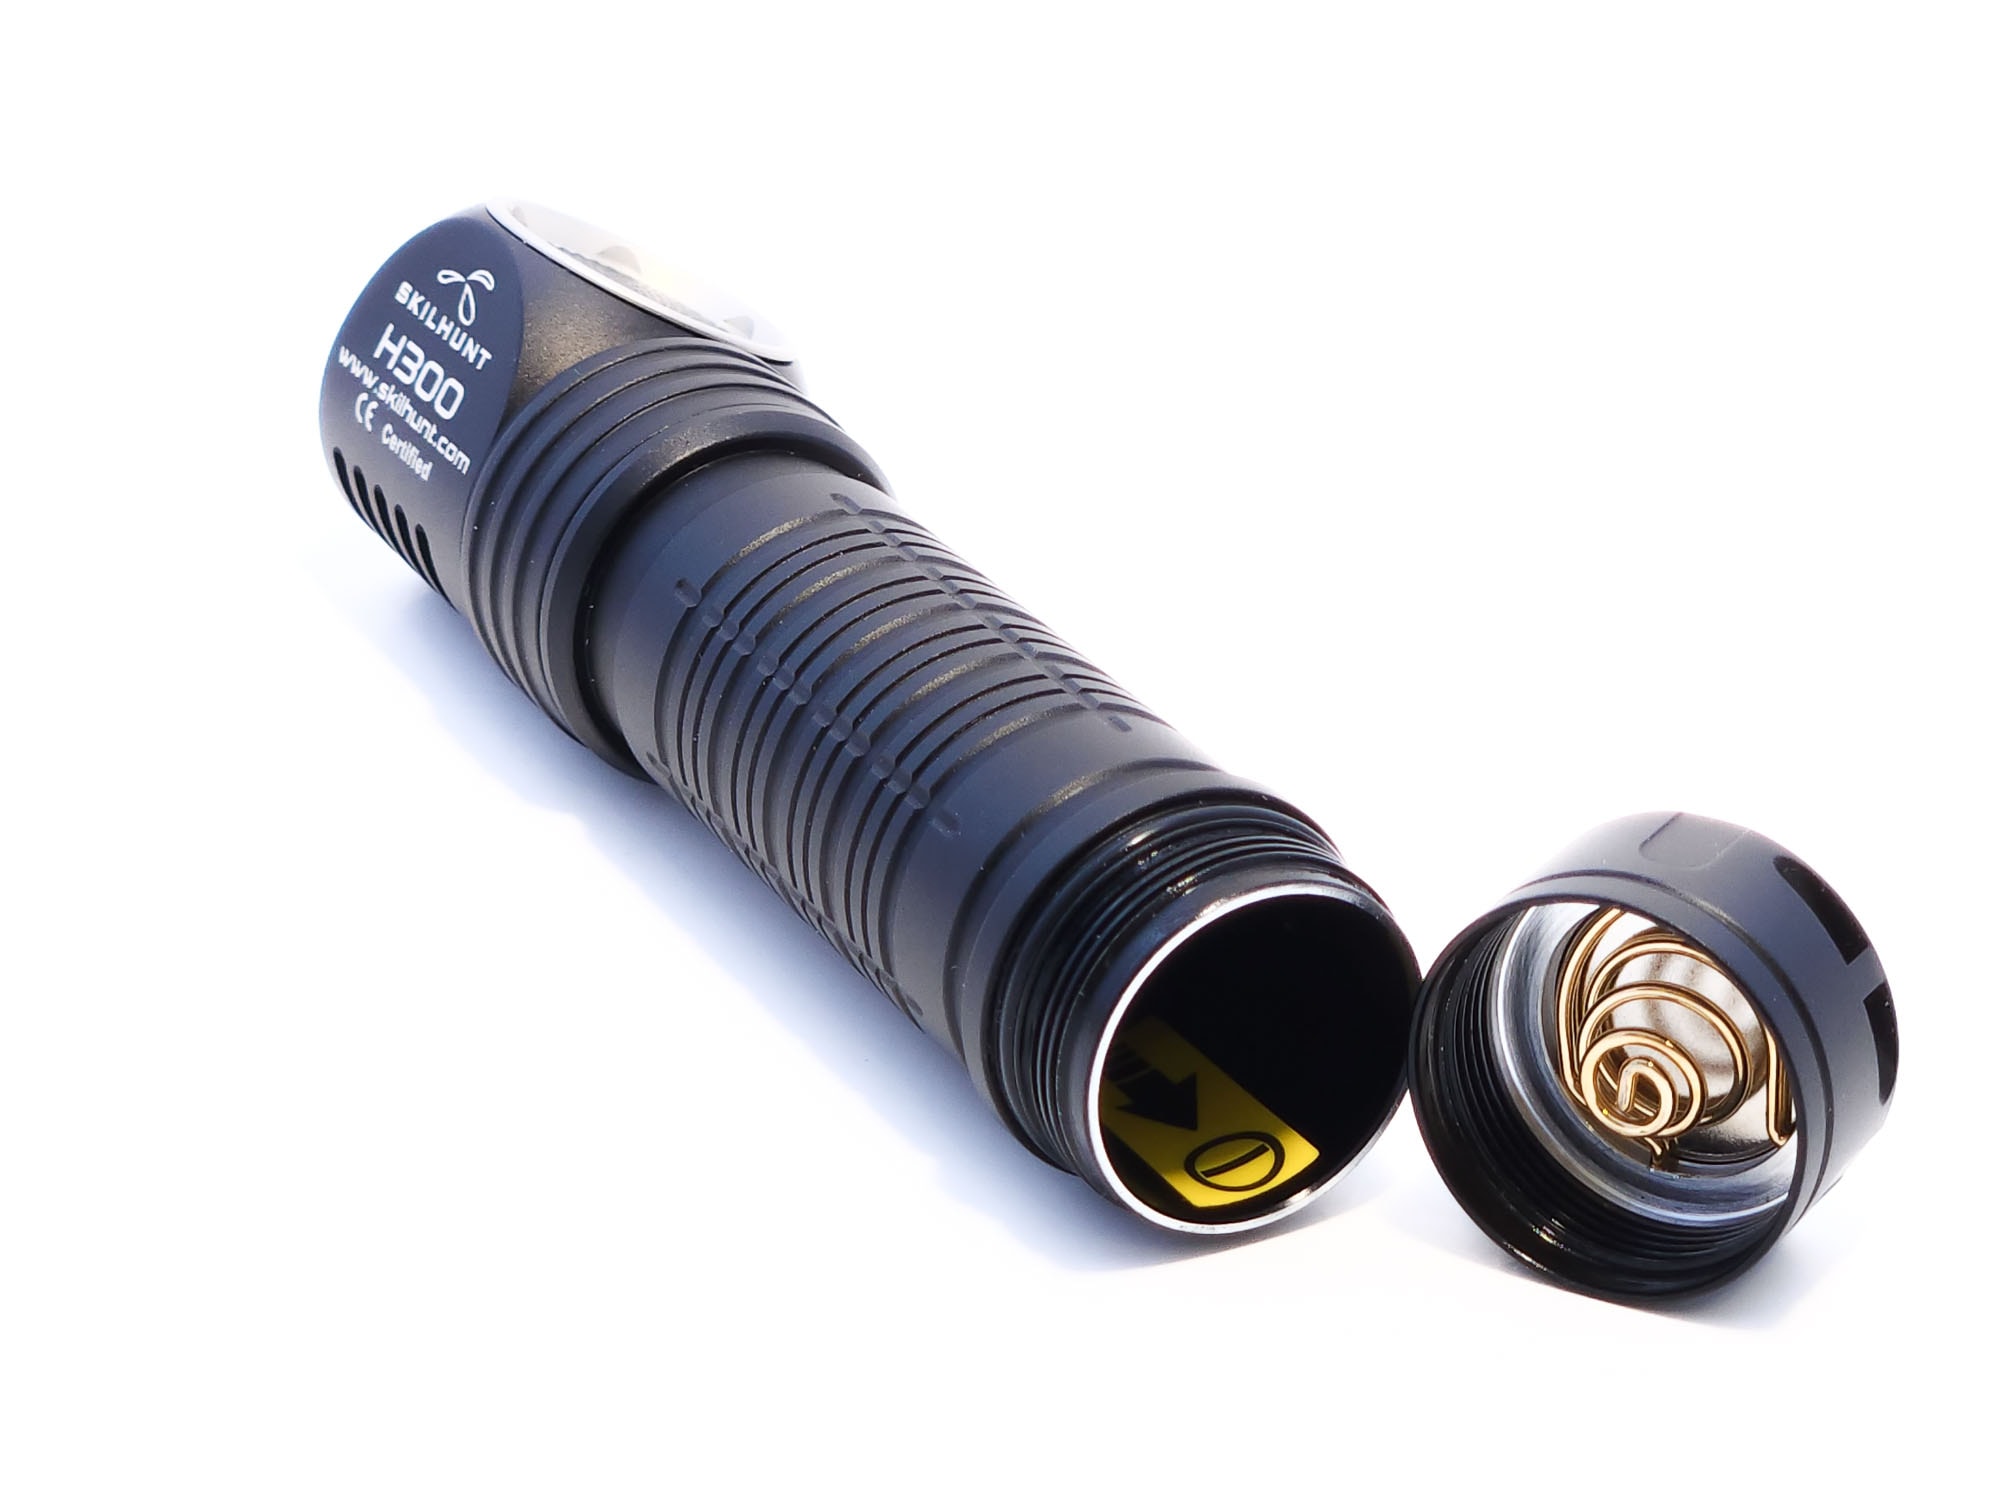
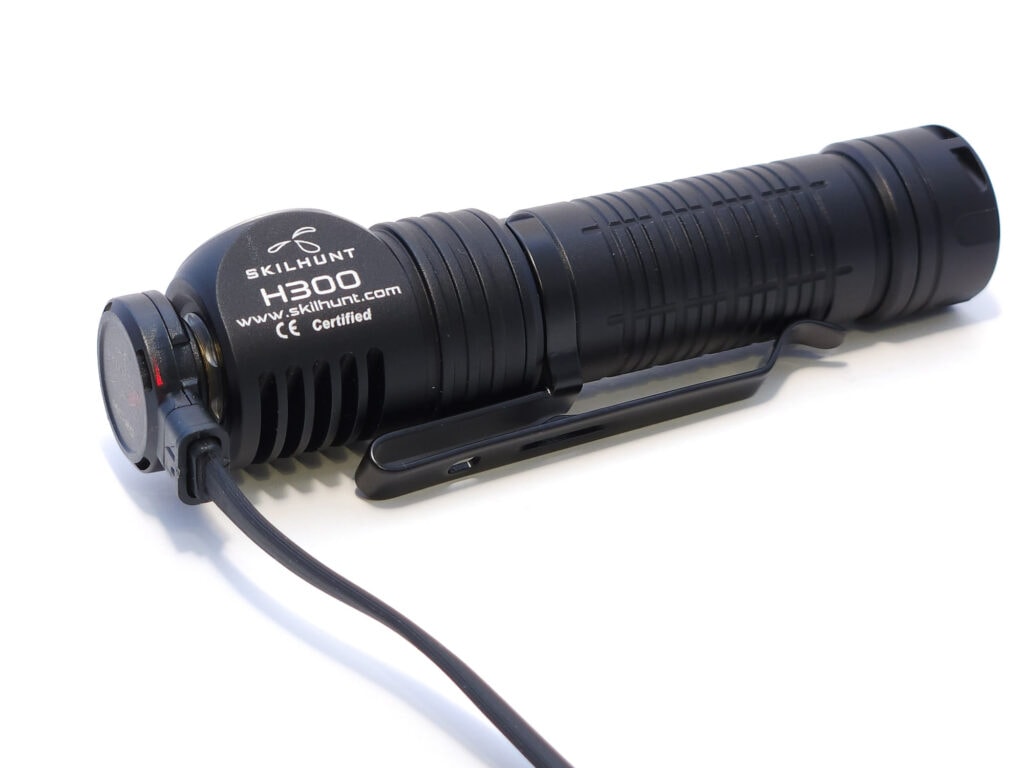
Like some other Skilhunt models, the H300 has a removable magnet in the tailcap. If you take it out, there’s a small rubber disk you can put in its place to keep the spring stable. The magnet holds pretty well, so you can stick it horizontal or even upside down on something magnetic.
All in all, the H300 works best as a headlamp, so anything you need a headlamp for, the H300 will fit the bill, though the floody beam will be best for relatively closer work, as opposed to a thrower-type headlamp.
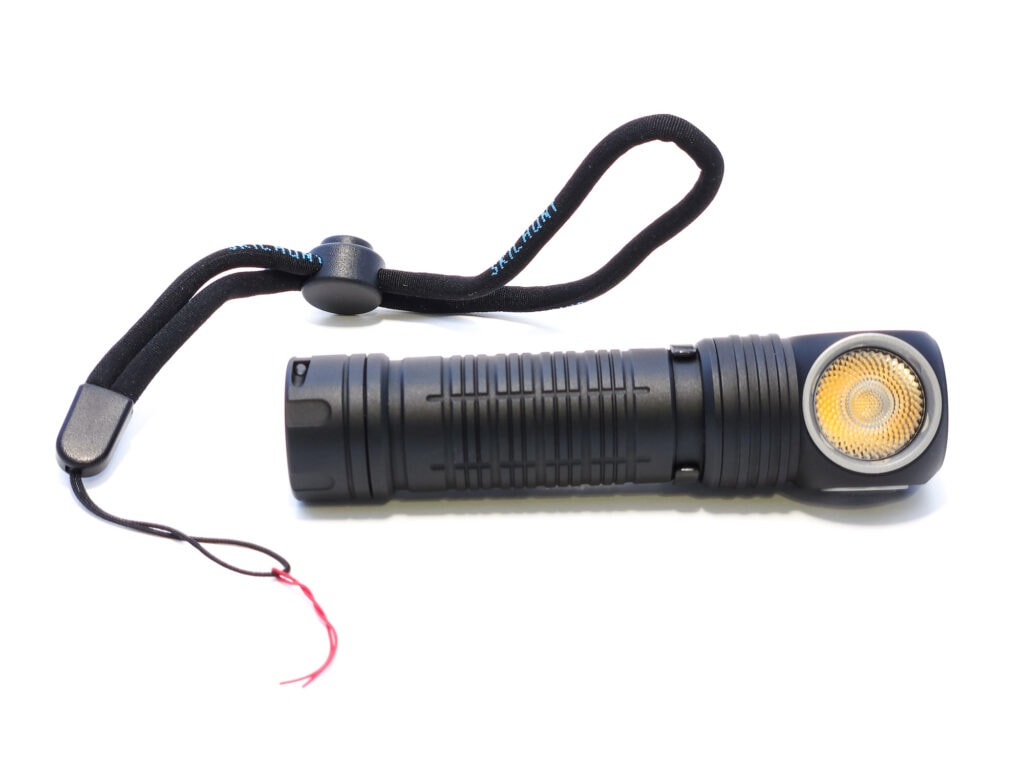
Build Quality and Warranty
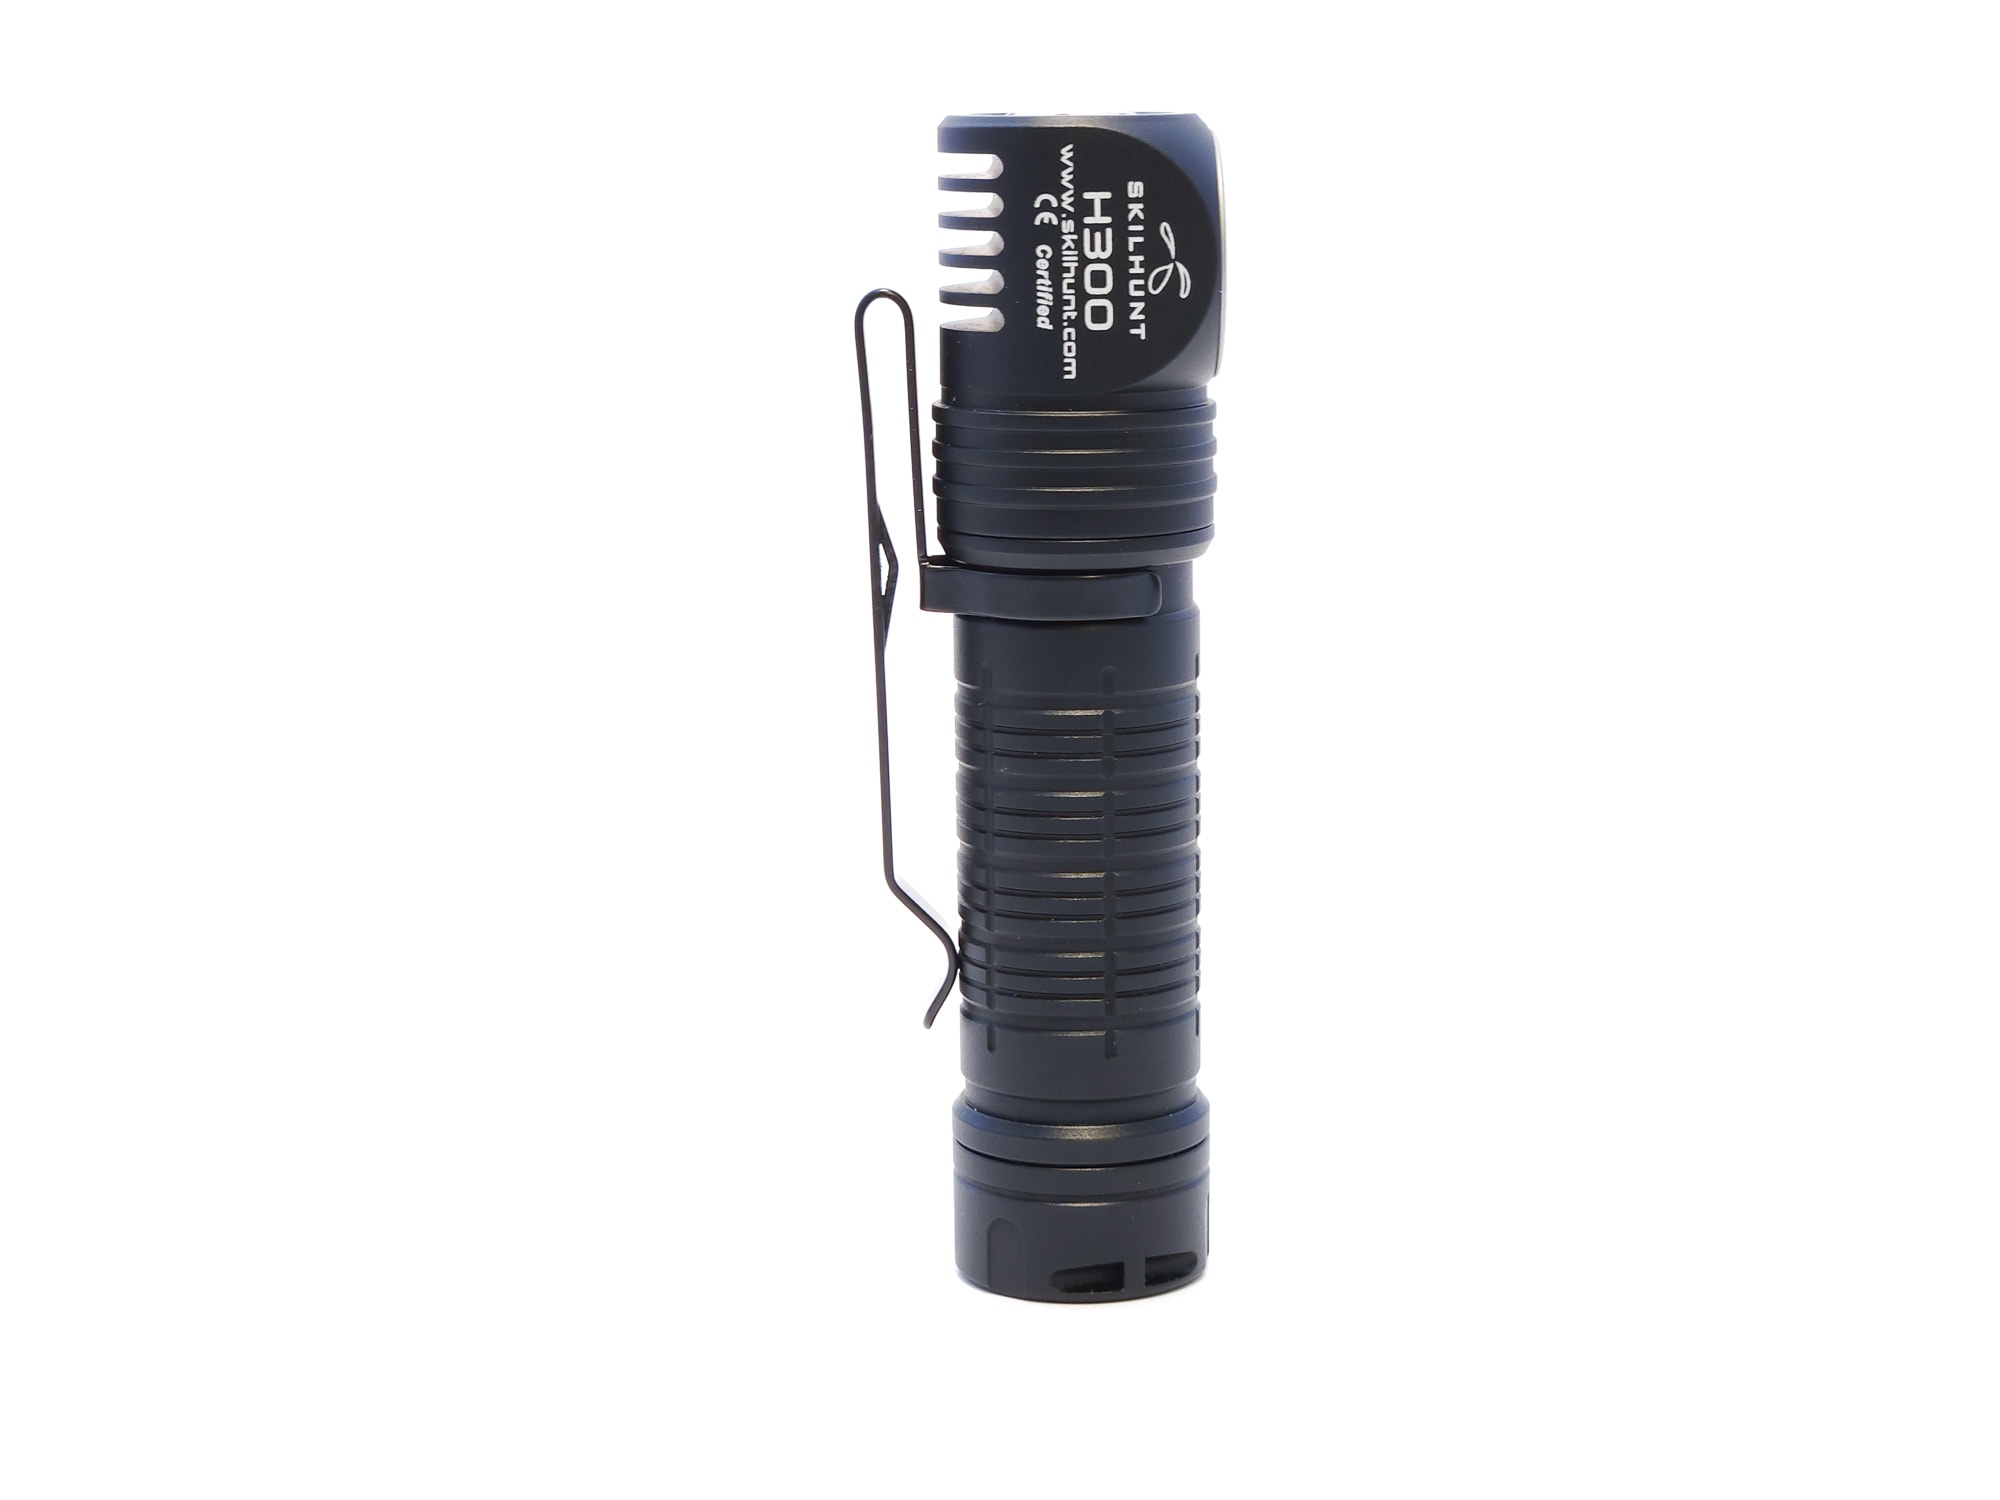
Skilhunt always has high quality builds. The H300, which comes in gray or black anodized aluminum, is no exception.
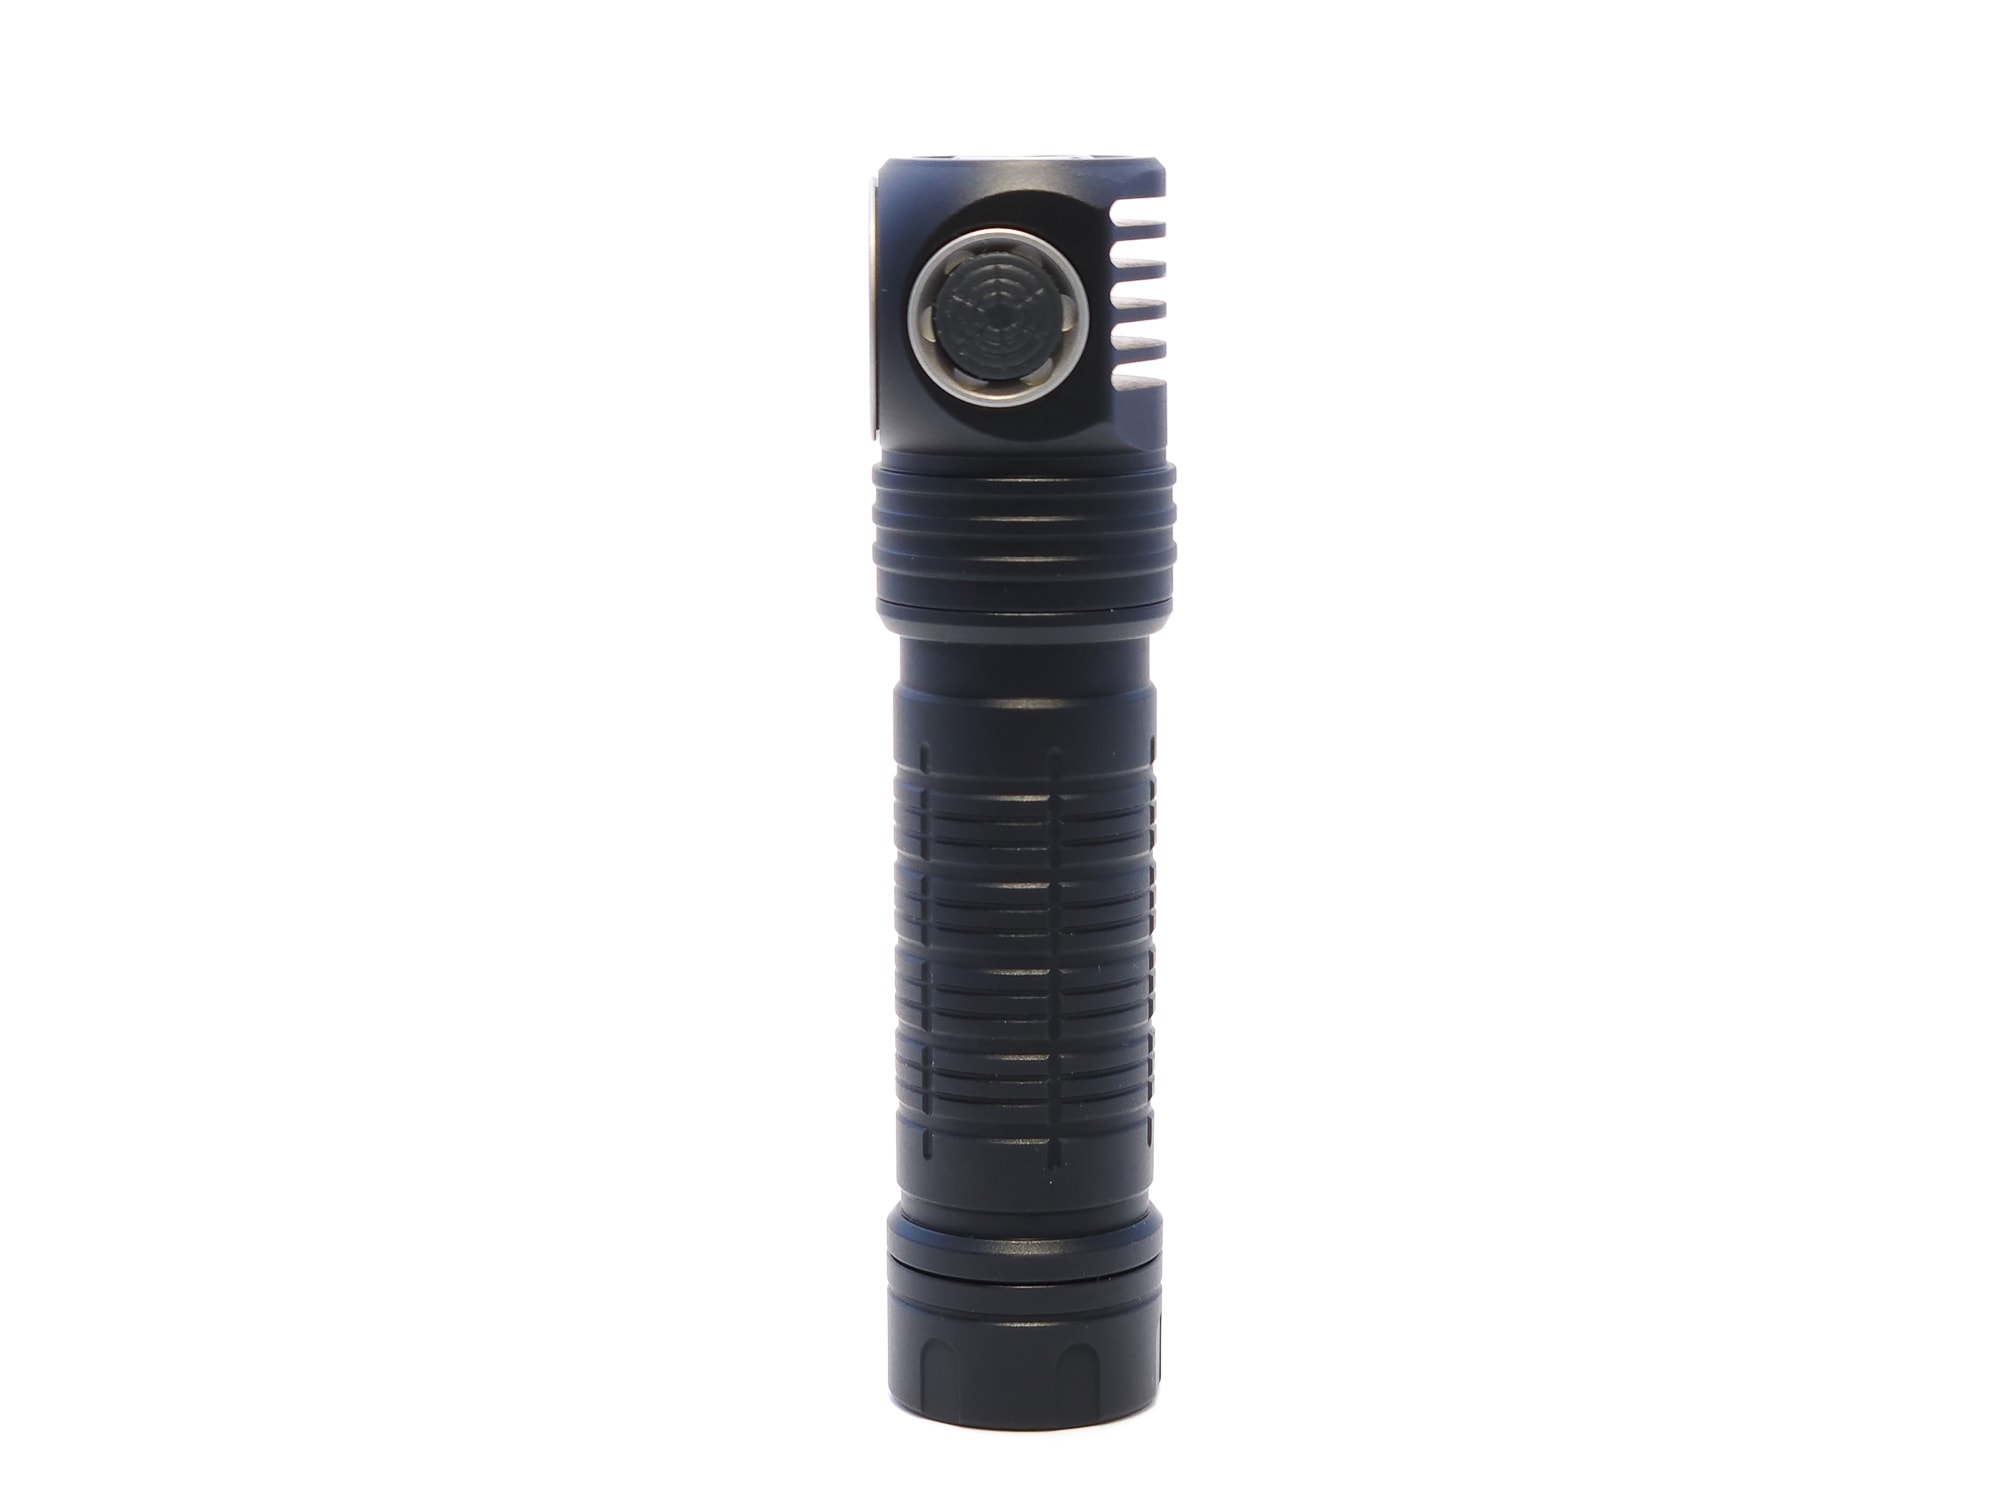
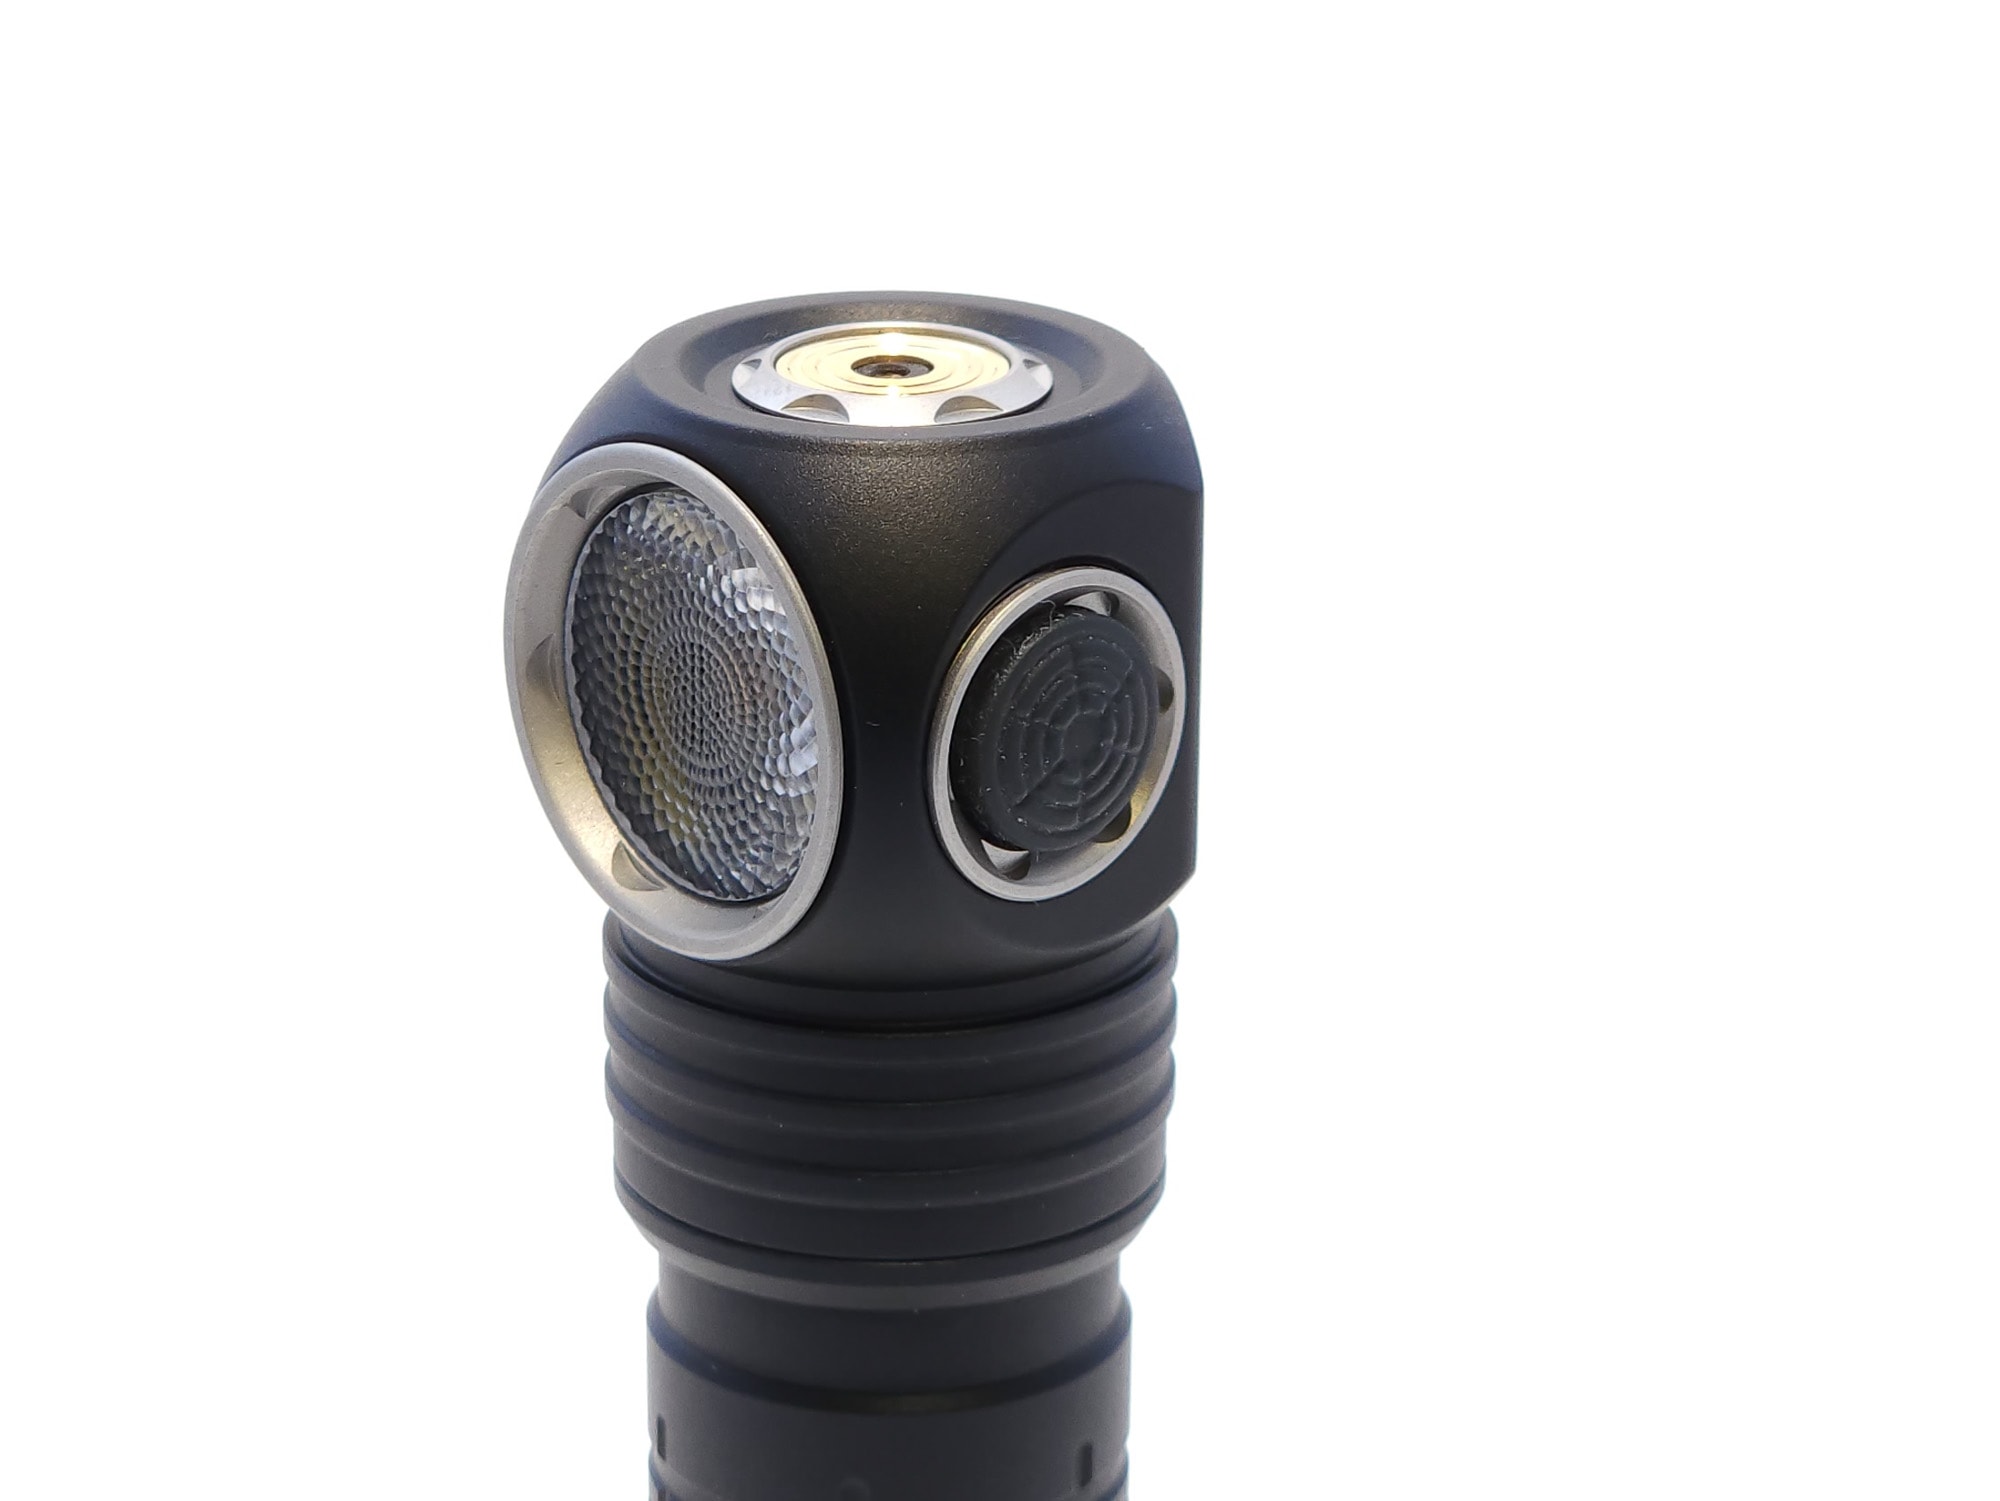
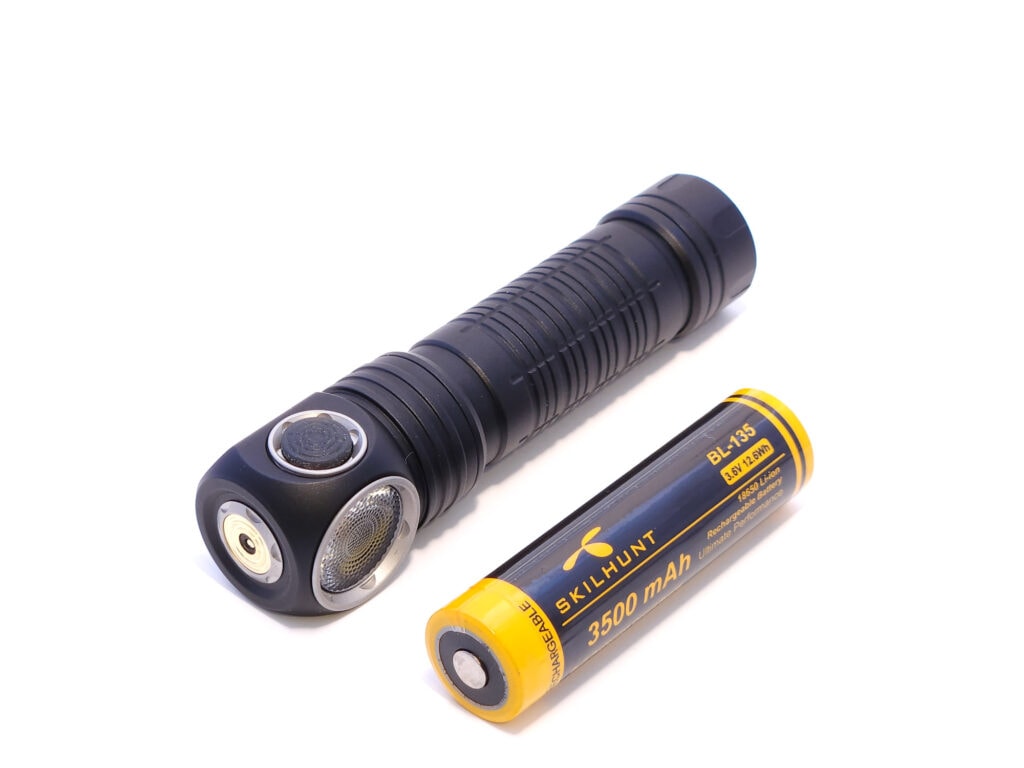
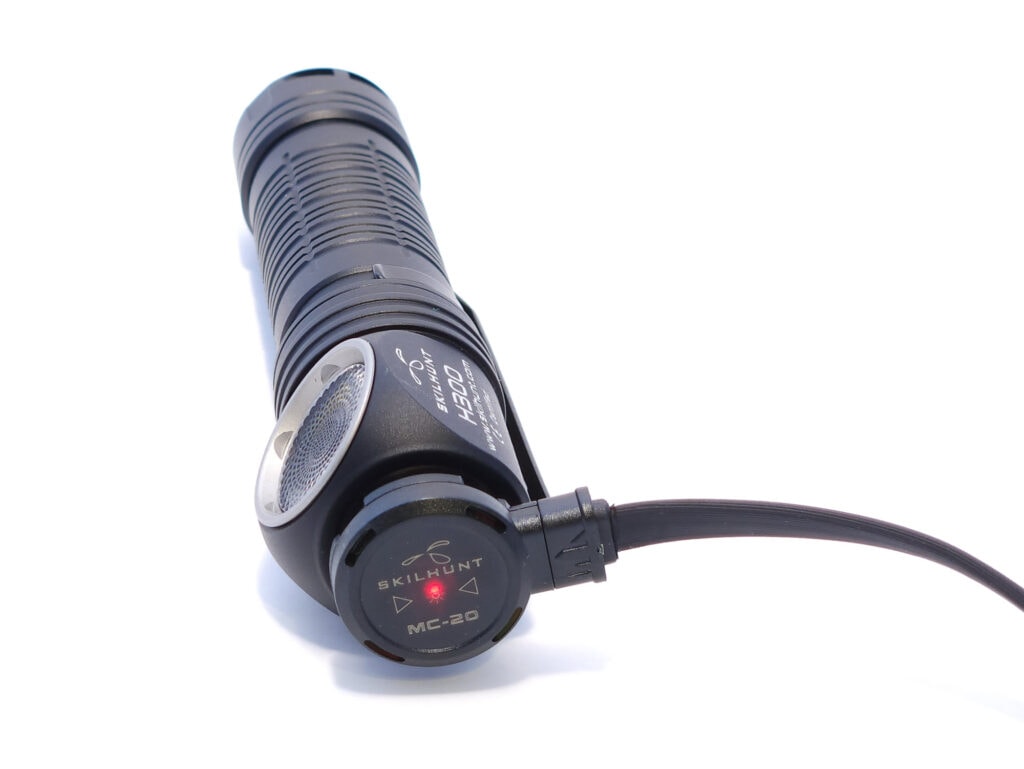
The head has the button on one side, as already mentioned, and all the branding on the opposite side. On the top is the magnetic charging port, which seems to be a good place for it, since it can easily be swiveled around to face whichever direction you need. The rear of the head has very, very deep cooling fins. It would be interesting to see how differently the light would perform with or without them, since they’re so big.
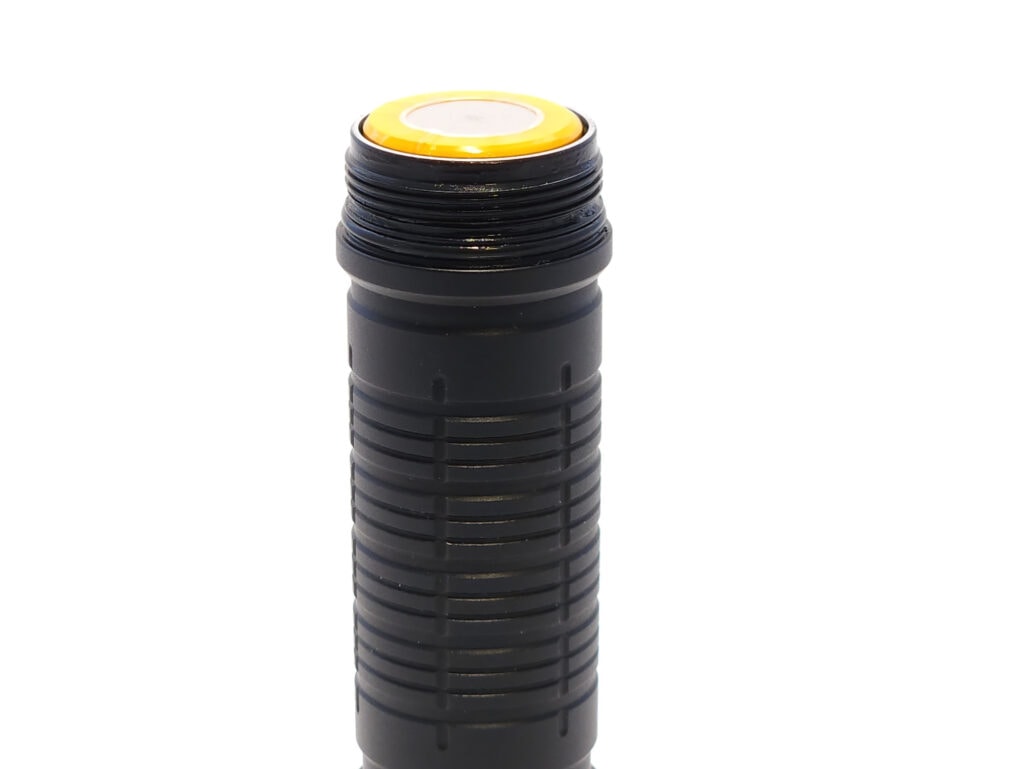
The body has thick, rectangular knurling, which helps you hold onto it, though you’ll probably be using it in the headband. The head is glued to the body, so you can’t switch it around, and the only threads you can get to are on the tail. They’re nice, though, and well lubed.
The tail cap itself is rather smooth, but has a number of shallow cutouts which help with grip. The lanyard holes are also located here, and the bottom is smooth for standing up.
The H300 is covered by Skilhunt’s standard warranty. You can read the full text of it on their Service page.
To summarize:
- Free product replacement due to defect within 15 days of purchase
- Free product repair due to defect within 24 months of purchase
- Paid repair available after 24 months
- Warranty may not be honored if purchased from unauthorized dealer
- Warranty does not cover normal wear or non-defect damage
LED, Lens, Bezel, Beam, and Reflector
The H300 differs from the H04 in that the H300 uses a 5050-size (5.0mm x 5.0mm), quad-die, 6V emitters, vs 3535, 3V emitters. There are two versions: The H300R has a reflector as opposed to the H300, which has a TIR. The 144ART is only available with the TIR and the XHP50.3 is only available with the reflector, but the XHP50.2 variants can be had with either TIR or reflector. This review covers the H300 with Nichia 144ART.
With both lower CCT and higher CRI, the Nichia 144ART will have the lowest output in terms of lumens and throw of the various emitter options, but has some nice quality light.
The TIR in the H300 has a very pleasing to look at circular pattern of dimples for diffusion. It reminds me of a flower, like a chrysanthemum or something like that. I believe, but don’t have confirmation, that it’s a Ledil lens. It produces a smooth, floody beam pattern, though still has a hotspot, even if it’s not strongly defined.
The bezel on the H300 screws in, so you could access the emitter to swap it if you wanted, but with four emitter options, you can probably just buy one with the type of emitter you need.
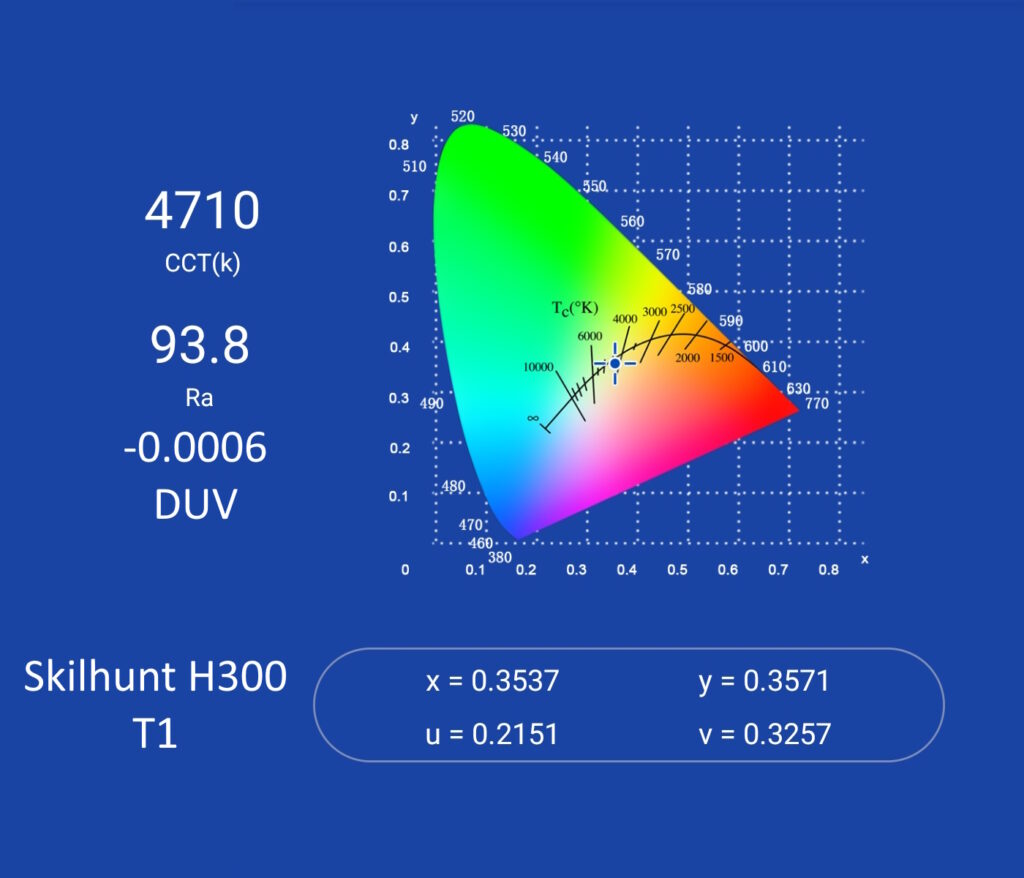
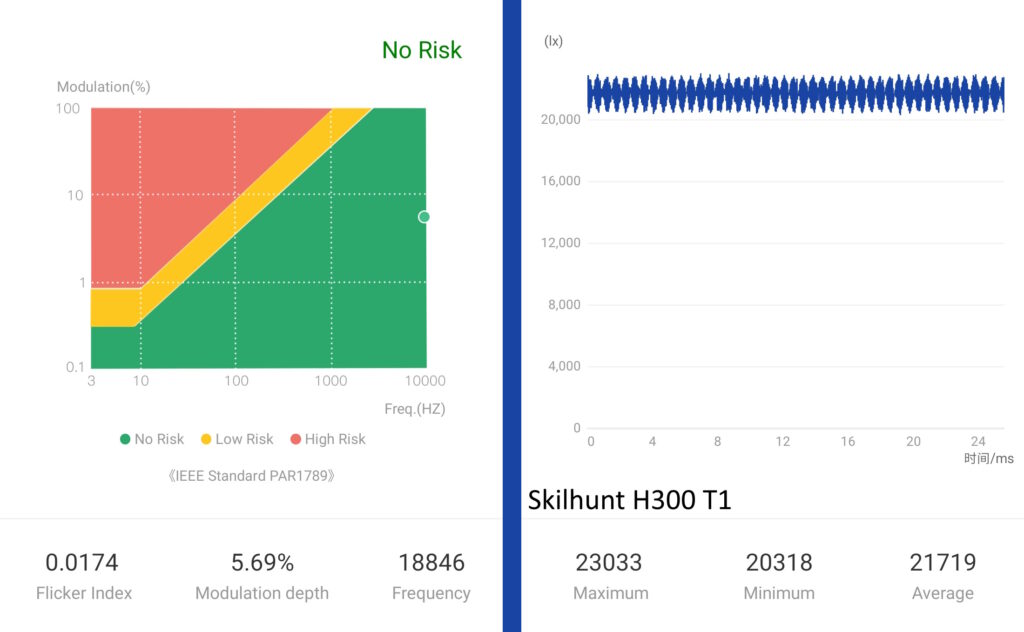
The measurements from my Opple Light Master Pro were very consistent across modes. DUV is slightly above BBL on the lower half of the modes and negative in the higher modes. The TIR seems to balance the light out nicely, as the DUV is much lower than on the M300 v2 with the 144ART, and the tint is nicer, too. It’s very white without much, if any, shift in color.
| Mode | CCT | CRI | DUV | Flicker |
|---|---|---|---|---|
| L2 | 4447K | 95.1 | 0.0016 | 760 Hz |
| L1 | 4477K | 95.5 | 0.0010 | 6192 Hz |
| M2 | 4497K | 95.5 | 0.0010 | 30037 Hz |
| M1 | 4527K | 95.1 | 0.0013 | 30118 Hz |
| H1 | 4563K | 95.1 | 0.0003 | 22548 Hz |
| T2 | 4538K | 94.2 | -0.0009 | 21815 Hz |
| T1 | 4710K | 93.8 | -0.0006 | 18846 Hz |
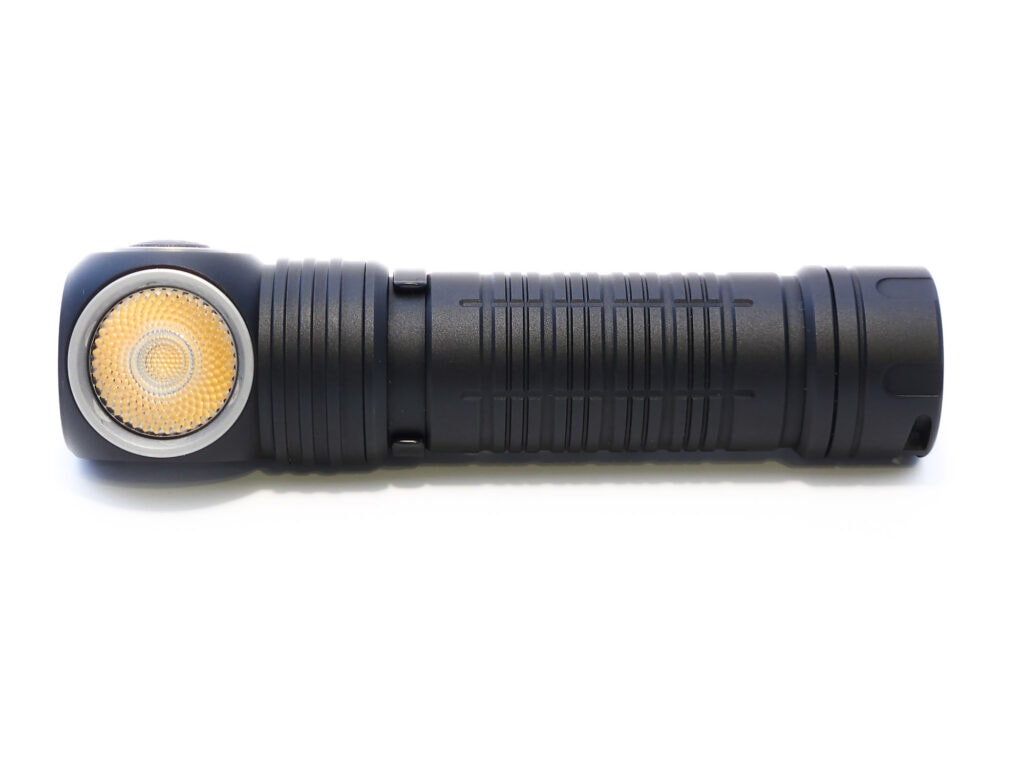
Dimensions and its competition
Dimensions:
| Skilhunt H300 | Millimeters | Inches |
|---|---|---|
| Length | 105 mm | 4.1 in |
| Head diameter (widest point) | 30 mm | 1.2 in |
| Body diameter | 22 mm | 0.8 in |
Dimensions are rounded to the nearest millimeter, and to the nearest tenth of an Inch.
Weight:
| Skilhunt H300 | Weight in grams | Weight in oz |
|---|---|---|
| Without battery: | 60 g | 3.9 oz |
| With battery | 111 g | 2.1 oz |
Weight is rounded to the nearest gram, and to the nearest tenth of an Oz.
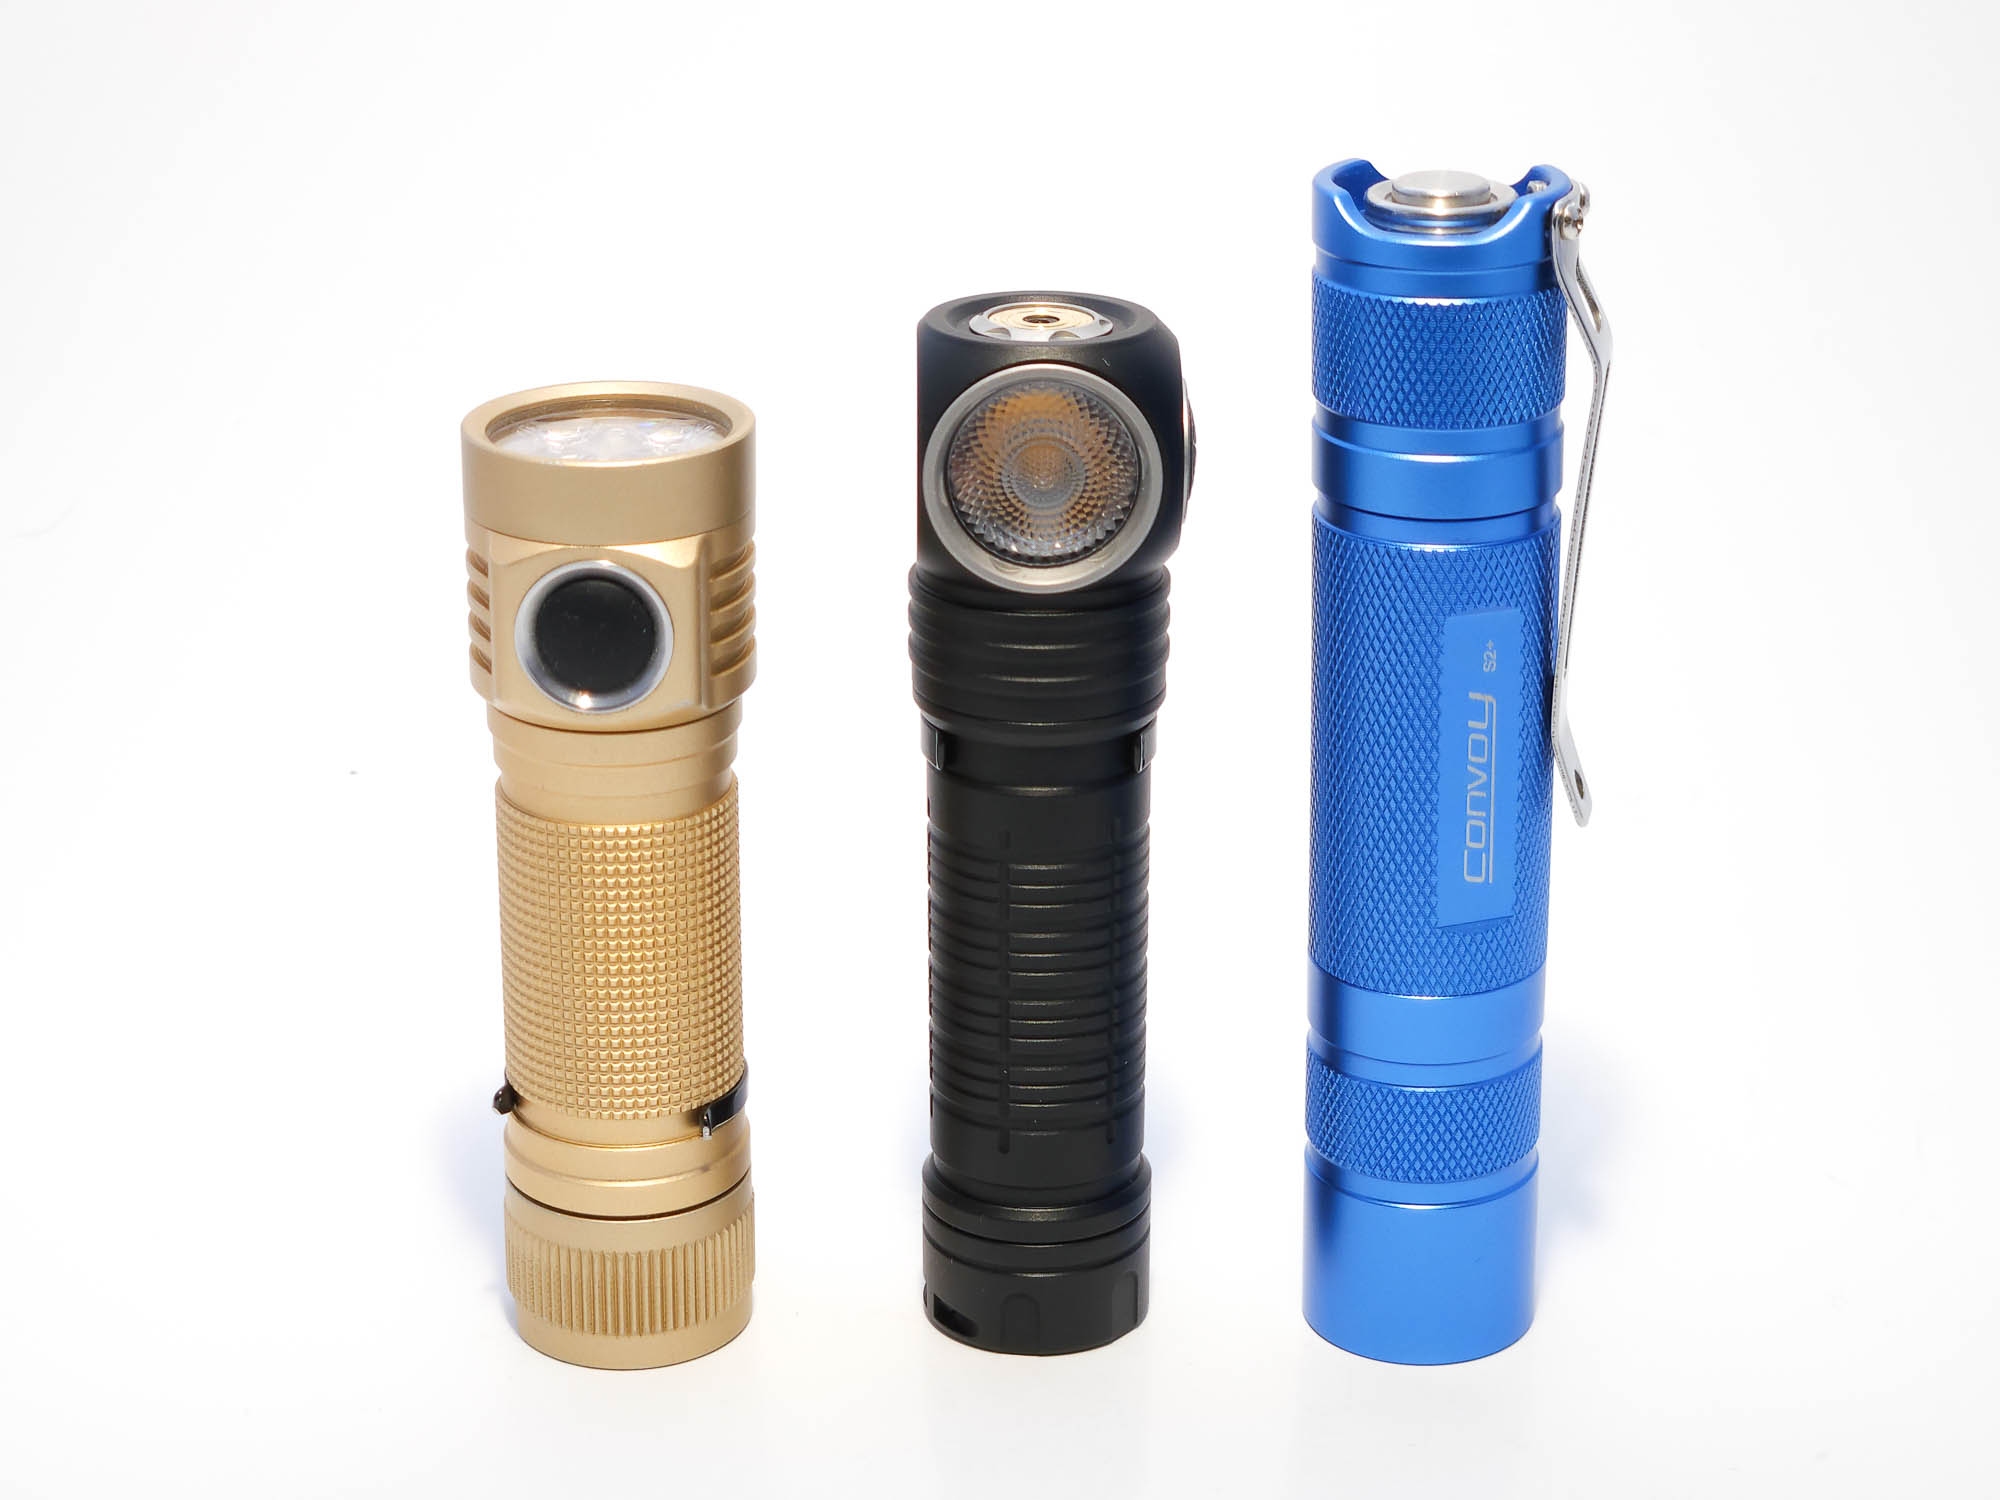
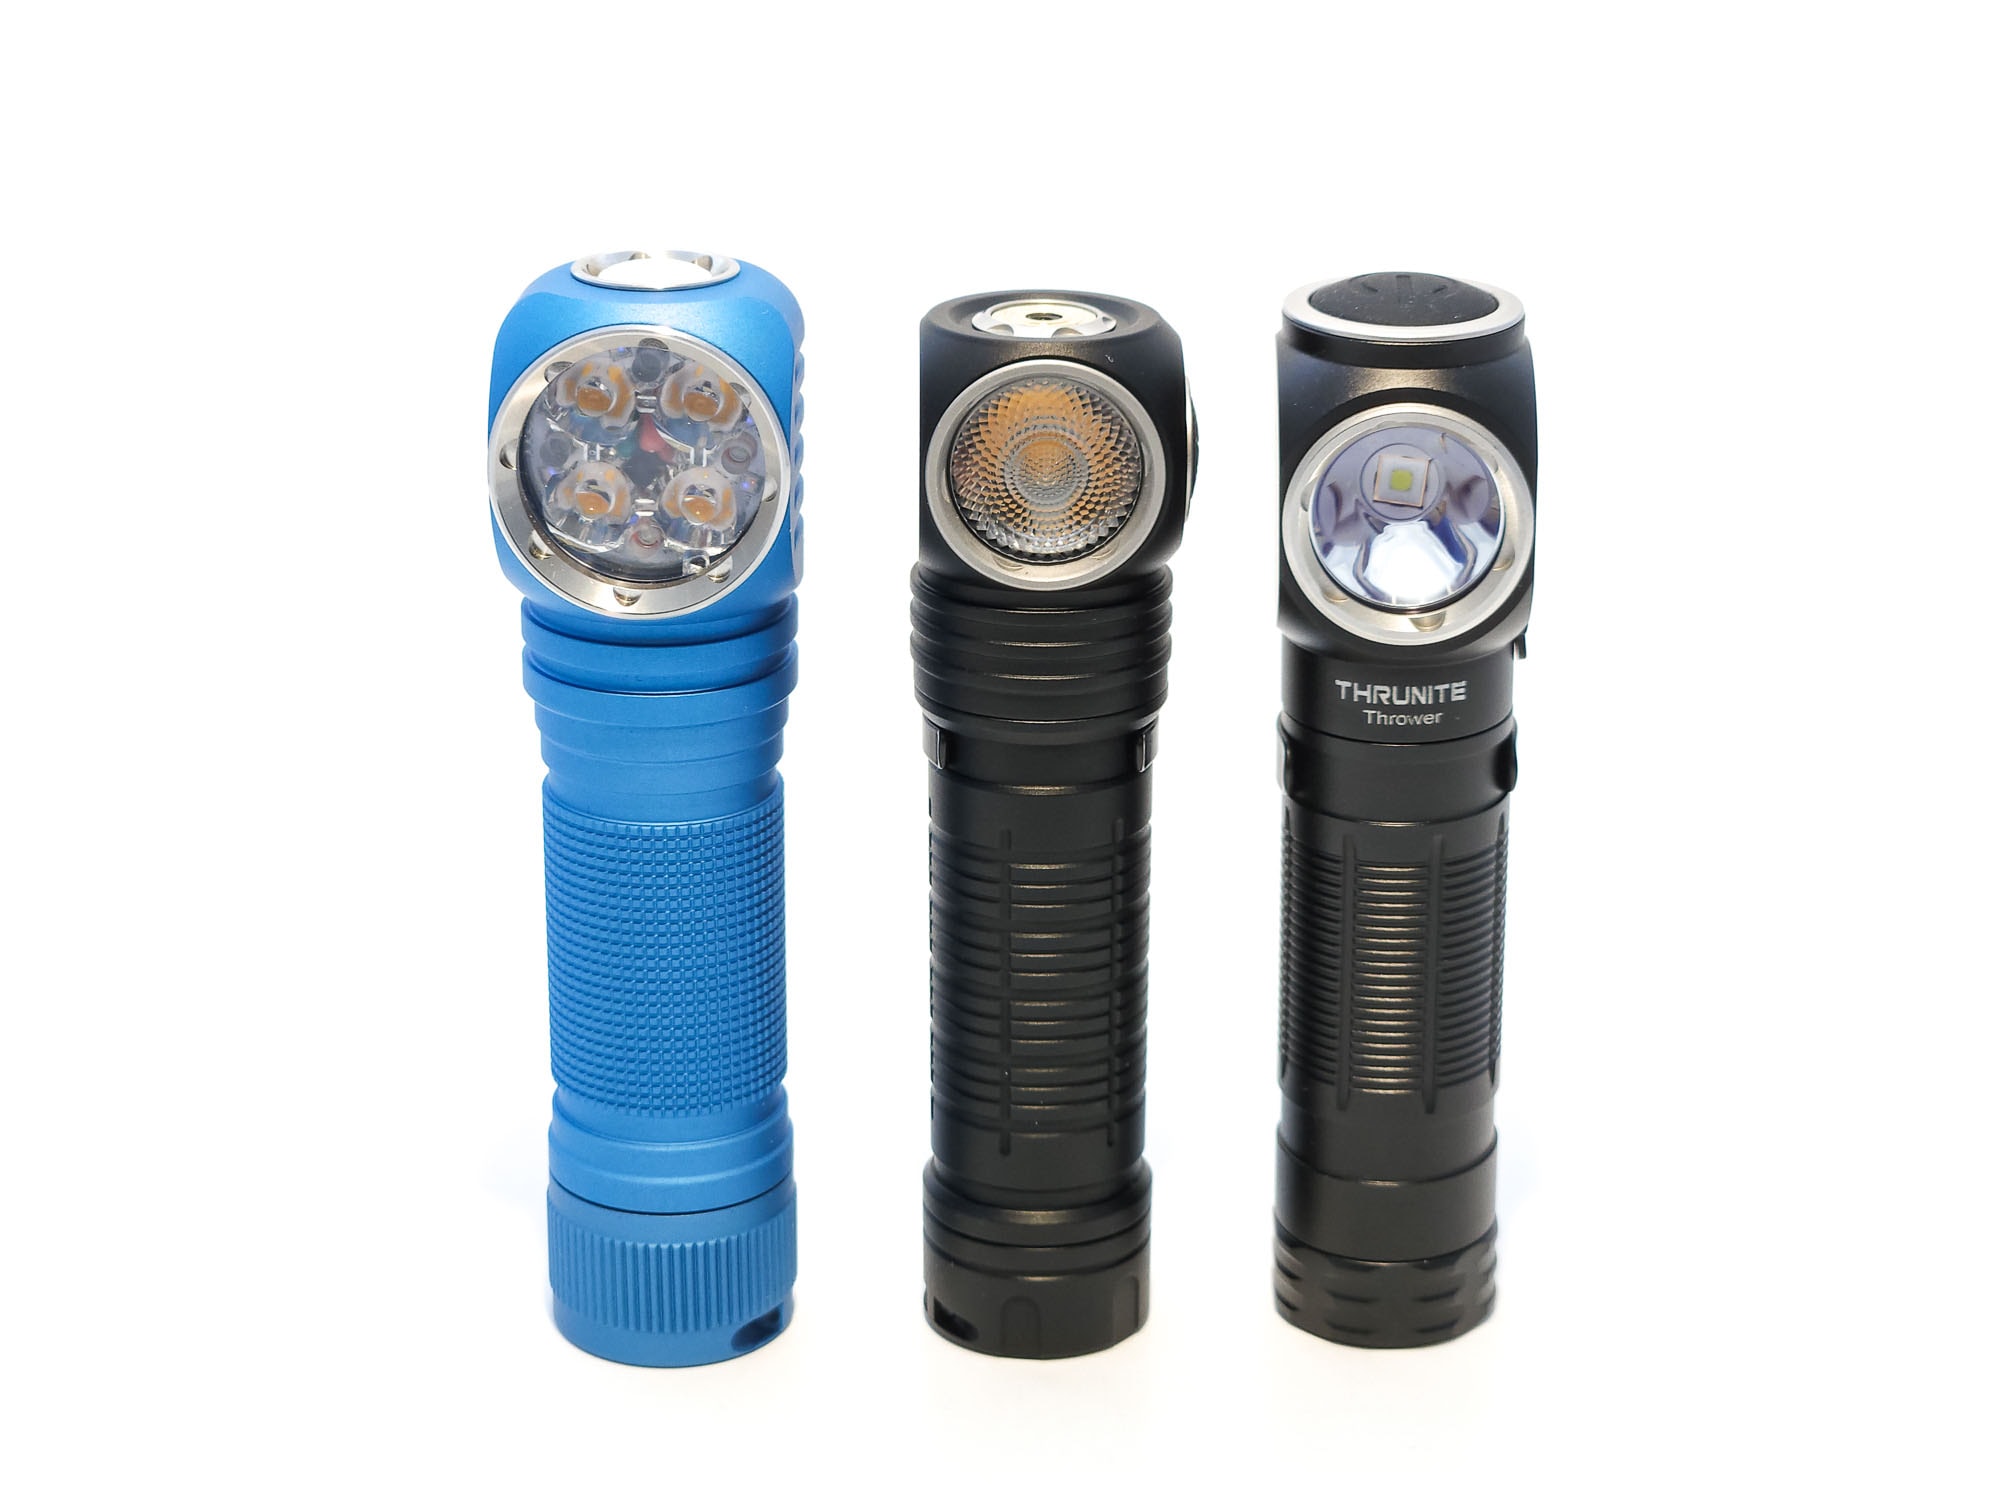
Flashlight size comparison with its competition:
Group 1: Emisar DW4, Skilhunt H300, ThruNite Thrower
Group 2: Emisar D4V2, Skilhunt H300, Convoy S2+
Skilhunt H300 UI: User Interface and Driver
The H300 uses Skilhunt’s standard UI.
Available modes:
- L2, L1, M2, M1, H1, T2, T1
Available blinky modes:
- Strobe, SOS, beacon
From OFF:
- Press and hold: Memorized low mode: L2 or L1
- Single click: Memorized regular mode: M2, M1, or H1
- Double click: Memorized turbo mode: T2 or T1
- 3 clicks: Memorized strobe mode
- 4 clicks: Lockout
From ON:
- Press and hold: Cycle next level within the same mode (except strobe)
- 1 click: Off
- Double click: Memorized turbo level (except from low mode)
- 3 clicks: Memorized strobe mode
Mode memory:
- Each of the modes retains its level
Shortcuts:
- To Low: Hold from off
- To Turbo: Double-click from off or regular mode
- To Strobe: Triple-click from off or regular mode
Low voltage warning:
- When the battery is getting low, the indicator light on the switch blinks red, and the emitter will blink twice every two seconds
Strobe/blinkies
- Triple-click to get into strobe mode
- Double click to cycle through strobes
- Strobes
- Strobe
- SOS
- Beacon
Lock-out mode:
- Electronic lockout is possible with 4 clicks from off
- When in electronic lockout, you can hold for momentary moonlight (L2)
- Physical lockout is also possible by unscrewing the tail cap
- Double-click in lockout to enable the locator beacon in the indicator light
PWM
- Not visible to me by eye or on my phone’s camera.
Skilhunt H300 Charging and batteries
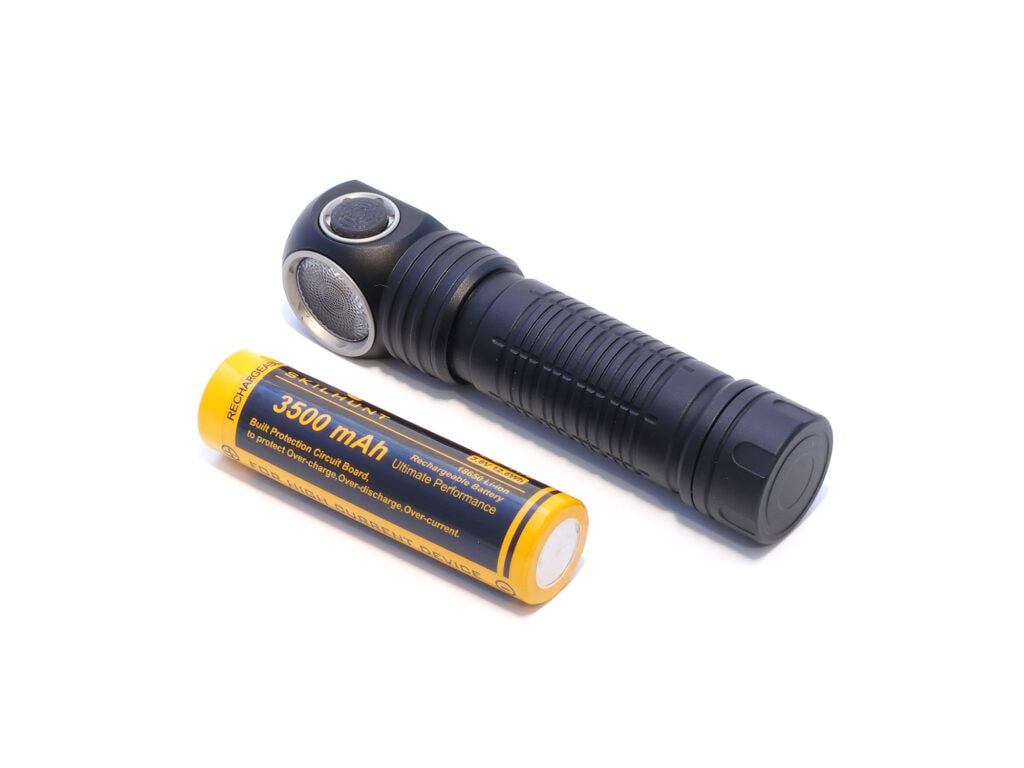
Skilhunt offers a choice of two batteries with this light: The BL-131 or the BL-135. Mine came with the BL-135. Both are protected, button top, and 69mm by 18.6mm. The differences are that the BL-131 is 3100mAh, with 15A continuous discharge and apparently 30A burst, while the BL-135 has 3500mAh capacity with 8A continuous discharge and 17A burst. Unprotected flat-top batteries should also work.
Skilhunt includes their MC-20 with the H300. This 2A magnetic charger sticks to the port on the top of the head and includes a tiny indicator light which is red while charging and turns blue when complete.
Of course, this is a proprietary connector, which some people dislike, but it works fine. Even better would be if you had multiple Skilhunt lights, since you get a charger with each and you’ll have spares. If you lose your charger or it breaks, you’ll either have to buy another cable or charge your batteries externally.
The H300 has low voltage protection on the driver, and it kicks in around 2.9V. Charging took on average 2.5 hours, which seems a bit long for 2A and a 3500mAh battery, and terminated around 4.13V. Incidentally, you can use the light on any mode while charging. Plugged in without the battery, you can use any mode but turbo.
When I did a 250mA capacity test with my Vapcell S4+ charger, it finished at 3389mAh. Short of the BL-135’s specs, but not by too much.
Skilhunt also advertises that the H300 can be powered by two CR123A batteries. I did not test this configuration, but remember that these are not rechargeable and never mix new and old CR123As.
On that note, the product page says that the driver is rated for 2.7V – 8.4V and half of 8.4 is 4.2, which is the max voltage of a standard Lithium Ion battery, which would also mean that you could use two 16340/RCR123 batteries or possibly two 18350s. My flat-top 18350s did not make contact, though.
Performance test
Lumen measurements
How Lumens are Measured: Understanding ANSI FL1 Standards How Lumens are Measured: Understanding ANSI FL1 Standards: The ANSI FL1 standards specify that output in lumens should be measured 30 seconds after turning on, as this is the standardized time for measuring brightness according to the industry standard. This is why we focus on this part in our measurements. The ANSI FL1 standards require an ambient temperature of 22 ± 3°C. We record the ambient the ambient temperature to identify potential reasons for any observed discrepancies.To obtain these numbers, I used a very rudimentary integrated shoebox and ceilingbounce on my Samsung Galaxy S10. Measurements have been calibrated using a standardized calibration light provided by 1Lumen.
| Mode | Amps at turn on | Specified | turn on | 30 sec | 10 minutes |
|---|---|---|---|---|---|
| L2 | 0.01 | 0.5 | 0 lm | 0 lm | 0 lm |
| L1 | 0.02 | 4 | 4 lm | 4 lm | 4 lm |
| M2 | 0.06 | 25 | 27 lm | 27 lm | 27 lm |
| M1 | 0.27 | 115 | 113 lm | 110 lm | 110 lm |
| H1 | 0.89 | 330/210 | 327 lm | 316 lm | 319 lm |
| T2 | * | 860/430/280 | 825 lm | 792 lm | 404 lm |
| T1 | * | 1500/590/400 | 1328 lm | 1264 lm | 453 lm |
| Turbo at 3.6V | * | – | 11247 | 590 lm | 529 lm |
Parasitic drain:
- None measured.
Amps were measured with a Cen-Tech digital multimeter to the best of my ability since my Klein Tools MM300 blew a fuse.
While the 144ART is the lowest performing emitter option for the H300, it still puts out a respectable amount of light and is fairly close to spec, which is a trait of Skilhunt lights, in my experience.
Skilhunt H300 Battery Life: Runtime graphs
How Runtimes are Measured: Understanding ANSI FL1 Standards About ANSI FL1 runtime standards: The runtime is measured until the light drops to 10% of its initial output (30 seconds after turning on). This does not mean that the flashlight is not usable anymore. The last column shows how long the light actually works till it shuts off. If there is a + symbol, it means that the test was stopped at that particular point, but the light was actually still running. This happens on certain occasions, with certain drivers, firmware, or batteries.| Mode | Specified runtime | Measured runtime ANSI | Time till shut off |
|---|---|---|---|
| L2 | – | – | – |
| L1 | 350h | – | – |
| M2 | 55h | – | – |
| M1 | 12h | 11h 23min | 11h 23min |
| H1 | 4h 10min | 4h 42min | 4h 42min |
| T2 | 2h 53min | 3h 30min | 3h 30min |
| T1 | 2h 21min | 2h 22min | 2h 22min |
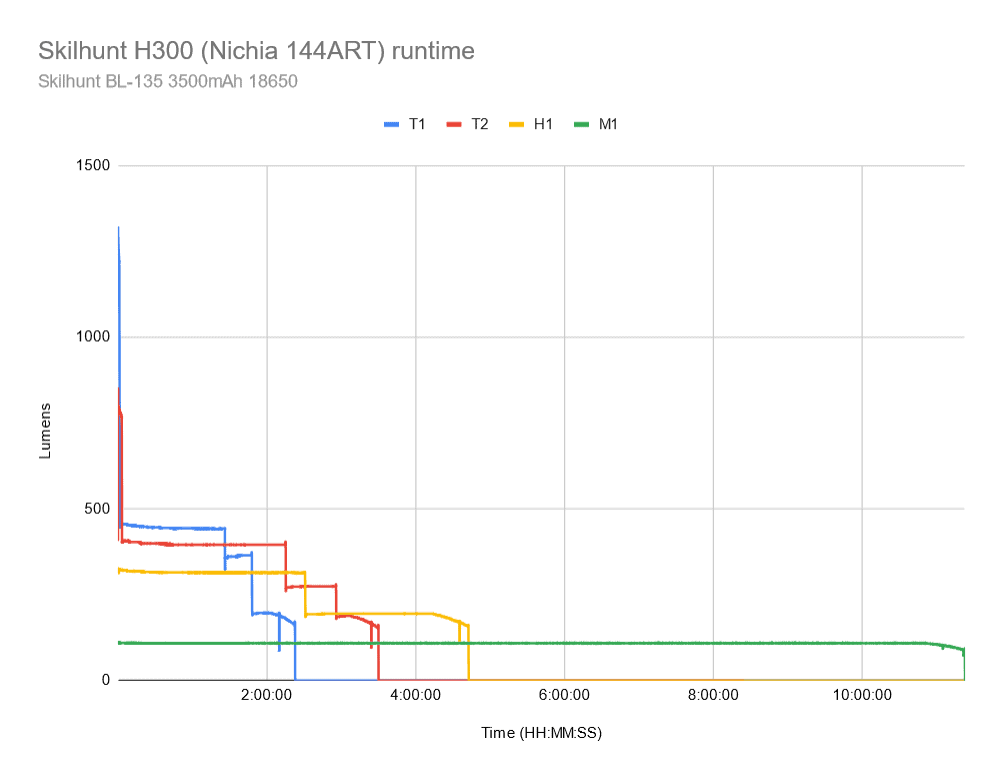
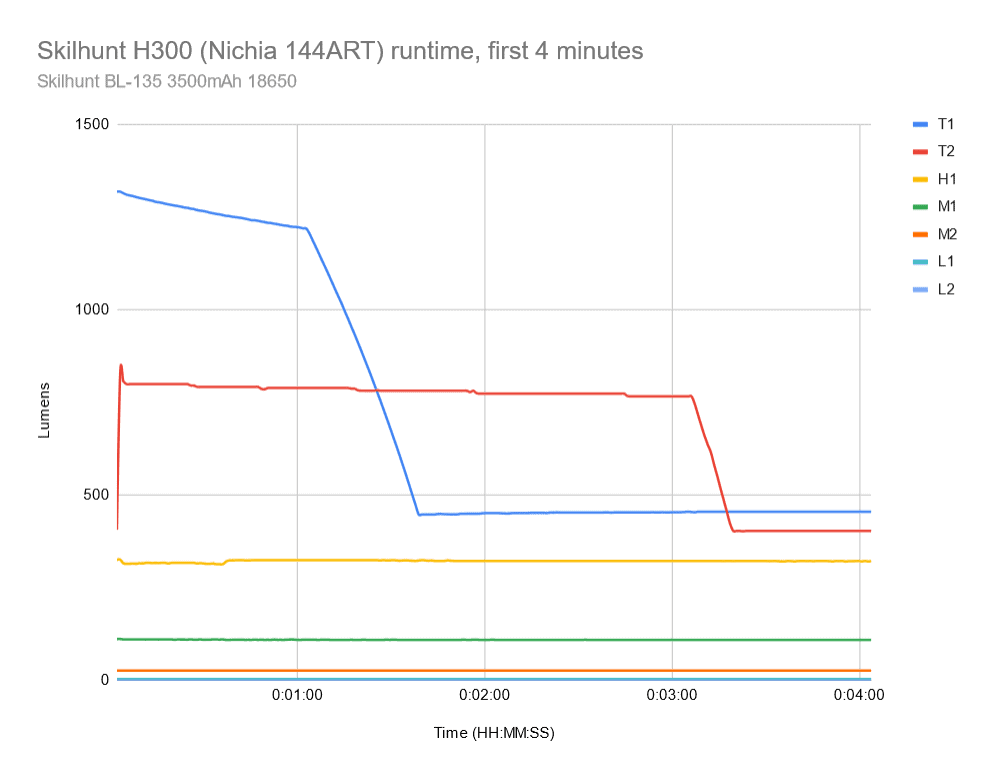
Given that most of my measurements were slightly above spec, I’m guessing their specs may have used the BL-131, which is 400mAh smaller than the BL-135 that I have. It’s always good to see a light outperform its specs, though. These are some respectable numbers!
Peak beam intensity and beam distance measurements
About Peak beam intensity: Understanding ANSI FL1 Standards About peak beam intensity The calculated value of distance in meters at which the flashlight produces a light intensity of 0.25 lux. (0.25 lux is about the brightness of a full moon shining on an object). This means that the intensity has decreased so much, it becomes difficult to see darker objects, or objects that don’t reflect light. The columns ‘Meters’ and ‘Yards’ use rounded numbers.The numbers for candela were obtained with a UNI-T UT383S luxmeter at 5 and 15 meters, then averaged.
| Mode | Specified | Candela measured | Meters | Yards |
|---|---|---|---|---|
| L2 | – | – | – | – |
| L1 | – | – | – | – |
| M2 | – | 141 cd | 24 m | 26 yd |
| M1 | – | 376 cd | 39 m | 43 yd |
| H1 | – | 799 cd | 57 m | 62 yd |
| T2 | – | 2703 cd | 104 m | 114 yd |
| T1 | 4500 cd | 4841 cd | 139 m | 152 yd |
Candela came out just above spec in my testing, which is nice to see, but keep in mind this is using an amateur setup. The H300 144ART has about half the spec throw of the H300R with the XHP50.3 HI, but that’s to be expected with their different power profiles, optics, and use cases.
Beamshots
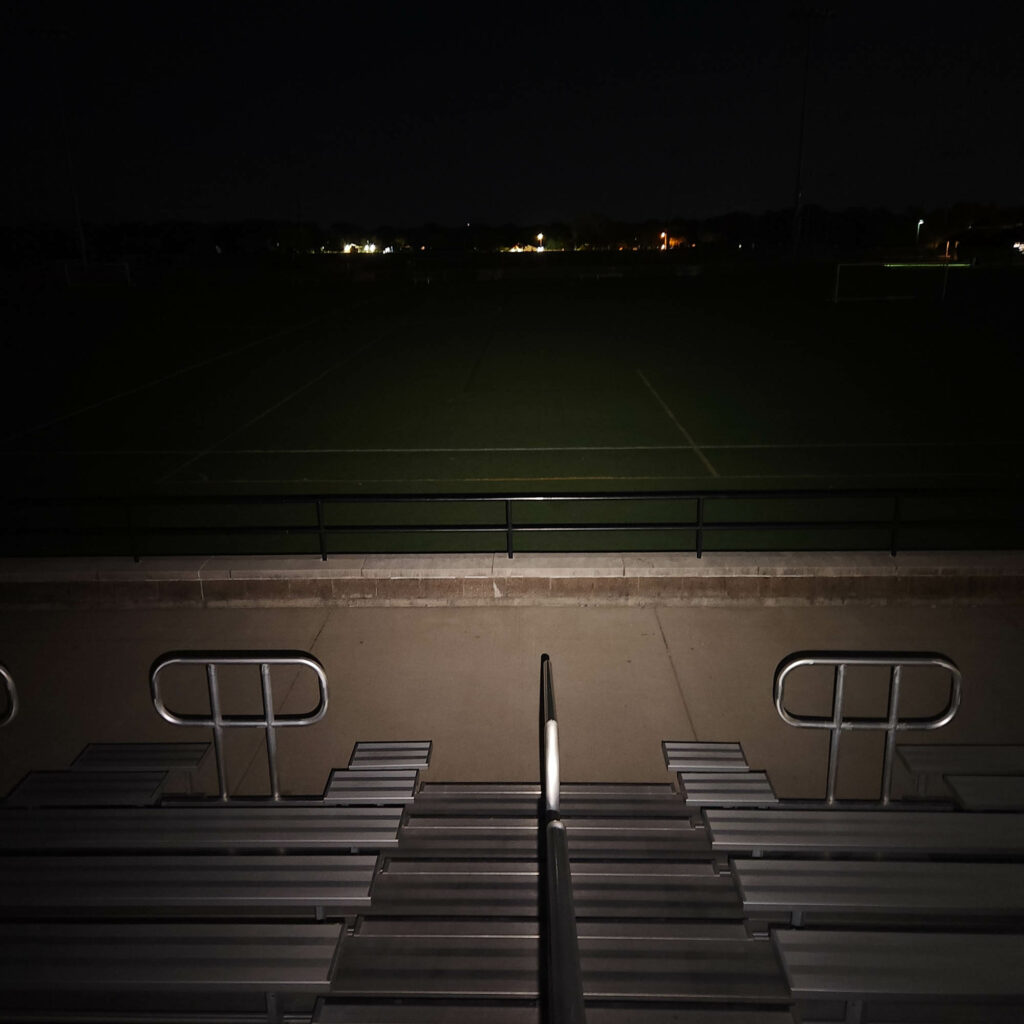
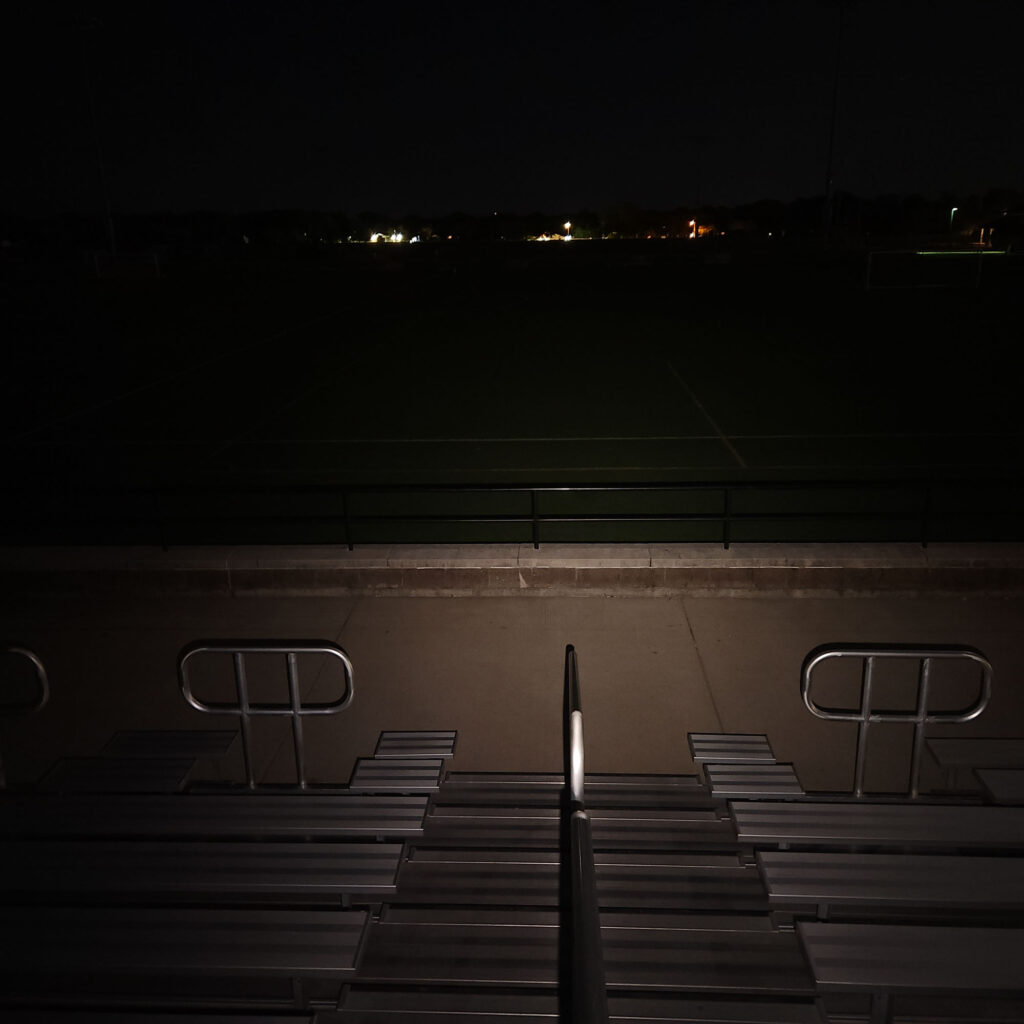
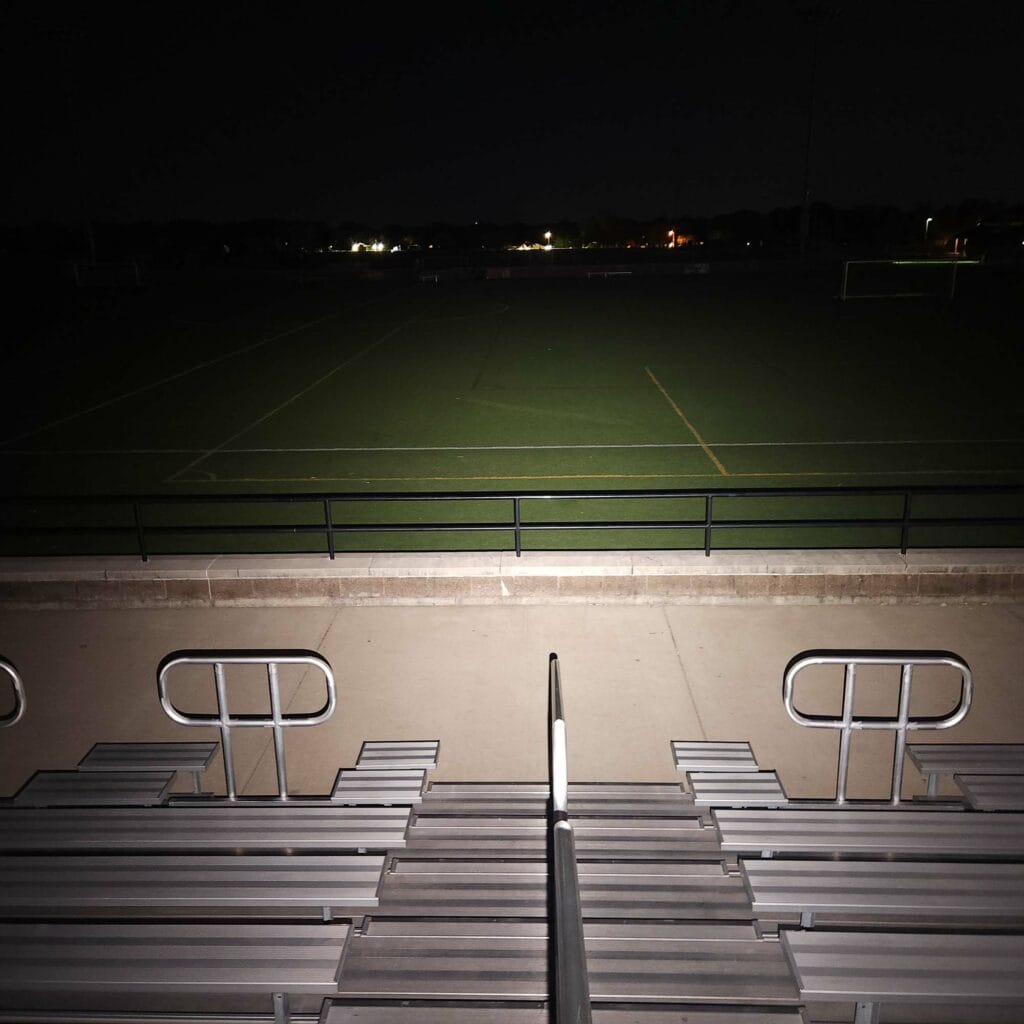
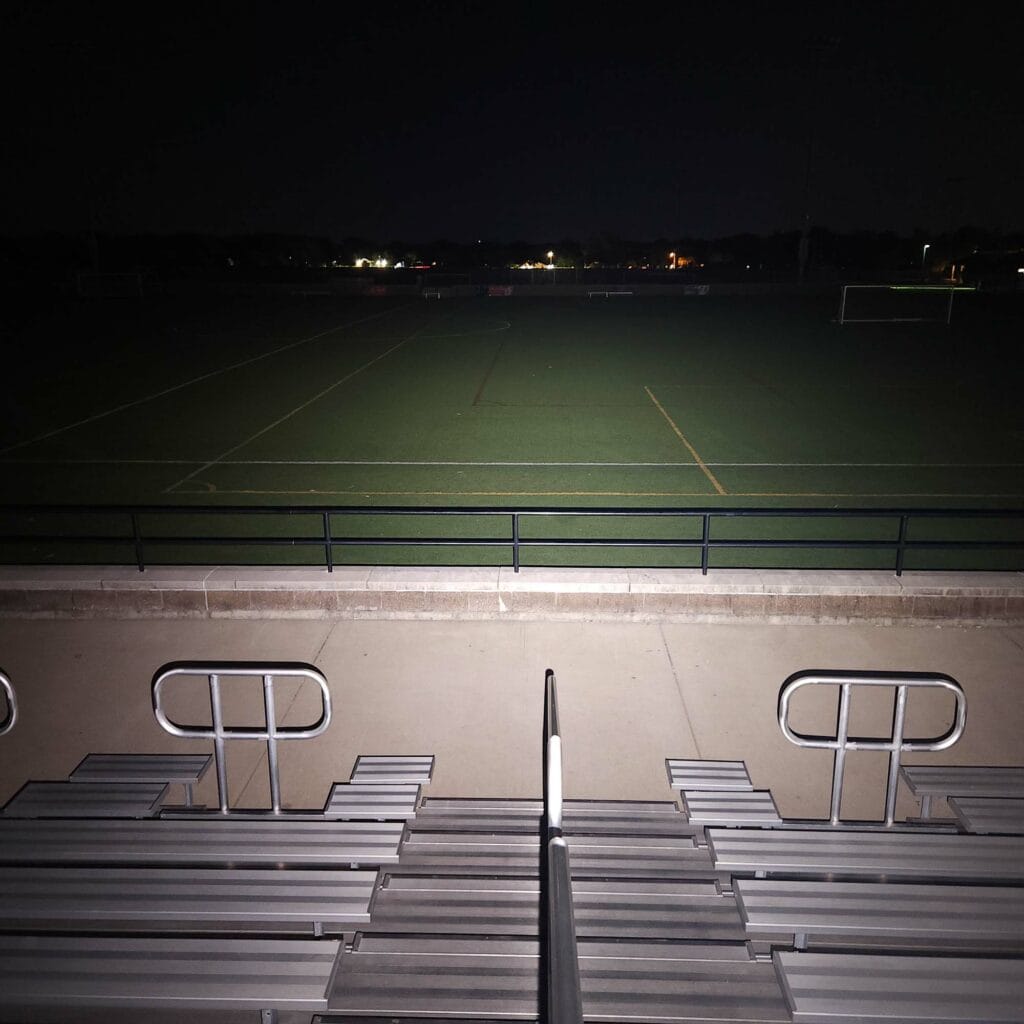
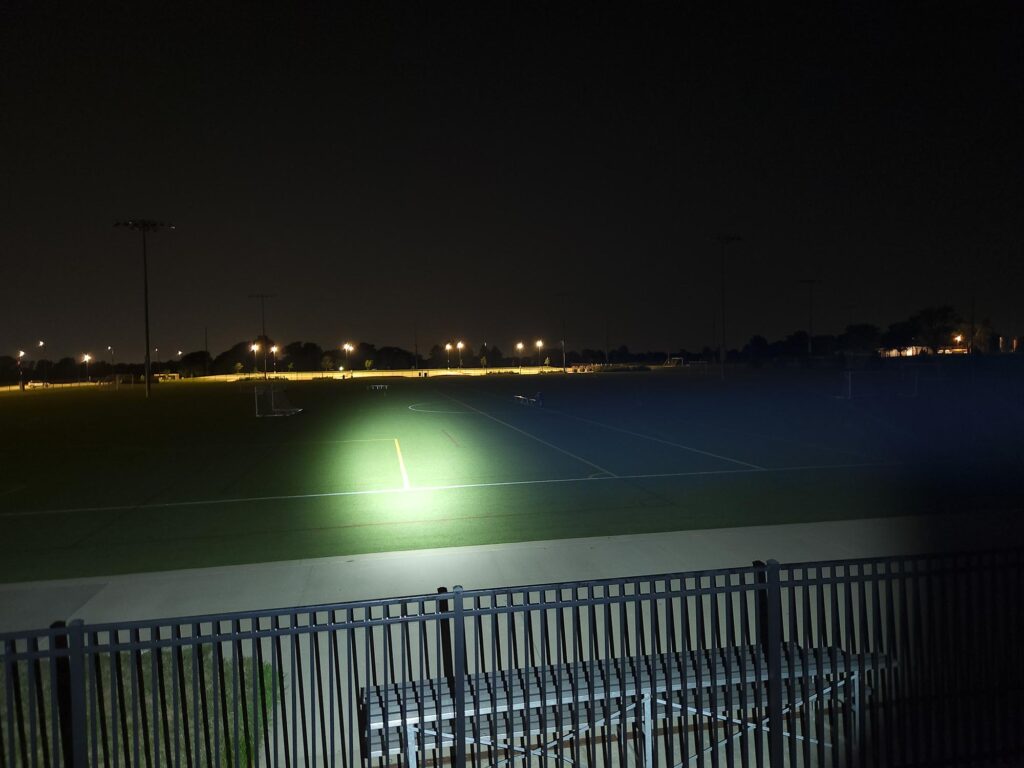
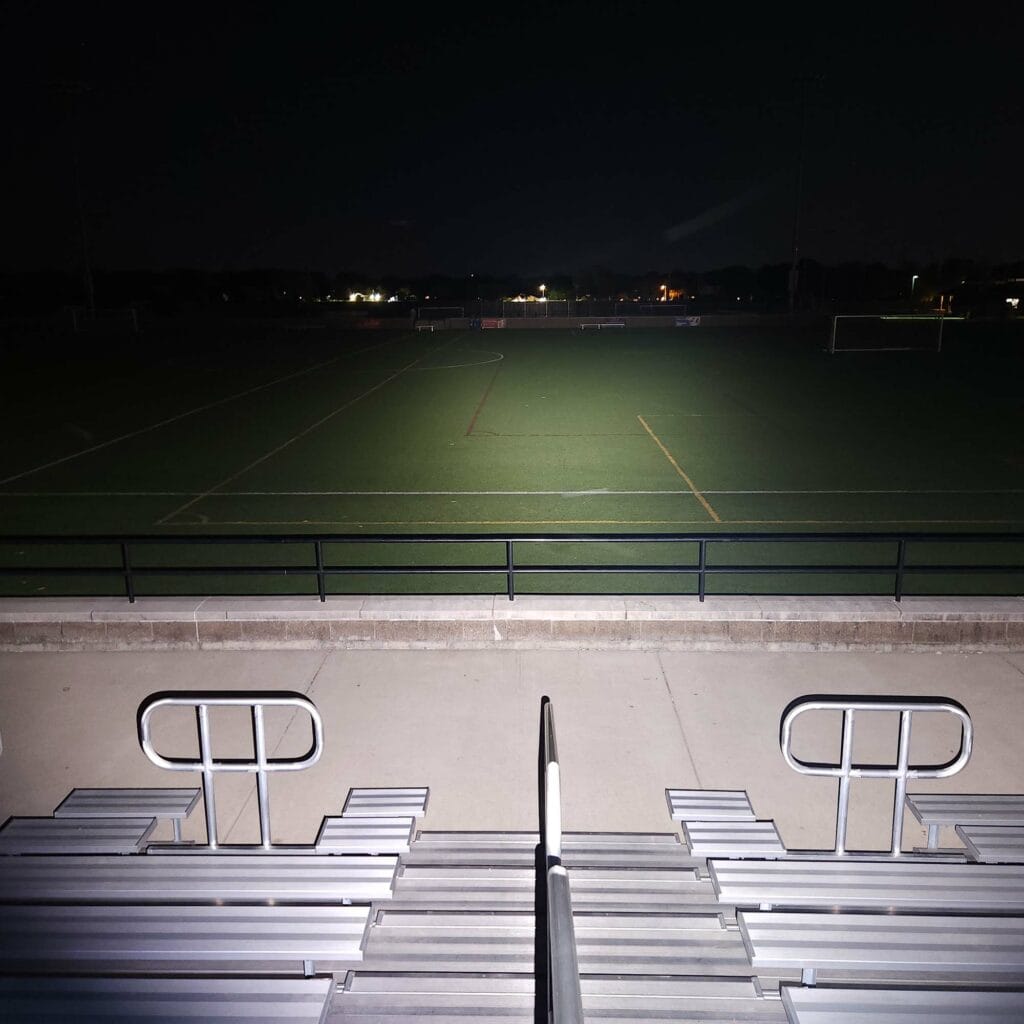
These were taken with a Samsung Galaxy S22+ using pro mode and the following settings:
- WB 5000K
- ISO 200
- Speed 0.5
Distance to the other end of the playing field is 100 meters.
You can see how the 144ART’s TIR lens creates a nice, floody beam, though it lacks in the throw department.
Beamshots of the following flashlights compared:
- Skilhunt H300 (Nichia 144ART)
- Skilhunt M300 v2
- ThruNite Thrower
Disclaimer: This flashlight was sent to me for review at no cost by Skilhunt. I have not been paid to review, nor have I been holding back on problems or defects.
Final Verdict
Pros
- Complete package with optional battery and onboard charging
- High CRI and good tint
- Meets or exceeds runtime specs
- Good sustained output thanks to regulation
- Button placement makes for easy activation when used as headlamp
- High quality headband
Cons
- Proprietary charger
- Nichia 144ART has lower output and throw than other options
Explanation on star ratings:
1: Avoid: a match would be a better choice – 2: Poor: significant defect or issues; almost unusable – 3: Average: some defects or issues; but still usable 4: Good: recommended (minor issues) – 5: Great: highly recommended

5 stars: ★★★★★
While our star rating provides a reliable indicator, we encourage you to read the full review to make an informed decision based on your own needs and preferences.
There’s always been a lot to like from the H300; the thoughtful button placement, the excellent headband, solid regulation, onboard charging, and other features show that Skilhunt makes a quality product. Now they’ve added another option for a neutral high CRI (there already was a Cree XHP 50.2 HD high CRI option), it further expands the H300’s useability.
If you’re ok with the proprietary magnetic charger (you can always just take the battery out to charge) and less output, the 144ART produces some nice light that you won’t regret using.
I give the Skilhunt H300 five stars.
Buy your Skilhunt H300 Nichia with a discount
Get 6% discount at Skilhunt by using the following discount code: blf06
1lumen selects and reviews products personally. We may earn affiliate commissions through our links, which help support our testing.