1lumen selects and reviews products personally. We may earn affiliate commissions through our links, which help support our testing.
Olight Warrior Mini 2 Cu review
Olight Warrior Mini 2 CU specifications
| Brand/model | Olight Warrior Mini 2 Cu |
|---|---|
| LED | N/A (Luminus SST-40) |
| Max. Lumens | 1,750 lm |
| Max. Beam intensity / distance | 12,300 cd |
| Battery config. | 1*18650 |
| Onboard charging | Proprietary |
| Modes | 5 |
| Blinkies | Strobe |
| Reflector | TIR optics |
| Waterproof | IPX8 |
| Review date | April 2022 |
Introduction:
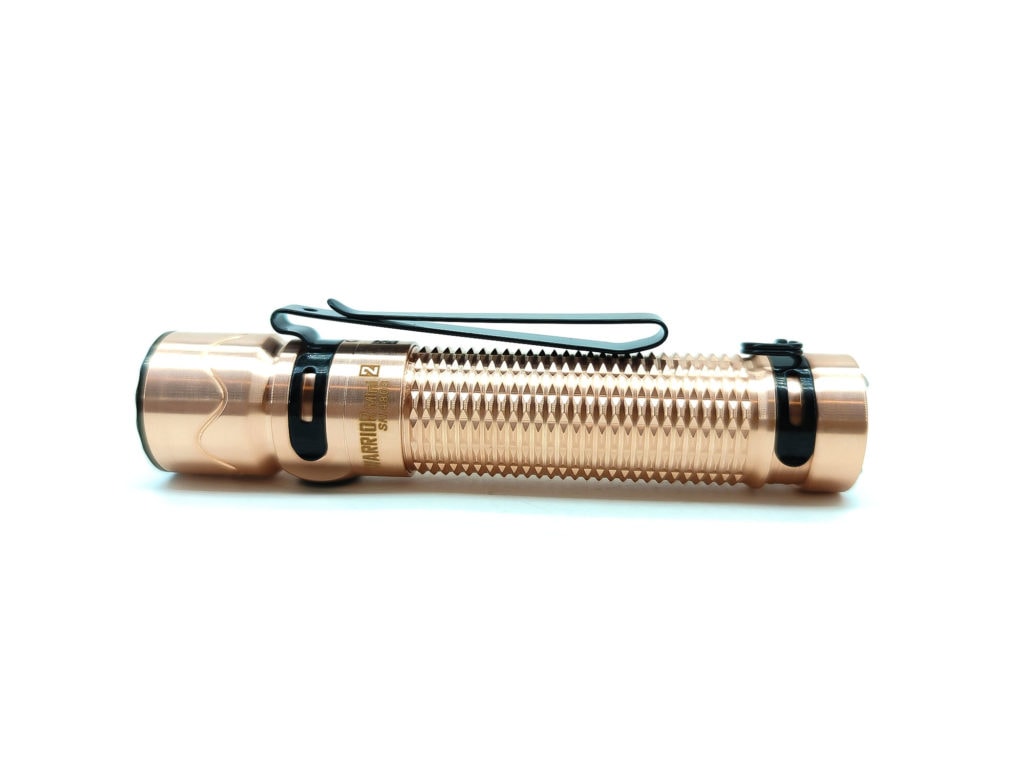
The Olight Warrior Mini 2 has been around for a little bit and has proven to be quite the popular light. We even did an Olight Warrior Mini 2 review of 1 of its special editions last year. Olight loves to do special editions, though, and this one is extra special. It’s not just a new anodizing pattern or color scheme. This beauty is machined from a sexy hunk of copper. Trimmed out in its black accents, it looks sharp. This is the new limited edition Olight Warrior Mini 2 Cu (“Cu” being the chemical symbol for copper).
The Warrior Mini 2 series straddles the EDC (everyday carry) and tactical realms. Fairly compact for a tactical light, it has a good blend of features from the two categories. There’s a common saying though: ”jack of all trades, a master of none.” Is that true of the Warrior Mini 2, trying to fit into too many roles? Let’s see.
Package quality.
Olight packaging never disappoints. It’s always sturdy, custom, and well thought out – not some plain-jane cardboard job. The box for the Olight Warrior Mini 2 Cu is a sturdy 2-piece affair with a cut-out black foam insert and neatly layered compartments for holding the accessories. Inside that package was:
- Olight Warrior Mini 2 Cu
- Battery (inserted)
- MCC3 charging cable
- Lanyard
- Carabiner ring
- Manual


Flashlight in use
As you’d expect from a copper flashlight, the Warrior Mini 2 Cu is no lightweight. It’s a bit heavy for your average EDC, but it is fairly slender and quite grippy. I never felt like I was at risk of it slipping out of my hand.
The Warrior comes with a two-way clip pre-installed. The clip is installed in a just-right sized groove that lies on the same meridian as the front button. There’s an identically sized groove at the tail of the light that comes with an attachment ring pre-installed. This has a small split ring on it and can be used to attach the included carabiner ring. The positions of the clip and this attachment are interchangeable. Even though the clip is two-way, if you prefer a “head down” carry, you might want to swap the clip to the groove in the tail as it allows for deep carry.
A lanyard also came in the box that’s different than any I’ve ever seen. It appears to be made nearly completely of silicone, or at least has a thick silicone coating. There is a small section of nylon at the end for actually attaching it to the Warrior.
Tail standing is definitely an option. It works, but I wouldn’t call it extremely stable. The tail is magnetic though, so if it’s a metal table, you’re set! It also holds stable on other ferrous surfaces, be they horizontal or vertical.
Many “tactical” lights have two switches: one at the tail for on/off, and one at the head for switching modes. While the Warrior Mini 2 does have two switches, that’s not the full story on how they’re used – they can be used independently. The tail switch can be used to enable Medium or Turbo, momentary or continuous. Or you can flip into Tactical mode and those options become Turbo or Strobe, momentary or continuous. And that’s just the tail switch. The front switch can activate any of the modes as well as turn the light on and off.
With the tail switch covering tactical duties and the front switch handling EDC tasks, the Warrior Mini 2 really is a versatile light. The beam is fairly tight, as we’ll discuss more in a minute, so it wouldn’t be my first choice for indoor tasks like reading. It should excel at many outdoor activities.


Build Quality, and Warranty
Aluminum? It’s a nice choice for your average flashlight. It’s inexpensive, easy to machine, lightweight, and transfers heat well. But sometimes you want something a little bit more flashy, substantial, or luxurious. Enter the higher-end metals: titanium, stainless, brass, copper, etc. That last option – copper – is particularly attractive to a lot of enthusiasts and collectors. It’s beautiful, it ages to a nice patina, dissipates heat even better than aluminum, and has a good heft to it. And that’s precisely what this limited edition Olight Warrior Mini 2 Cu is made of – copper!
The Warrior Mini 2’s body is aggressively machined for plenty of grip. The head of the light, which is mostly smooth, is adorned with a gentle sine-wave all the way around. The threads on many non-aluminum lights leave a bit to be desired. I’m very impressed with those on the Warrior Mini 2 Cu – they’re buttery smooth. I’ve grown accustomed to expecting good machining from Olight, but some of these fancy metals can be tricky. Olight seems to have nailed it though. That echoes across all of the Warrior’s build; everything feels top-notch.
This light is covered by Olight’s generous 5 year warranty:
- Within 30 days of purchase, contact the original seller for repair or replacement
- Within 5 years of purchase, contact Olight for repair or replacement
- The battery and charging cable are covered by a 1 year warranty


LED, Lens, Bezel, Beam, and Reflector
In typical Olight fashion, they have not disclosed which emitter they used in the Warrior Mini 2. Thankfully, the LED seems fairly easy to recognize as a Luminus SST40. That LED is situated beneath a smooth, narrow-focused TIR optic. The interesting looking, ultra-clear optic is covered with glass and held in place with a black retaining ring with light crenelations. I was pleased to discover that the retaining ring is not glued – it can easily be untwisted by hand and removed. This should allow fairly easy replacement of the LED if you’re into that kinda thing (at your own risk, as I’m sure that would void the warranty).
The TIR optic has a little notch in the side that is home to a proximity sensor. This adds a measure of safety, reducing the light output when it detects light bouncing back up at the sensor. After 60 seconds, the light shuts off.
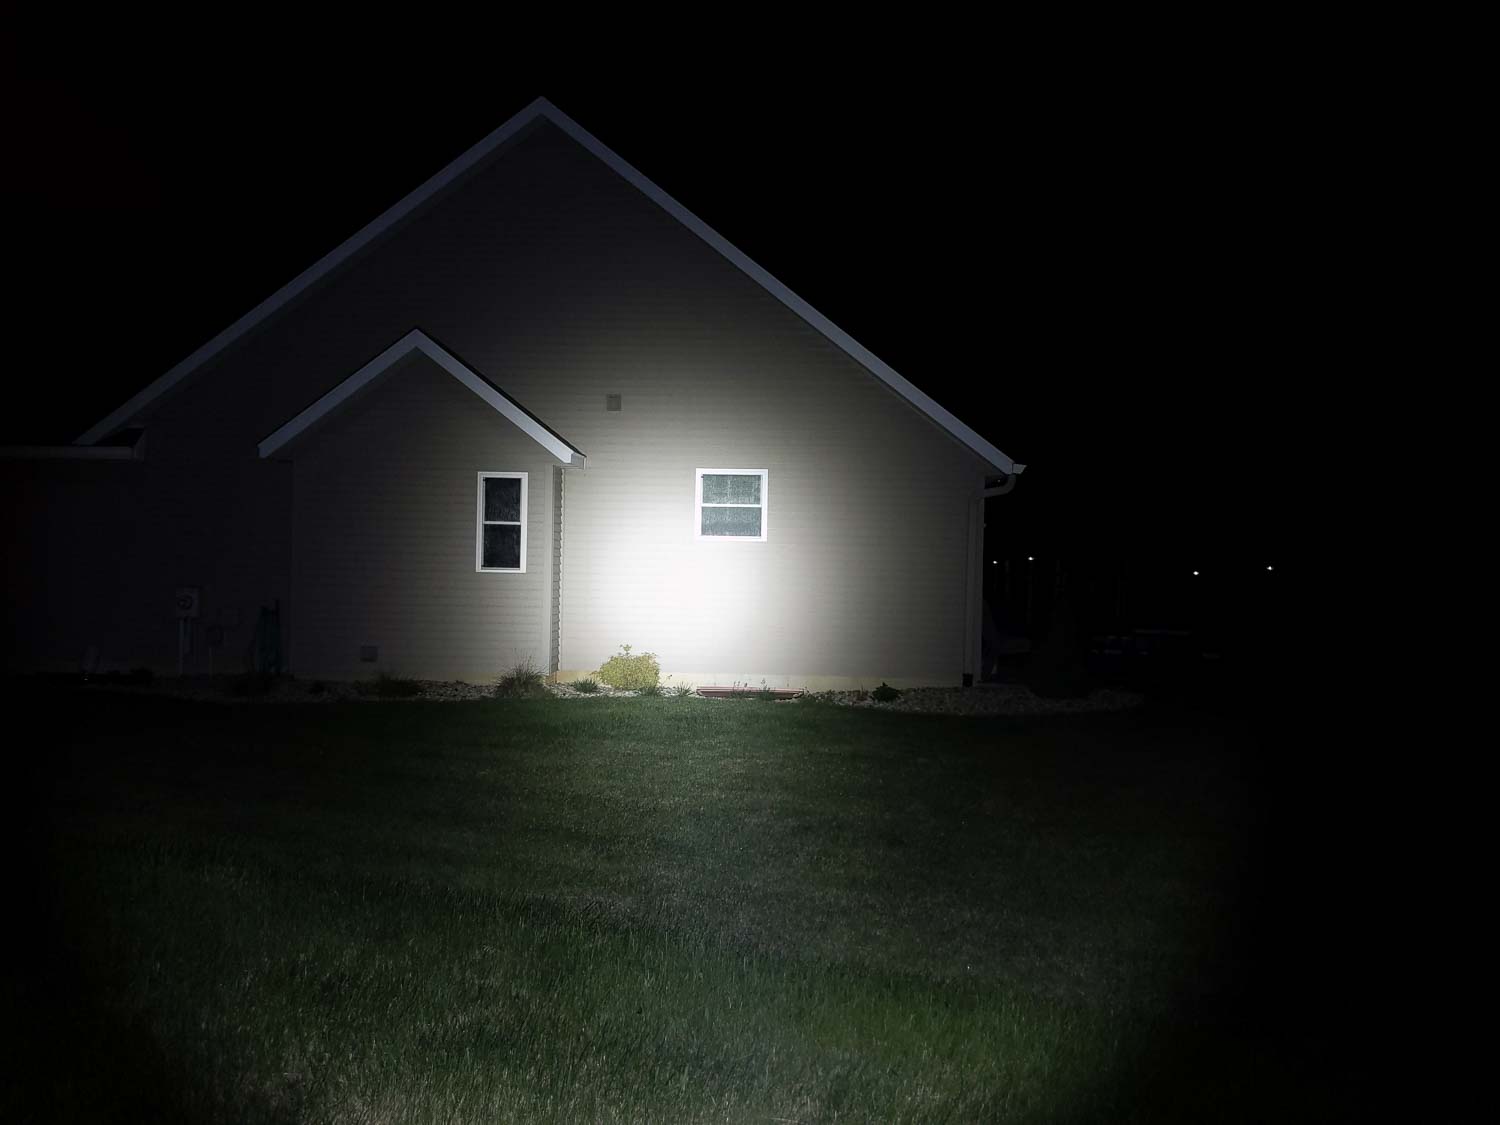
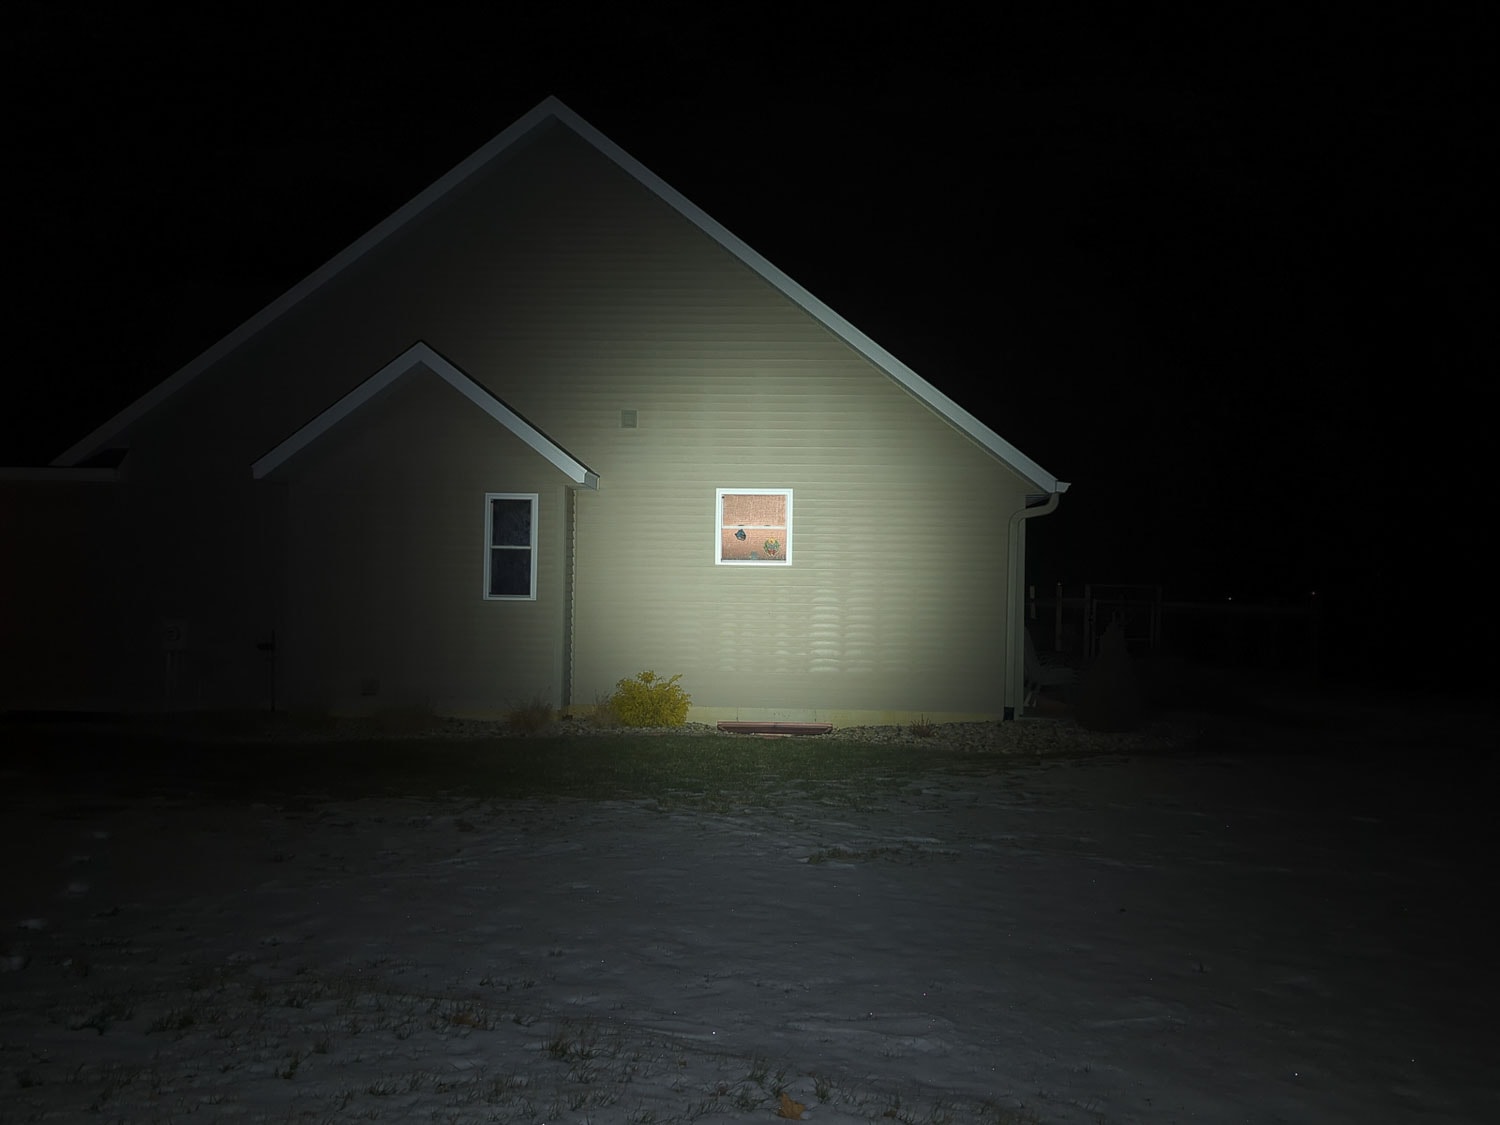
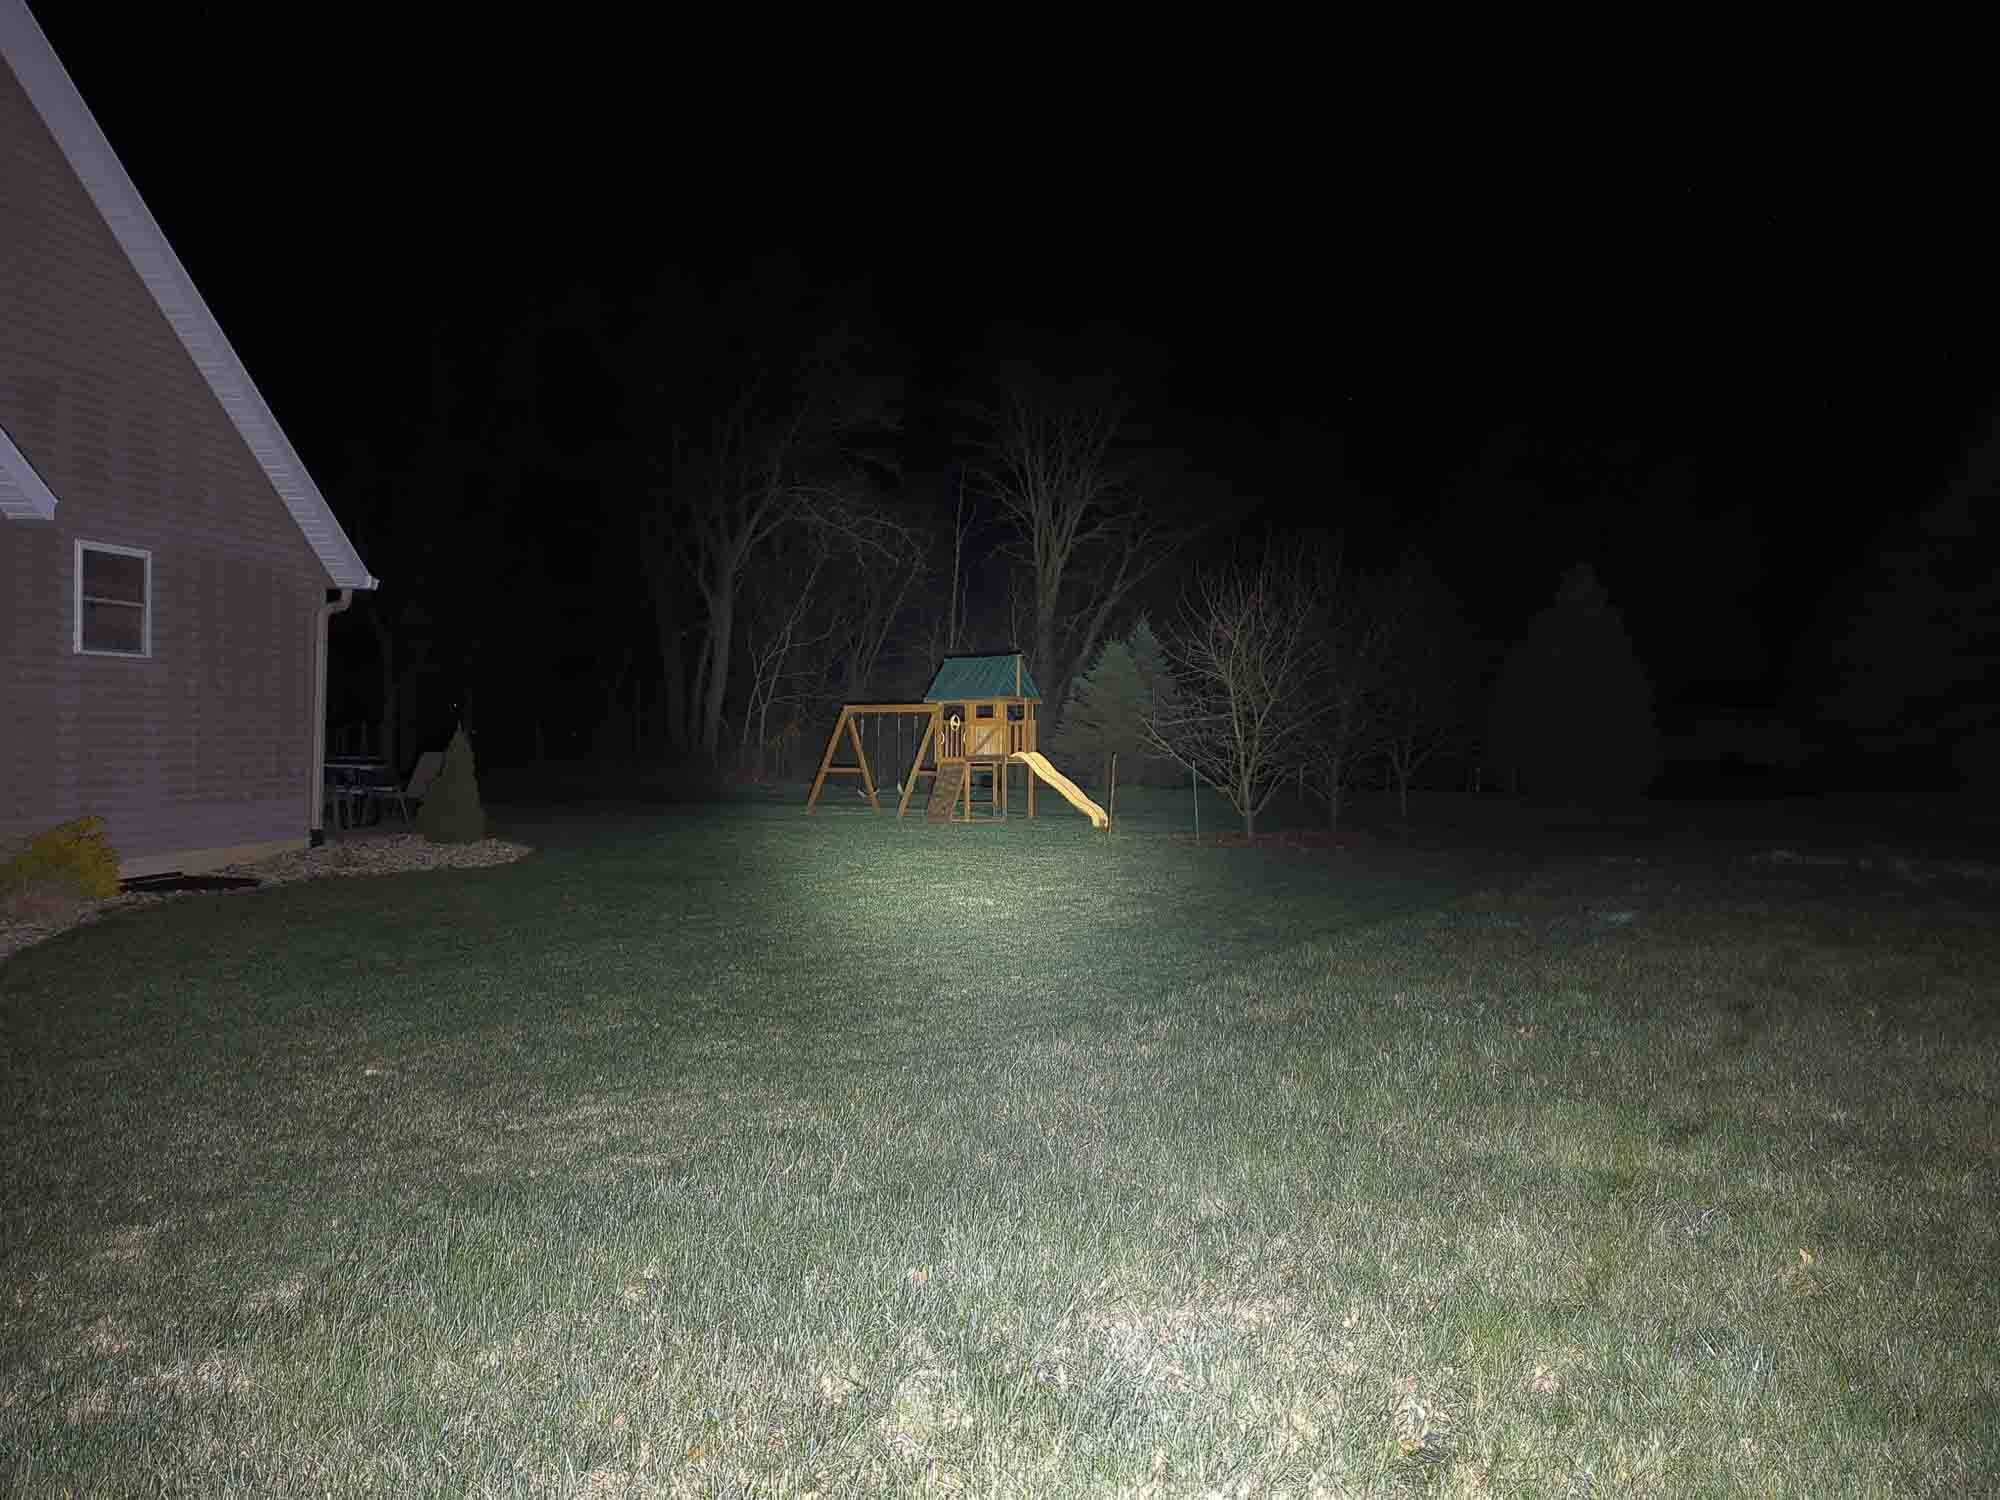
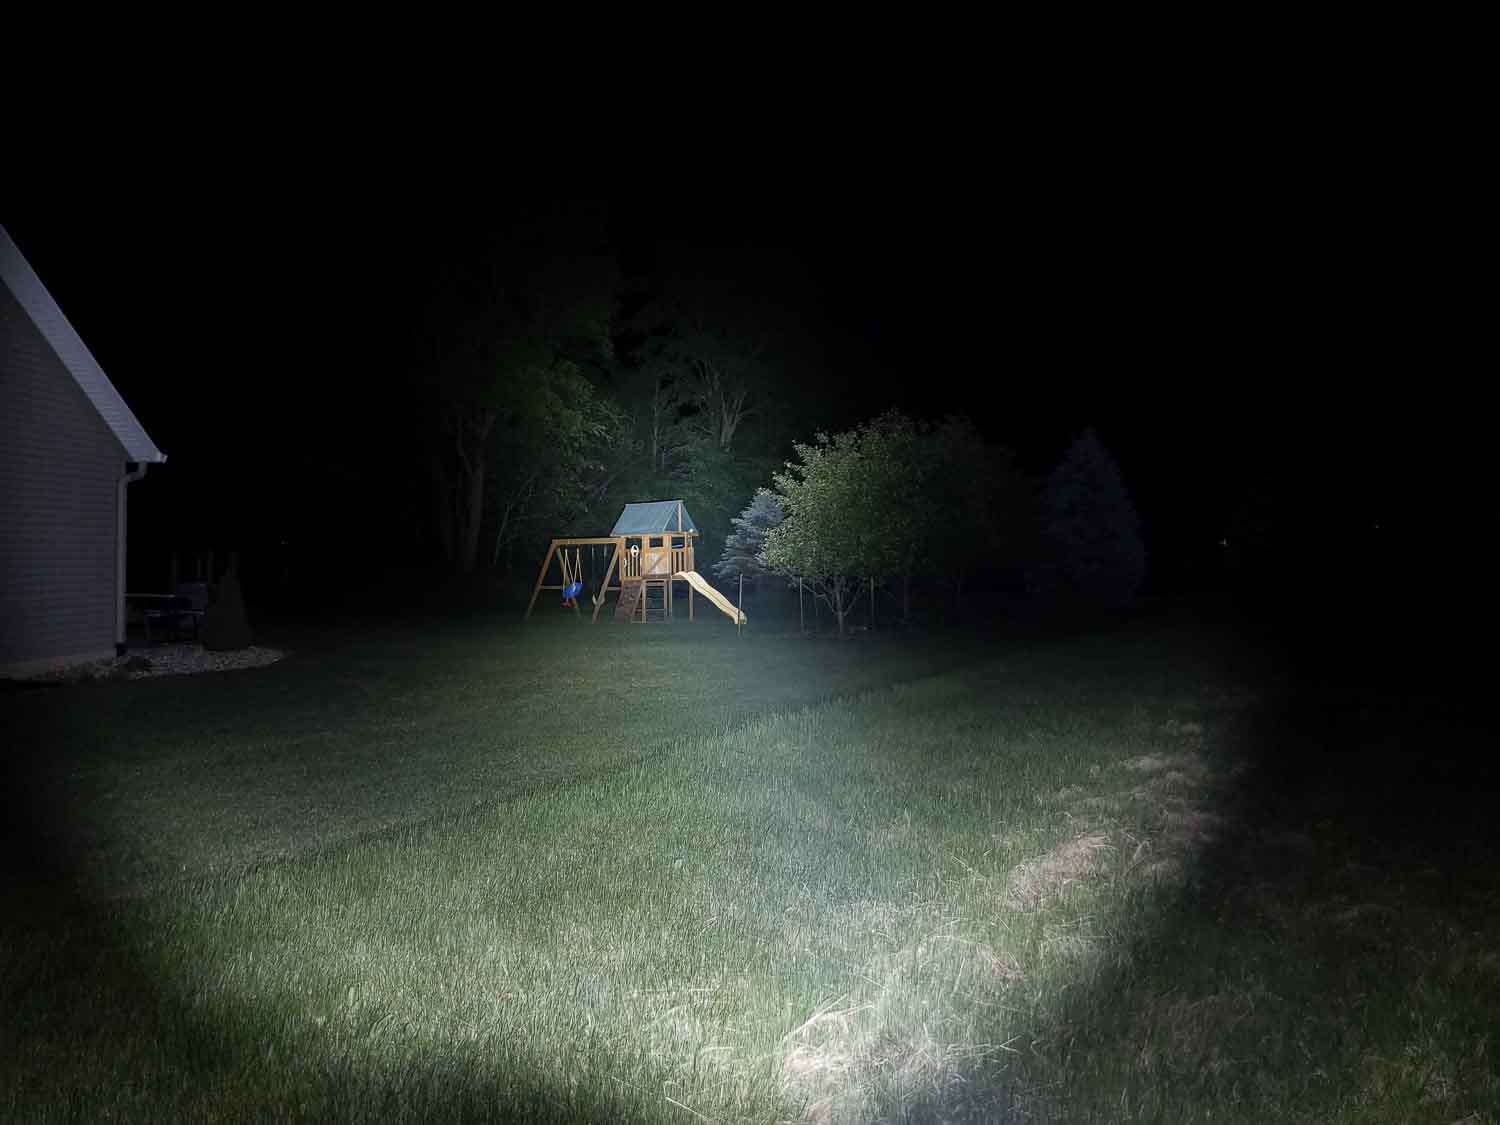
The beam of the Olight Warrior Mini 2 Cu is a tight, defined hotspot due to the TIR design. There is wide, even, and very light spill. The LED, as expected, is on the cool end of the spectrum but isn’t nearly as cool as I was preparing myself for. I took these measurements with the Opple Light Master:
- CCT: 5958 K
- CRI: 66.6 Ra
- DUV: +0.0086
With those measurements, it looks like we’re dealing with a ~6000K 70-CRI Luminus SST-40. Pretty standard stuff.


Dimensions and size comparison
Dimensions:
- Length: 118 mm / 4.65 inches
- Head diameter: 25 mm / 0.98 inches
- Body diameter: 23 mm / 0.91 inches
Weight:
- Without cells: 244 grams / 8.6 oz.
- With cells: 195 grams / 6.9 oz.
EDC Flashlight comparison
Copper flashlight beauties, left to right: Astrolux FT03 Copper, Olight Warrior Mini 2 Cu, Astrolux FT03 Mini Copper
EDC lights and tactical 18650 lights, left to right: Wurkkos FC11, Sofirn SC31 Pro, Olight Warrior Mini 2 Cu, PowerTac E5R-G4, Convoy S6
Tactical lights are generally pretty long, partially due to the forward clicky that you usually see in their tailcaps. The PowerTac is built in that manner, and you can see how much shorter the Warrior is. The size is on-par with the other common, reasonably compact 18650 lights like the Wurkkos, Sofirn, and Convoy.


Driver & User Interface:
The Warrior Mini 2 uses 2 switches just like the Mini 1. Both switches can be used interchangeably. For example: If you turn the light on with the rear switch, you can use the side switch to turn it off, and of course vice versa.
The rear (tail) switch has 2 menu configurations. You can switch between these 2 settings by doing the following: Press and hold the tail switch and while holding the tail switch, you simply click the side switch just 1 time. There’s no time limit, you can do it slowly or as quickly as you want. Just remember to keep pressing the tail switch. (Changing this setting doesn’t influence the functionality of the side switch)
2 Tail Switch configurations
Tail Switch Configuration 1 (default configuration, everyday use)
The default configuration has 4 options. Medium (Momentary on), Medium (continuous), Turbo (Momentary On), and Turbo (continuous).
- Short half-press: Medium (continuous)
- Short full-click: Turbo (continuous)
- Half-press and hold (more than 1 second): Momentary Medium (release the button to turn the light off)
- Full-click and hold (more than 1 second): Momentary Turbo (release the button to turn the light off)
Tail Switch Configuration 2: Tactical mode: Momentary Turbo and momentary Strobe only
- Half-press: momentary Turbo
- Ful-click: momentary Strobe
There is no continuous mode with this Tactical configuration. A fast click doesn’t do anything, nor does a short half-press.
Side switch
The side switch can access more modes. And keep in mind that you don’t need the tail switch for power.
Available modes:
- Moon, Low, Medium, High, and Turbo
- (Moon and Turbo are not part of the default menu cycle)
Side switch from OFF:
- Single-click: goes to last used mode (it has mode memory, including Moon)
- Double click: Turbo (not working with mode memory, unlike Moon and the default mode group)
- Triple-click: Strobe
- Press and hold 1 sec: Moon
- Press and hold 2+ sec: Lockout
Side switch from ON:
- Single-click: Off
- Double click: Turbo
- Triple-click: Strobe
- Press and hold: cycle through the modes from low to high and back to low again.
Side Switch Shortcuts:
- To Turbo: Double-click side switch from either On or Off
- To Moon: from off: press and hold
- To Strobe: Triple-click from on or off
Mode memory:
- Yes, including Moon even when Moon is not part of the normal cycle. This is a great and useful feature.
- Turbo won’t be memorized
- High will only be memorized for 10 minutes, and will then revert back to Medium mode
Blinky modes menu:
- Yes, Strobe.. a triple-click with the side switch from either On or Off / or fully press the tail switch when in Tail Configuration mode 2.
Shortcuts:
- To Moonlight: press and hold the side switch 1 second from Off
- To Turbo: double click the side switch or full click the tail switch (in tail switch config 1; in config 2 Turbo is a half-press of the tail switch)
- To Strobe: triple click the side switch, or if in tail switch config 2, full click the tail switch
Low battery warning:
- There is a small LED indicator inside the side switch. It will indicate the following:
- Solid green: 60%+
- Orange: 10-60%
- Solid red: 5-10%
- Blinking red: below 5%
Keep in mind that the flashlight will not turn off until the battery reaches a certain Voltage. The low voltage warning doesn’t mean Low Voltage Protection. Fortunately, it’s built into the battery, but after the runtime tests, the battery was about 2.6V. A little on the low side in my opinion
Lock-out mode:
- You can activate the electronic lockout mode by pressing the side switch for more than 2 seconds. It will briefly turn on in Moon and then locks out. Repeat this to unlock.
PWM:
- None detected
Batteries & Charging
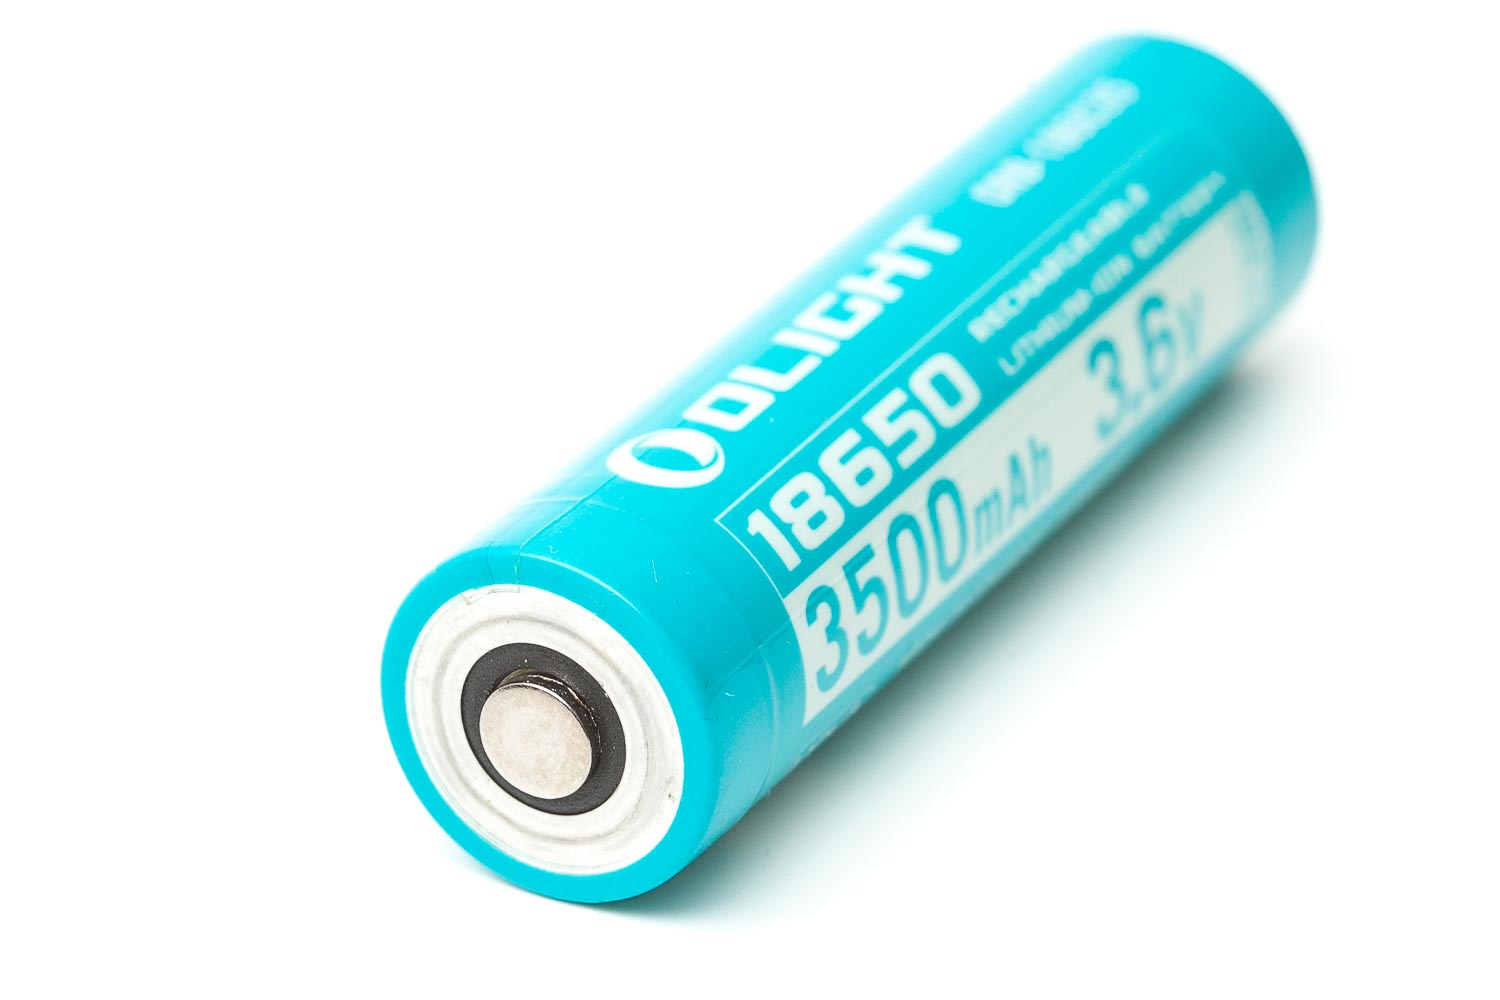
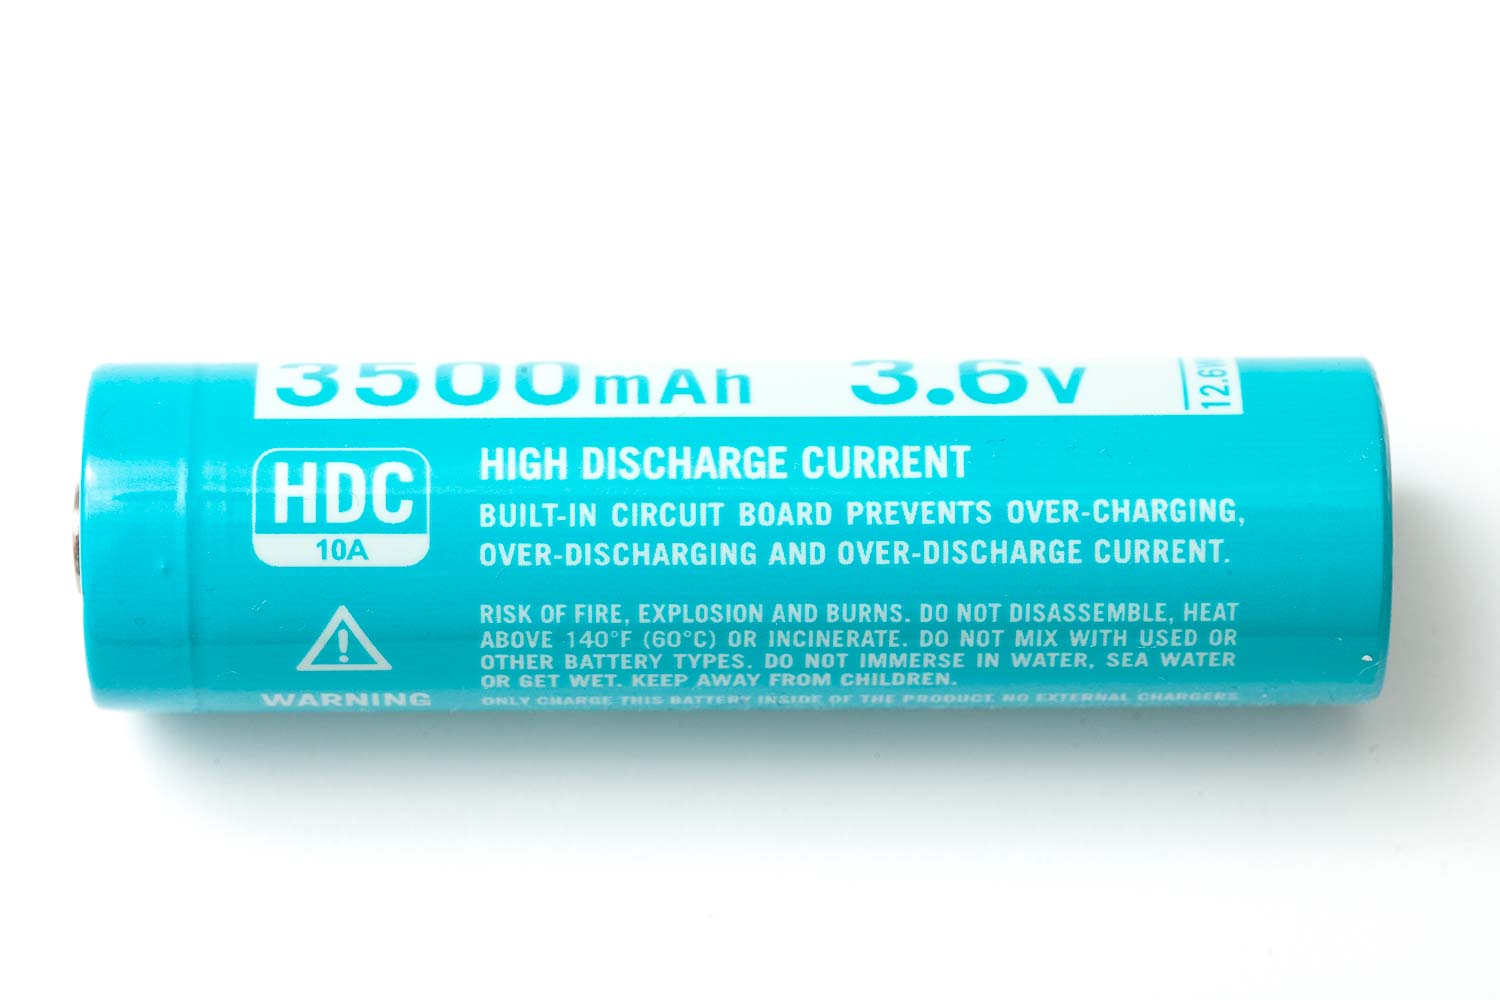
Olight includes a pre-installed 18650 battery in the Warrior Mini 2 Cu. It’s their ORB-186C35 model, which is rated at 3500 mAh or 12.6 Wh. As I’ve come to expect from Olight, this is a proprietary battery format with contacts for positive and negative at what would normally be considered the positive end of the battery. In order to use the Warrior, you do need to use one of the custom Olight batteries.
Like many Olight models, the Warrior Mini 2 charges with a magnetic port at the tail end of the light that doubles as the tail switch. An Olight MCC3 charging cable comes in the box, which itself is rated for up to 2 amp charge rate. The Warrior, however, has a spec’ed charge rate of 1.5 amps. In practice, I only got 1.4 amps for 7.0 watts which is close enough to Olight’s claim. When you attach the charging cable, the end of the cable glows red It switches to green to indicate that charging is done, but the charge cycle isn’t actually complete. It continues to trickle charge at around 1 watt for a considerable amount of time. The Warrior eventually completed its charge cycle in 5 hours and 40 minutes. That’s a really long time to charge a 18650 battery, but then again much of the charge cycle seems to be just “topping off” the battery.

Performance test
Lux was measured by a UNI-T UT383 BT at 5 meters. Lumens were measured in a homemade lumen tube using a TSL2591 sensor, calibrated with a Maukka calibration light. The temperature was monitored with a MLX90614 IR temperature sensor. The Olight 18650 battery was used.
Lumen measurements (for each mode)
| Mode | Specs | turn on | 30 sec | 10 minutes |
|---|---|---|---|---|
| Moon | 1 | 0.6 lm | 0.6 lm | – |
| Low | 15 | 13 lm | 13 lm | – |
| Med | 150 | 114 lm | 113 lm | – |
| High | 500 | 477 lm | 472 lm | 466 lm |
| Turbo | 1750 lm | 1744 lm | 1679 lm | 457 lm |
Runtime graph
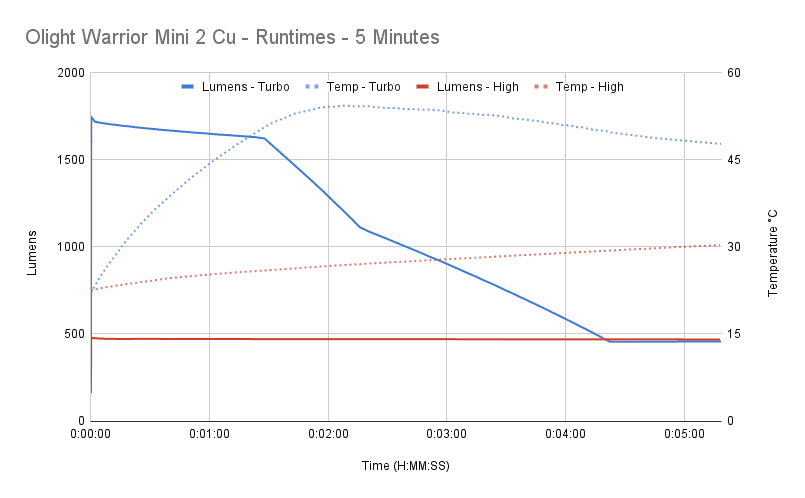
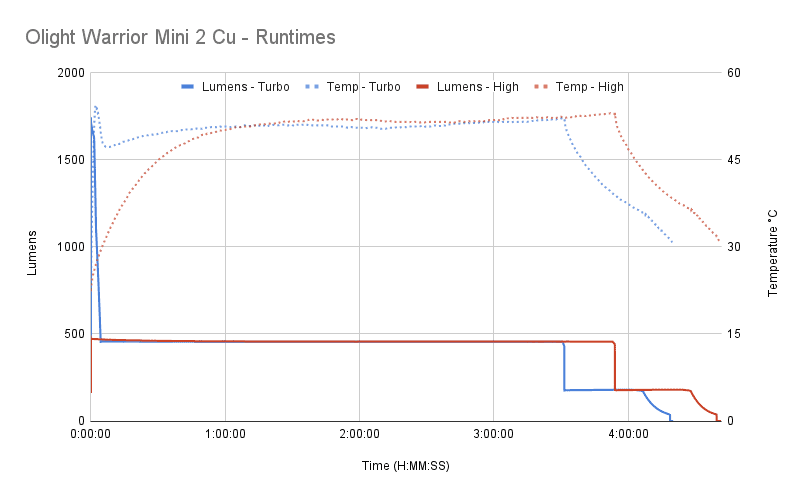
The Turbo test started out at a respectable 1744 lumens. By 30 seconds, it had sagged to 1679 lumens – a little bit shy of its 1750 claim, but close. At 1.5 minutes, output began to steadily ramp down. Just after 4 minutes into the test, it settled into its sustained output of 457 lumens. The Warrior stepped down at 3h30m to 179 lumens. Output began dropping further at 4h7m which is also when it crossed the ANSI 10% threshold. The light turned off at 4h19m. The max observed temperature was 54°C.
The High runtime test started out at 477 lumens. The Warrior stayed right around that level until it dropped at 3h53m to 180 lumens. Output really began to drop at 4h28m. It crossed 10% output at 4h37m and then shut off at 4h39m. The max observed temperature was 53°C.
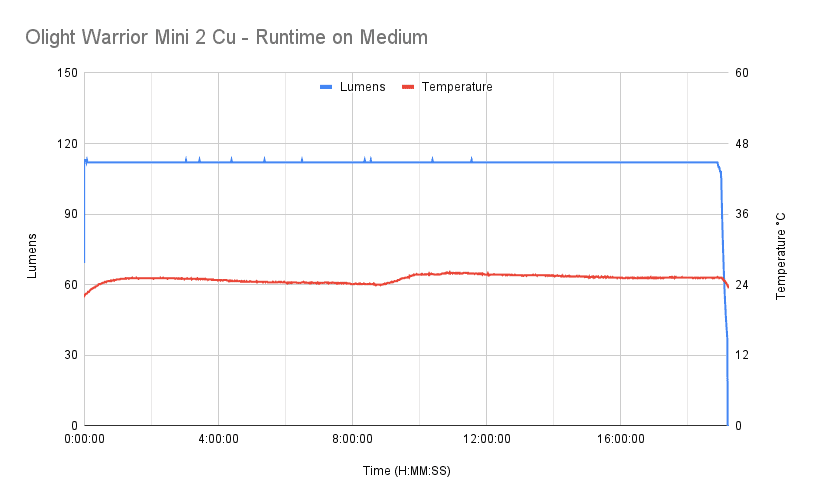
The Medium runtime test started out at 114 lumens. It settled into 112 lumens and stayed there for the duration of the test, dropping off sharply at 18h59m. The light shut off at 19h11m. The max observed temperature was 26°C
Throw numbers:
Throw was measured at 5 meters after 30 seconds
| Mode | Specs | Candela measured | Meters | Yards |
|---|---|---|---|---|
| Medium | (57 m) | 800 cd | 57 m | 62 yd |
| High | (117 m) | 3,150 cd | 112 m | 123 yd |
| Turbo | 12,300 cd (220 m) | 12,250 cd | 221 m | 242 yd |
Beamshots
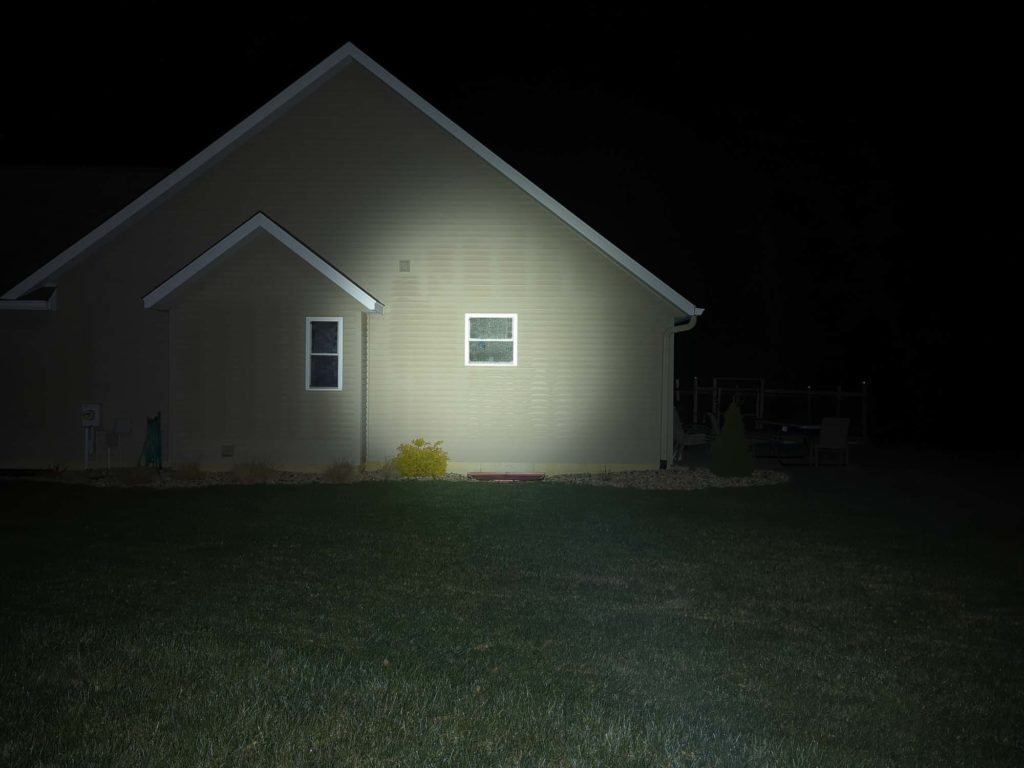
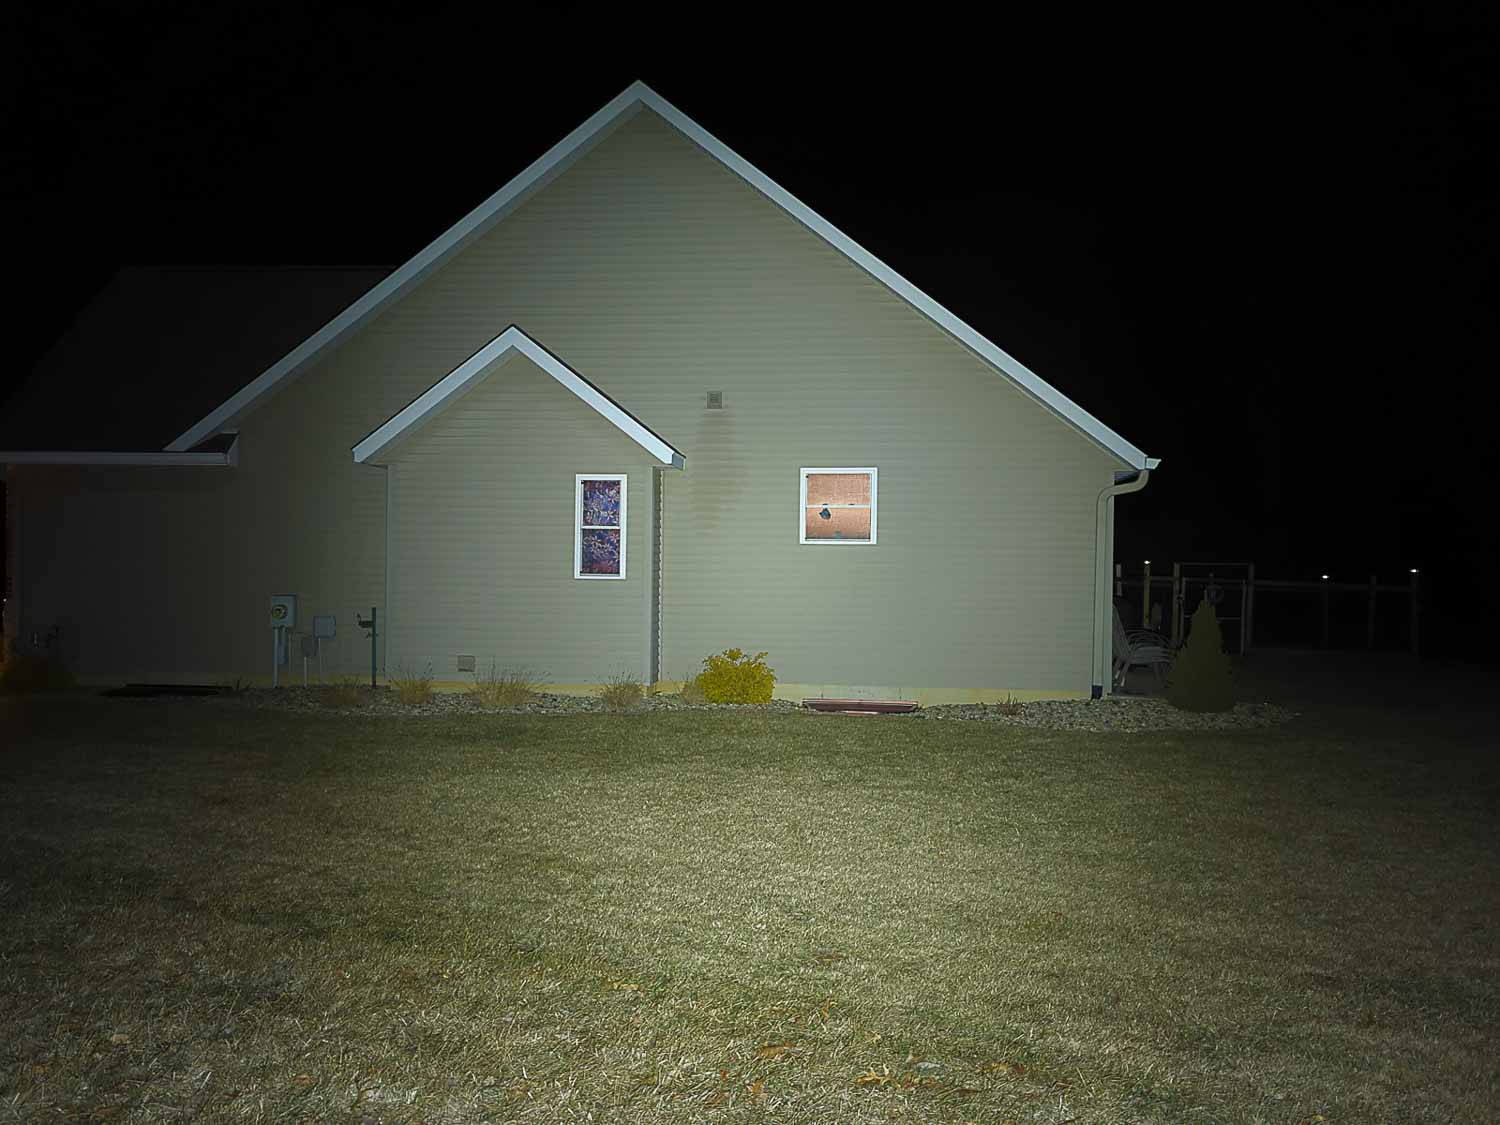
Beam shots of the building are taken at 15 m (16 yd) using a Pixel 6 set to ISO 200 with 1/10 second exposure time.
Beam shots of the playset are taken at 30 m (33 yd) using a Pixel 6 set to ISO 200 with 1/2 second exposure time. The trees in the background are around 65 m away.
- Olight Warrior Mini 2 Cu
- Olight Perun 2
- Nitecore P20i UV
- ThruNite T1S


Disclaimer: This flashlight was sent to me for review at no cost by Olight. I have not been paid to review, nor have I been holding back on problems or defects.
Final Verdict
Pros
- Beautiful copper build
- Good amount of throw for its size
- Full kit with nice accessories
- Flexible UI with shortcuts
- Has a proper sub-lumen mode
- Proximity sensor
Cons
- Proprietary battery
- Cool white (but not too cool)
Explanation on star ratings:
1: Avoid: my phone flashlight would be a better choice – 2: Poor: significant defect or issues; almost unusable – 3: Average: some defects or issues; but still usable 4: Good: recommended (minor issues) – 5: Great: highly recommended

5 stars: ★★★★★
The Olight Warrior Mini 2, in my opinion, strikes a really good balance between EDC and tactical functions. For a tactical flashlight, it’s surprisingly small but still plenty capable. And it has all of the shortcuts and button presses that you’d expect in an EDC. To top it all off, this limited copper edition really steps it up a notch; the flashlight is gorgeous.
Olight Warrior mini 2 for sale
The copper version was a limited edition, and therefore not available any longer. We link to the normal aluminum versions below.
Use our exclusive 1lumen discount code to get an extra 10% off anything you order at Olightstore.com (USA). Coupon code: 1lumen
1lumen selects and reviews products personally. We may earn affiliate commissions through our links, which help support our testing.