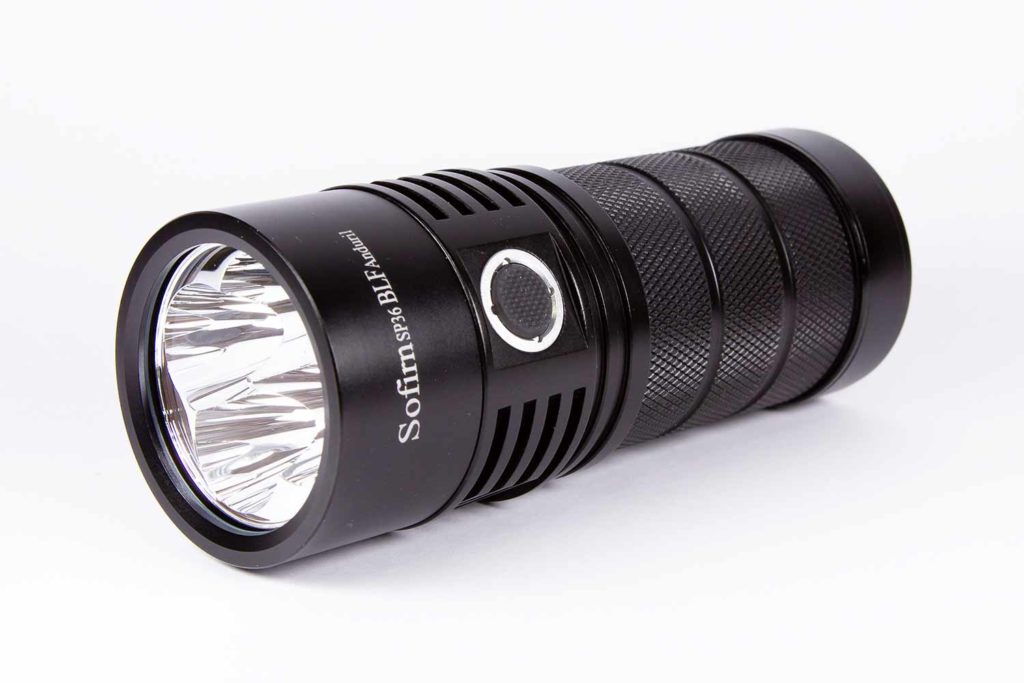
Sofirn BLF SP36 review
Sofirn BLF SP36 Specifications
| Brand / Model | Sofirn SP36 BLF |
|---|---|
| LED | Samsung LH351D 5000K 90CRI |
| Lumens | 5600 Lm |
| Beam intensity | N/A |
| Battery config. | 3*18650 |
| Material | Aluminum |
| Modes | Lots! The SP36 runs Andúril |
| Blinkies | Multiple |
| Reflector | Custom smooth quad reflector |
| Waterproof | Yes |
| Review date | July 2020 |
Introduction:
By now, you’ve most likely at least heard of the Sofirn SP36 BLF, and most likely read about it extensively too – after all, it’s an enthusiast dream – neutral white, quad FET, Anduril, high CRI – all components for a brilliant light.
I’m very excited to get to play with this light – Sofirn has made quite a name for themselves by making quality lights for a great price and listening to the enthusiast community when there’s input to be had, and the result is lights like this one!
But Owen, you say, surely we’ve read enough about this light by now! Every man and his dog have reviewed it!
Well… too bad. That may be true, but that’s not going to stop me from going over it myself. Call it due diligence, call it self-aggrandisement – this light is just too much fun not to spend some time with it.
Onward with the review!
What you’ll get:
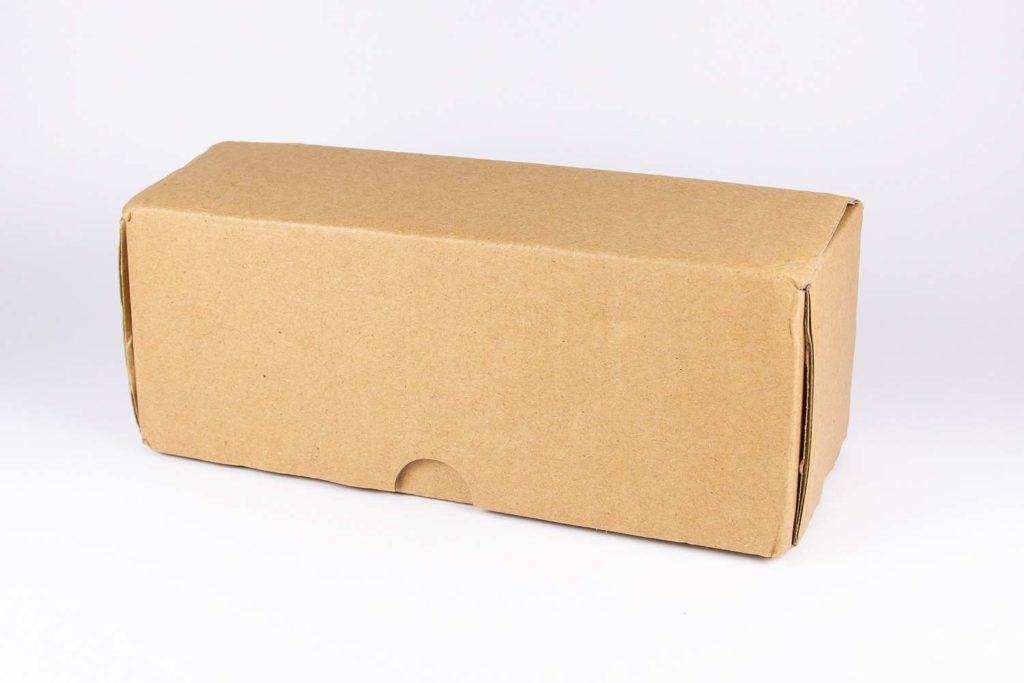
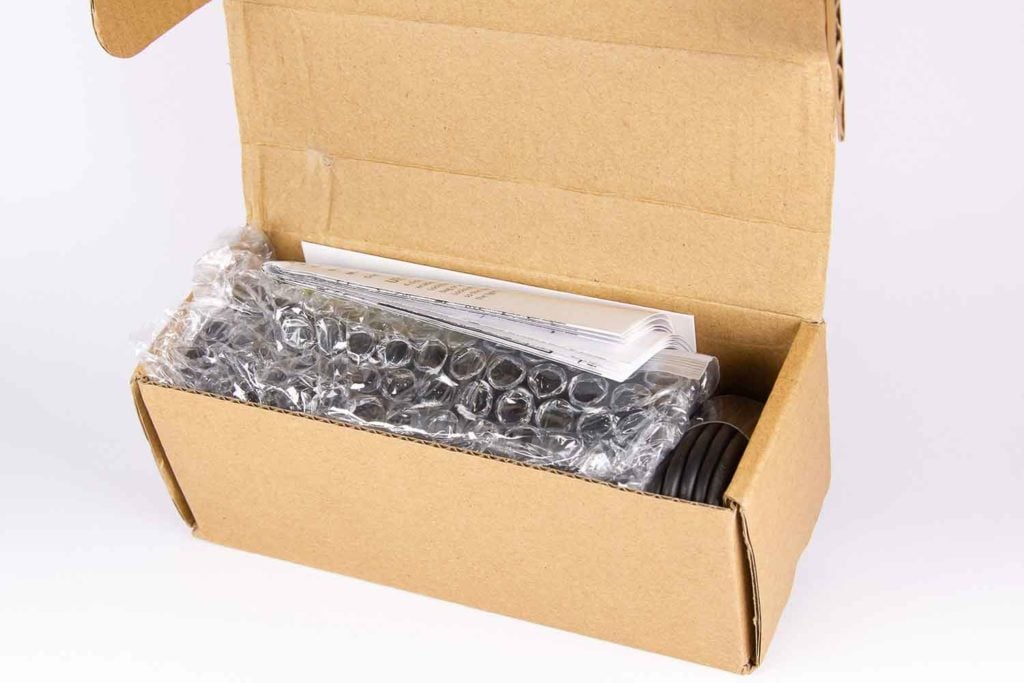
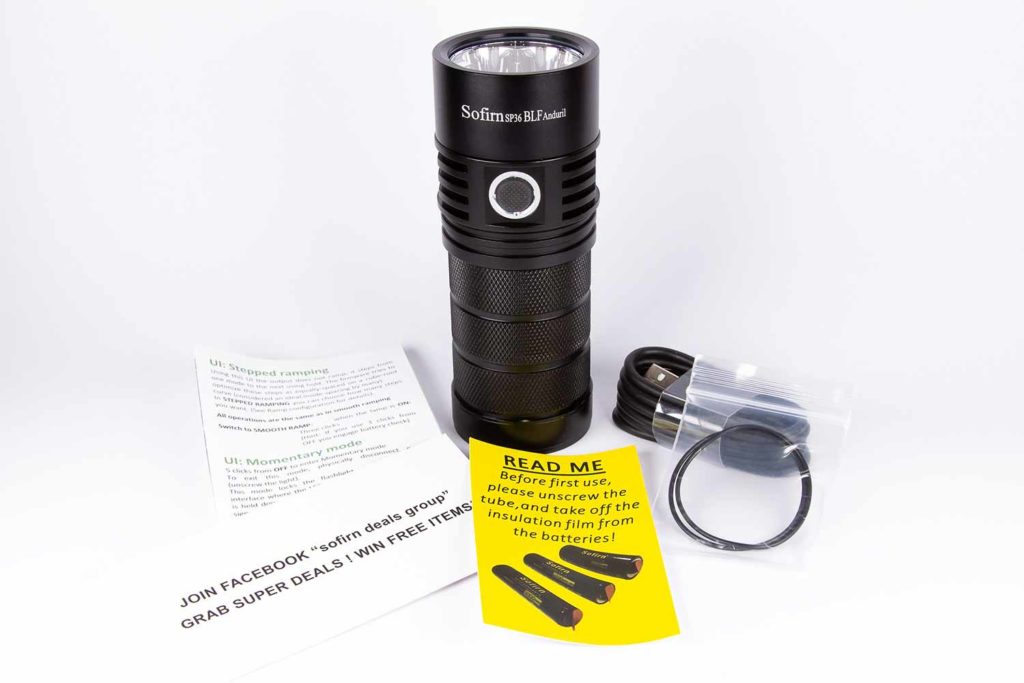
The Sofirn SP36 kit I received was packaged in a plain cardboard box, which is a bit of a departure from the usual Sofirn boxes I’ve been used to seeing. The size of the light definitely precludes the usual boxes, so that’s not a particular issue. Inside the box is:
- The SP36
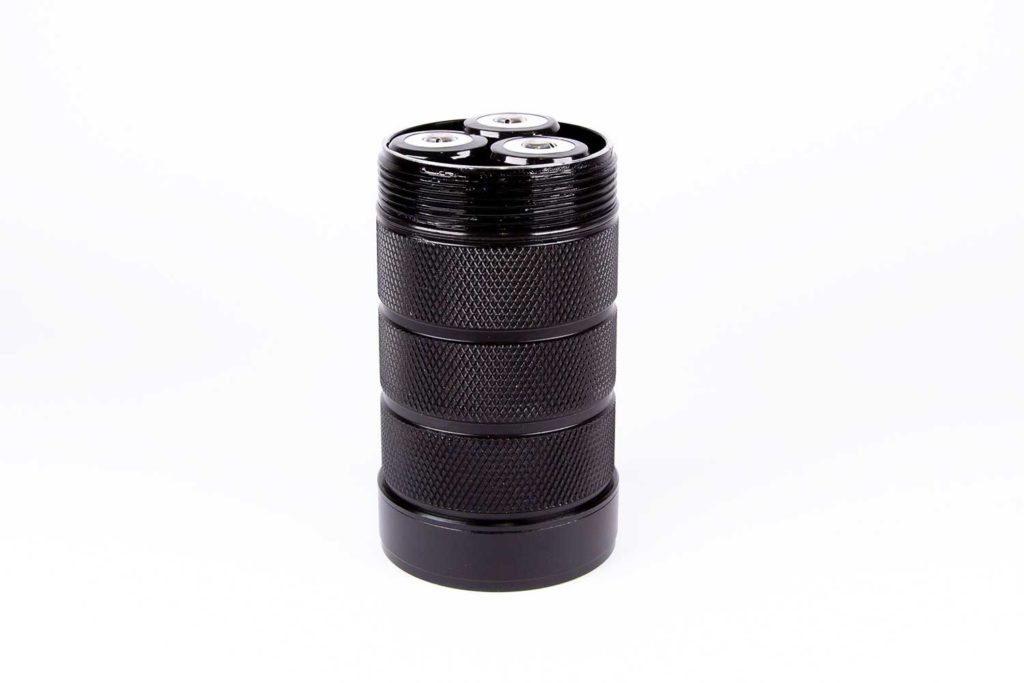
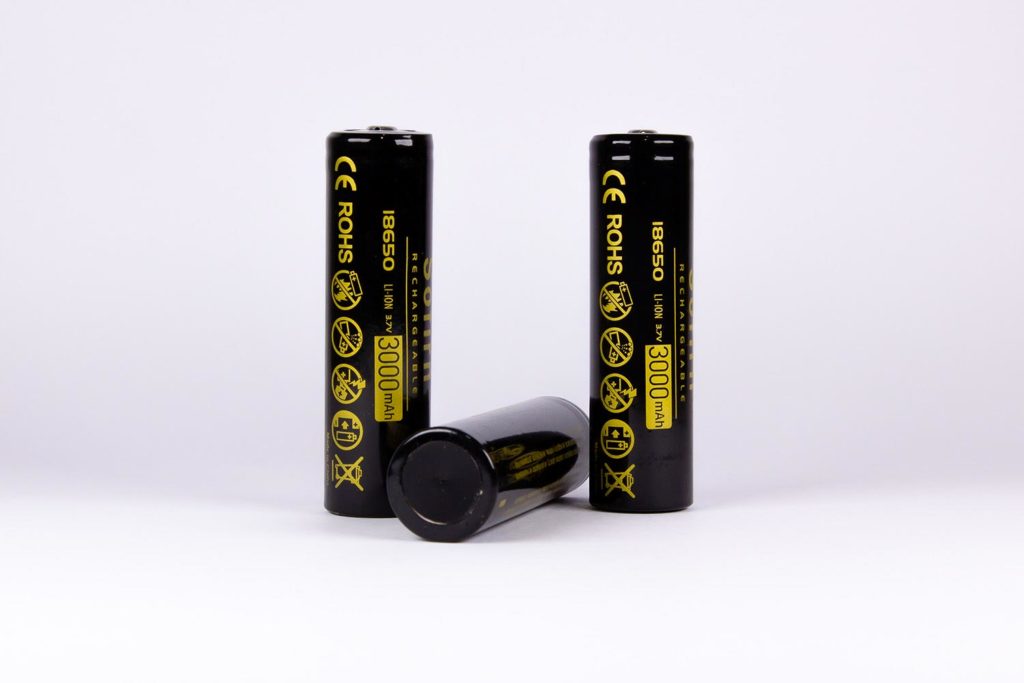
- Sofirn-branded 18650s inside the light (note the protective cap on each cell)
- USB-A to USB-C cable
- O-rings
- Instruction manual
- Sofirn promotional card
- A card referring to the insulators on the batteries
The card regarding the insulators on the batteries is a good addition; I’ve heard that a lot of returns to Sofirn are not due to a faulty light, but due to people not removing the insulators (that said, they used to be clear, from memory).
This kit has everything you need to get up and running with the light.
Note that the SP36 BLF is also available without the batteries – it requires button-top cells, though.
Handling of the light
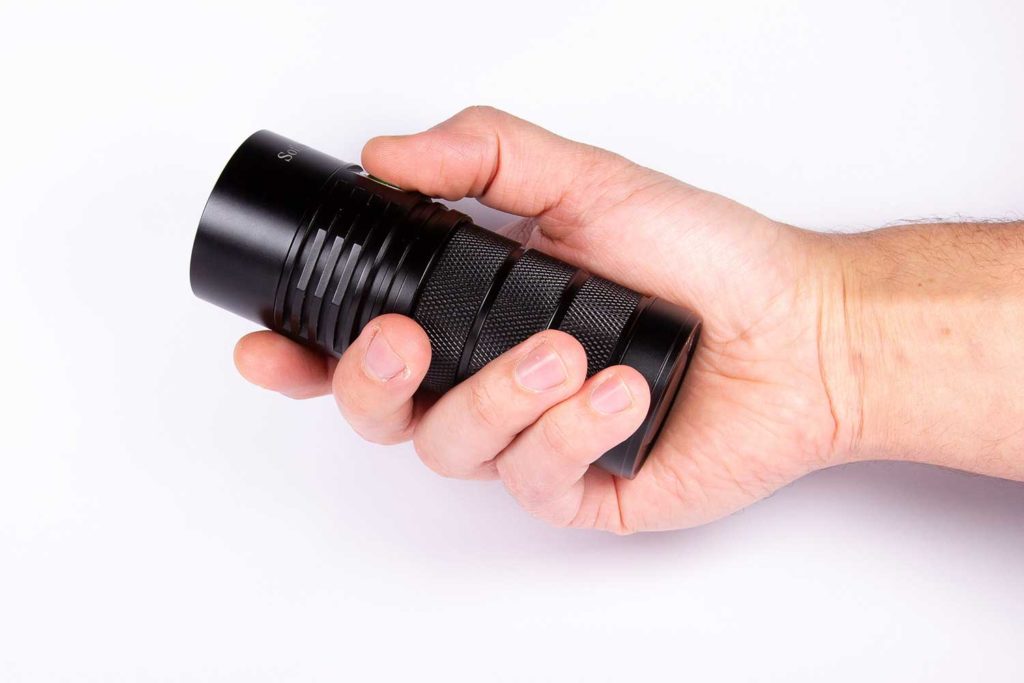
First off – this isn’t a small light. I’ve got big hands and it fits in quite nicely, but for those with small hands, it’s going to be quite an experience.
With that said though, it’s a nice feel. The knurling holds onto your hand well, and the fins at the head have sufficient edge to stop sliding. They’re not sharp but are definitely a very strong 90-degree angle.
The button on the light is a very nice e-switch; there’s a resounding “click” noise when activating it, which is always a nice feeling. I’ve actually since upgraded the AceBeam E10 I reviewed with a switch from the SP36/Q8 for that nice satisfying CLICK, and the responsive feedback. Big points on this one.
The light itself is almost perfectly round, so apart from the button, if you put it on its side somewhere uneven, it’s most likely going for a ride. Be sure to stow it safely if you want to avoid mishaps!
Given the size and weight of the light, this is best suited to popping into a bag or holster. You can put it in a pocket if you’ve got some that are spacious, but the heft may end up making it more annoying than you’d expect.
You can tail stand the light and add a diffuser to make a lovely lantern-style glow, too.
Build Quality, knurling, threads, and anodization
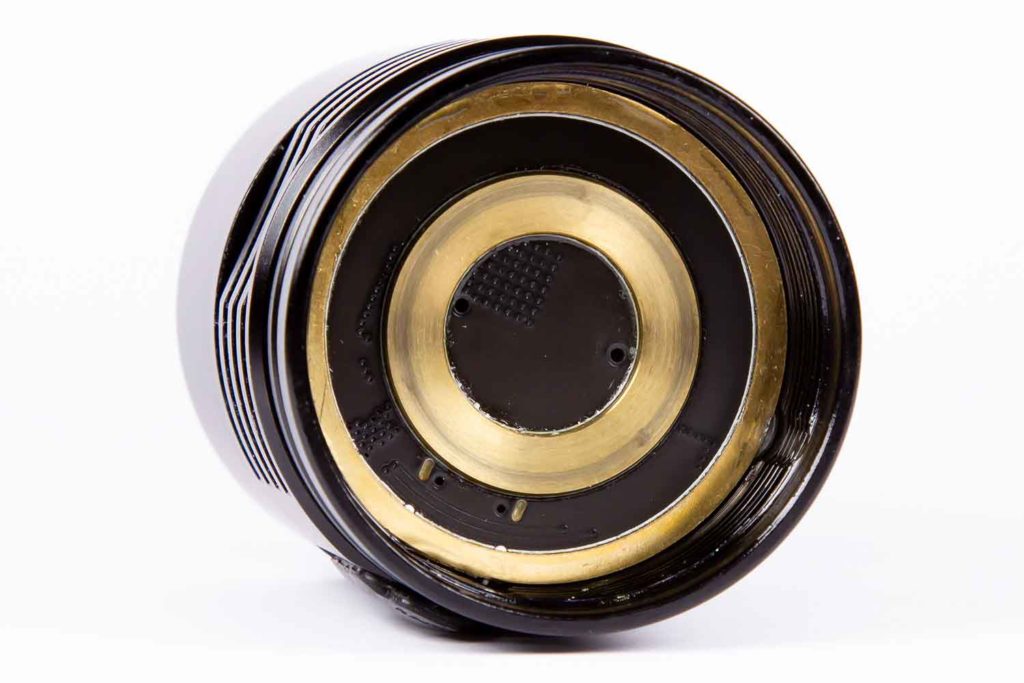
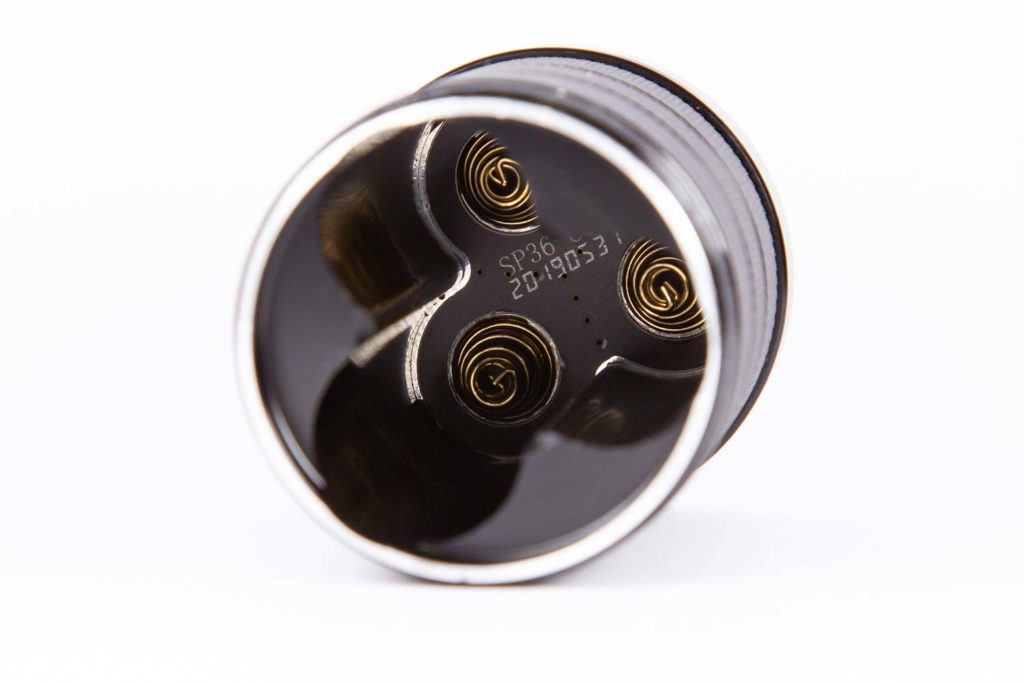
This light feels very solid. Unless I really give it a rattle, there’s no sensation of batteries moving, and even when I do, it’s more noise than the feel of weight shifting. Being an aluminum light, it’s surprising just how heavy it is, but there are some fairly solid pieces in there (around the cells in the battery tube, and the MCPCB shelf).
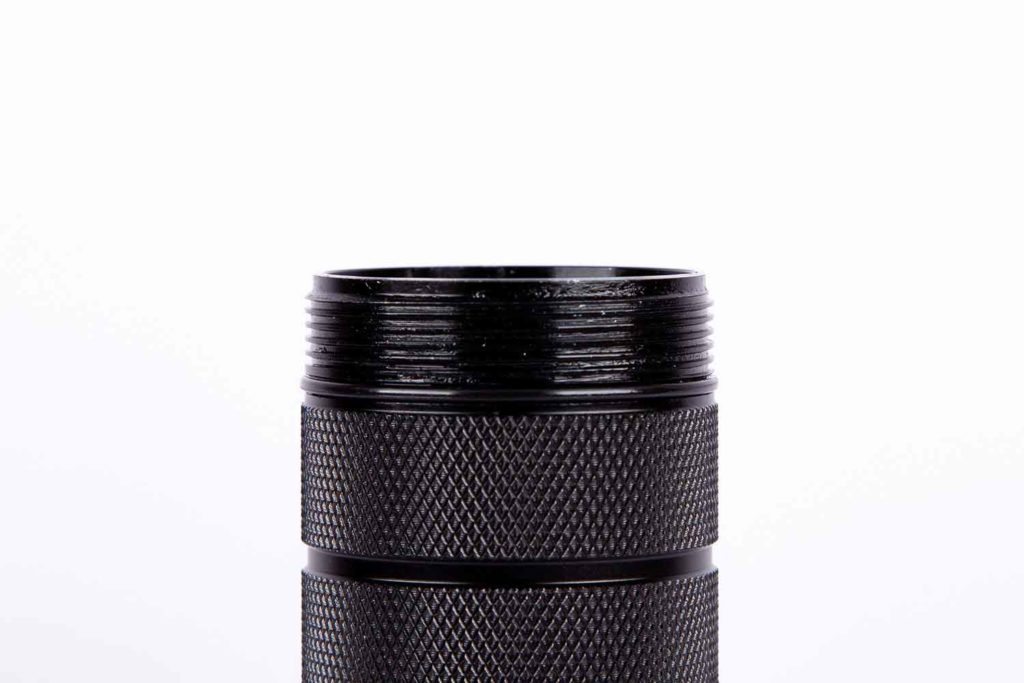
There’s no inherent faults with the anodisation that I can see – any marks that are visible in the photos are from my own sheer clumsiness. I have this horrible habit of dropping things as I’m setting up to take photos…
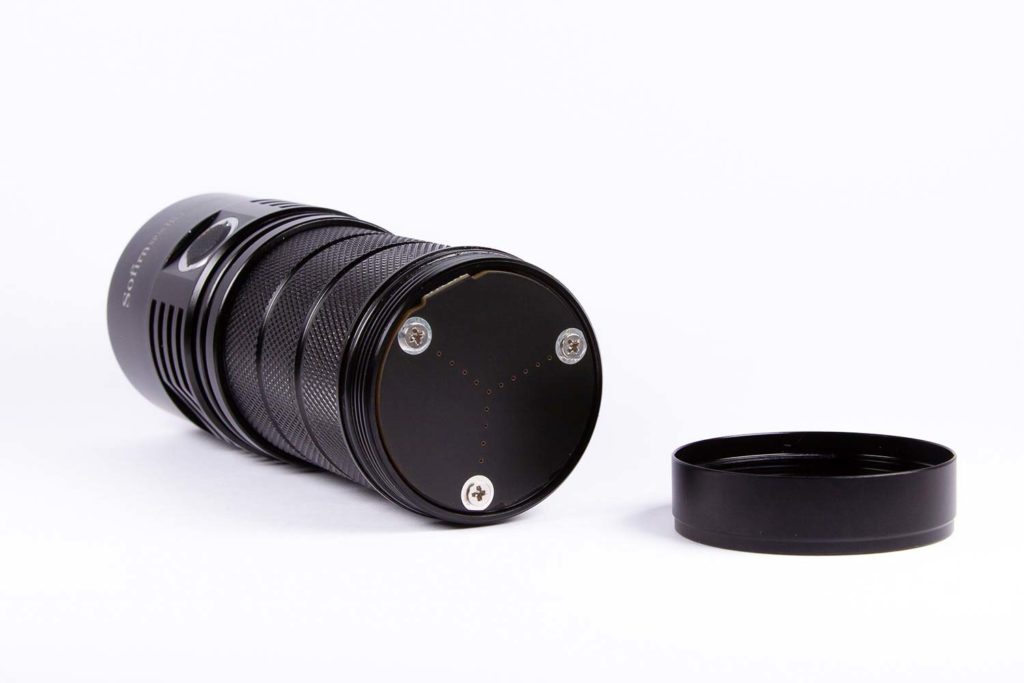
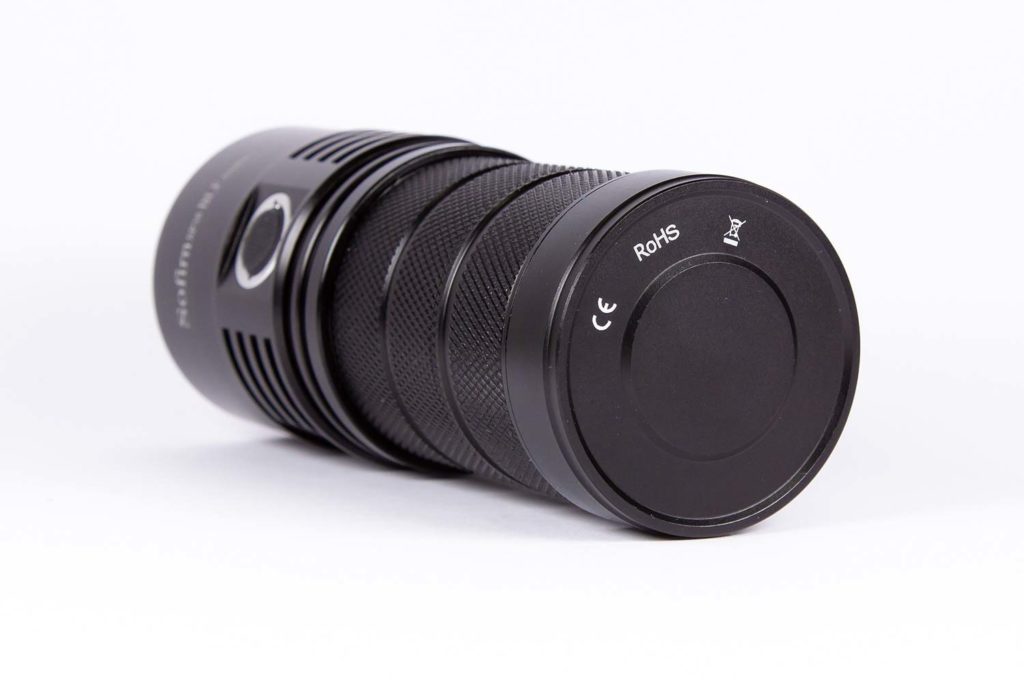
Sofirn has gone to lengths to make sure that getting water on the light won’t affect it – there are o-rings in the top of the light, in the bezel threads, in the body threads, and in the tailcap threads. Note that the tailcap itself is only for access to the spring PCB!
The threads in the battery tube are well-lubricated and square-cut, which makes re-assembling the light a breeze if you’re the kind to remove the cells for charging. The onboard charging will completely negate this for some people, though!
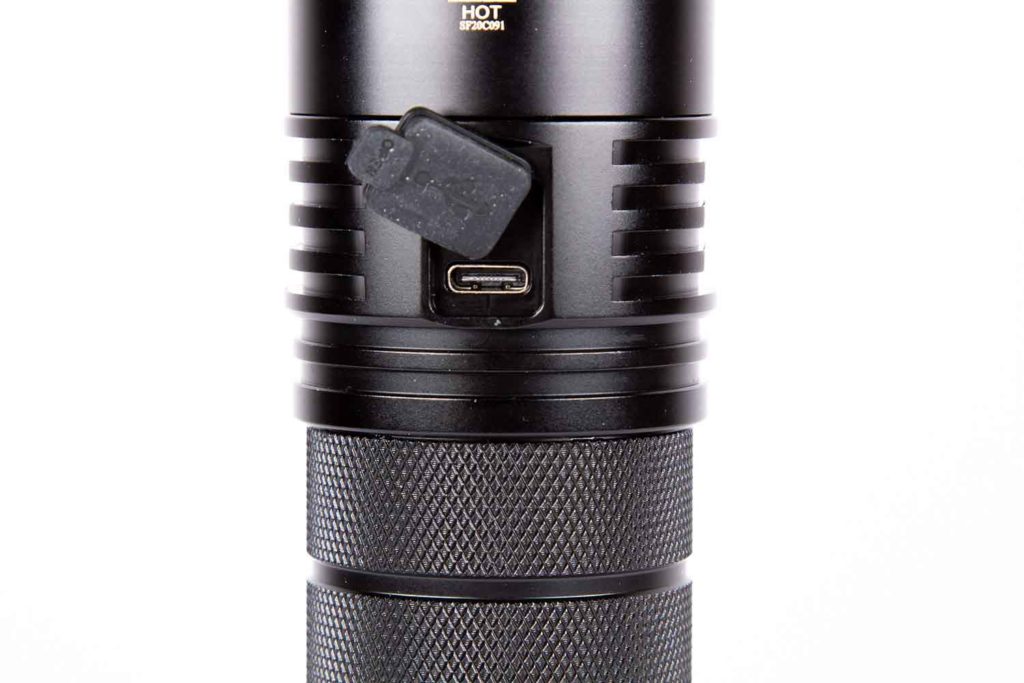
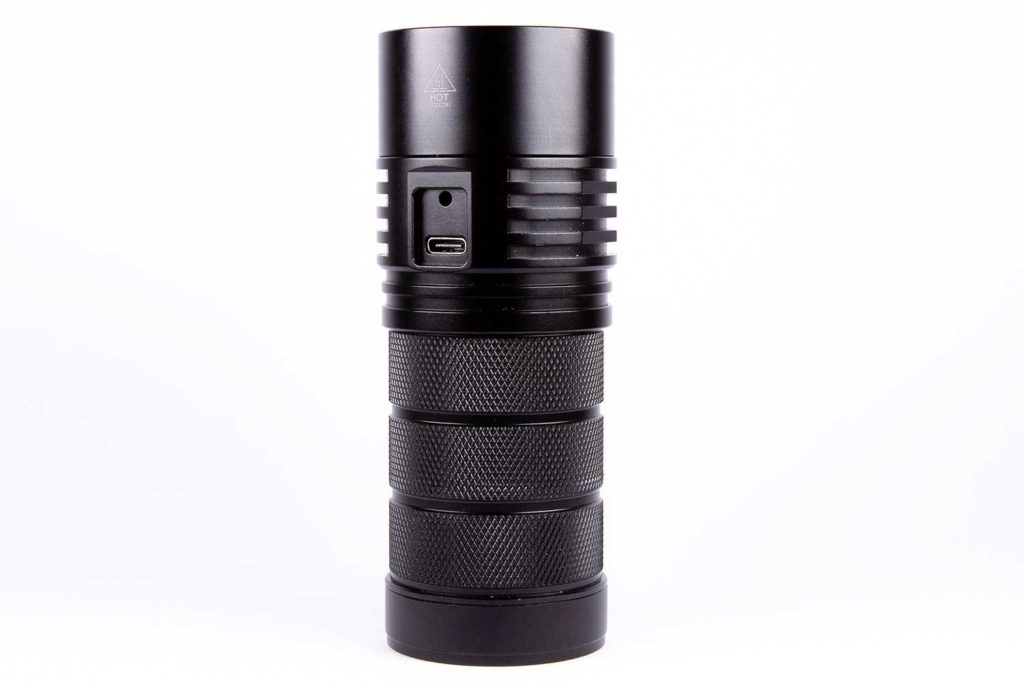
One interesting thing to note, however, is the rubber cap over the charge port. For general use it’s fine, but I seem to have inadvertently put it in a pocket that didn’t really fit it, so when I pulled it back out, the rubber cap has broken off and is now somewhere down at the creek not far from where I live. This obviously affects how waterproof the light now is (ie. not at all), and for my uses that’s fine, but it would definitely cause an issue for others. You don’t have to be super gentle with it, but just take some care not to let it grab on anything.
LEDs, Lens, Bezel, and Reflector
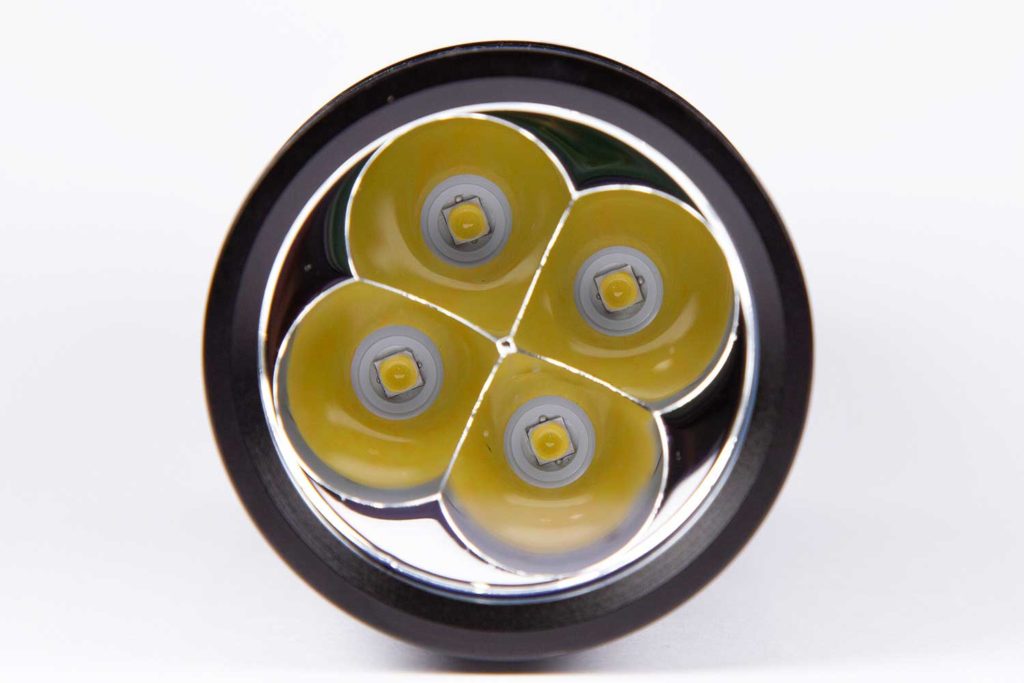
For the SP36 BLF, Sofirn chose the Samsung LH351D 5000K 90CRI – this is somewhat affectionately known in the community as the “dogfarts” emitter, as the part number is SPHWHTL3DA0GF4RTS6 (look closely…). It’s a great emitter for this light, as it provides a far better tint than the XPL emitters in the original SP36, along with high CRI, which is always great to see.
There’s an amount of green visible at low brightness, but fairly negligible. This is very common for the emitter though, as it’s quite hard to get a good tint bin. Ramp the brightness up though, and that all goes away.
Nestled behind an AR lens is a smooth quad reflector bezel, reminiscent of the Q8 – and as per the Q8, it’s attached to the body via a screw from behind the driver. Something to be very aware of if you were thinking of removing it for whatever reason!
As is traditional for this type of reflector, there’s a bit of a “flower” pattern visible. Some don’t like it, but I think it’s quite nice.
The bezel itself is smooth and unassuming, and at first, I didn’t realise that it was removable, because the bottom end of it blends into the edges for the heat-sinking fins so well.
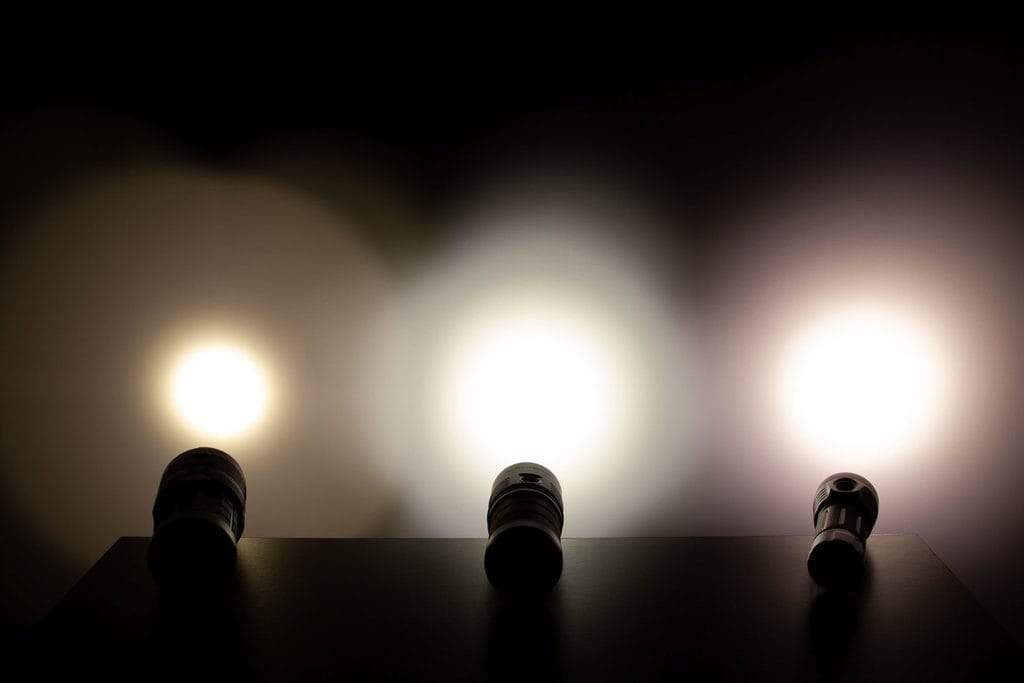
Comparison shot shows: BLF Q8 with FA3 SST20 4000K, Sofirn SP36 BLF LH351D 5000K, and Astrolux MF01 Mini modified with 219b sw45k.
Dimensions:
- Length: 126.8mm (4.99″)
- Head diameter: 49mm (1.93″), 50mm below bezel
- Body diameter: 44.7mm (1.76″) at knurling
Weight:
- Empty: 295.5g (10.42 oz)
- With included cells: 433.3g (15.28oz)
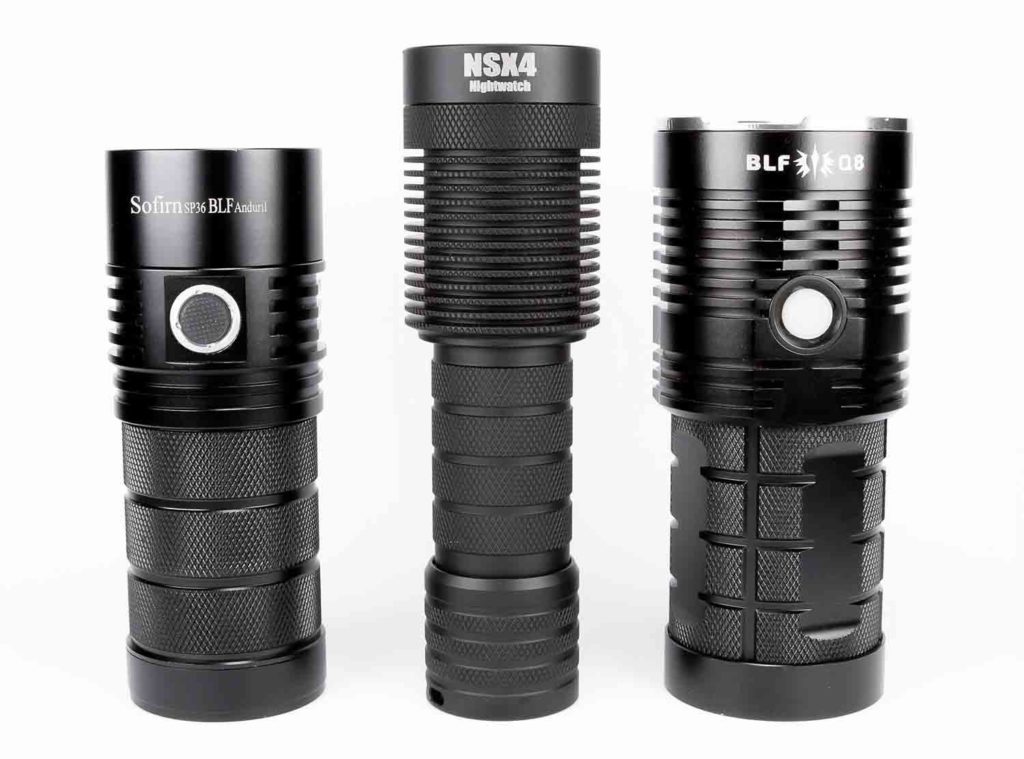
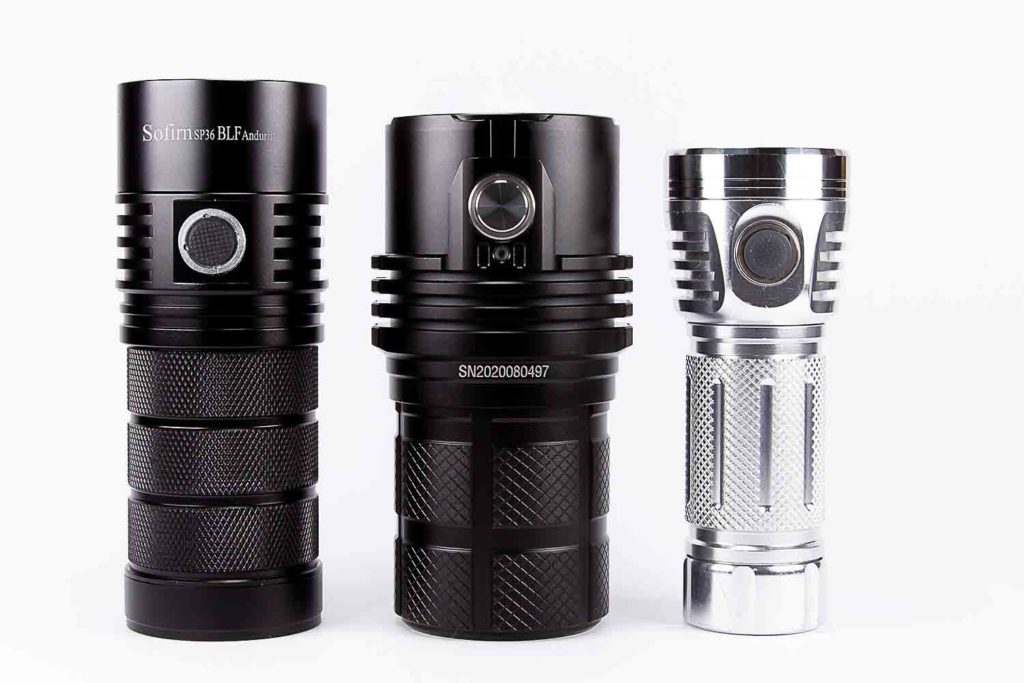
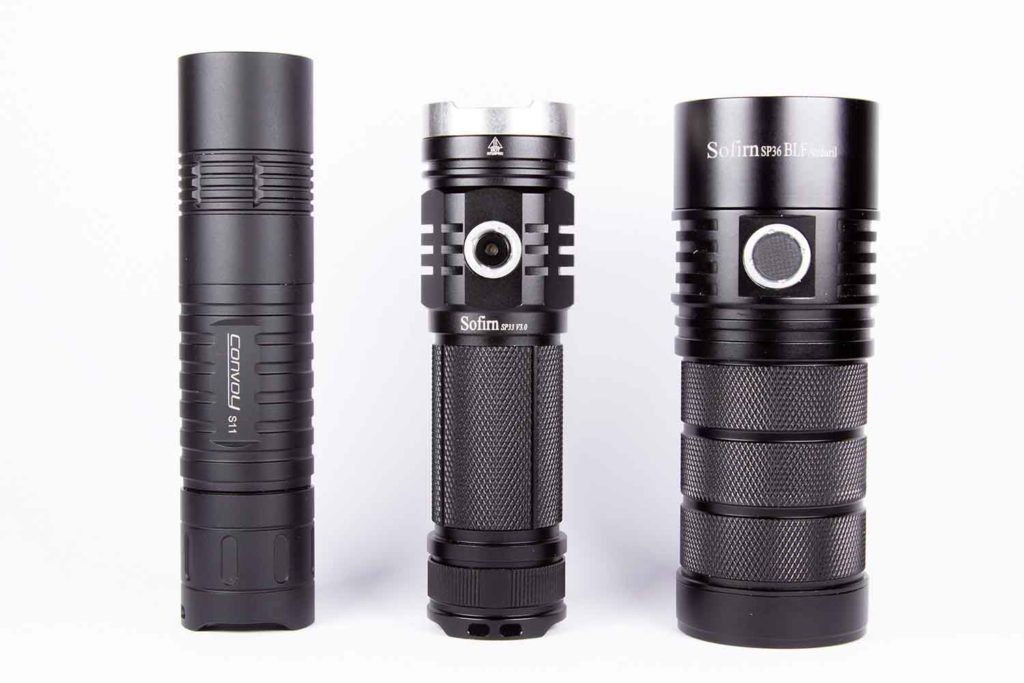
Popular flashlights Comparison
Image 1: Compared to some of the best flashlights:
Image 1: Sofirn SP36 BLF, Nightwatch NSX4, BLF Q8
Image 2: from left to right: Sofirn SP36 BLF, Imalent MS06, Astrolux MF01 Mini.
Image 3: from left to right: Convoy S11, Sofirn SP33 v3, Sofirn SP36 BLF
Driver & User Interface:
The SP36 uses a custom FET+1 driver running Anduril, which is hands-down my favourite UI. There are no components accessible on the driver board, but as it’s glued in, removing it is more difficult. It’s doable, but not particularly pretty (see Modding section at the end of the review if you’re interested).
Please note – thermal calibration is HIGHLY recommended! This can be done by first leaving your light somewhere near a thermometer for some time to settle to a known ambient temperature, then clicking three times from off, then two times, two more, two more, and then four times to enter thermal configuration mode. From there, you will get one flash and then a buzz – click the button the number of times that corresponds to the ambient temperature in Celsius. Ignore the two-flashes-then-buzz, then you’re all set. A diagram of this is found at ToyKeeper’s repository.
Modes:
- An awful lot! Anduril is one of the more intuitive UIs I’ve used, while also being extremely customisable. The general gist of it is:
From OFF:
- Click – On (to mode memory).
- Hold click: On to bottom of ramp
- Double Click: On to top of ramp
From ON:
- Click – Off.
- Hold click: ramp (or step) upwards, quickly release and hold again to ramp (or step) downwards
- Double Click: Turbo
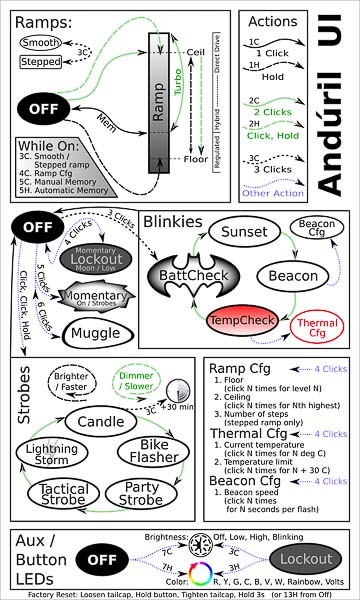
From there, it can get ridiculously complicated – a UI diagram is above/, and you can read a text-based manual here.
The driver board is an FET+1, which uses regulated modes below 350mA. The 7135 (the +1) helps keep output steady up to 350mA, but has a hard limit on brightness – going above that lets the FET take over and pull as much as it can out of the battery.
The light has low voltage protection, and lockout is done by either untwisting the tailcap a little for a mechanical lockout, or clicking four times for software lockout. While software locked, holding the button will turn on the light in moonlight until the button is released.
There’s PWM visible all across the brightness scale when looking at the light through a camera, but it’s not visible to my eye.
Batteries and charging:
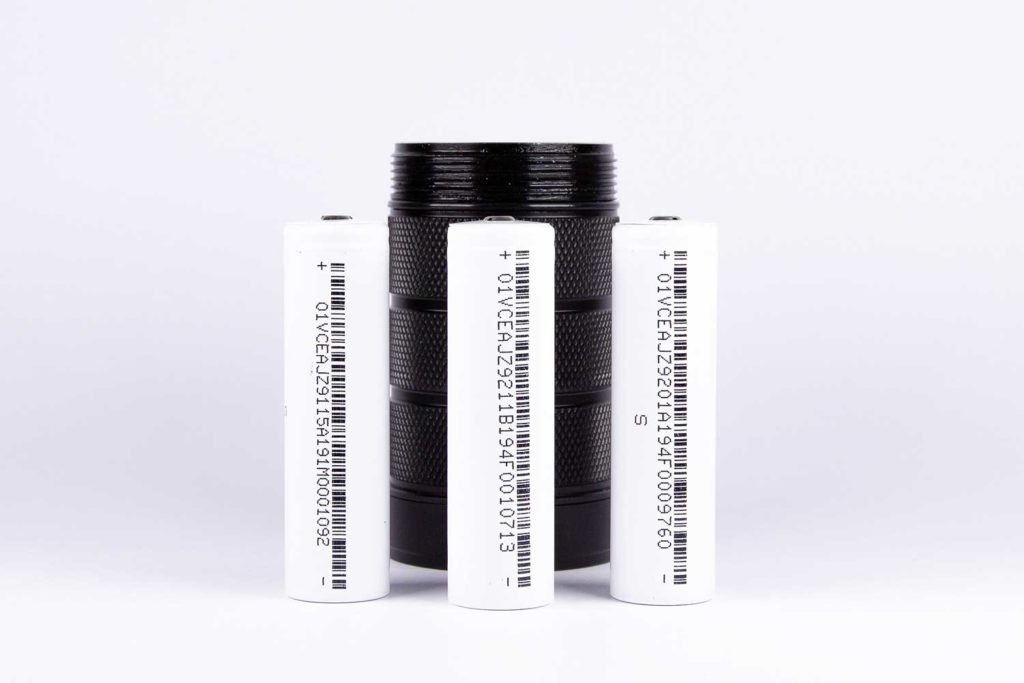
The Sofirn SP36 only works with button-top 18650 batteries due to the shaped battery tube and the connection to the driver, and that’s fine. While not the most energy-dense batteries, they serve a good purpose here.
Charging is available through the USB-C port on the back of the light, but this will only work with a USB-A to USB-C cable; USB-C to C charging doesn’t work, as the driver lacks the hardware to do voltage negotiation. While not a big deal for a lot of people, there is still a vocal minority who want to see all lights have C-C capabilities.
The kit I received comes with three Sofirn-branded 18650 3000mAh button top batteries – they’re re-wrapped cells of an unknown source, but they can put out 10A, which is a good amount for the emitters here.
Inside the light, I get 1.75A on initial charge from 3.7V, so a little under 600mA each. When putting the cells into my Vapcell S4 Plus charger though, it auto-selects either 1.5A or 2A to charge (not consistent on which it chooses). So while charging in the light is a convenient method, it’s also considerably slower than is possible externally.
Fun fact – you can use just the head of the light without any batteries in the light by having it connected to USB charging. You can’t go into turbo or anything crazy like that, but it will still happily work as a make-shift lantern.
Performance:
For my readings, I use the following:
- Lux Meter: UNI-T UT383S, and a custom tube for lumen readings.
- DMM: Fluke 87 and UNI-T UT210E – 16AWG wire is used directly into the Fluke, and 8AWG wire in a loop for the UNI-T.
I will be using the batteries supplied with the light, as well as some quick testing with button-top 30Qs.
Note that due to the carrier-type system for the batteries, I’ve just measured using one battery in the tube (far easier than designing a system to measure from all three at once!).
Amp measurement
- Standby current:
- Button light off: 40µA
- Low button brightness: 90µA
- High button brightness: 1.6mA (~ 8 months standby)
There’s no “mid-way” flash on the stock firmware like on some other Anduril lights, so all I can go on is the top and bottom.
- Bottom of ramp (moonlight): 2.5mA
- Top of ramp: 4.38A
- Turbo:
- Sofirn Cell: 10.9A
- 30Q – 11.9A
The light seems to cap out at the ~12A mark which may be a hardware limitation; I know the 30Q can definitely give more than that. I’m actually quite happy with that result though; it means that the cells provided in the kit aren’t giving much up to the maximum it can give at all.
- Step 1: 21mA
- Step 2: 82mA
- Step 3: 212mA
- Step 4: 499mA
- Step 5: 1.05A
- Step 6: 2.3A
- Step 7: 4.35A
Runtime graph
This runtime was done by putting the light in moonlight, and then quickly double-pressing to turbo.
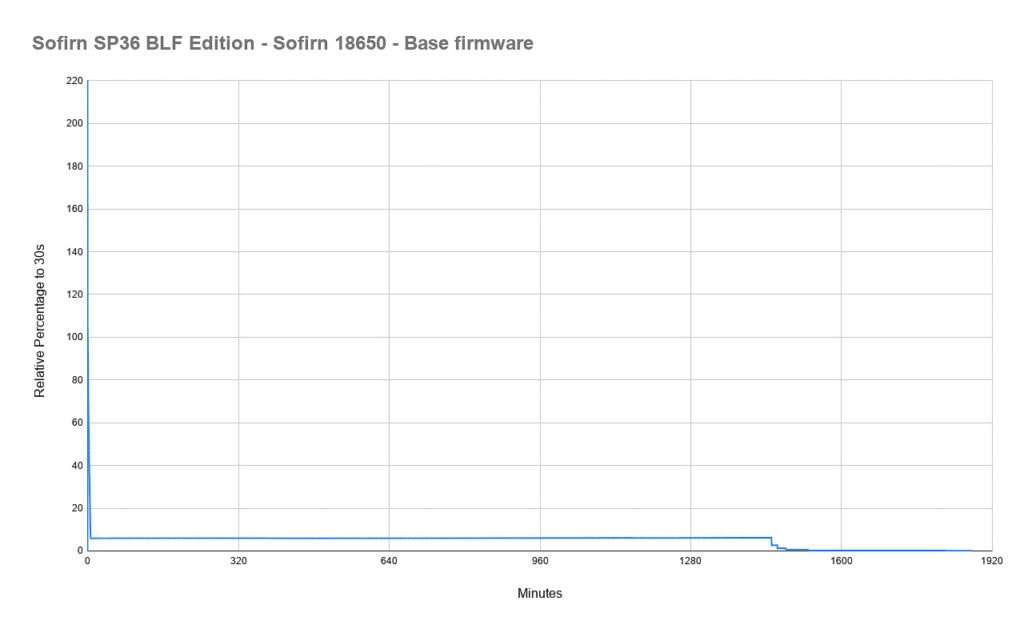
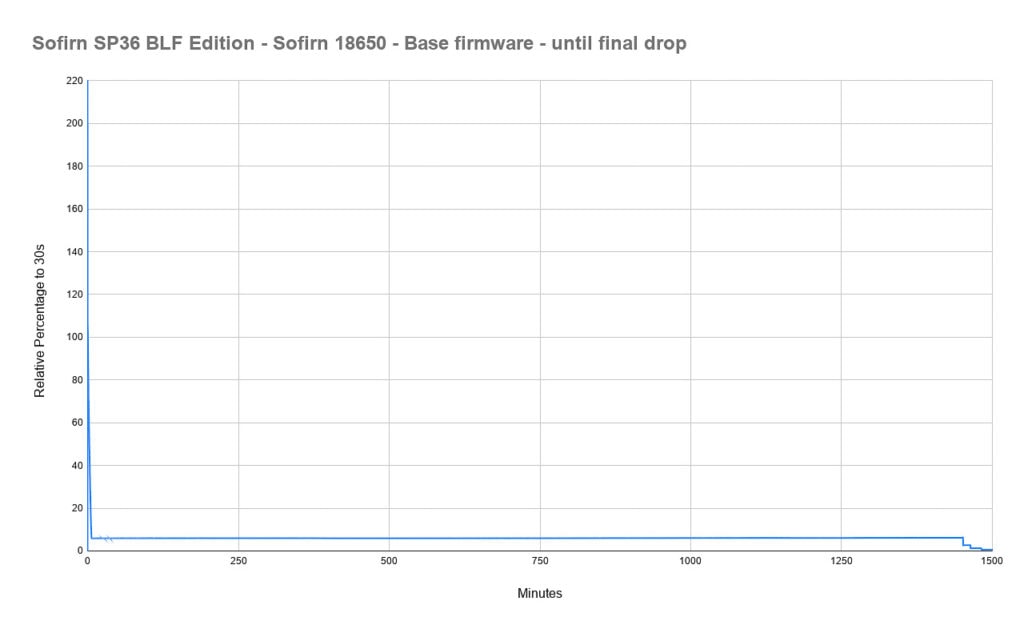
Where to start? There’s the brief spike of light which quickly drops off, but then over the course of seven minutes, drops to around 5-6% of the 30-second brightness. It doesn’t thermally respond and then rise back up as the temperature goes down, which is slightly annoying, but it’s easy to just hold the button and ramp it back up.
The big thing is though that it then proceeds to hold this 5-6% level for just over 24 hours, then steps down a few more times over the next 80 minutes to moonlight. I ended the run after a total of 31h 15 minutes, and the batteries all showed around 2.95V.
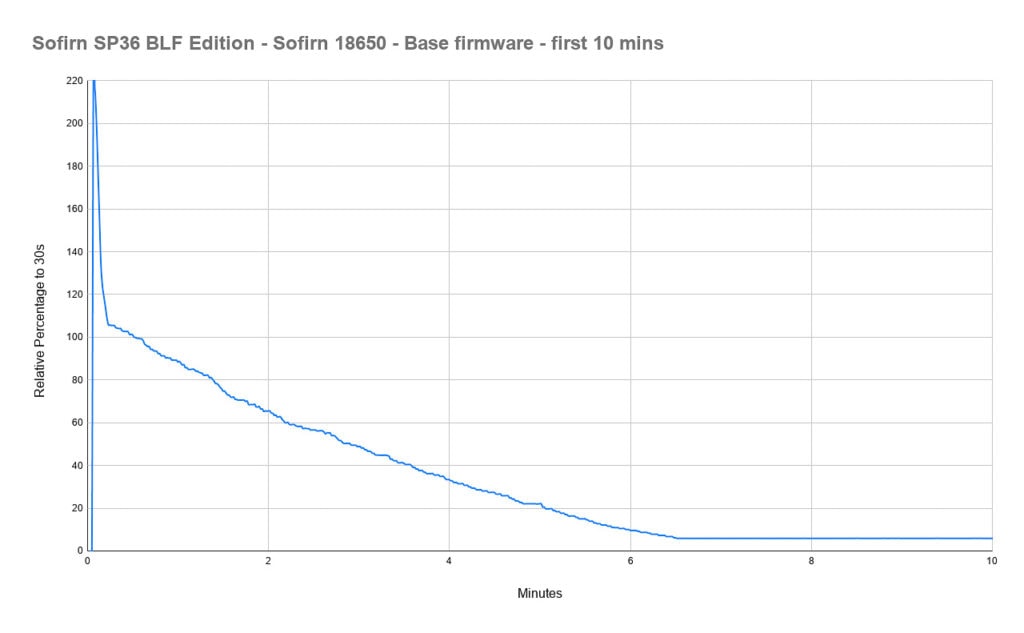
An important note – I initially ran this runtime as the light was out of the box, after charging the batteries. What I’d forgotten however, was to calibrate the ambient temperature, and then I ran it again. I got very similar results, but the first 10 minutes are definitely different. At almost exactly the same time, it hits that low mark (which is interesting), but it holds a higher brightness until that point.
Lumen measurements (for each mode)
I’ve been somewhat suspect of the results out of my lumen tube lately, and as of yet I haven’t found the right parts to make an integrating sphere locally – so these results are from my tube, as calibrated with lights from Maukka.
I’ve purchased some new equipment though to test multiple configurations, so hopefully will have some more accurate readings soon.
- Bottom of ramp (moonlight): too low for my sensor to read!
- Top of ramp: 2215 lumens
- Turbo: 4674 lumens
- Step 1: 6 lumens
- Step 2: 30 lumens
- Step 3: 81 lumens
- Step 4: 185 lumens
- Step 5: 540 lumens
- Step 6: 1068 lumens
- Step 7: 2192 lumens
Throw numbers:
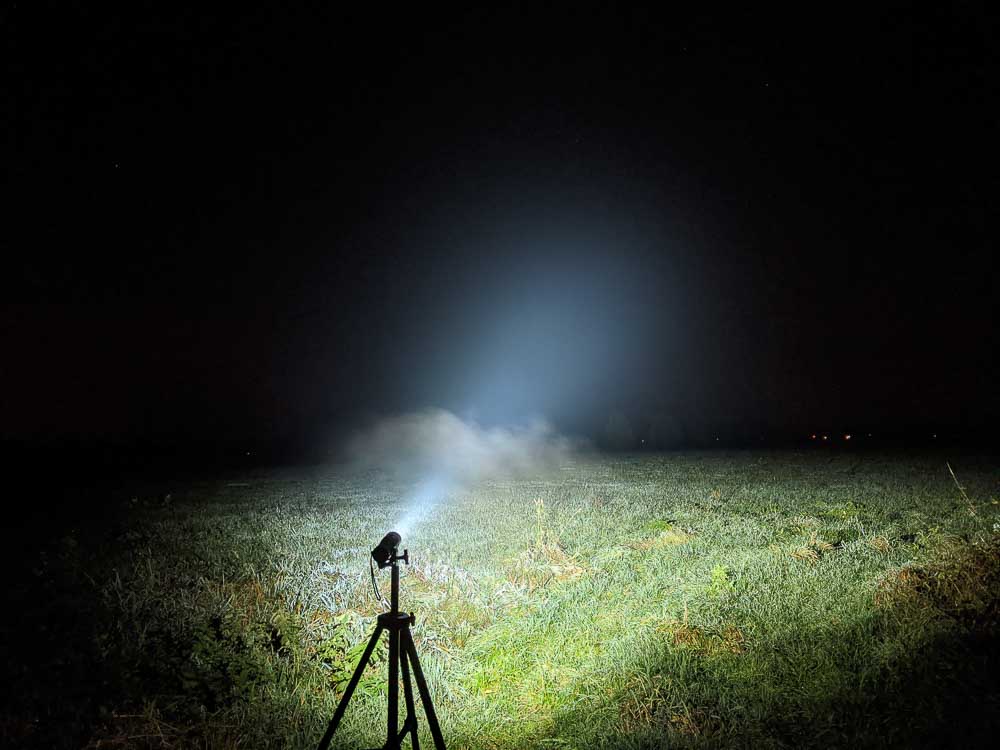
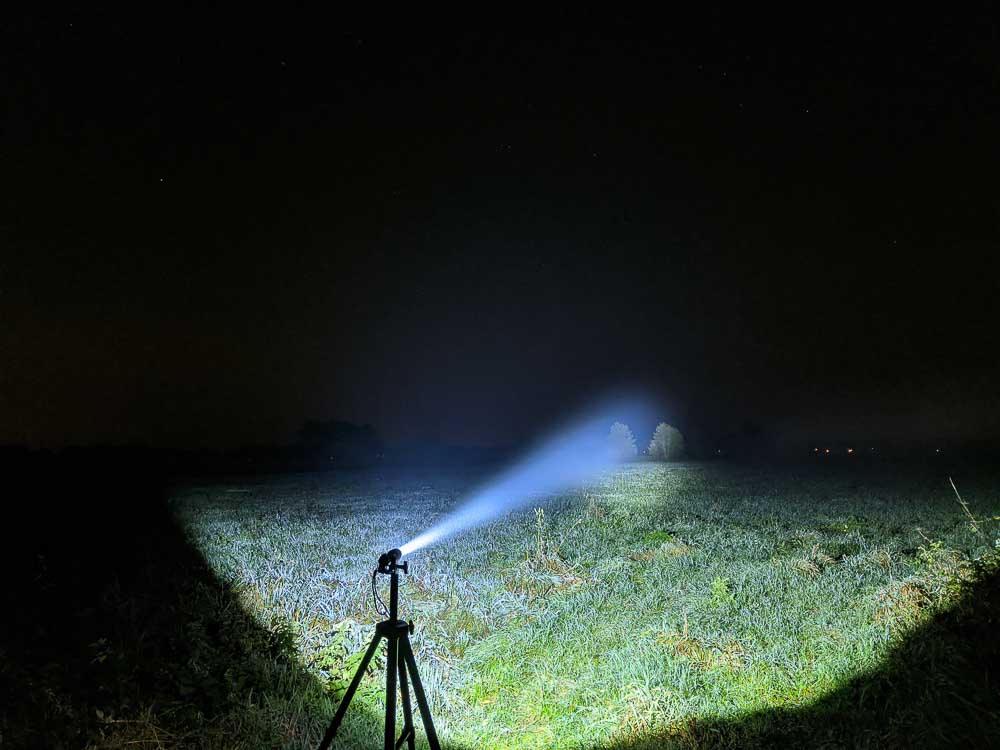
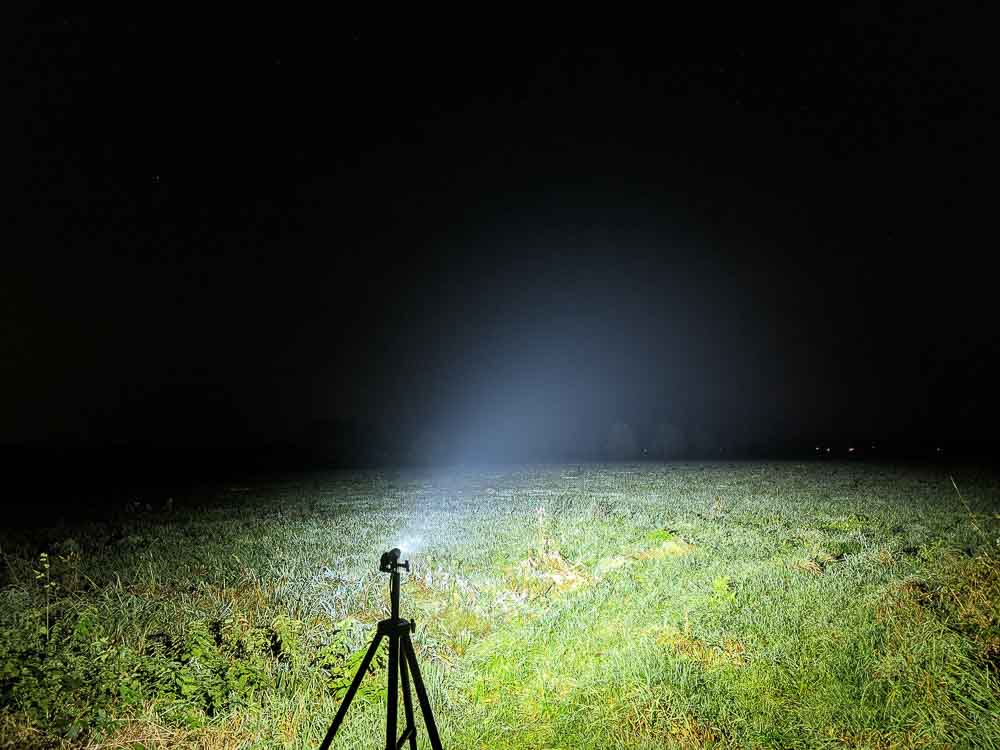
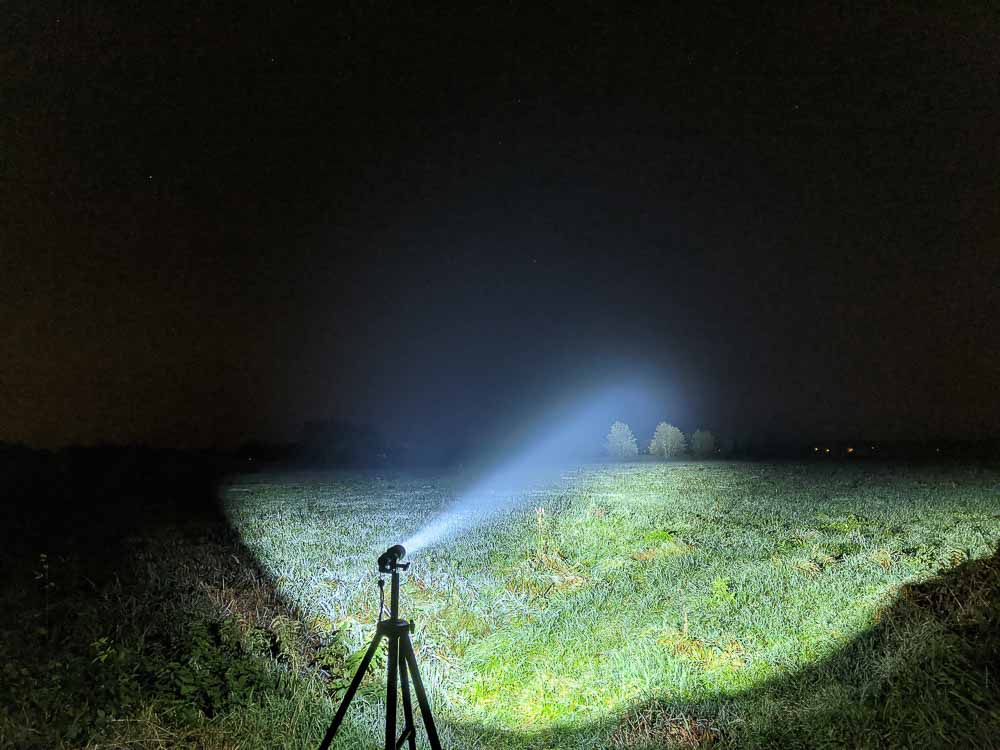
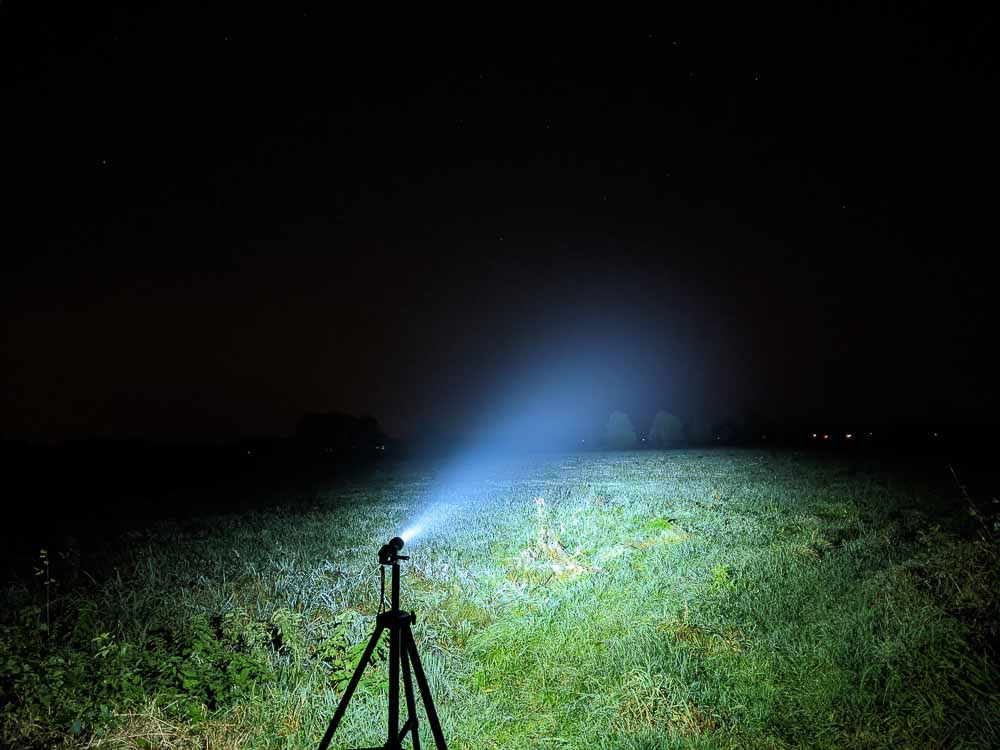
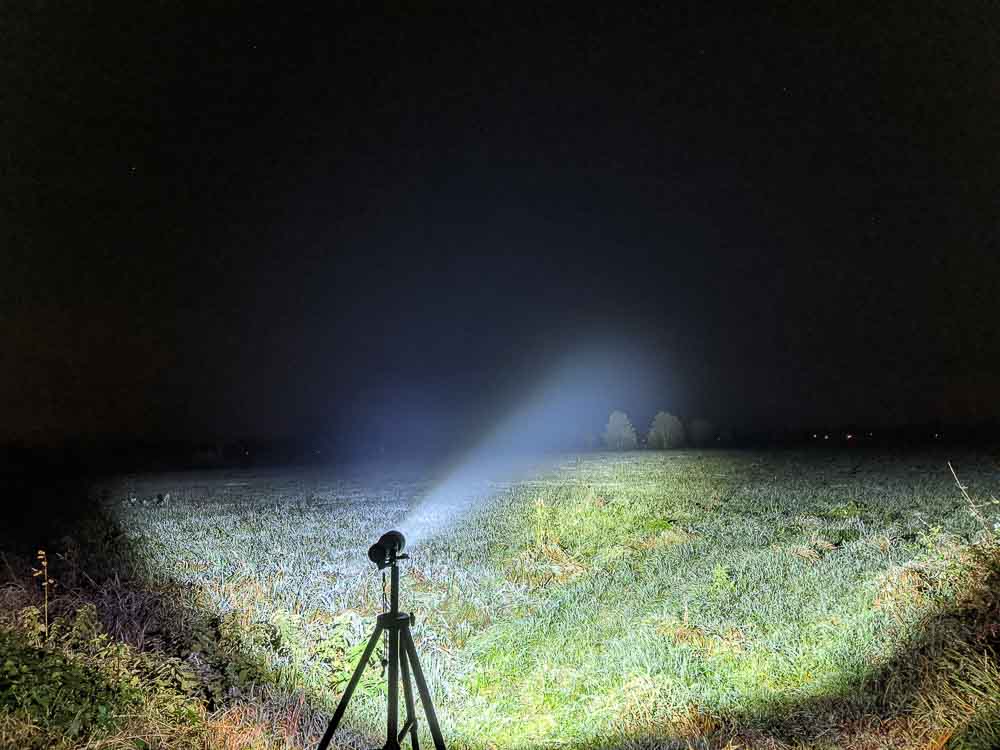
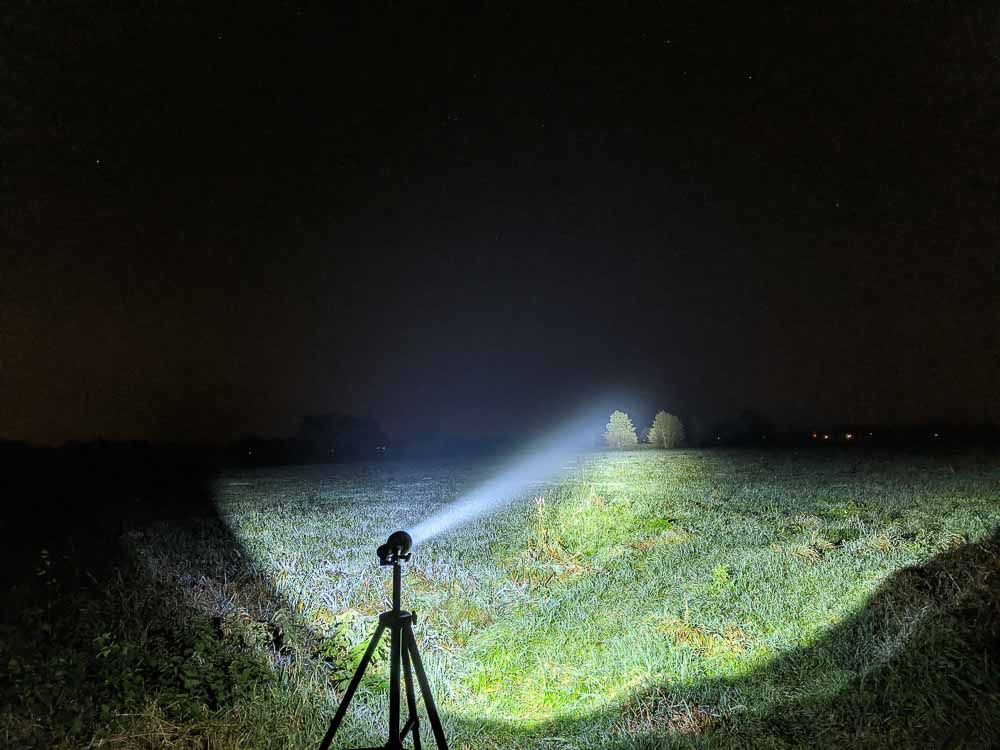
For candela, I do three full tests of charging the batteries to full then measuring, to get an average. Using the light in turbo, our maximum values are:
- Indoors 5m: 1649 lux = 41225 cd = 406m throw
- Outdoors 10m: 387 lux = 38700cd = 393m throw
Bonus section: Modding options and thoughts
Before I start – these are all do-at-your-own-risk, and we take no responsibility for anything breaking. I’ve done these myself, but if you’re not confident of your technical skills nor are prepared to fix things if they break (or buy replacement parts if they’re available), then feel free to read on, but not actually modify. The primary reason is that some parts in this light are glued in place (button PCB, driver), and that requires some force to break, which can damage the component.
Realistically, there’s not much to modify here. The emitter choice is already quite good, although it may be a little on the cool side for some purists. The bezel isn’t glued which is always nice. That said, to remove the reflector, you’ll need to remove the driver to remove screws holding it in place – which brings me to the next point.
This is one of the lights with an official Anduril build, available at ToyKeeper’s repository. As such, if you remove the driver, you can re-flash it with the latest build, which brings a bunch of new features (the build on the light I received is pre-October 2019, as it doesn’t have the 15-clicks-from-off firmware version check – this was introduced in v446; we’re now at v481). The closest I can guess as to the version is prior to v392 (2018-11-15), but after v377 (2018-10-12), as that includes another aux-LED “flash” mode, which I don’t seem to be able to use. Changes since then are, non-exhaustively, and relevant to the SP36: Safety ramp-down if button held too long at ceiling, and then auto-lock if button still held (in case of button short) Improved thermal regulation and speed of response “Heartbeat” button LED mode.
A safety feature and better thermal regulation are nothing to be sneezed at, so if you’re the tinkering type, get on it.
To remove the driver, you need to remove the button cover and its bezel (best done with a set of circlip pliers), then remove the button board. This is easier said than done – I found it moderately painful to do, as it’s glued in place.
Once that’s out of the way, a small but solid flat head screwdriver pressed down to the inside of the driver not very far in should pop it out, as it is glued in somewhat. There’s a space directly behind the button that is free of components, which is a very nice coincidence. Once that’s out, you can put on your SOIC8 clip and flash away.
Disclaimer: This flashlight was bought with my own money. I have not been paid to review, nor have I been holding back on problems or defects.
Overall conclusion
Pros:
- Anduril UI lovely as always
- Great emitter choice (temp and CRI)
- Can put out a ton of light when needed
- Long runtime (9000mAh total)
Cons
- Slight green tint at low brightness
- Older version of Anduril than expected

Overall Rating: excellent
There’s not really any other way to say it – I love this light. It’s a great size and shape, the cells in parallel means that it runs for a LONG time as seen in my runtime chart, and having these emitters and Anduril just makes it irresistible to me. Sofirn has heard the feedback from the community about wanting higher CRI emitters and better UIs, and they’ve come through on this with flying colours. This light now lives in my backpack because I just find it that useful. There are some minor things that I could pick on, but they really don’t detract from the light as a whole. Could it come with a newer version of Anduril? Yes, but perhaps I got old stock and new lights are being loaded with something newer. This is a five star light, and I have no hesitation in saying that.
Sofirn SP36 for sale
1lumen selects and reviews products personally. We may earn affiliate commissions through our links, which help support our testing.
